nexus operator manual 25112009.pages - Vending Machines
nexus operator manual 25112009.pages - Vending Machines
nexus operator manual 25112009.pages - Vending Machines

Create successful ePaper yourself
Turn your PDF publications into a flip-book with our unique Google optimized e-Paper software.
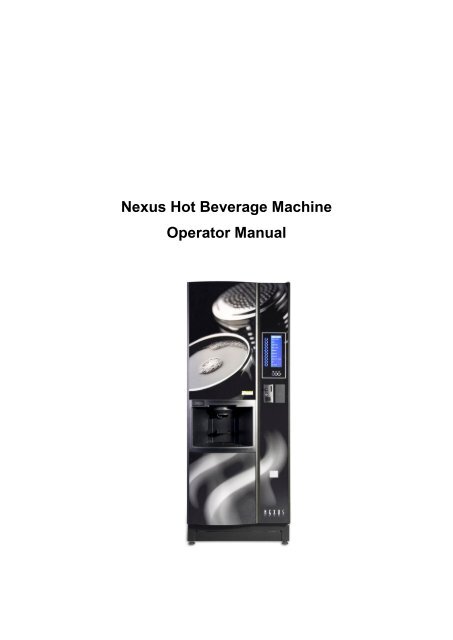
Nexus Hot Beverage Machine<br />
Operator Manual
COFFEtek LTD<br />
Nexus VENDING MACHINE<br />
CONTENTS page<br />
SAFETY WARNINGS ............................................................................................ 5<br />
FROST WARNING ................................................................................................ 6<br />
Flushing the Machine ............................................................................................ 7<br />
Cleaning the Mixing Systems ................................................................................ 8<br />
Cleaning the Tea Brewer ..................................................................................... 10<br />
Refitting the Tea Brewer ...................................................................................... 12<br />
Cleaning the Coffee Brewer Unit ......................................................................... 13<br />
Refitting the Coffee Brewer ................................................................................. 15<br />
Filter belt removal and replacement .................................................................... 16<br />
Extract Duct Cleaning ......................................................................................... 17<br />
Nexus OPERATOR MANUAL 3
COFFEtek LTD<br />
This page is intentionally blank<br />
4 OPERATOR MANUAL Nexus
COFFEtek LTD<br />
SAFETY WARNINGS<br />
1. The vending machine contains moving parts and utilizes very hot water<br />
both of which have the potential to cause injury. The machine should be<br />
switched off before undertaking any activity on the mixing or brewing<br />
systems, which requires the removal of any component part from the<br />
machine.<br />
2. Maintenance of the beverage machine is only to be undertaken by trained<br />
personnel who are fully aware of the dangers involved and who have taken<br />
adequate precautions.<br />
3. Lethal voltages are exposed when the mains electrical supply to the<br />
beverage machine is available and any of the following items are removed:<br />
• Left or right hand side boiler cover<br />
• Illuminated Door panel.<br />
Maintenance personnel must ensure that the machine is isolated from the<br />
mains electrical supply before removing any of these items.<br />
4. Replacement of the Type Y mains cable requires special tools. Should the<br />
cable become damaged, a trained person from an approved service agent<br />
must only carry out replacement.<br />
5. THIS APPLIANCE MUST BE EARTHED.<br />
6. Ensure that the connection to the water system is compliant with the<br />
pertinent national and local legislation. In the UK the Model Water Bylaws<br />
1986 Statutory Instrument (SI) No. 1147 are applicable.<br />
7. Ensure that the unit is positioned such that the plug connecting the unit to<br />
the mains supply is accessible.<br />
8. The beverage machine is designed for indoor use, in an environment with<br />
an ambient temperature range between 0ºC and 40ºC. The machine<br />
should be located close to the appropriate electrical and water services<br />
with a minimum of 100mm (4in) clearance between the rear of the cabinet<br />
and the wall to allow adequate ventilation, and, if in a corner location, not<br />
closer to the right hand wall than 400mm (16in) to accommodate the<br />
opening of the door.<br />
9. The unit should not be situated in an area where a water jet could be used.<br />
10. The vending machine is a heavy item. Ensure sufficient persons and<br />
suitable equipment are available when attempting to move it.<br />
11. The water in the boiler, and the boiler itself, are hot enough to scald burn,<br />
even some time after the machine has been switched off. The boiler must<br />
be drained, filled with cold water and drained again before any attempt is<br />
made to handle it or any of its associated parts.<br />
Nexus OPERATOR MANUAL 5
COFFEtek LTD<br />
12. Young children, the aged and infirm should not be allowed to operate the<br />
beverage machine unsupervised, in order to protect them from the risk of<br />
being scaled by hot beverages.<br />
FROST WARNING<br />
Care must be taken to protect the machine from frost. Do not attempt to operate<br />
the machine if it becomes frozen. Contact the nearest service agent<br />
immediately. Do not restore the machine to operational use until it has been<br />
checked and approved for use by the service agent.<br />
HOT WATER WARNING<br />
CAUTION<br />
The water available from the option shower head cleaning attachment is hot<br />
enough to scald or burn. Appropriate care must be taken when using this<br />
attachment.<br />
Note: initially the water flowing from the attachment will be cool, but will rapidly<br />
become extremely hot.<br />
6 OPERATOR MANUAL Nexus
COFFEtek LTD<br />
FLUSHING THE MACHINE<br />
Ensure that the following flushing instructions are carried out at least once a day<br />
and that mixing system and brewer cleaning is carried out at least once a week.<br />
To Flush Machine:<br />
(1) Open machine as instructed and ensure machine is switched on.<br />
(2) Press the flush button. The machine will flush all the whipper and mixing<br />
bowl assemblies with clean hot water.<br />
(3) Repeat as necessary.<br />
(4) Once flushing has ceased, the machine will be ready for use.<br />
To Flush Brewer(s):<br />
(5) Open machine as instructed and ensure machine is switched on.<br />
(6) Ensure that hands and loose clothing are clear of the brewer.<br />
(7) Press the brewer flush button. The machine will flush the brewer(s) with<br />
clean hot water.<br />
(8) Repeat as necessary.<br />
(9) Once flushing has ceased, the machine will be ready for use.<br />
Nexus OPERATOR MANUAL 7
COFFEtek LTD<br />
CLEANING THE MIXING SYSTEMS<br />
(10) Open the door of the machine and switch machine off using the main<br />
switch.<br />
(11) For each mixing system in turn remove the dispense nozzle from the<br />
dispense head and remove the mixing system A by pulling the top<br />
forward and downwards as shown.<br />
(12) Once removed the steam cover can be detached from the mixing<br />
chamber to facilitate cleaning.<br />
8 OPERATOR MANUAL Nexus
COFFEtek LTD<br />
(13)Remove the impellor disk B by pulling it in the<br />
direction shown.<br />
(14)Remove the whipper seal C and ensure that the<br />
running surface D is smooth and free of ingredient<br />
residues.<br />
(15)Inspect whipper seal for damage and replace as<br />
necessary.<br />
(16)Wash all the removed mixing system<br />
components in destaining fluid and then rinse<br />
thoroughly with clean water.<br />
(17)Reassemble the mixing systems by following the<br />
reverse procedure. Ensure that whipper seal C is<br />
tight against the running surface before refitting the impellor.<br />
(18)Ensure that both locking pegs E<br />
on the mixing system are correctly located by pressing firmly on the<br />
lower part of the mixing system.<br />
(19) When all mixing system components have been refitted, switch on the<br />
machine and perform a flush operation. Check the mixing systems for<br />
leaks and listen for abnormal sounds that may indicate incorrect<br />
assembly.<br />
Nexus OPERATOR MANUAL 9
COFFEtek LTD<br />
CLEANING THE TEA BREWER<br />
(20) Open the door of the machine and switch machine off using the main<br />
switch.<br />
(21) Turn tea canister dispense chute upwards to prevent ingredients being<br />
spilled onto the floor of the machine.<br />
(22) Remove the tealeaf waste chute by lifting it up wards and towards<br />
you.<br />
(23) Remove outlet elbow , by pulling gently whilst turning the elbow<br />
slightly.<br />
(24) Raise the brewer release lever to unlock the carriage assembly.<br />
(25) Gently slide carriage assembly towards you and remove it from the<br />
machine.<br />
10 OPERATOR MANUAL Nexus
• Remove the bre<br />
by swinging<br />
then gently pull<br />
indicated.<br />
COFFEtek LTD<br />
(26)Remove mixing bowl .<br />
(27)Remove the brewer cylinder by<br />
swinging it upwards and then gently<br />
pulling it in the direction indicated.<br />
• Remove mixing<br />
(28) Wash the brewer and cylinder in de-staining fluid and rinse with clean<br />
water.<br />
Nexus OPERATOR MANUAL 11
COFFEtek LTD<br />
REFITTING THE TEA BREWER<br />
(29) Refit brewer cylinder.<br />
(30) Refit the mixing chamber.<br />
(31) Refit brewer carriage onto machine. If it does not locate correctly, gently<br />
turn filter belt using the studded roller until it slides into place.<br />
(32) Lock the carriage in place by returning the release lever to the<br />
horizontal position; ensure that the groove on the lever engages with<br />
the slot on the shaft and that the carriage is secure.<br />
(33) Refit the tealeaf waste chute followed by the outlet elbow , and<br />
mixing bowl .<br />
(34) Turn tea canister dispense chute downward into mixing bowl.<br />
(35) Switch machine back on. Ensure that hands and loose clothing are<br />
clear of the brewer(s).<br />
(36) Close and lock the machine door as instructed.<br />
(37) Once machine has reset, test at least one Tea.<br />
12 OPERATOR MANUAL Nexus
COFFEtek LTD<br />
CLEANING THE COFFEE BREWER UNIT<br />
WARNING<br />
KEEP CLEAR OF THE BREWER UNIT WHEN IT IS IN MOTION.<br />
(38)Open the door of the machine and<br />
switch machine off using the main<br />
switch.<br />
(39)Turn the coffee canister dispense<br />
chute upwards to prevent ingredients<br />
being spilled onto the floor of the<br />
machine.<br />
(40)Remove the coffee brewer outlet<br />
spout .<br />
(41)Remove the brewer splashguard ,<br />
by lifting the cover up and towards you.<br />
(42)Pull the brewer shaft from the<br />
spindle , by pulling it firmly in the direction<br />
indicated.<br />
Nexus OPERATOR MANUAL 13
COFFEtek LTD<br />
(43)Lift the brewer retaining clips labeled<br />
and in the direction shown on the<br />
diagram, to release the carriage<br />
assembly.<br />
(44)Remove the carriage assembly <br />
from the machine by sliding it in the<br />
direction indicated.<br />
(45)Remove the steam trap and brewer<br />
chamber by pulling it towards yourself.<br />
(46)Once removed the steam trap can be<br />
separated from the brewing chamber.<br />
(47)Use a de-staining product to wash<br />
the brewer, cylinder, steam trap and<br />
carriage assembly. Then rinse all parts<br />
thoroughly with clean water.<br />
14 OPERATOR MANUAL Nexus
COFFEtek LTD<br />
REFITTING THE COFFEE BREWER<br />
(48) Open the door of the machine and switch machine off using the main<br />
switch.<br />
(49) Clip the stream trap back onto the brewer chamber , and refit the unit<br />
to the machine.<br />
(50) Refit the carriage assembly .<br />
(51) Use the brewer retaining clips and to lock the brewer in place.<br />
(52) Firmly push the brewer shaft back onto the spindle .<br />
(53) Refit the splashguard .<br />
(54) Refit the outlet nozzle .<br />
(55) Align the ingredients chute with the brewer chamber.<br />
(56) Ensure that hands and loose clothing are clear of the brewer(s). Switch<br />
machine back on.<br />
(57) Close and lock the machine.<br />
(58) Once machine has reset, test at least one Coffee.<br />
Nexus OPERATOR MANUAL 15
COFFEtek LTD<br />
FILTER BELT REMOVAL AND REPLACEMENT<br />
(59)Using fore finger and thumb<br />
compress the tensioning rollers as shown in A.<br />
(60) With the rollers compressed push and turn the red lever to the<br />
locked position as shown in B.<br />
(61) With the rollers locked in the compressed position the belt can now be<br />
removed.<br />
(62) The belt may be cleaned using de-staining solution but will<br />
progressively become blocked with scale and therefore require more<br />
frequent cleaning. A new belt will perform approximately 2000 vends<br />
before cleaning is required. It is recommended that a belt is replaced in<br />
any case after approximately 4000 vends.<br />
(63) Replace the filter belt making sure to thread the bottom edge beneath<br />
the scraper plate. Once the belt has been threaded over all three rollers<br />
it can be eased into place by sliding it sideways whilst turning the drive<br />
shaft.<br />
(64) Once the belt is in place press the red lever to release the tensioning<br />
roller and tighten the belt.<br />
16 OPERATOR MANUAL Nexus
COFFEtek LTD<br />
EXTRACT DUCT CLEANING<br />
(65) Open the door of the machine and switch machine off using the main<br />
switch.<br />
(66) Turn the ingredient nozzles upwards to prevent ingredient spillage and<br />
remove all canisters.<br />
(67) When all the canisters have been taken out, the extract duct cover can<br />
be removed by lifting it upwards and then forwards toward the front of<br />
the machine.<br />
(68) Thoroughly clean both the extract duct and its cover.<br />
(69) Refit the cover & replace the canisters.<br />
(70) Ensure all ingredient chutes are correctly positioned.<br />
(71) Switch on the machine and perform a flush operation.<br />
Nexus OPERATOR MANUAL 17
NOTES:<br />
........................................................................................................................<br />
........................................................................................................................<br />
........................................................................................................................<br />
........................................................................................................................<br />
........................................................................................................................<br />
........................................................................................................................<br />
........................................................................................................................<br />
........................................................................................................................<br />
........................................................................................................................<br />
........................................................................................................................