GENEVA - Vending Machines
GENEVA - Vending Machines
GENEVA - Vending Machines

You also want an ePaper? Increase the reach of your titles
YUMPU automatically turns print PDFs into web optimized ePapers that Google loves.
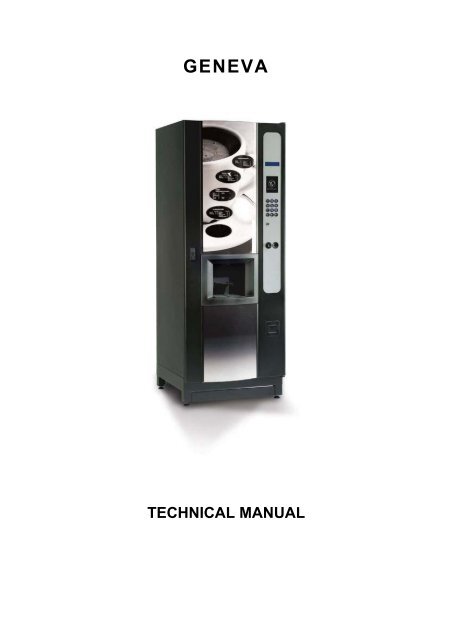
<strong>GENEVA</strong><br />
TECHNICAL MANUAL
COFFEtek Ltd<br />
<strong>GENEVA</strong><br />
TECHNICAL MANUAL<br />
CONTENTS<br />
page<br />
FOREWORD......................................................................................................................................4<br />
SAFETY WARNINGS........................................................................................................................5<br />
SECTION 1 TECHNICAL INFORMATION........................................................................................6<br />
INTRODUCTION ................................................................................................................................................6<br />
GENERAL DESCRIPTION ................................................................................................................................7<br />
Cabinet Front..................................................................................................................................................7<br />
Cabinet Rear ..................................................................................................................................................8<br />
WATER SYSTEM...............................................................................................................................................9<br />
Hot Water System ..........................................................................................................................................9<br />
Cold Water System ........................................................................................................................................9<br />
SECTION 2 INTERNAL KEYPAD FUNCTIONS.............................................................................18<br />
SECTION 3 PROGRAMMING.........................................................................................................22<br />
EXTERNAL KEYPAD FUNCTIONS IN PROGRAMMING MODE ..................................................................24<br />
PROGRAM FUNCTIONS.................................................................................................................................26<br />
PROGRAMMING SEQUENCE OF OPERATIONS .........................................................................................27<br />
MENU OPTIONS..............................................................................................................................................28<br />
Ingredient Times...........................................................................................................................................28<br />
Set Date and Time .......................................................................................................................................48<br />
Set Pricing Mode ..........................................................................................................................................48<br />
Change Prices..............................................................................................................................................48<br />
Inhibit Drinks.................................................................................................................................................49<br />
Alter Drink Name ..........................................................................................................................................49<br />
Timed Activities ............................................................................................................................................50<br />
Temperature Settings...................................................................................................................................51<br />
Output Test...................................................................................................................................................51<br />
Input Test......................................................................................................................................................52<br />
Set Product Constants .................................................................................................................................53<br />
Machine Status.............................................................................................................................................53<br />
Set Dry Vends ..............................................................................................................................................54<br />
Serial Number...............................................................................................................................................54<br />
Configure Machine .......................................................................................................................................54<br />
MDB Config ..................................................................................................................................................71<br />
EVA-DTS Config ..........................................................................................................................................72<br />
Product Codes..............................................................................................................................................73<br />
Operators Code............................................................................................................................................74<br />
Managers Code............................................................................................................................................74<br />
<strong>GENEVA</strong> Issue 3 06/08/2008 2
COFFEtek Ltd<br />
Engineers Code............................................................................................................................................74<br />
Free Drink Code ...........................................................................................................................................74<br />
Edit Drink Map..............................................................................................................................................75<br />
Card Actions.................................................................................................................................................77<br />
Cup Config....................................................................................................................................................77<br />
Configure Slave............................................................................................................................................78<br />
Economy Mode ............................................................................................................................................78<br />
Depressurise Coffee Brewer ........................................................................................................................80<br />
SECTION 4 INSTALLATION & COMMISSIONING ........................................................................82<br />
INTRODUCTION ..............................................................................................................................................82<br />
SAFETY WARNINGS.......................................................................................................................................83<br />
SERVICES REQUIRED, WEIGHT AND DIMENSIONS ..................................................................................84<br />
INSTALLATION ...............................................................................................................................................84<br />
Location........................................................................................................................................................84<br />
Levelling .......................................................................................................................................................84<br />
CONNECTING THE WATER SERVICES........................................................................................................85<br />
CONNECTING THE ELECTRICAL SERVICES ..............................................................................................85<br />
COMMISSIONING............................................................................................................................................86<br />
SECTION 5 SETTING UP A NEW OR REPLACEMENT CONTROL BOARD..............................88<br />
SECTION 6 EXPLODED PARTS DIAGRAMS ...............................................................................90<br />
3 06/08/2008 Issue 3 <strong>GENEVA</strong>
COFFEtek Ltd<br />
FOREWORD<br />
1. The information contained in this service manual is applicable to the Geneva beverage<br />
machine. Four versions of each type are available:<br />
(a)<br />
(b)<br />
(c)<br />
(d)<br />
Instant (INST)<br />
Single Fresh Brew (SFB)<br />
Double Fresh Brew (DFB)<br />
Bean To Cup (BTC)<br />
2. The machine described in this manual is the Geneva SFB version, which includes features<br />
of all models. Due to customer requirements, however, some features may vary from the<br />
one described, e.g. extras fitted, variations in programming etc.<br />
3. Maintenance of the beverage machine must only be undertaken by personnel who are<br />
authorised and suitably qualified.<br />
4. The Manufacturer reserves the right to make changes without notice to the design of the<br />
beverage machine, which may affect the information contained in this manual.<br />
5. Outline Specification<br />
(a)<br />
Dimensions<br />
Height 1830 mm (6”)<br />
Depth 680 mm (27”)<br />
Width 700 mm (27 ½ “)<br />
(b) Weight 100 kg (hot only versions)<br />
(c)<br />
Operating Environment<br />
Temperature<br />
Humidity<br />
1°C min - 40° max<br />
TBA max<br />
(d)<br />
(e)<br />
Cup Capability<br />
Quantity Standard Version 600 cups<br />
Plus Versions 73mm 950 typical<br />
Sizes<br />
70, 73 & 78 mm diameter<br />
Chiller Unit<br />
Weight<br />
20 kg<br />
Refrigerant<br />
R134A<br />
Refrigerant Weight<br />
TBA<br />
(f)<br />
Carbonator Unit<br />
Weight<br />
Refrigerant<br />
Refrigerant Weight<br />
26.5 kg<br />
R134A<br />
155 g<br />
<strong>GENEVA</strong> Issue 3 06/08/2008 4
COFFEtek Ltd<br />
SAFETY WARNINGS<br />
1. Maintenance of the beverage machine is only to be undertaken by trained personnel who<br />
are fully aware of the dangers involved and who have taken adequate precautions, e.g.<br />
ensuring that, whenever possible, the beverage machine is isolated from the mains<br />
electrical supply.<br />
2. Lethal voltages are exposed when any panel inside the cabinet is removed and the mains<br />
electrical supply is available (i.e. on/off switch is overridden). The mains electrical supply is<br />
maintained to the Carbonator even when the door is open.<br />
3. The beverage machine must be earthed.<br />
4. Keep clear of the Brewer Unit when it is indexing.<br />
5. The beverage machine is a heavy item. Ensure that sufficient personnel are available for<br />
lifting and transporting the machine. Use proper lifting procedures and equipment.<br />
6. The water in the heater tank, and the tank itself, are hot enough to scald or burn, even<br />
some time after the machine has been switched off. The water heater tank must be drained,<br />
filled with cold water and drained again before any attempt is made to handle it or any of its<br />
associated parts.<br />
7. The water available from the option shower head cleaning attachment is hot enough to<br />
scald or burn. Appropriate care must be taken when using this attachment.<br />
Note: Initially the water flowing from the attachment will be cool, but will rapidly become<br />
extremely hot.<br />
8. The Controller Board is fitted with a lithium battery. Abuse of this type of battery can lead to<br />
overheating, venting, explosion, release of potentially hazardous materials and<br />
spontaneous ignition.<br />
The lithium battery must not be charged or connected to any other source of power.<br />
The battery must not be short-circuited or forced to discharge its stored energy. The battery<br />
must not be subjected to physical damage or overheating. If the Controller Board is to be<br />
replaced, it must be handled with care, taking all practical anti-static precautions.<br />
9. Care must be taken to protect the beverage machine from frost. Do not attempt to operate<br />
the machine if it becomes frozen. Contact the nearest service agent immediately. Do not<br />
restore the machine to operational use until it has been checked and approved for use by<br />
the service agent.<br />
10. Young children, the aged and the infirm should not be allowed to operate the beverage<br />
machine unsupervised, in order to protect them from the risk of being scalded by hot<br />
beverages.<br />
11. Replacement of the Type Y mains cable requires special tools. Should the cable become<br />
damaged, a trained person from an approved service agent must only carry out<br />
replacement.<br />
5 06/08/2008 Issue 3 <strong>GENEVA</strong>
COFFEtek Ltd<br />
Section 1<br />
Technical Information<br />
INTRODUCTION<br />
1. The Geneva range consists of four basic types of coin-operated, microprocessor controlled<br />
beverage machines that dispense a range of hot and cold drinks in response to keypad<br />
selections. The main difference between the models is the option of either Instant or Fresh<br />
Brew drinks with or without a chiller or carbonation unit and optionally enhanced cup<br />
capacity.<br />
2. Four versions of each model are available:<br />
(a) Instant (INST) - Instant Coffee and Tea<br />
(b) Single Fresh Brew (SFB) - Fresh Brew Tea and Soluble Coffee<br />
(c) Double Fresh Brew (DFB) - Fresh Brew Tea and Coffee<br />
(d) Bean to Cup (BTC) - Fresh Brew Tea and Bean Coffee<br />
3. This manual uses the SFB version as the basis for examples. Where significant differences<br />
between versions exist, this will be highlighted in main body of the document. Due to<br />
customer requirements, however, some features may vary from those described, e.g.<br />
extras fitted, variations in programming etc.<br />
4. Three options are available to add a cold drinks capability to machines in the Geneva<br />
range. An optional chiller allows the addition of a cold water selection. A chiller<br />
incorporating a pair of syrup pumps allows for the addition of two flavoured cold drinks,<br />
whilst a carbonator provides the option of two flavours of still and carbonated drinks in<br />
addition to cold water. The same options are available on the enhanced cup capacity<br />
versions, but the enhanced cup capability is not retrofittable, i.e. it must be specified at the<br />
time of order.<br />
5. Cups from a cup drop mechanism are dispensed to contain the drinks. However, a keyoperated<br />
jug facility is also provided.<br />
6. Selection is made on a 12 button keypad and a LCD display panel shows status and drink<br />
selection information.<br />
7. The status of the machine may be monitored, and the configuration altered, by accessing a<br />
menu of program options using both internal and external keypads. Each option comprises<br />
a number of sub-options, the settings of which can be altered.<br />
8. A feature of the Geneva beverage machines is the mobile dispense head which moves the<br />
head to a parked position away from the cup port after each drink is vended, preventing the<br />
possibility of any residue from the previous drink dripping into the next one. The dispense<br />
head is fitted with two groups of nozzles, one for hot drinks and one for cold. Upon<br />
selection, the required group is moved into place above the cup port.<br />
9. The Geneva machines require a single-phase 240V electrical mains supply from a domestic<br />
13A outlet, and a cold water supply from the domestic cold water main. These services<br />
enter the machine at the rear of the cabinet.<br />
<strong>GENEVA</strong> Issue 3 06/08/2008 6
COFFEtek Ltd<br />
GENERAL DESCRIPTION<br />
10. The operational components which form a Geneva beverage machine are housed in a<br />
metal enclosure, access to which is gained by a swivel door secured by a key operated<br />
locking mechanism. Turning the key in the lock releases a door handle, which the locking<br />
mechanism to move to the unlocked state and the door to be opened. With the door open<br />
the mains isolation switch for ON/OFF operation of the machine is visible in the top left<br />
corner of the machine.<br />
11. Equipment inside the cabinet is arranged in two sections: front and rear. On opening the<br />
door, the Operator is immediately faced with those items of equipment to which he or she<br />
requires access, e.g. Ingredient Canisters, Cup Turrets, Coin Mechanism, CO 2 Bottle,<br />
Waste Trays, etc. The remaining items of equipment, e.g. Water Heater, Valves, Electrical<br />
and Electronic components, etc, to which specifically the Engineer requires access (and<br />
from which the Operator must be shielded) are located behind the Ingredient Canisters and<br />
Whipper Motor and Dispense Head Assembly panel, at the rear of the cabinet.<br />
Cabinet Front<br />
12. The Cup Drop Assembly, Coin Mechanism, Controller Board and Cup Station are fitted to<br />
the rear of the cabinet door. The Customer's keypad is fitted to the front panel and is<br />
connected to the Controller Board via a cable assembly.<br />
13. Ingredient canisters are located on a shelf approximately half way up the cabinet. At the<br />
front of the shelf is a duct assembly to which an extractor fan is connected. The fan pulls air<br />
from the extract duct, which in turn removes steam/moist air from the mixing systems,<br />
which are located on a vertical panel below the canister shelf. The moving dispense head<br />
protrudes through and is fastened to this vertical panel and in the case of the Fresh Brew<br />
versions this vertical panel also provides the mounting for the Fresh Brew Units.<br />
14. If fitted, the optional cold drinks unit is located in the lower left hand corner of the cabinet. In<br />
the case of a carbonated unit, the CO 2 cylinder is placed in the lower right hand corner of<br />
the cabinet with the two syrup containers at its side. A gas regulator with associated<br />
pressure gauge is fitted to the CO 2 cylinder in addition to an ordinary cylinder pressure<br />
gauge. The regulator is set to give an output pressure of 50 psi.<br />
15. On the Fresh Brew versions a large plastic waste bucket is located underneath the Brewer<br />
Unit(s), in addition to the smaller one placed at the front of the cabinet, beneath the Cup<br />
Station (when the door is closed). Water heater and carbonator overflow pipes, and a waste<br />
level probe, are directed into the smaller bucket. When the waste liquid in the bucket(s)<br />
reaches the level sensor probe, the water supply inlet is shut off and the machine is<br />
rendered inoperable.<br />
7 06/08/2008 Issue 3 <strong>GENEVA</strong>
COFFEtek Ltd<br />
Cabinet Rear<br />
16. Access to the components and equipment in the rear section of the cabinet is obtained by<br />
removing the ingredient canisters and the relevant back panel.<br />
17. Cold water mains supply enters the cabinet through an aperture in the rear panel and<br />
connects to a twin chamber inlet valve for the hot water supply. There is also a similar twin<br />
chamber inlet valve dedicated to the cold water supply. This is fitted only in the case where<br />
a cold drinks system is required.<br />
18. A length of tubing takes the water supply from the inlet valve into the water heater tank,<br />
located at the top of the cabinet. Hot water in the correct quantity is then directed from the<br />
tank to the appropriate mixing bowl via a solenoid operated dispense valve. A dispense<br />
valve is associated with each ingredient. Any overflow from the tank is directed into the<br />
waste bucket via an overflow tube. Fitted to this tube is a high temperature cut-out (or two<br />
cut-outs, depending on the model) which, when operated, cuts off the electrical supply to<br />
the heater in the tank. The cut-out must then be reset to restore the supply. Another length<br />
of tubing facilitates draining of the heater.<br />
19. The Carbonator is provided with three inputs: cold water from the inlet valve; two types of<br />
syrup pumped from the syrup containers; and carbon dioxide from the CO 2 cylinder. Still or<br />
carbonated water and syrup are taken from the carbonator, via separate tubes, to the<br />
dispense head.<br />
20. A level probe is fitted to the rear of the cabinet door and a similar device is located in the<br />
fresh brew waste container. When the door is closed these devices act as contact probes<br />
allowing the units control system to monitor the liquid level in the waste containers.<br />
21. Two printed circuit boards are fitted to the top right hand side of the cabinet rear panel; the<br />
DC Remote Input/Output Board (DC RIO) and the Power Supply Unit (PSU). The DC RIO<br />
Board provides the high current drives to operate the output devices (valves, motors, etc.)<br />
in response to signals from the Controller Board.<br />
22. A solid-state relay, located beneath the printed circuit boards, pulses current to the heater<br />
in response to signals from the DC RIO Board. The DC RIO board receives signal from the<br />
Controller Board via an I 2 C link. The temperature of the water in the boiler is measured by<br />
the Controller Board using an NTC thermistor mounted at the end of a stainless steel probe<br />
immersed in the hot water tank.<br />
<strong>GENEVA</strong> Issue 3 06/08/2008 8
COFFEtek Ltd<br />
WATER SYSTEM<br />
23. The cold water mains supply enters the machine via a double-solenoid operated inlet valve<br />
at the rear of the cabinet. This valve controls the flow of water to the unit’s hot water tank.<br />
If an optional cold drink system is fitted, a separate inlet valve is used to connect it to the<br />
mains water supply. In this eventuality a special ‘Y’ shaped mains water supply hose is<br />
required.<br />
Hot Water System<br />
24. Water is supplied via the Hot Inlet valve to the heater tank where it is heated to the required<br />
temperature by a heating element in the tank. Water temperature is controlled by a<br />
combined temperature and level probe assembly in the tank which causes the supply to the<br />
heater to be removed when the preset temperature is reached. The probe assembly also<br />
acts as a level sensor, causing the Hot Inlet valve to open when the water in the tank falls<br />
below a preset level. The probe (i.e. the input device) is monitored by the Controller Board,<br />
and the Water Heater and Hot Inlet valve (i.e. the output devices) are controlled by the DC<br />
RIO Board in response to signals from the Controller Board.<br />
25. Depending on the type of hot drink selected, hot water from the heater tank is fed via<br />
solenoid operated dispense valves to the appropriate mixing bowl or Brewer Unit container.<br />
Ingredients and water are mixed in exact quantities in the mixing bowl and then directed to<br />
the dispense head. Similarly, water and ingredient are brewed in exact amounts in the<br />
Brewer Unit and then directed to the dispense head.<br />
26. Resettable cut-out sensors, mounted on the boiler overfill tube, cuts off the electrical supply<br />
to the tank heater circuit if the water in the tank starts to boil. Additionally, if the fluid level in<br />
the overflow waste bucket rises above a preset level, it is detected by a level probe and<br />
reported to the Controller Board, which responds by closing the inlet valve via the DC RIO<br />
Board and rendering the machine inoperable.<br />
Cold Water System<br />
27. Water is supplied from the Cold Inlet valve to the chiller or carbonator unit (if fitted) via a<br />
pressure regulator. The chiller/carbonator provides either cold still water or cold carbonated<br />
water (carbonator only). The selected type of water (still or carbonated) is controlled by<br />
solenoid operated dispense valves. Flavoured syrup, if available, is added to the drink by<br />
means of oscillating pumps.<br />
9 06/08/2008 Issue 3 <strong>GENEVA</strong>
COFFEtek Ltd<br />
HOT WATER<br />
SUPPLY<br />
HOT WATER<br />
INLET VALVE<br />
COLD WATER<br />
INLET VALVE<br />
PRESSURE<br />
REGULATOR<br />
HEATER TANK<br />
CARBONATOR<br />
DECAF<br />
/ SOUP<br />
VALVE<br />
CHOC /<br />
TOPPIN<br />
G VALVE<br />
MILK /<br />
SUGAR<br />
VALVE<br />
C OFFEE<br />
VALVE<br />
TEA<br />
VALVE<br />
CARB<br />
VALVE<br />
STILL<br />
VALVE<br />
OVER<br />
TEMPERATURE<br />
CUTOUT<br />
HOT<br />
WATER<br />
OVERFLOW<br />
OVERFLOW<br />
HOT DISPENSE<br />
COLD DISPENSE<br />
FIG 1.1A WATER SYSTEM FUNCTIONAL DIAGRAM INSTANT<br />
<strong>GENEVA</strong> Issue 3 06/08/2008 10
COFFEtek Ltd<br />
HOT WATER<br />
SUPPLY<br />
HOT WATER<br />
INLET VALVE<br />
COLD WATER<br />
INLET VALVE<br />
PRESSURE<br />
REGULATOR<br />
HEATER TANK<br />
CARBONATOR<br />
DECAF<br />
/ SOUP<br />
VALVE<br />
CHOC /<br />
TOPPIN<br />
G VALVE<br />
MILK /<br />
SUGAR<br />
VALVE<br />
C OFFEE<br />
VALVE<br />
TEA<br />
VALVE<br />
CARB<br />
VALVE<br />
STILL<br />
VALVE<br />
OVER<br />
TEMPERATURE<br />
CUTOUT<br />
HOT<br />
WATER<br />
OVERFLOW<br />
OVERFLOW<br />
HOT DISPENSE<br />
COLD DISPENSE<br />
FIG 1.1B WATER SYSTEM FUNCTIONAL DIAGRAM SINGLE FRESH BREW TEA<br />
11 06/08/2008 Issue 3 <strong>GENEVA</strong>
COFFEtek Ltd<br />
HOT WATER<br />
SUPPLY<br />
HOT WATER<br />
INLET VALVE<br />
COLD WATER<br />
INLET VALVE<br />
PRESSURE<br />
REGULATOR<br />
HEATER TANK<br />
CARBONATOR<br />
DECAF<br />
/ SOUP<br />
VALVE<br />
CHOC /<br />
TOPPIN<br />
G VALVE<br />
MILK /<br />
SUGAR<br />
VALVE<br />
COFFEE<br />
VALVE<br />
TEA<br />
VALVE<br />
CARB<br />
VALVE<br />
STILL<br />
VALVE<br />
OVER<br />
TEMPERATURE<br />
CUTOUT<br />
HOT<br />
WATER<br />
OVERFLOW<br />
OVERFLOW<br />
HOT DISPENSE<br />
COLD DISPENSE<br />
FIG 1.1C WATER SYSTEM FUNCTIONAL DIAGRAM SINGLE FRESH BREW COFFEE<br />
<strong>GENEVA</strong> Issue 3 06/08/2008 12
COFFEtek Ltd<br />
HOT WATER<br />
SUPPLY<br />
HOT WATER<br />
INLET VALVE<br />
COLD WATER<br />
INLET VALVE<br />
PRESSURE<br />
REGULATOR<br />
HEATER TANK<br />
CARBONATOR<br />
DECAF<br />
/ SOUP<br />
VALVE<br />
CHOC /<br />
TOPPIN<br />
G VALVE<br />
MILK /<br />
SUGAR<br />
VALVE<br />
COFFEE<br />
VALVE<br />
TEA<br />
VALVE<br />
CARB<br />
VALVE<br />
STILL<br />
VALVE<br />
OVER<br />
TEMPERATURE<br />
CUTOUT<br />
HOT<br />
WATER<br />
OVERFLOW<br />
OVERFLOW<br />
HOT DISPENSE<br />
COLD DISPENSE<br />
FIG 1.1D WATER SYSTEM FUNCTIONAL DIAGRAM DOUBLE FRESH BREW & BTC+SFBT<br />
13 06/08/2008 Issue 3 <strong>GENEVA</strong>
COFFEtek Ltd<br />
<strong>GENEVA</strong> Issue 3 06/08/2008 14
COFFEtek Ltd<br />
15 06/08/2008 Issue 3 <strong>GENEVA</strong>
COFFEtek Ltd<br />
COIN<br />
MECHANISM<br />
CUP SENSOR<br />
USER JUG KEY<br />
CUP THROAT<br />
CAROUSEL INDEX<br />
OPTIONAL<br />
INTERFACE<br />
BREWER<br />
INDEX<br />
DISPENSE<br />
HEAD<br />
TEMP/LEVEL SENSOR<br />
WASTE LEVEL SWITCH<br />
MPU<br />
I 2 C LINK<br />
RIO<br />
MOTORS<br />
CARB LEVEL PROBE<br />
CUSTOMER<br />
KEYPAD<br />
VALVES<br />
DISPLAY<br />
DISPLAY<br />
SOLENOIDS<br />
HEATER SSR<br />
12V<br />
24V RETURN<br />
24V DC<br />
POWER<br />
SUPPLY<br />
VALVES<br />
HEATER SSR<br />
EXTRACT FAN<br />
12V<br />
MOTORS<br />
SOLENOIDS<br />
240V AC<br />
FIG 1.2 ELECTRICAL & ELECTRONIC SYSTEM – FUNCTIONAL DIAGRAM<br />
<strong>GENEVA</strong> Issue 3 06/08/2008 16
COFFEtek Ltd<br />
This page is intentionally blank.<br />
17 06/08/2008 Issue 3 <strong>GENEVA</strong>
COFFEtek Ltd<br />
Section 2<br />
Internal Keypad Functions<br />
ADVANCE<br />
COFFEE BREWER<br />
0<br />
5<br />
PROG<br />
MDB MECH<br />
DISPENSE<br />
COIN<br />
1<br />
6<br />
MDB FILL<br />
TUBES<br />
2 7<br />
BREWER<br />
FLUSH<br />
ADVANCE<br />
TEA BREWER<br />
3 8<br />
FLUSH<br />
CUP<br />
TEST<br />
SYRUP 1<br />
PRIME<br />
4 9<br />
DRINK<br />
TEST<br />
SYRUP 2<br />
PRIME<br />
ENTER<br />
ESC<br />
COUNTERS<br />
FIG 2.1 <strong>GENEVA</strong> INTERNAL KEYPAD<br />
1. The internal keypad provides the facility to carry out a number of frequently required machine<br />
functions without the necessity to enter any of the user programs.<br />
2. In most cases a single press of the key initiates the function associated with each button.<br />
If a further key press is necessary to end the action, it will be the escape key.<br />
<strong>GENEVA</strong> Issue 3 06/08/2008 18
COFFEtek Ltd<br />
3. The functions available from the internal keypad are as follows:<br />
(a)<br />
Advance Coffee Brewer<br />
If a coffee brewer is fitted, a single depression of this key will cause the brewer unit to index to<br />
its next position in the cycle. The purpose of this function is to allow the brewer to be locked<br />
prior to a flush cycle so that cleaning agents can be added.<br />
(b)<br />
MDB Mech Dispense Coin<br />
This key provides a method to empty the change tubes of an MDB coin mechanism, which<br />
does not itself possess the necessary buttons to do so. On pressing the key the external<br />
display will change to: -<br />
EMPTY TUBE<br />
£0.05 , ↓ ENTER OR ESC<br />
The currency value shown will be that of the lowest value coin tube in the coin mechanism. The<br />
function of the EXTERNAL keys will change as described in section 3 to allow actions to be<br />
performed on either the internal or external keypad. Pressing ENTER will cause a coin to be<br />
dispensed from the currently selected tube. Pressing the or ↓ selects the next/previous coin<br />
tube. Repeated use of the , ↓ & ENTER keys enables all tubes to be emptied. Pressing the<br />
ESCAPE key ends the process.<br />
(c)<br />
Brewer Flush<br />
This key provides the means to initiate a flush cycle of the fresh brew units. A single press of<br />
this key will initiate a cleaning cycle for all brewers fitted to the machine simultaneously. In the<br />
case of the instant version this function is redundant.<br />
(d)<br />
Syrup 1 Prime<br />
Manually controls the pump associated with flavoured syrup number 1. The first press turns on<br />
the pump; a second press turns it off again. Pressing the ESC key will also turn off the pump.<br />
(e)<br />
Syrup 2 Prime<br />
Manually controls the pump associated with flavoured syrup number 2. The first press turns on<br />
the pump; a second press turns it off again. Pressing the ESC key will also turn off the pump.<br />
(f)<br />
Prog<br />
This key activates the code entry sequence required to access the protected levels of the<br />
machine control programs. See section 3.<br />
(g)<br />
MDB Fill Tubes<br />
If an MDB coin mechanism is fitted, this function allows the change tubes to be filled. On<br />
pressing the key the external display will change to:<br />
INSERT FLOAT<br />
£0.00<br />
As coins are inserted the value displayed will reflect the total value of the money inserted.<br />
Pressing ESCAPE will cause the machine to return to normal operation and zero the credit.<br />
19 06/08/2008 Issue 3 <strong>GENEVA</strong>
COFFEtek Ltd<br />
(h)<br />
Advance Tea Brewer<br />
If a tea brewer is fitted, a single depression of this key will cause the brewer unit to index to its<br />
next position in the cycle. The purpose of this function is to allow the brewer to be locked prior<br />
to a flush cycle so that cleaning agents can be added.<br />
(i)<br />
Cup Test<br />
Causes a cup to be dispensed by the cup drop mechanism. The cup carousel will not index,<br />
unless a selection is made or a cup test performed. This reduces the possibility of damage;<br />
prevents damage to the carousel occurring because the cup stack has been pushed up from<br />
below causing a false out of cups signal to the control board.<br />
(j)<br />
Drink Test<br />
Allows the next selection to be taken as a free vend.<br />
(k)<br />
Counters<br />
Pressing the counters key places the machine in manual audit mode. Audit data is accessed<br />
via a series of menus. The chart below shows the menu headings in bold text whilst the key<br />
presses required to navigate the menu are shown in italics. Whilst in this mode, the functions of<br />
the EXTERNAL keypad change to allow the menus to be accessed from the same side of the<br />
door as the display – see section 3 paragraph 5 for button functions in this mode.<br />
<strong>GENEVA</strong> Issue 3 06/08/2008 20
COFFEtek Ltd<br />
DRINKS COUNTERS<br />
ENTER<br />
UP / DOWN<br />
NORMAL COUNTERS<br />
DOWN KEY<br />
ENTER<br />
ESCAPE<br />
ONE COUNTER<br />
PER SELECTION<br />
UP / DOWN<br />
FREE COUNTERS<br />
DOWN KEY<br />
ENTER<br />
ESCAPE<br />
ONE COUNTER<br />
PER SELECTION<br />
UP / DOWN<br />
UP KEY<br />
CHEAP COUNTERS<br />
DOWN KEY<br />
ENTER<br />
ESCAPE<br />
ONE COUNTER<br />
PER SELECTION<br />
UP / DOWN<br />
TEST COUNTERS<br />
DOWN KEY<br />
ENTER<br />
ESCAPE<br />
ONE COUNTER<br />
PER SELECTION<br />
UP / DOWN<br />
SLAVE COUNTERS<br />
ENTER<br />
ESCAPE<br />
DEPENDS<br />
ON SLAVE<br />
UP KEY<br />
UP / DOWN<br />
PERMANENT COUNTERS<br />
UP / DOWN KEY<br />
FINANCIAL AUDIT<br />
ENTER<br />
ESCAPE-<br />
OPPORTUNITY<br />
TO RESET*<br />
TUBE CONTENTS<br />
UP / DOWN KEY<br />
RESETABLE COUNTERS<br />
UP / DOWN KEY<br />
PERMANENT COUNTERS<br />
UP KEY<br />
* RESETS WHEN FINANCIAL AUDIT RESET<br />
UP / DOWN<br />
EVENT LOG<br />
ENTER<br />
ESCAPE<br />
EVENTS<br />
UP KEY<br />
UP / DOWN<br />
INGREDIENT COUNTERS<br />
ENTER<br />
ESCAPE<br />
ONE COUNTER<br />
PER INGREDIENT<br />
UP KEY<br />
VENDED CUP COUNT<br />
ENTER<br />
ESCAPE<br />
CUP COUNTER<br />
UP KEY<br />
TOTAL VEND COUNT<br />
ENTER<br />
ESCAPE<br />
TOTAL COUNTER<br />
21 06/08/2008 Issue 3 <strong>GENEVA</strong>
COFFEtek Ltd<br />
Section 3<br />
Programming<br />
1. The Geneva vending machine has a comprehensive configuration program to allow the behaviour<br />
and function of the machine to be changed to meet a customer’s requirement. There are three<br />
levels of access to the configuration functions of the machine. Access each level is protected by<br />
means of a four-digit code. The facilities available at each level are shown below:<br />
(1) Operator level access<br />
• Access to price related features only<br />
• Factory default Code 1111<br />
(2) Manager level access<br />
• Limited range modification of recipes<br />
• Access to price related features<br />
• Set date and time<br />
• Inhibit selections<br />
• Set the free drink code<br />
• Change the name of a selection<br />
• Change Operator level access code<br />
• Factory default Code 3333<br />
(3) Engineer level access<br />
• Full access to all features<br />
• Factory default code 4444<br />
<strong>GENEVA</strong> Issue 3 06/08/2008 22
COFFEtek Ltd<br />
ACCESSING THE USER PROGRAMS<br />
2. The programs are accessed by pressing key 5 (PROG) on the INTERNAL keypad.<br />
The EXTERNAL display will then prompt for input of a four-digit entry code. The code is input<br />
using the numbers printed on the keys of the INTERNAL keypad.<br />
(1) After pressing the PROG key the display will change to: -<br />
PLEASE ENTER<br />
ACCESS CODE<br />
(2) Use the numbered keys on the INTERNAL keypad to enter the correct code. It is not<br />
necessary to press ENTER. The code will be checked on entry of the fourth digit. Three<br />
attempts are allowed before the PROG key must be pressed again. On entry of a valid code<br />
the display will change to the menu heading appropriate to the level of access. Whilst in<br />
programming mode, the functions of the external keypad change to facilitate navigation of<br />
the program using the EXTERNAL keypad.<br />
3. In the event that the code has been lost or when fitting an un-programmed replacement board, it is<br />
necessary to complete the circuit between the two pins of the two pin header labelled ENG LINK<br />
on the Control Board. This bypasses the entry of the four-digit code, giving engineer level access<br />
immediately upon pressing the PROG key. If the ENG LINK is left in place during power up,<br />
the machine will boot straight into the engineer’s program with full access.<br />
NOTE REGARDING POWER UP PROBLEMS<br />
4. The Geneva electronics control system has two major elements. These are the Control Board and<br />
the DC RIO board. The two boards communicate via a three wire Inter Integrated Circuit bus (I 2 C<br />
bus). Some faults affecting the I 2 C bus or Control Board configuration can result in persistent<br />
system resets. To allow recovery / diagnosis from such situations, the control system provides an<br />
Access Window to a special ‘safe mode’ shortly after power is switched on. It is possible to enter<br />
engineer’s mode during this window.<br />
Some configuration faults related to unintialised boards do not allow the system to get even this far<br />
through start up, in which case it is necessary to insert the ENG LINK before switching the power on.<br />
In this case the machine will boot straight into the engineer’s program.<br />
In both cases the I 2 C bus linking the electronics boards is disabled. Without communication between<br />
the DC RIO board and the Control board the OUTPUT TEST facility is ineffective and the state of<br />
some inputs will be misreported in the INPUT TEST routines. As a reminder to this effect the sound<br />
associated with a key press is truncated to a very short pip rather than a beep.<br />
23 06/08/2008 Issue 3 <strong>GENEVA</strong>
COFFEtek Ltd<br />
EXTERNAL KEYPAD FUNCTIONS IN PROGRAMMING MODE<br />
5. Having entered a valid code, the keys on the EXTERNAL keypad are used to navigate and use<br />
the functions of the user programs. In programming mode the keys assume the following<br />
alternative functions:<br />
Numeric Keyed Fronted Machine<br />
FUNCTION<br />
Move up a list of menu options or increment a number.<br />
Move down a list of menu options or decrement a number.<br />
Move the cursor left.<br />
Move the cursor right.<br />
Move to previous menu option or reject values entered.<br />
Enter the menu option displayed or accept the changes made.<br />
KEY<br />
<br />
<br />
<br />
<br />
ESC<br />
ENTER<br />
<strong>GENEVA</strong> Issue 3 06/08/2008 24
COFFEtek Ltd<br />
Direct Selection Fronted Machine<br />
<br />
<br />
<br />
<br />
ESCAPE<br />
ENTER<br />
FUNCTION<br />
Move up a list of menu options or increment a number.<br />
Move down a list of menu options or decrement a number.<br />
Move the cursor left.<br />
Move the cursor right.<br />
Move to previous menu option or reject values entered.<br />
Enter the menu option displayed or accept the changes made.<br />
KEY<br />
<br />
<br />
<br />
<br />
ESCAPE<br />
ENTER<br />
25 06/08/2008 Issue 3 <strong>GENEVA</strong>
COFFEtek Ltd<br />
PROGRAM FUNCTIONS<br />
6. The following table shows the functions available and the access level required to use them within<br />
the Geneva configuration program:<br />
FUNCTION<br />
ACCESS LEVEL REQUIRED<br />
OPERATOR MANAGER ENGINEER<br />
INGREDIENT TIMES • limited •<br />
SET DATE /TIME • •<br />
SET PRICING MODE • • •<br />
CHANGE PRICES • • •<br />
INHIBIT DRINK • •<br />
ALTER DRINK NAME • •<br />
TIMED ACTIVITIES<br />
TEMP SETTINGS<br />
OUTPUT TEST<br />
INPUT TEST<br />
SET PRODUCT CONSTS<br />
MACHINE STATUS<br />
SET DRY VEND MODE<br />
SERIAL NUMBER<br />
CONFIGURE MACHINE<br />
MDB CONFIG<br />
EVA-DTS CONFIG<br />
PRODUCT CODES<br />
•<br />
•<br />
•<br />
•<br />
•<br />
•<br />
•<br />
•<br />
•<br />
•<br />
•<br />
•<br />
OPERATORS CODE • •<br />
MANAGERS CODE<br />
ENGINEERS CODE<br />
•<br />
•<br />
FREE DRINK CODE • •<br />
EDIT DRINK MAP<br />
CARD ACTIONS<br />
SET CUP TYPES<br />
CONFIGURE SLAVE<br />
ECONOMY MODE<br />
DEPRESSURISE<br />
COFFEE BREWER<br />
•<br />
•<br />
•<br />
•<br />
•<br />
•<br />
<strong>GENEVA</strong> Issue 3 06/08/2008 26
COFFEtek Ltd<br />
PROGRAMMING SEQUENCE OF OPERATIONS<br />
7. The method of navigating the menu structure is consistent throughout the program.<br />
The ↑ and ↓ keys are used to index through the headings in a particular level or increment /<br />
decrement a value. Pressing ENTER will select a submenu or confirm a change, whilst ESCAPE<br />
will reject a change or return to the previous menu level. The sequence for accessing a menu<br />
option and then accessing a submenu within that option and finally selecting and changing a<br />
parameter’s value is shown diagrammatically in Fig 3.1.<br />
PREVIOUS<br />
↑<br />
MAIN MENU HEADING<br />
NEXT<br />
↓<br />
ENTER<br />
ESCAPE<br />
PREVIOUS<br />
↑<br />
SUB-MENU HEADING<br />
NEXT<br />
↓<br />
ENTER<br />
ESCAPE<br />
INC<br />
↑<br />
ALTER SETTING<br />
DEC<br />
↓<br />
LEFT<br />
←<br />
RIGHT<br />
→<br />
FIG 3.1 ACCESSING AN OPTION SETTING – FLOW DIAGRAM<br />
27 06/08/2008 Issue 3 <strong>GENEVA</strong>
COFFEtek Ltd<br />
MENU OPTIONS<br />
Ingredient Times<br />
8. INGREDIENT TIMES provides access to a set of submenus, which allow modification of the<br />
parameters controlling the recipe and dispensing of individual drinks. The actual content of the<br />
submenu is dependent on the configuration of the machine. That is, for example, a Geneva Instant<br />
Hot version will have different drinks in its INGREDIENT TIMES submenu to a Double Fresh Brew<br />
version fitted with a carbonator. In general the entries of the INGREDIENT TIMES menu will<br />
consist only of the drinks available on that particular configuration of machine. The Geneva range<br />
has a number of pre-defined configurations. For each configuration each selection button is<br />
associated with a particular drink. This association is predefined for each configuration, but can be<br />
modified within narrow limits using the EDIT DRINK MAP menu.<br />
Note: Changes to the menu will lead to initialisation of all machine.<br />
9. For each selection a user with manager level access is granted a limited range adjustment on a<br />
subset of the parameters. This allows the site-based personnel to perform minor taste profile<br />
modifications without the need to call an engineer. The limited range adjustment is implemented<br />
as a multiplying scale factor of between 75% and 125%. In manager’s mode the limited range of<br />
adjustment permitted is displayed as a signed value between –25% and +25% and can be<br />
changed in 5% increments. For example, the limited range strength control for the coffee<br />
ingredient of an Espreschoc selection, which has had its coffee ingredient increased by 5% would<br />
appear to a manager level user as:<br />
OP: COFFEE MOD<br />
+5%<br />
When viewed with engineer level access this would appear as:<br />
OP: COFFEE MOD<br />
105<br />
In each case the same parameter is being viewed.<br />
<strong>GENEVA</strong> Issue 3 06/08/2008 28
COFFEtek Ltd<br />
10. The following tables describe the parameters that can be adjusted for each drink, and indicate the<br />
parameters visible at the different access levels. The drinks available in each configuration are<br />
described in Table 14.b later in this Section.<br />
INSTANT COFFEE<br />
* E indicates engineer access level<br />
M indicates manager access level<br />
Parameter Name Function Units<br />
Level<br />
See *<br />
COFFEE TIME Instant Coffee ingredient duration control .1s E<br />
COFFEE ADJUST<br />
Increment applied to coffee auger run time when strong .1s E<br />
selected<br />
WATER TIME Coffee water dispense valve open duration .1s E<br />
COF MIXER TIME Coffee whipper motor run duration .1s E<br />
WATER SPLIT<br />
Fraction of total water time, above, to be allocated to the % E<br />
milk sugar valve if milk or sugar is selected<br />
SUGAR TIME EAuger 75run illtime for t optional 75% fingredient th t tif selected th ilk l .1s E<br />
SUGAR ADJUSTMENT Increment applied to sugar auger run time when extra .1s E<br />
sugar selected<br />
MILK TIME Auger run time for optional ingredient if selected .1s E<br />
MILK ADJUSTMENT<br />
VALVE FACTOR<br />
OP: Sugar Mod<br />
OP: Milk Mod<br />
OP: Coffee Mod<br />
OP: Water Mod<br />
Increment applied to milk auger run time when extra milk<br />
selected<br />
Compensating variable to account for differing flow rates<br />
between milk/sugar and coffee valves. If white/sugar drink<br />
is bigger than black version decrease, if bigger increase<br />
Manager level control applied to SUGAR TIME<br />
The actual sugar auger run time will be:<br />
SUGAR TIME x OP: Sugar Mod /100<br />
Manager level control applied to MILK TIME<br />
The actual milk auger run time will be:<br />
MILK TIME x OP: Milk Mod /100<br />
Manager level control applied to COFFEE TIME<br />
The actual coffee auger run time will be:<br />
COFFEE TIME x OP: Coffee Mod /100<br />
Manager level control applied to COF WATER TIME<br />
The actual dispense valve open time will be:<br />
COF’ WATER TIME x OP: Water Mod /100<br />
.1s E<br />
.1s E<br />
% E ,M<br />
% E,M<br />
% E,M<br />
% E,M<br />
29 06/08/2008 Issue 3 <strong>GENEVA</strong>
COFFEtek Ltd<br />
CHOCOMILK<br />
* E indicates engineer access level<br />
M indicates manager access level<br />
Parameter Name Function Units<br />
Level<br />
See *<br />
CHOCOLATE START Start time for the chocolate components of the drink .1s E<br />
referenced to t=0<br />
CHOCOLATE TIME Auger run time for Chocolate ingredient .1s E<br />
TOPPING START<br />
Start time for the topping components of the drink<br />
.1s E<br />
referenced to t=0<br />
TOPPING TIME Auger run time for Topping ingredient .1s E<br />
WATER TIME Topping/chocolate dispense valve open duration .1s E<br />
MIXER TIME Chocolate mixer motor run time .1s E<br />
OP: Topping Mod<br />
OP: Chocolate Mod<br />
OP: Water Mod<br />
Manager level control applied to TOPPING TIME<br />
The actual topping auger run time will be:<br />
TOPPING TIME x OP: Topping Mod /100<br />
Manager level control applied to CHOCOLATE TIME<br />
The actual chocolate auger run time will be:<br />
CHOCOLATE TIME x OP: Chocolate Mod /100<br />
Manager level control applied to WATER TIME<br />
The actual dispense valve open time will be:<br />
WATER TIME x OP: Water Mod /100<br />
% E,M<br />
% E,M<br />
% E,M<br />
CHOCOLATE<br />
* E indicates engineer access level<br />
M indicates manager access level<br />
Parameter Name Function Units<br />
Level<br />
See *<br />
CHOCOLATE TIME Auger run time for Chocolate ingredient .1s E<br />
WATER TIME Chocolate dispense valve open duration .1s E<br />
MIXER START Chocolate mixer start time .1s E<br />
MIXER TIME Chocolate mixer motor run time .1s E<br />
OP: Chocolate Mod<br />
OP: Water Mod<br />
Manager level control applied to CHOCOLATE TIME<br />
The actual chocolate auger run time will be:<br />
CHOCOLATE TIME x OP: Chocolate Mod /100<br />
Manager level control applied to WATER TIME<br />
The actual dispense valve open time will be:<br />
WATER TIME x OP: Water Mod /100<br />
% E,M<br />
% E,M<br />
<strong>GENEVA</strong> Issue 3 06/08/2008 30
COFFEtek Ltd<br />
DECAF COFFEE (INSTANT)<br />
* E indicates engineer access level<br />
M indicates manager access level<br />
Parameter Name Function Units<br />
Level<br />
See *<br />
COFFEE TIME Decaf ingredient duration control .1s E<br />
COFFEE ADJUST<br />
Increment applied to decaf auger run time when strong .1 s E<br />
selected<br />
WATER TIME Coffee water dispense valve open duration .1s E<br />
MIXER TIME Coffee whipper motor run duration .1s E<br />
WATER SPLIT<br />
Fraction of total water time, above, to be allocated to the % E<br />
milk sugar valve if milk or sugar is selected<br />
SUGAR TIME Auger run time for optional ingredient if selected .1s E<br />
SUGAR ADJUSTMENT Increment applied to sugar auger run time when extra .1s E<br />
sugar selected<br />
MILK TIME Auger run time for optional ingredient if selected .1s E<br />
MILK ADJUSTMENT<br />
VALVE FACTOR<br />
OP: Sugar Mod<br />
OP: Milk Mod<br />
OP: Coffee Mod<br />
OP: Water Mod<br />
Increment applied to milk auger run time when extra milk<br />
selected<br />
Compensating variable to account for differing flow rates<br />
between milk/sugar and coffee valves. If white/sugar drink<br />
is bigger than black version decrease, if bigger increase<br />
Manager level control applied to SUGAR TIME<br />
The actual sugar auger run time will be:<br />
SUGAR TIME x OP: Sugar mod /100<br />
Manager level control applied to MILK TIME<br />
The actual milk auger run time will be:<br />
MILK TIME x OP: Milk Mod /100<br />
Manager level control applied to COFFEE TIME<br />
The actual decaf auger run time will be:<br />
COFFEE TIME x OP: Coffee Mod /100<br />
Manager level control applied to COF WATER TIME<br />
The actual dispense valve open time will be:<br />
COF’ WATER TIME x OP: Water Mod /100<br />
.1s E<br />
.1s E<br />
% E,M<br />
% E,M<br />
% E,M<br />
% E,M<br />
31 06/08/2008 Issue 3 <strong>GENEVA</strong>
COFFEtek Ltd<br />
CAPPUCCINO (INSTANT COFFEE)<br />
* E indicates engineer access level<br />
M indicates manager access level<br />
Parameter Name Function Units<br />
Level<br />
See *<br />
COFFEE WTR TIME Coffee water dispense valve open duration .1s E<br />
TOPPING WTR TIME Topping water dispense valve open duration .1s E<br />
SUGAR WATER TIME Sugar water dispense valve open duration .1s E<br />
TOPPING TIME Auger run time for topping ingredient .1s E<br />
COF MIXER TIME Coffee whipper motor run duration .1s E<br />
COFFEE TIME Auger run time for coffee ingredient .1s E<br />
SUGAR TIME Auger run time for optional ingredient if selected .1s E<br />
SUGAR ADJUSTMENT<br />
COFFEE START<br />
OP: Sugar Mod<br />
OP: Topping Mod<br />
OP: Coffee Mod<br />
OP: Water Mod<br />
Increment applied to sugar auger run time when extra<br />
sugar selected<br />
Offset from t=0 applied to all coffee related components.<br />
Ensures drink with white head<br />
Manager level control applied to SUGAR TIME<br />
The actual sugar auger run time will be:<br />
SUGAR TIME x OP: Sugar Mod /100<br />
Manager level control applied to TOPPING TIME<br />
The actual topping auger run time will be:<br />
TOPPING TIME x OP: Topping Mod /100<br />
Manager level control applied to COFFEE TIME<br />
The actual coffee auger run time will be:<br />
COFFEE TIME x OP:Coffee Mod /100<br />
Manager level control applied to water times<br />
The actual dispense valve open times will be:<br />
x OP: Water Mod /100<br />
.1s E<br />
.1s E<br />
% E,M<br />
% E,M<br />
% E,M<br />
% E,M<br />
<strong>GENEVA</strong> Issue 3 06/08/2008 32
COFFEtek Ltd<br />
CAFÉ LATTE (INSTANT COFFEE)<br />
* E indicates engineer access level<br />
M indicates manager access level<br />
Parameter Name Function Units<br />
COFFEE TIME<br />
COFFEE ADJUST<br />
WATER TIME<br />
COF MIXER TIME<br />
WATER SPLIT<br />
SUGAR TIME<br />
SUGAR ADJUSTMENT<br />
MILK TIME<br />
VALVE FACTOR<br />
COFFEE DELAY<br />
OP: Sugar Mod<br />
OP: Coffee Mod<br />
OP: Water Mod<br />
Coffee ingredient auger control<br />
Increment applied to coffee auger run time when strong<br />
selected<br />
Coffee water dispense valve open duration<br />
Coffee whipper motor run duration<br />
Fraction of total water time, above, to be allocated to the<br />
milk sugar valve if milk or sugar is selected<br />
EAuger 75run illtime for t optional 75% fingredient th t tif selected th ilk l<br />
Increment applied to sugar auger run time when extra<br />
sugar selected<br />
Auger run time for Milk ingredient<br />
Compensating variable to account for differing flow rates<br />
between milk/sugar and coffee valves. If white/sugar drink<br />
is bigger than black version decrease, if bigger increase<br />
Time after t=0 that coffee components of drink start<br />
Manager level control applied to SUGAR TIME<br />
The actual sugar auger run time will be:<br />
SUGAR TIME x OP: Sugar Mod /100<br />
Manager level control applied to COFFEE TIME<br />
The actual coffee auger run time will be:<br />
COFFEE TIME x OP: Coffee Mod /100<br />
Manager level control applied to water times<br />
The actual dispense valve open times will be:<br />
x OP: Water Mod/100<br />
Level<br />
See *<br />
.1s E<br />
.1s E<br />
.1s E<br />
.1s E<br />
% E<br />
.1s E<br />
.1s E<br />
.1s E<br />
.1s E<br />
.1s E<br />
% E ,M<br />
% E,M<br />
% E,M<br />
33 06/08/2008 Issue 3 <strong>GENEVA</strong>
COFFEtek Ltd<br />
ESPRESSO (INSTANT COFFEE)<br />
* E indicates engineer access level<br />
M indicates manager access level<br />
Parameter Name Function Units<br />
Level<br />
See *<br />
COFFEE TIME Coffee ingredient auger control .1s E<br />
COFFEE ADJUST<br />
Increment applied to coffee auger run time when strong .1s E<br />
selected<br />
WATER TIME Coffee water dispense valve open duration .1s E<br />
WATER SPLIT<br />
Fraction of total water time, above, to be allocated to the % E<br />
milk sugar valve if milk or sugar is selected<br />
SUGAR TIME Auger run time for optional ingredient if selected .1s E<br />
SUGAR ADJUSTMENT Increment applied to sugar auger run time when extra .1s E<br />
sugar selected<br />
MILK TIME Auger run time for optional ingredient if selected .1s E<br />
MILK ADJUSTMENT<br />
VALVE FACTOR<br />
OP: Sugar Mod<br />
OP: Milk Mod<br />
OP: Coffee Mod<br />
OP: Water Mod<br />
Increment applied to milk auger run time when extra milk<br />
selected<br />
Compensating variable to account for differing flow rates<br />
between milk/sugar and coffee valves. If white/sugar drink<br />
is bigger than black version decrease, if bigger increase<br />
Manager level control applied to SUGAR TIME.<br />
The actual sugar auger run time will be:<br />
SUGAR TIME x OP: Sugar Mod /100<br />
Manager level control applied to MILK TIME<br />
The actual milk auger run time will be:<br />
MILK TIME x OP: Milk Mod /100<br />
Manager level control applied to COFFEE TIME<br />
The actual coffee auger run time will be:<br />
COFFEE TIME x OP: Coffee Mod /100<br />
Manager level control applied to water times<br />
The actual dispense valve open times will be:<br />
x OP: Water Mod /100<br />
.1s E<br />
.1s E<br />
% E,M<br />
% E,M<br />
% E,M<br />
% E,M<br />
<strong>GENEVA</strong> Issue 3 06/08/2008 34
COFFEtek Ltd<br />
CAFÉ MOCHA (INSTANT COFFEE)<br />
* E indicates engineer access level<br />
M indicates manager access level<br />
Parameter Name Function Units<br />
Level<br />
See *<br />
CHOCOLATE START Chocolate ingredient start time referenced to t=0 .1s E<br />
CHOCOLATE TIME Chocolate ingredient auger run time .1s E<br />
TOPPING START Topping ingredient start time referenced to t=0 .1s E<br />
TOPPING TIME Topping ingredient auger run time .1s E<br />
WATER TIME<br />
Total amount of valve opening time for this selection<br />
allocation of water to the three bowls is automatic .1s E<br />
COFFEE START<br />
Start time for coffee component of this selection.<br />
Offset from t=0 for ingredient, water and mixer .1s E<br />
COFFEE TIME Coffee ingredient auger run time .1s E<br />
CHOC MIXER TIME<br />
OP: Topping Mod<br />
OP: Choc Mod<br />
OP: Coffee Mod<br />
OP: Water Mod<br />
Chocolate mixer run time referenced to t=0 other mixer<br />
times are calculated automatically .1s E<br />
Manager level control applied to TOPPING TIME<br />
% E,M<br />
The actual topping auger run time will be:<br />
TOPPING TIME x OP: Topping Mod /100<br />
Manager level control applied to CHOCOLATE TIME % E,M<br />
The actual chocolate auger run time will be:<br />
CHOCOLATE TIME x OP: Choc Mod /100<br />
Manager level control applied to COFFEE TIME<br />
% E,M<br />
The actual chocolate auger run time will be:<br />
COFFEE TIME x OP: Coffee Mod /100<br />
As engineers mode equivalent however the factor is % E,M<br />
displayed as a value between –25 and +25 %; the<br />
increments are 5%<br />
35 06/08/2008 Issue 3 <strong>GENEVA</strong>
COFFEtek Ltd<br />
WHIPPED COFFEE (INSTANT)<br />
* E indicates engineer access level<br />
M indicates manager access level<br />
Parameter Name Function Units<br />
Level<br />
See *<br />
COFFEE TIME Coffee ingredient auger control .1s E<br />
COFFEE ADJUST<br />
Increment applied to coffee auger run time when strong .1s E<br />
selected<br />
WATER TIME Coffee water dispense valve open duration .1s E<br />
MIXER TIME Coffee mixer motor run time .1s E<br />
WATER SPLIT<br />
Fraction of total water time, above, to be allocated to the % E<br />
milk sugar valve if milk or sugar is selected<br />
SUGAR TIME EAuger 75run illtime for t optional 75% fingredient th t tif selected th ilk l .1s E<br />
SUGAR ADJUSTMENT Increment applied to sugar auger run time when extra .1s E<br />
sugar selected<br />
MILK TIME Auger run time for optional ingredient if selected .1s E<br />
MILK ADJUSTMENT<br />
VALVE FACTOR<br />
OP: Sugar Mod<br />
OP: Milk Mod<br />
OP: Coffee Mod<br />
OP: Water Mod<br />
Increment applied to milk auger run time when extra milk<br />
selected<br />
Compensating variable to account for differing flow rates<br />
between milk/sugar and coffee valves. If white/sugar drink<br />
is bigger than black version decrease, if bigger increase<br />
Manager level control applied to SUGAR TIME<br />
The actual sugar auger run time will be:<br />
SUGAR TIME x OP: Sugar Mod /100<br />
Manager level control applied to MILK TIME<br />
The actual milk auger run time will be:<br />
MILK TIME x OP: Milk Mod /100<br />
Manager level control applied to COFFEE TIME<br />
The actual coffee auger run time will be:<br />
COFFEE TIME x OP: Coffee Mod /100<br />
Manager level control applied to COF WATER TIME<br />
The actual dispense valve open time will be:<br />
COF’ WATER TIME x OP: Water Mod/100<br />
.1s E<br />
.1s E<br />
% E ,M<br />
% E,M<br />
% E,M<br />
% E,M<br />
<strong>GENEVA</strong> Issue 3 06/08/2008 36
COFFEtek Ltd<br />
WHIPPED DECAF COFFEE (INSTANT)<br />
* E indicates engineer access level<br />
M indicates manager access level<br />
Parameter Name Function Units<br />
Level<br />
See *<br />
COFFEE TIME Decaf ingredient auger control .1 s E<br />
COFFEE ADJUST<br />
Increment applied to decaf auger run time when strong .1 s E<br />
selected<br />
WATER TIME Coffee water dispense valve open duration .1 s E<br />
MIXER TIME Coffee mixer motor run time .1 s E<br />
WATER SPLIT<br />
Fraction of total water time, above, to be allocated to the % E<br />
milk sugar valve if milk or sugar is selected<br />
SUGAR TIME Auger run time for optional ingredient if selected .1 s E<br />
SUGAR ADJUSTMENT Increment applied to sugar auger run time when extra .1 s E<br />
sugar selected<br />
MILK TIME Auger run time for optional ingredient if selected .1 s E<br />
MILK ADJUSTMENT<br />
VALVE FACTOR<br />
OP: Sugar Mod<br />
OP: Milk Mod<br />
OP: Coffee Mod<br />
OP: Water Mod<br />
Increment applied to milk auger run time when extra milk<br />
selected<br />
Compensating variable to account for differing flow rates<br />
between milk/sugar and coffee valves. If white/sugar drink<br />
iManager bi th level bl control k applied i d to SUGAR if bi TIME i<br />
The actual sugar auger run time will be:<br />
SUGAR TIME x OP: Sugar Mod /100<br />
Manager level control applied to MILK TIME<br />
The actual milk auger run time will be:<br />
MILK TIME x OP: Milk Mod /100<br />
Manager level control applied to COFFEE TIME<br />
The actual decaf auger run time will be:<br />
COFFEE TIME x OP: Coffee Mod /100<br />
Manager level control applied to COF WATER TIME<br />
The actual dispense valve open time will be:<br />
COF’ WATER TIME x OP: Water Mod /100<br />
.1 s E<br />
.1s E<br />
% E,M<br />
% E,M<br />
% E,M<br />
% E,M<br />
37 06/08/2008 Issue 3 <strong>GENEVA</strong>
COFFEtek Ltd<br />
INSTANT TEA<br />
* E indicates engineer access level<br />
M indicates manager access level<br />
Parameter Name Function Units<br />
Level<br />
See *<br />
TEA TIME Auger run time for Tea ingredient .1s E<br />
TEA ADJUSTMENT Increment applied to tea auger run time when strong .1s E<br />
selected<br />
WATER TIME Tea water dispense valve open duration .1s E<br />
WATER SPLIT<br />
Fraction of total water time, above, to be allocated to the % E<br />
milk sugar valve if milk or sugar is selected<br />
SUGAR TIME Auger run time for Optional ingredient if selected .1s E<br />
SUGAR ADJUSTMENT Increment applied to sugar auger run time when extra .1s E<br />
sugar selected<br />
MILK TIME Auger run time for optional ingredient if selected .1s E<br />
MILK ADJUSTMENT<br />
VALVE FACTOR<br />
OP: Sugar Mod<br />
OP: Milk Mod<br />
OP: Tea Mod<br />
OP: Water Mod<br />
Increment applied to milk auger run time when extra milk<br />
selected<br />
Compensating variable to account for differing flow rates<br />
between milk/sugar and tea valves. If white/sugar drink is<br />
bigger than black version decrease, if bigger increase<br />
Manager level control applied to SUGAR TIME<br />
The actual sugar auger run time will be:<br />
SUGAR TIME x OP: Sugar Mod /100<br />
Manager level control applied to MILK TIME<br />
The actual milk auger run time will be:<br />
MILK TIME x OP: Milk Mod /100<br />
Manager level control applied to TEA TIME<br />
The actual tea auger run time will be:<br />
TEA TIME x OP: Tea Mod /100<br />
Manager level control applied to WATER TIME<br />
The actual dispense valve open time will be:<br />
WATER TIME x OP: Water Mod/100<br />
.1s E<br />
8-14<br />
% E,M<br />
% E,M<br />
% E,M<br />
% E,M<br />
<strong>GENEVA</strong> Issue 3 06/08/2008 38
COFFEtek Ltd<br />
SOUP<br />
* E indicates engineer access level<br />
M indicates manager access level<br />
Parameter Name Function Units<br />
Level<br />
See *<br />
SOUP TIME Auger run time for Soup ingredient .1 s E<br />
WATER TIME Soup water dispense valve open duration .1s E<br />
MIXER TIME Soup mixer motor run time .1s E<br />
MIXER START Soup mixer motor start time referenced to t=0 .1s E<br />
OP: Soup Mod<br />
OP: Water Mod<br />
Manager level control applied to SOUP TIME<br />
The actual soup auger run time will be:<br />
SOUP TIME x OP: Soup Mod /100<br />
Manager level control applied to WATER TIME<br />
The actual dispense valve open time will be<br />
WATER TIME x OP: Water Mod/100<br />
% E,M<br />
% E,M<br />
LEMON (STILL DRINK 1)<br />
* E indicates engineer access level<br />
M indicates manager access level<br />
Parameter Name Function Units<br />
Level<br />
See *<br />
WATER TIME Chilled water dispense valve open duration .1s E<br />
SYRUP 1 TIME Syrup pump one operating time .1s E<br />
OP: Water Mod<br />
OP: Syrup 1 time<br />
Manager level control applied to WATER TIME<br />
The actual valve opening time will be:<br />
WATER TIME x OP: Water Mod /100<br />
Manager level control applied to SYRUP 1 TIME<br />
The actual syrup pump run time will be:<br />
SYRUP 1 TIME x OP: Syrup 1 time /100<br />
% E,M<br />
% E,M<br />
ORANGE (STILL DRINK 2)<br />
* E indicates engineer access level<br />
M indicates manager access level<br />
Parameter Name Function Units<br />
Level<br />
See *<br />
WATER TIME Chilled water dispense valve open duration .1s E<br />
SYRUP 2 TIME Syrup pump two operating time .1s E<br />
OP: Water Mod<br />
OP: Syrup 2 time<br />
Manager level control applied to WATER TIME<br />
The actual valve opening time will be:<br />
WATER TIME x OP: Water Mod /100<br />
Manager level control applied to SYRUP 2 TIME<br />
The actual syrup pump run time will be:<br />
SYRUP 2 TIME x OP: Syrup 2 time /100<br />
% E,M<br />
% E,M<br />
39 06/08/2008 Issue 3 <strong>GENEVA</strong>
COFFEtek Ltd<br />
COLD WATER<br />
* E indicates engineer access level<br />
M indicates manager access level<br />
Parameter Name Function Units<br />
Level<br />
See *<br />
WATER TIME Chilled water dispense valve open duration .1s E<br />
OP: Water Mod<br />
Manager level control applied to WATER TIME<br />
The actual valve opening time will be:<br />
WATER TIME x OP:Water Mod /100<br />
% E,M<br />
COLA (SPARKLING DRINK 1)<br />
* E indicates engineer access level<br />
M indicates manager access level<br />
Parameter Name Function Units<br />
Level<br />
See *<br />
WATER TIME Sparkling water dispense valve open duration .1s E<br />
SYRUP 1 TIME Syrup pump one operating time .1s E<br />
OP: Water Mod<br />
OP: Syrup 1 time<br />
Manager level control applied to WATER TIME<br />
The actual valve opening time will be:<br />
WATER TIME x OP: Water Mod /100<br />
Manager level control applied to SYRUP 1 TIME<br />
The actual syrup pump run time will be:<br />
SYRUP 1 TIME x OP: Syrup 1 time /100<br />
% E,M<br />
% E,M<br />
ORANGE (SPARKLING DRINK 2)<br />
* E indicates engineer access level<br />
M indicates manager access level<br />
Parameter Name Function Units<br />
Level<br />
See *<br />
WATER TIME Sparkling water dispense valve open duration .1s E<br />
SYRUP 2 TIME Syrup pump two operating time .1s E<br />
OP: Water Mod<br />
OP: Syrup 2 time<br />
Manager level control applied to WATER TIME<br />
The actual valve opening time will be:<br />
WATER TIME x OP: Water Mod /100<br />
Manager level control applied to SYRUP 2 TIME<br />
The actual syrup pump run time will be:<br />
SYRUP 2 TIME x OP: Syrup 2 time/100<br />
% E,M<br />
% E,M<br />
SPARKLING WATER<br />
* E indicates engineer access level<br />
M indicates manager access level<br />
Parameter Name Function Units<br />
Level<br />
See *<br />
WATER TIME Sparkling water dispense valve open duration .1s E<br />
OP: Water Mod<br />
Manager level control applied to WATER TIME<br />
The actual valve opening time will be:<br />
WATER TIME x OP:Water Mod /100<br />
% E,M<br />
<strong>GENEVA</strong> Issue 3 06/08/2008 40
COFFEtek Ltd<br />
HOT WATER<br />
* E indicates engineer access level<br />
M indicates manager access level<br />
Parameter Name Function Units<br />
Level<br />
See *<br />
HOT WATER TIME Hot water dispense valve open duration .1s E<br />
OP: Hot Water Mod<br />
Manager level control applied to HOT WATER TIME<br />
The actual valve opening time will be:<br />
HOT WATER TIME x OP: Water Mod /100<br />
% E,M<br />
FRESH BREW TEA<br />
* E indicates engineer access level<br />
M indicates manager access level<br />
Parameter Name Function Units<br />
Level<br />
See *<br />
TEA WATER TIME Tea water dispense valve open duration .1s E<br />
SUGAR WATER TIME Milk/Sugar dispense valve opening time if optional<br />
.1 s E<br />
ingredient selected. This will be deducted from the TEA<br />
WATER TIME if so used.<br />
TEA TIME Auger run time for tea ingredient .1s E<br />
TEA ADJUSTMENT Increment applied to tea auger run time when strong .1 s E<br />
selected<br />
TEA MIXER START Mixer start time for the optional milk/sugar component .1 s E<br />
That is the milk/sugar mixer start time ref t=0<br />
TEA MIXER TIME Mixer run time for the optional milk/sugar component .1 s E<br />
SUGAR TIME Auger run time for optional ingredient if selected .1 s E<br />
SUGAR ADJUSTMENT Increment applied to sugar auger run time when extra .01 s E<br />
sugar selected<br />
MILK TIME Auger run time for optional ingredient if selected .01 s E<br />
MILK ADJUSTMENT<br />
PAUSE TIME<br />
DRAIN TIME<br />
OP: Sugar Mod<br />
OP: Milk Mod<br />
OP: Tea Mod<br />
OP: Water Mod<br />
Increment applied to milk auger run time when extra milk<br />
selected<br />
Delay between first dose of water through brew chamber<br />
and the second dose<br />
Time to allow tea to drain from the brew chamber before<br />
allowing the head to move<br />
Manager level control applied to SUGAR TIME<br />
The actual sugar auger run time will be:<br />
SUGAR TIME x OP: Sugar Mod /100<br />
Manager level control applied to MILK TIME<br />
The actual milk auger run time will be:<br />
MILK TIME x OP: Milk Mod /100<br />
Manager level control applied to TEA TIME<br />
The actual tea auger run time will be:<br />
TEA TIME x OP: Tea Mod /100<br />
Manager level control applied to water times<br />
The actual dispense valve open times will be:<br />
x OP: Water Mod/100<br />
.1 s E<br />
.1s E,M<br />
.1s E,M<br />
% E,M<br />
% E,M<br />
% E,M<br />
% E,M<br />
41 06/08/2008 Issue 3 <strong>GENEVA</strong>
COFFEtek Ltd<br />
FRESH BREW COFFEE<br />
* E indicates engineer access level<br />
M indicates manager access level<br />
Parameter Name Function Units<br />
Level<br />
See *<br />
INFUSION TIME<br />
Delay after coffee & water are added to brew chamber before .1s E<br />
brewer closes<br />
WATER START TIME Time after start that coffee water valve opens .1s E<br />
WATER TIME Coffee brewer dispense valve open duration % E<br />
M&S WATER TIME Milk & sugar valve opening time E<br />
VALVE FACTOR<br />
Balancing factor to account for difference in flow rate<br />
between milk/sugar valve and brewer valve. If white/sugar<br />
drink is smaller than black version increase VALVE FACTOR<br />
and vice versa. Range 8-14<br />
Ratio<br />
X<br />
10<br />
COFFEE ING TIME Coffee ingredient auger control .1 s E<br />
STRENGTH ADJUST Increment applied to coffee auger run time when strong .1s E<br />
selected<br />
SUGAR TIME Auger run time for optional ingredient if selected 1. s E<br />
SUGAR ADJUSTMENT Increment applied to sugar auger run time when extra sugar .01 s E<br />
selected<br />
MILK TIME Auger run time for optional ingredient if selected .01 s E<br />
MILK ADJUSTMENT Increment applied to milk auger run time when extra milk .1 s E<br />
selected<br />
PUMP 1 DURATION Duration of first air pump operation .1 s E<br />
PUMP 1 DELAY Inactive period following first air pump operation .1 s E<br />
PUMP 2 DURATION Duration of second air pump operation .1 s E<br />
PUMP 2 DELAY Inactive period following second air pump operation .1 s E<br />
MIXER TIME<br />
HOT WATER TIME<br />
BLACK DRAIN TIME<br />
WHITE DRAIN TIME<br />
OP: Sugar Mod<br />
OP: Milk Mod<br />
OP: Coffee Mod<br />
OP: Water Mod<br />
Run time for coffee mixer motor referenced to the beginning<br />
of the first air pump activity<br />
Duration for which hot water valve opens to supplement<br />
brewer volume for larger drinks<br />
Idle time before head retracts following dispense of selection<br />
with no optional components<br />
Idle time before head retracts following dispense of selection<br />
where milk or sugar have been selected<br />
Manager level control applied to SUGAR TIME<br />
The actual sugar auger run time will be:<br />
SUGAR TIME x OP: Sugar Mod /100<br />
Manager level control applied to MILK TIME<br />
The actual milk auger run time will be:<br />
MILK TIME x OP: Milk Mod /100<br />
Manager level control applied to COFFEE TIME<br />
The actual coffee auger run time will be:<br />
COFFEE TIME x OP: Tea Mod /100<br />
Manager level control applied to WATER TIME<br />
The actual dispense valve open time will be:<br />
WATER TIME x OP: Water Mod /100<br />
E<br />
.1 s E<br />
.1 s E<br />
.1 s E<br />
.1 s E<br />
% E,M<br />
% E,M<br />
% E,M<br />
% E,M<br />
<strong>GENEVA</strong> Issue 3 06/08/2008 42
COFFEtek Ltd<br />
FRESH BREW DECAF COFFEE<br />
* E indicates engineer access level<br />
M indicates manager access level<br />
Parameter Name Function Units<br />
Level<br />
See *<br />
INFUSION TIME<br />
Delay after coffee & water are added to brew chamber .1s E<br />
before brewer closes<br />
WATER START TIME Time after start that coffee water valve opens .1s E<br />
WATER TIME Coffee brewer dispense valve open duration % E<br />
M&S WATER TIME Milk & sugar valve opening time E<br />
VALVE FACTOR<br />
Balancing factor to account for difference in flow rate<br />
between milk/sugar valve and brewer valve. If white/sugar<br />
drink is smaller than black version increase VALVE<br />
FACTOR and visa versa. Range 8-14<br />
Ratio<br />
X<br />
10<br />
COFFEE ING TIME Decaf ingredient auger control .1 s E<br />
STRENGTH ADJUST Increment applied to decaf auger run time when strong .1s E<br />
selected<br />
SUGAR TIME Auger run time for optional ingredient if selected 1. s E<br />
SUGAR ADJUSTMENT Increment applied to sugar auger run time when extra .01 s E<br />
sugar selected<br />
MILK TIME Auger run time for optional ingredient if selected .01 s E<br />
MILK ADJUSTMENT Increment applied to milk auger run time when extra milk .1 s E<br />
selected<br />
PUMP 1 DURATION Duration of first air pump operation .1 s E<br />
PUMP 1 DELAY Inactive period following first air pump operation .1 s E<br />
PUMP 2 DURATION Duration of second air pump operation .1 s E<br />
PUMP 2 DELAY Inactive period following second air pump operation .1 s E<br />
MIXER TIME<br />
BLACK DRAIN TIME<br />
WHITE DRAIN TIME<br />
OP: Sugar Mod<br />
OP: Milk Mod<br />
OP: Coffee Mod<br />
OP: Water Mod<br />
Run time for coffee mixer motor referenced to the<br />
beginning of the first air pump activity<br />
Idle time before head retracts following dispense of<br />
selection with no optional components<br />
Idle time before head retracts following dispense of<br />
selection where milk or sugar have been selected<br />
Manager level control applied to SUGAR TIME<br />
The actual sugar auger run time will be:<br />
SUGAR TIME x OP: Sugar Mod /100<br />
Manager level control applied to MILK TIME<br />
The actual milk auger run time will be:<br />
MILK TIME x OP: Milk Mod /100<br />
Manager level control applied to COFFEE TIME<br />
The actual decaf auger run time will be:<br />
COFFEE TIME x OP: Tea Mod /100<br />
Manager level control applied to WATER TIME<br />
The actual dispense valve open time will be:<br />
WATER TIME x OP: Water Mod /100<br />
E<br />
.1 s E<br />
.1 s E<br />
.1 s E<br />
% E,M<br />
% E,M<br />
% E,M<br />
% E,M<br />
43 06/08/2008 Issue 3 <strong>GENEVA</strong>
COFFEtek Ltd<br />
ESPRESSO<br />
* E indicates engineer access level<br />
M indicates manager access level<br />
Parameter Name Function Units<br />
Level<br />
See *<br />
INFUSION TIME<br />
Delay after coffee & water are added to brew chamber .1s E<br />
before brewer closes<br />
WATER START TIME Time after start that coffee water valve opens .1s E<br />
WATER TIME Coffee brewer dispense valve open duration % E<br />
M&S WATER TIME Milk & sugar valve opening time E<br />
SUGAR TIME Auger run time for optional ingredient if selected 1. s E<br />
SUGAR ADJUSTMENT Increment applied to sugar auger run time when extra .01 s E<br />
sugar selected<br />
MILK TIME Auger run time for optional ingredient if selected .01 s E<br />
MILK ADJUSTMENT Increment applied to milk auger run time when extra milk .1 s E<br />
selected<br />
COFFEE ING TIME Coffee ingredient auger control .1 s E<br />
VALVE FACTOR<br />
Balancing factor to account for difference in flow rate<br />
between milk/sugar valve and brewer valve. If white/sugar<br />
drink is smaller than black version increase VALVE<br />
FACTOR and vice versa. Range 8-14<br />
Ratio<br />
X<br />
10<br />
PUMP 1 DURATION Duration of first air pump operation .1 s E<br />
PUMP 1 DELAY Inactive period following first air pump operation .1 s E<br />
PUMP 2 DURATION Duration of second air pump operation .1 s E<br />
PUMP 2 DELAY Inactive period following second air pump operation .1 s E<br />
MIXER TIME<br />
BLACK DRAIN TIME<br />
WHITE DRAIN TIME<br />
STRENGTH ADJUST<br />
OP: Sugar Mod<br />
OP: Milk Mod<br />
OP: Coffee Mod<br />
OP: Water Mod<br />
Run time for coffee mixer motor referenced to the<br />
beginning of the first air pump activity<br />
Idle time before head retracts following dispense of<br />
selection with no optional components<br />
Idle time before head retracts following dispense of<br />
selection where milk or sugar have been selected<br />
Increment applied to coffee auger run time when strong<br />
selected<br />
Manager level control applied to SUGAR TIME<br />
The actual sugar auger run time will be:<br />
SUGAR TIME x OP: Sugar Mod /100<br />
Manager level control applied to MILK TIME<br />
The actual milk auger run time will be:<br />
MILK TIME x OP: Milk Mod /100<br />
Manager level control applied to COFFEE ING TIME<br />
The actual coffee auger run time will be:<br />
COFFEE ING TIME x OP: Tea Mod /100<br />
Manager level control applied to water times<br />
The actual dispense valve open times will be:<br />
x OP: Water Mod /100<br />
E<br />
.1 s E<br />
.1 s E<br />
.1 s E<br />
.1s E<br />
% E,M<br />
% E,M<br />
% E,M<br />
% E,M<br />
<strong>GENEVA</strong> Issue 3 06/08/2008 44
COFFEtek Ltd<br />
CAPPUCCINO (FRESH BREW COFFEE)<br />
* E indicates engineer access level<br />
M indicates manager access level<br />
Parameter Name Function Units<br />
Level<br />
See *<br />
TOPPING START Start time topping & sugar components. Referenced to t=0 .1s E<br />
INFUSION TIME<br />
Delay after coffee & water are added to brew chamber .1 s E<br />
before brewer closes<br />
WATER START TIME Time after start that coffee water valve opens .1s E<br />
WATER TIME Coffee brewer dispense valve open duration .1 s E<br />
TOPPING WATER TIME Topping dispense valve open duration .1s E<br />
MILK MIXER TIME Topping mixer motor run time .1s E<br />
COFFEE ING TIME Coffee ingredient auger control 1. s E<br />
COFFEE MIXER TIME Run time for coffee mixer motor referenced to the<br />
.1 s E<br />
beginning of the first air pump activity<br />
MILK MIXER TIME Run time for topping mixer motor .1 s E<br />
SUGAR WATER TIME Sugar valve open time if sugar selected if not water is .1 s E<br />
added to topping water<br />
SUGAR TIME Auger run time for optional ingredient if selected .01 s E<br />
SUGAR ADJUSTMENT Increment applied to sugar auger run time when extra .1 s E<br />
sugar selected<br />
TOPPING TIME Auger run time for Topping ingredient .1 s E<br />
PUMP 1 DURATION Duration of first air pump operation .1 s E<br />
PUMP 1 DELAY Inactive period following first air pump operation .1 s E<br />
PUMP 2 DURATION Duration of second air pump operation .1 s E<br />
PUMP 2 DELAY Inactive period following second air pump operation .1 s E<br />
OP: Sugar Mod<br />
OP: Milk Mod<br />
OP: Coffee Mod<br />
OP: Water Mod<br />
Manager level control applied to SUGAR TIME<br />
The actual sugar auger run time will be:<br />
SUGAR TIME x OP: Sugar Mod /100<br />
Manager level control applied to TOPPING TIME<br />
The actual topping auger run time will be:<br />
TOPPING TIME x OP: Milk Mod /100<br />
Manager level control applied to COFFEE ING TIME<br />
The actual coffee auger run time will be:<br />
COFFEE ING TIME x OP: Coffee Mod /100<br />
Manager level control applied to water times<br />
The actual dispense valve open times will be:<br />
x OP: Water Mod /100<br />
% E,M<br />
% E,M<br />
% E,M<br />
% E,M<br />
45 06/08/2008 Issue 3 <strong>GENEVA</strong>
COFFEtek Ltd<br />
CAFÉ LATE (FRESH BREW COFFEE)<br />
* E indicates engineer access level<br />
M indicates manager access level<br />
Parameter Name Function Units<br />
Level<br />
See *<br />
COFFEE ING TIME Coffee ingredient auger control .1s E<br />
INFUSION TIME<br />
Delay after coffee & water are added to brew chamber .1 s E<br />
before brewer closes<br />
WATER START TIME Time after start that coffee water valve opens .1s E<br />
WATER TIME Coffee brewer dispense valve open duration .1 s E<br />
PUMP 1 DURATION Duration of first air pump operation .1 s E<br />
PUMP 1 DELAY Inactive period following first air pump operation .1 s E<br />
PUMP 2 DURATION Duration of second air pump operation .1 s E<br />
PUMP 2 DELAY Inactive period following second air pump operation .1 s E<br />
MIXER TIME<br />
Run time for coffee mixer motor referenced to the<br />
.1 s E<br />
beginning of the first air pump activity<br />
MILK START Start time milk & sugar components. Referenced to t=0. .1s E<br />
MILK TIME Auger run time for Milk ingredient .1 s E<br />
MILK WATER TIME Milk/Sugar dispense valve open duration .1 s E<br />
SUGAR TIME Auger run time for optional ingredient if selected .1 s E<br />
SUGAR ADJUSTMENT<br />
OP: Sugar Mod<br />
OP: Milk Mod<br />
OP: Coffee Mod<br />
OP: Water Mod<br />
Increment applied to sugar auger run time when extra<br />
sugar selected<br />
Manager level control applied to SUGAR TIME<br />
The actual sugar auger run time will be:<br />
SUGAR TIME x OP: Sugar Mod /100<br />
Manager level control applied to MILK TIME<br />
The actual milk auger run time will be:<br />
MILK TIME x OP: Milk Mod /100<br />
Manager level control applied to COFFEE ING TIME<br />
The actual coffee auger run time will be:<br />
COFFEE ING TIME x OP: Coffee Mod /100<br />
Manager level control applied to water times<br />
The actual dispense valve open times will be:<br />
x OP:Water Mod/100<br />
.1 s E<br />
% E,M<br />
% E,M<br />
% E,M<br />
% E,M<br />
WHIPPED FRESH BREW COFFEE<br />
* E indicates engineer access level<br />
M indicates manager access level<br />
Parameter Name Function Units<br />
Level<br />
See *<br />
MIXER TIME<br />
Run time for coffee mixer motor referenced to the<br />
.1 s E<br />
beginning of the first air pump activity<br />
Note : All other settings for this drink are shared with the normal fresh brew coffee drink<br />
<strong>GENEVA</strong> Issue 3 06/08/2008 46
COFFEtek Ltd<br />
WHIPPED FRESH BREW DECAF COFFEE<br />
* E indicates engineer access level<br />
M indicates manager access level<br />
Parameter Name Function Units<br />
Level<br />
See *<br />
MIXER TIME<br />
Run time for coffee mixer motor referenced to the .1 s E<br />
beginning of the first air pump activity<br />
Note : All other settings for this drink are shared with the normal fresh brew decaf coffee drink<br />
CAFÉ MOCHA (FRESH BREW COFFEE)<br />
* E indicates engineer access level<br />
M indicates manager access level<br />
Parameter Name Function Units<br />
Level<br />
See *<br />
COFFEE TIME Coffee ingredient auger control 1. s E<br />
WATER START TIME Time after start that coffee water valve opens .1s E<br />
COFFEE WATER Coffee brewer dispense valve open duration .1 s E<br />
COFFEE MIXER TIME Run time for coffee mixer motor referenced to the<br />
.1 s E<br />
beginning of the first air pump activity<br />
TOPPING TIME Auger run time for ingredient .1 s E<br />
CHOCOLATE TIME Auger run time for ingredient .1s E<br />
CHOC WATER TIME Choc/topping dispense valve open duration .1s E<br />
CHOC MIXER TIME Run time for choc/topping mixer motor .1 s E<br />
BREWER START Brewer cycle start time .1s E<br />
PUMP 1 DURATION Duration of first air pump operation .1 s E<br />
PUMP 1 DELAY Inactive period following first air pump operation .1 s E<br />
PUMP 2 DURATION Duration of second air pump operation .1 s E<br />
PUMP 2 DELAY Inactive period following second air pump operation .1 s E<br />
OP: Topping Mod<br />
OP: Choc Mod<br />
OP: Water Mod<br />
OP: Coffee Mod<br />
Manager level control applied to TOPPING TIME<br />
The actual topping auger run time will be:<br />
TOPPING TIME x OP: Topping Mod /100<br />
Manager level control applied to CHOCOLATE TIME<br />
The actual chocolate auger run time will be:<br />
CHOCOLATE TIME x OP: Choc Mod /100<br />
Manager level control applied to water times<br />
The actual dispense valve open times will be:<br />
x OP: Water Mod /100<br />
Manager level control applied to COFFEE TIME<br />
The actual coffee auger run time will be:<br />
COFFEE TIME x OP: Coffee Mod /100<br />
% E,M<br />
% E,M<br />
% E,M<br />
% E,M<br />
47 06/08/2008 Issue 3 <strong>GENEVA</strong>
COFFEtek Ltd<br />
Set Date and Time<br />
11. Entering SET DATE & TIME provides access to a submenu consisting of SET DATE and SET<br />
TIME.<br />
(a)<br />
Set Date<br />
The SET DATE option allows the programmer to change the displayed date.<br />
(b)<br />
Set Time<br />
The SET TIME option allows the programmer to change the displayed time.<br />
The battery fitted to the 54955 Control Board has an open circuiting link to prevent discharge<br />
during extended periods of storage. When commissioning a new board, the links labelled<br />
CLOCK BAT on the control board must be fitted otherwise the board will not maintain the time<br />
when power is removed.<br />
The 54955 Control Board contains a lithium battery. Care should be taken to dispose of this in<br />
an appropriate manner, should a board be scrapped. The board should not be disposed of by<br />
burning.<br />
Set Pricing Mode<br />
12. Entering SET VEND PRICING allows the programmer to select one of the following Pricing<br />
modes:<br />
• NORMAL PRICES<br />
• ALL DRINKS FREE<br />
• CHEAP PRICES<br />
The selected mode becomes the default setting to which the machine will return after any timed<br />
activities.<br />
Change Prices<br />
13. Entering CHANGE PRICES provides access to the following submenu:<br />
• NORMAL PRICES<br />
• CHEAP PRICES<br />
• CUP PRICE<br />
• ALL CHEAP DRINK PRICES<br />
• ALL NORMAL PRICES<br />
• OWN CUP DISCOUNT<br />
Entering NORMAL PRICES or CHEAP PRICES provides access to a list of drinks with<br />
corresponding prices. The price of a displayed drink can be changed by pressing ENTER, altering<br />
the value shown, and pressing ENTER again.<br />
Entering CHANGE CUP PRICE allows the programmer to select the price of a plastic cup (and is<br />
preset at 0 pence). The value entered here is deducted from the normal price of a drink when there is<br />
no requirement for a dispensed plastic cup, i.e. when customers' own cups or mugs are used.<br />
Entering ALL NORMAL PRICES or ALL CHEAP PRICES provides access to a list of drinks with<br />
corresponding prices. The price of a displayed drink can be changed by pressing ENTER, altering<br />
the value shown, and pressing ENTER again.<br />
<strong>GENEVA</strong> Issue 3 06/08/2008 48
COFFEtek Ltd<br />
Entering OWN CUP DISCOUNT allows the programmer to select the price of a plastic cup (and is<br />
preset at 0 pence). The value entered here is deducted from the normal price of a drink when there is<br />
no requirement for a dispensed plastic cup, i.e. when customers' own cups or mugs are used.<br />
Inhibit Drinks<br />
14. Entering INHIBIT DRINKS provides access to a submenu of drinks, each one suffixed with the<br />
availability (AVAILABLE or INHIBITED). The status of a displayed drink can be changed by<br />
pressing ENTER, altering the status by using the ↑ or ↓ keys, and pressing ENTER again.<br />
Alter Drink Name<br />
15. The ALTER DRINK NAME menu allows the name displayed when a particular drink is selected to<br />
be changed to one of a number of pre-defined alternatives.<br />
To avoid confusion the drink retains its original name is this submenu. The alternative name will be<br />
used to reference that selection for all other display and audit activities. The reason retaining the<br />
original reference to the name in this submenu is that, for example, it could be that both syrup drinks<br />
are to be orange temporarily. Once the lemon name had been changed to orange it would not be<br />
possible to tell the altered drink from the existing one when it came time to change it back again.<br />
16. The list of alternative drink names is as follows:<br />
CHOC-O-CINO BLACKCURRANT LEMON<br />
COLA ORANGE VEG.SOUP<br />
TOMATO SOUP BEEF SOUP CAPPUCCINO<br />
LEMON PEACH SOUP<br />
LIME MUSHR'M SOUP MILO<br />
CAFE MOCHA ESPRESCHOC CAFE CREME<br />
ESPRESSO X 2 CHICKEN SOUP PEPSI COLA<br />
TROPICAL FRUIT COCA COLA DIET COCA COLA<br />
PEPSI-MAX PEPSI DIET PEPSI<br />
TANGO ORANGE TANGO LEMON STILL JUSODA<br />
SPARKLING JUSODA DIET TANGO LEMON IRN-BRU<br />
STILL IRN-BRU FIZZY IRN-BRU COFFEE<br />
WHIPPED COFFEE SOUP LEMON TEA<br />
COLA VIMTO ELDERFLOWER<br />
Note<br />
Changing a drinks name does not affect the actual parameters that control the drink. It only affects<br />
the name displayed when that selection is chosen or audited. If the name of the chocolate selection is<br />
changed to LIME, the chocolate ingredient motor, valves and mixer will still run when that selection is<br />
taken.<br />
49 06/08/2008 Issue 3 <strong>GENEVA</strong>
COFFEtek Ltd<br />
Timed Activities<br />
17. The TIMED ACTIVITIES option allows the machine to be set to different states on a timed basis.<br />
The states currently available are as follows:<br />
(a) Cheap causes the machine to offer drinks at the reduced rate.<br />
(b) Free causes the machine to offer drinks free.<br />
(c) Flush causes the machine to flush it instant components.<br />
(d) Fl’Brew causes the machine to flush its brewers.<br />
(e) Shutdown causes the machine to stop vending.<br />
(f) Unused timed activity slot not used, operate as normal.<br />
(g) Economy causes the machine to temporarily shutdown until a drink is requested. The<br />
water in the boiler is maintained at a reduced temperature and a message<br />
prompting potential users to press start and so cause the machine to heat and<br />
return to operation is displayed. After a period of inactivity the machine returns<br />
to low power mode.<br />
18. Entering TIMED ACTIVITIES provides access to a submenu consisting of ten timed activities. Two<br />
types of timing routine, Daily and Block, are available for each activity.<br />
(a)<br />
Daily<br />
D A I L Y 0 9 3 0 1 7 3 0<br />
M 0 N > F R I R E D U C E D<br />
The above display describes a timed activity where, between 9:30am and 5:30pm, Monday to<br />
Friday, the machine operates in the reduced prices mode.<br />
(b)<br />
Block<br />
B L 0 C K 0 9 3 0 M 0 N ><br />
1 7 3 0 F R I R E D U C E D<br />
The above display describes a timed activity where, between 9:30am on Monday and 5:30pm<br />
on Friday, the machine operates continually in the reduced prices mode.<br />
19. When entering a SELF CLEAN state into a daily routine, a comma will appear between the start<br />
and end times, indicating that flushing will occur at the two specified times and not between them.<br />
Where only one SELF CLEAN per day is required, the time entered in the second slot should be 1<br />
minute later than the first. If both times entered are the same flushing may not take place.<br />
Note<br />
The Flush and FL’Brew state must not be entered in a block routine.<br />
20. The displayed activity can be changed by altering the data using the ←, →, ↑ and ↓ keys. With the<br />
correct data entered, the ENTER key is pressed to move to the next activity, or ESCAPE pressed<br />
to leave.<br />
<strong>GENEVA</strong> Issue 3 06/08/2008 50
COFFEtek Ltd<br />
Temperature Settings<br />
21. Entering TEMP SETTINGS provides access to the following submenu:<br />
• DESIRED TEMP<br />
• MINIMUM TEMPERATURE<br />
(a) Desired Temperature allows the desired water heater temperature to be set.<br />
(b)<br />
Minimum Temperature allows the minimum temperature at which vending may commence<br />
to be set.<br />
The above values are set in degrees centigrade. The minimum possible temperature the control<br />
system can measure is 57ºC, and it is not possible to set a desired temperature below this value. The<br />
minimum temperature can be set to zero to allow operation with a cold tank for test purposes. The<br />
value read by the analogue to digital converter on the control board corresponding to the temperature<br />
set is displayed in parenthesis next to the ºC value.<br />
Output Test<br />
22. The OUTPUT TEST allows any of the output devices to be turned on and off to aid with<br />
diagnostics. On entering output test the display will show the device name, a prompt indicating<br />
that the↑, ↓ and ENTER keys are active and a number indicating the position of the device in the<br />
list. The arrow keys are used to scroll through the list of devices whilst the ENTER key will activate<br />
and deactivate the device.<br />
Note 1<br />
It should be noted that some specific devices specifically the SSR, Carousel Motor and the Inlet<br />
Valves may not respond as anticipated to OUTPUT TEST. The software controlling these devices is<br />
constantly running and will quickly override the control action of the output test. The output test<br />
function for the dispense arm is another special case. If either of the dispense arm actuators<br />
(DISPENSE ARM or DISP. ARM FORWARD) is invoked in output test, the arm will advance to the<br />
HOT position, and then return to the home position.<br />
Note 2<br />
The output test function will not work if the engineer’s program was entered when the machine was<br />
powered up with the ENG LINK in place. See section 3 paragraph 4.<br />
51 06/08/2008 Issue 3 <strong>GENEVA</strong>
COFFEtek Ltd<br />
Input Test<br />
23. The INPUT TEST function allows the state of the control board input signals to be examined. The<br />
input test menu is common to all three versions of the Geneva range and as such contains<br />
references to all possible input devices. The state of brewer position index inputs will be visible<br />
even if the brewers themselves are not fitted on a particular version.<br />
On entering input test, the display will show the device name of the first device in the list and logical<br />
state associated with the condition of its input. That is to say the meaning of the state of the input is<br />
displayed rather than a simple high or low value. Thus the values displayed for the waste probe are<br />
WET or DRY. The screen will dynamically reflect the condition of the input. The ↑ ↓ keys are used to<br />
step through each input in turn. The following input signals can be examined:<br />
INPUT DEVICE STATE 1 STATE 2<br />
Coffee brewer index CBREWER HOME CBREWER NOT HOME<br />
Carousel throat switch CUPS AVAILABLE CUPS NOT AVAILABLE<br />
Carousel position switch CUP DROP IN POS CUP DROP OUT POS<br />
Dispense arm ‘vend<br />
IN V POS<br />
NOT IN V POS<br />
position’ micro switch i.e. forward and ready to vend<br />
Dispense arm ‘HOME<br />
ARM NOT HOME<br />
DISP ARM HOME<br />
position’ micro switch<br />
Boiler level probe BOILER IS WET BOILER IS DRY<br />
Waste tub probe WASTE IS WET WASTE IS DRY<br />
Cold Level Input COLD LEVEL WET COLD LEVEL DRY<br />
User cup sensor CUPSNS:NO CUP CUPSNS:CUP PRESENT<br />
Tea brewer index switch TBREWER NOT HOME TBREWER HOME<br />
Brewer pressure switch NO PRESSURE PRESSURE<br />
0<br />
1<br />
Jug switch<br />
(Normal)<br />
(1=jug or free)<br />
ON<br />
Free Input<br />
OFF<br />
(To work must be enabled in<br />
General Settings)<br />
ON<br />
Security input<br />
OFF<br />
(To work must be enabled in<br />
General Settings)<br />
PIR off/on<br />
OFF<br />
ON<br />
(not fitted as standard) (part of economy mode)<br />
<strong>GENEVA</strong> Issue 3 06/08/2008 52
COFFEtek Ltd<br />
Set Product Constants<br />
24. The Geneva control system maintains a counter for the amount of each ingredient consumed. For<br />
these counters to work correctly the throw rate in grams per second actually dispensed from each<br />
ingredients canister must be input. One way to determine the correct value is to catch the<br />
ingredient dispensed during ten vends of a particular type and then divide the weight of<br />
ingredients so dispensed by the auger run time figures set for that vend. For this to work all scale<br />
factors must be set to 100.<br />
If the ingredient counters are not required, this facility can safely be ignored. The values entered are<br />
for audit purposes only and do not affect the drink formulations or machine operation in any way.<br />
Machine Status<br />
25. Entering MACHINE STATUS provides access to the status of the following machine features:<br />
• TEMP STATUS<br />
• 1 2 C HEALTH<br />
• MEMORY USAGE*<br />
• SOFTWARE VERSION<br />
(a)<br />
TEMP STATUS<br />
This display provides information relating to the heater control circuit. A power (PWR) level<br />
value and a graphical representation of the drive waveform to the heater are displayed. The<br />
temperature reading in degrees centigrade derived from the thermistor probe in the water boiler<br />
is displayed along with the analogue-to-digital converter value from which the temperature was<br />
calculated is parenthesis.<br />
(b)<br />
I 2 C Health<br />
This display provides information relating to the I 2 C serial link between the Controller and RIO<br />
Boards. A percentage 'health' reading is given, indicating the success rate of communication of<br />
the link. A reading of less than 100% may indicate the presence of electrical noise. The number<br />
of negative acknowledgements (NACKS) is also recorded.<br />
(c)<br />
Software Version<br />
These displays indicate the version of the software installed on the Controller Board. (Program<br />
+ EPROM = Firmware.) The firmware version should be quoted when seeking advice.<br />
(d)<br />
FRAM Faults<br />
This checks to see how many times the program has tried to write to the non-volatile<br />
memory should always been at (0), this is a program to check for faults that are occurring in<br />
the machine.<br />
53 06/08/2008 Issue 3 <strong>GENEVA</strong>
COFFEtek Ltd<br />
Set Dry Vends<br />
26. Entering SET DRY VENDS provides access to the following submenu:<br />
• VENDS ARE WET<br />
• VENDS ARE DRY<br />
(a)<br />
Vends are wet.<br />
All vends are dispensed with water as normal.<br />
(b)<br />
Vends are dry.<br />
All vends are dispensed without water. This allows ingredients to be weighed. If a multiingredient<br />
drink is selected, only those ingredients will be vended.<br />
Serial Number<br />
27. Entering SERIAL NUMBER accesses the following submenu:<br />
• M/C SERIAL NUMBER<br />
• M/C AUDIT NUMBER<br />
(a)<br />
M/C Serial Number<br />
The machine serial number consists of 8 digits and identifies the machine on audit trails.<br />
(b)<br />
M/C Audit Number<br />
The machine audit number indicates the number of audits carried out to date.<br />
Configure Machine<br />
28. Entering CONFIGURE M/C provides access to the following machine configuration submenu<br />
headings:<br />
• GENERAL SETTINGS<br />
• SET MACHINE TYPE<br />
• SET CASH SYSTEM<br />
• JUG SETTINGS<br />
• HARDWARE SETTINGS<br />
• CAROUSEL CONFIG<br />
• INST SNACK SLAVE<br />
(a)<br />
GENERAL SETTINGS<br />
The GENERAL SETTINGS menu provides access to a number of diverse parameters<br />
controlling machine operation that do not naturally group with any of the other control variables.<br />
<strong>GENEVA</strong> Issue 3 06/08/2008 54
COFFEtek Ltd<br />
PARAMETER<br />
POSSIBLE VALUES<br />
(DEFAULT IN BOLD)<br />
SILENT KEYS 0<br />
Keys give audible feedback<br />
1<br />
Keys are silent<br />
TOKEN ONLY 0<br />
Messages appropriate to<br />
coins/card system or free<br />
CHIPPER<br />
/CHIPKNIP<br />
1<br />
Suppress credit display if just<br />
card system fitted<br />
FLUSH ALARM 0<br />
Sound load siren while flushing<br />
WATER SHOT<br />
START<br />
WATER SHOT DUR<br />
1<br />
Messages appropriate to token<br />
only operation<br />
0<br />
Normal display of credit<br />
1<br />
Sound siren quietly while<br />
flushing<br />
(Consult factory before changing)<br />
Time after a fresh coffee dispense cycle ends that a grout clearing<br />
water shot starts.<br />
20 (Consult factory before changing)<br />
Duration in 1/100 seconds that the water shot described above lasts.<br />
BELT WARN TIME 700<br />
Time, in 1/100 seconds, after the pressure sensor should have<br />
reported the coffee brew chamber depressurised but has not, that a<br />
‘New filter belt’ warning is displayed.<br />
BELT FAULT TIME 2000<br />
Time, in 1/100 seconds, after the pressure sensor should have<br />
reported the coffee brew chamber depressurised but has not, that a<br />
‘New filter belt’ fault occurs.<br />
ROTATION LIMIT 100<br />
Time, in 1/100 seconds, after the pressure sensor should have<br />
reported the coffee brew chamber depressurised but has not, that a<br />
flag is set to perform an extra rotation of the brewer at the end of the<br />
next brewer drink cycle.<br />
NO BELT<br />
WARNING<br />
ENG MODE<br />
TIMEOUT<br />
1<br />
Do not display information about<br />
the state of the filter belt on the<br />
user display.<br />
0<br />
Do not automatically exit<br />
engineers mode.<br />
0<br />
Display belt warnings on the user<br />
display.<br />
30 (recommended)<br />
Time in 1/10 seconds after<br />
which, if no key is pressed, exit<br />
from the engineer’s program will<br />
commence.<br />
MAX EXTRA CUPS 2<br />
Number of retries at dispensing a cup before a long delay until next<br />
cup occurs to deter theft.<br />
CURRENCY<br />
0 Don’t display currency symbol.<br />
1 Currency symbol is £.<br />
2 Currency symbol is €.<br />
3 Currency symbol is $.<br />
FREE INPUT 0<br />
Ignore free input.<br />
SECURITY INPUT 0<br />
Ignore security input<br />
SIMPLE MDB<br />
CODES<br />
0<br />
Fully encode products, i.e., send<br />
product code for: Cheap+Own<br />
cup, Cheap No cup, Normal+Own<br />
cup and Normal No cup .<br />
1<br />
Monitor free input.<br />
1<br />
Monitor security input.<br />
1<br />
Go light on product codes.<br />
MDB sends just one number per<br />
selection regardless of price.<br />
N&W card reader fix.<br />
55 06/08/2008 Issue 3 <strong>GENEVA</strong>
GLOBAL<br />
SCALING<br />
ALLOW TANK<br />
RESET<br />
COFFEtek Ltd<br />
170 Size of drink in cc.<br />
Assuming machine default parameters and valves were set up to<br />
give 170cc then this variable can be used to scale all drinks together<br />
to rapidly accommodate changing cup sizes.<br />
(1)<br />
Number of times the machine allows the tank to be reset to fill again,<br />
this number can be altered to allow more resets of the machine.<br />
AUTO VEND TIME (0)<br />
Time the machine will automatically start to vend your drink from if<br />
not told to start vending manually, this can be altered to whatever<br />
you would like it to be.<br />
(b)<br />
SET MACHINE TYPE<br />
The SET MACHINE TYPE menu provides the means by which the control board software is<br />
configured to produce the desired menu and work with the appropriate combination of brewers<br />
and chillers present in the machine. This operation must be carried out when fitting a new or<br />
replacement board.<br />
Once you have entered Set Machine Type you will be given the choice of either Keyed Config<br />
or Numeric Config. Depending on your machine type, select the appropriate method,<br />
Numeric Config if you have numbered buttons or Keyed Config if you have a button fronted<br />
machine. Then you will be presented with a list of the different machine configurations<br />
available, this is where you select the appropriate configuration for your machine.<br />
The configuration of the machine is selected via the name of the drinks layout; this is done<br />
using the description of the machine such as SFBT + S/D which would represent single fresh<br />
brew tea with soup or decaf.<br />
The ↑↓ keys are used to scroll through the list of possible configurations. Pressing ENTER<br />
selects the new configuration. Whilst the set up process takes place, the LCD indicates the<br />
status of the procedure. On completion the screen reverts to the SET MACHINE TYPE menu.<br />
In order to aid understanding the following table contains an explanation of the abbreviations<br />
used.<br />
ABBREVIATION<br />
INSTANT<br />
SFB TEA<br />
DFB<br />
SFBC<br />
DFB+ID<br />
DFB+IC<br />
DFB+ID&S<br />
CHLR<br />
CARB<br />
TT<br />
TS<br />
EXPLANATION<br />
All drinks made from instant products.<br />
Tea selections are fresh brew.<br />
Tea and all coffee drinks are fresh brew.<br />
Fresh brew coffee but Instant tea.<br />
Tea and regular coffee are fresh brew. Decaf coffee is instant.<br />
Tea and regular coffee are fresh brew. Some selections use<br />
instant coffee.<br />
Tea and regular coffee are fresh brew. Decaf coffee is instant.<br />
Special mapping has soup as well, but only one whitener.<br />
Machine has a chiller unit for cold water.<br />
Machine has a carbonator unit with two flavoured syrups.<br />
Carousel Option Two Types of cup.<br />
Carousel Option Two Sizes of cup.<br />
1K Carousel Option 1000* cup. (*=Typically 950)<br />
Care should be exercised when using this option, as all previous settings will be lost.<br />
<strong>GENEVA</strong> Issue 3 06/08/2008 56
COFFEtek Ltd<br />
If a configuration with a Fresh Brew Coffee capability is selected, you will be offered the<br />
opportunity to select between R & G (Default) and BTC (Optional) configuration. The<br />
display will appear as below:<br />
SET BREWER TYPE<br />
ENTER=YES ESC=NO<br />
If Escape=No is selected initialisation will be performed using a set of defaults appropriate to<br />
R & G ingredients. After pressing ENTER to opt to specify the brewer type, the type can be<br />
changed using the ↑↓ arrow keys:<br />
BEAN GRINDER<br />
↑↓, ENTER OR ESC<br />
NO BEAN GRINDER<br />
↑↓, ENTER OR ESC<br />
Select NO BEAN GRINDER for the R & G case and BEAN GRINDER for the BTC case.<br />
Pressing ENTER confirms the selection.<br />
The tables below represent the drinks possible configurations, show their drink mapping and<br />
canister layout. All the tables are cross referenced between each other. The description of the<br />
configuration tells what the machine is such as DFB+ID would mean a Double Fresh Brew<br />
machine with Instant Decaf, by using that code next to each drink configuration and then<br />
looking for it in the drink map you can see exactly what is in each drink and using the<br />
configuration codes you can also see which canister layout is for the configured machine.<br />
57 06/08/2008 Issue 3 <strong>GENEVA</strong>
COFFEtek Ltd<br />
Numeric Configurations<br />
Canister<br />
Description<br />
Layout<br />
Drink Map<br />
SFBT+S/D CL00 N00<br />
SFBT+S/D+CHLR CL00 N01<br />
SFBT+S/D+CH2S CL00 N02<br />
SFBT+S/D+CARB CL00 N03<br />
TFB+S(1) CL01 N04<br />
TFB+S(1)+CHLR CL01 N05<br />
TFB+S(1)+CH2S CL01 N06<br />
TFB+S(1)+CARB CL01 N07<br />
INST+S/D CL02 N08<br />
INST+S/D+CHLR CL02 N09<br />
INST+S/D+CH2S CL02 N10<br />
INST+S/D+CARB CL02 N11<br />
DFB+ID CL03 N12<br />
DFB+ID+CHLR CL03 N13<br />
DFB+ID+CH2S CL03 N14<br />
DFB+ID+CARB CL03 N15<br />
SFBC+S CL04 N16<br />
SFBC+S+CHLR CL04 N17<br />
SFBC+S+CH2S CL04 N18<br />
SFBC+S+CARB CL04 N19<br />
SFBC+ID CL05 N20<br />
SFBC+ID+CHLR CL05 N21<br />
SFBC+ID+CH2S CL05 N22<br />
SFBC+ID+CARB CL05 N23<br />
DFB+ID&S CL06 N24<br />
DFB+ID&S+CHLR CL06 N25<br />
DFB+ID&S+CH2S CL06 N26<br />
DFB+ID&S+CARB CL06 N27<br />
DFB+IC CL01 N28<br />
DFB+IC+CHLR CL01 N29<br />
DFB+IC+CH2S CL01 N30<br />
DFB+IC+CARB CL01 N31<br />
SFBC+IC CL04 N32<br />
SFBC+IC+CHLR CL04 N33<br />
SFBC+IC+CH2S CL04 N34<br />
SFBC+IC+CARB CL04 N35<br />
SFBT+S&D CL07 N00<br />
SFBT+S&D+CHLR CL07 N01<br />
SFBT+S&D+CH2S CL07 N02<br />
SFBT+S&D+CARB CL07 N03<br />
INST+S&D CL08 N08<br />
INST+S&D+CHLR CL08 N09<br />
INST+S&D+CH2S CL08 N10<br />
INST+S&D+CARB CL08 N11<br />
TFB+S(2) CL01 N36<br />
TFB+S(2)+CHLR CL01 N37<br />
TFB+S(2)+CH2S CL01 N38<br />
TFB+S(2)+CARB CL01 N39<br />
TFB+ICFS CL01 N40<br />
TFB+ICFS+CHLR CL01 N41<br />
TFB+ICFS+CH2S CL01 N42<br />
TFB+ICFS+CARB CL01 N43<br />
TFB+ICIS CL01 N44<br />
TFB+ICIS+CHLR CL01 N45<br />
Numeric Configurations<br />
Canister<br />
Description<br />
Layout<br />
Drink Map<br />
TFB+ICIS+CH2S CL01 N46<br />
TFB+ICIS+CARB CL01 N47<br />
DFB+S CL01 N48<br />
DFB+S+CHLR CL01 N49<br />
DFB+S+CH2S CL01 N50<br />
DFB+S+CARB CL01 N51<br />
SFBT(BC) CL18 N00<br />
SFBT(BC)+CHLR CL18 N01<br />
SFBT(BC)+CH2S CL18 N02<br />
SFBT(BC)+CARB CL18 N03<br />
INST(BC) CL19 N08<br />
INST(BC)+CHLR CL19 N09<br />
INST(BC)+CH2S CL19 N10<br />
INST(BC)+CARB CL19 N11<br />
TFB+IC&S CL06 N52<br />
TFB+IC&S+CHLR CL06 N53<br />
TFB+IC&S+CH2S CL06 N54<br />
TFB+IC&S+CARB CL06 N55<br />
SFBT+S/D 1K CL00 N00<br />
SFBT+S/D+CHLR 1K CL00 N01<br />
SFBT+S/D+CH2S 1K CL00 N02<br />
SFBT+S/D+CARB 1K CL09 N03<br />
TFB+S(1) 1K CL01 N04<br />
TFB+S(1)+CHLR 1K CL01 N05<br />
TFB+S(1)+CH2S 1K CL01 N06<br />
INST+S/D 1K CL02 N08<br />
INST+S/D+CHLR 1K CL02 N09<br />
INST+S/D+CH2S 1K CL02 N10<br />
INST+S/D+CARB 1K CL11 N11<br />
DFB+ID 1K CL03 N12<br />
DFB+ID+CHLR 1K CL03 N13<br />
DFB+ID+CH2S 1K CL03 N14<br />
DFB+ID+CARB 1K CL12 N15<br />
SFBC+S 1K CL04 N16<br />
SFBC+S+CHLR 1K CL04 N17<br />
SFBC+S+CH2S 1K CL04 N18<br />
SFBC+S+CARB 1K CL13 N19<br />
SFBC+ID 1K CL05 N20<br />
SFBC+ID+CHLR 1K CL05 N21<br />
SFBC+ID+CH2S 1K CL05 N22<br />
SFBC+ID+CARB 1K CL14 N23<br />
DFB+ID&S 1K CL06 N24<br />
DFB+ID&S+CHLR 1K CL06 N25<br />
DFB+ID&S+CH2S 1K CL06 N26<br />
DFB+ID&S+CARB 1K CL15 N27<br />
DFB+IC 1K CL01 N28<br />
DFB+IC+CHLR 1K CL01 N29<br />
DFB+IC+CH2S 1K CL01 N30<br />
DFB+IC+CARB 1K CL10 N31<br />
SFBC+IC 1K CL04 N32<br />
SFBC+IC+CHLR 1K CL04 N33<br />
SFBC+IC+CH2S 1K CL04 N34<br />
SFBC+IC+CARB 1K CL13 N35<br />
SFBT+S&D 1K CL07 N00<br />
<strong>GENEVA</strong> Issue 3 06/08/2008 58
COFFEtek Ltd<br />
Numeric Configurations<br />
Canister<br />
Description<br />
Layout<br />
Drink Map<br />
SFBT+S&D+CHLR 1K CL07 N01<br />
SFBT+S&D+CH2S 1K CL07 N02<br />
SFBT+S&D+CARB 1K CL16 N03<br />
INST+S&D 1K CL08 N08<br />
INST+S&D+CHLR 1K CL08 N09<br />
INST+S&D+CH2S 1K CL08 N10<br />
INST+S&D+CARB 1K CL17 N11<br />
TFB+S(2) 1K CL01 N36<br />
TFB+S(2)+CHLR 1K CL01 N37<br />
TFB+S(2)+CH2S 1K CL01 N38<br />
TFB+ICFS 1K CL01 N40<br />
TFB+ICFS+CHLR 1K CL01 N41<br />
TFB+ICFS+CH2S 1K CL01 N42<br />
CL01<br />
N44<br />
TFB+ICIS+CHLR 1K CL01 N45<br />
TFB+ICIS+CH2S 1K CL01 N46<br />
DFB+S 1K CL01 N48<br />
DFB+S+CHLR 1K CL01 N49<br />
DFB+S+CH2S 1K CL01 N50<br />
DFB+S+CARB 1K CL10 N51<br />
SFBT(BC) 1K CL18 N00<br />
SFBT(BC)+CHLR 1K CL18 N01<br />
SFBT(BC)+CH2S 1K CL18 N02<br />
SFBT(BC)+CARB 1K CL20 N03<br />
INST(BC) 1K CL19 N08<br />
INST(BC)+CHLR 1K CL19 N09<br />
INST(BC)+CH2S 1K CL19 N10<br />
INST(BC)+CARB 1K CL21 N11<br />
TFB+IC&S 1K CL06 N52<br />
TFB+IC&S+CHLR 1K CL06 N53<br />
TFB+IC&S+CH2S 1K CL06 N54<br />
SFBT+S/D TS CL00 N00<br />
SFBT+S/D+CHLR TS CL00 N01<br />
SFBT+S/D+CH2S TS CL00 N02<br />
SFBT+S/D+CARB TS CL09 N03<br />
TFB+S(1) TS CL01 N04<br />
TFB+S(1)+CHLR TS CL01 N05<br />
TFB+S(1)+CH2S TS CL01 N06<br />
INST+S/D TS CL02 N08<br />
INST+S/D+CHLR TS CL02 N09<br />
INST+S/D+CH2S TS CL02 N10<br />
INST+S/D+CARB TS CL11 N11<br />
DFB+ID TS CL03 N12<br />
DFB+ID+CHLR TS CL03 N13<br />
DFB+ID+CH2S TS CL03 N14<br />
DFB+ID+CARB TS CL12 N15<br />
SFBC+S TS CL04 N16<br />
SFBC+S+CHLR TS CL04 N17<br />
SFBC+S+CH2S TS CL04 N18<br />
SFBC+S+CARB TS CL13 N19<br />
SFBC+ID TS CL05 N20<br />
SFBC+ID+CHLR TS CL05 N21<br />
SFBC+ID+CH2S TS CL05 N22<br />
SFBC+ID+CARB TS CL14 N23<br />
Numeric Configurations<br />
Canister<br />
Description<br />
Layout<br />
Drink Map<br />
DFB+ID&S TS CL06 N24<br />
DFB+ID&S+CHLR TS CL06 N25<br />
DFB+ID&S+CH2S TS CL06 N26<br />
DFB+ID&S+CARB TS CL15 N27<br />
DFB+IC TS CL01 N28<br />
DFB+IC+CHLR TS CL01 N29<br />
DFB+IC+CH2S TS CL01 N30<br />
DFB+IC+CARB TS CL10 N31<br />
SFBC+IC TS CL04 N32<br />
SFBC+IC+CHLR TS CL04 N33<br />
SFBC+IC+CH2S TS CL04 N34<br />
SFBC+IC+CARB TS CL13 N35<br />
SFBT+S&D TS CL07 N00<br />
SFBT+S&D+CHLR TS CL07 N01<br />
SFBT+S&D+CH2S TS CL07 N02<br />
SFBT+S&D+CARB TS CL16 N03<br />
INST+S&D TS CL08 N08<br />
INST+S&D+CHLR TS CL08 N09<br />
INST+S&D+CH2S TS CL08 N10<br />
INST+S&D+CARB TS CL17 N11<br />
TFB+S(2) TS CL01 N36<br />
TFB+S(2)+CHLR TS CL01 N37<br />
TFB+S(2)+CH2S TS CL01 N38<br />
TFB+ICFS TS CL01 N40<br />
TFB+ICFS+CHLR TS CL01 N41<br />
TFB+ICFS+CH2S TS CL01 N42<br />
TFB+ICIS TS CL01 N44<br />
TFB+ICIS+CHLR TS CL01 N45<br />
TFB+ICIS+CH2S TS CL01 N46<br />
DFB+S TS CL01 N48<br />
DFB+S+CHLR TS CL01 N49<br />
DFB+S+CH2S TS CL01 N50<br />
DFB+S+CARB TS CL10 N51<br />
SFBT(BC) TS CL18 N00<br />
SFBT(BC)+CHLR TS CL18 N01<br />
SFBT(BC)+CH2S TS CL18 N02<br />
SFBT(BC)+CARB TS CL20 N03<br />
INST(BC) TS CL19 N08<br />
INST(BC)+CHLR TS CL19 N09<br />
INST(BC)+CH2S TS CL19 N10<br />
INST(BC)+CARB TS CL21 N11<br />
TFB+IC&S TS CL06 N52<br />
TFB+IC&S+CHLR TS CL06 N53<br />
TFB+IC&S+CH2S TS CL06 N54<br />
SFBT+S/D TT CL00 N00<br />
SFBT+S/D+CHLR TT CL00 N01<br />
SFBT+S/D+CH2S TT CL00 N02<br />
SFBT+S/D+CARB TT CL09 N03<br />
TFB+S(1) TT CL01 N04<br />
TFB+S(1)+CHLR TT CL01 N05<br />
TFB+S(1)+CH2S TT CL01 N06<br />
INST+S/D TT CL02 N08<br />
INST+S/D+CHLR TT CL02 N09<br />
INST+S/D+CH2S TT CL02 N10<br />
59 06/08/2008 Issue 3 <strong>GENEVA</strong>
COFFEtek Ltd<br />
Numeric Configurations<br />
Canister<br />
Description<br />
Layout<br />
Drink Map<br />
INST+S/D+CARB TT CL11 N11<br />
DFB+ID TT CL03 N12<br />
DFB+ID+CHLR TT CL03 N13<br />
DFB+ID+CH2S TT CL03 N14<br />
DFB+ID+CARB TT CL12 N15<br />
SFBC+S TT CL04 N16<br />
SFBC+S+CHLR TT CL04 N17<br />
SFBC+S+CH2S TT CL04 N18<br />
SFBC+S+CARB TT CL13 N19<br />
SFBC+ID TT CL05 N20<br />
SFBC+ID+CHLR TT CL05 N21<br />
SFBC+ID+CH2S TT CL05 N22<br />
SFBC+ID+CARB TT CL14 N23<br />
DFB+ID&S TT CL06 N24<br />
DFB+ID&S+CHLR TT CL06 N25<br />
DFB+ID&S+CH2S TT CL06 N26<br />
DFB+ID&S+CARB TT CL15 N27<br />
DFB+IC TT CL01 N28<br />
DFB+IC+CHLR TT CL01 N29<br />
DFB+IC+CH2S TT CL01 N30<br />
DFB+IC+CARB TT CL10 N31<br />
SFBC+IC TT CL04 N32<br />
SFBC+IC+CHLR TT CL04 N33<br />
SFBC+IC+CH2S TT CL04 N34<br />
SFBC+IC+CARB TT CL13 N35<br />
SFBT+S&D TT CL07 N00<br />
SFBT+S&D+CHLR TT CL07 N01<br />
SFBT+S&D+CH2S TT CL07 N02<br />
Numeric Configurations<br />
Canister<br />
Description<br />
Layout<br />
Drink Map<br />
SFBT+S&D+CARB TT CL16 N03<br />
INST+S&D TT CL08 N08<br />
INST+S&D+CHLR TT CL08 N09<br />
INST+S&D+CH2S TT CL08 N10<br />
INST+S&D+CARB TT CL17 N11<br />
TFB+S(2) TT CL01 N36<br />
TFB+S(2)+CHLR TT CL01 N37<br />
TFB+S(2)+CH2S TT CL01 N38<br />
TFB+ICFS TT CL01 N40<br />
TFB+ICFS+CHLR TT CL01 N41<br />
TFB+ICFS+CH2S TT CL01 N42<br />
TFB+ICIS TT CL01 N44<br />
TFB+ICIS+CHLR TT CL01 N45<br />
TFB+ICIS+CH2S TT CL01 N46<br />
DFB+S TT CL01 N48<br />
DFB+S+CHLR TT CL01 N49<br />
DFB+S+CH2S TT CL01 N50<br />
DFB+S+CARB TT CL10 N51<br />
SFBT(BC) TT CL18 N00<br />
SFBT(BC)+CHLR TT CL18 N01<br />
SFBT(BC)+CH2S TT CL18 N02<br />
SFBT(BC)+CARB TT CL20 N03<br />
INST(BC) TT CL19 N08<br />
INST(BC)+CHLR TT CL19 N09<br />
INST(BC)+CH2S TT CL19 N10<br />
INST(BC)+CARB TT CL21 N11<br />
TFB+IC&S TT CL06 N52<br />
TFB+IC&S+CHLR TT CL06 N53<br />
TFB+IC&S+CH2S TT CL06 N54<br />
TABLE 3.2A). MACHINE CONFIGURATIONS - NUMERIC<br />
<strong>GENEVA</strong> Issue 3 06/08/2008 60
COFFEtek Ltd<br />
Keyed Configurations<br />
Canister<br />
Description<br />
Layout<br />
Drink Map<br />
INST HOT C+D CL02 K00<br />
INST HC C+D CL02 K01<br />
INST HC2 C+D CL02 K02<br />
INST HCC2 C+D CL02 K03<br />
INST HOT C&S CL02 K04<br />
INST HC C&S CL02 K05<br />
INST HC2 C&S CL02 K06<br />
INST HCC2 C&S CL02 K07<br />
SFBT HOT C+D CL00 K08<br />
SFBT HC C+D CL00 K09<br />
SFBT HC2 C+D CL00 K10<br />
SFBT HCC2 C+D CL00 K11<br />
SFBT HOT C&S CL00 K12<br />
SFBT HC C&S CL00 K13<br />
SFBT HC2 C&S CL00 K14<br />
SFBT HCC2 C&S CL00 K15<br />
DFB HOT C+D CL03 K16<br />
DFB HC C+D CL03 K17<br />
DFB HC2 C+D CL03 K18<br />
DFB HCC2 C+D CL03 K19<br />
DFB HOT C+E CL01 K20<br />
DFB HC C+E CL01 K21<br />
DFB HC2 C+E CL01 K22<br />
DFB HCC2 C+E CL01 K23<br />
DFB HOT C&S CL01 K24<br />
DFB HC C&S CL01 K25<br />
DFB HC2 C&S CL01 K26<br />
DFB HCC2 C&S CL01 K27<br />
SFBC HOT C+D CL05 K28<br />
SFBC HC C+D CL05 K29<br />
SFBC HC2 C+D CL05 K30<br />
SFBC HCC2 C+D CL05 K31<br />
SFBC HOT C+E CL04 K32<br />
SFBC HC C+E CL04 K33<br />
SFBC HC2 C+E CL04 K34<br />
SFBC HCC2 C+E CL04 K35<br />
SFBC HOT C&S CL04 K36<br />
SFBC HC C&S CL04 K37<br />
SFBC HC2 C&S CL04 K38<br />
SFBC HCC2 C&S CL04 K39<br />
INST HOT C+D 1K CL02 K00<br />
INST HC C+D 1K CL02 K01<br />
INST HC2 C+D 1K CL02 K02<br />
INST HCC2 C+D 1K CL11 K03<br />
INST HOT C&S 1K CL02 K04<br />
INST HC C&S 1K CL02 K05<br />
INST HC2 C&S 1K CL02 K06<br />
INST HCC2 C&S 1K CL11 K07<br />
SFBT HOT C+D 1K CL00 K08<br />
SFBT HC C+D 1K CL00 K09<br />
SFBT HC2 C+D 1K CL00 K10<br />
SFBT HCC2 C+D 1K CL09 K11<br />
SFBT HOT C&S 1K CL00 K12<br />
SFBT HC C&S 1K CL00 K13<br />
Keyed Configurations<br />
Canister<br />
Description<br />
Layout<br />
Drink Map<br />
SFBT HC2 C&S 1K CL00 K14<br />
SFBT HCC2 C&S 1K CL09 K15<br />
DFB HOT C+D 1K CL03 K16<br />
DFB HC C+D 1K CL03 K17<br />
DFB HC2 C+D 1K CL03 K18<br />
DFB HCC2 C+D 1K CL12 K19<br />
DFB HOT C+E 1K CL01 K20<br />
DFB HC C+E 1K CL01 K21<br />
DFB HC2 C+E 1K CL01 K22<br />
DFB HCC2 C+E 1K CL10 K23<br />
DFB HOT C&S 1K CL01 K24<br />
DFB HC C&S 1K CL01 K25<br />
DFB HC2 C&S 1K CL01 K26<br />
DFB HCC2 C&S 1K CL10 K27<br />
SFBC HOT C+D 1K CL05 K28<br />
SFBC HC C+D 1K CL05 K29<br />
SFBC HC2 C+D 1K CL05 K30<br />
SFBC HCC2 C+D 1K CL14 K31<br />
SFBC HOT C+E 1K CL04 K32<br />
SFBC HC C+E 1K CL04 K33<br />
SFBC HC2 C+E 1K CL04 K34<br />
SFBC HCC2 C+E 1K CL13 K35<br />
SFBC HOT C&S 1K CL04 K36<br />
SFBC HC C&S 1K CL04 K37<br />
SFBC HC2 C&S 1K CL04 K38<br />
SFBC HCC2 C&S 1K CL13 K39<br />
INST HOT C+D TS CL02 K00<br />
INST HC C+D TS CL02 K01<br />
INST HC2 C+D TS CL02 K02<br />
INST HCC2 C+D TS CL11 K03<br />
INST HOT C&S TS CL02 K04<br />
INST HC C&S TS CL02 K05<br />
INST HC2 C&S TS CL02 K06<br />
INST HCC2 C&S TS CL11 K07<br />
SFBT HOT C+D TS CL00 K08<br />
SFBT HC C+D TS CL00 K09<br />
SFBT HC2 C+D TS CL00 K10<br />
SFBT HCC2 C+D TS CL09 K11<br />
SFBT HOT C&S TS CL00 K12<br />
SFBT HC C&S TS CL00 K13<br />
SFBT HC2 C&S TS CL00 K14<br />
SFBT HCC2 C&S TS CL09 K15<br />
DFB HOT C+D TS CL03 K16<br />
DFB HC C+D TS CL03 K17<br />
DFB HC2 C+D TS CL03 K18<br />
DFB HCC2 C+D TS CL12 K19<br />
DFB HOT C+E TS CL01 K20<br />
DFB HC C+E TS CL01 K21<br />
DFB HC2 C+E TS CL01 K22<br />
DFB HCC2 C+E TS CL10 K23<br />
DFB HOT C&S TS CL01 K24<br />
DFB HC C&S TS CL01 K25<br />
DFB HC2 C&S TS CL01 K26<br />
DFB HCC2 C&S TS CL10 K27<br />
61 06/08/2008 Issue 3 <strong>GENEVA</strong>
COFFEtek Ltd<br />
Keyed Configurations<br />
Canister<br />
Description<br />
Layout<br />
Drink Map<br />
SFBC HOT C+D TS CL05 K28<br />
SFBC HC C+D TS CL05 K29<br />
SFBC HC2 C+D TS CL05 K30<br />
SFBC HCC2 C+D TS CL14 K31<br />
SFBC HOT C+E TS CL04 K32<br />
SFBC HC C+E TS CL04 K33<br />
SFBC HC2 C+E TS CL04 K34<br />
SFBC HCC2 C+E TS CL13 K35<br />
SFBC HOT C&S TS CL04 K36<br />
SFBC HC C&S TS CL04 K37<br />
SFBC HC2 C&S TS CL04 K38<br />
SFBC HCC2 C&S TS CL13 K39<br />
INST HOT C+D TT CL02 K00<br />
INST HC C+D TT CL02 K01<br />
INST HC2 C+D TT CL02 K02<br />
INST HCC2 C+D TT CL11 K03<br />
INST HOT C&S TT CL02 K04<br />
INST HC C&S TT CL02 K05<br />
INST HC2 C&S TT CL02 K06<br />
INST HCC2 C&S TT CL11 K07<br />
SFBT HOT C+D TT CL00 K08<br />
SFBT HC C+D TT CL00 K09<br />
SFBT HC2 C+D TT CL00 K10<br />
SFBT HCC2 C+D TT CL09 K11<br />
SFBT HOT C&S TT CL00 K12<br />
SFBT HC C&S TT CL00 K13<br />
SFBT HC2 C&S TT CL00 K14<br />
SFBT HCC2 C&S TT CL09 K15<br />
Keyed Configurations<br />
Canister<br />
Description<br />
Layout<br />
Drink Map<br />
DFB HOT C+D TT CL03 K16<br />
DFB HC C+D TT CL03 K17<br />
DFB HC2 C+D TT CL03 K18<br />
DFB HCC2 C+D TT CL12 K19<br />
DFB HOT C+E TT CL01 K20<br />
DFB HC C+E TT CL01 K21<br />
DFB HC2 C+E TT CL01 K22<br />
DFB HCC2 C+E TT CL10 K23<br />
DFB HOT C&S TT CL01 K24<br />
DFB HC C&S TT CL01 K25<br />
DFB HC2 C&S TT CL01 K26<br />
DFB HCC2 C&S TT CL10 K27<br />
SFBC HOT C+D TT CL05 K28<br />
SFBC HC C+D TT CL05 K29<br />
SFBC HC2 C+D TT CL05 K30<br />
SFBC HCC2 C+D TT CL14 K31<br />
SFBC HOT C+E TT CL04 K32<br />
SFBC HC C+E TT CL04 K33<br />
SFBC HC2 C+E TT CL04 K34<br />
SFBC HCC2 C+E TT CL13 K35<br />
SFBC HOT C&S TT CL04 K36<br />
SFBC HC C&S TT CL04 K37<br />
SFBC HC2 C&S TT CL04 K38<br />
SFBC HCC2 C&S TT CL13 K39<br />
TABLE 3.2B). MACHINE CONFIGURATIONS - KEYED<br />
<strong>GENEVA</strong> Issue 3 06/08/2008 62
COFFEtek Ltd<br />
Map No.<br />
Hot Water 1 (Hot Head)<br />
FB/BTC Coffee<br />
FB Decaff<br />
FB/BTC Espresso<br />
FB Tea<br />
I Coffee<br />
I Espresso<br />
I Cappuccino<br />
I Espreschoc<br />
Soup 1<br />
Chocolate<br />
Chocomilk<br />
Still Syrup 1<br />
Still Syrup 2<br />
Still Water 1<br />
Sparkling Syrup 1<br />
Sparkling Syrup 2<br />
Sparkling Water<br />
I Decaff<br />
Soup 2<br />
FB Decaff Espresso<br />
Hot Water 2 (Cold Head)<br />
I Whipped Coffee<br />
I Whipped Decaff<br />
I Tea<br />
Soup 3<br />
I Latte<br />
I Mocha<br />
FB/BTC Mocha<br />
FB/BTC Latte<br />
FB/BTC Cappuccino<br />
FB/BTC Espreschoc<br />
Cup Only<br />
FB/BTC Whipped Coffee<br />
FB/BTC Whipped Decaff<br />
Still Water 2 (Own Cup)<br />
Hot Water 3 (Own Cup)<br />
Snack 1<br />
Snack 2<br />
Snack 3<br />
Snack 4<br />
Snack 5<br />
Snack 6<br />
I Latte - Capp Top<br />
FB/BTC Latte - Capp Top<br />
N00 D D D D D D D D D D D D D * D * * * * * * * *<br />
N01 D D D D D D D D D D D D D D * D D * * * * * * * *<br />
N02 D D D D D D D D D D D D D D D D * D D * * * * * * * *<br />
N03 D D D D D D D D D D D D D D D D D D D * D * * * * * * * * *<br />
N04 D D D D D D D * D * D D D D D D * * * * * * * *<br />
N05 D D D D D D D D * D * D D D D D D D * * * * * * * *<br />
N06 D D D D D D D D D D * D * D D D D D D D * * * * * * * *<br />
N07 D D D D D D D D D D D D D * D * D D D D D D * * * * * * * * *<br />
N08 D D D D D D D D D D D D D * D * * * * * * * *<br />
N09 D D D D D D D D D D D D D D * D D * * * * * * * *<br />
N10 D D D D D D D D D D D D D D D D * D D * * * * * * * *<br />
N11 D D D D D D D D D D D D D D D D D D D * D * * * * * * * * *<br />
N12 D * D D D D D * D D * D D D D D * * * * * * * * *<br />
N13 D * D D D D D D * D D * D D D D D * D * * * * * * * *<br />
N14 D * D D D D D D D D * D D * D D D D D * D * * * * * * * *<br />
N15 D (*) D D D D D D D D D D D (*) D D * D D D D D (*) * * * * * * * * *<br />
N16 D D D D D D * D D * D D D D D D * * * * * * * *<br />
N17 D D D D D D D * D D * D D D D D D D * * * * * * * *<br />
N18 D D D D D D D D D * D D * D D D D D D D * * * * * * * *<br />
N19 D D D D D D D D D D D D * D D * D D D D D D * * * * * * * * *<br />
N20 D * D D D D * D D D * D D D D D * * * * * * * * *<br />
N21 D * D D D D D * D D D * D D D D D * D * * * * * * * *<br />
N22 D * D D D D D D D * D D D * D D D D D * D * * * * * * * *<br />
N23 D * D D D D D D D D D D * D D D * D D D D D * * * * * * * * * *<br />
N24 D * D D D D D D * D D * D D D D D * * * * * * * *<br />
N25 D * D D D D D D D * D D * D D D D D * D * * * * * * *<br />
N26 D * D D D D D D D D D * D D * D D D D D * D * * * * * * *<br />
N27 D (*) D D D D D D D D D D D D (*) D D * D D D D D (*) * * * * * * * *<br />
<strong>GENEVA</strong> Issue 3 06/08/2008 63
COFFEtek Ltd<br />
Map No.<br />
Hot Water 1 (Hot Head)<br />
FB/BTC Coffee<br />
FB Decaff<br />
FB/BTC Espresso<br />
FB Tea<br />
I Coffee<br />
I Espresso<br />
I Cappuccino<br />
I Espreschoc<br />
Soup 1<br />
Chocolate<br />
Chocomilk<br />
Still Syrup 1<br />
Still Syrup 2<br />
Still Water 1<br />
Sparkling Syrup 1<br />
Sparkling Syrup 2<br />
Sparkling Water<br />
I Decaff<br />
Soup 2<br />
FB Decaff Espresso<br />
Hot Water 2 (Cold Head)<br />
I Whipped Coffee<br />
I Whipped Decaff<br />
I Tea<br />
Soup 3<br />
I Latte<br />
I Mocha<br />
FB/BTC Mocha<br />
FB/BTC Latte<br />
FB/BTC Cappuccino<br />
FB/BTC Espreschoc<br />
Cup Only<br />
FB/BTC Whipped Coffee<br />
FB/BTC Whipped Decaff<br />
Still Water 2 (Own Cup)<br />
Hot Water 3 (Own Cup)<br />
Snack 1<br />
Snack 2<br />
Snack 3<br />
Snack 4<br />
Snack 5<br />
Snack 6<br />
I Latte - Capp Top<br />
FB/BTC Latte - Capp Top<br />
N28 D * * D D D D D D D * D D D * * * * * D D * * * * * * * * * *<br />
N29 D * * D D D D D D D D * D D D * * * * * D D * D * * * * * * * * *<br />
N30 D * * D D D D D D D D D D * D D D * * * * * D D * D * * * * * * * * *<br />
N31 D (*) * D D D D D D D D D D D D D (*) D D D * * * * * D D (*) * * * * * * * * * *<br />
N32 D * * D D D D D D * D D D D * * * * * D D * * * * * * * * * *<br />
N33 D * * D D D D D D D * D D D D * * * * * D D * D * * * * * * * * *<br />
N34 D * * D D D D D D D D D * D D D D * * * * * D D * D * * * * * * * * *<br />
N35 D * * D D D D D D D D D D D D * D D D D * * * * * D D * * * * * * * * * * *<br />
N36 D D D D D D D * D * D D D D * * * * * * * * * *<br />
N37 D D D D D D D D * D * D D D D * * D * * * * * * * *<br />
N38 D D D D D D D D D D * D * D D D D * * D * * * * * * * *<br />
N39 D D D D D D D D D D D D D * D * D D D D * * * * * * * * * * *<br />
N40 D D D D D * * * D D * D * * * * D D D D * * * * * * * * * * *<br />
N41 D D D D D * * * D D D * D * * * * D D D D * * D * * * * * * * * *<br />
N42 D D D D D * * * D D D D D * D * * * * D D D D * * D * * * * * * * * *<br />
N43 D D D D D * * * D D D D D D D D * D * * * * D D D D * * * * * * * * * * * *<br />
N44 D D D * D D D D D D * D * D * * * * * D * * * * * * * * * * *<br />
N45 D D D * D D D D D D D * D * D * * * * * D * * D * * * * * * * * *<br />
N46 D D D * D D D D D D D D D * D * D * * * * * D * * D * * * * * * * * *<br />
N47 D D D * D D D D D D D D D D D D * D * D * * * * * D * * * * * * * * * * * *<br />
N48 D * D D D D D * D * D D D D D * * * * * * * * *<br />
N49 D * D D D D D D * D * D D D D D * D * * * * * * * *<br />
N50 D * D D D D D D D D * D * D D D D D * D * * * * * * * *<br />
N51 D (*) D D D D D D D D D D D (*) D * D D D D D (*) * * * * * * * * *<br />
N52 D D D D D * * * D D D * D * * * * D D D D * * * * * * * * *<br />
N53 D D D D D * * * D D D D * D * * * * D D D D * * D * * * * * * *<br />
N54 D D D D D * * * D D D D D D * D * * * * D D D D * * D * * * * * * *<br />
N55 D D D D D * * * D D D D D D D D D * D * * * * D D D D * * * * * * * * * *<br />
64 06/08/2008 Issue 3 <strong>GENEVA</strong>
COFFEtek Ltd<br />
Map No.<br />
Hot Water 1 (Hot Head)<br />
FB/BTC Coffee<br />
FB Decaff<br />
FB/BTC Espresso<br />
FB Tea<br />
I Coffee<br />
I Espresso<br />
I Cappuccino<br />
I Espreschoc<br />
Soup 1<br />
Chocolate<br />
Chocomilk<br />
Still Syrup 1<br />
Still Syrup 2<br />
Still Water 1<br />
Sparkling Syrup 1<br />
Sparkling Syrup 2<br />
Sparkling Water<br />
I Decaff<br />
Soup 2<br />
FB Decaff Espresso<br />
Hot Water 2 (Cold Head)<br />
I Whipped Coffee<br />
I Whipped Decaff<br />
I Tea<br />
Soup 3<br />
I Latte<br />
I Mocha<br />
FB/BTC Mocha<br />
FB/BTC Latte<br />
FB/BTC Cappuccino<br />
FB/BTC Espreschoc<br />
Cup Only<br />
FB/BTC Whipped Coffee<br />
FB/BTC Whipped Decaff<br />
Still Water 2 (Own Cup)<br />
Hot Water 3 (Own Cup)<br />
Snack 1<br />
Snack 2<br />
Snack 3<br />
Snack 4<br />
Snack 5<br />
Snack 6<br />
I Latte - Capp Top<br />
FB/BTC Latte - Capp Top<br />
K00 D D D D D D D * * * D D D * * * * * * * * *<br />
K01 D D D D D D D D * * * D D D * * * * * * * * * *<br />
K02 D * D D D D D D D D * * * D D * * * * * * * * * * *<br />
K03 D * D * D D * D D D D * D * * * D D * * * * * * * * * * *<br />
K04 D D D D D D D * * D D D * * * * * * * * *<br />
K05 D D D D D D D D * * D D D * * * * * * * * * *<br />
K06 D * D D D D D D D D * * D D * * * * * * * * * * *<br />
K07 D * D * D D D * D D D D * * * D D * * * * * * * * * * *<br />
K08 D D D D D D D D * * * D D * * * * * * * * *<br />
K09 D D D D D D D D D * * * D D * * * * * * * * * *<br />
K10 D D * D D D D D D D D * * * D * * * * * * * * * * *<br />
K11 D D * D * D D * D D D D * D * * * D * * * * * * * * * * *<br />
K12 D D D D D D D D * * D D * * * * * * * * *<br />
K13 D D D D D D D D D * * D D * * * * * * * * * *<br />
K14 D D * D D D D D D D D * * D * * * * * * * * * * *<br />
K15 D D * D * D D D * D D D D * * * D * * * * * * * * * * *<br />
K16 D * D D D D D * * * D D D D * * * * * * * * * * *<br />
K17 D * D D D D D D * * * D D D D * * * * * * * * * * * *<br />
K18 D * * D D D D D D D * * * * D D D * * * * * * * * * * * *<br />
K19 D (*) * D D D * D D D D * D (*) * * * D D * * * (*) * * * * * * * * *<br />
K20 D * * D D D D D D D * * * D D * * * * * * * * * * * * * * * *<br />
K21 D * * D D D D D D D D * * * D D * * * * * * * * * * * * * * * * *<br />
K22 D * * D D * D D D D D D D * * * D * * * * * * * * * * * * * * * * * *<br />
K23 D (*) * D D * D * D D * D D D D * (*) * * D * * * * * * * (*) * * * * * * * * * *<br />
K24 D * D D D D D * * D D D D * * * * * * * * * * *<br />
K25 D * D D D D D D * * D D D D * * * * * * * * * * * *<br />
K26 D * * D D D D D D D * * * D D D * * * * * * * * * * * *<br />
K27 D (*) * D D D D * D D D D * (*) * * D D * * * (*) * * * * * * * * *<br />
<strong>GENEVA</strong> Issue 3 06/08/2008 65
COFFEtek Ltd<br />
Map No.<br />
Hot Water 1 (Hot Head)<br />
FB/BTC Coffee<br />
FB Decaff<br />
FB/BTC Espresso<br />
FB Tea<br />
I Coffee<br />
I Espresso<br />
I Cappuccino<br />
I Espreschoc<br />
Soup 1<br />
Chocolate<br />
Chocomilk<br />
Still Syrup 1<br />
Still Syrup 2<br />
Still Water 1<br />
Sparkling Syrup 1<br />
Sparkling Syrup 2<br />
Sparkling Water<br />
I Decaff<br />
Soup 2<br />
FB Decaff Espresso<br />
Hot Water 2 (Cold Head)<br />
I Whipped Coffee<br />
I Whipped Decaff<br />
I Tea<br />
Soup 3<br />
I Latte<br />
I Mocha<br />
FB/BTC Mocha<br />
FB/BTC Latte<br />
FB/BTC Cappuccino<br />
FB/BTC Espreschoc<br />
Cup Only<br />
FB/BTC Whipped Coffee<br />
FB/BTC Whipped Decaff<br />
Still Water 2 (Own Cup)<br />
Hot Water 3 (Own Cup)<br />
Snack 1<br />
Snack 2<br />
Snack 3<br />
Snack 4<br />
Snack 5<br />
Snack 6<br />
I Latte - Capp Top<br />
FB/BTC Latte - Capp Top<br />
K28 D * D D D D * * * D D D D D * * * * * * * * * * *<br />
K29 D * D D D D D * * * D D D D D * * * * * * * * * * * *<br />
K30 D * * D D D D D D * * * D * D D D * * * * * * * * * * * *<br />
K31 D * * D D * D D D D * D * * * D * D D * * * * * * * * * * * * *<br />
K32 D * * D D D D D D * * * D D D * * * * * * * * * * * * * * * *<br />
K33 D * * D D D D D D D * * * D D D * * * * * * * * * * * * * * * * *<br />
K34 D * * D * D D D D D D D * * * D D * * * * * * * * * * * * * * * * * *<br />
K35 D * * D * D * D D * D D D D * * * * D D * * * * * * * * * * * * * * * * * *<br />
K36 D * D D D D * * D D D D D * * * * * * * * * * *<br />
K37 D * D D D D D * * D D D D D * * * * * * * * * * * *<br />
K38 D * * D D D D D D * * D * D D D * * * * * * * * * * * *<br />
K39 D * * D D D * D D D D * * * D * D D * * * * * * * * * * * * *<br />
TABLE 3.3 DRINKS MAP MATRIX<br />
66 06/08/2008 Issue 3 <strong>GENEVA</strong>
COFFEtek Ltd<br />
Layout ID Canister 1 Canister 2 Canister 3 Canister 4 Canister 5 Canister 6 Canister 7 Canister 8<br />
CL00 Soup/I Decaff Chocolate Topping Milk Sugar FB Tea I Coffee<br />
CL01 Soup/I Coffee Chocolate Topping Milk Sugar FB Tea FB Decaff FB/BTC Coffee<br />
CL02 Soup/I Decaff Chocolate Topping Milk Sugar I Tea I Coffee<br />
CL03 Soup/I Decaff Chocolate Topping Milk Sugar FB Tea FB Decaff FB/BTC Coffee<br />
CL04 Soup/I Coffee Chocolate Topping Milk Sugar I Tea FB Decaff FB/BTC Coffee<br />
CL05 Soup/I Decaff Chocolate Topping Milk Sugar I Tea FB Decaff FB/BTC Coffee<br />
CL06 Soup Chocolate I Coffee/I Decaff Milk Sugar FB Tea FB Decaff FB/BTC Coffee<br />
CL07 Soup Chocolate Topping Milk Sugar FB Tea I Decaff I Coffee<br />
CL08 Soup Chocolate Topping Milk Sugar I Tea I Decaff I Coffee<br />
Note : Following maps are dual carousel + carbonator 'special' case equivalents of the previous 9 maps<br />
CL09 Soup/I Decaff Chocolate Topping Milk Sugar FB Tea I Coffee<br />
CL10 Soup/I Coffee Chocolate Topping Milk Sugar FB Tea N/A FB/BTC Coffee<br />
CL11 Soup/I Decaff Chocolate Topping Milk Sugar I Tea I Coffee<br />
CL12 Soup/I Decaff Chocolate Topping Milk Sugar FB Tea N/A FB/BTC Coffee<br />
CL13 Soup/I Coffee Chocolate Topping Milk Sugar I Tea FB Decaff FB/BTC Coffee<br />
CL14 Soup/I Decaff Chocolate Topping Milk Sugar I Tea FB Decaff FB/BTC Coffee<br />
CL15 Soup Chocolate I Coffee/I Decaff Milk Sugar FB Tea N/A FB/BTC Coffee<br />
CL16 Soup Chocolate Topping Milk Sugar FB Tea I Decaff I Coffee<br />
CL17 Soup Chocolate Topping Milk Sugar I Tea I Decaff I Coffee<br />
CL18 Soup I Decaff I Coffee Milk Sugar FB Tea Topping Chocolate<br />
CL19 Soup I Decaff I Coffee Milk Sugar I Tea Topping Chocolate<br />
Note : Following maps are dual carousel + carbonator 'special' case equivalents of the previous 2 maps<br />
CL20 Soup I Decaff I Coffee Milk Sugar FB Tea Topping Chocolate<br />
CL21 Soup I Decaff I Coffee Milk Sugar I Tea Topping Chocolate<br />
TABLE 3.4 CANISTER LAYOUT<br />
<strong>GENEVA</strong> Issue 3 06/08/2008 67
COFFEtek Ltd<br />
(c)<br />
SET CASH SYSTEM<br />
This option in this submenu allows the type of credit device to be selected. Existing<br />
versions of the Geneva range of equipment support MDB change giving coin<br />
mechanisms and MDB and DIGICARD card reader units. At present NO SYSTEM, MDB<br />
PROTOCOL, MDB (ZIP VARIANT) and DIGICARD are the only options, however other<br />
choices to allow the selection of proprietary systems may be added in future versions.<br />
If no payment system is connected NO SYSTEM should be selected.<br />
To enable an MDB peripheral MDB PROTOCOL should be selected. If MDB<br />
PROTOCOL is selected and communication with at least one peripheral does not take<br />
place, the error screen below will be displayed. MDB (ZIP VARIENT) should be selected<br />
if an N&W ZIP reader is fitted. These units have a different interpretation of the MDB<br />
specification to many other readers and require a product specific implementation of the<br />
protocol.<br />
OUT OF SERVICE<br />
MECH LINK ERROR<br />
(d)<br />
JUG SETTINGS<br />
The Geneva machine can be switched to a special ‘Jug Mode’ using a keyed switch<br />
located on the RHS inset panel. Whilst in this mode the machine will automatically<br />
repeat a number of cycles of a selected single cup portion. The number of repetitions<br />
can be altered by repeatedly pressing the selections key to increase the number of<br />
cycles. When the number of cycles reaches a programmable maximum, it resets to one.<br />
By default only the black coffee, decaf and tea selections can be selected in jug mode<br />
However it is possible to override this to enable pot of white / sugared tea and coffee.<br />
A further override forces the entire menu to be available. The following table<br />
summarizes the function of the jug mode parameters:<br />
PARAMETER<br />
MAX CUPS IN JUG<br />
FUNCTION<br />
Maximum number of cycles allowed<br />
JUG KEY=FREE KEY<br />
OPTIONS ON JUGS<br />
ALL DRINKS JUGABLE<br />
PRICED JUGS<br />
Re assign jug key to work as a free key.<br />
Default = NO<br />
Allow milk /sugar to be selected<br />
Default = NO<br />
Allow all menu items to be jugged<br />
Default = NO<br />
Require payment for jug vends<br />
Default = 0 (NO)<br />
<strong>GENEVA</strong> Issue 3 06/08/2008 68
COFFEtek Ltd<br />
(e)<br />
HARDWARE SETTINGS<br />
This submenu allows some machine components to be disabled to allow limited<br />
functionality to be restored in the event of a failure. For example, in the event that one of<br />
the cup sensor PCBs fails, it is possible to inform the control system that these are not<br />
fitted. Likewise in the event of a brewer failure setting the COFFEE BREWER to NO will<br />
allow any selections not reliant on the brewer to operate. Whilst all possible system<br />
components are visible in this submenu, irrespective of the machines configuration, it is<br />
only meaningful to ENABLE components that actually exist in the machine. Thus it<br />
makes no sense to set TEA BREWER to YES on an all-instant machine and indeed will<br />
result in an IO MAPPING ERROR.<br />
CUP SENSORS<br />
PARAMETER<br />
DISPENSE ARM<br />
TEA BREWER<br />
COFFEE BREWER<br />
COLD UNIT<br />
HW HOT HEAD (NO)<br />
SNACK SLAVE (NO)<br />
Caution - Setting this variable<br />
manually using this menu will<br />
result in an incorrectly configured<br />
machine. Don’t do it!<br />
SLAVE P’COL (NO)<br />
Caution - Setting this variable<br />
manually using this menu will<br />
result in an incorrectly configured<br />
machine. Don’t do it!<br />
FUNCTION<br />
Enable/disable user cup sensors.<br />
Default is YES - sensors fitted.<br />
Enable moving dispense head.<br />
Default is YES. Can be usefully disabled only<br />
for diagnostics. The machine cannot operate<br />
with this item deselected.<br />
Enable tea brewer.<br />
Default for fresh brew machine configurations is<br />
YES; for Instant configurations NO.<br />
Enable coffee brewer.<br />
Default for double fresh brew configurations is<br />
YES; instant and single fresh brew<br />
configurations NO.<br />
Indicates the type of cold drinks unit installed.<br />
Possible values are:<br />
• HOT ONLY<br />
• CARBONATOR<br />
• CHILLER<br />
• CHILLER+SYRUP<br />
Hot water dispense is physically located on the<br />
hot drink dispense position on the dispense<br />
head. Default is NO<br />
A Plus 7 board and loom are fitted to enable<br />
slave operation of a CB300 can and bottle<br />
slave.<br />
Note This is the means by which such a unit is<br />
disabled. Setting this to ON will result in an<br />
incorrectly set up machine. The INST’ SNACK<br />
SLAVE submenu of CONFIGURE M/C should<br />
be used install a slave. This will result in this<br />
variable being set.<br />
The machine is configured for connection to a<br />
Coffetek Water or Soup Salve via the Coffetek<br />
Slave Protocol.<br />
Note This is the means by which such a unit is<br />
disabled. Setting this to ON will result in an<br />
incorrectly set up machine. The INITIALISE<br />
SLAVE submenu of the CONFIGURE SLAVE<br />
MENU should be used install a slave. This will<br />
result in this variable being set.<br />
69 06/08/2008 Issue 3 <strong>GENEVA</strong>
COFFEtek Ltd<br />
(f)<br />
CAROUSEL CONFIG<br />
This informs the machine what type of carousel configuration is fitted. The default for all<br />
of the predefined configurations assumes a single 600 cup plastic cup drop unit, Part No<br />
89332, is fitted. Table 3.5, shows the possible values and corresponding physical<br />
hardware it implies: Note for Two Cup Types and Two Cup Sizes it is preferable to set<br />
these by choosing an appropriate configuration via SET MACHINE TYPE than using this<br />
menu. If set using this menu it is necessary to restart the machine before using the SET<br />
CUP types menu to define the carousel associated with each selection. For two carousel<br />
types the designation of carousel 1 & two is as follows:<br />
Carousel<br />
2<br />
(Large Cup)<br />
Carousel<br />
1<br />
FIG. 3.1 TWIN CAROUSEL DESIGNATIONS<br />
NONE<br />
VALUE<br />
PHYSICAL SET UP<br />
No cup drop mechanism is present. User supplies own cup.<br />
2 Cup Types Two different types of cup are available.<br />
2 Cup Sizes Two different Sizes of cup available. Set this and then use<br />
SET INGREDIENTS to change the two sizes. You must cycle<br />
the power after changing this variable.<br />
SINGLE<br />
Standard Plastic 600 cup capacity unit.<br />
1000 CUP Allows 1000* (*=Typically 950) cups of the same size to be put<br />
into a double cup drop system. This system needs to be<br />
loaded into the right hand cup drop first.<br />
TABLE 3.5<br />
(g)<br />
INSTALL SNACK SLAVE<br />
By entering this section it will allow a Plus 7 board and loom are fitted to enable slave<br />
operation of a CB300 can and bottle slave. The operation of the slave units is outside<br />
the scope of this manual.<br />
<strong>GENEVA</strong> Issue 3 06/08/2008 70
COFFEtek Ltd<br />
MDB Config<br />
29. This menu provides the means to modify parameters related to MDB peripherals connected<br />
to the machine. However, as support for additional peripherals is added, so additional<br />
settings will be added as appropriate.<br />
PARAMETER<br />
MAX CREDIT<br />
EXACT CHANG LIM<br />
VALIDATOR ESCROW<br />
VEND BEFORE CHANGE<br />
CHANGER MODE<br />
AUTO CONFIGURE<br />
ACCEPTANCE MASKS<br />
ENABLED COINS<br />
EXACT CHANGE<br />
DESCRIPTION<br />
This monetary value defines the largest amount that can be accepted<br />
by the mechanism. Once the displayed credit reaches the value set in<br />
MAX CREDIT no further coins will be accepted.<br />
This monetary value represents the value of coins remaining in the<br />
change tubes below which the EXACT CHANGE message is<br />
displayed. Note for the audit system to work correctly it is important<br />
that all coins are inserted via the coin insert slot, i.e. not placed<br />
directly in the change tubes.<br />
Provides the means by which an escrow capable validator is informed<br />
which of the bills that it can accept should be held in escrow. As with<br />
the coin accept masks for coin validators the bills are identified using<br />
a 16 bit mask.<br />
Possible values are YES and NO. When set to YES change will not<br />
be given until a vend cycle has taken place.<br />
Possible values are SINGLE VEND and MULTI VEND When set to<br />
MULTI VEND change will only be paid in response to depression of<br />
the escrow lever. When set to SINGLE VEND change will be given<br />
automatically following the vend cycle or in response to depression of<br />
the escrow lever.<br />
If a multi session capable card reader is fitted setting MULTI VEND<br />
has the effect of allowing several vends to be taken without removing<br />
the card. NOTE The reader must be multisession capable and<br />
most are not!<br />
This is a function rather than a setting. It is only available if an MDB<br />
Changer is fitted. If successful, it will interrogate the reader and set<br />
up the ENABLED NORMAL and ENABLED EXACT CHANGE<br />
MASKS. If no device is found, the message CONFIG FAILED and a<br />
depressing beep will occur.<br />
This variable controls which coins are accepted in circumstances<br />
where the exact change message would be displayed. The MBD<br />
protocol provides for up to 16 coins. For the purposes of enabling or<br />
disabling acceptance, the coins are represented by the letters A<br />
through to P with A being the least value coin. The acceptance status<br />
of each coin is shown by a 1 or 0 below the corresponding letter.<br />
One indicates acceptance and zero - rejection.<br />
PONMLKJIHGFEDCBA<br />
00000000000000000111<br />
ENABLED COINS<br />
NORMAL<br />
Applied to a silver only changer with 5, 10, 20 & 50p coin tubes the<br />
above setting will enable acceptance of the 5, 10 & 20p coins.<br />
This variable controls which of the coins that an attached changer is<br />
programmed to accept should actually be accepted in normal<br />
operation, i.e. other than exact change mode. For the purpose of<br />
changing the coins to be accepted the procedure is the same as for<br />
Enable Coins Exact Change above.<br />
71 06/08/2008 Issue 3 <strong>GENEVA</strong>
COFFEtek Ltd<br />
ENABLES NOTES EXACT<br />
CHANGE<br />
This variable controls which notes are accepted in circumstances<br />
where the exact change message would be displayed. The MBD<br />
protocol provides for certain notes. For the purposes of enabling or<br />
disabling acceptance, the notes are represented by the letters A<br />
through to P with A being the least value coin. The acceptance<br />
status of each note is shown by a 1 or 0 below the corresponding<br />
letter. One indicates acceptance and zero - rejection.<br />
PONMLKJIHGFEDCBA<br />
00000000000000000000<br />
ENABLES NOTES<br />
NORMAL<br />
This variable controls which of the notes that an attached changer is<br />
programmed to accept should actually be accepted in normal<br />
operation, i.e. other than exact change mode. For the purpose of<br />
changing the notes to be accepted the procedure is the same as for<br />
Enable Bills Exact Change above.<br />
EVA-DTS Config<br />
30. The EVA-DTS configuration menu provides the means to modify parameters controlling the<br />
format and method of auditing the machine. At the time of writing the machine supports<br />
EVA-DTS audit via DDCMP protocol IRDA transceiver or Direct connect. The submenus of<br />
this menu are:<br />
(a)<br />
PREVIOUS AUDIT<br />
On selecting this option the LCD screen will show a screen detailing the time and date of<br />
the last audit. The layout of the screen is as show below:<br />
Where:<br />
NO:XXXX ID:YYYYYY<br />
DD/MM/YY 00:00<br />
• XXXX represents the audit number maintained by the vending machine and<br />
incremented after each audit.<br />
• YYYYY represents the data carrier ID.<br />
• DD/MM/YY is the date the audit took place.<br />
• hh:mm is the time at which the audit took place.<br />
(b)<br />
METHOD OF AUDIT<br />
PARAMETER<br />
AUDIT METHOD<br />
DESCRIPTION<br />
Possible values are DDCMP or DISABLED.<br />
DDCMP selects infrared or direct connect audit.<br />
DISABLED turns off the audit system.<br />
<strong>GENEVA</strong> Issue 3 06/08/2008 72
COFFEtek Ltd<br />
(c)<br />
AUDIT CONFIG<br />
PARAMETER<br />
SECURITY CODE<br />
PASS CODE<br />
STATION ADDRESS<br />
DESCRIPTION<br />
Default 0 – Any data carrier may audit the machine<br />
The code is set by a data carrier. Once set by a carrier<br />
only a carrier with the appropriate code may access the<br />
machine.<br />
Default 0 – Any data carrier may audit the machine<br />
The code is set by a data carrier. Once set by a carrier<br />
only a carrier with the appropriate code may access the<br />
machine.<br />
Default 7 – Identifies the unit as a VMC for audit<br />
purposes.<br />
Product Codes<br />
31. This menu allows the product code associated with each selection reported for EVA DTS<br />
audit purposes to be viewed and or changed.<br />
On selecting this option the LCD screen will show a screen detailing drink name an<br />
COFFEE<br />
CODE=5<br />
The default codes for each selection vary depending on the configuration. For example fresh<br />
brew tea will have a different product code to instant tea. The ↓, ↑ keys can be used to scroll<br />
through the drinks to determine the codes. The following table defines the defaults for each<br />
drink type.<br />
DRINK NAME<br />
PRODUCT<br />
CODE<br />
HOT WATER 0<br />
FRESH BREW COFFEE 1 1<br />
FRESH BREW COFFEE 1 2<br />
FRESH BREW ESPRESSO 3<br />
FRESH TEA` 4<br />
INSTANT COFFEE 1 5<br />
INSTANT ESPRESSO 6<br />
INSTANT CAPPUCCINO 7<br />
INSTANT ESPRECHOC 8<br />
SOUP 9<br />
CHOCOLATE 10<br />
CHOCOMILK 11<br />
SYRUP 1 STILL DRINK 12<br />
SYRUP 2 STILL DRINK 13<br />
WATER STILL 14<br />
SPARKLING SYRUP 1 DRINK 15<br />
SPARKLING SYRUP 1 DRINK 16<br />
WATER SPARKLING 17<br />
INSTANT DECAF 18<br />
SECOND SOUP 19<br />
FRESH COFFEE 2 ESPRESSO 20<br />
HOT WATER (HOT HEAD) 21<br />
WHIPPED INSTANT COFFEE 22<br />
WHIPPED INSTANT DECAF 23<br />
73 06/08/2008 Issue 3 <strong>GENEVA</strong>
COFFEtek Ltd<br />
DRINK NAME<br />
PRODUCT<br />
CODE<br />
INSTANT TEA 24<br />
THIRD SOUP 25<br />
INSTANT LATTE 26<br />
INSTANT MOCHA 27<br />
FRESH BREW MOCHA 28<br />
FRESH BREW LATTE 29<br />
FRESH BREW CAPPUCCINO 30<br />
FRESH BREW ECHOC 31<br />
CUP ONLY 32<br />
WHIPPED FRESH COFFEE 1 1<br />
WHIPPED FRESH COFFEE 2 2<br />
COLD WATER OWN CUP ONLY 35<br />
HOT WATER OWN CUP ONLY 36<br />
SNACK/BOTTLE ACTUATOR 1 37<br />
SNACK/BOTTLE ACTUATOR 2 38<br />
SNACK/BOTTLE ACTUATOR 3 39<br />
SNACK/BOTTLE ACTUATOR 4 40<br />
SNACK/BOTTLE ACTUATOR 5 41<br />
SNACK/BOTTLE ACTUATOR 5 42<br />
TABLE 3.6 DEFAULT EVA DTS PRODUCT CODES<br />
Operators Code<br />
32. The operator’s code submenu is available to managers and engineers. It provides the<br />
means by which the engineer or manager can change the 4 digit access code used to gain<br />
operator level access to the program.<br />
Managers Code<br />
33. The manager’s code submenu is available to engineers. It provides the means by which the<br />
engineer can change the 4 digit access code used to gain manager level access to the<br />
program.<br />
Engineers Code<br />
34. The engineer’s code submenu is available to engineers. It provides the means by which the<br />
engineer can change the 4 digit access code used to gain full access to the program. In the<br />
event that the engineer’s code is forgotten, making the ENG link connection, LK2, on the<br />
54955 Control Board will grant access to the program, with engineer privileges, on entering<br />
any 4 digit code other than the managers or operators codes. Entering these codes will<br />
grant the associated access only. In summary it is inadvisable to put the ENG link on and<br />
press 1111 or 3333 because these will probably be the operator’s codes and you will<br />
therefore get restricted access.<br />
Free Drink Code<br />
35. Some sites have a requirement for the code equivalent of a free key. If enabled, entering<br />
the correct 4 digit code instead of the two digit drink code in response to the Select Drink<br />
standby prompt will cause the machine to give the next selection for free. The exact<br />
submenus of FREE DRINK CODE menu vary depending on whether a free code has been<br />
set. By default this feature is disabled. Pressing ENTER when no code has been set will<br />
result in the following display:<br />
<strong>GENEVA</strong> Issue 3 06/08/2008 74
COFFEtek Ltd<br />
FREE CODE=OFF<br />
NEW CODE=█111<br />
Entering a new code followed by pressing ENTER will both assign the code and enable the<br />
feature. Subsequently on entering the FREE DRINK CODE menu the following submenus will<br />
be available using the , ↓ keys: EDIT FREE CODE & DISABLE CODE. The function and<br />
operation of these two submenus is self explanatory.<br />
This section is only relevant to a machine which has a numeric button front; machines with a<br />
text button front will not be able to access this and will get the message NOT AVAILABLE<br />
come up on the screen if pressed.<br />
Edit Drink Map<br />
36. For each machine type and configuration there is a limited number of possible beverages<br />
that can be made from the available ingredients. The menu that results following selection<br />
of one of the preset configurations generally consists of a subset of these possible<br />
beverages. Typically not all of the possible beverages are made available in the menu due<br />
to the limited number of selection codes or because the application does not require them.<br />
For example in a machine which has fresh brew and instant coffee available it may not be<br />
necessary or desirable, for one application, to have café latte selections made from instant<br />
coffee and fresh brew coffee available. In another this may be precisely what is required.<br />
The edit drink map menu provides the means by which limited customisation of the drinks<br />
available may be achieved. Changes to the menu represent a significant modification to the<br />
machines operating parameters and as such an automatic initialization will take place<br />
following any changes. All previous changes to drink settings, temperatures, timed events,<br />
e.t.c. will be lost.<br />
The extra drinks available for substitution into the main menu depend on the machine type.<br />
The table 3.6. Default EVA DTS Product codes, defined in paragraph 32 lists all of the drinks<br />
available from the entire range of machines.<br />
When making substitutions the following must be borne in mind. The two digit selection system<br />
on the Geneva places a limitation on the menu that can be offered. A beverage that has<br />
optional milk, extra milk, sugar and extra sugar requires nine codes to fully define it. The code<br />
system does not include zero so a total of 81 codes are available. Obviously, if nine codes<br />
were allocated to each selection, the machine would only be able to support nine menu items,<br />
this would not be sufficient for most applications. The Geneva’s program allows a maximum of<br />
twenty menu items. Different numbers of codes are allocated to each of the twenty available<br />
slots in the menu. For the purposes of identification within the edit drinks submenu each slot is<br />
given a number between one and twenty. The following table shows the range of codes and<br />
their functions available for use on each menu slot.<br />
DRINK<br />
NUMBER<br />
CODE<br />
RANGE<br />
CONTROLS<br />
1 11-19 Milk and Sugar Options<br />
2 21-29 Milk and Sugar Options<br />
3 31-39 Milk and Sugar Options<br />
4 41-49 Milk and Sugar Options<br />
5 51-59 Milk and Sugar Options<br />
6 61-62 Sugar Option<br />
75 06/08/2008 Issue 3 <strong>GENEVA</strong>
COFFEtek Ltd<br />
7 63-64 Sugar Option<br />
8 65-66 Sugar Option<br />
9 67-68 Sugar Option<br />
10 71 No Options<br />
11 72 No Options<br />
12 81 No Options<br />
13 82 No Options<br />
14 83 & 89 Both codes give the same drink.<br />
15-20 91 to 96 One code per drink number. No Options<br />
TABLE 3.7 RELATIONSHIP BETWEEN DRINK NUMBERS AND CODE RANGES<br />
When making menu substitutions care must be taken to ensure that the drink is substituted<br />
into a menu slots with sufficient codes to support its options. For example substitution of the<br />
whipped coffee drink into menu slot fourteen would result in only the black and with sugar<br />
versions of the drink being available. Likewise, whilst possible, it would be a waste of codes to<br />
substitute the drink which did not require options into one of the first five menu slots.<br />
(1) On the entering the EDIT DRINK MAP submenu the LCD screen will show the<br />
following:<br />
DRINK NUMBER 1:<br />
COFFEE<br />
(2) The ↓, ↑keys may be used to navigate to the drink number the entry of which is to be<br />
changed. Once the desired drink number is displayed pressing ENTER again will<br />
cause the display to change to one of the following form.<br />
COFFEE<br />
↓↑ ENTER OR ESC<br />
(3) This display shows which drink will be substituted into the chosen menu slot.<br />
The ↓, ↑keys may be used to scroll through a list of possible substitutions. Additional<br />
information about each selection may be obtained by pressing the → key.<br />
For example a given machine may have two selections both named coffee available.<br />
Pressing the → key will display the information necessary to distinguish between the<br />
two.<br />
(4) When all substitutions have been made press ENTER. The LCD display will change<br />
to one of the following form :<br />
COMMIT CHANGES<br />
ENTER=YES ESC=NO<br />
(5) To accept the changes press ENTER. An automatic initialization will then take place<br />
to install the new menu. To discard any changes press ESCAPE.<br />
<strong>GENEVA</strong> Issue 3 06/08/2008 76
COFFEtek Ltd<br />
Card Actions<br />
37. CARD ACTIONS provides access to a number of submenus, which relate to the operation<br />
of the Geneva ranges optional smart card interface. The smart card interface provides the<br />
capability for both audit and engineering configuration activities. In the event that the reader<br />
is not fitted or an unreadable card is placed in the reader any attempt to enter this menu will<br />
result in the message INSERT CARD being displayed. Pressing ESC will return to the main<br />
menu. There are two types of card; one type is programmed to hold machine configuration<br />
data and the other audit information. The cards are identical; the choice of functionality is<br />
made by means of formatting. This must be carried out on a machine before a card can be<br />
used. The submenus of CARD ACTIVITIES depend on the type of card inserted and its<br />
contents as follows:<br />
(a)<br />
FORMAT CARD<br />
Smart cards can be formatted for use as either an audit card or a preset (engineering<br />
function) card. A card formatted using the MAKE AUDIT CARD function can only be<br />
used to hold audit data and likewise a card formatted using the MAKE PRESET CARD<br />
can only be used to hold data files as described in sections below.<br />
Cards formatted as engineering/configuration cards may hold one file of each of the<br />
following types:<br />
MACHINE<br />
CONFIG<br />
PRICE<br />
EVENTS<br />
STRINGS<br />
A file containing all of the data necessary to create an exact copy of<br />
a machine set up, i.e. to effectively allow a machine to be ‘cloned’.<br />
This includes drink parameters, general setting, serial number,<br />
counters and timed events and prices.<br />
A file containing all of the data necessary to create a copy of<br />
machine’s operational parameters. This includes only the drink<br />
parameters and general setting.<br />
A file containing the drink details.<br />
A file containing all programmed timed events.<br />
A file containing all the editable text messages.<br />
Cards formatted as AUDIT cards may only hold audit data. Audit data will be written to<br />
the card when it is inserted into the reader if the METHOD OF AUDIT in the EVA DTS<br />
CONFIG menu has been set to CARD.<br />
(b) LOAD, SAVE & DELETE where is MACHINE,CONFIG,PRICE<br />
or EVENTS<br />
If a card contains a data file of a given type a LOAD & DELETE menu for that file type<br />
will be available. If it does not then a SAVE menu to allow its creation will be available.<br />
The machine should be switched off and on after loading files.<br />
Cup Config<br />
38. The CUP CONFIG menu allows the carousel from which the cup associated with a<br />
particular selection is dispensed. Its submenus are only available if the carousel type has<br />
been set to two types in the Carousel Config submenu of the Configure M/C menu.<br />
If the carousel type is set to two sizes the larger cups are assumed to come from carousel 2,<br />
see Fig 3.1 Paragraph 29(f).<br />
77 06/08/2008 Issue 3 <strong>GENEVA</strong>
COFFEtek Ltd<br />
Configure Slave<br />
39. The CONFIGURE SLAVE menu is used to set up a Coffetek Water or Soup Slave. It has<br />
the following submenus:<br />
• INITIALISE SLAVE<br />
• SYNC WITH SLAVE<br />
• SLAVE STATISTICS<br />
• ELIMINATE SLAVE<br />
• GRAM THROW RATES<br />
• PRODUCT NAME<br />
The operation of the slave units is outside the scope of this manual. However the procedure is<br />
typically as follows: Firstly INITIALISE the slave unit. Preferably using the slave units own<br />
engineer’s program. Secondly perform a SYNC with slave activity. Then invoke the other<br />
functions if needed. If either SYNC or INITIALISATION fails then the ELIMINATE SLAVE<br />
function should be used before retrying.<br />
Economy Mode<br />
40. The ECONOMY MODE menu provides access to a number of facilities related to the<br />
configuration of the Nexus range's power saving options. The overall operation of<br />
ECONOMY MODE is governed by the economy periods set in TIMED ACTIVITIES; unless<br />
an economy period is active, no settings made in this menu will have any effect.<br />
The settings and submenus in ECONOMY MODE are as follows:<br />
• DISABLE KBD O/R<br />
• ENABLE PIR O/R<br />
• ADVANCED MODE<br />
(a)<br />
DISABLE KBD O/R<br />
The default method of overriding economy mode and heating the tank is with a key<br />
press. If a PIR activity sensor is fitted, then it may be desired to disable this means of<br />
override.<br />
(b)<br />
ENABLE PIR O/R<br />
PIR override is disabled by default, as a PIR sensor is not fitted as standard.<br />
(c)<br />
ADVANCED MODE<br />
Advanced economy mode allows for a greater level of control with regard to when<br />
economy mode is active. Enabling economy mode in TIMED ACTIVITIES sets the mode<br />
active for the entire duration of the economy period. Advanced mode allows this to be<br />
refined into 15 minute blocks. The machine can also be instructed to 'learn' when the<br />
machine is heavily used, and to auto-configure the 15 minute periods to either full power<br />
or economy as appropriate. Within the ADVANCED MODE submenu there are the<br />
following options:<br />
1. ADV MODE ENABLE<br />
Activates/Deactivates advanced mode. The remaining options in this menu are<br />
unavailable while advanced mode is inactive.<br />
<strong>GENEVA</strong> Issue 3 06/08/2008 78
2. SET LEARN MODE<br />
COFFEtek Ltd<br />
Configures the machine to 'learn' when the machine is used, and set up advanced mode<br />
accordingly. This is achieved by counting the number of vends taken in each 15 minute<br />
period, and, if they exceed a given threshold figure, setting the override ON for that<br />
period. This process can take place over a period of up to three weeks, with the result<br />
(ON/OFF) from previous week(s) being factored in, depending on the settings made in<br />
the following process:<br />
- If a learning process is already in progress, this will have to be cancelled<br />
before a new one can be set up.<br />
- SET NO OF WEEKS - select a learning process of 1, 2 or 3 week duration.<br />
- -If 2 or 3 weeks selected, a WEEK 2 WEIGHTING will be required. This is a<br />
percentage figure, determining how much importance is given to the existing<br />
setting (i.e. the week 1 result; override ON or OFF) of the current 15 minute<br />
period. This can be a value of 10%, 20%, 25%, 33% or 50%.<br />
- If 3 weeks selected, a WEEK 3 INCREMENT will be required. This is a<br />
modifier applied to the WEEK 2 WEIGHTING to (optionally) increase the<br />
influence of the previous 2 week's results in the final result. This can be an<br />
add-on value of +10% or +20%, no increment, or a multiplication factor of<br />
1.25, 1.5 or 2.0. For example, if the week 2 weighting was 10%, and a<br />
multiplication factor of 1.5 was applied, then the result after weeks 1 & 2 of<br />
the process would be given a weighting of 15% of the final determination of<br />
the setting.<br />
- Finally, a THRESHOLD figure needs to be set. This is the number of vends<br />
required in a 15 minute period for an override to be set.<br />
Once all settings have been entered, learning mode will be activated. It will cease after<br />
the given number of weeks have elapsed, and from then on the override settings will not<br />
be automatically modified.<br />
3. END LEARN MODE<br />
This allows the learning process to be terminated early. No changes made to the<br />
overrides whilst learning was active will be reversed, but no further changes will be<br />
made.<br />
4. MANUAL CONFIG<br />
Allows manual editing of the advanced mode override periods, with each day presented<br />
in 6 4 hour blocks of 16 15 minute periods. Each period is represented as a value of 0<br />
(Off) or 1 (On). For example, the override setting for 15.45-15.59 on a Saturday would<br />
be represented by the right-most value in the block labelled SAT 1200-1559.<br />
Periods which are marked with a '-', rather than a 0 or 1 are those in which economy<br />
mode (as a timed activity) is not active, so editing these settings would have no effect.<br />
Note that any manual changes made while the learning mode process is active will be<br />
subject to modification by the learning algorithm.<br />
5. CLEAR OVERRIDES<br />
This resets all advanced mode override periods to zero, effectively making advanced<br />
mode behave identically to the basic economy timed event. Note that it does not turn off<br />
advanced mode, neither does it cancel learning mode.<br />
79 06/08/2008 Issue 3 <strong>GENEVA</strong>
COFFEtek Ltd<br />
(d)<br />
ECONOMY DELAY<br />
This configures the time, in minutes, for which the machine should maintain full<br />
temperature following an override.<br />
(e)<br />
PIR SENSITIVITY<br />
Sets how much activity detected by the PIR is required to trigger an override. When set<br />
to ANY PIR ACTIVITY, a single read of activity is sufficient to trigger an override. When<br />
set to any other value (1-16), a store is maintained of the most recent 16 reads of PIR<br />
status. Only when sufficient of them have shown activity will the override state be<br />
activated.<br />
Depressurise Coffee Brewer<br />
41. This feature allows an engineer to depressurise a pressurised coffee brewer during<br />
testing/usage, by pressing ENTER on this section in the machines menu it allows air to be<br />
slowly released from the brewer preventing it from spraying hot liquid over the machine.<br />
<strong>GENEVA</strong> Issue 3 06/08/2008 80
COFFEtek Ltd<br />
This page is intentionally blank.<br />
81 06/08/2008 Issue 3 <strong>GENEVA</strong>
COFFEtek Ltd<br />
INTRODUCTION<br />
Section 4<br />
Installation & Commissioning<br />
1. The information given in this Section covers installation, commissioning and maintenance<br />
procedures for the Geneva Beverage Machine. Authorised personnel, who are fully<br />
conversant with the equipment, using only the manufacturer’s approved parts, must carry<br />
out these procedures.<br />
2. Servicing personnel must be familiar with the SAFETY WARNINGS listed on page 83<br />
before undertaking any installation, commissioning or maintenance procedure on the<br />
beverage machine. Any procedure, which is found to be impracticable, inadequate or<br />
inaccurate, should be reported to the Management for further investigation.<br />
3. The requirements of proper hygiene in respect of food products must be ensured at every<br />
level of contact with the beverage machine and the ingredients associated with it.<br />
<strong>GENEVA</strong> Issue 3 06/08/2008 82
COFFEtek Ltd<br />
SAFETY WARNINGS<br />
1. Maintenance of the beverage machine is only to be undertaken by trained personnel who<br />
are fully aware of the dangers involved and who have taken adequate precautions, e.g.<br />
ensuring that, whenever possible, the beverage machine is isolated from the mains<br />
electrical supply.<br />
2. Lethal voltages are exposed when any panel inside the cabinet is removed and the mains<br />
electrical supply is available (i.e. on/off switch is overridden). The mains electrical supply is<br />
maintained to the Carbonator even when the door is open.<br />
3. The beverage machine must be earthed.<br />
4. Keep clear of the Brewer Unit when it is indexing.<br />
5. The beverage machine is a heavy item. Ensure that sufficient personnel are available for<br />
lifting and transporting the machine. Use proper lifting procedures and equipment.<br />
6. The water in the heater tank, and the tank itself, are hot enough to scald or burn, even<br />
some time after the machine has been switched off. The water heater tank must be drained,<br />
filled with cold water and drained again before any attempt is made to handle it or any of its<br />
associated parts.<br />
7. The Controller Board is fitted with a lithium battery. Abuse of this type of battery can lead to<br />
overheating, venting, explosion, release of potentially hazardous materials and<br />
spontaneous ignition.<br />
8. The lithium battery must not be charged or connected to any other source of power.<br />
The battery must not be short-circuited or forced to discharge its stored energy. The battery<br />
must not be subjected to physical damage or overheating. If the Controller Board is to be<br />
replaced, it must be handled with care, taking all practical anti-static precautions.<br />
CAUTION HOT WATER<br />
THE WATER AVAILABLE FROM THE OPTION SHOWER HEAD CLEANING ATTACHMENT IS<br />
HOT ENOUGH TO SCALD OR BURN. APPROPRIATE CARE MUST BE TAKEN WHEN USING<br />
THIS ATTACHMENT.<br />
NOTE: INITIALLY THE WATER FLOWING FROM THE ATTACHMENT WILL BE COOL, BUT<br />
WILL RAPIDLY BECOME EXTREMELY HOT.<br />
83 06/08/2008 Issue 3 <strong>GENEVA</strong>
COFFEtek Ltd<br />
SERVICES REQUIRED, WEIGHT AND DIMENSIONS<br />
4.<br />
(a) Electrical Supply: 240V, 50Hz, 13A fused.<br />
(b) Water Supply: 15mm BSP stopcock - 1 bar min, 8 bar max.<br />
A double check valve MUST be fitted and for Hot and Cold Still<br />
<strong>Machines</strong> a 35psi regulator must be fitted.<br />
INSTALLATION<br />
WARNINGS<br />
(1) THE BEVERAGE MACHINE IS A HEAVY ITEM. ENSURE THAT SUFFICIENT<br />
PERSONNEL ARE AVAILABLE FOR LIFTING AND TRANSPORTING THE MACHINE.<br />
USE PROPER LIFTING PROCEDURES AND EQUIPMENT.<br />
(2) ENSURE THAT THE MAINS ELECTRICAL SUPPLY IS ISOLATED BEFORE<br />
CONNECTING THE ELECTRICAL SUPPLY CABLE TO THE MACHINE.<br />
(3) ENSURE THAT THE MAINS WATER SUPPLY IS ISOLATED BEFORE CONNECTING THE<br />
WATER SUPPLY HOSE TO THE MACHINE.<br />
(4) THE BEVERAGE MACHINE MUST BE EARTHED.<br />
(5) DO NOT EARTH THE BEVERAGE MACHINE TO THE MAINS WATER SUPPLY PIPE.<br />
Location<br />
5. Locate the beverage machine close to the appropriate electrical and water services, with a<br />
minimum of 100mm (4in) clearance between the rear of the cabinet and the wall to allow<br />
adequate ventilation. If situating in a corner location, do not install closer to the right hand<br />
wall less than 400mm (16in) to accommodate opening of the door.<br />
Levelling<br />
6. The machine should be levelled both fore and aft and side-to-side by adjustment of the four<br />
levelling feet, using a spirit level on the cabinet floor to check for level. Incorrect levelling of<br />
the machine can result in cup drop failures, door misalignment and Coin Mechanism<br />
malfunctions.<br />
<strong>GENEVA</strong> Issue 3 06/08/2008 84
COFFEtek Ltd<br />
CONNECTING THE WATER SERVICES<br />
7. The water supply should be taken from a 15mm rising main at a pressure of between 1 to 8<br />
bar and should be fitted with a stopcock to isolate the supply during servicing. A double<br />
check valve must be fitted to the machine and when installing a Hot/Cold still machine, a<br />
water pressure regulator set at 35psi should be fitted.<br />
8. The outlet should be fitted with BSP connections and must be positioned within 1.5m of the<br />
machine to ensure correct fitting of the hose. If possible, the outlet should be located behind<br />
the machine to prevent misuse.<br />
9. Before connecting the machine hose to the mains outlet, flush the system via the stopcock<br />
to remove any impurities, which may have accumulated in the mains supply pipe.<br />
10. Connect the machine hose to the mains outlet using the seals supplied and ensure that all<br />
fittings are tight. Turn on the water supply at the stopcock and check for leaks, both behind<br />
and inside the machine.<br />
CONNECTING THE ELECTRICAL SERVICES<br />
11. The beverage machine mains cable is fitted with a moulded 13A fused plug and is<br />
connected:<br />
• GREEN and YELLOW wire to the EARTH terminal (E)<br />
• BLUE wire to the NEUTRAL terminal (N)<br />
• BROWN wire to the LIVE terminal (L)<br />
12. Connect the mains cable plug to a switched 240V, 50Hz, 13A supply socket. Preferably, the<br />
switched outlet should be located behind the machine to prevent accidental damage or<br />
misuse. With the plug fitted to the socket, ensure that the cable is not being stretched,<br />
distorted or fouled.<br />
85 06/08/2008 Issue 3 <strong>GENEVA</strong>
COFFEtek Ltd<br />
COMMISSIONING<br />
WARNINGS<br />
(1) LETHAL VOLTAGES ARE EXPOSED WHEN ANY PANEL INSIDE THE CABINET IS<br />
REMOVED AND MAINS ELECTRICAL SUPPLY IS AVAILABLE (I.E. ON/OFF SWITCH IS<br />
SWITCHED ON).<br />
(2) MAINS ELECTRICAL SUPPLY IS MAINTAINED TO THE CARBONATOR EVEN WHEN<br />
THE DOOR IS OPEN.<br />
(3) THE WATER IN THE WATER HEATER IS HOT. AVOID CONTACT WITH WATER<br />
LEAKING FROM THE HEATER OR FROM ITS ASSOCIATED VALVES, TUBES AND<br />
PIPES.<br />
(4) KEEP CLEAR OF THE BREWER UNIT WHEN IT IS INDEXING.<br />
13. It is essential that the Service Engineer responsible for installing and commissioning the<br />
machine ensures that:<br />
(1) all electrical and water supplies are correctly and safely connected;<br />
(2) all covers, panels or access doors are in place and secured, and the machine is left in<br />
a SAFE condition;<br />
(3) the Operator is familiar with the SAFETY PRECAUTIONS for the machine.<br />
(4) the importance of hygiene and regular cleaning is fully appreciated by the Operator.<br />
14. With the water and electrical supplies available to the machine, check the operation of the<br />
water heater as follows:<br />
(1) Isolate the mains electrical supply from the machine.<br />
(2) Open the cabinet door and check that the on/off switch is in the OFF position.<br />
(3) Remove the ingredient canisters and back panels.<br />
(4) Ensure that the water heater overflow pipe is not trapped.<br />
(5) Restore the electrical supply to the machine.<br />
(6) Using the main switch, set to the ON position.<br />
(7) Check that the water heater fills with water and that the water supply cuts off when<br />
the correct level is reached, i.e. no water overflows into the waste bucket. Ensure that<br />
the waste level probe is located in the waste bucket.<br />
(8) Set the main switch to the OFF position.<br />
<strong>GENEVA</strong> Issue 3 06/08/2008 86
COFFEtek Ltd<br />
WARNING<br />
LETHAL VOLTAGES ARE EXPOSED WHEN ANY PANEL INSIDE THE CABINET IS<br />
REMOVED AND MAINS ELECTRICAL SUPPLY IS AVAILABLE (I.E. ON/OFF SWITCH IS<br />
SWITCHED ON).<br />
15. Prepare the Carbonator for use as follows:<br />
(1) Isolate the mains electrical supply from the machine.<br />
(2) Remove the front and top covers from the Carbonator, fit the small waste bucket in<br />
position in the cabinet and place the Carbonator overflow pipe in the bucket.<br />
(3) Slowly fill the Carbonator water reservoir with cold water up to the overflow level.<br />
(4) Purge the Carbonator of air by opening the shut-off valve for approximately 5<br />
seconds.<br />
(5) Using the seals provided, connect the regulator to the CO 2 gas cylinder and check<br />
that the CO 2 gas pressure is set at 50psi. Secure the cylinder in place in the cabinet.<br />
(6) Turn on the CO 2 gas supply and purge the Carbonator by gently lifting the pressure<br />
relief valve for approximately 10 seconds.<br />
(7) Place the waste level probe in the waste bucket and refit the front and top covers to<br />
the Carbonator.<br />
(8) Restore the mains electrical supply to the machine.<br />
(9) Place the syrup container in the cabinet and insert the stainless steel dip tubes into<br />
the container.<br />
87 06/08/2008 Issue 3 <strong>GENEVA</strong>
COFFEtek Ltd<br />
Section 5<br />
Setting up a New or Replacement<br />
Control Board<br />
WARNING<br />
THE 54955 FMCU CONTROL BOARD USED IN THE <strong>GENEVA</strong> VENDING MACHINE UTILISES<br />
STATIC SENSITIVE COMPONENTS. PRECAUTIONS FOR HANDLING STATIC SENSITIVE<br />
DEVICES SHOULD BE OBSERVED WHEN HANDLING THIS ITEM.<br />
1. The Geneva control board is programmable on two levels. At the lowest level the board’s<br />
flash memory (firmware) can be reprogrammed to enable a wide range of different<br />
machines to be controlled. This level of programming requires a PC and special interface<br />
equipment and is essentially a factory / main base activity. The firmware programmed into a<br />
board can be read from the label fitted to the component side of the board or, if placed in a<br />
functioning machine using the Machine Status menu, ref section 3 paragraph 26.<br />
2. For very early Geneva machines the software version will typically be of the form<br />
C_FRESH_XX. Where C_FRESH_ denotes the program and XX is a number defining the<br />
version. Later versions will have software of the form Wittern.XXX or Geneva.XXX New<br />
versions will be generated to support customer specific configurations and behaviours. It is<br />
therefore important to check that the firmware programmed into a board is appropriate<br />
to the machine to which it is to be fitted, as older versions may not support a particular<br />
machine type.<br />
3. The second level of programming involves setting up the board to operate the correct<br />
predefined menu configuration for the machine to which it is fitted. This section details the<br />
procedure to be to achieve this.<br />
(1) Switch off the machine.<br />
(2) Fit the new board and plug in the all connectors. It is not possible to put connectors in<br />
incorrectly as the plug sizes prevent this.<br />
(3) Fit the shorting link between the pins CLK BAT to enable the battery support for the<br />
clock.<br />
(4) Fit a shorting link between the pins labelled ENG LINK.<br />
(5) Turn on the power.<br />
(6) The display will change to INGREDIENT TIMES.<br />
(7) Select the Appropriate configuration from within the SET MACHINE TYPE sub menu<br />
of the CONFIGURE menu using the procedures described in section 3.<br />
(8) Remove the shorting link from the ENG LINK pins.<br />
(9) Switch the machine off and on.<br />
<strong>GENEVA</strong> Issue 3 06/08/2008 88
COFFEtek Ltd<br />
(10) Re-enter programming mode using the default code (4444).<br />
(11) Enable the MDB protocol if a coin / card system is fitted.<br />
(12) Set up the Operator and Manager level codes if different from the default.<br />
(13) Finally adjust the drink settings as required and test each selection.<br />
89 06/08/2008 Issue 3 <strong>GENEVA</strong>
COFFEtek Ltd<br />
Section 6<br />
Exploded Parts Diagrams<br />
<strong>GENEVA</strong> Issue 3 06/08/2008 90
...\89607_inst_cold\89607.dgn 23/08/2007 16:38:13
...\89585_instant_hot\89585_2.dgn 23/07/2008 09:49:12
...\89608_sfbt_cold\89608_2.dgn 22/07/2008 16:35:12
...\89586_sfbt_hot\89586_2.dgn 22/07/2008 12:55:40
...\geneva2\89587_sfbc\89587_2.dgn 22/07/2008 15:48:32
...\geneva2\89587_sfbc\89587_2.dgn 22/07/2008 15:45:00
...\89606_dfb_cold\89606_2.dgn 23/07/2008 08:45:07
...\89606_dfb_cold\89606_2.dgn 23/07/2008 08:44:24
...\89566_dfb_hot\89566.dgn 24/08/2007 13:51:11
...\89566_dfb_hot\89566.dgn 24/08/2007 13:51:56
...\geneva2\89706_btoc\89706.dgn 18/07/2008 08:16:44
...\geneva2\89706_btoc\89706.dgn 17/07/2008 16:58:34
...\geneva2\89706_btoc\89706.dgn 17/07/2008 16:57:23
...\geneva2\89706_btoc\89706.dgn 17/07/2008 16:54:47