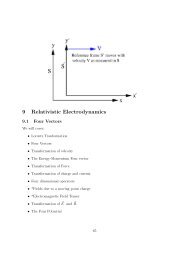
1 Introduction 2 The Haynes-Shockley Experiment
1 Introduction 2 The Haynes-Shockley Experiment
1 Introduction 2 The Haynes-Shockley Experiment

You also want an ePaper? Increase the reach of your titles
YUMPU automatically turns print PDFs into web optimized ePapers that Google loves.
( ) I01<br />
A 0 = log . (44)<br />
I 02<br />
<strong>The</strong>n, from expressions (41) and (43),<br />
α = 2.3 (A − A 0)<br />
(d 2 − d 1 ) . (45)<br />
- really need the schematic/principles of operation, because I think the taking of the baseline measurement<br />
involves the calculation and removal of I 01<br />
I 02<br />
in software, so that the quoted A is the (A − A 0 )<br />
from the original notes... Have just transcribed them for now, until I can get hold of a proper manual<br />
for the machine.<br />
- don’t forget to talk about what an absorption edge actually *is*!!<br />
theory theory theory... all the stuff about the differnet thicknesses and linking A to alpha<br />
- yes, you do have to do different thicknesses because you have to be able to cancel off<br />
the reflection term from the simplified T equation!<br />
3.4 Taking Spectra<br />
For this experiment you will be using the Varian 2215 UV-Vis Spectrophotometer. <strong>The</strong>re are two main<br />
modes - an automatic mode, which will allow you to take spectra relatively quickly, and a manual<br />
mode, for when you want to take high resolution measurements.<br />
You will need to turn on the machine 5 to 10 minutes before you begin taking spectra. <strong>The</strong> switch is on<br />
the front left-hand side, next to the chart recorder. <strong>The</strong> spectrophotometer will run through a series<br />
of self-tests before the default screen (showing the instrument settings and the current absorbance<br />
measurement) appears.<br />
3.4.1 Buttons Beneath the Screen!<br />
Menus are accessed via a series of buttons (eg Instrument Settings). Once you’re in a menu, you can<br />
change particular settings by pressing the number for that item on the menu (eg on the Instrument<br />
Settings screen, press 4 to change the chart resolution) and then pressing Enter.<br />
Most of the menus won’t concern you, but you should find the following basic controls (starting top<br />
left of console):<br />
1. RAPID: ABSORBANCE vs WAVELENGTH<br />
2. ADVANCED: INSTRUMENT SETTINGS<br />
3. ENTER (bottom left of the numbers)<br />
4. START, STOP (under the numbers)<br />
5. BASELINE SETUP<br />
6. GO TO WAVELENGTH<br />
7. AUTOMATIC BALANCE<br />
10