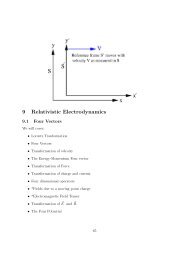
1 Introduction 2 The Haynes-Shockley Experiment
1 Introduction 2 The Haynes-Shockley Experiment
1 Introduction 2 The Haynes-Shockley Experiment

You also want an ePaper? Increase the reach of your titles
YUMPU automatically turns print PDFs into web optimized ePapers that Google loves.
1. Press “INTRUMENT SETTINGS” and adjust the scan rate and chart resolution as required.<br />
You may also wish to change to pen range, depending on your sample.<br />
2. Press “GO TO WAVELENGTH”, and enter the upper wavelength of your chosen range.<br />
3. Remove the sample from the beam path.<br />
4. Press “BASELINE SETUP” and “START”. <strong>The</strong> spectrophotometer will keep scanning until<br />
you press “STOP”, so keep an eye on the wavelength and stop the baseline measurement at (or<br />
slightly below) the lower end of your chosen range.<br />
5. Place the sample in the beam path. Press “GO TO WAVELENGTH” to go to a wavelength far<br />
from the absorption edge, and then “AUTOMATIC BALANCE” to zero the detector.<br />
6. Press “GO TO WAVELENGTH” and enter the upper wavelength of your chosen range.<br />
7. Press “START” to begin the scan. You can press “STOP” periodically to allow you to take<br />
down the value of the absorbance for a series of wavelengths. Press “STOP” to finish the scan<br />
once you reach the end of your chosen wavelength range.<br />
3.5 Determination of Absorption Coefficient and Band Gap - Procedure<br />
Before you begin, you should be aware of the fact that you will be taking lots of scans in the course of<br />
this experiment. You will end up with a long roll of paper with lots and lots of curvy lines on it. You<br />
should take care to label these carefully. Do this by actually writing things onto the chart paper<br />
next to the scan. You will need to take note of things like<br />
- what sample this spectrum is for<br />
- what the starting wavelength was<br />
- what the final wavelength was (It’s a good idea to write these near the start and end of the scan<br />
itself (as if on the scan’s independent axis), so that you know which direction the scan was made<br />
in.)<br />
- what the chart resolution was<br />
- the cause of any discontinuities in the spectrum (e.g. changes in lamp/filter or pen range).<br />
Provided you know the resolution, you should be able to read absorbances straight off the charts, but<br />
it is a good idea to write down a few pairs of (wavelength, absorbance) data so that you don’t have<br />
to rely on whether the chart paper’s zero exactly matches the detector’s zero. You should be able to<br />
press “STOP” and “START” during the scan, so taking this sort of backup data should be easy.<br />
(d) Measure α as a function of λ for MgO, ZnSe, glass, quartz and sapphire crystals using a 20 nm/cm<br />
scale. Use the instructions in section 3.4.3 above for this low resolution scan.<br />
(e) Comment on the usefulness of these materials as windows or as protective screens for radiation.<br />
Explain what limits the window width at the lower and upper ends of the transparency range,<br />
and thus explain the difference in the absorption characteristics of the materials tested.<br />
(f) Plot the absorption edge for MgO, ZnSe and glass using a higher resolution (i.e. a 1 nm/cm<br />
scale. Use the instructions in section 3.4.4 above for these scans.<br />
12