Welcome to the SRX-98 “Analog Essentials” Special SRX ... - Roland
Welcome to the SRX-98 “Analog Essentials” Special SRX ... - Roland
Welcome to the SRX-98 “Analog Essentials” Special SRX ... - Roland
You also want an ePaper? Increase the reach of your titles
YUMPU automatically turns print PDFs into web optimized ePapers that Google loves.
201a<br />
Before using this unit, carefully read <strong>the</strong> sections entitled: “USING THE UNIT<br />
SAFELY” and “IMPORTANT NOTES” (p. 2; p. 3). These sections provide<br />
important information concerning <strong>the</strong> proper operation of <strong>the</strong> unit. Additionally,<br />
in order <strong>to</strong> feel assured that you have gained a good grasp of every feature<br />
provided by your new unit, Owner’s Manual should be read in its entirety. The<br />
manual should be saved and kept on hand as a convenient reference.<br />
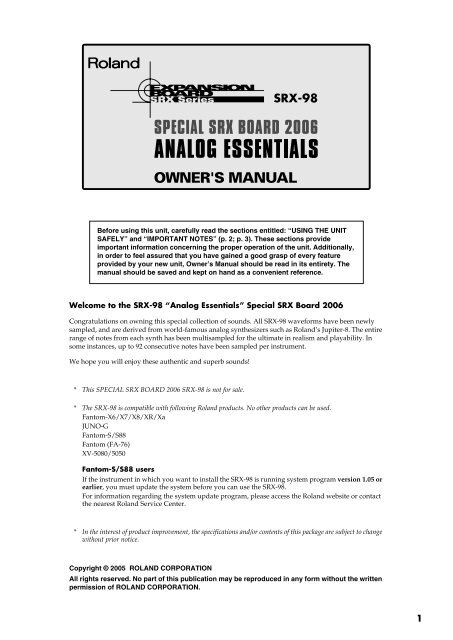
<strong>Welcome</strong> <strong>to</strong> <strong>the</strong> <strong>SRX</strong>-<strong>98</strong> <strong>“Analog</strong> <strong>Essentials”</strong> <strong>Special</strong> <strong>SRX</strong> Board 2006<br />
Congratulations on owning this special collection of sounds. All <strong>SRX</strong>-<strong>98</strong> waveforms have been newly<br />
sampled, and are derived from world-famous analog syn<strong>the</strong>sizers such as <strong>Roland</strong>’s Jupiter-8. The entire<br />
range of notes from each synth has been multisampled for <strong>the</strong> ultimate in realism and playability. In<br />
some instances, up <strong>to</strong> 92 consecutive notes have been sampled per instrument.<br />
We hope you will enjoy <strong>the</strong>se au<strong>the</strong>ntic and superb sounds!<br />
* This SPECIAL <strong>SRX</strong> BOARD 2006 <strong>SRX</strong>-<strong>98</strong> is not for sale.<br />
* The <strong>SRX</strong>-<strong>98</strong> is compatible with following <strong>Roland</strong> products. No o<strong>the</strong>r products can be used.<br />
Fan<strong>to</strong>m-X6/X7/X8/XR/Xa<br />
JUNO-G<br />
Fan<strong>to</strong>m-S/S88<br />
Fan<strong>to</strong>m (FA-76)<br />
XV-5080/5050<br />
Fan<strong>to</strong>m-S/S88 users<br />
If <strong>the</strong> instrument in which you want <strong>to</strong> install <strong>the</strong> <strong>SRX</strong>-<strong>98</strong> is running system program version 1.05 or<br />
earlier, you must update <strong>the</strong> system before you can use <strong>the</strong> <strong>SRX</strong>-<strong>98</strong>.<br />
For information regarding <strong>the</strong> system update program, please access <strong>the</strong> <strong>Roland</strong> website or contact<br />
<strong>the</strong> nearest <strong>Roland</strong> Service Center.<br />
962b<br />
* In <strong>the</strong> interest of product improvement, <strong>the</strong> specifications and/or contents of this package are subject <strong>to</strong> change<br />
without prior notice.<br />
202<br />
Copyright © 2005 ROLAND CORPORATION<br />
All rights reserved. No part of this publication may be reproduced in any form without <strong>the</strong> written<br />
permission of ROLAND CORPORATION.<br />
1
USING THE UNIT SAFELY<br />
Used for instructions intended <strong>to</strong> alert<br />
<strong>the</strong> user <strong>to</strong> <strong>the</strong> risk of death or severe<br />
injury should <strong>the</strong> unit be used<br />
improperly.<br />
Used for instructions intended <strong>to</strong> alert<br />
<strong>the</strong> user <strong>to</strong> <strong>the</strong> risk of injury or material<br />
damage should <strong>the</strong> unit be used<br />
improperly.<br />
* Material damage refers <strong>to</strong> damage or<br />
o<strong>the</strong>r adverse effects caused with<br />
respect <strong>to</strong> <strong>the</strong> home and all its<br />
furnishings, as well <strong>to</strong> domestic<br />
animals or pets.<br />
The symbol alerts <strong>the</strong> user <strong>to</strong> important instructions<br />
or warnings.The specific meaning of <strong>the</strong> symbol is<br />
determined by <strong>the</strong> design contained within <strong>the</strong><br />
triangle. In <strong>the</strong> case of <strong>the</strong> symbol at left, it is used for<br />
general cautions, warnings, or alerts <strong>to</strong> danger.<br />
The symbol alerts <strong>the</strong> user <strong>to</strong> items that must never<br />
be carried out (are forbidden). The specific thing that<br />
must not be done is indicated by <strong>the</strong> design contained<br />
within <strong>the</strong> circle. In <strong>the</strong> case of <strong>the</strong> symbol at left, it<br />
means that <strong>the</strong> unit must never be disassembled.<br />
The ● symbol alerts <strong>the</strong> user <strong>to</strong> things that must be<br />
carried out. The specific thing that must be done is<br />
indicated by <strong>the</strong> design contained within <strong>the</strong> circle. In<br />
<strong>the</strong> case of <strong>the</strong> symbol at left, it means that <strong>the</strong> powercord<br />
plug must be unplugged from <strong>the</strong> outlet.<br />
001<br />
• Before using this unit, make sure <strong>to</strong> read <strong>the</strong><br />
instructions below, and <strong>the</strong> Owner’s Manual.<br />
..........................................................................................................<br />
002a<br />
• Do not open or perform any internal modifications<br />
on <strong>the</strong> unit.<br />
..........................................................................................................<br />
003<br />
• Do not attempt <strong>to</strong> repair <strong>the</strong> unit, or replace parts<br />
within it (except when this manual provides<br />
specific instructions directing you <strong>to</strong> do so). Refer<br />
all servicing <strong>to</strong> your retailer, <strong>the</strong> nearest <strong>Roland</strong><br />
Service Center, or an authorized <strong>Roland</strong><br />
distribu<strong>to</strong>r.<br />
..........................................................................................................<br />
004<br />
• Never use or s<strong>to</strong>re <strong>the</strong> unit in places that are:<br />
• Subject <strong>to</strong> temperature extremes (e.g., direct<br />
sunlight in an enclosed vehicle, near a heating<br />
duct, on <strong>to</strong>p of heat-generating equipment); or<br />
are<br />
• Damp (e.g., baths, washrooms, on wet floors);<br />
or are<br />
• Humid; or are<br />
• Exposed <strong>to</strong> rain; or are<br />
• Dusty; or are<br />
• Subject <strong>to</strong> high levels of vibration.<br />
..........................................................................................................<br />
011<br />
• Do not allow any objects (e.g., flammable<br />
material, coins, pins); or liquids of any kind<br />
(water, soft drinks, etc.) <strong>to</strong> penetrate <strong>the</strong> unit.<br />
013<br />
• In households with small children, an adult<br />
should provide supervision until <strong>the</strong> child is<br />
capable of following all <strong>the</strong> rules essential for <strong>the</strong><br />
safe operation of <strong>the</strong> unit.<br />
..........................................................................................................<br />
014<br />
• Protect <strong>the</strong> unit from strong impact.<br />
(Do not drop it!)<br />
..........................................................................................................<br />
022c<br />
• Before installing <strong>the</strong> <strong>SRX</strong>-<strong>98</strong>, you must first<br />
always turn off <strong>the</strong> unit (Fan<strong>to</strong>m-X6/X7/X8/XR/<br />
Xa, JUNO-G, Fan<strong>to</strong>m-S/S88, Fan<strong>to</strong>m (FA-76), and<br />
XV-5080/5050) and unplug its power cord.<br />
..........................................................................................................<br />
106<br />
• Never climb on <strong>to</strong>p of, nor place heavy objects on<br />
<strong>the</strong> unit.<br />
..........................................................................................................<br />
115b<br />
• Install <strong>the</strong> circuit board only in<strong>to</strong> <strong>the</strong> specified<br />
unit (Fan<strong>to</strong>m-X6/X7/X8/XR/Xa, JUNO-G,<br />
Fan<strong>to</strong>m-S/S88, Fan<strong>to</strong>m (FA-76), and XV-5080/<br />
5050). Remove only <strong>the</strong> specified screws during <strong>the</strong><br />
installation.<br />
..........................................................................................................<br />
118a<br />
• Should you remove screws, keep <strong>the</strong>m in a safe<br />
place out of children’s reach, so <strong>the</strong>re is no chance<br />
of <strong>the</strong>m being swallowed accidentally.<br />
..........................................................................................................<br />
..........................................................................................................<br />
This product must be disposed of separately at your local waste recycling centre.<br />
Do not dispose of in household waste bin.<br />
2
IMPORTANT NOTES<br />
When you purchase <strong>the</strong> <strong>SRX</strong>-<strong>98</strong> <strong>Special</strong> <strong>SRX</strong> Board 2006 from an<br />
authorized <strong>Roland</strong> dealer, <strong>the</strong> included sounds and samples are<br />
licensed, not sold, <strong>to</strong> you by <strong>Roland</strong> Corporation, for commercial use<br />
in music production, public performance, broadcast, etc.<br />
You may use any of <strong>the</strong> included phrases and/or samples in a<br />
commercial or non-commercial recording without paying any<br />
additional license fees. However, you must strictly adhere <strong>to</strong> <strong>the</strong><br />
following crediting guidelines on any music recording that utilize<br />
material from <strong>SRX</strong>-<strong>98</strong>.<br />
Reproduction or duplication of this collection or any of <strong>the</strong> sound<br />
recording contained in <strong>the</strong> <strong>SRX</strong>-<strong>98</strong>, ei<strong>the</strong>r as <strong>the</strong>y exist on this<br />
expansion board or by any means of reformatting, mixing, filtering,<br />
re-syn<strong>the</strong>sizing, processing, or o<strong>the</strong>rwise editing for use in ano<strong>the</strong>r<br />
product or for re-sale, is strictly prohibited without <strong>the</strong> express<br />
written consent of <strong>Roland</strong>. All unauthorized giving, trading,<br />
lending, renting, re-issue, re-distribution, or re-sale of <strong>the</strong> sounds<br />
included in <strong>the</strong> <strong>SRX</strong>-<strong>98</strong> are expressly prohibited.<br />
In Plain English: Be creative in your application of <strong>the</strong> <strong>SRX</strong>-<strong>98</strong><br />
sounds, and keep this library for your use only. DO NOT COPY IT.<br />
<strong>Roland</strong> constantly moni<strong>to</strong>rs o<strong>the</strong>r soundware releases <strong>to</strong> check for<br />
copyright infringements, and will prosecute all piracy and copyright<br />
violations <strong>to</strong> <strong>the</strong> fullest extent of <strong>the</strong> law.<br />
THIS LIBRARY IS GUARANTEED TO BE 100% COPYRIGHT<br />
CLEAN.<br />
In addition <strong>to</strong> <strong>the</strong> items listed under “USING THE UNIT<br />
SAFELY” on page 2, please read and observe <strong>the</strong> following:<br />
Handling <strong>the</strong> Board<br />
To avoid <strong>the</strong> risk of damage <strong>to</strong> internal components that can be<br />
caused by static electricity, please carefully observe <strong>the</strong> following<br />
whenever you handle <strong>the</strong> board.<br />
* Before you <strong>to</strong>uch <strong>the</strong> board, always first grasp a metal object (such as a<br />
water pipe), so you are sure that any static electricity you might have<br />
been carrying has been discharged.<br />
* When handling <strong>the</strong> board, grasp it only by its edges. Avoid <strong>to</strong>uching<br />
any of <strong>the</strong> electronic components or connec<strong>to</strong>rs.<br />
* Save <strong>the</strong> bag in which <strong>the</strong> board was originally shipped, and put <strong>the</strong><br />
board back in<strong>to</strong> it whenever you need <strong>to</strong> s<strong>to</strong>re or transport it.<br />
Veuillez suivre attentivement les instructions suivantes quand vous<br />
manipulez la carte afin d’éviter <strong>to</strong>ut risque d’endommagement des<br />
pièces internes par l’électricité statique.<br />
* Toujours <strong>to</strong>ucher un objet métallique relié à la terre (comme un tuyau<br />
par exemple) avant de manipuler la carte pour vous décharger de<br />
l’électricité statique que vous auriez pu accumuler.<br />
* Lorsque vous manipulez la carte, la tenir par les côtés. Évitez de<br />
<strong>to</strong>ucher aux composants ou aux connecteurs.<br />
* Conservez le sachet d’origine dans lequel était la carte lors de l’envoi et<br />
remettez la carte dedans si vous devez la ranger ou la transporter.<br />
INSTALLING THE WAVE EXPANSION BOARD<br />
* Turn off your instrument.<br />
1. Remove <strong>the</strong> cover located on <strong>the</strong> <strong>to</strong>p (or rear) of your<br />
instrument.<br />
* When turning <strong>the</strong> unit upside-down, get a bunch of newspapers or<br />
magazines, and place <strong>the</strong>m under <strong>the</strong> four corners or at both ends <strong>to</strong><br />
prevent damage <strong>to</strong> <strong>the</strong> but<strong>to</strong>ns and controls. Also, you should try <strong>to</strong><br />
orient <strong>the</strong> unit so no but<strong>to</strong>ns or controls get damaged.<br />
* When turning <strong>the</strong> unit upside-down, handle with care <strong>to</strong> avoid<br />
dropping it, or allowing it <strong>to</strong> fall or tip over.<br />
2. Insert <strong>the</strong> Wave Expansion Board connec<strong>to</strong>r in<strong>to</strong> a connec<strong>to</strong>r<br />
for an <strong>SRX</strong> Series slot, while simultaneously inserting <strong>the</strong><br />
board holders in<strong>to</strong> <strong>the</strong> holes in <strong>the</strong> Wave Expansion Board.<br />
* Do not <strong>to</strong>uch any of <strong>the</strong> printed circuit pathways or connection<br />
terminals.<br />
* Never use excessive force when installing a circuit board. If it doesn’t<br />
fit properly on <strong>the</strong> first attempt, remove <strong>the</strong> board and try again.<br />
3. Use <strong>the</strong> supplied Installation Tool <strong>to</strong> turn <strong>the</strong> holders in <strong>the</strong><br />
LOCK direction, so <strong>the</strong> board will be fastened in place.<br />
(To remove <strong>the</strong> Wave Expansion Board, turn <strong>the</strong> board holders<br />
in <strong>the</strong> UNLOCK direction, and lift up <strong>the</strong> board.)<br />
* When circuit board installation is complete, double-check your work.<br />
4. Using <strong>the</strong> screws removed in Step 1, refasten <strong>the</strong> cover in its<br />
original position.<br />
5. Check if <strong>the</strong> Wave Expansion Board is correctly installed.<br />
* If <strong>the</strong> “EXP” display cannot be selected (doesn’t appear) in <strong>the</strong><br />
Waveform Selection Screen (refer <strong>to</strong> <strong>the</strong> owner’s manual of <strong>the</strong><br />
instrument you use), remove <strong>the</strong> Wave Expansion Board and install it<br />
properly.<br />
* Éteindre l’instrument.<br />
1. Retirer le couvercle situé sur le dessus (ou á l’arrière) de<br />
l’instrument.<br />
2. Inserer le connecteur de la carte dans un des creneaux pour<br />
la serie <strong>SRX</strong> <strong>to</strong>ut en enfoncant les supports a carte dans les<br />
trous de celle-ci.<br />
* Ne pas <strong>to</strong>ucher aux circuits imprimés ou aux connecteurs.<br />
* Ne jamais forcer lors de l’installation de la carte de circuits imprimés.<br />
Si la carte s’ajuste mal au premier essai, enlevez la carte et<br />
recommencez l’installation.<br />
3. Utiliser l’outil d’installation fourni pour <strong>to</strong>urner les clips de<br />
retenue vers la position de blocage (LOCK) de façon á ce que<br />
la carte soit retenue en place.<br />
(Pour retirer la carte d’expansion Wave, <strong>to</strong>urner les clips de<br />
retenue de la carte vers la position déblocage (UNLOCK) et<br />
retirer la carte en la soulevant.)<br />
* Quand l’installation de la carte de circuits imprimés est terminée,<br />
revérifiez si <strong>to</strong>ut est bien installé.<br />
4. Remettre la plaque a sa place et la fixer a l’aide des vis<br />
enlevees a l’etape 1.<br />
5. S’assurer que la carte d’expansion Wave est installée<br />
correctement.<br />
* S’il est impossible de sélectionner l’affichage “EXP” (il n’apparaît pas)<br />
á l’écran de sélection Waveform (se reporter au guide du propriétaire<br />
de l’instrument utilisé), retirer la carte d’expansion Wave et la<br />
réinstaller correctement.<br />
1 2 Wave Expansion Board (<strong>SRX</strong> series)<br />
Screwdriver<br />
Carte d'extension Wave (serie <strong>SRX</strong>)<br />
3<br />
Tournevis<br />
LOCK<br />
Connec<strong>to</strong>r<br />
Connecteur<br />
Board holder<br />
Support à carte<br />
Installation <strong>to</strong>ol<br />
Outil d'installation<br />
Position <strong>the</strong>m as shown before you install <strong>the</strong> board.<br />
Avant l’installation, orienter les supports à carte tel qu’indiqué sur le schéma.<br />
3
Patch List<br />
(BANK SELECT MSB:93; LSB:<strong>98</strong>)<br />
No. Name Voices Category<br />
1 [RealAnaSaw] 1 OTHER SYNTH<br />
2 [FullAnaSaw] 1 OTHER SYNTH<br />
3 [Forever] 4 SOFT PAD<br />
4 [StringsEns] 2 STRINGS<br />
5 [DryMG Lead] 2 SOFT LEAD<br />
6 [EPw/GtrAMP] 2 EL.PIANO<br />
7 [TrancySaw1] 6 OTHER SYNTH<br />
8 [Dis<strong>to</strong>rted] 4 HARD LEAD<br />
9 [Sweep Saw] 1 OTHER SYNTH<br />
10 [MG Bass 1] 1 SYNTH BASS<br />
11 [Dist Saw] 2 SYNTH BASS<br />
12 [C-Piano] 1 AC.PIANO<br />
13 [Retro Flt] 1 FLUTE<br />
14 [UnisonSaws] 4 STRINGS<br />
15 [90’s EP] 4 EL.PIANO<br />
16 [SawBrs2006] 4 SYNTH BRASS<br />
17 [LoFi Ambi] 5 SYNTH FX<br />
18 [Saw Lead] 2 HARD LEAD<br />
19 [MagicPiano] 2 SYNTH FX<br />
20 [Synth Key] 2 OTHER SYNTH<br />
21 [SquLead 06] 4 SOFT LEAD<br />
22 [Old EP] 1 EL.PIANO<br />
23 [HimalayaFl] 3 FLUTE<br />
24 [Curse] 4 SYNTH FX<br />
25 [Echo EP] 1 EL.PIANO<br />
26 [Big Sect] 7 STRINGS<br />
No. Name Voices Category<br />
27 [Flare Pad] 4 SOFT PAD<br />
28 [MG Bass 2] 1 SYNTH BASS<br />
29 [MG SawLead] 2 HARD LEAD<br />
30 [Dry Str] 5 STRINGS<br />
31 [Poly Synth] 2 OTHER SYNTH<br />
32 [Blue EP] 2 EL.PIANO<br />
33 [Reso Bass] 1 SYNTH BASS<br />
34 [DetuneBrs] 4 SYNTH BRASS<br />
35 [5th EP Pad] 4 SOFT PAD<br />
36 [SquareBass] 1 SYNTH BASS<br />
37 [Hybrid Str] 3 STRINGS<br />
38 [Old Phaser] 1 EL.PIANO<br />
39 [SuperSaw 1] 2 OTHER SYNTH<br />
40 [Pluck Clav] 2 KEYBOARDS<br />
41 [101 Bass] 1 SYNTH BASS<br />
42 [Solo Sine] 1 SOFT LEAD<br />
43 [Arie EP] 3 EL.PIANO<br />
44 [SftDist Ld] 2 SOFT LEAD<br />
45 [Tre EP] 2 EL.PIANO<br />
46 [Vinyl Str] 6 STRINGS<br />
47 [Cave 2006] 4 OTHER SYNTH<br />
48 [Motion] 5 SOFT PAD<br />
49 [JP8 Square] 4 SOFT LEAD<br />
50 [Creation] 5 SYNTH FX<br />
51 [Super-S] 5 BRIGHT PAD<br />
52 [Saw Brass] 4 SYNTH BRASS<br />
No. Name Voices Category<br />
53 [Phase EP] 1 EL.PIANO<br />
54 [Phase Bs] 2 SYNTH BASS<br />
55 [SuperSaw2] 4 OTHER SYNTH<br />
56 [TrancySaw2] 6 OTHER SYNTH<br />
57 [POP EP] 5 EL.PIANO<br />
58 [Treck Pad] 8 PULSATING<br />
59 [Dyno Str] 3 STRINGS<br />
60 [JP8 SquPad] 4 SOFT PAD<br />
61 [Phase Pad] 4 SOFT PAD<br />
62 [JP-8 Lead] 2 HARD LEAD<br />
63 [Tekno Bass] 2 SYNTH BASS<br />
64 [Magma] 4 SYNTH FX<br />
65 [Old Days] 4 SOFT PAD<br />
66 [TapeEchoEP] 1 EL.PIANO<br />
67 [FlareSweep] 4 SOFT PAD<br />
68 [Sweep Saw2] 2 OTHER SYNTH<br />
69 [Saw Stack] 3 OTHER SYNTH<br />
70 [Retro Str] 4 STRINGS<br />
71 [EP w/SP] 2 EL.PIANO<br />
72 [StrMachine] 4 STRINGS<br />
73 [Saw/SquPad] 4 SOFT PAD<br />
74 [Power Saws] 4 OTHER SYNTH<br />
75 [70’s EP] 2 EL.PIANO<br />
76 [Reso Lead] 2 SOFT LEAD<br />
77 [Phase Saws] 3 OTHER SYNTH<br />
78 [Explosion] 2 HIT&STAB<br />
When playing patches on <strong>the</strong> expansion board, we<br />
recommend that you set all <strong>the</strong> EFFECTS ON/OFF settings <strong>to</strong><br />
“ON.” If such settings are set <strong>to</strong> “OFF,” you may not obtain<br />
<strong>the</strong> intended sound.<br />
* Note that <strong>the</strong> Release Time has been set <strong>to</strong> a fairly long value for some of<br />
<strong>the</strong> patches. As a result, if your sound genera<strong>to</strong>r has been set so “Patch<br />
Remain” is “ON,” <strong>the</strong> release portion of a previously sounding patch<br />
may continue <strong>to</strong> be heard even after switching <strong>to</strong> a new patch.<br />
* Refer <strong>to</strong> <strong>the</strong> owner’s manual for your instrument for specific<br />
instructions on how <strong>to</strong> play Patches on <strong>the</strong> expansion board.<br />
Waveform List<br />
No. Name<br />
1 [Str2006A L]<br />
2 [Str2006A R]<br />
3 [Str2006B L]<br />
4 [Str2006B R]<br />
5 [Str2006C L]<br />
6 [Str2006C R]<br />
7 [SuperSawAL]<br />
8 [SuperSawAR]<br />
9 [SuperSawBL]<br />
10 [SuperSawBR]<br />
11 [SuperSawCL]<br />
12 [SuperSawCR]<br />
13 [XT Fazz A]<br />
14 [XT Fazz B]<br />
15 [XT Fazz C]<br />
16 [JP-8 Brs A]<br />
17 [JP-8 Brs B]<br />
18 [JP-8 Brs C]<br />
19 [EP MkI ppA]<br />
20 [EP MkI ppB]<br />
No. Name<br />
21 [EP MkI ppC]<br />
22 [EP MkI mpA]<br />
23 [EP MkI mpB]<br />
24 [EP MkI mpC]<br />
25 [EP MkI mfA]<br />
26 [EP MkI mfB]<br />
27 [EP MkI mfC]<br />
28 [EP MkI ffA]<br />
29 [EP MkI ffB]<br />
30 [EP MkI ffC]<br />
31 [XT EP A L]<br />
32 [XT EP A R]<br />
33 [XT EP B L]<br />
34 [XT EP B R]<br />
35 [XT EP C L]<br />
36 [XT EP C R]<br />
37 [C.Grand pA]<br />
38 [C.Grand pB]<br />
39 [C.Grand pC]<br />
40 [C.Grand fA]<br />
No. Name<br />
41 [C.Grand fB]<br />
42 [C.Grand fC]<br />
43 [SynBass1 A]<br />
44 [SynBass1 B]<br />
45 [SynBass1 C]<br />
46 [SynBass2 A]<br />
47 [SynBass2 B]<br />
48 [SynBass2 C]<br />
49 [SynBass3 A]<br />
50 [SynBass3 B]<br />
51 [SynBass3 C]<br />
52 [SynBass4 A]<br />
53 [SynBass4 B]<br />
54 [SynBass4 C]<br />
55 [101NovaBsA]<br />
56 [101NovaBsB]<br />
57 [101NovaBsC]<br />
58 [Hover Bs A]<br />
59 [Hover Bs B]<br />
60 [Hover Bs C]<br />
No. Name<br />
61 [XT Flute A]<br />
62 [XT Flute B]<br />
63 [XT Flute C]<br />
64 [EstnLead A]<br />
65 [EstnLead B]<br />
66 [EstnLead C]<br />
67 [ClickLeadA]<br />
68 [ClickLeadB]<br />
69 [ClickLeadC]<br />
70 [FlarePadAL]<br />
71 [FlarePadAR]<br />
72 [FlarePadBL]<br />
73 [FlarePadBR]<br />
74 [FlarePadCL]<br />
75 [FlarePadCR]<br />
76 [Real MGSaw]<br />
77 [TunedMGSaw]<br />
78 [XT Sine]<br />
When you create a Patch using <strong>the</strong> waveforms s<strong>to</strong>red in <strong>the</strong><br />
Expansion Board, observe <strong>the</strong> following points:<br />
* If you make a Patch with a single voice and <strong>the</strong>n later play it in a chord,<br />
<strong>the</strong> sound may be dis<strong>to</strong>rted with certain settings for <strong>the</strong> Effects and<br />
TVA. If this happens, adjust <strong>the</strong> level of <strong>the</strong> Effects and TVA.<br />
4 04128189 07-01-2N<br />
* 0 4 1 2 8 1 8 9 - 0 2 *


