Manual for hand portable Halon 1211 - Amerex Corporation
Manual for hand portable Halon 1211 - Amerex Corporation
Manual for hand portable Halon 1211 - Amerex Corporation

You also want an ePaper? Increase the reach of your titles
YUMPU automatically turns print PDFs into web optimized ePapers that Google loves.
HAND PORTABLE<br />
HALON <strong>1211</strong> FIRE EXTINGUISHERS<br />
MAINTENANCE & RECHARGE<br />
SERVICE MANUAL<br />
NO. 05604<br />
All fire extinguishers should be installed, inspected and maintained in<br />
accordance with the National Fire Protection Association standard titled<br />
"Portable Fire Extinguishers", NFPA-10 and the requirements of local<br />
authorities having jurisdiction.<br />
When maintenance is indicated, it should be per<strong>for</strong>med by trained<br />
persons having proper equipment. Fire extinguishers are pressure<br />
vessels and must be treated with respect and <strong>hand</strong>led with care. They<br />
are mechanical devices and require periodic maintenance to be sure that<br />
they are ready to operate properly and safely. <strong>Amerex</strong> strongly<br />
recommends that the maintenance of <strong>portable</strong> fire extinguishers be done<br />
by a trained professional – your local authorized <strong>Amerex</strong> Distributor.<br />
<strong>Amerex</strong> <strong>Corporation</strong> makes original factory parts available to insure<br />
proper maintenance – use of substitute parts releases <strong>Amerex</strong> of its<br />
warranty obligations. <strong>Amerex</strong> parts have machined surfaces and<br />
threads that are manufactured to exacting tolerances. O-rings, hoses,<br />
nozzles, and all metal parts meet precise specifications and are<br />
subjected to multiple in-house inspections and tests <strong>for</strong> acceptability.<br />
There are substitute parts available that are incorrectly labeled as UL<br />
component parts, some are advertised as <strong>Amerex</strong> type. None of these<br />
meet UL requirements and all of them voids the <strong>Amerex</strong> extinguisher<br />
warranty and UL listing. DO NOT SUBSTITUTE.<br />
RECHARGE FIRE EXTINGUISHERS IMMEDIATELY AFTER ANY USE<br />
REFERENCES IN THIS MANUAL:<br />
NFPA-10 Portable Fire Extinguishers<br />
AVAILABLE FROM:<br />
National Fire Protection Association<br />
1 Batterymarch Park, P.O, Box 9101<br />
Quincy, MA 02269-9101<br />
CGA C-1 Methods <strong>for</strong> Hydrostatic Testing of Compressed Gas Association, Inc.<br />
Compressed Gas Cylinders<br />
4221 Walney Road, 5 th Floor<br />
CGA C-6 Standard <strong>for</strong> Visual Inspection of Chantilly, VA 20151-2923<br />
Compressed Gas Cylinders<br />
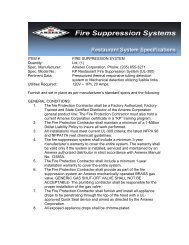
AMEREX CORPORATION – P.O. BOX 81 – TRUSSVILLE, ALABAMA 35173-0081<br />
Phone: 205/655-3271 Fax: 800/654-5980<br />
e-mail: sales@amerex-fire.com Web Page: http://www.amerex-fire.com<br />
Printed in U.S.A. 0M05604F Rev. 3/11
AMEREX CORPORATION DOES NOT SERVICE, MAINTAIN OR RECHARGE FIRE EXTINGUISHERS. THIS<br />
MANUAL IS PUBLISHED AS A GUIDE TO ASSIST QUALIFIED SERVICE PERSONNEL IN THE INSPECTION,<br />
MAINTENANCE AND RECHARGE OF AMEREX FIRE EXTINGUISHERS ONLY. NO INSTRUCTION MANUAL<br />
CAN ANTICIPATE ALL POSSIBLE MALFUNCTIONS THAT MAY BE ENCOUNTERED IN THE SERVICE OF FIRE<br />
EXTINGUISHERS. DUE TO THE POSSIBILITY THAT PRIOR SERVICE PERFORMED ON THIS EQUIPMENT MAY<br />
HAVE BEEN IMPROPERLY DONE, IT IS EXTREMELY IMPORTANT THAT ALL WARNINGS, CAUTIONS AND<br />
NOTES IN THIS MANUAL BE CAREFULLY OBSERVED. FAILURE TO HEED THESE INSTRUCTIONS COULD<br />
RESULT IN SERIOUS INJURY.<br />
AMEREX ASSUMES NO LIABILITY FOR SERVICE, MAINTENANCE OR RECHARGE OF FIRE EXTINGUISHERS<br />
BY PUBLISHING THIS MANUAL.<br />
INSPECTING THE EXTINGUISHER<br />
This extinguisher should be inspected at regular intervals (monthly or more often if<br />
circumstances dictate) to insure that it is ready <strong>for</strong> use. Inspection is a "quick check" that a fire<br />
extinguisher is available and is in operating condition. It is intended to give reasonable<br />
assurance that the fire extinguisher is fully charged. This is done by verifying that it is in its<br />
designated place, that it has not been actuated or tampered with, and that there is no obvious<br />
physical damage or condition to prevent its operation.<br />
PERIODIC INSPECTION PROCEDURES<br />
(Monthly or more often if circumstances dictate)<br />
[NFPA-10] Periodic inspection of fire extinguishers shall include a check of at least the following items:<br />
1. Location in designated place.<br />
2. No obstruction to access or visibility.<br />
3. Pressure gauge reading or indicator in the operable range or position.<br />
4. Operating instructions on nameplate and facing outward.<br />
5. Safety seals and tamper indicators not broken or missing.<br />
6. Examination <strong>for</strong> obvious physical damage, corrosion, leakage, or clogged nozzle.<br />
7. Fullness determined by weighing or "hefting"<br />
MAINTENANCE<br />
[NFPA-10] Extinguishers should be subjected to maintenance at intervals of not more than 1<br />
year, at the time of hydrostatic test, or when specifically indicated by an inspection or electronic<br />
notification. Maintenance procedures include a thorough examination of the basic elements of a<br />
fire extinguisher:<br />
1. Mechanical parts<br />
2. Extinguishing agent of cartridge or cylinder operated extinguishers, pump tanks and certain types of<br />
stored pressure extinguishers<br />
3. Expelling means<br />
NOTE: Stored pressure halon <strong>1211</strong> extinguishers do not require an internal examination of the<br />
cylinder or examination of the agent during annual maintenance, but shall receive a thorough<br />
external examination.<br />
1
Maintenance [NFPA 10] is a thorough examination of the fire extinguisher. It is intended to give<br />
maximum assurance that a fire extinguisher will operate effectively and safely. It includes a<br />
thorough examination <strong>for</strong> physical damage or condition to prevent its operation and any<br />
necessary repair or replacement. It will normally reveal if hydrostatic testing or internal<br />
maintenance is required.<br />
MAINTENANCE – SERVICE PROCEDURE<br />
1. Clean extinguisher to remove dirt, grease or <strong>for</strong>eign material. Check to make sure that the<br />
instruction nameplate is securely attached and legible. Inspect the cylinders <strong>for</strong> corrosion,<br />
abrasion, dents or weld damage. If any of these conditions are found and you doubt the<br />
integrity of the cylinder, hydrostatically test to factory test pressure, using the proof pressure<br />
method in accordance with CGA C-1 and C-6 and NFPA 10. See proper method of<br />
depressurizing and reclaiming <strong>Halon</strong> <strong>1211</strong> in SIX-YEAR MAINTENANCE/RECHARGE<br />
PROCEDURE.<br />
Note: When cleaning, avoid use of solvents around the pressure gauge. They<br />
could seriously damage the plastic gauge face.<br />
2. Inspect the extinguisher <strong>for</strong> damaged, missing or substitute parts. Only factory replacement<br />
parts are approved <strong>for</strong> use on <strong>Amerex</strong> fire extinguishers.<br />
3. Remove and check ring (safety) pin <strong>for</strong> freedom of movement. Replacement if bent or if<br />
removal appears difficult.<br />
4. Check the date of manufacture printed on the extinguisher label (nameplate). All stored<br />
pressure <strong>Halon</strong> <strong>1211</strong> extinguishers must be hydrostatically (proof pressure) tested every 12<br />
years.<br />
5. Visually inspect the pressure gauge:<br />
a. If bent, damaged or improper gauge, depressurize and replace.<br />
b. If pressure is low or high and temperature/pressure relationship has been ruled out:<br />
1. If pressure is low, check <strong>for</strong> leaks.<br />
2. If over pressurized (overcharged), depressurize the extinguisher and follow recharge<br />
instructions.<br />
6. Inspect discharge lever <strong>for</strong> any dirt or corrosion which might impair freedom of movement.<br />
Inspect carrying <strong>hand</strong>le <strong>for</strong> proper installation. If lever, <strong>hand</strong>le or rivets are damaged, replace<br />
with proper <strong>Amerex</strong> part(s).<br />
7. Check weight of extinguisher and compare to proper weight specified on extinguisher<br />
nameplate. If discrepancy is noted, remove nozzle or hose assembly and follow Complete<br />
Maintenance/Recharge Procedure <strong>for</strong> recharging.<br />
8. Remove nozzle or hose and horn assembly. Inspect nozzle, hose gasket (o-ring), hose and<br />
horn assembly <strong>for</strong> damage – replace as necessary. Blow air through hose and horn or nozzle<br />
to insure passage is clear of <strong>for</strong>eign material and replace component parts as necessary.<br />
9. Inspect the valve assembly <strong>for</strong> corrosion or damage to hose thread connection. Replace valve<br />
assembly or component parts as necessary following the proper recovery and recharge<br />
procedures. If valve removal is necessary, complete all steps in the Complete<br />
Maintenance/Recharge Procedure.<br />
10. Install nozzle or hose and horn assembly.<br />
11. Install new tamper seal if broken and record service data on the extinguisher inspection tag.<br />
12. Replace the extinguisher on the wall hanger making sure that it fits the bracket properly –<br />
replace the bracket if necessary.<br />
2
COMPLETE MAINTENANCE – SIX YEAR TEARDOWN<br />
[NFPA-10] Every six years, stored pressure extinguishers that require a 12 year hydrostatic test<br />
shall be emptied and subjected to the applicable maintenance procedures. When the applicable<br />
maintenance procedures are per<strong>for</strong>med during periodic recharging or hydrostatic testing, the<br />
six year requirement shall begin from that date.<br />
WARNING:<br />
a. Be<strong>for</strong>e attempting to delvalve the extinguisher <strong>for</strong> Maintenance, Hydrotest or Recharging<br />
be sure that it is completely depressurized. <strong>Halon</strong> <strong>1211</strong> generates a vapor pressure of<br />
22 psi @70°F. NEVER VENT TO THE ATMOSPHERE. Recover agent and vapor<br />
according to the instructions below.<br />
b. Never have any part of your body over the extinguisher while removing the valve<br />
assembly.<br />
c. <strong>Halon</strong> <strong>1211</strong> should not be mixed with even the slightest amount of moisture. Prolonged<br />
exposure of a devalved cylinder to ambient air should be avoided to prevent moisture<br />
contamination and cylinder rusting.<br />
1. Complete items 1 through 9 in Maintenance/Service Procedure above.<br />
2. Attach the appropriate recharge adapter to the extinguisher operating valve. Empty the<br />
extinguisher of all pressure and <strong>Halon</strong> <strong>1211</strong> using a Getz HR-1 (or UL approved equal) <strong>Halon</strong><br />
Recharge/Recovery system and a bulk <strong>Halon</strong> supply cylinder with sufficient empty capacity to<br />
accept the contents of the extinguisher.<br />
NOTE: Every ef<strong>for</strong>t should be made to halt unnecessary escape of <strong>Halon</strong> <strong>1211</strong> to<br />
the atmosphere to prevent detrimental environmental effect. High efficiency<br />
<strong>Halon</strong> <strong>1211</strong> Recharge/Recovery (Vacuum Pump Type) Systems (UL Standard 2006)<br />
are commercially available. The Getz HR-1 (UL approved) unit assures a minimum<br />
of 99% recovery efficiency. It allows a means of checking <strong>for</strong> and removing<br />
moisture or contamination during the recovery process.<br />
3. When the extinguisher is empty of all agent and pressure, remove valve assembly and<br />
disassemble by removing downtube, spring and valve stem assembly. Discard valve stem<br />
assembly and collar o-ring.<br />
NOTE: Keep cylinder opening covered while devalued to minimize interior<br />
corrosion.<br />
4. Thoroughly clean all parts of the disassembled valve with a soft bristle brush or soft cloth. Blow<br />
the valve out with dry nitrogen.<br />
5. Install a new <strong>Amerex</strong> valve stem assembly after lightly lubricating the valve stem o-ring with Visilox<br />
711 (do not lubricate the valve stem seal). Reassemble the spring and downtube. Carefully install<br />
a new collar o-ring which has been lightly lubricated with Visilox 711. Set the valve assembly<br />
aside.<br />
6. Inspect the cylinder interior following CGA Visual Inspection Standard C-6 and current NFPA 10<br />
guidelines. If a hydrotest has been per<strong>for</strong>med or any moisture is evident, the cylinder should be<br />
immediately warm air dried.<br />
7. Clean the o-ring seating groove in the cylinder neck. If any rust is evident, remove by using a fine<br />
emery cloth (200 grit). Clean the surface and lubricate the entire sealing area with a thin film of<br />
Visilox 711. Install the valve assembly in extinguisher cylinder. Hand tighten firmly.<br />
8. Use the Getz HR-1 system to purge the residual air from the extinguisher cylinder.<br />
9. Stand the extinguisher upright on a scale of sufficient size and capacity. Tare weight extinguisher<br />
or record empty weight.<br />
10. Follow all recharging instructions on Getz HR-1 or other UL Approved Recharge/Recovery system.<br />
3
11. Remove the recharge adapter. Some residual <strong>Halon</strong> vapor may remain in the valve outlet as a<br />
result of the charging procedure. Be<strong>for</strong>e attempting to leak detect, vacuum or blow the vapor away<br />
from the areas to be checked. Check extinguisher <strong>for</strong> leaks at the valve outlet, around the collar<br />
seal, cylinder welds and gauge using a Halogen Leak Detector (Preferred Method). The alternate<br />
method is to apply leak detecting fluid or a solution of soapy water to these areas. Use dry<br />
nitrogen to blow all liquid residue out of the valve and wipe the extinguisher to dry the exterior. DO<br />
NOT LEAVE ANY LIQUID INSIDE THE VALVE BODY.<br />
12. Install nozzle or hose and horn assembly to the extinguisher discharge valve.<br />
13. Weigh extinguisher to confirm that the total weight is within the tolerances indicated in the<br />
Maintenance section on the extinguisher nameplate.<br />
14. Record service date and attach new tag in accordance with the requirements of the "Authority<br />
Having Jurisdiction".<br />
TROUBLESHOOTING GUIDE<br />
WARNING: ANY HALON <strong>1211</strong> EXTINGUISHER MUST BE COMPLETELY DEPRESSURIZED<br />
BEFORE ANY ATTEMPT IS MADE TO REMOVE THE VALVE AND CORRECT A LEAKAGE<br />
PROBLEM.<br />
To depressurize, see instructions in the Complete Maintenance section. <strong>Halon</strong> <strong>1211</strong> is a liquid<br />
under nitrogen pressure. Variations in the temperature may affect gauge readings. The gauge<br />
dial has been calibrated to reflect the tested extinguisher temperature extremes (-65°F to<br />
+120°F). When in doubt about a gauge reading, place the extinguisher at room temperature<br />
(70°F) <strong>for</strong> several hours to obtain a true reading.<br />
PROBLEM<br />
CORRECTIVE ACTION<br />
1. Leak at collar o-ring Remove valve assembly, remove and discard o-ring,<br />
clean collar thoroughly. Install new collar o-ring.<br />
Lubricate o-ring with Visilox V-711.<br />
2.<br />
3.<br />
4.<br />
5.<br />
Leak through valve<br />
Leak around gauge<br />
Defective gauge<br />
Leak in the cylinder<br />
6. Leak under operating lever<br />
during discharge<br />
7. Gauge indicator high or low<br />
in green operable area, no<br />
detectable temperature<br />
leakage<br />
Check valve stem seating area <strong>for</strong> scratches or <strong>for</strong>eign<br />
matter. Clean seating area with a tooth brush and soft<br />
cloth. Install new valve stem assembly.<br />
Remove gauge*, clean threads and reinstall using Teflon<br />
tape on the gauge threads.<br />
Remove defective gauge* an install a new <strong>Halon</strong> <strong>1211</strong><br />
gauge (see parts list) using Teflon tape on the gauge<br />
threads.<br />
Contact <strong>Amerex</strong> if under warranty, otherwise mark<br />
"REJECTED" and remove from service or return to<br />
owner.<br />
Replace valve stem assembly.<br />
Extinguisher may have been subjected to extreme heat<br />
or cold. Condition the extinguisher to room temperature<br />
(70°F) overnight and check gauge reading.<br />
* Pressure gauge threads are coated with a special epoxy at the factory. For easy<br />
removal, soak the valve assembly in hot water (180°F) <strong>for</strong> two to four minutes.<br />
Remove gauge with a thin 7/16" open end wrench.<br />
4
PARTS LIST<br />
<strong>for</strong><br />
1-1/4 - 20 lb. <strong>Halon</strong> <strong>1211</strong><br />
Extinguisher Models<br />
344 354 A355<br />
A344T A354 B355<br />
352 A354TS 369<br />
A352 C354 B369<br />
C352 355 361<br />
372<br />
Item<br />
No.<br />
Part<br />
No. Description<br />
Std.<br />
Pkg.<br />
1 11953 Valve Assembly – ALL ALUMINUM MODELS 1<br />
1A 11954 Valve Assembly – ALL BRASS MODELS 1<br />
06066 Nozzle w/O-ring – 344/344T, A344T (.067)<br />
2 07115 A/B402 (.157)<br />
6<br />
01727 Nozzle w/O-ring – 355T, A/B355T (.144)<br />
2A 01532 Hose/Nozzle Gasket (O-ring) – Aluminum Valve 24<br />
2B 06978 Hose Gasket (O-ring) 24<br />
2C 06421 Hose & Horn Assembly – 354A, A354A, C354A (.098) 1<br />
05180 Hose & Horn Assembly – 369, B369 (.216)<br />
2D<br />
05178 Hose & Horn Assembly – 371, B371 (.234)<br />
05176 Hose & Horn Assembly – 361 (.152)<br />
1<br />
05174 Hose & Horn Assembly – 372 (.177)<br />
3<br />
01412 Ring Pin<br />
16353 Ring Pin 1 lb, 2-1/2 lb<br />
24<br />
3A 00160 Ring Pin, Stainless Steel 24<br />
3B 00532 Chain (Nylon) <strong>for</strong> Ring Pin 24<br />
4 01387 Lockwire Seal (Yellow) 500<br />
5 11825 Lever & Rivet – "A" Valve 1<br />
5A 01060 Rivet Only <strong>for</strong> Lever 24<br />
5B<br />
06067 Lever & Rivet – 344/344T, A344T<br />
02625 Lever & Rivet – Forged Vlv (except 344/344T,A344T)<br />
1<br />
5C 07762 Lever & Rivet – Brass Valve 1<br />
5D 01563 Rivet Only <strong>for</strong> Lever – Brass Valve 24<br />
04839 Gauge – 100 PSI – 344/344T, A344T<br />
03105 Gauge – 125 PSI – 352T, A/C352T, 355T, A/B355T<br />
6<br />
6<br />
Gauge – 195 PSI – 354A, A/C354A, 361, 369, B369,<br />
03106<br />
371, B371, 372<br />
7 11826 Handle & Rivet – Brass Valve 1<br />
7A 01064 Rivet Only <strong>for</strong> Handle – Old & "A/B" Valve 24<br />
7B<br />
09001 Handle & Rivet – 344/344T 24<br />
09002 Handle & Rivet – Old Valve 352T, A354A, 355T 24<br />
7C 09020 Handle & Rivet – Brass Valve 1<br />
7D 01564 Rivets <strong>for</strong> Handle (2 Required) – Brass Valve 24<br />
8<br />
05241 Collar O-Ring – Aluminum Valve 24<br />
Collar O-Ring – Aluminum Valve – Bulk Bag 100<br />
8A<br />
05240 Collar O-Ring 24<br />
Collar O-Ring – Bulk Bag 100<br />
9 05235 Valve Stem O-Ring 24<br />
9A 05243 Valve Stem O-Ring – Brass Valve 24<br />
10<br />
06092 Valve Stem Assembly – Aluminum Valve 6<br />
Valve Stem Assembly – Aluminum Valve – Bulk Bag 96<br />
10A<br />
06093 Valve Stem Assembly – Brass Valve 6<br />
Valve Stem Assembly – Brass Valve – Bulk Bag 96<br />
11 01074 Spring – All Aluminum Valve 6<br />
11A 00383 Spring – All Brass Valve 6<br />
06069 Downtube/Retainer Assembly – 344/344T, A344T<br />
12 01075<br />
Downtube/Retainer Assembly – 352T, 354A,<br />
A/C352T, A/C354A<br />
1<br />
06212 Downtube/Retainer Assembly – 355T, A/B355T<br />
03754 Downtube/Retainer Assembly – 369/B369<br />
12A 02609 Downtube/Retainer Assembly – 371, B371<br />
1<br />
01667 Downtube/Retainer Assembly – 361, 372<br />
13<br />
14776<br />
Strap & Clip Assembly (Black Plastic) 3/8" Hose<br />
354, A/C354A, 369, 371, B371<br />
14778<br />
Strap & Clip Assembly (Black Plastic) ½" Hose<br />
361, 372, B369<br />
1<br />
14<br />
15363 Hanger Loop with Screw – B371<br />
16694 Hanger Loop with Screw – B369, 361, 372<br />
6<br />
14A 14220 Hanger Loop with Screw – Aluminum Valve 6<br />
ALL BRACKETS – SEE BRACKET PAGE<br />
ALL FILL & HYDROTEST ADAPTERS – SEE ADAPTER PAGE<br />
ALL VALVE ASSEMBLIES INCLUDE VALVE BODY, GAUGE, LEVER & HANDLE<br />
5