Wired/Wireless IP Camera Quick Installation Guide (IE Browser) - Elro
Wired/Wireless IP Camera Quick Installation Guide (IE Browser) - Elro
Wired/Wireless IP Camera Quick Installation Guide (IE Browser) - Elro

Create successful ePaper yourself
Turn your PDF publications into a flip-book with our unique Google optimized e-Paper software.
More Security, More Convenience<br />
won’t work, if use the 3 rd DDNS, the manufacturer’s one won’t work.<br />
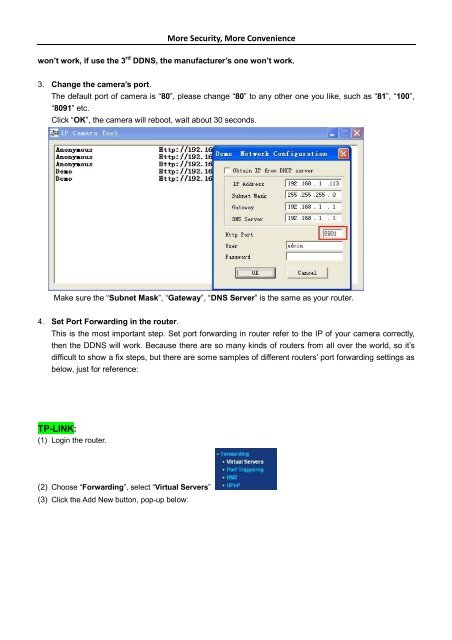
3. Change the camera’s port.<br />
The default port of camera is “80”, please change “80” to any other one you like, such as “81”, “100”,<br />
“8091” etc.<br />
Click “OK”, the camera will reboot, wait about 30 seconds.<br />
Make sure the “Subnet Mask”, “Gateway”, “DNS Server” is the same as your router.<br />
4. Set Port Forwarding in the router.<br />
This is the most important step. Set port forwarding in router refer to the <strong>IP</strong> of your camera correctly,<br />
then the DDNS will work. Because there are so many kinds of routers from all over the world, so it’s<br />
difficult to show a fix steps, but there are some samples of different routers’ port forwarding settings as<br />
below, just for reference:<br />
TP-LINK:<br />
(1) Login the router.<br />
(2) Choose “Forwarding”, select “Virtual Servers”<br />
(3) Click the Add New button, pop-up below: