Wired/Wireless IP Camera Quick Installation Guide (IE Browser) - Elro
Wired/Wireless IP Camera Quick Installation Guide (IE Browser) - Elro
Wired/Wireless IP Camera Quick Installation Guide (IE Browser) - Elro

You also want an ePaper? Increase the reach of your titles
YUMPU automatically turns print PDFs into web optimized ePapers that Google loves.
More Security, More Convenience<br />
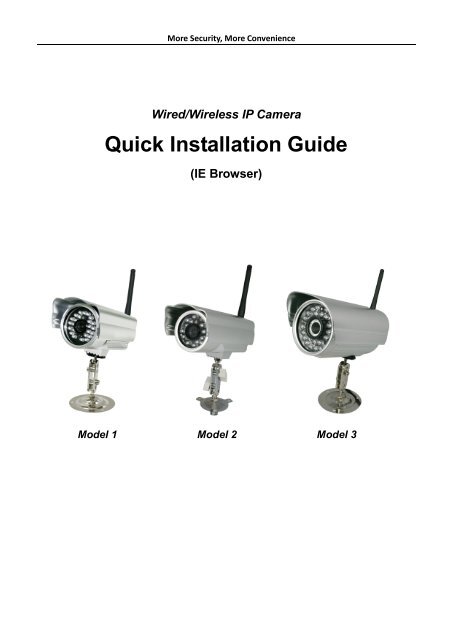
<strong>Wired</strong>/<strong>Wireless</strong> <strong>IP</strong> <strong>Camera</strong><br />
<strong>Quick</strong> <strong>Installation</strong> <strong>Guide</strong><br />
(<strong>IE</strong> <strong>Browser</strong>)<br />
Model 1 Model 2 Model 3
Step 1: Hardware <strong>Installation</strong>.<br />
1. Install the Wi-Fi antenna.<br />
2. Plug the power adaptor into camera.<br />
More Security, More Convenience<br />
3. Plug the network cable into camera, the other side to the router/switch.<br />
Step 2: Software <strong>Installation</strong>.<br />
Install the follow software:<br />
1. <strong>IP</strong> <strong>Camera</strong> Tool: Open the CD, click “<strong>IP</strong>CamSetup.exe”—“Next”—“Next”—“Close”.<br />
2. ActiveX: Click “Appinstall.exe”—“Next”—“Install”—“Finish”.<br />
After this done, the icon “<strong>IP</strong> <strong>Camera</strong> Tool” will be displayed on desktop.
More Security, More Convenience<br />
Step 3: Real-time Video Demonstration.<br />
1. Login:<br />
Double click “<strong>IP</strong> <strong>Camera</strong> Tool” icon on desktop, search the <strong>IP</strong> address, choose the one of your camera,<br />
double click to go to <strong>IE</strong> login interface.<br />
Default username: admin<br />
Password: no password.<br />
2. Choose the language.<br />
English, Chinese, Spanish, Korean, German, French, Italian, Portuguese optional.<br />
3. Choose the work mode.<br />
<strong>IE</strong> browser: choose ActiveX mode.<br />
Safari, Firefox, Google chrome browser: Server push mode.<br />
Mobile phone: sign in mobile phone mode.<br />
4. Sign in.<br />
Click Sign In, then can get video on real-time.
More Security, More Convenience<br />
Q1: No pictures problem with ActiveX Settings for <strong>IE</strong> <strong>Browser</strong><br />
If use <strong>IE</strong> browser to connect the camera for the 1 st time, maybe there is no image displayed, there will be an<br />
ActiveX prompt, please click the prompt and choose Run Add-on, refresh the <strong>IE</strong> interface, and login the<br />
camera again, then will see live video.<br />
If there is still no live video after run ActiveX, please try to enable the ActiveX options of <strong>IE</strong> security settings,<br />
please do the follow steps:<br />
1. Close the firewall of your computer.<br />
2. Change the ActiveX settings, “<strong>IE</strong>” browser > “Tool” > “Internet Options” > “Security”> “Custom<br />
Level” > “ActiveX control and Plug-ins”, all the ActiveX options set to be “Enable”: Especially:<br />
Enable: Download unsigned ActiveX controls
More Security, More Convenience<br />
Enable: Initialize and script ActiveX controls not marked as safe<br />
Enable: Run ActiveX controls and plu-ins<br />
In Addition: you can also click “start” menu->“Internet Explorer”, choose “Internet attributes “ to enter, or via<br />
“Control Panel” ->“Internet Explorer”, enter to Security setting.<br />
3. If there is still no image, please close your anti-virus software, and then try step 1 & 2 again.<br />
Q2: How to do <strong>Wireless</strong> Settings<br />
1. Make sure the router is a wireless router.<br />
2. Make sure the Wi-Fi antenna installed.<br />
3. Make sure whether there is encryption of the WLAN of router, if there is encryption, keep the key.<br />
4. Login the camera, click “Network”>”<strong>Wireless</strong> Lan Settings”>”Scan”, please scan 2 times, then<br />
you will find the WLAN from the list, choose the one you use.<br />
5. If there is no encryption, just click “Submit”, if there is encryption, please input the key, then click<br />
“Submit”.<br />
6. Wait about 30 seconds, the camera will reboot, then unplug the network cable.
Q3: How to use DDNS<br />
1. Login the camera:<br />
Click “Network”>”DDNS Service Settings”.<br />
2. Choose the DDNS, there are 2 options:<br />
More Security, More Convenience<br />
Manufacturer’s DDNS: This domain is provided by manufacturer.<br />
Third Party DDNS: This domain is provided by the 3 rd party, such as Dyndns, Oray, 3322 etc.
Third Party DDNS<br />
More Security, More Convenience<br />
If you use third party DDNS, please choose the server you use, such as “3322.org” or “dyndns.org” as<br />
below:<br />
You have to register an account firstly, keep the user, password, host, then fill in it.<br />
Note: Only one DDNS can be chosen, for example, if you use manufacturer’s DDNS, the 3 rd one
More Security, More Convenience<br />
won’t work, if use the 3 rd DDNS, the manufacturer’s one won’t work.<br />
3. Change the camera’s port.<br />
The default port of camera is “80”, please change “80” to any other one you like, such as “81”, “100”,<br />
“8091” etc.<br />
Click “OK”, the camera will reboot, wait about 30 seconds.<br />
Make sure the “Subnet Mask”, “Gateway”, “DNS Server” is the same as your router.<br />
4. Set Port Forwarding in the router.<br />
This is the most important step. Set port forwarding in router refer to the <strong>IP</strong> of your camera correctly,<br />
then the DDNS will work. Because there are so many kinds of routers from all over the world, so it’s<br />
difficult to show a fix steps, but there are some samples of different routers’ port forwarding settings as<br />
below, just for reference:<br />
TP-LINK:<br />
(1) Login the router.<br />
(2) Choose “Forwarding”, select “Virtual Servers”<br />
(3) Click the Add New button, pop-up below:
More Security, More Convenience<br />
Fill the service port (except 80), <strong>IP</strong> address of the camera, then click Save<br />
The port and <strong>IP</strong> address should be the same as <strong>Camera</strong>.<br />
BELKIN:<br />
(1) Login the router.<br />
(2) Choose “Firewall”, select “Virtual Servers”<br />
(3) Input the port (except 80) and <strong>IP</strong> address, then click save.<br />
Note: The port and <strong>IP</strong> address should be the same as <strong>Camera</strong>.<br />
DLINK:<br />
(1) Login the router.<br />
(2) Choose “Advanced”, select “Virtual Servers”<br />
(3) Input the port, <strong>IP</strong> address, Protocol, then click save.<br />
Note: The “public port” & “private port” should be the same as camera’s port, choose the protocol to be<br />
“both”.
More Security, More Convenience<br />
After all these 4 steps done, then you can use the DDNS freely, check the DDNS status from the camera as<br />
below, and get the link of DDNS for internet view.<br />
Step: “Login”>”System”>”Device Info”:
More Security, More Convenience<br />
Q4: How to know the WAN <strong>IP</strong> of the device.<br />
1. From internet.<br />
If you want to know the WAN <strong>IP</strong> of your device, please go to<br />
http://www.whatismyip.com. You will find the current WAN <strong>IP</strong> of your device.<br />
2. From router.<br />
You can also get the WAN <strong>IP</strong> address from your router.<br />
Q5: How to register a third party DDNS account<br />
For example, you can go to Dyndns website to register a free account.<br />
http://www.dyndns.org / http://www.dyndns.com.<br />
1. Click Sign up FREE.
2. Choose Sign Up under FREE.<br />
3. Do the follow steps:<br />
Then choose Add to Cart.<br />
More Security, More Convenience
4. Set the username and password as below:<br />
More Security, More Convenience<br />
After these settings have been done, it will send an email to your mailbox to active this account.<br />
5. Please login your email box, and open the active link you get by email, then it will go to the activate<br />
page to get this account active.<br />
You will get all the details of your DDNS, such as hostname, WAN <strong>IP</strong> address etc.<br />
Thanks for your support and attention, for further operation details, please check the full version<br />
user manual of our <strong>IP</strong> <strong>Camera</strong>s!