BH Series Operators Manual
BH Series Operators Manual
BH Series Operators Manual

Create successful ePaper yourself
Turn your PDF publications into a flip-book with our unique Google optimized e-Paper software.
M A I N T E N A N C E P R O C E D U R E S<br />
4.3.13 REPLACING BELTS<br />
1. Lock out all power.<br />
2. Make sure that the belt engaging lever is disengaged.<br />
3. ON MOTOR DRIVE… Remove pulley shield at motor if necessary (belts may slip past<br />
pulley without removing shield). If belts do not come off easily the engine mounting bolts<br />
will have to be loosened and the engine pushed toward the intake end of the auger. ON<br />
PTO DRIVE… The PTO driveline and shield will need to be removed before the belts can<br />
be taken off the pulley.<br />
4. The new auger belts can now be put in place. Make sure to route the belt over the idler<br />
pulley.<br />
5. Follow Procedure 4.3.14 for the proper belt tension.<br />
4.3.14 TIGHTENING BELTS<br />
1. Lock out all power.<br />
2. Engage the belt engaging lever.<br />
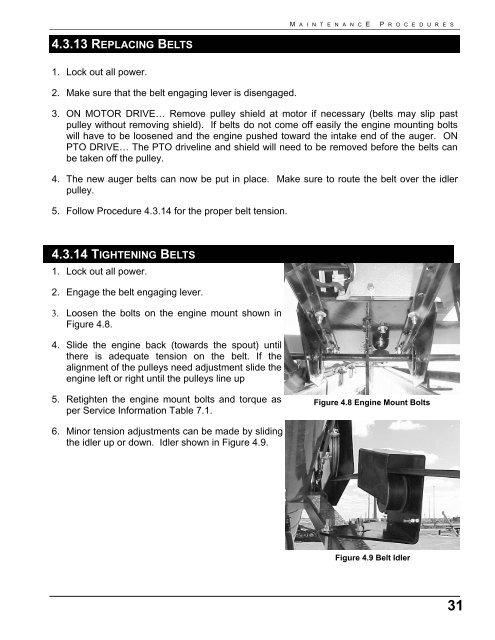
3. Loosen the bolts on the engine mount shown in<br />
Figure 4.8.<br />
4. Slide the engine back (towards the spout) until<br />
there is adequate tension on the belt. If the<br />
alignment of the pulleys need adjustment slide the<br />
engine left or right until the pulleys line up<br />
5. Retighten the engine mount bolts and torque as<br />
per Service Information Table 7.1.<br />
Figure 4.8 Engine Mount Bolts<br />
6. Minor tension adjustments can be made by sliding<br />
the idler up or down. Idler shown in Figure 4.9.<br />
Figure 4.9 Belt Idler<br />
31