O18902 Targon PH H.pdf - Osteosyntese
O18902 Targon PH H.pdf - Osteosyntese
O18902 Targon PH H.pdf - Osteosyntese

You also want an ePaper? Increase the reach of your titles
YUMPU automatically turns print PDFs into web optimized ePapers that Google loves.
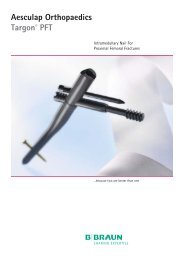
Aesculap Orthopaedics<br />
<strong>Targon</strong> ® <strong>PH</strong> <strong>Targon</strong> ® H<br />
Intramedullary Nail System for the<br />
Proximal Humerus and the Humeral Shaft
H<br />
for strong connections<br />
Fractures of the humeral shaft are generally treated conservatively<br />
with early functional mobilization with great success. Nevertheless,<br />
there are a number of very good or relative indications for surgical<br />
treatment. Among the surgical methods involving internal fixation<br />
devices, intramedullary nailing has increasingly gained in importance.<br />
For such procedures, the retrograde approach proved to be an<br />
attractive surgical option as an alternative method to the traditional<br />
antegrade approach, for certain fracture constellations. Some of<br />
the therapeutic failures reported in literature in conjunction with<br />
the use of intramedullary nailing to treat humerus shaft fractures<br />
are attributable to non-union of bone fragments. The use of compression<br />
devices represents a simple method for counteracting the<br />
tendency to fragment displacement. The <strong>Targon</strong> ® line of humeral<br />
nails developed by Aesculap incorporates such features and thereby<br />
creates the preconditions for achieving a low rate of complications<br />
in connection with the internal fixation of such fractures.<br />
The fixation of humeral head fractures by conventional methods,<br />
especially in patients with severe osteoporosis, suffers from high<br />
failure rates. Therefore new, more successful fixation methods have<br />
been developed in recent years, among them <strong>Targon</strong> ® <strong>PH</strong> and<br />
<strong>Targon</strong> ® H, which have already convinced many users because they<br />
reflect recent efforts to prevent the predominant complications<br />
discussed in the literature.<br />
Priv. Doz. Dr. H.-W. Stedtfeld<br />
Hospital for Traumatology Nuremberg<br />
October, 2006<br />
2
Pseudarthrosis is caused by excess elasticity in the supporting<br />
system and by relative displacements between the metaphyseal<br />
fragments. To prevent this complication, the capitellar nail<br />
provides rigid fixation of the capitellar fragments with high<br />
angular and relative displacement stability.<br />
The development of capitellar necrosis is also promoted by the<br />
compressing effect of certain fixation techniques on the branches<br />
of the circumflex humeral artery feeding the capitellum.<br />
Insufficient stability of fixation is another likely negative<br />
factor. Because the new interlocking screws penetrate the soft<br />
tissue near the capitellum only at certain points, the blood<br />
supply is afforded maximum protection. The adjusting-screw<br />
effect of the interlock allows using the remaining possibilities<br />
to revascularize the fragments (even if the patient exercises<br />
early in the postoperative period). User experience over the<br />
first few years led to two modifications of the implant components:<br />
The fixation of crushed tubercles is carried out with a short<br />
frame suture (rope-over-bitt method) around the head of<br />
the respective fixation screw. The screw head profile was<br />
slightly modified to hold of this suture more securely.<br />
Especially in patients with severe osteoporosis, spontaneous<br />
untightening of the smoothly running fixation screws<br />
has been observed. Therefore a plastic inlay (PEEK: Poly-<br />
EtherEtherKetone) was inserted as a “screw brake” in the<br />
upper nail section. In tests, <strong>Targon</strong> ® <strong>PH</strong> with PEEK inlays<br />
successfully underwent 200 processing cycles. Finally, the<br />
<strong>Targon</strong> ® instruments were developed with special emphasis<br />
on easy handling and practicality to offer optimum costefficiency<br />
for both main indication areas (humerus stem<br />
and humerus head).<br />
3
The Solution for<br />
Fractures of the Capitellum<br />
Protection of the<br />
blood supply<br />
The blood supply to the capitellar<br />
fragments provided<br />
by the fine branches of the<br />
circumflex humeral artery<br />
can be damaged by surface<br />
compression, e.g. by a T-plate,<br />
and by the constricting effect<br />
of cerclage wires. Since the<br />
interlocking screws, as peripheral<br />
load-bearing fixation<br />
elements, penetrate the tissue<br />
only at certain points, damage<br />
to the soft-tissue zone near<br />
the capitellum is minimized<br />
so that the blood supply in<br />
the fractured capitellum is<br />
given a maximum chance of<br />
recovery.<br />
Excellent fixation<br />
stability<br />
To achieve optimally stable<br />
fracture fixation, the interlocking<br />
screws (fixation screws)<br />
in the capitellar area are anchored<br />
within the nail with<br />
angular and displacement<br />
stability at various insertion<br />
angles congruent with the<br />
tubercles in the capitellum.<br />
As a result, the position of<br />
the fragments relative to<br />
each other is maintained<br />
(set-screw effect) even under<br />
exercise early in the postoperative<br />
period.<br />
Rope over bitt<br />
The nail locks the fragments<br />
in stable angular position.<br />
This is achieved by securing<br />
the 4.5 mm screws in the PEEK<br />
inlay and imbedding the screw<br />
heads in the cortical bone of<br />
the corresponding tubercle<br />
fragment. For splinter fractions,<br />
the fragments can be further<br />
fixated by short frame sutures<br />
between the tendon attachments<br />
and the screw heads.<br />
4
Areas of Indication<br />
Good subacromial<br />
passage<br />
The impingement of implant<br />
edges (e.g. spiked wire ends,<br />
screw heads, plate edges, etc.)<br />
under the scapular roof causes<br />
painful irritation to such an<br />
extent that postoperative<br />
exercising schedules cannot<br />
be maintained. This poses the<br />
risk of permanent scarring in<br />
the subacromial space and a<br />
severe loss of movement in<br />
the shoulder.<br />
To prevent this complication,<br />
the interlocking screw heads<br />
feature a new thread design<br />
that allows recessed insertion<br />
in the cortical bone of the<br />
capitellum. This allows the<br />
patient to start intensive<br />
exercising as soon as the<br />
postoperative inflammation<br />
subsides so that the articular<br />
functionality of the subacromial<br />
bursa can be restored<br />
rapidly.<br />
Neer-Classification<br />
<strong>Targon</strong> <strong>PH</strong> indication<br />
5
The Solution for<br />
Fractures of the Capitellum<br />
Measurement of the tilting<br />
displacement and tilting<br />
force of the fixation<br />
screw in the nail with and<br />
without screw brake<br />
With the same force applied,<br />
nails with screw brake allow<br />
roughly the same degree of tilting<br />
as nails without screw brake<br />
However, the tilting characteristic<br />
of nails without screw<br />
brake is abrupt whereas the<br />
tilting is softer, more dampened<br />
for nails with the screw brake<br />
feature. This buffer effect protects<br />
the joined bone-implant<br />
interface.<br />
+<br />
Force /<br />
Displacement<br />
–<br />
Experimental setup:<br />
<strong>PH</strong> nail clamped in, with<br />
fixation screw and force<br />
transmission.<br />
40<br />
20<br />
<strong>PH</strong> nail with PEEK screw brake<br />
<strong>PH</strong> nail without PEEK screw brake<br />
<strong>PH</strong> Nagel mit PEEK Schraubenbremse<br />
<strong>PH</strong> Nagel ohne PEEK Schraubenbremse<br />
Dampened<br />
tilting<br />
For the <strong>PH</strong> nail without<br />
screw brake the tilting<br />
curve is characterized<br />
by a forceless, abrupt<br />
region while the tilting<br />
of a <strong>PH</strong> nail with screw<br />
brake is softer, more<br />
dampened.<br />
Force in N<br />
0<br />
-20<br />
Forceless<br />
tilting<br />
-40<br />
-0,5 0,0 0,5<br />
Displacement in mm<br />
6
H<br />
The Solution for<br />
Fractures of the Humeral Shaft<br />
Antegrade or retrograde<br />
nail implantation<br />
The selection of a suitable<br />
surgical approach is not just<br />
a question of the surgeon’s<br />
personal preferences. The obvious<br />
advantage of retrograde<br />
nail implantation is the extraarticular<br />
access. On the other<br />
hand, the retrograde approach<br />
becomes more and more problematic<br />
(e.g. risk of fracture<br />
of the bone bridge between<br />
the edge of the fracture and<br />
the nail insertion hole) the<br />
further distal the fracture is<br />
located.<br />
Even for shaft fractures located<br />
far toward proximal,<br />
the retrograde implantation<br />
of an intermedullary nail can<br />
be complicated by poor anchoring<br />
of interlocking screws in<br />
the metaphysis (e.g. screw<br />
loosening in an osteoporotic<br />
bone bed). However, the<br />
targeting device and the nail<br />
drill holes fully meet the requirements<br />
of both surgical<br />
approaches.<br />
More stability through<br />
interfragmentary<br />
compression<br />
In stable transverse fractures<br />
and short oblique fractures,<br />
in particular, inadequate contact<br />
between fragments has<br />
the effect of delaying or even<br />
preventing fracture healing.<br />
A compression device creates<br />
secure, close, interlocked<br />
fragment contact preventing<br />
rotation. The resulting freedom<br />
from pain and stability of the<br />
arm during early postoperative<br />
exercise promotes rapid fracture<br />
healing.<br />
Fixation screw for<br />
optimized interlocking<br />
In patients with high-grade<br />
osteoporosis there is a danger<br />
that the interlocking screws<br />
may come loose and migrate<br />
into the proximal humerus<br />
region. For this reason there<br />
is the option of using a fixation<br />
screw (Ø 4.5 mm) instead of a<br />
normal screw (Ø 3.5 mm) for<br />
optimal displacement and<br />
angular stability.<br />
A long version of the proximal<br />
humeral nail is available<br />
offering several options for<br />
interlocking with fixation<br />
screws.<br />
7
Implant<br />
Proximal diameter 10 mm<br />
Locking screws prevent bone<br />
ingrowth and allow easy<br />
explantation<br />
Proximal locking holes with<br />
PEEK inlay<br />
Angular and displacement<br />
stability of the inserted screw<br />
Anatomical angular positioning<br />
of the fixation screws (capitellum,<br />
lesser and greater tubercle of the<br />
humerus)<br />
Reduced probability of<br />
neural lesions<br />
right and left versions<br />
Distal diameter<br />
8 mm/150 mm long<br />
7 mm/200 – 280 mm long<br />
Fixation screws<br />
Special threaded design for<br />
cancellous bone<br />
Large thread diameter on the<br />
screw head for secure hold on<br />
bone fragments<br />
Very flat screw head<br />
Suture channel in the screw<br />
head for “rope over bitt”<br />
fixation<br />
Transfixation holes<br />
hold 3.5 mm interlocking<br />
screws with proven, highload<br />
thread design to<br />
stabilize on the distal<br />
side of the fracture line<br />
Special surface treatment for:<br />
simple implantation and<br />
explantation<br />
no osteointegration<br />
minimal abrasion debris<br />
Implant material:<br />
Titanium alloy Ti6Al4V<br />
PEEK (PolyEtherEtherKetone)<br />
8
H<br />
Implant<br />
Antegrade or retrograde<br />
approach<br />
Threaded locking hole<br />
allows using fixation<br />
screws (e.g. patients with<br />
osteoporosis)<br />
allows compression with<br />
one screw<br />
for angular and displacement<br />
stability of screw seating<br />
Slotted hole compression<br />
path of 8 mm<br />
Locking screws<br />
prevent bone ingrowth and<br />
allow easy explantation<br />
Extension screws<br />
allow bicortical proximal<br />
locking<br />
Angulation of 4°<br />
Special surface treatment for:<br />
simple implantation and<br />
explantation<br />
no osteointegration<br />
minimal abrasion debris<br />
for easier retrograde<br />
implantation of the nail<br />
Slender nail, 7 or 8 mm diameter<br />
Four-way locking<br />
offers alternatives to<br />
standard interlocking<br />
procedures<br />
enhanced stability in<br />
patients with osteoporosis<br />
3.5 mm interlocking screws<br />
made of a high-strength<br />
titanium alloy; proven design<br />
Asymmetric sliding tip<br />
for easy implantation<br />
Implant material:<br />
Titanium alloy Ti6Al4V<br />
9
Operating Manual<br />
Preoperative planning<br />
Nail sizes<br />
Positioning of the<br />
fixation screws<br />
Allocation of transfixation<br />
holes<br />
Patient position<br />
Beach chair position<br />
Shoulder free<br />
10
Approach<br />
Deltoid-split approach at the frontal end of the acromial margin.<br />
Opening of the subacromial bursa.<br />
Patients with an intact rotator cuff: Longitudinal incision of the cuff 1 cm dorsolateral of the palpated<br />
bicipital groove in the direction of the fibers toward medial. Looping of the two incision edges and<br />
exposures of the capitellum. Repositioning of the capitellum (possibly with a Steinmann pin);<br />
monitoring by image converter.<br />
Patients with a defective rotator cuff: Dislocated tubercles, enlargement of the tear in the rotator cuff<br />
via an incision in the direction of the fibers. Opening and holding back of the tubercles laterally;<br />
repositioning of the capitellum with a Steinmann pin ("joystick procedure”).<br />
1<br />
Opening<br />
Guide pin KH161R<br />
Hollow reamer Ø 10.5 mm KH160R<br />
Repositioning of the capitellum-bearing main fragment<br />
with a Steinmann pin ("joystick procedure”). Longitudinal<br />
incision of the supraspinatus tendon in fiber direction.<br />
Insertion of the guide pin at the most cranial point of<br />
the capitellum. Image converter control in two planes.<br />
Opening of the capitellum with a hollow reamer.<br />
11
Operating Manual<br />
2<br />
Mounting the nail at the<br />
targeting device<br />
Targeting device base KH165T<br />
Nail-adapter screw KH172R<br />
Targeting attachment KH166P<br />
Fastening screw KH167T<br />
Targeting bow R / L KH170R / KH171R<br />
Tightening sleeve KH321R<br />
Wrench KH324C<br />
Fasten the targeting device base to the<br />
targeting attachment with the fastening<br />
screw.<br />
Note:<br />
To the right of the fastening screw, the<br />
inscription “proximal humerus nail” should<br />
be visible now.<br />
Push the nail adapter screw through the<br />
targeting device base and slightly tighten<br />
the nail by hand. The grooves of different<br />
sizes on the nail tip allow only one nail<br />
position on the targeting device. Firmly<br />
tighten the nail with the tightening sleeve<br />
or wrench. The right-hand or left-hand<br />
targeting bows can be attached either<br />
before or after manual insertion of the nail.<br />
If only fixation screws are used for placement<br />
in the capitellum, it is not necessary to attach<br />
the targeting bow. Insert the nail manually.<br />
12
3<br />
Checking the nail position<br />
Nail depth gauge KH169R<br />
70°<br />
50°<br />
Precise positioning of the greater tubercle<br />
and alignment of the targeting bow. Image<br />
converter control.<br />
The nail depth can be checked either by sliding<br />
the nail depth gauge along the targeting device<br />
or with the X-ray marking at the targeting<br />
device. At the height of the hexagon screw,<br />
the nail insertion depth can be read on the<br />
nail depth gauge.<br />
Care should be taken that the nail does not<br />
protrude beyond the calotte.<br />
3<br />
3<br />
1<br />
1<br />
2<br />
2<br />
4<br />
Applying the fixation screw holes<br />
Tissue-protection sleeve KH182R<br />
Obturator KH181R<br />
Spiral drill Ø 3.5 mm KH184R<br />
Screw length gauge KH398R<br />
Screwdriver KH189R<br />
Insert the obturator with the tissue-protection<br />
sleeve up to the bone. Drill the screw channel<br />
with the spiral drill (Ø 3.5 mm). Determine the<br />
length of the fixation screw. Insert the first<br />
fixation screw. Depending on the particular<br />
fracture, repeat this procedure until fixation<br />
screws are seated in all four nail holes.<br />
13
Operating Manual<br />
4a<br />
Inserting the fixation screw<br />
Tissue-protection sleeve KH182R<br />
Obturator KH181R<br />
Spiral drill Ø 3.5 mm KH184R<br />
Screw length gauge KH398R<br />
Screwdriver KH189R<br />
The marking on the screwdriver indicates<br />
when the screw head touches the cortical<br />
bone.<br />
5<br />
Inserting the transfixation screws<br />
Tissue-protection sleeve KH182R<br />
Obturator KH181R<br />
Drilling sleeve Ø 2.7 mm KH186R<br />
Spiral drill Ø 2.7 mm KH183R<br />
Screw length gauge KH398R<br />
Screwdriver KH189R<br />
Advance the tissue-protection sleeve with the<br />
obturator until contact is made with bone.<br />
Push the drilling sleeve (Ø 2.7 mm) into the<br />
tissue-protection sleeve and drill through both<br />
cortical layers with the spiral drill (Ø 2.7 mm).<br />
Determine the screw length and insert the<br />
transfixation screw (Ø 3.5 mm).<br />
6<br />
Distal locking (for long nail only)<br />
Spiral drill Ø 2.7 mm KH183R<br />
Screw length gauge KH398R<br />
Screwdriver KH189R<br />
If the long-nail version is used, the distal locking holes are locked through<br />
the freehand technique, using the shorter spiral drill Ø 2.7 mm KH190R.<br />
This technique is described in Section 4 of the Operating Manual for<br />
<strong>Targon</strong> ® H.<br />
14
7<br />
Removing the targeting device<br />
Tightening sleeve KH321R<br />
Wrench KH324C<br />
Screwdriver KH189R<br />
Using the tightening sleeve or wrench,<br />
loosen the adapter screw from the nail.<br />
Then disassemble the targeting device<br />
into its components.<br />
8<br />
Screwdriver KH189R<br />
Fixate the locking screw on the screwdriver<br />
and screw it into the nail.<br />
Metal removal<br />
Screwdriver LS013R<br />
Extractor adapter KH188R<br />
9<br />
Extractor instrument KH310R<br />
Slotted hammer KH113R<br />
Screwdriver KH189R<br />
Access is via the old scar. Push the guide<br />
pin centrally into the nail tip under image<br />
converter monitoring; carefully pre-drill<br />
with the hollow reamer. Remove the<br />
proximal fixation screws and screw in<br />
the extractor adapter. Remove the interlocking<br />
screws that have been inserted<br />
and then remove the nail with the<br />
extractor instrument and the slotted<br />
hammer.<br />
Note:<br />
For further information on the standard<br />
and special instrument sets for metal<br />
removal, see page 34.<br />
15
H<br />
Operating Manual<br />
Preoperative Planning<br />
Nail lengths<br />
Nail diameters<br />
Selection of screw type to<br />
maintain compression<br />
Patient Position<br />
16
Antegrade Approach<br />
A1<br />
Access and preparation<br />
of the nail bed<br />
Guide pin KH159R<br />
Hollow reamer Ø 8.5 mm KH158R<br />
Deltoid-split access on the front<br />
acromial margin.<br />
Insertion of the guide pin (Ø 8.5 mm) to<br />
the most cranial edge of the capitellum<br />
under image converter control. Drill<br />
the entry hole with the hollow reamer<br />
(Ø 8.5 mm).<br />
A2<br />
Mounting the nail to the<br />
targeting device<br />
Targeting device base KH165T<br />
Targeting attachment KH166P<br />
Fastening screw KH167T<br />
Nail adapter screw KH172R<br />
Tightening sleeve KH321R<br />
Wrench KH324C<br />
Fasten the targeting attachment to the<br />
targeting device base with the fastening<br />
screw.<br />
Note:<br />
Insert the nail adapter screw through<br />
the targeting device and slightly tighten<br />
the nail by hand before tightening it<br />
firmly with the tightening sleeve or<br />
wrench. The grooves of different sizes<br />
on the nail tip allow only one nail<br />
position.<br />
17
H<br />
Operating Manual<br />
A3<br />
Insertion of the nail and<br />
locking of the compression<br />
hole<br />
Nail depth gauge KH169R<br />
Tissue protection sleeve KH182R<br />
Obturator KH181R<br />
Spiral drill Ø 2.7 mm KH183R<br />
Note:<br />
If fracture compression is necessary,<br />
the nail must be inserted deeper<br />
by the length of the compression<br />
required. To achieve better support,<br />
we recommend bicortical insertion<br />
of the first proximal interlocking<br />
screw under the capitellum.<br />
Following manual insertion of the<br />
nail, check its position on the image<br />
converter. The nail insertion depth<br />
can be checked with the nail depth<br />
gauge, which is slid along the targeting<br />
device up to the capitellum.<br />
At the upper edge of the hexagon<br />
nut, the insertion depth can now<br />
be read on the scale or, alternatively,<br />
by means of the X-ray mark at the<br />
targeting device. To prevent protrusion<br />
of the nail the displayed value<br />
should be between 5 and 10 mm.<br />
Using the obturator, push the tissueprotection<br />
sleeve up to the bone in<br />
the hole marked as “compr”.<br />
Insert the spiral drill (Ø 2.7 mm)<br />
through the corresponding drilling<br />
sleeve to drill open the screw hole.<br />
Determine the screw length and<br />
insert the interlocking screw<br />
(Ø 3.5 mm).<br />
18
Antegrade Approach<br />
A4<br />
Compressing the fracture<br />
Spiral drill Ø 2.7 mm KH190R<br />
The first step is the freehand locking of the<br />
distal portion with the spiral drill (Ø 2.7 mm)<br />
and insertion of the screws (Ø 3.5 mm) in the<br />
selected locking holes.<br />
Compression screw KH173R<br />
Screwdriver KH189R<br />
Screw in the compression screw through the<br />
targeting device. With the screwdriver, turn<br />
the compression screw in the opposite direction<br />
to the interlocking screw until contact is made<br />
with bone in the fracture area. The compression<br />
maximum is 8 mm.<br />
The compression screw is left in this position.<br />
19
H<br />
Operating Manual<br />
Antegrade Approach<br />
A4<br />
Compressing the fracture<br />
Spiral drill Ø 2.7 mm KH183R<br />
Tissue-protection sleeve KH182R<br />
Obturator KH181R<br />
Screw length gauge KH398R<br />
Spiral drill Ø 3.5 mm KH184R<br />
A5<br />
Using the obturator, advance the tissue<br />
protection sleeve through the hole in<br />
the targeting bow marked with Stat.<br />
Open the screw hole by drilling with<br />
the spiral drill (Ø 3.5 mm). Determine<br />
the screw length and insert the selected<br />
fixation screw (Ø 4.5 mm).<br />
The screw hole geometry in the nail<br />
allows inserting in the 2nd screw an<br />
interlocking screw Ø 3.5 mm or a fixation<br />
screw Ø 4.5 mm.<br />
Removing the targeting device<br />
Screwdriver KH189R<br />
Tightening sleeve KH321R<br />
Wrench KH324C<br />
Remove the compression screw. Loosen<br />
the connection between targeting device<br />
and device base.<br />
Loosen the nail adapter screw, using the<br />
tightening sleeve or the wrench.<br />
A6<br />
Fixating the locking screw on the<br />
screwdriver and screwing it into<br />
the nail.<br />
If extending locking screws are used, care<br />
must be taken that the proximal locking<br />
holes of the nail are positioned deeper, by<br />
the appropriate extension length, in the bone.<br />
For this situation we recommend the short<br />
fixation screws, 22-28 mm, with their more<br />
slender threading. These screws were developed<br />
especially for fixation in the harder<br />
and thicker cortical bone in this region.<br />
20
Retrograde Approach<br />
Preoperative Planning<br />
Nail lengths<br />
Nail diameters<br />
Selection of screw type to<br />
maintain compression<br />
Patient Position<br />
21
H<br />
Operating Manual<br />
R1<br />
Access and preparation<br />
of the nail bed<br />
Guide instrument KH163R<br />
Access reamer KH162R<br />
Spiral drill Ø 2.7 mm KH183R<br />
Screw length gauge KH398R<br />
Screwdriver KH189R<br />
Reamer Ø 8 mm KH177R<br />
Reamer Ø 9 mm KH178R<br />
Splitting of the triceps tendon<br />
and exposure of the fossa olecrani.<br />
The guide instrument for the<br />
access reamer is placed on the<br />
fossa until the nail tip marked<br />
on the guide instrument corresponds<br />
to the planned nail tip.<br />
Using the spiral drill (Ø 2.7 mm),<br />
drill through the pin of the guide<br />
instrument and screw the guide<br />
instrument to the bone with a<br />
fixation screw (Ø 3.5 mm). The<br />
drilled hole can be used later as<br />
a locking hole for compression.<br />
Prepare the entry portal by<br />
advancing the motor-powered<br />
access reamer on the guide<br />
instrument up to the stop.<br />
Remove the guide instrument.<br />
Note:<br />
The access reamer cannot come<br />
into contact with the fixation<br />
screw.<br />
180 200 220 240 260 280 300 8<br />
To ensure easy insertion of the<br />
nail, rework the entry portal with<br />
the reamers after removing the<br />
guide instrument.<br />
22
Retrograde Approach<br />
R2<br />
Mounting the nail to the<br />
targeting device<br />
Targeting device base KH165T<br />
Targeting attachment KH166P<br />
Fastening screw KH167T<br />
Nail adapter screw KH172R<br />
Tightening sleeve KH321R<br />
Wrench KH324C<br />
Fasten the targeting attachment to<br />
the targeting device base with the<br />
fastening screw.<br />
Note:<br />
To the right of the attachment screw,<br />
the inscription “shaft nail” should be<br />
visible now.<br />
Insert the nail adapter screw through<br />
the targeting device, turn the nail<br />
lightly by hand and tighten it firmly<br />
with the tightening sleeve or wrench.<br />
The grooves of different sizes on the<br />
nail tip allow only one nail position.<br />
23
H<br />
Operating Manual<br />
R3<br />
Insertion of the nail and<br />
locking of the compression<br />
hole<br />
Tissue-protection sleeve KH182R<br />
Spiral drill Ø 2.7 mm KH183R<br />
Screw length gauge KH398R<br />
Screwdriver KH189R<br />
Note:<br />
If fracture compression is necessary,<br />
the nail must be inserted deeper by<br />
the amount of compression.<br />
Following manual insertion of the<br />
nail, check the position of the implant.<br />
The drilled hole through which the<br />
guide instrument is fixed can be used<br />
to lock the compression hole. To locate<br />
this hole, the spiral drill (Ø 2.7 mm)<br />
can be pushed through the tissueprotection<br />
sleeve with the drilling<br />
sleeve. Once the hole is located, the<br />
screw length is determined and the<br />
corresponding interlocking screw<br />
(Ø 3.5 mm) is inserted.<br />
24
Retrograde Approach<br />
R4<br />
Compression of the<br />
fracture<br />
Spiral drill Ø 2.7 mm KH190R<br />
The first step is the freehand<br />
interlocking of the proximal area<br />
with the spiral drill (Ø 2.7 mm)<br />
and insertion of the screws<br />
(Ø 3.5 mm) into the selected<br />
locking holes.<br />
Compression screw KH173R<br />
Screwdriver KH189R<br />
Screw in the compression screw<br />
through the targeting device.<br />
The compression screw is turned<br />
opposite to the interlocking<br />
screw, using the screwdriver,<br />
until contact is made with bone<br />
in the fracture area.<br />
The compression screw is left in<br />
this position.<br />
25
H<br />
Operating Manual<br />
Retrograde Approach<br />
R4<br />
Compression of the fracture<br />
Tissue-protection sleeve KH182R<br />
Obturator KH181R<br />
Screw length gauge KH398R<br />
Spiral drill Ø 3.5 mm KH184R<br />
With the obturator, push the tissueprotection<br />
sleeve through the hole<br />
marked “Stat” in the targeting bow.<br />
Open the screw hole with the spiral<br />
drill (Ø 3.5 mm). Measure the screw<br />
length and screw in the fixation screw<br />
(Ø 4.5 mm).<br />
26
Antegrade/<br />
Retrograde Approach<br />
5<br />
Metal removal<br />
Screwdriver KH189R<br />
Extractor adapter KH188R<br />
Extractor instrument KH310R<br />
Slotted hammer KH113R<br />
Once the fixation screw and the<br />
interlocking screws have been<br />
removed, the extractor adapter is<br />
screwed in and the nail is removed<br />
with the extractor instrument and<br />
the slotted hammer.<br />
27
H<br />
Instruments Overview<br />
Set 1<br />
A<br />
C<br />
F<br />
B<br />
D<br />
N<br />
K<br />
M<br />
Q<br />
L<br />
P<br />
E<br />
O<br />
G<br />
H<br />
J<br />
Art. no. Designation<br />
A KH161R Guide pin Ø 10.5 mm<br />
B KH160R Hollow reamer Ø 10.5 mm<br />
C KH159R Guide pin Ø 8.5 mm<br />
D KH158R Hollow reamer Ø 8.5 mm<br />
E KH163R Guide instrument including handle<br />
F<br />
Handle of guide instrument KH 163 R<br />
G KH398R Screw length gauge<br />
H KH178R Reamer Ø 9 mm<br />
J KH177R Reamer Ø 8 mm<br />
K KH186R Drilling sleeve Ø 2.7 mm<br />
L KH183R Spiral drill Ø 2.7 mm<br />
M KH184R Spiral drill Ø 3.5 mm<br />
N KH182R Tissue protection sleeve<br />
O KH181R Obturator<br />
P KH162R Access reamer<br />
Q KH190R Freehand drill Ø 2.7 mm<br />
28
Set 2<br />
L<br />
J<br />
H<br />
G<br />
F<br />
D<br />
C<br />
B<br />
E<br />
K<br />
A<br />
Art. no.<br />
Designation<br />
A KH166P Targeting attachment<br />
B KH171R Targeting bow, left<br />
C KH170R Targeting bow, right<br />
D KH165T Targeting device base<br />
E KH167T Attachment screw<br />
F KH172R Nail adapter screw<br />
G KH173R Compression screw<br />
H KH324C Wrench<br />
J KH321R Tightening sleeve<br />
K KH169R Nail depth gauge<br />
L KH189R Screwdriver<br />
29
H<br />
Instruments<br />
KH146 <strong>Targon</strong> ® <strong>PH</strong>/H Complete Instrument Set<br />
Basic Instrument Set 1<br />
Quantity Art. no. Description<br />
1 KH158R Hollow reamer Ø 8.5 mm<br />
1 KH159R Guide pin Ø 8.5 mm<br />
1 KH160R Hollow reamer Ø 10.5 mm<br />
1 KH161R Guide pin Ø 10.5 mm<br />
1 KH162R Access reamer<br />
1 KH163R Guide instrument for KH162R including handle<br />
1 KH177R Reamer Ø 8 mm<br />
1 KH178R Reamer Ø 9 mm<br />
1 KH182R Tissue protection sleeve<br />
1 KH183R Spiral drill Ø 2.7 mm<br />
1 KH186R Drilling sleeve Ø 2.7 mm<br />
1 KH184R Spiral drill Ø 3.5 mm<br />
1 KH398R Screw length gauge<br />
1 JF511 Wrapping drape<br />
1 JG785B Identification plate, labeled, red<br />
1 KH181R Obturator<br />
1 KH151R Tray with storage rack<br />
1 KH190R Freehand drill Ø 2.7 mm<br />
1 TE820 Packing template (for KH151R)<br />
1 TE823 Packing template (for KH153R)<br />
KH146 Set 1<br />
30
Basic Instrument Set 2<br />
Extraction Instruments<br />
Quantity Art. no. Designation<br />
1 KH165T Targeting device base<br />
1 KH166P Targeting attachment for humerus nail<br />
2 KH167T Attachment screw<br />
1 KH169R Nail depth gauge<br />
1 KH170R Targeting bow, right<br />
1 KH171R Targeting bow, left<br />
1 KH172R Nail adapter screw<br />
1 KH173R Compression screw<br />
1 KH321R Tightening sleeve SW 10<br />
1 KH324C Wrench<br />
1 KH189R Screwdriver<br />
1 JF511 Wrapping drape<br />
1 JG786B Identification plate, labeled, blue<br />
1 KH153R Tray with storage rack<br />
1 KH164 X-ray template<br />
Quantity Art. no. Designation<br />
1 KH310R Extractor instrument<br />
1 KH188R Extractor adapter<br />
1 KH113R Slotted hammer<br />
to be ordered separately;<br />
the expeller instrument set is also used for the<br />
removal procedure.<br />
KH146 Set 2<br />
Container for KH146 (recommended):<br />
Base<br />
JK441<br />
Lid PrimeLine<br />
JP001<br />
31
H<br />
Instruments<br />
KH150 <strong>Targon</strong> ® H – Instrument Set<br />
Basic Instrument Set<br />
Quantity Art. no. Designation<br />
1 KH158R Hollow reamer Ø 8.5 mm<br />
1 KH159R Guide pin Ø 8.5 mm<br />
1 KH162R Access reamer Ø 9 mm<br />
1 KH163R Guide instrument for KH162R incl. handle<br />
1 KH177R Reamer Ø 8 mm<br />
1 KH178R Reamer Ø 9 mm<br />
1 KH182R Tissue protection sleeve<br />
1 KH183R Spiral drill Ø 2.7 mm<br />
1 KH184R Spiral drill Ø 3.5 mm<br />
1 KH186R Drilling sleeve Ø 2.7 mm<br />
1 KH398R Screw length gauge<br />
1 KH181R Obturator<br />
1 KH151R Tray with storage rack<br />
2 JF511 Wrapping drape<br />
1 KH165T Targeting device base<br />
1 KH166P Targeting attachment for humerus nails<br />
1 KH190R Freehand drill Ø 2.7 mm<br />
1 TE821 Packing template (KH151R)<br />
1 TE824 Packing template (KH153R)<br />
Quantity Art. no. Designation<br />
2 KH167T Fastening screw<br />
1 KH169R Nail depth gauge<br />
1 KH172R Nail adapter screw<br />
1 KH173R Compression screw<br />
1 KH321R Tightening sleeve SW 10<br />
1 KH324C Wrench<br />
1 KH189R Screwdriver<br />
1 KH153R Tray with storage rack<br />
1 JG785B Identification plate, labeled, red<br />
1 JG786B Identification plate, labeled, blue<br />
Container for KH150 (recommended):<br />
Base<br />
JK441<br />
Lid PrimeLine<br />
JP001<br />
KH150 Set 2<br />
KH150 Set 1<br />
32
KH152 <strong>Targon</strong> ® <strong>PH</strong> – Instrument Set<br />
Basis Instrument Set<br />
Quantity Art. no. Designation<br />
1 KH160R Hollow reamer Ø 10.5 mm<br />
1 KH161R Guide pin KH160R<br />
1 KH182R Tissue protection sleeve<br />
1 KH184R Spiral drill Ø 3.5 mm<br />
1 KH183R Spiral drill Ø 2.7 mm<br />
1 KH186R Drilling sleeve Ø 2.7 mm<br />
1 KH398R Screw length gauge<br />
1 KH181R Obturator<br />
1 KH151R Tray with storage rack<br />
2 JF511 Wrapping drape<br />
1 KH165T Targeting device base<br />
1 KH166P Targeting attachment for humerus nails<br />
2 KH167T Fastening screw<br />
1 KH169R Nail depth gauge<br />
1 KH170R Targeting bow right<br />
1 KH171 Targeting bow left<br />
1 KH190R Freehand drill Ø 2.7 mm<br />
1 TE822 Packing template (KH151R)<br />
1 TE825 Packing template (KH153R)<br />
Quantity Art. no. Designation<br />
1 KH172R Nail adapter screw<br />
1 KH321R Tightening sleeve SW 10<br />
1 KH324C Wrench<br />
1 KH189R Screwdriver<br />
1 KH153R Tray with storage rack<br />
1 JG785B Identification plate, labeled, red<br />
1 JG786B Identification plate, labeled, blue<br />
Container for KH152 (recommended):<br />
Base<br />
JK441<br />
Lid PrimeLine<br />
JP001<br />
KH152 Set 2<br />
KH152 Set 1<br />
33
H<br />
Instruments<br />
Loaner Set O-0011<br />
Standard Metal Removal<br />
Quantity Art. no. Designation<br />
1 GB020R Tightening key standard hexagonal<br />
1 JF212R 1/1 Tray perforated 485 x 253 x 56 mm<br />
1 JF222R 1/1 Tray perforated 540 x 253 x 56 mm<br />
1 JF932 Silicone positioning mat 470 x 230 x 30 mm<br />
1 JK441 Basin only, for JK401P/T JK411P/T JK431P/T<br />
1 JK489 Basis 1/1 inner lid silver<br />
1 KH113R Slotted hammer for extraction hook<br />
1 KH188R <strong>Targon</strong> ® H/<strong>PH</strong> extractor adapter<br />
2 KH215R <strong>Targon</strong> ® PF extractor for support sleeves<br />
2 KH216R <strong>Targon</strong> ® PF external extractor for support sleeves<br />
1 KH275R <strong>Targon</strong> ® hollow reamer for screw shaft Ø 3.5 mm<br />
1 KH276R <strong>Targon</strong> ® hollow reamer for screw shaft Ø 4.5 - 6 mm<br />
2 KH278R <strong>Targon</strong> ® extractor for screw shaft Ø 7.0 mm<br />
2 KH279R <strong>Targon</strong> ® extractor for screw shaft Ø 8.0 mm<br />
1 KH286R <strong>Targon</strong> ® oversleeve for support sleeves<br />
1 KH289R <strong>Targon</strong> ® screwdriver SW 4.5, quick-action chuck adapter<br />
1 KH290R <strong>Targon</strong> ® T-handle SW 6.0 for explantation instrument<br />
1 KH291R <strong>Targon</strong> ® extractor for defective hexagon socket SW 4.5<br />
1 KH292R <strong>Targon</strong> ® extractor for defective hexagon socket SW 3.5<br />
1 KH293R <strong>Targon</strong> ® extractor for support sleeves<br />
1 KH294R <strong>Targon</strong> ® hollow reamer for screw head Ø 7.0 und 8.0 mm<br />
2 KH296R <strong>Targon</strong> ® extractor for screw shaft Ø 3.5 mm<br />
2 KH297R <strong>Targon</strong> ® extractor for screw shaft Ø 4.5 mm<br />
2 KH298R <strong>Targon</strong> ® extractor for screw shaft Ø 5.0 mm<br />
2 KH299R <strong>Targon</strong> ® extractor for screw shaft Ø 6.0 mm<br />
1 KH310R <strong>Targon</strong> ® expeller instrument for femur and tibia<br />
1 KH311R <strong>Targon</strong> ® expeller adapter for nails 8 -11 mm<br />
1 KH312R <strong>Targon</strong> ® expeller adapter for nails 12 -16 mm<br />
1 KH319R <strong>Targon</strong> ® Universal T-handle<br />
1 KH325R <strong>Targon</strong> ® Screwdriver SW 4.5 with holding device<br />
1 KH377R <strong>Targon</strong> ® PF driver instrument for support screws<br />
1 KH378R <strong>Targon</strong> ® PF holding screw for driver instrument<br />
1 KH404R <strong>Targon</strong> ® RF T-key for threaded sleeves<br />
1 KH427R <strong>Targon</strong> ® PF driver instrument for support sleeves<br />
1 KH428R <strong>Targon</strong> ® PF T-socket wrench SW 6.0<br />
1 LS013R Screwdriver SW 3.5 length 200 mm<br />
34
Loaner Set O-0012<br />
Instrument Set for Removal of Broken Nails<br />
Quantity Art. no. Designation<br />
1 KH113R Slotted hammer for extraction hook<br />
1 KH326R <strong>Targon</strong> ® extractor for broken nails Ø 7 mm<br />
1 KH327R <strong>Targon</strong> ® lever instrument for extractor<br />
1 KH328R <strong>Targon</strong> ® extractor for broken nails Ø 8 mm<br />
1 KH329R <strong>Targon</strong> ® extractor for broken nails Ø 9 mm<br />
1 KH330R <strong>Targon</strong> ® extractor for broken nails Ø 10 mm<br />
1 KH331R <strong>Targon</strong> ® extractor for broken nails Ø 11 mm<br />
1 KH332R <strong>Targon</strong> ® extractor for broken nails Ø 12 mm<br />
1 KH217R <strong>Targon</strong> ® extractor for broken nails Ø 13 mm<br />
1 KH218R <strong>Targon</strong> ® extractor for broken nails Ø 14 -15 mm<br />
1 KH219R <strong>Targon</strong> ® extractor for broken nails Ø 17 mm<br />
Instrument sets for the explantation of <strong>Targon</strong> ® nails can be<br />
ordered from Loaner Service:<br />
Phone: +49 7461 95-2019<br />
35
H<br />
Implant Sets<br />
KH154<br />
<strong>Targon</strong> ® H Nail Set<br />
Quantity Art. no. Designation/mm<br />
1 KE206T Shaft nail 7 x 180<br />
1 KE208T Shaft nail 7 x 200<br />
1 KE210T Shaft nail 7 x 220<br />
1 KE212T Shaft nail 7 x 240<br />
1 KE214T Shaft nail 7 x 260<br />
1 KE306T Shaft nail 8 x 180<br />
1 KE308T Shaft nail 8 x 200<br />
1 KE310T Shaft nail 8 x 220<br />
1 KE312T Shaft nail 8 x 240<br />
1 KE314T Shaft nail 8 x 260<br />
1 KH155R Tray with storage rack<br />
1 TE818 Packing template<br />
recommended container for KH156 and KH154: JK400<br />
recommended tray lid: JP001<br />
KH156<br />
<strong>Targon</strong> ® <strong>PH</strong> Nail Set<br />
Quantity Art. no. Designation/mm<br />
1 KE004T <strong>Targon</strong> ® <strong>PH</strong> nail 10/8 x 150 mm right<br />
1 KE019T <strong>Targon</strong> ® <strong>PH</strong> nail 10/7 x 200 mm right<br />
1 KE021T <strong>Targon</strong> ® <strong>PH</strong> nail 10/7 x 220 mm right<br />
1 KE024T <strong>Targon</strong> ® <strong>PH</strong> nail 10/7 x 250 mm right<br />
1 KE054T <strong>Targon</strong> ® <strong>PH</strong> nail 10/8 x 150 mm left<br />
1 KE069T <strong>Targon</strong> ® <strong>PH</strong> nail 10/7 x 200 mm left<br />
1 KE071T <strong>Targon</strong> ® <strong>PH</strong> nail 10/7 x 220 mm left<br />
1 KE074T <strong>Targon</strong> ® <strong>PH</strong> nail 10/7 x 250 mm left<br />
1 KH157R Tray with storage rack<br />
Additional Sizes<br />
Quantity Art. no. Designation/mm<br />
1 KE023T <strong>Targon</strong> ® <strong>PH</strong> nail 10/7 x 235 mm right<br />
1 KE026T <strong>Targon</strong> ® <strong>PH</strong> nail 10/7 x 265 mm right<br />
1 KE027T <strong>Targon</strong> ® <strong>PH</strong> nail 10/7 x 280 mm right<br />
1 KE073T <strong>Targon</strong> ® <strong>PH</strong> nail 10/7 x 235 mm left<br />
1 KE076T <strong>Targon</strong> ® <strong>PH</strong> nail 10/7 x 265 mm left<br />
1 KE077T <strong>Targon</strong> ® <strong>PH</strong> nail 10/7 x 280 mm left<br />
36
KH148 – Interlocking Screws<br />
Screw Set <strong>Targon</strong> ® <strong>PH</strong>/H<br />
KH148 – Fixation Screws<br />
Screw Set <strong>Targon</strong> ® <strong>PH</strong>/H<br />
Ø/mm Quantity Art. no. Length/mm<br />
3.5 4 KB518T 18<br />
3.5 4 KB521T 21<br />
3.5 4 KB524T 24<br />
3.5 4 KB527T 27<br />
3.5 4 KB530T 30<br />
3.5 4 KB533T 33<br />
3.5 4 KB536T 36<br />
3.5 4 KB539T 39<br />
3.5 4 KB542T 42<br />
3.5 4 KB545T 45<br />
3.5 4 KB548T 48<br />
3.5 2 KB551T 51<br />
3.5 2 KB554T 54<br />
3.5 2 KB557T 57<br />
3.5 2 KB560T 60<br />
recommended container for KH148: JK400<br />
recommended tray lid: JP001<br />
Ø/mm Quantity Art. no. Length/mm<br />
4.5 2 KB062T 22<br />
4.5 2 KB064T 24<br />
4.5 2 KB066T 26<br />
4.5 2 KB068T 28<br />
4.5 2 KB070T 30<br />
4.5 2 KB072T 32<br />
4.5 2 KB074T 34<br />
4.5 2 KB076T 36<br />
4.5 2 KB078T 38<br />
4.5 2 KB080T 40<br />
4.5 2 KB082T 42<br />
4.5 2 KB084T 44<br />
4.5 2 KB086T 46<br />
4.5 2 KB088T 48<br />
4.5 2 KB090T 50<br />
4.5 2 KB092T 52<br />
4.5 2 KB094T 54<br />
4.5 2 KB096T 56<br />
4.5 2 KB098T 58<br />
4.5 2 KB100T 60<br />
KH148 – Locking Screws<br />
KB062T – KB068T<br />
KB070T – KB100T<br />
Screw Set <strong>Targon</strong> ® <strong>PH</strong>/H<br />
Quantity Art. no. Extension/mm OD Ø/mm Length<br />
2 KB610T 0 (<strong>PH</strong>) 6 x 7<br />
2 KB615T 0 (H) 6 x 9<br />
2 KB617T 5 (<strong>PH</strong>/H)<br />
2 KB618T 10 (<strong>PH</strong>/H)<br />
2 KB619T 15 (<strong>PH</strong>/H)<br />
2 KB620T 20 (H)<br />
2 KB621T 25 (H)<br />
2 KB622T 30 (H)<br />
2 KB623T 35 (H)<br />
KB610T<br />
KB615T<br />
KB617T KB618T KB619T KB620T KB621T KB622T KB623T<br />
37
Implant Program<br />
Nail Type Right<br />
Ø prox./distal mm Length/mm Art. no.<br />
10/8 150 mm KE004T<br />
10/7 200 mm KE019T<br />
10/7 220 mm KE021T<br />
10/7 235 mm KE023T<br />
10/7 250 mm KE024T<br />
10/7 265 mm KE026T<br />
10/7 280 mm KE027T<br />
Nail Type Left<br />
Ø prox./distal mm Length/mm Art. no.<br />
10/8 150 mm KE054T<br />
10/7 200 mm KE069T<br />
10/7 220 mm KE071T<br />
10/7 235 mm KE073T<br />
10/7 250 mm KE074T<br />
10/7 265 mm KE076T<br />
10/7 280 mm KE077T<br />
38
H<br />
Nail Ø 7 mm<br />
Length/mm<br />
Art. no.<br />
180 KE206T<br />
200 KE208T<br />
220 KE210T<br />
240 KE212T<br />
260 KE214T<br />
280 KE216T<br />
300 KE218T<br />
Nail Ø 8 mm<br />
Length/mm<br />
Art. no.<br />
180 KE306T<br />
200 KE308T<br />
220 KE310T<br />
240 KE312T<br />
260 KE314T<br />
280 KE316T<br />
300 KE318T<br />
39
All rights reserved. Technical alterations are possible. This leaflet may be used for<br />
no other purposes than offering, buying and selling of our products. No part may<br />
be copied or reproduced in any form. In the case of misuse we retain the rights to<br />
recall our catalogues and pricelists and to take legal actions.<br />
Aesculap AG & Co. KG<br />
Am Aesculap-Platz<br />
78532 Tuttlingen<br />
Germany<br />
Phone +49 7461 95-0<br />
Fax +49 7461 95-2600<br />
www.aesculap.de<br />
Brochure No. O 189 02 1006/2/3