Installation Instructions RSR Bonneville Gear Indicator - RB Racing
Installation Instructions RSR Bonneville Gear Indicator - RB Racing
Installation Instructions RSR Bonneville Gear Indicator - RB Racing

You also want an ePaper? Increase the reach of your titles
YUMPU automatically turns print PDFs into web optimized ePapers that Google loves.
“L” will be displayed if you wish to reprogram the indicator. Simply hold down the button<br />
on the display before you “key on” and continue to hold the button down until “L” is<br />
displayed. Release the button and the unit can be programmed.<br />
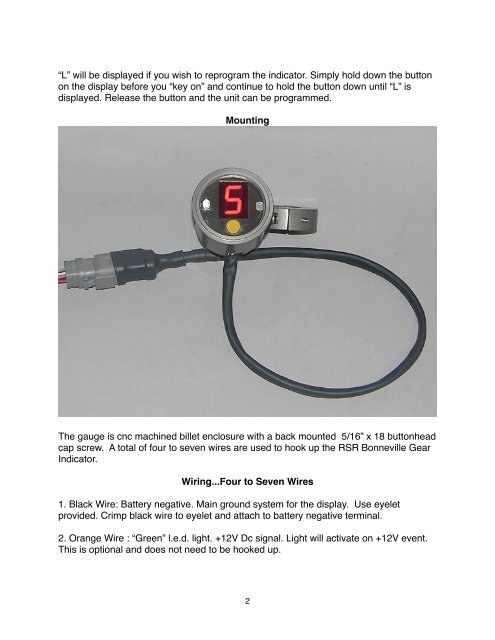
Mounting<br />
The gauge is cnc machined billet enclosure with a back mounted 5/16” x 18 buttonhead<br />
cap screw. A total of four to seven wires are used to hook up the <strong>RSR</strong> <strong>Bonneville</strong> <strong>Gear</strong><br />
<strong>Indicator</strong>.<br />
Wiring...Four to Seven Wires<br />
1. Black Wire: Battery negative. Main ground system for the display. Use eyelet<br />
provided. Crimp black wire to eyelet and attach to battery negative terminal.<br />
2. Orange Wire : “Green” l.e.d. light. +12V Dc signal. Light will activate on +12V event.<br />
This is optional and does not need to be hooked up.<br />
2