ESWA Induced Draft Closed Circuit Fluid Coolers ... - EVAPCO.com.au
ESWA Induced Draft Closed Circuit Fluid Coolers ... - EVAPCO.com.au
ESWA Induced Draft Closed Circuit Fluid Coolers ... - EVAPCO.com.au

Create successful ePaper yourself
Turn your PDF publications into a flip-book with our unique Google optimized e-Paper software.
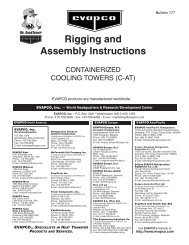
Bulletin 150B<br />
Rigging and<br />
Assembly Instructions<br />
<strong>ESWA</strong> CLOSED CIRCUIT COOLERS<br />
<strong>EVAPCO</strong> products are manufactured worldwide:<br />
<strong>EVAPCO</strong>, Inc. — World Headquarters & Research/Development Center<br />
<strong>EVAPCO</strong>, Inc. • P.O. Box 1300 • Westminster, MD 21158 USA<br />
PHONE: 410-756-2600 • FAX: 410-756-6450 • E-MAIL: marketing@evapco.<strong>com</strong><br />
<strong>EVAPCO</strong> North America<br />
<strong>EVAPCO</strong>, Inc.<br />
World Headquarters<br />
P.O. Box 1300<br />
Westminster, MD 21158 USA<br />
Phone: 410-756-2600<br />
Fax: 410-756-6450<br />
E-mail: marketing@evapco.<strong>com</strong><br />
<strong>EVAPCO</strong> East<br />
5151 Allendale Lane<br />
Taneytown, MD 21787 USA<br />
Phone: 410-756-2600<br />
Fax: 410-756-6450<br />
E-mail: marketing@evapco.<strong>com</strong><br />
<strong>EVAPCO</strong> Midwest<br />
1723 York Road<br />
Greenup, IL 62428 USA<br />
Phone: 217-923-3431<br />
Fax: 217-923-3300<br />
E-mail: evap<strong>com</strong>w@evap<strong>com</strong>w.<strong>com</strong><br />
<strong>EVAPCO</strong> West<br />
1900 West Almond Avenue<br />
Madera, CA 93637 USA<br />
Phone: 559-673-2207<br />
Fax: 559-673-2378<br />
E-mail: contact@evapcowest.<strong>com</strong><br />
<strong>EVAPCO</strong> Iowa<br />
925 Quality Drive<br />
Lake View, IA 51450 USA<br />
Phone: 712-657-3223<br />
Fax: 712-657-3226<br />
<strong>EVAPCO</strong> Iowa<br />
Sales & Engineering<br />
1234 Brady Boulevard<br />
Owatonna, MN 55060 USA<br />
Phone: 507-446-8005<br />
Fax: 507-446-8239<br />
E-mail: evap<strong>com</strong>n@evap<strong>com</strong>n.<strong>com</strong><br />
Refrigeration Valves &<br />
Systems Corporation<br />
A wholly owned subsidiary of <strong>EVAPCO</strong>, Inc.<br />
1520 Crosswind Dr.<br />
Bryan, TX 77808 USA<br />
Phone: 979-778-0095<br />
Fax: 979-778-0030<br />
E-mail: rvs@rvscorp.<strong>com</strong><br />
McCormack Coil Company, Inc.<br />
A wholly owned subsidiary of <strong>EVAPCO</strong>, Inc.<br />
P.O. Box 1727<br />
6333 S.W. Lakeview Boulevard<br />
Lake Oswego, OR 97035 USA<br />
Phone: 503-639-2137<br />
Fax: 503-639-1800<br />
E-mail: mail@mmccoil.<strong>com</strong><br />
EvapTech, Inc.<br />
A wholly owned subsidiary of <strong>EVAPCO</strong>, Inc.<br />
8331 Nieman Road<br />
Lenexa, KS 66214 USA<br />
Phone: 913-322-5165<br />
Fax: 913-322-5166<br />
E-mail: marketing@evaptech.<strong>com</strong><br />
Tower Components, Inc.<br />
A wholly owned subsidiary of <strong>EVAPCO</strong>, Inc.<br />
5960 US HWY 64E<br />
Ramseur, NC 27316<br />
Phone: 336-824-2102<br />
Fax: 336-824-2190<br />
E-mail: mail@tower<strong>com</strong>ponentsinc.<strong>com</strong><br />
<strong>EVAPCO</strong> Newton<br />
701 East Jourdan Street<br />
Newton, IL 62448 USA<br />
Phone: 618-783-3433<br />
Fax: 618-783-3499<br />
E-mail: evap<strong>com</strong>w@evap<strong>com</strong>w.<strong>com</strong><br />
<strong>EVAPCO</strong>...SPECIALISTS IN HEAT TRANSFER<br />
PRODUCTS AND SERVICES.<br />
<strong>EVAPCO</strong> Europe<br />
<strong>EVAPCO</strong> Europe, N.V.<br />
European Headquarters<br />
Industrieterrein Oost 4010<br />
3700 Tongeren, Belgium<br />
Phone: (32) 12-395029<br />
Fax: (32) 12-238527<br />
E-mail: evapco.europe@evapco.be<br />
<strong>EVAPCO</strong> Europe, S.r.l.<br />
Via Ciro Menotti 10<br />
I-20017 Passirana di Rho<br />
Milan, Italy<br />
Phone: (39) 02-939-9041<br />
Fax: (39) 02-935-00840<br />
E-mail: evapcoeurope@evapco.it<br />
<strong>EVAPCO</strong> Europe, S.r.l.<br />
Via Dosso 2<br />
23020 Piateda Sondrio, Italy<br />
<strong>EVAPCO</strong> Europe, GmbH<br />
Bovert 22<br />
D-40670 Meerbusch, Germany<br />
Phone: (49) 2159-69560<br />
Fax: (49) 2159-695611<br />
E-mail: info@evapco.de<br />
Flex coil a/s<br />
A wholly owned subsidiary of <strong>EVAPCO</strong>, Inc.<br />
Knøsgårdvej 115<br />
DK-9440 Aabybro Denmark<br />
Phone: (45) 9824 4999<br />
Fax: (45) 9824 4990<br />
E-mail: info@flexcoil.dk<br />
<strong>EVAPCO</strong> S.A. (Pty.) Ltd.<br />
A licensed manufacturer of Evapco, Inc.<br />
18 Quality Road<br />
Isando 1600<br />
Republic of South Africa<br />
Phone: (27) 11-392-6630<br />
Fax: (27) 11-392-6615<br />
E-mail: evapco@icon.co.za<br />
Tiba Engineering Industries Co.<br />
A licensed manufacturer of Evapco, Inc.<br />
5 Al Nasr Road St.<br />
Nasr City, Cairo, Egypt<br />
Phone: (20) 2-290-7483/(20) 2-291-3610<br />
Fax: (20) 2-404-4667/ (20) 2-290-0892<br />
E-mail: manzgroup@tedata.net.eg<br />
<strong>EVAPCO</strong> Asia/Pacific<br />
<strong>EVAPCO</strong> Asia/Pacific Headquarters<br />
1159 Luoning Rd. Baoshan Industrial Zone<br />
Shanghai, P. R. China, Postal Code: 200949<br />
Phone: (86) 21-6687-7786<br />
Fax: (86) 21-6687-7008<br />
E-mail: marketing@evapcochina.<strong>com</strong><br />
Evapco (Shanghai) Refrigeration<br />
Equipment Co., Ltd.<br />
1159 Louning Rd., Baoshan Industrial Zone<br />
Shanghai, P.R. China, Postal Code: 200949<br />
Phone: (86) 21-6687-7786<br />
Fax: (86) 21-6687-7008<br />
E-mail: marketing@evapcochina.<strong>com</strong><br />
Beijing <strong>EVAPCO</strong> Refrigeration<br />
Equipment Co., Ltd.<br />
Yan Qi Industrial Development District<br />
Huai Rou County<br />
Beijing, P.R. China, Postal Code: 101407<br />
Phone: (86) 10 6166-7238<br />
Fax: (86) 10 6166-7395<br />
E-mail: evapcobj@evapcochina.<strong>com</strong><br />
Evapco Australia (Pty.) Ltd.<br />
34-42 Melbourne Road.<br />
P.O. Box 436<br />
Riverstone, N.S.W. Australia 2765<br />
Phone: (61) 2 9627-3322<br />
Fax: (61) 2 9627-1715<br />
E-mail: sales@evapco.<strong>com</strong>.<strong>au</strong><br />
EvapTech Asia Pacific Sdn. Bhd<br />
A wholly owned subsidiary of EvapTech, Inc.<br />
IOI Business Park, 2/F Unit 21<br />
Persiaran Puchong Jaya Selatan<br />
Bandar Puchong Jaya,<br />
47170 Puchong, Selangor, Malaysia<br />
Phone: (60-3) 8070 7255<br />
Fax: (60-3) 8070 5731<br />
E-mail: marketing-ap@evaptech.<strong>com</strong><br />
Visit <strong>EVAPCO</strong>’s Website at: http://www.evapco.<strong>com</strong>
<strong>ESWA</strong> <strong>Closed</strong> <strong>Circuit</strong> <strong>Coolers</strong><br />
Method of Shipment<br />
<strong>ESWA</strong> models are shipped with the top section(s) separate<br />
from the bottom section(s). These sections have mating<br />
flanges and will join together in a waterproof joint when sealed<br />
and bolted together as described in the following instructions.<br />
Miscellaneous items, such as sealer tape, bolt sets and any<br />
other required materials, are packaged and placed inside the<br />
pan for shipment.<br />
For 8.5’ wide units, the motors and drives are factory aligned<br />
and then shipped loose inside the basin section for mounting<br />
during installation. Refer to the “External Motor Installation”<br />
section in this bulletin.<br />
Storage<br />
Do not place tarps or other coverings over the top of the units if<br />
the units are to be stored before installation. Excessive heat<br />
can build up if the units are covered, c<strong>au</strong>sing possible damage<br />
to the PVC eliminators, louvers or fill. For extended storage<br />
beyond six months rotate the fan and fan motor shaft(s)<br />
monthly. Also, the fan shaft bearings should be purged and<br />
regreased prior to start-up.<br />
International Building Code Provisions<br />
The International Building Code (IBC) is a <strong>com</strong>prehensive set<br />
of regulations addressing the structural design and installation<br />
requirements for building systems – including HVAC and<br />
industrial refrigeration equipment. As of June 2008, all 50<br />
states plus Washington D.C have adopted the International<br />
Building Code. The code provisions require that evaporative<br />
cooling equipment and all other <strong>com</strong>ponents permanently<br />
installed on a structure must meet the same seismic design<br />
criteria as the building. The <strong>ESWA</strong> <strong>Closed</strong> <strong>Circuit</strong> <strong>Coolers</strong> are<br />
IBC 2006 <strong>com</strong>pliant up to 1g with standard construction and up<br />
to 5.12g with additional structural modifications.<br />
All items attached to the Evapco <strong>ESWA</strong> <strong>Closed</strong> <strong>Circuit</strong> Cooler<br />
must be independently reviewed and isolated to meet<br />
applicable wind and seismic loads. This includes piping,<br />
ductwork, conduit, and electrical connections. These items<br />
must be flexibly attached to the Evapco unit so as not to<br />
transmit additional loads to the equipment as a result of<br />
seismic or wind forces.<br />
Structural Steel Support<br />
Evapco re<strong>com</strong>mends supporting the unit with two structural “I”<br />
beams that span the entire length of the unit*. These beams<br />
should be located underneath the outer flanges of the unit.<br />
(See Figure 1). Mounting holes, 3/4” in diameter, are located<br />
in the bottom flange for bolting to the structural steel (see<br />
certified print for exact bolt hole location). Bolt the bottom<br />
section to the steel support before rigging the top section.<br />
Beams should be sized in accordance with accepted structural<br />
practices. Maximum deflection of the beam under the unit to be<br />
1/360 of the unit length, not to exceed 1/2”. Deflection may be<br />
calculated by using 55% of the operating weight as a uniform<br />
load on each beam (see certified print for operating weight).<br />
Support beams and anchor bolts are to be furnished by others.<br />
Always refer to certified print for unit weights, dimensions and<br />
technical data.<br />
Note: Consult IBC 2006 for required steel support layout and<br />
structural design.<br />
A<br />
8.5' to 14' WIDE<br />
MODELS<br />
B<br />
8.5' to 14'<br />
WIDE<br />
MODELS<br />
The supporting “I” beams should be level before setting the<br />
unit. Do not level the unit by shimming between the bottom<br />
flange and the beams as this will not provide proper<br />
longitudinal support.<br />
Figure 1A<br />
Plan Views<br />
Figure 1B<br />
End Elevations<br />
Unit Footprint A B<br />
* The Engineer of Record is ultimately responsible for the<br />
steel support design and may require additional cross<br />
beams based on loads.<br />
8.5' x 9' 8' 11-1/2" 8' 5-1/2"<br />
8.5' x 12' 11' 11-3/4" 8' 5-1/2"<br />
8.5' x 18' 18' 0" 8' 5-1/2"<br />
12' x 12' 11' 11-3/4" 11' 10"<br />
12' x 18' 18' 0" 11' 10"<br />
14' x 24' 23' 9" 13' 11-1/4"<br />
14' x 48' 47' 8-1/2" 13' 11-1/4"<br />
Table 1 – <strong>ESWA</strong> Supporting Steel Dimensions<br />
2
<strong>ESWA</strong> <strong>Closed</strong> <strong>Circuit</strong> <strong>Coolers</strong><br />
Rigging the Bottom Section: Standard Lift<br />
Lifting devices are located in the upper corners of the coil as<br />
shown in Figures 2-4. The hook of the crane must be a<br />
minimum dimension of “H” above the top of the coil to prevent<br />
undue strain on the lifting devices.<br />
See Table 2 for the minimum “H” dimension. Bolt the bottom<br />
section to the steel support before rigging the top section of<br />
the unit.<br />
The unit lifting devices should not be used for extended lifts or<br />
where any hazard exists unless safety slings are employed<br />
under the section.<br />
Basin Section Length Min. “H” Dim. (above coil)<br />
9 Feet 7 Feet<br />
12 Feet 10 Feet<br />
18 Feet 12 Feet<br />
24 Feet 19 Feet<br />
Table 2 – Minimum “H” Dimension for Basin Sections<br />
Figure 2 – <strong>ESWA</strong> Bottom Section<br />
(8.5’ x 9’, 8.5’ x 12’, 8.5’ x 18’) 4 point rig<br />
Figure 3 – <strong>ESWA</strong> Bottom Section<br />
(12’ x 12’ and 12’ x 18’) 8 point rig<br />
Figure 4 – <strong>ESWA</strong> Bottom Section<br />
(14’ x 24’ and 14’ x 48’) 6 point rig<br />
Important: The lifting devices should be used only for lifting where no danger exists and for final positioning of the<br />
section. For extended lifts, safety slings should be provided under the section.<br />
3
<strong>ESWA</strong> <strong>Closed</strong> <strong>Circuit</strong> <strong>Coolers</strong><br />
Rigging the Bottom Section: Extended Lifts<br />
The preferred method for extended lifts is to use slings under<br />
the unit as shown in Figures 5-8. Spreader bars should always<br />
be used between the cables at the top of the section to prevent<br />
damage to the upper portion of the basin. Safety slings and<br />
skids should be removed before final positioning of the unit.<br />
See Table 2 for minimum “H” dimensions.<br />
Figure 5 – Proper Rigging Method for Extended Lifts<br />
(8.5’ x 9’ and 8.5’ x 12’)<br />
Figure 6 – Proper Rigging Method for Extended Lifts<br />
(8.5’ x 18’)<br />
Figure 7 – Proper Rigging Method for Extended Lifts<br />
(12’ x 12’ and 12’ x 18’)<br />
Figure 8 – Proper Rigging Method for Extended Lifts<br />
(14’ x 24’ and 14’ x 48’)<br />
4
<strong>ESWA</strong> <strong>Closed</strong> <strong>Circuit</strong> <strong>Coolers</strong><br />
Joining Multi-Cell Units<br />
Bottom Sections – Models 672<br />
Models 672-23M through 672-46Q have two bottom sections<br />
which are shipped separately and furnished with a connecting<br />
equalizer flume between cells. In addition to the equalizer<br />
flume, these units are provided with drip channels and splash<br />
guards to keep water from exiting between the cells. 14’ wide<br />
units have a two-piece horizontal drip channel assembly and<br />
two vertical splash guards (one for each side). The equalizer<br />
flume is factory installed on one section for field connection to<br />
the other. It is important to connect the equalizer flume to balance<br />
the water level in the pans for proper pump suction operation.<br />
The following procedures are to be performed in<br />
sequence.<br />
Figure 9 – Equalizer Flume Connection,<br />
Models 672-23M through 672- 46Q<br />
1. Install the bottom section with the factory installed flume<br />
box as described in the previous section.<br />
2. Clean the flanges on the exposed end of the equalizer<br />
flume box. Apply a layer of sealer tape on the flange<br />
centered between the hole centers and the outside edge.<br />
Remove paper backing strip from the sealer tape (see<br />
Figure 9).<br />
3. Clean the mating surface of the equalizer flume opening of<br />
any dirt, grease or moisture.<br />
4. Rig the second bottom section adjacent to the equalizer<br />
flume box on the steel support as shown in Figure 10.<br />
5. Align the bolt holes in the equalizer flume box and<br />
equalizer opening with drift pins (drift pins shall be<br />
provided by others) while drawing the second bottom<br />
section against the flanged connection.<br />
6. Install 3/8” bolts, nuts and washers in every hole around<br />
the equalizer opening and tighten.<br />
7. Bolt the second bottom section to the steel support.<br />
8. Remove the 1/4” bolts which hold the drip channel<br />
retaining clips to the end panel. Remove the drip channel<br />
sections and fasten them together, end to end, by driving a<br />
self-tapping 5/16” screw through the section end with the<br />
larger hole into the mating end with the smaller hole.<br />
Stainless steel units use 1/4” stainless steel rivnuts and<br />
bolts. See Figure 11.<br />
9. Place the drip channel over the adjoining pan section<br />
flanges. Turn around the retaining clips and re-install them<br />
using the same hardware. (See Figure 12)<br />
10. Place the vertical splash guard in the bend of the vertical<br />
supports. On galvanized units, attach the vertical splash<br />
guard using 5/16” self-tapping screws. On stainless steel<br />
units, attach the vertical splash guard using 5/16” stainless<br />
steel nuts and bolts. (See Figure 9)<br />
NOTE: Cut off any extra sealer tape and clean from basin.<br />
Figure 10 – Equalizer Flume Rigging Detail.<br />
Models 672-23M through 272-46Q have two bottom sections<br />
and one equalizer flume.<br />
SEALER TAPE<br />
Figure 11 – Drip Channel Assembly<br />
DRIP CHANNEL SECTION<br />
Figure 12 – Drip Channel Installation<br />
5
<strong>ESWA</strong> <strong>Closed</strong> <strong>Circuit</strong> <strong>Coolers</strong><br />
Applying Sealer Tape<br />
Once the bottom section has been set on the supporting steel<br />
and bolted in place, the top flanges should be wiped down to<br />
remove any dirt or moisture. Sealer tape should be placed over<br />
the mounting hole centerline on the side flanges. Apply two<br />
strips of sealer tape, one partially overlapping the other, on the<br />
end flanges.<br />
2 OVERLAPPING<br />
LAYERS OF SEALER<br />
ON THE ENDS<br />
1 LAYER OF SEALER<br />
CENTERED OVER<br />
MOUNTING HOLE<br />
The sealer tape should overlap on the corners as shown in<br />
Figure 13. Never splice the sealer tape along the end flanges<br />
and preferably not on the side flanges if it can be avoided.<br />
Always remove the paper backing from the sealer tape.<br />
Cut off any extra sealer tape.<br />
END<br />
SIDE<br />
Figure 13 – Proper Sealer Tape Application<br />
Rigging the Top Section: Standard Lift<br />
“U” bolts are provided in the four corners of the top section for<br />
lifting and final positioning (See Figure 14). The hook of the<br />
crane must be a minimum dimension “H” above the top of the<br />
section being lifted to prevent undue strain on the “U” bolts.<br />
This dimension varies with the type of fan that is installed in the<br />
unit. See Table 3 for the minimum “H” dimension.<br />
Unit No.<br />
Box Size<br />
Minumum “H” Dim.<br />
(above fan deck)<br />
Standard<br />
Fan<br />
Super Low<br />
Sound Fan<br />
<strong>ESWA</strong> 77 models 8.5 x 9 Feet 9 Feet 12 Feet<br />
<strong>ESWA</strong> 102 models 8.5 x 12 Feet 12 Feet 12 Feet<br />
<strong>ESWA</strong> 153 models 8.5 x 18 Feet 17 Feet 20 Feet<br />
<strong>ESWA</strong> 144 models 12 x 12 Feet 12 Feet 15 Feet<br />
<strong>ESWA</strong> 216 models 12 x 18 Feet 17 Feet 19 Feet<br />
<strong>ESWA</strong> 366 models 14 x 24 Feet 17 Feet 18 Feet<br />
<strong>ESWA</strong> 672 models 14 x 48 Feet 17 Feet 18 Feet<br />
Figure 14 – <strong>ESWA</strong> Top Section<br />
Table 3 – Minimum “H” Dimension for Top Sections<br />
Important: The “U” Bolts should be used only for lifting where no danger exists and for final positioning of the section.<br />
For extended lifts, safety slings should be provided under the section.<br />
6
<strong>ESWA</strong> <strong>Closed</strong> <strong>Circuit</strong> <strong>Coolers</strong><br />
Rigging the Top Section: Extended Lifts<br />
The preferred method for extended lifts is to use slings under<br />
the unit as shown in Figure 15. Spreader bars should always<br />
be used between the cables at the top of the section to prevent<br />
damage to the upper flanges or fan cylinder. Safety slings and<br />
skids should be removed before final positioning of the unit.<br />
See Table 3 for minimum “H” dimensions.<br />
Figure 15 – Proper Rigging Method for Extended Lifts<br />
Assembly of the Top Section to the Bottom Section<br />
Before assembling the top section to the bottom section,<br />
remove any loose parts shipped in the pan. Apply sealer tape<br />
as shown in Figure 13.<br />
Wipe the flanges on the bottom of the top section. Check to<br />
see that the water distribution connection on the top section is<br />
in the correction position relative to the bottom section (see<br />
certified unit drawing). Units are also provided with match<br />
markings on each section (i.e. A1 of bottom section should<br />
match up with A1 of top section).<br />
Lower the top section to within several inches of the bottom<br />
section making sure the two sections do not touch and the<br />
sealer tape is not disturbed. Using suitably sized drift pins to<br />
assure proper alignment, lower the top section down onto the<br />
bottom section.<br />
Place nuts and bolts in all four corner bolt holes. Then<br />
continue to install the rest of the nuts and bolts working from<br />
the corners toward the center. Nuts and bolts must be installed<br />
in every hole on the side flanges although none are required<br />
on the end flanges. Cut off extra sealer tape once the section<br />
is bolted into place.<br />
WATER<br />
DISTRIBUTION<br />
CONNECTIONS<br />
WATER<br />
DISTRIBUTION<br />
CONNECTIONS<br />
(INTERNAL)<br />
Figure 16 – Mating Upper Section to Bottom Section.<br />
(8.5’ and 12’ Wide Models)<br />
Figure 17 – Mating Upper Section to Bottom Section<br />
(14’ Wide Models)<br />
7
<strong>ESWA</strong> <strong>Closed</strong> <strong>Circuit</strong> <strong>Coolers</strong><br />
Mounting Fan Screens<br />
12’ and 14’ wide units will be shipped with the fan screens in<br />
the basin. Under these circumstances use the following<br />
procedures to mount the fan screen on the discharge cylinder.<br />
WARNING: DO NOT WALK ON THE FAN SCREENS<br />
AT ANY TIME!<br />
1. Lay both halves of the fan screen on the ground. Join the<br />
two screen halves with wire clips (Figure 18). There should<br />
be 4 wire clips on each side of the fan screen for 12’ wide<br />
units and 5 wire clips for 14’ wide units. Space the wire<br />
clips evenly across the radius of the fan screen as shown<br />
in Figure 19.<br />
2. On 12’ and 14’ wide models, the fan screen is supported<br />
from underneath by an “X” shaped support frame. Set the<br />
support frame across the top of the discharge cylinder<br />
(See Figure 20), and fasten to cylinder with 3/8” bolts.<br />
3. Place the fan screen on top of the support frame and<br />
discharge cylinder. Each half will be tagged to match<br />
markings on the cylinder. Align the eyelets of the fan<br />
screen with the holes on the perimeter of the discharge<br />
cylinder.<br />
4. At each hole, attach the fan screen to the discharge<br />
cylinder as shown in Figure 21.<br />
Figure 18 – Wire Clip Arrangement<br />
Figure 19 – Wire Clip Spacing<br />
(12’ Wide Models)<br />
Figure 20 - Support Frame Installation<br />
Figure 21 – Attaching Fan Screen to Cylinder<br />
8
<strong>ESWA</strong> <strong>Closed</strong> <strong>Circuit</strong> <strong>Coolers</strong><br />
External Motor Installation<br />
8.5’ Wide Models<br />
1. Study Figure 22 before installing the motor base on the unit.<br />
2. Insert the lifting device into “U” bolt A on motor base B.<br />
3. Lift the motor base and insert the pivot pin C down into<br />
hole E and pivot pin F into hole D.<br />
4. Install washer and nut (do not overtighten) on pivot pins.<br />
Install jam nut on pivot pin C.<br />
5. Insert “J” bolts G into holes H. Install flat washers and<br />
cotter pins. Place nuts and washers on threaded portion of<br />
“J” bolts. These will be behind the motor base installed in<br />
the next step.<br />
6. Insert “J” bolts into holes J in the motor base. Install flat<br />
washers, lock washer and nuts. Remove lifting device from<br />
the “U” bolt on the motor base. Position motor base toward<br />
casing of unit for belt installation.<br />
7. Install Powerband belt K (Figure 23) around fan sheave<br />
and motor sheave. Tighten belt by adjusting nuts on “J”<br />
bolts. Do not over tighten the belts. The center of the belt<br />
should deflect approximately 3/4” with moderate hand<br />
pressure.<br />
8. Measure to see that the top and bottom of the motor base<br />
are the same distance out from the casing of the unit. This<br />
should ensure that the sheaves are properly aligned as<br />
they have been pre-set at the factory.<br />
9. As a final check, lay a straight edge from sheave to<br />
sheave. There should be four point contact. (See Figure<br />
24.) Adjust the position of the motor sheave as necessary.<br />
10. To install Motor Guard L, match up hinges and install hinge<br />
pins M. (See Figure 23.)<br />
11. Close Motor Guard and install (2) wing bolts N.<br />
Figure 22 – External Motor Installation<br />
Figure 23 – Motor Guard and Powerband Belt Installation<br />
Figure 24 – Sheave Alignment Check<br />
9
<strong>ESWA</strong> <strong>Closed</strong> <strong>Circuit</strong> <strong>Coolers</strong><br />
Optional Motor and Gear Box Davit<br />
This accessory is available to aid in the removal of fan motors<br />
and gear boxes. The assembly consists of a davit and a<br />
mounting base/channel that is attached to the side of the unit<br />
next to the access door (Figure 25). Both of these items will<br />
ship loose in the unit’s basin.<br />
Use the following procedure to install the mounting channel:<br />
1. Place the mounting channel on the factory-installed<br />
mounting brackets near the access door.<br />
2. At each hole, attach the mounting channel to the bracket<br />
using 3/8” hardware as shown in Figure 26.<br />
Figure 25 – Motor Davit<br />
Figure 26 – Attaching Mounting Channel to Mounting Bracket<br />
Optional Heater Package<br />
This accessory is available to prevent the basin water from<br />
freezing during winter operation. The heater package consists<br />
of a heater, a low water cutout switch and a thermostat. The<br />
heater is installed at the factory. The low water cutout switch is<br />
shipped loose in the rigging box and will need to be screwed<br />
into the screw tight fitting installed in the unit. The thermostat<br />
is attached to the side of the unit at the factory. The bulbwell<br />
for the thermostat is shipped loose in the rigging box and will<br />
also need to be screwed into the screw tight fitting installed in<br />
the unit. See Figures 27 and 28 for heater package location<br />
diagrams.<br />
HEATER<br />
CONTROL PANEL<br />
(OPTIONAL)<br />
THERMOSTAT<br />
(ONE PER CELL)<br />
LWCO COVER PLATE<br />
(INSIDE UNIT)<br />
(ONE PER CELL)<br />
LOW<br />
WATER<br />
CUTOUT<br />
SWITCH<br />
IMMERSION<br />
HEATER<br />
LWCO<br />
COVER PLATE<br />
(INSIDE UNIT)<br />
BULB WELL<br />
THERMOSTAT<br />
HEATER<br />
CONTROL<br />
PANEL<br />
(OPTIONAL)<br />
BULB WELL<br />
(ONE PER CELL)<br />
LWCO<br />
(ONE PER CELL)<br />
IMMERSION<br />
HEATERS<br />
(ONE EA. END,<br />
ONE EA. SIDE<br />
ON 2 CELL UNITS)<br />
Figure 27 – Heater Component Location, 8.5’ and 12’ Wide Units<br />
Figure 28 – Heater Component Location, 14’ Wide Units<br />
10
<strong>ESWA</strong> <strong>Closed</strong> <strong>Circuit</strong> <strong>Coolers</strong><br />
Optional Sloped Ladders<br />
When sloped ladders are supplied with a unit, they are shipped<br />
in the basin section, if there is room. One sloped ladder will be<br />
provided for each cell. Assembly is identical for each cell.<br />
Sloped ladders are attached at a minimum of three points.<br />
Taller units will have four attachment points. At each point of<br />
attachment, the ladder will be fitted with a ladder bracket<br />
assembly. The ladder bracket assembly looks like a metal box<br />
and is shown in detail (<strong>com</strong>ponent #4) in Figure 29 below. The<br />
upper two assembly brackets are factory mounted to the ladder<br />
and are not adjustable. These two brackets define the slope of<br />
the ladder. The lower brackets are adjustable. See Figures 30<br />
and 31 for drawing of the final ladder assembly.<br />
NOTE: Upper Section of Unit Must Be Properly Oriented<br />
with Respect to Lower Section. All Mounting Brackets Must<br />
be on Same Side of Unit. Refer to Certified Print For Proper<br />
Orientation.<br />
Figure 29 – Detail of Ladder, Ladder Bracket Assembly<br />
and Mounting Channel<br />
Figure 30 – End View of Ladder Assembly<br />
To install the ladder assembly, follow the steps outlined below<br />
which refer to Figure 29:<br />
1. Remove the ladder bracket mounting bolts (1) from the<br />
ladder mounting channels (2) on pan and casing sections.<br />
2. Loosen, but do not remove, the ladder bracket and<br />
assembly bolts (3).<br />
3. Slide the ladder bracket assembly (4) over the ladder<br />
mounting channel (2) located on the unit panels. Do not<br />
remove the ladder bracket assembly (4) from the ladder.<br />
4. Align the bolt holes and reinstall the ladder bracket<br />
mounting bolts (1) through the ladder bracket assembly<br />
and the ladder mounting channels (2).<br />
5. Tighten all bolts.<br />
6. Tighten the adjusting screw (5) in the adjustable mounting<br />
bracket where applicable.<br />
Figure 31 – Side View of Ladder Assembly<br />
11
<strong>ESWA</strong> <strong>Closed</strong> <strong>Circuit</strong> <strong>Coolers</strong><br />
Optional Working Platform and Ladder<br />
The working platform and ladder will either be shipped in the basin or shipped separately due to basin accessories that interfere<br />
with storage. The platform is partially assembled prior to shipment for minimal field assembly.<br />
The platform and ladder assembly should be attached after the unit is fully rigged. Follow the instructions below.<br />
CONFIDENTIAL<br />
This document is the property of Evapco, Inc. It should not<br />
be copied or disclosed without prior written <strong>au</strong>thorization.<br />
SECURE DECK SUPPORT<br />
TO CONNECTION<br />
PLATES WTH 5/8"<br />
GRADE 5 HARDWARE<br />
SECURE DIAGONAL<br />
SUPPORT TO DECK<br />
SUPPORT USING 5/8"<br />
GRADE 5 HARDWARE<br />
DETAIL C<br />
CONNECTION<br />
PLATE<br />
DECK SUPPORT<br />
DETAIL A<br />
DECK SUPPORT<br />
DIAGONAL SUPPORT<br />
DETAIL E<br />
SECURE DIAGONAL<br />
SUPPORT TO CONNECTION<br />
PLATE USING 5/8"<br />
GRADE 5 HARDWARE<br />
SECURE LADDER BRACKET<br />
TO BASE ON UNIT WITH<br />
3/8" GRADE 5 HARDWARE<br />
C<br />
A<br />
DETAIL B<br />
DIAGONAL<br />
SUPPORT<br />
CONNECTION<br />
PLATE<br />
BASE<br />
LADDER<br />
BRACKET<br />
DETAIL D<br />
D<br />
NOTES:<br />
1. PLATFORM GRATING NOT SHOWN FOR CLARITY<br />
PART NO. REV. NO.<br />
093-04342GA 3<br />
RAILING FITTING<br />
SECURE RAILING<br />
FITTING TO FRONT<br />
TOEPLATE USING 3/8"<br />
GRADE 5 HARDWARE<br />
FRONT TOEPLATE<br />
F<br />
FAN DECK<br />
ATTACHMENT<br />
IF APPLICABLE<br />
F<br />
E<br />
B<br />
HANDRAIL FITTING<br />
DETAIL F<br />
1<br />
1/2" NUT<br />
12
<strong>ESWA</strong> <strong>Closed</strong> <strong>Circuit</strong> <strong>Coolers</strong><br />
General Information – Start-up & Maintenance<br />
Start-up Details<br />
Shipping Chocks and Debris<br />
Remove any chocks that have been placed inside the unit for<br />
shipping purposes. Be sure to remove the chocks from<br />
between the fan and fan guard if applicable. Clean all debris<br />
from the basin prior to start-up. Clean and secure all access<br />
doors.<br />
Pump Discharge Line<br />
Connect the riser pipe from the pump discharge on the basin<br />
section to the riser pipe on the coil/fan section using the<br />
flexible connection and hose clamps provided.<br />
Bleed-off Line<br />
A bleed-off line and valve are installed on the unit when<br />
shipped with a pump. On units shipped without a pump<br />
(remote sump applications) make sure a bleed-off line and<br />
valve are properly sized and installed on the discharge side of<br />
the pump and connected to a convenient drain. In either case,<br />
the bleed-off valve should be fully open.<br />
Strainer<br />
Check the strainers, if applicable, in the basin section to make<br />
certain they are in the proper location over the pump suction,<br />
along side of the anti-vortex hood. (See Figure 27.)<br />
SUCTION<br />
HOOD<br />
STRAINER<br />
Float Valve Adjustment<br />
The float valve is pre-set at the factory; however, adjustment<br />
should be checked after rigging. The float valve should be<br />
adjusted so that the centerline of the float is at the<br />
measurement shown in Table 4 from the basin bottom. Raise<br />
or lower the float by using the wing nuts on the vertical<br />
threaded rod only. Do not adjust the horizontal rod.<br />
Unit Width<br />
Level<br />
8.5’ 10”<br />
12’ 11”<br />
14’ 11”<br />
Table 4 – Re<strong>com</strong>mended Water Level<br />
Starting Sequence<br />
Before starting the unit, check that all access openings,<br />
safety screens and covers are in place. Start the unit as<br />
outlined below:<br />
1. Fill the pan to the overflow level.<br />
2. Bump start and check the spray water pump(s) for<br />
proper rotation. Directional arrows are found on the<br />
pump impeller housing.<br />
3. Bump start and check the fan(s) for proper rotation.<br />
Directional arrows are placed on the side of the fan<br />
cylinder.<br />
Maintenance<br />
Once the installation is <strong>com</strong>plete and the unit is turned on,<br />
it is important that it be properly maintained. Maintenance is<br />
not difficult or time-consuming but must be done regularly to<br />
assure full performance of the unit. Refer to the operation<br />
maintenance instructions enclosed with the unit for proper<br />
maintenance procedures.<br />
Figure 27 – Strainer Location<br />
Freeze Protection<br />
Proper freeze protection must be provided if the unit is located<br />
in a cold climate. Refer to the operation maintenance<br />
instructions as well as product bulletins for further information.<br />
Screens<br />
Protective fan screens are provided across the top of the fan<br />
cylinders of all models. Check and tighten all bolts.<br />
13
<strong>ESWA</strong> <strong>Closed</strong> <strong>Circuit</strong> <strong>Coolers</strong><br />
Rigging Hardware Parts List<br />
The following table lists those parts which are shipped together with the unit(s) for field assembly and/or spare parts.<br />
<strong>ESWA</strong> Model Box Size Flume Hardware 1 Rigging Joint Hardware 2 Sealer Tape Nozzles<br />
<strong>ESWA</strong> 77 Models 8.5x9 N/A 14 4 2<br />
<strong>ESWA</strong> 102 Models 8.5x12 N/A 18 5 2<br />
<strong>ESWA</strong> 153 Models 8.5x18 N/A 26 5 2<br />
<strong>ESWA</strong> 144 Models 12x12 N/A 18 5 2<br />
<strong>ESWA</strong> 216 Models 12x18 N/A 26 6 3<br />
<strong>ESWA</strong> 336 Models 14x24 N/A 34 8 2<br />
<strong>ESWA</strong> 672 Models 14x48 26 68 16 3<br />
NOTES:<br />
1. (1) 3/8” x 1-1/2” Long Bolt<br />
(1) 3/8” Hex Nut<br />
(1) 3/8” Lock Washer<br />
(1) 3/8” Flat Washer<br />
2. (1) 3/8” x 1” Long Bolt<br />
(2) 3/8” Flat Washer<br />
(1) 3/8” Locknut<br />
Table 5 – Rigging Hardware<br />
14
<strong>ESWA</strong> <strong>Closed</strong> <strong>Circuit</strong> <strong>Coolers</strong><br />
Accessories can ship in a variety of locations depending on the type of accessory, the size of the unit and the other accessories<br />
purchased with the unit. See Table 6 for a guide to accessory location.<br />
Unit Accessories<br />
Aluminum Ladder<br />
Drip Channels for Multi Cell Units<br />
Discharge Attenuation<br />
Electric Basin Heater<br />
Electric Basin Heater Control Panel<br />
Electric Basin Heater Low Water Cutout<br />
Electric Basin Heater Thermostat<br />
Electronic Water Level Control Probes<br />
Electronic Water Level Control PVC Standpipe<br />
External Service Platform with Ladder<br />
Factory Mounted Crossover Piping<br />
Fan Screens (If not mounted)<br />
Fan Screen Supports (If not mounted)<br />
Flume Plate<br />
Hot Water or Steam Coil<br />
Low Water Cutoff for Pump<br />
Remote Sump Trash Screen<br />
Rigging Hardware<br />
Safety Cage<br />
Sealer Tape<br />
Splash Guards for Multi Cell Units<br />
Sump Sweeper Piping with and without<br />
High Flow Eductors<br />
Vibration Switch<br />
Motor Davit and Base<br />
Water Level Indicator<br />
Fan Motor<br />
Shipping Location<br />
Shipping Location is Unit and Accessory Dependent<br />
- If Space is Available: Strapped Inside Unit Basin<br />
- If No Space is Available: Shipped Separately on Truck Bed<br />
Strapped Inside Unit Basin<br />
Mounted Loosely Bolted on Basin Section<br />
Shipping Location is Unit Dependent<br />
- End Mounted Heater: Installed in Unit Basin<br />
- Side Mounted Heater: Strapped Inside Basin Section<br />
Shipping Location is Dependent on Control Panel Size<br />
- If Space is Available: Mounted on Unit Basin<br />
- If No Space is Available: Boxed, Wrapped and Wire Tied Inside Basin Section<br />
Shipped in Rigging Box<br />
Shipping Location is Unit Dependent<br />
- End Mounted Thermostat: Mounted on Basin Section<br />
- Side Mounted Thermostat: Shipped in Rigging Box<br />
Mounted in PVC standpipe<br />
Strapped Inside Unit Basin<br />
Shipping Location is Unit and Accessory Dependent<br />
- If Space is Available: Strapped Inside Basin Section<br />
- If No Space is Available: Crated and Shipped Separately on Truck Bed<br />
Welded to Coil Connections<br />
Shipping Location is Unit and Accessory Dependent<br />
- If Space is Available: Strapped Inside Basin Sections<br />
- If No Space is Available: Crated and Shipped Separately on Truck Bed<br />
Shipping Location is Unit and Accessory Dependent<br />
- If Space is Available: Strapped Inside Basin Section<br />
- If No Space is Available: Crated and Shipped Separately on Truck Bed<br />
Mounted to Flume Box<br />
Installed in Unit Basin<br />
Shipped in Rigging Box<br />
Installed In Unit Basin<br />
Shipped in Rigging Box<br />
Attached to the Ladder<br />
Shipped in Rigging Box<br />
Strapped Inside Basin Section<br />
Installed in Unit Basin<br />
Mounted in Fan Section<br />
Shipping Location is Unit and Accessory Dependent<br />
- If Space is Available: Strapped Inside Basin Section<br />
- If No Space is Available: Crated and Shipped Separately on Truck Bed<br />
Strapped Inside Unit Basin<br />
Shipped Loose on 8.5’ Wide Units<br />
Table 6 – Unit Accessory Shipping Location<br />
15
<strong>EVAPCO</strong>, Inc. • P.O. Box 1300 • Westminster, MD 21158 USA<br />
PHONE: 410-756-2600 • FAX: 410-756-6450 • E-MAIL: marketing@evapco.<strong>com</strong><br />
©2009 <strong>EVAPCO</strong>, Inc.