Miata piggy back ECU installation & tuning - Flyin
Miata piggy back ECU installation & tuning - Flyin
Miata piggy back ECU installation & tuning - Flyin

Create successful ePaper yourself
Turn your PDF publications into a flip-book with our unique Google optimized e-Paper software.
everything is OK. Accelerate gently into boost. Watch the boost gauge and verify that the<br />
boost builds to about 6psi and no more. If the boost exceeds 8psi let off the throttle immediately<br />
and check the hose routing on the boost control solenoid.<br />
10) When accelerating into boost, listen for engine knock. At this boost pressure knock<br />
should not be a problem. If knock is heard repeat the process while monitoring the key pad in<br />
the ZONEIGN screen. Note what zone the knocks occurred in, then go to that ignition zone in<br />
the EDIT Z menu, and raise the number by one point. Repeat this process until no knocks are<br />
heard<br />
Note: For the next two steps use the table below to identify normal operation of<br />
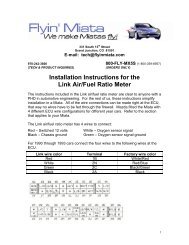
the engine as seen by the Lambda Link air/fuel (A/F) ratio meter.<br />
Throttle Position Manifold Pressure Lambda Link Display<br />
Steady Vacuum Dithering or Off<br />
Moving down slowly Vacuum Off, Red or Yellow<br />
Moving down quickly Vacuum to boost Yellow or 1st Green<br />
Steady Boost (5psi to 7psi) 2nd Green<br />
Steady Boost (8psi to 9psi) 3rd Green<br />
Moving up quickly High vacuum Off<br />
Note: For the next two steps, values only accessible in the EDIT Z menu may<br />
have to be adjusted. To locate the desired zones refer to the default tables in<br />
sections 10 & 11 or the list of memory locations in Section 12<br />
11) Verify the fuel enrichment: All readings to verify fuel enrichment during this step must<br />
be taken with the accelerator pedal in a steady state. If the accelerator pedal is moving down<br />
acceleration fuel will be added by the <strong>ECU</strong> and will color the readings. When operating in the<br />
300 row, 0psi on the boost gauge, the A/F meter should be operating in the yellow and/or the<br />
first green LEDs. The reading may bounce around a bit, but that is not a problem. If the right<br />
most green LED lights up at 0psi on the boost gauge, go to the EDIT Z menu and remove 5<br />
points of fuel out of each zone from Zf300 to Zf375. Don’t forget to save these new fuel values.<br />
If the fuel mixture is still reading too rich, repeat this step a second time. If a second<br />
reduction in row 3 fuel does not produce the desired results, call the tech line at FM for further<br />
instruction.<br />
12) Accelerator pump: Before testing the accelerator pump functions, change the following<br />
values in the EDIT Z menu. Z16=10, Z17=15, Z18=14, Z19=11, Z20=4. These values have<br />
been determined since the defaults have be set into the software included in the <strong>piggy</strong> <strong>back</strong><br />
<strong>ECU</strong>.<br />
The accelerator pump feature is triggered by the change in manifold pressure. It is possible to<br />
open the throttle slowly enough to not trigger the acceleration fuel. When testing the acceleration<br />
fuel, open the throttle quickly. If you see the air/fuel ratio go lean as the throttle goes<br />
down, then come <strong>back</strong> to normal, add more fuel to the corresponding acceleration zone. If the<br />
A/F ratio stays rich, but dips lean before stabilizing, then lengthen the acceleration decay time.<br />
16