Installing KOHA Software On Debian 5.0.1 LENNY Operating System
Installing KOHA Software On Debian 5.0.1 LENNY Operating System
Installing KOHA Software On Debian 5.0.1 LENNY Operating System

You also want an ePaper? Increase the reach of your titles
YUMPU automatically turns print PDFs into web optimized ePapers that Google loves.
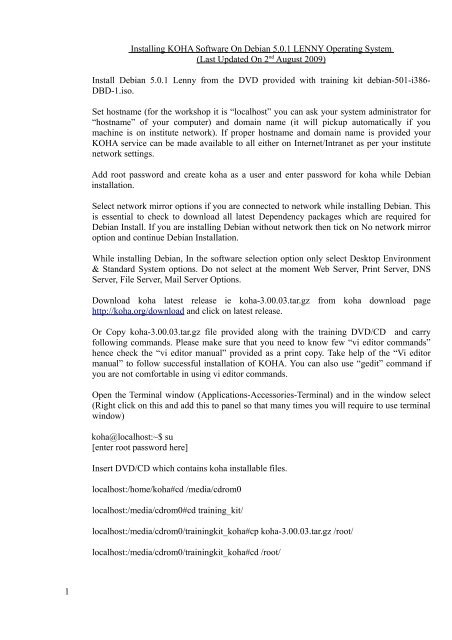
<strong>Installing</strong> <strong>KOHA</strong> <strong>Software</strong> <strong>On</strong> <strong>Debian</strong> <strong>5.0.1</strong> <strong>LENNY</strong> <strong>Operating</strong> <strong>System</strong><br />
(Last Updated <strong>On</strong> 2 nd August 2009)<br />
Install <strong>Debian</strong> <strong>5.0.1</strong> Lenny from the DVD provided with training kit debian-501-i386-<br />
DBD-1.iso.<br />
Set hostname (for the workshop it is “localhost” you can ask your system administrator for<br />
“hostname” of your computer) and domain name (it will pickup automatically if you<br />
machine is on institute network). If proper hostname and domain name is provided your<br />
<strong>KOHA</strong> service can be made available to all either on Internet/Intranet as per your institute<br />
network settings.<br />
Add root password and create koha as a user and enter password for koha while <strong>Debian</strong><br />
installation.<br />
Select network mirror options if you are connected to network while installing <strong>Debian</strong>. This<br />
is essential to check to download all latest Dependency packages which are required for<br />
<strong>Debian</strong> Install. If you are installing <strong>Debian</strong> without network then tick on No network mirror<br />
option and continue <strong>Debian</strong> Installation.<br />
While installing <strong>Debian</strong>, In the software selection option only select Desktop Environment<br />
& Standard <strong>System</strong> options. Do not select at the moment Web Server, Print Server, DNS<br />
Server, File Server, Mail Server Options.<br />
Download koha latest release ie koha-3.00.03.tar.gz from koha download page<br />
http://koha.org/download and click on latest release.<br />
Or Copy koha-3.00.03.tar.gz file provided along with the training DVD/CD and carry<br />
following commands. Please make sure that you need to know few “vi editor commands”<br />
hence check the “vi editor manual” provided as a print copy. Take help of the “Vi editor<br />
manual” to follow successful installation of <strong>KOHA</strong>. You can also use “gedit” command if<br />
you are not comfortable in using vi editor commands.<br />
Open the Terminal window (Applications-Accessories-Terminal) and in the window select<br />
(Right click on this and add this to panel so that many times you will require to use terminal<br />
window)<br />
koha@localhost:~$ su<br />
[enter root password here]<br />
Insert DVD/CD which contains koha installable files.<br />
localhost:/home/koha#cd /media/cdrom0<br />
localhost:/media/cdrom0#cd training_kit/<br />
localhost:/media/cdrom0/trainingkit_koha#cp koha-3.00.03.tar.gz /root/<br />
localhost:/media/cdrom0/trainingkit_koha#cd /root/<br />
1
localhost:~#tar xvzf koha-3.00.03.tar.gz<br />
Try the following commands to start the installation of software dependencies for <strong>KOHA</strong><br />
installation.<br />
localhost:~#cd /root/koha-3.00.03<br />
localhost:~/koha-3.00.03#gedit /etc/apt/sources.list<br />
(add the following lines in the sources.list file and save and exit the file). You can copy these<br />
files by opening one more window and by opening the file<br />
/root/koha-3.00.03/INSTALL.debian-lenny and selecting and copying and pasting the<br />
following lines in /etc/apt/sources.list at the end of the file.<br />
# Index Data<br />
deb http://ftp.indexdata.dk/debian lenny main<br />
deb-src http://ftp.indexdata.dk/debian lenny main<br />
localhost:~/koha-3.00.03# wget http://ftp.indexdata.dk/debian/indexdata.asc<br />
localhost:~#sudo apt-key add indexdata.asc<br />
localhost:~#apt-get update<br />
We could sort out the problem of Getting DBD-MySQL error which occurred while <strong>KOHA</strong><br />
installation and here are the steps for solving that error which was occuring during <strong>KOHA</strong><br />
workshop held at NCRA, Pune.<br />
Go to <strong>System</strong>-Administration-Synaptic Manager and search for the following files and mark<br />
them for installation by accepting “Apply” Command<br />
apache2<br />
apache2-doc<br />
apache2-mpm-event<br />
apache2-mpm-worker<br />
apache2-src<br />
curl<br />
daemon<br />
ftpd<br />
git-core<br />
git-email<br />
libapache2-mod-perl2<br />
libapache2-mod-perl2-dev<br />
libapache2-mod-python<br />
libmysqlclient15-dev<br />
mysql-client<br />
mysql-server<br />
libdbd-mysql<br />
mysql-admin<br />
libdbd-sqlite3<br />
libdbd-sqlite3-perl<br />
2
Open the following file<br />
localhost:~/koha-3.00.03#gedit /root/koha-3.00.03/install_misc/debian-lenny.packages<br />
(In this file delete apache2 install, apache2-mpm-worker install, libdbd-mysql-perl install,<br />
libdbd-mysql-perl install, libdbd-sqlite3-perl install, libdbi-perl install, mysql-server install )<br />
related lines and save the file and then run the following commands. Since we have<br />
separately installed those files through Synaptic we will not install those files through<br />
dselect).<br />
localhost:~/koha-3.00.03#sudo dpkg –set-selections
export PERL5LIB=/usr/share/koha/lib<br />
export <strong>KOHA</strong>_CONF=/etc/koha/koha-conf.xml<br />
UTF-8 Encoding in Apache:-<br />
Open a terminal<br />
localhost:~/koha-3.00.03# gedit /etc/apache/apache2.conf<br />
(Add following three lines at the end of the file in apache2.conf and save and exit)<br />
#UTF8 support for apache2<br />
ServerName localhost<br />
#[Here you if have proper name for your computer enter the computer name here instead of<br />
“localhost”]<br />
AddDefaultCharset UTF-8<br />
AddCharset UTF-8 .utf8<br />
UTF-8 Encoding in MySQL:<br />
localhost:~/koha-3.00.03# gedit /etc/mysql/my.cnf<br />
(open my.cnf file and add after the “Basic Setting” and after skip-external-locking line add<br />
the following lines)<br />
# UTF-8 Defaults for Koha<br />
init-connect=”SET NAMES utf8”<br />
character-set-server=utf8<br />
default-character-set=utf8<br />
collation-server=utf8_general_ci<br />
character_set_client=utf8<br />
localhost:~/koha-3.00.03# gedit /etc/apache2/ports.conf<br />
(open ports.conf file and below Listen 80 add following line and save file and exit)<br />
Listen 8080<br />
Creation of MySQL Database for <strong>KOHA</strong>:<br />
localhost:~/koha-3.00.03#mysql -u root -p<br />
(Enter mysql root password)<br />
mysql>create database koha;<br />
mysql>grant all privileges on koha.* to 'kohaadmin'@'localhost' identified by 'katikoan';<br />
Now <strong>KOHA</strong> can be installed by following commands:<br />
localhost:~# cd /root/koha-3.00.03<br />
localhost:~/koha-3.00.03# perl Makefile.PL<br />
4
answer all questions and enter password and username for koha and zebra server<br />
installation. [ here password is “katikoan” or as defined by you and koha mysql database<br />
user is “kohaadmin”]. If installation process ends with any missing PERL modules, try to<br />
install those missing modues from a terminal and tying cpan and module name and then<br />
again try above perl Makefile.PL command.<br />
Here are the default values you should select when you run perl Makefile.PL command<br />
# Choose the following options:<br />
Installation mode (dev, single, standard) [standard] = standard<br />
Base installation directory [/usr/share/koha] = /usr/share/koha<br />
User account [koha] = koha<br />
Group [koha] = koha<br />
DBMS to use (Pg, mysql) [mysql] = mysql<br />
Database server [localhost] = localhost<br />
Please specify the port used to connect to the DMBS [3306] = 3306<br />
Please specify the name of the database to be used by Koha [koha] = koha<br />
Please specify the user that owns the database to be used by Koha [kohaadmin] kohaadmin<br />
NOTE:This user (kohaadmin) and password are both the MySQL login/pwd and the web<br />
admin interface login/pwd.<br />
Please specify the password of the user that owns the database to be used by Koha<br />
[katikoan]<br />
= katikoan (or you can select the password as you wish)<br />
Install the Zebra configuration files? (no, yes) [yes] = yes<br />
MARC format for Zebra indexing (marc21, unimarc) [marc21] = marc21<br />
Primary language for Zebra indexing (en, fr) [en]<br />
Authorities indexing mode (dom, grs1) [grs1] = grs<br />
Please specify Zebra database user [kohauser] = kohauser<br />
Please specify the Zebra database password [zebrastripes] = zebrastripes [you can select<br />
your own password here]<br />
Install the SRU configuration files? (no, yes) [yes] = yes<br />
SRU Database host? [localhost] = localhost<br />
SRU port for bibliographic data? [9998] = 9998<br />
SRU port for authority data? [9999] = 9999<br />
Install the PazPar2 configuration files? [no] = no<br />
Would you like to run the database-dependent test suite? (no, yes) [no] = no<br />
# Compile the Perl code<br />
localhost:~/koha-3.00.03~# make<br />
localhost:~/koha-3.00.03~#make test<br />
localhost:~/koha-3.00.03~#make install<br />
localhost:~/koha-3.00.03#ln -s /etc/koha/koha-httpd.conf /etc/apache2/sites-available/koha<br />
localhost:~/koha-3.00.03#sudo a2enmod rewrite<br />
5
localhost:~/koha-3.00.03#sudo a2ensite koha<br />
localhost:~/koha-3.00.03#sudo apache2ctl restart<br />
localhost:~/koha-3.00.03# ln -s /usr/share/koha/bin/koha-zebra-ctl.sh /etc/init.d/koha-zebradaemon<br />
localhost:~/koha-3.00.03# sudo update-rc.d koha-zebra-daemon defaults<br />
localhost:~/koha-3.00.03# ln -s /usr/share/koha/bin/koha-zebraqueue-ctl.sh /etc/init.d/kohazebraqueue-daemon<br />
localhost:~/koha-3.00.03#sudo update-rc.d koha-zebraqueue-daemon defaults<br />
Cronjob Settings:<br />
localhost:~/koha-3.00.3#cd /usr/share/koha/bin/cronjobs<br />
localhost:~/usr/share/koha/bin/cronjobs#crontab -u root crontab.example<br />
localhost:~/usr/share/koha/bin/cronjobs#crontab -u koha crontab.example<br />
localhost:~/usr/share/koha/bin/cronjobs#crontab -e<br />
Add the following lines here,<br />
#Environment<br />
PERL5LIB=/usr/share/koha/lib<br />
<strong>KOHA</strong>_CONF=/etc/koha/koha-conf.xml<br />
#Some additional variables<br />
<strong>KOHA</strong>_CRON_PATH=/usr/share/koha/bin/cronjobs<br />
Save the file by pressing ctrl+O buttons<br />
Press enter<br />
Quit the editor by pressing ctrl+X buttons<br />
Run the Web installer now to populate the database and initial configuration by pointing<br />
browser to and selecting various options:<br />
http://localhost:8080/ [ Here you can enter your computer name if you have assigned any or<br />
enter localhost]<br />
To search for the records in OPAC you have to index data with zebra indexing by running<br />
the following command by logging in as koha<br />
koha@localhost:-~cd /usr/share/koha/bin/migration_tools<br />
koha@localhost:-~./rebuild_zebra.pl -b -a -z<br />
If the above command complains about C4, do the following<br />
6
localhost:~#cp -a /usr/share/koha/lib/* /etc/perl/<br />
Re-run then rebuld_zebra and check the database.<br />
and go to http://localhost and search for the <strong>KOHA</strong> database when records are added into the<br />
database.<br />
7