Sample Lesson Plan - Hand and Power Tools 1 Topic: Hand and ...
Sample Lesson Plan - Hand and Power Tools 1 Topic: Hand and ...
Sample Lesson Plan - Hand and Power Tools 1 Topic: Hand and ...
Create successful ePaper yourself
Turn your PDF publications into a flip-book with our unique Google optimized e-Paper software.
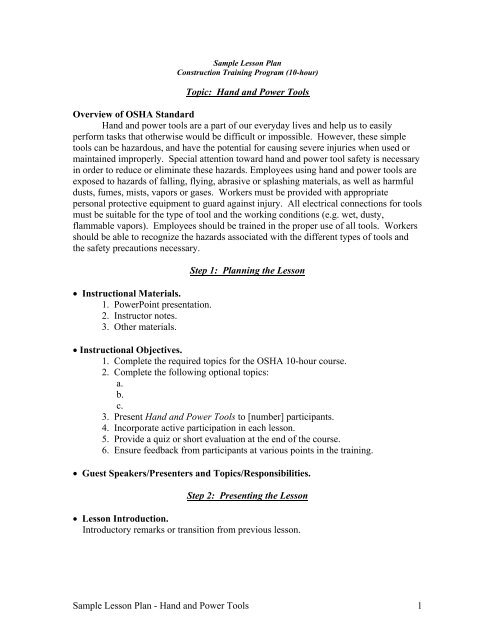
<strong>Sample</strong> <strong>Lesson</strong> <strong>Plan</strong><br />
Construction Training Program (10-hour)<br />
<strong>Topic</strong>: <strong>H<strong>and</strong></strong> <strong>and</strong> <strong>Power</strong> <strong>Tools</strong><br />
Overview of OSHA St<strong>and</strong>ard<br />
<strong>H<strong>and</strong></strong> <strong>and</strong> power tools are a part of our everyday lives <strong>and</strong> help us to easily<br />
perform tasks that otherwise would be difficult or impossible. However, these simple<br />
tools can be hazardous, <strong>and</strong> have the potential for causing severe injuries when used or<br />
maintained improperly. Special attention toward h<strong>and</strong> <strong>and</strong> power tool safety is necessary<br />
in order to reduce or eliminate these hazards. Employees using h<strong>and</strong> <strong>and</strong> power tools are<br />
exposed to hazards of falling, flying, abrasive or splashing materials, as well as harmful<br />
dusts, fumes, mists, vapors or gases. Workers must be provided with appropriate<br />
personal protective equipment to guard against injury. All electrical connections for tools<br />
must be suitable for the type of tool <strong>and</strong> the working conditions (e.g. wet, dusty,<br />
flammable vapors). Employees should be trained in the proper use of all tools. Workers<br />
should be able to recognize the hazards associated with the different types of tools <strong>and</strong><br />
the safety precautions necessary.<br />
• Instructional Materials.<br />
1. <strong>Power</strong>Point presentation.<br />
2. Instructor notes.<br />
3. Other materials.<br />
Step 1: <strong>Plan</strong>ning the <strong>Lesson</strong><br />
• Instructional Objectives.<br />
1. Complete the required topics for the OSHA 10-hour course.<br />
2. Complete the following optional topics:<br />
a.<br />
b.<br />
c.<br />
3. Present <strong>H<strong>and</strong></strong> <strong>and</strong> <strong>Power</strong> <strong>Tools</strong> to [number] participants.<br />
4. Incorporate active participation in each lesson.<br />
5. Provide a quiz or short evaluation at the end of the course.<br />
6. Ensure feedback from participants at various points in the training.<br />
• Guest Speakers/Presenters <strong>and</strong> <strong>Topic</strong>s/Responsibilities.<br />
Step 2: Presenting the <strong>Lesson</strong><br />
• <strong>Lesson</strong> Introduction.<br />
Introductory remarks or transition from previous lesson.<br />
<strong>Sample</strong> <strong>Lesson</strong> <strong>Plan</strong> - <strong>H<strong>and</strong></strong> <strong>and</strong> <strong>Power</strong> <strong>Tools</strong> 1
• Learning Objectives/Outcomes.<br />
Upon completion of the lesson, participants will be able to:<br />
1. List at least three basic h<strong>and</strong> <strong>and</strong> power tool safety rules.<br />
Possible responses.<br />
• Inspect the tool before use<br />
• Use the right tool for the job<br />
• Operate tools according to the manufacturers’ instructions<br />
• Use proper guards<br />
• Use appropriate personal protective equipment<br />
• Perform maintenance on tools regularly<br />
2. Identify at least two precautions that are essential to safe use of:<br />
a. <strong>H<strong>and</strong></strong> tools<br />
Possible responses.<br />
• Do not use wrenches if the jaws are sprung<br />
• Do not use chisels or wedges if the heads have<br />
mushroomed<br />
• Do not use tools with loose, cracked, splintered or taped<br />
h<strong>and</strong>les<br />
• Keep cutting tools sharp<br />
• Use the proper tool for its intended job<br />
• Use safety goggles <strong>and</strong> gloves<br />
• Keep floor surface free of debris <strong>and</strong> tripping hazards<br />
b. Electrically powered tools<br />
Possible responses.<br />
• Disconnect tools when not in use<br />
• Remove damaged tools <strong>and</strong> tag them “do not use”<br />
• Don’t carry electric tools by the power cord<br />
• Don’t operate in wet locations<br />
• Use a cord with a three-pronged plug <strong>and</strong> grounding pin<br />
• Ensure cords are not a tripping hazard<br />
c. Abrasive wheels <strong>and</strong> tools<br />
Possible responses.<br />
• Cover the spindle end, nut <strong>and</strong> flange projections<br />
• Maintain proper alignment with the wheel<br />
• Use eye <strong>and</strong>/or face protection<br />
• Perform a “ring” test to ensure the wheel is free of cracks<br />
<strong>and</strong> defects<br />
<strong>Sample</strong> <strong>Lesson</strong> <strong>Plan</strong> - <strong>H<strong>and</strong></strong> <strong>and</strong> <strong>Power</strong> <strong>Tools</strong> 2
• Learning Objectives/Outcomes. (Continued)<br />
d. Pneumatically powered tools<br />
Possible responses.<br />
• Use same precautions with air hoses as electrical cords<br />
• Keep away from sharp objects, oil, etc<br />
• Beware of tripping hazard<br />
• Do not carry the tool by the air hose<br />
• Ensure the air hose is securely fastened to the connector<br />
• Place a safety device on the muzzle<br />
• Wear eye protection <strong>and</strong>/or hearing protection<br />
• Don’t use compressed air for cleaning unless it’s reduced<br />
to less than 30 p.s.i<br />
e. Liquid fuel tools<br />
Possible responses.<br />
• Use only approved containers for liquid fuel<br />
• Shut down the engine before refueling<br />
• Let the engine cool before refueling<br />
• Avoid breathing fuel vapors<br />
• No open flames or electrical sparks near vapors<br />
f. Hydraulically powered tools<br />
Possible responses.<br />
• Ensure jacks are set solidly <strong>and</strong> will not shift<br />
• Use the jack with the correct weight capacity for the job<br />
• Lubricate <strong>and</strong> inspect jacks regularly<br />
• Do not exceed the stop limit for jacks<br />
g. Powder actuated tools<br />
• Limit the number of people in the work area to those that<br />
are directly involved in the work<br />
• Wear suitable eye, ear <strong>and</strong> face protection<br />
• Select a powder that will do the work without excessive<br />
force<br />
• Test the tool each day to be sure safety devices are<br />
functioning<br />
• Avoid using powder actuated tools on easily penetrated<br />
materials<br />
<strong>Sample</strong> <strong>Lesson</strong> <strong>Plan</strong> - <strong>H<strong>and</strong></strong> <strong>and</strong> <strong>Power</strong> <strong>Tools</strong> 3
• Learning Objectives/Outcomes. (Continued)<br />
3. Name at least two guarding techniques or principles that apply to h<strong>and</strong> <strong>and</strong><br />
power tools.<br />
Possible responses.<br />
• Guard an abrasive wheel so that the minimal amount of<br />
the wheel is exposed, <strong>and</strong> ensure the guard is properly<br />
aligned with the wheel<br />
• Guard moving parts of power tools<br />
• Never remove a guard when a tool is in use<br />
• Machine guards must protect the operator <strong>and</strong> others<br />
from point of operation, nip points, rotating parts or<br />
flying chips <strong>and</strong> sparks<br />
• Guard saws to prevent from coming in contact with the<br />
blade<br />
• <strong>Plan</strong>ned Activities, Discussion, or Participant Interaction<br />
Step 3: Evaluating Student Learning <strong>and</strong> Instruction<br />
• <strong>Lesson</strong> Evaluation <strong>and</strong> Comments.<br />
References<br />
OSHA St<strong>and</strong>ard: 29 CFR 1926 Subpart I (1926.300 to 1926.307)<br />
OSHA Publications<br />
‣ http://www.osha-slc.gov/OshDoc/Additional.html<br />
• 3080 <strong>H<strong>and</strong></strong> <strong>and</strong> <strong>Power</strong> <strong>Tools</strong><br />
• 3157 A Guide for Protecting Workers from Woodworking Hazards<br />
OSHA References/Resources<br />
• Construction Safety <strong>and</strong> Health Outreach Program - <strong>H<strong>and</strong></strong> <strong>and</strong> <strong>Power</strong> <strong>Tools</strong><br />
‣ http://www.osha.gov/doc/outreachtraining/htmlfiles/tools.html<br />
• OSHA Technical Links - Construction: <strong>H<strong>and</strong></strong> <strong>and</strong> <strong>Power</strong> <strong>Tools</strong><br />
‣ http://www.osha.gov/SLTC/constructionh<strong>and</strong>powertools/index.html<br />
• OSHA Technical Links - <strong>H<strong>and</strong></strong> <strong>and</strong> <strong>Power</strong> <strong>Tools</strong><br />
‣ http://www.osha.gov/SLTC/h<strong>and</strong>powertools/index.html<br />
• OSHA Technical Links - Woodworking<br />
‣ http://www.osha.gov/SLTC/woodproducts/tech_woodworking.html<br />
<strong>Sample</strong> <strong>Lesson</strong> <strong>Plan</strong> - <strong>H<strong>and</strong></strong> <strong>and</strong> <strong>Power</strong> <strong>Tools</strong> 4


