

TM 9-2320-260-34-2
TM 9-2320-260-34-2
TM 9-2320-260-34-2

Create successful ePaper yourself
Turn your PDF publications into a flip-book with our unique Google optimized e-Paper software.
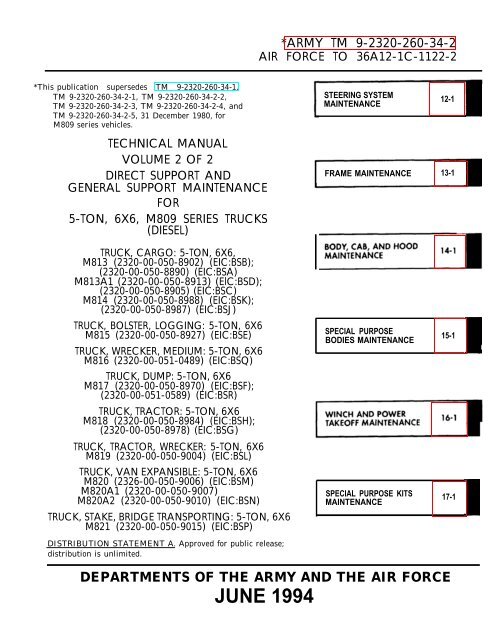
*ARMY <strong>TM</strong> 9-<strong>2320</strong>-<strong>260</strong>-<strong>34</strong>-2<br />
AIR FORCE TO 36A12-1C-1122-2<br />
*This publication supersedes <strong>TM</strong> 9-<strong>2320</strong>-<strong>260</strong>-<strong>34</strong>-1,<br />
<strong>TM</strong> 9-<strong>2320</strong>-<strong>260</strong>-<strong>34</strong>-2-1, <strong>TM</strong> 9-<strong>2320</strong>-<strong>260</strong>-<strong>34</strong>-2-2,<br />
<strong>TM</strong> 9-<strong>2320</strong>-<strong>260</strong>-<strong>34</strong>-2-3, <strong>TM</strong> 9-<strong>2320</strong>-<strong>260</strong>-<strong>34</strong>-2-4, and<br />
<strong>TM</strong> 9-<strong>2320</strong>-<strong>260</strong>-<strong>34</strong>-2-5, 31 December 1980, for<br />
M809 series vehicles.<br />
STEERING SYSTEM<br />
MAINTENANCE<br />
12-1<br />
TECHNICAL MANUAL<br />
VOLUME 2 OF 2<br />
DIRECT SUPPORT AND<br />
GENERAL SUPPORT MAINTENANCE<br />
FOR<br />
5-TON, 6X6, M809 SERIES TRUCKS<br />
(DIESEL)<br />
FRAME MAINTENANCE 13-1<br />
TRUCK, CARGO: 5-TON, 6X6,<br />
M813 (<strong>2320</strong>-00-050-8902) (EIC:BSB);<br />
(<strong>2320</strong>-00-050-8890) (EIC:BSA)<br />
M813A1 (<strong>2320</strong>-00-050-8913) (ElC:BSD);<br />
(<strong>2320</strong>-00-050-8905) (EIC:BSC)<br />
M814 (<strong>2320</strong>-00-050-8988) (EIC:BSK);<br />
(<strong>2320</strong>-00-050-8987) (EIC:BSJ)<br />
TRUCK, BOLSTER, LOGGING: 5-TON, 6X6<br />
M815 (<strong>2320</strong>-00-050-8927) (EIC:BSE)<br />
TRUCK, WRECKER, MEDIUM: 5-TON, 6X6<br />
M816 (<strong>2320</strong>-00-051-0489) (EIC:BSQ)<br />
TRUCK, DUMP: 5-TON, 6X6<br />
M817 (<strong>2320</strong>-00-050-8970) (EIC:BSF);<br />
(<strong>2320</strong>-00-051-0589) (EIC:BSR)<br />
TRUCK, TRACTOR: 5-TON, 6X6<br />
M818 (<strong>2320</strong>-00-050-8984) (EIC:BSH);<br />
(<strong>2320</strong>-00-050-8978) (EIC:BSG)<br />
TRUCK, TRACTOR, WRECKER: 5-TON, 6X6<br />
M819 (<strong>2320</strong>-00-050-9004) (EIC:BSL)<br />
TRUCK, VAN EXPANSIBLE: 5-TON, 6X6<br />
M820 (2326-00-050-9006) (EIC:BSM)<br />
M820A1 (<strong>2320</strong>-00-050-9007)<br />
M820A2 (<strong>2320</strong>-00-050-9010) (EIC:BSN)<br />
TRUCK, STAKE, BRIDGE TRANSPORTING: 5-TON, 6X6<br />
M821 (<strong>2320</strong>-00-050-9015) (EIC:BSP)<br />
DISTRIBUTION STATEMENT A. Approved for public release;<br />
distribution is unlimited.<br />
SPECIAL PURPOSE<br />
BODIES MAINTENANCE<br />
SPECIAL PURPOSE KITS<br />
MAINTENANCE<br />
15-1<br />
17-1<br />
DEPAR<strong>TM</strong>ENTS OF THE ARMY AND THE AIR FORCE<br />
JUNE 1994
<strong>TM</strong> 9-<strong>2320</strong>-<strong>260</strong>-<strong>34</strong>-2<br />
WARNING<br />
EXHAUST GASES CAN KILL<br />
1. DO NOT operate your vehicle engine in enclosed area.<br />
2. DO NOT idle vehicle engine with cab windows closed.<br />
3. DO NOT drive vehicle with inspection plates or cover plates removed.<br />
4. BE ALERT at all times for exhaust odors.<br />
5. BE ALERT for exhaust poisoning symptoms. They are:<br />
Headache<br />
Dizziness<br />
Sleepiness<br />
Loss of muscular control<br />
6. If YOU<br />
SEE another person with exhaust poisoning symptoms:<br />
Remove person from area<br />
Expose to open air<br />
Keep person warm<br />
Do not permit person to move<br />
Administer artificial respiration, if necessary*<br />
* For artificial respiration, refer to FM 21-11.<br />
All personnel must stand clear during lifting operations. A swinging or shifting load may cause injury or<br />
death to personnel.<br />
Eye protection must be worn when removing and installing springs under tension. Failure to do so may<br />
result in injury to personnel.<br />
Plunger rack is under spring tension. Keep hands clear of plunger rack during removal. Failure to do so<br />
may cause injury to personnel.<br />
Drycleaning solvent is flammable and will not be used near open flame. Use only in well-ventilated places.<br />
Failure to do so may result in injury to personnel.<br />
• Ensure lifting capacity is greater than weight of fifth wheel. Failure to do so may result in injury to<br />
personnel or damage to equipment.<br />
• Plunger is under spring tension. Keep hands clear of plunger during removal. Failure to do so may cause<br />
injury to personnel.<br />
• Eye protection is required when using wire brush for cleaning. Failure to do so may result in injury to<br />
personnel.<br />
Stabilize winch while sitting vertical. Failure to do so may result in injury to personnel.<br />
Warning a
<strong>TM</strong> 9-<strong>2320</strong>-<strong>260</strong>-<strong>34</strong>-2<br />
WARNING SUMMARY (Contd)<br />
Never work under raised dump body until safety braces are properly positioned. Injury to personnel may<br />
result if dump body suddenly lowers.<br />
• Do not operate dump controls when dump body is removed. Injury to personnel may result if lift cylinder<br />
is operated when not secured.<br />
• Bypass plugs are under tension. Remove plugs slowly. Failure to do so may result in injury to personnel.<br />
Spring is under tension. Release tension slowly. Failure to do so may result in injury to personnel.<br />
Ensure lifting capacity is greater than weight (465 lb (211 kg)) of cab protector shield. Failure to do so<br />
may result in injury to personnel or damage to equipment.<br />
Ensure lifting capacity is greater than weight (500 lb (227 kg)) of hoist cylinder. Failure to do so may<br />
result in injury to personnel or damage to equipment.<br />
Ensure lifting capacity is greater than weight (9,055 lb (4,111 kg)) of van body. Failure to do so may<br />
result in injury to personnel or damage to equipment.<br />
Support capacity must be greater than weight of van body, Ensure support capacity is not less than<br />
9,055 lb (4,111 kg). Failure to ensure this may result in injury to personnel or damage to equipment.<br />
Van body is insulated with fibrous glass felt insulation. Gloves, eyeshields, and dust mask must be worn<br />
during van body maintenance. Failure to do so may result in injury to personnel.<br />
Compressed air source will not exceed 30 psi (207 kPa). When cleaning with compressed air, eyeshields<br />
must be worn. Failure to wear eyeshields may result in injury to personnel.<br />
• Do not perform engine coolant heater testing while smoking or within 50 feet of sparks or open flame.<br />
Fuel is flammable and can explode easily, causing injury or death to personnel and damage to equipment.<br />
• Do not handle hot heater with bare hands; wear hand protection at all times. Failure to do so may cause<br />
injury to personnel.<br />
Exhaust gases can kill. Do not perform this task in enclosed areas. Ensure work area is well-ventilated<br />
and exhaust fumes are directed away from test area.<br />
• Allow time for heater to cool before removing from test equipment. Failure to do so may result in injury<br />
to personnel or damage to equipment.<br />
Ensure lifting capacity is greater than weight (1,800 lb (817 kg)) of cargo body. Failure to do so may<br />
result in injury to personnel or damage to equipment.<br />
Ensure lifting capacity is greater than weight (2,700 lb (1,226 kg)) of dump body. Failure to do so may<br />
result in injury to personnel or damage to equipment.<br />
Ensure lifting capacity is greater than weight (1,800 lb (817 kg)) of wrecker body. Failure to do so may<br />
result in injury to personnel or damage to equipment.<br />
Ensure lifting capacity is greater than weight (1,800 lb (817 kg)) of tractor wrecker body. Failure to do<br />
so may result in injury to personnel or damage to equipment.<br />
Ensure lifting capacity is greater than weight (2,700 lb (1,226 kg)) of subframe. Failure to do so may<br />
result in injury to personnel or damage to equipment.<br />
All personnel must be clear of vehicle when vehicle engine is running. Vehicle could suddenly move and<br />
cause injury to personnel.<br />
Platform is heavy and bulky; handle with care. Failure to do so may result in injury to personnel or<br />
damage to equipment,<br />
Do not disconnect air lines before draining air reservoirs. Small parts under pressure may shoot out with<br />
high velocity, causing injury to personnel.<br />
Warning b
<strong>TM</strong> 9-<strong>2320</strong>-<strong>260</strong>-<strong>34</strong>-2<br />
* ARMY <strong>TM</strong> 9-<strong>2320</strong> -<strong>260</strong>-<strong>34</strong>-2<br />
AIR FORCE TO 36A12-1C-1122-2<br />
TECHNICAL MANUAL<br />
NO. 9-<strong>2320</strong>-<strong>260</strong>-<strong>34</strong>-2<br />
TECHNICAL ORDER<br />
NO. 36A12-1C-1122-2<br />
DEPAR<strong>TM</strong>ENTS OF THE ARMY<br />
AND THE AIR FORCE<br />
WASHINGTON, D.C. 1 June 1994<br />
TECHNICAL MANUAL<br />
VOLUME 2 OF 2<br />
DIRECT SUPPORT AND GENERAL SUPPORT MAINTENANCE<br />
5-TON, 6X6, M809 SERIES TRUCKS<br />
(DIESEL)<br />
Model<br />
NSN Without Winch<br />
(EIC)<br />
NSN With Winch<br />
(EIC)<br />
Truck, Cargo<br />
M813<br />
M813A1<br />
M814<br />
<strong>2320</strong>-00-050-8902<br />
<strong>2320</strong>-00-050-8913<br />
<strong>2320</strong>-00-050-8988<br />
(BSB)<br />
(BSD)<br />
(BSK)<br />
<strong>2320</strong>-00-050-8890<br />
<strong>2320</strong>-00-050-8905<br />
<strong>2320</strong>-00-050-8987<br />
(BSA)<br />
(BSC)<br />
(BSJ)<br />
Truck, Bolster, Logging<br />
M815<br />
<strong>2320</strong>-00-050-8927<br />
(BSE)<br />
Truck, Wrecker, Medium<br />
M816<br />
<strong>2320</strong>-00-051-0489<br />
(BSQ)<br />
Truck, Dump<br />
M817<br />
<strong>2320</strong>-00-050-8970<br />
(BSF)<br />
<strong>2320</strong>-00-051-0589<br />
(BSR)<br />
Truck, Tractor<br />
M818<br />
<strong>2320</strong>-00-050-8984<br />
(BSH)<br />
<strong>2320</strong>-00-050-8978<br />
(BSG)<br />
Truck, Tractor, Wrecker<br />
M819<br />
<strong>2320</strong>-00-050-9004<br />
(BSL)<br />
Truck, Van, Expansible<br />
M820<br />
M820A1<br />
M820A2<br />
<strong>2320</strong>-00-050-9006<br />
<strong>2320</strong>-00-050-9007<br />
<strong>2320</strong>-00-050-9010<br />
(BSM)<br />
(BSN)<br />
Truck, Stake, Bridge Transporting<br />
M821<br />
<strong>2320</strong>-00-050-9015<br />
(BSP)<br />
This manual is published in two parts. <strong>TM</strong> 9-<strong>2320</strong>-<strong>260</strong>-<strong>34</strong>-1 contains chapters 1 through 11, and<br />
<strong>TM</strong> 9-<strong>2320</strong>-<strong>260</strong>-<strong>34</strong>-2 contains chapters 12 through 17 and appendices A, B, C, D, E, and F.<br />
This manual contains a table of contents and an alphabetized index for chapters 1 through 17.<br />
* This publication supersedes <strong>TM</strong> 9-<strong>2320</strong>-<strong>260</strong>-<strong>34</strong>-1. <strong>TM</strong> 9-<strong>2320</strong>-<strong>260</strong>-<strong>34</strong>-2-1. <strong>TM</strong> 9-<strong>2320</strong>-<strong>260</strong>-<strong>34</strong>-2-2.<br />
<strong>TM</strong> 9-<strong>2320</strong>-<strong>260</strong>-<strong>34</strong>-2-3, <strong>TM</strong> 9-<strong>2320</strong>-<strong>260</strong>-<strong>34</strong>-2-4, and <strong>TM</strong> 9-<strong>2320</strong>-<strong>260</strong>-<strong>34</strong>-2-5, dated 31 December 1980,<br />
for M809 series vehicles.<br />
DISTRIBUTION STATEMENT A. Approved for public release;<br />
distribution is unlimited.<br />
i
<strong>TM</strong> 9-<strong>2320</strong>-<strong>260</strong>-<strong>34</strong>-2<br />
REPORTING OF ERRORS<br />
You can help improve this manual. If you find any mistakes or if you know of a way<br />
to improve the procedures, please let us know. Mail your letter, DA Form 2028 (Recommended<br />
Changes to Publications and Blank Forms), or DA Form 2028-2, located in back<br />
of this manual, direct to: Commander, U.S. Army Tank-Automotive Command, ATTN:<br />
AMSTA-MB, Warren, Michigan 48397-5000. A reply will be furnished to you.<br />
VOLUME 2 OF 2<br />
CHAPTER12 STEERING SYSTEM MAINTENANCE. . . . . . . . . . . . . . . . . . . . . . . . . . . . . . . . . 12-1<br />
Section I. Mechanical and Power Steering System Maintenance . . . . . . . . . . . . . . . . . . . . . . 12-1<br />
II. Tire Maintenance . . . . . . . . . . . . . . . . . . . . . . . . . . . . . . . . . . . . . . . . . . . . . . . . 12-18<br />
CHAPTER 13 FRAME MAINTENANCE . . . . . . . . . . . . . . . . . . . . . . . . . . . . . . . . . . . . . . . 13-1<br />
CHAPTER 14 BODY, CAB, AND HOOD MAINTENANCE . . . . . . . . . . . . . . . . . . . . . . . . . . 14-1<br />
CHAPTER 15 SPECIAL PURPOSE BODIES MAINTENANCE l . . . . . . . . . . . . . . . . . . . . . . . 15-1<br />
Section I. Cargo Body Maintenance . . . . . . . . . . . . . . . . . . . . . . . . . . . . . . . . . . . . . . . . . . 15-1<br />
II. Wrecker Body Maintenance . . . . . . . . . . . . . . . . . . . . . . . . . . . . . . . . . . . . . . . . 15-8<br />
III. Tractor Wrecker Body Maintenance . . . . . . . . . . . . . . . . . . . . . . . . . . . . . . . . . . . 15-13<br />
IV. Dump Body Maintenance . . . . . . . . . . . . . . . . . . . . . . . . . . . . . . . . . . . . . . . . . . 15-24<br />
V. Van Body Maintenance . . . . . . . . . . . . . . . . . . . . . . . . . . . . . . . . . . . . . . . . . . . 15-70<br />
VI. Van Body Electrical Components Replacement . . . . . . . . . . . . . . . . . . . . . . . . . . . 15-239<br />
WINCH AND POWER TAKEOFF MAINTENANCE . . . . . . . . . . . . . . . . . 16-1<br />
Section I. Front Winch Maintenance . . . . . . . . . . . . . . . . . . . . . . . . . . . . . . . . . . . . . . . . . 16-1<br />
II. Rear Winch Maintenance . . . . . . . . . . . . . . . . . . . . . . . . . . . . . . . . . . . . . . . . . . 16-44<br />
III. Crane and Hoist Maintenance . . . . . . . . . . . . . . . . . . . . . . . . . . . . . . . . . . . . . . . 16-76<br />
IV. Transmission Power Takeoff Maintenance . . . . . . . . . . . . . . . . . . . . . . . . . . . . . . 16-230<br />
V. Transer Power Takeoff Maintenance . . . . . . . . . . . . . . . . . . . . . . . . . . . . . . . . . . 16-250<br />
VI. Power Divider and Drive Assembly Maintenance . . . . . . . . . . . . . . . . . . . . . . . . . 16-270<br />
SPECIAL PURPOSE KITS MAINTENANCE . . . . . . . . . . . . . . . . . . . . . . . . 17-1<br />
Section I. Description and Data . . . . . . . . . . . . . . . . . . . . . . . . . . . . . . . . . . . . . . . . . . 17-1<br />
Section II. Engine Coolant Heater Maintenance . . . . . . . . . . . . . . . . . . . . . . . . . . . . . . . . . . 17-3<br />
III. Personnel Heater Maintenance. . . . . . . . . . . . . . . . . . . . . . . . . . . . . . . . . . . . . . 17-36<br />
APPENDIX PREFERENCES . . . . . . . . . . . . . . . . . . . . . . . . . . . . . . . . . . . . . . . . . . . . .A-1<br />
APPENDIX B COMMON AND SPECLIAL TOOLS LIST . . . . . . . . . . . . . . . . . . . . . . . . . . . . . . . B-1<br />
APPENDIX C EXPENDABLE/DURABLE SUPPLIES AND MATERIALS LIST . . . . . . . . . . . . . . C-1<br />
APPENDIX D MANDATORY REPL.ACEMENT PARTS. . . . . . . . . . . . . . . . . . . . . . . . . . . . . . . . D-1<br />
Section I. Introduction . . . . . . . . . . . . . . . . . . . . . . . . . . . . . . . . . . . . . . . . . . . . . . . . . . . . D-1<br />
II. Mandatory Replacement Parts . . . . . . . . . . . . . . . . . . . . . . . . . . . . . . . . . . . . . . . D-2<br />
APPENDIX E ILLUSTRATED LIST OF MANUFACTURED ITEMS . . . . . . . . . . . . . . . . . . . . . . E-1<br />
APPENDIX F TORQUE LIMITS . . . . . . . . . . . . . . . . . . . . . . . . . . . . . . . . . . . . . . . . . . . . . . . . F-1<br />
INDEX . . . . . . . . . . . . . . . . . . . . . . . . . . . . . . . . . . . . . . . . . . . . . . . . . . .. Index 1<br />
ii
<strong>TM</strong> 9-<strong>2320</strong>-<strong>260</strong>-<strong>34</strong>-2<br />
CHAPTER 12<br />
STEERING SYSTEM MAINTENANCE<br />
Section I. Mechanical and Power Steering System Maintenance (page 12-1)<br />
Section II. Tire Maintenance (page 12-18)<br />
Section I. MECHANICAL AND POWER STEERING SYSTEM MAINTENANCE<br />
12-1. MECHANICAL AND POWER STEERING SYSTEM MAINTENANCE INDEX<br />
PARA.<br />
NO.<br />
TITLE<br />
PAGE<br />
NO.<br />
12-2. Description 12-1<br />
12-3. Preliminary Maintenance Checklist 12-2<br />
12-4. Maintenance Precautions 12-2<br />
12-5. Power Steering Gear Replacement 12-3<br />
12-6. Power Steering Test and Adjustment 12-6<br />
12-7. Power Steering Assist Cylinder Maintenance 12-16<br />
12-2. DESCRIPTION<br />
This paragraph describes the power steering gear and power steering pump with oil reservoir.<br />
a. The M809 series vehicles utilize a power steering system consisting of a power steering gear which<br />
is a fully integral power unit incorporating a hydraulic control valve, hydraulic power cylinders, and a<br />
mechanical steering mechanism. Now of oil from the engine-driven pump is directed to the power assist<br />
cylinder by the control valve.<br />
1. Power steering gear assembly<br />
2. Poppet valve adjustment<br />
3. Hydraulic pressure inlet<br />
4. Poppet valve adjustment screw<br />
5. Input shaft<br />
6. Hydraulic oil return<br />
7. Assist cylinder port<br />
8. Assist cylinder port<br />
9. Sector shaft<br />
12-1
<strong>TM</strong> 9-<strong>2320</strong>-<strong>260</strong>-<strong>34</strong>-2<br />
12-2. DESCRIPTION (Contd)<br />
b. The power steering pump and reservoir are incorporated into a single assembly. The oil reservoir<br />
encloses the pump housing and provides a reserve supply of oil to assure complete filling of hydraulic system.<br />
Atmospheric pressure in the reservoir is maintained through a breather near filler neck of reservoir.<br />
A filter is installed near intake of pump to prevent dirt and other foreign matter from entering hydraulic<br />
system. Two V-belts transfer power from the engine accessory drive to a double pulley which drives the<br />
power steering pump.<br />
1. Power steering pump pulley<br />
2. Breather<br />
3. Reservoir cap<br />
4. Reservoir return line tube<br />
5. Power steering pump reservoir<br />
6. Power steering pump<br />
7. Reservoir inlet port<br />
12-3. PRELIMINARY MAINTENANCE CHECKLIST<br />
1. Check steering linkage and components for wear before performing hydraulic tests and adjustments.<br />
2. Check tire pressures. Ensure pressures are correct and equal (<strong>TM</strong> 9-<strong>2320</strong>-<strong>260</strong>-10).<br />
3. Check slip joint on steering column. Ensure it is free and lubricated. A tight slip joint can cause<br />
steering problems.<br />
4. Check oil reservoir for proper oil level. (LO 9-<strong>2320</strong>-<strong>260</strong>-12).<br />
5. Check oil pump drivebelts for tightness, wear, and slippage (<strong>TM</strong> 9-<strong>2320</strong>-<strong>260</strong>-20).<br />
6. If problems cannot be determined during the preliminary check, you will have to test the hydraulic<br />
system.<br />
12-4. MAINTENANCE PRECAUTIONS<br />
1. Always use a puller to remove steering arms. Never use a torch or hammer.<br />
2. Do not weld any broken steering components. Replace defective or broken parts.<br />
3. Do not cold straighten, hot straighten, or bend any steering system part.<br />
4. Excessive heat will develop if power steering is held in extreme right or left turns longer than a few<br />
seconds. This heat will damage seals and/or pump.<br />
5. Prevent dirt and foreign matter from entering hydraulic steering system. Always clean around filler<br />
caps, hose, and fitting connections before removing.<br />
12-2
<strong>TM</strong> 9-<strong>2320</strong>-<strong>260</strong>-<strong>34</strong>-2<br />
I<br />
12-5. POWER STEERING GEAR REPLACEMENT<br />
1<br />
THIS TASK COVERS:<br />
a. Removal b. Installation<br />
INITIAL SETUP<br />
APPLICAB LE MODELS<br />
REFERENCES (<strong>TM</strong>)<br />
All LO- 9-<strong>2320</strong>-<strong>260</strong>-12<br />
TOOLS<br />
<strong>TM</strong> 9-<strong>2320</strong>-<strong>260</strong>-10<br />
General mechanic’s tool kit<br />
<strong>TM</strong> 9-<strong>2320</strong>-<strong>260</strong>-20<br />
(Appendix B, Item 1)<br />
<strong>TM</strong> 9-<strong>2320</strong>-<strong>260</strong>-<strong>34</strong>P-1<br />
Socket set, 3/4-in. dr.<br />
(Appendix B, Item 24)<br />
Torque wrench, 3/8-in. dr.<br />
(Appendix B, Item 4)<br />
Torque wrench, 3/4-in. dr.<br />
(Appendix B, Item 2)<br />
MATERIALS/PARTS<br />
Lockwasher (Appendix D, Item 248)<br />
Safety wire (Appendix D, Item 373)<br />
Cap and plug set (Appendix C, Item 6)<br />
Antiseize tape (Appendix C, Item 50)<br />
Left front wheel assembly removed<br />
(<strong>TM</strong> 9-<strong>2320</strong>-<strong>260</strong>-10).<br />
Power steering pump reservoir drained<br />
(<strong>TM</strong> 9-<strong>2320</strong>-<strong>260</strong>-10).<br />
Radiator removed (<strong>TM</strong> 9-<strong>2320</strong>-<strong>260</strong>-20).<br />
Steering gear shield removed<br />
(<strong>TM</strong> 9-<strong>2320</strong>-<strong>260</strong>-20).<br />
Pitman arm removed (<strong>TM</strong> 9-<strong>2320</strong>-<strong>260</strong>-20).<br />
1. Turn five fasteners (1) counterclockwise and remove access panel (2) from fender (3).<br />
12-3
<strong>TM</strong> 9-<strong>2320</strong>-<strong>260</strong>-<strong>34</strong>-2<br />
12-5. POWER STEERING GEAR REPLACEMENT (Contd)<br />
2. Remove nut (12), lockwasher (11), and screw (7) from universal joint (6). Discard lockwasher (11).<br />
3. Remove universal joint (6) from shaft (2) by pushing lower section (10) into upper section (9) of<br />
lower steering column (8).<br />
4. Remove safety wire (5) from four screws (4). Discard safety wire (5).<br />
CAUTION<br />
Clean area around hoses and lines before removal to prevent<br />
entry of dirt. Damage will occur if dirt or dust enters power<br />
steering system.<br />
Cap or plug all openings immediately after disconnecting lines<br />
and hoses to prevent contamination. Remove caps or plugs<br />
prior to connection. Failure to do so may result in damage to<br />
equipment.<br />
NOTE<br />
Tag hydraulic lines and ports for installation.<br />
Have drainage container ready to catch hydraulic fluid.<br />
Assistant will help with step 5.<br />
5. Remove four screws (4), washers (3), power steering gear (1), and mounting plate (15) from<br />
frame (13) and bracket (14).<br />
6. Remove pressure hose (17) and elbow (16) from power steering gear (1).<br />
7. Remove return tube (19) and adapter ( 18) from power steering gear (1).<br />
8. Disconnect power steering pressure lines (20) and (22) from adapters (21) and (23).<br />
9. Remove adapters (21) and (23) from power steering gear (1).<br />
NOTE<br />
Assistant will help with step 2.<br />
1. Wrap adapters (18), (21), and (23), and elbow (16) with anti seize tape before installation.<br />
2. Install mounting plate (15) and power steering gear (1) on bracket ( 14) and frame (13) with four<br />
washers (3) and screws (4). Tighten screws (4) <strong>260</strong>-280 lb-ft (353-380 N-m).<br />
3. Install new safety wire (5) through four screws (4) on bracket (14) and frame (13).<br />
4. Install adapters (18), (21), and (23), and elbow (16) on power steering gear (1).<br />
5. Install power steering lines (20) and (22) on power steering gear (1).<br />
6. Install return tube ( 19) on power steering gear (1).<br />
7. Install pressure hose (17) on power steering gear (1).<br />
8. Install lower steering column universal joint (6) on power steering gear shaft (2) with screw (7),<br />
new lockwasher (11), and nut (12). Tighten nut ( 12) 28-<strong>34</strong> lb-ft (38-46 N-m).<br />
9. Install access panel (25) on fender (26) with five fasteners (24).<br />
12-4
<strong>TM</strong> 9-<strong>2320</strong>-<strong>260</strong>-<strong>34</strong>-2<br />
FOLLOW-ON TASKS: • Install pitman arm (<strong>TM</strong> 9-<strong>2320</strong>-<strong>260</strong>-20).<br />
• Install steering gear shield (<strong>TM</strong> 9-<strong>2320</strong>-<strong>260</strong>-20).<br />
• Install left front wheel assembly (<strong>TM</strong> 9-<strong>2320</strong>-<strong>260</strong>-10).<br />
• Install radiator (<strong>TM</strong> 9-<strong>2320</strong>-<strong>260</strong>-20).<br />
• Fill power steering reservoir to proper level (LO 9-<strong>2320</strong>-<strong>260</strong>-12) and check for leaks.<br />
• Bleed hydraulic power steering system (<strong>TM</strong> 9-<strong>2320</strong>-<strong>260</strong>-20).<br />
Check power steering left and right travel.<br />
Road test vehicle for proper power steering system operation (<strong>TM</strong> 9-<strong>2320</strong>-<strong>260</strong>-10).<br />
12-5
<strong>TM</strong> 9-<strong>2320</strong>-<strong>260</strong>-<strong>34</strong>-2<br />
I<br />
12-6. POWER STEERING TEST AND ADJUS<strong>TM</strong>ENT<br />
THIS TASK COVERS:<br />
a. Steering Pump Test Equipment Installation e. Poppet Adjustment<br />
b. Steering Pump Pressure Test f. Sector Shaft Adjustment<br />
c. Steering Pump Flow Test g. Steering Pump Test Equipment Removal<br />
d. Steering Gear Internal Leakage Test<br />
INITIAL SETUP<br />
APPLICABLE MODELS<br />
All<br />
TOOLS<br />
General mechanic’s tool kit<br />
(Appendix B, Item 1)<br />
Torque wrench, 3/8-in. dr.<br />
(Appendix B, Item 4)<br />
TEST EQUIPMENT<br />
Power steering test set (Appendix B, Item 145)<br />
Flowmeter (Appendix B, Item 146)<br />
Thermometer (Appendix B, Item 147)<br />
MATERIALS/PARTS<br />
Cap and plug set (Appendix C, Item 6)<br />
REFERENCES (<strong>TM</strong>)<br />
LO 9-<strong>2320</strong>-<strong>260</strong>-12<br />
<strong>TM</strong> 9-<strong>2320</strong>-<strong>260</strong>-10<br />
<strong>TM</strong> 9-<strong>2320</strong>-<strong>260</strong>-20<br />
<strong>TM</strong> 9-<strong>2320</strong>-<strong>260</strong>-<strong>34</strong>P-1<br />
EQUIPMENT CONDITION<br />
Steering gear shield removed (<strong>TM</strong> 9-<strong>2320</strong>-<strong>260</strong>-20).<br />
GENERAL SAFETY INSTRUCTIONS<br />
All personnel must be clear of vehicle when vehicle<br />
engine is running.<br />
WARNING<br />
All personnel must be clear of vehicle when vehicle engine is<br />
running. Vehicle could suddenly move and cause injury to<br />
personnel.<br />
NOTE<br />
Do not begin this procedure before performing all preliminary<br />
maintenance checks (para. 12-3).<br />
a. Steering Pump Test Equipment Installation<br />
CAUTION<br />
Clean area around hoses and lines before removal to prevent<br />
entry of dirt. Damage will occur if dirt or dust enters the<br />
steering system.<br />
Cap or plug all openings immediately after disconnecting lines<br />
and hoses to prevent contamination. Remove caps or plugs<br />
prior to connection. Failure to do so may result in damage to<br />
equipment.<br />
NOTE<br />
Have drainage container ready to catch power steering fluid.<br />
1. Remove pressure hose (5) from elbow (8).<br />
2. Install load shutoff valve (7) on elbow (8).<br />
3. Install tee (6) on load shutoff valve (7).<br />
4. Install pressure hose (5) and gage on tee (6).<br />
12-6
<strong>TM</strong> 9-<strong>2320</strong>-<strong>260</strong>-<strong>34</strong>-2<br />
12-6. POWER STEERING TEST AND ADJUS<strong>TM</strong>ENT (Contd)<br />
5. Loosen clamp (10) and remove return hose (9) from return tube (2).<br />
6. Install flowmeter on return tube (2) and tighten clamp (1).<br />
7. Install return hose (9) on flowmeter and tighten clamp (10).<br />
8. Remove filler cap (4) and place thermometer in filler neck (3).<br />
12-7
<strong>TM</strong> 9-<strong>2320</strong>-<strong>260</strong>-<strong>34</strong>-2<br />
12-6. POWER STEERING TEST AND ADJUS<strong>TM</strong>ENT (Contd)<br />
I<br />
b. Steering Pump Pressure Test<br />
1. Start engine (<strong>TM</strong> 9-<strong>2320</strong>-<strong>260</strong>-10) and warm engine to operating temperature. Let engine run at idle<br />
until end of test.<br />
CAUTION<br />
Power steering oil temperature cannot exceed 200°F (93°C).<br />
Damage to equipment may result.<br />
2. Partially close load shutoff valve (2) until gage reads 1000 psi (6895 kPa).<br />
3. Observe temperature reading on thermometer. Temperature must be 165°- 175°F (74°-79°C).<br />
If temperature reading is not between 165°- 175°F (74°-79°C), refer to Chapter 2, Mechanical<br />
Troubleshooting, Steering Gear.<br />
4. Fully open load shutoff valve (2).<br />
CAUTION<br />
Do not keep load shutoff valve closed for more than 5 seconds.<br />
Failure to do so may result in damage to power steering pump.<br />
5. Close load shutoff valve (2) and observe gage. Replace pump (1) if gage reads below 1250 psi<br />
(8619 kPa) (<strong>TM</strong> 9-<strong>2320</strong>-<strong>260</strong>-20).<br />
6. Open load shutoff valve (2).<br />
7. Shut down engine (<strong>TM</strong> 9-<strong>2320</strong>-<strong>260</strong>-10).<br />
c. Steering Pump Flow Test<br />
1.<br />
2.<br />
3.<br />
4.<br />
5.<br />
6.<br />
7.<br />
8.<br />
9.<br />
Start engine (<strong>TM</strong> 9-<strong>2320</strong>-<strong>260</strong>-10) and warm engine to operating temperature. Engine at idle.<br />
CAUTION<br />
Power steering gear oil temperature cannot exceed 200°F (93°C).<br />
Damage to equipment may result.<br />
With engine idling, observe temperature reading on thermometer. Temperature must be 165°-175°F<br />
(74°-79°C). If temperature reading is not between 165°- 175°F (74°-79°C), refer to Chapter 2,<br />
Mechanical Troubleshooting, Steering Gear.<br />
Observe flow rate on flowmeter. Replace pump (1) if flowmeter reads below 4.3 gpm (16.3 lpm)<br />
(<strong>TM</strong> 9-<strong>2320</strong>-<strong>260</strong>-20).<br />
CAUTION<br />
Do not keep load shutoff valve closed for more than 5 seconds.<br />
Failure to do so may result in damage to power steering pump.<br />
Close load shutoff valve (2) and observe reading on gage and flowmeter. Gage should read 1250 psi<br />
(8619 kPa). Flowmeter should read zero. Replace pump (1) if gage reads below 1250 psi (8619 kPa)<br />
(<strong>TM</strong> 9-<strong>2320</strong>-<strong>260</strong>-20).<br />
Open load shutoff valve (2) and observe flowmeter. Replace pump (1) if flow rate is below 4.3 gpm<br />
(16.3 lpm) (<strong>TM</strong> 9-<strong>2320</strong>-<strong>260</strong>-20).<br />
Run engine at 3000 rpm.<br />
Close load shutoff valve (2) and observe gage and flowmeter. Gage should read 1525 psi (10514 kPa).<br />
Flowmeter should read zero. Replace pump (1) if gage reads above 1525 psi (10514 kPa)<br />
(<strong>TM</strong> 9-<strong>2320</strong>-<strong>260</strong>-20).<br />
Open load shutoff valve (2) and observe flowmeter. Replace pump (1) if flow rate is below 8 gpm<br />
(30.3 lpm) (<strong>TM</strong> 9-<strong>2320</strong>-<strong>260</strong>-20).<br />
Shut down engine (<strong>TM</strong> 9-<strong>2320</strong>-<strong>260</strong>-10).<br />
12-8
<strong>TM</strong> 9-<strong>2320</strong>-<strong>260</strong>-<strong>34</strong>-2<br />
I<br />
12-6. POWER STEERING TEST AND ADJUS<strong>TM</strong>ENT (Contd)<br />
12-9
<strong>TM</strong> 9-<strong>2320</strong>-<strong>260</strong>-<strong>34</strong>-2<br />
12-6. POWER STEERING TEST AND ADJUS<strong>TM</strong>ENT (Contd)<br />
d. Steering Gear Internal Leakage Test<br />
1.<br />
2.<br />
3.<br />
4.<br />
5.<br />
6.<br />
7.<br />
Start engine (<strong>TM</strong> 9-<strong>2320</strong>-<strong>260</strong>-10) and warm to operating temperature. Let engine idle to end of test.<br />
CAUTION<br />
Power steering oil temperature cannot exceed 200°F (93°C).<br />
Damage to equipment may result.<br />
With engine idling, observe temperature reading on thermometer. Temperature must be 165°-175°F<br />
(74°-79°C). If temperature is not between 165°-175°F (74-79°C), refer to Chapter 2, Mechanical<br />
Troubleshooting, Steering Gear.<br />
CAUTION<br />
Do not hold steering wheel in full turn position for more than<br />
10 seconds. Pump damage may result.<br />
NOTE<br />
Assistant will help with step 3.<br />
With steering wheel (1) at center position, turn steering wheel (1) a half turn to right. Hold steering<br />
wheel (1) for 3-10 seconds.<br />
Observe gage and flowmeter. Gage should read 1350-1500 psi (9308-10<strong>34</strong>2 kPa), if not, refer to<br />
chapter 2, Mechanical Troubleshooting, Steering Gear. Replace steering gear (2) if flowmeter reads<br />
greater than 0.75 gpm (2.84 lpm) (para. 12-5).<br />
NOTE<br />
Assistant will help with step 5.<br />
With steering wheel (1) at center position, turn wheel (1) one half turn to left. Hold steering<br />
wheel (1) for 3-10 seconds.<br />
Observe gage and flowmeter. Gage should read 1350-1500 psi (9308-10<strong>34</strong>2 kPa), if not, refer to<br />
Chapter 2, Mechanical Troubleshooting, Steering Gear. Replace steering gear (2) if flowmeter reads<br />
greater than 0.75 gpm (2.84 lpm) (para. 12-5).<br />
Shut down engine (<strong>TM</strong> 9-<strong>2320</strong>-<strong>260</strong>-10).<br />
12-10
<strong>TM</strong> 9-<strong>2320</strong>-<strong>260</strong>-<strong>34</strong>-2<br />
12-6. POWER STEERING TEST AND ADJUS<strong>TM</strong>ENT (Contd)<br />
12-11
<strong>TM</strong> 9-<strong>2320</strong>-<strong>260</strong>-<strong>34</strong>-2<br />
12-6. POWER STEERING TEST AND ADJUS<strong>TM</strong>ENT (Contd)<br />
e. Poppet Adjustment<br />
1.<br />
2.<br />
3.<br />
4.<br />
5.<br />
6.<br />
7.<br />
8.<br />
9.<br />
10.<br />
11.<br />
12.<br />
Start engine (<strong>TM</strong> 9-<strong>2320</strong>-<strong>260</strong>-10) and warm to operating temperature. Let engine idle until end<br />
of test.<br />
CAUTION<br />
Do not hold steering wheel in full turn position for more than<br />
10 seconds. Pump damage may result.<br />
NOTE<br />
Assistant will help with steps 2 through 12.<br />
Rotate steering wheel (1) to full turn right position.<br />
Loosen jamnut (5).<br />
Turn poppet adjusting screw (4) counterclockwise until gage shows maximum pressure.<br />
Turn poppet adjusting screw (4) clockwise until gage shows a 200-400 psi (1379-2758 kPa) drop<br />
in pressure.<br />
Tighten jamnut (5) 10-15 lb-ft (14-20 N•m).<br />
Rotate steering wheel (1) to full turn left position.<br />
Loosen jamnut (6).<br />
Turn poppet adjusting screw (7) counterclockwise until gage shows maximum pressure.<br />
Turn poppet adjusting screw (7) clockwise until gage shows a 200-400 psi (1379-2758 kPa) drop<br />
in pressure.<br />
Tighten jamnut (6) 20-25 lb-ft (27-<strong>34</strong> N•m).<br />
Shut down engine (<strong>TM</strong> 9-<strong>2320</strong>-<strong>260</strong>-10).<br />
f. Sector Shaft Adjustment<br />
1.<br />
2.<br />
3.<br />
4.<br />
5.<br />
6.<br />
7.<br />
8.<br />
Remove drag link (<strong>TM</strong> 9-<strong>2320</strong>-<strong>260</strong>-20).<br />
NOTE<br />
Assistant will help with step 2.<br />
Rotate steering wheel (1) full travel in both directions and note halfway (midway) point. Position<br />
to halfway point.<br />
Loosen jamnut (3).<br />
Tighten adjusting screw (2) 15 lb-in. (2 N•m).<br />
Turn adjusting screw (2) counterclockwise one turn.<br />
Tighten jamnut (3) 20-25 lb-ft (27-<strong>34</strong> N•m).<br />
Rotate steering wheel (1) in both directions. If pulsations are felt, repeat steps 1 through 7.<br />
If pulsations continue, refer to general troubleshooting instructions (para. 2-6).<br />
Install drag link (<strong>TM</strong> 9-<strong>2320</strong>-<strong>260</strong>-20).<br />
12-12
<strong>TM</strong> 9-<strong>2320</strong>-<strong>260</strong>-<strong>34</strong>-2<br />
12-6. POWER STEERING TEST AND ADJUS<strong>TM</strong>ENT (Contd)<br />
12-13
<strong>TM</strong> 9-<strong>2320</strong>-<strong>260</strong>-<strong>34</strong>-2<br />
12-6. POWER STEERING TEST AND ADJUS<strong>TM</strong>ENT (Contd)<br />
I<br />
g. Steering Pump Test Equipment Removal<br />
1. Remove thermometer from filler neck (3).<br />
2. Install filler cap (4) on filler neck (3).<br />
NOTE<br />
Have drainage container ready to catch power steering fluid.<br />
3. Loosen clamp (10) and remove return hose (9) from flowmeter.<br />
4. Loosen clamp (1) and remove flowmeter from return tube (2).<br />
5. Install return hose (9) on return tube (2) and tighten clamp (10).<br />
6. Disconnect pressure hose (5) and gage from tee (6).<br />
7. Remove tee (6) from load shutoff valve (8).<br />
8. Remove load shutoff valve (8) from elbow (7).<br />
9. Install pressure hose (5) on elbow (7).<br />
12-14
<strong>TM</strong> 9-<strong>2320</strong>-<strong>260</strong>-<strong>34</strong>-2<br />
I<br />
12-6. POWER STEERING TEST AND ADJUS<strong>TM</strong>ENT (Contd)<br />
FOLLOW-ON TASKS: • Install steering gear shield (<strong>TM</strong> 9-<strong>2320</strong>-<strong>260</strong>-20).<br />
• Fill power steering reservoir to proper level (LO 9-<strong>2320</strong>-<strong>260</strong>-12) and check for leaks.<br />
• Bleed hydraulic power steering system (<strong>TM</strong> 9-<strong>2320</strong>-<strong>260</strong>-20).<br />
• Road test vehicle for proper power steering system operation (<strong>TM</strong> 9-<strong>2320</strong>-<strong>260</strong>-10).<br />
12-15
<strong>TM</strong> 9-<strong>2320</strong>-<strong>260</strong>-<strong>34</strong>-2<br />
I<br />
12-7. POWER STEERING ASSIST CYLINDER MAINTENANCE<br />
THIS TASK COVERS:<br />
a. Disassembly c. Assembly<br />
b. Cleaning and Inspection<br />
INITIAL SETUP<br />
APPLICABLE MODELS<br />
MATERIALS/PARTS (Contd)<br />
All Helical spring (Appendix D, Item 522)<br />
Lubricating oil (Appendix C, Item 21)<br />
TOOLS<br />
General mechanic’s tool kit<br />
REFERENCES (<strong>TM</strong>)<br />
(Appendix B, Item 1) LO 9-<strong>2320</strong>-<strong>260</strong>-12<br />
Retaining ring pliers (Appendix B, Item 116) <strong>TM</strong> 9-<strong>2320</strong>-<strong>260</strong>-20<br />
<strong>TM</strong> 9-<strong>2320</strong>-<strong>260</strong>-<strong>34</strong>P-1<br />
MATERIALS/PARTS<br />
Seal (Appendix D, Item 435)<br />
EQUIPMENT CONDITION<br />
Wiper ring (Appendix D, Item <strong>34</strong>5)<br />
Power steering assist cylinder removed<br />
Back-up ring (Appendix D, Item <strong>34</strong>4)<br />
preformed packing (Appendix D, Item 306)<br />
(<strong>TM</strong> 9-<strong>2320</strong>-<strong>260</strong>-20).<br />
1.<br />
2.<br />
3.<br />
4.<br />
5.<br />
6.<br />
7.<br />
8.<br />
9.<br />
10.<br />
11.<br />
Thoroughly clean exterior of steering assist cylinder (3).<br />
NOTE<br />
Have drainage container ready to catch oil.<br />
Hold ports downward and push piston rod (7) in and out to remove oil from steering assist<br />
cylinder (3).<br />
Remove three screws (12), seal retainer (11), wiper ring (10), and retainer plate (9) from steering<br />
assist cylinder (3). Discard wiper ring (10).<br />
Push gland (6) in and remove retaining ring (8) from large end of steering assist cylinder (3).<br />
Remove gland (6), piston (5), and piston rod (7) as an assembly from large end of steering assist<br />
cylinder (3).<br />
Remove power cylinder nut (4) from piston rod (7).<br />
Turn piston assembly (5) counterclockwise to remove from piston rod (7).<br />
Remove gland (6) from piston rod (7).<br />
Using retaining ring pliers, remove retaining ring (16) from gland (6).<br />
Remove flat washer (18), seal (15), flat washer (17), ring spacer (14), backup ring (19), and<br />
preformed packing (13) from gland (6). Discard seal (15), backup ring (19), and preformed<br />
packing (13).<br />
Remove two ball seats (1) and helical spring (2) from steering assist cylinder (3). Discard helical<br />
spring (2).<br />
b. Cleaning and Inspection<br />
NOTE<br />
No repairs are to be made on parts. If parts are damaged, install<br />
new power steering assist cylinder.<br />
1. For general cleaning instructions, refer to para. 2-8.<br />
2. For general inspection instructions, refer to para. 2-9.<br />
12-16
<strong>TM</strong> 9-<strong>2320</strong>-<strong>260</strong>-<strong>34</strong>-2<br />
I<br />
12-7. POWER STEERING ASSIST CYLINDER MAINTENANCE (Contd)<br />
NOTE<br />
Coat all power steering assist cylinder components with clean<br />
lubricating oil before assembly.<br />
1. Install new helical spring (2) and two ball seats (1) in steering assist cylinder (3).<br />
2. Install new preformed packing (13), new backup ring (19), ring spacer (14), flat washer (18),<br />
new seal (15), and flat washer (17).<br />
3. Using retaining ring pliers, install retaining ring (16) on gland (6).<br />
4. Install piston assembly (5) on piston rod (7) with power cylinder nut (4). Tighten nut (4).<br />
5. Install piston assembly (5) and piston rod (7) in steering assist cylinder (3).<br />
CAUTION<br />
Use care not to damage seals when passing gland assembly over<br />
threads on piston rod, Failure to do this may result in oil leaks.<br />
6. Slide gland (6) over piston rod (7) and into steering assist cylinder (3).<br />
7. Install retaining ring (8) at large end of steering assist cylinder (3). Be sure retaining ring (8)<br />
is seated in groove at top of steering assist cylinder (3).<br />
8. Install retainer plate (9), new wiper ring (10), and seal retainer (11) on steering assist cylinder (3)<br />
with three screws (12).<br />
FOLLOW-ON TASKS: Install power steering assist cylinder (<strong>TM</strong> 9-<strong>2320</strong>-<strong>260</strong>-20).<br />
Fill power steering assist cylinder with lubricant (LO 9-<strong>2320</strong>-<strong>260</strong>-12).<br />
12-17
<strong>TM</strong> 9-<strong>2320</strong>-<strong>260</strong>-<strong>34</strong>-2<br />
Section Il. TIRE MAINTENANCE<br />
12-8. TIRE MAINTENANCE<br />
Refer to <strong>TM</strong> 9-<strong>2320</strong>-<strong>260</strong>-20 and <strong>TM</strong> 9-2610-200-24 for repair of tires and tubes.<br />
12-18
<strong>TM</strong> 9-<strong>2320</strong>-<strong>260</strong>-<strong>34</strong>-2<br />
CHAPTER 13<br />
FRAME MAINTENANCE<br />
13-1. FRAME MAINTENANCE INDEX<br />
PARA.<br />
NO.<br />
TITLE<br />
PAGE<br />
NO.<br />
13-2. Frame Repair 13-1<br />
13-3. Fifth Wheel Maintenance (M818) 13-1<br />
13-4. Fifth Wheel Maintenance (M815) 13-11<br />
13-5. Fifth Wheel Maintenance (M819) 13-14<br />
13-6. Frame Alinement Inspection 13-24<br />
13-2. FRAME REPAIR<br />
Refer to TB 9-2300-247-40 for maintenance and repairs on frames used on the M809 series vehicles.<br />
Refer to <strong>TM</strong> 9-<strong>2320</strong>-<strong>260</strong>-<strong>34</strong>P for authorized replacement parts used in frame repair.<br />
13-3. FIFTH WHEEL MAINTENANCE (M818)<br />
THIS TASK COVERS:<br />
a. Disassembly c. Assembly<br />
b. Cleaning and Inspection<br />
INITIAL SETUP<br />
APPLICABLE MODELS<br />
MATERIALS/PARTS (Contd)<br />
M818 Lockwasher (Appendix D, Item 219)<br />
Locknut (Appendix D, Item 170<br />
Safety wire (Appendix D, Item 372)<br />
General mechanic’s tool kit (Appendix B, Item 1)<br />
Socket set, 3/4-in. dr. (Appendix B, Item 24)<br />
Torque wrench, 3/4-in. dr. (Appendix B, Item 2)<br />
Socket set, 3/8-in. dr. (Appendix B, Item 144)<br />
Inside micrometer (Appendix B, Item 9)<br />
Outside micrometer (Appendix B, Item 8)<br />
Lifting device<br />
Four washers (Appendix C, Item 56)<br />
Two screws (Appendix C, Item 33)<br />
Two nuts (Appendix C, Item 24)<br />
Chain<br />
PERSONNEL REQUIRED<br />
Two<br />
REFERECES (<strong>TM</strong>)<br />
LO-9-<strong>2320</strong>-<strong>260</strong>-12<br />
<strong>TM</strong>9-<strong>2320</strong>-<strong>260</strong>-20<br />
<strong>TM</strong>9-<strong>2320</strong>-<strong>260</strong>-<strong>34</strong>P-1<br />
Fifth wheel removed (M818, <strong>TM</strong> 9-<strong>2320</strong>-<strong>260</strong>-20).<br />
GENERAL SAFETY INSTRUCTIONS<br />
All personnel must stand clear during lifting operations.<br />
MATERIALS/PARTS Eye protection must be worn when removing or<br />
Cotter pin (Appendix D, Item 28)<br />
installing springs under tension.<br />
Cotter pin (Appendix D, Item 30)<br />
Personnel must stand clear during release of plunger<br />
Two locknuts (Appendix D, Item 192)<br />
rack.<br />
Locknut (Appendix D, Item 184) Ensure lifting capacity is greater than weight of fifth<br />
Two lockwashers (Appendix D, Item 249)<br />
wheel.<br />
13-1
<strong>TM</strong> 9-<strong>2320</strong>-<strong>260</strong>-<strong>34</strong>-2<br />
13-3. FIFTH WHEEL MAINTENANCE (M818) (Contd)<br />
a. Disassembly<br />
NOTE<br />
Assistant will help with entire procedure.<br />
1. Attach chain to fifth wheel housing (1) with four washers (2), two screws (4), and nuts (3).<br />
2. Attach lifting device to chain. Apply tension to chain.<br />
3. Remove two lubrication fittings (8) from fifth wheel housing (1).<br />
CAUTION<br />
Do not use heat to remove pivot pins from fifth wheel housing.<br />
Damage to equipment will result.<br />
4. Remove two retaining pins (6) and pivot pins (7) from fifth wheel housing (1) and base (5),<br />
WARNING<br />
All personnel must stand clear during lifting operations.<br />
A swinging or shifting load may cause injury to personnel.<br />
Ensure lifting capacity is greater than weight (600 lb (272 kg)) of<br />
fifth wheel. Failure to do so may result in injury to personnel or<br />
damage to equipment.<br />
5. Remove fifth wheel housing (1) from base (5).<br />
Three personnel are required for step 6,<br />
Fifth wheel housing must be 6 in. (15 cm) above workbench for<br />
bushing removal.<br />
6. Position fifth wheel housing (1) on workbench with trailer mating surface (9) side down.<br />
13-2
<strong>TM</strong> 9-<strong>2320</strong>-<strong>260</strong>-<strong>34</strong>-2<br />
13-3
<strong>TM</strong> 9-<strong>2320</strong>-<strong>260</strong>-<strong>34</strong>-2<br />
13-3. FIFTH WHEEL MAINTENANCE (M818) (Contd)<br />
WARNING<br />
7.<br />
Eye protection must be worn when removing springs under<br />
tension. Failure to do so may result in injury to personnel.<br />
Remove spring (30) and cotter pin (27) from fifth wheel housing (22) and handle (1). Discard cotter<br />
pin (27).<br />
WARNING<br />
8.<br />
9.<br />
10.<br />
11.<br />
12.<br />
13.<br />
14.<br />
15.<br />
16.<br />
17.<br />
18.<br />
19.<br />
20.<br />
Plunger rack is under spring tension, Keep hands clear of plunger<br />
rack during removal, Failure to do so may cause injury to<br />
personnel.<br />
Release plunger rack latch (17) and allow plunger rack (19) to slide to unloaded position.<br />
‘Remove spring (16) from plunger rack latch (17) and cotter pin (15).<br />
Remove cotter pin (15) from fifth wheel housing (22). Discard cotter pin (15).<br />
Remove safety wire (9), two locknuts (12), washers (13), bracket (14), and plunger rack latch (17)<br />
from stud (21), screw (23), and fifth wheel housing (22). Discard safety wire (9) and locknuts ( 12).<br />
Remove spring (7), plunger rack (19), screw (23), and spacer (20) from fifth wheel housing (22).<br />
Remove screw (29), lockwasher (28), cam (26), and bushing (25) from fifth wheel housing (22).<br />
Discard lockwasher (28).<br />
Remove locknut (6), washer (5), screw (3), and yoke (4) from pinion gear (18). Discard locknut (6).<br />
Remove handle (1) from fifth wheel housing (22).<br />
Loosen jamnut (2), remove handle (1) from yoke (4), and remove jamnut (2) from handle (1).<br />
Remove locknut (8), screw (24), washer (10), spacer (11), and pinion gear (18) from fifth wheel<br />
housing (22). Discard locknut (8).<br />
Remove spring (32) from two coupler jaws (31).<br />
Remove two lubrication fittings (<strong>34</strong>), screws (35), lockwashers (36), and washers (37) from two<br />
coupler jaws (31). Discard lockwashers (36).<br />
Remove two coupler jaws (31), compression arm (33), and two bushings (38) from fifth wheel<br />
housing (22).<br />
13-4
<strong>TM</strong> 9-<strong>2320</strong>-<strong>260</strong>-<strong>34</strong>-2<br />
13-3. FIFTH WHEEL MAINTENANCE (M818) (Contd)<br />
13-5
<strong>TM</strong> 9-<strong>2320</strong>-<strong>260</strong>-<strong>34</strong>-2<br />
I<br />
13-3. FIFTH WHEEL MAINTENANCE (M818) (Contd)<br />
1. For general cleaning instructions, refer to para. 2-8.<br />
2. For general inspection instructions, refer to para. 2-9.<br />
3. Inspect handle (1), plunger rack latch (3), pinion gear (6), stud (7), fifth wheel housing surface (8),<br />
coupler jaws (11), compression arm (14), and bushings (15) for grooves, breaks, cracks, cuts, bends,<br />
stripped threads, and damaged gear teeth. Replace part(s) if damaged.<br />
4. Inspect springs (2), (5), (12), and (13) for bends, breaks, collapsed coils, and correct spring<br />
lengths. Refer to table 13-1, Fifth Wheel Spring Free Length, for measurements. Replace<br />
springs (2), (5), (12), or (13) if damaged or worn.<br />
5. Inspect plunger rack (4), pivot pins (9), and cam (10) for wear. Refer to table 13-2, Fifth Wheel Wear<br />
Limits, for measurements. Replace plunger rack (4), pivot pins (9), or cam (10) if damaged or worn.<br />
I<br />
13-6
<strong>TM</strong> 9-<strong>2320</strong>-<strong>260</strong>-<strong>34</strong>-2<br />
13-3. FIFTH WHEEL MAINTENANCE (M818) (Contd)<br />
Table 13-1. Fifth Wheel Spring Free Length.<br />
ITEM<br />
NO.<br />
ITEM/POINT OF MEASUREMENT<br />
SPRING FREE LENGTH<br />
INCHES<br />
MILLIMETERS<br />
2<br />
5<br />
12<br />
13<br />
Locking plunger spring<br />
Plunger rack latch spring<br />
Handle spring<br />
Coupler jaw spring<br />
7.25<br />
2.0625<br />
6.00<br />
2.31<br />
184.2<br />
52.388<br />
152.4<br />
58.674<br />
Table 13-2. Fifth Wheel Wear Limits.<br />
13-7
<strong>TM</strong> 9-<strong>2320</strong>-<strong>260</strong>-<strong>34</strong>-2<br />
13-3. FIFTH WHEEL MAINTENANCE (M818) (Contd)<br />
c. Assembly<br />
1. Install compression arm (3) and two coupler jaws (1) in fifth wheel housing (8) with two<br />
bushings (9).<br />
2. Aline hole in compression arm (3) with hole in fifth wheel housing (8).<br />
3. Install two washers (7), new lockwashers (6), screws (5), and lubrication fittings (4) on two<br />
bushings (9). Tighten screws (5) 150-200 lb-ft (203-271 N•m).<br />
4. Install spring (2) on two coupler jaws (1).<br />
5. Install bushing (33) and cam (<strong>34</strong>) on fifth wheel housing (8) with new lockwasher (35) and<br />
screw (36).<br />
6. Place spring (16) on plunger rack (22).<br />
7. Install screw (31), spacer (21), and plunger rack (22) on fifth wheel housing (8).<br />
NOTE<br />
Add washers as needed to obtain proper height on plunger rack<br />
latch. Latch must set level with latch on plunger rack.<br />
8. Install plunger rack latch (29), bracket (26), two washers (25), two new locknuts (24), and new safety<br />
wire (23) on screw (31) and stud (30).<br />
9. Install new cotter pin (27) in fifth wheel housing (8) with eye of cotter pin (27) facing back of fifth<br />
wheel housing (8).<br />
WARNING<br />
Eye protection must be worn when installing springs under<br />
tension. Failure to do so may result in injury to personnel.<br />
10. Install spring (28) on plunger rack latch (29) and cotter pin (27),<br />
11. Install pinion gear (20) on fifth wheel housing (8) with screw (32), spacer ( 19), washer ( 18), and<br />
new locknut (17).<br />
12. Install jamnut (11) on handle (10) and install handle (10) on yoke (13). Tighten jamnut (11)<br />
80-95 lb-ft (108-129 N•m).<br />
13. Install yoke (13) on pinion gear (20) with screw (12), washer (14), and new locknut (15).<br />
14. Install new cotter pin (37) in fifth wheel housing (8).<br />
15. Install spring (38) on handle (10) and cotter pin (37).<br />
13-8
<strong>TM</strong> 9-<strong>2320</strong>-<strong>260</strong>-<strong>34</strong>-2<br />
13-3. FIFTH WHEEL MAINTENANCE (M818) (Contd)<br />
13-9
<strong>TM</strong> 9-<strong>2320</strong>-<strong>260</strong>-<strong>34</strong>-2<br />
13-3. FIFTH WHEEL MAINTENANCE (M818) (Contd)<br />
WARNING<br />
● All personnel must stand clear during lifting operations.<br />
A swinging or shifting load may cause injury to personnel.<br />
● Ensure lifting capacity is greater than weight (600 lb (272 kg)) of<br />
fifth wheel. Failure to do so may result in injury to personnel or<br />
damage to equipment.<br />
16. Remove fifth wheel housing (1) from workstand.<br />
17. Position fifth wheel housing (1) on base (5).<br />
18. Insert two pivot pins (7) through fifth wheel housing (1) and base (5) and install with two retaining<br />
pins (6).<br />
19. Install two lubrication fittings (8) in fifth wheel housing (1).<br />
20. Remove lifting device from chain.<br />
21. Remove two nuts (3), screws (4), four washers (2), and chain from fifth wheel housing (1).<br />
FOLLOW-ON TASKS: Install fifth wheel (M818) (<strong>TM</strong> 9-<strong>2320</strong>-<strong>260</strong>-20).<br />
Lubricate fifth wheel (LO 9-<strong>2320</strong>-<strong>260</strong>-12).<br />
13-10
<strong>TM</strong> 9-<strong>2320</strong>-<strong>260</strong>-<strong>34</strong>-2<br />
13-4. FIFTH WHEEL MAINTENANCE (M815)<br />
THIS TASK COVERS:<br />
a. Disassembly c. Assembly<br />
b. Cleaning and Inspection<br />
INITIAL SETUP<br />
APPLICABLE MODELS<br />
M815<br />
TOOLS<br />
General mechanic’s tool kit<br />
(Appendix B, Item 1)<br />
REFERENCES (<strong>TM</strong>)<br />
LO 9-<strong>2320</strong>-<strong>260</strong>-12<br />
TB 9-2300-247-40<br />
<strong>TM</strong> 9-237<br />
<strong>TM</strong> 9-<strong>2320</strong>-<strong>260</strong>-20<br />
<strong>TM</strong> 9-<strong>2320</strong>-<strong>260</strong>-<strong>34</strong>P-1<br />
MATERIALS/PARTS<br />
EQUIPMENT CONDITION<br />
Two cotter pins (Appendix D, Item 26) Fifth wheel removed (M815) (<strong>TM</strong> 9-<strong>2320</strong>-<strong>260</strong>-20).<br />
Two locknuts (Appendix D, Item 172)<br />
Drycleaning solvent (Appendix C, Item 48) GENERAL SAFETY INSTRUCTIONS<br />
Rags (Appendix C, Item 32) Keep fire extinguisher nearby when using<br />
drycleaning solvent.<br />
Eye protection must be worn when using<br />
compressed air.<br />
Compressed air source will not exceed 30 psi<br />
(207 kPa).<br />
a. Disassembly<br />
1. Remove two cotter pins (3) from two locking arms (5) and fifth wheel (2). Discard cotter pins (3).<br />
2. Remove two locknuts (l), screws (4), and locking arms (5) from fifth wheel (2). Discard locknuts (1).<br />
13-11
<strong>TM</strong> 9-<strong>2320</strong>-<strong>260</strong>-<strong>34</strong>-2<br />
13-4. FIFTH WHEEL MAINTENANCE (M815) (Contd)<br />
b. Cleaning and Inspection<br />
1. Clean fifth wheel (2) with steam cleaner. Allow to air dry.<br />
WARNING<br />
Drycleaning solvent is flammable and will not be used near open<br />
flame. Use only in well-ventilated places. Failure to do so may<br />
result in injury to personnel.<br />
2. Clean locking arms (5) and screws (4). Dry with clean rag.<br />
3. Inspect locking arms (5) for bends and cracks. Replace locking arms (5) if bent or cracked.<br />
4. Inspect fifth wheel (2) for bends, cracks, or broken welds. Repair if cracked or broken<br />
(TB 9-2300-247-40). Repair fifth wheel (2) if welds are broken (<strong>TM</strong> 9-237).<br />
1. Position two locking arms (5) on fifth wheel (2) and install with two screws (4) and new locknuts (1).<br />
2. Install two new cotter pins (3) in two locking arms (5) and fifth wheel (2).<br />
13-12
<strong>TM</strong> 9-<strong>2320</strong>-<strong>260</strong>-<strong>34</strong>-2<br />
I<br />
13-4. FIFTH WHEEL MAINTENANCE (M815) (Contd)<br />
FOLLOW-ON TASKS: ● Install fifth wheel (M815) (<strong>TM</strong> 9-<strong>2320</strong>-<strong>260</strong>-20).<br />
● Lubricate fifth wheel (LO 9-<strong>2320</strong>-<strong>260</strong>-12).<br />
13-13
<strong>TM</strong> 9-<strong>2320</strong>-<strong>260</strong>-<strong>34</strong>-2<br />
13-5. FIFTH WHEEL MAINTENANCE (M819)<br />
THIS TASK COVERS:<br />
a. Disassembly c. Assembly<br />
b. Cleaning and Inspection<br />
INITIAL SETUP<br />
APPLICABLE MODELS<br />
M819<br />
PERSONNEL REQUIRED<br />
Two<br />
TOOLS<br />
REFERENCES (<strong>TM</strong>)<br />
Outside micrometer (Appendix B, Item 1) LO 9-<strong>2320</strong>-<strong>260</strong>-12<br />
Arbor press (Appendix B, Item 7) <strong>TM</strong> 9-<strong>2320</strong>-<strong>260</strong>-20<br />
Torque wrench. 1/2-in. dr.<br />
<strong>TM</strong> 9-<strong>2320</strong>-<strong>260</strong>-<strong>34</strong>P-1<br />
(Appendix B, Item 3)<br />
Inside micrometer (Appendix B, Item 9)<br />
Lifting device<br />
Four washers (Appendix C, Item 56)<br />
TWO screws (Appendix C, Item 33)<br />
Two nuts (Appendix C, Item 24)<br />
Chain<br />
MATERIALS/PARTS<br />
Two cotter pins (Appendix D, Item 24)<br />
Cotter pin (Appendix D, Item 22)<br />
Locknut (Appendix D, Item 184)<br />
Two locknuts (Appendix D, Item 170)<br />
Lockwasher (Appendix D, Item 223)<br />
Two lockwashers (Appendix D, Item 218)<br />
Safety wire (Appendix D, Item 372)<br />
Drycleaning solvent (Appendix C, Item 48)<br />
a. Disassembly<br />
NOTE<br />
Assistant will help with entire procedure.<br />
EQUIPMENT CONDITION<br />
Fifth wheel removed (M819) (<strong>TM</strong> 9-<strong>2320</strong>-<strong>260</strong>-20).<br />
GENERAL SAFETY INSTRUCTIONS<br />
All personnel must stand clear during lifting<br />
operations.<br />
Ensure lifting capacity is greater than weight of<br />
fifth wheel.<br />
Eye protection must be worn when removing or<br />
installing springs under tension.<br />
Personnel must stand clear during release of<br />
plunger.<br />
Eye protection is required when using wire brush<br />
for cleaning.<br />
Keep fire extinguisher nearby when using<br />
drycleaning solvent.<br />
1. Attach chain to fifth wheel housing (3) with four washers (2), two screws (1), and nuts (4).<br />
2. Attach lifting device to chain. Apply tension to chain.<br />
3. Remove two lubrication fittings (6) from lateral pivot shaft (5).<br />
4. Remove nut (8), lockwasher (10), and screw (11) from walking beam (9) and lateral pivot shaft (5).<br />
Discard lockwasher (10).<br />
CAUTION<br />
Do not use heat to remove pivot shaft, from fifth wheel housing.<br />
Damage to equipment may result.<br />
5. Remove lateral pivot shaft (5) from walking beam (9) and fifth wheel housing (3).<br />
WARNING<br />
All personnel must stand clear during lifting operations.<br />
A swinging or shifting load may cause injury to personnel.<br />
Ensure lifting capacity is greater than weight (600 lb (272 kg)) of<br />
fifth wheel. Failure to do so may result in injury to personnel or<br />
damage to equipment.<br />
13-14
<strong>TM</strong> 9-<strong>2320</strong>-<strong>260</strong>-<strong>34</strong>-2<br />
13-5. FIFTH WHEEL MAINTENANCE (M819) (Contd)<br />
6. Remove fifth wheel housing (3) from base (7) and place on work bench with trailer mating<br />
surface (12) facing down.<br />
7. Remove lifting device from chain.<br />
8. Remove two nuts (4), screws (1), four washers (2), and chain from fifth wheel housing (3).<br />
13-15
<strong>TM</strong> 9-<strong>2320</strong>-<strong>260</strong>-<strong>34</strong>-2<br />
13-5. FIFTH WHEEL MAINTENANCE (M819) (Contd)<br />
NOTE<br />
Second assistant will help with step 9.<br />
9.<br />
10.<br />
11.<br />
Position base (3) on arbor press.<br />
Remove two lubrication fittings (1) from base pivot shaft (2).<br />
Using arbor press, depress walking beam (4) against leveling springs (5) and drive base pivot<br />
shaft (2) from base (3) and walking beam (4).<br />
WARNING<br />
12.<br />
13.<br />
Eye protection must be worn when removing springs under<br />
tension. Failure to do so may result in injury to personnel.<br />
Slowly release arbor press and remove walking beam (4) and two leveling springs (5) from<br />
base (3).<br />
Remove two screws (9), washers (8), lockwashers (7), and wedges (6) from base (3). Discard<br />
lockwashers (7).<br />
14. Remove safety wire (<strong>34</strong>), locknuts (10) and (33), and washers (11) and (32) from fifth wheel<br />
housing (18). Discard locknuts (10) and (33) and safety wire (<strong>34</strong>).<br />
WARNING<br />
Plunger is under spring tension. Keep hands clear of plunger<br />
during removal. Failure to do so may cause injury to personnel.<br />
15. Lift handle (26) and remove spring (28), plunger (14), bracket (13), sleeve (12), and screw (20) from<br />
fifth wheel housing (18).<br />
16. Remove spring (30) from plunger latch (31) and fifth wheel housing (18).<br />
17. Remove plunger latch (31) and three washers (29) from stud (23).<br />
13-16
<strong>TM</strong> 9-<strong>2320</strong>-<strong>260</strong>-<strong>34</strong>-2<br />
13-5. FIFTH WHEEL MAINTENANCE (M819) (Contd)<br />
18. Remove cotter pin (27), locknut (25), and handle (26) from stud (24). Discard cotter pin (27) and<br />
locknut (25).<br />
19. Remove screw (21) and safety latch (22) from fifth wheel housing (18).<br />
20. Remove two cotter pins (17) and lubrication fittings (16) from two coupler jaw pins (19). Discard<br />
cotter pins (17).<br />
21. Remove two coupler jaw pins (19) and two coupler jaws (15) from fifth wheel housing (18).<br />
13-17
<strong>TM</strong> 9-<strong>2320</strong>-240-<strong>34</strong>-2<br />
13-5. FIFTH WHEEL MAINTENANCE (M819) (Contd)<br />
b. Cleaning and Inspection<br />
1. For general cleaning instructions, refer to para. 2-8.<br />
2. For general inspection instructions, refer to para. 2-9.<br />
WARNING<br />
Eye protection is required when using wire brush for cleaning.<br />
Failure to do so may result in injury to personnel.<br />
3. Clean larger parts with steam and wire brush.<br />
WARNING<br />
Drycleaning solvent is flammable and will not be used near open<br />
flame. Use only in well-ventilated places. Failure to do so may<br />
result in injury to personnel.<br />
4. Clean smaller parts with drycleaning solvent. Allow to air dry.<br />
5. Inspect coupler jaws (2), fifth wheel housing surface (3), studs (4) and (5), base (7), walking<br />
beam (9), bores (10), plunger latch (14), and handle (15) for cracks, breaks, pitting, scoring, bends,<br />
grooves, and gouges. Replace part(s) if damaged.<br />
6. Inspect springs (8), (12), and (13) for bends, breaks, and collapsed coils. Measure spring lengths.<br />
Refer to table 13-3, Spring Free Length, for measurements. Replace springs (8), (12), or (13) if<br />
damaged or worn.<br />
7. Inspect plunger (1), base pivot shaft (6), and lateral pivot shaft (11) for wear. Refer to table 13-4,<br />
Fifth Wheel Wear Limits, for measurements. Replace plunger (1), base pivot shaft (6), or lateral<br />
pivot shaft (11) if damaged or worn.<br />
13-18
<strong>TM</strong> 9-<strong>2320</strong>-<strong>260</strong>-<strong>34</strong>-2<br />
13-5. FIFTH WHEEL MAINTENANCE (M819) (Contd)<br />
Table 13-3. Fifth Wheel Spring Free Length.<br />
ITEM<br />
NO.<br />
ITEM/POINT OF MEASUREMENT<br />
SPRING FREE LENGTH<br />
INCHES I MILLIMETERS<br />
8<br />
12<br />
13<br />
Leveling springs<br />
Plunger latch spring<br />
Plunger spring<br />
3.25 82.550<br />
2.625 66.675<br />
7.25 184.150<br />
Table 13-4. Fifth Wheel Wear Limits.<br />
13-19
<strong>TM</strong> 9-<strong>2320</strong>-<strong>260</strong>-<strong>34</strong>-2<br />
I<br />
13-5. FIFTH WHEEL MAINTENANCE (M819) (Contd)<br />
1. Install two coupler jaw pins (10) through fifth wheel housing (9).<br />
2. Install two coupler jaws (6) on coupler jaw pins (10) and fifth wheel housing (9).<br />
3. Install two new cotter pins (8) through coupler jaw pins (10) and install two lubrication fittings (7)<br />
on coupler jaw pins (10).<br />
4. Install safety latch (13) and screw ( 12) on fifth wheel housing (9).<br />
5. Install handle (17) on stud (15) and fifth wheel housing (9) with new locknut (16) and new cotter<br />
pin (18).<br />
6. Position screw (11) and sleeve (3) on fifth wheel housing (9).<br />
WARNING<br />
Eye protection must be worn when installing springs under<br />
tension. Failure to do so may result in injury to personnel.<br />
7. Position spring (19) on plunger (5).<br />
8. On fifth wheel housing (9) position plunger (5) and install spring (19) over screw (11) in fifth wheel<br />
housing (9).<br />
NOTE<br />
Add washers as needed to obtain proper height on plunger latch.<br />
Plunger latch should be level with plunger.<br />
9. Install three washers (20) and plunger latch (22) On stud (14).<br />
10. Install spring (21) on plunger latch (22) and fifth wheel housing (9).<br />
11. Position bracket (4) over screw (11), stud (15), plunger (5), and plunger latch (22)<br />
12. Install bracket (4) with washers (2) and (23) and new locknuts (1) and (24).<br />
13. Install new safety wire (25) through locknuts (1) and (24).<br />
13-20
<strong>TM</strong> 9-<strong>2320</strong>-<strong>260</strong>-<strong>34</strong>-2<br />
13-21
<strong>TM</strong> 9-<strong>2320</strong>-<strong>260</strong>-<strong>34</strong>-2<br />
13-5. FIFTH WHEEL MAINTENANCE (M819) (Contd)<br />
14.<br />
Position base (3) on arbor press.<br />
WARNING<br />
15.<br />
16.<br />
17.<br />
18.<br />
Eye protection must be worn when installing springs under<br />
tension. Failure to do so may result in injury to personnel.<br />
Install two leveling springs (2) on base (3).<br />
Position walking beam (1) on base (3) and leveling springs (2).<br />
NOTE<br />
Groove of base pivot shaft must face upwards.<br />
Using arbor press, depress walking beam (1) and install base pivot shaft (9) in walking beam (1)<br />
and base (3).<br />
Install two lubrication fittings (8) in base pivot shaft (9).<br />
WARNING<br />
19.<br />
20.<br />
21.<br />
22.<br />
23.<br />
24.<br />
25.<br />
26.<br />
27.<br />
• All personnel must stand clear during lifting operations.<br />
A swinging or shifting load may cause injury to personnel.<br />
• Ensure lifting capacity is greater than weight (600 lb (272 kg)) of<br />
fifth wheel. Failure to do so may result in injury to personnel or<br />
damage to equipment.<br />
Attach chain to fifth wheel housing (12) with two screws (10), four washers (11) and nuts (13).<br />
Attach lifting device to chain. Apply tension to chain.<br />
Lower fifth wheel housing (12) onto base (3) alining holes in fifth wheel housing (12) with holes in<br />
walking beam (1).<br />
Install lateral pivot shaft (14) in fifth wheel housing (12) alining hole (16) in lateral pivot shaft (14)<br />
with hole (17) in walking beam (1).<br />
Install screw (20), new lockwasher (19), and nut (18) on walking beam (1) and lateral pivot<br />
shaft (14). Tighten nut (18) 30-40 lb-ft (41-54 N•m).<br />
Install two lubrication fittings (15) in lateral pivot shaft ( 14).<br />
Install two wedges (4), new Iockwashers (5), washers (6), and screws (7) on base (3).<br />
Remove lifting device from chain.<br />
Remove two nuts (13), screws (10), and four washers (11) from fifth wheel housing (12).<br />
13-22
<strong>TM</strong> 9-<strong>2320</strong>-<strong>260</strong>-<strong>34</strong>-2<br />
13-5. FIFTH WHEEL MAINTENANCE(M819) (Contd)<br />
FOLLOW-ON TASKS: • Install fifth wheel (M819) (<strong>TM</strong> 9-<strong>2320</strong>-<strong>260</strong>-20)<br />
● Lubricate fifth wheel (LO 9-<strong>2320</strong>-<strong>260</strong>-12).<br />
13-23
<strong>TM</strong> 9-<strong>2320</strong>-<strong>260</strong>-<strong>34</strong>-2<br />
13-6. FRAME ALINEMENT INSPECTION<br />
THIS TASK COVERS:<br />
a. Frame Leveling c. Frame Squareness<br />
b. Horizontal Bow Inspection d. Vertical Bow Inspection<br />
INITIAL SETUP<br />
APPLICABLE MODELS<br />
All<br />
TOOLS<br />
General mechanic’s tool kit<br />
(Appendix B, Item 1)<br />
Tape measure (Appendix B, Item 133)<br />
Plumb bob (Appendix B, Item 1<strong>34</strong>)<br />
Two straightedges (Appendix B, Item 69)<br />
Hydraulic jack<br />
Wheel chocks<br />
PERSONNEL REQUIRED<br />
Two<br />
REFERENCES (<strong>TM</strong>)<br />
<strong>TM</strong> 9-<strong>2320</strong>-<strong>260</strong>-10<br />
<strong>TM</strong> 9-<strong>2320</strong>-<strong>260</strong>-20<br />
<strong>TM</strong> 9-<strong>2320</strong>-<strong>260</strong>-<strong>34</strong>P-1<br />
MATERIALS/PARTS (<strong>TM</strong> 9-<strong>2320</strong>-<strong>260</strong>-10).<br />
Tape, masking (Appendix C, Item 52)<br />
Twine (Appendix C, Item 54)<br />
EQUIPMENT CONDITION<br />
• Vehicle undercarriage clean and free of mud<br />
and debris.<br />
• Tires checked for proper air pressure<br />
I<br />
I<br />
a. Frame Leveling<br />
NOTE<br />
Frame alinement inspection is the same for vehicles with six,<br />
seven, eight, or nine frame crossmembers. This procedure covers<br />
frame alinement inspection on a vehicle with six crossmembers.<br />
Loose or missing crossmember rivets, loose or broken crossmembers,<br />
or damaged frame rails must be repaired prior to<br />
inspection.<br />
Ensure inspection procedure is performed on a flat, level surface.<br />
Assistant will help with entire procedure.<br />
1. Drive truck into inspection position from a 12 fl. (3.7 m) straight line of travel. Apply parking brake<br />
(<strong>TM</strong> 9-<strong>2320</strong>-<strong>260</strong>-10) and chock wheels (<strong>TM</strong> 9-<strong>2320</strong>-<strong>260</strong>-10).<br />
2. Using tape measure, determine distance from floor to bottom of frame rails (1) in front of crossmember<br />
(2). If one frame rail (1) is lower, use hydraulic jack and raise one side of front axle to level<br />
frame rails (1) to within 0.125 in. (3 mm) of each other.<br />
3. Using tape measure, determine distance from floor to bottom of rear frame rails (1) at crossmember<br />
(3). If one frame rail (1) is lower, use hydraulic jack and raise one side of rear-rear axle<br />
to adjust frame rails (1) to within 0.125 in. (3 mm) of each other.<br />
b. Horizontal Bow Inspection<br />
NOTE<br />
For horizontal bow inspection, the front 20 ft. (6 m) of frame rail<br />
(measured fron front to rear) and the rear 20 ft (6 m) of frame rail<br />
(measured from rear to front) are measured separately, This will<br />
cause an overlap in measurement.<br />
1. Tape one 8 x 10.5 in. (20 x 27 cm) sheet of white paper to floor under each end of frame crossmember<br />
(4) and in front of crossmembers (3) and (2) where attached to frame rails (1).<br />
13-24
<strong>TM</strong> 9-<strong>2320</strong>-<strong>260</strong>-<strong>34</strong>-2<br />
13-6. FRAME ALINEMENT INSPECTION (Contd)<br />
2. Tape one 8 x 10.5 in. (20 x 27 cm) sheet of white paper to floor under each front frame section (5).<br />
NOTE<br />
Ensure plumb bob string is placed flat against frame rails and free<br />
of obstructions such as bolts, rivets, brackets, and rear springs.<br />
Allow plumb bob to stop swinging before making mark on paper.<br />
3. Hold string and plumb bob to outside of frame rails (1) and above paper, Accurately locate point on<br />
paper directly below plumb bob.<br />
4. Carefully mark spot (6) on each paper directly below plumb bob point.<br />
13-25
<strong>TM</strong> 9-<strong>2320</strong>-<strong>260</strong>-<strong>34</strong>-2<br />
13-6. FRAME ALINEMENT INSPECTION (Contd)<br />
NOTE<br />
Two front-to-rear strings used for horizontal bow measurement<br />
will remain in place until task c, frame squareness, is complete.<br />
5. Stretch string tightly on floor between front and rear plumb bob marks (2) under each frame<br />
rail (1). Place weights on string to keep taut.<br />
NOTE<br />
For frame rail sections with added fishplate, subtract 0.31 in,<br />
(7.9 mm) from plumb bob marks to compensate for fishplate added<br />
to frame rail.<br />
6. Measure distance between string and each plumb bob mark (2). If distance is more than 0.5 in.<br />
(13 mm), frame rails (1) are out of tolerance.<br />
7. Repeat steps 1 through 6 for rear 20 ft (6 m) of frame rail.<br />
NOTE<br />
If frame rails are verified to be out of tolerance, notify your<br />
supervisor. If frame rails are out of tolerance, truck will be<br />
classified as unserviceable.<br />
13-26
<strong>TM</strong> 9-<strong>2320</strong>-<strong>260</strong>-<strong>34</strong>-2<br />
13-6. FRAME ALINEMENT INSPECTION (Contd)<br />
13-27
<strong>TM</strong> 11-<strong>2320</strong>-60-<strong>34</strong>-2<br />
13-6. FRAME ALINEMENT INSPECTION (Contd)<br />
c. Frame Squareness<br />
1. Locate and clean two front grease fittings (3) on right and left front spring shackles (4).<br />
2. Tape a 8 x 10.5 in. (20 x 27 cm) sheet of white paper to floor under right and left front spring<br />
shackles (4).<br />
NOTE<br />
Ensure plumb bob is placed toward front of truck on both right<br />
and left grease fittings. If not, inaccurate measurement of frame<br />
squareness will result.<br />
3. Place string over grease fitting (3) on left front spring shackle (4) with plumb bob toward front of<br />
truck. Lower plumb bob and locate point on paper below spring shackle (4).<br />
NOTE<br />
Do not mark paper until plumb bob has stopped swinging and is<br />
close to, but not touching paper.<br />
4. Carefully mark spot on paper directly below plumb bob point.<br />
5. Place one edge of square along horizontal line (2) used to measure horizontal bow on right side of<br />
truck, and other edge of square touching plumb bob mark.<br />
6. Stretch string along edge of square to right side of truck. Allow string to extend 6 in, (15 cm) beyond<br />
right horizontal line (2). Secure or tape string to floor.<br />
7. Repeat steps 3 and 4 for right front spring shackle.<br />
8. Measure distance between right side plumb bob mark and string on floor. If distance is more than<br />
0.25 in. (6 mm), frame rails (1) are out of tolerance.<br />
If frame rails are verified to be out of tolerance, notify your supervisor.<br />
If frame rails are out of tolerance, truck will be classified as<br />
unserviceable.<br />
13-28
<strong>TM</strong> 9-<strong>2320</strong>-<strong>260</strong>-<strong>34</strong>-2<br />
13-6. FRAME ALINEMENT INSPECTION (Contd)<br />
13-29
<strong>TM</strong> 9-<strong>2320</strong>-<strong>260</strong>-<strong>34</strong>-2<br />
13-6. FRAME ALINEMENT INSPECTION (Contd) I<br />
d. Vertical Bow Inspection<br />
1.<br />
2.<br />
3.<br />
4.<br />
5.<br />
NOTE<br />
● For vertical bow inspection, the front 20 ft (6 m) of frame rail<br />
(measured from front to rear) and the rear 20 ft (6 m) of frame<br />
rail (measured horn rear to front) are measured separately.<br />
This will cause an overlap in measurement.<br />
● Perform steps 1 through 3 for front 20 ft (6 m) of frame rails.<br />
Stretch string on floor and position weight under bottom and at front of frame rail (2), pull string<br />
tight, and position weight at 20 ft (6 m) measurement.<br />
Measure distance between string and bottom of frame rail (2) at the closest point to weights. Adjust<br />
string height until each measurement is the same and the entire length of string is unobstructed.<br />
Measure distance between string and bottom of frame rail (2) near crossmembers (1) and as close to<br />
the midway point as possible. If frame rail (2) bows more than 0.125 in. (3 mm) up or down, frame<br />
rail (2) is out of tolerance.<br />
Repeat steps 1 through 3 for rear 20 ft (6 m) of frame rails (2).<br />
Remove wheel chocks (<strong>TM</strong> 9-<strong>2320</strong>-<strong>260</strong>-10) and release parking brake (<strong>TM</strong> 9-<strong>2320</strong>-<strong>260</strong>-10).<br />
NOTE<br />
If frame rails are verified to be out of tolerance, notify your supervisor.<br />
If frame rails are out of tolerance, truck will be classified as<br />
unserviceable.<br />
13-30
<strong>TM</strong> 9-<strong>2320</strong>-<strong>260</strong>-<strong>34</strong>-2<br />
CHAPTER 14<br />
BODY, CAB, AND HOOD MAINTENANCE<br />
14-1. GENERAL INFORMATION<br />
a. The M809, 5-ton vehicles utilize common cab, hood, and fender components. All major body<br />
components are composed of steel and are subject to common welding and metal body repair procedures.<br />
b. Refer to <strong>TM</strong> 9-237 for welding body repair and to TC 3-510 for metal body repair instructions. Refer<br />
to <strong>TM</strong> 43-0139 for preparation of body components for painting instructions. Refer to TB 43-0209 for<br />
camouflage painting and military marking instructions.<br />
I 14-2. BODY, CAB, AND HOOD MAINTENANCE INDEX I<br />
PARA.<br />
NO.<br />
TITLE<br />
PAGE<br />
NO.<br />
14-3. Cab Replacement 14-1<br />
14-4. Driver’s Seat Base Maintenance 14-2<br />
14-5. Windshield Glass Replacemen~ 14-6<br />
14-3. CAB REPLACEMENT<br />
Refer to cab replacement kit (12300779) for cab removal and replacement instructions.<br />
14-1
<strong>TM</strong> 9-<strong>2320</strong>-<strong>260</strong>-<strong>34</strong>-2<br />
14-4. DRIVER’S SEAT BASE MAINTENANCE<br />
THIS TASK COVERS:<br />
a. Removal c. Installation<br />
b. Inspection and Repair<br />
INITIAL SETUP<br />
APPLICABLE MODELS<br />
REFERENCES (<strong>TM</strong>)<br />
All <strong>TM</strong> 9-<strong>2320</strong>-<strong>260</strong>-20<br />
TOOLS<br />
<strong>TM</strong> 9-<strong>2320</strong>-<strong>260</strong>-<strong>34</strong>P-1<br />
General mechanic’s tool kit<br />
EQUIPMENT CONDITION<br />
(Appendix B, Item 1) ● Driver’s seat removed (<strong>TM</strong> 9-<strong>2320</strong>-<strong>260</strong>-20).<br />
MATERIALS/PARTS<br />
• Driver’s seat cushion, backrest, frame, and seat<br />
adjuster removed (<strong>TM</strong> 9-<strong>2320</strong>-<strong>260</strong>-20).<br />
Four lockwashers (Appendix D, Item 235)<br />
Eight lockwashers (Appendix D, Item 223)<br />
GAA grease (Appendix C, Item 14)<br />
a. Removal<br />
1.<br />
2.<br />
3.<br />
4.<br />
Turn crank (3) counterclockwise to remove tension on spring (17).<br />
Remove two nuts (2), screws (16), and shock absorber (18) from seat base (13) and top frame (l).<br />
Remove four nuts (27), lockwashers (24), screws (26), and two brackets (25) from seat base (13).<br />
Discard Iockwashers (24).<br />
Remove spring (17) from seat base (13) and top frame (1).<br />
5.<br />
6.<br />
7.<br />
8.<br />
9.<br />
Tag struts for installation.<br />
Remove four nuts (5), lockwashers (6), screws ( 10), and lower strut (11) from top frame(1) and<br />
seat base (13). Discard lockwashers (6).<br />
Remove two nuts (9), lockwashers (8), torque rod (7), spring (22), sleeve (23), and spring (22) from<br />
top frame (1) and upper strut (19). Discard lockwashers (8).<br />
Remove two nuts (15), lockwashers (14), screws ( 12), and upper strut ( 19) from seat base (13).<br />
Discard lockwashers (14).<br />
Remove pin (20) from crank (3).<br />
Remove crank (3) and washer (21) from swivel nut (4) and top frame (1).<br />
14-2
<strong>TM</strong> 9-<strong>2320</strong>-240-<strong>34</strong>-2<br />
14-4. DRIVER’S SEAT BASE MAINTENANCE (Contd)<br />
14-3
<strong>TM</strong> 9-<strong>2320</strong>-<strong>260</strong>-<strong>34</strong>-2<br />
14-4. DRIVER’S SEAT BASE MAINTENANCE (Contd)<br />
b. Inspection and Repair<br />
1. For general inspection instructions, refer to para. 2-9.<br />
2. For general repair instructions, refer to para. 2-10.<br />
3. Inspect seat base (3), top frame (2), upper strut (6), lower strut (7), and sleeve (9) for cracks, bends,<br />
and breaks. Replace if cracked, bent, or broken.<br />
4. Inspect torque rod (10), spring (4), crank (1), and springs (8) for cracks, bends, and breaks. Replace<br />
if cracked, bent, or broken.<br />
5. Inspect shock absorber (5) for cracks, bends, breaks, and leakage. Replace if cracked, bent, broken,<br />
or leaking,<br />
Q 3<br />
14-4
<strong>TM</strong> 9-<strong>2320</strong>-<strong>260</strong>-<strong>34</strong>-2<br />
14-4. DRIVER’S SEAT BASE MAINTENANCE (Contd)<br />
c. Installation<br />
1.<br />
2.<br />
3.<br />
4.<br />
5.<br />
6,<br />
7.<br />
8.<br />
9.<br />
Install washer (23) and crank (1) in top frame (2) with swivel nut (12).<br />
Install pin (22) in crank (1).<br />
Apply light coat of GAA grease to threads of crank (1).<br />
Install upper strut (6), sleeve (9), and two springs (8) on top frame (2) with torque rod (10),<br />
two new lockwashers (15), and nuts (16).<br />
Install lower strut (7) on top frame (2) and seat base (3) with four screws (17), new lockwashers<br />
(14), and nuts (13).<br />
Install upper strut (6) on seat base (3) with two screws (18), new lockwashers (19), and nuts (20).<br />
Install spring (4) in seat base (3) and top frame (2).<br />
Install two brackets (26) on seat base (3) with four screws (27), new lockwashers (25), and<br />
nuts (24).<br />
Install shock absorber (5) on top frame (2) and seat base (3) with two screws (21) and nuts (11).<br />
FOLLOW-ON TASKS: ● Install driver’s seat cushion, backrest, frame, and seat adjuster<br />
(<strong>TM</strong> 9-<strong>2320</strong>-<strong>260</strong>-20).<br />
● Install driver’s seat (<strong>TM</strong> 9-<strong>2320</strong>-<strong>260</strong>-20).<br />
14-5
<strong>TM</strong> 9-<strong>2320</strong>-<strong>260</strong>-<strong>34</strong>-2<br />
14-5. WINDSHIELD GLASS REPLACEMENT<br />
THIS TASK COVERS:<br />
a. Removal b. Installation<br />
INITIAL SETUP<br />
APPLICABLE MODELS<br />
All<br />
TOOLS<br />
General mechanic’s tool kit<br />
(Appendix B, Item 1)<br />
Soft-head hammer (Appendix B, Item 47)<br />
MATERIALS/PARTS<br />
Four lockwashers (Appendix D, Item 244)<br />
Two lockwashers (Appendix D, Item 249)<br />
MATERIALS/PARTS (Contd)<br />
Rubber strip (Appendix D, Item 371)<br />
Adhesive (Appendix C, Item 3)<br />
REFERENCES (<strong>TM</strong>)<br />
<strong>TM</strong> 9-<strong>2320</strong>-<strong>260</strong>-20<br />
<strong>TM</strong> 9-<strong>2320</strong>-<strong>260</strong>-<strong>34</strong>P-1<br />
EQUIPMENT CONDITION<br />
ŽWindshield assembly removed (<strong>TM</strong> 9-<strong>2320</strong>-<strong>260</strong>-20).<br />
● Windshield arm, glass, and handle removed<br />
(<strong>TM</strong> 9-<strong>2320</strong>-<strong>260</strong>-20).<br />
1. Remove four screws (2) and lockwashers (1) from windshield frame (10). Discard lockwashers (l).<br />
2. Remove two nuts (5), lockwashers (4), screws (3), and crosspiece (6) from windshield frame (10).<br />
Discard lockwashers (4).<br />
NOTE<br />
Measure old rubber strip for installation.<br />
3. Remove rubber strip (7) from crosspiece (6). Discard rubber strip (7).<br />
4. Remove windshield glass (8) and rubber strips (9) from windshield frame (10). Discard rubber strips (9).<br />
NOTE<br />
Cut four new rubber strips to size.<br />
1. Apply adhesive to three new rubber strips (9) and install on windshield glass (8).<br />
2. Install windshield glass (8) in windshield frame (10). Tap windshield glass (8) gently into position.<br />
3. Apply adhesive to new rubber strip (7) and install on windshield glass (8).<br />
4. Position crosspiece (6) on windshield frame ( 10) and gently tap until screw holes aline.<br />
5. Install two screws (3), new lockwashers (4), nuts (5), four new lockwashers (1) and screws (2)<br />
on windshield frame (10) and crosspiece (6).<br />
6. Trim excess rubber strip (7) and (9) and adhesive from around windshield glass (8).<br />
FOLLOW-ON TASKS: Ž Install windshield arm, glass, and handle (<strong>TM</strong> 9-<strong>2320</strong>-<strong>260</strong>-20).<br />
● Install windshield assembly (<strong>TM</strong> 9-<strong>2320</strong>-<strong>260</strong>-20).<br />
14-6
<strong>TM</strong> 9-<strong>2320</strong>-<strong>260</strong>-<strong>34</strong>-2<br />
CHAPTER 15<br />
SPECIAL PURPOSE BODIES MAINTENANCE<br />
Section I. Cargo Body Maintenance (page 15-1)<br />
Section II. Wrecker Body Maintenance (page 15-8)<br />
Section III. Tractor Wrecker Body Maintenance (page 15-13)<br />
Section IV. Dump Body Maintenance (page 15-24)<br />
Section V. Van Body Maintenance (page 15-78)<br />
Section VI. Van Body Electrical Components Maintenance (page 15-245)<br />
Section 1. CARGO BODY MAINTENANCE<br />
15-1. CARGO BODY MAINTENANCE INDEX<br />
PARA.<br />
NO.<br />
TITLE<br />
PAGE<br />
NO.<br />
15-2. Cargo Body Replacement 15-1<br />
15-3. Cargo Body Frame Rail Sill Replacement 15-6<br />
15-2. CARGO BODY REPLACEMENT<br />
THIS TASK COVERS:<br />
a. Removal b. Instillation<br />
INITIAL SETUP<br />
APPLICABLE MODELS<br />
M813, M813A1, M814<br />
TOOLS<br />
General mechanic’s tool kit<br />
(Appendix B, Item 1)<br />
Torque wrench, 3/8-in. dr.<br />
(Appendix B, item 4)<br />
Lifting device<br />
Two chains<br />
Two guide lines<br />
MATERIALS/PARTS<br />
Twelve locknuts (M814)<br />
(Appendix D, Item 173)<br />
Four locknuts (M813, M813A1)<br />
(Appendix D, Item 184)<br />
Four locknuts (Appendix D, Item 168)<br />
Four locknuts (M813, M813A1)<br />
(Appendix D, Item 182)<br />
PERSONNEL REQUIRED<br />
Three<br />
REFERENCES (<strong>TM</strong>)<br />
<strong>TM</strong> 9-<strong>2320</strong>-<strong>260</strong>-20<br />
<strong>TM</strong> 9-<strong>2320</strong>-<strong>260</strong>-<strong>34</strong>P-1<br />
EQUIPMENT CONDITION<br />
● Upper and lower splash guards removed<br />
(<strong>TM</strong> 9-<strong>2320</strong>-<strong>260</strong>-20).<br />
● Troop seat and side racks removed<br />
(<strong>TM</strong> 9-<strong>2320</strong>-<strong>260</strong>-10).<br />
● Spare tire carrier removed (<strong>TM</strong> 9-<strong>2320</strong>-<strong>260</strong>-20).<br />
● Pioneer tool kit mounting bracket removed<br />
(<strong>TM</strong> 9-<strong>2320</strong>-<strong>260</strong>-20).<br />
● Reflectors removed (<strong>TM</strong> 9-<strong>2320</strong>-<strong>260</strong>-20).<br />
● Remove cargo body tailgate (<strong>TM</strong> 9-<strong>2320</strong>-<strong>260</strong>-20).<br />
• Remove cargo body dropsides (M813A1)<br />
(<strong>TM</strong> 9-<strong>2320</strong>-<strong>260</strong>-20).<br />
GENERAL SAFETY INSTRUCTIONS<br />
● All personnel must stand clear during lifting<br />
operations.<br />
• Ensure lifting capacity is greater than weight<br />
of cargo body.<br />
15-1
<strong>TM</strong> 9-<strong>2320</strong>-<strong>260</strong>-<strong>34</strong>-2<br />
15-2. CARGO BODY REPLACEMENT (Contd)<br />
NOTE<br />
Step 1 describes one side only. Perform step 1 for both sides of<br />
cargo body.<br />
1. Disconnect four wires (4) from wiring harness (5) and remove two screws (6), clips (2), and<br />
locknuts (1) from cargo body (3). Discard locknuts (l).<br />
2. Attach chains around cargo body (3).<br />
WARNING<br />
● All personnel must stand clear during lifting operations.<br />
A swinging or shifting load may cause injury to personnel.<br />
● Ensure lifting capacity is greater than weight (1,800 lb (817 kg))<br />
of cargo body, Failure to do so may result in injury to personnel<br />
or damage to equipment.<br />
3. Attach chains to lifting device and remove slack from chains.<br />
4. Attach two guide lines to cargo body (3).<br />
5. Remove four locknuts (11), washers (12), springs (13), springs (14), washers (12), and screws (8) from<br />
two brackets (9) and brackets (10). Discard locknuts (11).<br />
NOTE<br />
● Perform step 6 for M814 vehicles.<br />
Ž Perform step 7 for M813 and M813A1 vehicles.<br />
6. Remove twelve locknuts (22) and screws ( 19) from six brackets (20) and (21). Discard locknuts (22),<br />
7. Remove four locknuts (18) and screws (15) from four brackets (16) and (17). Discard locknuts (18).<br />
NOTE<br />
Two assistants will help with step 8.<br />
8. Raise cargo body (3) away from frame (7) and lower on supports.<br />
9. Remove lifting device from two chains.<br />
10. Remove two chains and guide lines from cargo body (3).<br />
15-2
<strong>TM</strong> 9-<strong>2320</strong>-<strong>260</strong>-<strong>34</strong>-2<br />
15-2. CARGO BODY REPLACEMENT (Contd)<br />
15-3
<strong>TM</strong> 9-<strong>2320</strong>-<strong>260</strong>-<strong>34</strong>-2<br />
15-2. CARGO BODY REPLACEMENT (Contd)<br />
b. Installation<br />
1.<br />
2.<br />
Install two guide lines and chains to cargo body (1).<br />
Install lifting device to two chains.<br />
WARNING<br />
3.<br />
4.<br />
5.<br />
6.<br />
7.<br />
8.<br />
9.<br />
10.<br />
11.<br />
• All personnel must stand clear during lifting operations.<br />
A swinging or shifiing load may cause injury to personnel.<br />
Ž Ensure lifting capacity is greater than weight (1,800 lb (817 kg))<br />
of cargo body. Failure to do so may result in injury to personnel<br />
or damage to equipment.<br />
NOTE<br />
● Use breaker bar to aline body and frame brackets.<br />
● Two assistants will help with step 3.<br />
Raise cargo body (1) away from supports and position on frame (2).<br />
Install four screws (3), washers (7), springs (8), springs (9), washers (7), and new locknuts (6) on two<br />
brackets (4) and brackets (5).<br />
Tighten locknuts (6) to set springs (8) and (9) height to 6.375 in. (16.19 cm).<br />
NOTE<br />
● Perform step 6 for M813 and M813A1 vehicles.<br />
● Perform step 7 for M814 vehicles.<br />
Install four screws (15) and new locknuts (18) on four brackets (16) and (17). Tighten locknut ( 18)<br />
40-50 lb-ft (54-68 N•m).<br />
Install twelve screws (19) and new locknuts (22) on six brackets (20) and (21). Tighten locknuts<br />
(227) 40-50 lb-ft (54-68 N•m).<br />
Remove lifting device from two chains.<br />
Remove two guide lines and chains from cargo body (1).<br />
NOTE<br />
Steps 10 and 11 describe one side only. Perform steps 10 and 11 for<br />
both sides of cargo body.<br />
Install two clips (11) on cargo body (1) with two screws (14) and new locknuts ( 10).<br />
Connect wiring harness (13) to four wires (12).<br />
15-4
<strong>TM</strong> 9-<strong>2320</strong>-<strong>260</strong>-<strong>34</strong>-2<br />
15-2. CARGO BODY REPLACEMENT (Contd)<br />
FOLLOW-ON TASKS: Ž Install pioneer tool kit mounting bracket (<strong>TM</strong> 9-<strong>2320</strong>-<strong>260</strong>-20).<br />
● Install spare tire carrier (<strong>TM</strong> 9-<strong>2320</strong>-<strong>260</strong>-20).<br />
● Install troop seat and side racks. (<strong>TM</strong> 9-<strong>2320</strong>-<strong>260</strong>-10).<br />
● Install upper and lower splash guards (<strong>TM</strong> 9-<strong>2320</strong>-<strong>260</strong>-20).<br />
Ž Install cargo body dropsides (M813A1) (<strong>TM</strong> 9-<strong>2320</strong>-<strong>260</strong>-20).<br />
● Install cargo body tailgate (<strong>TM</strong> 9-<strong>2320</strong>-<strong>260</strong>-20).<br />
● Install reflectors (<strong>TM</strong> 9-<strong>2320</strong>-<strong>260</strong>-20).<br />
15-5
<strong>TM</strong> 9-<strong>2320</strong>-<strong>260</strong>-<strong>34</strong>-2<br />
15-3. CARGO BODY FRAME RAIL SILL REPLACEMENT<br />
THIS TASK COVERS:<br />
a. Removal b. Installation<br />
lNITIAL SETUP<br />
APPLICABLE MODELS<br />
M813, M813A1, M814<br />
TOOLS<br />
General mechanic’s tool kit<br />
(Appendix B, Item 1)<br />
Torque wrench, 3/8-in. dr.<br />
(Appendix B, Item 4)<br />
MATERIALS/PARTS<br />
Five Lockwashers (M813, M813A1)<br />
(Appendix D, Item 215)<br />
Ten lockwashers (M814) (Appendix D, Item 215)<br />
Ten locknuts (M814) (Appendix D, Item 176)<br />
REFERENCES (<strong>TM</strong>)<br />
<strong>TM</strong> 9-<strong>2320</strong>-<strong>260</strong>-<strong>34</strong>P-1<br />
EQUIPMENT CONDITION<br />
Cargo body removed (para. 15-2).<br />
● Left and right frame rail sills are replaced the same. This procedure<br />
covers the left frame rail sill.<br />
● Perform steps 1 and 2 for M813 and M813A1 vehicles.<br />
● Perform steps 3 and 4 for M814 vehicles.<br />
1. Remove five nuts (7), lockwashers (9), and sill (3) from cargo body (1). Discard lockwashers (9).<br />
2. Remove five screws (8) from sill (3).<br />
3. Remove ten locknuts (2), washers (6), lockwashers (5), and two sills (3) from cargo body (1). Discard<br />
lockwashers (5) and locknuts (2).<br />
4. Remove ten screws (4) from sills (3).<br />
b. Installation<br />
NOTE<br />
● Perform steps 1 and 2 for M813 and M813A1 vehicles.<br />
● Perform steps 3 and 4 for M814 vehicles.<br />
1. Position sill (3) on cargo body (1) with five screws (8).<br />
2. Install sill (3) on cargo body (1) with five new lockwashers (9) and nuts (7). Tighten nuts (7)<br />
100-110 lb-in. (11.3-12.4 N.m).<br />
3. Position sill (3) on cargo body (1) with ten screws (4).<br />
4. Install sills (3) on cargo body (1) with ten new lockwashers (5), washers (6), and new locknuts (2).<br />
Tighten locknuts (2) 100-110 lb-in. (11.3 -12.4 N.m).<br />
15-6
<strong>TM</strong> 9-<strong>2320</strong>-<strong>260</strong>-<strong>34</strong>-2<br />
15-3. CARGO BODY FRAME RAIL SILL REPLACEMENT (Contd)<br />
FOLLOW-ON TASK: Install cargo body (para. 15-2).<br />
15-7
<strong>TM</strong> 9-<strong>2320</strong>-<strong>260</strong>-<strong>34</strong>-2<br />
Section Il. WRECKER BODY MAINTENANCE<br />
15-4. WRECKER BODY MAINTENANCE INDEX<br />
PARA.<br />
NO.<br />
TITLE<br />
PAGE<br />
NO.<br />
15-5. Wrecker Body Replacement 15-8<br />
15-6. Rear Winch Rollers Repair 15-12<br />
I<br />
15-5. WRECKER BODY REPLACEMENT<br />
THIS TASK COVERS:<br />
a. Removal b. Installation<br />
INITIAL SETUP<br />
APPLICABLE MODELS<br />
M816<br />
TOOLS<br />
General mechanic’s tool kit<br />
(Appendix B, Item 1)<br />
Lifting device<br />
Two chains<br />
Two guide lines<br />
MATERIALS/PARTS<br />
Sixteen locknuts (Appendix D, Item 186)<br />
Eighteen locknuts (Appendix D, Item 183)<br />
Eight locknuts (Appendix D, Item 169)<br />
REFERENCES (<strong>TM</strong>)<br />
<strong>TM</strong> 9-<strong>2320</strong>-<strong>260</strong>-<strong>34</strong>P-2<br />
EQUIPMENT CONDITION<br />
Crane turntable removed (para. 16-26).<br />
GENERAL SAFETY INSTRUCTIONS<br />
● All personnel must stand clear during lifting<br />
operations.<br />
● Ensure lifting capacity is greater than weight of<br />
wrecker body.<br />
NOTE<br />
The left and right side body mounts are replaced the same. The art<br />
shows the left side body mount.<br />
1. Remove four locknuts (12), two U-bolts (14), and two woodblocks (13) from frame rail (2) and<br />
wrecker body (l). Discard locknuts (12).<br />
2. Remove four locknuts (15) and two U-bolts (16) from frame rail (2) and wrecker body (l). Discard<br />
locknuts (15).<br />
3. Remove four locknuts (17), two U-bolts (19), and four woodblocks (18) from frame rail (2) and<br />
wrecker body (1). Discard locknuts (17).<br />
4. Remove four locknuts (3), four mounting bolts (6), two plates (5), and four woodblocks (4) from<br />
frame rail (2) and wrecker body (l). Discard locknuts (3).<br />
5. Remove ten locknuts (10), screws (8), sixteen locknuts (9), screws (11), and two brackets (7) from<br />
frame rail (2), Discard locknuts (10) and (9).<br />
15-8
<strong>TM</strong> 9-<strong>2320</strong>-<strong>260</strong>-<strong>34</strong>-2<br />
15-5. WRECKER BODY REPLACEMENT (Contd)<br />
● All personnel must stand clear during lifting operations. A<br />
swinging or shifting load may cause injury or death to personnel.<br />
● Ensure lifting capacity is greater than weight (1,800 lb (817 kg))<br />
of wrecker body. Failure to do so may result in injury to personnel<br />
or damage to equipment.<br />
6. Attach two guide lines to wrecker body (1).<br />
7. Attach two chains to wrecker body (1).<br />
8. Attach lifting device to two chains.<br />
NOTE<br />
Two assistants will help with steps 9 and 10.<br />
9. Remove wrecker body (1) from frame rail (2) and lower onto supports.<br />
10. Remove lifting device, two chains, and guide lines from wrecker body (1).<br />
15-9
<strong>TM</strong> 9-<strong>2320</strong>-<strong>260</strong>-<strong>34</strong>-2<br />
15-5. WRECKER BODY REPLACEMENT (Contd)<br />
WARNING<br />
● All personnel must stand clear during lifting operations. A<br />
swinging or shifting load may cause injury or death to personnel.<br />
● Ensure lifting capacity is greater than weight (1,800 lb (817 kg))<br />
of wrecker body. Failure to do so may result in injury to personnel<br />
or damage to equipment.<br />
NOTE<br />
Two assistants will help with steps 1 through 3.<br />
1.<br />
2.<br />
3.<br />
4.<br />
5.<br />
6.<br />
7.<br />
8.<br />
9.<br />
10.<br />
Attach two guide lines to wrecker body (1).<br />
Attach two chains to wrecker body (1).<br />
Attach lifting device to two chains.<br />
Raise wrecker body (1) from supports and position on frame rail (2). Ensure mounting holes of<br />
frame rail (2) and wrecker body (1) are alined.<br />
Install two woodblocks (13) and two U-bolts (14) on frame rail (2) and wrecker body (1) with four<br />
new locknuts (12).<br />
Install two U-bolts (16) on frame rail (2) and wrecker body (1) with four new locknuts (15).<br />
Install four woodblocks (18) and two U-bolts (19) on frame rail (2) and wrecker body (1) with four<br />
new locknuts (17).<br />
Install two plates (5) and four woodblocks (4) on frame rail (2) and wrecker body (1) with four<br />
mounting bolts (6) and four new locknuts (3).<br />
Install two brackets (7) on frame rail (2) with sixteen screws (11), new locknuts (9), ten screws (8),<br />
and new locknuts (10).<br />
NOTE<br />
Two assistants will help with step 10.<br />
Remove lifting device, two chains, and guide lines from wrecker body (1).<br />
15-10
<strong>TM</strong> 9-<strong>2320</strong>-<strong>260</strong>-<strong>34</strong>-2<br />
15-5. WRECKER BODY REPLACEMENT (Contd)<br />
FOLLOW-ON TASK: Install crane turntable (para. 16-25).<br />
15-11
<strong>TM</strong> 9-<strong>2320</strong>-<strong>260</strong>-<strong>34</strong>-2<br />
15-6. REAR WINCH ROLLERS REPAIR<br />
THIS TASK COVERS:<br />
Repair<br />
INITIAL SETUP<br />
APPLICABLE MODELS<br />
MATERIALS/PARTS<br />
M816 Two bearings (Appendix D, Item 2)<br />
TOOLS<br />
REFERENCES (<strong>TM</strong>]<br />
General mechanic’s tool kit <strong>TM</strong> 9-<strong>2320</strong>-<strong>260</strong>-20<br />
(Appendix B, Item 1)<br />
<strong>TM</strong> 9-<strong>2320</strong>-<strong>260</strong>-<strong>34</strong>P-2<br />
Mechanical puller kit (Appendix B, Item 14)<br />
Arbor press (Appendix B, Item 7)<br />
EQUIPMENT CONDITION<br />
Rear winch roller removed (<strong>TM</strong> 9-<strong>2320</strong>-<strong>260</strong>-20).<br />
1. Using mechanical puller, remove two bearings (1) from rear winch roller (2). Discard bearings (1).<br />
2. Using arbor press, install two new bearings (1) in rear winch roller (2).<br />
FOLLOW-ON TASK: Install rear winch roller (<strong>TM</strong> 9-<strong>2320</strong>-<strong>260</strong>-20).<br />
15-12
<strong>TM</strong> 9-<strong>2320</strong>-<strong>260</strong>-<strong>34</strong>-2<br />
Section Ill. TRACTOR WRECKER BODY MAINTENANCE<br />
15-7. TRACTOR WRECKER BODY MAINTENANCE INDEX<br />
PARA.<br />
NO.<br />
TITLE<br />
PAGE<br />
NO.<br />
I<br />
15-8. Tractor Wrecker Body Replacement 15-13<br />
15-9. Rear Fenders Replacement 15-18<br />
15-10. Hydraulic Hose and Tube Replacement 15-20<br />
15-8. TRACTOR WRECKER BODY REPLACEMENT<br />
THIS TASK COVERS:<br />
a. Removal b. Installation<br />
INITIAL SETUP<br />
APPLICABLE MODELS<br />
M819<br />
TOOLS<br />
General mechanic’s tool kit<br />
(Appendix B, Item 1)<br />
l-1/2-in. socket, 3/4-in. dr.<br />
(Appendix B, Item 118)<br />
Supports<br />
Lifting device<br />
Two chains<br />
MATERIALS/PARTS<br />
Sixteen locknuts (Appendix D, Item 167)<br />
Four locknuts (Appendix D, Item 202)<br />
GAA grease (Appendix C, Item 14)<br />
PERSONNEL REQUIRED<br />
Two<br />
REFERENCES (<strong>TM</strong>)<br />
LO 9-<strong>2320</strong>-<strong>260</strong>-12<br />
<strong>TM</strong> 9-<strong>2320</strong>-<strong>260</strong>-10<br />
<strong>TM</strong> 9-<strong>2320</strong>-<strong>260</strong>-20<br />
<strong>TM</strong> 9-<strong>2320</strong>-<strong>260</strong>-<strong>34</strong>P-2<br />
EQUIPMENT CONDITION<br />
● Oil reservoir drained (LO 9-<strong>2320</strong>-<strong>260</strong>-12).<br />
●<br />
Front splash guards removed (<strong>TM</strong> 9-<strong>2320</strong>-<strong>260</strong>-20).<br />
●<br />
Fifth wheel removed (<strong>TM</strong> 9-<strong>2320</strong>-<strong>260</strong>-20).<br />
Crane shipper, boom, and boom extension removed<br />
(para. 16-33).<br />
●<br />
Boom lift cylinder removed (para. 16-32).<br />
●<br />
Boom swing mechanism removed (para. 16-29).<br />
●<br />
Hydraulic swivel valve removed (para. 16-31).<br />
GENERAL SAFETY INSTRUCTIONS<br />
● All personnel must stand clear during lifting<br />
operations.<br />
● Ensure lifting capacity is greater than weight of<br />
tractor wrecker body.<br />
15-13
<strong>TM</strong> 9-<strong>2320</strong>-<strong>260</strong>-<strong>34</strong>-2<br />
15-8. TRACTOR WRECKER BODY REPLACEMENT (Contd)<br />
a. Removal<br />
1.<br />
2.<br />
3.<br />
4.<br />
Remove sixteen locknuts (14) from eight U-bolts (6).<br />
Remove four locknuts (15) from studs (7). Discard locknuts (15).<br />
Remove four locknuts (11), washers (10), screws (9), and panel (13) from side panels (8) and (12).<br />
Discard locknuts (11).<br />
Attach chain to boom support (2) and lifting device.<br />
WARNING<br />
5.<br />
6.<br />
7.<br />
8.<br />
9.<br />
10.<br />
● All personnel must stand clear during lifting operations.<br />
A swinging or shifting load may cause injury to personnel.<br />
● Ensure lifting capacity is greater than weight (1,800 lb (817 kg))<br />
of tractor wrecker body. Failure to do so may result in injury to<br />
personnel or damage to equipment.<br />
NOTE<br />
Two assistants will help with step 5.<br />
Lift pivot post (1), boom support (2), and base plate (4) from vehicle (5).<br />
Set pivot post (1), boom support (2), and base plate (4) on blocking at least 8 in. (21 cm) high.<br />
Remove four nuts (20), two clamp loops (19), wood blocks (18), and U-bolts (17) from tractor wrecker<br />
body (16) and frame (21).<br />
Remove sixteen locknuts (22), wood blocks (23), and eight U-bolts (24) from tractor wrecker<br />
body (16) and frame (21). Discard locknuts (22).<br />
Install two chains on tractor wrecker body (16).<br />
Install lifting device on two chains.<br />
WARNING<br />
All personnel must stand clear during lifting operations. A swinging<br />
or shifting load may cause injury to personnel.<br />
11.<br />
12.<br />
13.<br />
NOTE<br />
Assistant will help with step 11.<br />
Raise tractor wrecker body (16) away from frame (21) and lower onto supports.<br />
Remove lifting device from two chains.<br />
Remove two chains from tractor wrecker body (16).<br />
15-14
<strong>TM</strong> 9-<strong>2320</strong>-<strong>260</strong>-<strong>34</strong>-2<br />
15-8. TRACTOR WRECKER BODY REPLACEMENT (Contd)<br />
15-15
<strong>TM</strong> 9-<strong>2320</strong>-<strong>260</strong>-<strong>34</strong>-2<br />
15-8. TRACTOR WRECKER BODY REPLACEMENT (Contd)<br />
1. Install two chains on tractor wrecker body (1).<br />
2. Install lifting device on two chains.<br />
WARNING<br />
● All personnel must stand clear during lifting operations.<br />
A swinging or shifting load may cause injury to personnel.<br />
● Ensure Iifting capacity is greater than weight (1,800 lb (817 kg))<br />
of tractor wrecker body. Failure to do so may result in injury to<br />
personnel or damage to equipment.<br />
NOTE<br />
Assistant will help with step 3.<br />
3. Raise tractor wrecker body (1) away from supports and lower onto frame (6).<br />
4. Install sixteen wood blocks (8) on frame (6) and tractor wrecker body (1).<br />
5. Install eight U-bolts (9) on frame (6) and tractor wrecker body (1) with sixteen new locknuts (7).<br />
6. Install two wood blocks (3) on left and right frame rails (6).<br />
7. Install two clamp loops (4) and U-bolts (2) on frame (6) and wrecker body (1) with four nuts (5).<br />
15-16
<strong>TM</strong> 9-<strong>2320</strong>-<strong>260</strong>-<strong>34</strong>-2<br />
15-8. TRACTOR WRECKER BODY REPLACEMENT (Contd) I<br />
WARNING<br />
All personnel must stand clear during lifting operations. A swinging<br />
or shifting load may cause injury to personnel.<br />
8. Install chain on boom support (11).<br />
9. Install lifting device on chain.<br />
10. Lift pivot post (10), boom support (11), and base plate (13) from blocking.<br />
11. Set pivot post (10), boom support (11), and base plate (13) on vehicle (14).<br />
12. Install panel (22) on side panels (17) and (21) with four screws (18), washers (19), and new locknuts (20).<br />
13. Install four new locknuts (24) on studs (16).<br />
14. Install sixteen new locknuts (23) on eight U-bolts (15).<br />
FOLLOW-ON TASKS: ● Install pivot post and base (para. 16-44).<br />
● Install fifth wheel (<strong>TM</strong> 9-<strong>2320</strong>-<strong>260</strong>-20).<br />
• Install front splash guards (<strong>TM</strong> 9-<strong>2320</strong>-<strong>260</strong>-20).<br />
● Refill oil reservoir (LO 9-<strong>2320</strong>-<strong>260</strong>-12).<br />
15-17
<strong>TM</strong> 9-<strong>2320</strong>-<strong>260</strong>-<strong>34</strong>-2<br />
15-9. REAR FENDERS REPLACEMENT<br />
THIS TASK COVERS:<br />
a. Removal b. Installation<br />
INITIAL SETUP<br />
APPLICABLE MODELS<br />
REFERENCES (<strong>TM</strong>]<br />
M819 <strong>TM</strong> 9-<strong>2320</strong>-<strong>260</strong>-10<br />
<strong>TM</strong> 9-<strong>2320</strong>-<strong>260</strong>-<strong>34</strong>P-2<br />
TOOLS<br />
General mechanic’s tool kit<br />
EQUIPMENT CONDITION<br />
(Appendix B, Item 1)<br />
Parking brake set (<strong>TM</strong> 9-<strong>2320</strong>-<strong>260</strong>-10).<br />
MATERIALS/PARTS<br />
Eighteen lockwashers (Appendix D, Item 222)<br />
Two lockwashers (Appendix D, Item 247)<br />
NOTE<br />
Both rear fenders are removed and installed the same. This procedure<br />
covers one rear fender.<br />
1. Remove two screws (6), nuts (3), and lockwashers (4) from rear fender (5), two clamps (1), and<br />
flange (2). Discard lockwashers (4).<br />
2. Remove six nuts (17), lockwashers (18), and screws (7) from rear fender (5) and two braces (11).<br />
Discard lockwashers (18).<br />
3. Remove eight nuts (9), lockwashers (8), four screws (16), and screws ( 10) from rear fender (5) and<br />
tractor wrecker body (12). Discard lockwashers (8).<br />
4. Remove four screws (19), nuts (15), and lockwashers (14) from rear fender (5) and splash guard (13).<br />
Discard lockwashers (14).<br />
NOTE<br />
Assistant will help with step 5.<br />
5. Remove fender (5) from tractor wrecker body ( 12).<br />
NOTE<br />
Assistant will help with step 1.<br />
1. Position rear fender (5) on tractor wrecker body ( 12).<br />
2. Install four screws (19), new lockwashers (14), and nuts (15) on rear fender (5) and splash<br />
guard (13).<br />
3. Install four screws (10), screws (16), eight new lockwashers (8), and nuts (9) in rear fender (5) and<br />
tractor wrecker body (12).<br />
4. Install six screws (7), new lockwashers (18), and nuts (17) in rear fender (5) and two braces (11).<br />
5. Install two clamps (1) and rear fender (5) on flange (2) with two screws (6), new lockwashers<br />
(4), and nuts (3).<br />
15-18
<strong>TM</strong> 9-<strong>2320</strong>-<strong>260</strong>-<strong>34</strong>-2<br />
15-9. REAR FENDERS REPLACEMENT (Contd)<br />
15-19
<strong>TM</strong> 9-<strong>2320</strong>-<strong>260</strong>-<strong>34</strong>-2<br />
15-10. HYDRAULIC HOSE AND TUBE REPLACEMENT<br />
THIS TASK COVERS:<br />
a. Removal b. Installation<br />
INITIAL SETUP<br />
APPLICABLE MODELS<br />
REFERENCES (<strong>TM</strong>)<br />
M819 LO 9-<strong>2320</strong>-<strong>260</strong>-12<br />
TOOLS<br />
General mechanic’s tool kit<br />
(Appendix B, Item 1)<br />
<strong>TM</strong> 9-<strong>2320</strong>-<strong>260</strong>-10<br />
<strong>TM</strong> 9-<strong>2320</strong>-<strong>260</strong>-<strong>34</strong>P-2<br />
EQUIPMENT CONDITION<br />
MATERIALS/PARTS<br />
Cap and plug set (Appendix C, Item 6)<br />
● Parking brake set (<strong>TM</strong> 9-<strong>2320</strong>-<strong>260</strong>-10).<br />
● Shipper brake in travel position<br />
(<strong>TM</strong> 9-<strong>2320</strong>-<strong>260</strong>-10).<br />
I<br />
a. Removal<br />
NOTE<br />
There are three types of hydraulic hose and tube connections<br />
found on the M816 and M819 wreckers. This procedure covers the<br />
solid female and swivel male connection.<br />
CAUTION<br />
● Clean area around hoses and lines before removal to prevent<br />
entry of dirt. Damage will occur if dirt or dust enters system.<br />
● Cap or plug all openings after disconnecting tubes and hoses to<br />
prevent contamination. Failure to do so may result in hydraulic<br />
pump damage.<br />
● Do not twist hose during removal. Damage to hose may occur.<br />
NOTE<br />
● Tag all hoses and tubes for installation.<br />
● Use more than one wrench for removal and installation of hoses<br />
and tubes.<br />
● Hose and fittings connected by a single hexagonal nut cannot be<br />
disconnected until the swivel nut connection at the opposite end<br />
is removed. The entire hose must be free to turn when removing<br />
this type of hose connection.<br />
● Have drainage container ready to catch oil.<br />
1. Separate two hoses (1) and (2) from fittings (7) and (8).<br />
2. Remove hose (2) from check valve (4).<br />
3. Remove hose (1) from elbow (3).<br />
4. Remove bypass hose (6) from elbow (5).<br />
5. Remove bypass hose (6) from elbow (9).<br />
15-20
<strong>TM</strong> 9-<strong>2320</strong>-<strong>260</strong>-<strong>34</strong>-2<br />
15-10. HYDRAULIC HOSE AND TUBE REPLACEMENT (Contd)<br />
15-21
<strong>TM</strong> 9-<strong>2320</strong>-<strong>260</strong>-<strong>34</strong>-2<br />
15-10. HYDRAULIC HOSE AND TUBE REPLACEMENT (Contd)<br />
1. Install bypass hose (6) on elbow (9).<br />
2. Install bypass hose (6) on elbow (5).<br />
3. Install hose (1) on elbow (3).<br />
4. Install hose (2) on check valve (4).<br />
5. Connect two hoses (1) and (2) to fittings (7) and (8).<br />
15-22
<strong>TM</strong> 9-<strong>2320</strong>-<strong>260</strong>-<strong>34</strong>-2<br />
I<br />
15-10. HYDRAULIC HOSE AND TUBE REPLACEMENT (Contd)<br />
15-23
<strong>TM</strong> 9-<strong>2320</strong>-<strong>260</strong>-<strong>34</strong>-2<br />
Section IV. DUMP BODY MAINTENANCE<br />
15-11. DUMP BODY MAINTENANCE INDEX<br />
PARA.<br />
NO.<br />
15-12.<br />
15-13.<br />
15-14.<br />
15-15.<br />
15-16.<br />
15-17.<br />
15-18.<br />
15-19.<br />
15-20.<br />
15-21.<br />
TITLE<br />
Cab Protector Shield Maintenance<br />
Dump Body Maintenance<br />
Roller Arm Maintenance<br />
Hoist Cylinder Maintenance<br />
Hoist Safety Latch Maintenance<br />
Hoist Pump Maintenance<br />
Subframe Replacement<br />
Control Valve Maintenance<br />
Hydraulic Hoses Replacement<br />
Safety Brace Replacement<br />
PAGE<br />
NO.<br />
15-24<br />
15-28<br />
15-35<br />
15-38<br />
15-48<br />
15-52<br />
15-56<br />
15-60<br />
15-64<br />
15-69<br />
15-12. CAB PROTECTOR SHIELD MAINTENANCE I<br />
THIS TASK COVERS:<br />
a. Removal c. Installation<br />
b. Cleaning and Inspection<br />
INITIAL SETUP<br />
APPLICABLE MODELS<br />
M817<br />
TOOLS<br />
General mechanic’s tool kit<br />
(Appendix B, Item 1)<br />
Lifting device<br />
Two screws (Appendix C, Item <strong>34</strong>)<br />
Two nuts (Appendix C, Item 25)<br />
Four washers (Appendix C, Item 57)<br />
Chain<br />
Supports<br />
MATERIALS/PARTS<br />
Twelve locknuts (Appendix D, Item 169)<br />
Four cotter pins (Appendix D, Item 20)<br />
REFERENCES (<strong>TM</strong>)<br />
<strong>TM</strong> 9-237<br />
<strong>TM</strong> 9-<strong>2320</strong>-<strong>260</strong>-10<br />
<strong>TM</strong> 9-<strong>2320</strong>-<strong>260</strong>-<strong>34</strong>P-2<br />
EQUIPMENT CONDITION<br />
Parking brake set (<strong>TM</strong> 9-<strong>2320</strong>-<strong>260</strong>-10).<br />
GENERAL SAFETY INSTRUCTIONS<br />
● All personnel must stand clear during lifting<br />
operations.<br />
● Ensure lifting capacity is greater than weight of<br />
protector shield.<br />
1. Attach chain to cab protector shield (1) with two screws (2), four washers (3), and two nuts (4).<br />
2. Attach lifting device to chain.<br />
3. Remove eight locknuts (14), screws (16), and washers (15) from cab protector shield (1) and dump<br />
body (11). Discard locknuts (14).<br />
4. Remove four cotter pins (10), nuts (9), washers (8), washers (6), and screws (5) from cab protector<br />
shield (1) and dump body (11). Discard cotter pins (10).<br />
15-24
<strong>TM</strong> 9-<strong>2320</strong>-<strong>260</strong>-<strong>34</strong>-2<br />
15-12. CAB PROTECTOR SHIELD MAINTENANCE (Contd)<br />
5. Remove four locknuts (7), screws (13), and washers (12) from cab protector shield (1) and dump<br />
body (11). Discard locknuts (7).<br />
WARNING<br />
● All personnel must stand clear during lifting operations.<br />
A shifting or swinging load may cause injury to personnel.<br />
Ž Ensure lifting capacity is greater than weight (465 lb (211 kg))<br />
of cab protector shield, Failure to do so may result i n injury to<br />
personnel or damage to equipment,<br />
NOTE<br />
Assistant will help with step 6.<br />
6. Raise cab protector shield (1) away from dump body (11) and lower onto supports,<br />
7. Remove lifting device from chain,<br />
8. Remove two nuts (4), screws (2), four washers (3), and chain from cab protector shield (1).<br />
15-25
<strong>TM</strong> 9-<strong>2320</strong>-<strong>260</strong>-<strong>34</strong>-2<br />
15-12. CAB PROTECTOR SHIELD MAINTENANCE (Contd)<br />
I<br />
b. Cleaning and Inspection<br />
1. For general cleaning instructions, refer to para. 2-8.<br />
2. Inspect cab protector shield (1) for cracks, breaks, and broken welds. Repair broken welds, cracks,<br />
and breaks (<strong>TM</strong> 9-237).<br />
1.<br />
2.<br />
Install two screws (2), four washers (3), two nuts (4), and chain on cab protector shield (1).<br />
Attach lifting device to chain.<br />
WARNING<br />
● All personnel must stand clear during lifting operations.<br />
A swinging or shifting load may cause injury to personnel.<br />
● Ensure lifting capacity is greater than weight (465 lb (211 kg))<br />
of cab protector shield. Failure to do so may result in injury to<br />
personnel or damage to equipment,<br />
3.<br />
4.<br />
5.<br />
6.<br />
7.<br />
8.<br />
NOTE<br />
Assistant will help with step 3.<br />
Raise cab protector shield (1) away from supports and lower onto dump body (11).<br />
NOTE<br />
Ensure holes of cab protector shield aline with holes of dump body.<br />
Install cab protector shield (1) on dump body (11) with four screws (13), washers (12), and new<br />
locknuts (7).<br />
Install cab protector shield (1) on dump body (11) with four washers (6), screws (5), washers (8),<br />
nuts (9), and new cotter pins (10).<br />
Install cab protector shield (1) on dump body (11) with eight washers (15), screws (16), and new<br />
locknuts (14).<br />
Remove lifting device from chain.<br />
Remove two nuts (4), screws (2), washers (3) and chain from cab protector shield (1).<br />
15-26
I<br />
15-12. CAB PROTECTOR SHIELD MAINTENANCE (Contd)<br />
<strong>TM</strong> 9-<strong>2320</strong>-<strong>260</strong>-<strong>34</strong>-2<br />
15-27
<strong>TM</strong> 9-<strong>2320</strong>-<strong>260</strong>-<strong>34</strong>-2<br />
15-13. DUMP BODY MAINTENANCE<br />
THIS TASK COVERS:<br />
a. Removal c. Installation<br />
b. Cleaning, Inspection, and Repair<br />
INITIAL SETUP<br />
I<br />
APPLICABLE MODELS<br />
M817<br />
TOOLS<br />
General mechanic’s tool kit<br />
(Appendix B, Item 1)<br />
Lifting device<br />
Two chains<br />
Guide lines<br />
MATERIALS/PARTS<br />
Twelve locknuts (Appendix D, Item 173)<br />
Two locknuts (Appendix D, Item 175)<br />
Two locknuts (Appendix D, Item 199)<br />
PERSONNEL REQUIRED<br />
Two<br />
a. Removal<br />
WARNING<br />
REFERENCES (<strong>TM</strong>)<br />
LO 9-<strong>2320</strong>-<strong>260</strong>-12<br />
<strong>TM</strong> 9-237<br />
<strong>TM</strong> 9-<strong>2320</strong>-<strong>260</strong>-10<br />
<strong>TM</strong> 9-<strong>2320</strong>-<strong>260</strong>-20<br />
<strong>TM</strong> 9-<strong>2320</strong>-<strong>260</strong>-<strong>34</strong>P-2<br />
<strong>TM</strong> 43-0139<br />
EQUIPMENT CONDITION<br />
● Parking brake set (<strong>TM</strong> 9-<strong>2320</strong>-<strong>260</strong>-10).<br />
● Wheels chocked (<strong>TM</strong> 9-<strong>2320</strong>-<strong>260</strong>-10).<br />
● Remove cab protector shield (para. 15-12).<br />
GENERAL SAFETY INSTRUCTIONS<br />
● Position safety braces before working under raised<br />
dump body.<br />
● Do not operate dump controls when dump body is<br />
removed.<br />
● All personnel must stand clear during lifting<br />
operations.<br />
● Ensure lifting capacity is greater than weight of<br />
dump body.<br />
Never work under raised dump body until safety braces are<br />
properly positioned, Injury to personnel may result if dump body<br />
suddenly lowers.<br />
1. Raise dump body (2) and position two safety braces (1) in upright position,<br />
NOTE<br />
Step 2 must be performed for right and left sides of vehicle.<br />
2. Remove screw (5), locknut (3), and lubrication fitting (6) from thrust plate pin (4). Discard<br />
locknut (3).<br />
3. Lower safety braces (1) to lowest position and lower dump body (2).<br />
4. Attach two chains to dump body (2) and lifting device.<br />
5. Raise lifting device until slack is removed from chains.<br />
15-28
<strong>TM</strong> 9-<strong>2320</strong>-<strong>260</strong>-<strong>34</strong>-2<br />
15-13. DUMP BODY MAINTENANCE (Contd)<br />
15-29
<strong>TM</strong> 9-<strong>2320</strong>-<strong>260</strong>-<strong>34</strong>-2<br />
15-13. DUMP BODY MAINTENANCE (Contd)<br />
WARNING<br />
Do not operate dump controls when dump body is removed.<br />
Injury to personnel may result if lift cylinder is operated when<br />
not secured.<br />
NOTE<br />
Steps 6 through 10 must be performed for right and left sides of<br />
vehicle.<br />
6. Remove thrust plate pin (1) from thrust plate (2) and roller arm (4).<br />
7. Remove six locknuts (7) and screws (8) from hinge bracket (6). Discard locknuts (7).<br />
8. Remove lubrication fitting (5) from hinge pin (11).<br />
9. Remove locknut (10) and screw (9) from hinge bracket (6). Discard locknut (10).<br />
10. Remove hinge pin (11) from hinge bracket (6).<br />
11. Remove hinge bracket (6) from dump body (3).<br />
12. Connect guide lines to front and rear of dump body (3).<br />
WARNING<br />
All personnel must stand clear during lifting operations.<br />
A shifting or swinging load may cause injury to personnel.<br />
● Ensure lifting capacity is greater than weight (2,700 lb<br />
(1,226 kg)) of dump body. Failure to do so may result in injury<br />
to personnel or damage to equipment.<br />
NOTE<br />
Assistant will help with steps 13 and 14.<br />
13. Raise dump body (3) clear of subframe (12) and place on supports.<br />
14. Remove chains and guide lines from dump body (3) and lifting device.<br />
15-30
<strong>TM</strong> 9-<strong>2320</strong>-<strong>260</strong>-<strong>34</strong>-2<br />
15-13. DUMP BODY MAINTENANCE (Contd)<br />
15-31
<strong>TM</strong> 9-<strong>2320</strong>-<strong>260</strong>-<strong>34</strong>-2<br />
15-13. DUMP BODY MAINTENANCE (Contd)<br />
b. Cleaning, Inspection, and Repair<br />
1. For general cleaning instructions, refer to para. 2-8.<br />
2. Inspect dump body (1) for dents, cracks, rust, and broken welds. Repair dump body (1) if dented,<br />
cracked, rusted, or welds are broken (<strong>TM</strong> 9-237).<br />
3. Clean and paint dump body (1) as necessary (<strong>TM</strong> 43-0139).<br />
c. Installation<br />
1. Attach two chains and guide lines to dump body (1) and lifting device.<br />
WARNING<br />
● All personnel must stand clear during lifting operations.<br />
A shifting or swinging load may cause injury to personnel.<br />
● Ensure lifting capacity is greater than weight (2,700 lb<br />
(1,226 kg)) of dump body. Failure to do so may result in injury<br />
to personnel or damage to equipment.<br />
NOTE<br />
Assistant will help with steps 2 through 11.<br />
2. Raise dump body (1) clear of supports and position on subframe (2).<br />
NOTE<br />
Steps 3 through 5 apply to both left and right sides of vehicle.<br />
3. Install hinge bracket (4) on dump body (1) with six screws (6) and new locknuts (5).<br />
4. Insert hinge pin (9) in hinge bracket (4) and secure with screw (7) and new locknut (8).<br />
5. Install lubrication fitting (3) in hinge pin (9).<br />
6. Remove two guide lines from dump body (1).<br />
7. Remove chains from dump body (1) and lifting device.<br />
15-32
<strong>TM</strong> 9-<strong>2320</strong>-<strong>260</strong>-<strong>34</strong>-2<br />
15-13. DUMP BODY MAINTENANCE (Contd)<br />
15-33
<strong>TM</strong> 9-<strong>2320</strong>-<strong>260</strong>-<strong>34</strong>-2<br />
I 15-13. DUMP BODY MAINTENANCE (Contd) I<br />
WARNING<br />
Never work under dump body until safety braces are properly<br />
positioned. Injury to personnel may result if dump body suddenly<br />
lowers.<br />
8. Raise dump body(1) and position two safety braces (8) in upright position on dump body (1),<br />
NOTE<br />
Steps 9 and 10 apply to both left and right sides of vehicle.<br />
9. Install thrust plate pin (3) in thrust plate (5) and roller arm (7) with screw (6) and new locknut (4).<br />
10. Install lubrication fitting (2) on thrust plate pin (3).<br />
11. Lower safety braces (8) to lowest position and lower dump body (1).<br />
FOLLOW-ON TASK: Lubricate dump body (LO 9-<strong>2320</strong>-<strong>260</strong>-12).<br />
15-<strong>34</strong>
<strong>TM</strong> 9-<strong>2320</strong>-<strong>260</strong>-<strong>34</strong>-2<br />
15-14. ROLLER ARM MAINTENANCE<br />
THIS TASK COVERS:<br />
a. Removal d. Assembly<br />
b. Disassembly e. Installation<br />
c. Cleaning and Inspection<br />
INITIAL SETUP<br />
APPLICABLE MODELS<br />
M817<br />
TOOLS<br />
General mechanic’s tool kit<br />
(Appendix B, Item 1)<br />
Soft-head hammer (Appendix B, Item 47)<br />
Lifting device<br />
Chain<br />
MATERIALS/PARTS<br />
GAA grease (Appendix C, Item 14)<br />
REFERENCES (<strong>TM</strong>)<br />
LO 9-<strong>2320</strong>-<strong>260</strong>-12<br />
<strong>TM</strong> 9-214<br />
<strong>TM</strong> 9-<strong>2320</strong>-<strong>260</strong>-<strong>34</strong>P-2<br />
EQUIPMENT CONDITION<br />
Dump body removed (para. 15-13).<br />
GENERAL SAFETY INSTRUCTIONS<br />
Do not operate dump controls when dump body is<br />
removed.<br />
WARNING<br />
Do not operate dump controls when dump body is removed.<br />
Injury to personnel may result if lift cylinder is operated when<br />
not secured.<br />
NOTE<br />
Both roller arms are maintained the same. This procedure covers<br />
one roller arm.<br />
1. Attach chain to crosshead (1) and lifting device and remove slack from chain.<br />
2. Remove roller arm (2) from crosshead shaft (3).<br />
15-35
<strong>TM</strong> 9-<strong>2320</strong>-<strong>260</strong>-<strong>34</strong>-2<br />
15-14. ROLLER ARM MAINTENANCE (Contd)<br />
b. Disassembly<br />
1. Using punch and hammer, remove two pins (2) from roller pin (6) and roller arm (4).<br />
2. Remove two lubrication fittings (5) from roller pin (6).<br />
3. Using brass drift and hammer, drive roller pin (6) from roller arm (4) and roller (7).<br />
4. Remove roller (7) from roller arm (4).<br />
c. Cleaning and Inspection<br />
1. For general cleaning instructions, refer to para. 2-8.<br />
2. Inspect roller (7) and roller pin (6) for cracks and deep grooves. Replace roller (7) or roller pin (6)<br />
if cracked or deeply grooved.<br />
3. Inspect roller arm (4) for breaks and cracks. Replace roller arm (4) if broken or cracked.<br />
4, Inspect two bearings (3) (<strong>TM</strong> 9-214). Replace bearings (3) if damaged.<br />
NOTE<br />
● Perform steps 5 and 6 if bearings are to be replaced,<br />
● Apply GAA grease to bearings for installation.<br />
5. Using brass drift and hammer, drive bearings (3) from roller arm (4). Discard bearings (3).<br />
6. Using wood block and hammer, install bearings (3) flush into roller arm (4).<br />
1. Position roller (7) in roller arm (4)<br />
NOTE<br />
Apply a light coat of GAA grease to roller pin before installation<br />
2. Using soft-head hammer, install roller pin (6) in roller arm (4) and roller (7).<br />
3. Install two lubrication fittings (5) on roller-pin (6).<br />
4. Install roller (7) on roller arm (4) with two pins (2).<br />
15-36
<strong>TM</strong> 9-<strong>2320</strong>-<strong>260</strong>-<strong>34</strong>-2<br />
I 15-14. ROLLER ARM MAINTENANCE (Contd) I<br />
1. Install roller arm (4) on crosshead shaft (l).<br />
2, Remove chain from crosshead (8) and lifting device.<br />
FOLLOW-ON TASKS: ● Install dump body (para. 15-13).<br />
● Lubricate roller arm (LO 9-<strong>2320</strong>-<strong>260</strong>-12).<br />
15-37
<strong>TM</strong> 9-<strong>2320</strong>-<strong>260</strong>-<strong>34</strong>-2<br />
15-15. HOIST CYLINDER MAINTENANCE<br />
THIS TASK COVERS:<br />
a. Removal d. Assembly<br />
b. Disassembly e. Installation<br />
c. Cleaning and Inspection<br />
INITIAL SETUP<br />
APPLICABLE MODELS<br />
M817<br />
TOOLS<br />
General mechanic’s tool kit<br />
(Appendix B, Item 1)<br />
Torque wrench, 3/8-in. dr.<br />
(Appendix B, Item 4)<br />
Ring compressor (Appendix B, Item 15)<br />
Spring tester (Appendix B, Item 10)<br />
Lifting device<br />
Two chains<br />
MATERIALS/PARTS<br />
Three ring, spacers (Appendix D, Item 519)<br />
Fourteen lockwashers (Appendix D, Item 215)<br />
Four lockwashers (Appendix D, Item 218)<br />
Three piston rings (Appendix D, Item 319)<br />
Packing (Appendix D, Item 301)<br />
O-ring (Appendix D, Item 271)<br />
Cotter pin (Appendix D, Item 16)<br />
GAA grease (Appendix C, Item 14)<br />
Lint-free cloth (Appendix C, Item 9)<br />
PERSONNEL REQUIRED<br />
Two<br />
REFERENCES (<strong>TM</strong>]<br />
LO 9-<strong>2320</strong>-<strong>260</strong>-12<br />
<strong>TM</strong> 9-<strong>2320</strong>-<strong>260</strong>-10<br />
<strong>TM</strong> 9-<strong>2320</strong>-<strong>260</strong>-<strong>34</strong>P-2<br />
EQUIPMENT CONDITION<br />
● Roller arms removed (para. 15-14).<br />
GENERAL SAFETY INSTRUCTIONS<br />
● Do not operate dump controls when dump body<br />
is removed.<br />
● All personnel must stand clear during lifting<br />
operations.<br />
● Ensure lifting capacity is greater than weight of<br />
hoist cylinder.<br />
● Plugs are under spring tension. Release plugs<br />
slowly.<br />
Do not operate dump controls when dump body is removed. Injury<br />
to personnel may result if lift cylinder is operated when not secured.<br />
CAUTION<br />
Cap or plug all openings immediately after disconnecting lines<br />
and hoses to prevent contamination. Remove caps or plugs prior<br />
to connection. Failure to do so may result in damage to equipment.<br />
NOTE<br />
Tag all lines and hoses for installation, Have drainage container<br />
ready to catch hydraulic oil.<br />
1. Remove two hydraulic hoses (1) from hoist cylinder (2).<br />
2. Remove two screws (5), lockwashers (4), upper crosshead retainer (6), lower crosshead retainer (7),<br />
and crosshead (3) from piston rod (8). Discard lockwashers (4).<br />
3. Remove four screws (9), lockwashers (10), and two bearing caps (11) from hoist cylinder (2) and<br />
subframe (12). Discard lockwashers (10).<br />
4. Attach two chains on hoist cylinder (2) and lifting device.<br />
15-38
<strong>TM</strong> 9-<strong>2320</strong>-<strong>260</strong>-<strong>34</strong>-2<br />
15-15. HOIST CYLINDER MAINTENANCE (Contd)<br />
WARNING<br />
● All personnel must stand clear during lifting operations.<br />
A swinging or shifting load may cause injury to personnel.<br />
● Ensure lifting capacity is greater than weight (500 lb (227 kg)) of<br />
hoist cylinder. Failure to do so may result in injury to personnel<br />
or damage to equipment.<br />
5. Raise hoist cylinder (2) from subframe (12) and place on supports.<br />
6. Remove chains from hoist cylinder (2) and lifting device.<br />
15-39
<strong>TM</strong> 9-<strong>2320</strong>-<strong>260</strong>-<strong>34</strong>-2<br />
15-15. HOIST CYLINDER MAINTENANCE (Contd)<br />
b. Disassembly<br />
1. Remove lubrication fitting (5) from hinge pin (6).<br />
2. Remove two screws (13) from cylinder base (7) and slide hinge pin (6) out of cylinder base (7).<br />
3. Remove three screws (21) from retainer (20) and cylinder head (16).<br />
4. Tap retainer (20) free of cylinder head (16) and slide off piston rod (22).<br />
5. Remove ten screws ( 18) and Iockwashers (17) from cylinder head (16) and cylinder housing (4).<br />
Discard Iockwashers (17).<br />
6. Remove cylinder head ( 16) from cylinder housing (4).<br />
7. Remove packing (19) and O-ring (15) from cylinder head (16). Discard packing (19) and O-ring (15).<br />
NOTE<br />
Care must be used when removing piston rod and piston to<br />
prevent damage to cylinder base or piston.<br />
8. Remove piston rod (22) and piston (24) from cylinder housing (4).<br />
9. Remove cotter pin (14) and nut (25) from piston rod (22). Discard cotter pin (14).<br />
10. Slide piston (24) off piston rod (22).<br />
11. Remove three piston rings (23) from piston (24). Discard piston rings (23).<br />
WARNING<br />
Bypass plugs are under tension. Remove plugs slowly. Failure to<br />
do so may result in injury to personnel.<br />
NOTE<br />
Tag plugs for installation.<br />
12. Remove three bypass plugs (3), springs (2), and check balls (1) from cylinder housing (4).<br />
13. Remove two adapters (9), two ring spacers (8), orifice plug cover (10), ring spacer (11), and orifice<br />
plug (12) from cylinder base (7). Discard ring spacers (8) and (11).<br />
15-40
<strong>TM</strong> 9-<strong>2320</strong>-<strong>260</strong>-<strong>34</strong>-2<br />
15-15. HOIST CYLINDER MAINTENANCE (Contd)<br />
15-41
15-15. HOIST CYLINDER MAINTENANCE (Contd)<br />
c. Cleaning and Inspection<br />
1. For general cleaning instructions, refer to para. 2-8.<br />
2. Inspect three check balls (2) for scratches, chips, and seat wear marks. Replace check balls (2) if<br />
scratched, chipped, or marked.<br />
3. Inspect three springs (1) for wear. Replace springs (1) if spring free length is not 1.25 in. (31.75 mm).<br />
4. Inspect orifice plug (4) for scratches and chips. Replace orifice plug (4) if scratched or chipped.<br />
5. Inspect cylinder housing (3), piston (5), piston rod (6), retainer (7), and cylinder head (8) for cracks,<br />
breaks, scratches, chips, scoring, and excessive wear. Refer to table 15-1, Hoist Cylinder Wear<br />
Limits, for measurements. Replace part(s) if damaged or worn.<br />
Table 15-1. Hoist Cylinder Wear Limits.<br />
ITEM<br />
NO.<br />
lTEM/POINT OF MEASUREMENT<br />
WEAR LIMITS/TOLERANCES<br />
INCHES<br />
MILLIMETERS<br />
3 Cylinder housing – inner diameter 5.250-5.254 133.35-133.45<br />
5 Piston<br />
Outer diameter 5.241-5.244 133.12-133.20<br />
Inner diameter 1.251-1.252 31.78-31.80<br />
6 Piston rod<br />
Outer diameter 1.997-2.000 50.72-50.80<br />
Inner diameter 1.249-1.250 31.72-31.75<br />
7 Retainer<br />
Outer diameter 2.618-2.620 66.50-66.55<br />
Inner diameter 2.005-2.007 50,93-50.98<br />
8 Cylinder head<br />
Outer diameter 5.246-5.248 133.25-133.30<br />
Inner diameter 4.770-4.774 121.16-121.26<br />
15-42
<strong>TM</strong> 9-<strong>2320</strong>-<strong>260</strong>-<strong>34</strong>-2<br />
15-15. HOIST CYLINDER MAINTENANCE (Contd)<br />
15-43
<strong>TM</strong> 9-<strong>2320</strong>-<strong>260</strong>-<strong>34</strong>-2<br />
15-15. HOIST CYLINDER MAINTENANCE (Contd)<br />
d. Assembly<br />
1.<br />
2.<br />
NOTE<br />
Coat all internal parts and seals with GAA grease for assembly.<br />
Install three new piston rings (23) on grooves of piston (24). Ensure gaps in piston rings (23) are<br />
staggered around piston (24).<br />
Slide piston (24) on piston rod (22) and install with nut (25) and new cotter pin (14).<br />
CAUTION<br />
3.<br />
4.<br />
5.<br />
6.<br />
7.<br />
8.<br />
9.<br />
10.<br />
11.<br />
12.<br />
Care must be used when installing piston rod and piston to<br />
prevent damage to cylinder bore or piston.<br />
Install piston (24) and piston rod (22) in cylinder housing (4) with ring compressor.<br />
Install new O-ring (15) on cylinder head (16).<br />
Slide cylinder head (16) over piston rod (22) and position on cylinder housing (4).<br />
Install cylinder head (16) on cylinder housing (4) with ten new lockwashers (17) and screws (18).<br />
Tighten screws (18) 8-10 Ib-ft (11-14 N.m).<br />
Position new packing (19) in cylinder head (16).<br />
Position retainer (20) on piston rod (22) against packing (19) and install on cylinder head (16) with<br />
three screws (21).<br />
Install orifice plug (12), new ring spacer (11), orifice plug cover (10), two ring spacers (8), and two<br />
adapters (9) in cylinder base (7).<br />
Install three bypass check balls (1), springs (2), and plugs (3) in cylinder housing (4).<br />
Install hinge pin (6) in cylinder base (7) with two screws (13).<br />
Install lubrication fitting (5) on hinge pin (6).<br />
15-44
<strong>TM</strong> 9-<strong>2320</strong>-<strong>260</strong>-<strong>34</strong>-2<br />
15-15.HOIST CYLINDER MAINTENANCE (Contd)<br />
15-45
<strong>TM</strong> 9-<strong>2320</strong>-<strong>260</strong>-<strong>34</strong>-2<br />
15-15. HOIST CYLINDER MAINTENANCE (Contd)<br />
1. Attach two chains to hoist cylinder (2) and lifting device.<br />
WARNING<br />
● All personnel must stand clear during lifting operations.<br />
A swinging or shifting load may cause injury to personnel.<br />
● Ensure lifting capacity is greater than weight (500 lb (227 kg)) of<br />
hoist cylinder. Failure to do so may result in injury to personnel<br />
or damage to equipment.<br />
2. Raise hoist cylinder (2) from supports and position on sub frame (5).<br />
3. Install hoist cylinder (2) on subframe (5) with two bearing caps (4), four new lockwashers (3),<br />
and screws (1).<br />
15-46
<strong>TM</strong> 9-<strong>2320</strong>-<strong>260</strong>-<strong>34</strong>-2<br />
15-15. HOIST CYLINDER MAINTENANCE (Contd)<br />
4. Insert piston rod (11) through hole in crosshead (9) and install with upper crosshead retainer (8),<br />
lower crosshead retainer (10), two new lockwashers (7), and screws (6).<br />
5. Remove chains from hoist cylinder (2) and lifting device.<br />
6. Install two hydraulic hoses (12) on hoist cylinder (2).<br />
FOLLOW-ON TASKS: Install dump roller arms (para. 15-14).<br />
Fill hydraulic reservoir to proper oil level (LO 9-<strong>2320</strong>-<strong>260</strong>-12).<br />
Start engine (<strong>TM</strong> 9-<strong>2320</strong>-<strong>260</strong>-10) and operate dump body through full range.<br />
Check for leaks and proper operation (<strong>TM</strong> 9-<strong>2320</strong>-<strong>260</strong>-10).<br />
15-47
<strong>TM</strong> 9-<strong>2320</strong>-<strong>260</strong>-<strong>34</strong>-2<br />
15-16. HOIST SAFETY LATCH MAINTENANCE<br />
THIS TASK COVERS:<br />
a. Removal d. Assembly<br />
b. Disassembly e. Installation<br />
c. Cleaning and Inspection<br />
INITIAL SETUP<br />
APPLICABLE MODELS<br />
M817<br />
TOOLS<br />
General mechanic’s tool kit<br />
(Appendix B, Item 1)<br />
MATERIALS/PARTS<br />
Two cotter pins (Appendix D, Item 31)<br />
Cotter pin (Appendix D, Item 32)<br />
Five locknuts (Appendix D, Item 169)<br />
No packings (Appendix D, Item 303)<br />
Cap and plug set (Appendix C, Item 6)<br />
REFERENCES (<strong>TM</strong>)<br />
LO 9-<strong>2320</strong>-<strong>260</strong>-12<br />
<strong>TM</strong> 9-<strong>2320</strong>-<strong>260</strong>-10<br />
<strong>TM</strong> 9-<strong>2320</strong>-<strong>260</strong>-<strong>34</strong>P-2<br />
EQUIPMENT CONDITION<br />
● Dump body removed (para. 15-13).<br />
● Hydraulic reservoir drained (LO 9-<strong>2320</strong>-<strong>260</strong>-12).<br />
GENERAL SAFETY INSTRUCTIONS<br />
● Do not operate dump controls when dump body is<br />
removed.<br />
● Spring is under tension. Release tension slowly.<br />
a. Removal<br />
WARNING<br />
Do not operate dump controls when dump body is removed.<br />
Injury to personnel may result if lift cylinder is operated when<br />
not secured.<br />
CAUTION<br />
Cap or plug all openings immediately after disconnecting lines and<br />
hoses to prevent contamination, Failure to do so may result in<br />
damage to equipment.<br />
NOTE<br />
● Tag hoses for installation.<br />
● Have drainage container ready to catch hydraulic oil.<br />
1. Disconnect two hydraulic hoses (1) from safety latch cylinder (10).<br />
2. Remove two packings (2) from safety latch cylinder (10). Discard packings (2).<br />
3. Remove four locknuts (7), washers (8), screws (3), locknut (6), screw (4), and safety latch<br />
assembly (9) from subframe (5). Discard locknuts (7) and (6).<br />
b. Disassembly<br />
1.<br />
2.<br />
3.<br />
Remove cotter pin (23) and washer (22) from pin (13). Discard cotter pin (23).<br />
WARNING<br />
Spring is under tension. Release tension slowly. Failure to do so<br />
may result in injury to personnel.<br />
Slowly release spring (12) and remove pin (13) from mounting bracket (14) and safety hook (11).<br />
Remove cotter pin (19), pin (16), and two washers (20) from safety latch cylinder (10) and safety<br />
hook (11). Discard cotter pin (19).<br />
15-48
<strong>TM</strong> 9-<strong>2320</strong>-<strong>260</strong>-<strong>34</strong>-2<br />
15-16. HOIST SAFETY LATCH MAINTENANCE (Contd)<br />
4.<br />
5.<br />
6.<br />
Remove safety hook (11) from safety latch cylinder (10) and mounting bracket (14).<br />
Remove two lubrication fittings (21) from safety hook (11).<br />
Remove cotter pin (18), pin (17), four washers (15), and safety latch cylinder (10) from mounting<br />
bracket (14). Discard cotter pin (18).<br />
15-49
<strong>TM</strong> 9-<strong>2320</strong>-<strong>260</strong>-<strong>34</strong>-2<br />
15-16. HOIST SAFETY LATCH MAINTENANCE (Contd)<br />
c. Cleaning and Inspection<br />
1. For general cleaning instructions, refer to para. 2-8.<br />
2. Inspect safety hook (1) for cracks, breaks, and heavily worn areas. Replace safety hook (1) if cracked,<br />
broken, or heavily worn.<br />
3. Inspect pins (3), (6), and (7) for bends and cracks. Replace pins (3), (6), or (7) if bent or cracked.<br />
4. Inspect spring (2) for twists, breaks, and collapsed coils. Replace spring (2) if twisted or broken.<br />
5. Inspect safety latch cylinder (8) for twists, cracks, and leaks. Replace safety latch cylinder (8) if<br />
twisted, cracked, or leaking.<br />
1. Install safety latch cylinder (8) on mounting bracket (4) with four washers (5), pin (7), and new<br />
cotter pin (9).<br />
2. Install two lubrication fittings (12) on safety hook (1).<br />
3. Install safety hook (1) on mounting bracket (4) with spring (2), pin (3), washer (13), and new cotter<br />
pin (14).<br />
4. Install safety hook (1) on safety latch cylinder (8) with washer (11), pin (6), washer (11), and new<br />
cotter pin (10).<br />
e. Installation<br />
1. Install mounting bracket (4) and safety latch assembly (23) on subframe (19) with four screws (17),<br />
screw (18), four washers (22), new locknuts (21), and new locknut (20).<br />
2. Install two new packings (16) in safety latch cylinder (8).<br />
3. Connect two hydraulic hoses (15) to safety latch cylinder (8)<br />
15-50
<strong>TM</strong> 9-<strong>2320</strong>-<strong>260</strong>-<strong>34</strong>-2<br />
15-16. HOIST SAFETY LATCH MAINTENANCE (Contd)<br />
FOLLOW-ON TASKS: Install dump body (para. 15-13).<br />
Fill hydraulic reservoir to proper oil level (LO 9-<strong>2320</strong>-<strong>260</strong>-12).<br />
Start engine (<strong>TM</strong> 9-<strong>2320</strong>-<strong>260</strong>-10) and operate dump body through full range.<br />
Check for leaks and proper operation (<strong>TM</strong> 9-<strong>2320</strong>-<strong>260</strong>-10).<br />
15-51
<strong>TM</strong> 9-<strong>2320</strong>-<strong>260</strong>-<strong>34</strong>-2<br />
15-17. HOIST PUMP MAINTENANCE<br />
THIS TASK COVERS:<br />
a. Removal d. Assembly<br />
b. Disassembly e. Installation<br />
c. Cleaning and Inspection<br />
INITIAL SETUP<br />
APPLICABLE MODELS<br />
M817<br />
TOOLS<br />
General mechanic’s tool kit<br />
(Appendix B, Item 1)<br />
Arbor press (Appendix B, Item 7)<br />
Mechanical puller kit (Appendix B, Item 14)<br />
MATERIALS/PARTS<br />
Gasket (Appendix D, Item 62)<br />
Six lockwashers (Appendix D, Item 223)<br />
Oil seal (Appendix D, Item 480)<br />
Woodruff key (Appendix D, Item 551)<br />
Woodruff key (Appendix D, Item 552)<br />
REFERENCES (<strong>TM</strong>)<br />
LO 9-<strong>2320</strong>-<strong>260</strong>-12<br />
<strong>TM</strong> 9-214<br />
<strong>TM</strong> 9-<strong>2320</strong>-<strong>260</strong>-10<br />
<strong>TM</strong> 9-<strong>2320</strong>-<strong>260</strong>-20<br />
<strong>TM</strong> 9-<strong>2320</strong>-<strong>260</strong>-<strong>34</strong> P-2<br />
EQUIPMENT CONDITION<br />
• Power takeoff-to-hydraulic pump propeller shaft<br />
removed (<strong>TM</strong> 9-<strong>2320</strong>-<strong>260</strong>-20).<br />
• Hydraulic reservoir drained (LO 9-<strong>2320</strong>-<strong>260</strong>-12).<br />
a. Removal<br />
Remove six screws (1), lockwashers (2), pump (5), and gasket (4) from control valve adapter (3). Discard<br />
gasket (4) and lockwashers (2).<br />
b. Disassembly<br />
NOTE<br />
Tag front and rear wear plates for installation.<br />
1. Remove woodruff key (20) from shaft (15). Discard woodruff key (20).<br />
2. Remove eight screws (21), washers (20), front cover (19), and front wear plate (16) from pump<br />
body (11) and rear cover (6).<br />
3. Using puller, remove two bearings (17) and oil seal (18) from front cover (19). Discard oil seal (18).<br />
CAUTION<br />
Care must be taken when removing shafts and gears to prevent<br />
damage to gear teeth.<br />
4. Remove shafts (15) and (23) with gears (13) from pump body (11) and rear cover (6).<br />
5. Using arbor press, remove gears (13) and woodruff key (14) from shafts (15) and (23). Discard<br />
woodruff key (14).<br />
6. Remove pump body (11) and rear wear plate (9) from rear cover (6).<br />
7. Using puller, remove two bearings (8) and plug (7) from rear cover (6).<br />
NOTE<br />
Perform step 8 if dowel pins require replacement.<br />
8. Using puller, remove two dowel pins (10) and (12) from pump body (11). Discard dowel pins (10)<br />
and (12).<br />
15-52
<strong>TM</strong> 9-<strong>2320</strong>-<strong>260</strong>-<strong>34</strong>-2<br />
15-17. HOIST PUMP MAINTENANCE (Contd)<br />
15-53
<strong>TM</strong> 9-<strong>2320</strong>-<strong>260</strong>-<strong>34</strong>-2<br />
15-17. HOIST PUMP MAINTENANCE (Contd)<br />
c. Cleaning and Inspection<br />
1. For general cleaning instructions, refer to para. 2-8.<br />
2. Inspect front cover (14), rear cover (1), and pump body (6) for cracks and breaks. Replace front<br />
cover (14), rear cover (1), or pump body (6) if cracked or broken.<br />
3. Inspect front wear plate (11) and rear wear plate (4) for scores, scratches, nicks, and cracks. Replace<br />
front wear plate (11) or rear wear plate (4) if scored, scratched, nicked, or cracked.<br />
4. Inspect two gears (8) for nicks, burrs, or broken teeth. Replace gears (8) if nicked, burred, or teeth<br />
are broken.<br />
d. Assembly<br />
NOTE<br />
Notches on front cover, rear cover, and pump body must face left<br />
side of vehicle.<br />
1. Using arbor press, install two new dowel pins (5) and (7) on pump body (6).<br />
2. Install plug (2) in rear cover (1).<br />
3. Using arbor press, install two bearings (3) in rear cover (1).<br />
4. Install rear wear plate (4) and pump body (6) on rear cover (1).<br />
5. Install new woodruff key (9) on shaft (10).<br />
6. Using arbor press, install gears (8) on shafts (10) and (18).<br />
CAUTION<br />
Care must be used when installing gears and shafts to prevent<br />
damage to gear teeth.<br />
7. Install shafts (10) and (18) with gears (8) in pump body (6) and rear cover (1).<br />
8. Install new oil seal (13) in front cover (14).<br />
9. Using arbor press, install two bearings (12) in front cover (14).<br />
10. Install front wear plate (11) and front cover (14) on pump body (6) and rear cover (1) with eight<br />
washers (17) and screws (16).<br />
11. Install new woodruff key (15) on shaft (10).<br />
e. Installation<br />
Install new gasket (22) and pump (23) on control valve adapter (21) with six new Iockwashers (20)<br />
and screws (19).<br />
15-54
<strong>TM</strong> 9-<strong>2320</strong>-<strong>260</strong>-<strong>34</strong>-2<br />
15-17. HOIST PUMP MAINTENANCE (Contd)<br />
FOLLOW-ON TASKS: Install power takeoff-to-hydraulic pump propeller shaft (<strong>TM</strong> 9-<strong>2320</strong>-<strong>260</strong>-20).<br />
Fill hydraulic reservoir to proper oil level (LO 9-<strong>2320</strong>-<strong>260</strong>-12).<br />
Start engine (<strong>TM</strong> 9-<strong>2320</strong>-<strong>260</strong>-10) and operate dump body through full range.<br />
Check for leaks and proper operation (<strong>TM</strong> 9-<strong>2320</strong>-<strong>260</strong>-10).<br />
15-55
<strong>TM</strong> 9-<strong>2320</strong>-<strong>260</strong>-<strong>34</strong>-2<br />
15-18. SUBFRAME REPLACEMENT<br />
THIS TASK COVERS:<br />
a. Removal b. Installation<br />
INITIAL SETUP<br />
APPLICABLE MODELS<br />
M817<br />
TOOLS<br />
General mechanic’s tool kit<br />
(Appendix B, Item 1)<br />
Lifting device<br />
Two chains<br />
Two guide lines<br />
MATERIALS/PARTS<br />
Four cotter pins (Appendix D, Item 20)<br />
Eight locknuts (Appendix D, Item 173)<br />
REFERENCES (<strong>TM</strong>]<br />
<strong>TM</strong> 9-<strong>2320</strong>-<strong>260</strong>-20<br />
<strong>TM</strong> 9-<strong>2320</strong>-<strong>260</strong>-<strong>34</strong>P-2<br />
EQUIPMENT CONDITION<br />
● Dump body removed (para. 15-13).<br />
● Power takeoff-to-hydraulic pump propeller shaft<br />
removed (<strong>TM</strong> 9-<strong>2320</strong>-<strong>260</strong>-20).<br />
● Splash shields removed (<strong>TM</strong> 9-<strong>2320</strong>-<strong>260</strong>-20).<br />
GENERAL SAFETY INSTRUCTIONS<br />
● All personnel must stand clear during lifting<br />
operations.<br />
● Ensure lifting capacity is greater than weight of<br />
subframe.<br />
1, Remove eight locknuts (4) and screws (6) from subframe mounting plate (3) and frame (5). Discard<br />
locknuts (4).<br />
2. Remove four cotter pins (11) from nuts (12) and screws (8). Discard cotter pins (11).<br />
3. Remove four nuts (12), washers (13), screws (8), springs (14), and eight keepers (9) from four<br />
subframe mounting brackets (7).<br />
4. Attach two chains to subframe channels (2).<br />
5. Attach lifting device to chains and raise lifting device until slack is removed from chains.<br />
6. Attach two guide lines to subframe (1).<br />
WARNING<br />
All personnel must stand clear during lifting operations.<br />
A swinging or shifting load may cause injury to personnel.<br />
Ensure lifting capacity is greater than weight (2,700 lb<br />
(1,226 kg)) of subframe. Failure to do so may result in injury to<br />
personnel or damage to equipment.<br />
NOTE<br />
Two assistants will help with step 7.<br />
7. Raise subframe (1) away from sill (10) and frame (5) and position on supports.<br />
8. Remove two guide lines from subframe (1).<br />
9. Remove chains from subframe channels (2) and lifting device.<br />
10. Remove plug (15), gage (19), spacer (16), and screen (18) from tiller (17) and subframe (1).<br />
15-56
<strong>TM</strong> 9-<strong>2320</strong>-<strong>260</strong>-<strong>34</strong>-2<br />
15-18. SUBFAME REPLACEMENT (Contd)<br />
15-57
<strong>TM</strong> 9-<strong>2320</strong>-<strong>260</strong>-<strong>34</strong>-2<br />
15-18. SUBFRAME REPLACEMENT (Contd)<br />
b. Installation<br />
1.<br />
2.<br />
3.<br />
Install screen (18), spacer (16), gage (19), and plug (15) in filler (17) and subframe (1).<br />
Attach two chains to subframe channels (2) and lifting device.<br />
Attach two guide lines to subframe (1).<br />
WARNING<br />
4.<br />
5.<br />
6.<br />
7.<br />
8.<br />
9.<br />
All personnel must stand clear during lifting operations.<br />
A swinging or shifting load may cause injury to personnel.<br />
Ensure lifting capacity is greater than weight (2,700 lb<br />
(1,226 kg)) of subframe. Failure to do so may result in injury to<br />
personnel or damage to equipment.<br />
NOTE<br />
Two assistants will help with step 4.<br />
Raise subframe (1) and position onto sill (10) and frame (5). Ensure holes of subframe mounting<br />
plates (3) and subframe mounting brackets (7) aline with holes in frame (5).<br />
Install subframe (1) on frame (5) with four keepers (9), four springs (14), keepers (9), screws (8),<br />
washers (13), and nuts (12).<br />
Install four new cotter pins (11) through nuts (12) and screws (8).<br />
Install two subframe mounting plates (3) on frame (5) with eight screws (6) and new locknuts (4).<br />
Remove two guide lines from subframe (1).<br />
Remove chains from subframe channels (2) and lifting device.<br />
15-58
<strong>TM</strong> 9-<strong>2320</strong>-<strong>260</strong>-<strong>34</strong>-2<br />
15-18. SUBFRAME REPLACEMENT (Contd)<br />
FOLLOW-ON TASKS: Install dump body (para. 15-13).<br />
Install power takeoff-to-hydraulic pump propeller shaft (<strong>TM</strong> 9-<strong>2320</strong>-<strong>260</strong>-20).<br />
Install splash shields (<strong>TM</strong> 9-<strong>2320</strong>-<strong>260</strong>-20).<br />
15-59
<strong>TM</strong> 9-<strong>2320</strong>-<strong>260</strong>-<strong>34</strong>-2<br />
15-19. CONTROL VALVE MAINTENANCE<br />
THIS TASK COVERS:<br />
a. Removal d. Assembly<br />
b. Disassembly e. Installation<br />
c. Cleaning and inspection<br />
INITIAL SETUP<br />
APPLICABLE MODELS<br />
MATERIALS/PARTS (Contd)<br />
M817 O-ring (Appendix D, Item 285)<br />
TOOLS Cap and plug set (Appendix C, Item 6)<br />
General mechanic’s tool kit<br />
REFERENCES (<strong>TM</strong>)<br />
(Appendix B, Item 1) LO 9-<strong>2320</strong>-<strong>260</strong>-12<br />
MATERIALS/PARTS <strong>TM</strong> 9-<strong>2320</strong>-<strong>260</strong>-10<br />
<strong>TM</strong> 9-<strong>2320</strong>-<strong>260</strong>-<strong>34</strong>P-2<br />
Four spacer rings (Appendix D, Item 519)<br />
Fifteen lockwashers (Appendix D, Item 215) EQUIPMENT CONDITION<br />
Two gaskets (Appendix D, Item 94) ● Hydraulic reservoir drained (LO 9-<strong>2320</strong>-<strong>260</strong>-12).<br />
Gasket (Appendix D, Item 64) ● Hoist control box removed (<strong>TM</strong> 9-<strong>2320</strong>-<strong>260</strong>-20).<br />
a. Removal<br />
CAUTION<br />
Clean area around hoses and lines before removal to prevent entry<br />
of dirt. Damage wiII occur if dirt or dust enters system.<br />
NOTE<br />
● Tag hoses for installation.<br />
● Have drainage container ready to catch hydraulic oil.<br />
● Cap or plug openings immediately after disconnecting lines and<br />
hoses to prevent contamination. Failure to do so may result in<br />
damage to equipment. Remove all caps or plugs prior to<br />
connection.<br />
1. Disconnect six hoses (1) from four unions (2) and two elbows (4).<br />
2. Remove four unions (2), two elbows (4), and tee (7) from two manifolds (3).<br />
3. Remove drain valve (5) and bushing (6) from tee (7).<br />
4. Remove seven screws (19), lockwashers (20), cover (21), gasket (22), control valve (8), and gasket (9)<br />
from mounting bracket (17) and reservoir (16). Discard lockwashers (20) and gaskets (22) and (9).<br />
NOTE<br />
Screws attaching valve head to control valve are of different<br />
lengths. Tag all screws for installation.<br />
5. Remove four screws (12), lockwashers (11), two screws (13) and (14), four lockwashers (15),<br />
valve head (10), and gasket (18) from control valve (8). Discard lockwashers (11) and (15) and<br />
gasket (18).<br />
6. Remove two manifolds (3) from control valve (8).<br />
b. Disassembly<br />
1. Remove plug (23), spacer ring (24), spring (25), and plunger (26) from adapter (31). Discard spacer<br />
ring (24).<br />
2. Remove plug (29), spacer ring (30), spring (28) and plunger (27) from adapter (31). Discard spacer<br />
ring (30).<br />
3. Remove plug (32), spring (33), and ball (<strong>34</strong>) from valve cap (35).<br />
4. Remove valve cap (35) and spacer ring (44) from control valve body (36) and spool (43). Discard<br />
spacer ring (44).<br />
5. Remove nut (42), trunnion (41), boot (40), plug (39), spacer ring (38), and O-ring (37) from spool (43).<br />
Discard O-ring (37) and spacer ring (38).<br />
6. Remove spool (43) from control valve body (36).<br />
15-60
<strong>TM</strong> 9-<strong>2320</strong>-<strong>260</strong>-<strong>34</strong>-2<br />
15-19. CONTROL VALVE MAINTENANCE (Contd)<br />
15-61
<strong>TM</strong> 9-<strong>2320</strong>-<strong>260</strong>-<strong>34</strong>-2<br />
15-19. CONTROL VALVE MAINTENANCE (Contd)<br />
c. Cleaning and Inspection<br />
1. For general cleaning instructions, refer to para. 2-8.<br />
2. Inspect adapter (22) for breaks, cracks, and pitted or worn bores. Replace adapter (22) assembly<br />
if broken, cracked, or bores are pitted or worn.<br />
3. Inspect two manifolds (23) for cracks and damaged threads. Replace manifolds (23) if cracked or<br />
threads are damaged.<br />
4. Inspect control valve body (5) for cracks, scratches, and worn bore threads. Replace control valve<br />
body (5) if cracked, scratched, or bore threads are worn,<br />
5. Inspect spool (12) for scratches, nicks, and burrs. Replace spool (12) if scratched, nicked, or burred.<br />
d. Assembly<br />
1. Install spool (12) in control valve body (5).<br />
2. Install new spacer ring (13) and valve cap (4) on control valve body (5) and spool (12).<br />
3. Install ball (3), spring (2), and plug (1) in valve cap (4).<br />
4. Install new O-ring (6), new spacer ring (7), plug (8), boot (9), trunnion (10), and nut (11) on spool (12).<br />
5. install plunger (18), spring (19), new spacer ring (21), and plug (20) on adapter (22).<br />
6. Install plunger (17), spring (16), new spacer ring (15), and plug (14) on adapter (22).<br />
I e. Installation I<br />
1. Install two manifolds (23) on control valve (24).<br />
2. Install new gasket (<strong>34</strong>) and valve head (26) on control valve (24) with four new lockwashers (27),<br />
screws (28), four new lockwashers (31), and two screws (29) and (30).<br />
3. Install new gasket (<strong>34</strong>), control valve (24), new gasket (38) and cover (37) on mounting bracket (33)<br />
and reservoir (32) with seven new lockwashers (36) and screws (35).<br />
4. Install bushing (43) and drain valve (42) on tee (44).<br />
5. Install tee (44), two elbows (41), and four unions (40) on two manifolds (23).<br />
6. Connect six hoses (39) on four unions (40) and two elbows (41).<br />
15-62
<strong>TM</strong> 9-<strong>2320</strong>-<strong>260</strong>-<strong>34</strong>-2<br />
15-19. CONTROL VALVE MAINTENANCE (Contd)<br />
FOLLOW-ON TASKS: Install hoist control box (<strong>TM</strong> 9-<strong>2320</strong>-<strong>260</strong>-20).<br />
Fill hydraulic reservoir to proper oil lever (LO 9-<strong>2320</strong>-<strong>260</strong>-12).<br />
Start engine (<strong>TM</strong> 9-<strong>2320</strong>-<strong>260</strong>-10) and operate dump body through full range.<br />
Check for leaks and proper operation (<strong>TM</strong> 9-<strong>2320</strong>-<strong>260</strong>-10).<br />
15-63
<strong>TM</strong> 9-<strong>2320</strong>-<strong>260</strong>-<strong>34</strong>-2<br />
15-20. HYDRAULIC HOSES REPLACEMENT<br />
THIS TASK COVERS:<br />
a. Removal b. Installation<br />
INITIAL SETUP<br />
APPLICABLE MODELS<br />
M817<br />
TOOLS<br />
General mechanic’s tool kit<br />
(Appendix B, Item 1)<br />
Lifting device<br />
Chain<br />
MATERIALS/PARTS<br />
Cap and plug set (Appendix C, Item 6)<br />
Antiseize tape (Appendix C, Item 50)<br />
EQUIPMENT CONDITION<br />
● Parking brake set (<strong>TM</strong> 9-<strong>2320</strong>-<strong>260</strong>-10).<br />
● Hydraulic reservoir drained (LO 9-<strong>2320</strong>-<strong>260</strong>-12).<br />
GENERAL SAFETY INSTRUCTIONS<br />
● Position safety braces before working under raised<br />
dump body.<br />
● All personnel must stand clear during lifting<br />
operations.<br />
● Ensure lifting capacity is greater than weight of<br />
dump body.<br />
REFERENCES (<strong>TM</strong>)<br />
LO 9-<strong>2320</strong>-<strong>260</strong>-12<br />
<strong>TM</strong> 9-<strong>2320</strong>-<strong>260</strong>-10<br />
<strong>TM</strong> 9-<strong>2320</strong>-<strong>260</strong>-<strong>34</strong>P-2<br />
WARNING<br />
Never work under raised dump body until safety braces are<br />
properly positioned. Injury to personnel may result if dump body<br />
suddenly lowers.<br />
All personnel must stand clear during lifting operations.<br />
A swinging or shifting load may cause injury to personnel.<br />
Ensure lifting capacity is greater than weight (2,700 lb<br />
(1,226 kg)) of dump body. Failure to do so fray result in injury<br />
to personnel or damage to equipment.<br />
CAUTION<br />
Cap or plug all openings immediately after disconnecting lines or<br />
hoses to prevent contamination. Remove plugs prior to connection.<br />
Failure to do so may result in damage to hydraulic system.<br />
1. Install chain on cab protector (1) and lifting device.<br />
NOTE<br />
Assistant will help with step 2.<br />
2. Raise dump body (2) and position on two safety braces (3).<br />
3. Remove chain from dump body (2) and lifting device.<br />
15-64
<strong>TM</strong> 9-<strong>2320</strong>-<strong>260</strong>-<strong>34</strong>-2<br />
15-20. HYDRAULIC HOSES REPLACEMENT (Contd)<br />
15-65
<strong>TM</strong> 9-<strong>2320</strong>-<strong>260</strong>-<strong>34</strong>-2<br />
15-20. HYDRAULIC HOSES REPLACEMENT (Contd)<br />
NOTE<br />
Tag hoses for installation.<br />
Have drainage container ready to catch hydraulic oil.<br />
4. Remove two hoses (6) from two elbows (5).<br />
5. Remove two hoses (6) from safety latch cylinder (12).<br />
6. Remove three hoses (2) from three unions (3) in ports of upper manifold (4) and lower manifold (7).<br />
7. Remove two hoses (1) and (2) from two hoist cylinders (13).<br />
8. Remove two elbows (5) from center ports of upper manifold (4) and lower manifold (7).<br />
9. Remove three unions (3) from upper manifold (4) and lower manifold (7).<br />
NOTE<br />
Steps 10 through 13 apply to hydraulic hose connected to lower<br />
manifold and left hoist cylinder.<br />
10. Remove hose (1) from union (11) and hoist cylinder (13).<br />
11. Remove union (11) from tee (10).<br />
12. Remove valve cock (8) and bushing (9) from tee (10).<br />
13. Remove tee (10) from lower manifold (7).<br />
b. Installation<br />
NOTE<br />
Steps 2 through 5 apply to hydraulic hose connected to lower<br />
manifold and left hoist cylinder.<br />
1. Wrap hoses (1) and (2), unions (3) and (11), tee (10), bushing (9), valve cock (8), and elbows (5).<br />
2. Install tee (10) in port of lower manifold (7).<br />
3. Install bushing (9) and valve cock (8) in tee (10).<br />
4. Install union (11) in tee (10).<br />
5. Install hose (1) on union (11) and hoist cylinder (13).<br />
6. Install two elbows (5) in center ports of upper manifold (4) and lower manifold (7).<br />
7. Install three unions (3) in remaining ports of upper manifold (4) and lower manifold (7).<br />
8. Install two hoses (1) and (2) on two hoist cylinders (13).<br />
9. Install three hoses (2) on three unions (3).<br />
10. Install two hoses (6) on safety latch cylinder ( 12).<br />
11. Install two hoses (6) on two elbows (5).<br />
15-66
<strong>TM</strong> 9-<strong>2320</strong>-<strong>260</strong>-<strong>34</strong>-2<br />
15-20. HYDRAULIC HOSES REPLACEMENT (Contd)<br />
15-67
<strong>TM</strong> 9-<strong>2320</strong>-<strong>260</strong>-<strong>34</strong>-2<br />
15-20. HYDRAULIC HOSES REPLACEMENT (Contd)<br />
12. Install chain on cab protector (1) and lifting device.<br />
WARNING<br />
● Never work under raised dump body until safety braces are<br />
properly positioned. Injury to personnel may result if dump body<br />
suddenly lowers.<br />
● All personnel must stand clear during lifting operations.<br />
A swinging or shifting load may cause injury to personnel.<br />
● Ensure lifting capacity is greater than weight (2,700 lb<br />
(1,226 kg)) of dump body. Failure to do so may result in injury<br />
to personnel or damage to equipment.<br />
NOTE<br />
Assistant will help with steps 12 and 13.<br />
13. Raise dump body (2) and lower onto two safety braces (3).<br />
14. Lower dump body (2) and remove chain from cab protector (1) and lifting device.<br />
FOLLOW-ON TASKS: Fill hydraulic reservoir to proper oil level (LO 9-<strong>2320</strong>-<strong>260</strong>-12).<br />
Start engine (<strong>TM</strong> 9-<strong>2320</strong>-<strong>260</strong>-10) and operate dump body through full range.<br />
Check for leaks and proper operation (<strong>TM</strong> 9-<strong>2320</strong>-<strong>260</strong>-10).<br />
15-68
<strong>TM</strong> 9-<strong>2320</strong>-<strong>260</strong>-<strong>34</strong>-2<br />
15-21. SAFETY BRACE REPLACEMENT<br />
THIS TASK COVERS:<br />
a. Removal b. Installation<br />
lNITIAL SETUP<br />
APPLICABALE MODELS<br />
REFERENCES (<strong>TM</strong>)<br />
M817 <strong>TM</strong> 9-<strong>2320</strong>-<strong>260</strong>-10<br />
<strong>TM</strong> 9-<strong>2320</strong>-<strong>260</strong>-<strong>34</strong> P-1<br />
MATERIAIS/PARTS<br />
General mechanic’s tool kit<br />
(Appendix B, Item 1)<br />
MATERIALS/PARTS<br />
Lockwasher (Appendix D, Item 224)<br />
EQUIPMENT CONDITION<br />
• Parking brake set (<strong>TM</strong> 9-<strong>2320</strong>-<strong>260</strong>-10).<br />
• Dump body in lowered position<br />
(<strong>TM</strong> 9-<strong>2320</strong>-<strong>260</strong>-10).<br />
a. Removal<br />
1. Remove nut (4), lockwasher (3), and screw (6) from hinge pin (1) and bracket (2). Discard<br />
lockwasher (3).<br />
2. Using punch and hammer, remove hinge pin (1) from bracket (2).<br />
3. Remove safety brace (5) from bracket (2).<br />
b. Installation<br />
1. Position safety brace (5) in bracket (2) with hinge pin (1) hole alined with hole in bracket (2),<br />
2. Insert hinge pin (1) in bracket (2) through safety brace (5) and install with screw (6), new<br />
lockwasher (3), and nut (4).<br />
15-69
<strong>TM</strong> 9-<strong>2320</strong>-240-<strong>34</strong>-2<br />
Section V. VAN BODY MAINTENANCE<br />
15-22. DESCRIPTION AND DATA - VAN BODY<br />
The M820, M820A1, and M820A2 are expansible van body models used for maintenance, electrical,<br />
supply, power, and base station operations. The main difference between these models is that the M820A2<br />
expansible van has a hydraulic Iiftgate. Further information and tabulated data on M820, M820A1, and<br />
M820A2 expansible vans can be found in <strong>TM</strong> 9-<strong>2320</strong>-<strong>260</strong>-10.<br />
M820 AND M820A1 VAN BODIES<br />
M820A2 VAN BODY (WITH LIFTGATE)<br />
15-23. VAN BODY COMPONENTS MAINTENANCE INDEX<br />
PARA.<br />
NO.<br />
15-24.<br />
15-25.<br />
15-26.<br />
15-27.<br />
15-28.<br />
15-29.<br />
15-30.<br />
15-31,<br />
15-32.<br />
15-33.<br />
15-<strong>34</strong>.<br />
15-35.<br />
15-36.<br />
15-37.<br />
15-38.<br />
15-39.<br />
TITLE<br />
Van Body Maintenance<br />
Retractable Beam Driveshaft and Lock Maintenance<br />
Retractable Beam Replacement<br />
Retractable Beam Rollers Replacement<br />
Rear Doors Maintenance<br />
Side Doors Maintenance<br />
Underframe Repair<br />
Hinged Floor Maintenance<br />
Exterior Side Panel Maintenance<br />
Hinged End Panel Maintenance<br />
Rear Wall Interior Panels Replacement<br />
Interior Side Panels and Latches Replacement<br />
Ceiling and Frame Maintenance<br />
Hinged Roof Maintenance<br />
Ceiling Registers and Deflectors Replacement<br />
Front Wall Register Replacement<br />
PAGE<br />
NO.<br />
15-72<br />
15-76<br />
15-80<br />
15-82<br />
15-86<br />
15-95<br />
15-100<br />
15-102<br />
15-106<br />
15-113<br />
15-118<br />
15-120<br />
15-131<br />
15-140<br />
15-154<br />
15-156<br />
15-70
<strong>TM</strong> 9-<strong>2320</strong>-<strong>260</strong>-<strong>34</strong>-2<br />
15-23. VAN BODY COMPONENTS MAINTENANCE INDEX (Contd)<br />
PARA.<br />
NO.<br />
15-40.<br />
15-41.<br />
15-42.<br />
15-43.<br />
15-44.<br />
15-45.<br />
15-46.<br />
15-47.<br />
15-48.<br />
15-49.<br />
15-50.<br />
15-51.<br />
15-52.<br />
15-53.<br />
15-54.<br />
15-55.<br />
15-56.<br />
15-57.<br />
15-58.<br />
15-59.<br />
15-60.<br />
15-61.<br />
15-62.<br />
TITLE<br />
Ceiling Rear Cover Replacement (M820A1)<br />
Ceiling Rear Cover Replacement (M820, M820A2)<br />
Ceiling Transition Maintenance (M820, M820A2)<br />
Ceiling Transition Maintenance (M820A1)<br />
Ceiling Filler and Side Panels Replacement<br />
Ceiling Air Ducts and Supports Maintenance<br />
Bonnet Frame Repair<br />
Bonnet Access Door Maintenance<br />
Bonnet Door Maintenance<br />
Air Conditioner Replacement<br />
Liftgate Replacement (M820A2)<br />
Liftgate Platform and Hinge Plate Maintenance<br />
(M820A2)<br />
Liftgate Lift Frame Maintenance (M820A2)<br />
Liftgate Main Frame Maintenance (M820A2)<br />
Liftgate Clutches Replacement (M820A2)<br />
Liftgate Control Linkage Maintenance (M820A2)<br />
Liftgate Auxiliary Pump and Bracket Replacement<br />
(M820A2)<br />
Liftgate Hydraulic Tubing Replacement (M820A2)<br />
Liftgate Control Valve Replacement (M820A2)<br />
Liftgate Cylinder Maintenance (M820A2)<br />
Liftgate Closing Cylinders Maintenance (M820A2)<br />
Liftgate Hydraulic Pump Replacement (M820A2)<br />
Liftgate Pump Oil Tank Replacement (M820A2)<br />
PAGE<br />
NO.<br />
15-157<br />
15-158<br />
15-160<br />
15-164<br />
15-166<br />
15-168<br />
15-172<br />
15-178<br />
15-182<br />
15-188<br />
15-196<br />
15-200<br />
15-204<br />
15-206<br />
15-208<br />
15-210<br />
15-214<br />
15-216<br />
15-224<br />
15-226<br />
15-230<br />
15-2<strong>34</strong><br />
15-236<br />
15-71
<strong>TM</strong> 9-<strong>2320</strong>-<strong>260</strong>-<strong>34</strong>-2<br />
15-24. VAN BODY MAINTENANCE<br />
THIS TASK COVERS:<br />
a. Removal c. Installation<br />
b. Inspection<br />
INITIAL SETUP<br />
APPLICABLE MODELS<br />
M820, M820A1, M820A2<br />
TOOLS<br />
General mechanic’s tool kit<br />
(Appendix B, Item 1)<br />
Rivet gun (Appendix B, Item 120)<br />
Lifting device<br />
Two chains<br />
Two guide lines<br />
Wooden supports<br />
MATERIALS/PARTS<br />
Twelve locknuts (Appendix D, Item 193)<br />
Ten locknuts (M820, M820A2)<br />
(Appendix D, Item 177)<br />
Eight locknuts (Appendix D, Item 192)<br />
Eight rivets (Appendix D, Item 366)<br />
PERSONNEL REQUIRED<br />
Three<br />
REFERENCES (<strong>TM</strong>)<br />
<strong>TM</strong> 9-<strong>2320</strong>-<strong>260</strong>-10<br />
<strong>TM</strong> 9-<strong>2320</strong>-<strong>260</strong>-<strong>34</strong>P-2<br />
EQUIPMENT CONDITION<br />
Parking brake set (<strong>TM</strong> 9-<strong>2320</strong>-<strong>260</strong>-10).<br />
Ladders removed (<strong>TM</strong> 9-<strong>2320</strong>-<strong>260</strong>-10).<br />
Liftgate removed (M820A2) (para. 15-50).<br />
GENERAL SAFETY INSTRUCTIONS<br />
All personnel must stand clear during lifting<br />
operations.<br />
Ensure lifting, capacity is greater than weight of<br />
van body.<br />
Support capacity must be greater than the weight<br />
of van body.<br />
I a. Removal I<br />
NOTE<br />
M820, M820A1, and M820A2 van bodies are maintained the same<br />
except where noted.<br />
1.<br />
2.<br />
3.<br />
4.<br />
5.<br />
Remove four locknuts (23), screws (17), washers (18), springs (19), and springs (20) from two frame<br />
brackets (22) and van body (2). Discard locknuts (23).<br />
Remove eight locknuts (5) and screws (11) from two frame brackets (8), frame brackets (15), and van<br />
body (2). Discard locknuts (5).<br />
NOTE<br />
Perform step 3 for M820 and M820A2 vehicles.<br />
Remove ten locknuts (3) and bevel washers (4) from van body (2). Discard locknuts (3).<br />
Install chains to four lifting brackets (1) and lifting device.<br />
Attach guide lines to van body (2).<br />
WARNING<br />
● All personnel must stand clear during lifting operations.<br />
A shifting or swinging load may result in injury to personnel.<br />
● Ensure lifting capacity is greater than weight (9,055 lb<br />
(4,111 kg)) of van body. Failure to do so may result in injury<br />
to personnel or damage to equipment.<br />
● Support capacity must be greater than weight of van body.<br />
Ensure support capacity is not less than 9,055 lb (4,111 kg).<br />
Failure to do so may result in injury to personnel or damage<br />
to equipment.<br />
15-72
<strong>TM</strong> 9-<strong>2320</strong>-<strong>260</strong>-<strong>34</strong>-2<br />
15-24. VAN BODY MAINTENANCE (Contd)<br />
6,<br />
7.<br />
8.<br />
9.<br />
10.<br />
11.<br />
12.<br />
13.<br />
NOTE<br />
Two assistants will help with lifting operations.<br />
Raise van body (2) from frame (10).<br />
NOTE<br />
● Perform step 7 for M820 and M820A2 vehicles.<br />
● Perform step 8 for M820A1 vehicles.<br />
Remove four blocks (6), ten screws (13), washers (14), and four sills (7) from van body (2).<br />
Remove four blocks (6) and sills (7) from frame (10).<br />
Remove van body (2) from frame (10) and lower onto wooden supports.<br />
Remove lifting device and chains from lifting brackets (1).<br />
Remove guide lines from van body (2).<br />
NOTE<br />
Perform steps 12 and 13 if frame brackets are damaged.<br />
Remove eight locknuts (9), four screws (12), screws (16), two frame brackets (8), and frame<br />
brackets (15) from frame (10). Discard locknuts (9).<br />
Remove eight rivets (21) and two frame brackets (22) from frame (10). Discard rivets (21).<br />
15-73
<strong>TM</strong> 9-<strong>2320</strong>-<strong>260</strong>-<strong>34</strong>-2<br />
15-24. VAN BODY MAINTENANCE (Contd)<br />
b. Inspection<br />
Inspect sills (7) and blocks (6) for breaks, cracks, and rotting. Replace sills (7) or blocks (6) if broken,<br />
cracked, or rotten.<br />
c. Installation<br />
NOTE<br />
Perform steps 1 and 2 if frame brackets were removed.<br />
1. Install two frame brackets (22) on frame ( 10) with eight new rivets (21).<br />
2. Install two frame brackets (15) and frame brackets (8) on frame (10) with four screws (16).<br />
screws (12), and eight new locknuts (9).<br />
3. Attach chains on four lifting brackets (1) and lifting device.<br />
4. Attach guide lines to van body (2).<br />
WARNING<br />
5.<br />
6.<br />
7.<br />
8.<br />
9.<br />
10.<br />
11.<br />
12.<br />
● All personnel must stand clear during lifting operations.<br />
A swinging or shifting load may result in injury to personnel.<br />
● Ensure lifting capacity is greater than weight (9,055 lb<br />
(4,111 kg)) of van body. Failure to do so may result in damage to<br />
equipment or injury to personnel.<br />
NOTE<br />
● Perform step 5 for M820 and M820A2 vehicles.<br />
● Perform step 6 for M820A1 vehicles.<br />
● Two assistants will help with lifting operations.<br />
Raise van body (2) from wooden supports and install four sills (7) on van body (2) with ten<br />
washers (14), screws (13), bevel washers (4), and new locknuts (3).<br />
Position four sills (7) on frame (10).<br />
Position four blocks (6) on frame brackets (8) and (15).<br />
Raise van body (2) and position over frame (10). Aline holes of frame brackets (8),(15), and (22) with<br />
van body (2) and lower van body (2) on frame (10).<br />
Install van body (2) on two frame brackets (15) and frame brackets (8) with eight screws (11) and<br />
new locknuts (5).<br />
Install van body (2) on two frame brackets (22) with four springs (20), springs (19).<br />
washers (18), screws (17), and new locknuts (23).<br />
Remove lifting device and chains from four lifting brackets (1).<br />
Remove guide lines from van body (2).<br />
15-74
<strong>TM</strong> 9-<strong>2320</strong>-<strong>260</strong>-<strong>34</strong>-2<br />
15-24. VAN BODY MAINTENANCE (Contd)<br />
para. 15-50 <strong>TM</strong> 9-<strong>2320</strong>-<strong>260</strong>-10<br />
15-75
<strong>TM</strong> 9-<strong>2320</strong>-<strong>260</strong>-<strong>34</strong>-2<br />
15-25. RETRACTABLE BEAM DRIVESHAFT AND LOCK MAINTENANCE<br />
THIS TASK COVERS:<br />
a. Removal c. Installation<br />
b. Cleaning and Inspection<br />
INITIAL SETUP<br />
APPLICABLE MODELS<br />
M820, M820A1, M820A2<br />
TOOLS<br />
General mechanic’s tool kit<br />
(Appendix B, Item 1)<br />
MATERIALS/PARTS<br />
Five woodruff keys (Appendix D, Item 560)<br />
Locknut (Appendix D, Item 194)<br />
GAA grease (Appendix C, Item 14)<br />
Lubricating oil (Appendix C, Item 21)<br />
Emery cloth (Appendix C, Item 8)<br />
REFERENCES (<strong>TM</strong>)<br />
<strong>TM</strong> 9-<strong>2320</strong>-<strong>260</strong>-10<br />
<strong>TM</strong> 9-<strong>2320</strong>-<strong>260</strong>-<strong>34</strong>P-2<br />
EQUIPMENT CONDITION<br />
Parking brake set (<strong>TM</strong> 9-<strong>2320</strong>-<strong>260</strong>-10).<br />
SPECIAL ENVIRONMENTAL CONDITION<br />
Vehicle must be on level surface.<br />
a. Removal<br />
NOTE<br />
Retractable beam driveshafts and locks are replaced the same for<br />
M820, M820A1, and M820A2 vehicles. This procedure covers the<br />
M820A2.<br />
1. Remove locknut (1), screw (4), pawl (3), and lock (2) from underframe (5) and stud (8). Discard<br />
locknut (1).<br />
2. Remove thirty screws (7) and five covers (6) from underframe (5).<br />
3. Remove four setscrews (17) from four bushings (16).<br />
CAUTION<br />
Do not bend or strain ratchet shaft during removal. Doing so may<br />
result in damage to equipment.<br />
NOTE<br />
Lubricate ratchet shaft prior to removal.<br />
Direct assistant under van body to catch shaft components<br />
during ratchet shaft removal.<br />
Remove all nicks, burrs, and corrosion from exposed areas of<br />
ratchet shaft with file or emery cloth.<br />
4. Slowly remove ratchet shaft (10), five spacers (11), sprockets (12), spacers (13), nine bushings (14),<br />
and four bushings (16) from underframe channels (15).<br />
b. Cleaning and Inspection<br />
1. For general cleaning instructions, refer to para. 2-8.<br />
2. For general inspection instructions, refer to para. 2-9.<br />
3. Remove key (19) and bushing (18) from five sprockets (12). Discard five keys (19).<br />
4. Inspect bushings (18), (14), and (16) for wear. Replace bushing (18), (14), or (16) if worn.<br />
15-76
<strong>TM</strong> 9-<strong>2320</strong>-<strong>260</strong>-<strong>34</strong>-2<br />
15-25. RETRACTABLE BEAM DRIVESHAFT AND LOCK MAINTENANCE (Contd)<br />
5. Inspect ratchet shaft (10) for burrs, nicks, corrosion, and bends.<br />
a. Remove burrs, nicks, or corrosion with file or emery cloth.<br />
b. Replace ratchet shaft (10) if bent.<br />
6. Test spring action of lock plunger (9) in lock (2). Replace lock (2) if spring action is weak.<br />
7. Install new key (19) and bushing (18) in five sprockets (12).<br />
15-77
<strong>TM</strong> 9-<strong>2320</strong>-<strong>260</strong>-<strong>34</strong>-2<br />
15-25. RETRACTABLE BEAM DRIVESHAFT AND LOCK MAINTENANCE (Contd)<br />
CAUTION<br />
Do not bend or strain ratchet shaft during installation. Doing so<br />
may result in damage to equipment.<br />
NOTE<br />
Bevel forward end of ratchet shaft for installation.<br />
Coat two feet of forward end of ratchet shaft with GAA grease<br />
for installation.<br />
Direct assistant under van body to install shaft components<br />
during ratchet shaft installation.<br />
Lubricate ratchet shaft prior to installation.<br />
1. Slowly insert ratchet shaft (2) into underframe (1) and install four bushings (8), nine bushings (6),<br />
five spacers (5), sprockets (4), and spacers (3) on ratchet shaft (2).<br />
2. Install four setscrews (9) in four bushings (8) in underframe channels (7).<br />
3. Install five covers (14) on underframe (1) with thirty screws (15).<br />
4. Install pawl (12) on underframe (1) with screw (13).<br />
5. Insert lock (11) in pawl (12).<br />
6. Install lock (11) on stud (16) with new locknut (10).<br />
15-78
<strong>TM</strong> 9-<strong>2320</strong>-<strong>260</strong>-<strong>34</strong>-2<br />
15-25. RETRACTABLE BEAM DRIVESHAFT AND LOCK MAINTENANCE (Contd)<br />
15-79
<strong>TM</strong> 9-<strong>2320</strong>-<strong>260</strong>-<strong>34</strong>-2<br />
15-26. RETRACTABLE BEAM REPLACEMENT<br />
THIS TASK COVERS:<br />
a. Removal b. Installation<br />
INITIAL SETUP<br />
APPLICABILE MODELS<br />
M820, M820A1, M820A2<br />
TOOLS<br />
General mechanic’s tool kit<br />
(Appendix B, Item 1)<br />
MATERIALS/PARTS<br />
Two locknuts (Appendix D, Item 195)<br />
Seal (Appendix D, Item 445)<br />
Seal (Appendix D, Item 441)<br />
Seal (Appendix D, Item 442)<br />
REFERENCES (<strong>TM</strong>)<br />
<strong>TM</strong> 9-237<br />
<strong>TM</strong> 9-<strong>2320</strong>-<strong>260</strong>-10<br />
<strong>TM</strong> 9-<strong>2320</strong>-<strong>260</strong>-<strong>34</strong>P-2<br />
EQUIPMENT CONDITION<br />
● Parking brake set (<strong>TM</strong> 9-<strong>2320</strong>-<strong>260</strong>-10).<br />
● Van body sides fully expanded and secured<br />
(<strong>TM</strong> 9-<strong>2320</strong>-<strong>260</strong>-10).<br />
● Retractable beam rollers removed (para. 15-27).<br />
● Retractable beam driveshaft and lock removed<br />
(para. 15-25).<br />
CAUTION<br />
Remove and install retractable beam slowly from underframe.<br />
Failure to do so may result in damage to retractable beam.<br />
1. Break welds between side panel (1) and side panel support ( 13) (<strong>TM</strong> 9-237) and remove retractable<br />
beam (12) frorn side panel (1).<br />
2. Remove retractable beam (12) from underframe (3) at channel (4) by sliding under side panel (1).<br />
3. Remove two locknuts (6), washers (7), screws (11), seven screws (10), retainer (9), and seals (8), (2),<br />
and (5) from underframe (3). Discard locknuts (6) and seals (8), (2), and (5).<br />
1. Install new seals (5), (2), and (8) and retainer (9) on underframe (3) with seven screws (10), two<br />
screws (11), washers (7), and new locknuts (6).<br />
2. Install retractable beam (12) in underframe (3) at channel (4) by sliding under side panel (1).<br />
3. Weld side panel (1) to side panel support (13) (<strong>TM</strong> 9-237).<br />
15-80
<strong>TM</strong> 9-<strong>2320</strong>-<strong>260</strong>-<strong>34</strong>-2<br />
15-26. RETRACTABLE BEAM REPLACEMENT (Contd)<br />
FOLLOW-ON TASKS: Install retractable beam driveshaft and lock (para. 15-25)<br />
Install retractable beam rollers (para. 15-27).<br />
Retract van body sides (<strong>TM</strong> 9-<strong>2320</strong>-<strong>260</strong>-10).<br />
15-81
<strong>TM</strong> 9-<strong>2320</strong>-<strong>260</strong>-<strong>34</strong>-2<br />
15-27. RETRACTABLE BEAM ROLLERS REPLACEMENT<br />
THIS TASK COVERS:<br />
a. Support Roller Removal c. End Roller Removal<br />
b. Support Roller Installation d. End Roller Installation<br />
lNITIAL SETUP<br />
APPLICABLE MODELS<br />
M820, M820A1, M820A2<br />
TOOLS<br />
General mechanic’s tool kit<br />
(Appendix B, Item 1)<br />
MATERIALS/PARTS<br />
Two cotter pins (support roller)<br />
(Appendix D, Item 20)<br />
Two cotter pins (end roller)<br />
(Appendix D, Item 21)<br />
REFERENCES (<strong>TM</strong>)<br />
<strong>TM</strong> 9-<strong>2320</strong>-<strong>260</strong>-10<br />
<strong>TM</strong> 9-<strong>2320</strong>-<strong>260</strong>-<strong>34</strong>P-2<br />
EQUIPMENT CONDITION<br />
● Parking brake set (<strong>TM</strong> 9-<strong>2320</strong>-<strong>260</strong>-10).<br />
● Van body sides fully expanded and secured<br />
(<strong>TM</strong> 9-<strong>2320</strong>-<strong>260</strong>-10).<br />
SPECIAL ENVIRONMENTAL CONDITIONS<br />
Vehicle must be on level surface.<br />
a. Support Roller Removal<br />
NOTE<br />
All ten support rollers and end rollers are replaced the same. This<br />
procedure covers the left-rear support and end roller.<br />
NOTE<br />
The left-rear cover is secured with seven screws. All other covers<br />
are secured with eight screws.<br />
1. Remove seven screws (3), two clamps (2), and cover (4) from underframe (1).<br />
2. Remove two cotter pins (5) from support roller shaft (7). Discard cotter pins (5).<br />
3. Remove support roller shaft (7) and support roller (6) from underframe (1).<br />
--<br />
b. Support Roller Installation<br />
1. Install support roller (6) on underframe (1) with support roller shaft (7).<br />
2. Install two new cotter pins (5) in support roller shaft (7).<br />
NOTE<br />
The Ieft-rear cover is secured with seven screws. All other covers<br />
are secured with eight screws.<br />
3. Install cover (4) and two clamps (2) on underframe (1) with seven screws (3).<br />
15-82
<strong>TM</strong> 9-<strong>2320</strong>-<strong>260</strong>-<strong>34</strong>-2<br />
15-27. RETRACTABLE BEAM ROLLERS REPLACEMNET (Contd)<br />
15-83
<strong>TM</strong> 9-<strong>2320</strong>-<strong>260</strong>-<strong>34</strong>-2<br />
15-27. RETRACTABLE BEAM ROLLERS REPLACEMENT (Contd)<br />
c. End Roller Removal<br />
1. Remove support roller (subtask a.).<br />
2. Remove two cotter pins (3) from end roller shaft (2). Discard cotter pins (3).<br />
3. Remove end roller shaft (2) and end roller (4) from underframe (1).<br />
d. End Roller Installation<br />
1. Install end roller (4) on underframe (1) with end roller shaft (2).<br />
2. Install two new cotter pins (3) in end roller shaft (2).<br />
3. Install support roller (subtask b.).<br />
15-84
<strong>TM</strong> 9-<strong>2320</strong>-<strong>260</strong>-<strong>34</strong>-2<br />
15-27. RETRACTABLE BEAM ROLLERS REPLACEMENT (Contd)<br />
FOLLOW-ON TASK: Retract van body sides (<strong>TM</strong> 9-<strong>2320</strong>-<strong>260</strong>-10).<br />
15-85
<strong>TM</strong> 9-<strong>2320</strong>-<strong>260</strong>-<strong>34</strong>-2<br />
15-28. REAR DOORS MAINTENANCE<br />
THIS TASK COVERS:<br />
a. Removal d. Assembly<br />
b. Disassembly e. Installation<br />
c. Cleaning and Inspection<br />
INITIAL SETUP<br />
APPLICABLE MODELS<br />
M820, M820A1, M820A2<br />
TOOLS<br />
General mechanic’s tool kit<br />
(Appendix B, Item 1)<br />
Rivet gun (Appendix B, Item 120)<br />
MATERIALS/PARTS<br />
Two cotter pins (Appendix D, Item 21)<br />
Four lockwashers (M820, M820A1)<br />
(Appendix D, Item 215)<br />
Two lockwashers (right-rear, M820A1)<br />
(Appendix D, Item 253)<br />
Two lockwashers (Appendix D, Item 223)<br />
Four locknuts (M820, M820A1)<br />
(Appendix D, Item 182)<br />
Seven rivets (Appendix D, Item <strong>34</strong>6)<br />
Three rivets (right-rear)<br />
(Appendix D, Item <strong>34</strong>7)<br />
Gasket (right-rear) (Appendix D, Item 78)<br />
Seal (Appendix D, Item 444)<br />
Seal (Appendix D, Item 445)<br />
MATERIALS/PARTS (contd)<br />
Seal (M820, M820A2) (Appendix D, Item 448)<br />
Seal (M820A1) (Armendix D, Item 446)<br />
Weatherseal (Ieft-rear, M820, M820A1)<br />
(Appendix D, Item 540)<br />
Weatherseal (left-rear, M820A2)<br />
(Appendix D, Item 541)<br />
Sealing compound (Appendix C, Item 45)<br />
Adhesive (Appendix C, Item 3)<br />
REFERENCES (<strong>TM</strong>)<br />
TB 43-0213<br />
<strong>TM</strong> 9-<strong>2320</strong>-<strong>260</strong>-10<br />
<strong>TM</strong> 9-<strong>2320</strong>-<strong>260</strong>-20<br />
<strong>TM</strong> 9-<strong>2320</strong>-<strong>260</strong>-<strong>34</strong>P-2<br />
EQUIPMENT CONDITION<br />
Ladders removed (<strong>TM</strong> 9-<strong>2320</strong>-<strong>260</strong>-10).<br />
Liftgate lowered (M820A2) (<strong>TM</strong> 9-<strong>2320</strong>-<strong>260</strong>-10).<br />
Door window removed (if equipped)<br />
(M820, M820A2) (<strong>TM</strong> 9-<strong>2320</strong>-<strong>260</strong>-20).<br />
a. Removal<br />
NOTE<br />
Left- and right-rear doors are removed the same. This procedure<br />
covers the left-rear door.<br />
1. Remove two screws (1), lockwashers (2), doorcheck (3), and bracket (4) from door (7). Discard<br />
lockwashers (2).<br />
2. Remove fifteen screws (6) and door (7) from van body (5).<br />
b. Disassembly<br />
I<br />
NOTE<br />
Perform steps 1 through 3 for M820 and M820A1 vehicles.<br />
1. Remove four screws (10) and two angle brackets (9) from outer panel of door (7).<br />
2. Remove four screws (13), lockwashers (12), and clamp (11) from outer panel of door (7). Discard<br />
lockwashers (12).<br />
3. Remove two screws (15), locknuts (14), screws (8), washers (18), bushings (17), and rack (16) from<br />
outer panel of door (7). Discard locknuts (14).<br />
15-86
<strong>TM</strong> 9-<strong>2320</strong>-<strong>260</strong>-<strong>34</strong>-2<br />
15-28. REAR COORS MAINTENANCE (Contd)<br />
15-87
<strong>TM</strong> 9-<strong>2320</strong>-<strong>260</strong>-<strong>34</strong>-2<br />
15-28. REAR DOORS MAINTENANCE (Contd)<br />
4. Remove seven rivets (29) and seal (28) from door frame (6). Discard rivets (29) and seal (28).<br />
NOTE<br />
Perform step 5 for left-rear door.<br />
5. Remove four screws (12), clip (11), six screws (25), and bracket (26) from inner panel (8).<br />
NOTE<br />
Perform step 6 for right-rear door.<br />
6. Remove three rivets (33), handle (32), and gasket (31) from door (6). Discard gasket (31) and<br />
rivets (33).<br />
7. Remove two cotter pins (20), screws (17), lockwashers (18), and rods (13) from center case (24)<br />
and two bolts (15). Discard cotter pins (20) and lockwashers (18).<br />
8. Remove pins (22) and (23) and handle (21) from center case (24).<br />
9. Remove four screws (19) and center case (24) from inner panel (8).<br />
NOTE<br />
● Perform step 10 for left-rear door on M820 and M820A2 vehicles.<br />
● Perform step 11 for left-rear door on M820A1 and all right-rear<br />
doors.<br />
10. Remove eight screws (16), two bolts (15), and spacer plates (14) from inner panel (8).<br />
11. Remove eight screws (16) and two bolts (15) from inner panel (8).<br />
12. Remove sixteen screws (1), retainer (2), seal (3), hinge (4), and seal (5) from door (6). Discard<br />
seals (3) and (5).<br />
13. Remove eleven screws (9), thirty-two screws (10), and inner panel (8) from door (6).<br />
14. Break adhesive seal and remove four moldings (7) and (27) from inner panel (8).<br />
NOTE<br />
Perform step 15 for Ieft-rear door.<br />
15. Break adhesive seal and remove weatherseal (30) from door (6). Discard weatherseal (30).<br />
15-88
<strong>TM</strong> 9-<strong>2320</strong>-<strong>260</strong>-<strong>34</strong>-2<br />
15-28. REAR DOORS MAINTENANCE (Contd)<br />
15-89
<strong>TM</strong> 9-<strong>2320</strong>-<strong>260</strong>-<strong>34</strong>-2<br />
15-28. REAR DOORS MAINTENANCE (Contd)<br />
1. For general cleaning instructions, refer to para. 2-8.<br />
2. Visually inspect all movable parts of center case (6) for proper operation. Replace center case (6)<br />
if damaged.<br />
3. Inspect rods (7) and four moldings (2) and (8) for bends, breaks, or cracks. Replace part(s)<br />
if damaged.<br />
1. Rustproof all inside surfaces and boxed-in areas (TB 43-0213).<br />
NOTE<br />
• Apply sealing compound between exterior joints.<br />
• Apply adhesive to rubber and metal surfaces for installation.<br />
2. Install four moldings (2) and (8) on inner panel (3).<br />
3. Install inner panel (3) on door (1) with eleven screws (4) and thirty-two screws (5).<br />
NOTE<br />
Perform step 4 for left-rear doors.<br />
4. Install new weatherseal (9) on door (1) with adhesive.<br />
15-90
<strong>TM</strong> 9-<strong>2320</strong>-<strong>260</strong>-<strong>34</strong>-2<br />
15-28. REAR DOORS MAINTENANCE (Contd)<br />
15-91
<strong>TM</strong> 9-<strong>2320</strong>-<strong>260</strong>-<strong>34</strong>-2<br />
15-28. REAR DOORS MAINTENANCE (Contd)<br />
5. Install new seal (5), hinge (4), new seal (3), and retainer (2) on door (6) with sixteen screws (1).<br />
NOTE<br />
Perform step 6 for left-rear door on M820 and M820A2 vehicles.<br />
• Perform step 7 for left-rear door on M820A1 vehicles and all<br />
right-rear doors.<br />
6. Install two spacer plates (9) and bolts (10) on door (6) with eight screws (11).<br />
7. Install two bolts (10) on door (6) with eight screws (11).<br />
8. Install center case (20) on door (6) with four screws (15).<br />
9. Install two rods (14) on center case (20) and two bolts (10) with two new cotter pins (16), new<br />
Iockwashers (13), and screws (12).<br />
NOTE<br />
Ž Perform step 10 for left-rear door.<br />
• Perform step 11 for right-rear door.<br />
10. Install handle (17) on center case (20) with pins (18) and (19).<br />
11. Install new gasket (25) and handle (26) on door (6) with three new rivets (27).<br />
NOTE<br />
Perform step 12 for right-rear door.<br />
12. Install clip (7) and bracket (21) on door (6) with four screws (8) and six screws (22).<br />
13. Install new seal (24) on door (6) with seven new rivets (23).<br />
15-92
<strong>TM</strong> 9-<strong>2320</strong>-<strong>260</strong>-<strong>34</strong>-2<br />
15-93
<strong>TM</strong> 9-<strong>2320</strong>-<strong>260</strong>-<strong>34</strong>-2<br />
15-28. REAR DOORS MAINTENANCE (Contd)<br />
NOTE<br />
Perform steps 14 through 16 for M820 and M820A1 vehicles.<br />
14. Install rack (9) on door (1) with two screws (8), screws (12), washers (11), bushings (10), and new<br />
locknuts (7).<br />
15. Install clamp (4) on door (1) with four new lockwashers (5) and screws (6).<br />
Install two angle brackets (2) on door (1) with four screws (3).<br />
NOTE<br />
Left- and right-rear doors are installed the same. This procedure<br />
covers the left-rear door.<br />
• Assistant will help with step 1.<br />
1. Aline holes of door hinge (17) with holes in van body (18) and install door (1) on van body (18) with<br />
fifteen screws (19).<br />
2. Install doorcheck (15) and bracket (16) on door (1) with two new lockwashers (14) and screws (13).<br />
FOLLOW-ON TASKS: Install door window (if equipped) (M820, M820A2) (<strong>TM</strong> 9-<strong>2320</strong>-<strong>260</strong>-20).<br />
Install ladders (<strong>TM</strong> 9-<strong>2320</strong>-<strong>260</strong>-10).<br />
Raise liftgate (M820A2) (<strong>TM</strong> 9-<strong>2320</strong>-<strong>260</strong>-10).<br />
15-94
<strong>TM</strong> 9-<strong>2320</strong>-<strong>260</strong>-<strong>34</strong>-2<br />
15-29. SIDE DOORS MAINTENANCE<br />
THIS TASK COVERS:<br />
a. Removal d. Assembly<br />
b. Disassembly e. Installation<br />
c. Cleaning and Inspection<br />
APPLICABLE MODELS<br />
MATERIALS/PARTS (Contd)<br />
M820, M820A1, M820A2 Sealing compound (Appendix C, Item 45)<br />
TOOLS<br />
Adhesive (Appendix C, Item 2)<br />
General mechanic’s tool kit<br />
REFERENCES (<strong>TM</strong>)<br />
(Appendix B, Item 1) TB 43-0213<br />
Rivet gun (Appendix B, Item 120) <strong>TM</strong> 9-<strong>2320</strong>-<strong>260</strong>-10<br />
<strong>TM</strong> 9-<strong>2320</strong>-<strong>260</strong>-20<br />
MATERIAIS/PARTS<br />
<strong>TM</strong> 9-<strong>2320</strong>-<strong>260</strong>-<strong>34</strong>P-2<br />
Sixteen rivets (Appendix D, Item <strong>34</strong>8)<br />
Three rivets (Appendix D, Item <strong>34</strong>7)<br />
EQUIPMENT CONDITION<br />
Two cotter pins (Appendix D, Item 21)<br />
Two lockwashers (Appendix D, Item 215)<br />
Parking brake set (<strong>TM</strong> 9-<strong>2320</strong>-<strong>260</strong>-10).<br />
Door window removed (if equipped)<br />
Gasket (Appendix D, Item 78)<br />
Two lockwashers (Appendix D, Item 224)<br />
(M820, M820A2) (<strong>TM</strong> 9-<strong>2320</strong>-<strong>260</strong>-20).<br />
Van body sides fully expanded and secured<br />
Seal (Appendix D, Item 446)<br />
Seal (Appendix D, Item 445)<br />
(<strong>TM</strong> 9-<strong>2320</strong>-<strong>260</strong>-10).<br />
1. Remove two screws (1), lockwashers (2), bracket (3), and door check (4) from door (5). Discard<br />
lockwashers (2).<br />
NOTE<br />
Assistant will help with step 2.<br />
2. Remove fifteen screws (6) and door (5) from side panel (7).<br />
15-95
<strong>TM</strong> 9-<strong>2320</strong>-<strong>260</strong>-<strong>34</strong>-2<br />
15-29. SIDE DOORS MAINTENANCE (Contd)<br />
1.<br />
2.<br />
3.<br />
4.<br />
5.<br />
6.<br />
7.<br />
8.<br />
9.<br />
Remove pin (22) and handle (21) from center case (26) and handle (15).<br />
Remove three rivets (16), handle (15), and gasket (14) from pocket (13). Discard rivets (16) and<br />
gasket (14).<br />
Remove sixteen rivets (17) and pocket (13) from door (7). Discard fivets (17).<br />
Remove two cotter pins (20), screws (19), lockwashers (18), and rods (24) from center case (26) and<br />
bolts (2). Discard cotter pins (20) and Iockwashers (18).<br />
Remove four screws (23) and center case (26) from inner panel (4).<br />
Remove eight screws (1) and bolts (2) from inner panel (4).<br />
Remove fourteen screws (12), retainer (11), seal (10), hinge (9), and seal (8) from door (7). Discard<br />
seals (10) and (8).<br />
Remove eleven screws (3), thirty-two screws (25), and inner panel (4) from door (7).<br />
Break adhesive and remove four moldings (5) and (6) from inner panel (4).<br />
1. For general cleaning instructions, refer to para. 2-8.<br />
2. For general inspection instructions, refer to para. 2-9.<br />
3. Inspect all movable parts of center case (26) and two bolts (2) for proper operation. Replace center<br />
case (26) or bolts (2) if damaged.<br />
4. Inspect rods (24), moldings (5) and (6), and pocket (13) for bends, breaks, and cracks. Replace<br />
rods (24), moldings (5) or (6), or pocket (13), if damaged.<br />
5. Inspect door (7) for damage. Replace door (7) if damaged.<br />
15-96
<strong>TM</strong> 9-<strong>2320</strong>-<strong>260</strong>-<strong>34</strong>-2<br />
15-29. SIDE DOORS MAINTENANCE (Contd)<br />
15-97
<strong>TM</strong> 9-<strong>2320</strong>-<strong>260</strong>-<strong>34</strong>-2<br />
15-29. SIDE DOORS MAINTENANCE (Contd)<br />
NOTE<br />
• Rustproof all inside surfaces and boxed-in areas (TB 43-0213).<br />
• Apply sealing compound to exterior joints.<br />
1.<br />
2.<br />
3.<br />
4.<br />
5.<br />
6.<br />
7.<br />
8.<br />
9.<br />
Install four moldings (5) and (6) on inner panel (4) with adhesive.<br />
Install inner panel (4) on door (7) with eleven screws (3) and thirty-two screws (25).<br />
Install new seal (8), hinge (9), new seal (10), and retainer (11) on door (7) with fourteen screws (12).<br />
Install two bolts (2) on door (7) with eight screws (1).<br />
Install center case (26) on door (7) with four screws (23).<br />
Install two rods (24) on center case (26) and two bolts (2) with two new cotter pins (20), new<br />
lockwashers (19), and screws (18).<br />
Install pocket (13) on door (7) with sixteen new rivets (17).<br />
Install new gasket (14) and handle (15) on door (7) and pocket (13) with three new rivets (16).<br />
Install handle (21) on center case (26) and handle (15) with pin (22).<br />
NOTE<br />
Assistant will help with step 1.<br />
1. Install door (7) on van body (32) with fifteen screws (31).<br />
2. Install door check (27) and bracket (28) on door (7) with two new Iockwashers (29) and screws (30).<br />
15-98
<strong>TM</strong> 9-<strong>2320</strong>-<strong>260</strong>-<strong>34</strong>-2<br />
15-29. SIDE DOORS MAINTENANCE (Contd)<br />
FOLLOW-ON TASKS: ● Install door window (if equipped) (M820, M820A2) (<strong>TM</strong> 9-<strong>2320</strong>-<strong>260</strong>-20).<br />
Retract van body sides (<strong>TM</strong> 9-<strong>2320</strong>-<strong>260</strong>-10).<br />
15-99
<strong>TM</strong> 9-<strong>2320</strong>-<strong>260</strong>-<strong>34</strong>-2<br />
15-30. UNDERFRAME REPAIR<br />
THIS TASK COVERS:<br />
a. Disassembly b. Assembly<br />
INITIAL SETUP<br />
APPLICABLE MODES<br />
MATERIALS/PARTS (Contd)<br />
M820, M820A1, M820A2 Two seals (Appendix D, Item 447)<br />
Sealing compound (Appendix C, Item 45)<br />
TOOLS<br />
General mechanic’s tool kit<br />
REFERENCES (<strong>TM</strong>)<br />
(Appendix B, Item 1)<br />
<strong>TM</strong> 9-<strong>2320</strong>-<strong>260</strong>-10<br />
Rivet gun (Appendix B, Item 120)<br />
<strong>TM</strong> 9-<strong>2320</strong> -<strong>260</strong>-<strong>34</strong>P-2<br />
MATERIALS/PARTS<br />
EQUIPMENT CONDITION<br />
Eight lockwashers (Appendix D, Item 224) Parking brake set (<strong>TM</strong> 9-<strong>2320</strong>-<strong>260</strong>-10).<br />
Thirty-two rivets (M820A1)<br />
(Appendix D, Item <strong>34</strong>9)<br />
Thirty-two rivets (M820, M820A2)<br />
(Appendix D, Item 350)<br />
NOTE<br />
•Retainers are replaced the basically the same on M820, M820A1,<br />
and M820A2 vehicles. This procedures covers the M820 and<br />
M820A2 vehicles.<br />
•Assistant will help with step 1.<br />
1. Remove one hundred twenty-eight screws (15), two retainers (14), channels (12), and seals (13) from<br />
underframe (1). Discard seals (13).<br />
2. Remove thirty-two screws (4) and four covers (5) from underframe (1).<br />
3. Remove eight nuts (3), lockwashers (2), screws (7), and four plates (6) from underframe (1). Discard<br />
lockwashers (2).<br />
4. Remove thirty-two rivets (8) and eight tiedowns (9) from underframe (1). Discard rivets (8).<br />
5. Remove four screws (11) and angle bracket (10) from underframe (1).<br />
1. Install angle bracket (10) on underframe (1) with four screws (11).<br />
2. Install eight tiedowns (9) on underframe (1) with thirty-two new rivets (8).<br />
3. Install four plates (6) on underframe (1) with eight screws (7), new lockwashers (2), and nuts (3).<br />
4. Install four covers (5) on underframe (1) with thirty-two screws (4).<br />
NOTE<br />
• Apply sealing compound to exterior joints for installation.<br />
• Assistant will help with step 5.<br />
5. Install two new seals (13), channels (12), and retainers (14) on underframe (1) with one hundred<br />
twenty-eight screws (15).<br />
15-100
<strong>TM</strong> 9-<strong>2320</strong>-<strong>260</strong>-<strong>34</strong>-2<br />
15-30. UNDERFRAME REPAIR (Contd)<br />
15-101
<strong>TM</strong> 9-<strong>2320</strong>-<strong>260</strong>-<strong>34</strong>-2<br />
15-31. HINGED FLOOR MAINTENANCE<br />
THIS TASK COVERS:<br />
a. Removal d. Assembly<br />
b. Disassembly e. Installation<br />
c. Cleaning and Inspection<br />
INITIAL SETUP<br />
APPLICABLE MODEM<br />
M820, M820A1, M820A2.<br />
TOOLS<br />
General mechanic’s tool kit<br />
(Appendix B, Item 1)<br />
Rivet gun (Appendix B, Item 120)<br />
MATERIALS/PARTS<br />
Four seals (M820, M820A2)<br />
(Appendix D, Item 446)<br />
Four seals (M820A1) (Appendix D, Item 444)<br />
Seal (Appendix D, Item 449)<br />
Fifty-six rivets (Appendix D, Item 351)<br />
MATERlALS/PARTS (Contd)<br />
Adhesive (Appendix C, Item 2)<br />
sealing compound (Appendix C, Item 45)<br />
REFERENCES (<strong>TM</strong>)<br />
<strong>TM</strong> 9-237<br />
<strong>TM</strong> 9-<strong>2320</strong>-<strong>260</strong>-10<br />
<strong>TM</strong> 9-<strong>2320</strong>-<strong>260</strong>-20<br />
<strong>TM</strong> 9-<strong>2320</strong> -<strong>260</strong>-<strong>34</strong>P-2<br />
EQUIPMENT CONDITION<br />
l Van body sides fully expanded and secured<br />
(<strong>TM</strong> 9-<strong>2320</strong>-<strong>260</strong>-10).<br />
l Hinged end panel opened (<strong>TM</strong> 9-<strong>2320</strong>-<strong>260</strong>-10),<br />
l Counterbalance removed (<strong>TM</strong> 9-<strong>2320</strong>-<strong>260</strong>-20).<br />
NOTE<br />
Left and right side hinged floors are maintained the same. This<br />
procedure covers the left hinged floor.<br />
NOTE<br />
Perform step 1 for M820 and M820A2 vehicles.<br />
• Perform step 2 for M820A1 vehicles.<br />
• Assistant will help with step 1 or 2.<br />
1. Remove fifty-five screws (4), four screws (2), and hinged floor (1) from hinge (3).<br />
2. Remove fifty-nine screws (4) and hinged floor (1) from hinge (3).<br />
NOTE<br />
Perform step 1 for M820 and M820A2 vehicles.<br />
1. Remove four screws (7) and two pivots (8) from hinged floor (1).<br />
2. Remove thirty screws (9), two retainers (6), four seals (10), and two channels (5) from hinged<br />
floor (1). Discard seals (10).<br />
3. Remove ten screws (13) and five pads (12) from hinged floor ( 1).<br />
4. Remove four screws (15) and handle (14) from hinged floor (1).<br />
5. Remove seal (11) from hinged floor (l). Discard seal (11).<br />
NOTE<br />
Perform step 6. if hinge is to be replaced (subtask c.).<br />
6. Remove fifty-six rivets (16) and hinge (3) from underframe (17). Discard rivets (16).<br />
15-102
<strong>TM</strong> 9-<strong>2320</strong>-<strong>260</strong>-<strong>34</strong>-2<br />
15-31. HINGED FLOOR MAINTENANCE (Contd)<br />
15-103
<strong>TM</strong> 9-<strong>2320</strong>-<strong>260</strong>-<strong>34</strong>-2<br />
15-31. HINGED FLOOR MAINTENANCE (Contd)<br />
1. For general cleaning instructions, refer to para. 2-8.<br />
2. For general inspection instructions, refer to para. 2-9.<br />
3. Inspect hinge (1) for breaks, cracks, and smooth operation. Replace hinge (1) if damaged.<br />
4. Inspect hinged floor (4) for cracked, broken, and tom floor plates. Repair (<strong>TM</strong> 9-237) or replace<br />
hinged floor (4) if damaged.<br />
5. Inspect two retainers (6) and channels (5) for bends and breaks. Replace retainer(s) (6) or<br />
channel(s) (5) if bent or broken.<br />
NOTE<br />
●<br />
Seal exterior joints with sealing compound.<br />
●<br />
Insulate exterior joints and areas of metal-to-metal contact with<br />
adhesive.<br />
●<br />
Perform step 1 if hinge was removed.<br />
1. Install hinge (1) on underframe (3) with fifty-six new rivets 2).<br />
2. Install new seal (11) on hinged floor (4).<br />
3. Install handle (14) on hinged floor (4) with four screws (15).<br />
4. Install five pads (12) on hinged floor (4) with ten screws (13).<br />
5. Install two channels (5), four new seals (10), and two retainers (6) on hinged floor (4) with thirty<br />
screws (9).<br />
NOTE<br />
Perform step 6 for M820 and M820A2 vehicles.<br />
6. Install two pivots (8) on hinged floor (4) with four screws (7).<br />
NOTE<br />
• Perform step 1 for M820 and M820A2 vehicles.<br />
• Perform step 2 for M820A1 vehicles.<br />
• Assistant will help with step 1 or 2.<br />
1. Install hinged floor (4) on hinge (1) with four screws (16) and fifty-five screws (17).<br />
2. Install hinged floor (4) on hinge (1) with fifty-nine screws (17).<br />
15-104
<strong>TM</strong> 9-<strong>2320</strong>-<strong>260</strong>-<strong>34</strong>-2<br />
Install counterbalance (<strong>TM</strong> 9-<strong>2320</strong>-<strong>260</strong>-20).<br />
Close hinged end panel (<strong>TM</strong> 9-<strong>2320</strong>-<strong>260</strong>-10).<br />
Retract van body sides (<strong>TM</strong> 9-<strong>2320</strong>-<strong>260</strong>-10).<br />
15-105
<strong>TM</strong> 9-<strong>2320</strong>-<strong>260</strong>-<strong>34</strong>-2<br />
15-32. EXTERIOR SIDE PANEL MAINTENANCE<br />
THIS TASK COVERS:<br />
a. Disassembly c. Assembly<br />
b. Cleaning and Inspection<br />
INITIAL SETUP<br />
APPLICABLE MODELS<br />
M820, M820A1, M820A2<br />
TOOLS<br />
General mechanic’s tool kit<br />
(Appendix B, Item 1)<br />
Rivet gun (Appendix B, Item<br />
MATERIALS/PARTS (Contd)<br />
Adhesive (Appendix C, Item 2)<br />
Sealing compound (Appendix C, Item 45)<br />
REFERENCES (<strong>TM</strong>)<br />
<strong>TM</strong> 9-<strong>2320</strong>-<strong>260</strong>-10<br />
120) <strong>TM</strong> 9-<strong>2320</strong>-<strong>260</strong>-20<br />
MATERIALS/PARTS<br />
<strong>TM</strong> 9-<strong>2320</strong>-<strong>260</strong>-<strong>34</strong>P-2<br />
Two hundred forty-eight rivets<br />
EQUIPMENT CONDITION<br />
(Appendix D, Item 352) Van body sides fully expanded and secured<br />
Twenty-four rivets (Appendix D, Item 354) (<strong>TM</strong> 9-<strong>2320</strong>-<strong>260</strong>-10).<br />
One hundred eighty-nine rivets<br />
(Appendix D, Item <strong>34</strong>6)<br />
Seven seals (Appendix D, Item 446)<br />
Seal (Appendix D, Item 450)<br />
Channel seal (Appendix D, Item 474)<br />
Retractable window removed (M820, M820A2)<br />
(<strong>TM</strong> 9-<strong>2320</strong>-<strong>260</strong>-20).<br />
Side panel lock removed (<strong>TM</strong> 9-<strong>2320</strong>-<strong>260</strong>-20).<br />
Side door removed (para. 15-29).<br />
Left and right exterior side panels are disassembled the same.<br />
This procedure covers the right exterior side panel.<br />
1. Remove twenty-five screws (5) and retainers (3) and (15) from side panel frame (14).<br />
2. Remove seals (2) and (4) and channel (1) from side panel frame (14). Discard seals (2) and (4).<br />
3. Remove thirty screws (12) and five retainers (13) from seal (10) at side panel frame (14).<br />
4. Remove sixty-two screws (11), six retainers (9), and seal (10) from side panel frame (14).<br />
Discard seal (10).<br />
5. Remove six screws (8), two retainers (7), and seals (6) from side panel frame (14). Discard<br />
seals (6).<br />
15-106
<strong>TM</strong> 9-<strong>2320</strong>-<strong>260</strong>-<strong>34</strong>-2<br />
15-32. EXTERIOR SIDE PANEL MAINTENANCE (Contd)<br />
15-107
<strong>TM</strong> 9-<strong>2320</strong>-<strong>260</strong>-<strong>34</strong>-2<br />
15-32. EXTERIOR SIDE PANEL MAINTENANCE (Contd)<br />
6. Remove one hundred eighty-nine rivets (19), bracket ( 17), and seal (18) from skins (2) and (11)<br />
at side panel frame (8). Discard rivets (19) and seal (18).<br />
7. Remove eighty-two screws (l), nuts (5), four screws (10), two retainers (4), and seals (3) from side<br />
panel frame (8). Discard seals (3).<br />
8. Remove channel seal (9) from doorway of side panel frame (8). Discard channel seal (9).<br />
9. Remove nine screws (6) and molding (7) from doorway of side panel frame (8).<br />
NOTE<br />
• Perform steps 10 through 12 if skin is to be replaced.<br />
Assistant will help with steps 10 through 12.<br />
10. Remove two hundred forty-eight rivets (12) and skins (2) and (11) from side panel frame (8). Discard<br />
rivets (12).<br />
11. Remove twenty-four rivets (16), and lower skin (13) from side panel frame (8). Discard rivets (16).<br />
12. Remove eight screws (15) and two ladder hangers (14) from side panel frame (8).<br />
15-108
<strong>TM</strong> 9-<strong>2320</strong>-<strong>260</strong>-<strong>34</strong>-2<br />
15-32. EXTERIOR SIDE PANEL MAINTENANCE (Contd)<br />
15-109
<strong>TM</strong> 9-<strong>2320</strong>-<strong>260</strong>-<strong>34</strong>-2<br />
15-32. EXTERIOR SIDE PANEL MAINTENANCE (Contd)<br />
1. For general cleaning instructions, refer to para. 2-8.<br />
2. For general inspection instructions, refer to para. 2-9.<br />
3. Inspect five retainers (12), retainers (13), (5), and (6) for cracks and bends. Replace<br />
retainer(s) (12), (13), (5), or (6) if cracked or broken.<br />
4. Inspect bracket (3), retainers (9) and (10), and channel (11) for rust corrosion and breaks. Replace<br />
bracket (3), retainer(s) (9) or (10), or channel (11) if rusted, corroded, or broken.<br />
5. Inspect molding (4), two ladder hangers (8), and side panel frame (2) for cracks, breaks, and<br />
warpage. Replace molding (4), ladder hanger(s) (8) or side panel frame (2) if cracked, broken,<br />
or warped.<br />
6. Inspect skins (1) and ( 14) and lower skin (7) for tears and punctures. Replace skin(s) (1) or (14)<br />
or lower skin (7) if torn or punctured.<br />
1.<br />
2.<br />
3.<br />
4.<br />
5.<br />
6.<br />
7.<br />
NOTE<br />
• Left and right exterior side panels are assembled the same. This<br />
procedure covers the right exterior side panel.<br />
• Perform steps 1 through 3 if skin was removed.<br />
• Assistant will help with steps 1 through 3.<br />
Install two ladder hangers (8) on side panel frame (2) with eight screws (23).<br />
Install lower skin (7) on side panel frame (2) with twenty-four new rivets (24).<br />
Install skins (1) and (14) on side panel frame (2) with two hundred forty-eight new rivets (22).<br />
NOTE<br />
• Apply sealing compound to exterior joints for installation.<br />
• Apply adhesive to rubber and metal surfaces for installation.<br />
Install molding (19) on doorway of side panel frame (2) with nine screws ( 18).<br />
Install new channel seal (20) on doorway of side panel frame (2).<br />
Install two new seals (16) and retainers (5) on side panel frame (2) with eighty-two screws (15),<br />
nuts (17), and four screws (21).<br />
Install new seal (26) and bracket (25) on skins (1) and (14) and side panel frame (2) with<br />
one hundred eighty-nine new rivets (27).<br />
15-110
<strong>TM</strong> 9-<strong>2320</strong>-<strong>260</strong>-<strong>34</strong>-2<br />
15-32. EXTERIOR SIDE PANEL MAINTENANCE (Contd)<br />
15-111
<strong>TM</strong> 9-<strong>2320</strong>-<strong>260</strong>-<strong>34</strong>-2<br />
15-32. EXTERIOR SIDE PANEL MAINTENANCE (Contd)<br />
8. Install two new seals (6) and retainers (7) on side panel frame (14) with six screws (8).<br />
9. Install new seal (10) and six retainers (9) on side panel frame (14) with sixty-two screws (11).<br />
10. Install five retainers (13) on side panel frame (14) and new seal (10) with thirty screws (11),<br />
NOTE<br />
New seals may need to be formed to fit on side panel frame.<br />
11. Install channel (1), new seals (2) and (4), retainer (3), and retainer (15) on side panel frame (14)<br />
with twenty-five screws (5).<br />
FOLLOW-ON TASKS: • Install side door (para. 15-29).<br />
• Install side panel lock (<strong>TM</strong> 9-<strong>2320</strong>-<strong>260</strong>-20).<br />
• Install retractable window (M820, M820A2) (<strong>TM</strong> 9-<strong>2320</strong>-<strong>260</strong>-20).<br />
• Retract van body sides (<strong>TM</strong> 9-<strong>2320</strong>-<strong>260</strong>-10).<br />
15-112
<strong>TM</strong> 9-<strong>2320</strong>-240-<strong>34</strong>-2<br />
15-33. HINGED END PANEL MAINTENANCE<br />
THIS TASK COVERS:<br />
a. Removal d. Assembly<br />
b. Disassembly e. Installation<br />
c. Cleaning and Inspection<br />
INITIAL SETUP<br />
APPLICABLE MODELS<br />
M820, M820A1, M820A2<br />
TOOLS<br />
General mechanic’s tool kit<br />
(Appendix B, Item 1)<br />
Rivet gun (Appendix B, Item 120)<br />
MATERIALS/PARTS<br />
Eighteen rivets (Appendix D, Item 352)<br />
Twelve rivets (Appendix D, Item 356)<br />
Seal (Appendix D, Item 445)<br />
Seal (Appendix D, Item 446)<br />
MATERIALS/PARTS (Contd)<br />
Seal (Appendix D, Item 452)<br />
Sealing compound (Appendix C, Item 45)<br />
REFERENCES (<strong>TM</strong>)<br />
<strong>TM</strong> 9-<strong>2320</strong>-<strong>260</strong>-10<br />
<strong>TM</strong> 9-<strong>2320</strong>-<strong>260</strong>-<strong>34</strong>P-2<br />
EQUIPMENT CONDITION<br />
● Parking brake set (<strong>TM</strong> 9-<strong>2320</strong>-<strong>260</strong>-10).<br />
● Van body sides fully expanded and secured<br />
(<strong>TM</strong> 9-<strong>2320</strong>-<strong>260</strong>-10).<br />
NOTE<br />
All hinged end panels are maintained the same. This procedure<br />
covers the right-rear hinged end panel.<br />
NOTE<br />
Assistant will help with removal.<br />
Remove sixteen screws (3) and hinged end panel (2) from side panel (1).<br />
15-113
<strong>TM</strong> 9-<strong>2320</strong>-<strong>260</strong>-<strong>34</strong>-2<br />
15-33. HINGED END PANEL MAINTENANCE (Contd)<br />
1. Remove sixteen screws (18), hinge (19), and seal (20) from panel frame (7) and outer skin (12).<br />
Discard seal (20).<br />
2. Remove twenty-seven screws (9), retainer (10), and seal (8) from panel frame (7) and outer<br />
skin (12). Discard seal (8).<br />
3. Remove ten screws (1), retainers (2) and (3), and seal (4) from channel (5). Discard seal (4).<br />
4. Remove eighteen rivets (6), twenty screws (17), and channels (5) and (16) from outer skin (12), panel<br />
frame (7), and inner skin (22). Discard rivets (6).<br />
5. Remove two screws (15), strap (14), and spacer plate (13) from outer skin ( 12).<br />
NOTE<br />
l Perform steps 6 and 7 if skins are to be replaced<br />
l Assistant will help with steps 6 and 7.<br />
6. Remove twelve rivets (11) and outer skin (12) from panel frame (7). Discard rivets (11).<br />
7. Remove thirty screws (23), eighteen screws (21), and inner skin (22) from panel frame (7).<br />
1. For general cleaning instructions, refer to para. 2-8.<br />
2. For general inspection instructions, refer to para, 2-9.<br />
3. Inspect channels (5) and (16), retainers (2), (3), and (10), spacer plate (13), panel frame (7), and<br />
strap (14) for bends, breaks, and cracks. Replace part(s) if damaged.<br />
4. Inspect hinge (19) for cracks, breaks, corrosion, and proper operation. Replace hinge ( 19) if damaged.<br />
5. Inspect inner skin (22) and outer skin (12) for tears and punctures, Replace inner skin (22) or outer<br />
skin (12) if torn or punctured.<br />
6. Inspect panel frame (7) for cracks, breaks, and warpage. Replace hinged end panel if panel frame (7)<br />
is damaged.<br />
15-114
<strong>TM</strong> 9-<strong>2320</strong>-<strong>260</strong>-<strong>34</strong>-2<br />
15-33. HINGED END PANEL MAINTENANCE (Contd)<br />
NOTE<br />
All hinged end panels are assembled the same. This procedure<br />
covers the right-rear hinged end panel.<br />
● Seal all exterior joints with sealing compound.<br />
● Perform steps 1 and 2 if skins were removed.<br />
● Assistant will help with steps 1 and 2.<br />
1. Install inner skin (22) on panel frame (7) with thirty screws (23) and eighteen screws (2 1).<br />
2. Install outer skin (12) on panel frame (7) with twelve new rivets (11).<br />
3. Install spacer plate (13) and strap (14) on outer skin (12) with two screws (15).<br />
4. Install channels (5) and (16) on outer skin (12), panel frame (7), and inner skin (22) with eighteen<br />
new rivets (6) and twenty screws (17).<br />
5. Install new seal (4) and retainers (2) and (3) on channel (5) with ten screws (1).<br />
6. Install new seal (8) and retainer (10) on outer skin (12) and panel frame (7) with twenty-seven<br />
screws (9).<br />
7. Install new seal (20) and hinge (19) on outer skin (12) and panel frame (7) with sixteen screws (18).<br />
Install hinged end panel (25) on side panel (24) with sixteen screws (26).<br />
15-116
<strong>TM</strong> 9-<strong>2320</strong>-<strong>260</strong>-<strong>34</strong>-2<br />
FOLLOW-ON TASK: Retract van body sides (<strong>TM</strong> 9-<strong>2320</strong>-<strong>260</strong>-10).<br />
15-117
<strong>TM</strong> 9-<strong>2320</strong>-<strong>260</strong>-<strong>34</strong>-2<br />
15-<strong>34</strong>. REAR WALL INTERIOR PANELS REPLACEMENT<br />
THIS TASK COVERS:<br />
a. Left Panel Removal b. Left Panel Installation<br />
INITIAL SETUP<br />
APPLICABLE MODELS<br />
M820, M820A1, M820A2<br />
TOOLS<br />
General mechanic’s tool kit<br />
(Appendix B, Item 1)<br />
MATERIALS/PARTS<br />
Sealing compound (Appendix C, Item 45)<br />
REFERENCES (<strong>TM</strong>)<br />
<strong>TM</strong> 9-<strong>2320</strong>-<strong>260</strong>-10<br />
<strong>TM</strong> 9-<strong>2320</strong>-<strong>260</strong>-20<br />
<strong>TM</strong> 9-<strong>2320</strong> -<strong>260</strong>-<strong>34</strong>P-2<br />
EQUIPMENT CONDITION<br />
● Van body sides fully expanded and secured<br />
(<strong>TM</strong> 9-<strong>2320</strong>-<strong>260</strong>- 10).<br />
● Load center removed (M820, M820A2)<br />
(left side) (para. 15-82).<br />
EQUIPMENT CONDITION (Contd)<br />
● Load center conduit removed<br />
(M820, M820A2) (left side) (para. 15-83).<br />
● Electrical box removed (M820, M820A2) (left side)<br />
(para. 15-90).<br />
● Control center box removed (M820, M820A2)<br />
(right side) (para. 15-84).<br />
AC manual starter switches removed<br />
(M820, M820A2) (right side) (para. 15-89).<br />
● Phone jacks removed (M820, M820A2)<br />
(right side) (<strong>TM</strong> 9-<strong>2320</strong>-<strong>260</strong>-20).<br />
Fire extinguisher removed (right side)<br />
(<strong>TM</strong> 9-<strong>2320</strong>-<strong>260</strong>-10).<br />
GENERAL SAFETY INSTRUCTIONS<br />
Gloves, eyeshields, and dust mask must be worn<br />
during panel replacement.<br />
Van body is insulated with fibrous glass felt insulation. Gloves,<br />
eyeshields, and dust mask must be worn during panel replacement.<br />
Failure to do so may result in injury to personnel.<br />
NOTE<br />
Left- and right-rear wall interior panels are replaced the same.<br />
This procedure covers the left-rear wall interior panel.<br />
1. Remove thirteen screws (4) and molding (1) from left panel (2) and header (3).<br />
NOTE<br />
Assistant will help with step 2.<br />
2. Remove twenty-two screws (5) and left panel (2) from header (3).<br />
3. Remove four screws (8) and corner gusset (7) from skin (6) and underframe (9).<br />
NOTE<br />
Apply sealing compound to exterior joints for installation.<br />
1. Install corner gusset (7) on skin (6) and underframe (9) with four screws (8).<br />
NOTE<br />
Assistant will help with step 2.<br />
2. Install Ieft panel (2) on header (3) with twenty-two screws (5).<br />
3. Install molding (1) on left panel (2) and header (3) with thirteen screws (4).<br />
15-118
<strong>TM</strong> 9-<strong>2320</strong>-<strong>260</strong>-<strong>34</strong>-2<br />
15-<strong>34</strong>. REAR WALL INTERIOR PANELS REPLACEMENT (Contd)<br />
FOLLOW-ON TASKS: ● Install fire extinguisher (right side) (<strong>TM</strong> 9-<strong>2320</strong>-<strong>260</strong>-10).<br />
● Install phone jacks (M820, M820A2) (right side) (<strong>TM</strong> 9-<strong>2320</strong>-<strong>260</strong>-20).<br />
● Install AC manual starter switches (M820, M820A2) (right side) (para, 15-89).<br />
● Install control center box (M820, M820A2) (right side) (para, 15-84).<br />
● Install electrical box (M820, M820A2) (left side) (para. 15-90).<br />
● Install load center conduit (M820, M820A2) (left side) (para. 15-83).<br />
● Install load center (M820, M820A2) (left side) (para. 15-82).<br />
● Retract van body sides (<strong>TM</strong> 9-<strong>2320</strong>-<strong>260</strong>-10).<br />
15-119
<strong>TM</strong> 9-<strong>2320</strong>-<strong>260</strong>-<strong>34</strong>-2<br />
15-35. INTERIOR SIDE PANELS AND LATCHES REPLACEMENT<br />
THIS TASK COVERS:<br />
a. Removal b. Installation<br />
INITIAL SETUP<br />
APPLICABLE MODELS<br />
MATERIALS/PARTS (Contd)<br />
M820, M820A1, M820A2 Adhesive (Appendix C, Item 2)<br />
Fibrous glass felt insulation (Appendix C, Item 16)<br />
TOOLS<br />
General mechanic’s tool kit<br />
REFERENCES (<strong>TM</strong>)<br />
(Appendix B, Item 1) <strong>TM</strong> 9-<strong>2320</strong>-<strong>260</strong>-10<br />
<strong>TM</strong> 9-<strong>2320</strong> -<strong>260</strong>-<strong>34</strong>P-2<br />
MATERIALS/PARTS<br />
Four cotter pins (Appendix D, Item 43)<br />
EQUIPMENT CONDITION<br />
Two gaskets (Appendix D, Item 104) ● Parking brake set (<strong>TM</strong> 9-<strong>2320</strong>-<strong>260</strong>-10).<br />
Eight lockwashers (Appendix D, Item 247)<br />
● Van body sides fully expanded and secured<br />
Two lockwashers (Appendix D, Item 224) (<strong>TM</strong> 9-<strong>2320</strong>-<strong>260</strong>-10).<br />
Four locknuts (Appendix D, Item 196) ● Hinged end panels removed (para. 15-33).<br />
Two O-rings (M820, M820A2)<br />
Hinged floor removed (para. 15-31).<br />
(Appendix D, Item 295)<br />
● Hinged roof removed (para. 15-37).<br />
TWO O-rings (M820A1) (Appendix D, Item 297) ● Side doors removed (para. 15-29).<br />
Three rubber bumpers (Appendix D, Item 369)<br />
Four rubber bumpers (Appendix D, Item 368) GENERAL SAFETY INSTRUCTIONS<br />
Primer (Appendix C, Item 31)<br />
Gloves, eyeshields, and dust mask must be worn<br />
Sealing compound (Appendix C, Item 43) during panel replacement.<br />
WARNING<br />
Van body is insulated with fibrous glass felt insulation. Gloves,<br />
eyeshields, and dust mask must be worn during panel replacement.<br />
Failure to do so may result in injury to personnel.<br />
NOTE<br />
Left and right interior side panels are removed the same. This<br />
procedure covers the right interior side panel.<br />
1. Remove six screws (1) and three hooks (2) from side panel frame (4).<br />
2. Remove six screws (7) and three clips (3) from side panel frame (4).<br />
3. Remove two screws (8) and striker (9) from side panel frame (4).<br />
4. Remove two screws (11), Iockwashers (12), nuts (5), and door check (10) from door angle (6). Discard<br />
Iockwashers (12).<br />
5. Remove two screws (13), striker (14), and two spacer plates (15) from side panel frame (4).<br />
15-120
<strong>TM</strong> 9-<strong>2320</strong>-<strong>260</strong>-<strong>34</strong>-2<br />
15-35. INTERIOR SIDE PANELS AND LATCHES REPLACEMENT (Contd)<br />
6. Remove two screws (2) and rubber bumpers (3) from side panel frame (1). Discard rubber<br />
bumpers (3).<br />
7. remove four screws (11) and two clips (12) from panel (13).<br />
8. Remove four screws (17), washers (16), and rubber bumpers (18) from wood spacers (19) and<br />
panel (6). Discard rubber bumpers (18).<br />
9. Remove eight screws (15) and four wood spacers (19) from panel (6).<br />
NOTE<br />
Perform step 10 for M820 and M820A2 vehicles.<br />
10. Remove eight screws (20) and four hangers (21) from panel (6).<br />
11. Remove four screws (23) and junction box (24) from panel (6).<br />
12. Remove eight screws (7) and plate (8) from panel (6).<br />
13. Remove thirteen screws (22) and molding (25) from panel (6).<br />
NOTE<br />
Assistant will help with steps 14 and 15<br />
14. Remove thirty-three screws (10) and panel (13) from side panel frame (1).<br />
15. Remove fifty-eight screws (9), molding (14), and panel (6) from side panel frame (1).<br />
16. Remove mouldings (26), (4), and (5) from panel (6).<br />
17. Remove two moldings (27), moldings (28), and moldings (29) from panel (6).<br />
15-122
<strong>TM</strong> 9-<strong>2320</strong>-<strong>260</strong>-<strong>34</strong>-2<br />
15-35. INTERIOR SIDE PANELS AND LATCHES REPLACEMENT (Contd)<br />
15-123
<strong>TM</strong> 9-<strong>2320</strong>-<strong>260</strong>-<strong>34</strong>-2<br />
15-35. INTERIOR SIDE PANELS AND LATCHES REPLACEMENT (Contd)<br />
18.<br />
19.<br />
20.<br />
21.<br />
22.<br />
23.<br />
24.<br />
25.<br />
26.<br />
27.<br />
28.<br />
Remove eight screws (15) and plate (14) from panel (16).<br />
NOTE<br />
Assistant will help with step 19.<br />
Remove thirty-three screws (13), moldings (27), (28), (29), (17), (18), and (12), and panel (16) from<br />
side panel frame (4).<br />
Remove nut (20) and washer (21) from shank (5) and latch (22).<br />
Remove two screws (7), plate (8), gasket (9), shank (5), and O-ring (6) from latch (22). Discard<br />
gasket (9) and O-ring (6).<br />
Remove two cotter pins (23), pins (19), clevis (24) and (26) from latch (22). Discard cotter pins (23).<br />
Remove four nuts (11), Iockwashers (10), and latch (22) from side panel frame (4). Discard<br />
lockwashers (10).<br />
Remove two screws (31) and retainer (30) from side panel frame (4).<br />
Remove clevis (26) and flush bolt (3) from side panel frame (4).<br />
Remove clevis (24) and horizontal bar (25) from side panel frame (4).<br />
Remove left latch (steps 18 through 26).<br />
Remove screw (1) and rubber bumper (2) from side panel frame (4). Discard rubber bumper (2).<br />
15-124
<strong>TM</strong> 9-<strong>2320</strong>-<strong>260</strong>-<strong>34</strong>-2<br />
15-35. INTERIOR SIDE PANELS AND LATCHES REPLACEMENT (Contd)<br />
15-125
<strong>TM</strong> 9-<strong>2320</strong>-<strong>260</strong>-<strong>34</strong>-2<br />
15-35. INTERIOR SIDE PANELS AND LATCHES REPLACEMENT (Contd)<br />
1.<br />
2.<br />
3.<br />
4.<br />
5.<br />
6.<br />
7.<br />
8.<br />
9.<br />
10.<br />
11.<br />
12.<br />
13.<br />
NOTE<br />
● Left and right latches are installed the same. This procedure<br />
covers the right side.<br />
● Insulate areas of dissimilar metal-to-metal contact with zinc<br />
chromate primer.<br />
● Seal area between exterior joints with sealing compound.<br />
● Apply adhesive to rubber and metal surfaces.<br />
Install new rubber bumper (2) on side panel frame (4) with screw (1).<br />
Install retainer (30) on side panel frame (4) with two screws (31).<br />
Install horizontal bar (25) and flush bolt (3) in side panel frame (4).<br />
Install clevis (24) on horizontal bar (25).<br />
Install clevis (26) on flush bolt (3).<br />
Install latch (22) on side panel frame (4) with four new lockwashers (10) and nuts (11).<br />
Install clevises (24) and (26) on latch (22) with two pins (19) and new cotter pins (23).<br />
Install new O-ring (6), shank (5), new gasket (9), and plate (8) on latch (22) with two screws (7).<br />
Install washer (21) and nut (20) on shank (5) and latch (22).<br />
Install left latch (22) (steps 2 through 9).<br />
NOTE<br />
● Insulate entire structure with fibrous glass felt insulation,<br />
● Assistant will help with step 11.<br />
Position moldings (27), (28), (29), (17), (18), and (12) on panel (16).<br />
Install panel (16) on side panel frame (4) with thirty-three screws (13).<br />
Install plate (14) on panel (16) with eight screws (15).<br />
15-126
<strong>TM</strong> 9-<strong>2320</strong>-<strong>260</strong>-<strong>34</strong>-2<br />
15-35. INTERIOR SIDE PANELS AND LATCHES REPLACEMENT (Contd)<br />
15-127
<strong>TM</strong> 9-<strong>2320</strong>-<strong>260</strong>-<strong>34</strong>-2<br />
15-35. INTERIOR SIDE PANELS AND LATCHES REPLACEMENT (Contd)<br />
14.<br />
15.<br />
16.<br />
17.<br />
18.<br />
19.<br />
20.<br />
21.<br />
22.<br />
23.<br />
24.<br />
25.<br />
Install two moldings (27), moldings (28), and moldings (29) on panel (6).<br />
Install moldings (4), (5), and (26) on panel (6).<br />
NOTE<br />
● Insulate entire structure with fibrous glass felt insulation.<br />
● Assistant will help with steps 16 and 17.<br />
Install panel (6) and molding (14) on side panel frame (1) with fifty-eight screws (9).<br />
Install panel (13) on side panel frame (1) with thirty-three screws (10).<br />
Install molding (25) on panels (6) and ( 13) with thirteen screws (22).<br />
Install plate (8) on panel (6) with eight screws (7).<br />
Install junction box (24) on panel (6) with four screws (23).<br />
NOTE<br />
Perform step 21 for M820 and M820A2 vehicles.<br />
Install four hangers (21) on panel (6) with eight screws (20).<br />
Install four wood spacers (19) on panel (6) with eight screws ( 15).<br />
Install four new rubber bumpers (18) on panel (6) and wood spacers (19) with four washers (16) and<br />
screws (17).<br />
Install two clips (12) on panel (13) with four screws (11).<br />
Install two new rubber bumpers (3) on side panel frame (1) with two screws (2).<br />
15-128
<strong>TM</strong> 9-<strong>2320</strong>-<strong>260</strong>-<strong>34</strong>-2<br />
15-129<br />
15-35. INTERIOR SIDE PANELS AND LATCHES REPLACEMENT (Contd)
<strong>TM</strong> 9-<strong>2320</strong>-<strong>260</strong>-<strong>34</strong>-2<br />
15-35. INTERIOR SIDE PANELS AND LATCHES REPLACEMENT (Contd)<br />
26. Install two spacer plates (15) and striker (14) on side panel frame (4) with two screws (13).<br />
27. Install door check (10) on door angle (6) with two new lockwashers (12), screws (11), and nuts (5).<br />
28. Install striker (8) on side panel frame (4) with two screws (9).<br />
29. Install three clips (3) on side panel frame (4) with six screws (7).<br />
30. Install three hooks (2) on side panel frame (4) with six screws (1).<br />
FOLLOW-ON TASKS: ● Install side doors (para. 15-29).<br />
● Install hinged roof (para. 15-37).<br />
● Install hinged floor (para, 15-31).<br />
lInstall hinged end panels (para. 15-33).<br />
● Retract van body sides (<strong>TM</strong> 9-<strong>2320</strong>-<strong>260</strong>-10).<br />
15-130
<strong>TM</strong> 9-<strong>2320</strong>-<strong>260</strong>-<strong>34</strong>-2<br />
15-36. CEILING AND FRAME MAINTENANCE<br />
THIS TASK COVERS:<br />
a. Removal c. Installation<br />
b. Cleaning and Inspection<br />
INITIAL SETUP<br />
APPLICABLE MODELS<br />
MATERIALS/PARTS (Contd)<br />
M820, M820A1, M820A2 Fibrous glass felt insulation (Appendix C, Item 16)<br />
Adhesive (Appendix C, Item 2)<br />
TOOLS<br />
Primer (Appendix C, Item 31)<br />
General mechanic’s tool kit<br />
(Appendix B, Item 1)<br />
REFERENCES (<strong>TM</strong>)<br />
Rivet gun (Appendix B, Item 120) <strong>TM</strong> 9-<strong>2320</strong>-<strong>260</strong>-10<br />
<strong>TM</strong> 9-<strong>2320</strong>-<strong>260</strong>-<strong>34</strong>P-2<br />
MATERIALS/PARTS<br />
One hundred two rivets<br />
EQUIPMENT CONDITION<br />
(Appendix D, Item 352) ● Parking brake set (<strong>TM</strong> 9-<strong>2320</strong>-26 0-10).<br />
Ninety-three rivets (Appendix D, Item 357)<br />
● Van body sides fully expanded and secured<br />
Six lockwashers (Appendix D, Item 219) (<strong>TM</strong> 9-<strong>2320</strong>-<strong>260</strong>-10).<br />
Seal (Appendix D, Item 454) Ceiling air ducts removed (para. 15-45).<br />
Eighty-two rivets (Appendix D, Item <strong>34</strong>6) ● Ceiling transition removed (para. 15-42 or 15-43).<br />
One hundred twenty-four rivets<br />
● Rear doors removed (para. 15-28).<br />
(Appendix D, Item 354)<br />
One hundred forty-four rivets<br />
GENERAL SAFETY INSTRUCTIONS<br />
(Appendix D, Item 359)<br />
Gloves, eyeshields, and dust mask must be worn<br />
Ninety-three rivets (Appendix D, Item 353) during ceiling replacement.<br />
Two seals (Appendix D, Item 453)<br />
WARNING<br />
Van body is insulated with fibrous glass felt insulation. Gloves,<br />
eyeshields, and dust mask must be worn during ceiling replacement.<br />
Failure to do so may result in injury to personnel.<br />
NOTE<br />
Assistant will help with steps 1 through 4.<br />
1. Remove ninety-three rivets (4), ceiling panel (3), and two liner strips (1) from ceiling frame (2).<br />
Discard rivets (4).<br />
2. Remove one hundred two rivets (5), ceiling panel (6), and two liner strips (1) from ceiling frame (2).<br />
15-131
<strong>TM</strong> 9-<strong>2320</strong>-<strong>260</strong>-<strong>34</strong>-2<br />
15-36. CEILING AND FRAME MAINTENANCE (Contd)<br />
3. Remove ninety-three rivets (4), ceiling panel (3), and two liner strips (2) from ceiling frame (1).<br />
Discard rivets (4).<br />
4. Remove eighty-two rivets (5), ceiling panel (6), and three liner strips (2) from ceiling frame (1).<br />
Discard rivets (5).<br />
15-132
<strong>TM</strong> 9-<strong>2320</strong>-<strong>260</strong>-<strong>34</strong>-2<br />
15-36. CEILING AND FRAME MAINTENANCE (Contd)<br />
5. Remove one hundred twenty-eight screws (12), two moldings (11), moldings (13), and seals (10) from<br />
ceiling frame (1). Discard seals (10).<br />
6. Remove six nuts (14), screws (8), lockwashers (7), and two lifting brackets (17). Discard<br />
lockwashers (7).<br />
NOTE<br />
● Perform step 7 if roof is to be removed (subtask b.).<br />
● Assistant will help with step 7.<br />
7. Remove one hundred twenty-four rivets (15), one hundred forty-four rivets (9), and ceiling panel (16)<br />
from ceiling frame (1). Place ceiling panel (16) on wooden blocks. Discard rivets (15) and (9).<br />
15-133
<strong>TM</strong> 9-<strong>2320</strong>-<strong>260</strong>-<strong>34</strong>-2<br />
15-36. CEILING AND FRAME MAINTENANCE (Contd)<br />
8. Remove twenty-three screws (2) and moldings (1), (3), and (4) from van body (11).<br />
9. Remove three screws (6) and angle bracket (7) from retainer (8).<br />
10. Remove fifteen screws (5), retainer (8), seal (9), and wood block (10) from van body (11). Discard<br />
seal (9).<br />
1. For general cleaning instructions, refer to para. 2-8<br />
2. For general inspection instructions, refer to para. 2-9.<br />
3. Inspect moldings (1), (3), and (4), angle bracket (7), retainer (8), wood block (10), mouldings (14)<br />
and (15), and lifting bracket (13), for cracks, bends, and breaks. Replace part(s) if cracked) bent,<br />
or broken.<br />
4. Inspect ceiling frame (16) for breaks, warpage, and broken bows. Replace roof if frame (16) is broken,<br />
warped, or has broken bows.<br />
5. Inspect ceiling panels (12), (17), (18), (19), and (20) for cracks, tears, and punctures. Replace part(s)<br />
if cracked, torn, or punctured.<br />
15-1<strong>34</strong>
<strong>TM</strong> 9-<strong>2320</strong>-<strong>260</strong>-<strong>34</strong>-2<br />
15-36. CEILING AND FRAME MAINTENANCE (Contd)<br />
15-135
<strong>TM</strong> 9-<strong>2320</strong>-<strong>260</strong>-<strong>34</strong>-2<br />
15-36. CEILING AND FRAME MAINTENANCE (Contd)<br />
NOTE<br />
l Apply adhesive for installation.<br />
l Insulate areas of dissimilar metal-to-metal contact with zinc<br />
chromate primer.<br />
NOTE<br />
When installing molding, wood block, and seal on van body, leave<br />
three center holes of retainer open for installation of angle bracket.<br />
1. Install wood block (10), new seal (9), and retainer (8) on van body (11) with fifteen screws (5).<br />
2. Install angle bracket (7) on retainer (8) and van body (11) with three screws (6).<br />
3. Install moldings (1), (3), and (4) on van body (11) with twenty-three screws (2).<br />
15-136
<strong>TM</strong> 9-<strong>2320</strong>-<strong>260</strong>-<strong>34</strong>-2<br />
15-36. CEILING AND FRAME MAINTENANCE (Contd)<br />
NOTE<br />
Perform step 4 if roof panel is to be installed (subtask b.).<br />
Insulate entire structure with fibrous glass felt insulation.<br />
Assistant will help with steps 4 and 5.<br />
4. Lift ceiling panel (21) from wooden supports and position on ceiling frame (19).<br />
5. Install ceiling panel (21) on ceiling frame (19) with one hundred forty-four new rivets (13) and<br />
one hundred twenty-four new rivets (20).<br />
6. Install two lifting brackets (22) on ceiling frame (21) with six new lockwashers (23), screws (12),<br />
and nuts (18).<br />
7. Install two new seals (14), moldings (15), and moldings (17) on ceiling frame (19) with one hundred<br />
twenty-eight screws (16).<br />
15-137
<strong>TM</strong> 9-<strong>2320</strong>-<strong>260</strong>-<strong>34</strong>-2<br />
15-36. CEILING AND FRAME MAINTENANCE (Contd)<br />
NOTE<br />
Assistant will help with steps 8 through 11.<br />
8. Install ceiling panel (6) and three liner strips (2) on ceiling frame (1) with eighty-two new rivets (5).<br />
9. Install ceiling panel (3) and two liner strips (2) on ceiling frame (1) with ninety-three new rivets (4).<br />
10. Install ceiling panel (7) and two liner strips (2) on ceiling frame (1) with one hundred two new<br />
rivets (9).<br />
11. Install ceiling panel (10) and two liner strips (2) on ceiling frame (1) with ninety-three new rivets (8).<br />
15-138
<strong>TM</strong> 9-<strong>2320</strong>-<strong>260</strong>-<strong>34</strong>-2<br />
15-36. CEILING AND FRAME MAINTENANCE (Contd)<br />
FOLLOW-ON TASKS: • Install rear doors (para. 15-28).<br />
• Install ceiling transition (para. 15-42 or 15-43).<br />
• Install ceiling air ducts (para. 15-45).<br />
•Retract van body sides (<strong>TM</strong> 9-<strong>2320</strong>-<strong>260</strong>-10).<br />
15-139
<strong>TM</strong> 9-<strong>2320</strong>-<strong>260</strong>-<strong>34</strong>-2<br />
15-37. HINGED ROOF MAINTENANCE<br />
THIS TASK COVERS:<br />
a. Removal d. Assembly<br />
b. Disassembly e. Installation<br />
c. Cleaning and Inspection<br />
INITIAL SETUP<br />
APPLICABLE MODELS<br />
M820, M820A1, M820A2<br />
TOOLS<br />
General mechanic’s tool kit<br />
(Appendix B, Item 1)<br />
Rivet gun (Appendix B, Item 120)<br />
Lifting device<br />
Chains<br />
MATERIALS/PARTS<br />
Locknut (Appendix D, Item 196)<br />
One hundred fifty-seven rivets<br />
(Appendix D, Item 360)<br />
Fifty-two rivets (Appendix D, Item 361)<br />
Twenty-four rivets (Appendix D, Item 362)<br />
Seal (Appendix D, Item 445)<br />
Seal (Appendix D, Item 455)<br />
Seal (Appendix D, Item 450)<br />
Seal (Appendix D, Item 456)<br />
Seal (Appendix D, Item 457)<br />
Cushion pad (Appendix D, Item 52)<br />
Cushion pad (Appendix D, Item 53)<br />
Four rubber bumpers (Appendix D, Item 369)<br />
Two cotter pins (Appendix D, Item 21)<br />
Cotter pin (Appendix D, Item 37)<br />
Gasket (Appendix D, Item 104)<br />
O-ring (Appendix D, Item 299)<br />
Fibrous glass felt insulation<br />
(Appendix C, Item 16)<br />
MATERIALS/PARTS (Contd)<br />
Primer (Appendix C, Item 31)<br />
Sealing compound (Appendix C, Item 45)<br />
Adhesive (Appendix C, Item 2)<br />
REFERENCES (<strong>TM</strong>)<br />
<strong>TM</strong> 9-<strong>2320</strong>-<strong>260</strong>-10<br />
<strong>TM</strong> 9-<strong>2320</strong>-<strong>260</strong>-20<br />
<strong>TM</strong> 9-<strong>2320</strong>-<strong>260</strong>-<strong>34</strong>P-2<br />
EQUIPMENT CONDITION<br />
● Van body sides fully expanded and secured<br />
(<strong>TM</strong> 9-<strong>2320</strong>-<strong>260</strong>-10).<br />
● Hinged roof-operated blackout plungers removed<br />
(<strong>TM</strong> 9-<strong>2320</strong>-<strong>260</strong>-20).<br />
● Ceiling rear cover removed (para. 15-40 or 15-41).<br />
● Ceiling filler and side panels removed<br />
(M820, M820A2) (para. 15-44).<br />
● Left and right side blackout wiring harness<br />
removed (M820, M820A2) (para. 15-72).<br />
● Ceiling removed (M820A1) (para. 15-36).<br />
GENERAL SAFETY INSTRUCTIONS<br />
All personnel must stand clear during lifting<br />
operations.<br />
Ensure lifting capacity is greater than weight of<br />
hinged roof.<br />
Gloves, eyeshields, and dust mask must be worn<br />
during hinged roof replacement.<br />
WARNING<br />
Van body is insulated with fibrous glass felt insulation, Gloves,<br />
eyeshields, and dust mask must be worn during hinged roof<br />
maintenance. Failure to do so may result in injury to personnel.<br />
NOTE<br />
Left and right side hinged roofs are maintained the same. This<br />
procedure covers the right side hinged roof.<br />
1. Attach two chains to lifting device and hinged roof (2) and remove slack from chains.<br />
2. Remove four screws (4), two angle brackets (3), and holding rods (5) from hinged roof (2).<br />
15-140
<strong>TM</strong> 9-<strong>2320</strong>-<strong>260</strong>-<strong>34</strong>-2<br />
15-37. HINGED ROOF MAINTENANCE (Contd)<br />
WARNING<br />
● All personnel must stand clear during lifting operations.<br />
A swinging or shifting load may cause injury to personnel.<br />
● Ensure lifting capacity is greater than weight of hinged roof.<br />
Failure to do so may result in injury to personnel or damage to<br />
equipment.<br />
NOTE<br />
Assistant will help with step 3.<br />
3. Remove sixty-nine screws (6) and hinged roof (2) from van body (1). Place hinged roof (2) on wooden<br />
supports.<br />
4. Remove chains from lifting device and hinged roof (2).<br />
15-141
<strong>TM</strong> 9-<strong>2320</strong>-<strong>260</strong>-<strong>34</strong>-2<br />
15-37. HINGED ROOF MAINTENANCE (Contd)<br />
b. Disassembly<br />
1.<br />
2.<br />
3.<br />
4.<br />
5.<br />
6.<br />
7,<br />
8.<br />
9.<br />
10.<br />
11.<br />
12.<br />
Van body is insulated with fibrous glass felt insulation. Gloves,<br />
eyeshields, and dust mask must be worn during ceiling replacement.<br />
Failure to do so may result in injury to personnel.<br />
Remove twelve screws (27) and three clamps (28) from hinged roof frame (1).<br />
Remove six screws (25) and three holder assemblies (26) from hinged roof frame (1).<br />
Remove thirty screws (5), three moldings (4), moldings (6), and moldings (7) from panels (2) and (18).<br />
Remove four screws (11) and handle (12) from panel (2).<br />
Remove ten screws (13) and cover (14) from panel (2).<br />
Remove six screws (9) and plate (8) from panel (2).<br />
Remove six screws (19) and three bars (20) from panels (2) and (18).<br />
Remove six screws (21) and three fillers (22) from panels (2) and (18).<br />
Remove two screws (15) and molding (16) from panels (2) and (18).<br />
Remove moldings (3), (23), and (24) from panels (2) and (18).<br />
NOTE<br />
Assistant will help with steps 11 and 12.<br />
Remove fifty-five screws (10) and panel (2) from hinged roof frame (1).<br />
Remove forty-one screws (17) and panel (18) from hinged roof frame (1).<br />
15-142
<strong>TM</strong> 9-<strong>2320</strong>-<strong>260</strong>-<strong>34</strong>-2<br />
15-37. HINGED ROOF MAINTENANCE (Contd)<br />
15-143
<strong>TM</strong> 9-<strong>2320</strong>-<strong>260</strong>-<strong>34</strong>-2<br />
15-37. HINGED ROOF MAINTENANCE (Contd) I<br />
13.<br />
14.<br />
15.<br />
16.<br />
17.<br />
18.<br />
19,<br />
20.<br />
21.<br />
22.<br />
23.<br />
24.<br />
25.<br />
26.<br />
27.<br />
Remove sixty-nine screws (26), hinge (14), and seal (13) from hinged roof frame (11). Discard<br />
seal (13).<br />
Remove twenty-four rivets (29), retainer (30), and seal (28) from hinged roof frame (11). Discard<br />
rivets (29) and seal (28).<br />
Remove fifty-two rivets (<strong>34</strong>), retainer (33), and seal (35) from hinged roof frame (11). Discard<br />
rivets (<strong>34</strong>) and seal (35).<br />
Remove seals (31) and (32) from hinged roof frame (11). Discard seals (31) and (32).<br />
Remove padlock and chain (2) and chain hook (1) from angle bracket (37).<br />
Remove screw (38) and angle bracket (37) from skin (7).<br />
Remove cotter pin (24), locknut (23), and washer (22) from handle (3). Discard cotter pin (24) and<br />
locknut (23).<br />
Remove two screws (4), plate (5), handle (3), gasket (6), and O-ring (36) from skin (7). Discard<br />
gasket (6) and O-ring (36).<br />
Remove two cotter pins (19) and pins (16) from latch (17). Discard cotter pins (19).<br />
Remove four nuts (21), washers (20), and latch (17) from hinged roof frame (11).<br />
Remove two clevises (18) from bars (15) and (25).<br />
Remove bars (15) and (25) from hinged roof frame (11).<br />
Remove four screws (9) and rubber bumpers (10) from hinged roof frame (11). Discard rubber<br />
bumpers (10).<br />
NOTE<br />
● Perform step 27 if skin is to be replaced (subtask c.).<br />
● Assistant will help with step 27.<br />
Remove one hundred fifty-seven rivets (8) and skin (7) from hinged roof frame (11). Discard<br />
rivets (8).<br />
15-144
<strong>TM</strong> 9-<strong>2320</strong>-<strong>260</strong>-<strong>34</strong>-2<br />
15-37 HINGED ROOF MAINTENANCE (Contd)<br />
15-145
<strong>TM</strong> 9-<strong>2320</strong>-<strong>260</strong>-<strong>34</strong>-2<br />
15-37. HINGED ROOF MAINTENANCE (Contd)<br />
c. Cleaning and Inspection<br />
1.<br />
2.<br />
3.<br />
4.<br />
5.<br />
6.<br />
7.<br />
8.<br />
9.<br />
10.<br />
For general cleaning instructions, refer to para. 2-8.<br />
For general inspection instructions, refer to para. 2-9.<br />
Inspect panels (2) and (11) and retainers (28) and (29) for cracks and breaks. Replace part(s) if<br />
cracked or broken.<br />
Inspect moldings (3), (4), (5), (6), (10), (14), and (15) for warpage and breaks. Replace part(s) if<br />
warped or broken.<br />
Inspect plate (7), handle (8), cover (9), three bars (12), fillers (13), bars (24) and (27), and two<br />
clevises (25) for bends and breaks. Replace part(s) if bent or broken.<br />
Inspect three clamps (17), holders (16), and hinge (23) for breaks and proper operation. Replace<br />
clamp(s) (17), holder(s) (16), or hinge (23) if broken or operating improperly.<br />
Inspect angle bracket (18), padlock and chain (19), chain hook (20), and handle (21) for breaks.<br />
Replace part(s) is broken.<br />
Inspect latch (26) for proper operation. Replace latch (26) if operating improperly.<br />
Inspect skin (22) for tears and punctures. Replace skin (22) if torn or punctured.<br />
Inspect frame (1) for breaks. Replace hinged roof if frame (1) is broken.<br />
15-146
<strong>TM</strong> 9-<strong>2320</strong>-<strong>260</strong>-<strong>34</strong>-2<br />
15-37.<br />
15-147
<strong>TM</strong> 9-<strong>2320</strong>-<strong>260</strong>-<strong>34</strong>-2<br />
15-37. HINGED ROOF MAINTENANCE (Contd)<br />
1.<br />
2.<br />
3.<br />
4.<br />
5.<br />
6.<br />
7.<br />
8.<br />
9.<br />
10.<br />
11.<br />
12.<br />
13.<br />
14.<br />
●<br />
●<br />
●<br />
●<br />
●<br />
NOW<br />
Insulate areas of dissimilar metal-to-metal contact with zinc<br />
chromate primer.<br />
Seal between exterior joints with sealing compound.<br />
Apply adhesive to both rubber and metal surfaces.<br />
Perform step 1 only if skin was replaced (subtask c.).<br />
Assistant will help with step 1.<br />
Install skin (7) on hinged roof frame (11) with one hundred fifty-seven new rivets (8).<br />
Install four new rubber bumpers (10) on hinged roof frame (11) with four screws (9).<br />
Install two clevises (18) on bars (15) and (25) and position in slots of hinged roof frame ( 11).<br />
Install latch (17) on hinged roof frame (11) with four washers (20) and nuts (21).<br />
Install two clevises (18) on latch (17) with two pins (16) and new cotter pins (19).<br />
Install new O-ring (36), new gasket (6), plate (5), and handle (3) on skin (7) with two screws (4).<br />
Install handle (3) on latch (17) with washer (22), new locknut (23), and new cotter pin (24).<br />
Install angle bracket (37) on skin (7) with three screws (38).<br />
Install chain hook (1) and padlock and chain (2) on angle bracket (37).<br />
Install new seals (31) and (32) on hinged roof frame (11).<br />
Install new seal (35) and retainer (33) on hinged roof frame (11) with fifty-two new rivets (<strong>34</strong>).<br />
Install new cushion pads (12) and (27) on hinged roof frame (11).<br />
Install new seal (28) and retainer (30) on hinged roof frame (11) with twenty-four new rivets (29).<br />
Install new seal (13) and hinge (14) on hinged roof frame (11) with sixty-nine screws (26).<br />
15-148
<strong>TM</strong> 9-<strong>2320</strong>-<strong>260</strong>-<strong>34</strong>-2<br />
15-37. HINGED ROOF MAINTENANCE (Contd)<br />
15-149
<strong>TM</strong> 9-<strong>2320</strong>-<strong>260</strong>-<strong>34</strong>-2<br />
15-37. HINGED ROOF MAINTENANCE (Contd)<br />
15.<br />
16.<br />
17.<br />
18.<br />
19.<br />
20.<br />
21.<br />
22.<br />
23.<br />
24.<br />
25.<br />
26.<br />
NOTE<br />
● Insulate entire structure with fibrous glass felt insulation.<br />
● Assistant will help with steps 15 and 16.<br />
Install panel (18) on hinged roof frame (1) with forty-one screws (17).<br />
Install panel (2) on hinged roof frame (1) with fifty-five screws (10).<br />
Install molding (16) on panels (2) and (18) with two screws (15).<br />
Install moldings (3), (23), and (24) on panels (2) and (18).<br />
Install three fillers (22) on panels (2) and (18) with six screws (21).<br />
Install three bars (20) on fillers (22) with six screws (19).<br />
Install plate (8) on panel (2) with six screws (9).<br />
Install cover (14) on panel (2) with ten screws (13).<br />
Install handle (12) on panel (2) with four screws (11).<br />
Install three moldings (4), moldings (6), and moldings (7) on panels (2) and (18) with thirty<br />
screws (5).<br />
Install three holders (26) on hinged roof frame (1) with six screws (25).<br />
Install three clamps (28) on hinged roof frame (1) with twelve screws (27).<br />
15-150
<strong>TM</strong> 9-<strong>2320</strong>-<strong>260</strong>-<strong>34</strong>-2<br />
15-37.<br />
15-151
15-37. HINGED ROOF MAINTENANCE (Contd)<br />
1. Attach two chains to lifting device and hinged roof (2).<br />
WARNING<br />
• All personnel must stand clear during lifting operations.<br />
A swinging or shifting load may result in injury to personnel.<br />
• Ensure lifting capacity is greater than weight (500 lb (227 kg))<br />
of hinged roof. Failure to do so may result in injury to personnel.<br />
NOTE<br />
Assistant will help with step 2.<br />
2. Lift hinged roof (2) from wooden supports and install on van body (1) with sixty-nine screws (6).<br />
3. Install hinged roof (2) on two holding rods (5) and angle brackets (3) with four screws (4).<br />
4. Remove chains from lifting device and hinged roof (2).<br />
NOTE<br />
Hinged roof-operated blackout plungers must be installed before<br />
side blackout harnesses are installed in load center,<br />
5. Install hinged roof-operated blackout plungers (<strong>TM</strong> 9-<strong>2320</strong>-<strong>260</strong>-20).<br />
15-152
<strong>TM</strong> 9-<strong>2320</strong>-<strong>260</strong>-<strong>34</strong>-2<br />
15-37. HINGED ROOF MAINTENANCE (Contd)<br />
FOLLOW-ON TASKS: ● Install ceiling (M820A1) (para. 15-36).<br />
● Install left and right side blackout wiring harness (M820, M820A2) (para. 15-72).<br />
● Install ceiling filler and side panels (M820, M820A2) (para. 15-44).<br />
● Install ceiling rear cover (para. 15-40 or 15-41).<br />
● Install hinged roof-operated blackout plungers (<strong>TM</strong> 9-<strong>2320</strong>-<strong>260</strong>-20).<br />
● Retract van body sides (<strong>TM</strong> 9-<strong>2320</strong>-<strong>260</strong>-10).<br />
15-153
<strong>TM</strong> 9-<strong>2320</strong>-<strong>260</strong>-<strong>34</strong>-2<br />
I5-38. CEILING REGISTERS AND DEFLECTORS REPLACEMENT<br />
THIS TASK COVERS:<br />
a. Removal b. Installation<br />
INITIAL SETUP<br />
APPUCABLE MODELS<br />
EQUIPMENT CONDITION<br />
M820, M820A1, M820A2 Parking brake set (<strong>TM</strong> 9-<strong>2320</strong>-<strong>260</strong>-10).<br />
TOOIS<br />
General mechanic’s tool kit<br />
(Appendix B, Item 1)<br />
REFERENCES (<strong>TM</strong>]<br />
<strong>TM</strong> 9-<strong>2320</strong>-<strong>260</strong>-10<br />
<strong>TM</strong> 9-<strong>2320</strong>-<strong>260</strong>-<strong>34</strong>P-2<br />
GENERAL SAFETY INSTRUCTIONS<br />
Gloves, eyeshields, and dust mask must be worn<br />
during register and deflector replacement.<br />
WARNING<br />
a. Removal<br />
Van body is insulated with fibrous glass felt insulation. Gloves,<br />
eyeshields, and dust mask must be worn during register and<br />
deflector replacement. Failure to do so may result in injury to<br />
personnel.<br />
NOTE<br />
● All ceiling registers and cleflectors are replaced the same. This<br />
procedure covers the replacement of one register and deflector,<br />
● Registers and deflectors in M820, M820A1, and M820A2 vehicles<br />
are replaced the same. This procedure covers the M820 and<br />
M820A2 vehicles.<br />
1. Remove two screws (5) and register (6) from ceiling side panel (4) and deflector (2).<br />
2. Remove twelve screws (1) and deflector (2) from air duct (3) and ceiling side panel (4).<br />
3. Remove two screws (8) and register (7) from air duct (3).<br />
1. Install register (7) on air duct (3) with two screws (8).<br />
2. Install deflector (2) on air duct (3) and ceiling side panel (4) with twelve screws ( 1).<br />
3. Install register (6) on ceiling side panel (4) and deflector (2) with two screws (5).<br />
15-154
15-38. CEILING REGISTERS AND DEFLECTORS REPLACEMENT (Contd)<br />
<strong>TM</strong> 9-<strong>2320</strong>-<strong>260</strong>-<strong>34</strong>-2
<strong>TM</strong> 9-<strong>2320</strong>-<strong>260</strong>-<strong>34</strong>-2<br />
15-39. FRONT WALL REGISTER REPLACEMENT<br />
THIS TASK COVERS:<br />
a. Removal b. Installation<br />
INITIAL SETUP<br />
APPLICABLE MODELS<br />
REFERENCES (<strong>TM</strong>)<br />
M820, M820A1, M820A2 <strong>TM</strong> 9-<strong>2320</strong>-<strong>260</strong>-10<br />
<strong>TM</strong> 9-<strong>2320</strong> -<strong>260</strong>-<strong>34</strong>P-2<br />
TOOLS<br />
General mechanic’s tool kit<br />
EQUIPMENT CONDITION<br />
(Appendix B, Item 1) Parking brake set (<strong>TM</strong> 9-<strong>2320</strong>-<strong>260</strong>-10).<br />
NOTE<br />
All four front wall registers are replaced the same. This procedure<br />
Remove four screws (3) and register (2) from front wall (1).<br />
Install register (2) on front wall (1) with four screws (3).<br />
15-156
<strong>TM</strong> 9-<strong>2320</strong>-<strong>260</strong>-<strong>34</strong>-2<br />
15-40. CEILING REAR COVER REPLACEMENT (M820A1 )<br />
THIS TASK COVERS:<br />
a. Removal b. Installation<br />
INITIAL SETUP<br />
APPLICABLE MODELS<br />
M820A1<br />
TOOLS<br />
General mechanic’s tool kit<br />
(Appendix B, Item 1)<br />
MATERIALS/PARTS<br />
Fibrous glass felt insulation<br />
(Appendix C, Item 16)<br />
Adhesive (Appendix C, Item 2)<br />
Primer (Appendix C, Item 31)<br />
REFERENCES (<strong>TM</strong>)<br />
<strong>TM</strong> 9-<strong>2320</strong>-<strong>260</strong>-10<br />
<strong>TM</strong> 9-<strong>2320</strong> -<strong>260</strong>-<strong>34</strong>P-2<br />
EQUIPMENT CONDITION<br />
• Parking brake set (<strong>TM</strong> 9-<strong>2320</strong>-<strong>260</strong>-10).<br />
• Van body sides fully expanded and secured<br />
(<strong>TM</strong> 9-<strong>2320</strong>-<strong>260</strong>-10).<br />
GENERAL SAFETY INSTRUCTIONS<br />
Gloves, eyeshields, and dust mask must be worn<br />
during rear cover replacement.<br />
WARNING<br />
Van body is insulated with fibrous glass felt insulation. Gloves,<br />
eyeshields, and dust mask must be worn during rear cover<br />
replacement, Failure to do so may result in injury to personnel.<br />
Remove eight screws (3), thirty-two screws (4), and rear cover (5) from rear header (2) and air duct (1).<br />
• Insulate areas of metal-to-metal contact with zinc chromate<br />
primer.<br />
• Apply adhesive to metal surfaces.<br />
• lnsulate entire structure with fibrous glass felt insulation.<br />
Install rear cover (5) on air duct (1) and rear header (2) with thirty-two screws (4) and eight screws (3).<br />
FOLLOW-ON TASK: Retract van body sides (<strong>TM</strong> 9-<strong>2320</strong>-<strong>260</strong>-10).<br />
15-157
15-41. CEILING REAR COVER REPLACEMENT (M820, M820A2)<br />
THIS TASK COVERS:<br />
a. Removal b. Installation<br />
INITIAL SETUP<br />
APPLICABLE MODELS<br />
M820, M820A2<br />
TOOLS<br />
General mechanic’s tool kit<br />
(Appendix B, Item 1)<br />
MATERIALS / PARTS<br />
Fibrous glass felt insulation<br />
(Appendix C, Item 16)<br />
Adhesive (Appendix C, Item 2)<br />
Primer (Appendix C, Item 31)<br />
REFERENCES (<strong>TM</strong>)<br />
<strong>TM</strong> 9-<strong>2320</strong>-<strong>260</strong>-10<br />
<strong>TM</strong> 9-<strong>2320</strong>-<strong>260</strong>-<strong>34</strong>P-2<br />
EQUIPMENT CONDITION<br />
Parking brake set (<strong>TM</strong> 9-<strong>2320</strong>-<strong>260</strong>-10).<br />
GENERAL SAFETY INSTRUCTIONS<br />
Gloves, eyeshields, and dust mask must be worn<br />
during rear cover replacement.<br />
WARNING<br />
Van body is insulated with fibrous glass felt insulation. Gloves,<br />
eyeshields, and dust mask must be worn during rear cover<br />
replacement. Failure to do so may result in injury to personnel.<br />
1. Remove four screws (7) from rear cover (5) and two plates (1).<br />
2. Remove eight screws (4), eleven screws (6), and rear cover (5) from rear header (3) and air duct (2).<br />
NOTE<br />
• Insulate areas of metal-to-metal contact<br />
primer.<br />
• Apply adhesive to metal surfaces.<br />
with zinc chromate<br />
• Insulate entire structure with fibrous glass felt insulation.<br />
1. Install rear cover (5) on rear header (3) and air duct (2) with eleven screws (6) and eight screws (4).<br />
2. Install four screws (7) in rear cover (5) and two plates (1).<br />
15-158
<strong>TM</strong> 9-<strong>2320</strong>-<strong>260</strong>-<strong>34</strong>-2<br />
15-41. CEILING REAR COVER REPLACEMENT (M820, M820A) (Contd)<br />
15-159
15-42. CEILING TRANSITION MAINTENANCE (M820, M820A2)<br />
THIS TASK COVERS:<br />
a. Removal c. Assembly<br />
b. Disassembly d. Installation<br />
INITIAL SETUP<br />
APPLICABLE MODELS<br />
REFERENCES (<strong>TM</strong>)<br />
M820, M820A2<br />
<strong>TM</strong> 9-<strong>2320</strong>-<strong>260</strong>-10<br />
<strong>TM</strong> 9-<strong>2320</strong> -<strong>260</strong>-<strong>34</strong>P-2<br />
TOOLS<br />
General mechanic’s tool kit<br />
EQUIPMENT CONDITION<br />
(Appendix B, Item 1) • Parking brake set (<strong>TM</strong> 9-<strong>2320</strong>-<strong>260</strong>-10),<br />
Rivet gun (Appendix B, Item 120)<br />
MATERIALS/PARTS<br />
Twenty-four rivets (Appendix D, Item 365)<br />
Four seals (Appendix D, Item 446)<br />
Fibrous glass felt insulation<br />
(Appendix C, Item 16)<br />
Adhesive (Appendix C, Item 2)<br />
Van body sides fully expanded and secured<br />
(<strong>TM</strong> 9-<strong>2320</strong>-<strong>260</strong>-10).<br />
Ceiling filler and side panels removed<br />
(para. 15-44).<br />
GENERAL SAFETY INSTRUCTIONS<br />
Gloves, eyeshields, and dust mask must be worn<br />
during transition replacement.<br />
WARNING<br />
Van body is insulated with fibrous glass felt insulation. Gloves,<br />
eyeshields, and dust mask must be worn during transition<br />
replacement. Failure to do so may result in injury to personnel.<br />
NOTE<br />
Assistant will help with steps 1 through 3.<br />
1, Remove twenty-six screws (5) and enclosure (4) from air duct (2) and transition (3).<br />
2. Remove seven screws (8) from support (7) and van ceiling (l).<br />
3. Remove twenty-four screws (6) and transition (3) from van ceiling (l).<br />
1. Remove seven rivets (11), retainer (10), seal (9), and support (7) from transition (3). Discard<br />
rivets (11) and seal (9).<br />
2. Remove ten rivets ( 12), two retainers (13), and seals (14) from transition (3). Discard seals (14) and<br />
rivets (12).<br />
3. Remove seven rivets (18), retainer (19), and seal (17) from transition (3). Discard seal (17) and<br />
rivets (18).<br />
4. Remove ten screws (15) and two angles (16) from transition (3).<br />
15-160
M 9-<strong>2320</strong>-<strong>260</strong>-<strong>34</strong>-2<br />
15-42. CEILING TRANSITION MAINTENANCE (M820, M820A2) (Contd)<br />
15-161
<strong>TM</strong> 9-<strong>2320</strong>-<strong>260</strong>-<strong>34</strong>-2<br />
15-42. CEILING TRANSITION MAINTENANCE (M820, M820A2) (Contd)<br />
1. Install two angles (4) on transition (2) with ten screws (3).<br />
NOTE<br />
Apply adhesive to both rubber and metal surfaces.<br />
2. Install new seal (5) and retainer (7) on transition (2) with seven new rivets (6).<br />
3. Install two new seals (1) and retainers (8) on transition (2) with ten new rivets (9).<br />
4. Install support (15), new seal (17), and retainer (18) on transition (2) with seven new rivets (19).<br />
• Insulate inside of transition with fibrous glass felt insulation.<br />
• Assistant will help with steps 1 through 3.<br />
1. Install transition (2) on van ceiling (10) with twenty-four screws ( 14).<br />
2. Secure support (15) to van ceiling (10) with seven screws (16).<br />
3. Install enclosure (13) on air duct (11) and transition (2) with twenty-six screws (12).<br />
15-162
<strong>TM</strong> 9-<strong>2320</strong>-<strong>260</strong>-<strong>34</strong>-2<br />
15-42. CEILING TRANSITION MAINTENANCE (M820, M820A2) (Contd)<br />
FOLLOW-ON TASKS: • Install ceiling filler and side panels (M820, M820A2) (para. 15-44).<br />
• Retract van body sides (<strong>TM</strong> 9-<strong>2320</strong>-<strong>260</strong>-10).<br />
15-163
<strong>TM</strong> 9-<strong>2320</strong>-<strong>260</strong>-<strong>34</strong>-2<br />
15-43. CEILING TRANSITION MAINTENANCE (M820A1)<br />
THIS TASK COVERS:<br />
a. Removal c. Assembly<br />
b. Disassembly d. Installation<br />
lNITIAL SETUP<br />
APPLICABLE MODELS<br />
M820A1<br />
TOOLS<br />
General mechanic’s tool kit<br />
(Appendix B, Item 1)<br />
MATERIALS/PARTS<br />
Four seals (Appendix D, Item 461)<br />
Two seals (Appendix D, Item 460)<br />
Adhesive (Appendix C, Item 2)<br />
Fibrous glass felt insulation<br />
(Appendix C, Item 16)<br />
REFERENCES (<strong>TM</strong>)<br />
<strong>TM</strong> 9-<strong>2320</strong>-<strong>260</strong>-10<br />
<strong>TM</strong> 9-<strong>2320</strong>-<strong>260</strong>-<strong>34</strong>P-2<br />
EQUIPMENT CONDITION<br />
• Parking brake set (<strong>TM</strong> 9-<strong>2320</strong>-<strong>260</strong>-10).<br />
• Van body sides fully expanded and secured<br />
(<strong>TM</strong> 9-<strong>2320</strong>-<strong>260</strong>-10).<br />
GENERAL SAFETY INSTRUCTIONS<br />
Gloves, eyeshields, and dust mask must be worn<br />
during transition replacement.<br />
WARNING<br />
Van body is insulated with fibrous glass felt insulation. Gloves,<br />
eyeshields, and dust mask must be worn during transition<br />
replacement. Failure to do so may result in injury to personnel.<br />
1. Remove thirty-six screws (4) and enclosure (5) from filler panel (2) and transition (3).<br />
2. Remove sixteen screws (8) and liner (7) from van ceiling (1) and transition (3).<br />
3. Remove twenty screws (6) and transition (3) from van ceiling ( 1).<br />
b. Disassembly<br />
Remove two seals (9), seals (12), seal (11), and seal (10) from transition (3). Discard<br />
seals (9), (12), (11), and (10).<br />
NOTE<br />
Apply adhesive to seals before installation.<br />
Install new seal (11), seal (10), two new seals (12), and new seals (9) on transition (3).<br />
NOTE<br />
Insulate inside of transition with fibrous glass felt insulation.<br />
1. Install transition (3) on van ceiling (1) with twenty screws (6).<br />
2. Install liner (7) on van ceiling (1) and transition (3) with sixteen screws (8).<br />
3. Install enclosure (5), filler panel (2) and transition (3) on van ceiling (1) with thirty-six screws (4).<br />
15-164
<strong>TM</strong> 9-<strong>2320</strong>-<strong>260</strong>-<strong>34</strong>-2<br />
15-43.<br />
FOLLOW-ON TASK: Retract van body sides (<strong>TM</strong> 9-<strong>2320</strong>-<strong>260</strong>-10).<br />
15-165
15-44. CEILING FILLER AND SIDE PANELS REPLACEMENT<br />
THIS TASK COVERS:<br />
a. Left Side Panel and Filler Removal c. Right Side Panel and Filler Installation<br />
b. Right Side Panel and Filler Removal d. Left Side Panel and Filler Installation<br />
INITIAL SETUP<br />
APPLICABLE MODELS<br />
M820, M820A2<br />
TOOLS<br />
General mechanic’s tool kit<br />
(Appendix B, Item 1)<br />
MATERIALS/PARTS<br />
Fibrous glass felt insulation<br />
(Appendix C, Item 16)<br />
PERSONNEL REQUIRED<br />
Two<br />
REFERENCES<br />
<strong>TM</strong> 9-<strong>2320</strong>-<strong>260</strong>-10<br />
<strong>TM</strong> 9-<strong>2320</strong>-<strong>260</strong>-20<br />
<strong>TM</strong> 9-<strong>2320</strong>-<strong>260</strong>-<strong>34</strong>P-2<br />
EQUIPMENT CONDITION<br />
Van body sides fully expanded and secured<br />
(<strong>TM</strong> 9-<strong>2320</strong>-<strong>260</strong>-10).<br />
Fluorescent light fixtures removed (para. 15-92).<br />
Blackout and emergency light fixtures removed<br />
(para. 15-91).<br />
Blackout switch removed (<strong>TM</strong> 9-<strong>2320</strong>-<strong>260</strong>-20).<br />
Ceiling rear cover removed (para. 15-41).<br />
3-phase receptacles and 400 Hz receptacles<br />
removed (<strong>TM</strong> 9-<strong>2320</strong>-<strong>260</strong>-20).<br />
• Telephone jack removed (left side)<br />
(<strong>TM</strong> 9-<strong>2320</strong>-<strong>260</strong>-20).<br />
• Cord box removed (<strong>TM</strong> 9-<strong>2320</strong>-<strong>260</strong>-20).<br />
• Registers and deflectors removed (para. 15-38).<br />
GENERAL SAFETY INSTRUCTIONS<br />
Gloves, eyeshields, and dust mask must be worn<br />
during ceiling filler and side panel replacement.<br />
WARNING<br />
1. Remove seventy-nine screws (6) and side panel (5) from van ceiling (3), air ducts (4), and<br />
transition (7).<br />
2. Remove three screws (1) and filler (2) from transition (7).<br />
b. Right Side Panel and Filler Removal<br />
1. Remove seventy-nine screws (10) and side panel (11) from van ceiling (3), air ducts (4), and<br />
transition (7).<br />
2. Remove five screws (9) and filler (8) from transition (7).<br />
c. Right Side Panel and Filler Installation<br />
NOTE<br />
Insulate entire structure with fibrous glass felt insulation.<br />
1. Install filler (8) on transition (7) with five screws (9).<br />
2. Install side panel (11) on van ceiling (3), air ducts (4), and transition (7) with seventy-nine<br />
screws (10).<br />
15-166
<strong>TM</strong> 9-<strong>2320</strong>-<strong>260</strong>-<strong>34</strong>-2<br />
15-44. CEILING FILLER AND SIDE PANELS REPLACEMENT (Cont'd)<br />
d. Left Side Panel and Filler Installation<br />
1.<br />
2.<br />
Install filler (2) on transition (7) with three screws (1).<br />
Install side panel (5) on van ceiling (3), air ducts (4), and transition (7) with seventy-nine screws (6).<br />
FOLLOW-ON TASKS: • Install registers and deflectors (para. 15-38).<br />
• Install cord box (<strong>TM</strong> 9-<strong>2320</strong>-<strong>260</strong>-20).<br />
• Install telephone jack (left side) (<strong>TM</strong> 9-<strong>2320</strong>-<strong>260</strong>-20).<br />
• Install 3-phase receptacles and 400 Hz receptacles (<strong>TM</strong> 9-<strong>2320</strong>-<strong>260</strong>-20).<br />
• Install ceiling rear cover (para. 15-41).<br />
• Install blackout switch (<strong>TM</strong> 9-<strong>2320</strong>-<strong>260</strong>-20).<br />
• Install blackout and emergency light fixtures (para. 15-91).<br />
• Install fluorescent light fixtures (para, 15-92).<br />
• Retract van body sides (<strong>TM</strong> 9-<strong>2320</strong>-<strong>260</strong>-10).
<strong>TM</strong> 9-<strong>2320</strong>-<strong>260</strong>-<strong>34</strong>-2<br />
15-45. CEILING AIR DUCTS AND SUPPORTS REPLACEMENT<br />
THIS TASK COVERS:<br />
a. Removal b. Installation<br />
INITIAL SETUP<br />
APPLICABLE MODELS<br />
M820, M820A1, M82A2<br />
TOOLS<br />
General mechanic’s tool kit<br />
(Appendix B, Item 1)<br />
MATERIALS/PARTS<br />
Primer (Appendix C, Item 31)<br />
PERSONNEL REQUIRED<br />
Two<br />
REFERENCES (<strong>TM</strong>)<br />
<strong>TM</strong> 9-<strong>2320</strong>-<strong>260</strong>-10<br />
<strong>TM</strong> 9-<strong>2320</strong> -<strong>260</strong>-<strong>34</strong>P-2<br />
EQUIPMENT CONDITION<br />
• Parking brake set (<strong>TM</strong> 9-<strong>2320</strong>-<strong>260</strong>-10).<br />
• Van body sides fully expanded and secured<br />
(<strong>TM</strong> 9-<strong>2320</strong>-<strong>260</strong>-10).<br />
• Ceiling rear cover removed (para. 15-40 or 15-41).<br />
• Ceiling filler and side panels removed<br />
(M820, M820A2) (para. 15-44).<br />
• Ceiling registers and deflectors removed (M820A1)<br />
(para. 15-38).<br />
• Ceiling lights removed (M820A1) (para. 15-93).<br />
GENERAL SAFETY INSTRUCTIONS<br />
Gloves, eyeshields, and dust mask must be worn<br />
during duct and support replacement.<br />
Van body is insulated with fibrous glass felt insulation. Gloves,<br />
eyeshields, and dust mask must be worn during duct and support<br />
replacement. Failure to do so may result in injury to personnel.<br />
NOTE<br />
• Perform step 1 for M820 and M820A2 vehicles.<br />
• Perform step 2 for M820A1 vehicles.<br />
1. Remove fifty-two screws (8) and two enclosures (9) from air ducts (4) and (7).<br />
2. Remove seventy-two screws (8) and two enclosures (9) from air ducts (4) and (7).<br />
3. Remove fourteen screws (6) from air ducts (4) and (7) and support (3).<br />
4. Remove sixteen screws (5) and air duct (4) from ceiling (1).<br />
5. Remove eighteen screws (10) and air duct (7) from ceiling (1).<br />
6. Remove nine screws (2) and support (3) from ceiling (1).<br />
NOTE<br />
• Perform step 7 for M820 and M820A2 vehicles.<br />
• Perform step 8 for M820A1 vehicles.<br />
7. Remove fifty-two screws (21) and two enclosures (20) from air ducts (11) and (18).<br />
8. Remove seventy-two screws (21) and two enclosures (20) from air ducts (11) and (18).<br />
9. Remove eight screws (17) and four screws (19) from air ducts (11) and (18) and supports (12)<br />
and (14).<br />
10. Remove eighteen screws (16) and air duct (18) from ceiling (1).<br />
15-168
<strong>TM</strong> 9-<strong>2320</strong>-<strong>260</strong>-<strong>34</strong>-2<br />
15-45. CEILING AIR DUCTS AND SUPPORTS REPLACEMENT (Cont'd)<br />
11. Remove sixteen screws (16) and air duct (11) from ceiling (1).<br />
12. Remove ten screws (15) and support (14) from ceiling (1).<br />
13. Remove eleven screws (13) and support (12) from ceiling (1).
15-45. CEILING AIR DUCTS AND SUPPORTS REPLACEMENT (Cont'd)<br />
b. Installation<br />
NOTE<br />
Insulate areas of dissimilar metal-to-metal contact with zinc<br />
chromate primer.<br />
1. Install support (2) on ceiling (3) with eleven screws (4).<br />
2. Install support (5) on ceiling (3) with ten screws (6).<br />
3. Install air duct (1) on ceiling (3) with sixteen screws (7).<br />
4. Install air, duct (9) on ceiling (3) with eighteen screws (7).<br />
5. Secure air ducts (1) and (9) to supports (2) and (5) with four screws (10) and eight screws (8).<br />
NOTE<br />
• Perform step 6 for M820 and M820A2 vehicles.<br />
• Perform step 7 for M820A1 vehicles.<br />
6. Install two enclosures (11) on air ducts (1) and (9) with fifty-two screws (12).<br />
7. Install two enclosures (11) on air ducts (1) and (9) with seventy-two screws (12).<br />
8. Install support (14) on ceiling (3) with nine screws (13).<br />
9. Install air duct (18) on ceiling (3) with eighteen screws (21).<br />
10. Install air duct (15) on ceiling (3) with sixteen screws (16).<br />
11. Secure air ducts (18) and (15) to support ( 14) with fourteen screws ( 17).<br />
NOTE<br />
• Perform step 12 for M820 and M820A2 vehicles.<br />
• Perform step 13 for M820A1 vehicles.<br />
12. Install two enclosures (20) on air ducts (15) and (18) with fifty-two screws (19)<br />
13. Install two enclosures (20) on air ducts (15) and ( 18) with seventy-two screws (19).<br />
15-170
<strong>TM</strong> 9-<strong>2320</strong>-<strong>260</strong>-<strong>34</strong>-2<br />
15-45. CEILING AIR DUCTS AND SUPPORTS REPLACEMENT (Cont'd)<br />
FOLLOW-ON TASKS: • Install ceiling lights (M82A1) (para. 15-93).<br />
• Install ceiling registers and deflectors (M820A1) (para. 15-38).<br />
• Install ceiling filler and side panels (M820, M820A2) (para. 15-44).<br />
• Install ceiling rear cover (para, 15-40 or 15-41).<br />
• Retract van body sides (<strong>TM</strong> 9-<strong>2320</strong>-<strong>260</strong>-10).
<strong>TM</strong> 9-<strong>2320</strong>-<strong>260</strong>-<strong>34</strong>-2<br />
15-46. BONNET FRAME REPAIR<br />
THIS TASK COVERS:<br />
a. Disassembly b. Assembly<br />
INITIAL SETUP<br />
APPLICABLE MODELS<br />
M820, M820A1, M820A2<br />
TOOLS<br />
General mechanic’s tool kit<br />
(Appendix B, Item 1)<br />
Rivet gun (Appendix B, Item 120)<br />
MATERIALS/PARTS<br />
One hundred forty rivets<br />
(Appendix D, Item <strong>34</strong>6)<br />
One hundred thirty-one rivets<br />
(Appendix D, Item 352)<br />
Eighty rivets (Appendix D, Item 363)<br />
Fibrous glass felt insulation<br />
(Appendix C, Item 16)<br />
Primer (Appendix C, Item 31)<br />
Sealing compound (Appendix C, Item 45)<br />
REFERENCES (<strong>TM</strong>)<br />
<strong>TM</strong> 9-<strong>2320</strong>-<strong>260</strong>-20<br />
<strong>TM</strong> 9-<strong>2320</strong>-<strong>260</strong>-<strong>34</strong>P-2<br />
EQUIPMENT CONDITION<br />
l Heaters removed (<strong>TM</strong> 9-<strong>2320</strong>-<strong>260</strong>-20).<br />
. Air conditioner removed (para. 15-49).<br />
l Bonnet access door removed (para. 15-47).<br />
l Bonnet door removed (para. 15-48).<br />
GENERAL SAFETY INSTRUCTIONS<br />
Gloves, eyeshids, and dust mask must be worn<br />
during bonnet frame repair.<br />
WARNING<br />
Van body is insulated with fibrous glass felt insulation. Gloves,<br />
eyeshields, and dust mask must be worn during bonnet frame<br />
repair. Failure to do so may result in injury to personnel.<br />
a. Disassembly<br />
1. Remove twenty-seven screws (6) and drip molding (5) from bonnet frame (15).<br />
2. Remove seventeen screws (14) and door panel (13) from bonnet frame (15).<br />
3. Remove four screws (1) and plate (2) from outer panel (3) and bonnet frame (15).<br />
4. Remove thirty-eight rivets (4), twenty-four rivets (8), and outer panels (3) and (7) from bonnet<br />
frame (15) an bonnet lower panel ( 12). Discard rivets (4) and (8).<br />
NOTE<br />
• Left filler is shown in illustration.<br />
• Assistant will help with step 5.<br />
5. Remove sixty-four rivets (11), thirty-one rivets (10), bonnet lower panel (12), and two fillers (9) from<br />
bonnet frame (15). Discard rivets (11) and (10).<br />
15-172
<strong>TM</strong> 9-<strong>2320</strong>-<strong>260</strong>-<strong>34</strong>-2<br />
15-46. BONNET FROME REPAIR (Contd)<br />
15-173
<strong>TM</strong> 9-<strong>2320</strong>-<strong>260</strong>-<strong>34</strong>-2<br />
15-46. BONNET FRAME REPAIR (Cont'd)<br />
6.<br />
7.<br />
8.<br />
9.<br />
10.<br />
11.<br />
12.<br />
NOTE<br />
Left and right heater ducts are replaced the same. This procedure<br />
covers the right side heater duct.<br />
Remove two screws (6) from heater duct (7) and support ( 18).<br />
Remove four rivets (16) and two speed nuts (17) from support (18). Discard rivets (16).<br />
Remove three screws (15) and support (18) from front wall (19).<br />
Remove thirty-six rivets (8), heater duct (7), and insulation (9) from bonnet floor (3). Discard<br />
rivets (8) and insulation (9).<br />
Remove sixteen rivets (11), twenty-four rivets (12), thirty-six rivets (14), and inner panels (13)<br />
and (20) from bonnet frame (10) and bonnet floor (3). Discard rivets (11), (12), and (14).<br />
Remove three screws (4) and post (5) from bonnet floor (3).<br />
NOTE<br />
Assistant will help with step 12.<br />
Remove fortv-three rivets (1). thirtv-five rivets (2). and bonnet floor (3) from bonnet frame (10) and<br />
front wall (19). Discard rivets (1) and (2).<br />
b. Assembly<br />
NOTE<br />
• Insulate areas of dissimilar metal-to-metal contact with zinc<br />
chromate primer.<br />
• Seal area between exterior joints with sealing compound.<br />
• Insulate all enclosed structures with fibrous glass felt insulation.<br />
• Assistant will help with step 1.<br />
1. Install bonnet floor (3) on bonnet frame (10) and front wall (19) with forty-three new rivets (1) and<br />
thirty-five new rivets (2).<br />
2. Install post (5) on bonnet floor (3) with three screws (4).<br />
3. Install inner panels (13) and (20) on bonnet frame (10) and bonnet floor (3) with thirty-six new<br />
rivets (14), twenty-four new rivets (12), and sixteen new rivets (11).<br />
NOTE<br />
Left and right heater ducts are replaced the same. This procedure<br />
covers the right side heater duct.<br />
4. Install new insulation (9) and heater duct (7) on bonnet floor (3) with thirty-six new rivets (8).<br />
5. Install support (18) on front wall (19) with three screws (15).<br />
6. Install two speed nuts (17) on support (18) with four new rivets (16).<br />
7. Install heater duct (7) on support (18) with two screws (6).<br />
15-174
<strong>TM</strong> 9-<strong>2320</strong>-<strong>260</strong>-<strong>34</strong>-2<br />
15-46. BONNET FRAME REPAIR (Contd)<br />
15-175
<strong>TM</strong> 9-<strong>2320</strong>-<strong>260</strong>-<strong>34</strong>-2<br />
15-46. BONNET FRAME REPAIR (Contd)<br />
NOTE<br />
• Left filler is shown in illustration.<br />
• Assistant will help with step 8.<br />
8. Install two fillers (9) and bonnet lower panel (12) on bonnet frame (15) with sixty-four new<br />
rivets (11) and thirty-one new rivets (10).<br />
9. Install outer panels (3) and (7) on bonnet frame (15) and bonnet lower panel (12) with twenty-four<br />
new rivets (8) and thirty-eight new rivets (4).<br />
10. Install plate (2) on outer panel (3) and bonnet frame (15) with four screws (1).<br />
11. Install door panel (13) on bonnet frame (15) with seventeen screws (14).<br />
12. Install drip molding (5) on bonnet frame (15) with twenty-seven screws (6).<br />
15-176
<strong>TM</strong> 9-<strong>2320</strong>-<strong>260</strong>-<strong>34</strong>-2<br />
15-46. BONNET FRAME REPAIR (Contd)<br />
FOLLOW-ON TASKS: • Install bonnet door (para. 15-48).<br />
• Install bonnet access door (para. 15-47).<br />
• Install air conditioner (para. 15-49).<br />
• Install heaters (<strong>TM</strong> 9-<strong>2320</strong>-<strong>260</strong>-20).<br />
15-177
<strong>TM</strong> 9-<strong>2320</strong>-<strong>260</strong>-<strong>34</strong>-2<br />
15-47. BONNET ACCESS DOOR MAINTENANCE<br />
THIS TASK COVERS:<br />
a. Removal d. Assembly<br />
b. Disassembly e. Installation<br />
c. Cleaning and Inspection<br />
INITIAL SETUP<br />
APPLICABLE MODELS<br />
M820, M820A1, M820A2<br />
TOOLS<br />
General mechanic’s tool kit<br />
(Appendix B, Item 1)<br />
Rivet gun (Appendix B, Item 120)<br />
MATERIALS/PARTS<br />
Seventy-four rivets (Appendix D, Item 364)<br />
Seventy-four rivets (Appendix D, Item 367)<br />
Seal (Appendix D, Item 445)<br />
Seal (Appendix D, Item 459)<br />
Fibrous glass felt insulation<br />
(Appendix C, Item 16)<br />
MATERIALS/PARTS (Contd)<br />
Primer (Appendix C, Item 31)<br />
sealing compound (Appendix C, Item 45)<br />
REFERENCES (<strong>TM</strong>)<br />
<strong>TM</strong> 9-<strong>2320</strong>-<strong>260</strong>-10<br />
<strong>TM</strong> 9-<strong>2320</strong> -<strong>260</strong>-<strong>34</strong>P-2<br />
EQUIPMENT CONDITION<br />
Parking brake set (<strong>TM</strong> 9-<strong>2320</strong>-<strong>260</strong>-10).<br />
GENERAL SAFETY INSTRUCTIONS<br />
Gloves, eyeshields, and dust mask must be worn<br />
during bonnet access door maintenance.<br />
Van body is insulated with fibrous glass felt insulation. Gloves,<br />
eyeshields, and dust mask must be worn during bonnet access door<br />
maintenance. Failure to do so may result in injury to personnel.<br />
NOTE<br />
Assistant will help with removal.<br />
Remove twelve screws (2) and access door (3) from bonnet frame (1).<br />
b. Disassembly<br />
1. Remove twelve screws (6), hinge (5), and seal (4) from door frame (21). Discard seal (4).<br />
2. Remove four screws (9) and two angle brackets (8) from inner panel (7).<br />
3. Remove four screws (11), rod (12), and holder bracket (10) from inner panel (7).<br />
4. Remove screw (15), two nuts (13), screws (16), and bracket (14) from inner panel (7).<br />
NOTE<br />
Assistant will help with step 5.<br />
5. Remove thirty-three nuts (17), screws (23), seventy-four rivets (24), outer panel (22), three<br />
retainers (18), and seal (20) from door frame (21). Discard seal (20).<br />
NOTE<br />
Perform step 6 if inner panel is to be replaced (subtask c.).<br />
6. Remove seventy-four rivets (19) and inner panel (7) from door frame (21). Discard rivets (19).<br />
c. Cleaning and Inspection<br />
1. For general cleaning instructions, refer to para. 2-8.<br />
2. For general inspection instructions, refer to para. 2-9.<br />
15-178
<strong>TM</strong> 9-<strong>2320</strong>-<strong>260</strong>-<strong>34</strong>-2<br />
15-47. BONNET ACCESS DOOR MAINTENANCE (Cont'd)<br />
3.<br />
4.<br />
5.<br />
6.<br />
7.<br />
Inspect hinge (5) for bends, breaks, and proper operation. Replace hinge (5) if bent, broken,<br />
or operating improperly.<br />
Inspect three retainers (18) for bends and breaks. Replace retainers (18) if bent or broken.<br />
Inspect angle brackets (8), holder bracket (10), and rod (12) for cracks and breaks. Replace angle<br />
brackets (8), holder bracket (10), or rod (12) if cracked or broken.<br />
Inspect outer panel (22) and inner panel (7) for cracks and punctures. Replace outer panel (22)<br />
or inner panel (7) if cracked or punctured.<br />
Inspect door frame (21) for bends, cracks, and breaks. Replace door frame (21) if bent, cracked,<br />
15-179
<strong>TM</strong> 9-<strong>2320</strong>-<strong>260</strong>-<strong>34</strong>-2<br />
15-47. BONNET ACCESS DOOR MAINTENANCE (Cont'd)<br />
1.<br />
2.<br />
3.<br />
4.<br />
5.<br />
6.<br />
NOTE<br />
• Insulate areas of dissimilar metal-to-metal contact with zinc<br />
chromate primer.<br />
• Seal between exterior joints with sealing compound.<br />
• Insulate all enclosed structures with fibrous glass felt insulation.<br />
• Perform step 1 if inner panel is to be installed (subtask c.).<br />
• Assistant will help with steps 1 and 2.<br />
Install inner panel (4) on door frame (18) with seventy-four new rivets (16).<br />
Install new seal (1), three retainers (15), and outer panel (19) on door frame (18) with thirty-three<br />
screws (20), nuts (14), and seventy-four new rivets (21).<br />
Install holder bracket (7) and rod (9) on inner panel (4) with four screws (8).<br />
Install screw (12) and two nuts (10) on bracket (11).<br />
Install bracket (11) on inner panel (4) with two screws (13).<br />
Install two angle brackets (5) on inner panel (4) with four screws (6).<br />
15-180
<strong>TM</strong> 9-<strong>2320</strong>-<strong>260</strong>-<strong>34</strong>-2<br />
15-47. BONNET ACCESS DOOR MAINTENANCE (Contd)<br />
Assistant will help with installation.<br />
Install access door (24) on bonnet frame (22) with twelve screws (23).<br />
15-181
<strong>TM</strong> 9-<strong>2320</strong>-<strong>260</strong>-<strong>34</strong>-2<br />
15-48. BONNET DOOR MAINTENANCE<br />
THIS TASK COVERS:<br />
a. Removal d. Assembly<br />
b. Disassembly e. Installation<br />
c. Cleaning and Inspection<br />
lNITIAL SETUP<br />
APPLICABLE MODELS<br />
M820, M820A1, M820A2<br />
TOOS<br />
General mechanic’s tool kit<br />
(Appendix B, Item 1)<br />
Rivet gun (Appendix B, Item 120)<br />
MATERIALS/PARTS<br />
Thirty-eight rivets (Appendix D, Item 352)<br />
Fifty-two rivets (Appendix D, Item 363)<br />
Six seals (Appendix D, Item 444)<br />
Seal (Appendix D, Item 445)<br />
MATERIALS/PARTS (Contd)l<br />
Fibrous glass felt insulation (Appendix C, Item 16)<br />
Primer (Appendix C, Item 31)<br />
Sealing compound (Appendix C, Item 45)<br />
REFERENCES (<strong>TM</strong>)<br />
<strong>TM</strong> 9-<strong>2320</strong>-<strong>260</strong>-10<br />
<strong>TM</strong> 9-<strong>2320</strong> -<strong>260</strong>-<strong>34</strong>P-2<br />
EQUIPMENT CONDITION<br />
Parking brake set (<strong>TM</strong> 9-<strong>2320</strong>-<strong>260</strong>-10).<br />
GENERAL SAFETY INSTRUCTIONS<br />
Gloves, eyeshields, and dust mask must be worn<br />
during bonnet door maintenance.<br />
WARNING<br />
Van body is insulated with fibrous glass felt insulation. Gloves,<br />
eyeshields, and dust mask must be worn during bonnet door<br />
maintenance. Failure to do so may result in injury to personnel.<br />
a. Removal<br />
1. Remove two screws (6) and washers (5) and open bonnet door (7).<br />
NOTE<br />
Assistant will help with step 2.<br />
2. Remove seven screws (1) and bonnet door (7) from bonnet (2).<br />
3. Remove four screws (3) and lever (4) from bonnet door (7).<br />
15-182
<strong>TM</strong> 9-<strong>2320</strong>-<strong>260</strong>-<strong>34</strong>-2<br />
15-48. BONNET DOOOR MAINTENANCE (Contd)<br />
15-138
<strong>TM</strong> 9-<strong>2320</strong>-<strong>260</strong>-<strong>34</strong>-2<br />
15-48. BONNET DOOR MAINTENANCE (Cont'd)<br />
b. Disassembly<br />
1.<br />
2.<br />
3.<br />
4.<br />
5.<br />
6.<br />
7.<br />
8.<br />
9.<br />
Remove seven screws (21), spacer plate (20), seal (19), hinge (18), and seal (17) from frame (11).<br />
Discard seals (19) and (17).<br />
Remove eighteen nuts (24), screws (13), and two retainers (23) from outer panel (12), frame (11), and<br />
seal (22).<br />
NOTE<br />
Assistant will help with step 3.<br />
Remove seventeen rivets (14), four screws (15), washers (16), and outer panel (12) from frame (11).<br />
Discard rivets (14).<br />
Remove thirty-two rivets (29) and intake (5) from inner panel (26). Discard rivets (29).<br />
Remove twelve nuts (6), screws (l), two retainers (2), seals (3), and channels (4) from intake (5).<br />
Discard seals (3).<br />
Remove twenty-two nuts (7), screws (33), two retainers (32), seals (31), and channels (30) from<br />
intake (5). Discard seals (31).<br />
Remove seven nuts (8), screws (10), retainer (9), and seal (22) from frame (11). Discard seal (22).<br />
NOTE<br />
Assistant will help with step 8.<br />
Remove thirty-five rivets (25) and inner panel (26) from frame (11). Discard rivets (25).<br />
Remove six rivets (27) and toolbox (28) from inner panel (26), Discard rivets (27).<br />
15-184
<strong>TM</strong> 9-<strong>2320</strong>-<strong>260</strong>-<strong>34</strong>-2<br />
15-48. BONNET DOOR MAINTENANCE (Cont'd)<br />
15-185
<strong>TM</strong> 9-<strong>2320</strong>-<strong>260</strong>-<strong>34</strong>-2<br />
15-48 BONNET DOOR MAINTENANCE (Cont'd)<br />
c. Cleaning and Inspection<br />
1. For general cleaning instructions, refer to para. 2-8.<br />
2. For general inspection instructions, refer to para, 2-9.<br />
3. Replace all bonnet door parts failing inspection.<br />
4. Inspect frame (11) for bends, breaks, cracks, and warpage. Replace bonnet door (<strong>34</strong>) if frame (11)<br />
is bent, broken, cracked, or warped.<br />
d. Assembly<br />
1.<br />
2.<br />
3.<br />
4.<br />
5.<br />
6.<br />
7.<br />
8.<br />
9.<br />
NOTE<br />
• Insulate areas of dissimilar metal-to-metal contact with zinc<br />
chromate primer.<br />
• Seal between all exterior joints with sealing compound.<br />
• Insulate all enclosed structures with fibrous glass felt insulation.<br />
• Assistant will help with step 2.<br />
Install toolbox (28) on inner panel (26) with six new rivets (27).<br />
Install inner panel (26) on frame (11) with thirty-five new rivets (25).<br />
Install new seal (22) and retainer (9) on frame (11) with seven screws (10) and nuts (8).<br />
Install two channels (30), new seals (31), and retainers (32) on intake (5) with twenty-two<br />
screws (33) and nuts (7).<br />
Install two channels (4), new seals (3), and retainers (2) on intake (5) with twelve screws (1) and<br />
nuts (6).<br />
Install intake (5) on inner panel (26) with thirty-two new rivets (29).<br />
NOTE<br />
Assistant will help with step 7.<br />
Install outer panel (12) on frame (11) with seventeen new rivets (14), four washers (16), and<br />
screws (15).<br />
Install two retainers (23) on seal (22), frame ( 11), and outer panel (12) with eighteen screws ( 13)<br />
and nuts (24).<br />
Install new seal (17), hinge (18), new seal (19), and spacer plate (20) on frame (11) with seven<br />
screws (21).<br />
1. Install lever (38) on bonnet door (<strong>34</strong>) with four screws (37).<br />
NOTE<br />
Assistant will help with step 2.<br />
2. Position bonnet door (<strong>34</strong>) on bonnet (36) and install with seven screws (35).<br />
3. Close bonnet door (<strong>34</strong>) and secure with two washers (39) and screws (40).<br />
15-186
<strong>TM</strong> 9-<strong>2320</strong>-240-<strong>34</strong>-2<br />
15-48. BONNET DOOR MAINTENANCE (Cont'd)<br />
15-187
<strong>TM</strong> 9-<strong>2320</strong>-<strong>260</strong>-<strong>34</strong>-2<br />
15-49. AIR CONDITIONER REPLACEMENT<br />
THIS TASK COVERS:<br />
a. Removal b. Installation<br />
INITIAL SETUP<br />
APPLICABI.E MODELS<br />
M820, M820A1, M820A2<br />
TOOLS<br />
General mechanic’s tool kit<br />
(Appendix B, Item 1)<br />
Tool kit, electrical (Appendix B, Item 106)<br />
Lifting device<br />
Chains<br />
MATERIALS/PARTS<br />
Fourteen lockwashers (Appendix D, Item 215)<br />
Cotter pin (Appendix D, Item 37)<br />
Thirteen lockwashers (Appendix D, Item 257)<br />
Two lockwashers (Appendix D, Item 255)<br />
REFERENCES (<strong>TM</strong>)<br />
<strong>TM</strong> 9-<strong>2320</strong>-<strong>260</strong>-10<br />
<strong>TM</strong> 9-<strong>2320</strong>-<strong>260</strong>-20<br />
<strong>TM</strong> 9-<strong>2320</strong>-<strong>260</strong>-<strong>34</strong>P-2<br />
EQUIPMENT CONDITION<br />
• External Power source disconnected<br />
(<strong>TM</strong> 9-<strong>2320</strong>-<strong>260</strong>-10)<br />
• Battery ground cable disconnected<br />
(<strong>TM</strong> 9-<strong>2320</strong>-<strong>260</strong>-20).<br />
Companion seat lowered (<strong>TM</strong> 9-<strong>2320</strong>-<strong>260</strong>-10).<br />
Windshield lowered and cab top removed<br />
(<strong>TM</strong> 9-<strong>2320</strong>-<strong>260</strong>-10).<br />
• Air conditioner drain tube removed<br />
(<strong>TM</strong> 9-<strong>2320</strong>-<strong>260</strong>-20).<br />
Bonnet door removed (para. 15-48).<br />
GENERAL SAFETY INSTRUCTIONS<br />
• All personnel must stand clear during lifting<br />
operations.<br />
• Ensure lifting capacity is greater than weight<br />
of air conditioner.<br />
a. Removal<br />
NOTE<br />
Screw quantity for steps 1, 2, and 4 may differ from vehicle to<br />
vehicle. Record screw quantity for installation,<br />
1. Remove sixteen screws (7) and lower angle bracket (6) from lower panel mounting angle (8) and two<br />
mounting angles (5).<br />
2. Remove twelve screws (10) and lower panel mounting angle (8) from bonnet (12).<br />
3. Remove fourteen screws (4), snap (3), fourteen lockwashers (2), and condenser guard (1) from air<br />
conditioner (11). Discard lockwashers (2).<br />
4. Remove four screws (9) and two mounting angles (5) from bonnet (12).<br />
15-188
<strong>TM</strong> 9-<strong>2320</strong>-<strong>260</strong>-<strong>34</strong>-2<br />
15-49. AIR CONDITIONER REPLACEMENT (Contd)<br />
15-189
<strong>TM</strong> 9-<strong>2320</strong>-<strong>260</strong>-<strong>34</strong>-2<br />
15-49. AIR CONDITIONER REPLACEMENT (Contd)<br />
5.<br />
6.<br />
7.<br />
8.<br />
9.<br />
10.<br />
11.<br />
12.<br />
13.<br />
14.<br />
15.<br />
Remove sixteen screws (1) and top enclosure (2) from bonnet (9) and air conditioner (8).<br />
Remove seven screws (6), ten screws (3), bottom enclosure (5), and left enclosure (4) from bonnet (9)<br />
and air conditioner (8).<br />
Remove four screws (14), plate (13), and bellows (12) from right enclosure (11).<br />
Remove cotter pin (16) and door rod (10) from swing arm (15). Discard cotter pin (16).<br />
Remove ten screws (7) and right enclosure (11) from bonnet (9) and air conditioner (8).<br />
Disconnect cable (24) from air conditioner (8).<br />
Remove screw (26), lockwasher (27), washer (28), ground wire (29), and lockwasher (25) from air<br />
conditioner (8). Discard Iockwashers (27) and (25).<br />
Remove nut (33), Iockwashers (32), washer (31), screw (23), ground wire (29), and lockwasher (30)<br />
from mounting plate (19) and bonnet floor (35). Discard Iockwashers (32) and (30).<br />
Remove five nuts (<strong>34</strong>), Iockwashers (36), washers (37), and screws (22) from mounting plate (19) and<br />
bonnet floor (35). Discard Iockwashers (36).<br />
Remove six screws (21) and Iockwashers (38) from mounting plate (18) and bonnet floor (35). Discard<br />
Iockwashers (38).<br />
Attach chain to lifting device and four lifting brackets (17).<br />
WARNING<br />
16.<br />
17.<br />
All personnel must stand clear during lifting operations.<br />
A swinging or shifting load may cause injury to personnel.<br />
Ensure lifting capacity is greater than weight (450 lb (204 kg)) of<br />
air conditioner. Failure to do so may result in injury to personnel<br />
or damage to equipment.<br />
Remove air conditioner (8) from bonnet (9).<br />
NOTE<br />
Assistant will help with step 16.<br />
Remove six screws (20) and mounting plates (18) and (19) from air conditioner (8).<br />
15-190
<strong>TM</strong> 9-<strong>2320</strong>-<strong>260</strong>-<strong>34</strong>-2<br />
15-49. AIR CONDITIONER REPLACEMENT (Contd)<br />
15-191
<strong>TM</strong> 9-<strong>2320</strong>-<strong>260</strong>-<strong>34</strong>-2<br />
15-49. AIR CONDITIONER REPLACEMENT (Contd)<br />
b. Installation<br />
1.<br />
2.<br />
Install mounting plates (2) and (3) on air conditioner (1) with six screws (4).<br />
Attach chain to lifting device and four lifting brackets (6).<br />
WARNING<br />
3.<br />
4.<br />
5.<br />
6.<br />
7.<br />
8.<br />
9.<br />
10.<br />
11.<br />
12.<br />
13.<br />
14.<br />
All personnel must stand clear during lifting operations.<br />
A swinging or shifting load may cause injury to personnel.<br />
Ensure lifting capacity is greater than weight (450 lb (204 kg)) of<br />
air conditioner. Failure to do so may result in injury to personnel<br />
or damage to equipment.<br />
Position air conditioner (1) in bonnet (5).<br />
NOTE<br />
Assistant will help with step 3.<br />
Secure mounting plate (2) to bonnet floor (21) with six new Iockwashers (24) and screws (7).<br />
Secure mounting plate (3) to bonnet floor (21) with five screws (8), washers (23), new Iockwashers<br />
(22), and nuts (20).<br />
Install ground wire (15) on mounting plate (3) and bonnet floor (21) with new Iockwashers (16),<br />
screw (9), washer (17), new lockwasher (18), and nut (19).<br />
Install ground wire (15) on air conditioner (1) with new Iockwashers (11), washer (14), new<br />
lockwasher (13), and screw (12).<br />
Connect cable (10) to air conditioner (1).<br />
Remove lifting device from chains and remove chains from four lifting brackets (6).<br />
Install left enclosure (28) and bottom enclosure (29) on bonnet (5) and air conditioner (1) with ten<br />
screws (27) and seven screws (30).<br />
Install bellows (<strong>34</strong>) and plate (35) on right enclosure (33) with four screws (36).<br />
Install door rod (32) on swing arm (37) with new cotter pin (38).<br />
Install right enclosure (33) on bonnet (5) and air conditioner (1) with ten screws (31).<br />
Install top enclosure (26) on bonnet (5) and air conditioner (1) with sixteen screws (25).<br />
15-192
<strong>TM</strong> 9-<strong>2320</strong>-<strong>260</strong>-<strong>34</strong>-2<br />
15-49. AIR CONDITIONER REPLACEMENT (Contd)<br />
15-193
<strong>TM</strong> 9-<strong>2320</strong>-<strong>260</strong>-<strong>34</strong>-2<br />
15-49. AIR CONDITIONER REPLACEMENT (Contd)<br />
NOTE<br />
Screw quantity for steps 15, 16, and 18 may differ from vehicle to<br />
vehicle, Install screws as recorded.<br />
15. Install condenser guard (1) on air conditioner (11) with fourteen new Iockwashers (2), snap (3), and<br />
fourteen screws (4).<br />
16. Install two mounting angles (5) on bonnet (12) with four screws (9).<br />
17. Install lower panel mounting angle (8) on bonnet (12) with twelve screws (10).<br />
18. Install lower angle bracket (6) on bonnet (12), mounting angle (8), and two mounting angles (5) with<br />
sixteen screws (7).<br />
15-194
<strong>TM</strong> 9-<strong>2320</strong>-<strong>260</strong>-<strong>34</strong>-2<br />
15-49.<br />
FOLLOW-ON TASKS: Install bonnet door (para. 15-48).<br />
Install air conditioner drain tube (<strong>TM</strong> 9-<strong>2320</strong>-<strong>260</strong>-20).<br />
Raise windshield and install cab top (<strong>TM</strong> 9-<strong>2320</strong>-<strong>260</strong>-10).<br />
Wise companion seat (<strong>TM</strong> 9-<strong>2320</strong>-<strong>260</strong>-10).<br />
Connect battery ground cable (<strong>TM</strong> 9-<strong>2320</strong>-<strong>260</strong>-20).<br />
Connect external power source (<strong>TM</strong> 9-<strong>2320</strong>-<strong>260</strong>-10).<br />
15-195
<strong>TM</strong> 9-<strong>2320</strong>-<strong>260</strong>-<strong>34</strong>-2<br />
15-50. LIFTGATE REPLACEMENT (M820A2)<br />
THIS TASK COVERS:<br />
a. Removal b. Installation<br />
INITIAL SETUP<br />
APPLICABLE MODELS<br />
M820A2<br />
TOOLS<br />
General mechanic’s tool kit<br />
(Appendix B, Item 1)<br />
Hydraulic jack<br />
MATERIALS/PARTS<br />
Cap and plug set (Appendix C, Item 6)<br />
Antiseize tape (Appendix C, Item 50)<br />
REFERENCES (<strong>TM</strong>)<br />
LO 9-<strong>2320</strong>-<strong>260</strong>-12<br />
<strong>TM</strong> 9-<strong>2320</strong>-<strong>260</strong>-10<br />
<strong>TM</strong> 9-<strong>2320</strong>-<strong>260</strong>-20<br />
<strong>TM</strong> 9-<strong>2320</strong>-<strong>260</strong>-<strong>34</strong>P-2<br />
EQUIPMENT CONDITION<br />
● Hydraulic oil reservoir drained<br />
(LO 9-<strong>2320</strong>-<strong>260</strong>-12).<br />
● Van body ladders removed (<strong>TM</strong> 9-<strong>2320</strong>-<strong>260</strong>-10).<br />
● Liftgate platform opened but not lowered<br />
(<strong>TM</strong> 9-<strong>2320</strong>-<strong>260</strong>-10).<br />
● Liftgate platform controls removed<br />
(<strong>TM</strong> 9-<strong>2320</strong>-<strong>260</strong>-20).<br />
● Liftgate control valve removed (para. 15-58).<br />
GENERAL SAFETY INSTRUCTIONS<br />
● All personnel must stand clear during lifting<br />
operations.<br />
Ensure lifting capacity is greater than weight<br />
of liftgate.<br />
CAUTION<br />
● Clean area around hoses and lines before removal to prevent<br />
entry of dirt. Damage will occur if dirt or dust enters system.<br />
● Cap or plug all openings immediately after disconnecting lines<br />
and hoses to prevent contamination.<br />
NOTE<br />
● Tag all hydraulic lines and fittings for installation.<br />
● Have drainage container ready to catch oil.<br />
1. Remove hydraulic hoses (12) and (13) from two elbows (6).<br />
2. Remove two elbows (6) from closing cylinder (5).<br />
3. Remove hydraulic hoses (11) and (14) from adapter (10) and restrictor (22).<br />
4. Remove adapter (10), elbow (9), nipple (8), and restrictor (22) from cylinder (4).<br />
5. Remove hydraulic hoses (15) and (16) from elbows (20).<br />
6. Remove check valve (19) and two connectors (18) from closing cylinder (17).<br />
7. Center hydraulic jack under liftgate (1) and raise in place.<br />
8. Remove twelve nuts (3) and screws (7) from main frame (21) and vehicle frame (2).<br />
● All personnel must stand clear during Iifting operations.<br />
A swinging or shifting load may cause injury to personnel.<br />
● Ensure lifting capacity is greater than weight (500 lb (227 kg))<br />
of liftgate. Failure to do so may result in injury to personnel or<br />
damage to equipment.<br />
15-196
<strong>TM</strong> 9-<strong>2320</strong>-<strong>260</strong>-<strong>34</strong>-2<br />
15-50. LIFTGATE REPLACEMENT (M820A2) (Contd)<br />
NOTE<br />
Three assistants will help with steps 9 and 10.<br />
9.<br />
10.<br />
While steadying liftgate (1) by platform, remove Iiftgate (1) from vehicle frame (2).<br />
Remove liftgate (1) from hydraulic jack.<br />
15-197
<strong>TM</strong> 9-<strong>2320</strong>-<strong>260</strong>-<strong>34</strong>-2<br />
15-50. LIFTGATE REPLACEMENT (M820A2) (Contd)<br />
b. Installation<br />
WARNING<br />
1.<br />
2.<br />
3.<br />
4.<br />
5.<br />
6.<br />
7.<br />
8.<br />
9.<br />
10.<br />
11.<br />
All personnel must stand clear during Iifting operations.<br />
A swinging or shifting load may cause injury to personnel.<br />
Ensure Iifting capacity is greater than weight (500 lb (227 kg))<br />
of liftgate. Failure to do so may result in injury to personnel or<br />
damage to equipment.<br />
Center liftgate (1) on hydraulic jack.<br />
NOTE<br />
Three assistants will help with steps 1 and 2.<br />
While steadying liftgate (1) by platform, raise liftgate (1) in place.<br />
Install main frame (21) on vehicle frame (2) with twelve screws (7) and nuts (3).<br />
Remove hydraulic jack from liftgate (1).<br />
Wrap male threads of two connectors (18), elbows (20), elbows (6), restrictor (22), nipple (8),<br />
adapter (10), and hydraulic hoses (11), (12), (13), and (14) with antiseize tape.<br />
Install two connectors (18) and check valve (19) on closing cylinder (17).<br />
Install hydraulic hoses (15) and (16) on elbows (20).<br />
Install restrictor (22), nipple (8), elbow (9), and adapter (10) on closing cylinder (4).<br />
Install hydraulic hoses (11) and (14) on restrictor (22) and adapter (10).<br />
Install two elbows (6) on closing cylinder (5).<br />
Install hydraulic hoses (12) and (13) on two elbows (6). .<br />
15-198
<strong>TM</strong> 9-<strong>2320</strong>-<strong>260</strong>-<strong>34</strong>-2<br />
15-50. LIFTGATE REPLACEMENT (M820A2) (Contd)<br />
FOLLOW-ON TASKS: Install liftgate control valve (para. 15-58).<br />
Install liftgate platform controls (<strong>TM</strong> 9-<strong>2320</strong>-<strong>260</strong>-20).<br />
Grease all lubrication fittings (LO 9-<strong>2320</strong>-<strong>260</strong>-12).<br />
Lower and raise liftgate (<strong>TM</strong> 9-<strong>2320</strong>-<strong>260</strong>-10), and check for proper operation.<br />
Raise and lock liftgate platform (<strong>TM</strong> 9-<strong>2320</strong>-<strong>260</strong>-10).<br />
Fill hydraulic oil reservoir (LO 9-<strong>2320</strong>-<strong>260</strong>-12).<br />
Install van body ladders (<strong>TM</strong> 9-<strong>2320</strong>-<strong>260</strong>-10).<br />
15-199
<strong>TM</strong> 9-<strong>2320</strong>-<strong>260</strong>-<strong>34</strong>-2<br />
15-51. LIFTGATE PLATFORM AND HINGE PLATE MAINTENANCE (M820A2)<br />
THIS TASK COVERS:<br />
a. Removal d. Adjustment<br />
b. Cleaning and Inspection e. Installation<br />
c. Repair<br />
INITIAL SETUP<br />
APPLICABLE MODELS<br />
M820A2<br />
SPECIAL TOOLS<br />
General mechanic’s tool kit<br />
(Appendix B, Item 1)<br />
Inside micrometer (Appendix B, Item 9)<br />
Outside micrometer (Appendix B, Item 8)<br />
Torque wrench, 1/2-in. dr.<br />
(Appendix B, Item 3)<br />
MATERIALS/PARTS<br />
Twelve Iockwashers (Appendix D, Item 226)<br />
Eight cotter pins (Appendix D, Item 33)<br />
Shims (Appendix D, Item 499)<br />
Lubricating oil (Appendix C, Item 21)<br />
REFERENCES (<strong>TM</strong>)<br />
LO 9-<strong>2320</strong>-<strong>260</strong>-12<br />
<strong>TM</strong> 9-237<br />
<strong>TM</strong> 9-<strong>2320</strong>-<strong>260</strong>-10<br />
<strong>TM</strong> 9-<strong>2320</strong>-<strong>260</strong>-<strong>34</strong>P-2<br />
EQUIPMENT CONDITION<br />
● Parking brake set (<strong>TM</strong> 9-<strong>2320</strong>-<strong>260</strong>-10).<br />
● Van body ladders removed (<strong>TM</strong> 9-<strong>2320</strong>-<strong>260</strong>-10).<br />
● Platform opened but not lowered<br />
(<strong>TM</strong> 9-<strong>2320</strong>-<strong>260</strong>-10).<br />
● Van doors opened (<strong>TM</strong> 9-<strong>2320</strong>-<strong>260</strong>-10).<br />
GENERAL SAFETY INSTRUCTIONS<br />
Platform is heavy and bulky. Use assistants to<br />
remove and install platform.<br />
1. Remove four screws (4), Iockwashers (3), two hinge leaves (2), and bar nuts (6) from van floor (5) and<br />
hinge plate (1). Discard Iockwashers (3).<br />
2. Remove hinge plate (1) from van floor (5).<br />
NOTE<br />
Assistant will help with steps 2 and 3.<br />
3. Lift platform (9) and position support under outer edge to take weight off of radius arms (20).<br />
4. Remove eight cotter pins (15), two connecting links (21), four radius pins (18), and radius rods (20)<br />
from two clutches (22) and platform supports (17). Discard cotter pins (15).<br />
5. Remove eight lubrication fittings (19) from four radius pins (18) and radius rods (20).<br />
NOTE<br />
Tag and measure shims for installation,<br />
6. Remove eight nuts (14), Iockwashers (13), screws (12), two bearing caps (11), and shims (10) from<br />
two bearing arms (7) and platform journals (16). Discard Iockwashers (13).<br />
7. Remove two lubrication fittings (8) and bearing arms (7).<br />
WARNING<br />
Platform is heavy and bulky; handle with care. Failure to do so<br />
may result in injury to personnel or damage to equipment.<br />
NOTE<br />
Four assistants will help with step 8.<br />
8. Remove platform (9) from two bearing arms (7) and support.<br />
15-200
<strong>TM</strong> 9-<strong>2320</strong>-<strong>260</strong>-<strong>34</strong>-2<br />
15-51. LIFTGATE PLATFORM AND HINGE PLATE MAINTENANCE (M820A2) (Contd)<br />
15-201
<strong>TM</strong> 9-<strong>2320</strong>-<strong>260</strong>-<strong>34</strong>-2<br />
15-51. LIFTGATE PLATFORM AND HINGE PLATE MAINTENANCE (M820A2) (Contd)<br />
b. Cleaning and Inspection<br />
1. For general cleaning instructions, refer to para. 2-8.<br />
2. For general inspection instructions, refer to para. 2-9.<br />
1. Straighten and aline platform (9), two platform supports (17), connecting links (21), four radius<br />
rods (18), hinge plate (1), and two hinge leaves (2) (<strong>TM</strong> 9-237).<br />
2. Weld platform (9), two platform journals (16), platform supports (17), connecting links (21), four radius<br />
rods (18), hinge plate (1), and two hinge leaves (2) if cracked or weld seams are split (<strong>TM</strong> 9-237).<br />
1. Using outside micrometer, measure outer diameter of two platform journals (16) and note<br />
measurements separately.<br />
2. Install shims (10) and two bearing caps (11) on bearing arms (7) with eight screws (12) and<br />
nuts (14). Tighten nuts (6) 75-85 lb-ft (102-115 N·m).<br />
3. Using inside micrometer, measure inner diameter of bearing surface between bearing arms (7)<br />
and bearing caps (11). Note measurements separately.<br />
NOTE<br />
Clearance between platform journals and bearing surfaces must be<br />
0.010-0.015 in. (0.25 mm-0.38 mm).<br />
4. Subtract measurement from step 3 from measurement from step 1 to obtain journal clearance.<br />
NOTE<br />
Tag shims for installation.<br />
5. Remove eight nuts (14), screws (12), shims (10), and two bearing caps (11) from bearing arms (7).<br />
6. If clearance is not within limits, add or remove shims (10) by performing steps 2 through 5 until<br />
journal clearance is within limits.<br />
1. Install two lubrication fittings (8) on bearing arms (7).<br />
WARNING<br />
Platform is heavy and bulky; handle with care. Failure to do so<br />
may result in injury to personnel or damage to equipment.<br />
NOTE<br />
● Four assistants will help with steps 2 and 3.<br />
● Coat all bearing surfaces with lubricating oil during installation.<br />
2. Install platform (9) on two bearing arms (7) and position support under platform outer edge.<br />
3. Install shims (10) and two bearing caps (11) on bearing arms (7) and platform journals (16) with<br />
eight screws (12), new Iockwashers (13), and nuts (14). Tighten nuts (14) 75-85 lb-ft (102-115 N·m).<br />
4. Install eight lubrication fittings (19) on four radius pins (18) and radius rods (20).<br />
5. Install four radius rods (20) on two platform supports (17) and clutches (22) with four radius<br />
pins (18), two connecting links (21), and eight new cotter pins (15).<br />
15-202
<strong>TM</strong> 9-<strong>2320</strong>-<strong>260</strong>-<strong>34</strong>-2<br />
15-51. LIFTGATE PLATFORM AND HINGE PLATE MAINTENANCE (M820A2) (Contd)<br />
6.<br />
7.<br />
Lift platform outer edge and remove support.<br />
NOTE<br />
Assistant will help with steps 6 and 7.<br />
Install hinge plate (1) on van floor (5) with two hinge leaves (2), bar nuts (6), four new<br />
Iockwashers (3), and screws (4). Tighten screws (4) 49-55 lb-ft (66-75 N·m).<br />
FOLLOW-ON TASKS: Grease all lubrication fittings (LO 9-<strong>2320</strong>-<strong>260</strong>-12).<br />
Close van doors (<strong>TM</strong> 9-<strong>2320</strong>-<strong>260</strong>-10).<br />
Close platform (<strong>TM</strong> 9-<strong>2320</strong>-<strong>260</strong>-10).<br />
Install van body ladders (<strong>TM</strong> 9-<strong>2320</strong>-<strong>260</strong>-10).<br />
15-203
<strong>TM</strong> 9-<strong>2320</strong>-<strong>260</strong>-<strong>34</strong>-2<br />
15-52. LIFTGATE LIFT FRAME MAINTENANCE (M820A2)<br />
THIS TASK COVERS:<br />
a. Removal d. Assembly<br />
b. Disassembly e. Installation<br />
c. Cleaning and Inspection<br />
lNITIAL SETUP<br />
APPLICABLE MODELS<br />
A11<br />
TOOLS<br />
General mechanic’s tool kit<br />
(Appendix B, Item 1)<br />
MATERIALS/PARTS<br />
Four Iockwashers (Appendix D, Item 228)<br />
Two pins (Appendix D, Item 318)<br />
REFERENCES (<strong>TM</strong>)<br />
LO 9-<strong>2320</strong>-<strong>260</strong>-12<br />
<strong>TM</strong> 9-<strong>2320</strong>-<strong>260</strong>-10<br />
<strong>TM</strong> 9-<strong>2320</strong>-<strong>260</strong>-<strong>34</strong>P-2<br />
EQUIPMENT CONDITION<br />
● Parking brake set (<strong>TM</strong> 9-<strong>2320</strong>-<strong>260</strong>-10).<br />
● Liftgate platform and hinge plate removed<br />
(para. 15-51).<br />
● Liftgate closing cylinders removed (para. 15-60).<br />
● Liftgate clutches removed (para. 15-54).<br />
1. Remove two pins (4) from straight pin (14). Discard pins (4).<br />
NOTE<br />
Two assistants will help with steps 2 and 3.<br />
2. Manually raise lift frame (8) to take weight off lifting cylinder rod (2).<br />
3. Remove straight pin (14) from lift frame (8) and lifting cylinder rod (2).<br />
4. Remove shouldered shaft (3) and Iift frame (8) from main frame (1).<br />
b. Disassembly<br />
1. Remove two sleeve bushings (7) from lift frame (8).<br />
2. Remove two lubrication fittings (5) from lift frame (8).<br />
3. Remove four nuts (10), Iockwashers (11), screws (13), and two bearings arms (12) from lift frame (8).<br />
Discard Iockwashers (11).<br />
4. Remove nut (9) and liftgate kickout screw (6) from lift frame (8).<br />
c. Cleaning and Inspection<br />
1. For general cleaning instructions, refer to para. 2-8.<br />
2. For general inspection instructions, refer to para. 2-9.<br />
1. Install liftgate kickout screw (6) in lift frame (8) with nut (9).<br />
2. Install two bearing arms (12) on lift frame (8) with four screws (13), new Iockwashers (11),<br />
and nuts (10).<br />
3. Install two sleeve bushings (7) on lift frame (8).<br />
4. Install two lubrication fittings (5) on lift frame (8).<br />
15-204
<strong>TM</strong> 9-<strong>2320</strong>-<strong>260</strong>-<strong>34</strong>-2<br />
15-52. LIFTGATE LIFT FRAME MAINTENANCE (M820A2) (Contd)<br />
e. Installation<br />
N0TE<br />
Two assistants will help with steps 1 through 3.<br />
1. Aline lift frame (8) on main frame (l), and install shoulder shaft (3) and lift frame (8) on main<br />
frame (1).<br />
2. Manually raise lift frame (8) and aline with lifting cylinder rod (2).<br />
3. Install lifting cylinder rod (2) on lift frame (8) with straight pin (14) and two new pins (4).<br />
FOLLOW-ON TASKS: Install liftgate platform and hinge plate (para. 15-51).<br />
Install Iiftgate closing cylinders (para. 15-60).<br />
Install liftgate clutches (para. 15-54).<br />
Grease lubrication fittings (LO 9-<strong>2320</strong>-<strong>260</strong>-12).<br />
15-205
<strong>TM</strong> 9-<strong>2320</strong>-<strong>260</strong>-<strong>34</strong>-2<br />
15-53. LIFTGATE MAIN FRAME MAINTENANCE (M820A2)<br />
THIS TASK COVERS:<br />
a. Removal c. Installation<br />
b. Cleaning and Inspection<br />
lNITIAL SETUP<br />
APPLICABLE MODELS<br />
M820A2<br />
TOOLS<br />
General mechanic’s tool kit<br />
(Appendix B, Item 1)<br />
Hydraulic jack<br />
REFERENCES (<strong>TM</strong>)<br />
<strong>TM</strong> 9-<strong>2320</strong>-<strong>260</strong>-10<br />
<strong>TM</strong> 9-<strong>2320</strong>-<strong>260</strong>-<strong>34</strong>P-2<br />
EQUIPMENT CONDITION<br />
Parking brake set (<strong>TM</strong> 9-<strong>2320</strong>-<strong>260</strong>-10).<br />
Liftgate lift frame removed (para. 15-52).<br />
Liftgate cylinder removed (para. 15-59).<br />
Liftgate control valve removed (para. 15-58).<br />
Liftgate control linkage removed (para. 15-55).<br />
GENERAL SAFETY INSTRUCTIONS<br />
● All personnel must stand clear during lifting<br />
operations.<br />
● Ensure lifting capacity is greater than weight of<br />
liftgate main frame.<br />
a. Removal<br />
1. Remove four lubrication fittings (4) from main frame (6).<br />
2. Center hydraulic jack under main frame (6) and raise in place.<br />
3. Remove twelve nuts (2) and screws (3) from main frame (6) and vehicle frame (1).<br />
WARNING<br />
All personnel must stand clear during lifting operations.<br />
A swinging or shifting load may cause injury to personnel.<br />
Ensure lifting capacity is greater than weight of liftgate main<br />
frame. Failure to do so may result in injury to personnel or<br />
damage to equipment.<br />
NOTE<br />
Two assistants will help with steps 4 and 5.<br />
4. While steadying main frame (6) by control levers (5), remove main frame (6) from vehicle frame (1).<br />
5. Remove main frame (6) from hydraulic jack.<br />
b. Cleaning and Inspection<br />
1. For general cleaning instructions, refer to para. 2-8.<br />
2. For general inspection instructions, refer to para. 2-9.<br />
All personnel must stand clear during Iifting operations.<br />
A swinging or shifting load may cause injury to personnel.<br />
Ensure Iifting capacity is greater than weight of liftgate main<br />
frame. Failure to do so may result in injury to personnel or<br />
damage to equipment.<br />
15-206
<strong>TM</strong> 9-<strong>2320</strong>-<strong>260</strong>-<strong>34</strong>-2<br />
15-53. LIFTGATE MAIN FRAME MAINTENANCE (M820A2) (Contd)<br />
NOTE<br />
Two assistants will help with steps 1 and 2.<br />
1. Center main frame (6) on hydraulic jack.<br />
2. While steadying main frame (6) by control levers (5), raise main frame (6) in place.<br />
3. Install main frame (6) on vehicle frame (1) with twelve screws (3) and nuts (2).<br />
4. Remove hydraulic jack from main frame (6).<br />
5. Install four lubrication fittings (4) on main frame (6).<br />
FOLLOW-ON TASKS: Install liftgate control linkage (para. 15-55).<br />
Install liftgate control valve (para. 15-58).<br />
Install liftgate cylinder (para. 15-59).<br />
Install liftgate lift frame (para. 15-52).<br />
15-207
<strong>TM</strong> 9-<strong>2320</strong>-<strong>260</strong>-<strong>34</strong>-2<br />
15-54. LIFTGATE CLUTCHES REPLACEMENT (M820A2)<br />
THIS TASK COVERS:<br />
a. Removal b. Installation<br />
INITIAL SETUP<br />
APPLICABLE MODELS<br />
M820A2<br />
TOOLS<br />
General mechanic’s tool kit<br />
(Appendix B, Item 1)<br />
MATERIALS/PARTS<br />
Two Iockwashers (Appendix D, Item 230)<br />
Four pins (Appendix D, Item 318)<br />
REFERENCES (<strong>TM</strong>)<br />
<strong>TM</strong> 9-<strong>2320</strong>-<strong>260</strong>-10<br />
<strong>TM</strong> 9-<strong>2320</strong>-<strong>260</strong>-<strong>34</strong>P-2<br />
EQUIPMENT CONDITION<br />
● Parking brake set (<strong>TM</strong> 9-<strong>2320</strong>-<strong>260</strong>-10).<br />
● Liftgate platform and hinge removed<br />
(para. 15-51).<br />
1. Remove four pins (1) and two pivots (2) from left hand clutch (13), right hand clutch (7), and two<br />
closing cylinder rods (9) and (14). Discard pins (1).<br />
2. Remove screw (11), lockwasher (12), and left hand clutch (13) from closing cylinder rod (14) and lift<br />
frame shaft (10). Discard lockwasher (12).<br />
3. Remove screw (6), lockwasher (5), two screws (4), nuts (3), and right hand clutch (7) from closing<br />
cylinder rod (9) and lift frame shaft (8). Discard lockwasher (5).<br />
b. Installation<br />
1. Install right hand clutch (7) on lift frame shaft (8) with two screws (4), nuts (3), new lockwasher<br />
(5), and screw (6).<br />
2. Install left hand clutch (13) on lift frame shaft (10) with new lockwasher (12) and screw (11).<br />
3. Connect left hand clutch (13) and right hand clutch (7) to two closing cylinder rods (14) and (9)<br />
with two pivots (2) and four new pins (1).<br />
15-208
<strong>TM</strong> 9-<strong>2320</strong>-<strong>260</strong>-<strong>34</strong>-2<br />
15-54. LIFTGATE CLUTCHES REPLACEMENT (M820A2) (Contd)<br />
FOLLOW-ON TASK: Install platform and hinge (para. 15-51).<br />
15-209
<strong>TM</strong> 9-<strong>2320</strong>-<strong>260</strong>-<strong>34</strong>-2<br />
15-55. LIFTGATE CONTROL LINKAGE MAINTENANCE (M820A2)<br />
THIS TASK COVERS:<br />
a. Removal d. Assembly<br />
b. Disassembly e. Installation<br />
c. Cleaning and Inspection<br />
INITIAL SETUP<br />
APPLICABLE MODELS<br />
M820A2<br />
TOOLS<br />
General mechanic’s tool kit<br />
(Appendix B, Item 1)<br />
MATERIALS/PARTS<br />
Seven cotter pins (Appendix D, Item 35)<br />
Lubricating oil (Appendix C, Item 21)<br />
REFERENCES (<strong>TM</strong>)<br />
LO 9-<strong>2320</strong>-<strong>260</strong>-12<br />
<strong>TM</strong> 9-<strong>2320</strong>-<strong>260</strong>-10<br />
<strong>TM</strong> 9-<strong>2320</strong>-<strong>260</strong>-<strong>34</strong>P-2<br />
EQUIPMENT CONDITION<br />
Parking brake set (<strong>TM</strong> 9-<strong>2320</strong>-<strong>260</strong>-10).<br />
Liftgate lowered to ground level<br />
(<strong>TM</strong> 9-<strong>2320</strong>-<strong>260</strong>-10).<br />
a. Removal<br />
Remove both connector rods from levers and latch hooks.<br />
1. Remove two nuts (9), washer (7), cotter pin (3) and connector rod (6) from lever (8) and latch<br />
hook (1). Discard cotter pin (3).<br />
NOTE<br />
Remove both latch hooks from main frame.<br />
2. Remove two snaprings (4), shaft (10), latch hook (1), and two collars (2) from main frame (5).<br />
3. Remove cotter pin (29), pin (16), nut (28), and connector link (15) from control valve (18) and<br />
lever (27). Discard cotter pin (29).<br />
4. Remove cotter pin (20), washer (19), cotter pin (17), and connector link (23) from connector rod (12)<br />
and Iever (26). Discard cotter pins (20) and (17).<br />
5. Remove cotter pin (21), pin (22); and connector rod (12) from control valve (18). Discard cotter<br />
pin (21).<br />
6. Remove two cotter pins (11), pin (14), and connector rod (12) from bracket (13). Discard cotter<br />
pins (11).<br />
7. Remove handle grip (24) from lever (25).<br />
NOTE<br />
Remove both handle grips from levers.<br />
15-210
<strong>TM</strong> 9-<strong>2320</strong>-<strong>260</strong>-<strong>34</strong>-2<br />
15-55. LIFTGATE CONTROL LINKAGE MAINTENANCE (M820A2) (Contd)<br />
15-211
<strong>TM</strong> 9-<strong>2320</strong>-<strong>260</strong>-<strong>34</strong>-2<br />
15-55. LIFTGATE CONTROL LINKAGE MAINTENANCE (M820A2) (Contd)<br />
b. Disassembly<br />
1. Remove two nuts (5), lever (10), spring (6), and two nuts (7) from rod (8).<br />
2. Remove lubrication fitting (9) from lever (10).<br />
NOTE<br />
Disassemble both connector rods.<br />
3. Remove two nuts (24), eyebolt (25), spring (23), and two nuts (22) from rod (21).<br />
c. Cleaning and Inspection<br />
1. For general cleaning instructions, refer to para. 2-8.<br />
2. For general inspection instructions, refer to para. 2-9.<br />
d. Assembly<br />
NOTE<br />
● Coat all threads with lubricating oil before assembly.<br />
● Assemble both connector rods.<br />
1. Install two nuts (22), spring (23), eyebolt (25), and two nuts (24) on rod (21).<br />
2. Install two nuts (7), spring (6), lever (10), and two nuts (5) on rod (8).<br />
3. Install lubrication fitting (9) on lever (10).<br />
e. Installation<br />
NOTE<br />
Coat all threads and bearing surfaces with lubricating oil before<br />
installation.<br />
1. Install connector rod (2) on bracket (3) with pin (4) and two new cotter pins (1).<br />
2. Install connector rod (2) on control valve eyebolt (<strong>34</strong>) with pin (38) and new cotter pin (37).<br />
3. Install handle grip (40) on lever (41).<br />
NOTE<br />
Install both handle grips on levers.<br />
4. Install connector link (39) on lever (26) and connector rod (2) with new cotter pin (32), washer (35),<br />
and new cotter pin (36).<br />
5. Install connector link (30) on lever (27) and control valve eyebolt (33) with nut (28), pin (31), and<br />
new cotter pin (29).<br />
NOTE<br />
Install both latch hooks on main frame.<br />
6. Install latch hook (11) and two collars (12) on main frame (15) with shaft (20) and two<br />
snaprings (14).<br />
NOTE<br />
Install both connector rods on latch hooks and levers.<br />
7. Install connector rod (16) on latch hook (11) and lever (18) with new cotter pin (13), washer (17),<br />
and two nuts (19).<br />
15-212
<strong>TM</strong> 9-<strong>2320</strong>-<strong>260</strong>-<strong>34</strong>-2<br />
15-55. LIFTGATE CONTROL LINKAGE MAINTENANCE (M820A2) (Contd)<br />
FOLLOW-ON TASKS: Grease lubrication fittings (L0 9-<strong>2320</strong>-<strong>260</strong>-12).<br />
Lower and raise liftgate and check for proper operation (<strong>TM</strong> 9-<strong>2320</strong>-<strong>260</strong>-10).<br />
15-213
<strong>TM</strong> 9-<strong>2320</strong>-<strong>260</strong>-<strong>34</strong>-2<br />
15-56. LIFTGATE AUXILIARY PUMP AND BRACKET REPLACEMENT (M820A2)<br />
THIS TASK COVERS:<br />
a. Removal b. Installation<br />
INITIAL SETUP<br />
APPLICABLE MODELS<br />
M820A2<br />
TOOLS<br />
General mechanic’s tool kit<br />
(Appendix B, Item 1)<br />
MATERIALS/PARTS<br />
Four Iockwashers (Appendix D, Item 232)<br />
Four Iockwashers (Appendix D, Item 2<strong>34</strong>)<br />
Gasket sealant (Appendix C, Item 43)<br />
Cap and plug set (Appendix C, Item 6)<br />
Antiseize tape (Appendix C, Item 50)<br />
REFERENCES (<strong>TM</strong>)<br />
LO 9-<strong>2320</strong>-<strong>260</strong>-12<br />
<strong>TM</strong> 9-<strong>2320</strong>-<strong>260</strong>-10<br />
<strong>TM</strong> 9-<strong>2320</strong>-<strong>260</strong>-20<br />
<strong>TM</strong> 9-<strong>2320</strong>-<strong>260</strong>-<strong>34</strong>P-2<br />
EQUIPMENT CONDITION<br />
Battery ground cable disconnected<br />
(<strong>TM</strong> 9-<strong>2320</strong>-<strong>260</strong>-20).<br />
Drain hydraulic system (LO 9-<strong>2320</strong>-<strong>260</strong>-12).<br />
CAUTION<br />
● Clean area around hoses and lines before removal to prevent<br />
entry of dirt. Damage will occur if dirt or dust enters system.<br />
● Cap or plug all openings immediately after disconnecting lines<br />
and hoses to prevent contamination.<br />
NOTE<br />
● Tag all wires and hydraulic lines for installation.<br />
● Have drainage container ready to catch hydraulic oil.<br />
1. Disconnect hydraulic hoses (8) and (10) from elbows (7) and (9).<br />
2. Remove elbows (7) and (9) from auxiliary pump (5).<br />
3. Remove four screws (1), terminal cover (2), and gasket (3) from auxiliary pump (5).<br />
4. Remove three nuts (23), washers (22), and wires (18) from terminal studs (4).<br />
5. Loosen jamnut (20) and remove wiring insulator (19) and washer (21) from auxiliary pump (5).<br />
6. Remove four nuts (16), Iockwashers (17), screws (6), and auxiliary pump (5) from mounting<br />
bracket (14). Discard Iockwashers (17).<br />
7. Remove four nuts (11), Iockwashers (12), screws (15), and mounting bracket ( 14) from frame (13).<br />
Discard Iockwashers (12).<br />
b. Installation<br />
1. Install mounting bracket (14) on frame (13) with four screws (15), new Iockwashers (12), and<br />
nuts (11).<br />
2. Install auxiliary pump (5) on mounting bracket (14) with four screws (6), new Iockwashers ( 17),<br />
and nuts (16).<br />
3. Install washer (21) on wiring insulator (19), and connect wiring insulator (19) to auxiliary pump (5).<br />
Tighten jamnut (20).<br />
15-214
<strong>TM</strong> 9-<strong>2320</strong>-<strong>260</strong>-<strong>34</strong>-2<br />
15-56.<br />
4. Install three wires (18) on terminal studs (4) with washers (22), and nuts (23).<br />
5. Clean gasket (3) remains from sealing surfaces of terminal cover (2) and auxiliary pump (5). Apply<br />
gasket sealant (3) to terminal cover (2) and install gasket (3) and terminal cover (2) on auxiliary<br />
pump (5) with four screws (1).<br />
6. Wrap male threads on elbows (9) and (7) with antiseize tape.<br />
7. Install elbows (9) and (7) on auxiliary pump (5).<br />
8. Connect hydraulic hoses (10) and (8) on elbows (9) and (7).<br />
FOLLOW-ON TASKS: Connect battery ground cable (<strong>TM</strong> 9-<strong>2320</strong>-<strong>260</strong>-20).<br />
Fill hydraulic system (LO 9-<strong>2320</strong>-<strong>260</strong>-12).<br />
Start engine and check operation (<strong>TM</strong> 9-<strong>2320</strong>-<strong>260</strong>-10).<br />
15-215
<strong>TM</strong> 9-<strong>2320</strong>-<strong>260</strong>-<strong>34</strong>-2<br />
15-57. LIFTGATE HYDRAULIC TUBING REPLACEMENT (M820A2)<br />
THIS TASK COVERS:<br />
a. Removal b. Installation<br />
INITIAL SETUP<br />
APPLICABLE MODELS<br />
M820A2<br />
TOOLS<br />
General mechanic’s tool kit<br />
(Appendix B, Item 1)<br />
MATERIALS/PARTS<br />
Eight Iockwashers (Appendix D, Item 236)<br />
Two tiedown straps (Appendix D, Item 524)<br />
Cap and plug set (Appendix C, Item 6)<br />
Antiseize tape (Appendix C, Item 50)<br />
REFERENCES (<strong>TM</strong>)<br />
LO 9-<strong>2320</strong>-<strong>260</strong>-12<br />
<strong>TM</strong> 9-<strong>2320</strong>-<strong>260</strong>-10<br />
<strong>TM</strong> 9-<strong>2320</strong>-<strong>260</strong>-<strong>34</strong>P-2<br />
EQUIPMENT CONDITION<br />
● Parking brake set (<strong>TM</strong> 9-<strong>2320</strong>-<strong>260</strong>-10).<br />
● Liftgate lowered to ground level<br />
(<strong>TM</strong> 9-<strong>2320</strong>-<strong>260</strong>-10).<br />
● Liftgate pump oil tank drained<br />
(L0 9-<strong>2320</strong>-<strong>260</strong>-12).<br />
● Auxiliary pump wiring harness removed<br />
(para. 15-80).<br />
a. Removal<br />
CAUTION<br />
1.<br />
2.<br />
3.<br />
4.<br />
5.<br />
6.<br />
7.<br />
8.<br />
9.<br />
10.<br />
11.<br />
● Clean area around hoses and lines before removal to prevent<br />
entry of dirt. Damage will occur if dirt or dust enters system.<br />
● Cap or plug all openings immediately after disconnecting lines<br />
and hoses to prevent contamination.<br />
NOTE<br />
● Tag all hydraulic lines for installation.<br />
● Have drainage container ready to catch hydraulic oil.<br />
Remove two tiedown straps (11), screw (6), clamp (5), and hydraulic hoses (9) and (10) from<br />
frame (4). Discard tiedown straps (11).<br />
Remove hydraulic hoses (9) and (10) from two tees (3) and elbows (8).<br />
Remove hydraulic hoses (23) and (24) from two connectors (27) and elbows (25).<br />
Remove two elbows (8) from closing cylinder (7).<br />
Remove two connectors (27), flow valve (28), nipple (29), two tees (3), and nipples (2) from control<br />
valve (1).<br />
Remove hydraulic hose (22) from control valve (1) and fluid restrictor (18).<br />
Disconnect return hose (12) from adapter (26).<br />
Remove hydraulic hose (17) from adapter (16) and tee (19).<br />
Remove adapter (26), tee (19), nipple (20), and two elbows (21) from control valve (1).<br />
Remove adapter (16), elbow (15), and nipple (14) from lifting cylinder (13).<br />
Remove fluid restrictor (18) from lifting cylinder (13).<br />
15-216
<strong>TM</strong> 9-<strong>2320</strong>-<strong>260</strong>-<strong>34</strong>-2<br />
15-57. LIFTGATE HYDRAULIC TUBING REPLACEMENT (M820A2) (Contd.)<br />
15-217
<strong>TM</strong> 9-<strong>2320</strong>-<strong>260</strong>-<strong>34</strong>-2<br />
15-57. LIFTGATE HYDRAULIC TUBING REPLACEMENT (M820A2) (Contd)<br />
12.<br />
13.<br />
14.<br />
15.<br />
16.<br />
17.<br />
18.<br />
19.<br />
20.<br />
21.<br />
22.<br />
23.<br />
24.<br />
25.<br />
26.<br />
Remove return hose (37) from adapter (1).<br />
Remove inlet hose (35) from control valve (36) and adapter (38).<br />
Remove adapter (1) and (38) and elbows (2) and (39) from pipes (5) and (40).<br />
Remove union (7) from pipe (40) and hydraulic hose (8).<br />
Remove hydraulic hose (8) from tee (9).<br />
Remove hydraulic hose (13) from reducer (12) and elbow (31).<br />
Remove reducer (12), check valve (11), connector (10), tee (9), check valve (11), connector (10),<br />
bushing (14), and elbow (15) from hydraulic pump (16).<br />
Remove hydraulic hose (18) from elbow (17) and adapter (28).<br />
Remove elbow (17) from pipe (5) and adapter (28), and elbow (27) from pump oil tank (21).<br />
Remove hydraulic hose (22) from elbows (29) and (23).<br />
Remove elbows (29) and (31) from pump motor (30).<br />
Remove hydraulic hose (20) from elbow (19) and adapter (26).<br />
Remove elbows (19) and (23), adapters (24) and (26), and tee (25) from hydraulic pump (16) and<br />
pump oil tank (21).<br />
Remove eight setscrews (4) and pipes (5) and (40) from four brackets (3).<br />
Remove eight nuts (33), Iockwashers (32), screws (6), and four brackets (3) from frame (<strong>34</strong>). Discard<br />
Iockwashers (32).<br />
15-218
<strong>TM</strong> 9-<strong>2320</strong>-<strong>260</strong>-<strong>34</strong>-2<br />
15-219
<strong>TM</strong> 9-<strong>2320</strong>-<strong>260</strong>-<strong>34</strong>-2<br />
15-57. LIFTGATE HYDRAULIC TUBING REPLACEMENT (M820A2) (Contd)<br />
b. Installation<br />
1.<br />
2.<br />
3.<br />
4.<br />
5.<br />
6.<br />
7.<br />
8.<br />
9.<br />
10.<br />
11.<br />
12.<br />
13.<br />
14.<br />
15.<br />
16.<br />
Install four brackets (3) on frame (<strong>34</strong>) with eight screws (6), new Iockwashers (32), and nuts (33).<br />
Install pipes (40) and (5) on four brackets (3) with eight setscrews (4).<br />
Wrap male threads on tees (9) and (25), adapters (24), (26), and (28),<br />
elbows (2), (15), (19), (23), (27), (29), (31), and (39), hydraulic hoses (8), (13), (18), (20), and (22),<br />
hoses (5), (35), and (37), bushing (14), connectors (10), reducer (12), and pipe (40) with antiseize<br />
tape.<br />
Install tee (25), adapters (26) and (24), and elbow (23) on pump oil tank (21).<br />
Install hydraulic hoses (20) and (22) on elbow (23) and adapter (26).<br />
Install elbows (31) and (29) on pump motor (30).<br />
Install hydraulic hoses (20) and (22) on elbows (19) and (29).<br />
Install elbow (27), adapter (28), and elbow (19) on pump oil tank (21) and hydraulic pump (16).<br />
Install hydraulic hose (18) on adapter (28) and elbow (17) and hose (5) on elbow (17) and (2).<br />
Install elbow (15), bushing (14), connector (10), check valve (11), tee (9), connector (10), check<br />
valve (11), and reducer (12) on hydraulic pump (16).<br />
Install hydraulic hose (13) on elbow (31) and reducer (12).<br />
Install hydraulic hose (8) on tee (9).<br />
Install union (7) on hydraulic hose (8) and pipe (40).<br />
Install elbows (39) and (2) and adapters (38) and (1) on pipes (40) and (5).<br />
Install inlet hose (35) on adapter (38) and control valve (36).<br />
Install return hose (37) on adapter (1) and control valve (36).<br />
15-220
<strong>TM</strong> 9-<strong>2320</strong>-<strong>260</strong>-<strong>34</strong>-2<br />
15-57. LIFTGATE HYDRAULIC TUBING REPLACEMENT (M820A2) (Contd.)<br />
15-221
<strong>TM</strong> 9-<strong>2320</strong>-<strong>260</strong>-<strong>34</strong>-2<br />
15-57. LIFTGATE HYDRAULIC TUBING REPLACEMENT (M820A2) (Contd)<br />
17.<br />
18.<br />
19.<br />
20.<br />
21.<br />
22.<br />
23.<br />
24.<br />
25.<br />
26.<br />
27.<br />
Install fluid restrictor (18) on lifting cylinder (13).<br />
Install nipple (14), elbow (15), and adapter (16) on lifting cylinder (13).<br />
Install two elbows (21), nipple (20), tee (19), and adapter (26) on control valve (1).<br />
Install hydraulic hose (17) on adapter (16) and tee (19).<br />
Install return hose (12) on adapter (26).<br />
Install hydraulic hose (22) on fluid restrictor (18) and control valve (1).<br />
Install two nipples (2), tees (3), nipple (29), flow valve (28), and two connectors (27) on control<br />
valve (1).<br />
Install two elbows (8) on closing cylinder (7).<br />
Install hydraulic hoses (24) and (23) on two elbows (25) and connectors (27).<br />
Install hydraulic hoses (10) and (9) on two elbows (8) and tees (3).<br />
Install hydraulic hoses (10) and (9) on frame (4) with clamp (5), screw (6), and two new tiedown<br />
straps (11).<br />
15-222
<strong>TM</strong> 9-<strong>2320</strong>-<strong>260</strong>-<strong>34</strong>-2<br />
15-57. LIFTGATE HYDRAULIC TUBING REPLACEMENT (M820A2) (Contd)<br />
FOLLOW-ON TASKS: Install auxiliary pump wiring harness (para. 15-80).<br />
Fill liftgate pump oil tank (LO 9-<strong>2320</strong>-<strong>260</strong>-12).<br />
15-223
<strong>TM</strong> 9-<strong>2320</strong>-<strong>260</strong>-<strong>34</strong>-2<br />
15-58. LIFTGATE CONTROL VALVE REPLACEMENT (M820A2)<br />
THIS TASK COVERS:<br />
a. Removal b. Installation<br />
INITIAL SETUP<br />
APPLICABLE MODELS<br />
M820A2<br />
TOOLS<br />
General mechanic’s tool kit<br />
(Appendix B, Item 1)<br />
MATERIALS/PARTS<br />
Three Iockwashers (Appendix D, Item 238)<br />
Cap and plug set (Appendix C, Item 6)<br />
Anti seize tape (Appendix C, Item 50)<br />
REFERENCES (<strong>TM</strong>)<br />
LO 9-<strong>2320</strong>-<strong>260</strong>-12<br />
<strong>TM</strong> 9-<strong>2320</strong>-<strong>260</strong>-10<br />
<strong>TM</strong> 9-<strong>2320</strong>-<strong>260</strong>-<strong>34</strong>P-2<br />
EQUIPMENT CONDITION<br />
● Parking brake set (<strong>TM</strong> 9-<strong>2320</strong>-<strong>260</strong>-10).<br />
● Liftgate lowered to ground level<br />
(<strong>TM</strong> 9-<strong>2320</strong>-<strong>260</strong>-10).<br />
● Control linkage removed from control valve<br />
(para. 15-55).<br />
● Drain hydraulic system (L0 9-<strong>2320</strong>-<strong>260</strong>-12).<br />
a. Removal<br />
1.<br />
2.<br />
3.<br />
4.<br />
5.<br />
6.<br />
7.<br />
8.<br />
CAUTION<br />
● Clean area around hoses and lines before removal to prevent<br />
entry of dirt. Damage will occur if dirt or dust enters system.<br />
● Cap or plug all openings immediately after disconnecting lines<br />
and hoses to prevent contamination.<br />
NOTE<br />
Tag all hydraulic lines for installation.<br />
Have drainage container ready to catch hydraulic oil.<br />
Disconnect hydraulic hoses (13) and (17) from control valve (3).<br />
Disconnect hydraulic hoses (15) and (16) from two connectors (14).<br />
Disconnect hydraulic hoses (11) and (12) from two tees (10).<br />
Remove three nuts (9), screws (1), Iockwashers (2), and control valve (3) from main frame<br />
mount (4). Discard Iockwashers (2).<br />
Disconnect hydraulic lines (5) and (7) from adapter (6) and tee (8).<br />
N0TE<br />
Perform steps 6 through 8 if replacing control valve.<br />
Remove two connectors (14), flow control valve (23), and nipple (22) from two tees (10).<br />
Remove two tees (10) and nipples (21) from control valve (3).<br />
Remove adapter (6), tee (8), nipple (20), and elbows (18) and (19) from control valve (3).<br />
Perform steps 1 through 4 if installing new control valve.<br />
1. Wrap male threads on hydraulic hoses (5), (7), (11), (12), (13), and (17), connectors (14),<br />
nipples (20), (21), and (22), adapter (6), and elbows (18) and (19) with antiseize tape.<br />
2. Install elbows (18 and (19), nipple (20), tee (8), and adapter (6) on control valve (3).<br />
3. Install two nipples (21) and tees (10) on control valve (3).<br />
4. Install nipple (22), flow control valve (23), and two connectors (14) on two tees (10).<br />
15-224
<strong>TM</strong> 9-<strong>2320</strong>-<strong>260</strong>-<strong>34</strong>-2<br />
15-58. LIFTGATE CONTROL VALVE REPLACEMENT (M820A2) (Contd)<br />
5. Install control valve (3) on main frame mount (4) with three new Iockwashers (2), screws (1), and<br />
nuts (9).<br />
6. Connect hydraulic hoses (7) and (5) to tee (8) and adapter (6).<br />
7. Connect hydraulic hoses (11) and (12) to two tees (10).<br />
8. Connect hydraulic hoses (15) and (16) to two connectors (14).<br />
9. Connect hydraulic hoses (13) and (17) to control valve (3).<br />
FOLLOW-ON TASKS: Fill hydraulic system (LO 9-<strong>2320</strong>-<strong>260</strong>-12).<br />
Install control linkage on control valve (para. 15-55).<br />
Operate liftgate (<strong>TM</strong> 9-<strong>2320</strong>-<strong>260</strong>-10) and check for leaks.<br />
15-225
<strong>TM</strong> 9-<strong>2320</strong>-<strong>260</strong>-<strong>34</strong>-2<br />
15-59. LIFTGATE CYLINDER MAINTENANCE (M820A2)<br />
THIS TASK COVERS:<br />
a. Removal d. Assembly<br />
b. Disassembly e. Installation<br />
c. Cleaning and Inspection<br />
INITIAL SETUP<br />
APPLICABLE MODELS<br />
M820A2<br />
TOOLS<br />
General mechanic’s tool kit<br />
(Appendix B, Item 1)<br />
Arbor press (Appendix B, Item 7)<br />
Vise (Appendix B, Item 38)<br />
MATERIALS/PARTS<br />
Two pins (Appendix D, Item 318)<br />
Two cotter pins (Appendix D, Item 33)<br />
O-ring (Appendix D, Item 275)<br />
O-ring (Appendix D, Item 277)<br />
O-ring (Appendix D, Item 279)<br />
O-ring (Appendix D, Item 281)<br />
Seal (Appendix D, Item 414)<br />
Seal (Appendix D, Item 417)<br />
MATERIALS/PARTS (Contd)<br />
Bushing (Appendix D, Item 7)<br />
Lubricating oil (Appendix C, Item 21)<br />
REFERENCES (<strong>TM</strong>)<br />
LO 9-<strong>2320</strong>-<strong>260</strong>-12<br />
<strong>TM</strong> 9-<strong>2320</strong>-<strong>260</strong>-10<br />
<strong>TM</strong> 9-<strong>2320</strong>-<strong>260</strong>-<strong>34</strong>P-2<br />
EQUIPMENT CONDITION<br />
Parking brake set (<strong>TM</strong> 9-<strong>2320</strong>-<strong>260</strong>-10).<br />
Liftgate lowered to ground level<br />
(<strong>TM</strong> 9-<strong>2320</strong>-<strong>260</strong>-10).<br />
Drain hydraulic system (LO 9-<strong>2320</strong>-<strong>260</strong>-12).<br />
SPECIAL ENVIRONMENTAL CONDITIONS<br />
Perform this task in clean, dust-free area.<br />
1. Remove hydraulic tubing (12) and (13) from adapter (11) and fluid restrictor (14).<br />
2. Remove adapter (11), elbow (10), and nipple (9) from liftgate cylinder (3).<br />
3. Remove fluid restrictor (14) from liftgate cylinder (3).<br />
4. Remove two pins (1) and straight pin (8) from liftgate cylinder (3) and main frame (2). Discard pins (1).<br />
5. Remove two cotter pins (5) and straight pin (7) from piston rod (4) and lift frame (6). Discard cotter<br />
pins (5).<br />
6. Remove liftgate cylinder (3) from main frame (2).<br />
b. Disassembly<br />
CAUTION<br />
Perform this task in a clean, dust-free area. Failure to do so may<br />
result in damage to equipment.<br />
1.<br />
2.<br />
3.<br />
4.<br />
5.<br />
6.<br />
7,<br />
With liftgate cylinder (3) positioned vertically in vise, loosen setscrew (15) and remove retaining<br />
nut (17) and piston rod (4) from liftgate cylinder (3).<br />
With piston rod (4) positioned vertically in vise, remove nut (27), piston (25), and front head (20)<br />
from piston rod (4).<br />
Remove setscrew (15) and grommet (16) from retaining nut (17).<br />
Remove O-ring (24) and seal (23) from piston (25). Discard O-ring (24) and seal (23).<br />
Remove O-ring (18), seal (19), and O-rings (21) and (22) from front head (20). Discard<br />
O-rings (18), (21), (22), and seal (19).<br />
Remove two grease fittings (26) from liftgate cylinder (3).<br />
Using arbor press, remove bushing (28) from piston rod (4). Discard bushing (28).<br />
15-226
<strong>TM</strong> 9-<strong>2320</strong>-<strong>260</strong>-<strong>34</strong>-2<br />
15-59. LIFTGATE CYLINDER MAINTENANCE (M820A2) (Contd)<br />
c. Cleaning and Inspection<br />
1. For general cleaning instructions, refer to para. 2-8.<br />
2. For general inspection instructions, refer to para. 2-9.<br />
15-227
<strong>TM</strong> 9-<strong>2320</strong>-<strong>260</strong>-<strong>34</strong>-2<br />
15-59. LIFTGATE CYLINDER MAINTENANCE (M820A2) (Contd)<br />
CAUTION<br />
Perform this task in a clean, dust-free area.<br />
result in damage to equipment.<br />
Failure to do so may<br />
Coat all parts with lubricating oil before assembly.<br />
1. Using arbor press, install new bushing (16) on piston rod (4).<br />
2. Install two grease fittings (13) on liftgate cylinder (14).<br />
3. Install new O-rings (8) and (9), new seal (5), and new O-ring (6) on front head (7).<br />
4. Install new seal (11) and new O-ring (10) on piston (12).<br />
5. Install grommet (2) and setscrew (1) on retaining nut (3). Do not tighten setscrew (1).<br />
6. With piston rod (4) positioned vertically in vise, install front head (7), piston (12), and nut (15)<br />
on piston rod (4).<br />
7. With liftgate cylinder (14) positioned vertically in vise, install piston rod (4) in liftgate cylinder (14)<br />
with retaining nut (3).<br />
8. Tighten setscrew (1) on retaining nut (3) and liftgate cylinder (14).<br />
e. Installation<br />
1. Position liftgate cylinder (14) on main frame (18), and install liftgate cylinder (14) on main<br />
frame (18) with straight pin (22) and two new pins (17).<br />
2. Install piston rod (4) on lift frame (20) with straight pin (21) and two new cotter pins (19).<br />
3. Install nipple (23), elbow (24), and adapter (25) on Iiftgate cylinder (14).<br />
4. Install fluid restrictor (28) on liftgate cylinder (14).<br />
5. Install hydraulic tubing (27) and (26) on fluid restrictor (28) and adapter (25).<br />
15-228
<strong>TM</strong> 9-<strong>2320</strong>-<strong>260</strong>-<strong>34</strong>-2<br />
15-59. LIFTGATE CYLINDER MAINTENANCE (M820A2) (Contd)<br />
FOLLOW-ON TASKS: Grease lubrication fittings (LO 9-<strong>2320</strong>-<strong>260</strong>-12).<br />
Fill hydraulic system (LO 9-<strong>2320</strong>-<strong>260</strong>-12).<br />
Operate liftgate (<strong>TM</strong> 9-<strong>2320</strong>-<strong>260</strong>-10) and check for leaks.<br />
15-229
<strong>TM</strong> 9-<strong>2320</strong>-<strong>260</strong>-<strong>34</strong>-2<br />
15-60. LIFTGATE CLOSING CYLINDERS MAINTENANCE (M820A2)<br />
THIS TASK COVERS:<br />
a. Removal d. Assembly<br />
b. Disassembly e. Installation<br />
c. Cleaning and Inspection<br />
lNITIALSETUP<br />
APPLICABLE MODELS<br />
M820A2<br />
TOOLS<br />
General mechanic’s tool kit<br />
(Appendix B, Item 1)<br />
Vise (Appendix B, Item 38)<br />
MATERlALS/PARTS<br />
Lockwasher (Appendix D, Item 240)<br />
O-ring (Appendix D, Item 267)<br />
O-ring (Appendix D, Item 287)<br />
O-ring (Appendix D, Item 289)<br />
O-ring (Appendix D, Item 291)<br />
Seal (Appendix D, Item 419)<br />
No seals (Appendix D, Item 421)<br />
Four cotter pins (Appendix D, Item 33)<br />
a. Removal<br />
CAUTION<br />
MATERIALS/PARTS (Contd)<br />
Lubricating oil (Appendix C, Item 21)<br />
Cap and plug set (Appendix C, Item 6)<br />
Antiseize tape (Appendix C, Item 50)<br />
REFERENCES (<strong>TM</strong>)<br />
LO 9-<strong>2320</strong>-<strong>260</strong>-12<br />
<strong>TM</strong> 9-<strong>2320</strong>-<strong>260</strong>-10<br />
<strong>TM</strong> 9-<strong>2320</strong>-<strong>260</strong>-<strong>34</strong>P-2<br />
EQUIPMENT CONDITION<br />
Parking brake set (<strong>TM</strong> 9-<strong>2320</strong>-<strong>260</strong>-10).<br />
Lock liftgate in raised and closed position<br />
(<strong>TM</strong> 9-<strong>2320</strong>-<strong>260</strong>-10).<br />
Drain hydraulic system (LO 9-<strong>2320</strong>-<strong>260</strong>-12).<br />
SPECIAL ENVIRONMENTAL CONDITIONS<br />
Perform this task in clean dust-free area.<br />
Clean area around hoses and lines before removal to prevent<br />
entry of dirt. Damage will occur if dirt or dust enters system.<br />
Cap or plug all openings immediately after disconnecting lines<br />
and hoses to prevent contamination. Remove caps or plugs prior<br />
to installation. Failure to do so may result in injury to personnel.<br />
NOTE<br />
● Tag all hydraulic hoses for installation.<br />
● Have drainage container ready to catch hydraulic fluid.<br />
1. Disconnect hydraulic hoses (11) and (12) from two elbows (7) and (8).<br />
2. Disconnect hydraulic hoses (15) and (18) from elbows (16) and (17).<br />
3. Remove two screws (1), Iockwashers (2), washers (3), two cotter pins (13), cotter pins (9), pivot<br />
pins (10), and closing cylinders (4) and (6) from main frame (5) and two clutches (14). Discard<br />
Iockwashers (2) and cotter pins (13) and (9).<br />
b. Disassembly<br />
Perform this task in a clean, dust-flee area. Failure to do so may<br />
result in damage to equipment.<br />
1. Remove elbows (16) and (17) from closing cylinder (4).<br />
2. Remove elbows (7) and (8) from tee, (21) and check valve (22).<br />
3. Remove tubes (20) and (24) frorn two connectors (19), tee (21), and connector (23).<br />
15-230
<strong>TM</strong> 9-<strong>2320</strong>-<strong>260</strong>-<strong>34</strong>-2<br />
15-60. LIFTGATE CLOSING CYLINDERS MAINTENANCE (M820A2) (Contd)<br />
4.<br />
5.<br />
6.<br />
7.<br />
8.<br />
9.<br />
10.<br />
Remove tee (21) and connector (23) from check valve (22).<br />
Remove two connectors (19) from closing cylinder (6).<br />
With housing (<strong>34</strong>) facing up in vise, remove setscrew (26) and grommet (27) from retaining nut (25).<br />
Remove retaining nut (25) and piston rod (28) from cylinder (<strong>34</strong>).<br />
With piston rod (28) facing up in vise, remove nut (35), piston (36), and actuating head (31) from<br />
piston rod (28).<br />
Remove O-ring (37) and two seals (38) from piston (36). Discard O-ring (37) and seals (38).<br />
Remove O-ring (29), seal (30), and O-rings (32) and (33) from actuating head (31). Discard<br />
15-231
<strong>TM</strong> 9-<strong>2320</strong>-<strong>260</strong>-<strong>34</strong>-2<br />
15-60. LIFTGATE CLOSING CYLINDERS MAINTENANCE (M820A2) (Contd)<br />
c. Cleaning and Inspection<br />
1. For general cleaning instructions, refer to para. 2-8.<br />
2. For general inspection instructions, refer to para. 2-9.<br />
d. Assembly<br />
CAUTION<br />
Perform this task in a clean, dust-free area. Failure to do so may<br />
result in damage to equipment.<br />
1.<br />
2.<br />
3.<br />
4.<br />
5.<br />
6.<br />
7.<br />
8.<br />
9.<br />
10.<br />
11.<br />
NOTE<br />
Coat all closing cylinder internal parts with lubricating oil before<br />
assembly.<br />
Install new O-rings (8) and (9), new seal (6), and new O-ring (5) on actuating head (7).<br />
Install two new seals (14) and new O-ring (13) on piston (12).<br />
With piston rod (4) facing up in vise, install actuating head (7) and piston (12) on piston rod (4)<br />
with nut (11).<br />
Wrap male threads on elbows (19), (20), (36), and (37), connectors (16) and (22), tee (18), and<br />
hydraulic hoses (35) and (38) with antiseize tape.<br />
With housing (10) facing up in vise, install piston rod (4) in cylinder (10) with retaining nut (1).<br />
Install grommet (3) and setscrew (2) on retaining nut (1).<br />
Install two connectors (16) on closing cylinder (15).<br />
Install connector (22) and tee (18) on check valve (21).<br />
Install elbows (19) and (20) on check valve (21) and tee (18).<br />
Install two tubes (17) and (23) on tee (18), connector (22) and two connectors (16).<br />
Install two elbows (36) and (37) on closing cylinder (27).<br />
e. Installation<br />
1. Install closing cylinders (15) and (27) on main frame (28) and two clutches (<strong>34</strong>) with two<br />
washers (26), new Iockwashers (25), screws (24), pivots (30), and four new cotter pins (29) and (33).<br />
2. Connect hydraulic hoses (31) and (32) to elbows (19) and (20).<br />
3. Connect hydraulic hoses (35) and (38) to elbows (36) and (37).<br />
15-232
<strong>TM</strong> 9-<strong>2320</strong>-<strong>260</strong>-<strong>34</strong>-2<br />
15-60. LIFTGATE CLOSING CYLINDERS MAINTENANCE (M820A2) (Contd)<br />
FOLLOW-ON TASKS: ● Fill hydraulic system (LO 9-<strong>2320</strong>-<strong>260</strong>-12).<br />
Operate liftgate (<strong>TM</strong> 9-<strong>2320</strong>-<strong>260</strong>-10) and check for leaks.<br />
15-233
<strong>TM</strong> 9-<strong>2320</strong>-<strong>260</strong>-<strong>34</strong>-2<br />
15-61. LIFTGATE HYDRAULIC PUMP REPLACEMENT (M820A2)<br />
THIS TASK COVERS:<br />
a. Removal b. Installation<br />
INITIAL SETUP<br />
APPLICABLE MODELS<br />
M820A2<br />
TOOLS<br />
General mechanic’s tool kit<br />
(Appendix B, Item 1)<br />
PERSONNEL REQUIRED<br />
Two<br />
REFERENCES (<strong>TM</strong>)<br />
<strong>TM</strong> 9-<strong>2320</strong>-<strong>260</strong>-20<br />
<strong>TM</strong> 9-<strong>2320</strong>-<strong>260</strong>-<strong>34</strong>P-2<br />
MATERIALS/PARTS<br />
EQUIPMENT CONDlTION<br />
Six Iockwashers (Appendix D, Item 232) Pump driveshaft removed (<strong>TM</strong> 9-<strong>2320</strong>-<strong>260</strong>-20).<br />
Antiseize tape (Appendix C, Item 50)<br />
●<br />
●<br />
●<br />
●<br />
NOTE<br />
Clean area around hoses and lines before removal to prevent<br />
entry of dirt. Damage will occur if dirt or dust enters system.<br />
Cap or plug all openings immediately after disconnecting lines<br />
and hoses to prevent contamination. Remove caps or plugs prior<br />
to installation. Failure to do so may result in injury to personnel.<br />
Tag all hoses and lines for installation.<br />
Assistant will hold hydraulic pump during removal and<br />
installation.<br />
1. Remove hydraulic hose (11) from tee (14).<br />
2. Remove hydraulic hose (8) from reducer (9).<br />
3. Remove hydraulic hose (12) from elbow (10).<br />
4. Remove two nuts (3), Iockwashers (4), screws (13), and hydraulic pump (15) from bracket (5).<br />
Discard Iockwashers (4).<br />
5. Remove four nuts (7), Iockwashers (6), screws (2), and bracket (5) from frame (1). Discard<br />
Iockwashers (6).<br />
NOTE<br />
Perform steps 6 and 7 if replacing hydraulic pump.<br />
6. Remove reducer (9), check valve (17), connector (18), tee (14), check valve (19), connector (20),<br />
bushing (21), and elbow (16) from hydraulic pump (15).<br />
7. Remove elbow (10) from hydraulic pump (15).<br />
NOTE<br />
Perform steps 1 through 3 if installing new hydraulic pump.<br />
1. Install elbow (10) on hydraulic pump (15).<br />
2. Wrap threads of elbow (10), elbow (16), bushing (21), connector (20), tee (14), connector (18),<br />
reducer (9), and hoses (8), (11), and (12) with antiseize tape.<br />
3. Install elbow (16), bushing (21), connector (20), check valve (19), tee (14), connector (18), check<br />
valve (17), and reducer (9) on hydraulic pump (15).<br />
15-2<strong>34</strong>
<strong>TM</strong> 9-<strong>2320</strong>-<strong>260</strong>-<strong>34</strong>-2<br />
15-61.<br />
4. Install bracket (5) on frame (1) with four screws (2), new Iockwashers (6), and nuts (7).<br />
5. Install hydraulic pump (15) on bracket (5) with two screws (13), new Iockwashers (4). and nuts (3).<br />
6. Install hydraulic hose (12) cm elbow (10).<br />
7. Install hydraulic hose (8) on reducer (9).<br />
8. Install hydraulic hose (11) on tee (14).<br />
FOLLOW-ON TASKS: ● Install hydraulic tubing on pump (para. 15-57).<br />
● Install pump driveshaft (<strong>TM</strong> 9-<strong>2320</strong>-<strong>260</strong>-20).<br />
15-235
<strong>TM</strong> 9-<strong>2320</strong>-<strong>260</strong>-<strong>34</strong>-2<br />
15-62. LIFTGATE PUMP OIL TANK REPLACEMENT (M820A2)<br />
THIS TASK COVERS:<br />
a. Removal, b. Installation<br />
INITIAL SETUP<br />
APPLICABLE MODELS<br />
M820A2<br />
TOOLS<br />
General mechanic’s tool kit<br />
(Appendix B, Item 1)<br />
REFERENCES (<strong>TM</strong>)<br />
<strong>TM</strong> 9-<strong>2320</strong>-<strong>260</strong>-10<br />
<strong>TM</strong> 9-<strong>2320</strong>-<strong>260</strong>-<strong>34</strong>P-2<br />
EQUIPMENT CONDITION<br />
Parking brake set (<strong>TM</strong> 9-<strong>2320</strong>-<strong>260</strong>-10).<br />
Liftgate hydraulic tubing removed (para. 15-57).<br />
Two Iockwashers (Appendix D, Item 236)<br />
Antiseize tape (Appendix C, Item 50)<br />
a. Removal<br />
Clean area around hoses and lines before removal to prevent<br />
entry of dirt. Damage will occur if dirt or dust enters system.<br />
Cap or plug all openings immediately after disconnecting lines<br />
and hoses to prevent contamination. Remove caps or plugs prior<br />
to installation. Failure to do so may result in injury to personnel.<br />
● Tag all lines and hoses for installation.<br />
1. Remove hydraulic hose (3) from adapter (4).<br />
2. Remove hydraulic hose (11) from adapter (10).<br />
3. Remove hydraulic hose (9) from elbow (8).<br />
4. Remove two nuts (7), screws (1), Iockwashers (2), brackets (12), and oil tank (5) from frame (6).<br />
Discard Iockwashers (2).<br />
5. Remove adapter (4) and elbow ( 18) from oil tank (5).<br />
6. Remove elbow (8), adapters (10) and (16), and tee (17) from oil tank (5).<br />
7. Remove breather cap (14), bushing (13), and plug (15) from oil tank (5).<br />
15-236
<strong>TM</strong> 9-<strong>2320</strong>-<strong>260</strong>-<strong>34</strong>-2<br />
15-62.<br />
15-237
<strong>TM</strong> 9-<strong>2320</strong>-<strong>260</strong>-<strong>34</strong>-2<br />
15-62. LIFTGATE PUMP OIL TANK REPLACEMENT (M820A2) (Contd)<br />
1. Wrap male threads on adapters (4), (10), and (16), hydraulic hoses (3), (9), and (11), tee (17), and<br />
elbows (8) and (18) with antiseize tape.<br />
2. Install bushing (13), breather cap (14), and plug (15) on oil tank (5).<br />
3. Install elbow (8), adapters (10) and (16), and tee ( 17) on oil tank (5).<br />
4. Install elbow (18) and adapter (4) on oil tank (5).<br />
5. Install oil tank (5) on frame (6) with two brackets (12), screws (l), new Iockwashers (2), and nuts (7).<br />
6. Install hydraulic hose (3) on adapter (4).<br />
7. Install hydraulic hose (11) on adapter (10).<br />
8. Install hydraulic hose (9) on elbow (8).<br />
FOLLOW-ON TASK: Install liftgate hydraulic tubing (para. 15-57).<br />
15-238
<strong>TM</strong> 9-<strong>2320</strong>-<strong>260</strong>-<strong>34</strong>-2<br />
Section VI. VAN BODY ELECTRICAL COMPONENTS MAINTENANCE<br />
15-63. VAN BODY ELECTRICAL COMPONENTS MAINTENANCE INDEX<br />
PARA.<br />
NO.<br />
15-64.<br />
15-65.<br />
15-66.<br />
15-67.<br />
15-68.<br />
15-69.<br />
15-70.<br />
15-71.<br />
15-72.<br />
15-73.<br />
15-74.<br />
15-75.<br />
15-76.<br />
15-77.<br />
15-78.<br />
15-79.<br />
15-80.<br />
15-81.<br />
15-82.<br />
15-83.<br />
15-84.<br />
15-85.<br />
15-86.<br />
15-87.<br />
15-88.<br />
15-89.<br />
15-90.<br />
15-91.<br />
15-92.<br />
15-93.<br />
TITLE<br />
Main Wiring Harness Replacement<br />
Air Conditioner Wiring Harness Replacement<br />
Heater Wiring Harness Replacement<br />
Electric Heater (10 kW) Wiring Harness Replacement<br />
Heater Fuel Pump Wiring Harness Replacement<br />
Circuit Breaker Harness and Circuit Breaker Replacement<br />
Blackout Bypass Wiring Harness Replacement<br />
Blackout and Clearance Light Wiring Harness Replacement<br />
Right and Left Side Blackout Wiring Harness Replacement<br />
Left Side Emergency Lamp Wiring Harness Replacement<br />
Right Side Emergency Lamp Wiring Harness Replacement<br />
Telephone Post Wiring Harness Replacement<br />
3-Phase Receptacle Wiring Harness Replacement<br />
Flexible Converter Wiring Harness Replacement<br />
400 Hz Supply Wiring Harness Replacement<br />
400 Hz Receptacle Wiring Harness Replacement<br />
Converter and Auxiliary Pump Wiring Harnesses Replacement<br />
Entrance Receptacle Replacement<br />
Load Center Maintenance<br />
Load Center Conduit Replacement<br />
Control Center Box Maintenance<br />
400 Hz Converter and Support Bracket Replacement<br />
Converter Junction Box Replacement<br />
400 Hz Converter Harness Conduit Replacement<br />
Outlet Box Replacement<br />
AC Manual Starter Switches Replacement<br />
Electrical Box Replacement<br />
Blackout and Emergency Light Fixtures Replacement<br />
Fluorescent Light Fixtures Maintenance<br />
Ceiling Light Fixtures Replacement (M820A1)<br />
PAGE<br />
NO.<br />
15-240<br />
15-244<br />
15-248<br />
15-252<br />
15-256<br />
15-258<br />
15-<strong>260</strong><br />
15-264<br />
15-266<br />
15-270<br />
15-274<br />
15-278<br />
15-280<br />
15-282<br />
15-284<br />
15-288<br />
15-290<br />
15-294<br />
15-296<br />
15-312<br />
15-316<br />
15-320<br />
15-322<br />
15-326<br />
15-328<br />
15-330<br />
15-332<br />
15-333<br />
15-3<strong>34</strong><br />
15-336<br />
15-239
<strong>TM</strong> 9-<strong>2320</strong>-<strong>260</strong>-<strong>34</strong>-2<br />
15-64. MAIN WIRING HARNESS REPLACEMENT<br />
THIS TASK COVERS:<br />
a. Removal b. Installation<br />
INITIAL SETUP<br />
APPLICABLE MODELS<br />
M820, M820A1, M820A2<br />
TEST EQUIPMENT<br />
Multimeter (Appendix B, Item 115)<br />
TOOLS<br />
General mechanic’s tool kit<br />
(Appendix B, Item 1)<br />
Tool, kit, electrical (Appendix B, Item 106)<br />
MATERIALS/PARTS<br />
Safety wire (Appendix D, Item 372)<br />
Electrical tape (Appendix C, Item 51)<br />
REFERENCES (<strong>TM</strong>)<br />
<strong>TM</strong> 9-<strong>2320</strong>-<strong>260</strong>-10<br />
<strong>TM</strong> 9-<strong>2320</strong>-<strong>260</strong>-20<br />
<strong>TM</strong> 9-<strong>2320</strong> -<strong>260</strong>-<strong>34</strong>P-2<br />
EQUIPMENT CONDITION<br />
• External power source disconnected<br />
(<strong>TM</strong> 9-<strong>2320</strong>-<strong>260</strong>-10).<br />
• Battery ground cable disconnected<br />
(<strong>TM</strong> 9-<strong>2320</strong>-<strong>260</strong>-20).<br />
• Ceiling filler and side panels removed<br />
(M820, M820A2) (para. 15-44).<br />
• Ceiling removed (M820A1) (para. 15-36).<br />
CAUTION<br />
Use care when replacing wiring harness. Excessive snagging or<br />
pulling may damage wiring harness.<br />
1.<br />
2.<br />
3.<br />
4.<br />
5.<br />
6.<br />
7.<br />
8.<br />
9.<br />
NOTE<br />
• Tag wires, cables, and leads for installation.<br />
• The left and right main wiring harnesses are replaced the same.<br />
This procedure covers the right main wiring harness.<br />
Remove six screws (1) and cover (16) from load center (7).<br />
Remove three screws (13) and five wires (14) from three 20-amp circuit breakers (12).<br />
Remove three setscrews (9) and wires (3) from relay (8).<br />
Remove setscrew (11) and wire (15) from neutral bar (10).<br />
Remove screw (4) and clamp (5) from mounting plate (6).<br />
Remove twelve screws (20) and clamps (19) from van ceiling (17).<br />
Remove grommet (21) from van side panel (22).<br />
Remove three screws (23) and wire clip (24) from van side panel (22).<br />
NOTE<br />
• Safety wire will be used to install new wiring harness. Do not<br />
cut safety wire from spool until wiring harness has been pulled<br />
through and proper length has been obtained.<br />
• Safety wire must be attached to wires with electrical tape.<br />
Remove main wiring harness (2) from van body (18).<br />
15-240
<strong>TM</strong> 9-<strong>2320</strong>-<strong>260</strong>-<strong>34</strong>-2<br />
15-64. MAIN WIRING HARNESS REPLACEMENT (Contd)<br />
15-241
<strong>TM</strong> 9-<strong>2320</strong>-<strong>260</strong>-<strong>34</strong>-2<br />
15-64. MAIN WIRING HARNESS REPLACEMENT (Contd)<br />
1. Position main wiring harness (5) in van body (6). Ensure main wiring harness (5) iS routed through<br />
grommet (9), twelve clamps (7), and clamp (14).<br />
2. Install wire clip (3) on van side panel (1) with three screws (2).<br />
3. Install grommet (9) in van side panel (1).<br />
4. Secure main wiring harness (5) to van ceiling (4) with twelve clamps (7) and screws (8).<br />
5. Install wire (23) in neutral bar (18) with setscrew (22).<br />
6. Install three wires (12) in relay (17) with three setscrews (24).<br />
7. Install five tires (21) in three 20-amp circuit breakers (19) with three screws (20).<br />
8. Install clamp (14) on mounting plate (15) with screw (13).<br />
9. Install cover (11) on load center (16) with six screws (10).<br />
15-242
<strong>TM</strong> 9-<strong>2320</strong>-<strong>260</strong>-<strong>34</strong>-2<br />
15-64. MAIN WIRING HARNESS REPLACEMENT (Contd)<br />
FOLLOW-ON TASKS: • Install ceiling (M820A1) (para. 15-36).<br />
• Install ceiling filler and side panels (M820, M820A2) (para. 15-44).<br />
• Connect battery ground cable (<strong>TM</strong> 9-<strong>2320</strong>-<strong>260</strong>-20).<br />
• Connect external power source (<strong>TM</strong> 9-<strong>2320</strong>-<strong>260</strong>-10).<br />
15-243
<strong>TM</strong> 9-<strong>2320</strong>-<strong>260</strong>-<strong>34</strong>-2<br />
15-65. AIR CONDITIONER WIRING HARNESS REPLACEMENT<br />
THIS TASK COVERS:<br />
a. Removal b. Installation<br />
INITIAL SETUP<br />
APPLICABLE MODELS<br />
M820, M820A1, M820A2<br />
TEST EQUIPMENT<br />
Multimeter (Appendix B, Item 115)<br />
TOOLS<br />
General mechanic’s tool kit<br />
(Appendix B, Item 1)<br />
Tool kit, electrical (Appendix B, Item 106)<br />
MATERIALS/PARTS<br />
Two lockwashers (Appendix D, Item 248)<br />
Safety wire (Appendix D, Item 372)<br />
Electrical tape (Appendix C, Item 51)<br />
REFERENCES (<strong>TM</strong>)<br />
<strong>TM</strong> 9-<strong>2320</strong>-<strong>260</strong>-10<br />
<strong>TM</strong> 9-<strong>2320</strong>-<strong>260</strong>-20<br />
<strong>TM</strong> 9-<strong>2320</strong> -<strong>260</strong>-<strong>34</strong>P-2<br />
EQUIPMENT CONDITION<br />
• External power source disconnected<br />
(<strong>TM</strong> 9-<strong>2320</strong>-<strong>260</strong>-10).<br />
• Battery ground cable disconnected<br />
(<strong>TM</strong> 9-<strong>2320</strong>-<strong>260</strong>-20).<br />
• Ceiling filler and side panels removed<br />
(M820, M820A2) (para. 15-44).<br />
• Ceiling removed (M820A1) (para. 15-36).<br />
a. Removal<br />
1.<br />
2.<br />
3.<br />
4.<br />
5.<br />
6.<br />
7.<br />
CAUTION<br />
Use care when replacing wiring harness. Excessive snagging or<br />
pulling may damage wiring harness.<br />
NOTE<br />
Tag wires, cables, and leads for installation.<br />
Remove twelve screws (5) and clamps (6) from van ceiling (1).<br />
Disconnect plug (2) from air conditioner (3).<br />
Remove six screws (8) and cover (23) from load center (18).<br />
Remove screw (9) and clamp (10) from mounting plate (13).<br />
Remove nut (11), lockwasher (12), wires (22), (14), and (17), screw (16), and lockwasher (15) from<br />
load center (18). Discard lockwashers (12) and (15).<br />
Remove three screws (20) and wires (21) from 40-amp circuit breaker (19).<br />
NOTE<br />
• Safety wire will be used to install new wiring harness. Do not<br />
cut safety wire from spool until wiring harness has been pulled<br />
through and proper length has been obtained.<br />
• Safety wire must be attached to wires with electrical tape.<br />
Remove air conditioner wiring harness (7) from van body (4).<br />
15-244
<strong>TM</strong> 9-<strong>2320</strong>-240-<strong>34</strong>-2<br />
15-65. AIR CONDITIONER WIRING HARNESS REPLACEMENT (Contd)<br />
15-245
<strong>TM</strong> 9-<strong>2320</strong>-<strong>260</strong>-<strong>34</strong>-2<br />
15-65. AIR CONDITIONER WIRING HARNESS REPLACEMENT (Contd)<br />
b. Installation<br />
1. Position air conditioner wiring harness (7) in van body (4). Ensure air conditioner wiring harness (7)<br />
is routed through twelve clamps (6) and clamp (11).<br />
2. Install three wires (22) in 40-amp circuit breaker (20) with three screws (21).<br />
3. Install wires (23), (15), and (18) in load center (19) with new lockwasher (16), screw (17), new<br />
lockwasher (13), and nut (12).<br />
4. Install clamp (11) on mounting plate (14) with screw (10).<br />
5. Install cover (9) on load center (19) with six screws (8).<br />
6. Connect plug (2) to air conditioner (3).<br />
7. Secure air conditioner wiring harness (7) to van ceiling (1) with twelve clamps (6) and screws (5)<br />
15-246
<strong>TM</strong> 9-<strong>2320</strong>-<strong>260</strong>-<strong>34</strong>-2<br />
15-65. AIR CONDITIONER WIRING HARNESS REPLACEMENT (Contd)<br />
FOLLOW-ON TASKS: Install ceiling (M820A1) (para. 15-36).<br />
• Install ceiling filler and side panels (M820, M820A2) (para. 15-44).<br />
• Connect battery ground cable (<strong>TM</strong> 9-<strong>2320</strong>-<strong>260</strong>-20).<br />
• Connect external power source (<strong>TM</strong> 9-<strong>2320</strong>-<strong>260</strong>-10).<br />
15-247
<strong>TM</strong> 9-<strong>2320</strong>-<strong>260</strong>-<strong>34</strong>-2<br />
15-66. HEATER WIRING HARNESS REPLACEMENT<br />
THIS TASK COVERS:<br />
a. Removal b. Installation<br />
lNITIAL SETUP<br />
APPLICABLE MODELS<br />
M820, M820A1, M820A2<br />
TEST EQUIPMENT<br />
Multimeter (Appendix B, Item 115)<br />
TOOLS<br />
General mechanic’s tool kit<br />
(Appendix B, Item 1)<br />
Tool kit, electrical (Appendix B, Item 106)<br />
MATERIALS/PARTS<br />
Safety wire (Appendix D, Item 372)<br />
Electrical tape (Appendix C, Item 51)<br />
REFERENCES (<strong>TM</strong>)<br />
<strong>TM</strong> 9-<strong>2320</strong>-<strong>260</strong>-10<br />
<strong>TM</strong> 9-<strong>2320</strong>-<strong>260</strong>-20<br />
<strong>TM</strong> 9-<strong>2320</strong> -<strong>260</strong>-<strong>34</strong>P-2<br />
EQUIPMENT CONDITION<br />
● External power source disconnected<br />
(<strong>TM</strong> 9-<strong>2320</strong>-<strong>260</strong>-10).<br />
● Battery ground cable disconnected<br />
(<strong>TM</strong> 9-<strong>2320</strong>-<strong>260</strong>-20).<br />
● Ceiling filler and side panels removed<br />
(M820, M820A2) (para. 15-44).<br />
● Ceiling removed (M820A1) (para. 15-36).<br />
CAUTION<br />
Use care when replacing wiring harness. Excessive snagging or<br />
pulling may cause damage to wiring harness.<br />
a. Removal<br />
1.<br />
2.<br />
3.<br />
4.<br />
5.<br />
6.<br />
7.<br />
8.<br />
9.<br />
10.<br />
11.<br />
NOTE<br />
Tag wires, cables, and leads for installation.<br />
Remove twelve screws (5) and clamps (6) from van ceiling (1).<br />
Disconnect two plugs (2) from heater (3).<br />
Remove two grommets (4) from van ceiling (1).<br />
Remove thermostat cover (12) from thermostat (10).<br />
Remove two screws (11) from thermostat (10) and control center box (8). Pull thermostat (10)<br />
forward.<br />
Remove two screws (13) and wires (9) from thermostat (10) and remove thermostat (10) from control<br />
center box (8).<br />
Remove six screws (14) and cover (15) from load center (20).<br />
Remove screw (16) and clamp (17) from mounting plate (18).<br />
Remove setscrew (24) and wire (25) from neutral bar (26).<br />
Remove screw (22) and wire (23) from 20-amp circuit breaker (21).<br />
NOTE<br />
● Safety wire will be used to install new wiring harness. Do not<br />
cut safety wire from spool until wiring harness has been pulled<br />
through and proper length has been obtained.<br />
● Safety wire must be attached to wires with electrical tape.<br />
Remove heater wiring harness (7) from van body (19).<br />
15-248
<strong>TM</strong> 9-<strong>2320</strong>-<strong>260</strong>-<strong>34</strong>-2<br />
15-66. HEATER WIRING HARNESS REPLACEMENT (Contd)<br />
15-249
<strong>TM</strong> 9-<strong>2320</strong>-<strong>260</strong>-<strong>34</strong>-2<br />
15-66. HEATER WIRING HARNESS REPLACEMENT (Contd)<br />
b. Installation<br />
1. Position heater wiring harness (3) in van body (7). Ensure heater wiring harness (3) is routed<br />
through clamp (5), twelve clamps (26), and two grommets (24).<br />
2. Install wire (11) in 20-amp circuit breaker (9) with screw (10).<br />
3. Install wire (13) in neutral bar (14) with setscrew (12).<br />
4. Install clamp (5) on mounting plate (6) with screw (4).<br />
5. Install cover (2) on load center (8) with six screws (1).<br />
6. Install two wires (16) on thermostat (17) with two screws (20).<br />
7. Install thermostat (17) on control center box (15) with two screws (18).<br />
8. Install thermostat cover (19) on thermostat (17).<br />
9. Install two grommets (24) in van ceiling (21).<br />
10. Connect two plugs (22) to heater (23).<br />
11. Secure heater wiring harness (3) to van ceiling (21) with twelve clamps (26) and screws (25).<br />
15-250
<strong>TM</strong> 9-<strong>2320</strong>-<strong>260</strong>-<strong>34</strong>-2<br />
15-66. HEATER WIRING HARNESS REPLACEMENT (Contd)<br />
FOLLOW-ON TASKS: Install ceiling (M820A1) (para. 15-36).<br />
Install ceiling filler and side panels (M820, M820A2) (para. 15-44).<br />
Connect battery ground cable (<strong>TM</strong> 9-<strong>2320</strong>-<strong>260</strong>-20.<br />
Connect external power source (<strong>TM</strong> 9-<strong>2320</strong>-<strong>260</strong>-10).<br />
15-251
<strong>TM</strong> 9-<strong>2320</strong>-<strong>260</strong>-<strong>34</strong>-2<br />
15-67. ELECTRIC HEATER (10 kW) WIRING HARNESS REPLACEMENT<br />
THIS TASK COVERS:<br />
a. Removal b. Installation<br />
INITIAL SETUP<br />
APPLICABLE MODELS<br />
REFERENCES (<strong>TM</strong>]<br />
M820, M820A1, M820A2 <strong>TM</strong> 9-<strong>2320</strong>-<strong>260</strong>-10<br />
<strong>TM</strong> 9-<strong>2320</strong>-<strong>260</strong>-20<br />
TEST EQUIPMENT<br />
<strong>TM</strong> 9-<strong>2320</strong>-<strong>260</strong>-<strong>34</strong>P-2<br />
Multimeter (Appendix B, Item 115)<br />
EQUIPMENT CONDITION<br />
TOOLS<br />
General mechanic’s tool kit<br />
(Appendix B, Item 1)<br />
Tool kit, electrical (Appendix B, Item 106)<br />
MATERIALS/PARTS<br />
Safety wire (Appendix D, Item 372)<br />
Electrical tape (Appendix C, Item 51)<br />
Three insulated wire splices<br />
(Appendix C, Item 49)<br />
CAUTION<br />
.<br />
External power source disconnected<br />
(<strong>TM</strong> 9-<strong>2320</strong>-<strong>260</strong>-10).<br />
Battery ground cable disconnected<br />
(<strong>TM</strong> 9-<strong>2320</strong>-<strong>260</strong>-20).<br />
Ceiling filler and side panels removed<br />
(M820, M820A2) (para. 15-44).<br />
Ceiling removed (M820A1) (para. 15-36).<br />
Use care when replacing wiring harness. Excessive snagging or<br />
pulling may damage wiring harness.<br />
1.<br />
2.<br />
3.<br />
4.<br />
5.<br />
6.<br />
7.<br />
8.<br />
9.<br />
10.<br />
11.<br />
NOTE<br />
Tag wires, cables, and leads for installation.<br />
Remove twelve screws (7) and clamps (6) from van ceiling (4).<br />
Remove grommet (3) from van ceiling (4).<br />
Disconnect wires (2) and (1) from electric heater (9).<br />
Remove thermostat cover (16) from thermostat (14).<br />
Remove two screws (15) from thermostat (14) and control center box (10).<br />
Pull thermostat (14) forward, remove three insulated wire splices (12) from three wires (11) and<br />
wires (13), and remove thermostat (14) from control center box (10). Discard insulated wire<br />
splices (12).<br />
Remove six screws (17) and cover (24) from load center (20).<br />
Remove screw (18) and clamp (25) from mounting plate (19).<br />
Remove setscrew (27) and wire (28) from neutral bar (26).<br />
Remove three screws (22) and wires (23) from 30-amp circuit breaker (21).<br />
NOTE<br />
● Safety wire will be used to install new wiring harness. Do not<br />
cut safety wire from spool until wiring harness has been pulled<br />
through and proper length has been obtained.<br />
● Safety wire must be attached to wires with electrical tape.<br />
Remove electric heater wiring harness (5) from van body (8).<br />
15-252
<strong>TM</strong> 9-<strong>2320</strong>-<strong>260</strong>-<strong>34</strong>-2<br />
15-67. ELECTRIC HEATER (10 kW) WIRING HARNESS REPLACEMENT (Contd)<br />
15-253
<strong>TM</strong> 9-<strong>2320</strong>-<strong>260</strong>-<strong>34</strong>-2<br />
15-67. ELECTRIC HEATER (10 kW) WIRING HARNESS REPLACEMENT (Contd)<br />
b. Installation<br />
1.<br />
2.<br />
3.<br />
4.<br />
5.<br />
6.<br />
7.<br />
8.<br />
9.<br />
10.<br />
11.<br />
Position electric heater wiring harness (5) in van body (8). Ensure electric heater wiring harness (5)<br />
is routed through grommet (3), twelve clamps (6), and clamp (13).<br />
Install clamp (13) on mounting plate (14) with screw (12).<br />
Install three wires (19) in 30-amp circuit breaker (17) with three screws (18).<br />
Install wire (20) in neutral bar (16) with setscrew (21).<br />
Install cover (11) on load center (15) with six screws (10).<br />
Connect three wires (23) to three wires (25) with three new insulated wire splices (24).<br />
Install thermostat (26) on control center box (22) with two screws (27).<br />
Install cover (28) on thermostat (26).<br />
Connect wires (1) and (2) to electric heater (9).<br />
Install grommet (3) in van ceiling (4).<br />
Secure electric heater wiring harness (5) to van ceiling (4) with twelve clamps (6) and screws (7).<br />
15-254
<strong>TM</strong> 9-<strong>2320</strong>-<strong>260</strong>-<strong>34</strong>-2<br />
15-67. ELECTRIC HEATER (10 kW) WIRING HARNESS REPLACEMENT (Contd)<br />
FOLLOW-ON TASKS:<br />
❵❵ • ●<br />
●<br />
●<br />
●<br />
Install ceiling (M820A1) (para. 15-36).<br />
Install ceiling filler and side panels (M820, M820A2) (para. 15-44).<br />
Connect battery ground cable (<strong>TM</strong> 9-<strong>2320</strong>-<strong>260</strong>-20).<br />
Connect external power source (<strong>TM</strong> 9-<strong>2320</strong>-<strong>260</strong>-10).<br />
15-255
<strong>TM</strong> 9-<strong>2320</strong>-<strong>260</strong>-<strong>34</strong>-2<br />
15-68. HEATER FUEL PUMP WIRING HARNESS REPLACEMENT<br />
THIS TASK COVERS:<br />
a. Removal b. Installation<br />
INITIAL SETUP<br />
APPLICABLE MODELS<br />
REFERENCES (<strong>TM</strong>)<br />
M820, M820A1, M820A2 <strong>TM</strong> 9-<strong>2320</strong>-<strong>260</strong>-10<br />
<strong>TM</strong> 9-<strong>2320</strong>-<strong>260</strong>-20<br />
TEST EQUIPMENT<br />
<strong>TM</strong> 9-<strong>2320</strong>-<strong>260</strong>-<strong>34</strong>P-2<br />
Multimeter (Appendix B, Item 115)<br />
EQUIPMENT CONDITION<br />
TOOLS<br />
• External power source disconnected<br />
General mechanic’s tool kit (<strong>TM</strong> 9-<strong>2320</strong>-<strong>260</strong>-10).<br />
(Appendix B, Item 1)<br />
• Battery ground cable disconnected<br />
Toolkit, electrical (Appendix B, Item 106)<br />
(<strong>TM</strong> 9-<strong>2320</strong>-<strong>260</strong>-20).<br />
MATERIALS/PARTS<br />
Safety wire (Appendix D, Item 372)<br />
Electrical tape (Appendix C, Item 51)<br />
CAUTION<br />
Use care when replacing wiring harness. Excessive snagging or<br />
pulling may damage wiring harness.<br />
NOTE<br />
Tag wires, cables, and leads for installation.<br />
1. Disconnect heater fuel pump wiring harness (1) from fuel pump plug (2).<br />
NOTE<br />
Perform step 2 for M820A2 vehicles.<br />
2. Remove screw (3) and clamp (5) from van body (4).<br />
3. Disconnect heater fuel pump wiring harness (1) from heater plug (6).<br />
NOTE<br />
● Safety wire will be used to install new wiring harness. Do not<br />
cut safety wire from spool until wiring harness has been pulled<br />
through and proper length has been obtained.<br />
● Safety wire must be attached to wires with electrical tape.<br />
4. Remove heater fuel pump wiring harness (1) from van body (4).<br />
3.<br />
4.<br />
5.<br />
Position heater fuel pump wiring harness (1) in van body (4).<br />
Connect heater fuel pump wiring harness (1) to heater plug (6).<br />
NOTE<br />
Perform step 3 for M820 and M820A1 vehicles. Perform steps 4<br />
and 5 for M820A2 vehicles.<br />
Connect heater fuel pump wiring harness (1) to fuel pump plug (2).<br />
Route heater fuel pump wiring harness (1) through clamp (5) and connect heater fuel pump wiring<br />
harness (1) to fuel pump plug (2).<br />
Secure heater fuel pump wiring harness (1) to van body (4) with clamp (5) and screw (3).<br />
15-256
<strong>TM</strong> 9-<strong>2320</strong>-<strong>260</strong>-<strong>34</strong>-2<br />
15-68. HEATER FUEL PUMP WIRING HARNESS REPLACEMENT (Contd)<br />
FOLLOW-ON TASKS: • Connect battery ground cable (<strong>TM</strong> 9-<strong>2320</strong>-<strong>260</strong>-20).<br />
• Connect external power source (<strong>TM</strong> 9-<strong>2320</strong>-<strong>260</strong>-10).<br />
15-257
<strong>TM</strong> 9-<strong>2320</strong>-<strong>260</strong>-<strong>34</strong>-2<br />
15-69. CIRCUIT BREAKER HARNESS AND CIRCUIT BREAKER REPLACEMENT<br />
THIS TASK COVERS:<br />
a. Circuit Breaker Harness Removal c. Circuit Breaker Removal<br />
b. Circuit Breaker Harness Installation d. Circuit Breaker Installation<br />
INITIAL SETUP<br />
APPLICABLE MODELS<br />
REFERENCES (<strong>TM</strong>)<br />
M820, M820A1, M820A2 <strong>TM</strong> 9-<strong>2320</strong>-<strong>260</strong>-10<br />
<strong>TM</strong> 9-<strong>2320</strong>-<strong>260</strong>-20<br />
TEST EQUIPMENT<br />
<strong>TM</strong> 9-<strong>2320</strong>-<strong>260</strong>-<strong>34</strong>P-2<br />
Multimeter (Appendix B, Item 115)<br />
EQUIPMENT CONDITION<br />
TOOLS<br />
.<br />
●<br />
External power source disconnected<br />
General mechanic’s tool kit<br />
(<strong>TM</strong> 9-<strong>2320</strong>-<strong>260</strong>-10).<br />
(Appendix B, Item 1)<br />
Battery ground cable disconnected<br />
Tool kit, electrical (Appendix B, Item 106)<br />
(<strong>TM</strong> 9-<strong>2320</strong>-<strong>260</strong>-20).<br />
MATERIALS/PARTS<br />
Locknut (Appendix D, Item 167)<br />
Locknut (Appendix D, Item 191)<br />
Lockwasher (Appendix D, Item 224)<br />
a. Circuit Breaker Harness Removal<br />
1. Disconnect connector (2) from circuit breaker (1).<br />
2. Remove two screws (4) and clamps (3) from van body ( 15).<br />
3. Remove locknut (10), screw (13), and clamp (14) from spare tire carrier mounting bracket (5).<br />
Discard locknut (10).<br />
4. Remove locknut (6), screw (12), washer (11), circuit breaker harness (9), wire (8), and lockwasher (7)<br />
from spare tire carrier mounting bracket (5). Discard locknut (6) and Iockwasher (7).<br />
5. Remove circuit breaker harness (9) from van body (15).<br />
b. Circuit Breaker Harness Installation<br />
1. Install new lockwasher (7), wire (8), and circuit breaker harness (9) on spare tire carrier mounting<br />
bracket (5) with washer (11), screw (12), and new locknut (6).<br />
2. Install clamp (14) on spare tire carrier mounting bracket (5) with screw (13) and new locknut (10).<br />
3. Install two clamps (3) on van body (15) with two screws (4).<br />
4. Connect connector (2) to circuit breaker ( 1).<br />
c. Circuit Breaker Removal<br />
1. Disconnect emergency lamp wiring harness (17) and circuit breaker harness (9) from circuit<br />
breaker (1).<br />
2. Remove two screws (16) and circuit breaker (1) from van body (15).<br />
d. Circuit Breaker Installation<br />
1. Install circuit breaker (1) on van body (15) with two screws (16).<br />
2. Connect emergency lamp wiring harness (17) and circuit breaker harness (9) to circuit breaker (1).<br />
15-258
<strong>TM</strong> 9-<strong>2320</strong>-<strong>260</strong>-<strong>34</strong>-2<br />
15-69. CIRCUIT BREAKER HARNESS AND CIRCUIT BREAKER REPLACEMENT (Contd)<br />
FOLLOW-ON TASKS: • Connect battery sound cable (<strong>TM</strong> 9-<strong>2320</strong>-<strong>260</strong>-20).<br />
• Connect external power source (<strong>TM</strong> 9-<strong>2320</strong>-<strong>260</strong>-10).<br />
15-259
<strong>TM</strong> 9-<strong>2320</strong>-<strong>260</strong>-<strong>34</strong>-2<br />
15-70. BLACKOUT BYPASS WIRING HARNESS REPLACEMENT<br />
THIS TASK COVERS:<br />
a. Removal b. Installation<br />
INITIAL SETUP<br />
APPLICABLE MODELS<br />
M820, M820A2<br />
TEST EQUIPMENT<br />
Multimeter (Appendix B, Item 115)<br />
TOOLS<br />
General mechanic’s tool kit<br />
(Appendix B, Item 1)<br />
Tool kit, electrical (Appendix B, Item 106)<br />
MATERIALS/PARTS<br />
Safety wire (Appendix D, Item 372)<br />
Electrical tape (Appendix C, Item 51)<br />
REFERENCES (<strong>TM</strong>)<br />
<strong>TM</strong> 9-<strong>2320</strong>-<strong>260</strong>-10<br />
<strong>TM</strong> 9-<strong>2320</strong>-<strong>260</strong>-20<br />
<strong>TM</strong> 9-<strong>2320</strong>-<strong>260</strong>-<strong>34</strong>P-2<br />
EQUIPMENT CONDITION<br />
• External power source disconnected<br />
(<strong>TM</strong> 9-<strong>2320</strong>-<strong>260</strong>-10).<br />
• Battery ground cable disconnected<br />
(<strong>TM</strong> 9-<strong>2320</strong>-<strong>260</strong>-20).<br />
CAUTION<br />
Use care when replacing wiring harness. Excessive snagging or<br />
pulling may damage wiring harness.<br />
NOTE<br />
Tag wires, cables, and leads for installation.<br />
1. Remove six screws (1) and cover (2) from load center (6).<br />
2. Remove two setscrews (10) and wires (3) from relay (5).<br />
3. Remove screw (8) and wire (9) from 20-amp circuit breaker (7).<br />
4. Remove two screws (16) and cover ( 15) from switch (13).<br />
5. Remove two screws (14) and Pull switch (13) away from van body (11).<br />
6. Loosen three screws (12), remove three wires (17) from switch (13), and remove switch (13) from<br />
van body (11).<br />
NOTE<br />
• Safety wire will be used to install new wiring harness. Do not<br />
cut safety wire from spool until wiring harness has been pulled<br />
through and proper length has been obtained.<br />
Ž Safety wire must be attached to wires with electrical tape.<br />
7. Remove blackout bypass wiring harness (4) from van body (11).<br />
15-<strong>260</strong>
<strong>TM</strong> 9-<strong>2320</strong>-<strong>260</strong>-<strong>34</strong>-2<br />
15-70. BLACKOUT BYPASS WIRING HARNESS REPLACEMENT (Contd)<br />
15-261
<strong>TM</strong> 9-<strong>2320</strong>-<strong>260</strong>-<strong>34</strong>-2<br />
15-70. BLACKOUT BYPASS WIRING HARNESS REPLACEMENT (Contd)<br />
1. Position blackout bypass wiring harness (8) in van body (1).<br />
2. Install three wires (7) on switch (3) by tightening three screws (2).<br />
3. Install switch (3) on van body (1) with two screws (4).<br />
4. Install cover (5) on switch (3) with two screws (6).<br />
5. Install wire (16) in 20-amp circuit breaker (14) with screw ( 15).<br />
6. Install two wires (11) in relay (13) with two setscrews (17).<br />
7. Install cover (10) on load center (12) with six screws (9).<br />
15-262
<strong>TM</strong> 9-<strong>2320</strong>-<strong>260</strong>-<strong>34</strong>-2<br />
15-70. BLACKOUT BYPASS WIRING HARNESS REPLACEMENT (Contd)<br />
FOLLOW-ON TASKS: • Connect battery ground cable (<strong>TM</strong> 9-<strong>2320</strong>-<strong>260</strong>-20).<br />
• Connect external power source (<strong>TM</strong> 9-<strong>2320</strong>-<strong>260</strong>-10).<br />
15-263
<strong>TM</strong> 9-<strong>2320</strong>-<strong>260</strong>-<strong>34</strong>-2<br />
15-71. BLACKOUT AND CLEARANCE LIGHT WIRING HARNESS REPLACEMENT<br />
THIS TASK COVERS:<br />
a. Removal b. Installation<br />
INITIAL SETUP<br />
APPLICABLE MODELS<br />
M820, M820A1, M820A2<br />
TEST EQUIPMENT<br />
Multimeter (Appendix B, Item 115)<br />
TOOLS<br />
General mechanic’s tool kit<br />
(Appendix B, Item 1)<br />
Tool kit, electrical (Appendix B, Item 106)<br />
MATERIALS/PARTS<br />
Safety wire (Appendix D, Item 372)<br />
Electrical tape (Appendix C, Item 51)<br />
REFERENCES (<strong>TM</strong>)<br />
<strong>TM</strong> 9-<strong>2320</strong>-<strong>260</strong>-10<br />
<strong>TM</strong> 9-<strong>2320</strong>-<strong>260</strong>-20<br />
<strong>TM</strong> 9-<strong>2320</strong> -<strong>260</strong>-<strong>34</strong>P-2<br />
EQUIPMENT CONDITION<br />
● External power source disconnected<br />
(<strong>TM</strong> 9-<strong>2320</strong>-<strong>260</strong>-10).<br />
● Battery ground cable disconnected<br />
(<strong>TM</strong> 9-<strong>2320</strong>-<strong>260</strong>-20).<br />
● Ceiling filler and side panels removed<br />
(M820, M820A2) (para. 15-44).<br />
● Ceiling removed (M820A1) (para. 15-36).<br />
● Rear wall interior panel removed (para. 15-<strong>34</strong>).<br />
CAUTION<br />
Use care when replacing wiring harness. Excessive snagging or<br />
pulling may damage wiring harness.<br />
NOTE<br />
Tag wires, cables, and leads for installation.<br />
1. Disconnect two wires (3) from two wires (4).<br />
2. Remove two screws (5) and clamps (6) from van body (2) and wiring harness (7).<br />
3. Remove grommet (1) from van body (2) and wiring harness (7).<br />
4. Remove twelve screws (9) and clamps (10) from van ceiling (11).<br />
5. Remove five screws (12) and clamps (13) from van ceiling (11) and wiring harness (7).<br />
6. Remove four grommets (8) from van ceiling (11) and wiring harness (7).<br />
NOTE<br />
● Safety wire will be used to install new wiring harness. Do not<br />
cut safety wire from spool until wiring harness has been pulled<br />
through and proper length has been obtained.<br />
● Safety wire must be attached to wires with electrical tape.<br />
7. Remove wiring harness (7) from van body (2).<br />
b. Installation<br />
1.<br />
2.<br />
3.<br />
4.<br />
5.<br />
6.<br />
7.<br />
Position blackout and clearance light wiring harness (7) in van body (2). Ensure blackout and<br />
clearance light wiring harness (7) is routed through four grommets (8), twelve clamps (10),<br />
grommet (1), and two clamps (6).<br />
Install four grommets (8) in van body (2).<br />
Secure blackout and clearance light wiring harness (7) in van ceiling (11) with twelve clamps (10)<br />
and screws (9).<br />
Install five clamps (13) on van ceiling (11) with five screws (12).<br />
Install grommet (1) in van body (2).<br />
Install two clamps (6) on van body (2) with two screws (5).<br />
Connect two wires (3) to two wires (4).<br />
15-264
<strong>TM</strong> 9-<strong>2320</strong>-240-<strong>34</strong>-2<br />
15-71. BLACKOUT AND CLEARANCE LIGHT WIRING HARNESS REPLACEMENT (Contd)<br />
FOLLOW-ON TASKS: •<br />
●<br />
●<br />
●<br />
●<br />
Install rear wall interior panel (para. 15-<strong>34</strong>).<br />
Install ceiling (M820A1) (para. 15-36).<br />
Install ceiling filler and side panels (M820, M820A2) (para. 15-44).<br />
Connect battery ground cable (<strong>TM</strong> 9-<strong>2320</strong>-<strong>260</strong>-20).<br />
Connect external power source (<strong>TM</strong> 9-<strong>2320</strong>-<strong>260</strong>-10).<br />
15-265
<strong>TM</strong> 9-<strong>2320</strong>-<strong>260</strong>-<strong>34</strong>-2<br />
15-72. RIGHT AND LEFT SIDE BLACKOUT WIRING HARNESS REPLACEMENT<br />
THIS TASK COVERS:<br />
a. Removal b. Installation<br />
INITIAL SETUP<br />
APPLICABLE MODELS<br />
REFERENCES (<strong>TM</strong>)<br />
M820, M820A2 <strong>TM</strong> 9-<strong>2320</strong>-<strong>260</strong>-10<br />
<strong>TM</strong> 9-<strong>2320</strong>-<strong>260</strong>-20<br />
TEST EQUIPMENT<br />
<strong>TM</strong> 9-<strong>2320</strong>-<strong>260</strong>-<strong>34</strong>P-2<br />
Multimeter (Appendix B, Item 115)<br />
EQUIPMENT CONDITION<br />
TOOLS<br />
● External power source disconnected<br />
General mechanic’s tool kit<br />
(<strong>TM</strong> 9-<strong>2320</strong>-<strong>260</strong>-10).<br />
(Appendix B, Item 1)<br />
● Van body sides fully expanded and secured<br />
Toolkit, electrical (Appendix B, Item 106) (<strong>TM</strong> 9-<strong>2320</strong>-<strong>260</strong>-10).<br />
● Battery ground cable at frame disconnected<br />
MATERIALS/PARTS (<strong>TM</strong> 9-<strong>2320</strong>-<strong>260</strong>-20).<br />
Safety wire (Appendix D, Item 371)<br />
● Hinged-roof operated blackout circuit plunger<br />
Electrical tape (Appendix C, Item 51) removed (<strong>TM</strong> 9-<strong>2320</strong>-<strong>260</strong>-20).<br />
CAUTION<br />
Use care when replacing wiring harness. Excessive snagging or<br />
pulling may damage wiring harness.<br />
NOTE<br />
Tag wires, cables, and leads for installation.<br />
1. Remove six screws (22) and cover (21) from load center (16).<br />
NOTE<br />
Perform steps 2 and 3 for right side blackout wiring harness.<br />
2. Remove screw (5) and wire (6) from rear door blackout switch (7).<br />
3. Remove screw (10) and wire (11) from relay (12).<br />
NOTE<br />
Perform steps 4 and 5 for left side blackout wiring harness.<br />
4. Remove screw (9) and wire (8) from rear door blackout switch (7).<br />
5. Remove setscrew (14) and wire (13) from neutral bar (15).<br />
6. Remove six screws (25) and cover (20) from van body (1). Pull cover (20) forward.<br />
7. Remove nut (23) and connectors ( 19) and (18) from cover (20).<br />
8. Remove nut (3) and connectors (2) and (1) from van body (1).<br />
9. Remove two screws (17) and connector (18) from connector (19).<br />
10. Remove two screws (26) and connector (27) from connector (2).<br />
11. Remove grommet (4) from van body (1).<br />
NOTE<br />
● Safety wire will be used to install new wiring harness. Do not<br />
cut safety wire from spool until wiring harness has been pulled<br />
through and proper length has been obtained.<br />
● Safety wire must be attached to wires with electrical tape.<br />
12. Remove blackout wiring harness (24) from van body (1).<br />
15-266
<strong>TM</strong> 9-<strong>2320</strong>-<strong>260</strong>-<strong>34</strong>-2<br />
15-72. RIGHT AND LEFT SIDE BLACKOUT WIRING HARNESS REPLACEMENT (Contd)<br />
15-267
<strong>TM</strong> 9-<strong>2320</strong>-<strong>260</strong>-<strong>34</strong>-2<br />
15-72. RIGHT AND LEFT SIDE BLACKOUT WIRING HARNESS REPLACEMENT (Contd)<br />
1. Position blackout wiring harness (24) in van body (1). Ensure blackout wiring harness (24) is routed<br />
through nuts (3) and (23), connectors (2) and (19), cover (20), and grommet (4).<br />
2. Install connector (2) on van body (1) with nut (3) and install connector (27) on connector (2) with<br />
two screws (26).<br />
3. Install connector (19) on cover (20) with nut (23).<br />
4. Install cover (20) on van body (1) with six screws (25).<br />
5. Install connector (18) on connector (19) with two screws (17).<br />
6. Install grommet (4) in van body (1).<br />
NOTE<br />
Perform steps 7 and 8 for right side blackout wiring harness.<br />
7. Install wire (11) on relay (12) with screw (10).<br />
8. Install wire (6) on rear door blackout switch (7) with screw (5).<br />
NOTE<br />
Perform steps 9 and 10 for left side blackout wiring harness.<br />
9. Install wire (13) on neutral bar (15) with setscrew (14).<br />
10. Install wire (8) on rear door blackout switch (7) with screw (9).<br />
11. Install cover (21) on load center (16) with six screws (22).<br />
15-268
<strong>TM</strong> 9-<strong>2320</strong>-<strong>260</strong>-<strong>34</strong>-2<br />
15-72. RIGHT AND LEFT SIDE BLACKOUT WIRING HARNESS REPLACEMENT (Contd)<br />
FOLLOW-ON TASKS: • Install hinged-roof operated blackout circuit plunger (<strong>TM</strong> 9-<strong>2320</strong>-<strong>260</strong>-20).<br />
• Connect battery ground cable at frame (<strong>TM</strong> 9-<strong>2320</strong>-<strong>260</strong>-20).<br />
• Retract van body sides (<strong>TM</strong> 9-<strong>2320</strong>-<strong>260</strong>-10).<br />
• Connect external power source (<strong>TM</strong> 9-<strong>2320</strong>-<strong>260</strong>-10).<br />
15-269
<strong>TM</strong> 9-<strong>2320</strong>-<strong>260</strong>-<strong>34</strong>-2<br />
15-73. LEFT SIDE EMERGENCY LAMP WIRING HARNESS REPLACEMENT<br />
I<br />
THIS TASK COVERS:<br />
a. Removal b. Installation<br />
INITIAL SETUP<br />
APPLICABLE MODELS<br />
REFERENCES (<strong>TM</strong>)<br />
M820, M820A2 <strong>TM</strong> 9-<strong>2320</strong>-<strong>260</strong>-10<br />
<strong>TM</strong> 9-<strong>2320</strong>-<strong>260</strong>-20<br />
TEST EQUIPMENT<br />
<strong>TM</strong> 9-<strong>2320</strong> -<strong>260</strong>-<strong>34</strong>P-2<br />
Multimeter (Appendix B, Item 115)<br />
EQUIPMENT CONDITION<br />
TOOLS<br />
• External power source disconnected<br />
General mechanic’s tool kit<br />
(<strong>TM</strong> 9-<strong>2320</strong>-<strong>260</strong>-10).<br />
(Appendix B, Item 1)<br />
• Battery ground cable disconnected<br />
Tool kit, electrical (Appendix B, Item 106)<br />
(<strong>TM</strong> 9-<strong>2320</strong>-<strong>260</strong>-20).<br />
• Ceiling filler and side panels removed<br />
MATERIALS/PARTS<br />
(M820, M820A2) (para. 15-44).<br />
Locknut (Appendix D, Item 191)<br />
Safety wire (Appendix D, Item 371)<br />
Electrical tape (Appendix C, Item 51)<br />
a. Removal<br />
CAUTION<br />
Use care when replacing wiring harness. Excessive snagging or<br />
pulling may damage wiring harness.<br />
NOTE<br />
Tag wires, cables, and leads for installation.<br />
1. Remove twelve screws (5) and clamps (4) from van ceiling (1).<br />
2. Remove two screws (11) and cover (12) from switch (14).<br />
3. Remove two screws (13) and pull switch (14) forward.<br />
4. Loosen two screws (10) and remove three wires (9) from switch (14).<br />
5. Remove four screws (8) and switch box (15) from van body (2).<br />
6. Remove grommet (7) and left side emergency lamp wiring harness (3) from switch box (15).<br />
7. Disconnect right side emergency lamp wiring harness lead (16) from left side emergency lamp<br />
wiring harness lead (6).<br />
8. Disconnect lead (19) from circuit breaker (26).<br />
9. Remove two screws (18), screws (24), clamps (17), and clamps (25) from van body (2).<br />
10. Remove screw (23), locknut (21), and clamp (22) from spare tire carrier mounting bracket (20).<br />
Discard locknut (21).<br />
11. Remove nut (29) and wire (27) from positive battery terminal (28).<br />
NOTE<br />
● Safety wire will be used to install new wiring harness. Do not<br />
cut safety wire from spool until wiring harness has been pulled<br />
through and proper length has been obtained.<br />
● Safety wire must be attached to wires with electrical tape,<br />
12. Remove grommet (30) and left side emergency lamp wiring harness (3) from van body (2).<br />
15-270
<strong>TM</strong> 9-<strong>2320</strong>-<strong>260</strong>-<strong>34</strong>-2<br />
15-73. LEFT SIDE EMERGENCY LAMP WIRING HARNESS REPLACEMENT (Contd)<br />
15-271
<strong>TM</strong> 9-<strong>2320</strong>-<strong>260</strong>-<strong>34</strong>-2<br />
I<br />
15-73. LEFT SIDE EMERGENCY LAMP WIRING HARNESS REPLACEMENT (Contd)<br />
I<br />
b. Installation<br />
1.<br />
2.<br />
3.<br />
4.<br />
5.<br />
6.<br />
7.<br />
8.<br />
9.<br />
10.<br />
11.<br />
12.<br />
13.<br />
Position left side emergency lamp wiring harness (2) in van body (3). Ensure left side emergency<br />
lamp wiring harness (2) is routed through twelve clamps (4), grommet (6), two clamps (10),<br />
clamps (13), clamp (15), and grommet (21).<br />
Install grommet (6) in van ceiling (1).<br />
Install wire (8) on positive battery terminal (9) with nut (7).<br />
Install clamp (15) on spare tire carrier mounting bracket (14) with screw (17) and new locknut (16).<br />
Install two clamps (10) and clamps (13) on van body (3) with two screws (11) and screws (18).<br />
Connect lead (12) to circuit breaker (19).<br />
Connect left side emergency lamp wiring harness lead (20) to right side emergency lamp wiring<br />
harness lead (30).<br />
Install grommet (21) in switch box (29) and route three wires (23) through grommet (21) and<br />
switch box (29).<br />
Install switch box (29) in van body (3) with four screws (22).<br />
Install three wires (23) on switch (28) by tightening two screws (24).<br />
Install switch (28) on switch box (29) with two screws (27).<br />
Install cover (26) on switch (28) with two screws (25).<br />
Secure left side emergency lamp wiring harness (2) to van ceiling (1) with twelve clamps (4) and<br />
screws (5).<br />
15-272
<strong>TM</strong> 9-<strong>2320</strong>-<strong>260</strong>-<strong>34</strong>-2<br />
15-73. LEFT SIDE EMERGENCY LAMP WIRING HARNESS REPLACEMENT (Contd)<br />
FOLLOW-ON TASKS: ● Install ceiling filler and side panels (M820, M820A2) (para. 15-44).<br />
● Connect battery ground cable (<strong>TM</strong> 9-<strong>2320</strong>-<strong>260</strong>-20).<br />
● Connect external power source (<strong>TM</strong> 9-<strong>2320</strong>-<strong>260</strong>-10).<br />
15-273
<strong>TM</strong> 9-<strong>2320</strong>-<strong>260</strong>-<strong>34</strong>-2<br />
15-74. RIGHT SIDE EMERGENCY LAMP WIRING HARNESS REPLACEMENT<br />
THIS TASK COVERS:<br />
a. Removal b. Installation<br />
INITIAL SETUP<br />
APPLICABLE MODELS<br />
M820, M820A2<br />
TEST EQUIPMENT<br />
Multimeter (Appendix B, Item 115)<br />
TOOLS<br />
General mechanic’s tool kit<br />
(Appendix B, Item 1)<br />
Tool, kit, electrical (Appendix B, Item 106)<br />
MATERIALS/PARTS<br />
Safety wire (Appendix D, Item 371)<br />
Electrical tape (Appendix C, Item 51)<br />
REFERENCES (<strong>TM</strong>)<br />
<strong>TM</strong> 9-<strong>2320</strong>-<strong>260</strong>-10<br />
<strong>TM</strong> 9-<strong>2320</strong>-<strong>260</strong>-20<br />
<strong>TM</strong> 9-<strong>2320</strong> -<strong>260</strong>-<strong>34</strong>P-2<br />
EQUIPMENT CONDITION<br />
● External power source disconnected<br />
(<strong>TM</strong> 9-<strong>2320</strong>-<strong>260</strong>-10).<br />
● Battery ground cable disconnected<br />
(<strong>TM</strong> 9-<strong>2320</strong>-<strong>260</strong>-20).<br />
● Ceiling filler and side panels removed<br />
(M820, M820A2) (para. 15-44).<br />
a. Removal<br />
1.<br />
2.<br />
3.<br />
4.<br />
5.<br />
6.<br />
7.<br />
8.<br />
CAUTION<br />
Use care when replacing wiring harness. Excessive snagging or<br />
pulling may damage wiring harness.<br />
NOTE<br />
Tag wires, cables, and leads for installation.<br />
Remove twelve screws (2) and clamps (3) from van ceiling (1).<br />
Remove two screws (11) and cover (12) from switch (14).<br />
Remove two screws (13) and pull switch (14) forward.<br />
Loosen two screws (10) and remove three wires (9) from switch (14).<br />
Remove four screws (8) and switch box (15) from van body (4).<br />
Remove grommet (7) and right side emergency lamp wiring harness (5) from switch box (15).<br />
Disconnect left side emergency lamp wiring harness lead (6) from right side emergency lamp wiring<br />
harness lead (16).<br />
NOTE<br />
● Safety wire will be used to install new wiring harness. Do not<br />
cut safety wire from spool until wiring harness has been pulled<br />
through and proper length has been obtained.<br />
● Safety wire must be attached to wires with electrical tape.<br />
Remove right side emergency lamp wiring harness (5) from van body (4).<br />
15-274
<strong>TM</strong> 9-<strong>2320</strong>-<strong>260</strong>-<strong>34</strong>-2<br />
15-74. RIGHT SIDE EMERGENCY LAMP WIRING HARNESS REPLACEMENT (Contd)<br />
15-275
<strong>TM</strong> 9-<strong>2320</strong>-<strong>260</strong>-<strong>34</strong>-2<br />
15-74. RIGHT SIDE EMERGENCY LAMP WIRING HARNESS REPLACEMENT (Contd) I<br />
b. Installation<br />
1. Position right side emergency lamp wiring harness (5) in van body (4). Ensure right side emergency<br />
lamp wiring harness (5) is routed through twelve clamps (3).<br />
2. Connect right side emergency lamp wiring harness lead (16) to left side emergency lamp wiring<br />
harness lead (6).<br />
3. Install grommet (7) in switch box (15) and route three wires (9) through grommet (7) and switch<br />
box (15).<br />
4. Install switch box (15) in van body (4) with four screws (8).<br />
5. Install three wires (9) on switch (14) by tightening two screwS (10).<br />
6. Install switch (14) on switch box (15) with two screws (13).<br />
7. Install cover (11) on switch (14) with two screws (12).<br />
8. Secure right side emergency lamp wiring harness (5) to van ceiling (1) with twelve clamps (3) and<br />
screws (2).<br />
15-276
<strong>TM</strong> 9-<strong>2320</strong>-<strong>260</strong>-<strong>34</strong>-2<br />
15-74. RIGHT SIDE EMERGENCY LAMP WIRING HARNESS REPLACEMENT (Contd)<br />
FOLLOW-ON TASKS: Install ceiling filler and side panels (M820, M820A2) (para. 15-44).<br />
Connect battery ground cable (<strong>TM</strong> 9-<strong>2320</strong>-<strong>260</strong>-20).<br />
Connect external power source (<strong>TM</strong> 9-<strong>2320</strong>-<strong>260</strong>-10).<br />
15-277
<strong>TM</strong> 9-<strong>2320</strong>-<strong>260</strong>-<strong>34</strong>-2<br />
15-75. TELEPHONE POST WIRING HARNESS REPLACEMENT<br />
THIS TASK COVERS:<br />
a. Removal b. Installation<br />
lNITIAL SETUP<br />
APPLICABLE MODELS<br />
M820, M820A2<br />
TEST EQUIPMENT<br />
Multimeter (Appendix B, Item 115)<br />
TOOLS<br />
General mechanic’s tool kit<br />
(Appendix B, Item 1)<br />
Toolkit, electrical (Appendix B, Item 106)<br />
MATERIALS/PARTS<br />
Safety wire (Appendix D, Item 371)<br />
Electrical tape (Appendix C, Item 51)<br />
REFERENCES (<strong>TM</strong>)<br />
<strong>TM</strong> 9-<strong>2320</strong>-<strong>260</strong>-10<br />
<strong>TM</strong> 9-<strong>2320</strong>-<strong>260</strong>-20<br />
<strong>TM</strong> 9-<strong>2320</strong>-<strong>260</strong>-<strong>34</strong>P-2<br />
EQUIPMENT CONDITION<br />
• External power source disconnected<br />
(<strong>TM</strong> 9-<strong>2320</strong>-<strong>260</strong>-10).<br />
• Battery ground cable disconnected<br />
(<strong>TM</strong> 9-<strong>2320</strong>-<strong>260</strong>-20).<br />
• Interior and exterior telephone jacks removed<br />
(<strong>TM</strong> 9-<strong>2320</strong>-<strong>260</strong>-20).<br />
• Ceiling filler and side panels removed<br />
(M820, M820A2) (para. 15-44).<br />
I<br />
a. Removal<br />
I<br />
CAUTION<br />
Use care when replacing wiring harness. Excessive snagging or<br />
pulling may damage wiring harness.<br />
NOTE<br />
Tag wires, cables, and leads for installation.<br />
1. Remove twelve screws (3) and clamps (2) from van ceiling (1).<br />
NOTE<br />
● Safety wire will be used to install new wiring harness. Do not<br />
cut safety wire from spool until wiring harness has been pulled<br />
through and proper length has been obtained.<br />
● Safety wire must be attached to wires with electrical tape.<br />
2. Remove telephone post wiring harness (4) from van body (5).<br />
1. Position telephone post wiring harness (4) in van body (5). Ensure telephone post wiring<br />
harness (4) is routed through twelve clamps (2).<br />
2. Secure telephone post wiring harness (4) to van ceiling (1) with twelve clamps (2) and screws (3).<br />
15-278
<strong>TM</strong> 9-<strong>2320</strong>-240-<strong>34</strong>-2<br />
15-75. TELEPHONE POST WIRING HARNESS REPLACEMENT (Contd)<br />
FOLLOW-ON TASKS: ● Install ceiling filler and side panels (M820, M820A2) (para. 15-44).<br />
● Install interior and exterior telephone jacks (<strong>TM</strong> 9-<strong>2320</strong>-<strong>260</strong>-20).<br />
● Connect battery ground cable (<strong>TM</strong> 9-<strong>2320</strong>-<strong>260</strong>-20).<br />
• Connect external power source (<strong>TM</strong> 9-<strong>2320</strong>-<strong>260</strong>-10).<br />
15-279
<strong>TM</strong> 9-<strong>2320</strong>-<strong>260</strong>-<strong>34</strong>-2<br />
15-76. 3-PHASE RECEPTACLE WIRING HARNESS REPLACEMENT<br />
THIS TASK COVERS:<br />
a. Removal b. Installation<br />
lNITIAL SETUP<br />
APPLICABLE MODELS<br />
M820, M820A2<br />
TEST EQUIPMENT<br />
Multimeter (Appendix B, Item 115)<br />
TOOLS<br />
General mechanic’s tool kit<br />
(Appendix B, Item 1)<br />
Tool kit, electrical (Appendix B, Item 106)<br />
MATERIALS/PARTS<br />
Safety wire (Appendix D, Item 371)<br />
Electrical tape (Appendix C, Item 51)<br />
REFERENCES (<strong>TM</strong>)<br />
<strong>TM</strong> 9-<strong>2320</strong>-<strong>260</strong>-10<br />
<strong>TM</strong> 9-<strong>2320</strong>-<strong>260</strong>-20<br />
<strong>TM</strong> 9-<strong>2320</strong>-<strong>260</strong>-<strong>34</strong>P-2<br />
EQUIPMENT CONDITION<br />
●<br />
External power source disconnected<br />
(<strong>TM</strong> 9-<strong>2320</strong>-<strong>260</strong>-10).<br />
●<br />
Battery ground cable disconnected<br />
(<strong>TM</strong> 9-<strong>2320</strong>-<strong>260</strong>-20).<br />
● 3-phase receptacle removed (<strong>TM</strong> 9-<strong>2320</strong>-<strong>260</strong>-20).<br />
●<br />
Ceiling filler and side panels removed<br />
(M820, M820A2) (para. 15-44).<br />
a. Removal<br />
Use care when replacing wiring harness. Excessive snagging or<br />
pulling may damage wiring harness.<br />
NOTE<br />
Tag wires, cables, and leads for installation.<br />
1. Remove twelve screws (5) and clamps (4) from van ceiling (1).<br />
2. Remove six screws (6) and cover (7) from load center (11).<br />
3. Remove screw (8) and clamp (9) from mounting plate ( 10).<br />
4. Remove three screws (14) and wires (15) from 20-amp circuit breaker (13).<br />
5. Remove setscrew (17) and wire (16) from neutral bar (12).<br />
NOTE<br />
● Safety wire will be used to install new wiring harness. Do not<br />
cut safety wire from spool until wiring harness has been pulled<br />
through and proper length has been obtained.<br />
● Safety wire must be attached to wires with electrical tape.<br />
6. Remove 3-phase receptacle wiring harness (2) from van body (3).<br />
b. Installation<br />
1. Position 3-phase receptacle wiring harness (2) in van body (3). Ensure 3-phase receptacle wiring<br />
harness (2) is routed through twelve clamps (4) and clamp (9).<br />
2. Install wire (16) in neutral bar (12) with setscrew (17).<br />
3. Install three wires (15) in 20-amp circuit breaker (13) with three screws (14).<br />
4. Install clamp (9) on mounting plate (10) with screw (8).<br />
5. Install cover (7) on load center (11) with six screws (6).<br />
6. Secure 3-phase receptacle wiring harness (2) to van ceiling (1) with twelve clamps (4) and screws (5).<br />
15-280
<strong>TM</strong> 9-<strong>2320</strong>-<strong>260</strong>-<strong>34</strong>-2<br />
15-76. 3-PHASE RECEPTACLE WIRING HARNESS REPLACEMENT (Contd)<br />
FOLLOW-ON TASKS: ● Install ceiling fine; and side panels (M820, M820A2) (para. 15-44).<br />
• Install 3-phase receptacle (<strong>TM</strong> 9-<strong>2320</strong>-<strong>260</strong>-20).<br />
• Connect battery ground cable (<strong>TM</strong> 9-<strong>2320</strong>-<strong>260</strong>-20).<br />
• Connect external power source (<strong>TM</strong> 9-<strong>2320</strong>-<strong>260</strong>-10).<br />
15-281
<strong>TM</strong> 9-<strong>2320</strong>-<strong>260</strong>-<strong>34</strong>-2<br />
15-77. FLEXIBLE CONVERTER WIRING HARNESS REPLACEMENT<br />
THIS TASK COVERS:<br />
a. Removal b. Installation<br />
INITIAL SETUP<br />
APPLICABLE MODELS<br />
M820, M820A2<br />
TEST EQUIPMENT<br />
Multimeter (Appendix B, Item 115)<br />
TOOLS<br />
General mechanic’s tool kit<br />
(Appendix B, Item 1)<br />
Tool kit, electrical (Appendix B, Item 106)<br />
REFERENCES (<strong>TM</strong>]<br />
<strong>TM</strong> 9-<strong>2320</strong>-<strong>260</strong>-10<br />
<strong>TM</strong> 9-<strong>2320</strong>-<strong>260</strong>-20<br />
<strong>TM</strong> 9-<strong>2320</strong>-<strong>260</strong>-<strong>34</strong>P-2<br />
EQUIPMENT CONDITION<br />
• External power source disconnected<br />
(<strong>TM</strong> 9-<strong>2320</strong>-<strong>260</strong>-10).<br />
• Battery ground cable disconnected<br />
(<strong>TM</strong> 9-<strong>2320</strong>-<strong>260</strong>-20).<br />
a. Removal<br />
CAUTION<br />
Use care when replacing wiring harness. Excessive snagging or<br />
pulling may damage wiring harness.<br />
NOTE<br />
• The flexible converter wiring harness and 400 Hz output wiring<br />
harness are replaced the same. This procedure covers the flexible<br />
converter wiring harness.<br />
• Tag wires, cables, and leads for installation.<br />
1. Disconnect connector (10) from junction box (9).<br />
2. Remove four screws (1), cover (2), and gasket (3) from converter (6).<br />
3. Remove three nuts (11), wires (7), and lockwasher (5) from converter (6).<br />
4. Remove flexible converter wiring harness (8) from van body (4).<br />
b. Installation<br />
1. Position flexible converter wiring harness (8) in converter (6) and install lockwasher (5) over flexible<br />
converter wiring harness (8).<br />
2. Install three wires (7) in converter (6) with three nuts (11).<br />
3. Install gasket (3) and cover (2) on converter (6) with four screws (1).<br />
4. Connect connector (10) to junction box (9).<br />
15-282
<strong>TM</strong> 9-<strong>2320</strong>-<strong>260</strong>-<strong>34</strong>-2<br />
15-77. FLEXIBLE CONVERTER WIRING HARNESS REPLACEMENT (Contd)<br />
FOLLOW-ON TASKS: • Connect battery ground cable (<strong>TM</strong> 9-<strong>2320</strong>-<strong>260</strong>-20).<br />
• Connect external power source (<strong>TM</strong> 9-<strong>2320</strong>-<strong>260</strong>-10).<br />
15-283
<strong>TM</strong> 9-<strong>2320</strong>-<strong>260</strong>-<strong>34</strong>-2<br />
15-78. 400 Hz SUPPLY WIRING HARNESS REPLACEMENT<br />
THIS TASK COVERS:<br />
a. Removal b. Installation<br />
INITIAL SETUP<br />
APPLICABLE MODELS<br />
M820, M820A2<br />
TEST EQUIPMENT<br />
Multimeter (Appendix B, Item 115) .<br />
TOOLS<br />
General mechanic’s tool kit<br />
(Appendix B, Item 1)<br />
Tool kit, electrical (Appendix B, Item 106)<br />
Soldering gun (Appendix B, Item 117)<br />
MATERIALS/PARTS<br />
Safety wire (Appendix D, Item 372)<br />
Electrical tape (Appendix C, Item 51)<br />
MATERIALS/PARTS (Contd)<br />
Solder (Appendix C, Item 47)<br />
Sealing compound (Appendix C, Item 45)<br />
REFERENCES (<strong>TM</strong>)<br />
<strong>TM</strong> 9-<strong>2320</strong>-<strong>260</strong>-10<br />
<strong>TM</strong> 9-<strong>2320</strong>-<strong>260</strong>-20<br />
<strong>TM</strong> 9-<strong>2320</strong>-<strong>260</strong>-<strong>34</strong>P-2<br />
EQUIPMENT CONDITION<br />
• External power source disconnected<br />
(<strong>TM</strong> 9-<strong>2320</strong>-<strong>260</strong>-10).<br />
• Battery ground cable disconnected<br />
(<strong>TM</strong> 9-<strong>2320</strong>-<strong>260</strong>-20).<br />
CAUTION<br />
Use care when replacing wiring harness. Excessive snagging or<br />
pulling may damage wiring harness.<br />
1. Remove eight screws (2) and upper and lower covers (3) and (6) from control center (8).<br />
NOTE<br />
Tag wires, cables, and leads for installation.<br />
2. Remove three screws (5) and wires (9) from circuit breaker (7).<br />
3. Remove screw (4) and wire (11) from terminal board (10).<br />
4. Disconnect wiring harnesses (15) and (16) from connectors (17) and (18).<br />
5. Remove eight screws (14) and cover (13) from junction box (20).<br />
6. Desolder four wires (19) from connector (17).<br />
NOTE<br />
• Safety wire will be used to install new wiring harness. Do not<br />
cut safety wire from spool until wiring harness has been pulled<br />
through and proper length has been obtained.<br />
• Safety wire must be attached to wires with electrical tape.<br />
7. Remove 400 Hz supply wiring harness (1) from van body (12).<br />
15-284
<strong>TM</strong> 9-<strong>2320</strong>-<strong>260</strong>-<strong>34</strong>-2<br />
15-78. 400 Hz SUPPLY WIRING HARNESS REPLACEMENT (Contd)<br />
15-285
<strong>TM</strong> 9-<strong>2320</strong>-<strong>260</strong>-<strong>34</strong>-2<br />
15-78. 400 Hz SUPPLY WIRING HARNESS REPLACEMENT (Contd)<br />
1. Position 400 Hz supply wiring harness (10) in van body (1).<br />
2. Solder four wires (8) to connector (6).<br />
3. Apply sealing compound to cover (2) and install cover (2) on junction box (9) with eight screws (3).<br />
4. Connect wiring harnesses (4) and (5) to connectors (6) and (7).<br />
5. Install wire (19) on terminal board (18) with screw (20).<br />
6. Install three wires (17) on circuit breaker (15) with three screws (13).<br />
7. Install upper and lower covers (12) and (14) on control center (16) with eight screws (11).<br />
15-286
<strong>TM</strong> 9-<strong>2320</strong>-<strong>260</strong>-<strong>34</strong>-2<br />
15-78. 400 Hz SUPPLY WIRING HARNESS REPLACEMENT (Contd)<br />
FOLLOW-ON TASKS: • Connect battery ground cable (<strong>TM</strong> 9-<strong>2320</strong>-<strong>260</strong>-20).<br />
• Connect external power source (<strong>TM</strong> 9-<strong>2320</strong>-<strong>260</strong>-10).<br />
15-287
<strong>TM</strong> 9-<strong>2320</strong>-<strong>260</strong>-<strong>34</strong>-2<br />
15-79. 400 Hz RECEPTACLE WIRING HARNESS REPLACEMENT<br />
THIS TASK COVERS:<br />
a. Removal b. Installation<br />
INITIAL SETUP<br />
APPLICABLE MODELS<br />
M820, M820A2<br />
TEST EQUIPMENT<br />
Multimeter (Appendix B, Item 115)<br />
TOOLS<br />
General mechanic’s tool kit<br />
(Appendix B, Item 1)<br />
Tool kit, electrical (Appendix B, Item 106)<br />
MATERIALS/PARTS<br />
Safety wire (Appendix D, Item 372)<br />
Electrical tape (Appendix C, Item 51)<br />
REFERENCES (<strong>TM</strong>)<br />
<strong>TM</strong> 9-<strong>2320</strong>-<strong>260</strong>-10<br />
<strong>TM</strong> 9-<strong>2320</strong>-<strong>260</strong>-20<br />
<strong>TM</strong> 9-<strong>2320</strong>-<strong>260</strong>-<strong>34</strong>P-2<br />
EQUIPMENT CONDITION<br />
• External power source disconnected<br />
(<strong>TM</strong> 9-<strong>2320</strong>-<strong>260</strong>-10).<br />
• Battery ground cable disconnected<br />
(<strong>TM</strong> 9-<strong>2320</strong>-<strong>260</strong>-20).<br />
• Ceiling filler and side panel removed<br />
(M820, M820A2) (para. 15-44).<br />
a. Removal<br />
CAUTION<br />
Use care when replacing wiring harness. Excessive snagging or<br />
pulling may damage wiring harness.<br />
NOTE<br />
Tag wires, cables, and leads for installation.<br />
1. Remove four screws (3) and upper cover (2) from control center (1).<br />
2. Remove two screws (4) and wires (5) from terminal board (6).<br />
3. Remove six screws (10) and clamps (9) from van ceiling (7).<br />
NOTE<br />
• Safety wire will be used to install new wiring harness. Do not<br />
cut safety wire from spool until wiring harness has been pulled<br />
through and proper length has been obtained.<br />
• Safety wire must be attached to wires with electrical tape.<br />
4. Remove 400 Hz receptacle wiring harness (8) from van body (11).<br />
b. Installation<br />
1. Position 400 Hz receptacle wiring harness (8) in van body (11). Ensure 400 Hz receptacle wiring<br />
harness (8) is routed through six clamps (9).<br />
2. Install two wires (5) on terminal board (6) with two screws (4).<br />
3. Install upper cover (2) on control center (1) with four screws (3).<br />
4. Install six clamps (9) in van ceiling (7) with six screws (10).<br />
15-288
<strong>TM</strong> 9-<strong>2320</strong>-<strong>260</strong>-<strong>34</strong>-2<br />
15-79. 400 Hz RECEPTACLE WIRING HARNESS REPLACEMENT (Contd)<br />
FOLLOW-ON TASKS: ● Install ceiling filler and side panels (M820, M820A2) (para. 15-44).<br />
● Connect battery ground cable (<strong>TM</strong> 9-<strong>2320</strong>-<strong>260</strong>-20).<br />
● Connect external power source (<strong>TM</strong> 9-<strong>2320</strong>-<strong>260</strong>-10).<br />
15-289
<strong>TM</strong> 9-<strong>2320</strong>-<strong>260</strong>-<strong>34</strong>-2<br />
15-80. CONVERTER AND AUXILIARY PUMP WIRING HARNESSES REPLACEMENT<br />
THIS TASK COVERS:<br />
a. Removal b. Installation<br />
INITIAL SETUP<br />
APPLICABLE MODELS<br />
REFERENCES (<strong>TM</strong>)<br />
M820, M820A2 <strong>TM</strong> 9-<strong>2320</strong>-<strong>260</strong>-10<br />
<strong>TM</strong> 9-<strong>2320</strong>-<strong>260</strong>-20<br />
<strong>TM</strong> 9-<strong>2320</strong>-<strong>260</strong>-<strong>34</strong>P-2<br />
TEST EQUIPMENT<br />
Multimeter (Appendix B, Item 115)<br />
TOOLS<br />
General mechanic’s tool kit<br />
(Appendix B, Item 1)<br />
Tool kit, electrical (Appendix B, Item 106)<br />
MATERIALS/PARTS<br />
Gasket (Appendix D, Item 76)<br />
Safety wire (Appendix D, Item 372)<br />
Electrical tape (Appendix C, Item 51)<br />
Solder (Appendix C, Item 47)<br />
Sealing compound (Appendix C, Item 45)<br />
CAUTION<br />
EQUIPMENT CONDITION<br />
● Disconnect external power source<br />
(<strong>TM</strong> 9-<strong>2320</strong>-<strong>260</strong>-10).<br />
●<br />
Battery ground cable disconnected<br />
(<strong>TM</strong> 9-<strong>2320</strong>-<strong>260</strong>-20).<br />
●<br />
AC manual starter switches removed<br />
(para. 15-89).<br />
Use care when replacing wiring harnesses. Excessive snagging or<br />
pulling may damage wiring harnesses.<br />
NOTE<br />
Tag wires, cables, and leads for installation.<br />
1. Disconnect wiring harnesses (5) and (6) from connectors (8) and (4).<br />
2. Remove eight screws (7) and cover (3) from junction box (1).<br />
3. Desolder three wires (2) from connector (4).<br />
4. Disconnect wiring harness (15) from connector (14).<br />
5. Remove four screws (9), cover (10), and gasket (11) from outlet box (12). Discard gasket (11).<br />
6. Desolder three wires (13) from connector (14).<br />
7. Remove six screws ( 16) and cover (24) from load center (20).<br />
8. Remove screw (17) and clamp (18) from mounting plate (19).<br />
9. Remove six screws (23) and wires (26) from two 20-amp circuit breakers (22).<br />
NOTE<br />
● Safety wire will be used to install new wiring harness. Do not<br />
cut safety wire from spool until wiring harness has been pulled<br />
through and proper length has been obtained.<br />
● Safety wire must be attached to wires with electrical tape.<br />
10. Remove converter and auxiliary pump wiring harnesses (25) from van body (21).<br />
15-290
<strong>TM</strong> 9-<strong>2320</strong>-<strong>260</strong>-<strong>34</strong>-2<br />
15-291
<strong>TM</strong> 9-<strong>2320</strong>-<strong>260</strong>-<strong>34</strong>-2<br />
15-80. CONVERTER AND AUXILIARY PUMP WIRING HARNESSES REPLACEMENT (Contd)<br />
1. Position converter and auxiliary pump wiring harnesses (11) in van body (7). Ensure converter and<br />
auxiliary pump wiring harnesses (11) are routed through clamp (4).<br />
2. Install six wires (10) in two 20-amp circuit breakers (8) with six screws (9).<br />
3. Install clamp (4) on mounting plate (5) with screw (3).<br />
4. Install cover (2) on load center (6) with six screws (1).<br />
5. Position new gasket (15) on outlet box (16).<br />
6. Solder three wires (17) to connector (12).<br />
7. Install gasket (15) and cover (14) on outlet box (16) with four screws (13),<br />
8. Connect wiring harness (12) to connector (18).<br />
9. Solder three wires (20) to connector (22).<br />
NOTE<br />
Apply sealing compound to cover.<br />
10. Install cover (21) on junction box (19) with eight screws (25).<br />
11. Connect wiring harnesses (23) and (24) to connectors (26) and (22).<br />
15-292
<strong>TM</strong> 9-<strong>2320</strong>-<strong>260</strong>-<strong>34</strong>-2<br />
15-80. CONVERTER AND AUXILIARY PUMP WIRING HARNESSES REPLACEMENT (Contd)<br />
FOLLOW-ON TASK ● Install AC manual starter switches (para. 15-89).<br />
● Connect battery ground cable (<strong>TM</strong> 9-<strong>2320</strong>-<strong>260</strong>-20).<br />
● Connect external power source (<strong>TM</strong> 9-<strong>2320</strong>-<strong>260</strong>-10).<br />
15-293
<strong>TM</strong> 9-<strong>2320</strong>-<strong>260</strong>-<strong>34</strong>-2<br />
15-81. ENTRANCE RECEPTACLE REPLACEMENT<br />
THIS TASK COVERS:<br />
a. Removal b. Installation<br />
INITIAL SETUP<br />
APPLICABLE MODELS<br />
M820, M820A1, M820A2<br />
TEST EQUIPMENT<br />
Multimeter (Appendix B, Item 115)<br />
Tools<br />
General mechanic’s tool kit<br />
(Appendix B, Item 1)<br />
Toolkit, electrical (Appendix B, Item 106)<br />
REFERENCES (<strong>TM</strong>)<br />
<strong>TM</strong> 9-<strong>2320</strong>-<strong>260</strong>-10<br />
<strong>TM</strong> 9-<strong>2320</strong>-<strong>260</strong>-20<br />
<strong>TM</strong> 9-<strong>2320</strong>-<strong>260</strong>-<strong>34</strong>P-2<br />
EQUIPMENT CONDITION<br />
● External power source disconnected<br />
(<strong>TM</strong> 9-<strong>2320</strong>-<strong>260</strong>-10).<br />
● Battery ground cable disconnected<br />
(<strong>TM</strong> 9-<strong>2320</strong>-<strong>260</strong>-20).<br />
MATERIALS/PARTS<br />
Four locknuts (Appendix D, Item 190)<br />
Safety wire (Appendix D, Item 372)<br />
Electrical tape (Appendix C, Item 51)<br />
CAUTION<br />
Use care when replacing wiring harness. Excessive snagging or<br />
pulling may damage wiring harness.<br />
NOTE<br />
Tag wires, cables, and leads for installation.<br />
1. Remove six screws (13) and cover (1) from load center (4).<br />
2. Remove three screws (14) and wires (15) from 100-amp circuit breaker (17).<br />
3. Remove setscrew (16) and wire (2) from neutral bar (3).<br />
4. Remove three screws (9) from plate (10) and electrical box (11).<br />
5. Remove four screws (6), locknuts (12), and receptacle (7) from van body (5). Discard locknuts (12).<br />
NOTE<br />
● Safety wire will be used to install new wiring harness. Do not<br />
cut safety wire from spool until wiring harness has been pulled<br />
through and proper length has been obtained.<br />
● Safety wire must be attached to wires with electrical tape.<br />
6. Remove entrance receptacle (8) from van body (5).<br />
1. Position entrance receptacle (8) in van body (5).<br />
2. Install receptacle (7) on van body (5) with four screws (6) and new locknuts (12).<br />
3. Secure plate (10) on electrical box (11) with three screws (9).<br />
4. Install wire (2) on neutral bar (3) with setscrew (16).<br />
5. Install three wires (15) on 100-amp circuit breaker (17) with three screws (14).<br />
6. Install cover (1) on load center (4) with six screws (13).<br />
15-294
<strong>TM</strong> 9-<strong>2320</strong>-<strong>260</strong>-<strong>34</strong>-2<br />
15-81. ENTRANCE RECEPTACLE REPLACEMENT (Contd)<br />
FOLLOW-ON TASKS: ● Connect external power source (<strong>TM</strong> 9-<strong>2320</strong>-<strong>260</strong>-10).<br />
● Connect battery ground cable (<strong>TM</strong> 9-<strong>2320</strong>-<strong>260</strong>-20).<br />
15-295
<strong>TM</strong> 9-<strong>2320</strong>-<strong>260</strong>-<strong>34</strong>-2<br />
15-82. LOAD CENTER MAINTENANCE<br />
THIS TASK COVERS:<br />
a. Removal c. Assembly<br />
b. Disassembly d. Installation<br />
INITIAL SETUP<br />
APPLICABLE MODELS<br />
M820, M820A1, M820A2<br />
TEST EQUIPMENT<br />
Multimeter (Appendix B, Item 115)<br />
TOOLS<br />
General mechanic’s tool kit<br />
(Appendix B, Item 1)<br />
Tool kit, electrical (Appendix B, Item 106)<br />
Soldering gun (Appendix B, Item 117)<br />
MATERIALS/PARTS<br />
Two lockwashers (Appendix D, Item 248)<br />
Gasket (Appendix D, Item 76)<br />
Four lockwashers (Appendix D, Item 224)<br />
Three lockwashers (Appendix D, Item 244)<br />
MATERIALS/PARTS (Contd)<br />
Safety wire (Appendix D, Item 372)<br />
Electrical tape (Appendix C, Item 51)<br />
Sealing compound (Appendix C, Item 43)<br />
Solder (Appendix C, Item 47)<br />
REFERENCES (<strong>TM</strong>)<br />
<strong>TM</strong> 9-<strong>2320</strong>-<strong>260</strong>-10<br />
<strong>TM</strong> 9-<strong>2320</strong>-<strong>260</strong>-20<br />
<strong>TM</strong> 9-<strong>2320</strong>-<strong>260</strong>-<strong>34</strong>P-2<br />
EQUIPMENT CONDITION<br />
● Battery ground cable disconnected<br />
(<strong>TM</strong> 9-<strong>2320</strong>-<strong>260</strong>-20).<br />
● External power source disconnected<br />
(<strong>TM</strong> 9-<strong>2320</strong>-<strong>260</strong>-10).<br />
NOTE<br />
Tag wires, cables, and leads for installation.<br />
1.<br />
2.<br />
3.<br />
4.<br />
5.<br />
6.<br />
7.<br />
8.<br />
9.<br />
10.<br />
11.<br />
12.<br />
13.<br />
14.<br />
15.<br />
CAUTION<br />
Use care when replacing load center. Excessive snagging and<br />
pulling may damage wiring harness.<br />
Remove six screws (1) and cover (2) from load center (4).<br />
Remove three setscrews (12) and wires (13) from relay (5).<br />
Remove setscrew (10) and wire (11) from neutral bar (6).<br />
Remove three screws (8) and five wires (9) from three 20-amp circuit breakers (7).<br />
Remove main wiring harness (3) from load center (4).<br />
Remove setscrew (20) and three wires (21) from relay (5).<br />
Remove setscrew (18) and wire (19) from neutral bar (6).<br />
Remove three screws (16) and five wires (17) from three 20-amp circuit breakers (15).<br />
Remove main wiring harness (14) from load center (4).<br />
NOTE<br />
Perform steps 10 through 12 for M820 and M820A2 vehicles.<br />
Remove setscrew (27) and wires (28) and (26) from relay (5).<br />
Remove screw (24) and wire (25) from 20-amp circuit breaker (23).<br />
Remove blackout bypass wiring harness (22) from load center (4).<br />
Remove nut (30), lockwasher (29), wires (31), (32), and (35), screw (<strong>34</strong>), and lockwasher (33) from<br />
load center (4). Discard lockwashers (29) and (33).<br />
Remove three screws (37) and wires (38) from 40-amp circuit breaker (36).<br />
Remove air conditioner wiring harness (39) from load center (4).<br />
15-296
<strong>TM</strong> 9-<strong>2320</strong>-<strong>260</strong>-<strong>34</strong>-2<br />
15-82. LOAD CENTER MAINTENANCE (Contd)<br />
15-297
<strong>TM</strong> 9-<strong>2320</strong>-<strong>260</strong>-<strong>34</strong>-2<br />
15-82. LOAD CENTER MAINTENANCE (Contd)<br />
16.<br />
17.<br />
18.<br />
19.<br />
20.<br />
21.<br />
22.<br />
23.<br />
24.<br />
25.<br />
26.<br />
27.<br />
Remove setscrew (7) and wire (6) from neutral bar (2).<br />
Remove three screws (4) and wires (5) from 30-amp circuit breaker (3).<br />
Remove 10kW electric heater wiring harness (8) from load center (1).<br />
Remove setscrew (13) and wire (14) from neutral bar (2).<br />
Remove screw (11) and wire (12) from 20-amp circuit breaker (10).<br />
Remove heater wiring harness (9) from load center (1).<br />
NOTE<br />
Perform steps 22 through 27 for M820 and M820A2 vehicles.<br />
Disconnect auxiliary pump wiring harness (15) from connector (16).<br />
Remove four screws (17), cover (18), and gasket (19) from outlet box (20). Discard gasket (19).<br />
Desolder three wires (21) from connector (16).<br />
Disconnect converter wiring harnesses (26) and (27) from connectors (29) and (25).<br />
Remove eight screws (28) and cover (24) from junction box (22).<br />
Desolder three wires (23) and four wires (30) from connectors (25) and (29).<br />
15-298
<strong>TM</strong> 9-<strong>2320</strong>-<strong>260</strong>-<strong>34</strong>-2<br />
15-82. LOAD CENTER MAINTENANCE (Contd)<br />
15-299
<strong>TM</strong> 9-<strong>2320</strong>-<strong>260</strong>-<strong>34</strong>-2<br />
15-82. LOAD CENTER MAINTENANCE (Contd)<br />
CAUTION<br />
Safety wire will be used to route converter and auxiliary pump<br />
wiring harness and entrance receptacle wiring harness through<br />
van body. Connect safety wire to wiring harness with electrical<br />
tape.<br />
NOTE<br />
Perform steps 28 and 29 for M820 and M820A2 vehicles.<br />
28. Remove six screws (3) and wires (4) from two 20-amp circuit breakers (2).<br />
29. Remove converter and auxiliary pump wiring harnesses (5) from load center (1).<br />
30. Remove setscrew (11) and wire (12) from neutral bar (7).<br />
31. Remove three setscrews (9) and wires (10) from 100-amp circuit breaker (8).<br />
32. Remove entrance receptacle wiring harness (6) from load center (1).<br />
15-300
<strong>TM</strong> 9-<strong>2320</strong>-<strong>260</strong>-<strong>34</strong>-2<br />
15-82. LOAD CENTER MAINTENANCE (Contd)<br />
NOTE<br />
Perform steps 33 through 39 for M820 and M820A2 vehicles.<br />
33. Remove screw (22) and wire (21) from relay (20).<br />
<strong>34</strong>. Remove two screws (14) and wires (15) from switch (17).<br />
35. Remove setscrew (19) and wire (18) from neutral bar (7).<br />
36. Remove right and left blackout harnesses (13) and (16) from load center (1).<br />
37. Remove setscrew (27) and wire (26) from neutral bar (7).<br />
38. Remove three screws (24) and wires (25) from 20-amp circuit breaker (23).<br />
39. Remove 3-phase receptacle wiring harness (28) from load center (1).<br />
15-301
<strong>TM</strong> 9-<strong>2320</strong>-<strong>260</strong>-<strong>34</strong>-2<br />
15-82. LOAD CENTER MAINTENANCE (Contd)<br />
NOTE<br />
Perform steps 40 through 42 for M820 and M820A2 vehicles.<br />
40. Remove setscrew (6) and wire (7) from neutral bar (2).<br />
41. Remove three screws (4) and wires (5) from 20-amp circuit breaker (3).<br />
42. Remove 3-phase receptacle wiring harness (8) from load center (1).<br />
43. Remove nut (13) from conduit (12).<br />
44. Remove four screws (9), lockwashers (10), and load center (1) from van body (11).<br />
b. Disassembly<br />
1. Remove six plates (15) from cover (14).<br />
2. Remove two screws (36), three tires (19), screw (39), and tire (38) from relay (37).<br />
3. Remove three setscrews (21), two wires (19), and wire (16) from neutral bar (20).<br />
4. Remove setscrew (<strong>34</strong>) and tire (38) from 20-amp circuit breaker (35).<br />
5. Remove three screws (40), lockwasher (41), and relay (37) from load center (1). Discard lockwashers (41).<br />
6. Remove six screws (25) and insulators (26) from load center (1).<br />
7. Remove nine screws (33) and 20-amp circuit breakers (35) from load center (1).<br />
8. Remove three screws (31) and 30-amp circuit breaker (32) from load center (1).<br />
9. Remove three screws (29) and 40-amp circuit breaker (30) from load center (1).<br />
10. Remove twelve screws (28) and four 20-amp circuit breakers (27) from load center (1).<br />
11. Remove three screws (23) and 100-amp circuit breaker (24) from load center (1).<br />
12. Remove grommet (22) from load center (1).<br />
13. Remove two screws (18) and blackout door switch (17) from load center (1).<br />
15-302
<strong>TM</strong> 9-<strong>2320</strong>-<strong>260</strong>-<strong>34</strong>-2<br />
15-82. LOAD CENTER MAINTENANCE (Contd)<br />
15-303
<strong>TM</strong> 9-<strong>2320</strong>-<strong>260</strong>-<strong>34</strong>-2<br />
15-82. LOAD CENTER MAINTENANCE (Contd)<br />
c. Assembly<br />
1. Install blackout door switch (3) on load center (2) with two screws (4).<br />
2. Install grommet (8) in load center (2).<br />
3. Install 100-amp circuit breaker (10) in load center (2) with three screws (11).<br />
4. Install four 20-amp circuit breakers (14) in load center (2) with twelve screws (13).<br />
5. Install 40-amp circuit breaker (16) in load center (2) with three screws (15).<br />
6. Install 30-amp circuit breaker (18) in load center (2) with three screws (17).<br />
7. Install nine 20-amp circuit breakers (21) in load center (2) with nine screws (19).<br />
8. Install six insulators (9) in load center (2) with six screws (12).<br />
9. Install relay (23) in load center (2) with three new lockwashers (27) and screws (26).<br />
10. Install wire (24) in 20-amp circuit breaker (21) with setscrew (20).<br />
11. Install two wires (7) and wire (1) in neutral bar (5) with three setscrews (6).<br />
12. Install wire (24) in relay (23) with screw (25).<br />
13. Install three wires (7) in relay (23) with two setscrews (22).<br />
14. Install six plates (29) on cover (28).<br />
15-304
<strong>TM</strong> 9-<strong>2320</strong>-<strong>260</strong>-<strong>34</strong>-2<br />
15-82. LOAD CENTER MAINTENANCE (Contd)<br />
1. Install load center (2) on van body (32) with four new lockwashers (31) and screws (30).<br />
2. Install nut (<strong>34</strong>) on conduit (33).<br />
NOTE<br />
Perform steps 3 through 5 for M820 and M820A2 vehicles.<br />
3. Position 3-phase receptacle wiring harness (35) in load center (2).<br />
4. Install three wires (39) in 20-amp circuit breaker (37) with three screws (38).<br />
5. Install wire (41) on neutral bar (36) with setscrew (40).<br />
15-305
<strong>TM</strong> 9-<strong>2320</strong>-<strong>260</strong>-<strong>34</strong>-2<br />
15-82. LOAD CENTER MAINTENANCE (Contd)<br />
NOTE<br />
Perform steps 6 through 10 for M820 and M820A2 vehicles.<br />
6. Position 3-phase receptacle wiring harness (8) in load center (1).<br />
7. Install three wires (5) on 20-amp circuit breaker (3) with three screws (4).<br />
8. Install wire (6) in neutral bar (2) with setscrew (7).<br />
9. Position right and left blackout harnesses (9) and (11) in load center (1).<br />
10. Install wire (15) in neutral bar (2) with setscrew (16).<br />
11. Install wires (13) and (14) on switch (12) with two screws (10).<br />
12. Install wire (18) on relay (17) with screw (19).<br />
15-306
<strong>TM</strong> 9-<strong>2320</strong>-<strong>260</strong>-<strong>34</strong>-2<br />
15-82. LOAD CENTER MAINTENANCE (Contd)<br />
13.<br />
14.<br />
15.<br />
16.<br />
17.<br />
18.<br />
NOTE<br />
Perform steps 13 through 18 for M820 and M820A2 vehicles.<br />
Position entrance receptacle wiring harness (20) in load center (1).<br />
Install three wires (23) on 100-amp circuit breaker (21) with three setscrews (22).<br />
Install wire (25) in neutral bar (2) with setscrews (24).<br />
Position converter and auxiliary pump wiring harness (26) in load center (1).<br />
Route converter and auxiliary pump wiring harness (26) through conduit (28).<br />
Install six wires (30) in two 20-amp circuit breakers (27) with six screws (29).<br />
15-307
<strong>TM</strong> 9-<strong>2320</strong>-<strong>260</strong>-<strong>34</strong>-2<br />
15-82. LOAD CENTER MAINTENANCE (Contd)<br />
19.<br />
20.<br />
21.<br />
22.<br />
23.<br />
24.<br />
25.<br />
26.<br />
27.<br />
28.<br />
29.<br />
30.<br />
Solder three wires (2) and four wires (9) to connectors (4) and (8).<br />
NOTE<br />
Apply sealing compound to cover.<br />
Install cover (3) on junction box (1) with eight screws (7).<br />
Connect converter wiring harnesses (5) and (6) to connectors (8) and (4).<br />
Position new gasket (14) on outlet box (15) and solder three wires (16) to connector (11).<br />
Install gasket (14) and cover (13) on outlet box (15) with four screws (12).<br />
Connect auxiliary pump wiring harness (10) to connector (11).<br />
Position heater wiring harness (24) in load center (17).<br />
Install wire (23) in neutral bar (18) with setscrew (22).<br />
Install wire (21) in 20-amp circuit breaker (19) with screw (20).<br />
Position 10kW electric heater wiring harness (30) in load center (17).<br />
Install wire (28) in neutral bar (18) with setscrew (29).<br />
Install three wires (27) in 30-amp circuit breaker (25) with three screws (26).<br />
15-308
<strong>TM</strong> 9-<strong>2320</strong>-<strong>260</strong>-<strong>34</strong>-2<br />
15-309
<strong>TM</strong> 9-<strong>2320</strong>-<strong>260</strong>-<strong>34</strong>-2<br />
15-82. LOAD CENTER MAINTENANCE (Contd)<br />
31.<br />
32.<br />
33.<br />
<strong>34</strong>.<br />
35.<br />
36.<br />
37.<br />
38.<br />
39.<br />
40.<br />
41.<br />
42.<br />
43.<br />
44.<br />
45.<br />
46.<br />
47.<br />
Position air conditioner wiring harness (11) in load center (7).<br />
Install three wires (10) in 20-amp circuit breaker (8) with three setscrews (9).<br />
Install three wires (12), (3), and (6) with new lockwasher (4), screw (5), new lockwasher (2),<br />
and nut (1).<br />
NOTE<br />
Perform steps <strong>34</strong> through 37 for M820 and M820A2 vehicles.<br />
Position blackout bypass wiring harness (13) in load center (7).<br />
Install wire (18) in relay (14) with setscrew (19).<br />
Position wire (20) in relay (14).<br />
Install wire (17) in 20-amp circuit breaker (15) with screw (16).<br />
Position main wiring harness (22) in load center (7).<br />
Install five wires (26) in three 20-amp circuit breaker (24) with three screws (25).<br />
Install wire (28) in neutral bar (23) with setscrew (27).<br />
Install wire (30) in relay (14) with setscrew (28).<br />
Position two wires (21) in relay (14).<br />
Position main wiring harness (33) in load center (7).<br />
Install five wires (36) in three circuit breakers (<strong>34</strong>) with three screws (35).<br />
Install wire (38) in neutral bar (23) with setscrew (37).<br />
Install three wires (40) in relay (14) with three setscrews (39).<br />
Install cover (32) on load center (7) with six screws (31).<br />
15-310
<strong>TM</strong> 9-<strong>2320</strong>-<strong>260</strong>-<strong>34</strong>-2<br />
15-82. LOAD CENTER MAINTENANCE (Contd)<br />
FOLLOW-ON TASKS: ● Connect battery ground cable (<strong>TM</strong> 9-<strong>2320</strong>-<strong>260</strong>-20).<br />
● Connect external power source (<strong>TM</strong> 9-<strong>2320</strong>-<strong>260</strong>-10).<br />
15-311
<strong>TM</strong> 9-<strong>2320</strong>-<strong>260</strong>-<strong>34</strong>-2<br />
15-83. LOAD CENTER CONDUIT REPLACEMENT<br />
THIS TASK COVERS:<br />
a. Removal b. Installation<br />
INITIAL SETUP<br />
APPLICABLE MODELS<br />
M820, M820A2<br />
TEST EQUIPMENT<br />
Multimeter (Appendix B, Item 115)<br />
TOOLS<br />
General mechanic’s tool kit<br />
(Appendix B, Item 1)<br />
Tool kit, electrical (Appendix B, Item 106)<br />
Soldering gun (Appendix B, Item 117)<br />
MATERIALS/PARTS<br />
Gasket (Appendix D, Item 76)<br />
Safety wire (Appendix D, Item 372)<br />
MATERIALS/PARTS (Contd)<br />
Electrical tape (Appendix C, Item 51)<br />
Solder (Appendix C, Item 47)<br />
Sealing compound (Appendix C, Item 43)<br />
REFERENCES (<strong>TM</strong>)<br />
<strong>TM</strong> 9-<strong>2320</strong>-<strong>260</strong>-10<br />
<strong>TM</strong> 9-<strong>2320</strong>-<strong>260</strong>-20<br />
<strong>TM</strong> 9-<strong>2320</strong>-<strong>260</strong>-<strong>34</strong>P-2<br />
EQUIPMENT CONDITION<br />
● External power source disconnected<br />
(<strong>TM</strong> 9-<strong>2320</strong>-<strong>260</strong>-10).<br />
● Battery ground cable disconnected<br />
(<strong>TM</strong> 9-<strong>2320</strong>-<strong>260</strong>-20).<br />
a. Removal<br />
1.<br />
2.<br />
3.<br />
4.<br />
5.<br />
6.<br />
7.<br />
NOTE<br />
Tag wires, cables, and leads for installation.<br />
Disconnect wiring harness (7) from connector (1).<br />
Remove four screws (2), cover (3), and gasket (4) from outlet box (5). Discard gasket (4).<br />
Desolder three wires (6) from connector (1).<br />
Disconnect wiring harnesses (12) and (13) from connectors (15) and (11).<br />
Remove eight screws (14) and cover (10) from junction box (8).<br />
Desolder four wires (16) and three wires (9) from connectors (15) and (11).<br />
Remove six screws (17) and cover (29) from load center (22).<br />
CAUTION<br />
8.<br />
9.<br />
10.<br />
Use care when replacing wiring harness. Excessive snagging or<br />
pulling may damage wiring harness.<br />
NOTE<br />
● Safety wire will be used to install new wiring harness. Do not<br />
cut safety wire from spool until wiring harness has been pulled<br />
through and proper length has been obtained.<br />
● Safety wire must be attached to wires with electrical tape.<br />
Remove auxiliary pump wiring harness (20) and converter wiring harness (21) from conduit (25).<br />
Remove coupling (24), nipple (19), and nut (18) from load center (22) and conduit (25).<br />
Remove nut (26), nipple (27), nut (28), and conduit (25) from conduit (23).<br />
15-312
<strong>TM</strong> 9-<strong>2320</strong>-<strong>260</strong>-<strong>34</strong>-2<br />
15-83. LOAD CENTER CONDUIT REPLACEMENT (Contd)<br />
15-313
<strong>TM</strong> 9-<strong>2320</strong>-<strong>260</strong>-<strong>34</strong>-2<br />
15-83. LOAD CENTER CONDUIT REPLACEMENT (Contd)<br />
b. Installation<br />
1.<br />
2.<br />
3.<br />
4.<br />
5.<br />
6.<br />
7.<br />
8.<br />
9.<br />
10.<br />
Install conduit (10) on conduit (8) with nut (13), nipple (12), and nut (11).<br />
Install conduit (10) on load center (6) with nut (2), nipple (3), and coupling (9).<br />
Position auxiliary pump wiring harness (4) and converter wiring harness (5) in van body (7). Ensure<br />
auxiliary pump wiring harness (4) and converter wiring harness (5) are routed through conduit (10).<br />
Install cover (14) on load center (6) with six screws (1).<br />
Solder four wires (23) and three wires (16) to connectors (22) and (18).<br />
NOTE<br />
Apply sealing compound to cover.<br />
Install cover (17) on junction box (15) with eight screws (21).<br />
Connect wiring harnesses (19) and (20) to connectors (22) and (18).<br />
Solder three wires (30) to connector (25).<br />
Install new gasket (28) and cover (27) on outlet box (29) with four screws (26).<br />
Connect wiring harness (24) to connector (25).<br />
15-314
<strong>TM</strong> 9-<strong>2320</strong>-<strong>260</strong>-<strong>34</strong>-2<br />
15-83. LOAD CENTER CONDUIT REPLACEMENT (Contd)<br />
FOLLOW-ON TASKS: ● Connect battery ground cable (<strong>TM</strong> 9-<strong>2320</strong>-<strong>260</strong>-20).<br />
● Connect external power source (<strong>TM</strong> 9-<strong>2320</strong>-<strong>260</strong>-10),<br />
15-315
<strong>TM</strong> 9-<strong>2320</strong>-<strong>260</strong>-<strong>34</strong>-2<br />
15-84. CONTROL CENTER BOX MAINTENANCE<br />
THIS TASK COVERS:<br />
a. Removal c. Assembly<br />
b. Disassembly d. Installation<br />
INITIAL SETUP<br />
APPLICABLE MODELS<br />
M820, M820A2<br />
TEST EQUIPMENT<br />
Multimeter (Appendix B, Item 115)<br />
TOOLS<br />
General mechanic’s tool kit<br />
(Appendix B, Item 1)<br />
Tool kit, electrical (Appendix B, Item 106)<br />
MATERIALS/PARTS<br />
Four lockwashers (Appendix D, Item 224)<br />
REFERENCES (<strong>TM</strong>)<br />
<strong>TM</strong> 9-<strong>2320</strong>-<strong>260</strong>-10<br />
<strong>TM</strong> 9-<strong>2320</strong>-<strong>260</strong>-20<br />
<strong>TM</strong> 9-<strong>2320</strong>-<strong>260</strong>-<strong>34</strong>P-2<br />
EQUIPMENT CONDITION<br />
● External power source disconnected<br />
(<strong>TM</strong> 9-<strong>2320</strong>-<strong>260</strong>-10).<br />
● Battery ground cable disconnected<br />
(<strong>TM</strong> 9-<strong>2320</strong>-<strong>260</strong>-20).<br />
● Heater thermostat and 10 kW heater thermostat<br />
removed (<strong>TM</strong> 9-<strong>2320</strong>-<strong>260</strong>-20).<br />
● AC manual starter switches removed<br />
(para. 15-89).<br />
NOTE<br />
Tag wires, cables, and leads for installation.<br />
1. Remove eight screws (4) and covers (5) and (7) from control center box (10).<br />
2. Remove three screws (3) and wires (2) from terminal board (1).<br />
3. Remove three screws (6) and wires (8) from circuit breaker (9).<br />
CAUTION<br />
Use care when removing wiring harness. Excessive snagging or<br />
pulling may damage wiring harness.<br />
4. Pull wiring harnesses (14) and (15) through control center box (10).<br />
5. Remove four screws (12), lockwashers (11), and control center box (10) from van body (13). Discard<br />
lockwashers (11).<br />
1. Remove three screws (16) and wires (18) from terminal board (1).<br />
2. Loosen three screws (17) and remove three wires (18) from circuit breaker (9).<br />
3. Remove four screws (23) and terminal board (1) from control center box (10).<br />
4. Remove circuit breaker (9) from circuit breaker mounting base (21).<br />
5. Remove two screws (22) and circuit breaker mounting base (21) from control center box (10).<br />
6. Remove two nuts (20) and nipples (19) from control center box (10).<br />
15-316
<strong>TM</strong> 9-<strong>2320</strong>-<strong>260</strong>-<strong>34</strong>-2<br />
15-84. CONTROL CENTER BOX MAINTENANCE (Contd)<br />
15-317
<strong>TM</strong> 9-<strong>2320</strong>-<strong>260</strong>-<strong>34</strong>-2<br />
15-84. CONTROL CENTER BOX MAINTENANCE (Contd)<br />
1. Install two nipples (7) on control center box (1) with two nuts (8).<br />
2. Install circuit breaker mounting base (9) in control center box (1) with two screws (10).<br />
3. Install circuit breaker (4) on circuit breaker mounting base (9).<br />
4. Install terminal board (2) in control center box (1) with four screws (11).<br />
5. Install three wires (6) on circuit breaker (4) by tightening three screws (5).<br />
6. Install three wires (6) on terminal board (2) with three screws (3).<br />
1. Install control center box (1) on van body (14) with four new lockwashers (13) and screws (12).<br />
2. Route wiring harnesses (16) and (15) through two nipples (7) in control center box (1).<br />
3. Install three wires (23) on circuit breaker (4) with three screws (21).<br />
4. Install three wires (17) on terminal board (2) with three screws (18).<br />
5. Install covers (22) and (20) on control center box (1) with eight screws (19).<br />
15-318
<strong>TM</strong> 9-<strong>2320</strong>-<strong>260</strong>-<strong>34</strong>-2<br />
15-84. CONTROL CENTER BOX MAINTENANCE (Contd)<br />
FOLLOW-ON TASKS: ● Install AC manual starter switches (para. 15-89).<br />
● Install heater thermostat and 10 kW heater thermostat (<strong>TM</strong> 9-<strong>2320</strong>-<strong>260</strong>-20).<br />
● Connect battery ground cable (<strong>TM</strong> 9-<strong>2320</strong>-<strong>260</strong>-20).<br />
● Connect external power source (<strong>TM</strong> 9-<strong>2320</strong>-<strong>260</strong>-10).<br />
15-319
<strong>TM</strong> 9-<strong>2320</strong>-<strong>260</strong>-<strong>34</strong>-2<br />
15-85. 400 Hz CONVERTER AND SUPPORT BRACKET REPLACEMENT<br />
THIS TASK COVERS:<br />
a. Removal b. Installation<br />
INITIAL SETUP<br />
APPLICABLE MODELS<br />
REFERENCES (<strong>TM</strong>)<br />
M820, M820A2 <strong>TM</strong> 9-<strong>2320</strong>-<strong>260</strong>-10<br />
<strong>TM</strong> 9-<strong>2320</strong>-<strong>260</strong>-20<br />
TEST EQUIPMENT<br />
<strong>TM</strong> 9-<strong>2320</strong>-<strong>260</strong>-<strong>34</strong>P-2<br />
Multimeter (Appendix B, Item 115)<br />
EQUIPMENT CONDITION<br />
TOOLS<br />
●<br />
External power source disconnected<br />
General mechanic’s tool kit<br />
(<strong>TM</strong> 9-<strong>2320</strong>-<strong>260</strong>-10).<br />
●<br />
(Appendix B, Item 1)<br />
Battery ground cable disconnected<br />
Tool kit, electrical (Appendix B, Item 106) (<strong>TM</strong> 9-<strong>2320</strong>-<strong>260</strong>-20).<br />
MATERIALS/PARTS<br />
Four locknuts (Appendix D, Item 170)<br />
TWO locknuts (Appendix D, Item 189)<br />
Four locknuts (Appendix D, Item 171)<br />
NOTE<br />
Tag wires, cables, and leads for installation.<br />
1. Remove four screws (1), cover (2), and gasket (3) from converter (4).<br />
2. Remove seven nuts (9) and wires (10) from converter (4).<br />
3. Remove two lockwashers (8) and wiring harnesses (6) and (7) from converter (4).<br />
4. Remove four locknuts (18), washers (19), screws (11), and converter (4) from support bracket (5).<br />
Discard locknuts (18).<br />
5. Remove two locknuts (12), U-bolt (16), and two nuts (17) from support bracket (5). Discard<br />
locknuts (12).<br />
6. Remove four locknuts (14), screws (15), and support bracket (5) from van body (13). Discard<br />
locknuts (14).<br />
1. Install support bracket (5) on van body (13) with four screws (15) and new locknuts (14).<br />
2. Install two nuts (17) and U-bolt (16) on support bracket (5) with two new locknuts (12).<br />
3. Install converter (4) on support bracket (5) with four screws (11), washers ( 19), and new<br />
locknuts (18).<br />
4. Route wiring harnesses (7) and (6) through converter (4) and install two lockwashers (8) over<br />
wiring harnesses (7) and (6).<br />
5. Install seven wires (10) on converter (4) with seven nuts (9).<br />
6. Install gasket (3) and cover (2) on converter (4) with four screws (1).<br />
15-320
<strong>TM</strong> 9-<strong>2320</strong>-240-<strong>34</strong>-2<br />
15-85. 400 Hz CONVERTER AND SUPPORT BRACKET REPLACEMENT (Contd)<br />
FOLLOW-ON TASKS: ● Connect battery ground cable (<strong>TM</strong> 9-<strong>2320</strong>-<strong>260</strong>-20).<br />
● Connect external power source (<strong>TM</strong> 9-<strong>2320</strong>-<strong>260</strong>-10).<br />
15-321
<strong>TM</strong> 9-<strong>2320</strong>-<strong>260</strong>-<strong>34</strong>-2<br />
15-86. CONVERTER JUNCTION BOX REPLACEMENT<br />
THIS TASK COVERS:<br />
a. Removal b. Installation<br />
INITIAL SETUP<br />
APPLICABLE MODELS<br />
M820, M820A2<br />
TEST EQUIPMENT<br />
Multimeter (Appendix B, Item 115)<br />
TOOLS<br />
General mechanic’s tool kit<br />
(Appendix B, Item 1)<br />
Tool kit, electrical (Appendix B, Item 106)<br />
Soldering gun (Appendix B, Item 117)<br />
MATERIALS/PARTS<br />
Eight locknuts (Appendix D, Item 182)<br />
Gasket (Appendix D, Item 76)<br />
Safety wire (Appendix D, Item 372)<br />
MATERIALS/PARTS (Contd)<br />
Electrical tape (Appendix C, Item 51)<br />
Solder (Appendix C, Item 47)<br />
Sealing compound (Appendix C, Item 43)<br />
REFERENCES (<strong>TM</strong>)<br />
<strong>TM</strong> 9-<strong>2320</strong>-<strong>260</strong>-10<br />
<strong>TM</strong> 9-<strong>2320</strong>-<strong>260</strong>-20<br />
<strong>TM</strong> 9-<strong>2320</strong>-<strong>260</strong>-<strong>34</strong>P-2<br />
EQUIPMENT CONDITION<br />
● External power source disconnected<br />
(<strong>TM</strong> 9-<strong>2320</strong>-<strong>260</strong>-10).<br />
● Battery ground cable disconnected<br />
(<strong>TM</strong> 9-<strong>2320</strong>-<strong>260</strong>-20).<br />
a. Removal<br />
1.<br />
2.<br />
3.<br />
4.<br />
5.<br />
6.<br />
7.<br />
8.<br />
9.<br />
10.<br />
NOTE<br />
Tag wires, cables, and leads for installation.<br />
Disconnect auxiliary pump wiring harness (1) from connector (2).<br />
Remove four screws (3), cover (4), and gasket (5) from outlet box (7). Discard gasket (5).<br />
Desolder three wires (6) from connector (1).<br />
Disconnect wiring harnesses (15) and (16) from connectors (14) and (12).<br />
Remove eight screws (17) and cover (11) from junction box (8).<br />
Desolder three wires (9) and four wires (18) from connectors (12) and (14).<br />
Remove eight locknuts (10), screws (13), and connectors (12) and (14) from cover (11). Discard<br />
locknuts (10).<br />
Remove nut (27), nut (24), adapter (25), and coupling (26) from junction box (8).<br />
NOTE<br />
● Safety wire will be used to install new wiring harness. Do not<br />
cut safety wire from spool until wiring harness has been pulled<br />
through and proper length has been obtained.<br />
● Safety wire must be attached to wires with electrical tape.<br />
Pull wire (22) out of conduit (23).<br />
Remove junction box (8) from conduits (20) and (23) and wires (19), (21), and (22).<br />
15-322
<strong>TM</strong> 9-<strong>2320</strong>-<strong>260</strong>-<strong>34</strong>-2<br />
15-323
<strong>TM</strong> 9-<strong>2320</strong>-<strong>260</strong>-<strong>34</strong>-2<br />
15-86. CONVERTER JUNCTION BOX REPLACEMENT (Contd)<br />
1.<br />
2.<br />
3.<br />
4.<br />
5.<br />
6.<br />
7.<br />
8.<br />
9.<br />
10.<br />
11.<br />
Place nut (11) on conduit (2) and route harnesses (1) and (4), and wires (3) through holes in junction<br />
box (10).<br />
Route harness (4) through conduit (5).<br />
Position junction box (10) on conduits (2) and (5). Install adapter (8) on junction box (10) and<br />
conduit (5) with nut (7) and coupling (9).<br />
Install nut (11) on junction box (10).<br />
Install connectors (12) and (14) on cover (20) with eight screws (13) and new locknuts (19).<br />
Solder four wires (18) and three wires (3) on connectors (14) and (12).<br />
NOTE<br />
Apply sealing compound to cover.<br />
Install cover (20) on junction box (10) with eight screws (15).<br />
Connect wiring harnesses (17) and (16) to connectors (12) and (14).<br />
Position new gasket (24) and cover (23) on outlet box (25) and solder three wires (26) to<br />
connector (27). Remove safety wire from wires (26).<br />
Install new gasket (24) and cover (23) on outlet box (25) with four screws (22).<br />
Connect auxiliary pump wiring harness (21) to connector (27).<br />
15-324
<strong>TM</strong> 9-<strong>2320</strong>-<strong>260</strong>-<strong>34</strong>-2<br />
FOLLOW-ON TASKS: ● Connect battery ground cable (<strong>TM</strong> 9-<strong>2320</strong>-<strong>260</strong>-20).<br />
● Connect external power source (<strong>TM</strong> 9-<strong>2320</strong>-<strong>260</strong>-10).<br />
15-325
<strong>TM</strong> 9-<strong>2320</strong>-<strong>260</strong>-<strong>34</strong>-2<br />
15-87. 400 Hz CONVERTER HARNESS CONDUIT REPLACEMENT<br />
THIS TASK COVERS:<br />
a. Removal b. Installation<br />
INITIAL SETUP<br />
APPLICABLE MODELS<br />
REFERENCES (<strong>TM</strong>)<br />
M820, M820A2 <strong>TM</strong> 9-<strong>2320</strong>-<strong>260</strong>-10<br />
<strong>TM</strong> 9-<strong>2320</strong>-<strong>260</strong>-20<br />
TEST EQUIPMENT<br />
<strong>TM</strong> 9-<strong>2320</strong>-<strong>260</strong>-<strong>34</strong>P-2<br />
Multimeter (Appendix B, Item 115)<br />
EQUIPMENT CONDITION<br />
TOOLS<br />
● External power source disconnected<br />
General mechanic’s tool kit<br />
(<strong>TM</strong> 9-<strong>2320</strong>-<strong>260</strong>-10).<br />
(Appendix B, Item 1)<br />
● Battery ground cable disconnected<br />
Tool kit, electrical (Appendix B, Item 106) (<strong>TM</strong> 9-<strong>2320</strong>-<strong>260</strong>-20).<br />
● Outlet box removed (para. 15-88).<br />
● Converter junction box removed (para. 15-86).<br />
1. Remove six screws (2) and clamps (3) from conduits (7) and (4).<br />
2. Remove nuts (8) and (5) from coupling (l).<br />
3. Remove coupling (1) from conduits (7) and (4).<br />
4. Remove conduits (7) and (4) from van body (6).<br />
1. Position nuts (8) and (5) on conduits (7) and (4).<br />
2. Install coupling (1) on conduits (7) and (4).<br />
3. Install conduits (7) and (4) on van body (6) with six clamps (3) and screws (2).<br />
4. Tighten nuts (8) and (5) on coupling (1).<br />
15-326
<strong>TM</strong> 9-<strong>2320</strong>-<strong>260</strong>-<strong>34</strong>-2<br />
15-87. 400 Hz CONVERTER HARNESS CONDUIT REPLACEMENT (Contd)<br />
FOLLOW-ON TASKS: ● Install converter junction box (para. 15-86).<br />
● Install outlet box (para. 15-88).<br />
● Connect battery ground cable (<strong>TM</strong> 9-<strong>2320</strong>-<strong>260</strong>-20).<br />
● Connect external power source (<strong>TM</strong> 9-<strong>2320</strong>-<strong>260</strong>-10).<br />
15-327
<strong>TM</strong> 9-<strong>2320</strong>-<strong>260</strong>-<strong>34</strong>-2<br />
15-88. OUTLET BOX REPLACEMENT<br />
THIS TASK COVERS:<br />
a. Removal b. Installation<br />
INITIAL SETUP<br />
APPLICABLE MODELS<br />
M820, M820A2<br />
TEST EQUIPMENT<br />
Multimeter (Appendix B, Item 115)<br />
TOOLS<br />
General mechanic’s tool kit<br />
(Appendix B, Item 1)<br />
Tool kit, electrical (Appendix B, Item 106)<br />
Soldering gun (Appendix B, Item 117)<br />
REFERENCES (<strong>TM</strong>)<br />
<strong>TM</strong> 9-<strong>2320</strong>-<strong>260</strong>-10<br />
<strong>TM</strong> 9-<strong>2320</strong>-<strong>260</strong>-20<br />
<strong>TM</strong> 9-<strong>2320</strong>-<strong>260</strong>-<strong>34</strong>P-2<br />
EQUIPMENT CONDITION<br />
● External power source disconnected<br />
(<strong>TM</strong> 9-<strong>2320</strong>-<strong>260</strong>-10).<br />
● Battery ground cable disconnected<br />
(<strong>TM</strong> 9-<strong>2320</strong>-<strong>260</strong>-20).<br />
MATERIALS/PARTS<br />
Gasket (Appendix D, Item 76)<br />
Four locknuts (Appendix D, Item 182)<br />
Solder (Appendix C, Item 47)<br />
NOTE<br />
Tag wires, cables, and leads for installation.<br />
1. Disconnect auxiliary pump wiring harness (1) from connector (2).<br />
2. Remove four screws (3), cover (4), and gasket (5) from outlet box (6). Discard gasket (5).<br />
3. Desolder three wires (8) from connector (2).<br />
4. Remove four locknuts (12), screws (13), and connector (2) from cover (4). Discard locknuts (12).<br />
5. Remove nut (11) from conduit (9) and outlet box (6).<br />
6. Remove two screws (10) and outlet box (6) from van body (7).<br />
1. Slide outlet box (6) onto end of conduit (9), secure outlet box (6) to conduit (9) with nut (11), and<br />
route wires (8) through hole in outlet box (6).<br />
2. Install connector (2) on cover (4) with four screws (13) and new locknuts (12).<br />
3. Position new gasket (5) and cover (4) on outlet box (6) and solder three wires (8) on connector (2).<br />
4. Install new gasket (5) and cover (4) on outlet box (6) with four screws (3).<br />
5. Install auxiliary pump wiring harness (1) on connector (2).<br />
15-328
15-88. OUTLET BOX REPLACEMENT (Contd)<br />
FOLLOW-ON TASKS: ● Connect battery ground cable (<strong>TM</strong> 9-<strong>2320</strong>-<strong>260</strong>-20).<br />
● Connect external power source (<strong>TM</strong> 9-<strong>2320</strong>-<strong>260</strong>-10).<br />
15-329
<strong>TM</strong> 9-<strong>2320</strong>-<strong>260</strong>-<strong>34</strong>-2<br />
15-89. AC MANUAL STARTER SWITCHES REPLACEMENT<br />
THIS TASK COVERS:<br />
a. Removal b. Installation<br />
INITIAL SETUP<br />
APPLICABLE MODELS<br />
M820, M820A2<br />
TEST EQUIPMENT<br />
Multimeter (Appendix B, Item 115)<br />
TOOLS<br />
General mechanic’s tool kit<br />
(Appendix B, Item 1)<br />
Toolkit, electrical (Appendix B, Item 106)<br />
MATERIALS/PARTS<br />
Twelve insulated wire splices<br />
(Appendix C, Item 49)<br />
REFERENCES (<strong>TM</strong>)<br />
<strong>TM</strong> 9-<strong>2320</strong>-<strong>260</strong>-10<br />
<strong>TM</strong> 9-<strong>2320</strong>-<strong>260</strong>-20<br />
<strong>TM</strong> 9-<strong>2320</strong>-<strong>260</strong>-<strong>34</strong>P-2<br />
EQUIPMENT CONDITION<br />
● External power source disconnected<br />
(<strong>TM</strong> 9-<strong>2320</strong>-<strong>260</strong>-10).<br />
● Battery ground cable disconnected<br />
(<strong>TM</strong> 9-<strong>2320</strong>-<strong>260</strong>-20).<br />
Tag wires, cables, and leads for installation.<br />
1. Remove covers (5) and (6) from AC manual starter switches (9) and (8).<br />
2. Disconnect six wires (2) and wires (1) from six insulated wire splices (4). Discard insulated wire<br />
splices (4).<br />
3. Disconnect six wires (3) and wires (7) from six insulated wire splices (4). Discard insulated wire<br />
splices (4).<br />
4. Remove two nuts (17) from two nipples (16).<br />
CAUTION<br />
Use care when removing AC manual starter switches. Excessive<br />
snagging or pulling on wiring harnesses may result in damage to<br />
wiring harnesses.<br />
5. Remove four screws (18) and AC manual starter switch (8) from van body (19).<br />
6. Remove two nuts (15) and nipples (16) from AC manual starter switch (9).<br />
7. Remove two nuts (14) from two nipples (12).<br />
8. Remove four screws (13) and AC manual starter switch (9) from van body (19).<br />
1.<br />
2.<br />
3.<br />
4.<br />
5.<br />
6.<br />
7.<br />
8.<br />
Position AC manual starter switch (9) on two nipples (12) and install on van body (19)<br />
with four screws (13). Ensure wiring harnesses (10) and (11) are routed through AC manual starter<br />
switch (9).<br />
Install two nuts (14) on two nipples (12).<br />
Install two nipples (16) on AC manual starter switch (9) with two nuts (15).<br />
Position AC manual starter switch (8) on two nipples (16) and install on van body (19) with four<br />
screws (18). Ensure wiring harnesses (10) and (11) are routed through two nipples (16).<br />
Install two nuts (17) on two nipples (16).<br />
Connect six wires (2) and wires (1) to six new insulated wire splices (4).<br />
Connect six wires (3) and wires (7) to six new insulated wire splices (4).<br />
Install covers (5) and (6) on AC manual starter switches (9) and (8).<br />
15-330
<strong>TM</strong> 9-<strong>2320</strong>-<strong>260</strong>-<strong>34</strong>-2<br />
15-89. AC MANUAL STARTER SWITCHES REPLACEMENT (Contd)<br />
FOLLOW-ON TASKS: ● Connect battery ground cable (<strong>TM</strong> 9-<strong>2320</strong>-<strong>260</strong>-20).<br />
● Connect external power source (<strong>TM</strong> 9-<strong>2320</strong>-<strong>260</strong>-10).<br />
15-331
<strong>TM</strong> 9-<strong>2320</strong>-<strong>260</strong>-<strong>34</strong>-2<br />
I<br />
15-90. ELECTRICAL BOX REPLACEMENT<br />
THIS TASK COVERS:<br />
a. Removal b. Installation<br />
INITIAL SETUP<br />
APPLICABLE MODELS<br />
REFERENCES (<strong>TM</strong>)<br />
M820, M820A1, M820A2 <strong>TM</strong> 9-<strong>2320</strong>-<strong>260</strong>-10<br />
<strong>TM</strong> 9-<strong>2320</strong>-<strong>260</strong>-20<br />
TOOLS<br />
<strong>TM</strong> 9-<strong>2320</strong>-<strong>260</strong>-<strong>34</strong>P-2<br />
General mechanic’s tool kit<br />
(Appendix B, Item 1)<br />
EQUIPMENT CONDITION<br />
● Battery ground cable disconnected<br />
(<strong>TM</strong> 9-<strong>2320</strong>-<strong>260</strong>-20).<br />
● Entrance receptacle removed (para. 15-81).<br />
1. Remove six screws (1) and bracket (2) from electrical box (7) and load center (3).<br />
2. Remove electrical box (7) from end panel (4).<br />
3. Remove grommet (8) from electrical box (7).<br />
4. Remove screw (5) and plate (6) from electrical box (7).<br />
1. Install plate (6) on electrical box (7) with screw (5).<br />
2. Install grommet (8) on electrical box (7).<br />
3. Position electrical box (7) on end panel (4) and install bracket (2) on electrical box (7) and load<br />
center (3) with six screws (1).<br />
FOLLOW-ON TASKS: ● Install entrance receptacle (para. 15-81).<br />
● Connect battery ground cable (<strong>TM</strong> 9-<strong>2320</strong>-<strong>260</strong>-20).<br />
15-332
<strong>TM</strong> 9-<strong>2320</strong>-<strong>260</strong>-<strong>34</strong>-2<br />
15-91. BLACKOUT AND EMERGENCY LIGHT FIXTURES RELACEMENT<br />
THIS TASK COVERS:<br />
a. Removal b. Installation<br />
INITIAL SETUP<br />
APPLICABLE MODELS<br />
M820, M820A2<br />
TEST EQUIPMENT<br />
Multimeter (Appendix B, Item 115)<br />
TOOLS<br />
General mechanic’s tool kit<br />
(Appendix B, Item 1)<br />
Tool kit, electrical (Appendix B, Item 106)<br />
REFERENCES (<strong>TM</strong>)<br />
<strong>TM</strong> 9-<strong>2320</strong>-<strong>260</strong>-10<br />
<strong>TM</strong> 9-<strong>2320</strong>-<strong>260</strong>-20<br />
<strong>TM</strong> 9-<strong>2320</strong>-<strong>260</strong>-<strong>34</strong>P-2<br />
EQUIPMENT CONDITION<br />
● External power source disconnected<br />
(<strong>TM</strong> 9-<strong>2320</strong>-<strong>260</strong>-10).<br />
● Battery ground cable disconnected<br />
(<strong>TM</strong> 9-<strong>2320</strong>-<strong>260</strong>-20).<br />
● Emergency and blackout lamps removed<br />
(<strong>TM</strong> 9-<strong>2320</strong>-<strong>260</strong>-20).<br />
NOTE<br />
Tag wires; cables, and leads for installation.<br />
1. Remove four screws (7) and housing (6) from van ceiling (3).<br />
2. Remove four screws (1), two jumper cables (5), and wiring harness leads (2) and (4) from housing (6).<br />
1. Install two jumper cables (5) and wiring harness leads (2) and (4) on housing (6) with four<br />
screws (1).<br />
2. Install housing (6) on van ceiling (3) with four screws (7).<br />
FOLLOW-ON TASKS: ● Install emergency and blackout lamps (<strong>TM</strong> 9-<strong>2320</strong>-<strong>260</strong>-20).<br />
● Connect battery ground cable (<strong>TM</strong> 9-<strong>2320</strong>-<strong>260</strong>-20).<br />
● Connect external power source (<strong>TM</strong> 9-<strong>2320</strong>-<strong>260</strong>-10).<br />
15-333
<strong>TM</strong> 9-<strong>2320</strong>-<strong>260</strong>-<strong>34</strong>-2<br />
15-92. FLUORESCENT LIGHT FIXTURES MAINTENANCE<br />
THIS TASK COVERS:<br />
a. Removal c. Assembly<br />
b. Disassembly d. Installation<br />
INITIAL SETUP<br />
APPLICABLE MODELS<br />
M820, M820A2<br />
TEST EQUIPMENT<br />
Multimeter (Appendix B, Item 115)<br />
TOOLS<br />
General mechanic’s tool kit<br />
(Appendix B, Item 1)<br />
Tool kit, electrical (Appendix B, Item 106)<br />
MATERIALS/PARTS<br />
Lockwasher (Appendix D, Item 251)<br />
Two insulated wire splices<br />
(Appendix C, Item 49)<br />
PREFERENCES (<strong>TM</strong>)<br />
<strong>TM</strong> 9-<strong>2320</strong>-<strong>260</strong>-10<br />
<strong>TM</strong> 9-<strong>2320</strong>-<strong>260</strong>-20<br />
<strong>TM</strong> 9-<strong>2320</strong>-<strong>260</strong>-<strong>34</strong>P-2<br />
EQUIPMENT CONDITION<br />
● External power source disconnected<br />
(<strong>TM</strong> 9-<strong>2320</strong>-<strong>260</strong>-10).<br />
● Battery ground cable disconnected<br />
(<strong>TM</strong> 9-<strong>2320</strong>-<strong>260</strong>-20).<br />
● Fluorescent light removed (<strong>TM</strong> 9-<strong>2320</strong>-<strong>260</strong>-20).<br />
CAUTION<br />
Use care when maintaining fluorescent light fixtures. Excessive<br />
snagging or pulling on wiring harnesses may damage wiring<br />
harness.<br />
NOTE<br />
Tag wires, cables, and leads for installation.<br />
1. Remove twenty screws (7) and light fixture (8) from van ceiling (9).<br />
2. Remove screw (10), nut (6), lockwasher (5), and ground wire (4) from light fixture (8). Discard<br />
lockwasher (5).<br />
3. Disconnect two wires (3) and wires (1) from two insulated wire splices (2). Discard insulated wire<br />
splices (2).<br />
1. Remove four screws (19), fixture (18), and two wires (3) from light fixture (8).<br />
2. Remove six screws (17), nuts (14), and sockets (15) from fixture (18).<br />
NOTE<br />
Tag wires, cables, and leads for installation.<br />
3. Remove twelve screws (13) and wires (12) from six sockets (15).<br />
4. Remove six starters (16) from six sockets (15).<br />
5. Remove grommet (11) from light fixture (8).<br />
15-3<strong>34</strong>
<strong>TM</strong> 9-<strong>2320</strong>-<strong>260</strong>-<strong>34</strong>-2<br />
15-92. FLUORESCENT LIGHT FIXTURES MAINTENANCE (Contd)<br />
1. Install grommet (11) in light fixture (8).<br />
2. Install six starters (16) in six sockets (15).<br />
3. Install six sockets (15) in fixture (18) with six screws (17) and nuts (14).<br />
4. Install twelve wires (12) in six sockets (15) with twelve screws (13).<br />
5. Route two wires (3) through grommet (11) in light fixture (8) and install fixture (18) on light<br />
fixture (8) with four screws (19).<br />
1. Connect two wires (3) to two wires (1) with two new insulated wire splices (2).<br />
2. Install ground wire (4) on light fixture (8) with screw (10), new lockwasher (5), and nut (6).<br />
3. Install light fixture (8) in van ceiling (9) with twenty screws (7).<br />
FOLLOW-ON TASKS: ● Install fluorescent light (<strong>TM</strong> 9-<strong>2320</strong>-<strong>260</strong>-20).<br />
● Connect battery ground cable (<strong>TM</strong> 9-<strong>2320</strong>-<strong>260</strong>-20).<br />
● Connect external power source (<strong>TM</strong> 9-<strong>2320</strong>-<strong>260</strong>-10).<br />
15-335
<strong>TM</strong> 9-<strong>2320</strong>-<strong>260</strong>-<strong>34</strong>-2<br />
15-93. CEILING LIGHT FIXTURES REPLACEMENT (M820A1)<br />
THIS TASK COVERS:<br />
a. Removal b. Installation<br />
INITIAL SETUP<br />
APPLICABLE MODELS<br />
M820A1<br />
TOOLS<br />
General mechanic’s tool kit<br />
(Appendix B, Item 1)<br />
MATERIALS/PARTS<br />
Two insulated wire splices<br />
(Appendix C, Item 49)<br />
REFERENCES (<strong>TM</strong>)<br />
<strong>TM</strong> 9-<strong>2320</strong>-<strong>260</strong>-10<br />
<strong>TM</strong> 9-<strong>2320</strong>-<strong>260</strong>-20<br />
<strong>TM</strong> 9-<strong>2320</strong>-<strong>260</strong>-<strong>34</strong>P-2<br />
EQUIPMENT CONDITION<br />
● External power source disconnected<br />
(<strong>TM</strong> 9-<strong>2320</strong>-<strong>260</strong>-10).<br />
● Battery ground cable disconnected<br />
(<strong>TM</strong> 9-<strong>2320</strong>-<strong>260</strong>-20).<br />
● Ceiling light removed (<strong>TM</strong> 9-<strong>2320</strong>-<strong>260</strong>-20).<br />
NOTE<br />
All ceiling light fixtures are replaced the same. This procedure<br />
covers one ceiling light fixture.<br />
1. Remove four screws (3) and center light fixture (2) from ceiling (1).<br />
NOTE<br />
Tag wires, cables, and leads for installation.<br />
2. Disconnect two wires (4) and wires (6) from two insulated wire splices (5). Discard insulated wire<br />
splices (5).<br />
1. Connect two wires (4) to two wires (6) with two new insulated wires splices (5).<br />
2. Install center ceiling light fixture (2) in ceiling (1) with four screws (3).<br />
15-336
<strong>TM</strong> 9-<strong>2320</strong>-<strong>260</strong>-<strong>34</strong>-2<br />
15-93. CEILING LIGHT FIXTURES REPLACEMENT (M820A1) (Contd)<br />
FOLLOW-ON TASKS: ● Install ceiling light (<strong>TM</strong> 9-<strong>2320</strong>-<strong>260</strong>-20).<br />
● Connect battery ground cable (<strong>TM</strong> 9-<strong>2320</strong>-<strong>260</strong>-20).<br />
● Connect external power source (<strong>TM</strong> 9-<strong>2320</strong>-<strong>260</strong>-10).<br />
15-337(15-338 blank)
<strong>TM</strong> 9-<strong>2320</strong>-<strong>260</strong>-<strong>34</strong>-2<br />
CHAPTER 16<br />
WINCH AND POWER TAKEOFF MAINTENANCE<br />
Section I.<br />
Section IL<br />
Section III.<br />
Section IV.<br />
Section V.<br />
Section VI.<br />
Front Winch Maintenance (page 16-1)<br />
Rear Winch Maintenance (page 16-44)<br />
Crane and Hoist Maintenance (page 16-76)<br />
Transmission Power Takeoff Maintenance (page 16-226)<br />
Transfer Power Takeoff Maintenance (page 16-246)<br />
Power Divider and Drive Assembly Maintenance (page 16-266)<br />
Section 1. FRONT WINCH MAINTENANCE<br />
16-1. FRONT WINCH MAINTENANCE INDEX<br />
PARA.<br />
NO.<br />
TITLE<br />
PAGE<br />
NO.<br />
16-2. Front Winch Repair 16-1<br />
16-3. Front Winch Level Wind Maintenance 16-18<br />
16-4. Front Winch Cable Tensioner Maintenance 16-28<br />
16-5. Front Winch Roller Maintenance 16-<strong>34</strong><br />
16-6. Front Winch Drag Brake Replacement 16-41<br />
16-2. FRONT WINCH REPAIR<br />
THIS TASK COVERS:<br />
a. Winch Disassembly e. Gearcase Assembly<br />
b. End Frame Disassembly f. End Frame Assembly<br />
c. Gearcase Disassembly g. Winch Assembly<br />
d. Cleaning, Inspection, and Repair<br />
16-1
<strong>TM</strong> 9-<strong>2320</strong>-<strong>260</strong>-<strong>34</strong>-2<br />
16-2. FRONT WINCH REPAIR (Contd)<br />
APPLICABLE MODELS<br />
All<br />
TOOLS<br />
General mechanic’s tool kit<br />
(Appendix B, Item 1)<br />
Mechancal puller kit (Appendix B, Item 14)<br />
Spring tester (Appendix B, Item 10)<br />
Torque wrench, 1/2-in. dr.<br />
(Appendix B, Item 3)<br />
Outside micrometer (Appendix B, Item 8)<br />
Inside micrometer (Appendix B, Item 9)<br />
Dial indicator (Appendix B, Item 11)<br />
Arbor press (Appendix B, Item 7)<br />
Soft-head hammer (Appendix B, Item 47)<br />
MATERIALS/PARTS<br />
Nine lockwashers (Appendix D, Item 223)<br />
Two seals (Appendix D, Item 427)<br />
Seal (Appendix D, Item 429)<br />
Seal (Appendix D, Item 423)<br />
Seal (Appendix D, Item 425)<br />
Two gaskets (Appendix D, Item 137)<br />
Gasket (Appendix D, Item 96)<br />
Gasket (Appendix D, Item 97)<br />
TWO woodruff keys (Appendix D, Item 545)<br />
Two woodruff keys (Appendix D, Item 556)<br />
Two woodruff keys (Appendix D, Item 555)<br />
MATERIALS/PARTS (Contd)<br />
Woodruff key (Appendix D, Item 554)<br />
Six screw-assembled lockwashers<br />
(Appendix D, Item 383)<br />
Expansion plug (Appendix D, Item 330)<br />
Plug (Appendix D, Item 327)<br />
Four lockwashers (Appendix D, Item 219)<br />
Six lockwashers (Appendix D, Item 218)<br />
Gear oil (Appendix C, Item 22)<br />
Sealing compound (Appendix C, Item 45)<br />
GAA grease (Appendix C, Item 14)<br />
REFERENCES (<strong>TM</strong>)<br />
LO 9-<strong>2320</strong>-<strong>260</strong>-12<br />
<strong>TM</strong> 9-214<br />
<strong>TM</strong> 9-<strong>2320</strong>-<strong>260</strong>-20<br />
<strong>TM</strong> 9-<strong>2320</strong>-<strong>260</strong>-<strong>34</strong>P-2<br />
EQUIPMENT CONDITION<br />
● Winch gear oil drained (LO 9-<strong>2320</strong>-<strong>260</strong>-12).<br />
● Winch removed (<strong>TM</strong> 9-<strong>2320</strong>-<strong>260</strong>-20).<br />
● Winch level wind removed (if equipped)<br />
(para. 16-3).<br />
Winch roller removed (para. 16-5).<br />
GENERAL SAFETY INSTRUCTIONS<br />
Stabilize winch while sitting vertical.<br />
a Winch Disassembly<br />
NOTE<br />
Perform steps 1 and 2 if front winch is not equipped with level<br />
wind mechanism.<br />
1. Remove four screws (2), lockwashers (3), and top channel (1) from gearcase (4) and end frame (8).<br />
Discard lockwashers (3).<br />
2. Remove four screws (6), lockwashers (5), and side channel (7) from gearcase (4) and end frame (8).<br />
Discard lockwashers (5).<br />
3. Remove nut (10) from tie rod (9).<br />
NOTE<br />
Assistant will help with step 4.<br />
4. Turn gearcase (4) to the ground so drum (14) is vertical.<br />
WARNING<br />
Stabilize winch while sitting vertical. Failure to do so may result<br />
in injury to personnel.<br />
5. Remove end frame (8) from drum shaft (15).<br />
6. Remove setscrew (11), drag brake (13), and spring (12) from end frame (8).<br />
7. Remove clutch (16), thrust ring (17), and sleeve (18) from end frame (8).<br />
16-2
<strong>TM</strong> 9-<strong>2320</strong>-<strong>260</strong>-<strong>34</strong>-2<br />
16-2. FRONT WINCH REPAIR (Contd)<br />
NOTE<br />
Mark position of adjusting nuts on tie rod for installation.<br />
8. Remove tie rod (9) from gearcase (4).<br />
9. Remove two woodruff keys (20) from drum shaft (15). Discard woodruff keys (20).<br />
10. Remove thrust washer (19), drum (14), and seal (21) from shaft (15). Discard seal (21).<br />
16-3
<strong>TM</strong> 9-<strong>2320</strong>-<strong>260</strong>-<strong>34</strong>-2<br />
16-2. FRONT WINCH REPAIR (Contd)<br />
1.<br />
2.<br />
3.<br />
4.<br />
5.<br />
6.<br />
7.<br />
8.<br />
9.<br />
10.<br />
11.<br />
12.<br />
13.<br />
Remove jamnut (26), nut (25), latch (24), bolt (23), spacer (22), spring (21), and shoulder pin (20)<br />
from end frame (2).<br />
Remove pipe plug (7) from end frame (2).<br />
Remove two screws (4), Iockwashers (5), washers (6), and lock (3) from end frame (2). Discard<br />
lockwashers (5).<br />
Remove seal (10) from end frame (2). DiSCard seal (10).<br />
Remove pipe plug (19) from end frame (2).<br />
Remove setscrew (18) from shift fork (8).<br />
Remove setscrew (15), bail (12), and spring (13) from shifter handle (14).<br />
Remove shifter handle (14) and woodruff key (11) from shifter shaft (16). Discard woodruff key (11).<br />
Remove expansion plug (1) from end frame (2). Discard expansion plug (1).<br />
Using brass drift, drive shifter shaft (16) from shift fork (8) until woodruff key (9) clears shift<br />
fork (8).<br />
Remove woodruff key (9) from shifter shaft (16). Discard woodruff key (9).<br />
Using brass drift, remove shifter shaft (16) from end frame (2).<br />
Remove seal (17) from end frame (2). Discard seal (17).<br />
16-4
<strong>TM</strong> 9-<strong>2320</strong>-<strong>260</strong>-<strong>34</strong>-2<br />
16-2. FRONT WINCH REPAIR (Contd)<br />
I<br />
c. Gearcase Disassembly<br />
1.<br />
2.<br />
3.<br />
4.<br />
5.<br />
6.<br />
7.<br />
8.<br />
9.<br />
10.<br />
11.<br />
Remove four screws (29), cover (30), and gasket (28) from gearcase (27). Discard gasket (28).<br />
Remove four screws (32), Iockwashers (33), cover (<strong>34</strong>), and gasket(s) (35) from gearcase (27). Discard<br />
lockwashers (33) and gasket(s) (35).<br />
Remove seal (31) from cover (<strong>34</strong>), Discard seal (31).<br />
Remove six screw-assembled lockwashers (48), cover (49), and gasket (50) from brake housing (43).<br />
Discard screw-assembled lockwashers (48) and gasket (50).<br />
Remove screw (44), washer (45), spring (46), and brake band (47) from brake housing (43) and<br />
brakedrum (39).<br />
Remove screw (42), lockwasher (41), and washer (40) from brakedrum (39). Discard lockwasher (41).<br />
Using puller, remove brakedrum (39) from brake housing (43).<br />
Remove woodruff key (53) from worm shaft (54). Discard woodruff key (53).<br />
Remove four screws (38), lockwashers (37), brake housing (43), and gasket (36) from gearcase (27).<br />
Discard Iockwashers (37) and gasket (36).<br />
Remove plug (51) and seal (52) from brake housing (43). Discard plug (51) and seal (52).<br />
Remove breather (55) from gearcase (27).<br />
16-5
<strong>TM</strong> 9-<strong>2320</strong>-<strong>260</strong>-<strong>34</strong>-2<br />
16-2. FRONT WINCH REPAIR (Contd)<br />
12. Remove drum shaft (3) and worm gear (2) from gearcase (1).<br />
CAUTION<br />
Worm gear is a composite gear. Ensure hub is supported when<br />
pressing out shaft. Failure to do so may cause damage to gear.<br />
13. Using arbor press, remove drum shaft (3) from worm gear (2).<br />
14. Remove two woodruff keys (4) from drum shaft (3), Discard woodruff keys (4).<br />
15. Using soft-head hammer, tap end of wormshaft (7) enough forbearing (5) to clear gearcase (1).<br />
16. Using puller, remove bearing (5) from wormshaft (7).<br />
17. Remove wormshaft (7) from gearcase (1).<br />
18. Using puller, remove bearing (6) from wormshaft (7).<br />
d. Cleaning Inspection, and Repair<br />
1. For general cleaning instructions, refer to para. 2-8.<br />
2. For general inspection instructions, refer to para. 2-9.<br />
3. For general repair instructions, refer to para. 2-10.<br />
4. Inspect clutch (8) and drag brake (15) for cracks, breaks, chips, and burrs. Replace clutch (8) or drag<br />
brake (15) if cracked, broken, chipped, or burred.<br />
5. Inspect end frame thrust ring (9), drum thrust ring (10), drum (11), drum bushings (12), sleeve (13),<br />
sleeve bushing (14), and shift fork (16) for cracks, chips, nicks, scores, breaks, bends, and excessive<br />
wear. Refer to table 16-1, End Frame Wear Limits, for measurements. Replace part(s) if damaged<br />
or worn.<br />
16-6
<strong>TM</strong> 9-<strong>2320</strong>-<strong>260</strong>-<strong>34</strong>-2<br />
16-2. FRONT WINCH REPAIR (Contd]<br />
6. Inspect shifter lock spring (17) and drag brake spring (18) for damaged coils, wear, and free length.<br />
Using spring tester, inspect drag brake spring (18) for compressed length. Refer to table 16-1, End<br />
Frame Wear Limits, for measurements. Replace shifter lock spring (17) or drag brake spring (18)<br />
if damaged or worn.<br />
Table 16-1. End Frame Wear Limits.<br />
ITEM<br />
NO.<br />
ITEM/POINT OF MEASUREMENT<br />
WEAR LIMITS/TOLERANCES<br />
INCHES<br />
MILLIMETERS<br />
9 End frame thrust ring - thickness - minimum 0.486 12.<strong>34</strong><br />
10 Drum thrust ring - thickness - minimum 0.492 12.50<br />
11 Drum<br />
12 Bushing - inner diameter – maximum 2.131 54.13<br />
Bushing bore (bushing (12) removed) -<br />
inner diameter - maximum 2,376 60.35<br />
13 Sleeve<br />
14 Bushing - inner diameter - maximum 2.131 54.13<br />
Bushing bore (bushing (14) removed) -<br />
inner diameter - maximum 2.376 60.35<br />
16 Shifter fork<br />
Fork lug - outer diameter - minimum 0.486 12.<strong>34</strong><br />
Fork lug spacing 2.968-3.032 75.39-77.01<br />
17 Shifter lock spring free length 1.91 48.5<br />
18 Drag brake spring<br />
free length 1.50 38.1<br />
compressed length with 52 lb (23 kg) applied 1.00 25.4<br />
16-7
<strong>TM</strong> 9-<strong>2320</strong>-<strong>260</strong>-<strong>34</strong>-2<br />
16-2. FRONT WINCH REPAIR (Contd)<br />
7. Inspect wormshaft (1), worm gear (2), drum shaft (3), two bearings (4), gearcase (5), gearcase<br />
bushinge (6), cover (7), cover bushing (8), and brakedrum (9) for chips, cracks, burrs, scores,<br />
damaged threads, and excessive wear. Refer to table 16-2, Front Winch Gearcase Wear Limits,<br />
for measurements. Replace part(s) if damaged or worn.<br />
8. Inspect brake band (10) for cracks, breaks, missing rivets, glazed lining, and wear. Refer to table<br />
16-2, Front Winch Gearcase Wear Limits, for measurements. Replace brake band (10) if damaged<br />
or worn.<br />
16-8
<strong>TM</strong> 9-<strong>2320</strong>-<strong>260</strong>-<strong>34</strong>-2<br />
16-2. FRONT WINCH REPAIR (Contd)<br />
Table 16-2. Front Winch Gearcase Wear Limits.<br />
ITEM<br />
NO.<br />
lTEM/POINT OF MEASUREMENT<br />
WEAR LIMITS/TOLERANCES<br />
INCHES<br />
MILLIMETERS<br />
1 Wormshaft<br />
(a) seal surface – outer diameter - minimum 1.765 44.83<br />
(b) bearing surface - outer diameter – minimum 1.771 44.98<br />
3 Drum shaft - outer diameter - minimum 2.123 53.92<br />
4 Bearings<br />
Outer diameter - minimum 3.9304 99.832<br />
Inner diameter - maximum 1.7717 45.001<br />
5 Gearcase<br />
6 Bushing - inner diameter – maximum<br />
Bushing bore (bushing (6) removed) -<br />
2.131 54.13<br />
inner diameter - maximum 2.376 60.35<br />
Bearing bore 3.937 100.00<br />
Cover<br />
7 Bushing - inner diameter - maximum<br />
8 Bushing bore (bushing (8) removed) -<br />
2.131 54.13<br />
inner diameter - maximum 2.376 60.35<br />
9 Brakedrum - outer diameter - minimum 4.992 126.80<br />
10 Brake band - thickness - minimum 0.030 0.76<br />
16-9
<strong>TM</strong> 9-<strong>2320</strong>-<strong>260</strong>-<strong>34</strong>-2<br />
16-2. FRONT WINCH REPAIR (Contd)<br />
e. Gearcase Assembly<br />
1.<br />
2.<br />
3.<br />
4.<br />
NOTE<br />
Coat all internal parts with gear oil before assembly.<br />
Using arbor press, install bearing (3) on wormshaft (2).<br />
Using arbor press, install wormshaft (2) in gearcase (1).<br />
Using arbor press, install bearing (4) on wormshaft (2) in gearcase (1).<br />
Install two new woodruff keys (6) on drum shaft (7).<br />
CAUTION<br />
5.<br />
6.<br />
7.<br />
8.<br />
9.<br />
10.<br />
11.<br />
12.<br />
13.<br />
Worm gear is a composite gear. Ensure hub is supported when<br />
pressing onto shaft. Failure to do so may cause damage to gear.<br />
Using arbor press, install drum shaft (7) into worm gear (5). Press drum shaft (7) until woodruff<br />
keys (6) are flush with hub of worm gear (5).<br />
Install drum shaft (7) and worm gear (5) in gearcase (1).<br />
Install breather (23) on gearcase (1).<br />
Apply sealing compound to outer edge of new seal (21) and install seal (21) in brake housing (15).<br />
Coat new plug (20) with sealing compound and install plug (20) in brake housing (15).<br />
Install new gasket (8) and brake housing (15) on gearcase (1) with four new Iockwashers (9) and<br />
screws (10).<br />
Install new woodruff key (22) on wormshaft (2).<br />
Position brakedrum (11) on wormshatt (2) and brake housing (15) and install with washer (12),<br />
new lockwasher (13), and screw (14).<br />
Position brake band (19) and spring (18) in brake housing (15) and around brakedrum (11) and<br />
install with washer (17) and screw (16). Do not tighten screw (16).<br />
16-10
<strong>TM</strong> 9-<strong>2320</strong>-<strong>260</strong>-<strong>34</strong>-2<br />
16-2. FRONT WINCH REPAIR (Contd)<br />
14. Apply sealing compound to outer edge of new seal (4) and install seal (4) on cover (7).<br />
15. Install new gasket(s) (3) and cover (7) on gearcase (1) with four new lockwashers (6) and screws (5).<br />
16. Check endplay of wormshaft (2).<br />
a. Install dial indicator on gearcase (1) and position plunger on head of screw (8).<br />
b. Push wormshaft (2) toward brake housing (9) and set dial indicator to zero.<br />
c. Pull wormshaft (2) away from brake housing (9) and record dial indicator reading.<br />
d. Endplay of wormshaft (2) should be 0.005-0.015 in. (0.13-0.38 mm).<br />
e. If endplay is not within limits, remove cover (7) and add or remove gasket(s) (3). Repeat step 16<br />
until endplay is correct.<br />
f. Remove dial indicator from gearcase (1).<br />
17. Install new gasket (10) and cover (11) on brake housing (9) with six new screw-assembled<br />
lockwashers (12).<br />
16-12
<strong>TM</strong> 9-<strong>2320</strong>-<strong>260</strong>-<strong>34</strong>-2<br />
16-2. FRONT WINCH REPAIR (Contd)<br />
16-13
<strong>TM</strong> 9-<strong>2320</strong>-<strong>260</strong>-<strong>34</strong>-2<br />
16-2. FRONT WINCH REPAIR (Contd)<br />
f. End Frame Assembly<br />
1.<br />
2.<br />
3.<br />
4.<br />
5.<br />
6.<br />
7.<br />
8.<br />
9.<br />
10.<br />
11.<br />
12.<br />
Apply sealing compound to outer edge of new seal (17). Install seal (17) on end frame (2).<br />
Insert shifter shaft (16) in end frame (2).<br />
Install new woodruff key (9) on shifter shaft (16) and drive shifter shaft (16) into shift fork (8) with<br />
soft-head hammer.<br />
Install setscrew (18) on shift fork (8).<br />
Install lock (3) on end frame (2) with two washers (6), new lockwashers (5), and screws (4).<br />
Install new woodruff key (11) on shifter shaft (16).<br />
Install spring (13) and ball (12) in shifter handle (14).<br />
Install shifter handle (14) on shifter shaft (16). Ensure ball (12) rests in detents on lock (3). Install<br />
setscrew (15) in shifter handle (14).<br />
Apply sealing compound to outer edge of new seal (10) and install on end frame (2).<br />
Install pipe plugs (7) and (19) on end frame (2).<br />
Install shoulder pin (20), spring (21), spacer (22), bolt (23), and latch (24) on end frame (2) with<br />
nut (25) and jamnut (26).<br />
Coat new expansion plug (1) with sealing compound. Install new expansion plug (1) on end<br />
frame (2).<br />
16-14
<strong>TM</strong> 9-<strong>2320</strong>-<strong>260</strong>-<strong>34</strong>-2<br />
16-2. FRONT WINCH REPAIR (Contd)<br />
g. Winch Assembly<br />
Assistant will help with step 1.<br />
1. Turn gearcase (30) to the ground so drum shaft (31) is vertical.<br />
WARNING<br />
Stabilize winch while sitting vertical. Failure to do so may result<br />
in injury to personnel.<br />
2. Install new seal (33) and thrust washer (27) on drum (28).<br />
3. Install drum (28) on drum shaft (31).<br />
4. Install two new woodruff keys (32) on drum shaft (31).<br />
5. Install tie rod (29) on gearcase (30).<br />
6. Install clutch (37), thrust ring (38), and sleeve (39) on drum shaft (31).<br />
7. Install spring (35) and drag brake (36) in end frame (2) with setscrew (<strong>34</strong>).<br />
8. Install end frame (2) on drum (28), drum shaft (31), and tie rod (29). Ensure grooves in sleeve (39)<br />
engage shift fork (8).<br />
9. Install nut (40) on tie rod (29).<br />
NOTE<br />
16-15
<strong>TM</strong> 9-<strong>2320</strong>-<strong>260</strong>-<strong>34</strong>-2<br />
16-2. FRONT WINCH REPAIR (Contd)<br />
10. Rotate winch (8) so drum (4) is horizontal.<br />
NOTE<br />
Assistant will help with step 10.<br />
NOTE<br />
Perform steps 11 and 12 if front winch is not equipped with level<br />
wind assembly.<br />
11. Install side channel (7) on winch (8) with four new Iockwashers (5) and screws (6). Do not tighten<br />
screws (6).<br />
12. Install top channel (1) on winch (8) with four new Iockwashers (3) and screws (2). Do not tighten<br />
screws (2).<br />
13. Install dial indicator on gearcase (9) and position plunger on drum shaft (10).<br />
14. Measure endplay of drum shaft (10) as follows:<br />
a. Push drum shaft (10) back in gearcase (9) and set dial indicator to zero.<br />
b. Pull drum shaft (10) forward in gearcase (9) and record dial indicator reading.<br />
c. If endplay is not within 0.005-0.015 in. (O. 13-0.38 mm), turn tie rod ( 11) clockwise or<br />
counterclockwise. Repeat endplay check until reading is within limits.<br />
15. Tighten two nuts (12) and four screws (2) and (6).<br />
16. Remove dial indicator from gearcase (9).<br />
17. Apply GAA grease to new gasket (13) and install gasket (13) and cover (14) on gearcase (9) with<br />
four screws (15).<br />
16-16
<strong>TM</strong> 9-<strong>2320</strong>-<strong>260</strong>-<strong>34</strong>-2<br />
16-2. FRONT WINCH REPAIR (Contd)<br />
FOLLOW-ON TASKS: ● Install winch roller (para. 16-5).<br />
● Install winch level wind (if equipped) (para. 16-3).<br />
● Install winch (<strong>TM</strong> 9-<strong>2320</strong>-<strong>260</strong>-20).<br />
Fill winch with gear oil (LO 9-<strong>2320</strong>-<strong>260</strong>-12).<br />
● Install winch cable (<strong>TM</strong> 9-<strong>2320</strong>-<strong>260</strong>-20).<br />
16-17
<strong>TM</strong> 9-<strong>2320</strong>-<strong>260</strong>-<strong>34</strong>-2<br />
16-3. FRONT WINCH LEVEL WIND MAINTENANCE<br />
THIS TASK COVERS:<br />
a. Removal d. Assembly<br />
b. Disassembly e. Installation<br />
c. Cleaning and Inspection<br />
INITIAL SETUP<br />
APPLICABLE MODELS<br />
M816<br />
TOOLS<br />
General mechanic’s tool kit<br />
(Appendix B, Item 1)<br />
Arbor press (Appendix B, Item 7)<br />
Outside micrometer (Appendix B, Item 8)<br />
Inside micrometer (Appendix B, Item 9)<br />
MATERIALS/PARTS<br />
Eight lockwashers (Appendix D, Item 215)<br />
Five lockwashers (Appendix D, Item 219)<br />
TWO felt washers (Appendix D, Item 528)<br />
Two felt washers (Appendix D, Item 530)<br />
Felt washer (Appendix D, Item 531)<br />
MATERIALS/PARTS (Contd)<br />
Cotter pin (Appendix D, Item 36)<br />
Felt seal (Appendix D, Item 477)<br />
Locknut (Appendix D, Item 177)<br />
GAA grease (Appendix C, Item 14)<br />
Lubricating oil (Appendix C, Item 21)<br />
REFERENCES (<strong>TM</strong>)<br />
LO 9-<strong>2320</strong>-<strong>260</strong>-12<br />
<strong>TM</strong> 9-<strong>2320</strong>-<strong>260</strong>-20<br />
<strong>TM</strong> 9-<strong>2320</strong>-<strong>260</strong>-<strong>34</strong>P-2<br />
EQUIPMENT CONDITlON<br />
Winch cable removed from level wind<br />
(<strong>TM</strong> 9-<strong>2320</strong>-<strong>260</strong>-20).<br />
a. Removal<br />
1. Remove four screws (5) and lockwashers (6) from base of track frame (16) and front winch (8).<br />
Discard lockwashers (6).<br />
2. Remove track frame (16) with level wind (1) from front winch (8).<br />
b. Disassembly<br />
NOTE<br />
Rectangular holes are provided for removing screws. Slide the<br />
level wind from side to side until screws are visible through holes,<br />
1. Remove four screws (14) and lockwashers (15) from level wind (1) through holes (9). Discard<br />
lockwashers (15).<br />
2. Remove two nuts (7) from stop screws (2). Record position in end plate of track frame (16) of stop<br />
screws (2) for installation.<br />
3. Remove two stop screws (2) and jamnuts (3) from end plates of track frame (16).<br />
4. Remove two nuts (13), lock latch (12), poppet nut (11), spring (10), and poppet (4) from track<br />
frame (16).<br />
NOTE<br />
All trolley wheels are removed the same.<br />
5. Remove grease fitting (17), hollow screw (18) or solid screw (26), Iockwasher (19), washer (20), felt<br />
washer (21), wheel (22), felt washer (21), and washer (20) from axle (24) and trolley frame (25).<br />
Discard felt washers (21) and Iockwasher (19).<br />
NOTE<br />
Axles are removed only if they fail measurement and inspection.<br />
6. Remove bearing (23) from wheel (22).<br />
16-18
<strong>TM</strong> 9-<strong>2320</strong>-<strong>260</strong>-<strong>34</strong>-2<br />
16-3. FRONT WINCH LEVEL WIND MAINTENANCE (Contd)<br />
16-19
<strong>TM</strong> 9-<strong>2320</strong>-<strong>260</strong>-<strong>34</strong>-2<br />
16-3. FRONT WINCH LEVEL WIND MAINTENANCE (Contd)<br />
7.<br />
8.<br />
9.<br />
10.<br />
11.<br />
12.<br />
13.<br />
14.<br />
15.<br />
Remove four screws (5), lockwashers (4), and sheave guard (3) from sheave frame (12). Discard lockwashers<br />
(4).<br />
Remove grease fitting (14), cotter pin (9), slotted nut (10), and washer (11) from special screw (13).<br />
Discard cotter pin (9).<br />
Remove special screw (13) and sheave (6) from sheave frame (12).<br />
Remove two thrust washers (1) and felt washers (2) from sheave (6). Discard felt washers (2).<br />
Using arbor press, remove sleeve (8) and bearing (7) from sheave (6).<br />
Remove grease fitting (16), nut (17), washer (18), and felt washer (19) from end of extension (20).<br />
Discard felt washer (19).<br />
Using arbor press, press frame extension (20) and sheave frame (12) out of trolley frame (15).<br />
Remove locknut (21) and press frame extension (20) out of sheave frame (12). Discard locknut (21).<br />
Using arbor press, press bearing (22), inner race (23), twenty-six ball bearings (24), outer race (25),<br />
felt seal (26), and bushing (27) from trolley frame (15). Discard felt seal (26).<br />
c. Cleaning and Inspection<br />
1. For general cleaning instructions, refer to para. 2-8.<br />
2. For general inspection instructions, refer to para. 2-9.<br />
16-20
<strong>TM</strong> 9-<strong>2320</strong>-<strong>260</strong>-<strong>34</strong>-2<br />
16-3. FRONT WINCH LEVEL WIND MAINTENANCE (Contd)<br />
16-21
<strong>TM</strong> 9-<strong>2320</strong>-<strong>260</strong>-<strong>34</strong>-2<br />
16-3. FRONT WINCH LEVEL WIND MAINTENANCE (Contd)<br />
3. Inspect track frame (2) and four trolley wheels (3) for cracks, breaks, broken welds, and chips or<br />
nicked wheel surfaces (1). Repair or replace track frame (2) or trolley wheels (3) if cracked, broken,<br />
chipped, or nicked.<br />
4. Inspect two axles (5) for cracks, breaks, obstructed lube holes (6), and nicked and scored thrust<br />
washer surfaces (7). Refer to table 16-3, Level Wind Parts Wear Limits, for measurements. Replace<br />
axle (5) if damaged or worn.<br />
NOTE<br />
Perform steps 5 and 6 if axle fails inspection in step 4.<br />
5. Using arbor press, remove axle (5) from trolley frame (8).<br />
6. Apply light coat of GAA grease to axle (5). Using arbor press, install axle (5) in trolley frame (8).<br />
16-22
<strong>TM</strong> 9-<strong>2320</strong>-<strong>260</strong>-<strong>34</strong>-2<br />
16-3. FRONT WINCH LEVEL WIND MAINTENANCE (Contd)<br />
7. Inspect twenty-six ball bearings (17), trolley frame (8), outer race (16), and inner race (18) for pits,<br />
chips, cracks, or scoring. Replace part(s) if pitted, chipped, cracked, or scored.<br />
8. Inspect four thrust washers (4), axle (5), trolley frame bores (9) and (10), two thrust washers (11)<br />
and (15), sheave (12), sleeve (14), bearing (13), bushing (19), and bearing (20) for cracks, breaks,<br />
scoring, pits, chips, and excessive wear. Refer to table 16-3, Level Wind Parts Wear Limits, for<br />
measurements. Replace part(s) if damaged or worn.<br />
Table 16-3. Level Wind Parts Wear Limits.<br />
ITEM<br />
NO.<br />
ITEM/POINT OF MEASUREMENT<br />
WEAR LIMITS/TOLERANCES<br />
INCHES<br />
MILLIMETERS<br />
4 Thrust washer – thickness – minimum 0.058 1.47<br />
5 Axle (4 places) - outer diameter – minimum 1.2495 31.737<br />
9 Bushing bore – inner diameter – maximum 1.2505 31.763<br />
10 Bushing bore – inner diameter – maximum 3.251 82.58<br />
11,15 Sheave thrust washer – thickness – minimum 0.0615 1.562<br />
12 Sheave bore – inner diameter – maximum 2.5005 63.513<br />
13 Bearing<br />
Inner diameter – maximum 2.1270 54.026<br />
Outer diameter - minimum 2.4995 63.487<br />
14 Sleeve<br />
Inner diameter – maximum 1.503 38.18<br />
Outer diameter – minimum 2.1244 53.960<br />
19 Bushing<br />
Inner diameter – maximum 3.005 76.33<br />
Outer diameter – minimum 3.252 82.60<br />
20 Bearing<br />
Inner diameter – maximum 1.0014 25.436<br />
Outer diameter – minimum 1.2495 31.737<br />
16-23
<strong>TM</strong> 9-<strong>2320</strong>-<strong>260</strong>-<strong>34</strong>-2<br />
16-3. FRONT WINCH LEVEL WIND MAINTENANCE (Contd)<br />
d. Assembly<br />
NOTE<br />
● Ensure all felt seals are soaked in oil before installation.<br />
● Ensure all bearings are packed with grease before installation.<br />
1.<br />
2.<br />
3.<br />
4.<br />
5.<br />
6.<br />
7.<br />
8.<br />
9.<br />
10.<br />
11.<br />
Press short end of frame extension (11) into sheave frame (2) and install new locknut (1).<br />
Coat inner race (9) with light coat of grease and place in trolley frame (7). Inner race (9) has no bevel<br />
on shaft bore.<br />
Coat twenty-six ball bearings (6) with grease and place in groves of inner race (9).<br />
Coat outer race (5) with light coat of grease and place in trolley frame (7). Ensure level side of outer<br />
race (5) is facing up and is seated over ball bearings (6).<br />
Soak new felt seal (4) in lubricating oil and place in trolley frame (7).<br />
Install bushing (3) in trolley frame (7) until it touches felt seal (4).<br />
Coat bushing contact surface of sheave frame (2) with grease, and install in trolley frame (7). Using<br />
arbor press, press bushing (3) and frame (2) until shoulder (12) of frame extension (11) is seated in<br />
bevel (10) of outer race (5). Bushing (3) and felt seal (4) will be correctly seated at same time.<br />
Install bearing (8) on frame extension (11).<br />
Soak new felt washer (13) in lubricating oil and place over bearing (8) in bore of trolley frame (7).<br />
Place washer (14) on frame extension (11) and install with nut (15).<br />
Install grease fitting (16) in end of frame extension (11).<br />
16-24
<strong>TM</strong> 9-<strong>2320</strong>-<strong>260</strong>-<strong>34</strong>-2<br />
16-3. FRONT WINCH LEVEL WIND MAINTENANCE (Contd)<br />
12.<br />
13.<br />
14.<br />
15.<br />
16.<br />
17.<br />
18.<br />
19.<br />
Pack bearing (23) with grease and place sleeve (24) in bearing (23).<br />
Position sleeve (24) and bearing (23) in bore of sheave (22).<br />
Soak two new felt washers (18) in lubricating oil and place in bore of sheave (22). Graphited surface<br />
of felt washers (18) must be against sheave (22).<br />
Aline sheave (22), bearing (23), sleeve (24), and two thrust washers (17) in sheave frame (2).<br />
Insert special screw (28) through sheave frame (2) and sleeve (24) and install with washer (27) and<br />
slotted nut (26).<br />
Aline slotted nut (26) with hole in special screw (28) and install new cotter pin (25). Bend ends of<br />
cotter pin (25) around nut (26).<br />
Install grease fitting (29) in head of special screw (28).<br />
Install sheave guard (19) on sheave frame (2) with four new lockwashers (20) and screws (21).<br />
16-25
<strong>TM</strong> 9-<strong>2320</strong>-<strong>260</strong>-<strong>34</strong>-2<br />
16-3. FRONT WINCH LEVEL WIND MAINTENANCE (Contd)<br />
20.<br />
21.<br />
22.<br />
23.<br />
24.<br />
25.<br />
26.<br />
27.<br />
28.<br />
29.<br />
30.<br />
NOTE<br />
Both sets of winch trolley wheels are installed the same.<br />
Pack bearing (7) with grease and place in trolley wheel (6),<br />
Soak two new felt washers (5) in lubricating oil and place one on each end of bearing (7).<br />
Place two washers (4) in trolley wheel (6) over each felt washer (5).<br />
Place trolley wheel (6) on axle (8).<br />
NOTE<br />
Install hollow screws on same side of level wind assembly that<br />
faces front of winch.<br />
Install new lockwasher (3) and hollow screw (2) or solid screw (9) on end of axle (8) that faces front<br />
of winch.<br />
Install grease fitting (1) in hollow screw (2).<br />
Install poppet (13) and spring (18) on track frame (24) with poppet nut (19).<br />
Install latch (20) on poppet (13) with two nuts (21).<br />
Install two jamnuts (12) on stop screws (11) to recorded position.<br />
Insert stop screws (11) through end plates of track frame (24) and install with two nuts (16).<br />
NOTE<br />
Roll level wind back and forth as needed to allow access to screw<br />
holes through rectangular slots in track frame.<br />
Position level wind (10) on track frame (24) and install with four new lockwashers (23) and<br />
screws (22). Ensure level wind (10) travels freely on tracks of track frame (24) and poppet (13)<br />
engages and holds level wind (10) in locked position.<br />
Install track frame (24) with level wind (10) on front winch (17) with four new lockwashers (15) and<br />
screws (14).<br />
16-26
<strong>TM</strong> 9-<strong>2320</strong>-<strong>260</strong>-<strong>34</strong>-2<br />
16-3. FRONT WINCH LEVEL WIND MAINTENCE (Contd)<br />
FOLLOW-ON TASKS: ●<br />
●<br />
Install winch cable (<strong>TM</strong> 9-<strong>2320</strong>-<strong>260</strong>-20).<br />
Lubricate level wind assembly (LO 9-<strong>2320</strong>-<strong>260</strong>-12).<br />
16-27
<strong>TM</strong> 9-<strong>2320</strong>-<strong>260</strong>-<strong>34</strong>-2<br />
16-4. FRONT WINCH CABLE TENSlONER MAINTENANCE<br />
THIS TASK COVERS:<br />
a. Removal d. Assembly<br />
b. Disassembly e. Installation<br />
c. Cleaning and Inspection<br />
INITIAL SETUP<br />
APPLICABLE MODELS<br />
M816<br />
TOOLS<br />
General mechanic’s tool kit<br />
(Appendix B, Item 1)<br />
Soft-head hammer (Appendix B, Item 47)<br />
MATERlALS/PARTS<br />
Eight Iockwashers (Appendix D, Item 216)<br />
Woodruff key (Appendix D, Item 557)<br />
Four felt washers (Appendix D, Item 532)<br />
MATERIALS/PARTS (Contd)<br />
GAA grease (Appendix C, Item 14)<br />
Lubricating oil (Appendix C, Item 21)<br />
REFERENCES (<strong>TM</strong>)<br />
LO 9-<strong>2320</strong>-<strong>260</strong>-12<br />
<strong>TM</strong> 9-<strong>2320</strong>-<strong>260</strong>-10<br />
<strong>TM</strong> 9-<strong>2320</strong>-<strong>260</strong>-20<br />
<strong>TM</strong> 9-<strong>2320</strong>-<strong>260</strong>-<strong>34</strong>P-2<br />
EQUIPMENT CONDITION<br />
● Parking brake set (<strong>TM</strong> 9-<strong>2320</strong>-<strong>260</strong>-10).<br />
● Winch cable removed (<strong>TM</strong> 9-<strong>2320</strong>-<strong>260</strong>-20).<br />
1. Remove four nuts (1), lockwashers (2), and screws (5) from roller (4) and cable tensioner (14).<br />
Discard lockwashers (2).<br />
2. Remove cable tensioner (14), shim (7), and spacer plate (6) from roller (4).<br />
b. Disassembly<br />
1. Remove two grease fittings (3) from cable tensioner (14) shafts ( 12) and (13).<br />
2. Remove setscrew (10), handle (9), and woodruff key (8) from shaft (12). Discard woodruff key (8).<br />
3. Loosen poppet nut (17) and remove poppet unit (11) from handle (9).<br />
4. Remove nut (15), latch (16), poppet nut (17), and spring (18) from poppet (19).<br />
16-28
<strong>TM</strong> 9-<strong>2320</strong>-<strong>260</strong>-<strong>34</strong>-2<br />
16-4. FRONT WINCH CABLE TENSlONER MAINTENANCE (Contd)<br />
5. Remove two snaprings (22) from shaft (1).<br />
6. Remove shaft (1) from tensioner frame (23) and sheave (21).<br />
7. Remove sheave (21) and two thrust washers (18) from tensioner frame (23).<br />
8. Remove two felt washers (19) and bearing (20) from sheave (21). Discard felt washers (19).<br />
9. Remove four screws (29), Iockwashers (30), and block (28) from tensioner frame (23). Discard<br />
Iockwashers (30).<br />
10. Using hammer and brass drift, remove shaft (9) from sheave (27) and tensioner frame (23).<br />
11. Remove sheave (27) and two thrust washers (24) from tensioner frame (23).<br />
12. Remove two felt washers (25) and bearing (26) from sheave (27). Discard felt washers (25).<br />
16-29
<strong>TM</strong> 9-<strong>2320</strong>-<strong>260</strong>-<strong>34</strong>-2<br />
16-4. FRONT WINCH CABLE TENSlONER MAINTENANCE (Contd)<br />
c. Cleaning and Inspection<br />
1. For general cleaning instructions, refer to para. 2-8.<br />
2. For general inspection procedures, refer to para. 2-9.<br />
3. Inspect tensioner frame (1), two sheaves (2), two bearings (3), four thrust washers (4), bushings (5)<br />
and (6), shaft (7), pin (8), shaft (9), and block (10) for breaks, cracks, bends, chips, scoring, and<br />
excessive wear. Refer to table 16-4, Cable Tensioner Parts Wear Limits, for measurements. Replace<br />
part(s) if damaged or worn.<br />
16-30
<strong>TM</strong> 9-<strong>2320</strong>-<strong>260</strong>-<strong>34</strong>-2<br />
16-4. FRONT WINCH CABLE TENSlONER MAINTENANCE (Contd)<br />
Table 16-4. Cable Tensioner Parts Wear Limits.<br />
ITEM<br />
NO.<br />
ITEM/POINT OF MEASUREMENT<br />
WEAR LIMITS/TOLERANCES<br />
INCHES<br />
MILLIMETERS<br />
1 Tensioner frame<br />
Pin bore (2 places) - inner diameter – maximum 1.003 25.48<br />
Shaft bore (rear only) - inner diameter - maximum 1,000 25.40<br />
Bushing surface - outer diameter - minimum 0.748 19.00<br />
2 Sheave bore - inner diameter - maximum 1.4997 38.092<br />
Hub - thickness - minimum 1.230 31.24<br />
3 Bearing<br />
Inner diameter - maximum 1.0000 25.400<br />
Outer diameter - minimum 1.4495 36.817<br />
4 Thrust washer - thickness - minimum 0.062 1.57<br />
5,6 Bushing<br />
Inner diameter - maximum 0.754 19.15<br />
Outer diameter - minimum 1.0025 25.464<br />
7 Shaft<br />
Caroming surface - outer diameter - minimum 0.9995 25.39<br />
9 Shaft - outer diameter – minimum 0.995 25.27<br />
10 Block bore - inner diameter - maximum 1.005 25.527<br />
16-31
<strong>TM</strong> 9-<strong>2320</strong>-<strong>260</strong>-<strong>34</strong>-2<br />
16-4. FRONT WINCH CABLE TENSlONER MAINTENANCE (Contd)<br />
1.<br />
2.<br />
3.<br />
4.<br />
Pack bearing (3) with GAA grease and install in bore of sheave (4). Center bearing (3) in bore.<br />
Soak two new felt washers (2) in lubricating oil and install on each side of bearing (3) in sheave (4).<br />
Install snapring (10) on shaft (8) and coat shaft (8) with light coat of GAA grease.<br />
Position sheave (4) and two thrust washers (1) in tensioner frame (6), aline with bore (7), and install<br />
with shaft (8) and snapring (5). Ensure pin (9) seats in notch of bore (7),<br />
NOTE<br />
Perform steps 5 and 6 if bushings were removed.<br />
5.<br />
6.<br />
7.<br />
8.<br />
9.<br />
10.<br />
11.<br />
12.<br />
13.<br />
14.<br />
15.<br />
16.<br />
17.<br />
Install bushing (18) in block (19). Seat bushing (18) flush to slightly below inside edge of block (19).<br />
Install bushing (15) in tensioner frame (6). Seat bushing (15) flush to slightly below inside edge of<br />
reinforcement plate in tensioner frame (6).<br />
Pack bearing (13) with GAA grease and install in sheave (14). Center bearing (13) in bore.<br />
Soak two new felt washers (12) in lubricating oil and install on each side of bearing (13) in<br />
sheave (14).<br />
Coat shaft (17) with light coat of GAA grease.<br />
Position sheave (14) and two thrust washers (11) in tensioner frame (6), aline with bore ( 16),<br />
and install with shaft (17), short end of shaft (17) installed first.<br />
Install block (19) on shaft (17) and tensioner frame (6) with four new lockwashers (21) and<br />
screws (20).<br />
Install new woodruff key (29) in shaft (17).<br />
Install handle (30) on shaft (17). Tap handle (30) with soft-head hammer.<br />
Install setscrew (31) in handle (30).<br />
Install poppet spring (37), poppet nut (35), and latch (38) on poppet (36) with nut (<strong>34</strong>).<br />
Install poppet unit (32) in shaft (17) with poppet nut (35).<br />
Install two grease fittings (24) on shafts (8) and (17). Ensure ends of grease fittings (24) point up.<br />
e. Installation<br />
Install cable tensioner (33) on roller (25) with shim (28), spacer plate (27), four screws (26), new<br />
lockwashers (23), and nuts (22).<br />
16-32
<strong>TM</strong> 9-<strong>2320</strong>-240-<strong>34</strong>-2<br />
16-4. FRONT WINCH CABLE TENSlONER MAINTENANCE (Contd)<br />
FOLLOW-ON TASKS: Install winch cable (<strong>TM</strong> 9-<strong>2320</strong>-<strong>260</strong>-20).<br />
● Lubricate winch cable tensioner (LO 9-<strong>2320</strong>-<strong>260</strong>-12).<br />
16-33
<strong>TM</strong> 9-<strong>2320</strong>-240-<strong>34</strong>-2<br />
16-5. FRONT WINCH ROLLER MAINTENANCE<br />
THIS TASK COVERS:<br />
a. Removal d. Assembly<br />
b. Disassembly e. Installation<br />
c. Cleaning and Inspection<br />
INITIAL SETUP<br />
APPLICABLE MODELS<br />
All<br />
TOOLS<br />
General mechanic’s tool kit<br />
(Appendix B, Item 1)<br />
MATERIALS/PARTS<br />
Twelve lockwashers (Appendix D, Item 219)<br />
Two lockwashers (Appendix D, Item 215)<br />
Two felt washers (Appendix D, Item 533)<br />
Lubricating oil (Appendix C, Item 21)<br />
REFERENCES (<strong>TM</strong>)<br />
LO 9-<strong>2320</strong>-<strong>260</strong>-12<br />
<strong>TM</strong> 9-<strong>2320</strong>-<strong>260</strong>-20<br />
<strong>TM</strong> 9-<strong>2320</strong>-<strong>260</strong>-<strong>34</strong>P-2<br />
EQUIPMENT CONDITION<br />
● Winch cable removed (<strong>TM</strong> 9-<strong>2320</strong>-<strong>260</strong>-20).<br />
● Cable tensioner removed (if installed) (para. 16-4).<br />
a. Removal<br />
1. Remove eight screws (5) and lockwashers (6) from winch roller (1). Discard lockwashers (6),<br />
2. Remove four screws (4) and lockwashers (3) from winch roller (1). Discard lockwashers (3),<br />
NOTE<br />
Assistant will help with step 3.<br />
3. Remove winch roller (1) from winch (2).<br />
b. Disassembly<br />
1. Remove two grease fittings (7) from ends of roller shaft (10).<br />
2. Remove left roller bracket (8) and thrust washer (9) from roller shaft (10).<br />
3. Remove roller (13) and thrust washer (14) from roller shaft (10).<br />
4. Remove two felt washers (11) and bearings (12) from roller (13). Discard felt washers (11).<br />
5. Remove two setscrews (16) from right roller bracket (15) and roller shaft (10).<br />
6. Remove roller shaft (10) from right roller bracket (15).<br />
16-<strong>34</strong>
<strong>TM</strong> 9-<strong>2320</strong>-<strong>260</strong>-<strong>34</strong>-2<br />
16-5. FRONT WINCH ROLLER MAINTENANCE (Contd)<br />
16-35
<strong>TM</strong> 9-<strong>2320</strong>-<strong>260</strong>-<strong>34</strong>-2<br />
16-5. FRONT WINCH ROLLER MAINTENANCE (Contd)<br />
NOTE<br />
● Both side rollers and brackets are disassembled the same. This<br />
procedure is for the right side roller and bracket.<br />
● Perform steps 7 and 8 for front winch model 7412382.<br />
7. Remove three screws (1) and rub bar (13) from bracket (4).<br />
8. Remove two nuts (2), lockwashers (3), washers (6), screws (7), and bracket (4) from roller bracket (5).<br />
Discard Iockwashers (3).<br />
9. Remove grease fitting (8) from top end of pin (9).<br />
10. Remove drive pin (12) from roller bracket (5) and pin (9).<br />
11. Remove pin (9) from roller bracket (5) and side roller (11) assembly.<br />
12. Remove two thrust washers (10) and side roller (11) from roller bracket (5).<br />
c. Cleaning and Inspection<br />
1. For general cleaning instructions, refer to para. 2-8.<br />
2. For general inspection instructions, refer to para. 2-9.<br />
NOTE<br />
Perform step 3 for winch model 7412382.<br />
3. Inspect rub bar (13) and bracket (4) for grooving, cracks, and breaks. Replace rub bar (13) or<br />
bracket (4) if grooved, cracked, or broken. Replace rub bar (13) and bracket (4) if original is the<br />
old straight rub bar and bracket.<br />
NOTE<br />
Aluminum roller brackets must be replaced by steel brackets on<br />
winch model 7411122.<br />
4. Inspect roller brackets (5) for cracks, breaks, and damaged threads. Replace roller bracket(s) (5)<br />
if cracked, broken, or threads are damaged.<br />
5. Inspect roller (15), roller shaft (17) at bearing contact surfaces (18), pin (9), side roller (11), and<br />
thrust washers (10) and (16) for cracks, bends, scoring, damaged threads and excessive wear.<br />
Refer to table 16-5, Roller Wear Limits, for measurements. Replace part(s) if damaged or worn.<br />
6. Inspect two bearings (14) for wear. Refer to table 16-5, Roller Wear Limits, for measurements.<br />
Replace bearing(s) (14) if worn past limits.<br />
16-36
<strong>TM</strong> 9-<strong>2320</strong>-<strong>260</strong>-<strong>34</strong>-2<br />
16-5. FRONT WINCH ROLLER MAINTENANCE (Contd)<br />
Table 16-5. Roller Wear Limits.<br />
ITEM<br />
NO.<br />
ITEM/POINT OF MEASUREMENT<br />
WEAR LIMITS/TOLERANCES<br />
INCHES<br />
MILLIMETERS<br />
9 Pin (at bushing surface) 0.994 25.25<br />
10 Thrust washer - thickness – minimum 0.598 15.19<br />
11 Roller bore - inner diameter – maximum 1.2505 31.763<br />
14 Bearing<br />
Inner diameter - maximum 1.2500 31,75<br />
Outer diameter - minimum 2.0620 52.375<br />
15 Roller bore - inner diameter - maximum<br />
(at bearing surface) 2.061 52.35<br />
16 Thrust washer - thickness – minimum 0.0615 15.621<br />
17 Shaft - outer diameter - minimum -<br />
at bearing surface (18) 1.495 37.97<br />
16-37
<strong>TM</strong> 9-<strong>2320</strong>-<strong>260</strong>-<strong>34</strong>-2<br />
16-5. FRONT WINCH ROLLER MAINTENANCE (Contd)<br />
d. Assembly<br />
1.<br />
2.<br />
3.<br />
4.<br />
5.<br />
6.<br />
7.<br />
8.<br />
9.<br />
10.<br />
11.<br />
12.<br />
NOTE<br />
Right and left side rollers and brackets are assembled the same.<br />
This procedure covers the right side roller and bracket.<br />
Position two thrust washers (9) and side roller (10) in right roller bracket (4) and install with pin (8).<br />
Ensure drive pin (11) hole alines in both pin (8) and right roller bracket (4).<br />
Install drive pin (11) in right roller bracket (4) and pin (8).<br />
Install grease fitting (7) on top end of pin (8).<br />
NOTE<br />
Perform steps 4 and 5 for front winch model 7412382.<br />
Install rub bar (12) on bracket (3) with three screws (13).<br />
Install bracket (3) on right roller bracket (4) with two screws (6), washers (5), new lockwashers (2),<br />
and nuts (1).<br />
Install bearings (15) in each end of roller (16).<br />
Soak two new felt washers (14) in lubricating oil and install in roller (16).<br />
Install roller shaft (18) in right roller bracket (4) and aline setscrew holes in roller shaft (18) and<br />
right roller bracket (4).<br />
Secure roller shaft (18) in right roller bracket (4) with two setscrews ( 19).<br />
Install thrust washer (17) and roller (16) on roller shaft (18).<br />
Position thrust washer (22) and left roller bracket (21) on roller shaft (18).<br />
Install two grease fittings (20) in ends of roller shaft (18).<br />
16-38
<strong>TM</strong> 9-<strong>2320</strong>-<strong>260</strong>-<strong>34</strong>-2<br />
16-5. FRONT WINCH ROLLER MAINTENANCE (Contd)<br />
16-39
<strong>TM</strong> 9-<strong>2320</strong>-<strong>260</strong>-<strong>34</strong>-2<br />
16-5. FRONT WINCH ROLLER MAINTENANCE (Contd)<br />
1.<br />
2.<br />
3.<br />
Assistant will help with step 1.<br />
NOTE<br />
Do not tighten screws on front winch model 7411122. Proceed<br />
to step 2.<br />
Install winch roller (5) on front winch (1) with eight new lockwashers (7), screws (6), four new lockwashers<br />
(3), and screws (4).<br />
NOTE<br />
Perform step 2 for front winch model 7411122.<br />
Measure distance between machined pads (8). Distance must be 15.50 ± 0.06 in. (39.370 ± 0.152 cm).<br />
Move brackets (2) and (9) using slack at screw holes to set correct distance.<br />
Tighten eight screws (6) and four screws (4).<br />
FOLLOW-ON TASKS: ● Lubricate roller (LO 9-<strong>2320</strong>-<strong>260</strong>-12).<br />
● Install cable tensioner (if removed) (para<br />
● Install winch cable (<strong>TM</strong> 9-<strong>2320</strong>-<strong>260</strong>-20).<br />
16-4).<br />
16-40
<strong>TM</strong> 9-<strong>2320</strong>-<strong>260</strong>-<strong>34</strong>-2<br />
16-6. FRONT WINCH DRAG BRAKE REPLACEMENT<br />
THIS TASK COVERS:<br />
a. Removal b. Installation<br />
INITIAL SETUP<br />
APPLICABLE MODELS<br />
All<br />
TOOLS<br />
General mechanic’s tool kit<br />
(Appendix B, Item 1)<br />
MATERIALS/PARTS<br />
Four lockwashers (Appendix D, Item 219)<br />
Four lockwashers (Appendix D, Item 218)<br />
REFERENCES (<strong>TM</strong>)<br />
<strong>TM</strong> 9-<strong>2320</strong>-<strong>260</strong>-20<br />
<strong>TM</strong> 9-<strong>2320</strong>-<strong>260</strong>-<strong>34</strong>P-2<br />
● Front winch removed (<strong>TM</strong> 9-<strong>2320</strong>-<strong>260</strong>-20).<br />
● Level wind removed (if installed) (para. 16-3).<br />
● Roller and cable tensioner removed (if installed)<br />
(para. 16-5).<br />
● Roller removed (if installed) (para. 16-5).<br />
NOTE<br />
Perform steps 1 and 2 if front winch is not equipped with level<br />
wind mechanism.<br />
1. Remove four screws (2), Iockwashers (3), and top channel (1) from end frame (8) and gearcase (4).<br />
Discard lockwashers (3).<br />
2. Remove four screws (6), lockwashers (5), and side channel (7) from end frame (8) and gearcase (4).<br />
Discard lockwashers (5).<br />
16-41
<strong>TM</strong> 9-<strong>2320</strong>-<strong>260</strong>-<strong>34</strong>-2<br />
16-6. FRONT WINCH DRAG BRAKE REPLACEMENT (Contd)<br />
3. Remove nut (1) from end of tie rod (2).<br />
NOTE<br />
Place support beneath drum before removing end frame.<br />
4. Remove end frame (8), clutch (4), thrust washer (5), and sleeve (6) from drum (3) and drum<br />
shaft (13).<br />
5. Remove adjusting screw (10), drag brake (12), and spring (11) from end frame (8).<br />
b. Installation<br />
1.<br />
2.<br />
3.<br />
4.<br />
5.<br />
6.<br />
7.<br />
8.<br />
9.<br />
Install spring (11) and drag brake (12) on end frame (8) with adjusting screw (10).<br />
Install clutch (4) on drum shaft (13).<br />
Install thrust washer (5) on drum shaft (13) against clutch (4).<br />
Install sleeve (6) in end frame (8). Ensure lugs of shift fork (9) engage grooves in sleeve (6).<br />
Install end frame (8) onto drum shaft (13) and tie rod (2), and seat toward drum (3).<br />
Operate shift handle (7) and ensure clutch (4) engages and disengages drum (3). If not, pull end<br />
frame (8) off and repeat steps 2 through 5.<br />
Install nut (1) on tie rod (2).<br />
NOTE<br />
Perform steps 8 and 9 if front winch is not equipped with level<br />
wind mechanism.<br />
Install side channel (20) on end frame (8) and gearcase (17) with four new lockwashers (18) and<br />
screws (19).<br />
Install top channel (14) on end frame (8) and gearcase (17) with four new lockwashers (16) and<br />
screws (15).<br />
16-42
<strong>TM</strong> 9-<strong>2320</strong>-<strong>260</strong>-<strong>34</strong>-2<br />
16-6. FRONT WINCH DRAG BRAKE REPLACEMENT (Contd)<br />
FOLLOW-ON TASKS: ● Install level wind (if removed) (para. 16-3).<br />
● Install roller and cable tensioner (if removed) (para. 16-5).<br />
● Install roller (if removed) (para. 16-5)<br />
● Install winch (<strong>TM</strong> 9-<strong>2320</strong>-<strong>260</strong>-20).<br />
● Adjust drag brake (<strong>TM</strong> 9-<strong>2320</strong>-<strong>260</strong>-20).<br />
16-43
<strong>TM</strong> 9-<strong>2320</strong>-<strong>260</strong>-<strong>34</strong>-2<br />
Section Il. REAR WINCH<br />
16-7. REAR WINCH MAINTENANCE INDEX<br />
PARA.<br />
NO.<br />
TITLE<br />
PAGE<br />
NO.<br />
16-8. Rear Winch Repair 16-44<br />
16-9. Rear Winch Level Wind Maintenance 16-58<br />
16-10. Rear Winch Cable Tensioner Maintenance 16-70<br />
16-11. Rear Winch Automatic Brake Maintenance 16-74<br />
16-8. REAR WINCH REPAIR<br />
THIS TASK COVERS:<br />
a. Disassembly c. Assembly<br />
b. Cleaning, Inspection, and Repair<br />
INITIAL SETUP<br />
APPLICABLE MODELS<br />
M816<br />
TOOLS<br />
General mechanic’s tool kit<br />
(Appendix B, Item 1)<br />
Mechanical puller kit (Appendix B, Item 14)<br />
Spring tester (Appendix B, Item 10)<br />
Inside micrometer (Appendix B, Item 9)<br />
Vernier caliper (Appendix B, Item 33)<br />
Outside micrometer (Appendix B, Item 8)<br />
Soft-head hammer (Appendix B, Item 47)<br />
Arbor press (Appendix B, Item 7)<br />
MATERIALS/PARTS<br />
Four cotter pins (Appendix D, Item 37)<br />
Twenty Iockwashers (Appendix D, Item 223)<br />
Six lockwashers (Appendix D, Item 219)<br />
Five lockwashers (Appendix D, Item 218)<br />
Six screw-assembled lockwashers<br />
(Appendix D, Item 382)<br />
Two gaskets (Appendix D, Item 100)<br />
Gasket (Appendix D, Item 98)<br />
Gasket (Appendix D, Item 99)<br />
MATERIALS/PARTS (Contd)<br />
Two seals (Appendix D, Item 4<strong>34</strong>)<br />
Seal (Appendix D, Item 433)<br />
Seal (Appendix D, Item 431)<br />
Three woodruff keys (Appendix D, Item 557)<br />
O-ring (Appendix D, Item 293)<br />
GM grease (Appendix C, Item 14)<br />
Gear oil (Appendix C, Item 22)<br />
Rags (Appendix C, Item 32)<br />
PERSONNEL REQUIRED<br />
Two<br />
REFERENCES (<strong>TM</strong>)<br />
LO 9-<strong>2320</strong>-<strong>260</strong>-12<br />
<strong>TM</strong> 9-<strong>2320</strong>-<strong>260</strong>-20<br />
<strong>TM</strong> 9-<strong>2320</strong>-<strong>260</strong>-<strong>34</strong>P-2<br />
EQUIPMENT CONDITION<br />
Rear winch removed (<strong>TM</strong> 9-<strong>2320</strong>-<strong>260</strong>-20).<br />
Rear winch level wind removed (para. 16-9).<br />
Gear oil drained (LO 9-<strong>2320</strong>-<strong>260</strong>-12).<br />
a. Disassembly<br />
1. Remove four cotter pins (8), two pins (7), and lever (5) from right bracket (6). Discard cotter pins (8).<br />
2. Remove two nuts (17), lockwashers (16), and screws (15) from bracket (12) and tensioner (11).<br />
Discard lockwashers (16).<br />
3. Remove four screws (13), lockwashers (14), and bracket (12) from winch (1). Discard lockwashers<br />
(14).<br />
16-44
<strong>TM</strong> 9-<strong>2320</strong>-<strong>260</strong>-<strong>34</strong>-2<br />
16-8. REAR WINCH REPAIR (Contd)<br />
4. Remove two nuts (18), lockwashers (19), screws (4), and tensioner (11) from bracket (6). Discard<br />
lockwashers (19).<br />
5. Remove four nuts (2), Iockwashers (3), screws (9), washers (10), and bracket (6) from winch (1).<br />
Discard lockwashers (3).<br />
6. Remove nut (22), lockwasher (23), and screw (25) from channel (24) and winch (1). Discard<br />
lockwasher (23).<br />
7. Remove three screws (21), lockwashers (20), and channel (24) from winch (1). Discard lock-<br />
14-45
<strong>TM</strong> 9-<strong>2320</strong>-<strong>260</strong>-<strong>34</strong>-2<br />
16-8. REAR WINCH REPAIR (Contd)<br />
8.<br />
9.<br />
10.<br />
11.<br />
12.<br />
13.<br />
14.<br />
15.<br />
16.<br />
Remove grease fitting (8) from end frame (7).<br />
Remove end frame (7) from shaft (3).<br />
Remove drum (6) from shaft (3).<br />
Remove seal (4) and thrust washer (5) from drum (6). Discard seal (4).<br />
Remove two woodruff keys (2) from shaft (3). Discard woodruff keys (2).<br />
Remove two screws (14), six screws (15), lockwashers (16), end cover (17), and gasket (13) from<br />
gearcase (1). Discard Iockwashers (16) and gasket (13).<br />
Remove key washer (12) from shaft (3).<br />
Remove four screws (9), lockwashers (10), bearing cap (19), and gasket (11) from gearcase (1).<br />
Discard lockwashers ( 10) and gasket (11).<br />
Remove seal (18) from bearing cap (19). Discard seal (18).<br />
16-46
<strong>TM</strong> 9-<strong>2320</strong>-240-<strong>34</strong>-2<br />
16-8. REAR WINCH REPAIR (Contd)<br />
17.<br />
18.<br />
19.<br />
20.<br />
21.<br />
22.<br />
23.<br />
24.<br />
25.<br />
26.<br />
27.<br />
Remove six screw-assembled lockwashers (31), cover (32), and gasket (30) from brake housing (22).<br />
Discard gasket (30) and screw-assembled Iockwashers (31).<br />
Remove adjusting screw (36), washer (35), O-ring (<strong>34</strong>), and spring (33) from brake housing (22).<br />
Discard O-ring (<strong>34</strong>).<br />
Remove brake band (29) from brakedrum (25).<br />
Remove screw (28), lockwasher (27), and washer (26) from wormshaft (20). Discard lockwasher (27),<br />
Using puller, remove brakedrum (25) from wormshaft (20).<br />
Remove woodruff key (38) from wormshaft (20). Discard woodruff key (38).<br />
Remove four screws (24), lockwashers (23), brake housing (22), and gasket (21) from gearcase (1).<br />
Discard lockwashers (23) and gasket (21).<br />
Remove seal (37) from brake housing (22). Discard seal (37).<br />
Tap wormshaft (20) with soft-head hammer until front and rear bearings are unseated and<br />
worm (41) drops away from worm gear (39).<br />
Remove worm gear (39), shaft (3), and thrust washer (40) from gearcase (1).<br />
Remove thrust washer (40) from shaft (3).<br />
16-47
<strong>TM</strong> 9-<strong>2320</strong>-<strong>260</strong>-<strong>34</strong>-2<br />
16-8. REAR WINCH REPAIR (Contd)<br />
28.<br />
29.<br />
30.<br />
31.<br />
Using puller, remove rear bearing (1) from wormshaft (3).<br />
Remove wormshaft (3) with front bearing (4) from gearcase (2).<br />
Using puller, remove front bearing (4) from wormshaft (3).<br />
Remove seal (5), thrust washer (6), and sleeve (7) from end frame (8). Discard seal (5).<br />
1. For general cleaning instructions, refer to para. 2-8.<br />
2. For general inspection instructions, refer to para. 2-9.<br />
3. For general repair instructions, refer to para. 2-10.<br />
4. Inspect gearcase (2), gearcase bores (10), bushing (9), shaft (11), cover (12), and bushing (13) in<br />
cover (12) for nicks, burrs, scores, cracks, breaks, and excessive wear. Refer to table 16-6, Rear<br />
Winch Parts Wear Limits, for measurements. Replace or repair part(s) if damaged or worn.<br />
NOTE<br />
● Perform steps 5 and 6 if gearcase bushing fails inspection.<br />
● Perform steps 7 and 8 if cover bushing fails inspection.<br />
5. Using arbor press, remove bushing (9) from gearcase (2). Discard bushing (9).<br />
6. Using arbor press, install new bushing (9) in gearcase (2).<br />
16-48
<strong>TM</strong> 9-<strong>2320</strong>-<strong>260</strong>-<strong>34</strong>-2<br />
16-8. REAR WINCH REPAIR (Contd)<br />
7. Using arbor press, remove bushing (13) from cover (12). Discard bushing (13).<br />
8. Using arbor press, install new bushing (13) in cover (12).<br />
9. Inspect end frame (8) for cracks, breaks, damaged or missing pin (15), damaged threads, and scoring<br />
on seal surface (14). Repair or replace end frame (8) if worn or damaged. Replace pin (15)<br />
if missing or damaged.<br />
Table16-6. Rear Winch Parts Wear Limits.<br />
No.<br />
ITEM/POINT OF MEASUREMENT<br />
WEAR LIMITS/TOLERANCES<br />
INCHES<br />
MILLIMETERS<br />
2 Gearcase<br />
9 Bushing - inner diameter - maximum 3.006 76.33<br />
10 Bearing bores - inner diameter - maximum 5.1191 130.025<br />
11 Shaft (3 places) - outer diameter-minimum 2.998 76.15<br />
12 Cover<br />
13 Bushing - inner diameter - maximum 3.251 82.58<br />
16-49
<strong>TM</strong> 9-<strong>2320</strong>-<strong>260</strong>-<strong>34</strong>-2<br />
16-8. REAR WINCH REPAIR (Contd)<br />
10.<br />
11.<br />
12.<br />
Using spring tester, compress spring (1) and inspect spring (1) for distortions, cracks, and excessive<br />
wear. Refer to table 16-7, Rear Winch Parts Wear Limits, for measurements. Replace spring (1) if<br />
distorted, cracked, or worn.<br />
Inspect brake housing (2) for cracks, burrs, breaks, damaged threads, and loose or leaking freeze<br />
plug (3). Repair or replace brake housing (2) if cracked, burred, broken, or threads are damaged.<br />
Replace loose or missing freeze plug (3).<br />
Inspect worm gear (4) and shaft (5) for breaks, chips, cracks, scores, and loose outer ring (6). Replace<br />
worm gear (4) or shaft (5) if damaged (steps 13 and 14).<br />
CAUTION<br />
Ensure worm gear is properly supported when pressing.<br />
13.<br />
14.<br />
15.<br />
16.<br />
17.<br />
18.<br />
19.<br />
NOTE<br />
Perform steps 13 and 14 if worm gear or shaft fails inspection.<br />
Using arbor press, remove worm gear (4) from shaft (5). Discard worm gear (4) or shaft (5) if<br />
damaged or worn.<br />
Using arbor press, install worm gear (4) on shaft (5).<br />
Inspect right tensioner (7) and left tensioner (8) frame brackets for cracks and breaks. Repair or<br />
replace right tensioner (7) or left tensioner (8) frame brackets if cracked or broken.<br />
Inspect sleeve (9), bushing (10), four keyed thrust washers (11), brakedrum (12), brake band (13),<br />
and wormshaft (16) for distortions, cracks, burrs, scoring, and excessive wear. Refer to table 16-7,<br />
Rear Winch Parts Wear Limits, for measurements. Replace part(s) if damaged or worn.<br />
Inspect drum (17), machined surface (20), and bushing (18) for cracks, breaks, scoring, and excessive<br />
wear. Refer to table 16-7, Rear Winch Parts Wear Limits, for measurements. Replace part(s) if<br />
damaged or worn.<br />
NOTE<br />
Perform steps 18 and 19 if bushing fails inspection.<br />
Using arbor press, remove bushing (18) from drum (17). Discard bushing (18).<br />
Using arbor press, install new bushing (18) in drum (17).<br />
16-50
<strong>TM</strong> 9-<strong>2320</strong>-<strong>260</strong>-<strong>34</strong>-2<br />
16-8. REAR WINCH REPAIR (Contd)<br />
Table 16-7. Rear Winch Parts Wear Limits.<br />
ITEM WEAR LIMITS/TOLERANCES<br />
NO.<br />
lTEM/POINT OF MEASUREMENT<br />
INCHES<br />
MILLIMETERS<br />
1 Spring - length (compressed to 97 lb-ft (131.5 N•m)) 2.0 50.8<br />
9 Sleeve<br />
10 Bushing – inner diameter - maximum 3.005 76.33<br />
11 Keyed thrust washers – thickness – minimum 0.0615 1.562<br />
12 Brakedrum – outer diameter - minimum 5.497 139.62<br />
13 Brake band - minimum thickness to rivet head 0.070 1.78<br />
16 Wormshaft<br />
14 Seal surface - outer diameter – minimum 2.124 53.95<br />
15 Bearing surface - outer diameter – minimum 2.3615 59.982<br />
17 Drum<br />
18 Bushing - inner diameter – maximum 3.005 76.33<br />
19 Bushing bore - inner diameter – maximum 3.251 82,58<br />
20 Machined seal surface – minimum 4.999 126.97<br />
16-51
<strong>TM</strong> 9-<strong>2320</strong>-<strong>260</strong>-<strong>34</strong>-2<br />
16-8. REAR WINCH REPAIR (Contd)<br />
1.<br />
2.<br />
3.<br />
4.<br />
5.<br />
6.<br />
7.<br />
8.<br />
9.<br />
10.<br />
11.<br />
NOTE<br />
Apply light film of gear oil to all parts during assembly. Do not<br />
lubricate brake band or brakedrum.<br />
Place wormshaft (6) in gearcase (4) with round shear pin hole to right.<br />
Apply light coat of GAA grease to thrust washer (2) and place over long end of shaft (7) with key of<br />
thrust washer (2) away from worm gear (8).<br />
Place long end of shaft (7) through bushing (3) in gearcase (4) and slide shaft (7) and worm gear (8)<br />
into gearcase (4).<br />
Aline key of thrust washer (2) with notch (5) in gearcase (4) and seat thrust washer (2) and worm<br />
gear (8) in gearcase (4).<br />
Place gearcase (4) on its side and move wormshaft (6) so that wormshaft end (12) is up and through<br />
bore (10). Using arbor press, install bearing (11) over wormshaft end (12) and seat against shoulder<br />
of wormshaft (6).<br />
Aline wormshaft (6) and worm gear (8) and press bearing (11) into bore (10) of gearcase (4).<br />
Turn gearcase (4) over so that wormshaft end (14) is up through bore (13). Using arbor press, install<br />
bearing (9) over wormshaft end (14) and into bore (13) and seat against shoulder of worm shaft (6).<br />
Apply light coat of GAA grease to thrust washer (1) and place thrust washer (1) over short end of<br />
shaft (7) with key pointing away from worm gear (8).<br />
Position cover (17) over shaft (7) and aline key of thrust washer (1) with notch in cover (17). Push<br />
cover (17) all the way on shaft (7).<br />
Measure gap between cover (17) and gearcase (4) mating surface. Gap should be 0.005-0.015 in.<br />
(0.13-0.38 mm).<br />
a. If gap is less than 0.005 in. (0. 13 mm), remove worm gear (8) and shaft (7) from gearcase (4).<br />
Press worm gear (8) further on shaft (7).<br />
b. If gap is greater than 0.015 in. (0.38 mm), remove worm gear (8) and shaft (7) from gearcase (4).<br />
Press worm gear (8) toward short end of shaft (7).<br />
NOTE<br />
Use one gasket for each 0.005 in. (O. 13 mm) of gap measured in<br />
step 10.<br />
Place new gaskets (18) and cover (17) over shaft (7), checking that key of thrust washer (1)<br />
and notch in cover (17) are alined, and install on gearcase (4) with two screws (19), six new<br />
lockwashers (16), and screws (15).<br />
16-52
<strong>TM</strong> 9-<strong>2320</strong>-<strong>260</strong>-<strong>34</strong>-2<br />
16-8. REAR WINCH REPAIR (Contd)<br />
16-53
<strong>TM</strong> 9-<strong>2320</strong>-<strong>260</strong>-<strong>34</strong>-2<br />
16-8. REAR WINCH REPAIR (Contd) I<br />
12.<br />
13.<br />
14.<br />
15.<br />
16.<br />
17.<br />
18.<br />
19.<br />
20.<br />
21.<br />
22.<br />
23.<br />
24.<br />
Install new seal (15) on brake housing (8).<br />
Install new gasket (7) and brake housing (8) on gearcase (5) with four new lockwashers (9) and<br />
screws (10).<br />
Install new woodruff key (16) on wormshaft (6).<br />
Install brakedrum (14) on wormshaft (6) with washer (11), new lockwasher (13), and screw (12).<br />
Install new seal (18) on bearing cap (3).<br />
Position two new gaskets (4) and bearing cap (3) over wormshaft end (17) and install on gearcase (5)<br />
with four new lockwashers (2) and screws (1).<br />
Position dial indicator on gearcase (5) to read wormshaft (6) end play. Normal end play is<br />
0.005-0.015 in. (0.13-0.38 mm). If end play is less than normal, go to step a. If end play is more<br />
than normal, go to step b. Remove dial indicator when end play is correct.<br />
a. To increase end play:<br />
(1) Remove four screws (1), lockwashers (2), and bearing cap (3) from gearcase (5).<br />
(2) Add one or more additional gaskets (4).<br />
(3) Install additional gaskets (4) and bearing cap (3) on gearcase (5) with four lockwashers (2)<br />
and screws (1).<br />
(4) Recheck end play.<br />
b. To decrease end play:<br />
(1) Remove four screws (1), lockwashers (2), and bearing cap (3) from gearcase (5).<br />
(2) Remove one or more gaskets (4).<br />
(3) Install remaining gaskets (4) and bearing cap (3) on gearcase (5) with four lockwashers (2)<br />
and screws (1).<br />
(4) Recheck end play.<br />
Position brake band (19) and spring (23) on brakedrum (14) and brake housing (8).<br />
Install new O-ring (24), washer (25), and adjusting screw (26) on brake housing ( 14). Adjusting<br />
screw (26) threads into captive nut (27).<br />
Tighten adjustment screw (26) until spring length (28) is 2.125-2.187 in. (53.98-55.55 mm).<br />
Install new gasket (20) and cover (21) on housing (8) with six new screw-assembled lockwashers<br />
(22).<br />
Install new seal (29) in seal groove (32) of end frame (31).<br />
Place sleeve (30) in end frame (31) with slot (<strong>34</strong>) over pin (33).<br />
16-54
<strong>TM</strong> 9-<strong>2320</strong>-<strong>260</strong>-<strong>34</strong>-2<br />
16-8. REAR WINCH REPAIR (Contd)<br />
16-55
<strong>TM</strong> 9-<strong>2320</strong>-<strong>260</strong>-<strong>34</strong>-2<br />
16-8. REAR WINCH REPAIR (Contd)<br />
25.<br />
26.<br />
27.<br />
28.<br />
29.<br />
30.<br />
31.<br />
32.<br />
Place thrust washer (5) over shaft (4) against gearcase (1). Ensure thrust washer (5) key engages<br />
key in thrust washer (2).<br />
Install two new keys (3) in shaft (4).<br />
Install new seal (6) in gearcase end of drum (7).<br />
Place drum (7) on shaft (4) and aline keyways in drum (7) to keys (3) in shaft (4). Position drum (7)<br />
against thrust washer (5) and gearcase (1).<br />
Position thrust washer (8) over shaft (4) against drum (7) with key of thrust washer (8) facing away<br />
from drum (7).<br />
Aline end of shaft (4) to sleeve and bushing (10) and place end frame (9) on shaft (4) against<br />
drum (7). Ensure key of thrust washer (8) engages notch in end frame (9).<br />
Install channel (11) on gearcase (1) and end frame (9) with three new lockwashers (12), three<br />
screws (13), screw (16), new lockwasher (15), and nut (14).<br />
Install grease fitting (17) in end frame (9).<br />
16-56
<strong>TM</strong> 9-<strong>2320</strong>-<strong>260</strong>-<strong>34</strong>-2<br />
16-8. REAR WINCH REPAIR (Contd)<br />
33.<br />
<strong>34</strong>.<br />
35.<br />
36.<br />
37.<br />
Install bracket (29) on end frame (9) with four washers (<strong>34</strong>), screws (33), new lockwashers (26),<br />
and nuts (25).<br />
Aline frame bar (35) with hole in bracket (29) and position tensioner (36) end plate against<br />
bracket (29). Install tensioner (36) on bracket (29) with two screws (27), new lockwashers (24),<br />
and nuts (23).<br />
Install bracket (37) on gearcase (1) and tensioner (36) with four new lockwashers (19), screws (18),<br />
two screws (20), new lockwashers (21), and nuts (22).<br />
Install lever (28) on bracket (29) with pin (30) and two new cotter Pins (31).<br />
Aline hole in lever (28) with hole in slot on frame bar (35) and install pin (32) in frame bar (35)<br />
and lever (28) with two new cotter pins (31).<br />
FOLLOW-ON TASKS: ● Install rear winch level wind (para. 16-9)<br />
Ž Install rear winch (<strong>TM</strong> 9-<strong>2320</strong>-<strong>260</strong>-20).<br />
● Lubricate winch (LO 9-<strong>2320</strong>-<strong>260</strong>-12).<br />
16-57
<strong>TM</strong> 9-<strong>2320</strong>-<strong>260</strong>-<strong>34</strong>-2<br />
16-9. REAR WINCH LEVEL WIND MAINTENANCE I<br />
THIS TASK COVERS:<br />
a. Removal d. Assembly<br />
b. Disassembly e. Installation<br />
c. Cleaning and Inspection<br />
INITIAL SETUP<br />
APPLICABLE MODELS<br />
M816<br />
TOOLS<br />
General mechanic’s tool kit<br />
(Appendix B, Item 1)<br />
Outside micrometer (Appendix B, Item 8)<br />
Inside micrometer (Appendix B, Item 9)<br />
Arbor press (Appendix B, Item 7)<br />
MATERIALS/PARTS<br />
Four lockwashers (Appendix D, Item 219)<br />
Four lockwashers (Appendix D, Item 215)<br />
Eight felt washers (Appendix D, Item 5<strong>34</strong>)<br />
MATERIALS/PARTS (contd)<br />
Felt washer (Appendix D, Item 533)<br />
Locknut (Appendix D, Item 183)<br />
Locknut (Appendix D, Item 180)<br />
Felt seal (Appendix D, Item 478)<br />
GAA grease (Appendix C, Item 14)<br />
Lubricating oil (Appendix C, Item 21)<br />
REFERENCES (<strong>TM</strong>)<br />
<strong>TM</strong> 9-<strong>2320</strong>-<strong>260</strong>-20<br />
<strong>TM</strong> 9-<strong>2320</strong>-<strong>260</strong>-<strong>34</strong>P-2<br />
EQUIPMENT CONDITION<br />
Rear winch cable removed (<strong>TM</strong> 9-<strong>2320</strong>-<strong>260</strong>-20).<br />
I<br />
Remove four screws (2), lockwashers (3), and level wind (1) from rear winch (4). Discard lockwashers<br />
(3).<br />
b. Disassembly<br />
I<br />
NOTE<br />
Record positions of retainer screws and stop screws for installation.<br />
1. Loosen four jamnuts (6) and remove four retainer screws (7) and jamnuts (6) from<br />
2. Remove trolley (5) from track frame (9).<br />
trolley (5).<br />
3. Loosen two jamnuts (8) and remove two stopscrews (16) and jamnuts (8) from track frame (9).<br />
4. Remove two nuts (11) and latch (12) from poppet nut (13).<br />
5. Remove poppet nut (13), spring (14), and poppet (15) from threaded bore (10) on track frame (9).<br />
16-58
<strong>TM</strong> 9-<strong>2320</strong>-<strong>260</strong>-<strong>34</strong>-2<br />
16-9. REAR WINCH LEVEL WIND MAINTENANCE (Contd)<br />
16-59
<strong>TM</strong> 9-<strong>2320</strong>-<strong>260</strong>-<strong>34</strong>-2<br />
16-9. REAR WINCH LEVEL WIND MAINTENANCE (Contd)<br />
6. Remove grease fitting (15) and locknut (14) from pivot shaft (2). Discard locknut (14).<br />
7. Remove pivot frame (1) and pivot shaft (2) from trolley frame (16).<br />
8. Remove upper race (3), forty-five ball bearings (18), and lower race (4) from trolley frame (16).<br />
NOTE<br />
Wheel sets of both axles are disassembled the same. Left axle<br />
wheel set is shown.<br />
9. Remove two grease fittings (8) from ends of axle (17).<br />
10. Remove two snaprings (7), washers (6), outer felt washers (5), wheels (9), inner felt washers (11),<br />
and thrust washers (12) from axle (17). Discard felt washers (5) and (11).<br />
11. Using arbor press, remove two bearings (10) from wheels (9).<br />
12. Remove two grease fittings (13) from trolley frame (16).<br />
16-60
<strong>TM</strong> 9-<strong>2320</strong>-<strong>260</strong>-<strong>34</strong>-2<br />
16-9. REAR WINCH LEVEL WIND MAINTENANCE (Contd)<br />
14.<br />
15.<br />
16.<br />
17.<br />
18.<br />
Remove four screws (26), lockwashers (25), and cable guard (24) from pivot frame (11). Discard<br />
lockwashers (25).<br />
Remove two snaprings (28), shaft (29), two thrust washers (19), and sheave (21) from pivot<br />
frame (1).<br />
Remove pin (27) from shaft (29).<br />
Remove two spacers (20), bearing (22), race (23), and grease fitting (35) from sheave (21).<br />
Remove locknut (<strong>34</strong>), washer (33), felt washer (32), and felt seal (30) from end of pivot shaft (2).<br />
Discard locknut (<strong>34</strong>), felt washer (32) and felt seal (30).<br />
Using arbor press, remove pivot shaft (2) and bearing (31) from pivot frame (1).<br />
16-61
<strong>TM</strong> 9-<strong>2320</strong>-<strong>260</strong>-<strong>34</strong>-2<br />
16-9. REAR WINCH LEVEL WIND MAINTENANCE (Contd)<br />
c. Cleaning and Inspection<br />
1. For general cleaning instructions, refer to para. 2-8.<br />
2. For general inspection instructions, refer to para. 2-9.<br />
3. Inspect pivot frame (1), bearing (5), shaft (7), two thrust washers (8), spacers (9), and sheave (10) for<br />
nicks, burrs, scoring, cracks, breaks, looseness, and excessive wear. Refer to table 16-8, Rear Winch<br />
Level Wind Wear Limits, for measurements. Replace part(s) if damaged or worn.<br />
4. Inspect race (12) and bearing (11) for nicks, burrs, scoring, cracks, and breaks. Replace race (12) and<br />
bearing (11) if damaged.<br />
5. Inspect pin (6) for nicks, burrs, scoring, cracks, and breaks. Replace pin (6) if damaged.<br />
Table 16-8. Rear Winch Level Wind Wear Limits.<br />
ITEM<br />
NO.<br />
lTEM/POINT OF MEASUREMENT<br />
WEAR LIMITS/TOLERANCES<br />
INCHES<br />
MILLIMETERS<br />
1 Pivot frame<br />
2 Sheave shaft bore (2 places) – inner diameter –<br />
maximum 2.747 69.77<br />
3 Race surface – outer diameter - minimum 2.812 71.42<br />
5 Bearing bore – inner diameter – maximum 1.3747 <strong>34</strong>.917<br />
4 Pivot frame bearing – outer diameter – minimum 1.3745 <strong>34</strong>.912<br />
7 Sheave shaft – outer diameter – minimum 2.7490 69.825<br />
8 Sheave thrust washer – thickness – minimum 0.0615 1.562<br />
9 Spacer<br />
Edge – thickness – minimum 0.087 2.21<br />
Body – thickness – minimum 0.178 4.52<br />
10 Sheave<br />
Bearing bore – inner diameter – maximum 4.2496 107.940<br />
Hub – width – minimum length 2.235 56.77<br />
11 Sheave bearing – outer diameter - minimum 4.2492 107.930<br />
16-62
<strong>TM</strong> 9-<strong>2320</strong>-<strong>260</strong>-<strong>34</strong>-2<br />
16-9. REAR WINCH LEVEL WIND MAINTENANCE (Contd)<br />
16-63
<strong>TM</strong> 9-<strong>2320</strong>-<strong>260</strong>-<strong>34</strong>-2<br />
16-9. REAR WINCH LEVEL WIND MAINTENANCE (Contd)<br />
6. Inspect four thrust washers (1), two axles (2), forty-five ball bearings (8), and four trolley wheels (13)<br />
for breaks, cracks, scoring, corrosion, chips, damaged threads, flat spots, and excessive wear. Refer<br />
to table 16-9, Rear Winch Level Wind Wear Limits, for measurements. Replace part(s) if damaged<br />
or worn.<br />
7. Inspect pivot shaft (3), trolley frame (6), track frame (7), latch (9), and two races (12) for breaks,<br />
cracks, scoring, corrosion, chips, and flat spots. Refer to table 16-9, Rear Winch Level Wind Limits,<br />
for measurements. Replace part(s) if damaged.<br />
NOTE<br />
● Perform steps 8 and 9 if trolley axle fails inspection.<br />
● Both axles are removed and installed the same. This procedure<br />
covers one axle.<br />
8. Using arbor press, remove axle (2) from trolley frame (6). Discard axle (2).<br />
9. Using arbor press, install new axle (2) on trolley frame (6).<br />
16-64
<strong>TM</strong> 9-<strong>2320</strong>-<strong>260</strong>-<strong>34</strong>-2<br />
16-9. REAR WINCH LEVEL WIND MAINTENANCE (Contd)<br />
Table 16-9. Rear Winch Level Wind Wear Limits.<br />
ITEM<br />
NO.<br />
lTEM/POINT OF MEASUREMENT<br />
WEAR LIMITS/TOLERANCES<br />
INCHES<br />
MILLIMETERS<br />
1 Thrust washers - thickness - minimum 0.0615 1.562<br />
2 Axles (4 places) – minimum 1.9995 50.787<br />
4 Pivot shaft bearing surface – outer diameter -<br />
minimum 0.8745 22.212<br />
5 Trolley frame shaft bore – inner diameter –<br />
maximum 0.750 19.05<br />
8 Ball bearings – minimum 0.5620 14.275<br />
12 Races<br />
10 Grooves - thickness – minimum 0.404 10.26<br />
11 Race - inner diameter - maximum 2.811 71.40<br />
13 Trolley wheel<br />
Outer diameter – minimum 3.745 95.12<br />
Inner diameter – maximum 2.5622 65.08<br />
16-65
16-9. REAR WINCH LEVEL WIND MAINTENANCE (Contd)<br />
d. Assembly<br />
1. Using arbor press, install bearing (14) on pivot frame (13).<br />
2. Soak new felt washer (16) in lubricating oil and install pivot shaft (15) on pivot frame (13) with felt<br />
washer (16), washer (17), and new locknut (18).<br />
3. Install bearing (4), race (5), two spacers (2), and grease fitting (19) on sheave (3).<br />
4. Install pin (9) in shaft (11).<br />
5. Install sheave (3), two thrust washers (1), shaft (11) and two snaprings (10) on pivot frame (13).<br />
Ensure pinhole in shaft (11) is alined with hole in pivot frame (13).<br />
6. Install cable guard (6) on pivot frame (13) with four new lockwashers (7) and screws (8).<br />
16-66
<strong>TM</strong> 9-<strong>2320</strong>-<strong>260</strong>-<strong>34</strong>-2<br />
16-9. REAR WINCH LEVEL WIND MAINTENANCE [Contd)<br />
NOTE<br />
Coat all internal parts and bearings with GAA grease before<br />
installation.<br />
8. Install forty-five ball bearings (35) on two races (20) and (21) and place two races (20) and (21) on<br />
trolley frame (33).<br />
9. Install pivot frame (13) on trolley frame (33) with new locknut (31), Install grease fitting (32) in<br />
pivot shaft (15).<br />
10. Install two grease fittings (30) on trolley frame (33).<br />
NOTE<br />
Wheel sets of both axles are installed the same. Left axle wheel set<br />
is shown.<br />
11. Using arbor press, install two bearings (27) on wheels (26).<br />
12. Soak four new felt washers (22) and (28) in lubricating oil.<br />
13. Install two thrust washers (29), felt washers (28), wheels (26), felt washers (22), and washers (23)<br />
on axle (<strong>34</strong>) with two snaprings (24).<br />
14. Install two grease fittings (25) on ends of axle (<strong>34</strong>).<br />
16-67
<strong>TM</strong> 9-<strong>2320</strong>-<strong>260</strong>-<strong>34</strong>-2<br />
16-9. REAR WINCH LEVEL WIND MAINTENANCE (Contd)<br />
15.<br />
16.<br />
17.<br />
18.<br />
19.<br />
20.<br />
21.<br />
22.<br />
Thread four jamnuts (2) on retainer screws (3).<br />
Install four retainer screws (3) on trolley (1).<br />
Install trolley (1) on track frame (5) and turn four retainer screws (3) through webs of trolley (1)<br />
until ends of retainer screws (3) project under track, but do not touch, frame of track frame (5).<br />
Tighten jamnuts (2).<br />
Install two jamnuts (4) on stopscrews (12).<br />
Install two stopscrews (12) on end plates of track frame (5) to position recorded during disassembly.<br />
Tighten jamnuts (4).<br />
Install trolley poppet (6) and spring (7) on track frame (5) with poppet nut (8).<br />
Install latch (9) on poppet (6) with inner nut (10). Ensure latch (9) allows poppet (7) to engage<br />
trolley (1) when latch (9) is in lock position, but allows trolley (1) to roll freely on track of track<br />
frame (5) when latch (9) is in unlock position.<br />
When poppet movement is correct, install second nut (11) as a jamnut on poppet (6).<br />
e. Installation<br />
Position level wind (15) on winch (16) and install with four new lockwashers ( 13) and screws ( 14).<br />
16-68
<strong>TM</strong> 9-<strong>2320</strong>-<strong>260</strong>-<strong>34</strong>-2<br />
16-9. REAR WINCH LEVEL WIND MAINTENANCE (Contd)<br />
FOLLOW-ON TASKS: ● Install rear winch cable (<strong>TM</strong> 9-<strong>2320</strong>-<strong>260</strong>-20).<br />
● Adjust level wind stopscrews (<strong>TM</strong> 9-<strong>2320</strong>-<strong>260</strong>-20).<br />
16-69
<strong>TM</strong> 9-<strong>2320</strong>-<strong>260</strong>-<strong>34</strong>-2<br />
16-10. REAR WINCH CABLE TENSlONER MAINTENANCE<br />
THIS TASK COVERS:<br />
a. Disassembly c. Assembly<br />
b. Cleaning and Inspection<br />
INITIAL SETUP<br />
APPLICABLE MODELS<br />
M816<br />
TOOLS<br />
General mechanic’s tool kit<br />
(Appendix B, Item 1)<br />
Inside micrometer (Appendix B, Item 9)<br />
Outside micrometer (Appendix B, Item 8)<br />
MATERIALS/PARTS<br />
Two cotter-pins (Appendix D, Item 38)<br />
Four felt washers (Appendix D, Item 529)<br />
Lubricating oil (Appendix C, Item 21)<br />
REFERENCES (<strong>TM</strong>)<br />
LO 9-<strong>2320</strong>-<strong>260</strong>-12<br />
<strong>TM</strong> 9-<strong>2320</strong>-<strong>260</strong>-20<br />
<strong>TM</strong> 9-<strong>2320</strong>-<strong>260</strong>-<strong>34</strong>P-2<br />
EQUIPMENT CONDITION<br />
● Rear winch cable removed (<strong>TM</strong> 9-<strong>2320</strong>-<strong>260</strong>-20).<br />
. Rear tensioner assembly removed (para. 16-8).<br />
I<br />
a. Disassembly<br />
I<br />
1. Remove grease fitting (7) from pin (8).<br />
2. Remove cotter pin (1) and pin (8) from sheave (5) and frame (2). Discard cotter pin (1).<br />
3. Remove sheave (5) and two thrust washers (3) from frame (2).<br />
4. Remove two felt washers (4) and bearing (6) from sheave (5). Discard felt washers (4).<br />
I<br />
5. Remove grease fitting ( 16) from pin (15).<br />
6. Remove cotter pin (9) and pin (15) from fork (10), sheave (13), and frame (2). Discard cotter pin (9).<br />
7. Remove sheave (13) and two thrust washers (11) from fork (10).<br />
8. Remove fork (10) from frame (2).<br />
9. Remove two felt washers (12) and bearing ( 14) from sheave (13). Discard felt washers (12).<br />
b. Cleaning and Inspection<br />
1. For general cleaning instructions, refer to para. 2-8.<br />
2. For general inspection instructions, refer to para. 2-9.<br />
3. Inspect frame (2) for breaks, cracks, distortion, and broken or loose welds. Replace frame (2)<br />
if damaged.<br />
4. Inspect fork (10) for breaks, cracks, misalinement of rod and plates, and broken or loose welds,<br />
Replace fork (10) if damaged.<br />
16-70
<strong>TM</strong> 9-<strong>2320</strong>-<strong>260</strong>-<strong>34</strong>-2<br />
16-10. REAR WINCH CABLE TENSlONER MAINTENANCE (Contd)<br />
16-71
<strong>TM</strong> 9-<strong>2320</strong>-<strong>260</strong>-<strong>34</strong>-2<br />
16-10. REAR WINCH CABLE TENSlONER MAINTENANCE (Contd) I<br />
5. Inspect four thrust washers (1), two pins (2), sheaves (3), and bearings (4) for breaks, cracks,<br />
scoring, chips, damaged threads, blocked lubrication passages, and excessive wear. Refer to table<br />
16-10, Rear Winch Tensioner Parts Wear Limits, for measurements. Replace part(s) if damaged<br />
or worn.<br />
Table 16-10. Rear Winch Tensioner Parts Wear Limits.<br />
ITEM<br />
NO.<br />
lTEM/POINT OF MEASUREMENT<br />
WEAR<br />
INCHES<br />
LIMITS/TOLERANCES<br />
MILLIMETERS<br />
1 Thrust washers – thickness - minimum 0.0615 1.562<br />
2 Pins – diameter – minimum 1.2495 31.737<br />
3 Sheaves<br />
Hub – thickness – minimum 1.480 37.59<br />
Bore - inner diameter – maximum 1.7497 44.442<br />
4 Bearings – outer diameter – minimum 1.7495 44.437<br />
1.<br />
2.<br />
3.<br />
4.<br />
5.<br />
6.<br />
7.<br />
8.<br />
9.<br />
Install bearing (4) in sheave (3). Ensure bearing (4) is centered in bore.<br />
Soak two new felt washers (8) in lubricating oil and install one felt washer (8) on each side of<br />
bearing (4) in sheave (3).<br />
Position rod end of fork (7) through right end plate of frame (5).<br />
Install sheave (3) and two thrust washers (1) in fork (7) and frame (5) with pin (2) and new cotter<br />
pin (6). Ensure threaded end of pin (2) is facing out.<br />
Install grease fitting (9) in pin (2).<br />
Install bearing (4) in sheave (3). Ensure bearing (4) is centered in bore.<br />
Soak two new felt washers (11) in lubricating oil and install one felt washer (11) on each side of<br />
bearing (4) in sheave (3).<br />
Position two thrust washers (1) and sheave (3) in left end of frame (5) and install with pin (2) and<br />
new cotter pin (10). Ensure threaded end of pin (2) is facing out.<br />
Install grease fitting (12) in pin (2).<br />
16-72
<strong>TM</strong> 9-<strong>2320</strong>-<strong>260</strong>-<strong>34</strong>-2<br />
I<br />
16-10. REAR WINCH CABLE TENSlONER MAINTENANCE (Contd)<br />
FOLLOW-ON TASKS: ● Install rear tensioner assembly (para. 16-8).<br />
● Lubricate tensioner assembly (LO 9-<strong>2320</strong>-<strong>260</strong>-12).<br />
● Install rear winch cable (<strong>TM</strong> 9-<strong>2320</strong>-<strong>260</strong>-20).<br />
16-73
<strong>TM</strong> 9-<strong>2320</strong>-<strong>260</strong>-<strong>34</strong>-2<br />
16-11. REAR WINCH AUTOMATIC BRAKE MAINTENANCE<br />
THIS TASK COVERS:<br />
a. Removal c. Installation<br />
b. Cleaning and Inspection<br />
INITIAL SETUP<br />
APPLICABLE MODELS<br />
M816<br />
TOOLS<br />
General mechanic’s tool kit<br />
(Appendix B, Item 1)<br />
Mechanical puller kit (Appendix B, Item 14)<br />
Outside micrometer (Appendix B, Item 8)<br />
MATERIALS/PARTS<br />
Lockwasher (Appendix D, Item 218)<br />
Gasket (Appendix D, Item 97)<br />
MATERIALS/PARTS (Contd)<br />
Six screw-assembled lockwashers<br />
(Appendix D, Item 382)<br />
Woodruff key (Appendix D, Item 557)<br />
O-ring (Appendix D, Item 293)<br />
REFERENCES (<strong>TM</strong>]<br />
<strong>TM</strong> 9-<strong>2320</strong>-<strong>260</strong>-20<br />
<strong>TM</strong> 9-<strong>2320</strong>-<strong>260</strong>-<strong>34</strong>P-2<br />
EQUIPMENT CONDITION<br />
Rear winch removed (<strong>TM</strong> 9-<strong>2320</strong>-<strong>260</strong>-20).<br />
1. Remove six screw-assembled lockwashers (15), cover (14), and gasket (13) from housing (6). Discard<br />
screw-assembled lockwashers (15) and gasket (13).<br />
2. Remove screw (1), washer (2), O-ring (3), and spring (12) from brake band (11) and housing (6).<br />
Discard O-ring (3).<br />
3. Remove brake band (11) from brakedrum (7).<br />
4. Remove screw (10), lockwasher (9), and washer (8) from shaft (5). Discard lockwasher (9).<br />
5. Using puller, remove brakedrum (7) from shaft (5).<br />
6. Remove woodruff key (4) from shaft (5). Discard woodruff key (4).<br />
b. Cleaning and Inspection<br />
1. For general cleaning instructions, refer to para. 2-8.<br />
2. For general inspection instructions, refer to para. 2-9.<br />
3. Inspect cover (14) for breaks and cracks. Replace cover (14) if broken or cracked.<br />
4. Inspect brakedrum (7) and brake band (11) for breaks, cracks, scoring, and wear. Refer to table<br />
16-11, Automatic Brake Wear Limits, for measurements. Replace brakedrum (7) or brake band (11)<br />
if damaged or worn.<br />
5. Inspect spring (12) for broken coils and distortion. Using spring tester, compress spring (12) and<br />
check for wear. Refer to table 16-11, Automatic Brake Wear Limits, for measurements. Replace<br />
spring (12) if damaged or worn.<br />
Table 16-11. Automatic Brake Wear Limits.<br />
ITEM WEAR LIMITS/TOLERANCES<br />
lTEM/POINT OF MEASUREMENT<br />
NO.<br />
INCHES<br />
MILLIMETERS<br />
,<br />
7 Brakedrum - outer diameter – minimum 5.497 139.62<br />
11 Brake band - minimum thickness to rivet head 0.070 1.78<br />
12 Spring<br />
16-74
<strong>TM</strong> 9-<strong>2320</strong>-<strong>260</strong>-<strong>34</strong>-2<br />
16-11. REAR WINCH AUTOMATIC BRAKE MAINTENANCE (Contd)<br />
1.<br />
2,<br />
3.<br />
4.<br />
5.<br />
6.<br />
7.<br />
Install new woodruff key (6) in shaft (5).<br />
Aline slot in brakedrum (7) with woodruff key (6) and install on shaft (5) with washer (8), new<br />
lockwasher (9), and screw (10).<br />
Place brake band (11) on brakedrum (7), with captive nut (16) leg on right.<br />
Install new O-ring (3) in brake housing (4).<br />
Place washer (2) on adjusting screw (1) and insert screw (1) through seal (3), left wall of brake<br />
housing (4), spring (12), clearance hole in left leg of brake band (11), and thread into captive nut (16)<br />
in right leg of brake band (11).<br />
Turn adjusting screw (1) until spring length (17) is 2.125-2.187 in. (53.98-55.55 mm).<br />
Position new gasket (13) and cover (14) on housing (4) and install with six new screw-assembled<br />
lockwashers (15).<br />
FOLLOW-ON TASKS: ● Install rear winch (<strong>TM</strong> 9-<strong>2320</strong>-<strong>260</strong>-20).<br />
● Adjust automatic brake (<strong>TM</strong> 9-<strong>2320</strong>-<strong>260</strong>-20).<br />
16-75
<strong>TM</strong> 9-<strong>2320</strong>-<strong>260</strong>-<strong>34</strong>-2<br />
Section Ill. CRANE AND HOIST MAINTENANCE<br />
16-12. CRANE AND HOIST MAINTENANCE INDEX<br />
Para<br />
NO.<br />
16-13.<br />
16-14.<br />
16-15.<br />
16-16.<br />
16-17.<br />
16-18.<br />
16-19.<br />
16-20.<br />
16-21.<br />
16-22.<br />
16-23.<br />
16-24.<br />
16-25.<br />
16-26.<br />
16-27.<br />
16-28.<br />
16-29.<br />
16-30.<br />
16-31.<br />
16-32.<br />
16-33.<br />
16-<strong>34</strong>.<br />
16-35.<br />
16-36.<br />
16-37.<br />
16-38.<br />
TITLE<br />
Upper and Lower Boom Roller Maintenance (M816)<br />
Boom Elevating Cylinders Maintenance (M816)<br />
Hoist Winch Motor Replacement (M816)<br />
Hoist Level Wind Maintenance (M816)<br />
Hoist Winch Maintenance (M816)<br />
Boom Assembly Replacement (M816)<br />
Inner Boom Maintenance (M816)<br />
Extension Cylinder Repair (M816)<br />
Boom Repair (M816)<br />
Crane Gondola Maintenance (M816)<br />
Hoist Hydraulic Winch Motor Replacement (M816)<br />
Hoist Hydraulic Pump and Support Maintenance (M816)<br />
Hoist Bevel Gearcase Repair (M816)<br />
Crane Turntable Maintenance (M816)<br />
Control Valve Repair (M816)<br />
Crane Gearcase Maintenance (M816)<br />
Crane Cab (Gondola) Replacement (M819)<br />
Boom Swing Mechanism Replacement (M819)<br />
Cable Hoist Winch Replacement (M819)<br />
Hydraulic Swivel Valve Replacement (M819)<br />
Boom Lift Cylinder Maintenance (M819)<br />
Crane Shipper, Boom, Boom Extension, and Rollers Maintenance (M819)<br />
Boom Extension Cylinder Maintenance (M819)<br />
Control Valve Bank Replacement (M819)<br />
Relief Valve Maintenance (M819)<br />
Check Valves Replacement (M819)<br />
PAGE<br />
NO.<br />
16-76<br />
16-81<br />
16-90<br />
16-92<br />
16-94<br />
16-104<br />
16-112<br />
16-120<br />
16-124<br />
16-130<br />
16-138<br />
16-140<br />
16-144<br />
16-156<br />
16-164<br />
16-168<br />
16-174<br />
16-176<br />
16-178<br />
16-182<br />
16-188<br />
16-194<br />
16-214<br />
16-218<br />
16-224<br />
16-228<br />
16-13. UPPER AND LOWER BOOM ROLLER MAINTENANCE (M816)<br />
THIS TASK COVERS:<br />
a. Removal d. Assembly<br />
b. Disassembly e. Installation<br />
c. Cleaning and Inspection<br />
lNITAL SETUP<br />
APPLICABLE MODELS<br />
M816<br />
TOOLS<br />
General mechanic’s tool kit<br />
(Appendix B, Item 1)<br />
Mechanical puller kit (Appendix B, Item 14)<br />
MATERIALS/PARTS<br />
Six lockwashers (Appendix D, Item 219)<br />
Sixteen lockwashers (Appendix D, Item 223)<br />
Shim (Appendix D, Item 488)<br />
MATERIALS/PARTS (Contd)<br />
Shim (Appendix D, Item 491)<br />
Two woodruff keys (Appendix D, Item 551)<br />
Sealing compound (Appendix C, Item 44)<br />
References <strong>TM</strong>)<br />
<strong>TM</strong> 9-<strong>2320</strong>-<strong>260</strong>-10<br />
<strong>TM</strong> 9-<strong>2320</strong>-<strong>260</strong>-20<br />
<strong>TM</strong> 9-<strong>2320</strong>-<strong>260</strong>-<strong>34</strong>P-2<br />
EQUIPMENT CONDITION<br />
Parking brake set (<strong>TM</strong> 9-<strong>2320</strong>-<strong>260</strong>-10).<br />
16-76
<strong>TM</strong> 9-<strong>2320</strong>-<strong>260</strong>-<strong>34</strong>-2<br />
16-13. UPPER AND LOWER BOOM ROLLER MAINTENANCE (M816) (Contd)<br />
NOTE<br />
● Upper and lower boom rollers are removed and installed the<br />
same. This procedure covers the upper boom roller.<br />
● Assistant will help with removal task.<br />
Remove six screws (1), lockwashers (2), and upper boom roller (3) from boom (4). Discard lockwashers (2).<br />
1.<br />
2.<br />
3.<br />
4.<br />
5.<br />
6.<br />
7.<br />
8.<br />
9.<br />
NOTE<br />
● Measure shim thickness on each side and record for installation.<br />
● Mark wheels, hub bodies, and shaft for installation.<br />
Remove eight screws (5) and lockwashers (6) from two shaft supports (7). Discard lockwashers (6).<br />
Using a brass drift and hammer, drive shaft (13) and one shaft support (7) part way out of<br />
housing (9).<br />
Using a mechanical puller, remove the protruding shaft support (7) and shims (8) from shaft (13)<br />
and housing (9).<br />
Repeat steps 2 and 3 to remove opposite shaft support (7) and shims (8).<br />
Measure shims (8) as a pack. Record thickness of each side for installation.<br />
Remove wheels (11) and shaft. (13) from housing (9).<br />
Remove wheels (11) and bearings (12) from shaft (13).<br />
Remove two woodruff keys (10) from shaft (13). Discard woodruff keys (10).<br />
Remove bearings (12) from wheels (11) by carefully driving a punch through holes (14) in wheels (11).<br />
16-77
<strong>TM</strong> 9-<strong>2320</strong>-<strong>260</strong>-<strong>34</strong>-2<br />
I<br />
16-13. UPPER AND LOWER BOOM ROLLER MAINTENANCE (M816) (Contd)<br />
I<br />
I<br />
c. Cleaning and Inspection<br />
1. For general cleaning instructions, refer to para. 2-8.<br />
2. For general inspections instructions, refer to para 2-9.<br />
1.<br />
2.<br />
3.<br />
4.<br />
5.<br />
6.<br />
7.<br />
8.<br />
9.<br />
10.<br />
Press bearings (8) on shaft (9). Seat inner race of bearings (8) to shoulders of shaft (9).<br />
Supporting outer race of bearings (8), press wheels (7) on bearings (8).<br />
NOTE<br />
If new parts, except shims, were installed in boom roller, a new<br />
height adjustment must be made after installation. Assemble<br />
with woodruff keys pointing toward boom to provide maximum<br />
clearance.<br />
Install two new woodruff keys (6) in shaft (9).<br />
Install wheels (7) and shaft (9) in housing (5).<br />
Place two 0.25 in. (6.4 mm) dots of sealing compound on housing (5) 180° apart. Install shims (4) on<br />
housing (5) over sealing compound.<br />
Add shims (4) as necessary, with dots of sealing compound in between, until thickness recorded<br />
during disassembly is equalled. Do not apply sealing compound to outermost shims (4).<br />
NOTE<br />
Assistant will help with steps 7 through 10,<br />
Press two shafts supports (3) onto shaft (9).<br />
Turn housing (5) over on arbor press and place support under lower end of shaft (9). Ensure shaft<br />
supports (3) and shims (4) are tight against housing (5).<br />
When second shaft support (3) is seated on shims (4), measure gaps (10) between shaft supports (3)<br />
and wheels (7).<br />
a. If gaps (10) are 0.030-0.180 in. (0.76-4.57 mm), go to step 10.<br />
b. If gaps (10) are less than 0.030 in. (0.76 mm), remove shaft supports (3), add shim(s) (4), and<br />
install shaft supports (3). Measure gaps (10) and go to step 10 if correct.<br />
c. If gaps (10) are greater than 0.180 in. (4.57 mm), remove shaft supports (3), remove shim(s) (4),<br />
and install shaft supports (3). Measure gaps (10) and go to step 10 if correct.<br />
When gaps (10) are correct, aline index marks on shaft supports (3) with marks on housing (5) and<br />
install with sixteen new lockwashere (2) and screws (1).<br />
16-78
<strong>TM</strong> 9-<strong>2320</strong>-<strong>260</strong>-<strong>34</strong>-2<br />
16-13. UPPER AND LOWER BOOM ROLLER MAINTENANCE (M816) (Contd)<br />
16-79
<strong>TM</strong> 9-<strong>2320</strong>-<strong>260</strong>-<strong>34</strong>-2<br />
16-13. UPPER AND LOWER BOOM ROLLER MAINTENANCE (M816) (Contd)<br />
e. Installation<br />
NOTE<br />
Assistant will help with installation.<br />
Install boom roller (1) on boom (2) with six new lockwashers (4) and screws (3).<br />
FOLLOW-ON TASK: Check boom roller height adjustment (<strong>TM</strong> 9-<strong>2320</strong>-<strong>260</strong>-20).<br />
16-80
<strong>TM</strong> 9-<strong>2320</strong>-<strong>260</strong>-<strong>34</strong>-2<br />
16-14. BOOM ELEVATING CYLINDERS MAINTENANCE (M816)<br />
THIS TASK COVERS:<br />
a. Removal d. Assembly<br />
b. Disassembly e. Installation<br />
c. Cleaning and Inspection<br />
lNITIAL SETUP<br />
APPLICABLE MODELS<br />
M816<br />
TOOLS<br />
General mechanic’s tool kit<br />
(Appendix B, Item 1)<br />
Spanner wrench (Appendix B, Item 136)<br />
Bearing remover/replacer<br />
(Appendix B, Item 83)<br />
1-1/2-in. open-end wrench<br />
(Appendix B, Item 119)<br />
1-11/16-in. open-end wrench<br />
(Appendix B, Item 127)<br />
Vise (Appendix B, Item 38)<br />
Arbor press (Appendix B, Item 7)<br />
Inside micrometer (Appendix B, Item 9)<br />
Chain<br />
Lifting device<br />
Prybar<br />
MATERIALS/PARTS<br />
Lockwasher (Appendix D, Item 223)<br />
Cotter pin (Appendix D, Item 45)<br />
Seal (Appendix D, Item 463)<br />
Packing (Appendix D, Item 308)<br />
Packing (Appendix D, Item 312) ,<br />
Packing (Appendix D, Item 310)<br />
Bearing sleeve (Appendix D, Item 4)<br />
MATERIALS/PARTS (Contd)<br />
Cup seal (Appendix D, Item 476)<br />
Two piston rings (Appendix D, Item 319)<br />
Safety wire (Appendix D, Item 372)<br />
Twine (Appendix C, Item 54)<br />
Antiseize tape (Appendix C, Item 50)<br />
Cap and plug set (Appendix C, Item 6)<br />
Lubricating oil (Appendix C, Item 21)<br />
GAA grease (Appendix C, Item 14)<br />
REFERENCES (<strong>TM</strong>)<br />
LO 9-<strong>2320</strong>-<strong>260</strong>-12<br />
<strong>TM</strong> 9-<strong>2320</strong>-<strong>260</strong>-10<br />
<strong>TM</strong> 9-<strong>2320</strong>-<strong>260</strong>-<strong>34</strong>P-2<br />
EQUIPMENT CONDITION<br />
● Parking brake set (<strong>TM</strong> 9-<strong>2320</strong>-<strong>260</strong>-10).<br />
● Boom raised and shipper braces installed<br />
(<strong>TM</strong> 9-<strong>2320</strong>-<strong>260</strong>-10).<br />
● Gondola guard removed (left elevating cylinder)<br />
(<strong>TM</strong> 9-<strong>2320</strong>-<strong>260</strong>-10).<br />
GENERAL SAFETY INSTRUCTIONS<br />
● All personnel must stand clear during lifting<br />
operations.<br />
● Ensure lifting capacity is greater than weight of<br />
boom elevating cylinders.<br />
16-81
<strong>TM</strong> 9-<strong>2320</strong>-<strong>260</strong>-<strong>34</strong>-2<br />
16-14. BOOM ELEVATING CYLINDERS MAINTENANCE (M816) (Contd)<br />
a. Removal<br />
1.<br />
2.<br />
3.<br />
● Clean area around hoses and lines before removal to prevent<br />
entry of dirt. Damage will occur if dirt or dust enters system.<br />
● Cap or plug all openings immediately after disconnecting lines<br />
and hoses to prevent contamination. Remove caps or plugs<br />
prior to installation. Failure to do so may result in damage to<br />
equipment.<br />
NOTE<br />
● Left and right elevating cylinders are maintained the same. This<br />
procedure covers the right elevating cylinder.<br />
● Assistance is needed when removing elevating cylinder.<br />
● Tag hydraulic hoses for installation.<br />
● Have drainage container ready to catch oil.<br />
Install chain on boom (1) and attach to lifting device. Remove slack from chain.<br />
Disconnect hose (12) from elbow (4) and check valve (13).<br />
Disconnect hose (19) from elbow (14). Tie hose (19) out of the way.<br />
WARNIN6<br />
4.<br />
5.<br />
6.<br />
7.<br />
8.<br />
9.<br />
10.<br />
11.<br />
• All personnel must stand clear during lifting operations.<br />
A swinging or shifting load may cause injury to personnel.<br />
● Ensure lifting capacity is greater than weight (160 lb (73 kg)) of<br />
boom elevating cylinders. Failure to do so may result in injury to<br />
personnel or damage to equipment.<br />
Raise boom (1). Release shipper braces (2) from boom (1) and install on wrecker body (3).<br />
Lower boom (1) and remove lifting device and chain.<br />
Install chain on elevating cylinder (5) and attach to lifting device. Take up slack in chain.<br />
Remove screw (10), lockwasher (9), washer (8), and keeper pin (7) from bracket (6) and piston rod<br />
trunnion (11). Discard lockwasher (9).<br />
Remove cotter pin (16) from pin (18). Discard cotter pin (16).<br />
Using hammer and drift, remove pin (18) from bracket (17) and cylinder housing trunnion ( 15).<br />
Using prybar and lifting device, remove elevating cylinder (5) from brackets (6) and (17).<br />
Remove lifting device and chain from elevating cylinder (5).<br />
16-82
<strong>TM</strong> 9-<strong>2320</strong>-<strong>260</strong>-<strong>34</strong>-2<br />
16-14. BOOM ELEVATING CYLINDERS MAINTENANCE (M816) (Contd)<br />
16-83
<strong>TM</strong> 9-<strong>2320</strong>-<strong>260</strong>-<strong>34</strong>-2<br />
16-14. BOOM ELEVATING CYLINDERS MAINTENANCE (M816) (Contd)<br />
1.<br />
2.<br />
3.<br />
4.<br />
5.<br />
6.<br />
7.<br />
8.<br />
9.<br />
10.<br />
11.<br />
12.<br />
13.<br />
NOTE<br />
Record position of check valve and elbow for installation.<br />
Remove elbow (7) and check valve (8) from cylinder housing (6).<br />
Remove two grease fittings (4) from cylinder housing trunnion (9) and piston rod trunnion (5).<br />
Using spanner wrench, remove cylinder head (2) piston rod (3), and piston (1) from cylinder<br />
housing (6).<br />
Install piston rod (3) in vise.<br />
Remove safety wire (10) from piston rod (3) and nut (11). Discard safety wire (10).<br />
Remove nut (11), washer (12), retainer washer (13), piston (1), and packing (16) from piston rod (3).<br />
Discard packing (16).<br />
Remove two piston rings (15) and cup seal (14) from piston (1). Discard piston rings (15) and cup<br />
seal (14).<br />
Remove cylinder head (2) from piston rod (3).<br />
Using spanner wrench, remove packing nut (21) from cylinder head (2).<br />
Remove seal (22) from packing nut (21). Discard seal (22).<br />
Remove piston rod packing (20) and packing (18) from cylinder head (2). Discard piston rod<br />
packing (20) and packing (18).<br />
Using arbor press, remove bearing sleeve (19) from cylinder head (2). Discard bearing sleeve (19).<br />
Remove piston rod (3) from vise.<br />
c. Cleaning and Inspection<br />
1.<br />
2.<br />
3.<br />
4.<br />
5.<br />
6.<br />
For general cleaning instructions, refer to para. 2-8.<br />
For general inspection instructions, refer to para. 2-9.<br />
Inspect piston rod (3) for bends, burrs, scratches, and damaged threads. Repair damaged threads.<br />
Replace piston rod (3) if bent, burred, or scratched.<br />
Inspect two bushings (17) in piston rod trunnion (5) for nicks, scratches, cracks, and wear. Measure<br />
inside diameter of bushing(s) (17). If nicked, scratched, cracked, or inside diameter exceeds<br />
1.5030 in. (38. 18mm), replace bushing(s) (17).<br />
Inspect piston (1) for nicks, burrs, and scratches. Replace piston (1) if nicked, burred, or scratched.<br />
Inspect cylinder housing (6) for cracks or scoring. Replace cylinder housing (6) if cracked, scored, or<br />
threads are damaged.<br />
16-84
<strong>TM</strong> 9-<strong>2320</strong>-<strong>260</strong>-<strong>34</strong>-2<br />
16-14. BOOM ELEVATING CYLINDERS MAINTENANCE (M816) (Contd)<br />
16-85
<strong>TM</strong> 9-<strong>2320</strong>-<strong>260</strong>-<strong>34</strong>-2<br />
16-14. BOOM ELEVATING CYLINDERS MAINTENANCE (M186) (Contd)<br />
1.<br />
2.<br />
3.<br />
4.<br />
5.<br />
6.<br />
7.<br />
8.<br />
9.<br />
10.<br />
11.<br />
12.<br />
13.<br />
14.<br />
15.<br />
16.<br />
17.<br />
18.<br />
19.<br />
Install new seal (16) on packing nut (15).<br />
Coat piston rod (11) with lubricating oil and install packing nut (15) on piston rod (11).<br />
Using bearing replacer and handle, install new bearing sleeve (13) in cylinder head (9).<br />
Coat new piston rod packing (14) with GAA grease and install in cylinder head (9). Ensure elements<br />
of piston rod packing (14) face away from toothed end of cylinder head (9).<br />
Install new packing (12) on cylinder head (9).<br />
Install cylinder head (9) on piston rod (11).<br />
Using spanner wrench, install packing nut (15) on cylinder head (9). Tighten packing nut (15) until<br />
a distance of 0.125 in. (3.18 mm) remains.<br />
Place piston rod trunnion (10) in vise.<br />
Coat two new piston rings (6) with GAA grease and install on piston (7).<br />
Install new cup seal (5) on piston (7).<br />
Install new packing (8), piston (7), retainer washer (4), and washer (3) on piston rod (11) with<br />
nut (2).<br />
Install new safety wire (1) on piston rod (11) and nut (2).<br />
Remove piston rod (11) from vise.<br />
Coat bore of cylinder housing (18) with lubricating oil.<br />
NOTE<br />
Assistant will help with step 15.<br />
Insert piston (7) and piston rod (11) in cylinder housing (18). Ensure piston ring seals (6) stay seated<br />
and do not fold over.<br />
Using spanner wrench, install cylinder head (9) on cylinder housing (18).<br />
Wrap male threads of elbow (19) and check valve (20) with antiseize tape.<br />
Install elbow (19) and check valve (20) on cylinder housing (18). Tighten to previously recorded<br />
position.<br />
Install grease fittings (17) on cylinder housing trunnion (21) and piston rod trunnion (10).<br />
16-86
<strong>TM</strong> 9-<strong>2320</strong>-<strong>260</strong>-<strong>34</strong>-2<br />
16-14. BOOM ELEVATING CYLINDERS MAINTENANCE (M186) (Contd)<br />
16-87
<strong>TM</strong> 9-<strong>2320</strong>-<strong>260</strong>-<strong>34</strong>-2<br />
16-14. BOOM ELEVATING CYLINDERS MAINTENANCE (M816) (Contd)<br />
WARNING<br />
● All personnel must stand clear during lifting operations.<br />
A swinging or shifting load may cause injury to personnel.<br />
● Ensure lifting capacity is greater than weight (160 lb (73 kg)) of<br />
boom elevating cylinders. Failure to do so may result in injury to<br />
personnel or damage to equipment.<br />
1.<br />
2.<br />
3.<br />
4.<br />
5.<br />
6.<br />
7.<br />
8.<br />
NOTE<br />
Assistant will help with installation task.<br />
Install chain to elevating cylinder (2) and lifting device.<br />
Raise elevating cylinder (2) and position on brackets (3) and (14).<br />
Install cylinder housing trunnion (12) on bracket (14) with pin (15) and new cotter pin (13).<br />
Install piston rod trunnion (8) on bracket (3) with keeper pin (4), washer (5), new lockwasher (6),<br />
and screw (7).<br />
Remove lifting device and chain from elevating cylinder (2).<br />
Wrap male threads of hoses (9) and elbows (1) and (11) with anti seize tape.<br />
Connect hose (16) to elbow (11).<br />
Connect hose (9) to check valve (10) and elbow (1).<br />
16-88
<strong>TM</strong> 9-<strong>2320</strong>-<strong>260</strong>-<strong>34</strong>-2<br />
16-14. BOOM ELEVATING CYLINDERS MAINTENANCE (M816) (Contd)<br />
9. Install chain on boom (17) and attach to lifting device.<br />
10. Release shipper braces (18) from wrecker body (19) and install on boom (17).<br />
11. Remove chain and lifting device from boom (17).<br />
FOLLOW-ON TASKS: ● Start engine and check for leaks (<strong>TM</strong> 9-<strong>2320</strong>-<strong>260</strong>-10).<br />
● Check crane operation (<strong>TM</strong> 9-<strong>2320</strong>-<strong>260</strong>-10).<br />
● Install gondola guard (left elevating cylinder) (<strong>TM</strong> 9-<strong>2320</strong>-<strong>260</strong>-10).<br />
16-89
<strong>TM</strong> 9-<strong>2320</strong>-<strong>260</strong>-<strong>34</strong>-2<br />
16-15. HOIST WINCH MOTOR REPLACEMENT (M816)<br />
THIS TASK COVERS:<br />
a. Removal b. Installation<br />
APPLICABLE MODELS<br />
M816<br />
TOOLS<br />
General mechanic’s tool kit<br />
(Appendix B, Item 1)<br />
1-1/2-in. open-end wrench<br />
(Appendix B, Item 125)<br />
MATERIALS/PARTS<br />
Locknut (Appendix D, Item 177)<br />
Woodruff key (Appendix D, Item 561)<br />
Gasket (Appendix D, Item 84)<br />
Four lockwashers (Appendix D, Item 223)<br />
Cap and plug set (Appendix C, Item 6)<br />
Antiseize tape (Appendix C, Item 50)<br />
REFERENCES (<strong>TM</strong>)<br />
LO 9-<strong>2320</strong>-<strong>260</strong>-12<br />
<strong>TM</strong> 9-<strong>2320</strong>-<strong>260</strong>-10<br />
<strong>TM</strong> 9-<strong>2320</strong>-<strong>260</strong>-<strong>34</strong>P-2<br />
EQUIPMENT CONDITION<br />
Ž Parking brake set (<strong>TM</strong> 9-<strong>2320</strong>-<strong>260</strong>-10).<br />
● Boom raised and supported (<strong>TM</strong> 9-<strong>2320</strong>-<strong>260</strong>-10).<br />
GENERAL SAFETY INSTRUCTIONS<br />
● All personnel must stand clear during lifting<br />
operations.<br />
● Ensure lifting capacity is greater than weight<br />
of boom.<br />
a. Removal<br />
WARNING<br />
● All personnel must stand clear during lifting operations.<br />
A swinging or shifting load may cause injury to personnel.<br />
● Ensure lifting capacity is greater than weight (2820 lb (1280 kg))<br />
of raised boom, Failure to do so may result in injury to personnel<br />
or damage to equipment.<br />
CAUTION<br />
● Clean area around hoses and lines before removal to prevent<br />
entry of dirt. Damage will occur if dirt or dust enters system.<br />
● Cap or plug all openings immediately after disconnecting hoses<br />
to prevent contamination. Failure to do so may result in damage<br />
to hydraulic components.<br />
NOTE<br />
● Tag hoses and positions of fittings for installation.<br />
Ž Have drainage container ready to catch oil.<br />
1. Remove locknut (8) and clamp (7) from hoses (13) and (14) and boom (9). Discard locknut (8),<br />
2. Disconnect hoses (13) and (14) from elbows (1) and (16).<br />
3. Remove four screws (1 1), lockwashers (12), winch hydraulic motor (2), gasket (5), and coupling (6)<br />
from hydraulic winch (10). Discard lockwashers (12) and gasket (5).<br />
4. Remove woodruff key (3) from shaft (4) of winch hydraulic motor (2). Discard woodruff key (3).<br />
5. Remove elbows (1) and (16) from winch hydraulic motor (2).<br />
16-90
<strong>TM</strong> 9-<strong>2320</strong>-<strong>260</strong>-<strong>34</strong>-2<br />
16-15. HOIST WINCH MOTOR REPLACEMENT (M816) (Contd)<br />
1.<br />
2.<br />
3.<br />
4.<br />
5.<br />
6.<br />
7.<br />
Wrap male threads on elbows (1) and (16) with antiseize tape.<br />
Install elbows (1) and (16) on winch hydraulic motor (2).<br />
Position coupling (6) on shaft (15) of hydraulic winch (10).<br />
Install new woodruff key (3) on shaft (4) of winch hydraulic motor (2).<br />
Install new gasket (5) and winch hydraulic motor (2) on hydraulic winch (10) with four new<br />
lockwashers (12) and screws (11).<br />
Install hoses (13) and (14) on elbows (1) and (16).<br />
Install clamp (7) on hoses (13) and (14) and boom (9) with new locknut (8).<br />
FOLLOW-ON TASKS: Ž Fill hydraulic oil reservoir (LO 9-<strong>2320</strong>-<strong>260</strong>-12).<br />
● Start engine and check crane winch operation (<strong>TM</strong> 9-<strong>2320</strong>-<strong>260</strong>-10).<br />
16-91
<strong>TM</strong> 9-<strong>2320</strong>-<strong>260</strong>-<strong>34</strong>-2<br />
16-16. HOIST LEVEL WIND MAINTENANCE (M816)<br />
THIS TASK COVERS:<br />
a. Removal d. Assembly<br />
b. Disassembly e. Installation<br />
c. Cleaning and Inspection<br />
INITAL SETUP<br />
APPLICABLE MODELS<br />
MATERIALS/PARTS (Contd)<br />
M816 Cotter pin (Appendix D, Item 49)<br />
TOOLS<br />
GM grease (Appendix C, Item 14)<br />
General mechanic’s tool kit<br />
REFERENCES (<strong>TM</strong>)<br />
(Appendix B, Item 1)<br />
Mechanical puller kit (Appendix B, Item 14)<br />
LO 9-<strong>2320</strong>-<strong>260</strong>-12<br />
<strong>TM</strong> 9-<strong>2320</strong>-<strong>260</strong>-10<br />
Arbor press (Appendix B, Item 7)<br />
<strong>TM</strong> 9-<strong>2320</strong>-<strong>260</strong>-<strong>34</strong>P-2<br />
Inside micrometer (Appendix B, Item 9)<br />
EQUIPMENT CONDITION<br />
MATERIALS/PARTS Parking brake set (<strong>TM</strong> 9-<strong>2320</strong>-<strong>260</strong>-10).<br />
Sleeve bearing (Appendix D, Item 5)<br />
Four locknuts (Appendix D, Item 170)<br />
Front and rear level winds are maintained the same. This<br />
procedure covers the rear level wind.<br />
Remove four locknuts (2), screws (9), and two brackets (4) from boom (1). Discard locknuts (2).<br />
1. Remove grease fitting (8) from shaft (7).<br />
2. Remove cotter pin (3), two brackets (4), and roller (5) from shaft (7). Discard cotter pin (3).<br />
c. Cleaning and Inspection<br />
1.<br />
2.<br />
3.<br />
4.<br />
5.<br />
6.<br />
For general cleaning instructions, refer to para. 2-8.<br />
Inspect shaft (7) and roller (5) for bends, breaks, and wear. Replace shaft (7) and roller (5) if bent,<br />
broken, or worn.<br />
Measure inside diameter of sleeve bearings (6). Replace sleeve bearings (6) if inside diameter<br />
exceeds 1.00 ± .003 in. (25.4 ± .08 mm) for steel or 1.005 ± .001 in. (25.53 ± .03 mm) for bronze.<br />
NOTE<br />
Perform steps 4 through 6 if sleeve bearing(s) require replacement.<br />
Using puller, remove sleeve bearing(s) (6) from roller (5). Discard sleeve bearing(s) (6).<br />
Coat new sleeve bearing(s) (6) with GAA grease.<br />
Using arbor press, install sleeve bearing(s) (6) in roller (5).<br />
16-92
<strong>TM</strong> 9-<strong>2320</strong>-<strong>260</strong>-<strong>34</strong>-2<br />
16-16. HOIST LEVEL WIND MAINTENANCE (M816] (Contd)<br />
1. Apply a light coat of GAA grease on shaft (7).<br />
2. Install roller (5) and two braces (4) on shaft (7) with new cotter pin (3).<br />
3, Install grease fitting (8) on shaft (7).<br />
Install two brackets (4) on boom (1) with four screws (9) and new locknuts (2).<br />
FOLLOW-ON TASK: Lubricate hoist level wind (LO 9-<strong>2320</strong>-<strong>260</strong>-12).<br />
16-93
<strong>TM</strong> 9-<strong>2320</strong>-<strong>260</strong>-<strong>34</strong>-2<br />
16-17. HOIST WINCH MAINTENANCE (M816)<br />
THIS TASK COVERS:<br />
a. Removal d. Assembly<br />
b. Disassembly e. Installation<br />
c. Cleaning and Inspection<br />
lNITIAL SETUP<br />
APPLICABLE MODELS<br />
M816<br />
TOOLS<br />
General mechanic’s tool kit<br />
(Appendix B, Item 1)<br />
Mechanical puller kit (Appendix B, Item 14)<br />
Inside micrometer (Appendix B, Item 9)<br />
Outside micrometer (Appendix B, Item 8)<br />
Dial indicator (Appendix B, Item 11)<br />
Soft-head hammer (Appendix B, Item 47)<br />
Chain<br />
Lifting device<br />
MATERIALS/PARTS<br />
Ten lockwashers (Appendix D, Item 247)<br />
Fifteen lockwashers (Appendix D, Item 223)<br />
Twelve lockwashers (Appendix D, Item 218)<br />
Gasket (Appendix D, Item 90)<br />
Gasket (Appendix D, Item 112)<br />
Gasket (Appendix D, Item 95)<br />
Gasket (Appendix D, Item 97)<br />
Two seals (Appendix D, Item 427)<br />
Seal (Appendix D, Item 464)<br />
Shim (Appendix D, Item 493)<br />
Four woodruff keys (Appendix D, Item 544)<br />
Woodruff key (Appendix D, Item 554)<br />
Woodruff key (Appendix D, Item 563)<br />
MATERIALS/PARTS (Contd)<br />
Woodruff key (Appendix D, Item 561)<br />
Six screw-assembled lockwashers<br />
(Appendix D, Item 382)<br />
Gear lubricating oil (Appendix C, Item 22)<br />
GAA grease (Appendix C, Item 14)<br />
REFERENCES (<strong>TM</strong>)<br />
LO 9-<strong>2320</strong>-<strong>260</strong>-12<br />
<strong>TM</strong> 9-<strong>2320</strong>-<strong>260</strong>-10<br />
<strong>TM</strong> 9-<strong>2320</strong>-<strong>260</strong>-20<br />
<strong>TM</strong> 9-<strong>2320</strong>-<strong>260</strong>-<strong>34</strong>P-2<br />
EQUIPMENT CONDITION<br />
● Hoist gear reducer and hoist gearcase oil drained<br />
(LO 9-<strong>2320</strong>-<strong>260</strong>-12).<br />
● Hoist winch cable removed (<strong>TM</strong> 9-<strong>2320</strong>-<strong>260</strong>-20).<br />
● Floodlight wiring harness removed<br />
(<strong>TM</strong> 9-<strong>2320</strong>-<strong>260</strong>-20).<br />
● Hoist winch motor removed (para. 16-15).<br />
● Hoist level wind removed (para. 16-16).<br />
GENERAL SAFETY CONDITIONS<br />
• All personnel must stand clear during lifting<br />
operations.<br />
● Ensure lifting capacity is greater than weight of<br />
hoist winch.<br />
1.<br />
Position chain around hoist winch (4) and attach to lifting device. Take up tension in chain.<br />
WARNING<br />
2.<br />
3.<br />
4.<br />
● All personnel must stand clear during lifting operations.<br />
A swinging or shifting load may cause injury to personnel.<br />
● Ensure lifting capacity is greater than weight (400 lb (182 kg))<br />
of hoist winch. Failure to do so may result in injury to personnel<br />
or damage to equipment.<br />
NOTE<br />
Assistant will help with steps 2 and 3.<br />
Remove twelve screws (3), lockwashers (2), and hoist winch (4) from boom (1). Discard<br />
lockwashers (2).<br />
Lower hoist winch (4) from boom (1) and remove hoist winch (4) from vehicle.<br />
Remove lifting device and chain from hoist winch (4).<br />
16-94
<strong>TM</strong> 9-<strong>2320</strong>-<strong>260</strong>-<strong>34</strong>-2<br />
16-17. HOIST WINCH MAINTENANCE (M816) (Contd)<br />
1.<br />
2.<br />
3,<br />
4.<br />
5.<br />
6,<br />
7.<br />
8.<br />
9.<br />
10.<br />
11.<br />
Remove four screws (5) and lockwashers (6), adapter (27), and gasket (7) from cover (26). Discard<br />
lockwashers (6) and gasket (7).<br />
Remove woodruff key (9) from input shaft (10). Discard woodruff key (9).<br />
Remove ten screws (24), lockwashers (25), cover (26), and gasket (11) from housing (16). Discard<br />
lockwashers (25) and gasket (11).<br />
Remove bearing (12) from cover (26).<br />
Remove input shaft gear (8) and input shaft (10) from housing (16).<br />
Remove input shaft gear (8) from input shaft (10).<br />
Remove snapring (19) from wormshaft (23).<br />
Using puller, remove drive gear (20) from wormshaft (23).<br />
Remove woodruff key (13) from wormshaft (23). Discard woodruff key (13).<br />
Remove four screws (18), lockwashers (17), housing (16), and gasket (15) from gearcase (14). Discard<br />
lockwashers (17) and gasket (15).<br />
Remove bearing (21) and seal (22) from housing (16). Discard seal (22).<br />
16-95
<strong>TM</strong> 9-<strong>2320</strong>-<strong>260</strong>-<strong>34</strong>-2<br />
16-17. HOIST WINCH MAINTENANCE (M816) (Contd)<br />
12.<br />
13.<br />
14.<br />
15.<br />
16.<br />
17.<br />
18.<br />
19.<br />
20.<br />
21.<br />
22.<br />
NOTE<br />
Record thickness of shim(s) for assembly.<br />
Remove screw (6), lockwasher (7), washer (5), shim(s) (8), and bracket (9) from drum shaft (2).<br />
Discard shim(s) (8) and lockwasher (7).<br />
Remove thrust washer (10) and drum (11) from drum shaft (2).<br />
Remove two woodruff keys (4) and thrust washer (12) from drum shaft (2). Discard woodruff keys (4).<br />
Remove screw (13), plate (14), and gasket (3) from drum shaft (2) and gearcase (1). Discard gasket (3).<br />
Remove six screw-assembled lockwashers (26), cover (27), and gasket (28) from brake housing (25).<br />
Discard screw-assembled lockwashers (26) and gasket (28).<br />
Remove screw (31), washer, (32), seal (33), spring (30), and brake band (29) from brakedrum (18) and<br />
brake housing (25). Discard seal (33).<br />
Remove screw (15), lockwasher (16), and washer (17) from brakedrum (18) and wormshaft (22).<br />
Using puller, remove brakedrum ( 18) from worm shaft (22) and brake housing (25).<br />
Remove woodruff key (23) from worm shaft (22). Discard woodruff key (23).<br />
NOTE<br />
Mark brake housing and gearcase for assembly.<br />
Remove four screws (19) and lockwashers (20), brake housing (25), and gasket (21) from gearcase (1).<br />
Discard lockwashers (20) and gasket (21).<br />
Remove seal (24) from brake housing (25). Discard seal (24).<br />
16-96
<strong>TM</strong> 9-<strong>2320</strong>-<strong>260</strong>-<strong>34</strong>-2<br />
16-17. HOIST WINCH MAINTENANCE (M816) (Contd)<br />
I<br />
23.<br />
24.<br />
25.<br />
26.<br />
27.<br />
28.<br />
29.<br />
30.<br />
31.<br />
32.<br />
Using soft-head hammer, tap on end of wormshaft (<strong>34</strong>) to drive bearing (35) from bore of<br />
gearcase (1).<br />
Using puller, remove bearing (35) from wormshaft (<strong>34</strong>).<br />
Aline bearing (47) with bore of gearcase (1). Using softhead hammer, tap opposite end of worm<br />
shaft (<strong>34</strong>) and remove wormshaft (<strong>34</strong>) with bearing (47) from gearcase (1).<br />
Use puller or arbor press to remove bearing (47) from wormshaft (<strong>34</strong>).<br />
Remove screw (44), lockwasher (43), and washer (42) from drum shaft (2) and cover (37). Discard<br />
lockwasher (43).<br />
Remove four screws (39) and lockwashers (40), screws (38), cover (37), and gasket (36) from<br />
gearcase (1). Discard lockwashers (40) and gasket (36).<br />
Remove seal (41) from cover (37). Discard seal (41).<br />
Using softhead hammer, tap on drum end of drum shaft (2) to remove drum shaft (2) and worm<br />
gear (45) from gearcase (1).<br />
Using arbor press, remove worm gear (45) from drum shaft (2).<br />
Remove two woodruff keys (46) from drum shaft (2). Discard woodruff keys (46).<br />
16-97
<strong>TM</strong> 9-<strong>2320</strong>-<strong>260</strong>-<strong>34</strong>-2<br />
16-17. HOIST WINCH MAINTENANCE (M816) (Contd)<br />
I<br />
c. Cleaning and Inspection<br />
1. For general cleaning instructions, refer to para. 2-8.<br />
2. For general inspection instructions, refer to para. 2-9.<br />
3. Inspect drum shaft (3), input shaft(s), and wormshafts (4) for bends, cracks, breaks, chips, and wear.<br />
Refer to table 16-12, Hoist Winch Wear Limits, for measurements. Replace drum shaft (3), input<br />
shaft (5), and wormshaft (4) if damaged or worn.<br />
4. Inspect drum (9), cover (7), gearcase (6), bracket (2), and plate (1) for cracks, bends, damaged<br />
threads, and wear. Refer to table 16-12, Hoist Winch Wear Limits, for measurements. Replace<br />
drum (9), cover (7), gearcase (6), bracket (2), and plate (1), if damaged or worn.<br />
5. Inspect gearcase bearings (7) and thrust washers (10) for wear. Refer to table 16-12, Hoist Winch<br />
Wear Limits, for measurements, Replace gearcase bearings (8) and thrust washers (10) if worn.<br />
6. Inspect worm gear (11) and input shaft gear (12) for cracks, nicks, burrs, ridged, chipped, broken<br />
teeth, or particles in teeth of worm gear (11). Refer to table 16-12, Hoist Winch Wear Limits, for<br />
measurements. Replace worm gear (11) and input shaft gear (12), if damaged or worn.<br />
Table 16-12. Hoist Winch Wear Limits.<br />
ITEM WEAR LIMITS/TOLERANCES<br />
ITEM/POINT OF MEASUREMENT<br />
NO.<br />
INCHES<br />
MILLIMETERS<br />
1,2 Shaft support (2)<br />
Inner diameter – bushing – maximum 2.130 54.10<br />
3 Drum shaft<br />
Outer diameter – four places – minimum 2.123 53.92<br />
4 Wormshaft<br />
Outer diameter – bearing journal – minimum 1.771 44.98<br />
Outer diameter – sealing surface – minimum 1.765 44.83<br />
5 Input shaft – outer diameter – minimum 1.746 43.35<br />
6 Gearcase<br />
Inner diameter – bushing – maximum 2.130 54.10<br />
Width – cover edge to hub 4.469 113.51<br />
Inner diameter – bearing bores (2) – maximum 3.937 100.00<br />
7 Cover<br />
Inner diameter – bushing – maximum 2.130 54.10<br />
Width – bushing hub – minimum 2.000 50.8<br />
8 Bearings (2)<br />
Inner diameter – inner race – maximum 1.771 44.98<br />
Outer diameter – outer race – minimum 3.936 99.97<br />
9 Drum - outer diameter – minimum 4.992 126.80<br />
10 Thrust washers (2) – thickness – minimum 0.062 1.57<br />
11 Worm gear – width – hub - minimum 2.492 63.30<br />
12 Input shaft gear 1.88 47.75<br />
16-98
<strong>TM</strong> 9-<strong>2320</strong>-<strong>260</strong>-<strong>34</strong>-2<br />
16-17. HOIST WINCH MAINTENANCE (M816) (Contd)<br />
16-99
<strong>TM</strong> 9-<strong>2320</strong>-<strong>260</strong>-<strong>34</strong>-2<br />
16-17. HOIST WINCH MAINTENANCE (M816) (Contd)<br />
d. Assembly<br />
NOTE<br />
● Coat all internal hoist winch parts with lubrication oil before<br />
installation.<br />
● Coat inside lips of seals with GAA grease before installation.<br />
1.<br />
2.<br />
3.<br />
4.<br />
5.<br />
6.<br />
7.<br />
8.<br />
9.<br />
10.<br />
11.<br />
12.<br />
Install two new woodruff keys (14) on drum shaft (15).<br />
Using arbor press, install drum shaft (15) in worm gear ( 13) until drum shaft ( 15) extends 2.50 in.<br />
(63.5 mm) from face of hub.<br />
Insert drum shaft (15) through gearcase (2) until hub is seated.<br />
Using arbor press, install bearing (16) on worm shaft (1). Ensure bearing (16) seats on shoulder of<br />
wormshaft ( 1).<br />
Insert wormshaft ( 1) into gearcase (2).<br />
Using arbor press, install bearing (3) into bore of gearcase (2) until seated on shoulder of wormshaft<br />
(1), flush with face of gearcase.<br />
Install dial indicator on gearcase (2), and measure backlash of worm gear ( 13) and worm shaft (1).<br />
Backlash should be 0.006-0.010 in. (0. 15-0.25 mm). Replace worm gear (13) if backlash is not within<br />
limits.<br />
Using arbor press, install new seal (9) in cover (5).<br />
Install new gasket (4) and cover (5) on gearcase (2) with four screws (6), new lockwashers (8), and<br />
screws (7).<br />
Install washer (10) and new lockwasher (12) on cover (5) and drum shaft (15) with screw (11).<br />
Install dial indicator on gearcase (2).<br />
Check end play of drum shaft (15).<br />
a. End play should be 0.005-0.015 in. (0,13-0.38 mm).<br />
b. If end play is less than 0.005 in. (O. 13 mm), remove cover (5) and remove gasket(s) (4). Recheck<br />
end play.<br />
c. If end play is more than 0.015 in. (0.38 mm), remove cover (5) and add gasket(s) (4). Install<br />
cover (5) on drum shaft (15) and recheck end play.<br />
16-100
<strong>TM</strong> 9-<strong>2320</strong>-<strong>260</strong>-<strong>34</strong>-2<br />
16-17. HOIST WINCH MAINTENANCE (M816) (Contd)<br />
13.<br />
14.<br />
15.<br />
16.<br />
17.<br />
18.<br />
19.<br />
20.<br />
21.<br />
Install new seal (25) in brake housing (26),<br />
Install new gasket (23) and brake housing (26) on gearcase (2) with four new lockwashers (22), and<br />
screws (21).<br />
Install new woodruff key (24) on worm shaft ( 1).<br />
Install brakedrum (20) on wormshaft (1) with washer (19), new Iockwashers (18), and screw (17).<br />
Install brake band (30) and spring (31) on brake housing (26) and brakedrum (20) with new<br />
seal (<strong>34</strong>), washer (33), and screw (32).<br />
Install new gasket (29) and cover (28) on brake housing (26) with six new screw-assembled<br />
lockwashers (27).<br />
Install new gasket (35) and plate (46) on gearcase (2) and drum shaft (15) with screw (45).<br />
Install two new woodruff keys (36) on drum shaft (15).<br />
Install thrust washer (44) and drum (43) on drum shaft (15). Tap with soft-head hammer to seat<br />
drum (43) against thrust washer (44) on plate (46).<br />
22.<br />
NOTE<br />
Ensure shims are installed to prerecorded thickness.<br />
Install thrust washer (42), bracket (41), and shim(s) (40) on drum shaft (15)<br />
lockwashers (39), and screw (38).<br />
with washer (37), new<br />
16-101
<strong>TM</strong> 9-<strong>2320</strong>-<strong>260</strong>-<strong>34</strong>-2<br />
16-17. HOIST WINCH MAINTENANCE (M816) (Contd)<br />
23.<br />
24.<br />
25.<br />
26.<br />
27.<br />
28.<br />
29.<br />
30.<br />
31.<br />
32.<br />
33.<br />
Install new seal (18) and bearing (17) on housing (12).<br />
Install new gasket (11) and housing (12) on gearcase (10) with four new lockwashers (13) and<br />
Screws (14).<br />
Install new woodruff key (9) in wormshaft (19).<br />
Using puller, install drive gear (16) on wormshaft (19).<br />
Install snapring (15) on wormshaft (19).<br />
Install input shaft gear (4) on input shaft (6).<br />
Install input shaft (6) and input shaft gear (4) on housing (12).<br />
Install bearing (8) on cover (20).<br />
Install new gasket (7) and cover (20) on housing (12) with ten new lockwashers (22) and screws (21).<br />
Install new woodruff’ key (5) in input shaft (6).<br />
Install new gasket (3) and adapter (23) on cover (20) with four new lockwashers (2) and screws (1).<br />
16-102
<strong>TM</strong> 9-<strong>2320</strong>-<strong>260</strong>-<strong>34</strong>-2<br />
16-17. HOIST WINCH MAINTENANCE (M816) (Contd)<br />
e. Installation<br />
1. Install chain on hoist winch (27) and attach to lifting device.<br />
WARNING<br />
● All personnel must stand clear during lifting operations.<br />
A swinging or shifting load may cause injury to personnel.<br />
● Ensure lifting capacity is greater than weight (400 lb (182 kg))<br />
of hoist winch. Failure to do so may result in injury to personnel<br />
or damage to equipment.<br />
NOTE<br />
Assistant will help with steps 2 and 3.<br />
2. Raise hoist winch (27) and position on boom (24).<br />
3. Install hoist winch (27) on boom (24) with twelve new lockwashers (25) and screws (26).<br />
FOLLOW-ON TASKS: ● Install hoist level wind (para. 16-16).<br />
● Install hoist winch motor (para. 16-15).<br />
● Install floodlight wiring harness (<strong>TM</strong> 9-<strong>2320</strong>-<strong>260</strong>-20).<br />
● Fill gear reducer and hoist winch gearcase with gear oil (LO 9-<strong>2320</strong>-<strong>260</strong>-12).<br />
● Start engine and check hoist winch operation (<strong>TM</strong> 9-<strong>2320</strong>-<strong>260</strong>-10).<br />
● Install hoist winch cable (<strong>TM</strong> 9-<strong>2320</strong>-<strong>260</strong>-20).<br />
16-103
<strong>TM</strong> 9-<strong>2320</strong>-<strong>260</strong>-<strong>34</strong>-2<br />
16-18. BOOM ASSEMBLY REPLACEMENT (M816)<br />
THIS TASK COVERS:<br />
a. Removal b. Installation<br />
INITIALSETUP<br />
APPLICABLE MODELS<br />
M816<br />
TOOLS<br />
General mechanic’s tool kit<br />
(Appendix B, Item 1)<br />
3/4-in. torque wrench (Appendix B, Item 2)<br />
1-5/8-in. socket, 3/4-in. dr.<br />
(Appendix B, Item 102)<br />
1-718-in. socket, 3/4-in. dr.<br />
(Appendix B, Item 135)<br />
Torque multiplier<br />
Blocking<br />
Two chains<br />
Lifting device<br />
Guide lines<br />
MATERIALS/PARTS<br />
Two lockwashers (Appendix D. Item 223)<br />
Locknut (Appendix D, Item 202)<br />
GM grease (Appendix C, Item 14)<br />
Antiseize tape (Appendix C, Item 50)<br />
Cap and plug set (Appendix C, Item 6)<br />
PERSONNEL REQUIRED<br />
Two<br />
a. Removal<br />
●<br />
●<br />
WARNING<br />
REFERENCES (<strong>TM</strong>)<br />
LO 9-<strong>2320</strong>-<strong>260</strong>-12<br />
<strong>TM</strong> 9-<strong>2320</strong>-<strong>260</strong>-10<br />
<strong>TM</strong> 9-<strong>2320</strong>-<strong>260</strong>-20<br />
<strong>TM</strong> 9-<strong>2320</strong>-<strong>260</strong>-<strong>34</strong>P-2<br />
EQUIPMENT CONDITION<br />
● Hydraulic reservoir drained (LO 9-<strong>2320</strong>-<strong>260</strong>-12).<br />
● Hoist winch cable removed (<strong>TM</strong> 9-<strong>2320</strong>-<strong>260</strong>-20).<br />
Operator guard removed (<strong>TM</strong> 9-<strong>2320</strong>-<strong>260</strong>-20).<br />
● Pioneer tool bracket removed (<strong>TM</strong> 9-<strong>2320</strong>-<strong>260</strong>-20).<br />
● Floodlight housing and mount removed<br />
(<strong>TM</strong> 9-<strong>2320</strong>-<strong>260</strong>-20).<br />
GENERAL SAFETY INSTRUCTIONS<br />
● All personnel must stand clear during lifting<br />
operations.<br />
● Keep hands clear during removal and installation<br />
of boom.<br />
● Ensure lifting capacity is greater than weight of<br />
boom assembly.<br />
All personnel must stand clear during lifting operations.<br />
A swinging or shifting load may cause injury to personnel.<br />
Ensure lifting capacity is greater than weight of boom assembly.<br />
Failure to do so may result in injury to personnel or damage to<br />
equipment.<br />
NOTE<br />
Two assistants will help with this procedure.<br />
1. Install chain on boom (1) and attach to lifting device.<br />
2. Wrap second chain around lower boom roller (4) and inner boom (3) to hold inner boom (3)<br />
in position.<br />
3. Raise boom (1) to remove weight from shipper braces (2).<br />
4. Remove two safety pins (5) and shipper braces (2) from boom (1).<br />
5. Remove two safety pins (6), pins (8), and shipper braces (2) from brackets (7).<br />
16-104
<strong>TM</strong> 9-<strong>2320</strong>-<strong>260</strong>-<strong>34</strong>-2<br />
16-18. BOOM ASSEMBLY REPLACEMENT (M816) (Contd)<br />
16-105
<strong>TM</strong> 9-<strong>2320</strong>-<strong>260</strong>-<strong>34</strong>-2<br />
16-18. BOOM ASSEMBLY REPLACEMENT (M816) (Contd)<br />
6.<br />
7.<br />
8.<br />
9.<br />
10.<br />
11.<br />
●<br />
●<br />
CAUTION<br />
Clean area around hoses and lines before removal to prevent<br />
entry of dirt. Damage will occur if dirt or dust enters system.<br />
Cap or plug all openings immediately after disconnecting lines<br />
and hoses to prevent contamination. Remove caps or plugs<br />
prior to installation. Failure to do so may result in damage to<br />
equipment.<br />
NOTE<br />
● Tag all lines and hoses for installation.<br />
● Have drainage container ready to catch hydraulic fluid.<br />
Disconnect two hoses (4) from lines (1).<br />
Disconnect two hoses (3) from elbows (2).<br />
Install two chains on brackets (6) and boom (5) and attach to lifting device.<br />
Remove two screws (9), lockwashers (8), washers (10), keeper pins (7), and elevating cylinders (11)<br />
from brackets (6) and boom (5). Discard lockwashers (8).<br />
Remove two grease fittings (12) and locknut (15) from shaft pin (13). Discard locknut (15).<br />
NOTE<br />
It may be necessary to adjust lifting device to remove weight from<br />
boom during step 11.<br />
Using hammer and drift, remove shaft pin (13) and sheave (16) from boom (5) and boom<br />
support (14).<br />
WARNING<br />
12.<br />
13.<br />
14.<br />
15.<br />
16.<br />
17.<br />
● All personnel must stand clear during lifting operations.<br />
A swinging or shifting load may cause injury to personnel.<br />
● Keep hands clear of boom and boom support when removing<br />
boom.<br />
● Use pry bar to maneuver boom from position. Failure to do so<br />
may cause injury to personnel.<br />
● Ensure lifting capacity is greater than weight (2850 lb (1300 kg))<br />
of boom assembly. Failure to do so may result in injury to personnel<br />
or damage to equipment.<br />
Install guide line around inner boom (17).<br />
Direct three assistants to support elevating cylinders (11) and guide line.<br />
Raise boom (5) from boom support (14) and elevating cylinders (11). Direct assistants to lower<br />
elevating cylinders (11) and step away from vehicle.<br />
NOTE<br />
Ensure blocking is high enough to allow removal of hoist winch,<br />
if necessary.<br />
Remove boom (5) from vehicle, and position on blocking.<br />
Remove lifting device and chains from boom (5).<br />
Remove guide line and chain from inner boom (17) and boom (5).<br />
16-106
<strong>TM</strong> 9-<strong>2320</strong>-<strong>260</strong>-<strong>34</strong>-2<br />
16-18. BOOM ASSEMBLY REPLACEMENT (M816) (Contd)<br />
16-107
<strong>TM</strong> 9-<strong>2320</strong>-<strong>260</strong>-<strong>34</strong>-2<br />
16-18. BOOM ASSEMBLY REPLACEMENT (M816) (Contd)<br />
b. Installation<br />
1.<br />
2.<br />
3.<br />
NOTE<br />
Two assistants will help with this procedure.<br />
Install guide line around inner boom (1).<br />
Wrap chain around lower boom roller (4) and inner boom (1) to hold inner boom (1) in position.<br />
Install two chains on brackets (3) and boom (2) and attach to lifting device.<br />
WARNING<br />
4.<br />
5.<br />
6.<br />
7.<br />
8.<br />
9.<br />
10.<br />
● All personnel must stand clear during lifting operations.<br />
A swinging or shifting load may cause injury to personnel.<br />
● Keep hands clear of boom and boom support when installing<br />
boom. Use tanker or prybar to maneuver and aline boom into<br />
position. Failure to do so may cause injury to personnel.<br />
Ensure lifting capacity is greater than weight (2850 lb (1300 kg))<br />
of boom assembly. Failure to do so may result in injury to personnel<br />
or damage to equipment.<br />
NOTE<br />
Apply a light coat of GAA grease to trunnions of boom and boom<br />
support, shaft pin, and sheave prior to installation.<br />
Raise boom (2) from blocking. Direct assistants to guide boom (2) into position over boom<br />
support (13) and vehicle.<br />
Using drift, aline boom (2) in boom support (13).<br />
Using hammer and drift, install sheave (15) and shaft pin (12) in boom support (13) and boom (2).<br />
Install new locknut (14) and two grease fittings (11) on shaft pin (12). Tighten locknut (14)<br />
800-1000 lb-ft (1085-1356<br />
Direct three assistants to raise elevating cylinders (10). Lower boom (2) and position elevating<br />
cylinders (10) on brackets (5) and boom (2).<br />
Install elevating cylinders (10) on brackets (5) and boom (2) with two keeper pins (6),<br />
washers (9), new lockwashers (7), and screws (8).<br />
Lower boom (2) and remove lifting device, chains, and guide line from boom (2).<br />
16-108
<strong>TM</strong> 9-<strong>2320</strong>-<strong>260</strong>-<strong>34</strong>-2<br />
16-18. BOOM ASSEMBLY REPLACEMENT (M816) (Contd)<br />
16-109
<strong>TM</strong> 9-<strong>2320</strong>-<strong>260</strong>-<strong>34</strong>-2<br />
16-18. BOOM ASSEMBLY REPLACEMENT (M816) (Contd)<br />
WARNING<br />
11.<br />
12.<br />
13.<br />
14.<br />
15.<br />
16.<br />
17.<br />
● All personnel must stand clear during lifting operations.<br />
A swinging or shifting load may cause injury to personnel.<br />
● Ensure lifting capacity is greater than weight (2850 lb (1300 kg))<br />
of boom assembly. Failure to do so may result in injury or<br />
damage to equipment.<br />
Install chain on boom (7) and attach to lifting device.<br />
Install two shipper braces (8) on boom (7) with safety pins (3).<br />
Raise boom (7) slightly, and install shipper braces (8) on brackets (5) with two pins (6) and safety<br />
pins (4).<br />
Lower boom (7) and remove lifting device and chain from boom (7).<br />
Wrap male threads of two hoses (11) and (12) with antiseize tape.<br />
Connect two hoses (11) on elbows (10).<br />
Connect two hoses (12) on lines (9).<br />
16-110
<strong>TM</strong> 9-<strong>2320</strong>-<strong>260</strong>-<strong>34</strong>-2<br />
16-18. BOOM ASSEMBLY REPLACEMENT (M816) (Contd)<br />
FOLLOW-ON TASKS: Lubricate boom (LO 9-<strong>2320</strong>-<strong>260</strong>-12).<br />
● Fill hydraulic reservoir to proper oil level (LO 9-<strong>2320</strong>-<strong>260</strong>-12).<br />
Start engine and check for leaks and proper crane operation (<strong>TM</strong> 9-<strong>2320</strong>-<strong>260</strong>-10).<br />
Adjust upper and lower boom rollers (para. 16-13).<br />
● Install pioneer tool bracket (<strong>TM</strong> 9-<strong>2320</strong>-<strong>260</strong>-20).<br />
● Install operator guard (<strong>TM</strong> 9-<strong>2320</strong>-<strong>260</strong>-20).<br />
● Install hoist winch cable (<strong>TM</strong> 9-<strong>2320</strong>-<strong>260</strong>-20).<br />
● Install floodlight housing and mount (<strong>TM</strong> 9-<strong>2320</strong>-<strong>260</strong>-20).<br />
16-111
<strong>TM</strong> 9-<strong>2320</strong>-<strong>260</strong>-<strong>34</strong>-2<br />
16-19. INNER BOOM MAINTENANCE (M816)<br />
THIS TASK COVERS:<br />
a. Removal d. Assembly<br />
b. Disassembly e. Installation<br />
c. Cleaning and Inspection<br />
lNITIAL SETUP<br />
APPLICABLE MODELS<br />
M816<br />
TOOLS<br />
General mechanic’s tool kit<br />
(Appendix B, Item 1)<br />
Chain sling and spreader bar<br />
(Appendix B, Item 137)<br />
Outside micrometer (Appendix B, Item 8)<br />
Inside micrometer (Appendix B, Item 9)<br />
Jack stand<br />
Lifting device<br />
Chain<br />
Blocking<br />
MATERIALS/PARTS<br />
Eight Iockwashers (Appendix D, Item 223)<br />
Four Iockwashers (Appendix D, Item 224)<br />
Two locknuts (Appendix D, Item 172)<br />
Two cotter pins (Appendix D, Item 46)<br />
Cotter pin (Appendix D, Item 47)<br />
MATERIALS/PARTS (Contd)<br />
Cotter pin (Appendix D, Item 20)<br />
GAA grease (Appendix C, Item 14)<br />
PERSONNEL REQUIRED<br />
Two<br />
REFERENCES (<strong>TM</strong>)<br />
<strong>TM</strong> 9-237<br />
<strong>TM</strong> 9-<strong>2320</strong>-<strong>260</strong>-<strong>34</strong>P-2<br />
EQUIPMENT CONDITION<br />
Boom assembly removed (para. 16-18).<br />
GENERAL SAFETY lNSTRUCTIONS<br />
All personnel must stand clear during lifting<br />
operations.<br />
Ensure lifting capacity is greater than weight of<br />
inner boom.<br />
● The inner boom must be supported at all times to<br />
prevent unbalancing of boom.<br />
WARNING<br />
1.<br />
2.<br />
3.<br />
4.<br />
5.<br />
6.<br />
● All personnel must stand clear during lifting operations.<br />
A swinging or shifting load may cause injury or death to<br />
personnel.<br />
Ensure lifting capacity is greater than weight (700 lb (318 kg))<br />
of inner boom. Failure to do so may result in injury to personnel<br />
or damage to equipment.<br />
Attach chain and lifting device on inner boom (2).<br />
Raise inner boom (2) to remove weight from pin (4).<br />
Remove cotter pin (5) and pin (4) from extension cylinder (3) and boom (1). Discard cotter pin (5).<br />
Remove cotter pin (11) and grease fitting (15) from shaft (14). Discard cotter pin (11).<br />
Remove four screws (12), Iockwashers (13), cover (10), shaft (14), and inner boom roller (9) from<br />
boom (1). Discard Iockwashers (13).<br />
Remove eight screws (8), Iockwashers (7), and two stop plates (6) from boom (1). Discard<br />
Iockwashers (7).<br />
16-112
<strong>TM</strong> 9-<strong>2320</strong>-<strong>260</strong>-<strong>34</strong>-2<br />
16-19. INNER BOOM MAINTENANCE (M816)(Contd)<br />
16-113
<strong>TM</strong> 9-<strong>2320</strong>-<strong>260</strong>-<strong>34</strong>-2<br />
16-19. INNER BOOM MAINTENANCE (M816) (Contd)<br />
NOTE<br />
● Two assistants will help with step 7.<br />
● It may be necessary to loosen adjustments of upper, lower, and<br />
inner boom rollers to ease installation of inner boom.<br />
7. Direct assistants to remove inner boom (2) from boom (1) until 18 ft (5,49 m) mark is reached. Place<br />
jack stand under rear of inner boom (2).<br />
8. Remove lifting device and chain from inner boom (2).<br />
9. Install chain sling, spreader bar, and lifting device on inner boom (2).<br />
10. Remove inner boom (2) from boom (1) and place on blocking,<br />
11. Remove lifting device, chain sling, and spreader bar from inner boom (2).<br />
b. Disassembly<br />
1. Remove cotter pin (3) and pin (13) from extension cylinder (14) and inner boom (2). Discard cotter<br />
pin (3).<br />
NOTE<br />
Assistant will help with steps 2 through 6.<br />
2. Partially remove extension cylinder (14) from inner boom (2). Install one leg of chain sling to<br />
extension cylinder (14) and attach to lifting device.<br />
3. Continue removing extension cylinder (14) from inner boom (2) and place on jack stand.<br />
4. Reposition chain sling on extension cylinder (14) and spreader bar and attach to lifting device,<br />
5. Remove extension cylinder (14) from inner boom (2).<br />
6. Remove lifting device, chain sling, and spacer bar from extension cylinder (14).<br />
7. Remove two locknuts (8), screws (10), and spacers (9) from inner boom (2). Discard locknuts (8).<br />
8. Remove two grease fittings (11), cotter pin (7), and shaft (12) from inner boom (2). Discard cotter<br />
pin (7).<br />
9. Remove two washers (4), sheaves (5), and spacer (6) from inner boom (2).<br />
16-114
<strong>TM</strong> 9-<strong>2320</strong>-<strong>260</strong>-<strong>34</strong>-2<br />
16-19. INNER BOOM MAINTENANCE (M816) (Contd)<br />
16-115
<strong>TM</strong> 9-<strong>2320</strong>-<strong>260</strong>-<strong>34</strong>-2<br />
16-19. INNER BOOM MAINTENANCE (M816) (Contd)<br />
NOTE<br />
Assistant will help with steps 10 through 13.<br />
WARNING<br />
● All personnel must stand clear during lifting operations. A<br />
swinging or shifting load may cause injury or death to personnel.<br />
Ensure lifting capacity is greater than weight (700 lb (318 kg))<br />
of inner boom. Failure to do so may result in injury to personnel<br />
or damage to equipment.<br />
10. Install chain sling, spreader bar, and lifting device on inner boom (2).<br />
11. Raise inner boom (2) slightly from blocking and position on side. Use prybar in pin hole (1) to aid<br />
in turning.<br />
12. Remove lifting device, chain sling, and spreader bar from inner boom (2).<br />
c. Cleaning and Inspection<br />
1. For general cleaning instructions, refer to para. 2-8.<br />
2. For general inspection instruction, refer to para 2-9.<br />
3. Inspect two sheave(s) (6) for bends, cracks, breaks, and wear. Measure inside diameter of<br />
bushing (15). Replace bushing(s) (15) if inside diameter exceeds 1.506 in. (38.25 mm). Replace<br />
sheave(s) (6) of bent, cracked, broken, or worn.<br />
4. Inspect extension cylinder (14) for cracks, bends, dents, and signs of leaks.<br />
5. Inspect inner boom (2) for bends, cracks, and wear. Repair by welding <strong>TM</strong> 9-237. Replace inner<br />
boom (2) if damaged.<br />
● Perform steps 1 through 3 if assembling new inner boom.<br />
● Assistant will help with steps 1 through 3.<br />
1. Install chain sling, spreader bar, and lifting device on inner boom (2).<br />
2. Position inner boom (2) on blocking as shown. Use prybar in pin hole (1) to aid in turning.<br />
3. Remove lifting device, chain sling, and spreader bar from inner boom (2).<br />
4. Install four tracks (4) on inner boom (2) with one hundred four screws (3).<br />
NOTE<br />
Assistant will help with steps 5 through 11.<br />
5. Install chain sling, spreader bar, and lifting device on inner boom (2).<br />
6. Position inner boom (2) upright on blocking. Use pry bar in pin hole (1) to aid in turning.<br />
7. Remove lifting device, chain sling, and spreader bar from inner boom (2).<br />
8. Install chain sling, spreader bar, and lifting device on extension cylinder (14).<br />
9. Aline piston trunnion head (16) with pin hole (1) in inner boom (2) and insert extension cylinder (14)<br />
until contact is made with chain sling.<br />
10. Position jack stand under base of extension cylinder (14).<br />
11. Remove chain sling and spreader bar from extension cylinder (14). Continue to insert extension<br />
cylinder (14) into inner boom (2) until holes of piston trunnion head (16) and inner boom (2)<br />
are alined.<br />
16-116
<strong>TM</strong> 9-<strong>2320</strong>-<strong>260</strong>-<strong>34</strong>-2<br />
16-19. INNER BOOM MAINTENANCE (M816) (Contd)<br />
12.<br />
13.<br />
14.<br />
15.<br />
Insert pin (18) through inner boom (2) and piston trunnion head (16) and install with new cotter<br />
pin (17).<br />
Apply a light coat of GAA grease on two washers (5) and inside diameter of two sheaves (6) and<br />
spacer (7). Position in inner boom (2), and install with pin (13) and new cotter pin (8).<br />
Install two grease fittings (12) on pin (13).<br />
Install two spacers (10) on inner boom (2) with two screws (11) an new locknuts (9).<br />
16-117
<strong>TM</strong> 9-<strong>2320</strong>-<strong>260</strong>-43-2<br />
16-19. INNER BOOM MAINTENANCE (M816) (Contd)<br />
1.<br />
2.<br />
3.<br />
4.<br />
5.<br />
6.<br />
7.<br />
8.<br />
9.<br />
10.<br />
11,<br />
12.<br />
13.<br />
All personnel must stand clear during lifting operations. A<br />
swinging or shifting load may cause injury or death to personnel.<br />
● Inner boom must be supported during installation to prevent<br />
unbalancing of boom. Failure to do so may cause injury to<br />
personnel.<br />
● Ensure lifting capacity is greater than weight (700 lb (318 kg))<br />
of inner boom. Failure to do so may result in injury to personnel<br />
or damage to equipment.<br />
NOTE<br />
● Two assistants will help with installation.<br />
● It may be necessary to loosen adjustments of upper boom roller,<br />
lower boom roller, and inner boom roller to ease in installation of<br />
inner boom.<br />
Install chain sling, spreader bar, and lifting device on inner boom (2).<br />
Raise inner boom (2) and insert boom (1).<br />
Direct assistant to adjust lifting sling while another guides inner boom (2) into boom (1) until inner<br />
boom (2) contacts leg of chain sling.<br />
Place jacks under inner boom (2).<br />
Remove chain sling, spreader bar, and lifiing device from inner boom (2).<br />
Install chain sling and lifting device on end of inner boom (2).<br />
Continue to install inner boom (2) in boom (1).<br />
Aline trunnion (4) of extension cylinder (3) with brackets (6) of boom (1) and install with pin (5) and<br />
new cotter pin (7).<br />
Install two stop plates (12) on boom (1) with eight new Iockwashers (13) and screws (14).<br />
Place inner boom roller (15) on shaft (16) and install in boom (1).<br />
Install cover (10) on boom (1) with four new lockwashers (9) and screws (8).<br />
Install new cotter pin (17) and two grease fittings (11) on shaft (16).<br />
Remove lifting device and chain from inner boom (2).<br />
16-118
<strong>TM</strong> 9-<strong>2320</strong>-<strong>260</strong>-<strong>34</strong>-2<br />
16-19. INNER BOOM MAINTENANCE (Contd)<br />
FOLLOW-ON TASK: Install boom assembly (para. 16-18).<br />
16-119
<strong>TM</strong> 9-<strong>2320</strong>-<strong>260</strong>-<strong>34</strong>-2<br />
16-20. EXTENSION CYLINDER REPAIR (M816)<br />
THIS TASK COVERS:<br />
a. Disassembly c. Reassembly<br />
b. Cleaning, Inspection, and Repair<br />
lNITIAL SETUP<br />
APPLICABLE MODELS<br />
M816<br />
TOOLS<br />
General mechanic’s tool kit<br />
(Appendix B, Item 1)<br />
Spanner wrench (Appendix B, Item 136)<br />
SPECIAL TOOLS<br />
Bushing installer (Appendix B, Item 148)<br />
Handle (Appendix B, Item 149)<br />
MATERIALS/PARTS<br />
Seal (Appendix D, Item 463)<br />
Safety wire (Appendix D, Item 376.1)<br />
Packing (Appendix D, Item 301)<br />
MATERIALS/PARTS (Contd)<br />
Packing (Appendix D, Item 310)<br />
Crocus cloth (Appendix C, Item 8)<br />
Link free cloth (Appendix C, Item 9)<br />
REFERENCES (<strong>TM</strong>)<br />
<strong>TM</strong> 9-<strong>2320</strong>-<strong>260</strong>-<strong>34</strong>P-2<br />
EQUIPMENT CONDITION<br />
Extension cylinder removed (para. 16-18).<br />
GENERAL SAFETY INSTRUCTIONS<br />
Keep fire extinguisher nearby when using<br />
drycleaning solvent.<br />
a Removal<br />
1.<br />
2.<br />
3.<br />
4.<br />
5.<br />
6.<br />
7.<br />
8.<br />
9.<br />
Remove elbows (8) and (9), two couplings (6), nipples (5), and elbow (10) from extension cylinder (4).<br />
Remove plug (7) from elbow (8).<br />
Remove grease fitting (3) from piston rod (1).<br />
Using spanner wrench, remove cylinder head (2) and piston rod (1) from extension cylinder (4).<br />
Remove safety wire (11), piston rod nut (12), and washer (13) from piston rod (1). Discard safety<br />
wire (11).<br />
Remove two U-cup retainers (14), U-cups (15), piston (17), and cylinder head (2) from piston rod (1).<br />
Remove two half rings (16) from piston (17).<br />
Remove packing (18), packing nut (21), packing (20), and piston rod bushing (19) from cylinder<br />
head (2). Discard packing (18) and packing (20).<br />
Remove seal (22) from packing nut (21). Discard seal (22).<br />
16-120
<strong>TM</strong> 9-<strong>2320</strong>-<strong>260</strong>-<strong>34</strong>-2<br />
16-20. EXTENSION CYLINDER REPAIR (M816) (Contd)<br />
16-121
<strong>TM</strong> 9-<strong>2320</strong>-<strong>260</strong>-<strong>34</strong>-2<br />
16-20. EXTENSION CYLINDER REPAIR (M816) (Contd)<br />
b. Cleaning, Inspection, and Repair<br />
WARNING<br />
Drycleaning solvent is flammable and will not be used near open<br />
flame. Use only in well-ventilated places. Failure to do so may<br />
result in injury to personnel.<br />
1. For general cleaning instructions, refer to para. 2-8.<br />
2. For general inspection instructions, refer to para. 2-9.<br />
3. Inspect piston rod (2) for burrs, scoring, scratches, and stripped threads. Remove minor scratches<br />
and burrs with crocus cloth. If piston rod (2) is scored, or if stripped threads are evident. replace<br />
piston rod (2).<br />
4. Inspect piston (9) and extension cylinder (16) for scoring. If scored, replace.<br />
1.<br />
2.<br />
3.<br />
4.<br />
5.<br />
6.<br />
7.<br />
8.<br />
9.<br />
10.<br />
Install new seal (14) in packing nut (13).<br />
Install new packing (10), piston rod bushing (11), new packing<br />
head (1).<br />
Install two half rings (8) on piston (9).<br />
NOTE<br />
Use care not to damage wiper strip when passing over threads on<br />
piston rod.<br />
12), and packing nut 13) on cylinder<br />
Install cylinder head (1) on piston rod (2).<br />
Install two U-cup retainers (6), U-cups (7), and piston (9) on piston rod (2) with washer (5) and<br />
piston rod nut (4).<br />
Install new safety wire (3) on piston rod nut (4) and piston rod (2).<br />
Slide piston rod (2) into extension cylinder (16) and install cylinder head (1) on extension<br />
cylinder (16). Use spanner wrench to tighten cylinder head (1).<br />
Install grease fitting (15) on piston rod (2).<br />
Install plug (19) on elbow (20).<br />
Install elbow (22), two nipples (17), couplings (18), and elbows (20) and (21) on extension<br />
cylinder (16).<br />
16-122
<strong>TM</strong> 9-<strong>2320</strong>-<strong>260</strong>-<strong>34</strong>-2<br />
16-20. EXTENSION CYLINDER REPAIR (M816) (Contd)<br />
FOLLOW-ON TASKS: ● Lubricate extension cylinder (LO 9-<strong>2320</strong>-272-12).<br />
● Install extension cylinder (para. 16-18).<br />
16-123
<strong>TM</strong> 9-<strong>2320</strong>-<strong>260</strong>-<strong>34</strong>-2<br />
16-21. BOOM REPAIR (M816)<br />
THIS TASK COVERS:<br />
a. Removal c. Assembly<br />
b. Cleaning, Inspection, and Repair<br />
INITIAL SETUP<br />
APPLICABLE MODELS<br />
M816<br />
TOOLS<br />
General mechanic’s tool kit<br />
(Appendix B, Item 1)<br />
1-1/2-in. open-end wrench<br />
(Appendix B, Item 125)<br />
Spanner wrench (Appendix B, Item 136)<br />
MATERIALS/PARTS<br />
Twelve Iockwashers (Appendix D, Item 219)<br />
Six lockwashers (Appendix D, Item 218)<br />
Four locknuts (Appendix D, Item 177)<br />
Four locknuts (Appendix D, Item 192)<br />
Two cotter pins (Appendix D, Item 49)<br />
MATERIALS/PARTS (Contd)<br />
Antiseize tape (Appendix C, Item 50)<br />
GM grease (Appendix C, Item 14)<br />
REFERENCES (<strong>TM</strong>)<br />
<strong>TM</strong> 9-237<br />
<strong>TM</strong> 9-<strong>2320</strong>-<strong>260</strong>-<strong>34</strong>P-2<br />
EQUIPMENT CONDITION<br />
Inner boom removed (para. 16-19).<br />
GENERAL SAFETY INSTRUCTIONS<br />
● All personnel must stand clear during lifting<br />
operations.<br />
● Ensure lifting capacity is greater than weight of<br />
hoist winch.<br />
1.<br />
2.<br />
3.<br />
4.<br />
5.<br />
Remove two nuts (4), washers (2), and floodlight (3) from boom (l).<br />
NOTE<br />
● Upper and lower boom rollers are removed the same. Step 2 is<br />
for the upper boom roller.<br />
● Assistant will help with step 2.<br />
Remove six screws (5), Iockwashers (6), and boom roller (7) from boom (1). Discard Iockwashers (6).<br />
NOTE<br />
Both level wind rollers are removed the same. Steps 3 through 5<br />
cover the removal of one level wind roller.<br />
Remove four locknuts (14), screws (13), two hangers (9), and level wind roller (10) from boom (1).<br />
Discard locknuts (14).<br />
Remove grease fitting (12) from shaft (11).<br />
Remove cotter pin (8), two hangers (9), and level wind roller (10) from shaft (11). Discard cotter<br />
pin (8).<br />
16-124
<strong>TM</strong> 9-<strong>2320</strong>-240-<strong>34</strong>-2<br />
16-21. BOOM REPAIR (M816) (Contd)<br />
16-125
<strong>TM</strong> 9-<strong>2320</strong>-<strong>260</strong>-<strong>34</strong>-2<br />
16-21. BOOM REPAIR (M816) (Contd)<br />
6.<br />
7.<br />
Install chain on hoist winch (5) and attach to lifting device. Take up slack in chain.<br />
NOTE<br />
● Tag lines and fittings for installation.<br />
● Have drainage container ready to catch oil.<br />
Disconnect two hydraulic lines (1) from hoist winch motor (6).<br />
WARNING<br />
8.<br />
9.<br />
10.<br />
11.<br />
12.<br />
13.<br />
● All personnel must stand clear during lifting operations.<br />
A swinging or shifting load may cause injury to personnel.<br />
● Ensure lifting capacity is greater than weight (400 lb (182 kg))<br />
of hoist winch. Failure to do so may result in injury to personnel<br />
or damage to equipment.<br />
NOTE<br />
Assistant will help with step 8.<br />
Remove twelve screws (4) and lockwashers (3), and hoist winch (5) from boom (2). Discard<br />
lockwashers (3).<br />
Lower hoist winch (5) from boom (2). Remove lifting device and chain from hoist winch (5).<br />
Remove four locknuts (13), clamps (12), two lines (14), and eight pads (11) from boom (2). Discard<br />
locknuts (13).<br />
Remove cotter pin (7) from pin (10). Discard cotter pin (7).<br />
Using hammer and drive, remove pin (10) and sheave (9) from boom (2).<br />
Remove grease fitting (8) from sheave (9).<br />
16-126
<strong>TM</strong> 9-<strong>2320</strong>-<strong>260</strong>-<strong>34</strong>-2<br />
16-21. BOOM REPAIR (M816) (Contd)<br />
b. Cleaning, Inspection, and Repair<br />
1. For general cleaning instructions, refer to para. 2-8.<br />
2. For general inspection instructions, refer to para. 2-9.<br />
3. For general repair instructions, refer to para. 2-10.<br />
4. Inspect level wind rollers (1), sheave (3), and boom (5) for bends, cracks, breaks, and wear. Refer to<br />
table 16-13, Boom Assembly Wear Limits, for measurements. Replace level wind rollers (1).<br />
sheave (3), or boom (5) if damaged or worn.<br />
5. Inspect bushings (2), (4), and (6) for wear. Refer to table 16-13, Boom Assembly Wear Limits, for<br />
measurements. Replace bushings (2), (4), and (6) if worn.<br />
Table 16-13. Boom Assembly Wear Limits.<br />
ITEM<br />
NO.<br />
ITEM/POINT OF MEASUREMENT<br />
WEAR LIMITS/TOLERANCES<br />
INCHES<br />
MILLIMETERS<br />
1 Level wind rollers<br />
2 Bushings – inside diameter – maximum<br />
Steel 1.004 25.50<br />
Brass 1.006 25.55<br />
3 Sheave<br />
4 Bushings – inside diameter – maximum 1.515 38.48<br />
5 Boom<br />
6 Bushing – inside diameter – maximum 1.506 38.25<br />
16-127
<strong>TM</strong> 9-<strong>2320</strong>-<strong>260</strong>-<strong>34</strong>-2<br />
16-21. BOOM REPAIR (M816) (Contd)<br />
6. Inspect floodlight (1) for damage. Repair floodlight if damaged (<strong>TM</strong> 9-<strong>2320</strong>-<strong>260</strong>-20).<br />
7. Inspect hoist winch motor (2), hoist winch (3), and upper and lower boom rollers (4) for damage.<br />
Repair hoist winch motor (2), hoist winch (3), or upper and lower boom roller(s) (4) if damaged<br />
(para, 16-15, 16-17, or 16- 13).<br />
1. Install grease fitting (7) on sheave (8).<br />
2. Install sheave (8) on boom with pin (9) and new cotter pin (6),<br />
3. Insert two lines (13) through bracket (14) and position on boom (5).<br />
4. Install eight pads (10) and two lines (13) on boom (5) with four clamps (11) and new locknuts (12).<br />
16-128
<strong>TM</strong> 9-<strong>2320</strong>-<strong>260</strong>-<strong>34</strong>-2<br />
16-21. BOOM REPAIR (M816) (Contd)<br />
WARNING<br />
5.<br />
6.<br />
7.<br />
8.<br />
9.<br />
10.<br />
11.<br />
12.<br />
13.<br />
14.<br />
● All personnel must stand clear during lifting operations.<br />
A swinging or shifting load may cause injury to personnel.<br />
● Ensure lifting capacity is greater than weight (400 lb (182 kg))<br />
of hoist winch. Failure to do so may result in injury to personnel<br />
or damage to equipment.<br />
NOTE<br />
Assistant will help with steps 5 and 6.<br />
Install chain and lifting device on hoist winch (3).<br />
Install hoist winch (3) on boom (5) with twelve new lockwashers (16) and screws (17).<br />
Connect two lines (15) to hoist winch motor (2).<br />
NOTE<br />
● All hanger rollers are installed the same way. This procedure<br />
covers rear hanger rollers.<br />
Apply a light coat of GM grease to all shafts and bushings of<br />
rollers prior to installation.<br />
Install roller (23) on shaft (22).<br />
Install hanger (21) on each end of shaft (23) level wind roller (22) and bracket (14) with four new<br />
locknuts (26) and screws (25).<br />
Install shaft (23) and level wind rollers (22) on brackets (14) with new cotter Pin (20).<br />
Wrap male threads on grease fitting (24) with antiseize tape.<br />
Install grease fitting (24) in shaft (23).<br />
NOTE<br />
● Upper and lower boom rollers are installed the same way. This<br />
procedure covers upper boom rollers.<br />
● Assistant will help with step 13.<br />
Install upper boom roller (4) on boom (5) with six new Iockwashers (18) and screws (19).<br />
Install floodlight (28) on boom (5) with two washers (27) and nuts (29).<br />
FOLLOW-ON TASKS: Install inner boom (para. 16-19).<br />
16-129
<strong>TM</strong> 9-<strong>2320</strong>-<strong>260</strong>-<strong>34</strong>-2<br />
16-22. CRANE GONDOLA MAINTENANCE (M816)<br />
THIS TASK COVERS:<br />
a. Removal d. Assembly<br />
b. Disassembly e. Installation<br />
c. Cleaning and Inspection<br />
INITIAL SETUP<br />
APPLICABLE MODELS<br />
M816<br />
TOOLS<br />
General mechanic’s tool kit<br />
(Appendix B, Item 1)<br />
Chain<br />
Lifting device<br />
MATERIALS/PARTS<br />
Twelve Iockwashers (Appendix D, Item 223)<br />
Six locknuts (Appendix D, Item 176)<br />
Twelve locknuts (Appendix D, Item 200)<br />
Six screw-assembled Iockwashers<br />
(Appendix D, Item 382)<br />
Three seals (Appendix D, Item 472)<br />
REFERENCES (<strong>TM</strong>)<br />
LO 9-<strong>2320</strong>-<strong>260</strong>-12<br />
<strong>TM</strong> 9-<strong>2320</strong>-<strong>260</strong>-10<br />
REFERENCES (<strong>TM</strong>) (Contd)<br />
<strong>TM</strong> 9-<strong>2320</strong>-<strong>260</strong>-20<br />
<strong>TM</strong> 9-<strong>2320</strong>-<strong>260</strong>-<strong>34</strong>P-2<br />
EQUIPMENT CONDITION<br />
● Oil reservoir drained (LO 9-<strong>2320</strong>-26-12).<br />
● Control valve removed (<strong>TM</strong> 9-<strong>2320</strong>-<strong>260</strong>-20).<br />
● Floodlight removed (<strong>TM</strong> 9-<strong>2320</strong>-<strong>260</strong>-20).<br />
● Floodlight wiring harness removed<br />
(<strong>TM</strong> 9-<strong>2320</strong>-<strong>260</strong>-20).<br />
● Gondola seat cushions removed<br />
(<strong>TM</strong> 9-<strong>2320</strong>-<strong>260</strong>-20).<br />
Fire extinguisher brackets removed<br />
(<strong>TM</strong> 9-<strong>2320</strong>-<strong>260</strong>-20).<br />
GENERAL SAFETY INSTRUCTIONS<br />
● All personnel must stand clear during lifting<br />
operations.<br />
● Ensure lifting capacity is greater than weight of<br />
crane gondola.<br />
a. Removal<br />
1. Loosen swivel nuts (2) and (4), and remove tube (3) and flex hose (5) from crossover tee (17).<br />
NOTE<br />
Mark and record hoses and locations on brackets before removal.<br />
2. Remove three locknuts (8) and clamps (7) from studs (15) in bracket (16) and six hydraulic<br />
hoses (11). Discard locknuts (8).<br />
3. Remove three locknuts (9) and clamps (10) from studs (13) in bracket (12). Discard locknuts (9).<br />
4. Pull hydraulic hose (14) out of gondola (6).<br />
5. Remove gondola guard (1) from gondola (6).<br />
6. Attach chain and lifting device to gondola (6) and take up slack in chain.<br />
WARNING<br />
● All personnel must stand clear during lifting operations. A<br />
swinging or shifting load may cause injury or death to personnel,<br />
● Ensure lifting capacity is greater than weight (500 lb (227 kg))<br />
of crane gondola. Failure to do so may result in injury to personnel<br />
or damage to equipment.<br />
NOTE<br />
Assistant will help with steps 7 and 8.<br />
7. Remove twelve screws (19) and Iockwashers (20) from two gondola brackets (16) and (12) and boom<br />
support (18). Discard Iockwashers (20).<br />
16-130
<strong>TM</strong> 9-<strong>2320</strong>-<strong>260</strong>-<strong>34</strong>-2<br />
16-22. CRANE GONDOLA MAINTENCE (M816) (Contd)<br />
16-131
<strong>TM</strong> 9-<strong>2320</strong>-<strong>260</strong>44-2<br />
16-22. CRANE GONDOLA MAINTENANCE (M816) (Contd)<br />
b. Disassembly<br />
NOTE<br />
Mark brackets for installation.<br />
1. Remove twelve locknuts (2), screws (6), and brackets (3) and (5) from gondola body (1). Discard<br />
locknuts (2).<br />
2. Remove six screw-assembled Iockwashers (10) and cover (9) from gondola body (1). Discard screwassembled<br />
Iockwashers (10).<br />
3. Remove six screws (7) and cover (8) from gondola body (1).<br />
4. Remove three seals (16) from gondola body (1). Discard seals (16).<br />
5. Remove anti-chafing channel (15) from gondola body (1).<br />
6. Remove two screws (13) and oil can bracket (14) from gondola body (1).<br />
NOTE<br />
Perform step 7 if cover and data plates were installed after control<br />
valve was removed.<br />
7. Remove four screws (11) and cover (12) from gondola body (1).<br />
c. Cleaning, Inspection, and Repair<br />
1. For general cleaning instructions, refer to para. 2-8.<br />
2. For general inspection instructions, refer to para. 2-9.<br />
a. Inspect seals (16) and anti-chafing channel (15) for tears, chafing, cracks, and missing sections.<br />
NOTE<br />
Cover and data plates were removed in equipment condition step,<br />
but are included for inspection and repair of gondola.<br />
b. Inspect cover (12) and warning, caution, and data plates for legibility, and secure for anchorage.<br />
3. Repair damaged and worn parts (para. 2-10). Replace all worn or damaged parts that are<br />
unrepairable.<br />
4. Inspect wooden hose supports (4) on bracket (3) and in gondola body (1). Repair or replace wooden<br />
hose supports (4) if damaged.<br />
16-132
<strong>TM</strong> 9-<strong>2320</strong>-<strong>260</strong>-<strong>34</strong>-2<br />
16-22. CRANE GONDOLA MAINTENANCE (M816) (Contd)<br />
16-133
<strong>TM</strong> 9-<strong>2320</strong>-<strong>260</strong>-<strong>34</strong>-2<br />
16-22. CRANE GONDOLA MAINTENANCE (M816) (Contd)<br />
NOTE<br />
Perform step 1 if cover and data plates were removed during<br />
disassembly.<br />
1. Install cover (2) on gondola body (5) with four screws (1).<br />
2. Install oil can bracket (4) on gondola body (5) with two screws (3).<br />
3. Install anti-chafing channel (6) on gondola body (5). Ensure gap in anti-chafing channel (6) faces up.<br />
4. Install three new seals (7) on gondola body (5).<br />
5. Install cover (15) on gondola body (5) with six screws (14).<br />
6. Install cover (16) on gondola body (5) with six new screw-assembled Iockwashers (17).<br />
7. Install bracket (10) on gondola body (5) with six screws (8) and new locknuts (9).<br />
8. Install bracket (12) on gondola body (5) with six screws (13) and new locknuts (11).<br />
16-1<strong>34</strong>
<strong>TM</strong> 9-<strong>2320</strong>-<strong>260</strong>-<strong>34</strong>-2<br />
16-22. CRANE GONDOLA MAINTENANCE (M816) (Contd)<br />
16-135
<strong>TM</strong> 9-<strong>2320</strong>-<strong>260</strong>-<strong>34</strong>-2<br />
16-22. CRANE GONDOLA MAINTENANCE (M816) (Contd)<br />
1.<br />
Attach chain to lifting device and gondola body (2).<br />
WARNING<br />
2.<br />
3.<br />
4.<br />
5.<br />
6.<br />
7.<br />
8.<br />
● All personnel must stand clear during lifting operations.<br />
A swinging or shifting load may cause injury to personnel.<br />
● Ensure lifting capacity is greater than weight (500 lb (227 kg))<br />
of crane gondola. Failure to do so may result in injury to personnel<br />
or damage to equipment.<br />
NOTE<br />
Assistant will help with steps 2 and 3.<br />
Position gondola body (2) near boom support (1) and route two hoses (11) through bracket (16) and<br />
into gondola body (2).<br />
Install gondola body (2) on boom support (1) using twelve new lockwashers (5) and screws (4).<br />
Tighten screws (4) 44-61 lb-ft (60-83 N•m).<br />
Remove chain from lifting device and gondola body (2).<br />
Route four hoses (15) through bracket (16) and into gondola body (2).<br />
Install hoses (11) and (15) on brackets (14) and (16) with three clamps (9) and (13) and new<br />
locknuts (10) and (12).<br />
Install tube (8) and hose (7) on crossover tee ( 17).<br />
Install gondola guard (6) on gondola body (2).<br />
16-136
<strong>TM</strong> 9-<strong>2320</strong>-<strong>260</strong>-<strong>34</strong>-2<br />
16-22. CRANE GONDOLA MAINTENANCE (M816) (Contd)<br />
FOLLOW-ON TASKS: ● Install control valve (<strong>TM</strong> 9-<strong>2320</strong>-<strong>260</strong>-20).<br />
● Fill oil reservoir (LO 9-<strong>2320</strong>-<strong>260</strong>-12).<br />
● Start engine and check crane operation (<strong>TM</strong> 9-<strong>2320</strong>-<strong>260</strong>-10).<br />
● Install floodlight wiring harness (<strong>TM</strong> 9-<strong>2320</strong>-<strong>260</strong>-20).<br />
● Install gondola seat cushions (<strong>TM</strong> 9-<strong>2320</strong>-<strong>260</strong>-20).<br />
● Install fire extinguisher brackets (<strong>TM</strong> 9-<strong>2320</strong>-<strong>260</strong>-20).<br />
16-137
<strong>TM</strong> 9-<strong>2320</strong>-<strong>260</strong>-<strong>34</strong>-2<br />
16-23. HOIST HYDRAULIC WINCH MOTOR REPLACEMENT (M816)<br />
THIS TASK COVERS:<br />
a. Removal b. Installation<br />
INITIAL SETUP<br />
APPLICABLE MODELS<br />
REFERENCES (<strong>TM</strong>)<br />
M186 LO 9-<strong>2320</strong>-<strong>260</strong>-12<br />
<strong>TM</strong> 9-<strong>2320</strong>-<strong>260</strong>-10<br />
TOOLS<br />
<strong>TM</strong> 9-<strong>2320</strong>-<strong>260</strong>-<strong>34</strong>P-2<br />
General mechanic’s tool kit<br />
(Appendix B, Item 1)<br />
EQUIPMENT CONDITION<br />
● Parking brake set (<strong>TM</strong> 9-<strong>2320</strong>-<strong>260</strong>-10).<br />
MATERIALS/PARTS<br />
●<br />
Hydraulic system drained (LO 9-<strong>2320</strong>-<strong>260</strong>-12).<br />
Four lockwashers (Appendix D, Item 219)<br />
Gasket (Appendix D, Item 84)<br />
Woodruff key (Appendix D, Item 561)<br />
Antiseize tape (Appendix C, Item 50)<br />
Cap and plug set (Appendix C, Item 6)<br />
CAUTION<br />
● Clean area around hoses and lines before removal to prevent<br />
entry of dirt. Damage will occur if dirt or dust enters system.<br />
● Cap or plug all openings after disconnecting hoses and lines to<br />
prevent contamination. Failure to do so may result in damage to<br />
hydraulic system.<br />
NOTE<br />
● Have drainage container ready to catch oil.<br />
● Tag hoses for installation.<br />
1. Remove hoses (3) from elbows (4). Secure hoses (3) away from hydraulic winch motor (9).<br />
2. Attach chain to hydraulic winch motor (9) and lifting device. Take up slack in chain.<br />
NOTE<br />
Assistant will help with step 3.<br />
3. Remove four screws (1), lockwashers (2), hydraulic winch motor (9), and gasket (6) from flange (5).<br />
Discard lockwashers (2) and gasket (6).<br />
4. Remove woodruff key (7) from shaft (8). Discard woodruff key (7).<br />
NOTE<br />
Perform step 5 if hydraulic winch motor is being replaced with a<br />
new unit.<br />
5. Remove elbows (4) from hydraulic winch motor (9).<br />
6. Remove chain from hydraulic winch motor (9) and lifting device.<br />
1. Attach chain to hydraulic winch motor (9) and lifting device.<br />
16-138
<strong>TM</strong> 9-<strong>2320</strong>-<strong>260</strong>-<strong>34</strong>-2<br />
16-23. HOIST HYDRAULIC WINCH MOTOR REPLACEMENT (M816) (Contd)<br />
NOTE<br />
Perform step 3 if hydraulic winch motor is being replaced with a<br />
new unit.<br />
2. Wrap male threads of two elbows (4) and hoses (3) with antiseize tape.<br />
3. Install elbows (4) on hydraulic winch motor (9).<br />
4. Install new woodruff key (7) on shaft (8).<br />
NOTE<br />
Assistant will help with step 5.<br />
5. Install new gasket (6) and hydraulic winch motor (9) on flange (5) with four new lockwashers (2)<br />
and screws (1).<br />
6. Remove chain from hydraulic winch motor (9) and lifting device.<br />
7. Install hoses (3) on elbows (4).<br />
FOLLOW-ON TASKS: ● Fill hydraulic oil reservoir (LO 9-<strong>2320</strong>-<strong>260</strong>-12).<br />
● Start engine and inspect for hydraulic leaks (<strong>TM</strong> 9-<strong>2320</strong>-<strong>260</strong>-10).<br />
● Check crane operation (<strong>TM</strong> 9-<strong>2320</strong>-<strong>260</strong>-10).<br />
16-139
<strong>TM</strong> 9-<strong>2320</strong>-<strong>260</strong>-<strong>34</strong>-2<br />
16-24. HOIST HYDRAULIC PUMP AND SUPPORT MAINTENANCE (M816)<br />
THIS TASK COVERS:<br />
a. Removal c. Installation<br />
b. Cleaning, Inspection, and Repair<br />
INITIAL SETUP<br />
APPLICABLE MODELS<br />
M816<br />
TOOLS<br />
General mechanic’s tool kit<br />
(Appendix B, Item 1)<br />
Torque wrench, 3/8-in. dr.<br />
(Appendix B, Item 4)<br />
Soldering gun (Appendix B, Item 117)<br />
Lifting device<br />
Chain<br />
MATERIALS/PARTS<br />
Six lockwashers (Appendix D, Item 215)<br />
Four lockwashers (Appendix D, Item 223)<br />
Four lockwashers (Appendix D, Item 247)<br />
Gasket (Appendix D, Item 86)<br />
MATERIALS/PARTS (Contd)<br />
Adhesive (Appendix C, Item 3)<br />
Antiseize tape (Appendix C, Item 50)<br />
Cap and plug set (Appendix C, Item 6)<br />
Solder (Appendix C, Item 47)<br />
REFERENCES (<strong>TM</strong>)<br />
LO 9-<strong>2320</strong>-<strong>260</strong>-12<br />
<strong>TM</strong> 9-<strong>2320</strong>-<strong>260</strong>-10<br />
<strong>TM</strong> 9-<strong>2320</strong>-<strong>260</strong>-<strong>34</strong>P-2<br />
EQUIPMENT CONDITION<br />
● Parking brake set (<strong>TM</strong> 9-<strong>2320</strong>-<strong>260</strong>-10).<br />
● Boom elevated, and shipper braces extended,<br />
locked, and installed (<strong>TM</strong> 9-<strong>2320</strong>-<strong>260</strong>-10).<br />
● Hydraulic system drained (LO 9-<strong>2320</strong>-<strong>260</strong>-12).<br />
Perform steps 1 through 4 if boom will not elevate under its own<br />
power.<br />
1. Attach chain to boom (1) and lifting device.<br />
2. Disconnect shipper braces (2) from boom (1). Extend shipper braces (2) to maximum length, and lock<br />
in place.<br />
3. Raise boom (1) to height of extended shipper braces (2), and attach shipper braces (2) to boom (1).<br />
4. Remove chain from boom (1) and lifting device.<br />
CAUTION<br />
Clean area around hoses and lines before removal to prevent entry<br />
of dirt. Damage will occur is dirt or dust enters system.<br />
5. Remove hose (5) from oil filter (6).<br />
NOTE<br />
● Have drainage container ready to catch oil.<br />
● Tag hoses for installation.<br />
6. Remove hoses (5) and (4) from hydraulic pump (3).<br />
7. Remove four screws (7) and Iockwashers (18) from hydraulic pump (3). Discard lockwashers (18).<br />
8. Remove hydraulic pump (3) from support (10).<br />
NOTE<br />
Assistant will help with step 8.<br />
16-140
<strong>TM</strong> 9-<strong>2320</strong>-<strong>260</strong>-<strong>34</strong>-2<br />
16-24. HOIST HYDRAULIC PUMP AND SUPPORT MAINTENANCE (M816) (Contd)<br />
9.<br />
10.<br />
11.<br />
NOTE<br />
Tag wires for installation.<br />
Disconnect wires (13) from wiring harness (12).<br />
Remove four screws (14), lockwashers (15), brush holder (16), and gasket (17) from support (10).<br />
Discard lockwashers (15) and gasket (17).<br />
NOTE<br />
Assistant will help with step 11.<br />
Remove six screws (8), lockwashers (9), and support (10) from turntable (11). Discard lockwashers<br />
(9).<br />
16-141
<strong>TM</strong> 9-<strong>2320</strong>-<strong>260</strong>-<strong>34</strong>-2<br />
16-24. HOIST HYDRALIC PUMP AND SUPPORT MAINTENANCE (M816) (Contd)<br />
I<br />
b. Cleaning, Inspection, and Repair<br />
1. For general cleaning instructions, refer to para. 2-8.<br />
2. For general inspection instructions, refer to para. 2-9.<br />
3. Inspect brush holder (1) for cracks, broken solder connections, and excessively worn brushes (3).<br />
Replace brush holder (1) if cracked, or if brushes (3) are worn. Repair broken solder connections.<br />
NOTE<br />
Perform steps 4 through 6 if brush holder is being replaced.<br />
4. Install three brushes (3) in plate (2) by spreading cyanocrylate adhesive on contact surface of<br />
brush (3) and pushing brush (3) into place.<br />
5. Inspect wires (5) in grommet (6), and install grommet (6) in plate (2). Solder wires (5) to springs (7)<br />
corresponding to the appropriate brush (3).<br />
6. Install three brush covers (4) on plate (2).<br />
c. Installation<br />
NOTE<br />
Assistant will help with steps 1 and 2.<br />
1. Install support (12) on turntable (13) with six new Iockwashers (11) and screws (10). Tighten<br />
screws (10) 25-31 lb-ft (<strong>34</strong>-42 N•m).<br />
2. Install hydraulic pump (9) on support (12) with four new lockwashers (18) and screws (8). Tighten<br />
screws (8) 44-61 lb-ft (60-83 N•m).<br />
3. Install new gasket (17) and brush holder (1) on support (12) with four new lockwashers (16) and<br />
screws (15).<br />
4. Connect wires (5) to wiring harness (14).<br />
5. Wrap male threads on hoses (19) and (20) with antiseize tape.<br />
6. Install hoses (19) and (20) on hydraulic pump (9).<br />
7. Install hose (20) on oil filter (21).<br />
16-142
<strong>TM</strong> 9-<strong>2320</strong>-<strong>260</strong>-<strong>34</strong>-2<br />
16-24. HOIST HYDRAULIC PUMP AND SUPPORT MAINTENANCE (M816) (Contd]<br />
FOLLOW-ON TASKS: ●<br />
●<br />
●<br />
Fill hydraulic system (LO 9-<strong>2320</strong>-<strong>260</strong>-12).<br />
Start engine and check operation of hydraulic system (<strong>TM</strong> 9-<strong>2320</strong>-<strong>260</strong>-10).<br />
Lower boom and retract shipper braces (<strong>TM</strong> 9-<strong>2320</strong>-<strong>260</strong>-10).<br />
16-143
<strong>TM</strong> 9-<strong>2320</strong>-<strong>260</strong>-<strong>34</strong>-2<br />
16-25. HOIST BEVEL GEARCASE REPAIR (M816)<br />
THIS TASK COVERS:<br />
a. Removal d. Repair<br />
b. Disassembly e. Assembly<br />
c. Cleaning and Inspection f. Installation<br />
INITIAL SETUP<br />
APPLICABLE MODELS<br />
M816<br />
TOOLS<br />
General mechanic’s tool kit<br />
(Appendix B, Item 1)<br />
Mechanical puller kit (Appendix B, Item 14)<br />
3/8-in. torque wrench (Appendix B, Item 4)<br />
Arbor press (Appendix B, Item 7)<br />
Hydraulic jack<br />
MATERIALS/PARTS<br />
Twenty-four lockwashers<br />
(Appendix D, Item 215)<br />
Two lockwashers (Appendix D, Item 223)<br />
Lockwasher (Appendix D, Item 227)<br />
Gasket (Appendix D, Item 66)<br />
Gasket (Appendix D, Item 88)<br />
Gasket (Appendix D, Item 102)<br />
Seal (Appendix D, Item 462)<br />
Two woodruff keys (Appendix D, Item 562)<br />
Shims (Appendix D, Item 503)<br />
MATERIALS/PARTS (Contd)<br />
Grommet (Appendix D, Item 157.1)<br />
Shims (Appendix D, Item 501)<br />
Iron base pigment (Appendix C, Item 26)<br />
Gear oil (Appendix C, Item 22)<br />
REFERENCES (<strong>TM</strong>)<br />
LO 9-<strong>2320</strong>-<strong>260</strong>-12<br />
<strong>TM</strong> 9-<strong>2320</strong>-<strong>260</strong>-20<br />
<strong>TM</strong> 9-<strong>2320</strong>-<strong>260</strong>-<strong>34</strong>P-2<br />
EQUIPMENT CONDITION<br />
● Hydraulic oil reservoir removed<br />
(<strong>TM</strong> 9-<strong>2320</strong>-<strong>260</strong>-20).<br />
● Crane drive propeller shaft removed<br />
(<strong>TM</strong> 9-<strong>2320</strong>-<strong>260</strong>-20).<br />
● Boom assembly removed (para. 16-18).<br />
● Crane gondola removed (para. 16-22).<br />
● Boom elevating cylinders removed (para. 16-14).<br />
● Hoist hydraulic pump assembly and support<br />
removed (para. 16-24).<br />
● Crane gearcase removed (para. 16-28).<br />
1.<br />
2.<br />
3.<br />
4.<br />
5.<br />
6.<br />
7.<br />
8.<br />
9.<br />
Have container ready to catch oil.<br />
Remove two plugs (10), and drain oil from gearcase (9) and input shaft housing (11).<br />
Install plugs (10) in gearcase (9) and input shaft housing (11).<br />
NOTE<br />
Tag wires for installation.<br />
Disconnect. two wires (7) from wire harness (8). (Third wire (14) is not connected.)<br />
NOTE<br />
Assistant will help with steps 4 through 9.<br />
Position hydraulic jack under gearcase (9) and input drive housing (11).<br />
Remove six screws (4) and lockwashers (3) from inner circle holes of housing flange (6).<br />
Discard lockwashers (3).<br />
Remove gearcase (9) and input drive housing (11) from wrecker body (13).<br />
Remove gasket (12) from gearcase (9). Discard gasket (12).<br />
Remove six screws (2) and lockwashers (1) from housing flange (6). Discard lockwashers (1).<br />
Remove housing (5) from wrecker body (13).<br />
NOTE<br />
16-144
<strong>TM</strong> 9-<strong>2320</strong>-<strong>260</strong>-<strong>34</strong>-2<br />
16-25. HOIST BEVEL GEARCASE REPAIR (M816) (Contd)<br />
16-145
<strong>TM</strong> 9-<strong>2320</strong>-<strong>260</strong>-<strong>34</strong>-2<br />
16-25. HOIST BEVEL GEARCASE REPAIR (M816) (Contd)<br />
b. Disassembly<br />
1. Remove driveshaft coupling (5) from driveshaft (14).<br />
2. Pull three electrical leads (9) through grommet (10), and remove grommet (10) from flange (11) of<br />
housing (13). Discard grommet (10).<br />
3. Remove screw (8), lockwasher (7), and ring support (6) from housing (13). Discard lockwasher (7).<br />
4. Remove snapring (1), four screws (2), lockwashers (3), cap (4), and gasket (15) from driveshaft (14)<br />
and housing (13). Discard lockwashers (3) and gasket (15).<br />
5. Remove seal (16) from cap (4). Discard seal (16).<br />
6. Remove breather (12) from housing (13).<br />
16-146
<strong>TM</strong> 9-<strong>2320</strong>-<strong>260</strong>-<strong>34</strong>-2<br />
16-25. HOIST BEVEL GEARCASE REPAIR (M816) (Contd)<br />
7.<br />
8.<br />
9.<br />
10.<br />
11.<br />
12.<br />
13.<br />
14.<br />
Remove screw (23), lockwasher (22), and washer (21) from driveshaft (14). Discard lockwashers (22).<br />
NOTE<br />
Tag gear and shaft for installation.<br />
Using puller, remove bevel gear (20) and woodruff key (19) from driveshaft (14). Discard woodruff<br />
key (19).<br />
Remove snapring (24) from housing (13).<br />
Using arbor press, press driveshaft (14) toward gearcase end of housing (13) until bearing (18) clears<br />
housing (13).<br />
Using puller, remove bearing (18) from driveshaft (14).<br />
Using arbor press, turn housing (13) over, and press driveshaft (14) and bearing (17) out of pump<br />
end of housing (13).<br />
Using arbor press or mechanical puller, remove bearing (17) from drive shaft (14).<br />
Remove screw (25), lockwasher (26), washer (27), yoke (28), and spacer (29) from input shaft (30).<br />
Discard lockwasher (26).<br />
16-147
<strong>TM</strong> 9-<strong>2320</strong>-<strong>260</strong>-<strong>34</strong>-2<br />
16-25. HOIST BEVEL GEARCASE REPAIR (M816) (Contd)<br />
15.<br />
16.<br />
17.<br />
18.<br />
19.<br />
20.<br />
21.<br />
22.<br />
23.<br />
24.<br />
Remove two plugs (11), three plugs (10), and plugs (16) and (20) from gearcase housing (12) and<br />
input drive housing (15).<br />
Remove four screws (7), lockwashers (6), cover (5), shims (8), and gasket (9) from gearcase<br />
housing (12). Discard lockwashers (6) and gasket (9).<br />
Using micrometer, measure and record thickness of shims (8). Discard shims (8).<br />
Remove four screws (13), lockwashers (14), input drive housing (1), gasket (17), and shims (18)<br />
from gearcase housing (12). Discard lockwashers (14) and gasket (17).<br />
Using arbor press, press input shaft (1) and bearing (4) until bearing (4) clears gearcase<br />
housing (12).<br />
Using micrometer, measure and record thickness of shims (18). Discard shims (18).<br />
Using mechanical puller, remove bearing (19) from input shaft (1).<br />
Remove bearing (4), bevel gear (3), and input shaft (1) from top of gearcase housing (12).<br />
Using mechanical puller, remove bearing (4) from input shaft (1).<br />
NOTE<br />
Tag gear and shaft for installation.<br />
Using arbor press, remove bevel gear (3) and woodruff key (2) from input shaft (1). Discard<br />
woodruff key (2).<br />
c. Cleaning and Inspection<br />
1. For general cleaning instructions, refer to para. 2-8.<br />
2. For general inspection instructions, refer to para. 2-9.<br />
3. Inspect housing (21), gearcase housing (12), input shaft (1), and driveshaft (23) for cracks, bends,<br />
breaks, and wear. Refer to table 16-14, Hoist Bevel Gearcase Wear Limits, for measurements.<br />
Replace housing (21), gearcase housing (12), input shaft (1), and driveshaft (23), if damaged<br />
or worn.<br />
4. Inspect front and rear bearings (4) and (19), upper bearing (24), and lower bearing (22) for wear.<br />
Refer to table 16-14, Hoist Gearcase Wear Limits, for measurements. Replace front and rear<br />
bearings (4) and (19), upper bearing (24), and lower bearing (22), if worn.<br />
16-148
<strong>TM</strong> 9-<strong>2320</strong>-<strong>260</strong>-<strong>34</strong>-2<br />
16-25. HOIST BEVEL GEARCASE REPAIR (M816) (Contd)<br />
1. For general repair instructions, refer to para. 2-10.<br />
2. For testing and replacement of ring support assembly (25), refer to para. 16-27.<br />
Table 16-14. Hoist Bevel Gearcase Wear Limits.<br />
ITEM<br />
NO.<br />
ITEM/POINT OF MEASUREMENT<br />
WEAR LIMITS/TOLERANCES<br />
INCHES<br />
MILLIMETERS<br />
1 Input shaft – front and rear bearing journals –<br />
minimum 1.575 40.01<br />
4,19 Front and rear bearings<br />
Inner diameter - maximum 1.547 39.29<br />
Outer diameter - minimum 3.149 79.98<br />
12 Gearcase housing-front and rear bearing bores -<br />
maximum 3.150 80.01<br />
21 Housing<br />
Upper bearing bore - maximum 2.835 72.01<br />
Lower bearing bore - maximum 3.150 80.01<br />
22 Lower bearing<br />
Inner diameter - maximum 1.574 39.98<br />
Outer diameter - minimum 2.835 72.01<br />
23 Driveshaft<br />
Upper bearing journal - minimum 1.379 35.03<br />
Lower bearing journal - minimum 1.575 40.01<br />
24 Upper bearing<br />
Inner diameter - maximum 1.375 <strong>34</strong>.93<br />
Outer diameter - minimum 2.8<strong>34</strong> 71.98<br />
16-149
<strong>TM</strong> 9-<strong>2320</strong>-<strong>260</strong>-<strong>34</strong>-2<br />
16-25. HOIST BEVEL GEARCASE REPAIR (M816) (Contd)<br />
e. Assembly<br />
NOTE<br />
Coat bearings with gear oil before assembly.<br />
1.<br />
2.<br />
3.<br />
4.<br />
5.<br />
6.<br />
7.<br />
8.<br />
Install new woodruff key (9) on input shaft (7), and press bevel gear (10) on input shaft (7) using<br />
arbor press. Seat bevel gear (10) to shoulder (8) of input shaft (7).<br />
Position input shaft (7) and bevel gear (10) in gearcase housing (17) with splined end of input<br />
shaft (7) protruding through front bearing bore (18).<br />
NOTE<br />
Assistant will help with steps 3 through 6.<br />
Using arbor press, install bearing (24) on input shaft (7). Seat bearing (24) to shoulder (6) of input<br />
shaft (7).<br />
Using arbor press, install bearing and input shaft (7) on gearcase housing (17) until inner edge<br />
of bearing (24) is even with inner edge of gearcase housing (17).<br />
Using arbor press, install bearing (11) on input shaft (7) and gearcase housing (17). Seat<br />
bearing (11) to bevel gear (10).<br />
NOTE<br />
Use new shims of same thickness as shims removed.<br />
Install new shims (19), new gasket (20), and input drive housing (21) on gearcase housing (17) with<br />
four new lockwashers (23) and screws (22). Tighten screws (22) 25-33 lb-ft (<strong>34</strong>-45 N•m).<br />
Install spacer (5) and yoke (4) on input shaft (7) with washer (3), new lockwasher (2), and screw (1).<br />
Tighten screw (1) 29-33 lb-ft (39-45 N•m).<br />
Install new gasket (16), new shim (15), and cover (12) on gearcase housing (17) with four new<br />
lockwashers (13) and screws (14). Tighten screws (14) 25-33 lb-ft (<strong>34</strong>-45 N•m).<br />
16-150
<strong>TM</strong> 9-<strong>2320</strong>-<strong>260</strong>-<strong>34</strong>-2<br />
16-25. HOIST BEVEL GEARCASE REPAIR (M816) (Cont'd)<br />
10.<br />
11.<br />
12.<br />
13.<br />
14.<br />
15.<br />
16.<br />
17.<br />
18.<br />
Using arbor press, install bearing (35) on driveshaft (28). Seat bearing (35) to shoulder (36) of<br />
driveshaft (28).<br />
Using arbor press, install dnveshaft (28) and bearing (35) on gearcase end of housing (27).<br />
Install snapring (<strong>34</strong>) on housing (27).<br />
Install new woodruff key (29) and bevel gear (30) on driveshaft (28) with washer (31), new lockwasher<br />
(32), and screw (33). Tighten screw (33) 29-33 lb-ft (39-45 N•m).<br />
Using arbor press, install bearing (38) on driveshaft (28) and pump end of housing (27). Seat<br />
bearing (38) to shoulder (37) of driveshaft (28).<br />
Using arbor press, install new seal (40) on cap (41).<br />
Install new gasket (39) and cap (41) on driveshaft (28) and housing (27) with four new lockwashers<br />
(26) and screws (25). Tighten screws (25) 29-33 lb-ft (39-45 N•m).<br />
NOTE<br />
Clean oil from tooth contact surfaces of bevel gears.<br />
Coat contact surfaces of four to eight teeth of bevel gear (30) with blue iron base pigment.<br />
With bevel gears (10) and (30) alined, install new gasket (44) and housing (27) on gearcase<br />
housing (17) with six new lockwashers (43) and screws (42). Tighten screws (42) 25-33 lb-ft<br />
(<strong>34</strong>-45 N•m).<br />
Turn driveshaft (28) two full turns and remove six screws (42), lockwashers (43), and housing (27)<br />
from gearcase housing (17).<br />
16-151
<strong>TM</strong> 9-<strong>2320</strong>-<strong>260</strong>-<strong>34</strong>-2<br />
16-25. HOIST BEVEL GEARCASE REPAIR (M816) (Contd)<br />
19.<br />
20.<br />
21.<br />
22.<br />
23.<br />
24.<br />
25.<br />
26.<br />
27.<br />
28.<br />
Examine pigment pattern on teeth of bevel gear ( 12). Compare pigment patterns to examples below:<br />
a. If pattern most resembles example A, no further adjustments are necessary. Go to step 22.<br />
b. If pattern most resembles example B, gears (10) and ( 12) are meshing too deeply. Go to step 20.<br />
c. If pattern most resembles example C, gears (10) and (12) are not meshing deep enough. Go to<br />
step 21.<br />
Remove four screws (7), Iockwashers (8), cover (6), gasket (5), and shims (4) from gearcase<br />
housing (9). Add shim(s), and repeat step 8 and steps 16 through 19.<br />
Remove four screws (7), lockwashers (8), cover (6), gasket (5), and shims (4) from gearcase<br />
housing (9). Subtract shim(s) and repeat step 8 and steps 16 through 19.<br />
Thoroughly clean bevel gears (10) and (12). Ensure no pigment remains on teeth.<br />
Aline bevel gears (10) and (12) and install housing(1) on gearcase housing (9) with six new<br />
lockwashers (3) and screws (2). Tighten screws (2) 25-33 lb-ft (<strong>34</strong>-45 N•m).<br />
Install dial indicator with extension on gearcase housing (9) and gear (12). Ensure extension contacts<br />
gear (12) on outer edge of tooth.<br />
Zero dial indicator by holding driveshaft ( 13) and turning yoke ( 14) counterclockwise.<br />
Turn yoke (14) clockwise until resistance is felt.<br />
Read backlash on dial indicator. Backlash should be 0.004-0.008 in (0. 10-0.20 mm). If backlash is<br />
incorrect, replace worn bevel gears (10) and (12).<br />
Remove six screws (2), lock washers (3), housing ( 1), and new gasket (11) from gearcase housing (9).<br />
16-152
<strong>TM</strong> 9-<strong>2320</strong>-<strong>260</strong>-<strong>34</strong>-2<br />
29.<br />
30.<br />
31.<br />
32.<br />
33.<br />
<strong>34</strong>.<br />
Install snapring (28) in notch on driveshafl (13).<br />
Install breather (27) in side of housing (1).<br />
Aline hole (21) inside of ring support assembly (18) with hole (24) in side of housing (1), place ring<br />
support assembly (18) on housing (1), and install with new lockwasher (19) and screw (20).<br />
Slide three wire leads (22), one at a time, through new grommet (23), and slide grommet (23) up<br />
wire leads (22).<br />
Cut notch in upper lip of grommet (23), and install grommet (23) and three wire leads (22) through<br />
hole (25) of flange plate (26). Aline notch to clear head of screw to be installed in flange plate (26)<br />
at installation.<br />
Aline splines of coupling (17) with splines of driveshaft (13), and slide coupling (17) onto<br />
driveshaft (13). Seat coupling (17) against snapring (28).<br />
16-153
<strong>TM</strong> 9-<strong>2320</strong>-<strong>260</strong>-<strong>34</strong>-2<br />
16-25. HOIST BEVEL GEARCASE REPAIR (M816) (Cont'd)<br />
35. Install two plugs (5), three plugs (2), Plug (1), and plug(3) in gearcase housing (4) and input shaft<br />
housing (6).<br />
1. Position gearcase housing (4) and input shaft housing (6) on hydraulic jack.<br />
NOTE<br />
Assistant will help with steps 2 through 6.<br />
2. Install housing (11) and gasket (15) on gearcase housing (4) with six new lockwashers (10) and<br />
screws (9). Do not tighten screws (9).<br />
3. Aline flange plate (12) with wrecker body (16), and install flange plate (12) with six new<br />
lockwashers (7) and screws (8).<br />
4. Connect electrical leads (13) to wiring harness (14). (Electrical lead (17) does not connect to wiring<br />
harness (14).)<br />
5. Tighten screws (8) and (9) 25-33 lb-fl (<strong>34</strong>-45 N•m).<br />
6. Fill gearcase housing (4) and input shaft housing (6) with gear oil (LO 9-<strong>2320</strong>-<strong>260</strong>-12).<br />
16-154
<strong>TM</strong> 9-<strong>2320</strong>-<strong>260</strong>-<strong>34</strong>-2<br />
16-25. HOIST BEVEL GEARCASE REPAIR (M816) (Cont'd)<br />
FOLLOW-ON TASKS: • Install crane gearcase (para. 16-28).<br />
• Install hoist hydraulic pump assembly and support (para. 16-24).<br />
• Install boom assembly (para. 16-18).<br />
● Install boom elevating cylinders (para. 16-14).<br />
● Install crane gondola assembly (para. 16-22).<br />
• Install crane drive propeller shaft (<strong>TM</strong> 9-<strong>2320</strong>-<strong>260</strong>-20).<br />
● Install hydraulic oil reservoir (<strong>TM</strong> 9-<strong>2320</strong>-<strong>260</strong>-20).<br />
● Fill hydraulic oil reservoir (LO 9-<strong>2320</strong>-<strong>260</strong>-12).<br />
• Test crane hydraulic system operation (<strong>TM</strong> 9-<strong>2320</strong>-<strong>260</strong>-10).<br />
16-155
<strong>TM</strong> 9-<strong>2320</strong>-<strong>260</strong>-<strong>34</strong>-2<br />
16-26. CRANE TURNTABLE MAINTENANCE (M816)<br />
THIS TASK COVERS:<br />
a. Removal d. Assembly<br />
b. Disassembly e. Installation<br />
c. Cleaning and Inspection<br />
APPLICABLE MODELS<br />
M816<br />
TOOLS<br />
General mechanic’s tool kit<br />
(Appendix B, Item 1)<br />
Lifting device<br />
Eight washers (Appendix C, Item 56)<br />
Four nuts (Appendix C, Item 24)<br />
Four screws (Appendix C, Item 33)<br />
MATERIALS/PARTS<br />
Two lockwashers (Appendix D. Item 213)<br />
Eighteen locknuts (Appendix D, Item 173)<br />
Eight lockwashers (Appendix D, Item 223)<br />
GAA grease (Appendix C, Item 14)<br />
AntiSeize tape (Appendix C, Item 50)<br />
REFERENCES (<strong>TM</strong>)<br />
<strong>TM</strong> 9-237<br />
LO 9-<strong>2320</strong>-<strong>260</strong>-12<br />
<strong>TM</strong> 9-<strong>2320</strong>-<strong>260</strong>-20<br />
<strong>TM</strong> 9-<strong>2320</strong>-<strong>260</strong>-<strong>34</strong>P-2<br />
EQUIPMENT CONDITION<br />
• Floodlight wiring harness removed<br />
(<strong>TM</strong> 9-<strong>2320</strong>-<strong>260</strong>-20).<br />
• Hoist bevel gearcase removed (para. 16-25).<br />
• Hydraulic pump and support removed<br />
(para. 16-24).<br />
• Crane gearcase removed (para. 16-28).<br />
• Crane boom elevating cylinders removed<br />
(para. 16-14).<br />
• Crane gondola assembly removed (para. 16-22).<br />
• Hydraulic oil reservoir removed<br />
(<strong>TM</strong> 9-<strong>2320</strong>-<strong>260</strong>-20).<br />
• Boom assembly removed (para. 16-18).<br />
GENERAL SAFETY lNSTRUCTlONS<br />
• All personnel must stand clear during lifting<br />
operations.<br />
• Ensure lifting capacity is greater than weight of<br />
boom support.<br />
NOTE<br />
Assistant will help with step 1.<br />
1. Attach chains and lifting device to boom support (1). Take up slack in chains.<br />
2. Remove eighteen screws (2) and locknuts (3) from boom support (1) and turntable frame (6). Discard<br />
locknuts (3).<br />
WARNING<br />
• All personnel must stand clear during Iifting operations.<br />
A swinging or shifting load may cause injury to personnel.<br />
• Ensure lifting capacity is greater than weight (30 lb (14 kg)) of<br />
boom support. Failure to do so may result m injury to personnel<br />
or damage to equipment.<br />
NOTE<br />
Assistant will help with step 3.<br />
3. Remove boom support (1) from turntable frame (6).<br />
4. Remove four screws (4) and right-hand guard (5) from turntable frame (6).<br />
5. Remove four screws (7) an left-hand guard (8) from turntable frame (6).<br />
6. Rotate turntable frame (6) 90° clockwise and remove two screws (14), lockwashers (13), and stop<br />
block (12) from wrecker body (11). Discard lockwashers (13).<br />
7. Remove socket-head screw (9) from ring•gear (10).<br />
8. Rotate turntable frame (6) and remove next socket head screw (9) from ring gear (10). Repeat until<br />
all eighteen socket-head screws (9) are removed.<br />
16-156
<strong>TM</strong> 9-<strong>2320</strong>-<strong>260</strong>-<strong>34</strong>-2<br />
16-26. CRANE TURNTABLE MAINTENANCE (M816) (Cont'd)<br />
9. Attach chain to turntable frame (6) and Iifting device with eight washers (16), four screws (17) and<br />
nuts (15). Take up slack in chain.<br />
WARNING<br />
• All personnel must stand clear during lifting operations.<br />
A swinging or shifting load may cause injury to personnel.<br />
• Ensure lifting capacity is greater than weight of turntable<br />
frame, Failure to do so may result in injury to personnel or<br />
damage to equipment.<br />
NOTE<br />
Assistant will help with step 10.<br />
10. Remove turntable frame (6) from wrecker body (11). Set down on supports. Remove chain from rear<br />
end of turntable frame (6).<br />
16-157
<strong>TM</strong> 9-<strong>2320</strong>-<strong>260</strong>-<strong>34</strong>-2<br />
16-26. CRANE TURNTABLE MAINTENANCE (M816) (Cont'd)<br />
b. Disassembly<br />
1.<br />
2.<br />
3.<br />
4.<br />
5.<br />
6.<br />
7.<br />
8.<br />
9.<br />
10.<br />
11.<br />
12.<br />
13.<br />
14.<br />
15.<br />
16.<br />
17.<br />
18.<br />
19.<br />
20.<br />
21.<br />
22.<br />
16-158
<strong>TM</strong> 9-<strong>2320</strong>-<strong>260</strong>-<strong>34</strong>-2<br />
16-26. CRANE TURNTABLE MAINTENANCE (M816) (Cont'd)<br />
16-159
<strong>TM</strong> 9-<strong>2320</strong>-<strong>260</strong>-<strong>34</strong>-2<br />
16-26. CRANE TURNTABLE MAINTENANCE (M816) (Cont'd)<br />
c. Cleaning, Inspection, and Repair<br />
1. For general cleaning instruction, refer to para 2-8.<br />
2. For general inspection instructions, refer to para. 2-9.<br />
3. Replace all worn or unrepairable parts.<br />
4. Repair damaged part(s) (para. 2-10).<br />
5. Replace ring (29) and/or gear (27) if part is worn, damaged, or defective.<br />
6. Repair minor cracks and broken welds (<strong>TM</strong> 9-237).<br />
1. Wrap all male pipe threads on tee fittings (3) and (15), adapters (14) and (19), hose (13), adapter (2),<br />
elbows (1) and (12), hoses (20) and (11), elbows (5) and (10), and tee fitting (4) with antiseize tape.<br />
2. Install tee fittings (3) and (15) on crosstube (17).<br />
3. Install adapters (14) and (19) on tee fittings (3) and (15).<br />
4. Install hoses (13) and (18) on adapters (3) and (15).<br />
5. Install adapter (2) and elbows (1) and (12) on tee fittings (3) and (15).<br />
6. Install hoses (20) and (11) on elbows (1) and (12).<br />
7. Install elbows (5) and (10) on crosstube (6).<br />
8. Install tee fitting (4) on elbow (5).<br />
9. Install two braces (9) on boom support (16) with eight new Iockwashers (7) and screws (8).<br />
NOTE<br />
Coat all internal surfaces and parts lightly with GAA grease<br />
before installation.<br />
10. Position ring (29) and gear (27) on supports with bearing races (28) alined. Shim if necessary.<br />
11. Install fifty-four springs (25) and bearings (26) in races (28).<br />
12. Install plug (24) and pin (21) in ring gear (22).<br />
13. Install grease fitting (23) in plug (24) and lubricate bearings (26) (LO 9-<strong>2320</strong>-<strong>260</strong>-12).<br />
14. Install chain on ring gear (22) with two washers (31), screw (32), and nut (33).<br />
WARNING<br />
• All personnel must stand clear during lifting operations.<br />
A swinging or shifting load may cause injury to personnel.<br />
• Ensure lifting capacity is greater than weight of ring gear.<br />
Failure to do so may result in injury to personnel or damage<br />
to equipment.<br />
NOTE<br />
Assistant will help with step 15.<br />
15. Attach chain to lifting device and position ring gear (22) on turntable frame (<strong>34</strong>). Ensure ring<br />
gear (22) is flush against turntable frame (<strong>34</strong>).<br />
16. Remove nut (33), screw (32), two washers (31), and chain from ring gear (22).<br />
17. Install ring gear (22) on turntable frame (<strong>34</strong>) with eighteen socket-head screws (30). Tighten sockethead<br />
screws (30) to 170-200 lb-ft (231-271 N*m).<br />
16-160
<strong>TM</strong> 9-<strong>2320</strong>-<strong>260</strong>-<strong>34</strong>-2<br />
16-25 HOIST BEVEL GEARCASE REPAIR (M 816) (Contd)<br />
16-161
<strong>TM</strong> 9-<strong>2320</strong>-<strong>260</strong>-<strong>34</strong>-2<br />
16-26. CRANE TURNTABLE MAINTENANCE (M816) (Cont'd)<br />
1.<br />
2.<br />
3.<br />
4.<br />
5.<br />
6.<br />
7.<br />
8.<br />
Install chains on turntable frame (1) with eight washers (3), four screws (4), and nuts (2).<br />
Attach chain to Iifting device.<br />
WARNING<br />
• All personnel must stand clear during lifting operations.<br />
A swinging or shifting load may cause injury to personnel.<br />
• Ensure lifting capacity is greater than weight of turntable<br />
frame. Failure to do so may result in injury to personnel or<br />
damage to equipment.<br />
NOTE<br />
Assistant will help with steps 3 through 6.<br />
Lift turntable frame (1), rotate turntable frame (1), and lower onto supports with ring gear (6) down.<br />
Reposition second chain on turntable frame (1) and lifting device.<br />
Position turntable frame (1) on wrecker body (7). Ensure holes in ring gear (6) aline with threaded<br />
holes in wrecker body (7).<br />
Install turntable frame (1) on wrecker body (7) with eighteen socket-head screws (5). Rotate<br />
turntable frame (1) as necessary to gain access to screw holes.<br />
Install stop block (8) on wrecker body (7) with two new lockwashers (9) and screws (10).<br />
Remove four nuts (2), screws (4), eight washers (3), and chain from turntable frame (1) and lifting device.<br />
16-162
<strong>TM</strong> 9-<strong>2320</strong>-<strong>260</strong>-<strong>34</strong>-2<br />
16-26. CRANE TURNTABLE MAINTENANCE (M816) (Cont'd)<br />
9. Install left guard (17) on turntable frame (1) with four screws (16).<br />
10. Install right guard (15) on turntable frame (1) with four screws (14).<br />
11. Attach two chains to boom support (11) and lifting device.<br />
12.<br />
• All personnel must stand clear during lifting operations.<br />
A swinging or shifting load may cause injury to personnel.<br />
• Ensure lifting capacity is greater than weight (30 lb (14 kg)) of<br />
boom support. Failure to do so may result m injury to personnel<br />
or damage to equipment.<br />
NOTE<br />
Assistant will help with step 12.<br />
Lift boom support (11), aline over turntable frame (l), and install with eighteen screws (12) and<br />
new locknuts (13).<br />
13. Remove chain from boom support (11).<br />
FOLLOW-ON TASKS: • Install hoist bevel gearcase (para. 16-25).<br />
• Install hydraulic pump and support (para. 16-24).<br />
• Install crane gearcase (para. 16-28).<br />
• Install crane boom elevating cylinders (para 16-14).<br />
• lnstall floodlight wiring harness (<strong>TM</strong> 9-<strong>2320</strong>-<strong>260</strong>-20).<br />
• Install crane gondola assembly ( para. 16-22).<br />
• Install hydraulic oil reservoir (<strong>TM</strong> 9-<strong>2320</strong>-<strong>260</strong>-20).<br />
• Install boom assembly (para. 16-18).<br />
• Start engine, check oil leaks, and check crane operation (<strong>TM</strong> 9-<strong>2320</strong>-<strong>260</strong>-10).<br />
16-163
<strong>TM</strong> 9-<strong>2320</strong>-<strong>260</strong>-<strong>34</strong>-2<br />
16-27. CONTROL VALVE REPAIR (M816)<br />
THIS TASK COVERS:<br />
a. Disassembly c. Assembly<br />
b. Cleaning, Inspection, and Repair<br />
INITIAL SETUP<br />
APPULIABI.E MODELS<br />
M816<br />
TOOLS<br />
General mechanic’s tool kit<br />
(Appendix B, Item 1)<br />
MATERIALS/PARTS<br />
Control valve parts kit<br />
(Appendix D, Item 14)<br />
MATERIALS/PARTS (Contd)<br />
Control valve parts kit -<br />
(Appendix D, Item 15)<br />
Lubricating oil (Appendix C, Item 21)<br />
REFERENCES (<strong>TM</strong>)<br />
<strong>TM</strong> 9-<strong>2320</strong>-<strong>260</strong>-20<br />
<strong>TM</strong> 9-<strong>2320</strong>-<strong>260</strong>-<strong>34</strong>P-2<br />
EQUIPMENT CONDITION<br />
Control valve removed (<strong>TM</strong> 9-<strong>2320</strong>-<strong>260</strong>-20).<br />
a. Disassembly<br />
Control valve must be disassembled on a clean and protected work<br />
surface. Failure to do so may result in damage to equipment.<br />
1.<br />
2.<br />
3.<br />
4.<br />
5.<br />
6.<br />
7.<br />
8.<br />
9.<br />
10.<br />
NOTE<br />
• Clean control valve housing exterior before start of disassembly<br />
(para. 2-8).<br />
• Tag location and position of spools and check valve caps for<br />
installation.<br />
Remove four spool valve caps (11) from control valve housing (5).<br />
Remove C-clip (12), retainer (13), spring (14), washer (15), and retainer (16) from four spools (24)<br />
and control valve housing (5).<br />
Remove four spools (24) from control valve housing (5).<br />
Remove four wipers (25), eight retainers (17), and packings (18) from control valve housing (5).<br />
Discard packings (18).<br />
Remove seven check valve caps (8), springs (10), and check valves (9) from control valve housing (5).<br />
Remove three retainers (6) and packings (7) from seven check valve caps (8). Discard retainers (6)<br />
and packings (7).<br />
Remove check valve cap (1) and valve (4) from control valve housing (5).<br />
Remove three retainers (3) and packings (2) from check valve cap (1). Discard retainers (3) and<br />
packings (2).<br />
Remove plug (20) and retainer seat (19) from control valve housing (5). Discard plug (20) and<br />
retainer seat (19).<br />
Remove adjuster body (23), spring (22), and poppet (21) from control valve housing (5). Discard<br />
adjuster body (23), spring (22), and poppet (21).<br />
b. Cleaning, Inspection, and Repair<br />
1. For general cleaning instructions, refer to para 2-8.<br />
2. For general inspection instructions,’ refer to para. 2-9.<br />
3. Inspect control valve housing (5) for cracks, breaks, and damaged threads. Repair or replace control<br />
valve housing (5).<br />
16-164
<strong>TM</strong> 9-<strong>2320</strong>-<strong>260</strong>-<strong>34</strong>-2<br />
4. Inspect four spool valve caps (11) for damaged threads or dents. Replace control valve housing (5)<br />
if spool valve caps (11) are damaged.<br />
5. Inspect check valve caps (1) and (8) for nicks, burrs, and damage. Replace check valve cap(s) (1)<br />
or (8) if damaged.<br />
6. Inspect four spools (24) for nicks, burrs, and scoring. Replace entire control valve housing (5)<br />
if spool(s) (24) are damaged.<br />
16-165
<strong>TM</strong> 9-<strong>2320</strong>-<strong>260</strong>-<strong>34</strong>-2<br />
16-27. CONTROL VALVE REPAIR (M816) (Cont'd)<br />
CAUTION<br />
Control valve must be assembled on a clean and protected work<br />
surface. Failure to do so may result in damage to equipment.<br />
NOTE<br />
• All spools and check valve caps must be installed in bore from<br />
which it was removed.<br />
• Lubricate all internal parts with hydraulic oil before assembling.<br />
1. Install new poppet (21), spring (22), and adjuster body (23) on control valve housing(5).<br />
2. Install new retainer seat (19) and plug (20) on control valve housing (5).<br />
3. Install three new packings (2) and new retainers (3) on check valve cap (1).<br />
4. Install valve (4) and check valve cap (1) on control valve housing (5).<br />
5. Install three new packings (7) and new retainers (6) on seven check valve caps (8).<br />
6. Install seven check valves (9), springs (10), and check valve caps (8) on control valve housing(5).<br />
7. Install eight new packings (18) and retainers (17) on control valve housing (5).<br />
8. Install four wipers (25) on control valve housing (5).<br />
9. Install four spools (24) in control valve housing (5) in positions previously noted.<br />
10. Install retainer (16), washer (15), spring (14), and retainer (13) on four spools (24) and control valve<br />
housing (5) with C-clip (12).<br />
11. Install four spool valve caps (11) on control valve housing (5).<br />
16-166
<strong>TM</strong> 9-<strong>2320</strong>-<strong>260</strong>-<strong>34</strong>-2<br />
16-27. CONTROL VALVE REPAIR (M816) (Cont'd)<br />
FOLLOW-ON TASK: Install control valve (<strong>TM</strong> 9-<strong>2320</strong>-<strong>260</strong>-20).<br />
16-167
<strong>TM</strong> 9-<strong>2320</strong>-<strong>260</strong>-<strong>34</strong>-2<br />
16-28. CRANE GEARCASE MAINTENANCE (M816)<br />
THIS TASK COVERS:<br />
a. Removal d. Assembly<br />
b. Disassembly e. Installation<br />
c. Cleaning and Inspection<br />
lNITIAL SETUP<br />
APPLICABLE MODELS<br />
M816<br />
TOOLS<br />
General mechanic’s tool kit<br />
(Appendix B, Item 1)<br />
Mechanical puller kit (Appendix B, Item 14)<br />
Outside micrometer (Appendix B, Item 8)<br />
Inside micrometer (Appendix B, Item 9)<br />
Arbor press (Appendix B, Item 7)<br />
MATERIALS/PARTS<br />
Twenty lockwashers (Appendix D, Item 223)<br />
Two woodruff keys (Appendix D, Item 566)<br />
Two woodruff keys (Appendix D, Item 567)<br />
MATERIALS/PARTS (Cont'd)<br />
Woodruff key (Appendix D, Item 562)<br />
Two gaskets - (Appendix D, Item 112)<br />
Gasket (Appendix D, Item 114)<br />
Seal (Appendix D, Item 468)<br />
REFERENCES (TN)<br />
LO 9-<strong>2320</strong>-<strong>260</strong>-12<br />
<strong>TM</strong> 9-<strong>2320</strong>-<strong>260</strong>-10<br />
<strong>TM</strong> 9-<strong>2320</strong>-<strong>260</strong>-<strong>34</strong>P-2<br />
EQUIPMENT CONDITION<br />
Hoist winch motor removed (para. 16-15).<br />
1. Remove four screws (8) and lockwashers (7) from end cap (1) and motor mounting cap (6). Discard<br />
Iockwashers (7).<br />
2. Remove two screws (3) and lockwashers (4) from gearcase housing (2). Discard lockwasher (4).<br />
NOTE<br />
Assistant will help with step 3.<br />
3. Pry gearcase housing (2) from turntable (5) and remove gearcase housing (2).<br />
1.<br />
2.<br />
3.<br />
4.<br />
5.<br />
6.<br />
NOTE<br />
Have drainage container ready to catch oil.<br />
Remove magnetic plug (15) and two plugs (14) from gearcase housing (2). Drain gearcase housing (2).<br />
Remove six screws (12) and Iockwashers (13) from cover (17). Discard Iockwashers (13).<br />
Install three screws (11) in three jacking holes (10) in cover (17). Evenly tighten screws (11) and<br />
remove cover (17) and gasket (16) from gearcase housing (2). Discard gasket (16).<br />
Remove three screws (11) and plug (9) from cover (17).<br />
Remove screw (18), lockwasher (19), and washer (20) from spur gear shaft (21). Discard lockwasher<br />
(19).<br />
NOTE<br />
Assistant will help with step 6.<br />
Using an arbor press, press spur gear shaft (21) from gearcase housing (2).<br />
l6-168
<strong>TM</strong> 9-<strong>2320</strong>-<strong>260</strong>-<strong>34</strong>-2<br />
16-28. CRANE GEARCASE MAINTENANCE (M816) (Cont'd)<br />
7. Using a mechanical puller, remove bearing (24) from spur gear shaft (21).<br />
8. Press worm gear (22) and washer (23) from spur gear shaft (21).<br />
9. Remove two woodruff keys (28) from spur gear shaft (21). Discard woodruff keys (28).<br />
10. Using a mechanical puller, remove bearing (26) and washer (25) from spur gear shaft (21).<br />
11. Remove seal (27) from spur gear shaft (21). Discard seal (27).<br />
16-169
<strong>TM</strong> 9-<strong>2320</strong>-<strong>260</strong>-<strong>34</strong>-2<br />
16-28. CRANE GEARCASE MAINTENANCE (M816) (Cont'd)<br />
12. Remove four screws (14) and lockwashers (13), motor mounting cap (l), and gasket (2) from gearcase<br />
housing (8). Discard lockwashers (13) and gasket (2).<br />
13. Remove coupling (3) from wormshaft (4).<br />
14. Remove woodruff key (5) from wormshafi (4). Discard woodruff key (5).<br />
15. Remove four screws (9), lockwashers (10), end cap (11), and gasket (12) from gearcase housing (8).<br />
Discard lockwashers (10) and gasket (12).<br />
16. Using arbor press, partially remove wormshaft (4) so that front bearing(6) is unseated from<br />
gearcase housing (8).<br />
CAUTION<br />
Ensure rear bearing on shaft and front bore in gearcase housing<br />
are alined before pressing rear bearing through front bore. Failure<br />
to do so may result in damage to bearing or gearcase.<br />
17. Aline rear bearing (7) and front, bearing bore in gearcase housing (8) and press wormshaft (4) from<br />
gearcase housing (8).<br />
18. Using mechanical puller, remove bushing (21) and front bearing (6) from wormshaft (4).<br />
19. Press bushing (21) from front bearing (6).<br />
20. Remove woodruff key (26) from wormshaft (4). Discard woodruff key (26).<br />
21. Remove spring (22), spacer (23), and washer (24) from wormshaft (4).<br />
22. Using mechanical puller, remove rear bearing (7) and bushing (31) from wormshaft (4).<br />
23. Press bushing (31) from rear bearing (7).<br />
24. Press woodruff key (27) from wormshaft (4). Discard woodruff key (27).<br />
25. Remove spring (30), spacer (29), washer (28), and worm gear (25) from wormshaft (4).<br />
c. Cleaning and Inspection<br />
1. For general cleaning instructions, refer to para 2-8.<br />
2. For general inspection instructions, refer to para. 2-9.<br />
3. Inspect front wormshaft bearing (6), rear wormshaft bearing (7), spur gear bearing (20), spur<br />
gear shaft (16), wormshaft (4), gearcase housing (8), cover (15), thrust washers (18) and (19), and<br />
bushings (21) and (31) for damage and wear. Refer to table 16-15, Crane GearCase Wear Limits,<br />
for measurements. Replace parts if worn or damaged.<br />
Table 16-15. Crane Gearcase Wear Limits.<br />
ITEM<br />
NO.<br />
4<br />
6,7<br />
8<br />
15<br />
ITEM/POINT OF MEASUREMENT<br />
Wormshaft – outer diameter – minimum (2 places)<br />
Wormshaft bearings<br />
Outer diameter<br />
Inner diameter<br />
Gearcase housing<br />
Gearcase bore - maximum (2)<br />
Gearcase bore - maximum<br />
Cover bearing bore - outer diameter - minimum<br />
WEAR LIMITS/TOLERANCES<br />
INCHES<br />
I MILLIMETERS<br />
1.720 43.69<br />
3.9364 99.98<br />
1.7717 45.00<br />
3.9379 100.25<br />
4.3315 110.02<br />
16-170
<strong>TM</strong> 9-<strong>2320</strong>-<strong>260</strong>-<strong>34</strong>-2<br />
16-28. CRANE GEARCASE MAINTENANCE (M816) (Cont'd)<br />
NO.<br />
Table 16-15. Crane Gearcase Wear Limits (Cont'd).<br />
—<br />
lTEM/POINT OF MEASUREMENT<br />
WEAR LIMITS/TOLERANCES<br />
INCHES<br />
MILLIMETERS<br />
16 Spur gear shaft<br />
Outer diameter (a) - minimum 1.7718 45.00<br />
Outer diameter (b) - minimum 1.895 48.13<br />
Outer diameter (c) - minimum 2.3623 60.002<br />
Outer diameter (d) - minimum 2.624 66.65<br />
17 Spur gear bearing<br />
Outer diameter 4.3301 109.985<br />
Inner diameter 2.3016<br />
18 Thrust washer - thickness - minimum 0.489 12.42<br />
Thrust washer - thickness - minimum 0.185 4.70<br />
:19 Spur gear bearing<br />
Outer diameter 3.9364 99.985<br />
Inner diameter 1.7717 45.001<br />
21,31 Bushing - outer diameter - minimum 1.7718 45.00<br />
16-171
<strong>TM</strong> 9-<strong>2320</strong>-<strong>260</strong>-<strong>34</strong>-2<br />
16-28. CRANE GEARCASE MAINTENANCE (M816) (Cont'd)<br />
1.<br />
2.<br />
3.<br />
4.<br />
5.<br />
6.<br />
7.<br />
8.<br />
9.<br />
10.<br />
11.<br />
12.<br />
13.<br />
14.<br />
NOTE<br />
Coat all internal parts with gear oil before assembly.<br />
Install washer (7), spacer (8), and spring (9) on shaft (12).<br />
Install new woodruff key (6) on shaft (12).<br />
Press bushing (10) into bearing (11).<br />
Install bushing (10) and bearing (11) on shaft (12).<br />
Slide worm gear (14) over splines of shaft (12).<br />
Install washer (5), spacer (4), and spring (3) on shaft (12).<br />
Install new woodruff key (13) in shaft (12).<br />
Install bushing (2) into bearing(1).<br />
Install bushing (2) and bearing (1) on shaft (12).<br />
Install worrnshaft (19) in gearcase housing (20).<br />
Install new gasket (21) and end cap (24) on gearcase housing (20) with four new lockwashers (23)<br />
and screws (22). Tighten screws (22) 44-61 lb-ft (60-83 N-m).<br />
Install new woodruff key (18) in wormsha.ft (19).<br />
Install coupling (17) on wormshaft (19).<br />
Install new gasket (16) and motor mount (15) on gearcase housing (20) with four new lockwashers<br />
(25) and screws (26). Tighten screws (26) 44-61 lb-ft (60-83 N•m).<br />
16-172
<strong>TM</strong> 9-<strong>2320</strong>-<strong>260</strong>-<strong>34</strong>-2<br />
16-28. CRANE GEARCASE MAINTENANCE (M816) (Cont'd)<br />
15.<br />
16.<br />
17.<br />
18.<br />
19.<br />
20.<br />
21.<br />
22.<br />
23.<br />
24.<br />
25.<br />
26.<br />
Install new seal (33) on spur gear shaft (27).<br />
Using arbor press, install bearing (32) on spur gear shaft (27).<br />
Install washer (31) on spur gear shaft (27).<br />
Install two woodruff keys (<strong>34</strong>) on spur gear shaft (27).<br />
Using arbor press, install worm gear (28) on spur gear shaft (27).<br />
Install washer (29) on spur gear shaft (27).<br />
Using arbor press, install bearing (30) on spur gear shaft (27) and seat against worm gear (28).<br />
Using arbor press, install spur gear shaft (27) in gearcase housing (20).<br />
Install washer (37), new lockwasher (36), and screw (35) on spur gear shaft (27).<br />
Install new gasket (43) and cover (44) on gearcase housing (20) with six new Iockwashers (40) and<br />
screws (39).<br />
Install plug (38) on cover (44).<br />
Install two plugs (41) and magnetic plug (42) on gearcase housing (20).<br />
e. Installation<br />
NOTE<br />
Assistant will help with installation of gearcase housing.<br />
Position gearcase housing (20) on turntable (47) and instill with two new lockwashers (46), screws (45),<br />
four new lockwashers (48). and screws (49). Tighten screws (45) 44-61 lb-ft (60-83 N•m). Tighten<br />
screws (49) 90-98 lb-ft (122-133 N•m). -<br />
FOLLOW-ON TASKS: • Install hoist winch motor (para. 16-15).<br />
• Fill drive gearcase assembly with oil (LO 9-<strong>2320</strong>-<strong>260</strong>-12).<br />
• Test wrecker operation (<strong>TM</strong> 9-<strong>2320</strong>-<strong>260</strong>-10).<br />
16-173
<strong>TM</strong> 9-<strong>2320</strong>-<strong>260</strong>-<strong>34</strong>-2<br />
16-29 CRANE CAB (GONDOLA) REPLACEMENT (M 819)<br />
THIS TASK COVERS:<br />
a. Removal b. Installation<br />
lNITIAL SETUP<br />
APPLICABLE MODELS<br />
M819<br />
TOOLS<br />
General mechanic’s tool kit<br />
(Appendix B, Item 1)<br />
1-5116-in. open-end wrench<br />
(Appendix B, Item 122)<br />
1-7/16-in. open-end wrench<br />
(Appendix B, Item 124)<br />
1-lJ2-in. open-end wrench<br />
(Appendix B, Item 125)<br />
Lifting device<br />
Chains<br />
MATERIALS/PARTS<br />
Four lockwashers (Appendix D, Item 247)<br />
Four lockwashers (Appendix D, Item 220)<br />
Two lockwashers (Appendix D, Item 221)<br />
PERSONNEL REQUIRED<br />
Two<br />
REFERENCES (<strong>TM</strong>)<br />
<strong>TM</strong> 9-<strong>2320</strong>-<strong>260</strong>-10<br />
<strong>TM</strong> 9-<strong>2320</strong>-<strong>260</strong>-20<br />
<strong>TM</strong> 9-<strong>2320</strong>-<strong>260</strong>-<strong>34</strong>P-2<br />
EQUIPMENT CONDITION<br />
• Parking brake set (<strong>TM</strong> 9-<strong>2320</strong>-<strong>260</strong>-10).<br />
• Cab door sliding windows removed<br />
(<strong>TM</strong> 9-<strong>2320</strong>-<strong>260</strong>-20).<br />
• Cab side window removed (<strong>TM</strong> 9-<strong>2320</strong>-<strong>260</strong>-20).<br />
• Cab stationary window removed<br />
(<strong>TM</strong> 9-<strong>2320</strong>-<strong>260</strong>-20).<br />
• Control valve bank removed (para. 16-36).<br />
• Hydraulic lines and hoses (in cab) disconnected<br />
(para. 15-10).<br />
• Spare tire removed (<strong>TM</strong> 9-<strong>2320</strong>-<strong>260</strong>-10).<br />
• Operator's seat cushion removed<br />
(<strong>TM</strong> 9-<strong>2320</strong>-<strong>260</strong>-20).<br />
• Cab door and steps removed (<strong>TM</strong> 9-<strong>2320</strong>-<strong>260</strong>-20).<br />
• Floodlights removed (<strong>TM</strong> 9-<strong>2320</strong>-<strong>260</strong>-20).<br />
• Floodlight electrical harness removed<br />
(<strong>TM</strong> 9-<strong>2320</strong>-<strong>260</strong>-20).<br />
• Fire extinguisher and bracket removed<br />
(<strong>TM</strong> 9-<strong>2320</strong>-<strong>260</strong>-20).<br />
GENERAL SAFETY INSTRUCTIONS<br />
• All personnel must stand clear during lifting<br />
operations.<br />
• Ensure lifting capacity is greater than the weight<br />
of the cab.<br />
WARNING<br />
• All personnel must stand clear during lifting operations. A<br />
swinging or shifting load may cause injury or death to personnel.<br />
• Ensure lifting capacity is greater than weight (500 lb (227 kg)) of<br />
cab. Failure to do so may result in injury to personnel or damage<br />
1. Attach chains to cab (1) and lifting device. Remove slack from chain.<br />
2. Remove four nuts (5), lockwashers (4), and screws (3) from cab (1) and boom (2). Discard<br />
lockwashers (4).<br />
3. Remove four screws (9) and Iockwashers (8), and bracket ( 10) from cab (1) and boom (2). Discard<br />
lockwashers (8).<br />
4. Remove two screws (7) and lockwashers (6), and cab (1) from boom (2). Place cab (1) on wooden<br />
supports. Discard lockwashers (6).<br />
5. Remove chain from cab (1) and lifting device.<br />
1. Attach chain to cab (1) and lifting device.<br />
16-174
<strong>TM</strong> 9-<strong>2320</strong>-<strong>260</strong>-<strong>34</strong>-2<br />
16-29 CRANE CAB (GONDOLA REPLACEMENT (M819) (Contd)<br />
WARNING<br />
2.<br />
3.<br />
4.<br />
5.<br />
6.<br />
●<br />
❵<br />
All personnel must stand clear during lifting operations, A<br />
swinging or shifting load may cause injury or death to personnel.<br />
Ensure lifting capacity is greater than weight (500 lb (227 kg)) of<br />
cab. Failure to do so may result in injury to personnel or damage<br />
to equipment.<br />
Lift cab (1) from wooden supports and position cab (1) next to boom (2).<br />
Aline holes in cab (1) with holes in boom (2).<br />
Install two new lockwashers (6) and screws (7) on cab (1) and boom (2).<br />
Install bracket (10) and four new lockwashers (8) and screws (9) on cab (1) and boom (2).<br />
Install four screws (3) on cab (1) and boom (2) with four new lockwashers (4) and nuts (5).<br />
FOLLOW-ON TASKS: •<br />
•<br />
•<br />
•<br />
•<br />
•<br />
•<br />
•<br />
Install cab door and steps (<strong>TM</strong> 9-<strong>2320</strong>-<strong>260</strong>-20).<br />
Ihstall operator’s seat cushion (<strong>TM</strong> 9-<strong>2320</strong>-<strong>260</strong>-20).<br />
Install spare tire (<strong>TM</strong> 9-<strong>2320</strong>-<strong>260</strong>-10).<br />
Connect hydraulic lines and hoses (in cab) (para. 15-10).<br />
Install control valve bank (para. 16-36).<br />
Install cab stationary window (<strong>TM</strong> 9-<strong>2320</strong>-<strong>260</strong>-20).<br />
Install cab side window (<strong>TM</strong> 9-<strong>2320</strong>-<strong>260</strong>-20).<br />
Install cab door sliding window (<strong>TM</strong> 9-<strong>2320</strong>-<strong>260</strong>-20).<br />
Install fire extinguisher and bracket (<strong>TM</strong> 9-<strong>2320</strong>-<strong>260</strong>-20).<br />
Install floodlight electrical harness (<strong>TM</strong> 9-<strong>2320</strong>-<strong>260</strong>-20).<br />
Install floodlights (<strong>TM</strong> 9-<strong>2320</strong>-<strong>260</strong>-20).<br />
16-175
<strong>TM</strong> 9-<strong>2320</strong>-269-<strong>34</strong>-2<br />
16-30. BOOM SWING MECHANISM REPLACEMENT (M819)<br />
THIS TASK COVERS:<br />
a. Removal b. Installation<br />
APPLICABLE MODELS<br />
M819<br />
TOOLS<br />
General mechanic’s tool kit<br />
(Appendix B, Item 1)<br />
1-1/8 in. open-end wrench<br />
(Appendix B, Item 121)<br />
1-11/16 in. open-end wrench<br />
(Appendix B, Item 127)<br />
Lifting device<br />
Chains<br />
MATERIALS/PARTS<br />
Gasket (Appendix D, Item 59)<br />
Six lockwashers (Appendix D, Item 215)<br />
Woodruff key (Appendix D, Item 546)<br />
Cap and plug set (Appendix C, Item 6)<br />
Antiseize tape (Appendix C, Item 50)<br />
REFERENCES (<strong>TM</strong>)<br />
LO 9-<strong>2320</strong>-<strong>260</strong>-12<br />
<strong>TM</strong> 9-<strong>2320</strong>-<strong>260</strong>-10<br />
<strong>TM</strong> 9-<strong>2320</strong>-<strong>260</strong>-<strong>34</strong>P-2<br />
EQUIPMENT CONDITION<br />
• Parking brake set (<strong>TM</strong> 9-<strong>2320</strong>-<strong>260</strong>-10).<br />
• Drain gear oil from boom swing mechanism<br />
(LO 9-<strong>2320</strong>-<strong>260</strong>-12).<br />
GENERAL SAFETY INSTRUCTIONS<br />
• All personnel must stand clear during lifting<br />
operations.<br />
• Ensure lifting capacity is greater than weight of<br />
swing mechanism.<br />
a. Removal<br />
1.<br />
2.<br />
3.<br />
4.<br />
5.<br />
6.<br />
7.<br />
• Clean area around hoses and lines before removal to prevent<br />
entry of dirt. Damage will occur if dirt or dust enters system.<br />
• Cap or plug all openings immediately after disconnecting lines<br />
and hoses to prevent contamination. Remove caps or plugs<br />
before installation. Failure to do so may result in hydraulic<br />
system damage.<br />
NOTE<br />
• Have drainage container ready to catch oil.<br />
• Tag hoses for installation.<br />
• Mark positions of h hydraulic motor fittings for installation.<br />
Loosen swivel nuts (5) and (7) and disconnect hoses (10) and (12) from adapter elbows (4) and (6).<br />
Loosen swivel nut (9) on angle adapter (8) and disconnect drain hose (11) from angle adapter (8).<br />
Remove six screws (15) and Iockwashers (14) from flange of boom swing mechanism (13). Discard<br />
lockwashers (14).<br />
Remove hydraulic motor (3) and coupling (1) from boom swing mechanism (13).<br />
Remove coupling (1) and woodruff key (2) from shaft of hydraulic motor (3) and boom swing<br />
mechanism (13). Discard woodruff key (2).<br />
Remove three nuts (18) from studs (17) on housing (16).<br />
Attach chains to boom swing mechanism (13) and lifting device.<br />
WARNING<br />
• All personnel must stand clear during lifting operations,<br />
A swinging or shifting load may cause injury to personnel,<br />
• Ensure lifting capacity is greater than weight of boom swing<br />
mechanism. Failure to do so may result in injury to personnel<br />
or damage to equipment.<br />
16-176
<strong>TM</strong> 9-<strong>2320</strong>-<strong>260</strong>-<strong>34</strong>-2<br />
16-30. BOOM SWING MECHANISM REPLACEMENT (M819) (Cont'd)<br />
8. Remove boom swing mechanism (13) and gasket (20) from base plate flange (19). Discard gasket (20).<br />
9. Remove chains from lifting device and boom swing mechanism (13).<br />
b. Installation<br />
1.<br />
2.<br />
3.<br />
4.<br />
5.<br />
6.<br />
7.<br />
8.<br />
9.<br />
10.<br />
FOLLOW-ON TASKS: • Fill gear box of boom swing mechanism with gear oil (LO 9-<strong>2320</strong>-<strong>260</strong>-12).<br />
• Check crane operation (<strong>TM</strong> 9-<strong>2320</strong>-<strong>260</strong>-10).<br />
16-177
<strong>TM</strong> 9-<strong>2320</strong>-<strong>260</strong>-<strong>34</strong>-2<br />
16-31. CABLE HOIST WINCH REPLACEMENT (M819)<br />
THIS TASK COVERS:<br />
a. Removal ‘ b. Installation<br />
INITIAL SETUP<br />
APPLICABLE MODELS<br />
M819<br />
TOOLS<br />
General mechanic’s tool kit<br />
(Appendix B, Item 1)<br />
Mechanical puller kit (Appendix B, Item 14)<br />
1-7/16-in. open-end wrench<br />
(Appendix B, Item 124)<br />
1-1/2-in. open-end wrench<br />
(Appendix B, Item 125)<br />
1-11/16-in. open-end wrench<br />
(Appendix B, Item 127)<br />
Lifting device<br />
Chains<br />
MATERIALS/PARTS<br />
Eight lockwashers (Appendix D, Item 210)<br />
Two gaskets (Appendix D, Item 60)<br />
Woodruff key (Appendix D, Item 546)<br />
Locknut (Appendix D, Item 205.1)<br />
Cap and plug set (Appendix C, Item 6)<br />
PERSONNEL REQUIRED<br />
Two<br />
REFERENCES (<strong>TM</strong>)<br />
LO 9-<strong>2320</strong>-<strong>260</strong>-12<br />
<strong>TM</strong> 9-<strong>2320</strong>-<strong>260</strong>-10<br />
<strong>TM</strong> 9-<strong>2320</strong>-<strong>260</strong>-20<br />
<strong>TM</strong> 9-<strong>2320</strong>-<strong>260</strong>-<strong>34</strong>P-2<br />
EQUIPMENT CONDITION<br />
• Parking brake set (<strong>TM</strong> 9-<strong>2320</strong>-<strong>260</strong>-10).<br />
• Hoist winch cable removed (<strong>TM</strong> 9-<strong>2320</strong>-<strong>260</strong>-20).<br />
GENERAL SAFETY INSTRUCTIONS<br />
• All personnel must stand clear during lifting<br />
operations.<br />
• Ensure lifting capacity is greater than weight of<br />
cable hoist winch.<br />
1.<br />
2.<br />
3.<br />
4.<br />
5.<br />
6.<br />
• Clean area around hoses and lines before removal to prevent<br />
entry of dirt. Damage will occur if dirt or dust enters system.<br />
• Cap or plug all openings immediately after disconnecting lines<br />
and hoses to prevent contamination. Remove caps and plugs<br />
prior to installation. Failure to do so may result in damage to<br />
hydraulic system.<br />
NOTE<br />
• Have drainage container ready to catch oil.<br />
• Tag hoses for installation.<br />
Loosen two swivel nuts (13) on tubes (12) and disconnect hoses (1) and (2) from tubes (12).<br />
Remove hoses (1) and (2) from elbow (6) and check valve (7).<br />
Loosen swivel nut (9) and disconnect drain hose (11) from adapter elbow (8).<br />
Remove two screws (5), lockwashers (4), hydraulic motor (3) gasket (14), and coupling (10) from<br />
drive housing (15). Remove woodruff key (36) from shaft (37\. Discard lockwashers (4) and<br />
woodruff key (36).<br />
Attach chains to drive housing ( 15), drum (17), and lifting device. Take up slack in chains.<br />
Remove three screws (24) and lockwashers (25) from drum housing (18) and bracket (26) on<br />
shipper (23). Discard lockwashers (25).<br />
WARNING<br />
• All personnel must stand clear during lifting operations.<br />
A swinging or shifting load may cause injury to personnel.<br />
• Ensure lifting capacity is greater than weight of cable hoist<br />
winch. Failure to do so may result in injury to personnel or<br />
damage to equipment.<br />
16-178
<strong>TM</strong> 9-<strong>2320</strong>-<strong>260</strong>-<strong>34</strong>-2<br />
16-31. CABLE HOIST WINCH REPLACEMENT (M819) (Cont'd)<br />
7.<br />
8.<br />
9.<br />
10.<br />
11.<br />
12.<br />
Remove three nuts (22), lockwashers (21), and screws (19) from drum housing (18) and bracket (20).<br />
Discard lockwashers (21). Lift cable hoist winch (16) from shipper (23) to work area.<br />
Remove chains from drive housing (15), drum (17), and lifting device.<br />
Remove four nuts (3o), bearing cap (31), and gasket (32) from drum housing (18). Discard<br />
gasket (32).<br />
Remove locknut (33) and thrust washer (<strong>34</strong>) from shaft (27). Discard locknut (33).<br />
Remove bearing cap (29), spacer (35), and gasket (28) from drum housing (18). Discard gasket (28).<br />
NOTE<br />
Assistant will help with step 12.<br />
Using puller, separate and remove drum housing (18) and drum (17) from cable hoist winch (16) and<br />
shaft-(27).<br />
16-179
<strong>TM</strong> 9-<strong>2320</strong>-<strong>260</strong>-24-2<br />
16-31. CABLE HOIST WINCH REPLACEMENT (M819) (Cont'd)<br />
1.<br />
2.<br />
3.<br />
4.<br />
5.<br />
Assistant will help with step 1.<br />
Position drum (12) in drum housing (11), aline drum (12) and shaft. (2), and slide drum (12) and<br />
drum housing (11) on shaft (2).<br />
Install new gasket (3), spacer (10), and bearing cap (4) on drum housing (11).<br />
Install thrust washer (9) and new locknut (8) on shaft (2).<br />
Install new gasket (7) and bearing cap (6) on drum housing (11) with four nuts (5).<br />
NOTE<br />
Assistant will help with steps 5 and 8.<br />
Attach chains to drive housing (1), drum (12), and lifting device.<br />
6.<br />
7.<br />
8.<br />
9.<br />
10.<br />
11.<br />
12.<br />
13.<br />
• All personnel must stand clear during lifting operations.<br />
A swinging or shifting load may cause injury to personnel.<br />
• Ensure Iifting capacity is greater than weight of cable hoist<br />
winch. Failure to do so may result in injury to personnel or<br />
damage to equipment.<br />
Lift cable hoist winch (15) and position on shipper (20) with holes in drum housing (11) alined with<br />
holes in brackets (17) and (23).<br />
Install three new lockwashere (18) and screws (16) on bracket (17) and drum housing (11) with<br />
nuts (19).<br />
Install three screws (21) and new Iockwashers (22) on bracket (23) and drum housing (11).<br />
Remove chains from drive housing(1), drum (12), and lifting device.<br />
Position new woodruff key (13) in keyway of shaft (14), and with keyway on coupling (33) alined,<br />
install new gasket (37) and hydraulic motor (26) on drive housing (1) with two new lockwashers (27)<br />
and screws (28).<br />
Install hoses (24) and (25) on elbow (29) and check valve (30).<br />
Connect hoses (24) and (25) to tubes (<strong>34</strong>) with two swivel nuts (35).<br />
Connect hose (36) to adapter elbow (31) with swivel nut (32).<br />
16-180
<strong>TM</strong> 9-<strong>2320</strong>-<strong>260</strong>-<strong>34</strong>-2<br />
16-31. CABLE HOIST WINCH REPLACEMENT (M819) (Cont'd)<br />
FOLLOW-ON TASKS: •<br />
•<br />
•<br />
Lubricate cable drive and cable drum (LO 9-<strong>2320</strong>-<strong>260</strong>-12).<br />
Install hoist winch cable (<strong>TM</strong> 9-<strong>2320</strong>-<strong>260</strong>-20).<br />
Check hoist operation (<strong>TM</strong> 9-<strong>2320</strong>-<strong>260</strong>-10 ).<br />
14-181
<strong>TM</strong> 9-<strong>2320</strong>-<strong>260</strong>-<strong>34</strong>-2<br />
16-32. HYDRAULIC SWIVEL VALVE REPLACEMENT (M819)<br />
THIS TASK COVERS:<br />
a. Removal b. Installation<br />
INITIAL SETUP<br />
APPLICABLE MODELS<br />
M819<br />
TOOLS<br />
General mechanic’s tool kit<br />
(Appendix B, Item 1)<br />
1-1/16-in. open-end wrench<br />
(Appendix B, Item 123)<br />
1-1/2-in. open-end wrench<br />
(Appendix B, Item 125)<br />
1-11/16-in. open-end wrench<br />
(Appendix B, Item 127)<br />
Lifting device<br />
Chains<br />
MATERIALS/PARTS<br />
Antiseize tape (Appendix C, Item 50)<br />
Cap and plug set (Appendix C, Item 6)<br />
REFERENCES (<strong>TM</strong>)<br />
LO 9-<strong>2320</strong>-<strong>260</strong>-12<br />
<strong>TM</strong> 9-<strong>2320</strong>-<strong>260</strong>-10<br />
<strong>TM</strong> 9-<strong>2320</strong>-<strong>260</strong>-<strong>34</strong>P-2<br />
EQUIPMENT CONDITION<br />
● Parking brake set (<strong>TM</strong> 9-<strong>2320</strong>-<strong>260</strong>-10).<br />
• Boom raised and supported (<strong>TM</strong> 9-<strong>2320</strong>-<strong>260</strong>-10).<br />
● Hydraulic oil tank drained (LO 9-<strong>2320</strong>-<strong>260</strong>-12).<br />
CAUTION<br />
• Clean area around hoses and lines before removal to prevent<br />
entry of dirt. Damage will occur if dirt or dust enters system.<br />
• Cap or plug all openings immediately after disconnecting lines<br />
and hoses to prevent contamination. Remove caps and plugs<br />
prior to installation. Failure to do so may result in damage to<br />
hydraulic system.<br />
NOTE<br />
l Tag hoses for installation.<br />
. Have drainage container ready to catch oil.<br />
1. Disconnect hoses (3) and (5) from elbows (2) and (4) on swing motor (1).<br />
2. Disconnect return hose (9) from coupling (8) on 45 degree elbow (7).<br />
3. Disconnect pressure hose (10) from coupling (11) on relief valve (12).<br />
4. Disconnect drain hose (13) from elbow (14) at hydraulic oil reservoir (6).<br />
5. Remove seven screws (18) and cover (19) from mounting brackets (23).<br />
6. Disconnect drain hose (21) from coupling (20) on control valve bank (22).<br />
7. Disconnect drain hose (16) from elbow (15) on hoist winch motor (17).<br />
16-182
<strong>TM</strong> 9-<strong>2320</strong>-<strong>260</strong>-<strong>34</strong>-2<br />
16-32. HYDRAULIC SWIVEL VALVE REPLACEMENT (M819) (Cont'd)<br />
16-183
<strong>TM</strong> 9-<strong>2320</strong>-<strong>260</strong>-<strong>34</strong>-2<br />
16-32. HYDRAULIC SWIVEL VALVE REPLACEMENT(M819) (Cont'd)<br />
8.<br />
9.<br />
10.<br />
11.<br />
12.<br />
13.<br />
14.<br />
15.<br />
16.<br />
17.<br />
18.<br />
19.<br />
20.<br />
21.<br />
22.<br />
23.<br />
Remove hoist winch drain hose (10) from end of tee fitting (13).<br />
Remove control valve bank drain hose (11) and bushing (12) from tee fitting (13).<br />
Remove tee fitting (13) from swivel valve (4).<br />
NOTE<br />
The four hoses on face of swivel must be disconnected from control<br />
valve bank before removal from swivel valve.<br />
Remove two hoses (7) and (8) from swivel valve (4).<br />
Disconnect wire (1) from wire (9).<br />
Working under vehicle at bottom of pivot post support (24), disconnect wire (6) from wire (25).<br />
Remove two screws (23), washers (22), and plates (21) from support cap (20) and swivel valve<br />
plug (5).<br />
Remove two screws (2) from top of swivel valve (4), and attach chain to swivel valve (4) with two<br />
longer screws (2) and washers (3).<br />
Attach chain to lifting device.<br />
NOTE<br />
Assistant will help with steps 17 through 23.<br />
Lift swivel valve (4) high enough to permit access to hose connections.<br />
Remove two swing motor hoses (16) from coupling nuts (14).<br />
Remove two coupling nuts (14) and pipe nipples (15) from swivel valve plug (5).<br />
Disconnect drain hose (19) from swivel valve plug (5).<br />
Disconnect hoses (17) and (18) from swivel valve plug (5).<br />
Remove swivel valve (4) horn support cap (20).<br />
Remove chain from lifting device and remove two screws (2), washers (3), and chain from swivel<br />
valve (4).<br />
1.<br />
2.<br />
3.<br />
4.<br />
5.<br />
6.<br />
7.<br />
8.<br />
9.<br />
Wrap male threads of swivel valve plug (5), hoses (7) and (8), winch drain hose (10), valve bank<br />
drain hose (11), tee fitting (13), and bushing (12) with antiseize tape.<br />
Install two pipe nipples (15) on marked lower ports of swivel valve plug (5).<br />
Install chain on swivel valve (4) with two longer screws (2) and washers (3) and attach chain to<br />
lifting device.<br />
NOTE<br />
Assistant will help with steps 3 through 10.<br />
Position swivel valve (4) over pivot post (24) above support cap (20).<br />
Connect two swing motor hoses (16) to pipe nipples (15) with coupling nuts (14).<br />
Connect pressure hose (17) and return hose (18) to swivel valve plug (5).<br />
Connect drain hose (19) to swivel valve plug (5).<br />
Position two plates (21) and washers (22) on support cap (20) and start screws (23) into support<br />
cap (20). Do not tighten screws (23).<br />
Carefully lower swivel valve (4) and aline swivel plug (5) with support cap (20).<br />
16-184
<strong>TM</strong> 9-<strong>2320</strong>-<strong>260</strong>-<strong>34</strong>-2<br />
10.<br />
11.<br />
12.<br />
13.<br />
14.<br />
15.<br />
16.<br />
17.<br />
Lower swivel valve (4) until plates (21) aline with notches in swivel valve plug (5). Tighten<br />
screws (23).<br />
Remove two screws (2), washers (3), and chain from swivel valve (4) and install original screws (2)<br />
into swivel valve (4). Remove chain from lifting device.<br />
Connect two hoses (8) and (7) to swivel valve (4) and control valve bank.<br />
Install tee fitting (13) on swivel valve (4).<br />
Connect hoist winch drain hose (10) to tee fitting (13).<br />
Connect bushing (12) and control valve bank drain hose (11) to tee fitting (13).<br />
Connect wire (1) to wire (9).<br />
Working under vehicle, connect wire (6) to wire (25).<br />
16-185
<strong>TM</strong> 9-<strong>2320</strong>-<strong>260</strong>-<strong>34</strong>-2<br />
16-32. HYDRAULIC SWIVEL VALVE REPLACEMENT (M819) (Cont'd)<br />
18.<br />
19.<br />
20.<br />
21.<br />
22.<br />
23.<br />
24.<br />
Connect drain hose (3) to coupling(5) on control valve bank (4).<br />
Install cover (2) on mounting brackets (6) with seven screws (1).<br />
Connect drain hose (8) to elbow (7) on hoist winch motor (9).<br />
Connect drain hose (17) to elbow (18) at hydraulic oil reservoir (10).<br />
Connect pressure hose (15) to coupling (14) on relief valve (16).<br />
Connect return hose (13) to coupling (12) on 45° elbow (11).<br />
Connect hoses (22) and (20) to elbows (21) and (19) on swing motor (23).<br />
16-186
<strong>TM</strong> 9-<strong>2320</strong>-<strong>260</strong>-<strong>34</strong>-2<br />
16-32. HYDRAULIC SWIVEL VALVE REPLACEMENT (M819) (Contd)<br />
FOLLOW-ON TASKS: • Remove boom support (<strong>TM</strong> 9-<strong>2320</strong>-<strong>260</strong>-10).<br />
• Fill hydraulic oil tank (LO 9-<strong>2320</strong>-<strong>260</strong>-12).<br />
• Operate crane and check for leaks (<strong>TM</strong> 9-<strong>2320</strong>-<strong>260</strong>-10).<br />
16-187
<strong>TM</strong> 9-<strong>2320</strong>-<strong>260</strong>-<strong>34</strong>-2<br />
16-33. BOOM LIFT CYLINDER MAINTENANCE (M819)<br />
THIS TASK COVERS:<br />
a. Removal d. Repair<br />
b. Disassembly e. Assembly<br />
c. Cleaning and Inspection<br />
lNITIAL SETUP<br />
APPLICABLE MODELS<br />
M819<br />
TOOLS<br />
GeneraI mechanic’s tool kit<br />
(Appendix B, Item 1)<br />
14-in. pipe wrench (Appendix B, Item 129)<br />
1-5/8-in. open-end wrench<br />
(Appendix B, Item 126)<br />
1-11/16-in. open-end wrench<br />
(Appendix B, Item 127)<br />
Bushing driver (Appendix B, Item 131)<br />
Chain<br />
Lifting device<br />
MATERlALS/PARTS<br />
Two Cotter pins (Appendix D, Item 17)<br />
Seal (Appendix D, Item 408)<br />
Seal (Appendix D, Item 409)<br />
Seal (Appendix D, Item 410)<br />
Seal (Appendix D, Item 412)<br />
Seal (Appendix D, Item 413)<br />
Lubricating oil (Appendix C, Item 20)<br />
GM grease (Appendix C, Item 14)<br />
PERSONNEL REQUIRED<br />
Two<br />
REFERENCES (<strong>TM</strong>)<br />
LO 9-<strong>2320</strong>-<strong>260</strong>-12<br />
<strong>TM</strong> 9-<strong>2320</strong>-<strong>260</strong>-10<br />
<strong>TM</strong> 9-<strong>2320</strong>-<strong>260</strong>-20<br />
<strong>TM</strong> 9-<strong>2320</strong>-<strong>260</strong>-<strong>34</strong>P-2<br />
EQUIPMENT CONDITION<br />
• Remove lift cylinder check valve (para. 16-38).<br />
• Remove spare tire (<strong>TM</strong> 9-<strong>2320</strong>-<strong>260</strong>-10).<br />
• Remove cab side window (<strong>TM</strong> 9-<strong>2320</strong>-<strong>260</strong>-20).<br />
• Drain hydraulic oil tank (LO 9-<strong>2320</strong>-<strong>260</strong>-12).<br />
GENERAL SAFETY lNSTRUCTIONS<br />
l All personnel must stand clear during lifting<br />
operations.<br />
l Ensure lifting capacity is greater than weight of<br />
boom lift cylinder.<br />
1.<br />
2.<br />
3.<br />
4.<br />
5.<br />
6.<br />
7.<br />
8.<br />
9.<br />
Raise boom (6) to maximum height and hold with hoist or securely block. Maximum angle is<br />
41 degrees (<strong>TM</strong> 9-<strong>2320</strong>-<strong>260</strong>-10),<br />
Loosen two jamnuts (2) and remove two setscrews (1) from boom trunnions (3).<br />
Drive out pivot shaft (8) from boom (6) and trunnion (4) on piston rod (5).<br />
Remove elbow (14) and pipe (15) from elbow (16).<br />
Remove elbow (16) and nipple (17) from lower port (20) of lift cylinder (22).<br />
Remove hose (13) from tube (24) and elbow (12).<br />
Remove elbow (12) and nipple (11) from port (10) in cylinder head (9).<br />
Attach chain to lift cylinder (22) and lifting device. Take up slack in chain.<br />
NOTE<br />
Assistant will help with steps 9 and 10.<br />
Remove cotter pin (23) and pivot pin (19) from lower trunnion of Iift cylinder (22) and boom support<br />
bores (21). Discard cotter pin (23).<br />
16-188
<strong>TM</strong> 9-<strong>2320</strong>-240-<strong>34</strong>-2<br />
16-33. BOOM LIFT CYLINDER MAINTENANCE (M819) (Cont'd)<br />
• All personnel must stand clear during lifting operations.<br />
A swinging or shifting load may cause injury to personnel.<br />
• Ensure lifting capacity is greater than weight of boom lift<br />
cylinder. Failure to do so may result in injury to personnel or<br />
damage to equipment.<br />
10. Raise and guide lift cylinder (22) up and out of boom support (7) and place in work area.<br />
11. Remove grease fitting (18) from pin (19).<br />
12. Remove chain from lift cylinder (22) and lifting device.<br />
16-189
<strong>TM</strong> 9-<strong>2320</strong>-<strong>260</strong>-<strong>34</strong>-2<br />
16-33. BOOM LIFT CYLINDER MAINTENANCE (M819) (Cont'd)<br />
1. Remove twelve nuts (6) from studs (4) and slide cylinder head (5) UP piston rod (11).<br />
2. Pull piston rod (11) and cylinder head (5) out of lift cylinder (3).<br />
3. Remove cotter pin (2), nut (1), piston (13), and cylinder head (5) from piston rod (11). Discard cotter<br />
pin (2).<br />
4. Remove seals (15) and (14) from piston (13). Discard seals (14) and (15).<br />
5. Remove seals (7), (8), and ( 12) from cylinder head (5). Discard seals (7), (8), and (12).<br />
6. Remove grease fitting (10) from trunnion (9) of piston rod (11).<br />
16-190
<strong>TM</strong> 9-<strong>2320</strong>-<strong>260</strong>-<strong>34</strong>-2<br />
16-33. BOOM LIFT CYLINDER MAINTENANCE (M819) (Cont'd)<br />
1. For general cleaning instructions, refer to para. 2-8.<br />
2. For general inspection instructions, refer to para. 2-9.<br />
a. Inspect piston rod (11), pivot pins (19) and (20), and lift cylinder (3) for chips, nicks, burrs,<br />
scoring, and rust.<br />
b. Inspect piston (13) and cylinder head (5) for nick, burrs, scoring, and chipped or broken edges of<br />
seal grooves.<br />
c. Inspect studs (4), two bushings (16), bushings (18), and bushing (17).<br />
1. For general repair procedures, refer to para. 2-10.<br />
a. Minor nicks, chips, burrs, and scoring of piston rod (11), pivot pins (19) and (20), lift cylinder (3),<br />
cylinder head (5), and bushings (16) and (18) may be repaired with fine mill file or crocus cloth.<br />
b. Replace damaged studs (4) and bushings (16), (18), and (17).<br />
c. Chipped or cracked seal grooves and notches on cylinder head (5) and piston (13) are<br />
unrepairable. Replace parts.<br />
d. Minor surface rust and scoring in bore of cylinder (3) maybe removed. Replace part if damage<br />
is more severe.<br />
16-191
<strong>TM</strong> 9-<strong>2320</strong>-<strong>260</strong>-<strong>34</strong><br />
16-33. BOOM LIFT CYLINDER MAINTENANCE (M819) (Cont'd)<br />
NOTE<br />
• Coat all internal surfaces and parts with lubricating oil before assembly.<br />
• Coat bushings and pivot pins with light coat GM grease before assembly.<br />
1. Install grease fitting (8) in piston rod trunnion (7).<br />
2. Install new seals (9), (10), and (12) in cylinder head (11). Slide cylinder head (11) on piston rod (6).<br />
3. Install new seals (14) and (15) on piston (13). Ensure seal (14) is not rolled in groove on piston (13).<br />
4. Install piston (13) on piston rod (6) with nut (16) and new cotter pin (17).<br />
5. Carefully slide piston (13) and piston rod (6) into lift cylinder (2).<br />
6. Aline cylinder head port(4) with lift cylinder port (1) and slide cylinder head (1) down piston<br />
rod (6) and over studs (3).<br />
7. Install cylinder head (11) on lift cylinder (2) with twelve nuts (5). Tighten nuts (5) evenly in star<br />
pattern.<br />
f. Installation<br />
Perform step 1 if boom was not removed.<br />
1.<br />
2.<br />
Raise and support boom (20) (<strong>TM</strong> 9-<strong>2320</strong>-<strong>260</strong>-10).<br />
Attach chains to lift cylinder (2) and lifting device.<br />
WARNING<br />
3.<br />
4.<br />
5.<br />
6.<br />
7.<br />
8.<br />
9.<br />
10.<br />
11.<br />
12.<br />
13.<br />
• All personnel must stand clear during lifting operations.<br />
A swinging or shifting load may cause injury to personnel.<br />
• Ensure lifting capacity is greater than weight of boom lift<br />
cylinder. Failure to do so may result in injury to personnel or<br />
damage t.o equipment.<br />
NOTE<br />
Assistant will help with steps 3 through 9.<br />
Move lift cylinder (2) into position in boom support (21). Aline lift cylinder port (1) and cylinder head<br />
port (4) to the right.<br />
Aline lower trunnion of lift cylinder (2) with pivot pin bores (32).<br />
Install lift cylinder (2) on boom support (21) with lower pivot pin (31) and new cotter pin (33).<br />
Install grease fitting (30) in lower pivot pin (31).<br />
Manually extend piston rod (6) and aline trunnion (7) with pivot pin bores (19) in boom (20).<br />
Install piston rod trunnion (7) on boom (20) with pivot pin (22). Ensure setscrew notches in<br />
pivot pin (22) aline with setscrew holes in boom trunnions (18).<br />
Install two setscrews (<strong>34</strong>) and jamnuts (35) in boom trunnions (18) and tighten jamnuts (35).<br />
Remove chain from lift cylinder (2) and lifting device.<br />
Install nipple (29), elbow (28), nipple (27), and elbow (26) in lift cylinder port (1).<br />
Install nipple (23) and elbow (24) in cylinder head port (4).<br />
Install hose (25) on elbow (24) and tube (36).<br />
16-192
<strong>TM</strong> 9-<strong>2320</strong>-<strong>260</strong>-<strong>34</strong>-2<br />
16-33. BOOM LIFT CYLINDER MAINTENANCE (M819) (Cont'd)<br />
FOLLOW-ON TASKS: • Install lift cylinder check valve (para. 16-38).<br />
Fill hydraulic oil tank (LO 9-<strong>2320</strong>-<strong>260</strong>-12).<br />
Check crane operation and check for leaks (<strong>TM</strong> 9-<strong>2320</strong>-<strong>260</strong>-10).<br />
Install spare tire (<strong>TM</strong> 9-<strong>2320</strong>-<strong>260</strong>-10).<br />
Install cab side window (<strong>TM</strong> 9-<strong>2320</strong>-<strong>260</strong>-20).<br />
16-193
<strong>TM</strong> 9-<strong>2320</strong>-<strong>260</strong>-<strong>34</strong><br />
16-<strong>34</strong>. CRANE SHIPPER, BOOM, BOOM EXTENSION, AND ROLLERS<br />
MAINTENANCE (M819)<br />
THIS TASK COVERS:<br />
a. Shipper Removal<br />
b. Boom Extension Removal<br />
c. Boom Removal<br />
d. Extension Cylinder Removal<br />
e. Upper Roller Removal<br />
f. Boom Extension Disassembly<br />
g. Front Lower Roller Disassembly<br />
h. Middle Lower Roller Disassembly<br />
i. Upper Roller Disassembly<br />
j. Cleaning and Inspection<br />
k.<br />
l.<br />
m.<br />
n.<br />
o.<br />
P.<br />
q.<br />
r.<br />
s.<br />
t.<br />
Repair<br />
Upper Roller Assembly and Adjustment<br />
Middle Lower Roller Assembly<br />
Front Lower Roller Assembly and Adjustment<br />
Boom Extension Assembly<br />
Upper Roller Installation<br />
Extension Cylinder Installation<br />
Boom Installation<br />
Boom Extension Installation<br />
Shipper Installation<br />
APPLICABLE MODELS<br />
M819<br />
TOOLS<br />
General mechanic’s tool kit<br />
(Appendix B, Item 1)<br />
1-5/8-in. open-end wrench<br />
(Appendix B, Item 126)<br />
1-11/16-in. open-end wrench<br />
(Appendix B, Item 127)<br />
14-in. pipe wrench (Appendix B, Item 129)<br />
Mechanical puller kit (Appendix B, Item .14)<br />
Arbor press (Appendix B, Item 7)<br />
Lifting device<br />
Two chains<br />
Spreader bar<br />
A-frame<br />
Jack stand<br />
MATERIALS/PARTS<br />
Locking Plate (Appendix D, Item 165)<br />
Four cotter pins (Appendix D, Item 18)<br />
Six lockwashers (Appendix D, Item 218)<br />
Nine lockwashers (Appendix D, Item 219)<br />
Eight lockwashers (Appendix D, Item 211)<br />
Shims (Appendix D, Item 492)<br />
Shims (Appendix D, Item 494)<br />
Shims (Appendix D, Item 489)<br />
MATERIALS/PARTS (Contd)<br />
Shims (Appendix D, Item 490)<br />
Cap and plug set (Appendix C, Item 6)<br />
Antiseize tape (Appendix C, Item 50)<br />
PERSONNEL REQUIRED<br />
Two<br />
REFERENCES (<strong>TM</strong>)<br />
LO 9-<strong>2320</strong>-<strong>260</strong>-12<br />
<strong>TM</strong> 9-237<br />
<strong>TM</strong> 9-<strong>2320</strong>-<strong>260</strong>-10<br />
<strong>TM</strong> 9-<strong>2320</strong>-<strong>260</strong>-20<br />
<strong>TM</strong> 9-<strong>2320</strong>-<strong>260</strong>-<strong>34</strong>P-2<br />
EQUIPMENT CONDITION<br />
• Spare tire removed (<strong>TM</strong> 9-<strong>2320</strong>-<strong>260</strong>-10).<br />
. Floodlight and wiring harness removed<br />
(<strong>TM</strong> 9-<strong>2320</strong>-<strong>260</strong>-20).<br />
• Crane cab (Gondola) removed (para. 16-29).<br />
• Cable hoist winch and hoses removed<br />
(para. 16-31).<br />
GENERAL SAFETY INSTRUCTIONS<br />
• All personnel must stand clear during lifting<br />
instructions.<br />
• Ensure lifting capacity is greater than weight of<br />
shipper.<br />
1. Attach chain to holdboom (1) and boom extension (4) to shipper (2) during removal.<br />
2. Attach chain to shipper (2) and lifting device and take up slack in chain.<br />
3. Disconnect boom supports (3) from shipper (2) (<strong>TM</strong> 9-<strong>2320</strong>-<strong>260</strong>-10).<br />
NOTE<br />
Assistant will help with steps 4 through 18.<br />
4. Lift shipper (2) to provide clearance to remove lift cylinder pivot pin (9).<br />
16-194
<strong>TM</strong> 9-<strong>2320</strong>-<strong>260</strong>-<strong>34</strong><br />
16-<strong>34</strong>. CRANE SHIPPER, BOOM, BOOM EXTENSION, AND ROLLERS<br />
MAINTENANCE (M819) (Cont'd)<br />
5. Loosen two jamnuts (6) and remove two screws (5) from shipper trunnions (7).<br />
6. Remove pivot pin (9) from shipper (2), lift cylinder trunnion (8), and shipper trunnions (7).<br />
7. Lower shipper (2) to horizontal position.<br />
• Clean area around hoses and lines before removal to prevent<br />
entry of dirt. Damage will occur if dirt or dust enters system.<br />
• Cap or plug all openings immediately after disconnecting lines<br />
and hoses to prevent contamination. Failure to do so may result<br />
in damage to hydraulic system.<br />
NOTE<br />
Tag hoses for installation.<br />
8. Loosen swivel nuts (13) and disconnect two hoses (12) from tubes (10).<br />
9. Remove two hoses (12) from elbows (11).<br />
10. Connect shipper braces (3) to shipper (2) and adjust shipper braces (3) so that shipper (2) rests in<br />
horizontal position (<strong>TM</strong> 9-<strong>2320</strong>-<strong>260</strong>-10).<br />
11. Remove chain from shipper (2) and Iifting device.<br />
16-195
<strong>TM</strong> 9-<strong>2320</strong>-<strong>260</strong>-<strong>34</strong><br />
16-<strong>34</strong>. CRANE SHIPPER, BOOM, BOOM EXTENSION, AND ROLLERS<br />
MAINTENANCE (M819) (Cont'd)<br />
12. Attach chain and spreader bar t.o shipper (2) and lifting device. Take up slack in chain.<br />
13. Disconnect shipper braces (4) from shipper (2) (<strong>TM</strong> 9-<strong>2320</strong>-<strong>260</strong>-10).<br />
14. Remove two grease fittings (8) from pivot pin (9).<br />
15. Remove nut (5) and screw (6) from trunnion (7) and pivot pin (9).<br />
16. Remove pivot pin (9) from shipper (2) and support (3).<br />
17. Attach two guide ropes to shipper (2) and boom extension (1).<br />
WARNING<br />
• All personnel must stand clear during lifting operations.<br />
A swinging or shifting load may cause injury to personnel.<br />
• Ensure lifting capacity is greater than weight of shipper.<br />
Failure to do so may result in injury to personnel or damage<br />
to equipment.<br />
NOTE<br />
Three assistants will help with step 18.<br />
18. Lift shipper (2) away from boom support (3) and vehicle, and set shipper (2) on wood blocks.<br />
19. Remove guide ropes, chains, and spreader bar from boom extension (1), shipper (2), and lifting<br />
device.<br />
16-196
<strong>TM</strong> 9-<strong>2320</strong>-<strong>260</strong>-<strong>34</strong><br />
16-<strong>34</strong>. CRANE SHIPPER, BOOM, BOOM EXTENSION, AND ROLLERS<br />
MAINTENANCE (M819) (Cont'd)<br />
b. Boom Extension Removal<br />
1. Remove two Iinch pins (11) and two pins (10) from boom extension (1) and boom (12),<br />
2. Attach chain to boom extension (1) and lifting device. Take up slack in chain.<br />
NOTE<br />
Two assistants will help with steps 3 through 7.<br />
3. Using lifting device attached to A-frame, raise or lower boom extension (1) while walking boom<br />
extension (1) out of boom (12) to expose eight feet of boom extension (1).<br />
4. Place jack stand under boom extension (1) and remove chain from boom extension (1).<br />
5. Attach chain and spreader bar to center of balance of boom extension (1).<br />
• All personnel must stand clear during lifting operations.<br />
A swinging or shifting load may cause injury to personnel.<br />
• Ensure lifting capacity is greater than weight of boom extension.<br />
Failure to do so may result in injury to personnel or damage to<br />
equipment.<br />
6. Continue raising or lowering lifting device while removing boom extension (1) from boom (12).<br />
7. Set boom extension (1) on wood blocks and remove chain and spreader bar from boom<br />
extension (1) and lifting device.<br />
16-197
<strong>TM</strong> 9-<strong>2320</strong>-<strong>260</strong>-<strong>34</strong><br />
16-<strong>34</strong>. CRANE SHIPPER, BOOM, BOOM EXTENSION, AND ROLLERS<br />
MAINTENANCE (M819) (Contd)<br />
1. From rear of shipper (2), remove elbow (6), nut (7), locking plate (8), and nut (7) from center port (9)<br />
of extension cylinder (3). Discard locking plate (8).<br />
2. Remove elbow (5) and pipe nipple (4) from retraction port (1) of extension cylinder (3).<br />
3. Attach chain to end of boom (10) and lifting device.<br />
NOTE<br />
Two assistants will help with steps 4 through 7.<br />
4. Walk boom (10) halfway out of shipper (2). Raise or lower lifting device to prevent binding.<br />
5. Support end of boom (10) with jack stand, and remove chain from boom (10) and lifting device.<br />
6. Attach chain and spreader barb boom (10) and lifting device.<br />
NOTE<br />
Two assistants will help with steps 3 through 6.<br />
3. Walk extension cylinder (3) out of boom (10) a distance of two-thirds length of extension cylinder (3).<br />
16-198
<strong>TM</strong> 9-<strong>2320</strong>-<strong>260</strong>-<strong>34</strong><br />
16-<strong>34</strong>. CRANE SHIPPER, BOOM, BOOM EXTENSION, AND ROLLERS<br />
MAINTENANCE (M819) (Cont'd)<br />
4. Place jack stand near end of extension cylinder (3) and remove chain from extension cylinder (3) and<br />
lift,ing device.<br />
5. Attach chain and spreader bar on extension cylinder (3) and lifting device.<br />
• All personnel must stand clear during lifting operations.<br />
A swinging or shifting load may cause injury to personnel.<br />
• Ensure Iifting capacity is greater than weight of extension<br />
cylinder. Failure to do so may result in injury to personnel or<br />
damage to equipment.<br />
6. Continue walking extension cylinder (3) out of boom (10), set extension cylinder (3) on wood blocks,<br />
and remove chain and spreader bar from extension cylinder (3) and lifting device<br />
Removal of upper roller maybe performed with crane shipper onvehicle<br />
if boom is supported.<br />
1. Remove six screws (16) and lockwashers (15) from roller housing (14) and shipper (2). Discard<br />
lockwashers (15).<br />
2. Remove roller housing (14) from shipper (2).<br />
16-199
<strong>TM</strong> 9-<strong>2320</strong>-<strong>260</strong>-<strong>34</strong><br />
16-<strong>34</strong>. CRANE SHIPPER, BOOM, BOOM EXTENSION, AND ROLLERS<br />
MAINTENANCE (M819) (Cont'd)<br />
1. Remove grease fitting (9) from end of shaft (8).<br />
2. Remove screw (7) from plate on shaft (8) and boom extension (10).<br />
3. Remove shaft (8), two sheaves (2), and four sheave washers(1) from boom extension (10).<br />
4. Remove two linch pins (5) from cable anchor pin (6).<br />
5. Drive out cable anchor pin (6) from boom extension (10).<br />
6. Remove two screws (4), chains (3), and linch pins (5) from boom extension (10).<br />
g. Front Lower Roller Disassembly<br />
NOTE<br />
This procedure may be performed on-vehicle if boom is supported or<br />
removed. Refer to subtask n. for assembly and adjustment procedure.<br />
1. Remove two grease fittings (19) from covers (16).<br />
2. Remove eight screws (18), lockwashers (17), two caps (16), and shims (15) from shipper (14),<br />
Measure total thickness of shims (15) for each side and record value. Discard shims (15) and<br />
lockwashers (17).<br />
3. Using mechanical puller, remove two bearings (20) and collars (11) from roller (13).<br />
NOTE<br />
Measure and record thickness of shims for installation.<br />
4. Remove roller (13) and two sets of shims (12) from shipper (14). Discard shims (12).<br />
16-200
<strong>TM</strong> 9-<strong>2320</strong>-<strong>260</strong>-<strong>34</strong><br />
16-<strong>34</strong>. CRANE SHIPPER, BOOM, BOOM EXTENSION, AND ROLLERS<br />
MAINTENANCE (M819) (Contd)<br />
h. Middle Lower Roller Disassembly<br />
NOTE<br />
● This procedure can be performed on-vehicle by rocking boom<br />
toward upper roller. Weigh down end of boom.<br />
● Mark holes on plate and shipper from which screw is removed.<br />
1. Remove screw (21) and lockwasher (22) from plate (23) on roller shaft (25) and shipper (14). Discard<br />
lockwasher (22).<br />
NOTE<br />
Assistant will help with step 2.<br />
2, Remove roller shaft (25) and roller (24) from shipper (14).<br />
3. Remove grease fitting (26) from roller shaft (25).<br />
i. Upper Roller Disassembly<br />
NOTE<br />
Upper roller assembly must be removed from shipper (subtask e.)<br />
before disassembly,<br />
1. Remove two grease fittings (35) from caps (27).<br />
2. Remove eight screws (<strong>34</strong>), lockwashers (33), two caps (27), and shims (28) from housing (29). Discard<br />
shims (28) and lockwashers (33).<br />
3. Remove two rollers (30) and shaft (32) from housing (29).<br />
4. Remove two rollers (30) and spacer plates (31) from shaft (32).<br />
16-201
<strong>TM</strong> 9-<strong>2320</strong>-<strong>260</strong>-<strong>34</strong><br />
16-<strong>34</strong>. CRANE SHIPPER, BOOM, BOOM EXTENSION, AND ROLLERS<br />
MAINTENANCE (M819) (Contd)<br />
j. Cleaning and Inspection<br />
1.<br />
2.<br />
3.<br />
4.<br />
5.<br />
6.<br />
7.<br />
8.<br />
9.<br />
10.<br />
11.<br />
12.<br />
13.<br />
14.<br />
15.<br />
16.<br />
17.<br />
18.<br />
For general cleaning instructions refer to para. 2-8.<br />
For general inspection instructions, refer to para. 2-9.<br />
Inspect shipper (1) for bends, cracks, broken welds, stripped or damaged threads, and loose, broken,<br />
and damaged pins (4) and (8). Repair if damaged (subtask k.).<br />
Inspect bushings (3) on shipper (1) for nicks, burrs, and wear (egg shaped when pivot pin (2) is<br />
inserted in bushings (3)). Replace bushings (3) if worn or damaged.<br />
Inspect boom (7) for bends, cracks, and broken welds. Repair if damaged (subtask k.).<br />
Inspect boom extension (14) for bends, cracks, and damaged threads. Repair if damaged (subtask k.).<br />
Inspect sheaves (11) for cracks, broken cable groove edges, and worn or scored bushings (10).<br />
Replace bushings (10) if damaged or worn.<br />
Inspect thrust washers (9) for breaks, grooves, or scoring. Replace thrust washers (9) if damaged.<br />
Inspect pins (2), (5), (12), and (13) for bends or breaks. Replace pins (2), (5), (12), and (13) if bent<br />
or broken.<br />
Inspect and repair extension cylinder (6) (para. 16-<strong>34</strong>).<br />
Inspect roller (27) for cracks and damaged bushings (26). Replace bushings (26) if damaged.<br />
Inspect roller (24) and collars (23) for breaks, cracks, and evidence of spun bearings (30). Replace<br />
bearings (30), races (29), and collars (23) if damaged.<br />
Inspect bearings (16) and mating races (18) for damage. Replace damaged bearings (16) and<br />
races (18) as sets.<br />
Inspect rollers (19) for breaks, cracks, and bent or broken dowel pins (20). Replace damaged dowel<br />
pins (20).<br />
Inspect two spacer plates (21) for cracks and corrosion. Replace spacer plates (21) if cracked or<br />
corroded.<br />
Inspect pin (25) for bends, cracks, and loose or broken plate. Replace pin (25) if damaged.<br />
Inspect shaft (22) and housing (17) for cracks, bends, and damaged threads. Repair if damaged<br />
(subtask k.).<br />
Inspect two caps (15) and (28) for bends and cracks. Replace caps (15) and (28) if bent or cracked.<br />
1. Repair damaged welds (<strong>TM</strong> 9-237) on shipper (l), boom (7), and boom extension (14).<br />
2. Using arbor press, replace defective bearings (16) and (30) and races (18) and (29) as a bearing<br />
and race set.<br />
3. Replace bushings (3), (10), and (26) if defective.<br />
4. Repair damaged threads (para. 2-10).<br />
5. Replace all other parts if defective.<br />
6. Minor scoring, nicks, or burrs may be repaired using soft stone or crocus cloth.<br />
16-202
<strong>TM</strong> 9-<strong>2320</strong>-<strong>260</strong>-<strong>34</strong><br />
16-<strong>34</strong>. CRANE SHIPPER, BOOM, BOOM EXTENSION, AND ROLLERS<br />
MAINTENANCE (M819) (Contd)<br />
16-203
<strong>TM</strong> 9-<strong>2320</strong>-<strong>260</strong>-<strong>34</strong><br />
16-<strong>34</strong>. CRANE SHIPPER, BOOM, BOOM EXTENSION, AND ROLLERS<br />
MAINTENANCE (M819) (Contd)<br />
L Upper Roller Assembly and Adjustment<br />
1.<br />
2.<br />
3.<br />
4.<br />
5.<br />
6.<br />
7.<br />
8.<br />
9.<br />
10.<br />
11.<br />
12.<br />
13.<br />
14.<br />
15.<br />
Place two spacer plates (9) on dowel pins (8) and, with holes in opposite roller (7) alined with dowel<br />
pins (8), push rollers (7) together.<br />
Install shaft (10) on two rollers (7).<br />
NOTE<br />
Assistant will help with steps 3, 5 ,7, and 8.<br />
With rollers (7) and shaft (10) positioned in housing (3), install two caps (1) on housing (3) with eight<br />
screws (5). Do not tighten screws (5).<br />
Tighten screws (5) on one side of housing (3) so that cap (1) is fully seated against housing (3).<br />
While turning rollers (7), evenly tighten four screws (5) on other side of housing (3) until a slight<br />
drag is felt on rollers (7).<br />
Using feeler gage, measure gap (11) and assemble two sets of new shims (2), each being equal in<br />
thickness to one-half the measured thickness of gap (11).<br />
Remove eight screws (5) and two caps (1) from housing (3).<br />
With rollers (7) and shaft (10) positioned in housing (3), install required number of new shims (2)<br />
and two caps (1) on housing (3) with eight new lockwashers (4) and screws (5).<br />
Measure distances “A” and “B” between flange of rollers (7) and inside of housing (3). Record<br />
measurements. Distances “A” and “B” are correct if measurements are the same.<br />
NOTE<br />
If the distances “A” and “B” do not measure the same, perform<br />
steps 10 through 13 to center rollers in housing.<br />
Remove eight screws (5) and lockwashere (4) from caps (1) and housing (3).<br />
Remove cap (1) on side with longer distance measured, and remove shims (2) from cap (1) equal in<br />
thickness to one-half the difference of distances “A” and “B.”<br />
Remove other cap (1) and place thickness of shims (2) removed in step 11 on cap (1).<br />
Perform step 8.<br />
Install two grease fittings (6) on caps (1).<br />
Install upper roller assembly on shipper (subtask p.) if performing this task on-vehicle.<br />
16-204
<strong>TM</strong> 9-<strong>2320</strong>-<strong>260</strong>-<strong>34</strong><br />
16-<strong>34</strong>. CRANE SHIPPER, BOOM, BOOM EXTENSION, AND ROLLERS<br />
MAINTENANCE (M819) (Contd)<br />
16-205
<strong>TM</strong> 9-<strong>2320</strong>-<strong>260</strong>-<strong>34</strong><br />
16-<strong>34</strong>. CRANE SHIPPER, BOOM, BOOM EXTENSION, AND ROLLERS<br />
MAINTENANCE (M819) (Contd)<br />
m. Middle Lower Roller Assembly<br />
NOTE<br />
● This task may be performed on-vehicle if boom is held up to<br />
upper roller by extending and weighting down end of boom.<br />
● Ensure lifting capacity is greater than weight of shipper.<br />
Failure to do so may result in injury to personnel or damage<br />
to equipment.<br />
● Assistant will help with steps 1 and 2.<br />
1. Hold roller (5) in shipper (4) and install shaft (6) on shipper (4) and roller (5).<br />
2. Aline marked holes in plate of shaft (6) and shipper (4) and install shaft (6) on shipper (4) with new<br />
lockwasher (3) and screw (2).<br />
3. Install grease fitting (1) on shaft (6).<br />
n. Front Lower Roller Assembly and Adjustment<br />
1.<br />
2.<br />
3<br />
4.<br />
5.<br />
NOTE<br />
●<br />
This task may be performed on-vehicle if boom is supported or<br />
removed from shipper. There is not a height adjustment for front<br />
lower roller.<br />
●<br />
All personnel must stand clear during lifting operations.<br />
A swinging or shifting load may cause injury to personnel.<br />
●<br />
Ensure lifting capacity is greater than weight of shipper.<br />
Failure to do so may result in injury to personnel or damage<br />
to equipment.<br />
Using recorded measurement, assemble two sets of new shims (5) and place shims (5) on roller (6).<br />
Using arbor press, press two collars (4) and bearings (8) on roller (6).<br />
NOTE<br />
Assistant will help with steps 3,5, 7, and 8.<br />
With roller (6) positioned in shipper (10), install two caps (3) on shipper (10) with eight screws (1).<br />
Do not tighten screws (1)<br />
Tighten screws (1) on one side of shipper (10) so that cap (3) is fully seated against shipper (10).<br />
While turning roller (6), evenly tighten four screws (1) on other side of shipper (10) until a slight<br />
drag is felt on roller (6).<br />
16-206
<strong>TM</strong> 9-<strong>2320</strong>-<strong>260</strong>-<strong>34</strong><br />
16-<strong>34</strong>. CRANE SHIPPER, BOOM, BOOM EXTENSION, AND ROLLERS<br />
MAINTENANCE (M819) (Contd)<br />
6.<br />
7.<br />
8.<br />
9.<br />
10.<br />
11.<br />
12.<br />
13.<br />
14.<br />
Using feeler gage, measure gap (11) and assemble two sets of new shims (9), each being equal in<br />
thickness to one-half the measured thickness of gap (11).<br />
Remove eight screws (1) and two caps (3) from shipper (10).<br />
With roller (6) positioned in shipper (10), install required number of new shims (9) and two caps (3)<br />
on shipper (10) with eight new lockwashers (2) and screws (1).<br />
Measure distances “A” and “B” between flange of collars (4) and inside of shipper (10). Record<br />
measurements. Distances “A” and “B” are correct if measurements are the same.<br />
NOTE<br />
If distances “A” and “B” do not measure the same, perform steps<br />
10 through 13 to center roller in shipper.<br />
Remove eight screws (1) and lockwashers (2) from caps (3) and shipper (10).<br />
Remove cap (3) on side with longer distance measured, and remove shims (9) from cap (3) equal in<br />
thickness to one-half the difference of distances “A” and “B.”<br />
Remove other cap (3) and place required number of shims (9) removed in step 11 on cap (3).<br />
Perform step 8.<br />
Install two grease fittings (7) on caps (3).<br />
16-207
<strong>TM</strong> 9-<strong>2320</strong>-<strong>260</strong>-<strong>34</strong><br />
16-<strong>34</strong>. CRANE SHIPPER, BOOM, BOOM EXTENSION, AND ROLLERS<br />
MAINTENANCE (M819) (Contd)<br />
1. Install two chains (4) and linch pins (5) on boom extension (10) with two screws (3).<br />
2. Install anchor pin (6) on boom extension (10) with two linch pins (5).<br />
NOTE<br />
Assistant will help with step 3.<br />
3. Install four thrust washers (1) and two sheaves (2) on boom extension (10) with pin (8) and screw (7).<br />
4. Install grease fitting (9) on pin (8).<br />
p. Upper Roller Installation<br />
NOTE<br />
This procedure may be performed on-vehicle. Adjust lower roller<br />
to lowest position. Adjust lower roller after installation. Refer to<br />
<strong>TM</strong> 9-<strong>2320</strong>-<strong>260</strong>-20 for lower roller adjustment.<br />
1. Install upper roller housing (11) on shipper (12) with six new lockwashers (14) and screws (13).<br />
2. Adjust lower middle roller after boom is installed (<strong>TM</strong>-9-<strong>2320</strong>-<strong>260</strong>-20).<br />
16-208
<strong>TM</strong> 9-<strong>2320</strong>-<strong>260</strong>-<strong>34</strong><br />
16-<strong>34</strong>. CRANE SHIPPER, BOOM, BOOM EXTENSION, AND ROLLERS<br />
MAINTENANCE (M819) (Contd)<br />
q. Extension Cylinder Installation<br />
1. Attach chain and spreader bar to extension cylinder (16) and lifting device.<br />
WARNING<br />
Ž All personnel must stand clear during lifting operations. A<br />
swinging or shifting load may cause injury or death to personnel.<br />
● Ensure lifting capacity is greater than weight of extension<br />
cylinder. Failure to do so may result in injury to personnel or<br />
damage to equipment.<br />
NOTE<br />
Two assistants will help with steps 2 through 4.<br />
2. Using A-frame, aline front of extension cylinder (16) to boom (15) and walk extension cylinder (16)<br />
into boom (15). Raise or lower lifting device as necessary to prevent extension cylinder (16) from<br />
binding in boom (15).<br />
3. When chain is near boom (15), support end of extension cylinder (16) with jack stand, remove<br />
spreader bar, and connect chain to end of extension cylinder (16).<br />
4. With holes in collar (18) alined with holes in boom (15), walk extension cylinder (16) into boom (15)<br />
and install two pins (19) on boom (15) and collar ( 18) with four new cotter pins (17).<br />
5. Remove chain from extension cylinder (16) and lifting device.<br />
16-209
<strong>TM</strong> 9-<strong>2320</strong>-<strong>260</strong>-<strong>34</strong><br />
16-<strong>34</strong>. CRANE SHIPPER, BOOM, BOOM EXTENSION, AND ROLLERS<br />
MAINTENANCE (M819) (Contd)<br />
r. Boom Installation<br />
1. Attach chain and spreader bar to boom (12) and lifting device.<br />
●<br />
●<br />
WARNING<br />
All personnel must stand clear during lifting operations. A<br />
swinging or shifting load may cause injury or death to personnel.<br />
Ensure lifting capacity is greater than weight (2820 lb (1280 kg))<br />
of boom. Failure to do so may result in injury to personnel or<br />
damage to equipment.<br />
NOTE<br />
Two assistants will help with steps 2 through 5.<br />
2. Aline retraction port (11) of extension cylinder (2) to upper left side of boom (12).<br />
3. Using A-frame, aline boom (12) to shipper (1) and walk boom (12) into shipper (1). Use lifting device<br />
to raise or lower boom (12) to prevent binding between boom (12) and shipper (1).<br />
4. When chain is near shipper (1), support end of boom (12) with jack stand, remove chain and<br />
spreader bar, and attach chain to end of boom (12).<br />
5. Continue to walk boom (12) into shipper (l). Ensure retraction port (11) is to upper left of<br />
anchor (10) on shipper (1) and center port (9) passes through anchor (10). Seat extension cylinder (2)<br />
on anchor (10).<br />
6. Install nut (8), new locking plate (7), and nut (6) on center port (9) of extension cylinder (2). Bend tab<br />
of locking plate (7) over flat on nut (6).<br />
7. Wrap male threads of pipe nipple (3) and elbows (4) and (5) with antiseize tape.<br />
8. Install pipe nipple (3) and elbow (4) an retraction port (11). End of elbow (4) must point down.<br />
9. Install elbow (5) on center port (9). End of elbow (5) must point down.<br />
10. Remove chain from boom (12) and lifting device.<br />
s. Boom Extension Installation<br />
1.<br />
2.<br />
3.<br />
4.<br />
5.<br />
6.<br />
Attach chain and spreader bar to boom extension (15) and lifting device.<br />
WARNING<br />
● All personnel must stand clear during lifting operations. A<br />
swinging or shifting load may cause injury or death to personnel.<br />
● Ensure lifting capacity is greater than weight of boom extension.<br />
Failure to do so may result in injury to personnel or damage to<br />
equipment.<br />
NOTE<br />
Two assistants will help with steps 2 through 5.<br />
Using A-frame, aline end of boom extension (15) with boom (12), and walk boom extension (15) into<br />
boom (12). Use lifting device to raise or lower boom extension (15) to prevent binding between<br />
boom (12) and boom extension (15).<br />
When chain is near boom (12), support end of boom extension (15) with jack stand and remove chain<br />
and spreader bar from boom extension (15).<br />
Attach chain to end of boom extension (15) and continue to walk boom extension (15) into boom (12).<br />
Aline holes in boom (12) and boom extension (15), and install two locking pins (13) on boom (12) and<br />
boom extension (15) with two linch pins (14).<br />
Remove chain from boom extension (15) and lifting device.<br />
16-210
<strong>TM</strong> 9-<strong>2320</strong>-<strong>260</strong>-<strong>34</strong><br />
16-<strong>34</strong>. CRANE SHIPPER, BOOM, BOOM EXTENSION, AND ROLLERS<br />
MAINTENANCE (M819) (Contd)<br />
16-211
<strong>TM</strong> 9-<strong>2320</strong>-<strong>260</strong>-<strong>34</strong><br />
16-<strong>34</strong>. CRANE SHIPPER, BOOM, BOOM EXTENSION, AND ROLLERS<br />
MAINTENANCE (M819) (Contd)<br />
t. Shipper Installation<br />
1.<br />
2.<br />
3.<br />
4.<br />
5.<br />
6.<br />
7.<br />
8.<br />
9.<br />
10.<br />
11.<br />
12.<br />
13.<br />
14.<br />
Attach chain with spreader bar to boom extension (1) and shipper (2) to hold boom extension (1) and<br />
shipper (2) together during installation.<br />
Attach chain to lifting device.<br />
WARNING<br />
● All personnel must stand clear during lifting operations.<br />
A swinging or shifting load may cause injury to personnel.<br />
● Ensure lifting capacity is greater than weight of shipper.<br />
Failure to do so may result in injury to personnel or damage<br />
to equipment.<br />
NOTE<br />
Two assistance will help with steps 3 through 10.<br />
Attach two guide lines to shipper (2), and boom extension (1) and lift shipper (2) over boom<br />
support (3) on vehicle.<br />
Aline pivot pin holes on shipper (2) and boom support (3), and install shipper (2) on boom support (3)<br />
with pivot pin (9).<br />
Install screw (6) and nut (5) on trunnion (7) and pivot pin (9).<br />
Connect shipper braces (4) to shipper (2) (refer to <strong>TM</strong> 9-<strong>2320</strong>-<strong>260</strong>-10), remove chain and spreader<br />
bar from shipper (2), and attach chain to end of shipper (2).<br />
Disconnect shipper braces (4) from shipper (2) (refer to <strong>TM</strong> 9-<strong>2320</strong>-<strong>260</strong>-10), and lift end of shipper (2)<br />
to height sufficient to connect lift cylinder trunnion (11) to shipper (2).<br />
Move lift cylinder trunnion (11) to aline with shipper trunnions (10).<br />
With holes in lift cylinder trunnion (11) and shipper trunnions (10) alined, install pivot pin (12)<br />
on cylinder trunnion (11) and shipper trunnions (10) with two screws (13) and nuts (14).<br />
Lower shipper (2) to normal stowage height, and connect shipper braces (4) to shipper (2)<br />
(<strong>TM</strong> 9-<strong>2320</strong>-<strong>260</strong>-10).<br />
Remove chain and two guide lines from shipper (2) and lifting device.<br />
Wrap male threads on hoses (20) and (21) with antiseize tape.<br />
Connect hoses (20) and (21) to elbows (18) and (19) and tubes (15) and (16). Tighten swivel nuts (17).<br />
Install two grease fittings (8) on pivot pin (9).<br />
16-212
<strong>TM</strong> 9-<strong>2320</strong>-<strong>260</strong>-<strong>34</strong><br />
16-<strong>34</strong>. CRANE SHIPPER, BOOM, BOOM EXTENSION, AND ROLLERS<br />
MAINTENANCE (M819) (Contd)<br />
FOLLOW-ON TASKS: ● Install crane cab (gondola) (para. 16-29).<br />
● Install floodlights and wiring harness (<strong>TM</strong> 9-<strong>2320</strong>-<strong>260</strong>-20).<br />
● Install spare tire (<strong>TM</strong> 9-<strong>2320</strong>-<strong>260</strong>-10).<br />
Ž Install cable hoist winch and hoses (para, 16-31).<br />
● Upper and middle lower roller adjustment (<strong>TM</strong> 9-<strong>2320</strong>-<strong>260</strong>-20).<br />
● Lubricate crane fittings (LO 9-<strong>2320</strong>-<strong>260</strong>-12).<br />
● Check crane operation (<strong>TM</strong> 9-<strong>2320</strong>-<strong>260</strong>-10).<br />
16-213
<strong>TM</strong> 9-<strong>2320</strong>-<strong>260</strong>-<strong>34</strong><br />
16-35. BOOM EXTENSION CYLINDER MAINTENANCE (M819)<br />
THIS TASK COVERS:<br />
a. Removal c. Repair<br />
b. Cleaning and Inspection d. Assembly<br />
APPLICABLE MODELS<br />
M819<br />
TOOLS<br />
General mechanic’s tool kit<br />
(Appendix B, Item 1)<br />
Snapring pliers (Appendix B, Item 130)<br />
MATERIALS/PARTS<br />
Four cotter pins (Appendix D, Item 17)<br />
Two compression cups (Appendix D, Item 51)<br />
O-ring (Appendix D, Item 268)<br />
Wiper ring (Appendix D, Item <strong>34</strong>5)<br />
Felt washer (Appendix D, Item 529)<br />
O-ring (Appendix D, Item 269)<br />
Hydraulic oil (Appendix C, Item 20)<br />
PERSONNEL REQUIRED<br />
Two<br />
REFERENCES (<strong>TM</strong>)<br />
LO 9-<strong>2320</strong>-<strong>260</strong>-12<br />
<strong>TM</strong> 9-<strong>2320</strong>-<strong>260</strong>-10<br />
<strong>TM</strong> 9-<strong>2320</strong>-<strong>260</strong>-20<br />
<strong>TM</strong> 9-<strong>2320</strong>-<strong>260</strong>-<strong>34</strong>P-2<br />
EQUIPMENT CONDITION<br />
Crane boom removed (para. 16-<strong>34</strong>).<br />
1. Remove four cotter pins (4) from slotted nuts (5). Discard cotter pins (4).<br />
2. Remove four nuts (5) from studs (1) on cylinder flange (2).<br />
NOTE<br />
Assistant will help with steps 3 through 5.<br />
3. Holding cylinder head (6), slide cylinder (3) off piston rod (13).<br />
4. Remove two nuts (7), expander (8), compression cup (9), spacer (10), compression cup (11), and<br />
expander (12) from piston rod (13). Discard compression cups (11).<br />
5. Remove cylinder head (6) from piston rod (13).<br />
6. Remove O-ring (14) from outside of cylinder head (6). Discard O-ring (14).<br />
7. Remove snapring (19), washer (18), wiper ring (17), felt washer (16), and O-ring (15) from bore of<br />
cylinder head (6). Discard wiper ring (17), felt washer (16), and O-ring (15).<br />
b. Cleaning and Inspection<br />
1. For general cleaning instructions, refer to para. 2-8.<br />
2. For general inspection instructions, refer to para 2-9.<br />
3. Inspect cylinder (3) for bends, cracks, and broken welds.<br />
4. Inspect cylinder (3) bore for scratches, scoring, rust, and corrosion.<br />
5. Inspect piston rod (13) for bends, nicks, scratches, scoring, damaged threads, rust, corrosion, and<br />
broken welds.<br />
6. Inspect cylinder head (6) for cracks, broken snapring lip, rust, and corrosion.<br />
16-214
<strong>TM</strong> 9-<strong>2320</strong>-<strong>260</strong>-<strong>34</strong>-2<br />
16-35. BOOM EXTENSION CYLINDER MAINTENANCE (M819) (Contd)<br />
16-215
<strong>TM</strong> 9-<strong>2320</strong>-<strong>260</strong>-<strong>34</strong>-2<br />
16-35. BOOM EXTENSION CYLINDER MAINTENANCE [M819) (Contd)<br />
Repair cylinder (9), cylinder head (7), and piston rod (18) (para. 2-10). Replace unrepairable parts.<br />
a. Remove minor rust and corrosion, scratches, and scoring with soft. stone or crocus cloth.<br />
Replace part if pitting is uncovered when rust or corrosion is removed. Replace parts if more<br />
severely damaged.<br />
b. Repair broken or cracked welds and replace broken or damaged studs (8).<br />
1.<br />
2.<br />
3.<br />
4.<br />
5.<br />
6.<br />
7.<br />
Install new outer O-ring (6) and new inner O-ring (5) on cylinder head (7).<br />
Position snapring (1), washer (2), new wiper ring (3), and new felt washer (4) on piston rod (18) and<br />
slide part way up piston rod (18).<br />
Carefully work cylinder head (7) onto piston rod (18) and install new felt washer (4), and new wiper<br />
ring (3) on bore of cylinder head (7).<br />
Slide washer (2) down piston rod (18) against wiper ring (3) and install snapring (1) on cylinder<br />
head (7).<br />
Install expander (13), new compression cup (14), spacer (15), new compression cup (16) and<br />
expander (17) on piston rod (18) with two nuts (12).<br />
NOTE<br />
Ž Assistant will help with steps 6 and 7.<br />
● Coat all internal surfaces and parts with hydraulic oil before<br />
assembly.<br />
Carefully work cylinder (9) over compression cups (16) and slide cylinder (9) onto piston rod (18).<br />
Aline studs (8) of cylinder (9) with holes in cylinder head (7) and install cylinder head (7) on<br />
cylinder (9) with four nuts (11) and new cotter pins (10).<br />
16-216
<strong>TM</strong> 9-<strong>2320</strong>-<strong>260</strong>-<strong>34</strong>-2<br />
16-35. BOOM EXTENSION CYLINDER MAINTENANCE (M819) (Contd)<br />
FOLLOW-ON TASKS: •Install crane voom (para. 16-<strong>34</strong>).<br />
• Check crane operation (<strong>TM</strong> 9-<strong>2320</strong>-2<strong>260</strong>-10).<br />
16-217
16-36. CONTROL VALVE BANK REPLACEMENT (M819)<br />
THIS TASK COVERS:<br />
a. Removal b. Installation<br />
APPLICABLE MODELS<br />
M819<br />
TOOLS<br />
General mechanic’s tool kit<br />
(Appendix B, Item 1)<br />
1-1/2-in. open-end wrench<br />
(Appendix B, Item 125)<br />
1-5/8-in. open-end wrench<br />
(Appendix B, Item 126)<br />
1-11/16-in. open-end wrench<br />
(Appendix B, Item 127)<br />
Lifting device<br />
Chain<br />
MATERIALS/PARTS<br />
Three locknuts (Appendix D, Item 192)<br />
Antiseize tape (Appendix C, Item 50)<br />
Cap and plug set (Appendix C, Item 6)<br />
REFERENCES (<strong>TM</strong>)<br />
LO 9-<strong>2320</strong>-<strong>260</strong>-12<br />
<strong>TM</strong> 9-<strong>2320</strong>-<strong>260</strong>-10<br />
<strong>TM</strong> 9-<strong>2320</strong>-<strong>260</strong>-20<br />
<strong>TM</strong> 9-<strong>2320</strong>-<strong>260</strong>-<strong>34</strong>P-2<br />
EQUIPMENT CONDITION<br />
● Parking brake set (<strong>TM</strong> 9-<strong>2320</strong>-<strong>260</strong>-10).<br />
Ž Hydraulic oil tank drained (LO 9-<strong>2320</strong>-<strong>260</strong>-12).<br />
Ž Disconnect battery ground cable<br />
(<strong>TM</strong> 9-<strong>2320</strong>-<strong>260</strong>-20).<br />
GENERAL SAFETY INSTRUCTIONS<br />
• All personnel must stand clear during lifting<br />
operations.<br />
● Ensure lifting capacity is greater than weight of<br />
control valve bank.<br />
1. Remove screw (4) and wire (3) from windshield wiper motor (2).<br />
2. Remove screw (8) and wiper arm (7) from shaft (6).<br />
3. Remove slotted nut (10) and adapter (11) from shaft (6).<br />
4. Remove two nuts (9), lockwasher (12), flat washer (13), and seal (14) from shaft (6).<br />
5. Remove windshield wiper motor (2) from cab front panel (15).<br />
6. Working inside cab, remove seven screws (1) and plate panel (23) from cab brackets (16).<br />
7. Remove two nuts (19) and clamp (20) from studs (21) and tubes (5) on inside left wall of cab (22).<br />
●<br />
●<br />
CAUTION<br />
Clean area around hoses and lines before removal to prevent<br />
entry of dirt. Damage will occur if dirt or dust enters system.<br />
Cap or plug all openings immediately after disconnecting lines<br />
and hoses to prevent contamination; Remove plugs prior-to<br />
installation. Failure to do so may result in damage to hydraulic<br />
system.<br />
NOTE<br />
● Have drainage container ready to catch oil.<br />
● Tag hydraulic hoses and tubes for installation.<br />
8. Disconnect seven tubes (5) and four hoses (18) from control valve bank (17).<br />
16-218
<strong>TM</strong> 9-<strong>2320</strong>-<strong>260</strong>-<strong>34</strong><br />
16-219
<strong>TM</strong> 9-<strong>2320</strong>-<strong>260</strong>-<strong>34</strong>-2<br />
16-36. CONTROL VALVE BANK REPLACEMENT (M819) (Contd)<br />
9. Remove three locknuts (4) and screws (1) from control valve bank (2) and bracket (5). Discard<br />
locknuts (4).<br />
10 Attach chain to control valve bank (2) and lifting device.<br />
WARNING<br />
● All personnel must stand clear during lifting operations.<br />
A swinging or shifting load may cause injury to personnel.<br />
● Ensure lifting capacity is greater than weight (165 lb (75 kg))<br />
of control valve bank. Failure to do so may result in injury to<br />
personnel or damage to equipment.<br />
NOTE<br />
Assistant will help with step 11.<br />
11. Remove control valve bank (2) from cab (3) and place in work area.<br />
12. Remove chain from control valve bank (2) and lifting device.<br />
16-220
<strong>TM</strong> 9-<strong>2320</strong>-<strong>260</strong>-<strong>34</strong>-2<br />
16-36. CONTROL VALVE BANK REPLACEMENT (M819) (Contd<br />
NOTE<br />
● Perform steps 13 and 14 if new control valve bank is to be<br />
installed.<br />
● Tag elbows and adapter elbows for installation.<br />
● Record angle positions of fittings for assembly.<br />
13. Remove elbow (8) and adapter elbow (6) from control valve bank (2).<br />
14. Remove six elbows (7) and two adapter elbows (9) from control valve bank (2).<br />
b. Installation<br />
NOTE<br />
Perform steps 1, 2, and 3 for installation of new control valve bank.<br />
1. Wrap male threads of six elbows (7), two adapter elbows (9), elbow (8), and adapter elbow (6) with<br />
antiseize tape.<br />
2. Install six elbows (7) and two adapter elbows (9) on control valve bank (2) to angles previously<br />
recorded.<br />
NOTE<br />
Elbow and adapter elbow must point to rear of control valve bank<br />
when tightened.<br />
3. Install elbow (8) and adapter elbow (6) on ends of control valve bank (2).<br />
16-221
<strong>TM</strong> 9-<strong>2320</strong>-<strong>260</strong>-<strong>34</strong><br />
16-36. CONTROL VALVE BANK REPLACEMENT(M819) (Contd)<br />
4.<br />
Attach chain to control valve bank (2) and lifting device.<br />
WARNING<br />
5.<br />
6.<br />
7.<br />
8.<br />
9.<br />
10.<br />
11.<br />
12.<br />
13.<br />
14.<br />
● All personnel must stand clear during lifting operations.<br />
A swinging or shifting load may cause injury to personnel.<br />
Ž Ensure lifting capacity is greater than weight (165 lb (75 kg))<br />
of control valve bank. Failure to do so may result in injury to<br />
personnel or damage to equipment.<br />
NOTE<br />
Assistant will help with step 5.<br />
Move control valve bank (2) from work area and install on bracket (5) in cab (3) with three screws (1)<br />
and new locknuts (4).<br />
Remove chain from control valve bank (2) and lifting device.<br />
Wrap male threads on four hoses (6) with antiseize tape.<br />
Connect seven tubes (12) and four hoses (6) to control valve bank (2).<br />
Install clamp (24) on tubes (12) and studs (25) with two nuts (23).<br />
Install plate panel (7) on brackets (26) with seven screws (8).<br />
Position wiper motor (9) on front panel (7) and install with seal (22), washer (21), lockwasher (20),<br />
and two nuts (14) and (19).<br />
Install adapter (18) and slotted nut (15) on shaft (13).<br />
Install wiper arm (16) on shaft (13) with screw (17).<br />
Connect wire (10) to wiper motor (9) with screw (11).<br />
16-222
<strong>TM</strong> 9-<strong>2320</strong>-<strong>260</strong>-<strong>34</strong><br />
16-36. CONTROL VALVE BANK REPLACEMENT (M819) (Contd)<br />
FOLLOW-ON TASKS: ● Connect battery ground cable (<strong>TM</strong> 9-<strong>2320</strong>-<strong>260</strong>-20).<br />
● Fill hydraulic oil tank (LO 9-<strong>2320</strong>-<strong>260</strong>-12).<br />
Ž Check crane operation and check for leaks (<strong>TM</strong> 9-<strong>2320</strong>-<strong>260</strong>-10).<br />
16-223
<strong>TM</strong> 9-<strong>2320</strong>-<strong>260</strong>-<strong>34</strong>-2<br />
16-37. REUEF VALVE MAINTENANCE (M819)<br />
THIS TASK COVERS:<br />
a. Removal d. Assembly<br />
b. Disassembly e. Installation<br />
c. Cleaning and Inspection<br />
INITIAL SETUP<br />
APPLICABLE MODELS<br />
M819<br />
Tools<br />
General mechanic’s tool kit<br />
(Appendix B, Item 1)<br />
Two 1-1/2-in. open-end wrench<br />
(Appendix B, Item 125)<br />
14-in. pipe wrench (Appendix B, Item 129)<br />
Vise (Appendix B, Item 38)<br />
Arbor press (Appendix B, Item 7)<br />
MATERIALS/PARTS<br />
Two O-rings (Appendix D, Item 272)<br />
O-ring (Appendix D, Item 273)<br />
MATERIALS/PARTS (Contd)<br />
Gasket (Appendix D, Item 61)<br />
Packing (Appendix D, Item 313)<br />
Lubricating oil (Appendix C, Item 20)<br />
Antiseize tape (Appendix C, Item 50)<br />
Cap and plug set (Appendix C, Item 6)<br />
REFERENCES (<strong>TM</strong>)<br />
LO 9-<strong>2320</strong>-<strong>260</strong>-12<br />
<strong>TM</strong> 9-<strong>2320</strong>-<strong>260</strong>-10<br />
<strong>TM</strong> 9-<strong>2320</strong>-<strong>260</strong>-<strong>34</strong>P-2<br />
EQUIPMENT CONDITION<br />
Ž Parking brake set (<strong>TM</strong> 9-<strong>2320</strong>-<strong>260</strong>-10).<br />
● Hydraulic oil tank drained (LO 9-<strong>2320</strong>-<strong>260</strong>-12).<br />
I a Removal I4<br />
1.<br />
2.<br />
3.<br />
4.<br />
5.<br />
6.<br />
7.<br />
8.<br />
CAUTION<br />
● Clean area around hoses and lines before removal to prevent<br />
entry of dirt. Damage will occur if dirt or dust enters system.<br />
Ž Cap or plug all openings immediately after disconnecting lines<br />
and hoses to prevent contamination. Remove caps and plugs<br />
before installation. Failure to do so may result in damage to<br />
hydraulic system.<br />
NOTE<br />
Tag hoses for installation.<br />
Disconnect hose (1) from elbow (3) on hydraulic oil reservoir (2).<br />
Loosen nut (9) on adapter (10) and disconnect hose (8).<br />
Loosen nut (6) on adapter elbow (7) and disconnect hose (5).<br />
Remove hose (1) from tee fitting (15).<br />
Remove adapter elbow (7) from tee fitting (15) and tee fitting (15) from bushing (14).<br />
Remove relief valve (13) from pipe nipple (4).<br />
Place relief valve (13) in vise and remove adapter (10) from bushing (11).<br />
Remove bushings (11), (12), and (14) from relief valve (13).<br />
b. Disassembly<br />
1. Remove capnut (16) and packing (17) from adjusting screw (18). Discard packing (17).<br />
NOTE<br />
Record position of adjusting screw for installation.<br />
2. Loosen jamnut (19) and remove adjusting screw (18), jamnut (19), and O-ring (20) from<br />
retainer (21). Take jamnut (19) off adjusting screw (18). Discard O-ring (20).<br />
16-224
<strong>TM</strong> 9-<strong>2320</strong>-<strong>260</strong>-<strong>34</strong>-2<br />
16-37. RELIEF VALVE MAINTENANCE (M819)<br />
3. Remove retainer (21) and O-ring (22) from valve body (13). Discard O-ring (22).<br />
4. Remove spring guide (29) and spring (28) from valve body (13).<br />
5. Turn valve body (13) over and allow plunger (27) to drop out of sleeve (26).<br />
6. Remove screw (25), gasket (24), and setscrew (23) from side of valve body (13). Discard gasket (24).<br />
7. Using arbor press, press sleeve (26) out of valve body (13).<br />
16-225
<strong>TM</strong> 9-<strong>2320</strong>-<strong>260</strong>-<strong>34</strong>-2<br />
16-37. RELIEF VALVE MAINTENANCE (M819) (Contd)<br />
I<br />
c. Cleaning and Inspection<br />
1.<br />
2.<br />
3.<br />
4.<br />
5.<br />
6.<br />
7.<br />
8.<br />
9.<br />
For general cleaning instructions, refer to para. 2-8.<br />
For general inspection instructions, refer to para. 2-9.<br />
Inspect spring (14) for breaks, bends, or collapsed coils. Replace spring (14) if damaged.<br />
Inspect adjusting screw (3) for bends and stripped or damaged threads. Replace adjusting screw (3)<br />
if damaged.<br />
Inspect plunger (13) for bends, burrs, chipped edges, and scoring. Repair or replace plunger (13)<br />
if damaged.<br />
Inspect sleeve (12) for burrs, scoring, chipped sealing edge, and blocked ports. Repair or replace<br />
sleeve (12) if damaged.<br />
Inspect retainer (6) for damaged threads or burred flats. Repair or replace retainer (6) if damaged.<br />
Inspect valve body (8) for cracks, chipped sealing edges, and damaged threads. Repair or replace<br />
valve body (8) if damaged.<br />
Repair minor burrs, scoring, and thread damage on all parts except adjusting screw (3) and<br />
spring (14) (para. 2-10). Replace unrepairable parts. -<br />
1.<br />
2.<br />
3.<br />
4.<br />
5.<br />
6.<br />
7.<br />
8.<br />
9.<br />
10.<br />
11.<br />
12.<br />
NOTE<br />
Coat all parts with lubricating oil before installation.<br />
Using arbor press, press sleeve (12) into bore of valve body (8). Seat sleeve (12) flush with drain<br />
chamber edge. Remove any burrs on sealing edge of sleeve (12).<br />
Install setscrew (9), new gasket (10), and-screw (11) in side of valve body (8). Ensure setscrew (9)<br />
seats in groove of sleeve (12).<br />
Aline large end of plunger (13) in bore of sleeve ( 12) and drop plunger (13) in sleeve (12).<br />
Position spring (14) and spring guide (15) on plunger (13).<br />
Position new O-ring (7) in groove on retainer (6) and install retainer (6) on valve body (8) over<br />
spring (14) and spring guide (15).<br />
Install adjusting screw (3) on retainer (6) until adjusting screw (3) makes contact with spring<br />
guide (15).<br />
Position new O-ring (5) over adjusting screw (3) and install jamnut (4) on adjusting screw (3).<br />
Turn jamnut (4) until in contact with O-ring (5).<br />
Back adjusting screw (3) out of retainer (6) three turns.<br />
Shake valve body (8) and ensure plunger (13) moves off seat of sleeve (12).<br />
Loosening jamnut (4) as necessary, screw in adjusting screw (3) to recorded position.<br />
Tighten jamnut (4) onto O-ring (5).<br />
Install new packing (2) and capnut (1) on adjusting screw (3).<br />
1. Wrap male threads on adapter (22), adapter elbow (19), tee fitting (26), and hoses (17) and (27)<br />
with antiseize tape.<br />
2. Place relief valve (8) in vise and install bushings (23), (24), and (25) on relief valve (8).<br />
3. Install adapter (22) and adapter elbow (19) on bushing (23) and tee fitting (26).<br />
4. Install relief valve (8) on pipe nipple (16).<br />
5. Install tee fitting (26) on bushing (25).<br />
16-226
<strong>TM</strong> 9-<strong>2320</strong>-<strong>260</strong>-<strong>34</strong>-2<br />
16-37. RELIEF VALVE MAINTENANCE (M819) (Contd)<br />
6. Connect hose (17) to adapter elbow (19) with nut (18).<br />
7. Connect hose (20) to adapter (22) with nut (21).<br />
8. Connect hose (27) to tee fitting (26).<br />
9. Connect hose (27) to elbow (29) on hydraulic oil reservoir (28).<br />
FOLLOW-ON TASKS: ● Fill hydraulic oil system (LO 9-<strong>2320</strong>-<strong>260</strong>-12).<br />
● Check crane operation and check for leaks (<strong>TM</strong> 9-<strong>2320</strong>-<strong>260</strong>-10).<br />
● Check pressure relief adjustment (<strong>TM</strong> 9-<strong>2320</strong>-<strong>260</strong>-20).<br />
16-227
<strong>TM</strong> 9-<strong>2320</strong>-<strong>260</strong>-<strong>34</strong>-2<br />
16-38. CHECK VALVES REPLACEMENT (M819)<br />
THIS TASK COVERS:<br />
a. Elevating Cylinder Check Valve Removal c. Elevating Cylinder Check Valve Installation<br />
b. Hoist Winch Motor Check Valve Removal d. Hoist Winch Motor Check Valve Installation<br />
APPLICABLE MODELS<br />
M819<br />
TOOLS<br />
General mechanic’s tool kit<br />
(Appendix B, Item 1)<br />
1-11/16-in. open-end wrench<br />
(Appendix B, Item 127)<br />
MATERlALS/PARTS<br />
Antiseize tape (Appendix C, Item 50)<br />
Cap and plug set (Appendix C, Item 6)<br />
REFERENCES (<strong>TM</strong>)<br />
LO 9-<strong>2320</strong>-<strong>260</strong>-12<br />
<strong>TM</strong> 9-<strong>2320</strong>-<strong>260</strong>-10<br />
<strong>TM</strong> 9-<strong>2320</strong>-<strong>260</strong>-<strong>34</strong>P-2<br />
EQUIPMENT CONDMON<br />
● Parking brake set (<strong>TM</strong> 9-<strong>2320</strong>-<strong>260</strong>-10).<br />
Ž Drain hydraulic oil reservoir (LO 9-<strong>2320</strong>-<strong>260</strong>-12).<br />
CAUTION<br />
● Clean area around hoses and lines before removal to prevent<br />
entry of dirt. Damage will occur if dirt or dust enters system.<br />
● Cap or plug all openings immediately after disconnecting lines<br />
and hoses to prevent contamination. Remove caps or plugs prior<br />
to installation. Failure to do so may result in hydraulic system<br />
damage.<br />
a. Elevating Cylinder Check Valve Removal<br />
NOTE<br />
● Have drainage container ready to catch oil.<br />
● Tag hoses and tubes for installation.<br />
1. Holding nut (4) on hose (1), loosen nut (3) and disconnect hose (1) from tube (2).<br />
2. Remove hose (1) from check valve (6).<br />
3. Remove check valve (6) from elbow (5).<br />
b. Hoist Winch Motor Check Valve Removal<br />
NOTE<br />
● Have drainage container ready to catch oil.<br />
● Tag hoses and tubes for installation.<br />
1. Holding nut (12) on hose (7), loosen nut (11) and disconnect hose (7) from tube (10).<br />
2. Remove hose (7) from check valve (8).<br />
3. Remove check valve (8) from elbow (9).<br />
c. Elevating Cylinder Check Valve Installation<br />
I<br />
1. Wrap male threads on elbow (5) and hose (1) with antiseize tape.<br />
2. Install check valve (6) on elbow (5).<br />
3. Install hose (1) in check valve (6).<br />
4. Connect hose (1) to tube (2) with swivel nut (3) and nut (4).<br />
16-228
<strong>TM</strong> 9-<strong>2320</strong>-<strong>260</strong>-<strong>34</strong>-2<br />
16-38. CHECK VALVES REPLACEMENT (M819) (Contd)<br />
d. Hoist Winch Motor Check Valve Installation<br />
1. Wrap male threads on hose (7) and elbow (9) with antiseize tape.<br />
2. Install check valve (8) on elbow (9).<br />
3. Install hose (7) in check valve (8).<br />
4. Connect hose (7) on tube (10) with swivel nut (11) and nut (12).<br />
FOLLOW-ON TASKS: ● Fill hydraulic oil reservoir (LO 9-<strong>2320</strong>-<strong>260</strong>-12).<br />
• Check crane operation (<strong>TM</strong> 9-<strong>2320</strong>-<strong>260</strong>-10).<br />
16-229
<strong>TM</strong> 9-<strong>2320</strong>-<strong>260</strong>-<strong>34</strong>-2<br />
Section IV. TRANSMISSION POWER TAKEOFF MAINTENANCE<br />
16-39. TRANSMISSION POWER TAKEOFF MAINTENANCE INDEX<br />
PARA.<br />
NO.<br />
TITLE<br />
PAGE<br />
NO.<br />
16-40. Transmission Power Takeoff Replacement 16-230<br />
16-41. Transmission Power Takeoff Repair 16-232<br />
16-40. TRANSMISSION POWER TAKEOFF REPLACEMENT<br />
THIS TASK COVERS:<br />
a. Removal b. Installation<br />
INITIAL SETUP<br />
APPLICABLE MODELS<br />
All<br />
TOOLS<br />
General mechanic’s tool kit<br />
(Appendix B, Item 1)<br />
MATERIALS/PARTS<br />
Seven lockwashers (Appendix D, Item 242)<br />
Gasket (Appendix D, Item 1<strong>34</strong>)<br />
Locknut (Appendix D, Item 204)<br />
Cotter pin (Appendix D, Item 48)<br />
REFERENCES (<strong>TM</strong>)<br />
LO 9-<strong>2320</strong>-<strong>260</strong>-12<br />
<strong>TM</strong> 9-<strong>2320</strong>-<strong>260</strong>-20<br />
<strong>TM</strong> 9-<strong>2320</strong>-<strong>260</strong>-<strong>34</strong>P-2<br />
EQUIPMENT CONDITION<br />
● Front winch propeller shaft disconnected<br />
(if so equipped) (<strong>TM</strong> 9-<strong>2320</strong>-<strong>260</strong>-20).<br />
● Hydraulic pump propeller shaft disconnected<br />
(M817, M820A2) (<strong>TM</strong> 9-<strong>2320</strong>-<strong>260</strong>-20).<br />
● Front and rear cab tunnel covers removed<br />
(<strong>TM</strong> 9-<strong>2320</strong>-<strong>260</strong>-20).<br />
● Transmission oil drained (LO 9-<strong>2320</strong>-<strong>260</strong>-12).<br />
NOTE<br />
Ž Perform step 1 for M817 and M820A2 vehicles.<br />
● Perform step 2 for vehicles except M817 and M820A2.<br />
1. Remove cotter pin (2), pin (4), and control rod (3) from PTO (1). Discard cotter pin (2).<br />
2. Remove screw (7) and lockwasher (6) from PTO (1) and control lever (8). Discard lockwasher (6).<br />
3. Remove locknut (5), screw (9), and control lever (8) from PTO (1). Discard locknut (5).<br />
4. Remove six nuts (12), lockwashers (11), PTO (1), and gasket (13) from transmission housing (14).<br />
Discard lock washers (11) and gasket ( 13).<br />
NOTE<br />
Perform step 5 if studs are damaged.<br />
5. Remove six studs (10) from transmission housing (14).<br />
16-230
<strong>TM</strong> 9-<strong>2320</strong>-<strong>260</strong>-<strong>34</strong>-2<br />
16-40. TRANSMISSION POWER TAKEOFF REPLACEMENT (Contd)<br />
NOTE<br />
Perform step 1 if studs were removed.<br />
1. Install six studs (10) on transmission housing (14).<br />
2. Position new gasket (13) and PTO (1) on studs (10) and transmission housing (14) and install with<br />
six new lockwashers (11) and nuts (12).<br />
NOTE<br />
● Perform steps 3 and 4 for all vehicles except M817 and M820A2.<br />
● Perform step 5 for M817 and M820A2 vehicles.<br />
3. Install control lever (8) on PTO (1) with screw (9) and new locknut (5).<br />
4. Install control lever (8) on PTO (1) with new lockwasher (6) and screw (7).<br />
5. Install control rod (3) on PTO (1) with pin (4) and new cotter pin (2).<br />
FOLLOW-ON TASKS: Ž Install front winch propeller shaft (if so equipped) (<strong>TM</strong> 9-<strong>2320</strong>-<strong>260</strong>-20).<br />
● Install hydraulic pump propeller shaft (M817, M820A2) (<strong>TM</strong> 9-<strong>2320</strong>-<strong>260</strong>-20).<br />
● Install front and rear cab tunnel covers (<strong>TM</strong> 9-<strong>2320</strong>-<strong>260</strong>-20).<br />
● Fill transmission with gear oil (LO 9-<strong>2320</strong>-<strong>260</strong>-12).<br />
16-231
<strong>TM</strong> 9-<strong>2320</strong>-<strong>260</strong>-<strong>34</strong>-2<br />
16-41. TRANSMISSION POWER TAKEOFF REPAIR<br />
THIS TASK COVERS:<br />
a. Disassembly c. Assembly<br />
b. Cleaning, Inspection, and Repair<br />
lNITIAL SETUP<br />
APPLICABLE MODELS<br />
All<br />
TOOLS<br />
General mechanic’s tool kit<br />
(Appendix B, Item 1)<br />
Mechanical puller kit (Appendix B, Item 14)<br />
Outside micrometer (Appendix B, Item 8)<br />
Inside micrometer (Appendix B, Item 9)<br />
Vernier caliper (Appendix B, Item 33)<br />
Arbor press (Appendix B, Item 7)<br />
MATERIALS/PARTS<br />
Fifteen lockwashers (Appendix D, Item 252)<br />
Two retainers (dual output)<br />
(Appendix D, Item 338)<br />
Cotter pin (Appendix D, Item 50)<br />
Cotter pin (Appendix D, Item 19)<br />
Three seals (Appendix D, Item 465)<br />
Three retainers (Appendix D, Item 338)<br />
MATERIALS/PARTS (Contd)<br />
Two seals (dual output) (Appendix D, Item 465)<br />
Gasket (Appendix D, Item 1<strong>34</strong>)<br />
Gasket (Appendix D, Item 110)<br />
Gasket (Appendix D, Item 108)<br />
Woodruff key (Appendix D, Item 564)<br />
Bushing (Appendix D, Item 11)<br />
Safety wire (Appendix D, Item 375)<br />
GAA grease (Appendix C, Item 14)<br />
Lubricating oil (Appendix C, Item 20)<br />
Sealing compound (Appendix C, Item 42)<br />
Mineral oil (Appendix C, Item 23)<br />
REFERENCES (<strong>TM</strong>)<br />
<strong>TM</strong> 9-<strong>2320</strong>-<strong>260</strong>-<strong>34</strong>P-2<br />
EQUIPMENT CONDITION<br />
Transmission power takeoff removed (para. 16-40).<br />
I<br />
a. Disassembly<br />
1. Remove six screws (7), lockwashers (6), cover (5), and gasket (4) from PTO housing (8). Discard<br />
lockwashers (6) and gasket (4).<br />
2. Remove retainer (1), spring (2), and ball (3) from PTO housing (8).<br />
3. Remove safety wire (11) and screw (10) from shift fork ( 12). Discard safety wire (11).<br />
4. Remove screw (15) and washer (14) from shift pin (13) and slide shift pin (13) out of two boots (9),<br />
shift fork (12), and PTO housing (8).<br />
5. Remove shift fork (12) from PTO housing (8).<br />
6. Remove two boots (9) and retainers (17) from PTO housing (8). Discard retainers (17).<br />
7. Remove two seals (16) from PTO housing (8). Discard seals ( 16).<br />
16-232
<strong>TM</strong> 9-<strong>2320</strong>-<strong>260</strong>-<strong>34</strong>-2<br />
I<br />
16-41. TRANSMISSION POWER TAKEOFF REPAIR (Contd)<br />
I<br />
16-233
<strong>TM</strong> 9-<strong>2320</strong>-<strong>260</strong>-<strong>34</strong>-2<br />
16-41. TRANSMISSION POWER TAKEOFF REPAIR (Contd)<br />
8.<br />
9.<br />
10.<br />
11.<br />
12.<br />
13,<br />
14.<br />
15.<br />
16.<br />
17.<br />
18.<br />
19.<br />
20.<br />
21.<br />
22.<br />
23.<br />
24.<br />
Remove cotter pin (1) from PTO housing (2) and input gear pin (3), Discard cotter pin (l).<br />
Using drift punch, remove input gear pin (3) from PTO housing (2). Remove end with cotter pin<br />
hole first.<br />
Remove two thrust washers (4) and input gear (6) from PTO housing (2).<br />
Remove two bearings (5) from input gear (6).<br />
NOTE<br />
Perform steps 12 through 24 for dual output shaft PTO.<br />
Remove plug (17), spring (18), and ball (19) from cover (12).<br />
Remove five screws (11), lockwashers (10), cover ( 12), and gasket (9) from PTO housing (2). Discard<br />
lockwashers (10) and gasket (9).<br />
Remove snapring (8) from reverse gear shaft (7).<br />
Loosen jamnut (15) and remove eye bolt (14) and washer (13) from rear output shift pin (16).<br />
Remove safety wire (25) from screw (24) and shifter fork (20). Discard safety wire (25).<br />
Remove screw (24) from shifter fork (20) and rear output shift pin (16).<br />
Using brass drift, remove rear output shift pin (16) from shifter fork (20) and cover (12).<br />
Remove retainer (22) and boot (23) from cover (12). Discard retainer (22),<br />
Remove seal (21) from cover (12). Discard seal (21).<br />
Remove seal (31) from cover (12). Discard seal (31).<br />
Remove snapring (30) from rear output shaft (27).<br />
Using arbor press, remove rear output shaft (27) and clutch gear (26) from bearing (29) and<br />
cover (12). Separate clutch gear (26) and rear output shaft (27).<br />
Remove two snaprings (28) and bearing (29) from cover ( 12).<br />
DUAL OUTPUT<br />
16-2<strong>34</strong>
<strong>TM</strong> 9-<strong>2320</strong>-<strong>260</strong>-<strong>34</strong>-2<br />
16-41. TRANSMISSION POWER TAKEOFF REPAIR (Contd)<br />
DUAL OUTPUT<br />
16-235
<strong>TM</strong> 9-<strong>2320</strong>-<strong>260</strong>-<strong>34</strong>-2<br />
16-41. TRANSMISSION POWER TAKEOFF REPAIR (Contd)<br />
25.<br />
26.<br />
27.<br />
28.<br />
29.<br />
30.<br />
31.<br />
32.<br />
33.<br />
<strong>34</strong>.<br />
35.<br />
36.<br />
37.<br />
38.<br />
NOTE<br />
Perform step 25 for single output shaft PTO.<br />
Remove five screws (4), lockwashers (3), cover (5), and gasket (2) from PTO housing (1). Discard<br />
lockwashers (3) and gasket (2).<br />
Remove four screws (6), lock washers (7), cover (11), and gasket (9) from PTO housing (1) and front —<br />
output shaft (8). Discard lockwashers (7) and gasket (9).<br />
Remove seal (10) from cover (11). Discard seal (10).<br />
Using arbor press, remove front output shaft (8) from bearing (17). As front output shaft (8) comes<br />
out of bearing ( 17) and is clear, gear (18) can be removed from front output shaft (8) and PTO<br />
housing (1).<br />
Using arbor press, remove bearing (17) and spacer (16) from PTO housing (1).<br />
Using mechnical puller and arbor press, remove bearing ( 12) from front output shaft (8).<br />
Remove snapring (13) from front output shaft (8).<br />
Remove thrust washer (14) and gear (15) from front output shaft (8).<br />
Remove cotter pin (28) and clevis pin (25) from reverse gear (27) and reverse gear shaft (23). Discard<br />
cotter pin (28).<br />
Using arbor press, remove bearing (22) and reverse gear shaft (23) from PTO housing (1) and<br />
reverse gear (27). Press on splined end of reverse gear shaft (23).<br />
Remove reverse gear (27) and two thrust washers (26) from PTO housing (1).<br />
Using bearing puller, remove bearing (19) from PTO housing ( 1).<br />
Remove woodruff key (21) from reverse gear shaft (23). Discard woodruff key (21).<br />
Remove plug (20) and two screws (24) from PTO housing (1).<br />
16-236
<strong>TM</strong> 9-<strong>2320</strong>-<strong>260</strong>-<strong>34</strong>-2<br />
16-41. TRANSMISSION POWER TAKEOFF REPAIR (Contd)<br />
16-237
<strong>TM</strong> 9-<strong>2320</strong>-<strong>260</strong>-<strong>34</strong>-2<br />
16-41. TRANSMISSION POWER TAKEOFF REPAIR (Contd)<br />
I<br />
b. Cleaning, Inspection, and Repair<br />
1.<br />
2.<br />
3.<br />
4.<br />
For general cleaning instructions, refer to para. 2-8.<br />
For general inspection instructions, refer to para. 2-9.<br />
Inspect reverse gear shaft (l), front output shaft (3), rear output shaft (4), main shift fork (6), rear<br />
shift fork (7), input gear pin (8), shift pin (9), and rear output Shift pin (10) for scores breaks, cracks,<br />
pits, burrs, nicks, and wear. Refer to table 16-16, Transmission PTO Wear Limits, for measurements.<br />
Repair minor burrs or scoring. Replace part(s) if damaged or worn past limits.<br />
Inspect front output shaft cover (5) for scores, breaks, cracks, pits, burrs, and nicks. Replace front<br />
output shaft cover (5) if damaged.<br />
NOTE<br />
Perform step 5 for dual output shaft PTO.<br />
5.<br />
6.<br />
7.<br />
8.<br />
Inspect rear output shaft (4), rear shift fork (7), and rear output shift pin (10) for scores, breaks,<br />
cracks, pits, burrs, nicks, and wear. Refer to table 16-16, Transmission PTO Wear Limits, for<br />
measurements. Replace rear output shaft (4), rear shift fork (7), or rear output shift pin (10) if<br />
damaged or worn past limits.<br />
Inspect bushing (2) of reverse gear shaft (1) for scores, overheating, and wear. Refer to table 16-16,<br />
Transmission PTO Wear Limits, for measurements. Replace bushing (2) if damaged or worn.<br />
NOTE<br />
Perform steps 7 and 8 if reverse gear shaft bushing requires<br />
replacement.<br />
Using puller, remove bushing (2) from reverse gear shaft (1). Discard bushing (2).<br />
Using arbor press, install new bushing (2) in reverse gear shaft (1).<br />
16-238
<strong>TM</strong> 9-<strong>2320</strong>-<strong>260</strong>-<strong>34</strong>-2<br />
I 16-41. TRANSMISSION POWER TAKEOFF REPAIR (Contd) I<br />
Table 16-16. Transmission PTO Wear Limits.<br />
ITEM<br />
NO.<br />
lTEM/POINT OF MEASUREMENT<br />
WEAR LIMITS/TOLERANCES<br />
INCHES<br />
MILLIMETERS<br />
1 Reverse gear shaft<br />
Bushing – inner diameter – maximum 0.626 15.90<br />
Bushing bore – inner diameter – maximum 0.750 19.05<br />
Front and rear bearing surfaces – outer diameter –<br />
minimum 1.2495 31.737<br />
3 Front output shaft<br />
Front and rear bearing - outer diameter –<br />
minimum 1.3778 <strong>34</strong>.996<br />
Front gear – outer diameter – minimum 1.4035 35.649<br />
4 Rear output shaft<br />
Bushing journal – outer diameter – minimum 0.6230 15.824<br />
Bearing – outer diameter – minimum 0.9843 25.001<br />
6 Main shift fork<br />
Bore - inner diameter – maximum 0.687 17.45<br />
Pad - thickness – minimum 0.370 9.398<br />
7 Rear shift fork<br />
Bore – inner diameter – maximum 0.688 17.48<br />
Pad – thickness – minimum 0.365 9.271<br />
8 Input gear pin<br />
Front - outer diameter – minimum 0.7510 19.075<br />
Rear – outer diameter – minimum 0.7495 19.037<br />
9 Shift pin – outer diameter– minimum 0.6845 17.386<br />
10 Rear output shift pin – outer diameter – minimum 0.6845 17.386<br />
16-239
<strong>TM</strong> 9-<strong>2320</strong>-<strong>260</strong>-<strong>34</strong>-2<br />
16-41. TRANSMISSION POWER TAKEOFF REPAIR (Contd)<br />
I<br />
9. Inspect PTO housing (1) for breaks, cracks, nicks, burrs. Repair minor nicks and burrs. Replace<br />
PTO housing (1) if damaged.<br />
10. Inspect shifter pin bores (2), front output shaft bearing bores (3), input shaft bearing bores (4), and<br />
reverse shaft bearing bores (5) in PTO housing (1) for wear. Refer to table 16-17, Transmission PTO<br />
Wear Limits for measurements. Replace PTO housing (1) if bore(s) is worn past limits.<br />
11. Inspect three boots (6) for checking, rips, and tears. Replace boot(s) (6) if checked, ripped, or tom.<br />
12. Inspect two springs (7) for broken coils and distortion, Replace spring(s) (7) if coils are broken or<br />
distorted.<br />
13. Inspect cover (8) for breaks, cracks, nicks, and burrs. Replace cover (8) if broken, cracked, nicked,<br />
or burred.<br />
14. Inspect cover (9) for breaks, cracks, nicks, burrs, and wear. Refer to table 16-17, Transmission PTO<br />
Wear Limits, for measurements. Repair minor nicks and burrs. Replace cover (9) if damaged or worn<br />
past limits.<br />
15. Inspect reverse gear (10) and input gear (11) for breaks, cracks, chipped teeth or splines, and wear.<br />
Refer to table 16-17, Transmission PTO Wear Limits, for measurements. Replace reverse gear (10)<br />
or input gear (11) if damaged or worn past limits.<br />
Table 16-17, Transmission PTO Wear Limits.<br />
ITEM<br />
NO.<br />
lTEM/POINT OF MEASUREMENT<br />
WEAR LIMITS/TOLERANCES<br />
INCHES<br />
MILLIMETERS<br />
2 Shifter pin bores – front and rear – maximum 0.692 17.58<br />
3 Front output shaft bearing bores – front and rear –<br />
maximum 2.8356 72.024<br />
4 Input shaft bearing bores<br />
Front – maximum 0.7510 19.075<br />
Rear – maximum 0.7495 19.037<br />
5 Reverse shaft bearing bores – front and rear –<br />
maximum 1.5005 38.113<br />
9 Cover<br />
Shift pin bore – maximum 0.692 17.58<br />
Rear bearing bore – maximum 2.0482 52.024<br />
10 Reverse gear – inner diameter – maximum 1.252 31.80<br />
11 Input gear – inner diameter – maximum 1.250 31.75<br />
16-240
<strong>TM</strong> 9-<strong>2320</strong>-<strong>260</strong>-<strong>34</strong>-2<br />
16-41. TRANSMISSION POWER TAKEOFF REPAIR (Contd)<br />
16-241
<strong>TM</strong> 9-<strong>2320</strong>-240-<strong>34</strong>-2<br />
16-41. TRANSMISSION POWER TAKEOFF REPAIR (Contd)<br />
16. Inspect front output shaft bearing (1), rear output shaft bearing (2), reverse shaft bearing (3),<br />
rear needle bearing (4), and two input shaft needle bearings (5) for wear. Refer to table 16-18,<br />
Transmission PTO Wear Limits, for measurements. Replace bearing(s) (1), (2), (3), (4), or (5) if<br />
worn past limits.<br />
17. Inspect spacer (6) and thrust washers (7), (8), and (9) for wear. Refer to table 16-18, Transmission<br />
PTO Wear Limits, for measurements. Replace spacer (6) or thrust washer(s) (7), (8), or (9) if worn<br />
past limits.<br />
16-242
<strong>TM</strong> 9-<strong>2320</strong>-<strong>260</strong>-<strong>34</strong>-2<br />
16-41. TRANSMISSION POWER TAKEOFF REPAIR (Contd)<br />
Table 16-18. Transmission PTO Wear Limits.<br />
ITEM<br />
NO.<br />
lTEM/POINT OF MEASUREMENT<br />
WEAR LIMITS/TOLERANCES<br />
INCHES I MILLIMETERS<br />
1<br />
2<br />
Front output shaft bearings – ball<br />
Outer diameter - minimum<br />
Inner diameter - maximum<br />
Rear output shaft bearing – ball<br />
Outer diameter – minimum<br />
Inner diameter - maximum<br />
2.8339<br />
1.3780<br />
2.0467<br />
0.9843<br />
71.981<br />
35.001<br />
51.986<br />
25.001<br />
3<br />
Reverse shaft bearing<br />
Front needle bearing (closed)<br />
Outer diameter – minimum<br />
Inner diameter – maximum<br />
1.5005<br />
1.2500<br />
38.113<br />
31.750<br />
4<br />
Rear needle bearing (open)<br />
Outer diameter – minimum<br />
Inner diameter – maximum<br />
1.4995<br />
1.2514<br />
38.087<br />
31.786<br />
5<br />
6<br />
7<br />
8<br />
9<br />
Input shaft needle bearings<br />
Outer diameter – minimum<br />
Inner diameter – maximum<br />
Spacer – thickness – minimum<br />
Thrust washer – thickness – minimum<br />
Thrust washer – thickness – minimum<br />
Thrust washer – thickness – minimum<br />
1.2505<br />
0.7500<br />
0.218<br />
0.061<br />
0.058<br />
0.122<br />
31.763<br />
19.050<br />
5.537<br />
1.549<br />
1.473<br />
3.099<br />
16-243
<strong>TM</strong> 9-<strong>2320</strong>-<strong>260</strong>-<strong>34</strong>-2<br />
16-41. TRANSMISSION POWER TAKEOFF REPAIR (Contd)<br />
c. Assembly<br />
●<br />
●<br />
●<br />
NOTE<br />
Coat roller bearings with straight mineral oil prior to<br />
installation.<br />
Coat threads of external screws and retainers and gaskets with<br />
sealing compound prior to installation.<br />
Coat internal parts with light coat of lubricating oil prior to<br />
installation.<br />
1.<br />
2.<br />
3.<br />
4.<br />
5.<br />
6.<br />
7.<br />
8.<br />
9.<br />
10.<br />
11.<br />
12.<br />
13.<br />
14,<br />
15.<br />
16.<br />
Install plug (3) and two screws (7) in PTO housing (8).<br />
Using arbor press, install bearing (1) in bore (2) of PTO housing (8). Ensure bearing (1) is flush with<br />
inner face of bore (2).<br />
Install new woodruff key (4) in reverse gear shaft (5).<br />
Insert reverse gear shaft (5) through bore (6) of PTO housing (8) and insert through one thrust<br />
washer (11), reverse gear (12), and second thrust washer (14), and start into bearing (1). Ensure<br />
woodruff key (4) alines with keyway of reverse gear (12).<br />
Continue to press reverse gear shaft (5) until hole in reverse gear (12) and reverse gear bore (6) will<br />
admit installation of pin (13).<br />
Install pin (13) in reverse gear (12) and reverse gear shaft (5) with new cotter pin (10). Bend ends of<br />
cotter pin (10) around reverse gear (12). Cotter pin (10) ends must be higher than roots of gear teeth<br />
on reverse gear ( 12).<br />
Using arbor press, install bearing (9) over reverse gear shaft (5) and into PTO housing (8). Rolled<br />
edges of bearing (9) may be above edge of bore (6) in PTO housing (8).<br />
Install gear (18) on front output shaft (19). Slide gear (18) up to splines on front output shaft (19).<br />
Position thrust washer (17) over front output shaft (19) and on gear (18) and install with<br />
snapring (16).<br />
Using arbor press, install bearing (15) on front output shaft (19). Seat to snapring (16).<br />
Place splined end of front output shaft (19) through bore (21) in PTO housing (8). Position gear (20)<br />
over end of front output shaft (19), and slide gear (20) onto splines of shaft (19). Fork groove of<br />
gear (20) is toward rear of PTO housing (8).<br />
Continue insertion of front output shaft (19) and use arbor press to seat bearing (15) in bore (21)<br />
of PTO housing (8). Seat bearing (15) flush with inner face of bore (21).<br />
Using arbor press, install bearing (26) on rear end of front output shaft (19) and into bearing<br />
bore (27) of PTO housing (8). Press bearing (26) flush with inner face of bore (27) and to shoulder<br />
on front output shaft (19).<br />
Coat outer surface of spacer (25) with light coat of GAA grease and place spacer (25) in bore (27)<br />
against bearing (26).<br />
Install new seal (29) in cover (24).<br />
Install new gasket (28) and cover (24) on PTO housing (8) with four new lockwashers (23) and<br />
screws (22).<br />
16-244
<strong>TM</strong> 9-<strong>2320</strong>-<strong>260</strong>-<strong>34</strong>-2<br />
16-41. TRANSMISSION POWER TAKEOFF REPAIR (Contd)<br />
16-245
<strong>TM</strong> 9-<strong>2320</strong>-<strong>260</strong>-<strong>34</strong>-2<br />
16-41. TRANSMISSION POWER TAKEOFF REPAIR (Contd)<br />
17.<br />
18.<br />
19.<br />
20.<br />
21.<br />
22.<br />
23.<br />
24.<br />
25.<br />
26.<br />
27.<br />
28.<br />
29.<br />
30.<br />
31.<br />
NOTE<br />
Perform steps 17 through 35 for dual output shaft PTO.<br />
Install snapring (4) in rear groove of cover (3).<br />
Using arbor press and adapter, install bearing (5) in cover (3). Seat bearing (5) against snapring (4).<br />
Install snapring (2) in front groove of cover (3).<br />
NOTE<br />
Support inner race of bearing during rear output shaft installation.<br />
Using arbor press, install rear output shaft (6), threaded end first, in and through bearing (5). Seat<br />
shoulder of rear output shaft (6) to inner race of bearing (5).<br />
Install snapring (7) in groove on rear output shaft (6).<br />
Install new seal (8) in rear of cover (3).<br />
Install new seal (9) in rear pin bore ( 10) of cover (3).<br />
Slide clutch gear (1) onto splines of rear output shaft (6).<br />
Position shift fork (13) over groove in rear output shift pin (14) and insert rear output shift pin (14)<br />
through bore of shift fork (13). Insert rear output shift pin (14) through rear shift pin bore ( 10) and<br />
seal (9). Threaded end (15) of rear output shift pin (14) goes into bore. Do not put end of rear<br />
output shift pin (14) with side hole (16) in first.<br />
Aline side hole (16) in rear output shift pin (14) with threaded hole in shift fork (13), and install shift<br />
fork (13) on rear output shift pin (14) with screw (12),<br />
Install new safety wire (11) in screw (12) and wrap around shift fork ( 13). Twist ends of safety<br />
wire (11) together and bend twist around shift fork (13).<br />
Place ball (25) and spring (24) in bore (22) and retain with plug (23).<br />
Place boot (17) over rear output shift pin (14) and install boot (17) to cover (3) with new<br />
retainer (21).<br />
Thread jamnut (18) on eyebolt (19) if it was removed.<br />
Place washer (20) over rear output shift pin (14) and install boot (17) to rear output shift pin (14)<br />
with eyebolt (19). Tighten jamnut (18) against washer (20).<br />
16-246
<strong>TM</strong> 9-<strong>2320</strong>-<strong>260</strong>-<strong>34</strong>-2<br />
16-41. TRANSMISSION POWER TAKEOFF REPAIR (Contd]<br />
32. Install snapring (27) in groove on rear of reverse gear shaft (26).<br />
33. Ensure spacer (31) is in position over bearing in PTO housing (32).<br />
<strong>34</strong>. Install new gasket (30) and cover (3) over reverse gear shaft (26) and on PTO housing (32) with five<br />
new lockwashers (28) and screws (29).<br />
35. Ensure all gears can rotate and both shifter shafts can move to all detent positions.<br />
NOTE<br />
Perform steps 36 through 38 for single output shaft PTO.<br />
36. Ensure spacer (31) is in position over bearing in PTO housing (32).<br />
37. Install new gasket (36) and cover (35) over reverse gear shaft (26) and on PTO housing (32) with five<br />
new lockwashers (33) and screws (<strong>34</strong>).<br />
38. Brush additional gear oil on internal parts of PTO.<br />
16-247
<strong>TM</strong> 9-<strong>2320</strong>-<strong>260</strong>-<strong>34</strong>-2<br />
16-41. TRANSMISSION POWER TAKEOFF REPAIR (Contd)<br />
39.<br />
40.<br />
41.<br />
42.<br />
43.<br />
44.<br />
45.<br />
46.<br />
47.<br />
48.<br />
49.<br />
50.<br />
51.<br />
52.<br />
53.<br />
Install two bearings (9) in input gear (10). Seat bearings (9) slightly below end faces of input<br />
gear (10).<br />
NOTE<br />
● Front end of pin is slightly larger than the other and has a slot<br />
in the rear end to aid in pin groove alinement.<br />
● Mark front of pin to indicate groove position.<br />
Start input gear pin (5) in front bore (6) of PTO housing (l), small end first.<br />
Place thrust washer (8), input gear (10), and second thrust washer (8) over input gear pin (5).<br />
Work through opening (7). Large end of input gear (10) is toward front of PTO housing (1).<br />
Turn input gear pin (5) and push back and forth until cotter pin groove (4) of input gear pin (5)<br />
alines with cotter pin hole (3) in PTO housing (1).<br />
Install new cotter pin (2) in PTO housing (1) and input gear pin (5).<br />
Install two new seals (11) and (12) in two bores (17) of PTO housing (1).<br />
Push shift pin (13), threaded end first, through seal (12) in rear of PTO housing (1).<br />
Place lug end of shift fork (15) in slot in gear (16) and push shift pin (13) through bore of shift<br />
fork (15) and continue to push shift pin (13) through front seal (11) in bore (17).<br />
Turn shift pin (13) to aline groove (14) with screw hole in shift fork (15) and install screw (22) in<br />
shift. fork (15) and groove (14) of shift pin (13).<br />
Retain screw (22) to shift fork (15) with new safety wire (23). Bend twisted ends of safety wire (23)<br />
around shift fork (15) to clear gear (16).<br />
Place ball bearing (20) and spring (19) in bore (21) and install with retainer (18).<br />
Install new gasket (24) and cover (25) on PTO housing (1) with six new lockwashers (26) and<br />
screws (27).<br />
Position boot (31) over front end of shift pin (13) and install into PTO housing (1) with new<br />
retainer (30).<br />
Install washer (29) and screw (28) on shift pin (13).<br />
Position boot (32) over rear end of shift pin (13) and install on PTO housing (1) with new<br />
retainer (33).<br />
16-248
<strong>TM</strong> 9-<strong>2320</strong>-<strong>260</strong>-<strong>34</strong>-2<br />
16-41. TRANSMISSION POWER TAKE OFF REPAIR (contd<br />
FOLLOW-ON TASK: Install transmission PTO (para. 16-40).<br />
16-249
<strong>TM</strong> 9-<strong>2320</strong>-<strong>260</strong>-<strong>34</strong>-2<br />
Section V. TRANSFER POWER TAKEOFF MAINTENANCE<br />
16-42. TRANSFER POWER TAKEOFF MAINTENANCE INDEX<br />
PARA.<br />
NO.<br />
TITLE<br />
PAGE<br />
NO.<br />
1<br />
16-43. Transfer Power Takeoff Replacement 16-250<br />
16-44. Transfer Power Takeoff Repair (M816) 16-254<br />
16-45. Transfer Power Takeoff Repair (M815, M819) 16-<strong>260</strong><br />
I 16-43. TRANSFER POWER TAKEOFF REPLACEMENT I<br />
THIS TASK COVERS:<br />
a. Removal b. Installation<br />
INITIAL SETUP<br />
APPLICABLE MODELS<br />
M815, M816, M819<br />
TOOK<br />
General mechanic’s tool kit<br />
(Appendix B, Item 1)<br />
Torque wrench, 3/8-in. dr.<br />
(Appendix B, Item 4)<br />
MATERIALS/PARTS<br />
Four lockwashers (Appendix D, Item 247)<br />
Two lockwashers (Appendix D, Item 239)<br />
Lockwasher (Appendix D, Item 223)<br />
Gasket (Appendix D, Item 141)<br />
Cotter pin (Appendix D, Item 48)<br />
Safety wire (Appendix D, Item 375)<br />
Antiseize tape (Appendix C, Item 50)<br />
REFERENCES (<strong>TM</strong>)<br />
LO 9-<strong>2320</strong>-<strong>260</strong>-12<br />
<strong>TM</strong> 9-<strong>2320</strong>-<strong>260</strong>-20<br />
<strong>TM</strong> 9-<strong>2320</strong>-<strong>260</strong>-<strong>34</strong>P-2<br />
EQUIPMENT CONDITION<br />
● Transfer PTO propeller shaft disconnected<br />
(<strong>TM</strong> 9-<strong>2320</strong>-<strong>260</strong>-20).<br />
● Parking brakedrum removed (<strong>TM</strong> 9-<strong>2320</strong>-<strong>260</strong>-20).<br />
● Transfer oil drained (LO 9-<strong>2320</strong>-<strong>260</strong>-12).<br />
a. Removal<br />
1.<br />
2.<br />
3.<br />
4.<br />
5.<br />
6.<br />
7.<br />
NOTE<br />
Perform step 1 for M815 and M819 vehicles<br />
Remove cotter pin (23), pin (24), and link rod (22) from power takeoff shift lever (21). Discard<br />
cotter pin (23).<br />
Remove screw (17), lockwasher (18), clamp (19), and tube (14) from bracket (13). Discard<br />
lockwasher (18).<br />
Remove clamp (19) and grommet (15) from tube (14).<br />
Disconnect tube (14) from adapter (7) and elbow (20).<br />
Remove elbow (20) from transfer (1).<br />
Remove two sleeve seals (16) from tube (14).<br />
Remove two nuts (9), lockwashers (8), four screws (11), lockwashers (12), power takeoff (10), and<br />
gasket (6) from transfer (l). Discard gasket (6) and lockwashers (8) and (12).<br />
16-250
<strong>TM</strong> 9-<strong>2320</strong>-<strong>260</strong>-<strong>34</strong>-2<br />
16-43. TRANSFER POWER TAKEOFF REPLACEMENT (Contd<br />
NOTE<br />
Perform steps 8 and 9 for M815 and M819 vehicles.<br />
8. Remove safety wire (5) from setscrew (4) and coupling (3). Discard safety wire (5).<br />
9. Remove setscrew (4) and coupling (3) from shaft (2).<br />
NOTE<br />
Perform step 10 for M816 vehicles.<br />
10. Remove coupling (25) from shaft (2).<br />
16-251
<strong>TM</strong> 9-<strong>2320</strong>-<strong>260</strong>-<strong>34</strong>-2<br />
16-43. TRANSFER POWER TAKEOFF REPLACEMENT (Contd)<br />
b. Installation<br />
NOTE<br />
● Perform step 1 for M816 vehicles.<br />
● Perform steps 2 and 3 for M815 and M819 vehicles.<br />
1.<br />
2.<br />
3.<br />
4.<br />
5.<br />
6.<br />
7.<br />
8.<br />
9.<br />
10.<br />
Install coupling (3) on shaft (2).<br />
Aline setscrew holes of shaft (2) and coupling (21) and install coupling (21) on shaft (2) with<br />
setscrew (19).<br />
Thread new safety wire (20) through setscrew (19), wrap ends around coupling (21), twist ends<br />
together, trim excess safety wire (20), and bend remaining safety wire (20) around coupling (21).<br />
Install new gasket (4) and power takeoff (7) on transfer (1) with four new Iockwashers (5), screws (6),<br />
two new lockwashers (9), and nuts (8). Tighten nuts (8) 30-40 lb-ft (41-54 N·m). Tighten screws (6)<br />
40-55 lb-ft (54-75 N·m).<br />
Install elbow (18) on transfer (1).<br />
NOTE<br />
Wrap male threads with antiseize tape before installation.<br />
Install two sleeve seals (15) in tube (16).<br />
Connect tube (16) to elbow (18) and adapter (10).<br />
Install grommet (11) and clamp (14) on tube (16).<br />
Install tube (16) and clamp (14) on bracket (17) with new lockwasher (13) and screw (12). Tighten<br />
screw (12) 40-55 lb-ft (54-75 N·m).<br />
NOTE<br />
Perform step 10 for M815 and M819 vehicles.<br />
Install link rod (23) on power takeoff shift lever (22) with pin (25) and new cotter pin (24).<br />
16-252
<strong>TM</strong> 9-<strong>2320</strong>-<strong>260</strong>-<strong>34</strong>-2<br />
16-43. TRANSFER POWER TAKEOFF REPLACEMENT (Contd)<br />
FOLLOW-ON TASKS: Install parking brakedrum (<strong>TM</strong> 9-<strong>2320</strong>-<strong>260</strong>-20).<br />
Install transfer PTO propeller shaft (<strong>TM</strong> 9-<strong>2320</strong>-<strong>260</strong>-20).<br />
Fill transfer to proper oil level (LO 9-<strong>2320</strong>-<strong>260</strong>-12).<br />
16-253
<strong>TM</strong> 9-<strong>2320</strong>-<strong>260</strong>-<strong>34</strong>-2<br />
16-44. TRANSFER POWER TAKEOFF REPAIR (M816)<br />
THIS TASK COVERS:<br />
a. Disassembly c. Assembly<br />
b. Cleaning and Inspection<br />
INITIAL SETUP<br />
APPLICABLE MODELS<br />
M816<br />
TOOLS<br />
General mechanic’s tool kit<br />
(Appendix B, Item 1)<br />
Inside micrometer (Appendix B, Item 9)<br />
Outside micrometer (Appendix B, Item 8)<br />
Spring tester (Appendix B, Item 10)<br />
Torque wrench, 3/8-in. dr.<br />
(Appendix B, Item 4)<br />
Torque wrench, 1/2-in. dr.<br />
(Appendix B, Item 3)<br />
Torque wrench, 3/4-in. dr.<br />
(Appendix B, Item 2)<br />
Mechanical puller kit (Appendix B, Item 14)<br />
Arbor press (Appendix B, Item 7)<br />
Vise (Appendix B, Item 38)<br />
MATERIALS/PARTS<br />
Four lockwashers (Appendix D, Item 247)<br />
Four Iockwashers (Appendix D, Item 215)<br />
Gasket (Appendix D, Item 116)<br />
Gasket (Appendix D, Item 118)<br />
Cotter pin (Appendix D, Item 42)<br />
Seal (Appendix D, Item 451)<br />
Two check valves (Appendix D, Item 13)<br />
GAA grease (Appendix C, Item 14)<br />
Sealing compound (Appendix C, Item 45)<br />
Lubricating oil (Appendix C, Item 21)<br />
REFERENCES (<strong>TM</strong>)<br />
<strong>TM</strong> 9-<strong>2320</strong>-<strong>260</strong>-<strong>34</strong>P-2<br />
EQUIPMENT CONDITION<br />
Transfer power takeoff removed (para. 16-43).<br />
a. Disassembly<br />
1.<br />
2.<br />
3.<br />
4.<br />
5.<br />
6.<br />
Position housing (1) in soft-jawed vise.<br />
Remove cotter pin (5), nut (6), and washer (4) from yoke (3) and shaft (2). Discard cotter pin (5).<br />
Using puller, remove yoke (3) from shaft (2).<br />
Remove housing (1) from vise.<br />
Remove four screws (7), lockwashers (8), oil pump (9), and gasket (10) from housing (1). Discard<br />
gasket (10) and lockwashers (8).<br />
Remove spring (17) from oil pump housing (18).<br />
NOTE<br />
Mark input bore of housing for installation.<br />
7.<br />
8.<br />
9.<br />
10.<br />
11.<br />
12.<br />
13.<br />
14.<br />
15.<br />
Remove bushing (14) and check valve (15) from input bore (16) of oil pump housing (18). Discard<br />
check valve (15).<br />
Remove plug (11), shim (12), and check valve (13) from plug bore (19) of oil pump housing (18).<br />
Discard check valve (13).<br />
Remove four screws (21), lockwashers (20), cap (23), and gasket (24) from housing (1). Discard<br />
gasket (24) and Iockwashers (20).<br />
Remove seal (22) from cap (23). Discard seal (22).<br />
Push in oil pump plunger (26) and rotate shaft (2) until oil pump plunger (26) falls from shaft (2).<br />
Using arbor press, remove shaft (2) from bearing (27) and housing (1).<br />
Remove snapring (25) from shaft (2).<br />
Remove oil pump plunger (26) from housing (1).<br />
Using puller, remove bearing (27) from housing (1).<br />
16-254
<strong>TM</strong> 9-<strong>2320</strong>-<strong>260</strong>-<strong>34</strong>-2<br />
16-44. TRANSFER POWER TAKEOFF REPAIR (M816) (Contd)<br />
16-255
<strong>TM</strong> 9-<strong>2320</strong>-<strong>260</strong>-<strong>34</strong>-2<br />
16-44. TRANSFER POWER TAKEOFF REPAIR (M816) (Contd)<br />
b. Cleaning and Inspection<br />
1.<br />
2.<br />
3.<br />
4.<br />
5.<br />
6.<br />
7.<br />
8.<br />
9.<br />
For general cleaning instructions, refer to para. 2-8.<br />
For general inspection instructions, refer to para. 2-9.<br />
Inspect housing (1) for breaks, cracks, burrs, wear, and damaged threads. Refer to table 16-19,<br />
Transfer Power Takeoff (M816) Wear Limits, for measurements. Replace or repair housing (1) if<br />
damaged or worn.<br />
Inspect shaft (2) for breaks, cracks, burrs, chips, and wear. Refer to table 16-19, Transfer Power<br />
Takeoff (M816) Wear Limits, for measurements. Replace shaft (2) if damaged or worn.<br />
Inspect oil pump plunger (3) for cracks, breaks, burrs, scores, and wear. Refer to table 16-19,<br />
Transfer Power Takeoff (M816) Wear Limits, for measurements. Replace oil pump plunger (3) if<br />
damaged or worn.<br />
Inspect oil pump housing (4) for cracks, breaks, scores, and damaged threads. Replace oil pump<br />
housing (4) if cracked, broken, scored, or threads are damaged.<br />
Inspect yoke (5) for breaks, cracks, corrosion, scores, wear, and damaged threads. Refer to table<br />
16-19, Transfer Power Takeoff (M816) Wear Limits, for measurements. Replace or repair yoke (5)<br />
if damaged or worn.<br />
Inspect bearing (6) for wear. Refer to table 16-19, Transfer Power Takeoff (M816) Wear Limits, for<br />
measurements. Replace bearing (6) if worn.<br />
Inspect spring (7) for broken and distorted coils. Using spring tester, check spring tension. Refer to<br />
table 16-19, Transfer Power Takeoff (M816) Wear Limits, for measurements. Replace spring (7) if<br />
damaged or worn.<br />
16-256
<strong>TM</strong> 9-<strong>2320</strong>-<strong>260</strong>-<strong>34</strong>-2<br />
16-44. TRANSFER POWER TAKEOFF REPAIR (M816) (Contd)<br />
Table 16-19. Transfer Power Takeoff (M816) Wear Limits.<br />
ITEM<br />
NO.<br />
lTEM/POINT OF MEASUREMENT<br />
WEAR LIMITS/TOLERANCES<br />
INCHES<br />
MILLIMETERS<br />
1 Housing – inside diameter of bearing bore – maximum 3.5431 89.9947<br />
2 Shaft<br />
Outside diameter of bearing journal 1.5747 39.997<br />
Outside diameter of cam surface 1.623 41.22<br />
3 Plunger<br />
Outside diameter - minimum 0.7485 19.012<br />
Pad clearance - minimum 1.624 41.25<br />
5 Yoke - outside diameter – minimum 2.250 57.15<br />
6 Bearing<br />
Outside diameter – minimum 1.5748 40.000<br />
Inside diameter – maximum 3.5427 89.985<br />
7 Spring<br />
Free length 2.33 59.2<br />
Compressed length with 19 lb (8.6 kg) 1.7<strong>34</strong> 44.04<br />
16-257
<strong>TM</strong> 9-<strong>2320</strong>-<strong>260</strong>-<strong>34</strong>-2<br />
16-44. TRANSFER POWER TAKEOFF REPAIR (M816) (Contd)<br />
c. Assembly<br />
NOTE<br />
Coat all internal parts with light coat of gear oil prior to assembly.<br />
1.<br />
2.<br />
3.<br />
4.<br />
5.<br />
6.<br />
7.<br />
8.<br />
9.<br />
10.<br />
11.<br />
12.<br />
13.<br />
14.<br />
15.<br />
16.<br />
17.<br />
18.<br />
Position plunger (6) in housing (7) with plunger shaft (11) projecting through bore (10).<br />
Place shaft (2) in housing (7) and position plunger caroming lugs (5) over cam (12) on shaft (2).<br />
Using arbor press, install bearing (9) on shaft (2) with sealed side of bearing (9) toward threaded end<br />
of shaft (2). Seat, bearing (9) on shaft (2) to shoulder (4).<br />
Using arbor press, install shaft (2) with bearing (9) in housing (7). Ensure bearing (9) seats flush<br />
with housing bore (8).<br />
Install new seal (15) in cap (16).<br />
Install new gasket (17) and cap (16) over shaft (2) and housing (7) with four new lockwashers (13)<br />
and screws (14). Tighten screws (14) 38-49 lb-ft (52-66 N·m).<br />
Coat bases of new check valves (20) and (22) with sealing compound and position in plug bore (26)<br />
and input plug (23) of oil pump housing (25). Ensure small end of check valves (20) and (22) point in<br />
direction shown.<br />
Stake check valves (20) and (22) at three points approximately 120° apart in plug bore (26) and<br />
input bore (23) of oil pump housing (25).<br />
Install shim (19) and plug (18) in plug bore (26) of oil pump housing (25).<br />
Install bushing (21) in input bore (23) of oil pump housing (25).<br />
Place spring (24) in oil pump housing (25).<br />
Install new gasket (30) and oil pump housing (29) on housing (7) with four new Iockwashers (28) and<br />
screws (27). Tighten screws (27) 22-28 lb-ft (30-38 N·m).<br />
Place housing (7) in soft-jawed vise.<br />
Coat lip of seal (15) with GAA grease and aline yoke (31) splines with splines on shaft (2).<br />
Install yoke (31) on shaft (2) with washer (32) and nut (<strong>34</strong>). Tighten nut (<strong>34</strong>) 100-200 lb-ft<br />
(136-271 N·m). Aline one slot in nut (<strong>34</strong>) with cotter pin hole in shaft (2).<br />
Install new cotter pin (33) in shaft (2) and nut (<strong>34</strong>).<br />
Install snapring (1) in groove (3) on shaft (2).<br />
Remove housing (7) from vise.<br />
16-258
<strong>TM</strong> 9-<strong>2320</strong>-<strong>260</strong>-<strong>34</strong>-2<br />
16-44. TRANSFER POWER TAKEOFF REPAIR (M816) (Contd)<br />
FOLLOW-ON TASK: Install transfer power takeoff (para.16-43).<br />
16-259
<strong>TM</strong> 9-<strong>2320</strong>-<strong>260</strong>-<strong>34</strong>-2<br />
16-45. TRANSFER POWER TAKEOFF REPAIR (M815, M819)<br />
THIS TASK COVERS:<br />
a. Disassembly c. Assembly<br />
b. Cleaning and Inspection<br />
INITIAL SETUP<br />
APPLICABLE MODELS<br />
M815, M819<br />
TOOLS<br />
General mechanic’s tool kit<br />
(Appendix B, Item 1)<br />
Mechanical puller kit (Appendix B, Item 14)<br />
Spring tester (Appendix B, Item 10)<br />
Torque wrench, 3/8-in. dr.<br />
(Appendix B, Item 4)<br />
Torque wrench, 1/2-in. dr.<br />
(Appendix B, Item 3)<br />
Torque wrench, 3/4-in. dr.<br />
(Appendix B, Item 2)<br />
1-1/2-in. socket, 3/4-in. dr.<br />
(Appendix B, Item 118)<br />
Inside micrometer (Appendix B, Item 9)<br />
Outside micrometer (Appendix B, Item 8)<br />
Feeler gage (Appendix B, Item 58)<br />
Arbor press (Appendix B, Item 7)<br />
Vise (Appendix B, Item 38)<br />
MATERIALS/PARTS<br />
Eleven lockwashers (Appendix D, Item 247)<br />
Two check valves (Appendix D, Item 13)<br />
Two cotter pins (Appendix D, Item 48)<br />
Cotter pin (Appendix D, Item 42)<br />
Seal (Appendix D, Item 470)<br />
Seal (Appendix D, Item 415)<br />
Shim (Appendix D, Item 498)<br />
Shim (Appendix D, Item 497)<br />
Shim (Appendix D, Item 496)<br />
Gasket (Appendix D, Item 116)<br />
Gasket (Appendix D, Item 122)<br />
Woodruff key (Appendix D, Item 567)<br />
Woodruff key (Appendix D, Item 568)<br />
Lubricating oil (Appendix C, Item 21)<br />
Sealing compound (Appendix C, Item 45)<br />
REFERENCES (<strong>TM</strong>)<br />
<strong>TM</strong> 9-<strong>2320</strong>-<strong>260</strong>-<strong>34</strong>P-2<br />
EQUIPMENT CONDITION<br />
Transfer power takeoff removed (para.16-43).<br />
a. Disassembly<br />
1.<br />
2.<br />
3.<br />
4.<br />
5.<br />
6.<br />
7.<br />
8.<br />
9.<br />
10.<br />
11.<br />
12.<br />
Place housing (6) in vise.<br />
Remove cotter pin (4), nut (5), and washer (3) from yoke (2) and shaft (1). Discard cotter pin (4).<br />
Using puller, remove yoke (2) from shaft (1).<br />
Remove housing (6) from vise.<br />
Remove two cotter pins (10), nut (9), two washers (8), and lever (11) from stud (7) and shifter<br />
rod (12). Discard cotter pins (10).<br />
Remove two screws (15), lockwashers (14), four washers (13), and bracket (16) from cover (17).<br />
Discard Iockwashers (14).<br />
Remove plug (18), Iockwasher (19), spring (20), and ball bearing (21) from housing (6). Discard<br />
lockwasher (19).<br />
Remove four screws (25), Iockwashers (24), oil pump (23), and gasket (22) from housing (6).<br />
Discard gasket (22) and lockwashers (24).<br />
Remove plug (26) from housing (6).<br />
Remove setscrew (27) and shifter rod (12) from fork (30) and housing (6).<br />
Remove seal (28) from shifter rod (12). Discard seal (28).<br />
Remove clutch (29) and fork (30) from housing (6) and shaft (1).<br />
16-<strong>260</strong>
<strong>TM</strong> 9-<strong>2320</strong>-<strong>260</strong>-<strong>34</strong>-2<br />
16-45. TRANSFER POWER TAKEOFF REPAIR (M815, M819) (Contd)<br />
16-261
<strong>TM</strong> 9-<strong>2320</strong>-<strong>260</strong>-<strong>34</strong>-2<br />
16-45. TRANSFER POWER TAKEOFF REPAIR (M815, M819) (Contd)<br />
13.<br />
14.<br />
15.<br />
16.<br />
17.<br />
18.<br />
19.<br />
20.<br />
21.<br />
22.<br />
23.<br />
24.<br />
25.<br />
26.<br />
Remove two lower screws (1), Iockwashers (13), and cover (3) from housing (6). Discard lockwashers<br />
(13).<br />
Remove seal (2) from cover (3). Discard seal (2).<br />
Remove shim pack (12) and two gaskets (4) from housing (6) and cover (3). Separate shim pack (12)<br />
from gaskets (4). Discard gaskets (4).<br />
Remove woodruff key (5) from shaft (11). Discard woodruff key (5).<br />
Remove two screws (7), lockwashers (8), governor cover (9), and gasket (10) from housing (6).<br />
Discard gasket (10) and lockwashers (8).<br />
Remove plunger (18) from housing (6).<br />
Position housing (6) on arbor press, small end down, and press shaft (11) with gear (15),<br />
bearings (14) and (16), and outer bearing race (17) out of housing (6).<br />
Remove race (17) from bearing (16).<br />
Using puller, remove bearing (14) from shaft (11).<br />
NOTE<br />
Mark gear for installation.<br />
Using arbor press, remove bearing (16) and gear (15) from shaft (11).<br />
Remove woodruff key (19) from shaft (11). Discard woodruff key (19).<br />
Remove spring (26) from bore (27) of oil pump housing (28).<br />
Remove bushing (23) and check valve (24) from input bore (25) of oil pump housing (28). Discard<br />
check valve (24).<br />
Remove plug (20), shim (21), and check valve (22) from output bore (29) of oil pump housing (28).<br />
Discard check valve (22).<br />
b. Cleaning and Inspection<br />
1. For general cleaning instructions, refer to para. 2-8.<br />
2. For general inspection instructions, refer to para. 2-9.<br />
3. Inspect oil pump housing (28) for cracks, breaks, burrs, scoring, and damaged threads. Replace oil<br />
pump housing (28) if cracked, broken, burred, scored, or threads are damaged.<br />
4. Inspect spring (26) for broken or distorted coils and a free length of 1.75 in. (44.5 mm). Replace<br />
spring (26) if broken or coils are distorted. Using spring tester, check spring length. Spring (26)<br />
should be 1.11 in. (28.2 mm) with 40 lb (18.2 kg) applied.<br />
16-262
16-45. TRANSFER POWER TAKEOFF REPAIR (M815, M819) (Contd)<br />
<strong>TM</strong> 9-<strong>2320</strong>-<strong>260</strong>-<strong>34</strong>-2
<strong>TM</strong> 9-<strong>2320</strong>-<strong>260</strong>-<strong>34</strong>-2<br />
16-45. TRANSFER POWER TAKEOFF REPAIR (M815, M819) (Contd)<br />
5.<br />
6.<br />
7.<br />
8.<br />
9.<br />
10.<br />
11.<br />
12.<br />
13.<br />
14.<br />
15.<br />
16.<br />
17.<br />
Inspect housing (1) for cracks, breaks, burrs, scores, and wear, Refer to table 16-20, Transfer Power<br />
Takeoff Wear Limits, for measurements. Replace housing (1) if damaged or worn.<br />
Inspect inner bearing race (2) for scores, chips, burrs, and wear. Refer to table 16-20, Transfer Power<br />
Takeoff Wear Limits, for measurements. Replace inner bearing race (2) if scored, chipped, burred, or<br />
worn.<br />
NOTE<br />
Perform steps 7 and 8 if inspection of inner bearing race requires<br />
replacement.<br />
Using arbor press and adapter, press inner bearing race (2) from housing (1). Discard inner bearing<br />
race (2).<br />
Using arbor press and adapter, press new inner bearing race (2) in housing (1).<br />
Inspect bearings (3) and (4) for wear. Refer to table 16-20, Transfer Power Takeoff Wear Limits, for<br />
measurements. Replace bearing (3) or (4) if worn.<br />
Inspect outer bearing race (5) for wear. Refer to table 16-20, Transfer Power Takeoff Wear Limits, for<br />
measurements. Replace outer bearing race (5) if worn.<br />
Inspect shaft (6) for burrs, breaks, cracks, chips, and wear. Refer to Table 16-20, Transfer Power<br />
Takeoff Wear Limits, for measurements. Replace shaft (6) if damaged or worn.<br />
Inspect clutch (8) and coupling (7) for cracks, breaks, burrs, bends, and damaged threads. Replace<br />
clutch (8) or coupling (7) if damaged.<br />
Inspect fork (9) for cracks, breaks, wear, or damaged threads. Refer to table 16-20, Transfer Power<br />
Takeoff Wear Limits, for measurements. Replace fork (9) if damaged or worn.<br />
Inspect shift rod (10) for cracks, breaks, burrs, and wear. Refer to table 16-20, Transfer Power<br />
Takeoff Wear Limits, for measurements. Replace shift rod (10) if damaged or worn.<br />
Inspect spring (11) for broken and distorted coil. Using spring tester, check spring tension. Refer to<br />
table 16-20, Transfer Power Takeoff Wear Limits, for measurements. Replace spring (11) if damaged<br />
or worn.<br />
Inspect gear (12) for breaks, cracks, chips, and burrs. Replace gear (12) if broken, cracked, chipped,<br />
or burred.<br />
Inspect yoke (13) for cracks, breaks, chips, and wear. Refer to table 16-20, Transfer Power Takeoff<br />
Wear Limits, for measurements. Replace yoke (13) if damaged or worn.<br />
16-264
<strong>TM</strong> 9-<strong>2320</strong>-<strong>260</strong>-<strong>34</strong>-2<br />
16-45. TRANSFER POWER TAKEOFF REPAIR (M815,M819) (Contd)<br />
Table 16-20. Transfer Power Takeoff Wear Limits.<br />
ITEM<br />
NO.<br />
lTEM/POINT OF MEASUREMENT<br />
WEAR LIMITS/TOLERANCES<br />
INCHES<br />
MILLIMETERS<br />
1 Housing<br />
Inner diameter - inner bearing bore – maximum 3.1486 79.974<br />
Inner diameter – outer bearing bore – maximum 3.1506 80.025<br />
Bearings<br />
3,4 Inner diameter - maximum 1.6885 42.888<br />
2,5 Outer diameter - minimum 3.1496 80.000<br />
6 Shaft<br />
Outer diameter - bearing journal - minimum 1.498 38.05<br />
Outer diameter - cam surface - minimum 1.685 42.80<br />
Outer diameter - seal surface - minimum 1.498 38.05<br />
9 Fork<br />
Inner diameter - shaft bore - maximum 0.5005 12.713<br />
Pad width - minimum 0.395 10.03<br />
10 Shift rod - outer diameter - minimum 0.498 12.65<br />
11 Spring<br />
Free length - minimum 0.53 13.5<br />
Compressed length with 25 lb (11.3 kg) 0.42 10.7<br />
13 Yoke - outside diameter - minimum 2.250 57.15<br />
16-265
<strong>TM</strong> 9-<strong>2320</strong>-<strong>260</strong>-<strong>34</strong>-2<br />
16-45. TRANSFER POWER TAKEOFF REPAIR (M815, M819) (Contd)<br />
c. Assembly<br />
1.<br />
2.<br />
3.<br />
4.<br />
5.<br />
6.<br />
7.<br />
8.<br />
9.<br />
10.<br />
Install new<br />
NOTE<br />
Coat all internal parts with-gear oil prior to assembly.<br />
woodruff key (7) in shaft (2).<br />
Using arbor press, install gear (4) and bearing (5) on shaft (2).<br />
Using arbor press, install bearing (3) on shaft (2).<br />
Place shaft (2) with bearings (3) and (5) and gear (4) in housing (1).<br />
Using hammer and brass drift, install outer race (6) in housing (1) overbearing (5).<br />
Install cover (8) on housing (1) with four screws (9). Finger tighten screws (9) to ensure cover (8)<br />
is positioned evenly.<br />
While turning shaft (2), tighten screws (9) until a slight drag is felt. Drag indicates there is zero<br />
end play.<br />
Using feeler gage, measure distance “d” between cover (8) and housing (1). Measure at three points<br />
approximately 120° apart. If measurements “d” vary by more than 0.003 in. (0.08 mm), loosen<br />
screws (9) and repeat steps 7 and 8.<br />
Record measurement “d.”<br />
Remove four screws (9) and cover (8) from housing (1).<br />
16-266
<strong>TM</strong> 9-<strong>2320</strong>-<strong>260</strong>-<strong>34</strong>-2<br />
16-45. TRANSFER POWER TAKEOFF REPAIR (M815, M819) (Contd)<br />
11.<br />
12.<br />
13.<br />
14.<br />
15.<br />
16.<br />
17.<br />
18.<br />
19.<br />
20.<br />
21.<br />
22.<br />
Using arbor press, install new seal (10) in cover (8).<br />
Assemble shim pack (17) equal to thickness recorded in step 9 plus 0.002-0.005 in. (0.05-0.13 mm).<br />
Position two new gaskets (11), shim pack (17), and cover (8) on housing (1) with four new<br />
lockwashers (18) and screws (9). Finger tighten screws (9).<br />
Install new gasket (16) and governor cover (15) on housing (1) with two new lockwashers (14) and<br />
screws (13).<br />
Install new woodruff key (12) in shaft (2).<br />
Coat new seal (27) with gear oil and place in groove on shifter rod (26).<br />
Install shifter rod (26) and seal (27) in housing (1). Carefully work seal (27) into bore.<br />
Place fork (19) in housing (1) and on shifter rod (26).<br />
Holding fork (19) up, slide clutch (28) on shaft (2) and push clutch (28) in until fork (19) can set in<br />
groove on clutch (28).<br />
Aline holes in fork (19) and shifter rod (26) and install setscrew (20).<br />
Install plug (21) in housing (1).<br />
Install ball bearing (25) and spring (24) in housing (1) with new lockwasher (23) and plug (22).<br />
16-267
<strong>TM</strong> 9-<strong>2320</strong>-240-<strong>34</strong>-2<br />
16-45. TRANSFER POWER TAKEOFF REPAIR (M815, M819) (Contd)<br />
NOTE<br />
● Coat outer edges of base of check valves with sealing compound<br />
before installation.<br />
● Check valves must be properly oriented to function correctly.<br />
23. Install new check valves (5) in input bore (8) and output bore (4) of oil pump housing (3). Stake each<br />
check valve (5) at three places in each bore at approximately 120° spacing. Check valve cap must<br />
point in direction of flow.<br />
24. Install shim (7) and plug (6) in output bore (4) of oil pump housing (3).<br />
25, Install bushing (9) in input bore (8) of oil pump housing (3).<br />
26. Place spring (2) and plunger (1) in bore (10) of oil pump housing (3).<br />
27. Install new gasket (11) and oil pump (12) on housing (15) with four new lockwashers (13), and<br />
screws (14). Tighten screws (14) 22-28 lb-ft (30-38 N·m).<br />
16-268
<strong>TM</strong> 9-<strong>2320</strong>-<strong>260</strong>-<strong>34</strong>-2<br />
16-45. TRANSFER POWER TAKEOFF REPAIR (M815, M819) (Contd)<br />
28.<br />
29.<br />
30.<br />
31.<br />
32.<br />
33.<br />
<strong>34</strong>.<br />
35.<br />
Remove two upper screws (22) and lockwashers (21) from cover (24) and housing (15). DO not discard<br />
lockwashers (21).<br />
Install bracket (23) on cover (24) and housing (15) with four washers (20), two Iockwashers (21), and<br />
screws (22). Tighten four screws (22) 38-49 lb-ft (52-66 N·m).<br />
Position lever (18) on stud (25) and shifter rod (19) and install on stud (25) with washer (26) and<br />
nut (28). Ensure lever (18) moves freely and aline slot in nut (28) with hole in stud (25). Tighten<br />
nut (28) 65-130 lb-ft (88-176 N·m).<br />
Install new cotter pin (27) in nut (28) and stud (25).<br />
Place washer (17), over end of shifter rod (19) and install new cotter pin (16) in end of shifter<br />
rod (19). Ensure shifter rod (19) moves freely.<br />
Place housing (15) in vise.<br />
Install yoke (30) on shaft (29) with washer (31) and nut (33). Tighten nut (33) 175-350 lb-ft<br />
(237-475 N·m) alining slot in nut (33) with hole in shaft (29).<br />
Install new cotter pin (32) in nut (33) and shaft (29).<br />
36. Remove housing (15) from vise.<br />
FOLLOW-ON TASK: Install transfer power takeoff (para.15-43).<br />
16-269
<strong>TM</strong> 9-<strong>2320</strong>-<strong>260</strong>-<strong>34</strong>-2<br />
Section VI. POWER DIVIDER AND DRIVE MAINTENANCE<br />
16-46. POWER DIVIDER AND DRIVE MAINTENANCE INDEX<br />
PARA.<br />
NO.<br />
TITLE<br />
PAGE<br />
NO.<br />
16-47. Power Divider and Drive Replacement 16-270<br />
16-48. Power Divider Repair 16-278<br />
16-49. Drive Repair 16-296<br />
16-50. Power Divider Governor Control Valve Replacement 16-299<br />
16-47. POWER DIVIDER AND DRIVE REPLACEMENT<br />
THIS TASK COVERS:<br />
a. Removal b. Installation<br />
INITIAL SETUP<br />
APPLICABLE MODELS<br />
M816<br />
TOOLS<br />
General mechanic’s tool kit<br />
(Appendix B, Item 1)<br />
Lifting device<br />
supports<br />
MATERIALS/PARTS<br />
Gasket (Appendix D, Item 102)<br />
Cotter pin (Appendix D, Item 21)<br />
Two locknuts (Appendix D, Item 182)<br />
Two sleeves (Appendix D, Item 511)<br />
Four cotter pins (Appendix D, Item 48)<br />
Six lockwashers (Appendix D, Item 224<br />
Six lockwashers (Appendix D, Item 215)<br />
Antiseize tape (Appendix C, Item 50)<br />
REFERENCES (<strong>TM</strong>)<br />
LO 9-<strong>2320</strong>-261-12<br />
<strong>TM</strong> 9-<strong>2320</strong>-<strong>260</strong>-10<br />
REFERENCES (<strong>TM</strong>) (Contd)<br />
<strong>TM</strong> 9-<strong>2320</strong>-<strong>260</strong>-20<br />
<strong>TM</strong> 9-<strong>2320</strong>-<strong>260</strong>-<strong>34</strong>P-2<br />
EQUIPMENT CONDITION<br />
● Power divider and drive oil drained<br />
(LO 9-<strong>2320</strong>-<strong>260</strong>-12).<br />
● Air reservoirs drained (<strong>TM</strong> 9-<strong>2320</strong>-<strong>260</strong>-10).<br />
● Transfer-to-power divider propeller shaft removed<br />
(<strong>TM</strong> 9-<strong>2320</strong>-<strong>260</strong>-20).<br />
● Power divider-to-rear winch drive propeller shaft<br />
removed (<strong>TM</strong> 9-<strong>2320</strong>-<strong>260</strong>-20).<br />
● Power divider-to-hydraulic pump propeller shaft<br />
removed (<strong>TM</strong> 9-<strong>2320</strong>-<strong>260</strong>-20).<br />
GENERAL SAFETY INSTRUCTIONS<br />
● Do not disconnect air lines before draining air<br />
reservoirs.<br />
● All personnel must stand clear during lifting<br />
operations.<br />
● Ensure lifting capacity is greater than weight of<br />
power cylinder.<br />
1. Remove two cotter pins (1), control link (5), and two washers (6) from air valve (9). Discard<br />
cotter pins (1).<br />
2. Remove cotter pin (2), straight pin (7), two washers (3), and clevis (4) from control lever (8).<br />
Discard cotter pin (2).<br />
3. Remove cotter pin (14), straight pin (15), and control link (17) from control lever (16). Discard<br />
cotter pin (14).<br />
4. Remove cotter pin (13), straight pin (11), and control link (10) from control lever (12). Discard<br />
cotter pin (13).<br />
16-270
<strong>TM</strong> 9-<strong>2320</strong>-<strong>260</strong>-<strong>34</strong>-2<br />
16-47. POWER DIVIDER AND DRIVE REPLACEMENT (Contd)<br />
16-271
<strong>TM</strong> 9-<strong>2320</strong>-<strong>260</strong>-<strong>34</strong>-2<br />
16-47. POWER DIVIDER AND DRIVE REPLACEMENT (Contd)<br />
WARNING<br />
5.<br />
6.<br />
7.<br />
8.<br />
9.<br />
10.<br />
11.<br />
Do not disconnect air lines before draining air reservoirs. Small<br />
parts under pressure may shoot out with high velocity, causing<br />
injury to personnel.<br />
NOTE<br />
● Tag air lines for installation.<br />
● Perform steps 5 through 9 if replacing power divider.<br />
Remove air lines (7) and (8) and two sleeves (6) from elbow (5) and adapter (9). Discard sleeves (6).<br />
Remove two locknuts (4), air valve (3), two spacers (2), and screws (1) from bracket (12). Discard<br />
locknuts (4).<br />
Remove elbow (5) and adapter (9) from air valve (3).<br />
Remove two screws (10), lockwashers (11), and bracket (12) from power divider (13). Discard<br />
lockwashers (11).<br />
Install two new lockwashers (11) and screws (10) on power divider (13).<br />
Remove four screws (20), lockwashers (22), and cover (21) from tool box floor (16). Discard<br />
Iockwashers (22).<br />
Attach lifting device to ring (15) of power divider (13).<br />
WARNING<br />
12.<br />
13.<br />
14.<br />
15.<br />
● All personnel must stand clear during lifting operations.<br />
A swinging or shifting load may cause injury to personnel.<br />
● Ensure lifting capacity is greater than weight (30 lb (14 kg)) of<br />
power divider. Failure to do so may result in injury to personnel<br />
or damage to equipment.<br />
Position support under power divider (13).<br />
NOTE<br />
Assistant will help with steps 12 through 16.<br />
Remove four nuts (19) and screws (14) from bracket (17) and tool box floor (16).<br />
Lower power divider (13) and drive (18) on supports and secure with safety strap.<br />
Remove lifting device from ring (15) on power divider (13).<br />
16-272
<strong>TM</strong> 9-<strong>2320</strong>-<strong>260</strong>-<strong>34</strong>-2<br />
16-47. POWER DIVIDER AND DRIVE REPLACEMENT (Contd)<br />
16-273
<strong>TM</strong> 9-<strong>2320</strong>-<strong>260</strong>-<strong>34</strong>-2<br />
16-47. POWER DIVIDER AND DRIVE REPLACEMENT (Contd)<br />
NOTE<br />
Mark flanges on power divider and drive for installation.<br />
16. Remove six screws (7), lockwashers (6), drive (4), and gasket (2) from power divider (1). Discard<br />
lockwashers (6) and gasket (2).<br />
NOTE<br />
1.<br />
2.<br />
3.<br />
4.<br />
5.<br />
Aline scribe marks on drive and power divider flanges if new<br />
power divider is being installed. Ensure drain plugs face<br />
downward.<br />
Assistant will help with steps 1 through 8.<br />
Position new gasket (2) on flange of drive (4).<br />
Aline key (5) of shaft (3) with keyway of coupling (8) and install drive (4) and gasket (2) on power<br />
divider (1) with six new lockwashers (6) and screws (7).<br />
Position power divider (1) on supports and secure with safety strap.<br />
Position power divider (1) and drive (4) under vehicle.<br />
Accessing through hole in tool box floor (11), install lifting device to ring (10) of power divider (1).<br />
WARNING<br />
6.<br />
7.<br />
● All personnel must stand clear during lifting operations.<br />
A swinging or shifting load may cause injury to personnel.<br />
● Ensure Iifting capacity is greater than weight (30 lb (14 kg)) of<br />
power divider. Failure to do so may result in injury to personnel<br />
or damage to equipment.<br />
Raise power divider (1) to tool box floor (11) and aline holes of bracket (12) with holes of tool box<br />
floor (11).<br />
Install power divider (1) on tool box floor (11) with four screws (9) and nuts (13).<br />
16-274
<strong>TM</strong> 9-<strong>2320</strong>-<strong>260</strong>-<strong>34</strong>-2<br />
16-47. POWER DIVIDER AND DRIVE REPLACEMENT (Contd)<br />
16-275
<strong>TM</strong> 9-<strong>2320</strong>-<strong>260</strong>-<strong>34</strong>-2<br />
16-47. POWER DIVIDER AND DRIVE REPLACEMENT (Contd)<br />
8.<br />
9.<br />
Remove lifting device from hook (2) of power divider (3).<br />
Install cover (5) on tool box floor (4) with four new lockwashers (6) and screws (1).<br />
10.<br />
11.<br />
12.<br />
13.<br />
14.<br />
15.<br />
Perform steps 10 through 14 if new power divider is installed.<br />
Wrap male threads on elbow (10) and adapter (14) with antiseize tape.<br />
Remove two screws (16) and lockwashers (17) from power divider (3). Discard lockwashers (17).<br />
Install bracket (18) on power divider (3) with two new lockwashers (17) and screws (16).<br />
Install elbow (10) and adapter (14) on air valve (15).<br />
Install two spacers (8) and air valve (15) on bracket (18) with two screws (7) and new locknuts (9).<br />
Install two new sleeves (11) and air lines (12) and (13) on elbow (10) and adapter (14).<br />
16-276
<strong>TM</strong> 9-<strong>2320</strong>-<strong>260</strong>-<strong>34</strong>-2<br />
16-47. POWER DIVIDER AND DRIVE REPLACEMENT (Contd)<br />
16.<br />
17.<br />
18.<br />
19.<br />
Install clevis (21) on control lever (26) with two washers (20), straight pin (25), and new cotter<br />
pin (19).<br />
Install control link (22) on air valve (27) with two washers (23) and two new cotter pins (24).<br />
Install control link (32) on control lever (<strong>34</strong>) with straight pin (33) and new cotter pin (35).<br />
Install control link (31) on control lever (30) with straight pin (29) and new cotter pin (28).<br />
FOLLOW-ON TASKS: Install power divider-to-hydraulic pump propeller shaft (<strong>TM</strong> 9-<strong>2320</strong>-<strong>260</strong>-20).<br />
Install power divider-to-rear winch drive propeller shaft (<strong>TM</strong> 9-<strong>2320</strong>-<strong>260</strong>-20).<br />
Install transfer-to-power divider propeller shaft (<strong>TM</strong> 9-<strong>2320</strong>-<strong>260</strong>-20).<br />
Fill power divider and drive with oil to proper level (LO 9-<strong>2320</strong>-<strong>260</strong>-12).<br />
Start engine (<strong>TM</strong> 9-<strong>2320</strong>-<strong>260</strong>-10), Check for leaks and proper operation.<br />
16-277
<strong>TM</strong> 9-<strong>2320</strong>-<strong>260</strong>-<strong>34</strong>-2<br />
16-48. POWER DIVIDER REPAIR<br />
THIS TASK COVERS:<br />
a. Disassembly c. Assembly<br />
b. Cleaning and Inspection<br />
INITIAL SETUP<br />
APPLICABLE MODELS<br />
M816<br />
TOOLS<br />
General mechanic’s tool kit<br />
(Appendix B, Item 1)<br />
Mechanical puller kit (Appendix B, Item 14)<br />
Dial indicator (Appendix B, Item 11)<br />
Inside micrometer (Appendix B, Item 9)<br />
Outside micrometer (Appendix B, Item 8)<br />
MATERIALS/PARTS<br />
Forty-two lockwashers (Appendix D, Item 215)<br />
Three Iockwashers (Appendix D, Item 223)<br />
Three Iockwashers (Appendix D, Item 252)<br />
Four gaskets (Appendix D, Item 66)<br />
Two gaskets (Appendix D, Item 68)<br />
Gasket (Appendix D, Item 74)<br />
Gasket (Appendix D, Item 70)<br />
MATERIALS/PARTS (Contd)<br />
Gasket (Appendix D, Item 68)<br />
Gasket (Appendix D, Item 66)<br />
Four seals (Appendix D, Item 438)<br />
Three seals (Appendix D, Item 437)<br />
Seal (Appendix D, Item 439)<br />
Seal (Appendix D, Item 440)<br />
Four cotter pins (Appendix D, Item 39)<br />
Woodruff key (Appendix D, Item 559)<br />
Pin (Appendix D, Item 317)<br />
Two expansion plugs (Appendix D, Item 330)<br />
Gear oil (Appendix C, Item 22)<br />
REFERENCES (<strong>TM</strong>)<br />
<strong>TM</strong> 9-<strong>2320</strong>-<strong>260</strong>-<strong>34</strong>P-2<br />
EQUIPMENT CONDITION<br />
Power divider removed (para. 16-47).<br />
1. Remove four screws (4), lockwashers (3), shifter housing (2), and gasket (1) from housing (5). Discard<br />
lockwashers (3) and gasket (1).<br />
2. Remove eight screws (7), Iockwashers (6), double shifter housing (8), and gasket (9) from housing (5).<br />
Discard lockwashers (6) and gasket (9).<br />
16-278
<strong>TM</strong> 9-<strong>2320</strong>-<strong>260</strong>-<strong>34</strong>-2<br />
16-48. POWER DIVIDER REPAIR (Contd)<br />
3. Remove screw (10), lockwasher (11), washer (12), and gasket (13) from yoke (14) and winch<br />
shaft (15). Discard lockwasher (11) and gasket (13).<br />
4. Using puller, remove yoke (14) from winch shaft (15).<br />
5. Remove four screws (20), lockwashers (19), cover (18), and gasket (16) from housing (5). Discard<br />
lockwashers (19) and gasket (16).<br />
6. Remove seal (17) from cover (18). Discard seal (17).<br />
16-279
<strong>TM</strong> 9-<strong>2320</strong>-240-<strong>34</strong>-2<br />
16-48. POWER DIVIDER REPAIR (Contd)<br />
7.<br />
8.<br />
9.<br />
10.<br />
11.<br />
12.<br />
13.<br />
14,<br />
15.<br />
16.<br />
17.<br />
Remove four screws (8), lockwashers (9), cover (7), and gasket (6) from housing (10). Discard<br />
lockwashers (9) and gasket (6).<br />
Using brass drift, tap on end (3) of winch shaft (2) and remove winch shaft (2) and winch gear (11)<br />
through opening (4) of housing (10).<br />
Using puller, remove bearing (1) from winch shaft (2).<br />
Remove winch gear (11) from winch shaft (2).<br />
Using puller, remove bearing (5) from winch shaft (2).<br />
Remove plug (15) from adapter (14).<br />
NOTE<br />
Access setscrew through plug opening.<br />
Remove setscrew (18) and coupling (17) from pump shaft (21).<br />
Remove six screws (13), Iockwashers (12), adapter (14), and gasket (16) from housing (10). Discard<br />
Iockwashers (12) and gasket (16).<br />
Remove seal (19) from adapter (14). Discard seal (19).<br />
Remove woodruff key (22) from pump shaft (21). Discard woodruff key (22).<br />
Remove seal (20) from housing (10). Discard seal (20).<br />
16-280
<strong>TM</strong> 9-<strong>2320</strong>-<strong>260</strong>-<strong>34</strong>-2<br />
16-48. POWER DIVIDER REPAIR (Contd)<br />
18. Remove two screws (23), lockwashers (24), cover plate (25), and gasket (26) from adapter (27).<br />
Discard lockwashers (24) and gasket (26).<br />
19. Remove four screws (44), lock washers (43), adapter (27), and gasket (42) from housing (10). Discard<br />
lockwashers (43) and gasket (42).<br />
20. Remove seal (28) from adapter (27). Discard seal (28).<br />
NOTE<br />
Clutch gear will catch bearing as shaft passes through clutch gear.<br />
21. Using a brass drift and hammer, tap adapter end (33) of pump shaft (21) to force pump shaft (21)<br />
through positive clutch gear (30), bore (29), and spur gear (39).<br />
22. Remove pump shaft rear bearing (32) from pump shaft (21).<br />
23. Remove pin (31) from pump shaft (21). Discard pin (31).<br />
24. Remove pump shaft front bearing (41), thrust washer (40), spur gear (39), and clutch thrust<br />
washer (35) through opening (<strong>34</strong>) of housing (10).<br />
25. Remove roller bearings (36) and (38) and spacer (37) from spur gear (39).<br />
16-281
<strong>TM</strong> 9-<strong>2320</strong>-<strong>260</strong>-<strong>34</strong>-2<br />
16-48. POWER DIVIDER REPAIR (Contd)<br />
26.<br />
27.<br />
28.<br />
29.<br />
30.<br />
31.<br />
32.<br />
33.<br />
<strong>34</strong>.<br />
35.<br />
36.<br />
Remove screw (22), Iockwasher (21), washer (20), and gasket (19) from input shaft (6). Discard<br />
lockwasher (21) and gasket (19).<br />
Using puller, remove yoke (23) from input shaft (6).<br />
Remove four screws (18), lockwashere (17), cap (24), and gasket (15) from housing (13). Discard<br />
lockwashers (17) and gasket (15).<br />
Remove seal (16) from cap (24). Discard seal (16).<br />
Remove four screws (9), lockwashers (10), cover (11), and gasket (12) from housing (13). Discard<br />
lockwashers (10) and gasket (12).<br />
Place housing (13) on blocking with splined end of input shaft (6) down. Blocking must be high<br />
enough to allow clearance for input shaft (6).<br />
Using brass drift and hammer, tap input shaft (6) and outer race of input shaft bearing (1) to force<br />
shaft. (6) and input shaft bearing (1) back through bore (14) of housing (13).<br />
Remove input shaft bearing (1) and input shaft (6) through bore (14) of housing (13).<br />
Remove input shaft bearing (8), input gear thrust washer (5), clutch (7), drive gear (4), and input<br />
gear thrust washer (2) from housing (13).<br />
Remove roller bearing (3) from drive gear (4).<br />
Press input gear bearing (1) from input shaft (6).<br />
16-282
<strong>TM</strong> 9-<strong>2320</strong>-<strong>260</strong>-<strong>34</strong>-2<br />
16-48. POWER DIVIDER REPAIR (Contd)<br />
NOTE<br />
Mark bracket and housing for installation.<br />
37. Remove four cotter pins (28), slotted nuts (27), and bracket (25) from studs (26) on housing (13).<br />
Discard cotter pins (28).<br />
38. Remove two retaining caps (33), springs (32), and ball bearings (31) from double shifter housing (37).<br />
39. Remove two screws (29), lockwashers (36), and levers (35) from shifter shafts (30) and (<strong>34</strong>). Discard<br />
lockwashers (36).<br />
40. Remove two screws (38), lockwashers (40), and forks (39) from shifter shafts (30) and (<strong>34</strong>). Discard<br />
Iockwashers (40).<br />
NOTE<br />
Tag levers and shifter shafts for installation.<br />
41. Remove shifter shafts (30) and (<strong>34</strong>) from double shifter housing (37).<br />
16-283
<strong>TM</strong> 9-<strong>2320</strong>-<strong>260</strong>-<strong>34</strong>-2<br />
16-48. POWER DIVIDER REPAIR (Contd)<br />
42. Remove plug (7) from double shifter housing (4).<br />
43. Remove two seals (6) from double shifter housing (4). Discard seals (6).<br />
44. Remove two expansion plugs (6) from double shifter housing (4). Discard expansion plugs (5).<br />
45. Remove breather (1), adapter (2), and nipple (3) from double shifter housing (4).<br />
46. Remove retainer (17), spring (18), and ball bearing (19) from single shifter housing (11).<br />
47. Remove screw (8), lockwasher (9), and shift fork (10) from shifter shaft (13). Discard lockwasher (9).<br />
NOTE<br />
Mark arm and shaft for installation.<br />
48. Remove shifter shaft (13) from single shifter housing (11).<br />
49. Remove screw (16), lockwasher (15), and lever (14) from shifter shaft (13). Discard lockwasher (15).<br />
50. Remove two seals (12) from single shifter housing (11). Discard seals (12).<br />
16-284
<strong>TM</strong> 9-<strong>2320</strong>-<strong>260</strong>-<strong>34</strong>-2<br />
16-48. POWER DIVIDER REPAIR (Contd)<br />
b. Cleaning and Inspection<br />
1. For general cleaning instructions, refer to para. 2-8.<br />
2. For general inspection instructions, refer to para. 2-9.<br />
3. Inspect double shifter housing (5), single shifter housing (16), and housing (20) for cracks, breaks,<br />
and wear. Refer to table 16-21, Power Divider and Shifter Housings Wear Limits, for measurements.<br />
Replace housings (5), (16), or (20) if damaged or worn past limits.<br />
Table 16-21. Power Divider and Shifter Housings Wear Limits.<br />
ITEM<br />
NO.<br />
lTEM/POINT OF MEASUREMENT<br />
WEAR LIMITS/TOLERANCES<br />
INCHES<br />
MILLIMETERS<br />
5 Double shifter housing<br />
A Shifter shaft bores (4) - maximum 1.501 38.125<br />
16 Single shifter housing<br />
B. Shifter shaft bores - maximum 1.501 38.125<br />
20 Housing<br />
C. Input shaft bores - maximum 3.1503 80.018<br />
D. Winch shaft bores – maximum 3.1503 80.018<br />
E. Pump shaft front bore – maximum 2.8353 72.017<br />
F. Pump shaft rear bore - maximum 3.1503 80.018<br />
16-285
<strong>TM</strong> 9-<strong>2320</strong>-<strong>260</strong>-<strong>34</strong>-2<br />
16-48. POWER DIVIDER REPAIR (Contd)<br />
4. Inspect bearings (1), (5), (7), (11), (12), and (15), fork (19), and thrust washers (6) and (9) for<br />
wear. Refer to table 16-22, Power Divider Parts Wear Limits, for measurements. Replace<br />
bearings (1), (5), (7), (11), (12), or (15), fork (19), or thrust washers (6) or (9), if worn past limits.<br />
5. Inspect yoke (4), gears (3), (8), (13), and (16), winch shaft (2), pump shaft (10), and three shifter<br />
shafts (18) for cracks, burrs, pits, chips, and wear. Refer to table 16-22, Power Divider Parts Wear<br />
Limits. Replace yoke (4), gears (3), (8), (13), or (16), winch shaft (2), or pump shaft (10) if damaged<br />
or worn past limits.<br />
6. Inspect spring (17) free length. Refer to table 16-22, Power Divider Parts Wear limits, for<br />
measurements. Replace spring (17), if worn past limits.<br />
Table 16-22. Power Divider Parts Wear Limits.<br />
ITEM<br />
NO.<br />
lTEM/POINT OF MEASUREMENT<br />
WEAR LIMITS/TOLERANCES<br />
INCHES<br />
MILLIMETERS<br />
1 Winch shaft bearings (3)<br />
Inner diameter - maximum 1.5743 39.987<br />
Outer diameter - minimum 3.1491 79.987<br />
2 Winch shaft - outer diameter -<br />
front and rear bearing – minimum 1.5747 39.997<br />
3 Winch gear 1.5747 39.997<br />
4 Yoke (2) - outer diameter - seal surface 1.873 47.574<br />
5 Input shaft bearings (2)<br />
Inner diameter – maximum 1.5743 39.987<br />
Outer diameter – minimum 3.1491 79.987<br />
6 Input gear thrust washers (2) – thickness - minimum 0.172 4.37<br />
7 Bearing – inner diameter - maximum 1.752 44.501<br />
8 Drive gear – inner diameter - maximum 2.3122 58.730<br />
9 Clutch thrust washers (2) – thickness - minimum 0.172 4.37<br />
10 Pump shaft<br />
Outer diameter - rear bearing - minimum 1.5747 39.997<br />
Outer diameter - front bearing – minimum 1.3779 <strong>34</strong>.999<br />
Outer diameter - gear bearing - minimum 1.4995 38.087<br />
11 Pump shaft rear bearing<br />
Inner diameter – maximum 1.5743 39.987<br />
Outer diameter – minimum 3.1491 79.987<br />
12 Pump shaft front bearing<br />
Inner diameter - maximum 1.3780 35.001<br />
Outer diameter – minimum 2.8<strong>34</strong>1 71.986<br />
13 Spur gear - inner diameter – maximum 2.126 54.000<br />
14 Input shaft<br />
Outer diameter - front and rear bearing 1.7495 44.437<br />
Outer diameter - needle bearing - minimum 1.5747 39.997<br />
15 Roller bearings (2)<br />
Inner diameter – maximum 1.752 44.501<br />
Outer diameter – minimum 2.312 58.725<br />
16 Positive clutch gear<br />
17 Spring<br />
Free length 1.656 42.06<br />
Length at 38 lb (17 kg) load 1.00 25.4<br />
18 Shifter shaft (3) - outer diameter - minimum 0.997 25.324<br />
19 Fork (3) – 2 pads width - minimum 0.300 7.620<br />
16-286
<strong>TM</strong> 9-<strong>2320</strong>-<strong>260</strong>-<strong>34</strong>-2<br />
16-287
<strong>TM</strong> 9-<strong>2320</strong>-<strong>260</strong>-<strong>34</strong>-2<br />
16-48. POWER DIVIDER REPAIR (Contd)<br />
1.<br />
2.<br />
3.<br />
4.<br />
5.<br />
6.<br />
7.<br />
8.<br />
9.<br />
10.<br />
11.<br />
12.<br />
13.<br />
● Coat seals with gear oil before installation.<br />
● Coat all internal parts of power divider with light coat of gear oil<br />
before assembly.<br />
Aline lever (9) on shifter shaft (7) and install with new lockwasher (10) and screw (11).<br />
Install two new seals (6) in bores (5).<br />
Slide shifter shaft (7) with lever (9) into bore (5) of shifter housing (17).<br />
Install shift fork (3) with pin (4) alined to pin hole (8) on shifter shaft (7) with new lockwasher (2)<br />
and screw (1).<br />
NOTE<br />
Ensure ball bearing is seated in groove.<br />
Aline grooves (12) in shifter shaft (7) with bore (16) in single shifter housing (17) and install ball<br />
bearing (13) and spring (14) in single shifter housing (17) with retainer (15).<br />
Install adapter (20), nipple (19) and breather (18) in double shifter housing (21).<br />
Install plug (25) in double shifter housing (21).<br />
Install two new seals (24) and new expansion plugs (23) in bores (22) of double shifter housing (21).<br />
NOTE<br />
Aline marks on levers with marks on shifter shafts.<br />
Install levers (28) and (30) on shifter shafts (<strong>34</strong>) and (41) in double shifter housing bores (22) with<br />
new lockwashers (27) and (31) and screws (26) and (32).<br />
NOTE<br />
Both forks are mounted on shifter shafts the same, but positioned<br />
opposite. Pin holes aline with forks on shifter shafts.<br />
Aline two ins (45) with holes (29) and (33) in shifter shafts (41) and (<strong>34</strong>) and install two forks (42)<br />
with new lockwashers (44) and screws (43).<br />
Aline grooves (40) and (35) in shifter shafts (<strong>34</strong>) and (41) with bores (39) in double shifter<br />
housing (21), and install two ball bearings (36) and springs (37) in double shifter housing (21)<br />
with two retainers (38).<br />
Aline marks on bracket (46) and housing (47) and place bracket (46) over studs (48).<br />
Install bracket (46) on housing (47) with four slotted nuts (49) and new cotter pins (50).<br />
16-288
<strong>TM</strong> 9-<strong>2320</strong>-<strong>260</strong>-<strong>34</strong>-2<br />
16-48. POWER DIVIDER REPAIR (Contd)<br />
I<br />
16-289
<strong>TM</strong> 9-<strong>2320</strong>-<strong>260</strong>-<strong>34</strong>-2<br />
16-48. POWER DIVIDER REPAIR (Contd)<br />
14. Press roller bearing (9) into drive gear (10) and position drive gear (10) in housing (6). Coat roller<br />
bearing (9) with gear oil after installation.<br />
15. Install splined end of input shaft (3) through bore (2), input gear thrust washer (11),drive gear (10)<br />
and input gear thrust washer (8).<br />
16. Press bearing (1) on input shaft (3) through bore (7).<br />
17. Install clutch (4) on gear end of input shaft (3) by pushing through bore (2).<br />
18. Install input shaft bearing (5) on input shaft (3) of housing (6).<br />
16-290
<strong>TM</strong> 9-232&<strong>260</strong>-<strong>34</strong>-2<br />
16-48. POWER DIVIDER REPAIR (Contd)<br />
19.<br />
20.<br />
21.<br />
22,<br />
23.<br />
24.<br />
25.<br />
Install new gasket (12) and cover (13) on housing (6) with four new lockwashers (14) and<br />
screws (15).<br />
Install new seal (17) in cover (18).<br />
Install new gasket (16) and cover (18) on housing (6) with four new lockwashers (20) and<br />
screws (19).<br />
Check end play of input shaft:<br />
a. Attach dial indicator to end of input shaft (3).<br />
b. Move input shaft (3) back and forth and record end play movement.<br />
c. If end play of input shaft (3) is between 0.010-0.033 in. (0.25-0.84 mm), remove dial indicator<br />
and go to Step 25.<br />
d. If end play of input shaft (3) is not between 0.010-0.033 in. (0.25-0.84 mm), then perform<br />
steps 23 and 24 until end play of input shaft (3) is correct.<br />
Remove four screws (19), Iockwashers (20), and cover (18) from housing (6). Discard<br />
lockwashers (20).<br />
Install or remove a new gasket (16), then replace cover (18) on housing (6) with four new lockwashers<br />
(20) and screws (19). Go back to step 22b.<br />
Install yoke (25) on input shaft (3) and housing (6) with new gasket (24), washer (23), new<br />
lockwasher (22), and screw (21).<br />
16-291
<strong>TM</strong> 9-<strong>2320</strong>-269-<strong>34</strong>-2<br />
16-48. POWER DIVIDER REPAIR (Contd)<br />
26.<br />
27.<br />
28.<br />
29.<br />
30.<br />
31.<br />
32.<br />
33.<br />
<strong>34</strong>.<br />
35.<br />
36.<br />
37.<br />
38.<br />
39.<br />
40.<br />
41.<br />
42.<br />
Install new pin (10), positive clutch gear (9), clutch thrust washer (13), roller bearing (14),<br />
spacer (15), and roller bearing (16) on pump shaft (11).<br />
Press pump shaft front bearing (19) in bore (20) flush with inner surface of housing (8).<br />
Install pump shaft (11) through spur gear (17) and spur thrust washer (18).<br />
Press pump shaft (11) through pump shaft front bearing (19).<br />
Install pump shaft rear bearing (12) on pump shaft (11) flush with housing (8).<br />
Install new seal (6) in adapter (5).<br />
Install new gasket (7) on pump shaft (11) and housing (8) with adapt (5), four new<br />
lockwashers (21), and screws (22).<br />
Install new seal (30) in adapter (25).<br />
Install new seal (31) on rear of pump shaft (11).<br />
Install new woodruff key (32) in pump shaft (11).<br />
NOTE<br />
Aline adapter and housing with index marks.<br />
Install new gasket (27) and adapter (25) on housing (8) with six new lockwashers (23) and<br />
screws (24).<br />
Check end play of pump shaft (11):<br />
a. Attach dial indicator through hole in adapter (5) to ride on pin (10).<br />
b. Move pump shaft (11) back and forth and record end play movement.<br />
c. If end play of pump shaft (11) is between 0.010-0.033 in. (0.25-0.84 mm), remove dial indicator<br />
and go to Step 40.<br />
d. If end play of pump shaft (11) is not between 0.010-0.033 in. (0.25-0.84 mm), then perform<br />
steps 38 and 39 until end play of pump shaft ( 11) is correct.<br />
Remove four screws (22), lockwashers (21), and adapter (5) from housing (8). Discard<br />
Iockwashers (21).<br />
Install or remove a new gasket (7), then replace adapter (5) with four new Iockwashers (21) and<br />
screws (22). Go back to step 37b.<br />
Install new gasket (4) and cover plate (3) on adapter (5) with two new lockwashers (2) and<br />
screws (1).<br />
NOTE<br />
Aline setscrew hole in coupling with hole in pump shaft.<br />
Work through plug hole in adapter.<br />
Install coupling (28) on pump shaft (11) with setscrew (29).<br />
Install plug (26) in adapter (25).<br />
14-292
<strong>TM</strong> 9-<strong>2320</strong>-240-<strong>34</strong>-2<br />
16-48. POWER DIVIDER REPAIR (Contd)<br />
16-293
<strong>TM</strong> 9-<strong>2320</strong>-<strong>260</strong>-<strong>34</strong>-2<br />
16-48. POWER DIVIDER REPAIR (Contd)<br />
43. Position winch shaft (2) in housing (3) and install winch gear (9) and bearing (4) on winch shaft (2).<br />
NOTE<br />
Bearing should be even with inside of housing.<br />
44. Install bearing (1) on winch shaft (2).<br />
45. Install new gasket (5) and cover (6) with four new lockwashers (7) and screws (8).<br />
46. Install new seal (18) in cover (15).<br />
47. Install new gasket (19) and cover (15) on splined end of winch shaft (2) and housing (3) with four new<br />
Iockwashers (16) and screws (17).<br />
48. Check end play of winch shaft (2):<br />
a.<br />
b.<br />
c.<br />
d.<br />
Attach dial indicator to winch shaft (2) and housing (3).<br />
Move winch shaft (2) back and forth and record end play movement.<br />
If end play of winch shaft. (2) is between 0.010-0.033 in. (0.25-0.84 mm), remove dial indicator<br />
and go to Step 51.<br />
If end play of winch shaft (2) is not between 0.010-0.033 in. (0.25-0.84 mm), then perform<br />
steps 49 and 50 until end play of winch shaft (2) is correct.<br />
49. Remove four screws (17), lockwashers (16), and cover (15) from housing (3). Discard lockwashers (16).<br />
50. Install or remove a new gasket (19), then replace cover (15) on housing (3) with four new lockwashers<br />
(16) and screws (17). Go back to step 48b.<br />
51. Install yoke (14) on winch shaft (2) with new gasket (13), washer (12), new lockwasher (11), and<br />
screw (10).<br />
16-294
<strong>TM</strong> 9-<strong>2320</strong>-<strong>260</strong>-<strong>34</strong>-2<br />
16-48. POWER DIVIDER REPAIR (Contd)<br />
52.<br />
53.<br />
NOTE<br />
● Ensure shifter moves in three detent positions and yoke moves<br />
in opposite direction as shifter moves from one detent to another<br />
with central being neutral.<br />
● Ensure fork is alined with yoke of clutch or yoke of gear before<br />
installing.<br />
Install double shifter housing (22) on housing (3) with new gasket (23), eight new lockwashers (21),<br />
and screws (20).<br />
Install shifter housing (26) on housing (3) with new gasket (27), four new lockwashers (25), and<br />
screws (24).<br />
FOLLOW-ON TASK: Install power divider (para. 16-47)<br />
16-295
<strong>TM</strong> 9-<strong>2320</strong>-<strong>260</strong>-<strong>34</strong>-2<br />
16-49. DRIVE REPAIR<br />
THIS TASK COVERS:<br />
a. Disassembly c. Assembly<br />
b. Cleaning, Inspection, and Repair<br />
APPLICABLE MODELS<br />
M816<br />
TOOLS<br />
General mechanic’s tool kit<br />
(Appendix B, Item 1)<br />
Soft-head hammer (Appendix B, Item 47)<br />
Arbor press (Appendix B, Item 7)<br />
MATERIALS/PARTS<br />
Lockwasher (Appendix D, Item 224)<br />
Four lockwashers (Appendix D, Item 215)<br />
MATERIALS/PARTS (Contd)<br />
Two woodruff keys (Appendix D, Item 550)<br />
Gasket (Appendix D, Item 102)<br />
Gear oil (Appendix C, Item 22)<br />
Antiseize tape (Appendix C, Item 50)<br />
REFERENCES (<strong>TM</strong>)<br />
<strong>TM</strong> 9-<strong>2320</strong>-<strong>260</strong>-<strong>34</strong>P-2<br />
EQUIPMENT CONDITION<br />
Power drive removed (para. 16-47).<br />
a. Disassembly<br />
1.<br />
2.<br />
3.<br />
4.<br />
5.<br />
6.<br />
7.<br />
8.<br />
Remove screw (8), lockwasher (7), and washer (6) from shaft (12). Discard Iockwasher (7).<br />
Remove flange (5) from shaft (12).<br />
Remove retaining ring (14) from housing (1).<br />
Remove four screws (9), Iockwashers (10), housing (4), and gasket (3) from housing (1). Discard<br />
gasket (3) and lockwashers (10).<br />
Press shaft (12) and front bearing (13) out of housing (1).<br />
Remove shaft (12) and rear bearing (2) from housing (4).<br />
Remove two woodruff keys (11) from shaft (12). Discard woodruff keys (11).<br />
Press bearing (2) and (13) from shaft (12).<br />
16-296
<strong>TM</strong> 9-<strong>2320</strong>-<strong>260</strong>-24-2<br />
16-49. DRIVE REPAIR (Contd)<br />
b. Cleaning, Inspection, and Repair<br />
1.<br />
2.<br />
3.<br />
4.<br />
5.<br />
6.<br />
7.<br />
For general cleaning instructions, refer to para. 2-8.<br />
For general inspection instructions, refer to para. 2-9.<br />
Wrap male threads on breather (16) with antiseize tape.<br />
Remove and inspect breather (15) for dents, stripped threads, and wear. Replace breather (15)<br />
if damaged.<br />
Inspect flange (5) for cracks, stripped or damaged threads. Repair or replace flange (5) if damaged.<br />
Inspect shaft (12) and housings (1) and (4) for breaks, cracks, stripped threads, and wear. Refer to<br />
table 16-23, Drive Parts Wear Limits, for measurements. Replace shaft (12) or housing (1) or (4)<br />
if damaged or worn past limits.<br />
Inspect bearings (2) and (13) for wear. Refer to table 16-23, Drive Parts Wear Limits, for<br />
measurements; Replace bearings (2) or (13) if worn past limits.<br />
NO.<br />
Table 16-23. Drive Parts Wear Limits.<br />
ITEM/POlNT OF MEASUREMENT<br />
WEAR LIMITS/TOLERANCES<br />
INCHES<br />
MILLIMETERS<br />
1 Housing - bearing bore (2) - inner diameter -<br />
maximum 3.1503 80.018<br />
2,13 Bearings<br />
Inner diameter - maximum 1.5743 39.987<br />
Outer diameter - minimum 3.1491 79.987<br />
4 Housing - bearing bore - inner diameter - maximum 3.1503 80.018<br />
12 Shaft - outer diameter of bearing contact surfaceminimum<br />
1.5747 39.997<br />
16-297
<strong>TM</strong> 9-<strong>2320</strong>-<strong>260</strong>-<strong>34</strong>-2<br />
16-49. DRIVE REPAIR (Contd)<br />
1.<br />
2.<br />
3.<br />
4.<br />
5.<br />
6.<br />
7.<br />
8.<br />
9.<br />
10.<br />
11.<br />
12.<br />
13.<br />
Position shaft (16) in housing (4).<br />
Press bearings (2) and (14) onto shaft (16) and seat to shoulders (11) and (12) of shaft (16),<br />
Install two new woodruff keys (15) in shaft (16).<br />
Position new gasket (3) and housing (1) over shaft (16), ensuring screw holes in housing (1) and<br />
gasket (3) aline with screw holes in housing (4).<br />
Using a soft-head hammer, tap housing (1) over bearing (14).<br />
Install four new Iockwashers (10) and screws (9) through housing (4) and into housing(1).<br />
NOTE<br />
If retaining ring groove does not clear bearing, an additional<br />
gasket must be installed between the two housings.<br />
Install retaining ring (13) in groove on shoulder (12). If retaining ring (13) cannot be installed,<br />
go to step 8. If retaining ring (13) can be installed, go to step 13.<br />
Remove four screws (9) and Iockwashers (10) from housing (4).<br />
Press on shaft (16) from inside housing (4) and separate housings (1) and (4).<br />
Install a second new gasket (3) on housing (4). Repeat steps 5 and 6.<br />
Tap on outer race of bearing (14) until race is clear of retaining ring groove on shoulder (12).<br />
Install retaining ring (13) in groove on shoulder (12).<br />
NOTE<br />
Aline keyway in flange with key in shaft.<br />
Install flange (5) on shaft (16) with washer (6), new lockwasher (7), and screw (8).<br />
FOLLOW-ON TASK: Install drive (para. 16-47).<br />
16-298
<strong>TM</strong> 9-<strong>2320</strong>-240-<strong>34</strong>-2<br />
16-50. POWER DIVIDER GOVERNOR CONTROL VALVE REPLACEMENT<br />
THIS TASK COVERS:<br />
a. Removal (M816) c. Installation (M819)<br />
b. Removal (M819) d. Installation (39816)<br />
APPLICABLE MODELS<br />
M816, M819<br />
TOOLS<br />
General mechanic’s tool kit<br />
(Appendix B, Item 1)<br />
MATERIALS/PARTS<br />
Two sleeves (Appendix D, Item 511)<br />
Cotter pin (M816) (Appendix D, Item 40)<br />
Two locknuts (M816) (Appendix D, Item 169)<br />
Two lockwashers (M816) (Appendix D, Item 215)<br />
Two locknuts (M819) (Appendix D, Item 182)<br />
Two locknuts (M819) (Appendix D, Item 171)<br />
MATERIALS/PARTS (Contd<br />
Cotter pin (M819) (Appendix D, Item 40)<br />
Antiseize tape (Appendix C, Item 50)<br />
REFERENCES (<strong>TM</strong>)<br />
<strong>TM</strong> 9-<strong>2320</strong>-<strong>260</strong>-10<br />
<strong>TM</strong> 9-<strong>2320</strong>-<strong>260</strong>-<strong>34</strong>P-1<br />
EQUIPMENT CONDITION<br />
Parking brake set (<strong>TM</strong> 9-<strong>2320</strong>-<strong>260</strong>-10).<br />
Air reservoirs drained (<strong>TM</strong> 9-<strong>2320</strong>-<strong>260</strong>-10).<br />
GENERAL SAFETY INSTRUCTIONS<br />
Do not disconnect air lines before draining air<br />
reservoirs.<br />
a. Removal (M816)<br />
WARNING<br />
Do not disconnect air lines before draining air reservoirs. Small<br />
parts under pressure may shoot out with high velocity, causing<br />
injury to personnel.<br />
1. Remove air lines (9) and (10) and two sleeves (8) from elbow (7) and adapter (11). Discard sleeves (8).<br />
2. Remove cotter pin (13), control link (16), and two washers (12) from air valve (5). Discard cotter<br />
pin (13).<br />
3. Remove two locknuts (6), air valve (5), two spacers (2), and screws (1) from bracket (18). Discard<br />
locknuts (6).<br />
4. Remove elbow (7) and adapter (11) from air valve (5).<br />
5. Remove breather (3) and bushing (4) from air valve (5).<br />
6. Remove two screws (14), lockwashers (15), and bracket (18) from power divider (17). Discard<br />
lockwashers (15).<br />
M816<br />
16-299
16-50. POWER DIVIDER GOVERNOR CONTROL VALVE REPLACEMENT (Contd)<br />
b. Removal (<strong>34</strong>819)<br />
1. Remove air lines (5) and (16) and two sleeves (2) from elbow (1) and adapter (6). Discard sleeves (2).<br />
2. Remove cotter pin (15), washer (17), and control link (4) from air valve (3). Discard cotter pin (15).<br />
3. Remove two locknuts (7), screws (10), and air valve (3) from bracket (13). Discard locknuts (7).<br />
4. Remove elbow (1) and adapter (6) from air valve (3).<br />
5. Remove breather (9) and bushing (8) from air valve (3).<br />
6. Remove two locknuts (12), screws (14), and bracket (13) from crossmember (11). Discard<br />
locknuts (12).<br />
c. Installation (M819)<br />
1. Install bracket (13) on crossmember (11) with two screws (14) and new locknuts (12).<br />
2. Wrap male threads on elbow (1), air valve (3), bushing (8), and breather (9) with antiseize tape.<br />
3. Install bushing (8) and breather (9) on air valve (3).<br />
4. Install elbow (1) and adapter (6) on air valve (3).<br />
5. Install air valve (3) on bracket (13) with two screws (10) and new locknuts (7).<br />
6. Install two new sleeves (2) and air lines (5) and (16) on adapter (6) and elbow (1).<br />
7. Install control link (4) on air valve (3) with washer (17) and new cotter pin (15).<br />
d. Installation (M816)<br />
1. Install bracket (35) on power divider (<strong>34</strong>) with two new lockwashers (32) and screws (31).<br />
2. Wrap male threads on breather (20), bushing (21), elbow (24), and adapter (28) with antiseize tape.<br />
3. Install bushing (21) and breather (20) on air valve (22).<br />
4. Install elbow (24) and adapter (28) on air valve (22).<br />
5. Install two spacers (19) and air valve (22) on bracket (35) with two screws (18) and new<br />
locknuts (23).<br />
6. Install two new sleeves (25) and air lines (26) and (27) on elbow (24) and adapter (28).<br />
7. Install control link (33) on air valve (22) with two washers (29) and new cotter pin (30).<br />
16-300
<strong>TM</strong> 9-<strong>2320</strong>-<strong>260</strong>-<strong>34</strong>-2<br />
16-50. POWER DIVIDER GOVERNOR CONTROL VALVE REPLACEMENT (Contd)<br />
FOLLOW-ON TASK: Start engine (<strong>TM</strong> 9-<strong>2320</strong>-<strong>260</strong>-10) and check for leaks.<br />
16-301 (16-302 blank)
<strong>TM</strong> 9-<strong>2320</strong>-<strong>260</strong>-<strong>34</strong>-2<br />
CHAPTER 17<br />
SPECIAL PURPOSE KIT MAINTENANCE<br />
Section I. Description and Data (page 17-1)<br />
Section II. Engine Coolant Heater Maintenance (page 17-3)<br />
Section III. Personnel Heater Maintenance (page 17-36)<br />
Section I. DESCRIPTION AND DATA<br />
17-1. DESCRIPTION AND DATA<br />
M809 series vehicles use engine coolant and personnel heater kits to enable the trucks to operate in<br />
temperatures of -25°F (-32°C) or less. The heaters found within the kits are capable of burning a variety of<br />
multifuels specified for M809 series trucks, and produce a heat output of 15,000 to 30,000 Btu/hr. The major<br />
components of the heaters are the ignition system, blower assembly, heat exchanger, burner assembly, and<br />
fuel metering valve. Additional data can be found in table 17-1, Engine Coolant and Personnel Heater Data.<br />
Table 17-1. Engine Coolant and Personnel Heater Data.<br />
1. Engine Coolant Heater<br />
Make . . . . . . . . . . . . . . . . . . . . . . . . . . . . . . . . . . . . . . . . . . . . . . . . . . . . . . . Stewart-Warner<br />
Model . . . . . . . . . . . . . . . . . . . . . . . . . . . . . . . . . . . . . . . . . . . . . . . . . . . . . . . . . . . ..939J24<br />
Heat Output (Coolant)<br />
High Heat . . . . . . . . . . . . . . . . . . . . . . . . . . . . . . . . . . . . . . . . . . . . . . . . . . 15,000 Btu/hr<br />
Low Heat . . . . . . . . . . . . . . . . . . . . . . . . . . . . . . . . . . . . . . . . . . . . . . . . . . . . 8,000 Btu/hr<br />
Fuel Pressure . . . . . . . . . . . . . . . . . . . . . . . . . . 3-15 psi (21-103 kPa) at fuel control valve inlet<br />
Fuel Consumption<br />
High Heat . . . . . . . . . . . . . . . . . . . . . . . . . . . . . . . 0.021-0.031 lb/rein (0.010-0.014 kg/rein)<br />
Low Heat . . . . . . . . . . . . . . . . . . . . . . . . . . . . . . . . 0.008-0.014 lb/rein (0.004-0.006 kg/rein)<br />
Operating Temperature Range . . . . . . . . . . . . . . . . . . . . . . . . . . . . . -60°to 100°F(-51°to38°C)<br />
Overheat Thermostat Setting ... . . . . . . . . . . . . . . . . . . . . . . . . . . . . . . . . . . . . . 245°F(118°C)<br />
Restriction Thermostat Setting. . . . . . . . . . . . . . . . . . . . . . . . . . . . . . . . . . . . . . . 160°F(71°C)<br />
17-1
<strong>TM</strong> 9-<strong>2320</strong>-<strong>260</strong>-<strong>34</strong>-2<br />
17-1. DESCRIPTION AND DATA (Contd)<br />
Table 17-1. Engine Coolant and Personnel Heater Data (Contd).<br />
2. Personnel Heater<br />
Make . . . . . . . . . . . . . . . . . . . . . . . . . . . . . . . . . . . . . . . . . . . . . . . . . . . . . . . Stewart-Warner<br />
Model . . . . . . . . . . . . . . . . . . . . . . . . . . . . . . . . . . . . . . . . . . . . . . . . . . . . . . 10530-A24<br />
Heat Output<br />
High Heat . . . . . . . . . . . . . . . . . . . . . . . . . . . . . . . . . . . . . . . . . . . . . . . 30,000 Btu/hr<br />
Low Heat . . . . . . . . . . . . . . . . . . . . . . . . . . . . . . . . . . . . . . . . . . . . . . . . . . . 14,000 Btu/hr<br />
Fuel Pressure . . . . . . . . . . . . . . . . . . . . . . . . . . 3-15 psi (21-103 kPa) at fuel control valve inlet<br />
Fuel Consumption<br />
High Heat . . . . . . . . . . . . . . . . . . . . . . . . . . . . . . . 0.035-0.043 lb/rein (0.016-0.020 kg/min)<br />
Low Heat . . . . . . . . . . . . . . . . . . . . . . . . . . . . . . . . 0.019-0.025 lb/min (0.009-0.011 kg/rein)<br />
Operating Temperature Range . . . . . . . . . . . . . . . . . . . . . . . . . . . . . -65°to100°F (-54° to 38°C)<br />
Overheat Thermostat Setting . . . . . . . . . . . . . . . . . . . . . . . . . . . . . . . . . . . . . . . 600°F(316°C)<br />
3. Personnel Heater<br />
Make . . . . . . . . . . . . . . . . . . . . . . . . . . . . . . . . . . . . . . . . . . . . . . . . . . . . . . . Stewart-Warner<br />
Model . . . . . . . . . . . . . . . . . . . . . . . . . . . . . . . . . . . . . . . . . . . . . . . . . . . . . . . . . . . . . 10530B<br />
Heat Output<br />
High Heat . . . . . . . . . . . . . . . . . . . . . . . . . . . . . . . . . . . . . . . . . . . . . . . . . .30.000 Btu/hr<br />
Low Heat . . . . . . . . . . . . . . . . . . . . . . . . . . . . . . . . . . . . . . . . . . . . . . . . . . . 15,000 Btu/hr<br />
Fuel Pressure . . . . . . . . . . . . . . . . . . . . . . . . . . 3-15 psi (21-103 kPa) at fuel control valve inlet<br />
Fuel Consumption<br />
High Heat . . . . . . . . . . . . . . . . . . . . . . . . . . . . . . . 0.036-0.040 lb/rein (0.016-0.018 kg/min)<br />
Low Heat . . . . . . . . . . . . . . . . . . . . . . . . . . . . . . . . 0.018-0.022 lb/rein (0.008-0.010 kg/min)<br />
Operating Temperature Range . . . . . . . . . . . . . . . . . . . . . . . . . . . . . -55° to 91°F (-48° to 33°C)<br />
Overheat Thermostat Setting . . . . . . . . . . . . . . . . . . . . . . . . . . . . . . . . . . . . . . . 400°F(2040C)<br />
17-2
<strong>TM</strong> 9-<strong>2320</strong>-<strong>260</strong>-<strong>34</strong>-2<br />
Section Il. ENGINE COOLANT HEATER MAINTENANCE<br />
17-2. ENGINE COOLANT HEATER MAINTENANCE INDEX<br />
PARA<br />
NO.<br />
17-3.<br />
17-4.<br />
17-5.<br />
17-6.<br />
17-7.<br />
17-8.<br />
17-9.<br />
17-10.<br />
17-11.<br />
17-12.<br />
TITLE<br />
Engine Coolant Heater Flame Detector Switch Maintenance<br />
Engine Coolant Heater Blower Motor Maintenance<br />
Engine Coolant Heater Restriction Thermostat Maintenance<br />
Engine Coolant Heater Component Bracket Maintenance<br />
Engine Coolant Heater Fuel Control Valve Replacement<br />
Engine Coolant Heater Overheat Switch and Igniter Maintenance<br />
Engine Coolant Heater Fuel Tube and Preheat Resistor Replacement<br />
Engine Coolant Heater Burner Maintenance<br />
Engine Coolant Heater Housing and Heat Exchanger Maintenance<br />
Engine Coolant Heater Testing<br />
PAGE<br />
NO.<br />
17-4<br />
17-8<br />
17-10<br />
17-12<br />
17-16<br />
17-18<br />
17-22<br />
17-24<br />
17-26<br />
17-28<br />
17-3
<strong>TM</strong> 9-<strong>2320</strong>-<strong>260</strong>-<strong>34</strong>-2<br />
17-3. ENGINE COOLANT HEATER FLAME DETECTOR SWITCH MAINTENANCE<br />
THIS TASK COVERS:<br />
a. Removal d. Assembly<br />
b. Disassembly e. Installation<br />
c. Inspection<br />
INITIAL SETUP<br />
APPLICABLE MODELS<br />
All<br />
TEST EQUIPMENT<br />
Multimeter (Appendix B, Item 115)<br />
TOOLS<br />
General mechanic’s tool kit<br />
(Appendix B, Item 1)<br />
Tool kit, electrical (Appendix B, Item 106)<br />
MATERIALS/PARTS<br />
Five screw-assembled lockwashers<br />
(Appendix D, Item 384)<br />
MATERIALS/PARTS (Contd)<br />
Four screw-assembled Iockwashers<br />
(Appendix D, Item 386)<br />
Sleeve (Appendix D, Item 509)<br />
Insulation varnish (Appendix C, Item 17)<br />
REFERENCES (<strong>TM</strong>)<br />
<strong>TM</strong> 9-<strong>2320</strong>-<strong>260</strong>-20<br />
<strong>TM</strong> 9-<strong>2320</strong>-<strong>260</strong>-<strong>34</strong>P-2<br />
EQUIPMENT CONDITION<br />
Engine coolant heater removed (<strong>TM</strong> 9-<strong>2320</strong>-<strong>260</strong>-20).<br />
NOTE<br />
Tag wires for installation.<br />
a .Removal<br />
1. Remove four screw-assembled lockwashers (9) and guard (10) from heater housing (11). Discard<br />
screw-assembled lockwashers (9).<br />
2. Remove nut-assembled lockwasher (2), ground lead (3), air tube (4), and elbows (1) and (5) from<br />
heater housing (11).<br />
3. Remove five screw-assembled lockwashers (12) and six leads (6) from flame detector switch (7).<br />
Discard screw-assembled lockwashers (12).<br />
4. Loosen nut (8) and remove flame detector switch (7) from heater housing (11).<br />
b. Disassembly<br />
1. Remove adjusting screw (15), washer (14), and spring (20) from microswitch (16) and mount (19).<br />
CAUTION<br />
Ceramic rod is very brittle and is easily broken; handle carefully.<br />
2. Tilt microswitch (16) back on mount (19), invert, and remove ceramic rod (13) from probe (17).<br />
3. Remove sleeve (18) and nut (8) from probe (17). Discard sleeve (18).<br />
c. Inspection<br />
1. Inspect probe (17) of flange detector switch (7) for bends and corrosion. Remove corrosion from<br />
probe (17). Replace flame detector switch (7) if bent.<br />
2. Inspect ceramic rod (13) for chips, cracks, and breaks. Replace ceramic rod (13) if chipped, cracked,<br />
or broken.<br />
17-4
<strong>TM</strong> 9-<strong>2320</strong>-<strong>260</strong>-<strong>34</strong>-2<br />
17-3. ENGINE COOLANT HEATER FLAME DETECTOR SWITCH MAINTENANCE (Contd)<br />
1 7-5
<strong>TM</strong>9-<strong>2320</strong>-<strong>260</strong>-<strong>34</strong>-2<br />
17-3. ENGINE COOLANT HEATER FUME DETECTOR SWITCH MAINTENANCE (Contd)<br />
d. Assembly<br />
1. Install nut (6) and new sleeve (7) on probe (5).<br />
CAUTION<br />
Ceramic rod is very brittle and is easily broken; handle carefully.<br />
2. Tilt microswitch (4) back on mount (8) and insert ceramic rod (1) into probe (5).<br />
3. Rotate microswitch (4) back on mount (8) and install with spring(9), washer (3), and adjusting<br />
screw(2)<br />
4. Tighten adjusting screw (2) until microswitch (4) clicks. Then continue three-quarters turn past click<br />
point.<br />
5. Apply insulation varnish to adjusting screw (2) to hold in place.<br />
e. Installation<br />
1. Install flame detector switch (18) on heater housing (17) and tighten nut (6).<br />
2. Install six leads (20) on flame detector switch (18) with five new screw-assembled lockwashers (19).<br />
3. Install air tube (13), elbows (10) and (14) and ground lead (12) on heater housing (17) with<br />
nut-assembled lockwasher (11).<br />
4. Install guard (16) on heater housing (17) with four new screw-assembled lockwashers (15).<br />
17-6
<strong>TM</strong> 9-<strong>2320</strong>-<strong>260</strong>-<strong>34</strong>-2<br />
17-3. ENGINE COOLANT HEATER FLAME DETECTOR SWITCH MAINTENANCE (Contd)<br />
FOLLOW-ON TASK Test engine coolant heater (para. 17-12).<br />
17-7
<strong>TM</strong> 9-<strong>2320</strong>-<strong>260</strong>-<strong>34</strong>-2<br />
17-4. ENGINE COOLANT HEATER BLOWER MOTOR MAINTENANCE<br />
THIS TASK COVERS:<br />
a. Removal c. Installation<br />
b. Cleaning and Inspection<br />
APPLICABLE MODELS<br />
All<br />
TEST EQUIPMENT<br />
Multimeter (Appendix B, Item 115)<br />
Tools<br />
General mechanic’s tool kit<br />
(Appendix B, Item 1)<br />
Tool kit, electrical<br />
(Appendix B, Item 106)<br />
MATERIALS/PARTS<br />
Four screw-assembled lockwashers<br />
(Appendix D, Item 405)<br />
Screw-assembled lockwasher<br />
(Appendix D, Item 384)<br />
Tiedown strap (Appendix C, Item 28)<br />
Drycleaning solvent (Appendix C, Item 48)<br />
Rag (Appendix C, Item 32)<br />
REFERENCES (<strong>TM</strong>)<br />
<strong>TM</strong> 9-<strong>2320</strong>-<strong>260</strong>-20<br />
<strong>TM</strong> 9-<strong>2320</strong>-<strong>260</strong>-<strong>34</strong>P-2<br />
EQUIPMENT CONDITION<br />
Engine coolant heater removed (<strong>TM</strong> 9-<strong>2320</strong>-<strong>260</strong>-20).<br />
GENERAL SAFETY INSTRUCTIONS<br />
● Keep fire extinguisher nearby when using<br />
drycleaning solvent.<br />
• Compressed air source will not exceed 30 psi<br />
(207 kPa).<br />
● Eyeshields must be worn when cleaning with<br />
compressed air.<br />
NOTE<br />
Tag wires for installation.<br />
a. Removal<br />
1. Remove four screw-assembled lockwashere (11) and guard (12) from heater housing (13). Discard<br />
screw-assembled lockwashers (11).<br />
2. Remove tiedown strap (6) from heater wiring. Discard tiedown strap (6).<br />
3. Remove nut-assembled lockwasher (2), ground lead (3), air tube (4), and elbows (1) and (5) from<br />
heater housing (13).<br />
4. Remove screw-assembled lockwasher (8) and wire (7) from heater component bracket (14). Discard<br />
screw-assembled lockwasher (8).<br />
5. Remove four nut-assembled lockwashers (10) and blower motor (9) from heater housing (13).<br />
b. Cleaning and Inspection<br />
1. Inspect blower motor (9) for dirt, grease, and carbon. Remove all dirt, grease, and carbon.<br />
17-8
<strong>TM</strong> 9-<strong>2320</strong>-<strong>260</strong>-<strong>34</strong>-2<br />
17-4. ENGINE COOLANT HEATER BLOWER MOTOR MAINTENANCE (Contd)<br />
WARNING<br />
• Drycleaning solvent is flammable and will not be used near open<br />
flame. Use only in well-ventilated places. Failure to do so may<br />
result in injury to personnel,<br />
• Compressed air source will not exceed 30 psi (207 kPa). When<br />
cleaning with compressed air, eyeshields must be worn. Failure<br />
to wear eyeshields may result in injury to personnel.<br />
2. Clean housing ( 13) surface with drycleaning solvent and dry with clean rag or compressed air.<br />
Do not immerse in solvent.<br />
c. Installation<br />
1. Install blower motor (9) on heater housing (13) with four nut-assembled lockwashers (10).<br />
2. Install wire (7) on heater component bracket (14) with new screw-assembled lockwasher (8).<br />
3. Install elbows (1) and (5), air tube (4), and ground lead (3) on heater housing (13) with<br />
nut-assembled lockwasher (2).<br />
4. Place new tiedown strap (6) around heater wiring.<br />
5. Install guard (12) on heater housing (13) with four new screw-assembled lockwashers (11).<br />
FOLLOW-ON TASK: Test engine coolant heater (para. 17-12).<br />
17-9
<strong>TM</strong> 9-<strong>2320</strong>-<strong>260</strong>-<strong>34</strong>-2<br />
17-5. ENGINE COOLANT HEATER RESTRICTION THERMOSTAT MAINTENANCE<br />
I<br />
THIS TASK COVERS:<br />
a. Removal c. Installation<br />
b. Inspection<br />
INITIAL SETUP<br />
APPLICABLE MODELS<br />
All<br />
TEST EQUIPMENT<br />
Multimeter (Appendix B, Item 115)<br />
TOOLS<br />
General mechanic’s tool kit<br />
(Appendix B, Item 1)<br />
Tool kit, electrical (Appendix B, Item 106)<br />
REFERENCES (<strong>TM</strong>)<br />
<strong>TM</strong> 9-<strong>2320</strong>-<strong>260</strong>-<strong>34</strong>P-2<br />
EQUIPMENT CONDITION<br />
Engine coolant heater blower motor removed<br />
(para. 17-4).<br />
a. Removal<br />
NOTE<br />
Tag wires for installation.<br />
1. Disconnect two leads (1) from restriction thermostat (4).<br />
2. Remove two nut-assembled lockwashers (2), washers (3), restriction thermostat (4), and two<br />
spacers (5) from heat exchanger (6).<br />
b. Inspection<br />
1. Inspect restriction thermostat (4) for corrosion and bends. Replace if corroded or bent.<br />
2. Check thermostat continuity at room temperature. If continuity exists, replace restriction<br />
thermostat (4).<br />
CAUTION<br />
Do not place thermostat in liquid for cooling. Placing thermostat in<br />
liquid will cause damage to equipment.<br />
3. Cool restriction thermostat (4) to 20°F (-6.7°C). Check thermostat continuity. If continuity does not<br />
exist, replace restriction thermostat (4).<br />
c. Installation<br />
1. Install two spacers (5) and restriction thermostat (4) on heat exchanger (6) with two washers (3) and<br />
nut-assembled lockwashers (2).<br />
2. Connect two leads (1) to restriction thermostat (4).<br />
17-10
<strong>TM</strong> 9-<strong>2320</strong>-<strong>260</strong>-<strong>34</strong>-2<br />
17-5. ENGINE COOLANT HEATER RESTRICTION THERMOSTAT MAINTENANCE (contd)<br />
FOLLOW-ON TASK: Install engine coolant heater blower motor (para. 17-4).<br />
17-11
<strong>TM</strong> 9-<strong>2320</strong>-<strong>260</strong>-<strong>34</strong>-2<br />
17-6. ENGINE COOLANT HEATER COMPONENT BRACKET MAINTENANCE<br />
THIS TASK COVERS:<br />
a. Removal d. Assembly<br />
b. Disassembly e. Installation<br />
c. Inspection<br />
lNITIAL SETUP<br />
APPLICABLE MODELS<br />
All<br />
TEST EQUIPMENT<br />
Multimeter (Appendix B, Item 115)<br />
Tools<br />
General mechanic’s tool kit<br />
(Appendix B, Item 1)<br />
Tool kit, electrical (Appendix B, Item 106)<br />
MATERIALS/PARTS<br />
Five screw-assembled lockwashers<br />
(Appendix D, Item 388)<br />
Three screw-assembled lockwashers<br />
(Appendix D, Item 390)<br />
Four screw-assembled lockwashers<br />
(Appendix D, Item 405)<br />
MATERIALS/PARTS (Contd)<br />
Four screw-assembled lockwashers<br />
(Appendix D, Item 392)<br />
Four screw-assembled lockwashers<br />
(Appendix D, Item 394)<br />
Tiedown strap (Appendix C, Item 28)<br />
REFERENCES (<strong>TM</strong>)<br />
<strong>TM</strong> 9-<strong>2320</strong>-<strong>260</strong>-<strong>34</strong>P-2<br />
EQUIPMENT CONDITION<br />
Engine coolant heater blower motor removed<br />
(para. 17-4).<br />
NOTE<br />
Tag wires for installation.<br />
a.Removal<br />
1. Remove tiedown strap (4) from wires. Discard tiedown strap (4).<br />
2. Remove two screw-assembled lockwashers (7), and leads (5), (6), and (8) from heater component<br />
bracket (9). Discard screw-assembled lockwashers (7).<br />
3. Remove two leads (11) from restriction thermostat ( 12).<br />
4. Remove grommet (14) and two leads (11) from heater housing (13).<br />
5. Remove three screw-assembled lockwashers (2) and leads ( 1), (3), ( 16), and ( 17) from flame detector<br />
switch (15). Discard screw-assembled lockwashers (2).<br />
6. Remove four screw-assembled lockwashers (10) and heater component bracket (9) from heater<br />
housing (13). Discard screw-assembled lockwashers (10).<br />
b. Disassembly<br />
NOTE<br />
Note direction of arrow on diode for installation.<br />
1. Remove diode (19) from diode holder (18).<br />
2. Remove screw-assembled lockwashers (23) and (36), resistor leads (22) and (33), and diode lead (35)<br />
from terminal strip (25). Discard screw-assembled lockwashers (23) and (36).<br />
3. Remove screw-assembled lockwasher (21) from diode holder (18) and terminal strip (25). Discard<br />
screw-assembled lockwasher (21).<br />
4. Remove screw (20) and diode holder (18) from heater component bracket (9).<br />
5. Remove four screw-assembled lockwashers (24), terminal strip (25), and spacer (26) from heater<br />
component bracket (9). Discard screw-assembled lockwashers (24).<br />
17-12
<strong>TM</strong> 9-<strong>2320</strong>-<strong>260</strong>-<strong>34</strong>-2<br />
17-6. ENGINE COOLANT HEATER COMPONENT BRACKET MAINTENANCE (Contd)<br />
6. Remove nut-assembled lockwasher (30), screw (<strong>34</strong>), and resistor (32) from resistor holder (31).<br />
7. Remove four screw-assembled lockwashers (29) and receptacle (28) from heater component<br />
bracket (9). Discard screw-assembled lockwashers (29).<br />
8. Remove nut-assembled lockwasher (27) and resistor holder(31) from heater component bracket (9),<br />
c. Inspection<br />
1. Check diode (19) for continuity. Reverse leads on diode (19) and check for continuity. If circuit is open<br />
in both test conditions or closed in both test conditions, replace diode (19).<br />
2. Check resistor (32) for continuity. If continuity does not exist, replace resistor (32).<br />
17-13
<strong>TM</strong> 9-<strong>2320</strong>-<strong>260</strong>-<strong>34</strong>-2<br />
17-6. ENGINE COOLANT HEATER COMPONENT BRACKET MAINTENANCE (Contd)<br />
d. Assembly<br />
1. Install receptacle (11) on heater component bracket (9) with four new screw-assembled<br />
lockwashers (12).<br />
2. Install resistor holder (14) on heater component bracket (9) with nut-assembled lockwasher<br />
(10).<br />
3. Install resistor (15) on resistor holder (14) with screw (17) and nut-assembled lockwasher (13).<br />
4. Install spacer (8) and terminal strip (7) on heater component bracket (9) with four new screwassembled<br />
lockwashers (6).<br />
5. Install diode holder (20) on heater component bracket (9) with screw (2).<br />
6. Install diode (1) on diode holder (20) with arrow pointed in direction previously noted.<br />
7. Install resistor leads (4) and (16), diode lead (19), and diode holder (20) on terminal strip (7)<br />
with new screw-assembled lockwashers ( 18), (5), and (3).<br />
e. Installation<br />
1. Install heater component bracket (9) on heater housing (33) with four new screw-assembled<br />
lockwashers (30).<br />
2. Install leads (26), (27), and (29) on heater component bracket (9) with two new screw-assembled<br />
lockwashers (28).<br />
3. Install leads (21), (22), (24), and (36) on flame detector switch (35) with three new screw-assembled<br />
lockwashers (23).<br />
4. Insert two leads (31) through hole in heater housing (33) and install on restriction thermostat (32).<br />
5. Place grommet (<strong>34</strong>) on two leads (31) and install on heater housing (33).<br />
6. Install new tiedown strap (25) around wires.<br />
17-14
<strong>TM</strong> 9-<strong>2320</strong>-<strong>260</strong>-<strong>34</strong>-2<br />
17-6. ENGINE COOLANT HEATER COMPONENT BRACKET MAINTENANCE (Contd)<br />
FOLLOW-ON TASK: Install engine coolant heater blower motor (para. 17-4).<br />
17-15
<strong>TM</strong> 9-<strong>2320</strong>-<strong>260</strong>-<strong>34</strong>-2<br />
17-7. ENGINE COOLANT HEATER FUEL CONTROL VALVE REPLACEMENT<br />
THIS TASK COVERS:<br />
a. Removal b. Installation<br />
APPLICABLE MODELS<br />
All<br />
TEST EQUIPMENT<br />
Multimeter (Appendix B, Item 115)<br />
TOOLS<br />
General mechanic’s tool kit<br />
(Appendix B, Item 1)<br />
Tool kit, electrical (Appendix B, Item 106)<br />
MATERIALS/PARTS<br />
Four screw-assembled lockwashers<br />
(Appendix D, Item 405)<br />
Two screw-assembled lockwashers<br />
(Appendix D, Item 396)<br />
MATERIALS/PARTS (Contd)<br />
Screw-assembled lockwasher<br />
(Appendix D, Item 390)<br />
Screw-assembled lockwasher<br />
(Appendix D, Item 398)<br />
REFERENCES (<strong>TM</strong>)<br />
<strong>TM</strong> 9-<strong>2320</strong>-<strong>260</strong>-20<br />
<strong>TM</strong> 9-<strong>2320</strong>-<strong>260</strong>-<strong>34</strong>P-2<br />
EQUIPMENT CONDITION<br />
Engine coolant heater removed (<strong>TM</strong> 9-<strong>2320</strong>-<strong>260</strong>-20).<br />
NOTE<br />
Tag wires for installation.<br />
a Removal<br />
1. Remove four screw-assembled lockwashers (7) and guard (6) from heater housing (8). Discard<br />
screw-assembled lockwashers (7).<br />
2. Remove nut-assembled lockwasher (2), ground lead (3), air tube (4), and elbows (1) and (5) from<br />
heater housing (8).<br />
3. Disconnect fuel control valve leads (9) and (10) from tab connector (18).<br />
4. Loosen nut (16) and slide down fuel tube (13).<br />
5. Remove screw-assembled lockwasher (22) and lead (21) from heater component bracket (19). Discard<br />
screw-assembled lockwasher (22).<br />
6. Remove screw-assembled lockwasher (11) and lead (20) from flame detector switch (17). Discard<br />
screw-assembled lockwasher (11).<br />
7. Remove two screw-assembled lockwashers (15) and fuel control valve (12) from fuel tube (13) and<br />
bracket (14). Discard screw-assembled lockwashers (15).<br />
b .Installation<br />
1. Position fuel control valve (12) on fuel tube (13) and bracket (14).<br />
2. Tighten nut (16) and install fuel control valve (12) on bracket (14) with two new screw-assembled<br />
lockwashers (15).<br />
3. Install lead (21) on heater component bracket (19) with new screw-assembled lockwasher (22).<br />
4. Install lead (20) on flame detector switch (17) with new screw-assembled lockwasher (11).<br />
5. Connect fuel control leads (9) and (10) on tab connector (18).<br />
6. Install air tube (4), elbows (1) and (5), and ground lead (3) on heater housing(8) with nut-assembled<br />
lockwashers (2).<br />
7. Install guard (6) on heater housing(8) with four new screw-assembled lockwashers (7).<br />
17-16
<strong>TM</strong> 9-<strong>2320</strong>-240-<strong>34</strong>-2<br />
17-7. ENGINE COOLANT HEATER FUEL CONTROL VALVE REPLACEMENT (Contd)<br />
FOLLOW-ON TASK Test engine coolant heater (para. 17-12).<br />
17-17
<strong>TM</strong> 9-<strong>2320</strong>-<strong>260</strong>-<strong>34</strong>-2<br />
17-8. ENGINE COOLANT HEATER OVERHEAT SWITCH AND IGNITER MAINTENANCE<br />
THIS TASK COVERS:<br />
a. Overheat Switch Removal d. Igniter Installation<br />
b. Igniter Removal e. Overheat Switch Installation<br />
c. Inspection<br />
lNITIAL SETUP<br />
APPLICABLE MODELS<br />
All<br />
TEST EQUIPMENT<br />
Multimeter (Appendix B, Item 115)<br />
TOOLS<br />
General mechanic’s tool kit<br />
(Appendix B, Item 1)<br />
Tool kit, electrical (Appendix B, Item 106)<br />
MATERIALS/PARTS<br />
Four screw-assembled lockwashers<br />
(Appendix D, Item 405)<br />
Screw-assembled lockwasher<br />
(Appendix D, Item 400)<br />
MATERIALS/PARTS (Contd)<br />
Lockwasher (Appendix D, Item 259)<br />
Lockwasher (Appendix D, Item 261)<br />
O-ring (Appendix D, Item 282)<br />
Washer (Appendix D, Item 526)<br />
Gasket (Appendix D, Item 80)<br />
Igniter (Appendix D, Item 158)<br />
REFERENCES (<strong>TM</strong>)<br />
<strong>TM</strong> 9-<strong>2320</strong>-<strong>260</strong>-20<br />
<strong>TM</strong> 9-<strong>2320</strong>-<strong>260</strong>-<strong>34</strong>P-2<br />
EQUIPMENT CONDITION<br />
Engine coolant heater removed (<strong>TM</strong> 9-<strong>2320</strong>-<strong>260</strong>-20).<br />
NOTE<br />
Tag all leads for installation.<br />
a. Overheat Switch Removal<br />
1. Remove four screw-assembled lockwashers (6) and guard (7) from heater housing (8). Discard<br />
screw-assembled lockwashers (6).<br />
2. Remove nut-assembled lockwasher (2), ground lead (3), air tube (4), and elbows (1) and (5) from<br />
heater housing (8).<br />
3. Disconnect lead (9) from overheat switch (13).<br />
4. Disconnect leads (10) and (12) from tab connector (11) and remove tab connector ( 11) from overheat<br />
switch (13).<br />
5. Remove nut (32), lockwasher (31), retainer (30), overheat switch (13), washer (14), and O-ring (15)<br />
form heater housing (8). Discard lockwasher (31), O-ring (15), and washer (14).<br />
b. Igniter Removal<br />
1. Remove four nut-assembled lockwashers (27) and end plate (26) from heater housing(8).<br />
2. Remove screw-assembled lockwasher (21), ground strap (22), igniter lead (23), and lockwasher (24)<br />
from burner (16). Discard screw-assembled lockwasher (21) and lockwasher (24).<br />
3. Remove nut (28) and ground strap (22) from stud (29).<br />
17-18
<strong>TM</strong> 9-<strong>2320</strong>-<strong>260</strong>-<strong>34</strong>-2<br />
17-8. ENGINE COOLANT HEATER OVERHEAT SWITCH AND IGNITER MAINTENANCE (Contd)<br />
CAUTION<br />
Igniter is fragile. Use care when removing igniter. Failure to do so<br />
may result in damage to equipment.<br />
4. Remove nuts (19) and (18), preheater resistor strap (17), igniter (20), and gasket (25) from<br />
burner (16), Discard igniter (20) and gasket (25).<br />
c. Inspection<br />
Test overheat switch (13) for continuity. If continuity does not exist, replace overheat switch (13).<br />
17-19
<strong>TM</strong> 9-<strong>2320</strong>-<strong>260</strong>-<strong>34</strong>-2<br />
17-8. ENGINE COOLANT HEATER OVERHEAT SWITCH AND IGNITER MAINTENANCE (Contd)<br />
d. Igniter Installation<br />
CAUTION<br />
Igniter is fragile. Use care when installing igniter. Failure to do so<br />
may result in damage to equipment.<br />
1. Install new gasket (17) and new igniter (12) on burner (8).<br />
2. Place preheater resistor strap (9) on igniter (12) and install with two nuts (10) and (11).<br />
3. Install ground strap (14) on stud (21) with nut (20).<br />
4. Install new lockwasher (16), igniter lead (15), and ground strap (14) on burner (8) with new screwassembled<br />
lockwasher (13),<br />
5. Install end plate (18) on heater housing (22) with four nut-assembled lockwashers (19).<br />
e. Overheat Switch Installation<br />
1. Install new O-ring (7), new washer (6), overheat switch (5), and retainer (23) on heater housing (22)<br />
with new lockwasher (24) and nut (25).<br />
2. Install leads (2) and (4) on tab connector (3) and install tab connector (3) on overheat switch (5).<br />
3. Install lead (1) on overheat switch (5).<br />
4. Install air tube (29), elbows (26) and (30), and ground lead (28) on heater housing (22) with<br />
nut-assembled lockwasher (27).<br />
5. Install guard (32) on heater housing (22) with four new screw-assembled lockwashers (31).<br />
17-20
<strong>TM</strong> 9-<strong>2320</strong>-<strong>260</strong>-<strong>34</strong>-2<br />
17-8. ENGINE COOLANT HEATER OVERHEAT SWITCH AND IGNITER MAINTENANCE (Contd)<br />
FOLLOW-ON TASK: Test engine coolant heater (para. 17-12).<br />
17-21
<strong>TM</strong> 9-<strong>2320</strong>-<strong>260</strong>-<strong>34</strong>-2<br />
17-9. ENGINE COOLANT HEATER FUEL TUBE AND PREHEAT RESISTOR REPLACEMENT<br />
THIS TASK COVERS:<br />
a. Removal b. Installation<br />
APPLICABLE MODELS<br />
All<br />
TEST EQUIPMENT<br />
Multimeter (Appendix B, Item 115)<br />
TOOLS<br />
General mechanic’s tool kit<br />
(Appendix B, Item 1)<br />
Tool kit, electrical (Appendix B, Item 106)<br />
MATERIALS/PARTS<br />
Sleeve (Appendix D, Item 508)<br />
Screw-assembled lockwasher (Appendix D, Item 388)<br />
REFERENCES (<strong>TM</strong>)<br />
<strong>TM</strong> 9-<strong>2320</strong>-<strong>260</strong>-<strong>34</strong>P-2<br />
EQUIPMENT CONDITION<br />
● Engine coolant heater fuel control valve removed<br />
(para. 17-7).<br />
● Engine coolant heater overheat switch and igniter<br />
removed (para. 17-8).<br />
NOTE<br />
Tag wires for installation.<br />
a.Removal<br />
1. Remove two screws (l), bracket (2), flange (3), and tapping plate (4) from heater housing (15).<br />
2. Remove grommet (14) from hole (13) in heater housing (15) and slide up on lead (10).<br />
3. Remove nut-assembled lockwasher (5), screw-assembled lockwasher (9), and lead (10) from<br />
preheat resistor (8). Discard screw-assembled lockwaeher (9).<br />
4. Remove fuel tube (11) with preheat resistor (8) from burner (12).<br />
5. Remove sleeve (6), nut(7), and preheat resistor (8) from fuel tube (11). Discard sleeve (6).<br />
b. Installation<br />
1. Install preheat resistor (8), nut (7), and new sleeve (6) on fuel tube (11).<br />
2. Install fuel tube (11) with preheat resistor (8) on burner (12).<br />
3. Insert lead (10) through hole (13) in heater housing (15) and install on preheat resistor (8) with new<br />
screw-assembled lockwasher (9) and nut-assembled lockwasher (5).<br />
4. Install grommet (14) in hole (13) on heater housing (15).<br />
5. Position tapping plate (4), flange (3), and bracket (2) on heater housing (15) and install with two<br />
screws (1).<br />
17-22
<strong>TM</strong> 9-<strong>2320</strong>-<strong>260</strong>-<strong>34</strong>-2<br />
17-9. ENGINE COOLANT HEATER FUEL TUBE AND PREHEAT RESISTOR REPLACEMENT (Contd)<br />
FOLLOW-ON TASKS: •Install engine coolant heater overheat switch and igniter (para. 17-8).<br />
•Install engine cooant heater fuel control valve (para. 17-7).<br />
17-23
<strong>TM</strong> 9-<strong>2320</strong>-<strong>260</strong>-<strong>34</strong>-2<br />
17-10. ENGINE COOLANT HEATER BURNER MAINTENANCE<br />
THIS TASK COVERS:<br />
a. Removal c. Installation<br />
b. Cleaning and Inspection<br />
APPLICABLE MODELS<br />
All<br />
TEST EQUIPMENT<br />
Multimeter (Appendix B, Item 115)<br />
TOOLS<br />
General mechanic’s tool kit<br />
(Appendix B, Item 1)<br />
Tool kit, electrical (Appendix B, Item 106)<br />
MATERIALS/PARTS<br />
O-ring (Appendix D, Item 283)<br />
Gasket (Appendix D, Item 106)<br />
Drycleaning solvent (Appendix C, Item 48)<br />
REFERENCES (<strong>TM</strong>)<br />
<strong>TM</strong> 9-<strong>2320</strong>-<strong>260</strong>-<strong>34</strong>P-2<br />
EQUIPMENT CONDITION<br />
Engine coolant heater fuel tube and preheat resistor<br />
removed (para. 17-9).<br />
GENERAL SAFETY INSTRUCTIONS<br />
● Keep fire extinguisher nearby when using<br />
drycleaning solvent.<br />
• Compressed air source will not exceed 30 psi<br />
(207 kPa).<br />
•Eyeshields must be worn when cleaning with<br />
compressed air.<br />
a.REMOVAL<br />
Remove four nuts (5), clamps (6), hook bolts (7), burner (4), O-ring (3), and gasket (2) from heat<br />
exchanger (1). Discard O-ring (3) and gasket (2).<br />
b. Cleaning and Inspection<br />
WARNING<br />
● Drycleaning solvent is flammable and will not be used near open<br />
flame. Use only in well-ventilated places. Failure to do so may<br />
result in injury to personnel.<br />
● Compressed air source will not exceed 30 psi (207 kPa). When<br />
cleaning with compressed air, eyeshields must be worn. Failure<br />
to wear eyeshields may result in injury to personnel.<br />
Inspect burner (4) for scorched and charred surfaces. If scorched or charred, clean burner (4) surfaces<br />
with wire brush, wipe clean with drycleaning solvent, and dry. Replace burner (4) if insulating pad is<br />
charred or parts are missing.<br />
c. Installation<br />
Position new gasket (2), new O-ring (3), and burner (4) on heat exchanger (1) and install with four hook<br />
bolts (7), clamps (6), and nuts (5).<br />
17-24
<strong>TM</strong> 9-<strong>2320</strong>-<strong>260</strong>-<strong>34</strong>-2<br />
17-10. ENGINE COOLANT HEATER BURNER MAINTENANCE (Contd)<br />
FOLLOW-ON TASK: Install engine coolant heater fuel tube and preheat resistor (para. 17-9).<br />
17-25
<strong>TM</strong> 9-<strong>2320</strong>-<strong>260</strong>-<strong>34</strong>-2<br />
17-11. ENGINE COOLANT HEATER HOUSING AND HEAT EXCHANGER MAINTENANCE<br />
THIS TASK COVERS:<br />
a. Removal c. Installation<br />
b. Cleaning and Inspection<br />
INITIAL SETUP<br />
APPLICABLE MODELS<br />
All<br />
TOOLS<br />
General mechanic’s tool kit<br />
(Appendix B, Item 1)<br />
MATERIALS/PARTS<br />
Three screw-assembled lockwashers<br />
(Appendix D, Item 405)<br />
Drycleaning solvent (Appendix C, Item 46)<br />
REFERENCES (<strong>TM</strong>)<br />
<strong>TM</strong> 9-<strong>2320</strong>-<strong>260</strong>-<strong>34</strong>P-2<br />
EQUIPMENT CONDITION<br />
• Engine coolant heater flame detector switch<br />
removed (para. 17-3).<br />
• Engine coolant heater restriction thermostat<br />
removed (para. 17-5).<br />
• Engine coolant heater burner removed<br />
(para. 17-10).<br />
GENERAL SAFETY INSTRUCTIONS<br />
● Compressed air source will not exceed 30 psi<br />
(207 kPa).<br />
● Eyeshields must be worn when cleaning with<br />
compressed air.<br />
● Keep fire extinguisher nearby when using<br />
drycleaning solvent.<br />
a. Removal<br />
1. Remove three screw-assembled lockwashers (2) from heater housing (1). Discard screw-assembled<br />
lockwashers (2).<br />
2. Separate heater housing (1) and remove heat exchanger (5) from heater housing (1).<br />
b. Cleaning and Inspection<br />
WARNING<br />
• Compressed air source will not exceed 30 psi (207 kPa). When<br />
cleaning with compressed air, eyeshields must be worn. Failure<br />
to wear eyeshields may result in injury to personnel.<br />
• Drycleaning solvent is flammable and will not be used near open<br />
flame. Use only in well-ventilated places. Failure to do so may<br />
result in injury to personnel.<br />
1. Inspect heat exchanger (5) for exterior damage, leaks, and corrosion. Replace heat exchanger (5) if<br />
damaged, heavily corroded, or leaks are present. To remove carbon from heat exchanger (5), soak in<br />
water for a short time and dry with compressed air.<br />
2. Clean housing (1) surface with drycleaning solvent and dry with clean rag or compressed air.<br />
c. Installation<br />
Ensure flame detector switch adapter (3) and exhaust tube (4) are alined and install heat exchanger (5)<br />
in heater housing (1) with three new screw-assembled lockwashers (2).<br />
17-26
<strong>TM</strong> 9-<strong>2320</strong>-<strong>260</strong>-<strong>34</strong>-2<br />
17-11. ENGINE COOLANT HEATER HOUSING AND HEAT EXCHANGER MAINTENANCE (Contd)<br />
FOLLOW-ON TASKS: ● Install engine coolant heater burner (para. 17-10).<br />
● Install engine coolant heater restriction thermostat (para. 17-5).<br />
● Install engine coolant heater flame detector switch (para. 17-3).<br />
17-27
<strong>TM</strong> 9-<strong>2320</strong>-<strong>260</strong>-<strong>34</strong>-2<br />
17-12. ENGINE COOLANT HEATER TESTING<br />
THIS TASK COVERS:<br />
a. Preparation e. Blower Motor Test<br />
b. Igniter Test f. Restriction Thermostat Test<br />
c. Flame Detector Switch Test g. Overheat Switch Test<br />
d. Fuel Control Valve Test h. Test Equipment Removal<br />
lNITIAL SETUP<br />
APPLICABLE MODELS<br />
All<br />
TEST EQUIPMENT<br />
24-volt DC power source<br />
Fuel container<br />
Coolant container (5 gal.)<br />
Test stand<br />
Thermometer (Appendix B, Item 147)<br />
Flowmeter (Appendix B, Item 146)<br />
Multimeter (Appendix B, Item 115)<br />
TOOLS<br />
General mechanic’s tool kit<br />
(Appendix B, Item 1)<br />
Tool kit, electrical (Appendix B, Item 106)<br />
MATERIALS/PARTS<br />
Four screw-assembled lockwashers<br />
(Appendix D, Item 405)<br />
Screw-assembled lockwasher<br />
(Appendix D, Item 390)<br />
Antifreeze (Appendix C, Item 4)<br />
REFERENCES<br />
<strong>TM</strong> 9-<strong>2320</strong>-<strong>260</strong>-20<br />
<strong>TM</strong> 9-<strong>2320</strong>-<strong>260</strong>-<strong>34</strong>P-2<br />
EQUIPMENT CONDITION<br />
Engine coolant heater removed<br />
(<strong>TM</strong> 9-<strong>2320</strong>-<strong>260</strong>-20).<br />
GENERAL SAFETY INSTRUCTIONS<br />
● Keep fire extinguisher nearby when working<br />
with open fuel lines.<br />
● Do not perform procedure near open flame,<br />
smoking, or sparking object.<br />
● Do not perform procedure in enclosed areas.<br />
● Do not handle hot heater with bare hands,<br />
wear hand protection at all times.<br />
● Do not remove heater from test equipment<br />
until cool.<br />
1.<br />
● Do not perform this procedure while smoking or within 50 feet of<br />
sparks or open flame. Fuel is flammable and can explode easily,<br />
causing injury to personnel and damage to equipment.<br />
● Do not handle hot heater with bare hands; wear hand protection<br />
at all times. Failure to do so may cause injury to personnel.<br />
● Exhaust gases can kill. Do not perform this task in enclosed<br />
areas. Ensure work area is well-ventilated and exhaust fumes<br />
are directed away from test area.<br />
NOTE<br />
● Perform “preparation” subtask before preforming any test and<br />
perform “test equipment removal” after each test is complete.<br />
● Heater must be tested in same position as mounted on vehicle.<br />
● Use proper coolant required for engines which are being heated.<br />
Water cannot be used because the overheat switch and restriction<br />
thermostat are set for temperatures above the boiling point<br />
of water.<br />
Connect coolant heater (14) to test equipment using schematic on next page.<br />
17-28
<strong>TM</strong> 9-<strong>2320</strong>-<strong>260</strong>-<strong>34</strong>-2<br />
17-12. ENGINE COOLANT HEATER TESTING (Contd)<br />
NOTE<br />
Coolant container must be vented and raised above the test<br />
apparatus in order for thermosyphon circulation to occur.<br />
Fuel pump, fuel filter, heater, wiring harness, fuel tubing,<br />
control box, and coolant must be the same type used on vehicle.<br />
1.<br />
2.<br />
3.<br />
4.<br />
5.<br />
6.<br />
7.<br />
8.<br />
9.<br />
KEY TO TEST EQUIPMENT ARRANGEMENT<br />
Electric fuel pump<br />
10. Coolant inlet hose<br />
Fuel tubing<br />
11. Power source lead<br />
Fuel filter<br />
12. 24-volt DC power source<br />
Fuel flowmeter<br />
13. Multimeter<br />
Fuel shutoff valve<br />
14. Coolant<br />
Coolant outlet hose 15. Wiring harness<br />
Thermometer<br />
16. Control box<br />
Coolant container 17. Fuel container<br />
Coolant shutoff valve<br />
17-29
<strong>TM</strong> 9-<strong>2320</strong>-<strong>260</strong>-<strong>34</strong>-2<br />
17-12. ENGINE COOLANT HEATER TESTING (Contd)<br />
2.<br />
3.<br />
4.<br />
5.<br />
6.<br />
7.<br />
8.<br />
9.<br />
10.<br />
11,<br />
12.<br />
13.<br />
14.<br />
15.<br />
16.<br />
17.<br />
Remove four screw-assembled lockwashers (2) and guard (1) from heater (9). Discard screwassembled<br />
lockwashers (2).<br />
Disconnect lead (16) from 24-volt power source (17).<br />
Remove screw-assembled lockwasher (11) and igniter lead (12) from flame detector switch (10).<br />
Discard screw-assembled lockwasher (11).<br />
Disconnect fuel control valve leads (6) and (8) from overheat switch (7).<br />
Connect hose (4) to bleed screw (13) on fuel control valve (3) and place other end of hose (4) in<br />
container (5).<br />
Open two fuel shutoff valves (14).<br />
NOTE<br />
Have drainage container ready to catch fuel.<br />
Connect lead (16) to power source (17).<br />
Ensure switch (21) is in LO position. Place switch (19) in START position and hold. Open bleed<br />
screw (13) and let fuel flow until no air bubbles are observed in fuel flowing into container (5).<br />
Place switch (19) in OFF position. Close bleed screw (13).<br />
Disconnect lead (16) from power source (17).<br />
Install igniter lead (12) on flame detector switch (10) with new screw-assembled lockwasher (11).<br />
Connect fuel control valve leads (6) and (8) on overheat switch (7).<br />
Open coolant shutoff valve (15).<br />
Check for signs of coolant leaks. Tighten loose connections or replace damaged parts if leaking<br />
(paras. 17-3 through 17-11, as necessary).<br />
Close coolant shutoff valve (15).<br />
Connect lead (16) to power source (17).<br />
b. Igniter Test<br />
NOTE<br />
Ignition time is the interval from activating control box switch to<br />
START position until indicator lamp illuminates.<br />
1. Place switch (19) in START position and hold. Record time interval fromactivating switch (19)<br />
until indicator lamp (20) illuminates. During this time interval, record ignition amperage on<br />
multimeter (18).<br />
2. If ignition time exceeds three minutes, or if ignition amperage exceeds 15 amperes, check fuel flow<br />
components (paras. 17-3 through 17-11, as necessary).<br />
3. Place switch (19) in OFF position.<br />
17-30
<strong>TM</strong> 9-2329-<strong>260</strong>-<strong>34</strong>-2<br />
17-12. ENGINE COOLANT HEATER TESTING (Contd)<br />
17-31
<strong>TM</strong> 9-<strong>2320</strong>-<strong>260</strong>-<strong>34</strong>-2<br />
17-12. ENGINE COOLANT HEATER TESTING (Contd)<br />
c. Flame Detector Switch Test<br />
1. Place switch (3) in START position and hold.<br />
2. When indicator lamp (4) illuminates, place switch (3) in RUN position.<br />
3. If indicator lamp (4) does not light, adjustor replace flame detector switch (6) (para. 17-3).<br />
4. Place switch (3) in OFF position.<br />
d. Fuel Control Valve Test<br />
1.<br />
2.<br />
3.<br />
4.<br />
5.<br />
6.<br />
7.<br />
Place switch (3) in START position and hold.<br />
When indicator lamp (4) illuminates, place switch (3) in RUN position.<br />
Check fuel consumption at flowmeter (1). Fuel consumption should be 0.013-0.017 lb/min<br />
(0.006-0.008 kg/min) at low heat, and 0.022-0.030 lb/min (0.010-0.014 kg/min) at high heat. Replace<br />
fuel control valve (7) if fuel consumption rate is not within limits (para. 17-7).<br />
Check operating amperage on multimeter (2). If operating amperage exceeds 4 amperes, check<br />
heater wiring. Replace damaged parts (paras. 17-3 through 17-11, as necessary).<br />
Move switch (5) from LO to HI position. Burning in heater (8) should intensify or decrease. Replace<br />
fuel control valve (7) if burning in heater (8) does not intensify or decrease (para. 17-7).<br />
Place switch (5) in LO position.<br />
Place switch (3) in OFF position.<br />
e. Blower Motor Test<br />
1. Place switch (3) in START position and hold.<br />
2. When indicator lamp (4) illuminates, place switch (3) in RUN position. Allow heater to run for a few<br />
minutes.<br />
a. If blower motor (9) does not run, replace blower motor (9) (para. 17-4).<br />
b. If blower motor (9) runs, but heater does not ignite, check ignition components. Replace ignition<br />
components if defective (para. 17-3, 17-7, 17-8, 17-9, or 17-10).<br />
NOTE<br />
Purge time is the interval from turning control box switch to OFF<br />
position until the indicator lamp goes out.<br />
3. Place switch (3) in OFF position and record purge time. Burning should stop within thirty seconds;<br />
blower motor (9) should continue to run up to three minutes. Replace or adjust flame detector<br />
switch (6) (para. 17-3) if purge time exceeds three minutes.<br />
17-32
<strong>TM</strong> 9-<strong>2320</strong>-<strong>260</strong>-<strong>34</strong>-2<br />
17-12. ENGINE COOLANT HEATER TESTING (Contd)<br />
17-33
<strong>TM</strong> 9-<strong>2320</strong>-<strong>260</strong>-<strong>34</strong>-2<br />
17-12. ENGINE COOLANT HEATER TESTING (Contd)<br />
f. Restriction Thermostat Test<br />
1. Place switch (4) in START position and hold.<br />
2. When indicator lamp (5) illuminates, place switch (4) in RUN position. AIlow heater (8) to run.<br />
3. Check temperature of coolant at thermometer (1). Temperature should be 140-170° F (60-77° C).<br />
a. Replace restriction thermostat if coolant temperature is not within limits (para. 17-5).<br />
b. If coolant temperature is still not within limits, replace fuel control valve (para. 17-7).<br />
4. Place switch (4) in OFF position.<br />
g. Overheat Switch Test<br />
1. Place switch (4) in START position and hold.<br />
2. When indicator lamp (5) illuminates, place switch (4) in RUN position. Allow heater (8) to run.<br />
3. Partially restrict air inlet with a sheet of cardboard or sheet metal. Overheat switch (9) should<br />
activate and shut down heater (8) within five minutes. Replace overheat switch (9) if heater (8)<br />
does not shut down after five minutes (para. 17-8).<br />
4. Check temperature of coolant at thermometer (1). Temperature should be 220-250° F<br />
(104-121° C).<br />
5. Replace overheat switch (9) if coolant temperature is not within limits (para. 17-8).<br />
6. Place switch (4) in OFF position.<br />
h. Test Equipment Removal<br />
WARNING<br />
Allow time for heater to cool before removing from test equipment.<br />
Failure to do so may result in injury to personnel or damage to<br />
equipment.<br />
1. Disconnect lead (2) from 24-volt power source (3).<br />
2. Install guard (6) on heater (8) with four new screw-assembled lockwashers (7).<br />
3. Remove heater (8) from test equipment.<br />
17-<strong>34</strong>
<strong>TM</strong> 9-<strong>2320</strong>-<strong>260</strong>-<strong>34</strong>-2<br />
17-12. ENGINE COOLANT HEATER TESTING (Contd)<br />
FOLLOW-ON TASK Install engine coolant heater (<strong>TM</strong> 9-<strong>2320</strong>-<strong>260</strong>-20).<br />
17-35
<strong>TM</strong> 9-<strong>2320</strong>-<strong>260</strong>-<strong>34</strong>-2<br />
Section Ill. PERSONNEL HEATER MAINTENANCE<br />
17-13. GENERAL I<br />
Both Stewart-Wamer heater models are covered in this section. M809 series trucks are equipped with<br />
either personnel heater model 10530-A24 (early model) or personnel heater model 10530B (late model).<br />
The heaters are capable of burning a variety of multitfuels, enabling truck operation in temperatures of<br />
-25°F (-32°C) or less. For additional personnel heater data, refer to para. 17-1.<br />
17-14. PERSONNEL HEATER MAINTENANCE INDEX<br />
PARA<br />
NO.<br />
17-15.<br />
17-16.<br />
17-17.<br />
17-18.<br />
17-19.<br />
17-20.<br />
17-21.<br />
17-22.<br />
17-23.<br />
17-24.<br />
17-25.<br />
17-26.<br />
TITLE<br />
Personnel Heater Flame Detector Switch Maintenance<br />
Personnel Heater Fuel Control Valve Maintenance<br />
Personnel Heater Control Bracket Replacement<br />
Personnel Heater Igniter and Ignition Control Unit Replacement<br />
Personnel Heater Fuel Line and Blower Housing Replacement<br />
Personnel Heater Blower Motor Replacement<br />
Personnel Heater Burner Maintenance<br />
Personnel Heater Overheat Switch Replacement<br />
Personnel Heater Receptacle Replacement<br />
Personnel Heater Heat Exchanger Maintenance<br />
Personnel Heater Testing<br />
Thermal Barrier Insulation Replacement<br />
PAGE<br />
NO.<br />
17-37<br />
17-40<br />
17-44<br />
17-46<br />
17-50<br />
17-52<br />
17-54<br />
17-60<br />
17-62<br />
17-64<br />
17-66<br />
17-74<br />
17-36
<strong>TM</strong> 9-<strong>2320</strong>-<strong>260</strong>-<strong>34</strong>-2<br />
17-15. PERSONNEL HEATER FLAME DETECTOR SWITCH MAINTENANCE<br />
THIS TASK COVERS:<br />
a. Removal d. Assembly<br />
b. Disassembly e. Installation<br />
c. Cleaning and Inspection<br />
INITIAL SETUP<br />
APPLICABLE MODELS<br />
MATERIALS/PARTS<br />
All<br />
Five screw-assembled lockwashers<br />
(Appendix D, Item 402)<br />
TEST EQUIPMENT<br />
Sleeve (Appendix D, Item 507)<br />
Multimeter (Appendix B, Item 115)<br />
REFERENCES (<strong>TM</strong>)<br />
TOOLS <strong>TM</strong> 9-<strong>2320</strong>-<strong>260</strong>-20<br />
General mechanic’s tool kit<br />
<strong>TM</strong> 9-<strong>2320</strong>-<strong>260</strong>-<strong>34</strong>P-2<br />
(Appendix B, Item 1)<br />
Tool kit, electrical (Appendix B, Item 106) EQUIPMENT CONDITION<br />
Personnel heater removed (<strong>TM</strong> 9-<strong>2320</strong>-<strong>260</strong>-20).<br />
● The flame detector switch is maintained the same for early and<br />
late model heaters.<br />
• Tag all wires for installation.<br />
a.Removal<br />
1. Release two dzus fasteners (6) and remove guard (5) from heater housing (7).<br />
2. Remove five screw-assembled lockwashers (l), two ignition control leads (4), receptacle leads (3), and<br />
blower motor lead (2) from flame detector switch (9). Discard screw-assembled lockwashers (1).<br />
3. Loosen nut (8) and remove flame detector switch (9) from heater housing (7).<br />
17-37
<strong>TM</strong> 9-<strong>2320</strong>-<strong>260</strong>-<strong>34</strong>-2<br />
17-15. PERSONNEL HEATER FLAME DETECTOR SWITCH MAINTENANCE (Contd)<br />
b. Diassembly<br />
1. Remove adjusting screw (2), washer (3), and spring (9) from microswitch (4) and mount (8).<br />
CAUTION<br />
Ceramic rod is very brittle and is easily broken; handle carefully,<br />
2. Tilt microswitch (4) back on mount (8).<br />
3. Invert microswitch (4) and remove.ceramic rod (1) from probe (5).<br />
4. Remove sleeve (7) and nut (6) from probe (5). Discard sleeve (7).<br />
c. Cleaning and Inspection<br />
1. Inspect probe (5) of flame detector switch (17) for bends and corrosion. Remove corrosion from<br />
probe (5). Replace flame detector switch (17) if probe (5) is bent.<br />
2. Inspect ceramic rod (1) for chips, cracks, and breaks. Replace ceramic rod (1) if chipped, cracked,<br />
or broken.<br />
d. Assembly<br />
CAUTION<br />
Ceramic rod is very brittle and is easily broken; handle carefully.<br />
1. Tilt microswitch (4) back on mount (8) and insert ceramic rod (1) in probe (5).<br />
2. Position spring (9) in place and tilt microswitch (4) back into position.<br />
3. Install washer (3) and adjusting screw (2) on microswitch (4) and mount (8). Tighten microswitch (4)<br />
until it clicks, then continue an additional three-quarter turn.<br />
4. Install new sleeve (7) and nut (6) on probe (5).<br />
e. Installation<br />
1. Install flame detector switch (17) on heater housing (16). Tighten nut (6).<br />
2. Install two receptacle leads (12), ignition control leads (13), and blower motor lead (11) on flame<br />
detector switch (17) with five new screw-assembled lockwashers (10).<br />
3. Position guard (14) on heater housing (16) and install with two dzus fasteners (15).<br />
17-38
<strong>TM</strong> 9-<strong>2320</strong>-<strong>260</strong>-<strong>34</strong>-2<br />
17-15. PERSONNEL HEATER FLAME DETECTOR SWITCH MAINTENANCE (Contd)<br />
FOLLOW-ON TASK Install personnel heater (<strong>TM</strong> 9-<strong>2320</strong>-<strong>260</strong>-20).<br />
17-39
<strong>TM</strong> 9-<strong>2320</strong>-<strong>260</strong>44-2<br />
17-16. PERSONNEL HEATER FUEL CONTROL VALVE MAINTENANCE<br />
THIS TASK COVERS:<br />
a. Removal c. Installation<br />
b. Inspection<br />
INITIAL SETUP<br />
Applicable MODELS<br />
All<br />
TEST EQUIPMENT<br />
Multimetir (Appendix B, Item 115)<br />
TOOLS<br />
General mechanic’s tool kit<br />
(Appendix B, Item 1)<br />
Tool kit, electrical (Appendix B, Item 106)<br />
MATERIALS/PARTS<br />
Four screw-assembled lockwashers<br />
(Appendix D, Item 405)<br />
MATERIALS/PARTS (Contd)<br />
Screw-assembled lockwasher (Appendix D, Item 402)<br />
Two nut-assembled lockwashers<br />
(Appendix D, Item 262)<br />
Nut-assembled lockwasher (Appendix D, Item 263)<br />
Antiseize tape (Appendix C, Item 50)<br />
REFERENCES (<strong>TM</strong>)<br />
<strong>TM</strong> 9-<strong>2320</strong>-<strong>260</strong>-20<br />
<strong>TM</strong> 9-<strong>2320</strong>-<strong>260</strong>-<strong>34</strong>P-2<br />
EQUIPMENT CONDITION<br />
Personnel heater removed (<strong>TM</strong> 9-<strong>2320</strong>-<strong>260</strong>-20).<br />
a. Removal<br />
1.<br />
2.<br />
3.<br />
4.<br />
5.<br />
6.<br />
7.<br />
8.<br />
● Perform this procedure for early model heaters.<br />
• Tag all wires for installation.<br />
Release two dzus fasteners (10) and remove guard (1) from heater housing (6).<br />
Remove nut-assembled lockwasher (9), screw (7), and clamp (8) from ignition control unit (2).<br />
Discard nut-assembled lockwasher (9).<br />
Remove screw-assembled lockwasher (3) and lead (4) from receptacle (5). Discard screw-assembled<br />
lockwasher (3).<br />
Remove nut-assembled lockwasher (13) and three leads (11) from overheat switch (12). Discard<br />
nut-assembled lockwasher ( 13).<br />
Remove nut-assembled lockwasher (14) and lead (15) from overheat switch (12). Discard nutassembled<br />
lockwasher (14).<br />
Disconnect fuel outlet line (20) from fuel control valve (16).<br />
Remove four screw-assembled lockwashers (19) and fuel control valve (16) from heater housing (6).<br />
Discard screw-assembled lockwashers (19).<br />
Remove elbow (18) and nipple (17) from fuel control valve (16).<br />
Inspect fuel control valve (16) for grooves, dents, and loose or damaged wiring. Replace fuel control<br />
valve (16) if grooved, dented, or wiring is loose or damaged.<br />
17-40
<strong>TM</strong> 9-<strong>2320</strong>-<strong>260</strong>-<strong>34</strong>-2<br />
17-16. PERSONNEL HEATER FUEL CONTROL VALVE MAINTENANCE (Contd)<br />
17-41
<strong>TM</strong> 9-<strong>2320</strong>-<strong>260</strong>-<strong>34</strong>-2<br />
17-16. PERSONNEL HEATER FUEL CONTROL VALVE MAINTENANCE (Contd)<br />
c Installation<br />
1. Wrap threads of nipple (2) with antiseize tape.<br />
2. Install nipple (2) and elbow (3) on fuel control valve (1).<br />
3. Install fuel control valve (1) on heater housing (5) with four new screw-assembled lockwashers (4).<br />
4. Connect fuel outlet line (6) on fuel control valve (1).<br />
5. Route lead (11) to overheat switch (8) and install with new nut-assembled lockwasher (10).<br />
6. Route three leads (7) to overheat switch (8) and install with new nut-assembled lockwasher (9).<br />
7. Route lead (15) to receptacle (16) and install with new screw-assembled lockwasher (14).<br />
8. Install clamp (18) on ignition control unit (13) with screw (17) and new nut-assembled lockwasher<br />
(19).<br />
9. Position guard (12) on heater housing(5) and install with two dzus fasteners (20).<br />
17-42
<strong>TM</strong> 9-<strong>2320</strong>-<strong>260</strong>-<strong>34</strong>-2<br />
17-16. PERSONNEL HEATER FUEL CONTROL VALVE MAINTENANCE (Contd)<br />
FOLLOW-ON TASK: Install personnel heater (<strong>TM</strong> 9-<strong>2320</strong>-<strong>260</strong>-20).<br />
17-43
<strong>TM</strong> 9-<strong>2320</strong>-<strong>260</strong>-<strong>34</strong>-2<br />
17-17. PERSONNEL HEATER CONTROL BRACKET REPLACEMENT<br />
THIS TASK COVERS:<br />
a. Removal b. Installation<br />
INITIAL SETUP<br />
APPLICABLE MODELS<br />
All<br />
TEST EQUIPMENT<br />
Multimeter (Appendix B, Item 115)<br />
TOOLS<br />
General mechanic’s tool kit<br />
(Appendix B, Item 1)<br />
Tool kit, electrical (Appendix B, Item 106)<br />
MATERIALS/PARTS<br />
Five screw-assembled lockwashers<br />
(Appendix D, Item 405)<br />
Two nut-assembled lockwashers<br />
(Appendix D, Item 262)<br />
Four tiedown straps (Appendix C, Item 28)<br />
REFERENCES (<strong>TM</strong>)<br />
<strong>TM</strong> 9-<strong>2320</strong>-<strong>260</strong>-20<br />
<strong>TM</strong> 9-<strong>2320</strong>-<strong>260</strong>-<strong>34</strong>P-2<br />
EQUIPMENT CONDITION<br />
Personnel heater removed (<strong>TM</strong> 9-<strong>2320</strong>-<strong>260</strong>-20).<br />
a. Removal<br />
NOTE<br />
Perform this procedure for late model heaters.<br />
1.<br />
2.<br />
3.<br />
4.<br />
5.<br />
6.<br />
7.<br />
8.<br />
Release two dzus fasteners (6) and remove guard (7) horn heater housing (14).<br />
NOTE<br />
Tag all wires for installation.<br />
Remove two nut-assembled lockwashers (16) and leads (17) from overheat switch (15). Discard<br />
nut-assembled lockwashers (16).<br />
Remove four tiedown straps (5) from heater wiring. Discard tiedown straps (5).<br />
Remove five screw-assembled lockwashers (1) and leads (19) from flame detector switch (18).<br />
Discard screw-assembled lockwashers (1).<br />
Disconnect two igniter leads (2) from ground terminal (11) and circuit board (4).<br />
Loosen nut (12) and disconnect fuel outlet line (13) from fuel control valve elbow (10).<br />
Remove two screws (3) and ground terminal (11) from control bracket (8) and heater housing (14).<br />
Remove six screws (9) and control bracket (8) from heater housing (14).<br />
b.Installation<br />
1. Install control bracket (8) on heater housing (14) with six screws (9).<br />
2. Install ground terminal (11) on heater housing (14) and control bracket (8) with two screws (3).<br />
17-44
<strong>TM</strong> 9-<strong>2320</strong>-<strong>260</strong>-<strong>34</strong>-2<br />
17-17. PERSONNEL HEATER CONTROL BRACKET REPLACEMENT (Contd)<br />
3. Connect fuel outlet line (13) on fuel control valve elbow (10). Tighten nut ( 12).<br />
4. Connect two igniter leads (2) on circuit board (4) and ground terminal (11).<br />
5. Install five leads (19) on flame detector switch (18) with five new screw-assembled lockwashers (1).<br />
6. Install two leads (17) on overheat switch (15) with two new nut-assembled lockwashers (16).<br />
7. Install four new tiedown straps (5) on heater wiring.<br />
8. Position guard (7) on heater housing (14) and install with two dzus fasteners (6).<br />
FOLLOW-ON TASK: Install personnel heater (<strong>TM</strong> 9-<strong>2320</strong>-<strong>260</strong>-20).<br />
17-45
<strong>TM</strong> 9-<strong>2320</strong>-<strong>260</strong>-<strong>34</strong>-2<br />
17-18. PERSONNEL HEATER IGNITER AND IGNITION CONTROL UNIT REPLACEMENT<br />
THIS TASK COVER:<br />
a. Igniter Removal c. Ignition Control Unit Installation<br />
b. Ignition Control Unit Removal d. Igniter Installation<br />
INITIAL SETUP<br />
APPLICABLE MODELS<br />
All<br />
TEST EQUIPMENT<br />
Multimeter (Appendix B, Item 115)<br />
TOOLS<br />
General mechanic’s tool kit<br />
(Appendix B, Item 1)<br />
Tool kit, electrical (Appendix B, Item 106)<br />
MATERIALS/PARTS (Contd)<br />
Screw-assembled lockwasher<br />
(Appendix D, Item 405)<br />
Nut-assembled lockwasher (Appendix D, Item 262)<br />
Five screw-assembled lockwashers<br />
(Appendix D, Item 402)<br />
Lockwasher (Appendix D, Item 214)<br />
REFERENCES (<strong>TM</strong>)<br />
<strong>TM</strong> 9-<strong>2320</strong>-<strong>260</strong>-<strong>34</strong>P-2<br />
MATERIALS/PARTS<br />
EQUIPMENT CONDITION<br />
Nut-assembled lockwasher<br />
Personnel heater blower motor removed<br />
(Appendix D, Item 263)<br />
Igniter (Appendix D, Item 159)<br />
(para. 17-20).<br />
a Igniter Removal<br />
NOTE<br />
• Removal of the igniter is basically the same for early and late<br />
model heaters. This procedure covers the early model heater.<br />
• Tag all wires for installation.<br />
1. Remove nut-assembled lockwasher (1), receptacle ground lead (8), ground strap (6), and<br />
lockwasher (7) from ignition control unit (3). Discard nut-assembled lockwasher (1).<br />
2. Disconnect igniter leads (2) and (5) from ignition control unit(3) and igniter hatch cover (4).<br />
3. Release two fly screws (9) and remove igniter hatch cover (4) from heater housing (10).<br />
CAUTION<br />
Igniter is fragile. Use care when removing igniter. Failure to do so<br />
may result in damage to equipment<br />
4. Press and turn igniter (13) one-fourth turn left and remove from igniter tube (12). Discard<br />
igniter (13).<br />
5. Remove screw-assembled lockwasher (11) and igniter tube (12) from heater housing (10). Discard<br />
screw-assembled lockwasher (11).<br />
b. Ignition Control Unit Removal<br />
NOTE<br />
Perform steps 1 through 4 for early model heaters.<br />
1. Remove igniter (13) (task a.).<br />
2. Remove nut-assembled lockwasher (18), thermostat lead (15), receptacle lead (14), and ignition<br />
control lead (17) from overheat switch (16). Discard nut-assembled lockwasher (18).<br />
3. Remove two screw-assembled lockwashers (19) and ignition control leads (20) from flame detector<br />
switch (23). Discard screw-assembled lockwashers (19).<br />
4. Remove three screw-assembled lockwashers (21), ignition control unit (3), and lockwasher (22)<br />
from heater housing (10). Discard lockwasher (22) and screw-assembled lockwashers (21).<br />
17-46
<strong>TM</strong> 9-<strong>2320</strong>-240-<strong>34</strong>-2<br />
17-18. PERSONNEL HEATER IGNITER AND IGNITION CONTROL UNIT REPLACEMENT (Contd)
<strong>TM</strong> 9-<strong>2320</strong>-240-<strong>34</strong>-2<br />
17-18. PERSONNEL HEATER lGNITER AND IGNITION CONTROL UNIT REPLACEMENT (Contd)<br />
c. Ignition Control Unit Installation<br />
NOTE<br />
Perform steps 1 through 3 for early model heaters.<br />
1. Install new lockwasher (6) and ignition control unit (3) on heater housing (4) with three new screwassembled<br />
lockwashers (5).<br />
2. Install two ignition control leads (2) on flame detector switch (7) with two new screw-assembled<br />
lockwashers (1).<br />
3. Install ignition control lead (11), receptacle lead (8), and thermostat lead (9) on overheat stitch (10)<br />
with new nut-assembled lockwasher (12).<br />
d. Igniter Installation<br />
CAUTION<br />
Installation of the igniter is basically the same for early and late<br />
model heaters. This procedure is for early model heaters.<br />
1. Install igniter tube (15) in heater housing (4) with new screw-assembled lockwasher (14).<br />
CAUTION<br />
Igniter is fragile. Use care when removing igniter. Failure to do so<br />
may result in damage to equipment.<br />
2. Install new igniter (16) in igniter tube (15) and press and turn one-fourth turn to right to hold<br />
in place.<br />
3. Install igniter hatch cover (17) on heater housing (4) and hold in place with two fly screws (13).<br />
4. Conned-igniter leads (19) and (20) on ignition control unit (3) and igniter hatch cover (17).<br />
5. Install new lockwasher (22), ground strap (21), and receptacle ground lead (23) on ignition control<br />
unit (3) with new nut-assembled lockwasher (18).<br />
1 7-48
<strong>TM</strong> 9-<strong>2320</strong>-<strong>260</strong>-<strong>34</strong>-2<br />
17-18. PERSONNEL HEATER IGNITER AND IGNITION CONTROL UNIT REPLACEMENT (Contd)<br />
FOLLOW-ON TASK: Install personnel heater blower motor (para. 17-20).<br />
17-49
<strong>TM</strong> 9-<strong>2320</strong>-<strong>260</strong>-<strong>34</strong>-2<br />
17-19. PERSONNEL HEATER FUEL LINE AND BLOWER HOUSING REPLACEMENT<br />
THIS TASK COVERS:<br />
a. Removal b. Installation<br />
INITIAL SETUP<br />
APPLICABLE MODELS<br />
All<br />
REFERENCES (<strong>TM</strong>)<br />
<strong>TM</strong> 9-<strong>2320</strong>-<strong>260</strong>-<strong>34</strong>P-2<br />
TEST EQUIPMENT<br />
EQUIPMENT CONDITION<br />
Multimeter (Appendix B, Item 115) Personnel heater igniter removed (para. 17-18).<br />
TOOLS<br />
General mechanic’s tool kit<br />
(Appendix B, Item 1)<br />
Tool kit, electrical (Appendix B, Item 106)<br />
a. Removal<br />
NOTE<br />
Fuel line and blower housing are replaced the same for early and<br />
late model heaters. This procedure is for early model heaters.<br />
1. Loosen nut (3) and remove fuel line (4) from fuel control valve (1).<br />
2. Loosen nut (5) and remove fuel line (4) from burner fuel inlet (6).<br />
3. Remove blower housing (2) from heat exchanger (7) and heater housing (8).<br />
b. Installation<br />
1. Place blower housing (2) in heater housing (8).<br />
2. Install fuel line (4) on burner fuel inlet (6) through blower housing (2). Do not fully tighten nut (5).<br />
3. Install fuel line (4) on fuel control valve (l). Finger tighten nut (3).<br />
17-50
<strong>TM</strong> 9-<strong>2320</strong>-<strong>260</strong>-<strong>34</strong>-2<br />
17-19. PERSONNEL HEATER FUEL LINE AND BLOWER HOUSING REPLACEMENT (Contd)<br />
FOLLOW-ON TASK: Install personnel heater igniter (para. 17-18).<br />
17-51
<strong>TM</strong> 9-<strong>2320</strong>-<strong>260</strong>-<strong>34</strong>-2<br />
17-20. PERSONNEL HEATER BLOWER MOTOR REPLACEMENT<br />
THIS TASK COVERS:<br />
a. Blower Motor Removal b. Blower Motor Installation<br />
INITIAL SETUP<br />
APPLICABLE MODELS<br />
All<br />
TEST EQUIPMENT<br />
Multimeter (Appendix B, Item 115)<br />
TOOLS<br />
General mechanic’s tool kit<br />
(Appendix B, Item 1)<br />
Tool kit, electrical (Appendix B, Item 106)<br />
MATERIALS/PARTS<br />
Screw-assembled lockwasher (Appendix D, Item 402)<br />
Nut-assembled lockwasher (Appendix D, Item 262)<br />
REFERENCES (<strong>TM</strong>)<br />
<strong>TM</strong> 9-<strong>2320</strong>-<strong>260</strong>-20<br />
<strong>TM</strong> 9-<strong>2320</strong>-<strong>260</strong>-<strong>34</strong>P-2<br />
EQUIPMENT CONDITION<br />
Personnel heater removed (<strong>TM</strong> 9-<strong>2320</strong>-<strong>260</strong>-20).<br />
a. Blower Motor Removal<br />
● Personnel heater guard and blower motor are replaced basically<br />
the same for early and late model heaters. This procedure is for<br />
the early model heaters.<br />
● Tag all wires for installation.<br />
1. Release two dzus fasteners (10) and remove guard (1) from heater housing (7).<br />
2. Remove screw-assembled lockwashers (2) and blower motor lead (3) from flame detector switch (4).<br />
Discard screw-assembled lockwashers (2).<br />
3. Remove nut-assembled lockwasher (9) and screw (5) from clamp (6) and ignition control unit (8).<br />
Discard nut-assembled lockwasher (9).<br />
4. Remove grommet (11) from heater housing (7).<br />
5. Loosen four screw-assembled lockwashers (12) and remove blower motor (13) from heater housing (7).<br />
b. Blower Motor Installation<br />
NOTE<br />
1. Route blower motor lead (3) through heater housing (7) and install blower motor (13) on heater<br />
housing (7). Tighten four screw-assembled lockwashers (12).<br />
2. Place grommet (11) around blower motor lead (3) and install on heater housing (7).<br />
3. Install blower motor lead (3) on flame detector switch (4) with new screw-assembled<br />
Iockwashers (2).<br />
4. Install clamp (6) on ignition control unit (8) with screw (5) and new nut-assembled lockwasher (9).<br />
5. Position guard (1) on heater housing (7) and hold in place with two dzus fasteners (10).<br />
17-52
<strong>TM</strong> 9-<strong>2320</strong>-<strong>260</strong>-<strong>34</strong>-2<br />
I<br />
17-20. PERSONNEL HEATER BLOWER MOTOR REPLACEMENT (Contd)<br />
FOLLOW-ON TASK: Test fuel burning personnel heater (para. 17-25).<br />
17-53
<strong>TM</strong> 9-<strong>2320</strong>-<strong>260</strong>-<strong>34</strong>-2<br />
17-21. PERSONNEL HEATER BURNER MAINTENANCE<br />
THIS TASK COVERS:<br />
a. Removal d. Assembly<br />
b. Disassembly e. Installation<br />
c. Cleaning and Inspection<br />
INITIAL SETUP<br />
APPLICABLE MODELS<br />
MATERIALS/PARTS (Contd)<br />
All Drycleaning solvent (Appendix C, Item 48)<br />
Rag (Appendix C, Item 32)<br />
TOOLS Wire (Appendix C, Item 59)<br />
General mechanic’s tool kit<br />
(Appendix B, Item 1)<br />
REFERENCES (<strong>TM</strong>)<br />
<strong>TM</strong> 9-<strong>2320</strong>-<strong>260</strong>-<strong>34</strong>P-2<br />
MATERIALS/PARTS<br />
Nut-assembled lockwashers<br />
EQUIPMENT CONDITION<br />
(Appendix D, Item 264)<br />
Personnel heater fuel line and blower housing<br />
Nut-assembled lockwasher<br />
removed (para. 17-19).<br />
(Appendix D, Item 265)<br />
Three lockwashers (Appendix D, Item 209) GENERAL SAFETY INSTRUCTIONS<br />
Lockwasher (Appendix D, Item 212)<br />
● Keep fire extinguisher nearby when using<br />
TWO fiber washers (late model heaters)<br />
drycleaning solvent.<br />
(Appendix D, Item 536)<br />
● Eye protection is required when using wire brush<br />
Fiber washer (early model heaters)<br />
for cleaning.<br />
(Appendix D, Item 537)<br />
● Compressed air source will not exceed 30 psi<br />
Fiber washer (Appendix D, Item 539)<br />
(207 kPa).<br />
O-ring (Appendix D, Item 283)<br />
● Eyeshields must be worn when cleaning with<br />
Gasket (Appendix D, Item 82)<br />
compressed air.<br />
Wick (Appendix D, Item 542)<br />
NOTE<br />
The burner is removed the same for early and late model heaters.<br />
This procedure is for early model heaters.<br />
1. Remove nut-assembled lockwasher (7), ground strap (5), lockwasher (6), and screw (8) from heater<br />
housing (10). Discard nut-assembled lockwasher (7) and lockwasher (6).<br />
2. Remove nut-assembled lockwasher (4) and ground strap (5) from hook bolt and clamp (2). Discard<br />
nut-assembled lockwasher (4).<br />
3. Loosen four nut-assembled lockwashers (3) and remove four hook bolt and clamps (2) from<br />
burner (9) and heat exchanger (1).<br />
4. Remove burner (9) from heat exchanger (1) and heater housing (10).<br />
5. Remove O-ring (12) and gasket (11) from burner (9). Discard O-ring (12) and gasket (11).<br />
17-54
<strong>TM</strong> 9-<strong>2320</strong>-<strong>260</strong>-<strong>34</strong>-2<br />
17-21. PERSONNEL HEATER BURNER MAINTENANCE (Contd)<br />
17-55
<strong>TM</strong> 9-<strong>2320</strong>-<strong>260</strong>-<strong>34</strong>-2<br />
17-21. PERSONNEL HEATER BURNER MAINTENANCE (Contd)<br />
b. Disassembly<br />
1.<br />
2.<br />
3.<br />
4.<br />
NOTE<br />
Perform steps 1 and 2 for early model heaters.<br />
Remove three nuts (3), lockwashers (2), and burner plate (4) from burner cup (1). Discard<br />
lockwashers (2).<br />
Remove screw (11), fuel vaporizer shield (10), washer (9), fiber washer (8), fuel vaporizer (7), fiber<br />
washer (6), and wick (5) from burner plate (4). Discard fiber washers (6) and (8) and wick (5).<br />
NOTE<br />
Perform steps 3 and 4 for late model heaters.<br />
Remove three nuts (13), screws (12), and burner plate (4) from burner cup (1).<br />
Remove screw (11), fuel vaporizer shield (10), washer (9), fiber washer (8), fuel vaporizer (7),<br />
retaining washer (15), two-fiber washers (14), and wick (5) from burner plate (4). Discard fiber<br />
washers (8) and (14) and wick (5).<br />
c. Cleaning and Inspection<br />
WARNING<br />
● Drycleaning solvent is flammable and will not be used near open<br />
flame. Use only in well-ventilated places. Failure to do so may<br />
result in injury to personnel.<br />
● Compressed air source will not exceed 30 psi (207 kPa). When<br />
cleaning with compressed air, eyeshields must be worn. Failure<br />
to wear eyeshields may result in injury to personnel.<br />
● Eye protection is required when using wire brush for cleaning.<br />
Failure to do so may result in injury to personnel.<br />
1. Using wire brush, remove carbon residue from burner plate (4) and burner cup (1). Wipe clean with<br />
drycleaning solvent and rag. Dry with compressed air.<br />
2. Inspect burner plate (4) and burner cups (1) for bends, cracks and scores. Replace burner plate (4)<br />
or burner cup (1) if bent, cracked, or scored.<br />
17-56
<strong>TM</strong> 9-<strong>2320</strong>-<strong>260</strong>-<strong>34</strong>-2<br />
17-21. PERSONNEL HEATER BURNER MAINTENANCE (Contd)<br />
17-57
<strong>TM</strong> 9-<strong>2320</strong>-<strong>260</strong>-<strong>34</strong>-2<br />
17-21. PERSONNEL HEATER BURNER MAINTENANCE (Contd)<br />
d. Assembly<br />
1.<br />
2.<br />
3.<br />
4.<br />
5.<br />
6.<br />
7.<br />
8.<br />
9.<br />
10.<br />
NOTE<br />
Perform steps 1 through 3 for late model heaters.<br />
Install two new fiber washers (8) on feed bushing (5) of burner plate (3). Ensure slots of fiber<br />
washers (8) aline with igniter pocket (6).<br />
Install retaining washer (9) on feed bushing (5) with flange facing outward.<br />
NOTE<br />
● A new vaporizer is supplied with the wick inserted in hole of fuel<br />
vaporizer. Excess length is required for assembly of heater.<br />
● Perform steps 4 and 5 for early model heaters.<br />
Insert new wick (7) through slots of retaining washer (9), fiber washers (8), and into igniter<br />
pocket (6).<br />
Install new fiber washer (17) on feed bushing (5) of burner plate (3). Ensure slot of fiber washer (17)<br />
alines with igniter pocket (6).<br />
Install new wick (7) through slot of fiber washer (17) and into igniter pocket (6).<br />
Using thin wire, loop wick (7) over T-bar support (18) of igniter pocket (6).<br />
Pressing fuel vaporizer (10) against fiber washer (17) or retaining washer (9), pull wick (7) back<br />
through hole of fuel vaporizer (10) until tight. Clip off excess wick (7).<br />
Position screw (14), washer (12), and new fiber washer (11) on fuel vaporizer shield ( 13) and install<br />
on fuel vaporizer ( 10).<br />
Install burner plate (3) on burner cup (1) with three new Iockwashers (15) and nuts (16).<br />
NOTE<br />
Perform step 10 for late model heaters.<br />
Install burner plate (3) on burner cup (1) with three screws (2) and nuts (4).<br />
17-58
<strong>TM</strong> 9-<strong>2320</strong>-<strong>260</strong>-<strong>34</strong>-2<br />
17-21. PERSONNEL HEATER BURNER MAINTENANCE (Contd)<br />
NOTE<br />
The burner is installed the same for early and late model heaters.<br />
This procedure is for early model heaters.<br />
1. Install new gasket (19) and new O-ring (20) on burner (21).<br />
2. Install burner (21) on heat exchanger (23) and heater housing (22) with four hook bolt and<br />
clamps (24). Tighten four nut-assembled lockwashers (25).<br />
3. Install ground strap (27) on hook bolt and clamp (24) with new nut-assembled lockwashers (26).<br />
4. Install ground strap (27) on heater housing (22) with screw (30), new lockwasher (28), and new nutassembled<br />
lockwashers (29).<br />
FOLLOW-ON TASK Install personnel heater fuel line and blower housing (para. 17-19).<br />
17-59
<strong>TM</strong> 9-<strong>2320</strong>-<strong>260</strong>-<strong>34</strong>-2<br />
17-22. PERSONNEL HEATER OVERHEAT SWITCH REPLACEMENT<br />
THIS TASK COVERS:<br />
a. Removal b. Installation<br />
INITIAL SETUP<br />
APPLICABLE MODELS<br />
All<br />
TEST EQUIPMENT<br />
Multimeter (Appendix B, Item 115)<br />
TOOLS<br />
General mechanic’s tool kit<br />
(Appendix B, Item 1)<br />
Tool kit, electrical (Appendix B, Item 106)<br />
MATERIALS/PARTS<br />
Two nut-assembled Iockwashers<br />
(Appendix D, Item 262)<br />
Two screw-assembled Iockwashers<br />
(Appendix D, Item 405)<br />
REFERENCES (<strong>TM</strong>)<br />
<strong>TM</strong> 9-<strong>2320</strong>-<strong>260</strong>-20<br />
<strong>TM</strong> 9-<strong>2320</strong>-<strong>260</strong>-<strong>34</strong>P-2<br />
EQUIPMENT CONDITION<br />
Personnel heater removed (<strong>TM</strong> 9-<strong>2320</strong>-<strong>260</strong>-20).<br />
NOTE<br />
● The overheat switch is removed basically the same for early and<br />
late model heaters. This procedure is for early model heaters.<br />
● Tag wires for installation.<br />
1. Remove flame detector switch (para. 17-15).<br />
2. Remove nut-assembled lockwashers (1) and shutoff valve lead (2) from overheat switch (8). Discard<br />
nut-assembled lockwashers (1).<br />
3. Remove nut-assembled lockwashers (9), receptacle lead (3), thermostat lead (4), and ignition control<br />
lead (5) from overheat switch (8). Discard nut-assembled lockwasher (9).<br />
4. Remove two screw-assembled lockwashers (7) and overheat switch (8) from heater housing (6).<br />
Discard screw-assembled lockwashers (7).<br />
1. Install overheat switch (8) on heater housing (6) with two new screw-assembled lockwashers (7).<br />
2. Install ignition control lead (5), thermostat lead (4), and receptacle lead (3) on overheat<br />
switch (8) with new nut-assembled lockwasher (9).<br />
3. Install shutoff valve lead (2) on overheat switch (8) with new nut-assembled lock washer (l).<br />
4. Install flame detector switch (para. 17-15).<br />
17-60
<strong>TM</strong> 9-<strong>2320</strong>-<strong>260</strong>-<strong>34</strong>-2<br />
17-22. PERSONNEL HEATER OVERHEAT SWITCH REPLACEMENT (Contd)<br />
FOLLOW-ON TASK: Install personnel heater (<strong>TM</strong>9-<strong>2320</strong>-<strong>260</strong>-20).<br />
17-61
<strong>TM</strong> 9-<strong>2320</strong>-<strong>260</strong>-<strong>34</strong>-2<br />
17-23. PERSONNEL HEATER RECEPTACLE REPLACEMENT<br />
THIS TASK COVERS:<br />
a. Removal b. Installation<br />
INITIAL SETUP<br />
APPLICABLE MODELS<br />
All<br />
TEST EQUIPMENT<br />
Multimeter (Appendix B, Item 115)<br />
TOOLS<br />
General mechanic’s tool kit<br />
(Appendix B, Item 1)<br />
Tool kit, electrical (Appendix B, Item 106)<br />
MATERIALS/PARTS<br />
Four screw-assembled lockwashers<br />
(Appendix D, Item 403)<br />
MATERIALS/PARTS (Contd)<br />
Three screw-assembled Iockwashers<br />
(Appendix D, Item 386)<br />
Two nut-assembled lockwashers<br />
(Appendix D, Item 262)<br />
REFERENCES (<strong>TM</strong>)<br />
<strong>TM</strong> 9-<strong>2320</strong>-<strong>260</strong>-20<br />
<strong>TM</strong> 9-<strong>2320</strong>-<strong>260</strong>-<strong>34</strong>P-2<br />
EQUIPMENT CONDITION<br />
Personnel heater removed (<strong>TM</strong> 9-<strong>2320</strong>-<strong>260</strong>-20).<br />
1.<br />
2.<br />
3.<br />
4.<br />
5.<br />
6.<br />
● Perform this procedure for early models.<br />
● Tag all wires for installation.<br />
Release two dzus fasteners (11) and remove guard (10) from heater housing (12).<br />
Remove screw-aesembled lockwasher (2) and restriction solenoid lead (3) from receptacle (19).<br />
Discard screw-assembled lockwasher (2).<br />
Remove nut-assembled lockwasher (16) and receptacle lead (17) from overheat switch (14). Discard<br />
nut-assembled lockwashers (16).<br />
Remove screw-assembled lockwashers (7) and (8) and leads (5) and (4) from flame detector<br />
switch (15). Discard screw-assembled lockwashers (7) and (8).<br />
Remove nut-assembled lockwasher (6) and receptacle ground lead (18) from stud (13). Discard<br />
nut-assembled lockwasher (6).<br />
Remove four screw-assembled lockwashers (1) and receptacle (19) from bracket (9). Discard<br />
screw-assembled lockwashers (1).<br />
1. Install receptacle (19) on bracket (9) with four new screw-assembled lockwashers (l).<br />
2. Install receptacle ground lead (18) on stud (13) with new nut-aesembled lockwasher (6).<br />
3. Install leads (4) and (5) on flame detector switch (15) with new screw-assembled lockwashers (8)<br />
and (7).<br />
4. Install receptacle lead (17) on overheat switch (14) with new nut-assembled lockwasher (16).<br />
5. Install restriction solenoid lead (3) on receptacle (19) with new screw-assembled lockwasher (2).<br />
6. Position guard (10) on heater housing (12) and install with two dzus fasteners (11).<br />
17-62
<strong>TM</strong> 9-<strong>2320</strong>-<strong>260</strong>-<strong>34</strong>-2<br />
17-23. PERSONNEL HEATER RECEPTACLE REPLACEMENT (Contd)<br />
FOLLOW-ON TASK Install personnel heater (<strong>TM</strong> 9-<strong>2320</strong>-<strong>260</strong>-20).<br />
17-63
<strong>TM</strong> 9-<strong>2320</strong>-<strong>260</strong>-<strong>34</strong>-2<br />
17-24. PERSONNEL HEATER HEAT EXCHANGER MAINTENANCE<br />
THIS TASK COVERS:<br />
a. Removal c. Installation<br />
b. Cleaning and Inspection<br />
INITIAL SETUP<br />
APPLICABLE MODELS<br />
All<br />
TEST EQUIPMENT<br />
Multimeter (Appendix B, Item 115)<br />
TOOLS<br />
General mechanic’s tool kit<br />
(Appendix B, Item 1)<br />
Tool kit, electrical (Appendix B, Item 106)<br />
MATERIALS/PARTS<br />
Three screw-assembled lockwashers<br />
(Appendix D, Item 380)<br />
Drycleaning solvent (Appendix C, Item 46)<br />
Rag (Appendix C, Item 32)<br />
REFERENCES (<strong>TM</strong>)<br />
<strong>TM</strong> 9-<strong>2320</strong>-<strong>260</strong>-<strong>34</strong>P-2<br />
EQUIPMENT CONDITION<br />
● Personnel heater flame detector switch removed<br />
(para. 17-15).<br />
● Personnel heater burner removed (para. 17-21).<br />
GENERAL SAFETY INSTRUCTIONS<br />
● Keep fire extinguisher nearby when working with<br />
drycleaning solvent.<br />
● Compressed air source will not exceed 30 psi<br />
(207 kpa).<br />
● Eyeshields must be worn when cleaning with<br />
compressed air.<br />
NOTE<br />
The heat exchanger is replaced the same for early and late model<br />
heaters. This procedure covers the early model heater.<br />
1. Remove three screw-assembled lockwashers (4) from heater housing (5). Discard screw-assembled<br />
lockwashers (4).<br />
2. Separate heater housing (5) and remove heat exchanger (3).<br />
b. Cleaning and Inspection<br />
WARNING<br />
● Drycleaning solvent is flammable and will not be used near open<br />
flame. Use only in well-ventilated places. Failure to do so may<br />
result in injury to personnel.<br />
● Compressed air source will not exceed 30 psi (207 kPa). When<br />
cleaning with compressed air, eyeshields must be worn. Failure<br />
to wear eyeshields may result in injury to personnel,<br />
1. Clean heat exchanger (3) and inside bore of heater housing (5) with drycleaning solvent and rag.<br />
Dry with compressed air.<br />
2. Inspect heat exchanger (3) for bends, cracks, stripped threads, and scoring. Repair stripped threads<br />
if damaged. Replace heat exchanger (3) if bent, cracked, or scored.<br />
17-64
<strong>TM</strong> 9-<strong>2320</strong>-<strong>260</strong>-<strong>34</strong>-2<br />
17-24. PERSONNEL HEATER HEAT EXCHANGER MAINTENANCE (Contd)<br />
c. Installation<br />
Spread heater housing (5) and install heat exchanger (3) in heater housing (5) with three new screwassembled<br />
lockwashers (4). Ensure exhaust tube (2) and flame detector switch adapter (1) extend<br />
through holes of heater housing (5) properly.<br />
FOLLOW-ON TASKS: ● Install personnel heater burner (para. 17-21).<br />
● Install personnel heater flame detector switch (para. 17-15).<br />
17-65
<strong>TM</strong> 9-<strong>2320</strong>-<strong>260</strong>-<strong>34</strong>-2<br />
17-25. PERSONNEL HEATER TESTING<br />
THIS TASK COVERS:<br />
a. Preparation e. Blower Motor Test<br />
b. Ignition Test f. Overheat Switch Test<br />
c. Flame Detector Switch Test g. Test Equipment Removal<br />
d. Fuel Control Valve Testing<br />
INITIAL SETUP<br />
APPLICABLE MODELS<br />
REFERENCES<br />
All <strong>TM</strong> 9-<strong>2320</strong>-<strong>260</strong>-20<br />
<strong>TM</strong> 9-<strong>2320</strong>-<strong>260</strong>-<strong>34</strong>P-2<br />
TEST EQUIPMENT<br />
Flowmeter (Appendix B, Item 146)<br />
EQUIPMENT CONDITION<br />
Multimeter (Appendix B, Item 115)<br />
Fuel burning personnel heater removed<br />
(<strong>TM</strong> 9-<strong>2320</strong>-<strong>260</strong>-20).<br />
TOOLS<br />
General mechanic’s tool kit<br />
GENERAL SAFETY INSTRUCTIONS<br />
(Appendix B, Item 1)<br />
● Do not perform procedure in enclosed areas.<br />
●<br />
Tool kit, electrical (Appendix B, Item 106) Keep fire extinguisher nearby when working<br />
with open fuel lines.<br />
MATERIALS/PARTS<br />
●<br />
Do not perform procedure near open flame,<br />
Insulation varnish (Appendix C, Item 17)<br />
smoking, or sparking object.<br />
●<br />
Do not handle personnel heater with bare hands,<br />
wear hand protection at all times.<br />
Do not remove heater from test equipment<br />
until cool.<br />
● Exhaust gases can kill. Do not perform this task in enclosed<br />
areas. Ensure work area is well-ventilated and exhaust fumes<br />
are directed away from test area.<br />
● Do not perform this procedure while smoking or within 50 feet<br />
of sparks or open flame. Fuel is flammable and can explode,<br />
causing injury or death to personnel and damage to equipment.<br />
● Do not handle personnel heater with bare hands, wear hand<br />
protection at all times.<br />
NOTE<br />
● This procedure covers testing of fuel burning personnel heater,<br />
early model 10530B and late model 10530-A24.<br />
● Perform “preparation” subtask before performing any test and<br />
perform “test equipment removal” after each test is complete.<br />
● Heater must be tested in same position as mounted on vehicle.<br />
● The van primary and van secondary personnel heaters are<br />
tested the same.<br />
1. Connect heater (6) to test equipment using schematic on next page.<br />
NOTE<br />
Fuel pump, fuel filter, heater, wiring harness, fuel tubing, and<br />
control box must be the same type installed in vehicle.<br />
17-66
<strong>TM</strong> 9-<strong>2320</strong>-<strong>260</strong>-<strong>34</strong>-2<br />
17.25 PERSONEL HEATER TESTING (Contd)<br />
KEY TO TEST SCHEMATIC<br />
1. Electric fuel pump 7. Power source lead<br />
2. Fuel tubing 8. 24-volt DC power source<br />
3. Fuel filter 9. Multimeter<br />
4. Fuel flowmeter 10. Wiring harness<br />
5. Fuel shutoff valve 11. Control box<br />
6. Heater 12. Fuel container<br />
17-67
<strong>TM</strong> 9-<strong>2320</strong>-<strong>260</strong>-<strong>34</strong>-2<br />
17-25. PERSONNEL HEATER TESTING (Contd)<br />
2.<br />
3.<br />
4.<br />
5.<br />
6.<br />
7.<br />
8.<br />
9.<br />
10.<br />
11.<br />
12.<br />
Turn two dzus fasteners (6) and remove guard (5) from heater housing (11).<br />
Disconnect lead (19) from 24-volt power source (20).<br />
NOTE<br />
Disconnect igniter lead from circuit board for late model heaters.<br />
Disconnect igniter lead (3) from ignition control unit (2).<br />
Remove nut-assembled lockwasher (15), shutoff valve lead (16), nut-assembled lockwashers (14),<br />
and thermostat lead (13) from overheat switch (12).<br />
Connect hose (8) to bleed screw (4) on fuel control valve (7) and place other end of hose (8)<br />
in container (9).<br />
Connect lead (19) to 24-volt power source (20).<br />
Open fuel shutoff valves (18).<br />
NOTE<br />
Have drainage container ready to catch fuel.<br />
Place switch (24) in LO position. Place switch (22) in START position and hold. Open bleed screw (4)<br />
and let fuel flow from bleed screw (4) until no air bubbles are observed in fuel.<br />
Place switch (22) in OFF position. Close bleed screw (4).<br />
Install thermostat lead (13) and shutoff valve lead (16) on overheat switch (12) with nut-assembled<br />
Iockwashers (14) and (15).<br />
NOTE<br />
Connect igniter lead to circuit board for late model heaters.<br />
Connect igniter lead (3) on ignition control unit (2).<br />
b. Ignition Test<br />
NOTE<br />
Ignition time is the interval from activating control box switch to<br />
START position until indicator lamp illuminates.<br />
1. Place switch (22) in START position and hold. Record time interval from activating switch (22)<br />
until indicator lamp (23) illuminates. During this time interval, record ignition amperage on<br />
multimeter (21).<br />
2. If ignition time exceeds three minutes, or if ignition amperage exceeds 15 amperes, check fuel flow<br />
components and replace damaged parts (paras. 17-15 through 17-22, as necessary).<br />
3. Place switch (22) in OFF position.<br />
C. Flame Detector Switch Test<br />
1. Place switch (22) in START position and hold.<br />
2. When indicator lamp (23) illuminates, place switch (22) in RUN position.<br />
3. If indicator lamp (23) does not light, adjustor replace flame detector switch (1) (para. 17-15).<br />
4. Place switch (22) in OFF position. Burning should stop within thirty seconds and blower motor (10)<br />
within three minutes. Replace or adjust flame detector switch (1) (para. 17-15) if time exceeds limits.<br />
d. Fuel Control Valve Testing<br />
1. Place switch (22) in START position and hold.<br />
2. When indicator lamp (23) illuminates, place switch (22) in RUN position.<br />
17-68
<strong>TM</strong> 9-<strong>2320</strong>-<strong>260</strong>-<strong>34</strong>-2<br />
17-25. PERSONNEL HEATER TESTING (Contd)<br />
3. Check fuel consumption at flowmeter (17). Fuel consumption should be 0.018-0.025 1b/min<br />
(0.008-0.011 kg/min) at low heat, and 0.035-0.043 lb/rein (0.016-0.020 kg/rein) at high heat.<br />
If fuel consumption rate is not within limits, replace fuel control valve (7) (para. 17-16).<br />
4. Check operating amperage at multimeter (21). If operating amperage exceeds 10 amperes,<br />
check heater wiring and replace damaged parts (paras. 17-15 through 17-22, as necessary).<br />
5. Place switch (22) in OFF position.<br />
17-69
<strong>TM</strong> 9-<strong>2320</strong>-<strong>260</strong>-<strong>34</strong>-2<br />
17-25. PERSONNEL HEATER TESTING (Contd)<br />
6.<br />
‘7.<br />
8.<br />
9.<br />
10.<br />
11.<br />
12.<br />
13.<br />
14.<br />
15.<br />
16.<br />
17.<br />
18.<br />
19.<br />
20.<br />
21.<br />
NOTE<br />
Perform steps 6 through 39 for late model heaters.<br />
Ensure power source is disconnected. Turn two dzus fasteners (2) and remove guard (1) from<br />
heater housing (3).<br />
Loosen nut (4) and disconnect fuel tube (5) from fuel control valve outlet (7).<br />
Connect one end of fuel tubing (6) to fuel control valve outlet (7) and place other end in graduated<br />
beaker or similar container.<br />
Disconnect lead (18) from shunt resistor (19) to disable the blower motor and igniter.<br />
Disconnect lead (12) from fuel control valve (16) to disable fuel control valve (16).<br />
Connect power source and place HI-LO switch to LO position.<br />
NOTE<br />
Have drainage container ready to catch fuel.<br />
Open bleed valve (17) on fuel control valve (16) to remove air from fuel flow. Close bleed valve (17)<br />
when fuel flow is free of air bubbles.<br />
Connect lead (12) to fuel control valve (16).<br />
Disconnect lead (11) from fuel control valve (16).<br />
Partially raise lead (12) and place switch in START position.<br />
Connect jumper lead (14) to lead terminals (13) and ( 15). A clicking sound should increase in rate.<br />
Connect 50 in. (127 cm) long, 0.187 in. (0.474 cm) diameter clear tubing (20) to bleed valve (17) and<br />
position the open end of tube (20) at least 45 in. (114 cm) higher than bleed valve (17). Open bleed<br />
valve (17) and allow fuel to flow up the tube (20) until it stabilizes.<br />
From bleed valve (17) measure vertically the height of fuel. Fuel should be between 36-40 in.<br />
(91-102 cm) from bleed valve (17). If adjustment is necessary, proceed to step 18. If not, proceed to<br />
Adjust height (regulated pressure) by turning the regulated pressure adjusting screw (10). If height<br />
will not adjust or stabilize, then replace fuel control valve (16) (para. 17-16). Close bleed valve (17).<br />
Disconnect tube (20) from bleed valve (17).<br />
Disconnect jumper lead (14) from lead terminals (13) and (15).<br />
NOTE<br />
Low fuel flow rate must be set before high fuel flow can be set.<br />
22.<br />
23.<br />
24.<br />
25.<br />
26.<br />
27.<br />
28.<br />
29.<br />
30.<br />
Operate fuel pump for one minute and stop.<br />
Repeat steps 16 and 17.<br />
Disconnect jumper lead (14) from lead terminals (13) and (15).<br />
Record amount of fuel accumulated in graduated beaker. The fuel flow rate must be 0 or 10 cc per<br />
minute.<br />
If flow is not within limits, turn adjusting screw (9) clockwise to lower flow rate or counterclockwise<br />
to raise flow rate. If flow rate is not obtainable, replace fuel control valve (16) (para. 17-16).<br />
Place HI-LO switch in HI position.<br />
Operate fuel pump for one minute and stop.<br />
Repeat steps 16 and 17.<br />
Disconnect jumper lead (14) from lead terminals (13) and (15).<br />
17-70
<strong>TM</strong> 9-<strong>2320</strong>-<strong>260</strong>-<strong>34</strong>-2<br />
17-25. PERSONNEL HEATER TESTING (Contd)<br />
31.<br />
32.<br />
33.<br />
<strong>34</strong>.<br />
35.<br />
36.<br />
37.<br />
38.<br />
39.<br />
Record amount of fuel accumulated in graduated beaker. High fuel flow rate should be 20 cc per<br />
minute.<br />
If flow rate is not within limits, turn adjusting screw (8) clockwise to lower flow rate or counterclockwise<br />
to raise flow rate. If flow rate is not obtainable, replace fuel control valve (16)<br />
(para. 17-16).<br />
Apply insulating varnish to adjusting screws (8), (9), and (10).<br />
Connect lead (12) to fuel control valve (16).<br />
Connect lead (18) to shunt resistor (19).<br />
Remove fuel tubing (6) from fuel control valve outlet (7).<br />
Install fuel tube (5) to fuel control valve outlet (7) and secure with nut (4).<br />
Disconnect test equipment from heater assembly.<br />
Install guard (1) on heater housing (3) with two dzus fasteners (2).<br />
17-71
<strong>TM</strong> 9-<strong>2320</strong>-240-<strong>34</strong>-2<br />
17-25. PERSONNEL HEATER TESTING (Contd)<br />
e. Blower Motor Test<br />
1. Place switch (5) in START position and hold.<br />
2. When indicator lamp (6) illuminates, place switch (5) in RUN position. Allow heater (2) to run for<br />
a few minutes.<br />
a. If blower motor (9) does not run, replace blower motor (9) (para. 17-20).<br />
b. If blower motor (9) runs, but heater (2) fails to ignite, replace ignition components<br />
(paras. 17-15 through 17-22).<br />
NOTE<br />
Perform steps c through e for late model personnel heaters.<br />
c. If shunt resistor (12) glows bright, remove screw-assembled lockwasher (11) and blower motor<br />
lead (14) from flame detector switch (13).<br />
d. If shunt resistor (12) turns dull, replace blower motor (9) (para. 17-20).<br />
e. If shunt resistor (12) continues to glow bright, check heater wiring.<br />
f. Overheat Switch Test<br />
1. Place switch (5) in START position.<br />
2. When indicator lamp (6) illuminates, place switch (5) in RUN position and allow heater (2) to<br />
operate for one minute.<br />
3. Partially restrict air inlet with a sheet of cardboard or sheet metal. Overheat switch (10) should<br />
activate and shut down heater (2) within five minutes.<br />
4. If heater (2) does not shut down after five minutes, replace overheat switch (10) (para. 17-22).<br />
g. Test Equipment Removal<br />
1. Close fuel shutoff valves (1).<br />
WARNING<br />
Allow time for heater to cool before removing from test equipment.<br />
Failure to do so may result in injury to personnel or damage to<br />
equipment.<br />
2. Disconnect lead (3) from power source (4).<br />
3. Remove heater (2) from test equipment.<br />
4. Place guard (7) on heater (2) and turn two dzus fasteners (8) to secure.<br />
17-72
<strong>TM</strong> 9-<strong>2320</strong>-<strong>260</strong>-<strong>34</strong>-2<br />
17-25. PERSONNEL HEATER TESTING [Contd)<br />
FOLLOW-ON TASK: Install fuel burning personnel heater (<strong>TM</strong> 9-<strong>2320</strong>-<strong>260</strong>-20).<br />
17-73
<strong>TM</strong> 9-<strong>2320</strong>-<strong>260</strong>-<strong>34</strong>-2<br />
17-26. THERMAL BARRIER INSULATION REPLACEMENT<br />
THIS TASK COVERS:<br />
a. Removal b. Installation<br />
lNITIAL SETUP<br />
APPLICABLE MODELS<br />
REFERENCES (<strong>TM</strong>)<br />
All <strong>TM</strong> 9-<strong>2320</strong>-<strong>260</strong>-20<br />
<strong>TM</strong> 9-<strong>2320</strong>-<strong>260</strong>-<strong>34</strong>P-2<br />
MATERIALS/PARTS<br />
Adhesive (Appendix C, Item 2)<br />
EQUIPMENT CONDITION<br />
● Driver’s seat removed (<strong>TM</strong> 9-<strong>2320</strong>-<strong>260</strong>-20).<br />
● Companion seat removed (<strong>TM</strong> 9-<strong>2320</strong>-<strong>260</strong>-20).<br />
NOTE<br />
All thermal barrier insulation is replaced the same. This procedure<br />
covers the left rear upper insulation panel only.<br />
1. Pull panel (2) away from cab interior (1). Discard panel (2) if irreparable damage occurs when<br />
removing.<br />
2. Clean all remaining insulating material and adhesive from contact surface areas.<br />
b. Installation<br />
CAUTION<br />
Once panel is coated with adhesive and put in place, it cannot be<br />
moved. Be careful not to place panel in the wrong position.<br />
NOTE<br />
Make all necessary cutouts and slits in panels before installation,<br />
Shiny side of panel must face outward.<br />
1. Place panel (2) in cab interior (1) to check for fit.<br />
2, Remove panel (2) and coat contact areas with adhesive.<br />
3. Install panel (2) on cab (1) and press firmly into place.<br />
17-74
<strong>TM</strong> 9-<strong>2320</strong>-<strong>260</strong>-<strong>34</strong>-2<br />
17.26 THERMAL BARRIER INSULATION REPLACEMENT (Contd)<br />
FOLLOW-ON TASKS: ● Install driver’s seat (<strong>TM</strong> 9-<strong>2320</strong>-<strong>260</strong>-20).<br />
● Install companion seat (<strong>TM</strong> 9-<strong>2320</strong>-<strong>260</strong>-20).<br />
17-75 (17-76 blank)
<strong>TM</strong> 9-<strong>2320</strong>-<strong>260</strong>-<strong>34</strong>-2<br />
APPENDIX A<br />
REFERENCES<br />
The following should be consulted for latest changes to, or revisions of, references given in this appendix<br />
and for new publications or instructions relating to material covered in this manual:<br />
a. Military Publications:<br />
Consolidated Index of Army Publications and Blank Forms . . . . . . . . . . . . . . . . . . . . . . . . . . DA PAM 25-30<br />
Equipment Improvement Report and Maintenance Digest . . . . . . . . . . . . . . . . . . . . . . . . . . . TB 43-0001-39<br />
b. General References:<br />
Authorized Abbreviations and Brevity Codes . . . . . . . . . . . . . . . . . . . . . . . . . . . . . . . . . . . . . . . . . . . .. AR310-50<br />
Dictionary of United States Army Terms . . . . . . . . . . . . . . . . . . . . . . . . . . . . . . . . . . . . . . . . . . . . . . . .. AR310-25<br />
How to Conduct Training Exercises . . . . . . . . . . . . . . . . . . . . . . . . . . . . . . . . . . . . . . . . . . . . . . . . . . . . . . .. FM 25-4<br />
Topographical Symbols . . . . . . . . . . . . . . . . . . . . . . . . . . . . . . . . . . . . . . . . . . . . . . . . . . . . . . . . . . . . . . . . . . .. FM 21-30<br />
A-2. SUPPLY CATALOGS<br />
The following Department of the Army Supply Catalogs pertain to this manual:<br />
General Mechanic's Tool Kit (5180-00-177-7033) . . . . . . . . . . . . . . . . . . . . . . . . . . . . . . . . . . . . . . . .. SC 5180-90-N26<br />
Shop Equipment, Automotive Field Maintenance<br />
and Repair (4910-00-754-0705) . . . . . . . . . . . . . . . . . . . . . . . . . . . . . . . . . . . . . . . . . . . . . . . . . . . .. SC 4910-95-CL-A31<br />
Shop Equipment, No. 2 Common Organizational Maintenance<br />
and Repair (4910-00-754-0653 )... . . . . . . . . . . . . . . . . . . . . . . . . . . . . . . . . . . . . . . . . . . . . . . . . . . SC 4910-95-CL-A72<br />
Shop Equipment, No. 2 Supplemental Field Maintenance<br />
and Repair (4910-00-754-0707). . . . . . . . . . . . . . . . . . . . . . . . . . . . . . . . . . . . . . . . . . . . . . . . . . . . . . .. SC 4910-95-A63<br />
Refer to DA Pam 25-30 for an index of blank forms. Refer to DA Pam 738-750, The Army Maintenance<br />
Management System (TAMMS), for pertinent maintenance forms and explanation on use.<br />
Product Quality Deficiency Report. . . . . . . . . . . . . . . . . . . . . . . . . . . . . . . . . . . . . . . . . . . . . . . . . . . . . . . . .. SF Form 368<br />
Recommended Changes to Publications and Blank Forms . . . . . . . . . . . . . . . . . . . . . . . . . . . . . . . . . DA Form 2028<br />
Recommended Changes to Equipment Technical Publications . . . . . . . . . . . . . . . . . . . . . . . . . . . DA Form 2028-2<br />
A-4. TECHNICAL MANUALS<br />
Camouflage Materials . . . . . . . . . . . . . . . . . . . . . . . . . . . . . . . . . . . . . . . . . . . . . . . . . . . . . . . . . . . . . . . . . . . . . . . . .. <strong>TM</strong> 5-200<br />
Care, Maintenance, and Repair of Pneumatic Tires, Inner Tubes, and Radial Tires . . . . <strong>TM</strong> 9-2610-200-24<br />
Cooling Systems: Tactical Vehicles . . . . . . . . . . . . . . . . . . . . . . . . . . . . . . . . . . . . . . . . . . . . . . . . . . . . . . . . . . . <strong>TM</strong> 750-254<br />
Destruction of Tank-Automotive Equipment to Prevent Enemy Use . . . . . . . . . . . . . . . . . . . . . . . . <strong>TM</strong> 750-244-6<br />
Direct Support, General Support, and Depot Maintenance Manual<br />
for starter, engine, electrical assembly (Delco-Remy model) . . . . . . . . . . . . . . . . . . . . . . . . . . . <strong>TM</strong> 9-2920-242-35<br />
Direct Support, General Support, and Depot Maintenance Manual<br />
for starter, engine, electrical assembly (Prestolite model) . . . . . . . . . . . . . . . . . . . . . . . . . . . . . . <strong>TM</strong> 9-2920-248-35<br />
Direct Support and General Support Maintenance Repair Parts and<br />
Special Tools List for 5-Ton, 6x6, M809 Series Trucks (Diesel) . . . . . . . . . . . . . . . . . . . . . . . <strong>TM</strong> 9-<strong>2320</strong>-<strong>260</strong>-<strong>34</strong>P<br />
Grinding Machine, Valve Face, Bench Mounting . . . . . . . . . . . . . . . . . . . . . . . . . . . . . . . . . . . . . .. <strong>TM</strong> 9-4910-484-10<br />
Inspection, Care and Maintenance of Antifriction Bearings . . . . . . . . . . . . . . . . . . . . . . . . . . . . . . . . . . . . .<strong>TM</strong> 9-214<br />
A-1
<strong>TM</strong> 9-<strong>2320</strong>-<strong>260</strong>-<strong>34</strong>-2<br />
APPENDIX A (Contd)<br />
A-4. TECHNICAL MANUALS (Contd)<br />
Maintenance, Direct and General Support Level Generator Assembly<br />
(Pestolite Model AMA-5102VT)<br />
(Leece-Neville Models 3002AC, 3002AD, and 3002AE)<br />
(NSN 2920-00-808-2483), (Models 5504AA, 5504AB) (2920-00-475-1446).<br />
(Model 2184AC) (2820-00-782-1955), and (Model 5300GP) (2920-00-818-8635) . . . . . . . . <strong>TM</strong> 9-2920-225-<strong>34</strong><br />
Marking, Packing, and Shipment of Supplies and Equipment<br />
General Packaging Instructions for Field Units . . . . . . . . . . . . . . . . . . . . . . . . . . . . . . . . . . . . . . . . . . . . <strong>TM</strong> . . 746-10<br />
Materials Used for Cleaning, Preserving, Abrading and Cementing Ordnance<br />
Material and Related Materials Including Chemicals . . . . . . . . . . . . . . . . . . . . . . . . . . . . . . . . . . . . . . . . . <strong>TM</strong> . 8-247<br />
Operator’s Manual for 5-Ton, 6x6, M809 Series Trucks (Diesel) . . . . . . . . . . . . . . . . . . . . . . . . <strong>TM</strong> 9-<strong>2320</strong>-<strong>260</strong>-10<br />
Operator’s Manual for Reliner, Brake Drum, Floor Mounted . . . . . . . . . . . . . . . . . . . . . . . . . . . <strong>TM</strong> 9-4910-443-12<br />
Operator’s Manual for Lathe, Brake Drum, Floor Mounted . . . . . . . . . . . . . . . . . . . . . . . . . . . . <strong>TM</strong> 9-4910-482-10<br />
Operator’s Manual: Welding Theory and Application . . . . . . . . . . . . . . . . . . . . . . . . . . . . . . . . . . . . . . . . . <strong>TM</strong> . . 9-237<br />
Painting Instructions for Field Use . . . . . . . . . . . . . . . . . . . . . . . . . . . . . . . . . . . . . . . . . . . . . . . . . . . . . . . . <strong>TM</strong> . . 43-0139<br />
Unit Maintenance for 5-Ton, 6x6, M809 Series Trucks (Diesel) . . . . . . . . . . . . . . . . . . . . . . . . . <strong>TM</strong> 9-<strong>2320</strong>-<strong>260</strong>-20<br />
Use and Care of Hand Tools and Measuring Tools . . . . . . . . . . . . . . . . . . . . . . . . . . . . . . . . . . . . . . . . . . . . <strong>TM</strong> 9-243<br />
A-5. TECHNICAL BULLETINS<br />
Calibration and Repair Requirements for the Maintenance<br />
of Army Material . . . . . . . . . . . . . . . . . . . . . . . . . . . . . . . . . . . . . . . . . . . . . . . . . . . . . . . . . . . . . . . . . . . . . . . . . . TB . . . 43-180<br />
Color, Marking, and Camouflage Painting of Military Vehicles,<br />
Construction Equipment, and Material Handling Equipment . . . . . . . . . . . . . . . . . . . . . . . . . . . . . . TB 43-0209<br />
Quarterly Equipment Improvement Report and Maintenance Digest<br />
Tank and Automotive Equipment . . . . . . . . . . . . . . . . . . . . . . . . . . . . . . . . . . . . . . . . . . . . . . . . . . . . . . TB . . 43-0001-39<br />
Rustproofing Procedures . . . . . . . . . . . . . . . . . . . . . . . . . . . . . . . . . . . . . . . . . . . . . . . . . . . . . . . . . . . . . . . . . . <strong>TM</strong> . . . 43-0213<br />
A-6. OTHER PUBLICATIONS<br />
Army Medical Department Expendable/Durable Items . . . . . . . . . . . . . . . . . . . . . . . . . . . . . . . . . . . . . . . CTA . 8-100<br />
Calibration Systems Requirements . . . . . . . . . . . . . . . . . . . . . . . . . . . . . . . . . . . . . . . . . . . . . . . . . . . . . . . MIL-C-45662<br />
. .<br />
Expendable/Durable Items<br />
(Except Medical, Class X, Repair Parts, and Heraldic Items) . . . . . . . . . . . . . . . . . . . . . . . . . . . . . . . ĊTA-50-970<br />
First Aid for Soldiers . . . . . . . . . . . . . . . . . . . . . . . . . . . . . . . . . . . . . . . . . . . . . . . . . . . . . . . . . . . . . . . . . . . . . . . . PM . . . 21-11<br />
Gage Inspection . . . . . . . . . . . . . . . . . . . . . . . . . . . . . . . . . . . . . . . . . . . . . . . . . . . . . . . . . . . . . . . . . . . . . . . . . MIL-STD-120<br />
. .<br />
Inspection Equipment, Acquisition, Maintenance and Disposition . . . . . . . . . . . . . . . . . . . . . . . . . . MIL-L-45607<br />
.<br />
Inspection, Liquid Penetrant Methods . . . . . . . . . . . . . . . . . . . . . . . . . . . . . . . . . . . . . . . . . . . . . . . . . . . . . . MIL-I-6866<br />
. .<br />
Inspection Process, Magnetic Particle . . . . . . . . . . . . . . . . . . . . . . . . . . . . . . . . . . . . . . . . . . . . . . . . . . . . . . MIL-I-6868<br />
. .<br />
Lubrication Order, Truck, Chassis: 5-Ton, 6x6, M809 Series Trucks (Diesel) . . . . . . . . . . . . LO 9-<strong>2320</strong>-<strong>260</strong>-12<br />
Official Nomenclature, Names and Designations . . . . . . . . . . . . . . . . . . . . . . . . . . . . . . . . . . . . . . MIL-HBK-63038-2<br />
Standard Assembly Dimensions for Screw Inserts . . . . . . . . . . . . . . . . . . . . . . . . . . . . . . . . . . . . . . . . . . . . MS33537 . .<br />
A-2
<strong>TM</strong> 9-<strong>2320</strong>-<strong>260</strong>-<strong>34</strong>-2<br />
APPENDIX B<br />
COMMON AND SPECIAL TOOLS LIST<br />
This appendix lists special and common tools outside the General Mechanic’s Tool Kit which you will need<br />
when servicing the M809 series vehicles.<br />
B-2. EXPLANATION OF COLUMNS<br />
a. Column (1) - Reference Code Number. This number is assigned to each entry in the listing and is<br />
referenced in the “Initial Setup” of applicable tasks under the heading of “Special Tools,” 'Test Equipment,”<br />
or “Tools.”<br />
b. Column (2) - Nomenclature. Name or identification of special tool or common tool.<br />
C. COIumn (3) - Part Number. This identifies the manufacturer’s part number or catalog number<br />
assigned to each tool or kit.<br />
d. Column (4) - National/NATO Stock Number. This is the National Stock Number assigned to each<br />
tool or kit; use it to request or requisition the tool or kit.<br />
e. Column (6) - Supply Catalog. This is the supply catalog number in which the common tool can be<br />
found. Special tools are not found in supply catalogs.<br />
B-1
<strong>TM</strong> 9-<strong>2320</strong>-<strong>260</strong>-<strong>34</strong>-2<br />
APPENDIX B<br />
COMMON AND SPECIAL TOOLS LIST<br />
(2) (4) (5)<br />
CODE NOMENCLATURE NATIONAL/NATO SUPPLY<br />
NUMBER NUMBER STOCK NUMBER CATALOG<br />
1 General Mechanic’s Tool Kit SC5180-90-CL-N26 5180-00-177-7033 —<br />
2 Torque Wrench, 3/4-in. dr. TESI800A 5120-01-118-3679 4910-95-CL-A31<br />
3 Torque Wrench, 1/2-in. dr. A-A-2411 5120-00-640-6364 4910-95-CL-A31<br />
4 Torque Wrench, 3/8-in. dr. TE-12A 5120-00-230-6380 4910-95-CL-A31<br />
5 Clutch Alinement Kit A37M 5180-00-449-3785 4910-95-CL-A31<br />
6 Brake Reliner MILR1<strong>34</strong>95TY1CL1 4910-00-173-5310 4910-95-CL-A31<br />
7 Arbor Press 26A49 <strong>34</strong>44-00-449-7295 4910-95-CL-A31<br />
8 Outside Micrometer GGG-C105TY1CL1STA 5210-00-554-71<strong>34</strong> 4910-95-A63<br />
9 Inside Micrometer 124B 5120-00-221-1921 4910-95-A63<br />
10 Spring Tester SPT 6635-00-641-7<strong>34</strong>6 4910-95-A63<br />
11 Dial Indicator 196A 5210-00-277-8840 4910-95-A63<br />
12 Mounting Plate,<br />
Air Compressor ST749 4910-00-159-8701 5180-00-762-1741<br />
13 Cylinder Liner Clamp Set 3376669 5120-00-104-1816 5180-00-762-1741<br />
14 Mechanical Puller Kit PE12 5180-00-423-1596 4910-95-CL-A31<br />
15 Ring Compressor HC686 5120-00-223-8848 4910-95-A63<br />
16 Depth Micrometer 445BZ-6RL 5210-00-619-4045 <strong>34</strong>70-95-A02<br />
17 Brakedrum Lathe 4100 4910-01-028-9849 4910-95-CL-A31<br />
18 2-3/8-in. Socket, 1-in. dr. A-A-1392 5120-00-261-2844 4910-95-CL-A31<br />
19 3/4-in. to 1-in. Adapter A-A-2172 5120-00-227-8104 4910-95-CL-A72<br />
20 2-1/8-in. Socket, 1-in. dr. A-A-1392 5120-00-235-58<strong>34</strong> 4910-95-CL-A31<br />
21 Cup Retainer Wrench ST-995 5120-00-150-7492 5180-00-762-1741<br />
22 Spray Pattern Tester 3376350 <strong>34</strong>65-00-999-1501 5180-00-762-1741<br />
23 Injector Body Wrench ST-1298 4910-01-082-1<strong>34</strong>6 —<br />
24 3/4-in. dr. Socket Set FED STD 353 5170-00-204-1999 4910-95-CL-A31<br />
25 Locknut Wrench 3375166 4910-01-097-6928 —<br />
26 Injector Test Stand ST790 4910-00-896-0997 5180-00-762-1741<br />
27 Test Stand Link ST-790-331 4910-01-142-0198 —<br />
28 Swivel Vise ST302 4910-00-999-1506 5180-00-762-1741<br />
29 Mounting Plate, Fuel Pump 3375133 4910-00-977-7505 5180-00-762-1741<br />
30 Torque Multiplier PD1201 5120-00-169-2986 4910-95-CL-A31<br />
31 1-5/6-in. Socket, 3/4-in. dr. 1242 5120-00-232-5681 4910-95-CL-A31<br />
32 Gage, Force, Mechanical<br />
(Bearing Preload Scale) AAA-S-133 6670-00-254-46<strong>34</strong> 4910-95-CL-A72<br />
33 Caliper, Vernier 6420 5210-01-113-1548 4910-95-CL-A31<br />
<strong>34</strong> 2-1/4-in. Socket, 1-in. dr. B107.1CL1STA 5120-00-261-2843 4910-95-CL-A31<br />
35 Bearing Adapter 7950112 5120-00-795-0112 5180-00-762-1741<br />
36 Guide Head Spacer ST633 4910-00-150-5797 5180-00-762-1741<br />
37 1-1/8-in. Socket, 3/4-in. dr. 1818 5120-00-239-0021 4910-95-CL-A31<br />
38 Vise 504M2 5120-00-293-1439 4910-95-CL-A31<br />
39 Spindle Bearing Remover 7950127 5120-00-378-4301 Special Tool<br />
40 Oil Seal Replacer 7950129 5120-00-795-0129 Special Tool<br />
41 Valve Refacer K403CM 4910-00-540-4679 4910-95-CL-A31<br />
42 Valve Seat Insert Tool ST-257 4910-00-<strong>34</strong>5-3708 —<br />
43 Counterbore Cutter ST662 4910-00-999-1208 —<br />
B-2
<strong>TM</strong> 9-<strong>2320</strong>-<strong>260</strong>-<strong>34</strong>-2<br />
APPENDIX B<br />
COMMON AND SPECIAL TOOLS LIST (Contd)<br />
(4)<br />
NATIONAL/NATO<br />
NUMBER NUMBER STOCK NUMBER CATALOG<br />
44 Valve Guide Arbor ST-663 <strong>34</strong>60-00-999-1173 5180-00-762-1741<br />
45 Valve Seat Insert Staking<br />
Tool ST-1124 4910-00-150-5844 5180-00-762-1741<br />
46 Valve Seat Insert Extractor ST-1279 5120-01-128-2679 5180-00-762-1741<br />
47 Soft-head Hammer 57-530 5120-01-071-5356 4910-95-A62<br />
48 Wheel Bearing Nut Wrench 7076968 5120-00-378-3139 —<br />
49 Injector Sleeve Extractor 3375425 4910-00-150-5858 5180-00-762-1741<br />
50 Injector Sleeve Mandrel ST-1227 5120-00-981-3108 5180-00-762-1741<br />
51 Injector Sleeve Expander<br />
Tool ST880 <strong>34</strong>41-00-922-6699 5180-00-762-1741<br />
52 Injector Sleeve Cutting Tool ST884 4910-00-981-3105 5180-00-762-1741<br />
53 Drill Press, Electric Portable 1550WITHSTAND 5130-00-204-2718 4910-95-CL-A01<br />
54 Injector Sleeve Holding Tool ST1179 5120-00-104-1795 5180-00-762-1741<br />
55 Bead Cutting Tool ST788 5110-00-932-2089 5180-00-762-1741<br />
56 Timing Fixture 3375522 4910-00-999-1269 5180-00-762-1741<br />
57 Injector and Valve<br />
Adjustment Kit 3823610 4910-00-548-7984 Special Tool<br />
58 Feeler Gage F71371 5120-00-221-1999 4910-95-B20<br />
59 Torque Wrench Adapter ST-669 5120-00-103-4687 —<br />
60 Differential Flange Replacer 7950155 5120-00-079-0155 Special Tool<br />
61 Tool Driver ST1122 4610-00-150-5843 5180-00-762-1741<br />
62 Valve Grinder K403CM 4910-00-540-4679 4910-95-CL-A31<br />
63 Drill Bit, 1/4-in. 206-1-4 5133-00-227-9658 4910-95-A62<br />
64 Electric Drill W-D-661 5310-00-293-1386 4910-95-A62<br />
65 Idle Adjustment Tool 3375981 4910-00-150-5805 Special Tool<br />
66 Engine Barring Tool ST747 4910-00-150-5798 Special Tool<br />
67 Crankshaft Flange Puller ST887 4910-00-185-8500 Special Tool<br />
68 1-1/16-in. Socket, 3/4-in. dr. A-A-1394 5120-00-189-7928 4910-95-CL-A31<br />
69 Straightedge 564000-36 6675-00-224-8807 49410-95-A63<br />
70 Magnetic Tester ST-1166 6635-01-128-2076 —<br />
71 Brush 51064 7920-00-285-3037 4910-95-CL-A31<br />
72 Brush H-B-491 8020-00-297-6657 4910-95-CL-A31<br />
73 Air Pressure Gage 3005456 4910-00-792-8304 Special Tool<br />
74 Telescoping Gage Set 599-590 5210-00-473-9350 <strong>34</strong>70-95-A02<br />
75 Universal Puller Kit 8708724 5180-00-338-6721 Special Tool<br />
76 Cylinder Liner Puller 3376015 5120-01-143-2032 —<br />
77 Cylinder Liner Driver ST594 5120-00-999-1206 5180-00-762-1741<br />
78 Gage Block 3376220 5210-01-157-3091 4910-95-A63<br />
79 Valve Guide Driver 3375282 4910-01-097-6971 5180-00-762-1741<br />
80 Valve Pin Extractor ST11<strong>34</strong> 4910-00-150-5848 —<br />
81 Valve Spring Compressor GGG-L-350 5120-00-239-8686 4910-95-CL-A31<br />
82 Vacuum Tester ST-1257-A 4910-01-128-2691 —<br />
83 Bearing Remover/Replacer 7950159 5120-00-795-0159 5180-00-762-1741<br />
84 Rear Cover Oil Seal Driver ST997 5120-00-150-5810 Special Tool<br />
85 Dial Indicator Attachment ST-1325 4910-01-097-6972 5180-00-762-1741<br />
B-3
<strong>TM</strong> 9-<strong>2320</strong>-<strong>260</strong>-<strong>34</strong>-2<br />
APPENDIX B<br />
COMMON AND SPECIAL TOOLS LIST (Contd)<br />
(2) (4)<br />
CODE NOMENCLATURE NATIONAL/NATO<br />
NUMBER NUMBER STOCK NUMBER CATALOG<br />
86 Cam Bushing Replacer ST1228 5120-00-055-4013 —<br />
87 Welding Rod 110FC <strong>34</strong>39-00-027-0953 —<br />
88 Fuel Injection Pump<br />
Tester Stand 11020200 4910-00-817-7431 —<br />
89 Engine Repair Stand 11669412 4910-00-977-7506 5180-00-762-1741<br />
90 Engine Mount Adapters ST805 4910-00-150-5799 —<br />
91 Bushing Installer ST598 5120-00-978-0805 5180-00-762-1741<br />
92 Main Bearing Cap Puller ST1178 5120-01-141-5777 —<br />
93 Drill and Reaming Fixture ST1232 4910-01-139-4892 —<br />
94 Wire Gage GGG-G-17 5120-00-278-1248 —<br />
95 Injector Leakage Tester 3375375 5120-01-029-6861 5180-00-762-1741<br />
96 Companion Flange Replacer 7950147 5120-00-795-0147 Special Tool<br />
97 Bearing Cone Adapter 7950090 5120-00-795-0090 —<br />
98 Bearing Cup Replacer 7950082 5120-00-795-0082 Special Tool<br />
99 Bearing Cup<br />
Remover/Replacer 7950079 5120-00-795-0079 Special Tool<br />
100 Spring Pack Adjusting Tool 3375981 4910-00-150-5805 —<br />
101 Travel Template 3375355 4910-01-074-0020 —<br />
102 1-5/8-in. Socket, 1-in. dr. A-A-1392 5120-00-189-7958 4910-95-CL-A31<br />
103 Gear Pump Block Plate ST844 5365-00-904-2159 5180-00-762-1741<br />
104 Shaft Installation Tool 3375204 4910-01-118-3747 5180-00-762-1741<br />
105 Torque Wrench, 1/4-in. dr. TQSC6A 5120-01-112-9532 4910-95-CL-A31<br />
106 Tool Kit, Electrical 7550526 5180-00-876-9336 4910-95-CL-A31<br />
107 Wire Brush 8078883 7920-00-291-5815 4910-95-CL-A31<br />
108 Injector Puller 3376000 5210-00-116-7604 —<br />
109 Injector Puller 3375161 — —<br />
110 Transmission Maintenance<br />
Stand MIL-S-45004 4910-00-529-8389 —<br />
111 Oil Pump Boring Tool 3375206 4910-01-085-7824 —<br />
112 Nano Reamer Set 7950124 5110-00-795-0124 Special Tool<br />
113 Engine Oil Cooler Tester 3375253 6850-01-142-7389 —<br />
114 Piston Ring Expander PRS-8 5120-00-857-3190 4910-95-CL-A31<br />
115 Multimeter ANURB 105 C 6625-00-999-6282 4910-95-CL-A31<br />
116 Retaining Ring Pliers <strong>260</strong>0 5120-00-293-0044 4910-95-CL-A31<br />
117 Soldering Gun 8200G3 <strong>34</strong>39-00-542-0396 4910-95-CL-A31<br />
118 1-1/2-in. Socket, 3/4-in. dr. 47148 5120-00-293-0094 4910-95-A62<br />
119 Wrench, Open-End,<br />
1-1/2 - 1-5/16-in. 39A 5120-00-277-2323 4910-95-CL-A31<br />
120 Rivet Gun 250K 5120-00-017-2849 4910-95-A74<br />
121 1-1/8-in. Open-End Wrench A-A-1356 5120-00-187-7133 4910-95-CL-A31<br />
122 1-5/16-in. Open-End Wrench ANSI B107.6 5120-00-449-8141 4910-95-CL-A31<br />
123 1-1/16-in. Open-End Wrench A-A-1356 5120-00-277-2693 4910-95-CL-A31<br />
124 1-7/16-in. Open-End Wrench A-A-1356 5120-00-277-2322 4910-95-CL-A31<br />
125 1-1/2-in. Open-End Wrench A-A-1356 5120-00-184-8439 4910-95-CL-A31<br />
126 1-5/8-in. Open-End Wrench A-A-1356 5120-00-184-8439 4910-95-CL-A3 1<br />
B-4
<strong>TM</strong> 9-<strong>2320</strong>-<strong>260</strong>-<strong>34</strong>-2<br />
APPENDIX B<br />
COMMON AND SPECIAL TOOLS LIST (Contd)<br />
(1)<br />
REFERENCE (2) (4)<br />
CODE NOMENCLATURE NATIONAL/NATO<br />
NUMBER NUMBER STOCK NUMBER CATALOG<br />
127 1-11/16-in. Open-End Wrench ANSI B107.6 5120-00-449-8141 4910-95-CL-A31<br />
128 Crimping Tool M22520/5-01-M225201<br />
5-100 5120-00-596-9313 4910-95-CLA01<br />
129 14-in. Pipe Wrench GGG-W-651 5120-00-277-1486 4910-95-CL-A31<br />
130 Snapring Pliers GGG-P-480 5120-00-789-0492 4910-95-A74<br />
131 Bushing Driver Set 5180-00-561-62<strong>34</strong> 4910-95-CL-A66<br />
132 A-Frame MILT21080 3950-00-449-7005 4910-95-CL-A66<br />
133 Tape Measure GGG-T-106TY2<br />
CLBCAVST 3 5210-00-2<strong>34</strong>-6745 4910-95-CL-A31<br />
1<strong>34</strong> Plumb Bob MS15747-8 5120-00-238-3299 4910-95-CL-A02<br />
135 1-7/8-in. Socket, 3/4-in. dr. GGG-W-641 5120-00-199-7769 4910-95-CL-A31<br />
136 Spanner Wrench GGG-W-665 5120-00-293-0316 —<br />
137 Spreader Bar/Sling CV15-206287-1 1730-00-546-0915 —<br />
138 Countersink Tool Set GGG-C-613 5133-00-529-4577 SC <strong>34</strong>70-95-A02<br />
139 Bar, Breaker 1818 5120-00-239-0021 4910-95-CL-A31<br />
140 1-1/4-in. Socket, 3/4-in dr. 3105A 5120-00-235-5871 4910-95-CL-A31<br />
141 1/4-in. Hex Head Socket,<br />
3/8-in. dr. 48508 5130-00-596-8508 4940-95-CL-A53<br />
142 Sling 1806 4910-00-944-495 4910-95-CL-A31<br />
143 Oil Priming Pump A-A-50202 Type II 4930-00-244-4860 4910-95-CL-31<br />
144 Driver, Socket, 3/8-in. dr. 890-5 5310-00-240-5252 4910-95-CL-A53<br />
145 Test Set, Power Steering 7010267 4910-00-627-7043 Special Tool<br />
146 Flowmeter 12375659 — —<br />
147 Thermometer MILT1180 6685-00-174-6237 —<br />
148 Bushing Installer 3005319 5120-00-792-1612 —<br />
149 Handle 2010321 5120-00-601-22<strong>34</strong> —<br />
150 Top Stop Setting Fixture 3822696 — 5180-00-767-1741<br />
151 Crowsfoot Wrench ST-1072 4910-00-185-8511 5180-00-767-1741<br />
152 Holding Bracket 3822726 — 5180-00-767-1741<br />
153 Injector Plunger Link 205462 3040-01-200-3010 5180-00-767-1741<br />
154 Injector Adjusting Tool 3375165 4910-01-097-6927 5180-00-767-1741<br />
155 Lifting Straps 3375958 3940-01-187-5870 —<br />
156 Dial Bore Gage 3375072 4910-01-142-4930 —<br />
157 Oil Seal Replacer 7950152 5120-00-795-0152 Special Tool<br />
B-5 (B-6 blank)
<strong>TM</strong> 9-<strong>2320</strong>-<strong>260</strong>-<strong>34</strong>-2<br />
C-1. SCOPE<br />
APPENDIX C<br />
EXPENDABLE/DURABLE SUPPLIES AND MATERIALS LIST<br />
Section I. Introduction (page C-1)<br />
Section II. Expendable/Durable Supplies and Materials List (page C-2)<br />
Section 1. INTRODUCTION<br />
This appendix lists expendable/durable supplies and materials you will need to maintain M809 series<br />
vehicles. This listing is for informational purposes only and is not authority to requisition listed items. These<br />
items are authorized to you by CTA 50-970, Expendable/Durable Items (except Medical, Class V, Repair Parts,<br />
and Heraldic Items), or CTA 8-100, Army Medical Department Expendable/Durable Items.<br />
C-2. EXPLANATION OF COLUMNS<br />
a. Column (1) - Item Number. This number is assigned to the entry in the listing and is referenced in the<br />
“INITIAL SETUP” of applicable tasks under the heading of “MATERIALS/PARTS.”<br />
b. Column (2) – Level. This column identifies the lowest level of maintenance that requires the listed item.<br />
C – Operator/Crew<br />
O – Unit Maintenance<br />
F – Direct Support Maintenance<br />
H – General Support Maintenance<br />
c. Column (3) - National Stock Number. This is the National stock number assigned to the item; use it<br />
to request or requisition the item.<br />
d. Column (4) - Description. This column indicates the Federal item name and, if required, a description<br />
to identify the item. The last line for each item indicates the Commercial and Government Entity Code<br />
(CAGEC) in parentheses followed by the part number.<br />
e. Column (5) - Unit of Measure (U/M). This column indicates the measure used in performing the<br />
actual maintenance function. This measure is expressed by a two-character abbreviation (e.g., EA, GL, OZ).<br />
If the unit of measure differs from the unit of issue, requisition the lowest unit of issue that will satisfy your<br />
requirements. Adjust when higher category maintenance requirements are involved.<br />
C-1
<strong>TM</strong> 9-<strong>2320</strong>-240-<strong>34</strong>-2<br />
Section Il. EXPENDABLE/DURABLE SUPPLIES AND MATERIALS LIST<br />
(1) (2) (3) (4) (5)<br />
NATIONAL<br />
ITEM<br />
STOCK<br />
NUMBER LEVEL NUMBER DESCRIPTION U/M<br />
1 F ADHESIVE: cyanocrylate plastic<br />
(12204) 4057988<br />
8040-01-024-6788 3-Gram Tube DZ<br />
2 F ADHESIVE: rubber, synthetic<br />
(92108) 25011-2<br />
8040-00-152-0067 6-Ounce Plastic Cartridge CA<br />
3 O ADHESIVE: silicone, non-hardening<br />
(94833) 52498<br />
8040-00-833-9536 1 Kit KT<br />
4 O ANTIFREEZE: permanent,<br />
ethylene glycol [-60° F (-51° C)]<br />
inhibited (O-A-548) type 1, heavy-duty,<br />
(81<strong>34</strong>9) MIL-A-46153<br />
6850-00-181-7929 1-Gallon Container GL<br />
6850-00-181-7933 5-Gallon Can GL<br />
6850-00-181-7940 55-Gallon Drum GL<br />
5 F CALIBRATING OIL: gulf 45A<br />
(72932) 45A<br />
6850-00-974-3738 55-Gallon Drum GL<br />
6 O CAP AND PLUG SET:<br />
(19207) 10935405<br />
5<strong>34</strong>0-00-450-5718 1 Set SE<br />
7 O CHALK, MARKING:<br />
(81<strong>34</strong>8) SS-C-255<br />
7510-00-223-6701 1 Gross GR<br />
8 O CLOTH, ABRASIVE (EMERY CLOTH):<br />
medium grade, 9-inches wide x 11-inches long<br />
(58536) A-A-1049<br />
5350-00-584-4653 50-Sheet/Package PG<br />
9 O CLOTH, CLEANING: lint-free, general purpose, white<br />
(81<strong>34</strong>9) MIL-C-85043<br />
7920-00-044-9281 10-Pound Box LB<br />
10 F CRAYON, TEMPILSTIK:<br />
temperature sensitive, melts at 600°F (316°C)<br />
(84032) 600<br />
6685-00-945-2367 1 Tube EA<br />
C-2
<strong>TM</strong> 9-<strong>2320</strong>-<strong>260</strong>-<strong>34</strong>-2<br />
Section Il. EXPENDABLE/DURABLE SUPPLIES AND MATERIALS LIST (Contd)<br />
(1) (2) (3) (4) (5)<br />
NATIONAL<br />
ITEM<br />
STOCK<br />
NUMBER LEVEL NUMBER DESCRIPTION U/M<br />
11 F CUTTING FLUID:<br />
(81<strong>34</strong>9) MIL-F-46148<br />
9150-00-265-9406 l-Gallon Can GL<br />
12 O DETERGENT: non-sudsing, general purpose, liquid<br />
(80244) MIL-D-16791, Type I<br />
7930-00-282-9699 l-Gallon GL<br />
13 C DIESEL FUEL: DF-1 grade<br />
(81<strong>34</strong>9) W-F-800<br />
9140-00-419-0450 500-Gallon Drum GL<br />
14 C GREASE, AUTOMOTIVE AND ARTILLERY:<br />
(81<strong>34</strong>9) MIL-G-10924<br />
9150-00-935-1017 14-Ounce Cartridge OZ<br />
9150-00-190-0904 1-3/4-Pound Can LB<br />
9150-00-190-0905 6-1/2-Pound Can LB<br />
15 O GASKET, SEALANT: silicone rubber,<br />
general purpose, MIL-A-46106, Type I,<br />
Silastic 732 RTV (black)<br />
(78500) 1199-T-3842<br />
8040-00-728-3088 5-Ounce Tube OZ<br />
16 H INSULATION: felt, thermal,<br />
fiberglass, MIL-I-22023<br />
(39428) 9<strong>34</strong>6N2<br />
5640-00-127-4929 1200-Inch Roll EA<br />
17 O INSULATION VARNISH: color, transparent blue,<br />
(72799) Glyptal 7526F<br />
8040-00-530-4820 1-Pint Can PT<br />
18 H LAPPING AND GRINDING COMPOUND:<br />
valve - grinding compound,<br />
grease – mixed, grit 120 coarse<br />
(58536) A-A-1203, Type I<br />
5350-00-271-5966 1-Pound Can LB<br />
19 H LAPPING AND GRINDING COMPOUND:<br />
valve – grinding compound,<br />
grease - mixed, grit 220 medium<br />
(58536) A-A-1203, Type I<br />
5350-00-193-1<strong>34</strong>1 1-Pound Can LB<br />
C-3
<strong>TM</strong> 9-<strong>2320</strong>-<strong>260</strong>-<strong>34</strong>-2<br />
Section Il. EXPENDABLE/DURABLE SUPPLIES AND MATERIALS LIST (Contd)<br />
(1)<br />
(2)<br />
I<br />
(3)<br />
(4)<br />
(5)<br />
ITEM<br />
NUMBER<br />
LEVEL<br />
DESCRIPTION<br />
U/M<br />
20<br />
C<br />
LUBRICATING OIL, ENGINE: OE/HDO 10<br />
(81<strong>34</strong>9) MIL-L-2104<br />
9150-00-189-6727<br />
9150-00-186-6668<br />
9150-00-188-9862<br />
9150-00-191-2772<br />
9150-00-183-7807<br />
1-Quart Can<br />
5-Gallon Drum<br />
55-Gallon Drum<br />
55-Gallon Drum<br />
Bulk<br />
QT<br />
GL<br />
GL<br />
GL<br />
BK<br />
21<br />
C<br />
9150-00-186-6681<br />
9150-00-188-9858<br />
9150-00-189-6729<br />
9150-00-183-7808<br />
LUBRICATING OIL, ENGINE: OE/HDO 30<br />
(81<strong>34</strong>9) MIL-L-2104<br />
1-Quart Can<br />
5-Gallon Drum<br />
55-Gallon Drum<br />
55-Gallon Drum<br />
QT<br />
GL<br />
GL<br />
GL<br />
22<br />
C<br />
9150-01-035-5392<br />
9150-01-035-5393<br />
9150-01-035-5394<br />
LUBRICATING OIL, GEAR: GO 80/90<br />
(81<strong>34</strong>9) MIL-L-2105<br />
1-Quart Can<br />
5-Gallon Drum<br />
55-Gallon Drum<br />
QT<br />
GL<br />
GL<br />
23<br />
C<br />
MINERAL OIL: gear lubricating<br />
SAE 250 viscosity<br />
(81<strong>34</strong>9) MIL-L-6086<br />
9150-00-223-4116<br />
5-Gallon Can<br />
GL<br />
9150-00-223-4130<br />
6-Gallon Can<br />
GL<br />
24<br />
O<br />
5310-00-010-3030<br />
NUT: non-locking<br />
(96906) MS35690-1027<br />
Each<br />
EA<br />
25<br />
O<br />
5310-00-010-3028<br />
NUT: non-locking<br />
(96906) MS35690-824<br />
Each<br />
EA<br />
26<br />
F<br />
8010-00-247-43<strong>34</strong><br />
PIGMENT: iron, blue, oil base<br />
(substitute for prussian blue)<br />
(81<strong>34</strong>8) TT-P-381<br />
1/2-Pint Can<br />
PT<br />
C-4
<strong>TM</strong> 9-<strong>2320</strong>-<strong>260</strong>-<strong>34</strong>-2<br />
Section Il. EXPENDABLE/DURABLE SUPPLIES AND MATERIALS LIST (Contd)<br />
(1) (2) (3) (4) (5)<br />
NATIONAL<br />
ITEM<br />
STOCK<br />
NUMBER LEVEL NUMBER DESCRIPTION U/M<br />
27 O PIGMENT: lead carbonate<br />
paste in oil<br />
(96906) MS35599-1<br />
8010-00-239-5736 1-Pound Can LB<br />
28 O PLASTIC STRAP, TIEDOWN: self-locking,<br />
Type I, Class 1, 5-inches long<br />
(96906) MS3367-5-9<br />
5975-00-111-3208 1 Hundred HD<br />
29 O PLASTIC STRAP, TIEDOWN<br />
ELECTRICAL COMPONENTS: self-locking,<br />
Type I, Class I, 10-inches long<br />
(96906) MS3367-7-9<br />
5975-00-570-9598 1 Hundred HD<br />
30 F PLASTIGAGE: clearance, range green,<br />
10 to 12-inches long<br />
(77220) PG-1<br />
5210-00-640-6177 250-Each Box BX<br />
31 F PRIMER: zinc chromate, color green<br />
(81<strong>34</strong>8) Spec TT-P-1757<br />
0010-00-145-0312 1 Can PT<br />
32 C RAG, WIPING: unbleached cotton and<br />
cotton-synthetic, mixed colors<br />
(58536) A-A-531<br />
7920-00-205-1711 50-Pound Bale LB<br />
33 O SCREW:<br />
(96906) MS90726-172<br />
5305-00-724-5938 Each EA<br />
<strong>34</strong> O SCREW:<br />
(96906) MS90727-127<br />
5305-00-269-8956 Each EA<br />
35 O SCREW<br />
(29510) 188978<br />
5305-01-184-3514 Each EA<br />
36 O SCREW:<br />
(96906) MS90728-66<br />
5305-00-782-9489 Each EA<br />
C-5
<strong>TM</strong> 9-<strong>2320</strong>-<strong>260</strong>-<strong>34</strong>-2<br />
Section Il. EXPENDABLE/DURABLE SUPPLIES AND MATERIALS LIST (Contd)<br />
(1) (2) (3) (4) (5)<br />
NATIONAL<br />
ITEM<br />
STOCK<br />
NUMBER LEVEL NUMBER DESCRIPTION U/M<br />
37 O SCREW<br />
(96906) MS90728-76<br />
5305-00-857-6886 Each EA<br />
38 O SCREW:<br />
(96906) MS90728-78<br />
5305-00-964-0503 Each EA<br />
39 O SCREW:<br />
(96906) MS90728-58<br />
5305-00-543-4372 Each EA<br />
40 O SCREW:<br />
(96906) MS90728-93<br />
5305-00-071-2059 Each EA<br />
41 O SCREW:<br />
(96906) MS90728-119<br />
5305-00-071-2075 Each EA<br />
42 O SEALING COMPOUND: anaerobic, retaining,<br />
MIL-R-46082, TypeII, Loctite RC/640<br />
(05972)64031<br />
8030-00-111-6404 50-Milliliter Bottle ML<br />
43 O SEALING COMPOUND: hardening,<br />
MIL-S-45180, Type I, Permatex No. 1<br />
(77247) FORMAGASKET 1<br />
8030-00-247-2525 11-Ounce Tube OZ<br />
44 O SEALING COMPOUND: non-hardening,<br />
MIL-S-45180, Type II, Permatex No. 2<br />
(77247) FORMAGASKET 2<br />
8030-00-252-3391 1 l-Ounce Tube OZ<br />
45 O SEALING COMPOUND: rubber synthetic<br />
kit has enough base, curing agent, and primer<br />
to make one gallon<br />
(81<strong>34</strong>9) MIL-C-18255<br />
8030-00-682-6745 l-Gallon Kit KT<br />
46 C SOAP, BAR: white, non-floating type<br />
(58536) AA-49<br />
8520-00-551-0376 500 Cakes Per Box BX<br />
47 F SOLDER, TIN ALLOY: rosin core<br />
(81<strong>34</strong>8) SN6WRAP3 0.094 5LB<br />
<strong>34</strong>39-00-224-3567 5-Pound LB<br />
C-6
<strong>TM</strong> 9-<strong>2320</strong>-<strong>260</strong>-<strong>34</strong>-2<br />
Section Il. EXPENDABLE/DURABLE SUPPLIES AND MATERIALS LIST (Contd)<br />
(1) (2) (3) (4) (5)<br />
NATIONAL<br />
ITEM<br />
STOCK<br />
NUMBER LEVEL NUMBER DESCRIPTION U/M<br />
48 C SOLVENT, DRYCLEANING: Type 11<br />
(81<strong>34</strong>8) P-D-680<br />
6850-00-110-4498 1-Pint Can PT<br />
6850-00-281-1985 1-Gallon Drum GL<br />
6850-00-274-5421 5-Gallon Drum GL<br />
6850-00-285-8012 55-Gallon Drum GL<br />
6850-00-637-6135 Bulk GL<br />
49 F SPLICE KIT: electrical wire<br />
(06090) D-436-37<br />
5940-00-271-7741 1 Package PG<br />
50 O TAPE, ANTISEIZE: white, MIL-T-27730,<br />
1/2-inch wide x <strong>260</strong>-inch long x 0.0035-inch thick,<br />
snap-on shell<br />
(81755) P5025-2R<br />
8030-00-889-3535 Each EA<br />
51 O TAPE, INSULATING, ELECTRICAL:<br />
(75037) 173-41NBLACK<br />
5970-00-419-4291 108-Foot Roll RL<br />
52 O TAPE, MASKING:<br />
(85480) Size-2<br />
7510-01-222-4532 Each EA<br />
53 F TOWEL, CROCUS CLOTH: abrasive (crocus),<br />
9-inch x n-inch sheets<br />
(58536) A-A-1206, Type I<br />
5350-00-221-0872 50-Sheets/Package PG<br />
54 O TWINE:<br />
(96599) 4PLY40Z12<br />
4020-00-446-1053 60-Yard Roll YD<br />
55 O UNDERCOATING COMPOUND: asphalt, petroleum<br />
(81<strong>34</strong>8) TT-C-520<br />
8030-00-221-1833 55-Gallon Drum GL<br />
56 O WASHER: flat<br />
(96906) MS15795-825<br />
5310-00-902-6659 Each EA<br />
57 O WASHER: flat<br />
(96906) MS15795-841<br />
5310-00-225-5328 Each EA<br />
C-7
<strong>TM</strong> 9-<strong>2320</strong>-<strong>260</strong>-<strong>34</strong>-2<br />
Section Il. EXPENDABLE/DURABLE SUPPLIES AND MATERIALS LIST (Contd)<br />
(1) (2] (3) (4) (5)<br />
NATIONAL<br />
ITEM<br />
STOCK<br />
NUMBER LEVEL NUMBER DESCRIPTION U/M<br />
58 O WASHER: flat<br />
(96906) MS15795-816<br />
5310-00-184-8628 Each EA<br />
59 O WIRE, NON-ELECTRICAL<br />
(96906) MS20995NC40<br />
9525-00-990-7799 1-Pound LB<br />
C-8
<strong>TM</strong> 9-<strong>2320</strong> -<strong>260</strong>-<strong>34</strong>-2<br />
APPENDIX D<br />
MANDATORY REPLACEMENT PARTS<br />
Section I.<br />
Section II.<br />
Introduction (page D-1)<br />
Mandatory Replacement Parts (page D-2)<br />
Section 1. INTRODUCTION<br />
This appendix lists mandatory replacement parts you will need to maintain M809 series vehicles.<br />
D-2. EXPLANATION OF COLUMNS<br />
a. Column (1) - Item Number. This number is assigned to the entry in the listing and is referenced in<br />
the “INITIAL SETUP” of applicable tasks under the heading of ''MATERIALS/PARTS.”<br />
b. Column (2) - Nomenclature. Name or identification of the part.<br />
c. Column (3) - Part Number. The manufacturer’s part number.<br />
d. Column (4) - National Stack Number. The national stock number of the part.<br />
D-1
<strong>TM</strong> 9-<strong>2320</strong>-<strong>260</strong>-<strong>34</strong>-2<br />
Section Il. MANDATORY REPLACEMENT PARTS<br />
(1) (2) (3) (4)<br />
ITEM<br />
NATIONAL (NATO)<br />
NUMBER NOMENCLATURE PART NUMBER STOCK NUMBER<br />
1 Ball Socket Seat 194037 2815-00-404-2940<br />
2 Bearing MS51961-32 3110-00-227-3255<br />
3 Bearing, Ball 213769 3110-01-079-8190<br />
4 Bearing, Sleeve 10876159 3120-00-826-5630<br />
5 Bearing, Sleeve 7409807 3120-00-740-9807<br />
6 Brake Lining 12356757 2530-01-281-5221<br />
7 Bushing 10-40897A 3120-01-140-5727<br />
8 Bushing 7<strong>34</strong>6812 5365-00-427-2282<br />
9 Bushing 187420 5365-00-132-0273<br />
10 Bushing 71<strong>34</strong>21 3110-00-183-6723<br />
11 Bushing 7373115 3120-00-737-3115<br />
12 Bypass Seat 153526 2815-00-131-1700<br />
13 Check Valve 11621192 4820-00-808-7461<br />
14 Control Valve Parts Kit 5704273 4820-01-093-5785<br />
15 Control Valve Parts Kit 5704274 2590-00-606-2383<br />
16 Cotter Pin EWB7633-06-17 5315-00-849-9854<br />
17 Cotter Pin MS24665-5 5315-00-236-8<strong>34</strong>5<br />
18 Cotter Pin MS24665-495 5315-00-2<strong>34</strong>-1664<br />
19 Cotter Pin MS24665-497 5315-00-013-7258<br />
20 Cotter Pin MS24655423 5315-00-013-7228<br />
21 Cotter Pin MS24665-353 5315-00-839-5822<br />
22 Cotter Pin MS24665-357 5315-00-298-1481<br />
23 Cotter Pin MS24665-360 5315-00-789-1499<br />
24 Cotter Pin MS24665-625 5315-00-209-7273<br />
25 Cotter Pin MS24665-361 5315-00-059-0184<br />
26 Cotter Pin MS24665-430 5315-00-500-1267<br />
27 Cotter Pin MS24665-363 5315-00-059-0187<br />
28 Cotter Pin MS24665-655 5315-00-187-9414<br />
29 Cotter Pin S510 5315-00-238-7631<br />
30 Cotter Pin 08-202008 5315-01-080-9051<br />
31 Cotter Pin MS9245-65 5315-00-926-5767<br />
32 Cotter Pin MS9245-95 5315-01-127-7201<br />
33 Cotter Pin G-6365 5315-01-135-9402<br />
<strong>34</strong> Cotter Pin MS24665-647 5315-01-253-5867<br />
35 Cotter Pin G-6107 5315-01-122-4602<br />
36 Cotter Pin MS24665-362 5315-00-298-1498<br />
37 Cotter Pin MS24665-351 5315-00-839-5821<br />
38 Cotter Pin MS24665-502 5315-00-849-5582<br />
39 Cotter Pin MS24665421 5315-00-849-9857<br />
40 Cotter Pin MS24665-132 5315-00-839-2325<br />
D-2
<strong>TM</strong> 9-<strong>2320</strong>-<strong>260</strong>-<strong>34</strong>-2<br />
Section Il. MANDATORY REPLACEMENT PARTS (Contd)<br />
(1) (2) (3) (4)<br />
ITEM<br />
NATIONAL (NATO)<br />
NUMBER NOMENCLATURE PART NUMBER STOCK NUMBER<br />
41 Cotter Pin MS24665-140 5315-00-252-5986<br />
42 Cotter Pin MS24665-355 5315-00-012-0123<br />
43 Cotter Pin MS24665-285 5315-01-061-2060<br />
44 Cotter Pin MS24665-359 5315-00-013-7214<br />
45 Cotter Pin MS25665-498 5315-00-849-9854<br />
46 Cotter Pin MS24665-628 5315-00-846-0126<br />
47 Cotter Pin MS24665-627 5315-00-013-7308<br />
48 Cotter Pin MS24665-283 5315-00-842-3044<br />
49 Cotter Pin G-6055 5315-01-206-5207<br />
50 Cotter Pin MS24665-281 5315-00-839-2326<br />
51 Cup, Compression 7490683 5<strong>34</strong>0-00-740-9683<br />
52 Cushion Pad 7084738 2590-00-471-5<strong>34</strong>3<br />
53 Cushion Pad 8380498 2590-00-471-5<strong>34</strong>4<br />
54 Disk 200819 4820-00-400-5189<br />
55 Disk 202897 5<strong>34</strong>0-00-951-3536<br />
56 Filler, Channel Lift 10906350 2510-00-179-5708<br />
57 Filter Element 146483 2910-00-790-8736<br />
58 Gasket 2146<strong>34</strong> 5330-01-126-8667<br />
58.1 Gasket 43085 —<br />
59 Gasket 833<strong>260</strong>3 5330-00-692-6144<br />
59.1 Gasket 68210 5330-00-328-8656<br />
60 Gasket 7409791 5330-00-740-9791<br />
60.1 Gasket 3008017 5330-01-079-6514<br />
61 Gasket P6855 5330-00-531-2821<br />
62 Gasket 7409082 5330-00-242-5587<br />
63 Gasket 110453 5330-00-143-8371<br />
64 Gasket 7409081 5330-00-740-9081<br />
65 Gasket 67963 5330-00-171-7267<br />
66 Gasket 6210696 5330-00-350-5248<br />
67 Gasket 157551 5330-00-143-8376<br />
68 Gasket 7414252 5330-00-741-4252<br />
69 Gasket 1<strong>34</strong>285 5330-00-465-5818<br />
70 Gasket 10900105 5330-00-232-6124<br />
71 Gasket 151911 5330-00-961-6314<br />
72 Gasket 10932109 5330-00-911-5621<br />
73 Gasket 151623 5330-01-082-1906<br />
74 Gasket 7414251 5330-00-741-4251<br />
75 Gasket 9333-1 5330-00-729-4427<br />
76 Gasket 11663365 5330-01-054-4011<br />
77 Gasket 3021735 5330-01-082-6985<br />
D-3
<strong>TM</strong> 9-<strong>2320</strong>-<strong>260</strong>-<strong>34</strong>-2<br />
Section Il. MANDATORY REPLACEMENT PARTS (Contd)<br />
(1) (2) (3) (4)<br />
ITEM<br />
NATIONAL (NATO)<br />
NUMBER NOMENCLATURE PART NUMBER STOCK NUMBER<br />
78 Gasket 11592566 5330-00-414-6695<br />
79 Gasket 9266A 5330-00-<strong>34</strong>9-1219<br />
80 Gasket 475067 5330-00-752-0358<br />
81 Gasket 9266 5330-00-175-6585<br />
82 Gasket 702903 5330-00-089-0978<br />
83 Gasket 3011272 5330-01-266-1047<br />
84 Gasket 10899995 5330-00-182-<strong>34</strong>89<br />
85 Gasket 120819 5330-00-777-3545<br />
86 Gasket 10899988 5330-00-419-5874<br />
87 Gasket 3011273 5330-01-267-6189<br />
88 Gasket 10900100 5330-00-545-1324<br />
89 Gasket 3047402 5330-01-080-5021<br />
90 Gasket 10900090 5330-00-064-3691<br />
91 Gasket 3017750 5330-00-861-8592<br />
92 Gasket 10876131 5330-00-522-1174<br />
93 Gasket 7409100 5330-00-740-9100<br />
94 Gasket 7409089 5330-00-740-9089<br />
95 Gasket 7409822 5330-00-057-3823<br />
96 Gasket 7409821 5330-00-740-9821<br />
97 Gasket 7973339 5330-00-895-<strong>34</strong>24<br />
98 Gasket 7409933 5330-00-740-9933<br />
99 Gasket 7409931 5330-00-166-4333<br />
100 Gasket 7409932 5330-00-740-9932<br />
101 Gasket 11664537 5330-00-419-5873<br />
102 Gasket 10876130 5330-00-826-5204<br />
103 Gasket B90429 5330-01-066-3908<br />
104 Gasket 8380431 5330-00-415-1488<br />
105 Gasket 3008591 5330-01-086-3523<br />
106 Gasket 703<strong>34</strong>9 5330-00-997-1528<br />
107 Gasket 30314<strong>34</strong> 5330-01-147-4071<br />
108 Gasket 5323606 5330-00-532-3606<br />
109 Gasket 200809 5330-00-026-2931<br />
110 Gasket 7061270 5330-00-706-1270<br />
111 Gasket 3032861 5330-01-147-0748<br />
112 Gasket 10876133 5330-00-826-5502<br />
113 Gasket 1422<strong>34</strong> 5330-00-659-3178<br />
114 Gasket 10876132 5330-00-826-5203<br />
115 Gasket 70089-1 5330-00-537-2382<br />
116 Gasket 11621135 5330-00-808-7417<br />
117 Gasket 173086 5330-00-132-0247<br />
D-4
<strong>TM</strong> 9-<strong>2320</strong>-<strong>260</strong>-<strong>34</strong>-2<br />
Section Il. MANDATORY REPLACEMENT PARTS (Contd)<br />
(1) (2) (3) (4)<br />
ITEM<br />
NATIONAL (NATO]<br />
NUMBER NOMENCLATURE PART NUMBER STOCK NUMBER<br />
118 Gasket 8327118 5330-00-832-7118<br />
119 Gasket 3035053 5330-00-160-7460<br />
120 Gasket 6156756 5330-00-615-6256<br />
121 Gasket 210647 5330-00-006-2494<br />
122 Gasket 8333103 5330-01-181-0829<br />
123 Gasket 70705 5330-00-562-1176<br />
124 Gasket TS33-016 5330-00-951-3538<br />
125 Gasket 100764 5330-00-506-4866<br />
126 Gasket MA128-21097 5330-01-099-9422<br />
127 Gasket 130240 5330-00-106-6369<br />
128 Gasket 130226 5330-00-106-6370<br />
129 Gasket 8327103 5330-00-832-7103<br />
130 Gasket 7520957 5330-00-752-0976<br />
131 Gasket 8333624 5330-00-532-9061<br />
132 Gasket 3024709 5330-01-145-5381<br />
133 Gasket 7376172 5330-00-040-2253<br />
1<strong>34</strong> Gasket 8327322 5330-00-2<strong>34</strong>-3317<br />
135 Gasket 7<strong>34</strong>7592 5330-01-097-8248<br />
136 Gasket 7<strong>34</strong>7591 5330-00-7<strong>34</strong>-7591<br />
137 Gasket 7<strong>34</strong>7593 5330-00-457-<strong>34</strong>53<br />
138 Gasket 7<strong>34</strong>7590 5330-00-7<strong>34</strong>-7590<br />
139 Gasket 7376584 5330-00-737-6584<br />
140 Gasket 10913209 5365-00-832-7774<br />
141 Gasket 7375291 5330-01-206-2195<br />
142 Gasket 7375293 5330-00-563-5524<br />
143 Gasket 7375292 5330-00-563-5523<br />
144 Gasket 7375246 5330-00-040-22<strong>34</strong><br />
145 Gasket 7375294 5330-01-231-9265<br />
146 Gasket 5214539 5310-00-275-6635<br />
147 Gasket 5160323 5310-00-209-1761<br />
148 Gasket 7<strong>34</strong>6886 5330-00-7<strong>34</strong>-6886<br />
149 Gasket 7<strong>34</strong>6896 5330-01-077-8512<br />
150 Gasket 10900396 5330-00-419-5872<br />
151 Gasket 65274 5330-00-246-0309<br />
152 Gasket 190397 2930-00-401-9531<br />
153 Gasket 3012972 5330-01-131-2967<br />
154 Gasket 11664454 5330-00-143-7371<br />
155 Gasket 8333623 5330-00-318-4310<br />
156 Gasket 7061270 5330-00-706-1270<br />
157 Grease Fitting MS15003-1 4730-00-050-4208<br />
D-5
<strong>TM</strong> 9-<strong>2320</strong>-<strong>260</strong>-<strong>34</strong>-2<br />
Section Il. MANDATORY REPLACEMENT PARTS (Contd)<br />
(1) (2) (3) (4)<br />
ITEM<br />
NATIONAL (NATO)<br />
NUMBER NOMENCLATURE PART NUMBER STOCK NUMBER<br />
157.1 Grommet 10906728 5325-00-419-0507<br />
158 Igniter G484055 4520-00-312-2017<br />
159 Igniter CS-4520-SV-0705 4520-00-217-5782<br />
160 Injector Sleeve 30119<strong>34</strong> 2910-01-146-0048<br />
161 Insulator 7411068 5<strong>34</strong>0-00-741-1068<br />
162 Insulator MS27183-12 5310-00-081-4219<br />
163 Keeper 127554 5<strong>34</strong>0-01-143-6048<br />
164 Locking Plate 114638 5310-00-887-8325<br />
165 Locking Plate 5215996 5<strong>34</strong>0-01-185-4950<br />
166 Locking Plate 109319 2815-00-406-8936<br />
167 Locknut MS51922-21 5310-00-959-1488<br />
168 Locknut MS51943-50 5310-00-<strong>34</strong>0-4953<br />
169 Locknut MS21044N4 5310-00-877-5796<br />
170 Locknut MS21045-8 5310-00-062-4954<br />
171 Locknut MS21045-6 5310-00-982-4908<br />
172 Locknut MS21045-12 5310-00-982-5012<br />
173 Locknut MS21045-14 5310-00-982-5014<br />
174 Locknut MS5194<strong>34</strong>4 5310-00-241-6664<br />
175 Locknut MS21044N7 5310-00-088-0552<br />
176 Locknut MS51943-36 5310-00-814-0672<br />
177 Locknut MS51922-17 5310-00-087-4652<br />
178 Locknut MS21083-C12 5310-00-923-4219<br />
179 Locknut 7409369 5310-00-740-9369<br />
180 Locknut MS21245-L8 5310-00-449-2378<br />
181 Locknut 10938317 5310-00-472-1963<br />
182 Locknut MS21045-4 5310-00-061-7325<br />
183 Locknut MS51943-16 5310-00-235-1078<br />
184 Locknut MS21045-10 5310-00-982-5009<br />
185 Locknut MS51943-46 5310-00-935-3569<br />
186 Locknut 10871252 5310-00-143-6456<br />
187 Locknut NAS1021-N17 5310-00-325-1900<br />
188 Locknut 3012526 5310-01-126-1045<br />
189 Locknut MS51922-37 5310-00-067-9507<br />
190 Locknut MS21045-5 5310-00-982-4912<br />
191 Locknut MS51922-5 5310-00-959-7600<br />
192 Locknut MS21044N8 5310-00-877-5795<br />
193 Locknut MS51922-53 5310-00-225-6408<br />
194 Locknut MSS1922-1 5310-00-088-1251<br />
196 Locknut MS21045-3 5310-00-96S-1820<br />
196 Locknut MSS1922-33 S310-00-225-6993<br />
D-6
<strong>TM</strong> 9-<strong>2320</strong>-<strong>260</strong>-<strong>34</strong>-2<br />
Section II. MANDATORY REPLACEMENT PARTS (Contd)<br />
(1) (2) (3) (4)<br />
ITEM<br />
NATIONAL (NATO)<br />
NUMBER NOMENCLATURE PART NUMBER STOCK NUMBER<br />
197 Locknut MS21045-06 5310-00-889-2544<br />
198 Locknut MS21045-08 8310-00-889-2549<br />
199 Locknut MS51943-<strong>34</strong> 5310-00-241-6658<br />
200 Locknut MS51943-40 5310-00-488-3888<br />
201 Locknut MS51922-18 5310-00-914-6028<br />
202 Locknut MS21045-20 5310-00-982-4998<br />
203 Locknut G-9185 5310-01-122-4492<br />
204 Locknut MS51968-8 5310-00-732-0559<br />
205 Locknut HCF19362 5306-01-045-3832<br />
205.1 Locknut 5255774 5310-01-203-6375<br />
206 Locktab 3009213 5310-00-356-1447<br />
207 Locktab 8758258 5330-00-147-3274<br />
208 Locktab Washer 8327018 2520-00-832-7018<br />
209 Lockwasher 705237 5310-01-063-8522<br />
210 Lockwasher 4E16 5310-01-203-0112<br />
211 Lockwasher 4E10 5310-01-105-9397<br />
212 Lockwasher 475005 5310-00-061-0004<br />
213 Lockwasher MS35338-111 5310-01-217-4645<br />
214 Lockwasher MS45904-57 5310-00-061-0004<br />
215 Lockwasher MS35338-46 5310-00-637-9541<br />
216 Lockwasher MS35338-40 5310-00-543-2410<br />
217 Lockwasher MS35338-47 5310-00-209-0965<br />
218 Lockwasher MS35338-51 5310-00-584-7888<br />
219 Lockwasher MS35338-50 5310-00-820-6653<br />
220 Lockwasher 25E25 5310-01-219-4032<br />
221 Lockwasher 25E26 5310-01-203-0111<br />
222 Lockwasher 25E18 5310-01-203-0120<br />
223 Lockwasher MS35338-48 5310-00-584-5272<br />
224 Lockwasher MS35338-44 5310-00-582-5965<br />
225 Lockwasher MS122032 5310-00-159-6209<br />
226 Lockwasher G-9125 5310-01-122-6109<br />
227 Lockwasher MS35338-43 5310-00-045-3296<br />
228 Lockwasher G-39500 5310-01-122-6152<br />
229 Lockwasher MS35338-27 5310-00-543-2705<br />
230 Lockwasher G-74004 5310-01-122-7677<br />
231 Lockwasher MS122033 5310-00-285-7040<br />
232 Lockwasher G-39203 5310-01-122-6151<br />
233 Lockwasher 181466 5310-00-484-1718<br />
2<strong>34</strong> Lockwasher G39350 5310-01-122-6153<br />
235 Lockwasher MS35333-40 5310-00-550-1130<br />
D-7
<strong>TM</strong> 9-<strong>2320</strong>-<strong>260</strong>-<strong>34</strong>-2<br />
Section II. MANDATORY REPLACEMENT PARTS (Contd)<br />
(1) (2) (3) (4)<br />
ITEM<br />
NATIONAL (NATO)<br />
NUMBER NOMENCLATURE PART NUMBER STOCK NUMBER<br />
236 Lockwasher G-39250 5310-01-122-6148<br />
237 Lockwasher MS35335-39 5310-00-800-0695<br />
238 Lockwasher G-39200 5310-01-122-6149<br />
239 Lockwasher MS3533<strong>34</strong>4 5310-00-194-1483<br />
240 Lockwasher G-39300 5310-01-122-6150<br />
241 Lockwasher MS35<strong>34</strong>0-52 5310-00-926-5884<br />
242 Lockwasher MS35338-046 5310-00-004-5033<br />
243 Lockwasher MS35335-38 5310-00-616-6354<br />
244 Lockwasher MS35333-38 5310-00-559-0070<br />
245 Lockwasher MS35338-52 5310-00-754-2005<br />
246 Lockwasher MS35335-30 5310-00-209-0788<br />
247 Lockwasher MS35338-45 5310-00-407-9566<br />
248 Lockwasher MS45904-68 5310-00-889-2528<br />
249 Lockwasher MS35333-56 5310-00-013-85<strong>34</strong><br />
250 Lockwasher MS45904-72 5310-00-889-2527<br />
251 Lockwasher MS35335-19 5310-00-209-0786<br />
252 Lockwasher MS35335-35 5310-00-627-6128<br />
253 Lockwasher MS35338-42 5310-00-045-3299<br />
254 Lockwasher MS35<strong>34</strong>0-43 5310-00-721-7809<br />
255 Lockwasher MS45904-76 5310-00-061-1258<br />
256 Lockwasher MS45904-77 5310-00-953-8628<br />
257 Lockwasher MS27183-14 5310-00-080-6004<br />
258 Lockwasher MS21333-67 5<strong>34</strong>0-00-079-7837<br />
259 Lockwasher MS35338-4 5310-00-010-6496<br />
<strong>260</strong> Lockwasher MS35335-33 5310-00-209-0786<br />
261 Lockwasher MS35338-5 5310-00-045-3296<br />
262 Nut-Assembled Lockwasher 488756 5310-00-606-8281<br />
263 Nut-Assembled Lockwasher 511-061800-00 5310-00-063-7360<br />
264 Nut-Assembled Lockwasher 706131 5310-01-287-6543<br />
265 Nut-Assembled Lockwasher 487283 5310-00-333-7<strong>34</strong>1<br />
266 Nylon Washer 160514 5365-00-965-0870<br />
267 O-ring G-63707 5330-01-122-4613<br />
268 O-ring 7409761 5330-00-740-9761<br />
269 O-ring 7409762 5330-00-740-9762<br />
270 O-ring 131026 5330-00-143-8485<br />
271 O-ring 8327984 5330-00-291-2439<br />
272 O-ring A788X5 5330-01-219-3998<br />
273 O-ring A395X23 5330-00-588-1140<br />
274 O-ring 137075 5330-00-005-0858<br />
275 O-ring G-61513 5330-01-122-4612<br />
D-8
<strong>TM</strong> 9-<strong>2320</strong>-240-<strong>34</strong>-2<br />
Section II. MANDATORY REPLACEMENT PARTS (Contd)<br />
(1) (2) (3) (4)<br />
ITEM<br />
NATIONAL (NATO)<br />
NUMBER NOMENCLATURE PART NUMBER STOCK NUMBER<br />
276 O-ring 154087 5330-00-951-3538<br />
277 O-ring 10-41321A 2590-01-125-9770<br />
278 O-ring 100099 5330-00-809-2667<br />
279 O-ring 10-9115A 5365-01-122-6136<br />
280 O-ring 139988 5330-00-809-3276<br />
281 O-ring G-63533 5330-01-143-6322<br />
282 O-ring 730051-1 5330-01-129-0361<br />
283 O-ring 718768-23 5330-00-089-0998<br />
284 O-ring 1JHV350REVCPC 5330-00-514-4804<br />
285 O-ring 501461 5330-00-292-0570<br />
286 O-ring 3010954 5330-01-161-0289<br />
287 O-ring 10-41045A 2590-01-126-0093<br />
288 O-ring 154086 5365-00-457-4401<br />
289 O-ring 10-12295A 5365-01-123-7063<br />
290 O-ring 100478 5330-00-081-9289<br />
291 O-ring G-63517 5330-01-122-0492<br />
292 O-ring 213768 5330-01-072-8983<br />
293 O-ring MS28775-113 5330-00-582-2855<br />
294 O-ring 68061-A 5330-00-970-<strong>34</strong>61<br />
295 O-ring MS28782-19 5330-00-171-6749<br />
296 O-ring MS28775-217 5330-00-579-7914<br />
297 O-ring MS35803-214 5330-00-993-1014<br />
298 O-ring 3019116 5330-01-160-7458<br />
299 O-ring 852826 —<br />
300 O-ring 3007759 5330-01-072-4436<br />
301 Packing MS28775-243 5330-01-185-4680<br />
302 Packing 11609215 5330-00-269-4953<br />
303 Packing 67270 5330-00-171-3879<br />
304 Packing MS28778-6 5330-00-004-5695<br />
305 Packing 172648 5330-00-404-2920<br />
306 Packing 032200-17 5330-00-733-9765<br />
307 Packing 3046201 5330-01-072-8984<br />
308 Packing MS28775-222 5330-00-297-9990<br />
309 Packing 70624 5330-00-506-4874<br />
310 Packing 10900300 5330-00-523-4235<br />
311 Packing 128086 5330-00-026-2931<br />
312 Packing MS28775-249 5330-01-019-2448<br />
313 Packing 127936 5330-00-441-0145<br />
314 Packing A788X5 5330-01-219-3998<br />
315 Pin MS35671-51 5315-01-136-8374<br />
D-9
<strong>TM</strong> 9-<strong>2320</strong>-<strong>260</strong>-<strong>34</strong>-2<br />
Section II. MANDATORY REPLACEMENT PARTS (Contd)<br />
(1) (2) (3) (4)<br />
ITEM<br />
NATIONAL (NATO)<br />
NUMBER NOMENCLATURE PART NUMBER STOCK NUMBER<br />
316 Pin 70550 2815-01-124-0232<br />
317 Pin 7414257 5315-00-741-4257<br />
318 Pin 10-41247 5315-01-126-9484<br />
319 Piston Ring 10876153 4720-00-504-8923<br />
320 Piston Ring 8327985 4310-00-287-8126<br />
321 Plug 3044992<br />
322 Plug 175831 5<strong>34</strong>0-00-485-0945<br />
323 Plug MS35648-6 5<strong>34</strong>0-00-232-5723<br />
324 Plug MS35648-8 5<strong>34</strong>0-00-050-1600<br />
325 Plug 213395 5<strong>34</strong>0-01-087-0681<br />
326 Plug 216524 5<strong>34</strong>0-01-086-6193<br />
327 Plug 213394 5<strong>34</strong>0-01-087-0682<br />
328 Plug 7520976 5<strong>34</strong>0-00-752-0976<br />
329 Plug MS90726-109 5305-00-226-7767<br />
330 Plug, Expansion 7417932 5<strong>34</strong>0-00-741-7932<br />
331 Plug, Expansion MS35648-3 5<strong>34</strong>0-00-050-1589<br />
332 Plug, Expansion 7409684 5<strong>34</strong>0-00-740-9684<br />
333 Repair Kit, Bevel Pinion Gear and Spacer 5704278 2520-00-421-7229<br />
3<strong>34</strong> Repair Kit, Brake Lining 5704496 2530-00-152-2465<br />
335 Repair Kit, Filter AR51436 2910-00-497-1925<br />
336 Repair Kit, Injector Overhaul AR51522 2910-01-117-3689<br />
337 Repair Kit, Wear Sleeve 5705699 4910-01-313-4621<br />
338 Retainer 73765<strong>34</strong> 5330-00-151-65<strong>34</strong><br />
339 Retaining Ring MS16625-1100 5365-00-807-2636<br />
<strong>34</strong>0 Retaining Ring MS16627-1093 5365-00-846-1637<br />
<strong>34</strong>1 Retaining Ring 3001704 5365-00-558-9412<br />
<strong>34</strong>2 Retaining Ring 174299 5365-00-815-1137<br />
<strong>34</strong>3 Retaining Ring 110827 5330-00-785-7894<br />
<strong>34</strong>4 Ring, Back-up 032249 5330-00-798-4635<br />
<strong>34</strong>5 Ring, Wiper 7409865 2590-00-740-9865<br />
<strong>34</strong>6 Rivet MS20600AD6W4 5320-00-582-3276<br />
<strong>34</strong>7 Rivet MS20600MP8W4 5320-01-068-2<strong>34</strong>0<br />
<strong>34</strong>8 Rivet MS20600AD8W8 5320-00-061-9653<br />
<strong>34</strong>9 Rivet MS24661-224 —<br />
350 Rivet MS24661-226 5320-00-231-3663<br />
351 Rivet MS24662-2<strong>34</strong> 5320-00-930-7865<br />
352 Rivet RV200-6-3 5320-00-582-3268<br />
353 Rivet MS20600-AD6-2 —<br />
354 Rivet MS20600-AD6-3 5320-00-286-4789<br />
355 Rivet MS20600-AD6-42 —<br />
D-10
<strong>TM</strong> 9-<strong>2320</strong>-<strong>260</strong>-<strong>34</strong>-2<br />
Section II. MANDATORY REPLACEMENT PARTS (Contd)<br />
(1) (2) (3) (4)<br />
ITEM<br />
NATIONAL (NATO)<br />
NUMBER NOMENCLATURE PART NUMBER STOCK NUMBER<br />
356 Rivet MS20600-AD5W2 5320-00-582-3302<br />
357 Rivet MS51861-45 5305-00-432-4201<br />
358 Rivet MS20470A6-6 5320-00-242-1580<br />
359 Rivet 10640792-1 5320-00-956-7355<br />
360 Rivet 10924933 5320-00-956-7355<br />
361 Rivet MS20470A6-9 5320-00-264-3266<br />
362 Rivet MS20470A5-8 5320-00-2<strong>34</strong>-8557<br />
363 Rivet RV200-6-2 5320-00-584-1285<br />
364 Rivet MS2425311-A602 —<br />
365 Rivet RV201-6-4 5320-00-582-3276<br />
366 Rivet 189513 5320-61-223-1094<br />
367 Rivet 10896748 5320-00-443-5065<br />
368 Rubber Bumper 7535643 5<strong>34</strong>0-00-766-3330<br />
369 Rubber Bumper 7035447 5<strong>34</strong>0-00-264-7182<br />
370 Rubber Bushing S1003A 5365-00-598-5255<br />
371 Rubber Strip 7005421 5330-00-700-5421<br />
372 Safety Wire MS20995F91-8 9505-00-248-9842<br />
373 Safety Wire MS20995N51 9525-00-618-5462<br />
374 Safety Wire MS20995-F91 9505-00-846-0941<br />
375 Safety Wire MS20995F41 9505-00-684-4843<br />
376 Safety Wire MS20995F47 —<br />
376.1 Safety Wire LWI 9505-00-596-1658<br />
377 Screen 3008706 2910-01-077-2016<br />
378 Screw S2286 5305-00-804-6318<br />
379 Screw-assembled Lockwasher 3012480 5305-01-227-6249<br />
380 Screw-assembled Lockwasher 487357 5305-00-576-2335<br />
381 Screw-assembled Lockwasher 3010596 5305-01-088-6019<br />
382 Screw-assembled Lockwasher 187527 5306-00-018-7527<br />
383 Screw-assembled Lockwasher 70772 5305-00-477-6769<br />
384 Screw-assembled Lockwasher 18672 5305-00-794-1104<br />
385 Screw-assembled Lockwasher 594119 5305-00-317-3102<br />
386 Screw-assembled Lockwasher 423531 5305-00-403-5130<br />
387 Screw-assembled Lockwasher 431938 5306-00-043-1938<br />
388 Screw-assembled Lockwasher 422398 —<br />
389 Screw-assembled Lockwasher 7748663 5305-00-145-1069<br />
390 Screw-assembled Lockwasher 422397 —<br />
391 Screw-assembled Lockwasher 3010593 5305-01-197-<strong>34</strong>49<br />
392 Screw-assembled Lockwasher 423315 —<br />
393 Screw-assembled Lockwasher 105574 5305-00-463-0429<br />
394 Screw-assembled Lockwasher 422399 —<br />
D-11
<strong>TM</strong> 9-<strong>2320</strong>-<strong>260</strong>-<strong>34</strong>-2<br />
Section Il. MANDATORY REPLACEMENT PARTS (Contd)<br />
(1) (2) (3) (4)<br />
ITEM<br />
NATIONAL (NATO)<br />
NUMBER NOMENCLATURE PART NUMBER STOCK NUMBER<br />
395 Screw-assembled Lockwasher 3008069 5305-01-212-5210<br />
396 Screw-assembled Lockwasher 423312 —<br />
397 Screw-assembled Lockwasher 3012473 5305-01-137-6706<br />
398 Screw-assembled Lockwasher 9422675<br />
399 Screw-assembled Lockwasher 3010590 5305-01-119-8621<br />
400 Screw-assembled Lockwasher 422310 5305-00-042-2310<br />
401 Screw-assembled Lockwasher 3010589 5305-01-129-6901<br />
402 Screw-assembled Lockwasher 170677 5305-01-237-1601<br />
403 Screw-assembled Lockwasher 488588 —<br />
404 Screw-assembled Lockwasher 420993 5305-00-042-0993<br />
405 Screw-assembled Lockwasher 719675 5305-00-403-5130<br />
406 Screw-assembled Lockwasher 3013904 5305-01-112-9021<br />
407 Seal 211255 5330-00-135-6382<br />
408 Seal 25K60120 5330-00-194-3705<br />
409 Seal 113586R91 —<br />
410 Seal 7409765 5330-00-740-9765<br />
411 Seal 3003156 5310-00-072-8830<br />
412 Seal 7409763 5330-00-740-9763<br />
413 Seal 7409764 5330-00-740-9764<br />
414 Seal 10-30326A 5330-01-122-5392<br />
415 Seal 10938432-1 —<br />
416 Seal 208069 5330-00-006-2529<br />
417 Seal 10-41320A 5330-01-122-5636<br />
418 Seal 3006737 5330-00-005-0858<br />
419 Seal 10-31103A 5330-01-122-5637<br />
420 Seal 450120 5330-01-046-7449<br />
421 Seal 10-41311A 5330-01-122-4609<br />
422 Seal 691-10014 5330-00-252-8888<br />
423 Seal 11640313 5330-01-126-<strong>34</strong>69<br />
424 Seal 106943 5310-00-506-4869<br />
425 Seal 7418774 5330-00-866-6236<br />
426 Seal 154088 5330-00-961-9470<br />
427 Seal 17657/55-542465 5330-01-150-9691<br />
428 Seal 83304012 5330-00-612-1188<br />
429 Seal 10875107-7 5330-01-119-5801<br />
430 Seal 11669023 5330-01-023-0269<br />
431 Seal 7409940 5330-00-292-1600<br />
432 Seal 8758294 5330-00-832-8235<br />
433 Seal 12300661 5330-01-131-5416<br />
4<strong>34</strong> Seal 500207 5330-00-585-3210<br />
D-12
<strong>TM</strong> 9-<strong>2320</strong>-<strong>260</strong>-<strong>34</strong>-2<br />
Section Il. MANDATORY REPLACEMENT PARTS (Contd)<br />
(1) (2) (3) (4)<br />
ITEM<br />
NATIONAL (NATO)<br />
NUMBER NOMENCLATURE PART NUMBER STOCK NUMBER<br />
435 Seal 032205 5330-00-733-9766<br />
436 Seal 032460 5330-01-143-6486<br />
437 Seal 500097 5330-00-286-8150<br />
438 Seal 7414275 5330-00-741-4275<br />
439 Seal 8333868 5330-00-091-9767<br />
440 Seal MS51000-116-2 5330-01-157-5676<br />
440.1 Seal 106276 5330-00-406-9388<br />
441 Seal 87350<strong>34</strong> 5330-00-419-9468<br />
442 Seal 8735036 5330-00-419-9469<br />
443 Seal 8735035 5330-00-470-2115<br />
444 Seal 11607302 5330-00-<strong>34</strong>0-3637<br />
445 Seal 8380420 9320-00-451-8080<br />
446 Seal 75<strong>34</strong>653 4610-00-020-5375<br />
447 Seal 8380424 2510-01-147-1517<br />
448 Seal 10937627-1 5330-01-106-2067<br />
449 Seal 11607267-2 9320-00-421-7230<br />
450 Seal 10937640 5330-00-338-0774<br />
451 Seal 8327116 5330-00-599-4968<br />
452 Seal 10937683-2 9390-00-158-2408<br />
453 Seal 10915159 9390-00-405-0215<br />
454 Seal 7373291-3 5330-00-152-3217<br />
455 Seal 10937683-3 5330-01-221-9183<br />
456 Seal 10937691 5330-01-098-6555<br />
457 Seal 10937727 5330-01-164-1245<br />
458 Seal SULLA 1437 5330-00-847-2119<br />
459 Seal 11607296-1 5330-00-391-8318<br />
460 Seal 11665765 5330-01-219-7859<br />
461 Seal 11665766-2 5330-01-217-2205<br />
462 Seal 03868AB 5330-00-285-1<strong>34</strong>6<br />
463 Seal 2012993-4 5330-00-972-2635<br />
464 Seal MS51000-131-2 5330-01-254-6377<br />
465 Seal 7061272 5330-01-143-1211<br />
466 Seal 7061271 5330-00-559-8733<br />
467 Seal 11640317 5330-00-404-3210<br />
468 Seal 500163 5330-00-178-2191<br />
469 Seal MS29513-012 5330-00-248-3836<br />
470 Seal MS51911-35-3 5330-00-919-8882<br />
471 Seal 7375282 5330-00-737-5282<br />
472 Seal 10938287 5330-00-571-7052<br />
473 Seal Retainer 7<strong>34</strong>6951 5330-00-7<strong>34</strong>-6951<br />
D-13
<strong>TM</strong> 9-<strong>2320</strong>-<strong>260</strong>-<strong>34</strong>-2<br />
Section II. MANDATORY REPLACEMENT PARTS (Contd)<br />
(1) (2) (3) (4)<br />
ITEM<br />
NATIONAL (NATO)<br />
NUMBER NOMENCLATURE PART NUMBER STOCK NUMBER<br />
474 Seal, Channel 7373291-2 5330-01-126-7512<br />
475 Seal, Channel Lift 7373301 9390-00-737-3301<br />
476 Seal, Cup 10900304 5<strong>34</strong>0-00-523-4305<br />
477 Seal, Felt 7411160 5330-00-741-1160<br />
478 Seal, Felt 7409889 5330-00-740-9889<br />
479 Seal, Frame 7373300 9390-00-737-3300<br />
480 Seal, Oil 8328155 2590-00-593-1852<br />
481 Set, Cylinder Liner Packing 3032874 5330-01-220-2389<br />
482 Set, Cylinder Liner Shim 3019955 5365-01-147-9802<br />
483 Set, Gasket AR51482 5330-00-133-6236<br />
484 Set, Gasket and Preformed Packing 3011472 5330-00-480-6133<br />
485 Set, Gasket and Shim 7<strong>34</strong>6807 5330-00-513-1443<br />
486 Set, Piston Ring 3801056 2815-01-165-0765<br />
487 Setscrew 11668952 5305-01-032-7355<br />
488 Shim 10900004 5365-00-405-4378<br />
489 Shim 5253129 —<br />
490 Shim 5253130 —<br />
491 Shim 10900005 5365-00-422-1160<br />
492 Shim 5253182 5365-00-245-5048<br />
493 Shim 10900101 5365-00-185-7835<br />
494 Shim HCF 452 5365-00-267-0680<br />
495 Shim 68192-A 5365-00-378-2885<br />
496 Shim 5186592 5365-00-518-6592<br />
497 Shim 5186593 5365-01-005-3004<br />
498 Shim 6143903 5365-00-614-3903<br />
499 Shim 10-42651-A 5365-01-123-7082<br />
500 Shim BM56657 5365-00-829-5150<br />
501 Shim 10900043 5365-00-405-0261<br />
502 Shim 68192-B 5365-00-378-2886<br />
503 Shim 10900042 5365-00-159-4669<br />
504 Shim 68192-C 5365-00-378-2887<br />
505 Shim 7375297 5365-00-563-5525<br />
506 Shim 7<strong>34</strong>6751 5365-00-7<strong>34</strong>-6751<br />
507 Sleeve 222-652 4730-01-193-7390<br />
508 Sleeve 4208 4730-00-278-8764<br />
509 Sleeve 475877 4730-01-193-7390<br />
510 Sleeve 8328015 5315-00-850-7038<br />
511 Sleeve MS39177 4730-00-278-8761<br />
512 Snapring 7521095 5365-00-699-8459<br />
513 Snapring 7<strong>34</strong>6784 5365-00-286-4437<br />
D-14
<strong>TM</strong> 9-<strong>2320</strong>-<strong>260</strong>-<strong>34</strong>-2<br />
Section Il. MANDATORY REPLACEMENT PARTS (Contd)<br />
(1) (2) (3) (4)<br />
ITEM<br />
NATIONAL (NATO)<br />
NUMBER NOMENCLATURE PART NUMBER STOCK NUMBER<br />
514 Snapring 7<strong>34</strong>6787 5365-00-7<strong>34</strong>-6787<br />
515 Snapring 7<strong>34</strong>6786 5365-00-7<strong>34</strong>-6786<br />
516 Snapring 7<strong>34</strong>6785 5365-00-7<strong>34</strong>-6785<br />
517 Snapring 7<strong>34</strong>6738 5365-00-7<strong>34</strong>-6738<br />
518 Spacer 8758279 5310-01-121-0390<br />
519 Spacer Ring 7409080 5365-00-182-9635<br />
520 Spring 251152 5360-00-932-7452<br />
521 Spring 68274 5360-00-664-5<strong>34</strong>3<br />
522 Spring, Helical 401212 5360-00-795-6975<br />
523 Tab Lockwasher 8327009 5310-00-145-2085<br />
524 Tiedown 10-42351 5<strong>34</strong>0-01-123-8324<br />
525 Valve Seat Insert 3014632 2815-01-127-1060<br />
526 Washer 730046-2 5310-01-211-3046<br />
527 Washer, Felt 7411154 5330-00-741-1154<br />
528 Washer, Felt 7409867 5330-00-740-9861<br />
529 Washer, Felt 7409929 5330-00-740-9929<br />
530 Washer, Felt 7411159 5330-00-741-1159<br />
531 Washer, Felt 7417093 5330-00-741-7093<br />
532 Washer, Felt 7417094 5330-00-741-7094<br />
533 Washer, Felt 7409956 5330-00-740-9956<br />
5<strong>34</strong> Washer, Felt 7409959 5330-00-740-9959<br />
535 Washer, Felt 0761 3930-00-016-9874<br />
536 Washer, Fiber 706062 5840-00-608-2508<br />
537 Washer, Fiber 704191 5310-01-164-0745<br />
538 Washer, Fiber 741160 —<br />
539 Washer, Fiber 704678 5310-01-164-1023<br />
540 Weatherseal 7373291 9390-00-737-3291<br />
541 Weatherseal 12368265 9390-01-285-9623<br />
542 Wick 705944 —<br />
543 Woodruff Key MS35756-18 5315-00-616-5527<br />
544 Woodruff Key 8327444 5315-00-281-7652<br />
545 Woodruff Key MS20066-407 5315-00-979-7732<br />
546 Woodruff Key MS35756-15 5315-00-616-5530<br />
547 Woodruff Key MS35756-105 5315-00-850-7038<br />
548 Woodruff Key 118002 5315-00-011-8002<br />
549 Woodruff Key MS20068-271 5315-00-781-2026<br />
550 Woodruff Key MS35756-14 5315-00-616-5520<br />
551 Woodruff Key MS35756-17 5315-00-012-4553<br />
552 Woodruff Key M535756-7 5315-00-616-5513<br />
553 Woodruff Key 8327443 5315-00-201-7650<br />
D-15
<strong>TM</strong> 9-<strong>2320</strong>-<strong>260</strong>-<strong>34</strong>-2<br />
Section II. MANDATORY REPLACEMENT PARTS (Contd)<br />
(1) (2) (3) (4)<br />
ITEM<br />
NATIONAL (NATO)<br />
NUMBER NOMENCLATURE PART NUMBER STOCK NUMBER<br />
554 Woodruff Key MS20067-270 5315-00-042-3293<br />
555 Woodruff Key MS35756-13 5315-00-616-5521<br />
556 Woodruff Key MS35756-1 5315-00-616-5519<br />
557 Woodruff Key MS20067-493 5315-01-119-5239<br />
558 Woodruff Key MS20067-305 5315-00-042-4950<br />
559 Woodruff Key MS35756-22 5315-00-616-5499<br />
560 Woodruff Key 7535631 5315-01-217-2269<br />
561 Woodruff Key MS35756-21 5315-00-616-5500<br />
562 Woodruff Key MS35756-27 5315-00-011-7995<br />
563 Woodruff Key MS20067-221 5315-00-242-0818<br />
564 Woodruff Key MS35756-109 5315-00-058-8581<br />
565 Woodruff Key 8328<strong>34</strong>1 5315-00-281-7651<br />
566 Woodruff Key MS35756-20 5315-00-616-5501<br />
567 Woodruff Key MS35756-6 5315-00-616-5514<br />
568 Woodruff Key 5168861 5315-00-032-1872<br />
569 Woodruff Key 542688 5315-00-054-2688<br />
D-16
<strong>TM</strong> 9-<strong>2320</strong>-<strong>260</strong>-<strong>34</strong>-2<br />
APPENDIX E<br />
ILLUSTRATED LIST OF MANUFACTURED ITEMS<br />
This appendix includes complete instructions for making items authorized to be manufactured or fabricated<br />
at direct and general support maintenance levels. A reference index is provided to indicate the illustration<br />
associated with the manufacture of each item. All bulk materials needed for manufacture of an item are listed<br />
by part number or specification number in a tabular list on the illustration.<br />
FIG.<br />
NO.<br />
TITLE<br />
PAGE<br />
NO.<br />
E-1. Dowel Pin E-1<br />
E-2. 0.25-in. (6.35 mm) Radius Gage E-2<br />
E-3. Rear Output Shaft Adjusting Fixture E-3<br />
E-4. Intermediate Shaft Adjusting Fixture E-5<br />
E-5. Guide Screw E-7<br />
E-6. Dowel Pin E-8<br />
NOTE:<br />
Two dowel pins are required.<br />
PROCEDURE:<br />
1. Fabricate from screw, part number MS90727-178 (NSN 5305-00-726-2572), or equivalent.<br />
2. Remove head of screw at A.<br />
3. Cut slot in screw at B. Slot will be large enough to accommodate screwdriver tip.<br />
Figure E-1. Dowel Pin.<br />
E-1
<strong>TM</strong> 9-<strong>2320</strong>-<strong>260</strong>-<strong>34</strong>-2<br />
APPENDIX E (Contd)<br />
NOTE:<br />
The tolerance on all two place decimal dimensions is ±0.03 in. (0.76 mm). The tolerance on all three<br />
place decimal dimensions is ±0.005 in. (0.127 mm).<br />
PROCEDURE:<br />
1. Trim sheet metal to dimensions shown in above diagram.<br />
2. Drill one hole in sheet metal 0.5 in. (12.7 mm) in diameter.<br />
3. Cut through center line of hole.<br />
4. Remove burrs and sharp edges from sheet metal.<br />
Figure E-2. 0.25-in. (6.35 mm) Radius Gage.<br />
E-2
<strong>TM</strong> 9-<strong>2320</strong>-<strong>260</strong>-<strong>34</strong>-2<br />
APPENDIX E (Contd)<br />
ITEM<br />
MATERIALS<br />
NO. REQ’D DESCRIPTION NSN<br />
2 Bolt: MS90728-171 5305-00-724-7248<br />
6 1 Bolt Guide: 6-5132 x 1-1/2 x 1-1/2, MS14296H405 9510-00-954-5302<br />
8 2 Bolt Guide Support: 9510-00-203-5845<br />
5-15/16 x 1-3/4 x 3/8, MS14296H389<br />
1 1 Cover, Rear Output Shaft: 8758288 3130-01-162-3856<br />
3 1 Flange Nut, Slotted Head: MS35692-1 5310-00-842-1218<br />
7 1 Gage Support: 1-1/2 x 1-1/8 x 3/16, MS14296H405 9510-00-954-5302<br />
4 1 Mounting Plate: 2-1/16 x 1-5/8 x 3/8, MS14296H369 9510-00-203-2175<br />
5 2 Nut: MS51922-49 5310-00-269-4040<br />
NOTES:<br />
1. The tolerance on all two place decimal dimensions is ±0.03 in, (0.76 mm). The tolerance on all<br />
three place decimal dimensions is ±0.005 in. (0.127 mm).<br />
2. Refer to <strong>TM</strong> 9-237, Operator’s Manual: Welding Theory and Application, for welding<br />
instructions.<br />
PROCEDURE<br />
1. Fabricate rear output shaft adjusting fixture using materials and instructions above.<br />
2. Assemble using instructions on next page.<br />
Figure E-3. Rear Output Shaft Adjusting Fixture.<br />
E-3
<strong>TM</strong> 9-<strong>2320</strong>-<strong>260</strong>-<strong>34</strong>-2<br />
APPENDIX E (Contd)<br />
ITEM<br />
MATERIALS<br />
NO. REQ’D DESCRIPTION NSN<br />
4 1 Bolt: MS90728-171 5305-00-724-7248<br />
5 1 Bolt Guide: 6-5/32 x 1-1/2 x 1-1/2, MS14296H405 9510-00-954-5302<br />
2 2 Bolt Guide Support: 9510-00-203-5845<br />
5-15/16 X 1-3/4 x 3/8, MS14296H389<br />
1 1 Cover, Rear Output Shaft: 8758288 3130-01-162-3856<br />
6 1 Gage Support: 1-1/2 x 1-1/8 x 3/16, MS14296H405 9510-00-954-5302<br />
8 1 Flange Nut, Slotted Head: MS35692-1 5310-00-842-1218<br />
9 1 Mounting Plate: 2-1/16 x 1-5/8 x 3/8, MS14296H369 9510-00-203-2175<br />
3 2 Nut: MS51922-49 5310-00-269-4040<br />
7 6 Screw, Cap, Socket Head: MS16997-70 5305-00-978-9389<br />
PROCEDURE<br />
1. Assemble rear output shaft adjusting fixture using materials and diagram above.<br />
2. Attach two bolt guide supports (2) to cover (1) with six socket head capscrews (7).<br />
3. Thread upper nut (3) onto bolt (4). Thread bolt (4) into bolt guide (5) and gage support (6).<br />
Thread lower nut (3), mounting plate (9), and flange nut (8) on bolt (4).<br />
Figure E-3 (Contd). Rear Output Shaft Adjusting Fixture.<br />
E-4
<strong>TM</strong> 9-<strong>2320</strong>-<strong>260</strong>-<strong>34</strong>-2<br />
APPENDIX E (Contd)<br />
ITEM<br />
MATERIALS<br />
NO. REQ’D DESCRIPTION NSN<br />
2 1 Bolt: MS16992-610 5305-00-449-2240<br />
3 1 Bolt MS16992-609 5306-00-412-9770<br />
4 1 Bolt Guide: 5-7/16 x 1-1/2 x 1-1/4, MS14296H389 9510-00-203-5845<br />
6 2 Bolt Guide Support: 9510-00-204-0119<br />
3/8 x 1-1/2 x 1-1/4, MS14296H403<br />
1 Cover, Rear Bearing 7<strong>34</strong>6759 3110-00-7<strong>34</strong>-6759<br />
5 1 Gage Support: 1-1/2 x 1-1/8 x 3/16, MS14296H369 9510-00-203-2175<br />
NOTES<br />
1. The tolerance on all two place decimal dimensions is ±0.03 in. (0.76 mm). The tolerance on all<br />
three place decimal dimensions is ±0.005 in. (0.127 mm).<br />
2. Refer tp <strong>TM</strong> 9-237, Operator’s Manual: Welding Theory and Application, for welding<br />
instructions.<br />
PROCEDURE<br />
1. Fabricate intermediate shaft adjusting fixture using materials and instructions above.<br />
2. Assemble using instructions on next page.<br />
Figure E-4. Intermediate Shaft Adjusting Fixture.<br />
E-5
<strong>TM</strong> 9-<strong>2320</strong>-<strong>260</strong>-<strong>34</strong>-2<br />
APPENDIX E (Contd)<br />
ITEM<br />
MATERIALS<br />
NO. REQ’D DESCRIPTION NSN<br />
3 1 Bolt: MS16922-610 5305-00-449-2240<br />
4 1 Bolt: MS16992-609 5306-00-412-9770<br />
6 1 Bolt Guide: 5-7/16 x 1-1/2 x 1-1/4, MS14296H389 9510-00-203-5845<br />
8 2 Bolt Guide Support: 9510-00-204-0119<br />
3/8 x 1-1/2 x 1-1/4, MS14296H403<br />
2 2 Cover, Rear Bearing 7<strong>34</strong>6759 3110-00-7<strong>34</strong>-6759<br />
7 1 Gage Support: 1-1/2 x 1-1/8 x 3/16, MS14296H369 9510-00-203-2175<br />
5 4 Nut: MS51922-53 5310-00-225-6408<br />
1 6 Screw, Cap, Socket Head: MS16997-70 5305-00-978-9389<br />
PROCEDURE:<br />
1. Assemble intermediate shaft adjusting fixture using materials and diagram above.<br />
2. Thread upper nut (5) onto bolt (3). Thread bolt (3) into bolt guide (6) and gage support (7).<br />
Thread lower nut (5) onto bolt (3).<br />
3. Thread upper nut (5) onto bolt (4). Thread bolt (4) into bolt guide (6). Thread lower nut (5) onto<br />
bolt (4).<br />
4. Attach two bolt guide supports (8) to cover (2) with six socket head capscrews (1).<br />
Figure E-4 (Contd). Intermediate Shaft Adjusting Fixture.<br />
E-6
<strong>TM</strong> 9-<strong>2320</strong>-<strong>260</strong>-<strong>34</strong>-2<br />
APPENDIX E (Contd)<br />
NOTES:<br />
Two guide screws are required.<br />
PROCEDURE:<br />
1. Fabricate from screw, part number 1777<strong>34</strong> (NSN 5305-01-072-4270) or equivalent.<br />
2. Remove head of screw at A.<br />
3. Cut slot in screw at B. Slot will be large enough to accommodate screwdriver tip.<br />
Figure E-5. Guide Screw.<br />
E-7
<strong>TM</strong> 9-<strong>2320</strong>-<strong>260</strong>-<strong>34</strong>-2<br />
APPENDIX E (Contd)<br />
NOTES:<br />
TWO dowel pins are required.<br />
PROCEDURE:<br />
1. Fabricate from screw, part number 3011711 (NSN 5305-01-147-4033) or equivalent.<br />
2. Remove head of screw at A<br />
3. Cut slot in screw at B. Slot will be large enough to accommodate screwdriver tip.<br />
Figure E-6. Dowel Pin.<br />
E-8
<strong>TM</strong> 9-<strong>2320</strong>-<strong>260</strong>-<strong>34</strong>-2<br />
APPENDIX F<br />
TORQUE LIMITS<br />
F-1. GENERAL<br />
This section provides general torque limits for screws used on the M809 series vehicles. Special torque<br />
limits are indicated in the maintenance procedures for applicable components. The general torque limits<br />
given in this appendix shall be used when specific torque limits are not indicated in the maintenance procedure.<br />
These general torque limits cannot be applied to screws that retain rubber components. The rubber<br />
components will be damaged before the correct torque limit is reached. If a special torque limit is not given<br />
in the maintenance instructions, tighten the screw or nut until it touches the metal bracket, then tighten it<br />
one more turn.<br />
F-2. TORQUE LIMITS<br />
Table F-1 lists dry torque limits. Dry torque limits are used on screws that do not have lubricants applied<br />
to the threads. Table F-2 lists wet torque limits. Wet torque limits are used on screws that have high<br />
pressure lubricants applied to the threads.<br />
F-3. HOW TO USE TORQUE TABLE<br />
c. Under the heading SIZE, look down the left<br />
hand column until you find the diameter<br />
of the screw you are installing (there will<br />
usually be two lines beginning with the<br />
same size).<br />
d. In the second column under SIZE, find the<br />
number of threads per inch that matches the<br />
number of threads you counted in step b.<br />
CAPSCREW HEAD MARKINGS<br />
a. Measure the diameter of the screw you are<br />
installing.<br />
Manufacturer’s marks may vary.<br />
These are all SAE Grade 5<br />
(3-line).<br />
e. To find the grade screw you are installing,<br />
match the markings on the head to the<br />
correct picture of CAPSCREW HEAD<br />
MARKINGS on the torque table.<br />
f. Look down the column under the picture you<br />
found in step e. until you find the torque limit<br />
(in lb-ft or N•m) for the diameter and threads<br />
per inch of the screw.<br />
b. Count the number of threads per inch.<br />
F-1
<strong>TM</strong> 9-<strong>2320</strong>-<strong>260</strong>-<strong>34</strong>-2<br />
Table F-1. Torque Limits for Dry Fasteners.<br />
CAPSCREW HEAD MARKINGS<br />
TORQUE<br />
SUE<br />
SAE GRADE SAE GRADE SAE GRADE SAE GRADE<br />
No. 1 or 2 No. 5 NO.6 or 7 NO. 8<br />
DIA. THREADS DIA. POUND NEWTON POUND NEWTON POUND NEWTON POUND NEWTON<br />
INCHES PER INCH MILLIMETERS FEET METERS FEET METERS FEET METERS FEET METERS<br />
1/4 20 6.35 5 6.78 8 10.85 10 13.56 12 16.27<br />
1/4 28 6.35 6 8.14 10 13.56 — — 14 18.98<br />
5/16 18 7.94 11 14.92 17 23.05 19 25.76 24 32.54<br />
5/16 24 7.94 13 17.63 19 25.76 — — 27 36.61<br />
3/8 16 9.53 18 24.41 31 42.04 <strong>34</strong> 46.10 44 59.66<br />
3/8 24 9.53 20 27.12 35 47.46 — — 49 66.44<br />
7/16 14 11.11 28 37.97 49 66.44 55 74.58 70 94.92<br />
7/16 20 11.11 30 40.68 55 74.58 — — 78 105.77<br />
1/2 13 12.70 39 52.88 75 101.70 85 115.26 105 142.38<br />
1/2 20 12.70 41 55.60 85 115.26 — — 120 162.72<br />
9/16 12 14.29 51 69.16 110 149.16 120 162.72 155 210.18<br />
9/16 18 14.29 55 74.58 120 162.72 — – 170 230.52<br />
5/8 11 15.88 63 85.43 150 203.40 167 226.45 210 284.76<br />
5/8 18 15.88 95 128.82 170 230.52 — – 240 325.44<br />
3/4 10 19.05 105 142.38 270 366.12 280 379.68 375 508.50<br />
3/4 16 19.05 115 155.94 295 400.02 – – 420 569.52<br />
7/8 9 22.23 160 216.96 395 535.62 440 596.64 605 820.38<br />
7/8 14 22.23 175 237.30 435 589.86 — — 675 915.30<br />
1 8 25.40 235 318.66 590 800.04 660 894.96 910 1233.96<br />
1 14 25.40 250 339.00 660 894.96 — — 990 1<strong>34</strong>2.44<br />
1-1/8 – 28.58 – – 800- 1084.8- – — 1280- 1735.7-<br />
880 1193.3 1440 1952.6<br />
1-1/4 — 31.75 – – – – – – 1820- 2467.9-<br />
2712.0<br />
1-3/8 – <strong>34</strong>.93 — — 1460- 1979.8- — – 2380- 3227.3-<br />
1680 2278.1 2720 3688.3<br />
1-1/2 – 38.10 – – 1940- 2630.6- – – 3160 4285.0-<br />
2200 2983.2 3560 4827.4<br />
F-2
<strong>TM</strong> 9-<strong>2320</strong>-<strong>260</strong>-<strong>34</strong>-2<br />
Table F-2. Torque Limits for Wet Fasteners.<br />
CAPSCREW HEAD MARKINGS<br />
TORQUE<br />
SIZE SAE GRADE SAE GRADE SAE GRADE SAE GRADE<br />
No. 1 or 2 No. 5 NO. 6 or 7 No. 8<br />
DIA. THREADS DIA. POUND NEWTON POUND NEWTON POUND NEWTON POUND NEWTON<br />
INCHES PER INCH MILLIMETERS FEET METERS FEET METERS FEET METERS FEET METERS<br />
1/4 20 6.35 4.5 6.1 7.2 9.76 9.0 12.20 10.8 14.64<br />
1/4 28 6.35 5.4 7.32 9.0 12.20 — — 12.6 17.09<br />
5/16 18 7.94 9,9 13.42 15.3 20.75 17.1 23.19 21.6 29.29<br />
5/16 24 7.94 11.7 15,87 17.1 23.19 – — 24.3 32.95<br />
3/8 16 9.53 16.2 21.97 27.9 37.83 30.6 41.49 39.6 53.70<br />
3/8 24 9.53 18.0 24.41 31.5 42.71 — — 44.1 59.80<br />
7/16 14 11.11 25.2 <strong>34</strong>.17 44.1 59.80 49.5 67.12 63.0 85.43<br />
7/16 20 11.11 27,0 36.61 49.5 67.12 — — 70.2 95.19<br />
1/2 13 12.70 35.1 47,60 67.5 91.53 76.5 103.73 94.5 128.14<br />
1/2 20 12.70 36.9 50.04 76.5 103.73 — – 108.0 146.45<br />
9/16 12 14.29 45.9 62.24 99.0 1<strong>34</strong>.24 108.0 146.45 139.5 189.16<br />
9/16 18 14.29 49.5 67.12 108.0 146.45 — — 153.0 207.47<br />
5/8 11 15.88 56.7 76.89 135.0 183.06 150.3 203.81 189.0 256.28<br />
5/8 18 15.88 85.5 115.94 153.0 207.47 — — 216.0 292.90<br />
3/4 10 19.05 94.5 128.14 243.0 329.51 252.0 <strong>34</strong>1.71 337.5 457.65<br />
3/4 16 19.05 103.5 140.35 265.5 360.02 — – 378.0 512.57<br />
7/8 9 22.23 144.0 195.26 355.5 482.06 396.0 536.98 544.5 738.<strong>34</strong><br />
7/8 14 22.23 157.5 213.57 391.5 530.87 — – 607.5 823.77<br />
8 25.40 211.5 286.79 531.0 720.04 594.0 805.46 819.0 1110.56<br />
14 25.40 225.0 305.10 594.0 805.46 – — 891.0 1208.20<br />
1-1/8 — 28.58 – – 720.0- 976.32- — — 1152.0- 1562.11-<br />
792.0 1073.95 1296.0 1757.38<br />
1-1/4 — 31.75 — – — — — — 1637.99- 2221.11-<br />
1800.00 2440.80<br />
1-3/8 — <strong>34</strong>.93 – – 1314.0- 1781.78- — — 2142.0- 2904.55-<br />
1512.0 2050.27 2448.0 3319.49<br />
1-1/2 – 38.10 — – 1746.0- 2367.58- – – 2844.0- 3856.5-<br />
1980.0 2684.88 3204.0 4<strong>34</strong>4.62<br />
F-3
<strong>TM</strong> 9-<strong>2320</strong>-<strong>260</strong>-<strong>34</strong>-2<br />
APPENDIX F (Contd)<br />
Tubing Application Tightening Assembly Instructions<br />
Slide tubing over barbed insert until it bottoms on<br />
fitting.<br />
1. Slide nut and then sleeve on tubing.<br />
2. Slide I.D. of tubing onto fitting insert until it<br />
bottoms.<br />
3. Assemble nut to fitting body.<br />
4. Tighten assembly finger tight to cover body<br />
threads.<br />
1.<br />
2.<br />
3.<br />
4.<br />
Slide nut and then sleeve on tubing.<br />
Slide I.D. of tubing onto fitting insert until it<br />
bottoms.<br />
Assemble nut to fitting body.<br />
Finger tighten nut. From that point, tighten<br />
with a wrench two complete turns.<br />
1. Cut tubing to desired length. Ensure ends are<br />
cut reasonably square.<br />
2. Slide tubing into the preassembled fitting and<br />
push until tube bottoms.<br />
3. Tighten nut as indicated in chart. Another<br />
check on proper assembly is dimension “A,”<br />
when nut is fully tightened.<br />
DISASSEMBLY — Remove nut and pull tubing out<br />
of fitting body. Insert will remain on tubing.<br />
REASSEMBLY — Push tubing and insert into<br />
fitting body until it bottoms. Thread nut onto<br />
fitting body and tighten as in step 3.<br />
TUBE O.D. TIGHTEN NUT TO.<br />
A<br />
1/4 85-115 lb-in. (9.6 - 13.0 N•m) .085/.105<br />
3/8 12-17 lb-ft (16.3 - 23.1 N•m) .125/.145<br />
1/2 25-33 lb-ft (33.9 - 44.7 N•m) .100/.120<br />
5/8 26-35 lb-ft (35.3 - 47.5 N•m) .115/.135<br />
3/4 38-50 lb-ft (51.5 - 67.8 N•m) .180/.200<br />
F-4
<strong>TM</strong> 9-<strong>2320</strong>-<strong>260</strong>-<strong>34</strong>-2<br />
APPENDIX F (Contd)<br />
Tubing Application Tightening Assembly Instructions (Contd)<br />
1. Slide nut and then sleeve on tubing. Threaded COPPER TUBING<br />
end of nut (C) must face out.<br />
FOR HAND AIRBRAKE<br />
2. Insert tubing into fitting. Ensure tubing is<br />
bottomed on fitting shoulder.<br />
3. Thread nut onto fitting body until it is hand<br />
tight.<br />
4. From that point, tighten with a wrench the<br />
number of turns indicated at right.<br />
TUBE<br />
SIZE<br />
ADDITIONAL NUMBER<br />
OF TURNS FROM HAND TIGHT<br />
1/4, 3/8 1-3/4<br />
1/2, 5/8, 3/4 3-1/4<br />
F-4. TORQUE WRENCH ADAPTERS<br />
Some tasks require the use of a torque wrench adapter when the nut or screw cannot be reached with<br />
a regular socket on the end of the torque wrench. These adapters add to the overall length of the torque<br />
wrench and make the dial or scale reading less than the actual torque applied to the nut or screw. To<br />
prevent overtorquing and damage to equipment, calculate correct dial or scale reading using Conversion<br />
Formula (para. F-5).<br />
F-5
<strong>TM</strong> 9-<strong>2320</strong>-<strong>260</strong>-<strong>34</strong>-2<br />
APPENDIX F (Contd)<br />
F-5. CONVERSION FORMULA<br />
Corrected dial or scale readings are determined by the use of the following formula:<br />
Corrected Required Length of torque wrench+ Length of adapter<br />
reading = torque value + Length of torque wrench<br />
Example:<br />
NOTE<br />
The length of the torque wrench is<br />
measured from the center of the handle<br />
to the center of the drive. The length of the<br />
adapter is measured from the center of the<br />
drive to the center of the wrench.<br />
F5<br />
CONVERSION FORMULA<br />
In this example, the torque wrench measures 22 in. (55.9 cm) and the adapter is 3 in, (7.6 cm). The required<br />
torque is 19 lb-ft (25.8 N•m).<br />
Corrected<br />
reading<br />
19 lb-ft (25.8 N•m) + 22 in. (55.9 cm)+ 3 in. (7.6 cm)<br />
= 22 in. (55.9 cm)<br />
Corrected<br />
reading<br />
Corrected<br />
reading<br />
Corrected<br />
reading<br />
=<br />
=<br />
=<br />
19 lb-ft (25.8 N•m) + 25 in. (63.5 cm)<br />
22 in. (55.9 cm)<br />
19 lb-ft (25.8 N•m) + 1.14<br />
17 lb-ft (23.1 N•m)<br />
F-6
<strong>TM</strong> 9-<strong>2320</strong>-<strong>260</strong>-<strong>34</strong>-2<br />
NOTE<br />
This index is a guide to both volumes of this manual. Use the Table of<br />
Contents to determine in which volume specific paragraphs are located.<br />
Para Page<br />
Para Page<br />
A<br />
Air cylinder, fuel pump,<br />
maintenance:<br />
Access door, bonnet,<br />
Adjustment . . . . . . . . . . . . . . . . . . . . 5-21c 5-56<br />
maintenance:<br />
Installation . . . . . . . . . . . . . . . . . . . . 5-21b 5-56<br />
Assembly . . . . . . . . . . . . . . . . . . . . . . 15-47d 15-180 Removal. . . . . . . . . . . . . . . . . . . . . . . 5-21a 5-56<br />
Cleaning and inspection . . . . . . . . 15-47c 15-178<br />
-<br />
Disassembly . . . . . . . . . . . . . . . . . . . 15-47b 15-178<br />
Installation . . . . . . . . . . . . . . . . . . . .<br />
Removal . . . . . . . . . . . . . . . . . . . . . . .<br />
Accessory drive and pulley<br />
removal:<br />
Removal . . . . . . . . . . . . . . . . . . . . . . .<br />
Accessory drive installation:<br />
Installation . . . . . . . . . . . . . . . . . . . .<br />
Accessory drive maintenance:<br />
Assembly . . . . . . . . . . . . . . . . . . . . . .<br />
Cleaning and inspection . . . . . . . .<br />
Disassembly . . . . . . . . . . . . . . . . . . .<br />
Installation . . . . . . . . . . . . . . . . . . . .<br />
Removal . . . . . . . . . . . . . . . . . . . . . . .<br />
Accessory drive pulley<br />
installation:<br />
Installation . . . . . . . . . . . . . . . . . . . .<br />
Accessory drive pulley<br />
replacement:<br />
Installation . . . . . . . . . . . . . . . . . . . .<br />
Removal . . . . . . . . . . . . . . . . . . . . . . .<br />
AC manual starter<br />
switches replacement:<br />
Installation . . . . . . . . . . . . . . . . . . . .<br />
Removal . . . . . . . . . . . . . . . . . . . . . . .<br />
Air compressor repair:<br />
Assembly . . . . . . . . . . . . . . . . . . . . . .<br />
Cleaning . . . . . . . . . . . . . . . . . . . . . . .<br />
Disassembly . . . . . . . . . . . . . . . . . . .<br />
Inspection and repair.. . . . . . . . . .<br />
Air compressor replacement:<br />
Installation . . . . . . . . . . . . . . . . . . . .<br />
Removal . . . . . . . . . . . . . . . . . . . . . . .<br />
Air conditioner replacement:<br />
Installation . . . . . . . . . . . . . . . . . . . .<br />
Removal . . . . . . . . . . . . . . . . . . . . . . .<br />
Air conditioner wiring<br />
harness replacement:<br />
Installation . . . . . . . . . . . . . . . . . . . .<br />
Removal . . . . . . . . . . . . . . . . . . . . . . .<br />
Air cylinder, front axle<br />
15-47e<br />
15-47a<br />
3-32<br />
3-67<br />
3-9d<br />
3-9c<br />
3-9b<br />
3-9e<br />
3-9a<br />
3-70<br />
3-8b<br />
3-8a<br />
15-89b<br />
15-89a<br />
11-5d<br />
11-5b<br />
11-5a<br />
11-5c<br />
11-3b<br />
11-3a<br />
15-49b<br />
15-49a<br />
15-65b<br />
15-65a<br />
15-181<br />
15-178<br />
3-11<br />
3-204<br />
3-22<br />
3-22<br />
3-20<br />
3-23<br />
3-20<br />
3-207<br />
3-18<br />
3-18<br />
15-330<br />
15-330<br />
11-22<br />
11-14<br />
11-10<br />
11-16<br />
11-6<br />
11-4<br />
15-192<br />
15-188<br />
engagement, maintenance:<br />
Assembly . . . . . . . . . . . . . . . . . . . . . . 9-2d 9-4<br />
Cleaning and inspection . . . . . . . . 9-2c 9-2<br />
Disassembly . . . . . . . . . . . . . . . . . . . 9-2b 9-2<br />
Installation . . . . . . . . . . . . . . . . . . . . 9-2e 9-4<br />
Removal . . . . . . . . . . . . . . . . . . . . . . . 9-2a 9-2<br />
15-246<br />
15-244<br />
INDEX<br />
Air ducts, ceiling, and<br />
supports replacement:<br />
Installation . . . . . . . . . . . . . . . . . . . .<br />
Removal . . . . . . . . . . . . . . . . . . . . . . .<br />
Alinement, frame, inspection:<br />
Frame leveling . . . . . . . . . . . . . . . . .<br />
Frame squareness . . . . . . . . . . . . . .<br />
Horizontal bow inspection . . . . . .<br />
Vertical bow inspection . . . . . . . . .<br />
Assembly - precautionary rules . . .<br />
Assist cylinder, power steering,<br />
maintenance:<br />
Assembly . . . . . . . . . . . . . . . . . . . . . .<br />
Cleaning and inspection . . . . . . . .<br />
Disassembly . . . . . . . . . . . . . . . . . . .<br />
Automatic brake, rear winch,<br />
maintenance:<br />
Cleaning and inspection . . . . . . . .<br />
Installation . . . . . . . . . . . . . . . . . . . .<br />
Removal . . . . . . . . . . . . . . . . . . . . . . .<br />
Auxiliary pump, converter and,<br />
wiring harnesses replacement:<br />
Installation . . . . . . . . . . . . . . . . . . . .<br />
Removal . . . . . . . . . . . . . . . . . . . . . . .<br />
Auxiliary pump, liftgate, and<br />
bracket replacement (M820A2):<br />
Installation . . . . . . . . . . . . . . . . . . . .<br />
Removal . . . . . . . . . . . . . . . . . . . . . . .<br />
Axle, forward-rear and<br />
rear-rear, replacement:<br />
Installation . . . . . . . . . . . . . . . . . . . .<br />
Removal . . . . . . . . . . . . . . . . . . . . . . .<br />
Axle, front, replacement:<br />
Installation. . . . . . . . . . . . . . . . . . . .<br />
Removal . . . . . . . . . . . . . . . . . . . . . . .<br />
B<br />
15-45b<br />
15-45a<br />
13-6a<br />
13-6c<br />
13-6b<br />
13-6d<br />
2-11<br />
12-7c<br />
12-7b<br />
12-7a<br />
16-11b<br />
16-11c<br />
16-11a<br />
15-80b<br />
15-80a<br />
15-56b<br />
15-56a<br />
10-5b<br />
10-5a<br />
10-2b<br />
10-2a<br />
15-170<br />
15-168<br />
13-24<br />
13-28<br />
13-24<br />
13-30<br />
2-38<br />
12-17<br />
12-16<br />
12-16<br />
16-74<br />
16-75<br />
16-74<br />
15-292<br />
15-290<br />
15-214<br />
15-214<br />
10-17<br />
10-16<br />
10-2<br />
10-2<br />
Base, driver’s seat, maintenance:<br />
Inspection and repair . . . . . . . . . . . 14-4b 14-4<br />
Installation . . . . . . . . . . . . . . . . . . . . 14-4c 14-5<br />
Removal . . . . . . . . . . . . . . . . . . . . . . . 14-4a 14-2<br />
Beam, retractable, replacement<br />
Installation . . . . . . . . . . . . . . . . . . . . 15-26b 15-80<br />
Removal . . . . . . . . . . . . . . . . . . . . . . . 15-26a 15-80<br />
Index 1
<strong>TM</strong> 9-<strong>2320</strong>-<strong>260</strong>-<strong>34</strong>-2<br />
Blackout and clearance light<br />
wiring harness replacement<br />
Installation . . . . . . . . . . . . . . . . . . . .<br />
Removal . . . . . . . . . . . . . . . . . . . . . . .<br />
Blackout and emergency<br />
light fixtures replacement<br />
Installation . . . . . . . . . . . . . . . . . . . .<br />
Removal . . . . . . . . . . . . . . . . . . . . . . .<br />
Blackout bypass wiring<br />
harness replacement:<br />
Installation . . . . . . . . . . . . . . . . . . . .<br />
Removal . . . . . . . . . . . . . . . . . . . . . . .<br />
Blackout wiring harness, right<br />
and left side, replacement:<br />
Installation . . . . . . . . . . . . . . . . . . . .<br />
Removal . . . . . . . . . . . . . . . . . . . . . . .<br />
Blower housing, personnel<br />
heater fuel line and,<br />
replacement:<br />
Installation . . . . . . . . . . . . . . . . . . . .<br />
Removal . . . . . . . . . . . . . . . . . . . . . . .<br />
Blower motor, engine coolant<br />
heater, maintenance:<br />
Cleaning and inspection . . . . . . . .<br />
Installation . . . . . . . . . . . . . . . . . . . .<br />
Removal . . . . . . . . . . . . . . . . . . . . . . .<br />
Blower motor, personnel<br />
heater, replacement:<br />
Installation . . . . . . . . . . . . . . . . . . . .<br />
Removal . . . . . . . . . . . . . . . . . . . . . . .<br />
Body, cargo, frame rail<br />
sill replacement:<br />
Installation . . . . . . . . . . . . . . . . . . . .<br />
Removal . . . . . . . . . . . . . . . . . . . . . . .<br />
Body, cargo, replacement:<br />
Installation . . . . . . . . . . . . . . . . . . . .<br />
Removal . . . . . . . . . . . . . . . . . . . . . . .<br />
Body, dump, maintenance:<br />
Cleaning, inspection,<br />
and repair . . . . . . . . . . . . . . . . . . . .<br />
Installation . . . . . . . . . . . . . . . . . . . .<br />
Removal . . . . . . . . . . . . . . . . . . . . . . .<br />
Body, tractor wrecker,<br />
replacement<br />
Installation . . . . . . . . . . . . . . . . . . . .<br />
Removal . . . . . . . . . . . . . . . . . . . . . . .<br />
Body, van, maintenance:<br />
Inspection . . . . . . . . . . . . . . . . . . . . . .<br />
Installation . . . . . . . . . . . . . . . . . . . .<br />
Removal . . . . . . . . . . . . . . . . . . . . . . .<br />
INDEX (Contd)<br />
Para Page Para Page<br />
15-71b<br />
15-71a<br />
15-91b<br />
15-91a<br />
15-70b<br />
15-70a<br />
15-72b<br />
15-72a<br />
17-19b<br />
17-19a<br />
17-4b<br />
17-4c<br />
17-4a<br />
17-20b<br />
17-20a<br />
15-3b<br />
15-3a<br />
15-2b<br />
15-2a<br />
15-13b<br />
15-13c<br />
15-13a<br />
15-8b<br />
15-8a<br />
15-24b<br />
15-24c<br />
15-24a<br />
15-264<br />
15-264<br />
15-333<br />
15-333<br />
15-262<br />
15-<strong>260</strong><br />
15-268<br />
15-266<br />
Body, wrecker, replacement<br />
Installation . . . . . . . . . . . . . . . . . . . .<br />
Removal . . . . . . . . . . . . . . . . . . . . . . .<br />
Bonnet access door<br />
maintenance:<br />
Assembly . . . . . . . . . . . . . . . . . . . . . .<br />
Cleaning and inspection . . . . . . . .<br />
Disassembly . . . . . . . . . . . . . . . . . . .<br />
Installation . . . . . . . . . . . . . . . . . . . .<br />
Removal . . . . . . . . . . . . . . . . . . . . . . .<br />
Bonnet door maintenance:<br />
Assembly . . . . . . . . . . . . . . . . . . . . . .<br />
Cleaning and inspection . . . . . . . .<br />
Disassembly . . . . . . . . . . . . . . . . . . .<br />
Installation . . . . . . . . . . . . . . . . . . . .<br />
Removal . . . . . . . . . . . . . . . . . . . . . . .<br />
Bonnet frame repair<br />
Assembly . . . . . . . . . . . . . . . . . . . . . .<br />
Disassembly . . . . . . . . . . . . . . . . . . .<br />
Boom assembly<br />
replacement (M816):<br />
15-5b 15-10<br />
15-5a 15-8<br />
15-47d 15-180<br />
15-47c 15-178<br />
15-47b 15-178<br />
15-47e 15-181<br />
15-47a 15-178<br />
15-48d 15-186<br />
15-48c 15-186<br />
15-48b 15-184<br />
15-48e 15-186<br />
15-48a 15-182<br />
15-46b 15-174<br />
15-46a 15-172<br />
17-50<br />
17-50 Installation, . . . . . . . . . . . . . . . . . . . 16-18b 16-108<br />
Removal . . . . . . . . . . . . . . . . . . . . . . . 16-18a 16-104<br />
Boom, boom extension,<br />
17-8 and rollers, crane shipper,<br />
17-9 maintenance (M819):<br />
17-8 Boom extension assembly . . . . . . . 16-<strong>34</strong>o 16-208<br />
Boom extension disassembly . . . .<br />
Boom extension installation . . . .<br />
16-<strong>34</strong>f<br />
16-<strong>34</strong>s<br />
16-200<br />
16-210<br />
17-52 Boom extension removal . . . . . . . . 16-<strong>34</strong>b 16-197<br />
17-52 Boom installation . . . . . . . . . . . . . . 16-<strong>34</strong>r 16-210<br />
Boom removal . . . . . . . . . . . . . . . . . . 16-<strong>34</strong>c 16-198<br />
Cleaning and inspection . . . . . . . . 16-<strong>34</strong>j 16-202<br />
Extension cylinder<br />
15-6<br />
15-6 installation . . . . . . . . . . . . . . . . . . . 16-<strong>34</strong>q 16-208<br />
Extension cylinder removal . . . . . 16-<strong>34</strong>d 16-198<br />
15-4<br />
Front lower roller assembly<br />
15-2<br />
and adjustment . . . . . . . . . . . . . . . 16-<strong>34</strong>n 16-206<br />
Front lower roller<br />
disassembly . . . . . . . . . . . . . . . . . . . 16-<strong>34</strong>g 16-200<br />
Middle lower roller<br />
15-32<br />
assembly. . . . . . . . . . . . . . . . . . . . . . 16-<strong>34</strong>m 16-206<br />
15-32<br />
Middle lower roller<br />
15-28<br />
disassembly . . . . . . . . . . . . . . . . . . . 16-<strong>34</strong>h 16-201<br />
Repair . . . . . . . . . . . . . . . . . . . . . . . . . 16-<strong>34</strong>k 16-202<br />
Shipper installation . . . . . . . . . . . . 16-<strong>34</strong>t 16-212<br />
15-16<br />
Shipper removal . . . . . . . . . . . . . . . 16-<strong>34</strong>a 16-194<br />
15-14 Upper roller assembly<br />
and adjustment . . . . . . . . . . . . . . . 16-<strong>34</strong>l 16-204<br />
15-74 Upper roller disassembly . . . . . . . 16-<strong>34</strong>i 16-201<br />
15-74 Upper roller installation . . . . . . . . 16-<strong>34</strong>p 16-208<br />
15-72 Upper roller removal . . . . . . . . . . . 16-<strong>34</strong>e 16-189<br />
Index 2
<strong>TM</strong> 9-<strong>2320</strong>-<strong>260</strong>-<strong>34</strong>-2<br />
INDEX (Contd)<br />
Para<br />
Page<br />
Boom elevating cylinders<br />
maintenance (M816):<br />
Assembly . . . . . . . . . . . . . . . . . . . . . . 16-14d 16-86<br />
Cleaning and inspection . . . . . . . . 16-14c 16-84<br />
Disassembly . . . . . . . . . . . . . . . . . . . 16-14b 16-84<br />
Installation . . . . . . . . . . . . . . . . . . . . 16-14e 16-88<br />
Removal . . . . . . . . . . . . . . . . . . . . . . . 16-14a 16-82<br />
Boom extension cylinder<br />
maintenance (M819):<br />
Assembly . . . . . . . . . . . . . . . . . . . . . . 16-35d 16-216<br />
Cleaning and inspection . . . . . . . . 16-35b 16-214<br />
Disassembly . . . . . . . . . . . . . . . . . . . 16-35a 16-214<br />
Repair . . . . . . . . . . . . . . . . . . . . . . . . . 16-35c 16-216<br />
Boom, inner,<br />
maintenance (M816):<br />
Assembly . . . . . . . . . . . . . . . . . . . . . . 16-19d 16-116<br />
Cleaning and inspection . . . . . . . . 16-19c 16-116<br />
Disassembly . . . . . . . . . . . . . . . . . . . 16-19b 16-114<br />
Installation . . . . . . . . . . . . . . . . . . . . 16-19e 16-118<br />
Removal . . . . . . . . . . . . . . . . . . . . . . . 16-19a 16-112<br />
Boom lift cylinder<br />
maintenance (M819):<br />
Assembly . . . . . . . . . . . . . . . . . . . . . . 16-33e 16-192<br />
Cleaning and inspection . . . . . . . . 16-33c 16-191<br />
Disassembly . . . . . . . . . . . . . . . . . . . 16-33b 16-190<br />
Installation . . . . . . . . . . . . . . . . . . . . 16-33f 16-192<br />
Removal . . . . . . . . . . . . . . . . . . . . . . . 16-33a 16-188<br />
Repair. . . . . . . . . . . . . . . . . . . . . . . . . 16-33d 16-191<br />
Boom repair (M816):<br />
Assembly . . . . . . . . . . . . . . . . . . . . . . 16-21c 16-128<br />
Cleaning, inspection,<br />
and repair . . . . . . . . . . . . . . . . . . . . 16-21b 16-127<br />
Removal . . . . . . . . . . . . . . . . . . . . . . . 16-21a 16-124<br />
Boom roller, upper and lower,<br />
maintenance (M816):<br />
Assembly . . . . . . . . . . . . . . . . . . . . . . 16-13d 16-78<br />
Cleaning and inspection . . . . . . . . 16-13c 16-78<br />
Disassembly . . . . . . . . . . . . . . . . . . . 16-13b 16-77<br />
Installation . . . . . . . . . . . . . . . . . . . . 16-13e 16-80<br />
Remora] . . . . . . . . . . . . . . . . . . . . . . . 16-13a 16-77<br />
Boom swing mechanism<br />
replacement (M819):<br />
Installation . . . . . . . . . . . . . . . . . . . . 16-30b 16-177<br />
Removal . . . . . . . . . . . . . . . . . . . . . . . 16-30a 16-176<br />
Box, control center,<br />
maintenance:<br />
Assembly . . . . . . . . . . . . . . . . . . . . . . 15-84c 15-318<br />
Disassembly . . . . . . . . . . . . . . . . . . . 15-84b 15-316<br />
Installation . . . . . . . . . . . . . . . . . . . . 15-84d 15-318<br />
Removal . . . . . . . . . . . . . . . . . . . . . . . 15-84a 15-316<br />
Para<br />
Page<br />
Box, converter junction,<br />
replacement:<br />
Installation . . . . . . . . . . . . . . . . . . . . 15-86b 15-324<br />
Removal, . . . . . . . . . . . . . . . . . . . . . . 15-86a 15-322<br />
Box, electrical, replacement:<br />
Installation . . . . . . . . . . . . . . . . . . . . 15-90b 15-332<br />
Removal . . . . . . . . . . . . . . . . . . . . . . . 15-90a 15-332<br />
Box, outlet, replacement:<br />
Installation . . . . . . . . . . . . . . . . . . . . 15-88b 15-328<br />
Removal . . . . . . . . . . . . . . . . . . . . . . . 15-88a 15-328<br />
Brace, safety, replacement:<br />
Installation . . . . . . . . . . . . . . . . . . . . 15-21b 15-69<br />
Removal . . . . . . . . . . . . . . . . . . . . . . . 15-21a 15-69<br />
Brackets, lifting, replacement:<br />
Installation . . . . . . . . . . . . . . . . . . . . 3-13b 3-36<br />
Removal . . . . . . . . . . . . . . . . . . . . . . . 3-13a 3-36<br />
Brakedrum, parking<br />
and service, repair:<br />
Cleaning . . . . . . . . . . . . . . . . . . . . . . 11-7a 11-28<br />
Inspection and repair . . . . . . . . . . . 11-7b 11-28<br />
Brake, front winch drag,<br />
replacement:<br />
Installation . . . . . . . . . . . . . . . . . . . . 16-6b 16-42<br />
Removal . . . . . . . . . . . . . . . . . . . . . . . 16-6a 16-41<br />
Brake, rear winch<br />
automatic, maintenance:<br />
Cleaning and inspection . . . . . . . . 16-11b 16-74<br />
Installation . . . . . . . . . . . . . . . . . . . . 16-11c 16-75<br />
Removal . . . . . . . . . . . . . . . . . . . . . . . 16-11a 16-74<br />
Brakeshoe, parking<br />
and service, repair:<br />
Parking and service<br />
brakeshoe inspection<br />
and repair . . . . . . . . . . . . . . . . . . 11-6c 11-26<br />
Parking brakeshoe<br />
assembly . . . . . . . . . . . . . . . . . . . . . . 11-6e 11-27<br />
Parking brakeshoe<br />
disassembly . . . . . . . . . . . . . . . . . . . 11-6a 11-26<br />
Service brakeshoe assembly . . . . 11-6d 11-27<br />
Service brakeshoe<br />
disassembly . . . . . . . . . . . . . . . . . . . 11-6b 11-26<br />
Burner, engine coolant<br />
heater, maintenance:<br />
Cleaning and inspection . . . . . . . . 17-10b 17-24<br />
Installation . . . . . . . . . . . . . . . . . . . . 17-10c 17-24<br />
Removal . . . . . . . . . . . . . . . . . . . . . . . 17-10a 17-24<br />
Burner, personnel heater,<br />
maintenance<br />
Assembly, . . . . . . . . . . . . . . . . . . . . . 17-21d 17-58<br />
Cleaning and inspection . . . . . . . . 17-21c 17-56<br />
Disassembly . . . . . . . . . . . . . . . . . . . 17-21b 17-56<br />
Installation . . . . . . . . . . . . . . . . . . . . 17-21e 17-59<br />
Removal . . . . . . . . . . . . . . . . . . . . . . . 17-21a 17-54<br />
Index 3
<strong>TM</strong> 9-<strong>2320</strong>-<strong>260</strong>-<strong>34</strong>-2<br />
Cab (gondola), crane,<br />
replacement (M819):<br />
Installation . . . . . . . . . . . . . . . . . . . .<br />
Removal . . . . . . . . . . . . . . . . . . . . . . .<br />
Cable hoist winch<br />
replacement (M819):<br />
Installation . . . . . . . . . . . . . . . . . . . .<br />
Removal . . . . . . . . . . . . . . . . . . . . . . .<br />
Cable tensioner, front<br />
winch, maintenance:<br />
Assembly . . . . . . . . . . . . . . . . . . . . . .<br />
Cleaning and inspection . . . . . . . .<br />
Disassembly . . . . . . . . . . . . . . . . . . .<br />
Installation . . . . . . . . . . . . . . . . . . . .<br />
Removal . . . . . . . . . . . . . . . . . . . . . . .<br />
Cable tensioner, rear<br />
winch, maintenance:<br />
Assembly . . . . . . . . . . . . . . . . . . . . . .<br />
Cleaning and inspection . . . . . . . .<br />
Disassembly . . . . . . . . . . . . . . . . . . .<br />
Cab protector shield<br />
maintenance:<br />
Assembly . . . . . . . . . . . . . . . . . . . . . .<br />
Cleaning and inspection . . . . . . . .<br />
Disassembly . . . . . . . . . . . . . . . . . . .<br />
Cab replacement . . . . . . . . . . . . . . . . . .<br />
Cam follower housing<br />
maintenance:<br />
Assembly . . . . . . . . . . . . . . . . . . . . . .<br />
Cleaning and inspection . . . . . . . .<br />
Disassembly . . . . . . . . . . . . . . . . . . .<br />
Installation . . . . . . . . . . . . . . . . . . . .<br />
Removal . . . . . . . . . . . . . . . . . . . . . . .<br />
Repair . . . . . . . . . . . . . . . . . . . . . . . . .<br />
Cam follower installation:<br />
Installation . . . . . . . . . . . . . . . . . . . .<br />
Cam follower removal:<br />
Removal . . . . . . . . . . . . . . . . . . . . . . .<br />
Camshaft installation:<br />
Installation . . . . . . . . . . . . . . . . . .<br />
Camshaft maintenance:<br />
Assembly . . . . . . . . . . . . . . . . . . . . . .<br />
Camshaft bushing removal . . . . .<br />
Camshaft gear backlash<br />
measurement . . . . . . . . . . . . . . . . .<br />
Cleaning and inspection . . . . . . . .<br />
Disassembly . . . . . . . . . . . . . . . . . . .<br />
Removal . . . . . . . . . . . . . . . . . . . . . . .<br />
Cargo body frame rail<br />
sill replacement<br />
Installation . . . . . . . . . . . . . . . . . . . .<br />
Removal . . . . . . . . . . . . . . . . . . . . . . .<br />
C<br />
INDEX (Contd)<br />
Para Page Para Page<br />
16-29b<br />
16-29a<br />
16-31b<br />
16-31a<br />
16-4d<br />
16-4c<br />
164b<br />
16-4e<br />
16-4a<br />
16-10c<br />
16-10b<br />
16-10a<br />
15-12c<br />
15-12b<br />
15-12a<br />
14-3<br />
3-19e<br />
3-19c<br />
3-19b<br />
3-19f<br />
3-19a<br />
3-19d<br />
Cargo body replacement<br />
Installation . . . . . . . . . . . . . . . . . . . .<br />
Removal . . . . . . . . . . . . . . . . . . . . . . .<br />
Ceiling air ducts and<br />
supporsa replacement<br />
Installation . . . . . . . . . . . . . . . . . . . .<br />
Removal . . . . . . . . . . . . . . . . . . . . . . .<br />
Ceiling and frame<br />
maintenance:<br />
Cleaning and inspection . . . . . . . .<br />
Installation . . . . . . . . . . . . . . . . . . . .<br />
Removal . . . . . . . . . . . . . . . . . . . . . . .<br />
Ceiling filler and side<br />
panels replacement<br />
Left side panel and filler<br />
15-2b 15-4<br />
15-2a 15-2<br />
16-174<br />
16-174 15-45b 15-170<br />
1545a 15-168<br />
16-180<br />
16-178<br />
16-32<br />
16-30<br />
16-28<br />
16-32<br />
3-61 3-194<br />
15-36b 15-1<strong>34</strong><br />
15-36c 15-136<br />
15-36a 15-131<br />
16-28 installation . . . . . . . . . . . . . . . . . . .<br />
Left side panel and filler<br />
15-44d 15-167<br />
removal . . . . . . . . . . . . . . . . . . . . . . . 1544a 15-166<br />
16-72 Right side panel and filler<br />
16-70<br />
installation . . . . . . . . . . . . . . . . . . .<br />
16-70<br />
15-44c 15-166<br />
Right side panel and filler<br />
removal . . . . . . . . . . . . . . . . . . . . . . . 15-44b 15-166<br />
15-26 Ceiling light fixtures<br />
15-26 replacement (M820A1):<br />
15-24<br />
Installation . . . . . . . . . . . . . . . . . . . . 15-93b 15-336<br />
14-1<br />
Removal . . . . . . . . . . . . . . . . . . . . . . .<br />
Ceiling rear cover<br />
15-93a 15-336<br />
replacement (M820A1):<br />
3-56<br />
Installation . . . . . . . . . . . . . . . . . . . . 15-40b 15-157<br />
3-54<br />
Removal . . . . . . . . . . . . . . . . . . . . . . . 1540a 15-157<br />
3-53<br />
Ceiling rear cover replacement<br />
3-58<br />
3-51<br />
(M820, M820A2):<br />
3-54<br />
Installation . . . . . . . . . . . . . . . . . . . . 15-41b 15-158<br />
Removal . . . . . . . . . . . . . . . . . . . . . . . 15-41a 15-158<br />
Ceiling registers and<br />
deflectors replacement:<br />
3-41 3-123 Installation . . . . . . . . . . . . . . . . . . . . 15-38b 15-154<br />
Removal . . . . . . . . . . . . . . . . . . . . . . . 15-38a 15-154<br />
3-56 3-184 Ceiling transition maintenance<br />
(M820, M820A2):<br />
3-44 3-128 Assembly . . . . . . . . . . . . . . . . . . . . . . 15-42c 15-162<br />
3-44f 3-128<br />
Disassembly . . . . . . . . . . . . . . . . . . . 15-42b 15-160<br />
Installation . . . . . . . . . . . . . . . . . . . . 15-42d 15-162<br />
3-44a 3-126<br />
3-44d 3-127<br />
Removal . . . . . . . . . . . . . . . . . . . . . . . 15-42a 15-160<br />
3-44c 3-127<br />
Ceiling transition<br />
3-44b 3-127 maintenance (M820A1):<br />
Assembly . . . . . . . . . . . . . . . . . . . . . . 1543c 15-164<br />
Disassembly . . . . . . . . . . . . . . . . . . . 15-43b 15-164<br />
15-3b 15-6<br />
Installation . . . . . . . . . . . . . . . . . . . . 15-43d 15-164<br />
15-3a 15-6<br />
Removal . . . . . . . . . . . . . . . . . . . . . . . 15-43a 15-164<br />
Index 4
<strong>TM</strong> 9-<strong>2320</strong>-<strong>260</strong>-<strong>34</strong>-2<br />
INDEX (Contd)<br />
Para Page Para Page<br />
Checklist preliminary<br />
maintenance; mechanical<br />
and power steering system<br />
maintenance . . . . . . . . . . . . . . . . . . . . 12-3 12-2<br />
Check valves replacement (M819):<br />
Elevating cylinder check valve<br />
installation . . . . . . . . . . . . . . . . . . . 16-38c 16-228<br />
Elevating cylinder check valve<br />
removal . . . . . . . . . . . . . . . . . . . . . . . 16-38a 16-228<br />
Hoist winch motor check valve<br />
installation . . . . . . . . . . . . . . . . . . . 16-38d 16-229<br />
Hoist winch motor check valve<br />
removal . . . . . . . . . . . . . . . . . . . . . . . 16-38b 16-228<br />
Circuit breaker harness and<br />
circuit breaker replacement:<br />
Circuit breaker harness<br />
installation . . . . . . . . . . . . . . . . . . . 15-69b 15-258<br />
Circuit breaker harness<br />
removal . . . . . . . . . . . . . . . . . . . . . . . 15-69a 15-258<br />
Circuit breaker installation . . . . . 15-69d 15-258<br />
Circuit breaker removal . . . . . . . . 15-69c 15-258<br />
Cleaning . . . . . . . . . . . . . . . . . . . . . . . . . 2-8 2-33<br />
Clearance light wiring harness,<br />
blackout and, replacement:<br />
Installation . . . . . . . . . . . . . . . . . . . 15-71b 15-264<br />
Removal . . . . . . . . . . . . . . . . . . . . . . . 15-71a 15-264<br />
Closing cylinder, liftgate,<br />
maintenance (M820A2):<br />
Assembly . . . . . . . . . . . . . . . . . . . . . . 15-60d 15-232<br />
Cleaning and inspection . . . . . . . . 15-60c 15-232<br />
Disassembly . . . . . . . . . . . . . . . . . . . 15-60b 15-230<br />
Installation . . . . . . . . . . . . . . . . . . . . . 15-60e 15-232<br />
Removal . . . . . . . . . . . . . . . . . . . . . . . 15-60a 15-230<br />
Clutches, liftgate,<br />
replacement (M820A2):<br />
Installation . . . . . . . . . . . . . . . . . . . . 15-54b 15-208<br />
Removal . . . . . . . . . . . . . . . . . . . . . . . 15-54a 15-208<br />
Clutch, flywheel<br />
and, installation:<br />
Clutch installation . . . . . . . . . . . . . 3-59b 3-192<br />
Flywheel installation.. . . . . . . . . . 3-59a 3-191<br />
Clutch, flywheel and, removal:<br />
Removal . . . . . . . . . . . . . . . . . . . . . . . 3-42 3-124<br />
Clutch maintenance:<br />
Cleaning and inspection . . . . . . . . 4-2b 4-2<br />
Clutch lever adjustment . . . . . . . . 4-2c 4-2<br />
Installation . . . . . . . . . . . . . . . . . . . . 4-2d 4-2<br />
Removal . . . . . . . . . . . . . . . . . . . . . . . 4-2a 4-2<br />
Common and special tools list,<br />
Appendix B . . . . . . . . . . . . . . . . . . . . . . B-1<br />
Common tools and equipment . . . . . 2-1 2-1<br />
Compressor, air, replacement:<br />
Assembly . . . . . . . . . . . . . . . . . . . . . . 11-5d 11-22<br />
Cleaning . . . . . . . . . . . . . . . . . . . . . . . 11-5b 11-14<br />
Disassembly . . . . . . . . . . . . . . . . . . . 11-5a 11-10<br />
Inspection and repair . . . . . . . . . . . 11-5c 11-16<br />
Compressor, air, replacement:<br />
Installation . . . . . . . . . . . . . . . . . . . . 11-3b 11-6<br />
Removal . . . . . . . . . . . . . . . . . . . . . . . 11-3a 11-4<br />
Conduit, 400 Hz converter<br />
harness, replacement:<br />
Installation . . . . . . . . . . . . . . . . . . . . 15-87b 15-326<br />
Removal . . . . . . . . . . . . . . . . . . . . . . . 15-87a 15-326<br />
Conduit, load center,<br />
replacement:<br />
Installation . . . . . . . . . . . . . . . . . . . . 15-83b 15-314<br />
Removal . . . . . . . . . . . . . . . . . . . . . . . 15-83a 15-312<br />
Connecting rod, piston<br />
and, installation:<br />
Assembly . . . . . . . . . . . . . . . . . . . . . . 3-55a 3-180<br />
Connecting rod side<br />
clearance . . . . . . . . . . . . . . . . . . . . . 3-55c 3-182<br />
Installation . . . . . . . . . . . . . . . . . . . . 3-55b 3-180<br />
Connecting rod, piston<br />
and, maintenance:<br />
Disassembly . . . . . . . . . . . . . . . . . . . 3-47b 3-132<br />
Removal . . . . . . . . . . . . . . . . . . . . . . . 3-47a 3-132<br />
Connectors, fuel crossover,<br />
replacement:<br />
Installation . . . . . . . . . . . . . . . . . . . . 3-17b 3-48<br />
Removal . . . . . . . . . . . . . . . . . . . . . . . 3-17a 3-48<br />
Container, engine<br />
and, replacement:<br />
Installation . . . . . . . . . . . . . . . . . . . . 3-25b 3-98<br />
Removal . . . . . . . . . . . . . . . . . . . . . . . 3-25a 3-97<br />
Control bracket, personnel<br />
heater, replacement:<br />
Installation . . . . . . . . . . . . . . . . . . . . 17-17b 17-44<br />
Removal . . . . . . . . . . . . . . . . . . . . . . . 17-17a 17-44<br />
Control center box<br />
maintenance:<br />
Assembly . . . . . . . . . . . . . . . . . . . . . . 15-84c 15-318<br />
Disassembly . . . . . . . . . . . . . . . . . . . 15-84b 15-316<br />
Installation . . . . . . . . . . . . . . . . . . . . 15-84d 15-318<br />
Removal . . . . . . . . . . . . . . . . . . . . . . . 15-84a 15-316<br />
Control linkage, liftgate,<br />
maintenance (M820A2):<br />
Assembly . . . . . . . . . . . . . . . . . . . . . . 15-55d 15-212<br />
Cleaning and inspection . . . . . . . . 15-55c 15-212<br />
Disassembly . . . . . . . . . . . . . . . . . . . 15-55b 15-212<br />
Installation . . . . . . . . . . . . . . . . . . . . 15-55e 15-212<br />
Removal . . . . . . . . . . . . . . . . . . . . . . . 15-55a 15-210<br />
Index 5
<strong>TM</strong> 9-<strong>2320</strong>-<strong>260</strong>-<strong>34</strong>-2<br />
Control valve bank<br />
replacement (M819):<br />
Installation . . . . . . . . . . . . . . . . . . . .<br />
Removal . . . . . . . . . . . . . . . . . . . . . . .<br />
Control valve, liftgate,<br />
replacement (M820A2):<br />
Installation . . . . . . . . . . . . . . . . . . . .<br />
Removal . . . . . . . . . . . . . . . . . . . . . . .<br />
Control valve maintenance:<br />
Assembly . . . . . . . . . . . . . . . . . . . . . .<br />
Cleaning and inspection . . . . . . . .<br />
Disassembly . . . . . . . . . . . . . . . . . . .<br />
Installation . . . . . . . . . . . . . . . . . . . .<br />
Removal . . . . . . . . . . . . . . . . . . . . . . .<br />
Control valve, power divider<br />
governor, replacement<br />
Installation (M816) . . . . . . . . . . . . .<br />
Installation (M819) . . . . . . . . . . . . .<br />
Removal (M816) . . . . . . . . . . . . . . . .<br />
Removal (M819) . . . . . . . . . . . . . . . .<br />
Control valve repair (M816):<br />
Assembly . . . . . . . . . . . . . . . . . . . . . .<br />
Cleaning, inspection,<br />
and repair . . . . . . . . . . . . . . . . . . . .<br />
Disassembly . . . . . . . . . . . . . . . . . . .<br />
Converter and auxiliary pump<br />
wiring harnesses replacement:<br />
Installation . . . . . . . . . . . . . . . . . . . .<br />
Removal . . . . . . . . . . . . . . . . . . . . . . .<br />
Converter, 400 Hz, and support<br />
bracket replacement<br />
Installation . . . . . . . . . . . . . . . . . . . .<br />
Removal . . . . . . . . . . . . . . . . . . . . . . .<br />
Converter, 400 Hz, harness<br />
conduit replacement<br />
Installation . . . . . . . . . . . . . . . . . . . .<br />
Removal . . . . . . . . . . . . . . . . . . . . . . .<br />
Converter junction box<br />
replacement:<br />
Installation . . . . . . . . . . . . . . . . . . . .<br />
Removal . . . . . . . . . . . . . . . . . . . . . . .<br />
Cooler, oil, maintenance:<br />
Assembly . . . . . . . . . . . . . . . . . . . . . .<br />
Cleaning and inspection . . . . . . . .<br />
Disassembly . . . . . . . . . . . . . . . . . . .<br />
Installation . . . . . . . . . . . . . . . . . . . .<br />
Removal . . . . . . . . . . . . . . . . . . . . . . .<br />
Covers, rocker lever<br />
housing, installation:<br />
Installation . . . . . . . . . . . . . . . . . . . .<br />
INDEX (Contd)<br />
Para Page Para Page<br />
16-36b<br />
16-36a<br />
15-58b<br />
15-58a<br />
15-19d<br />
15-19c<br />
15-19b<br />
15-19e<br />
15-19a<br />
16-50d<br />
16-50c<br />
16-50a<br />
16-50b<br />
16-221<br />
16-218<br />
15-224<br />
15-224<br />
15-62<br />
15-62<br />
15-60<br />
15-64<br />
15-60<br />
16-300<br />
16-300<br />
16-299<br />
16-300<br />
16-27c 16-166<br />
16-27b<br />
16-27a<br />
15-80b<br />
15-80a<br />
15-85b<br />
15-85a<br />
15-87b<br />
15-87a<br />
15-86b<br />
15-86a<br />
3-12d<br />
3-12c<br />
3-12b<br />
3-12e<br />
3-12a<br />
16-164<br />
16-164<br />
15-292<br />
15-290<br />
15-320<br />
15-320<br />
15-326<br />
15-326<br />
15-324<br />
15-322<br />
3-<strong>34</strong><br />
3-32<br />
3-30<br />
3-<strong>34</strong><br />
3-65 3-202<br />
Covers, rocker lever<br />
housing, replacement:<br />
Installation . . . . . . . . . . . . . . . . . . . .<br />
Removal . . . . . . . . . . . . . . . . . . . . . . .<br />
Crane cab (gondola)<br />
replacement (M819):<br />
Installation . . . . . . . . . . . . . . . . . . . .<br />
Removal . . . . . . . . . . . . . . . . . . . . . . .<br />
Crane gearcase<br />
maintenance (M816):<br />
Assembly . . . . . . . . . . . . . . . . . . . . . .<br />
Cleaning and inspection . . . . . . . .<br />
Disassembly . . . . . . . . . . . . . . . . . . .<br />
Installation . . . . . . . . . . . . . . . . . . . .<br />
Removal . . . . . . . . . . . . . . . . . . . . . . .<br />
Crane gondola<br />
maintenance (M816):<br />
Assembly . . . . . . . . . . . . . . . . . . . . . .<br />
Cleaning and inspection . . . . . . . .<br />
Disassembly . . . . . . . . . . . . . . . . . . .<br />
Installation . . . . . . . . . . . . . . . . . . . .<br />
Removal . . . . . . . . . . . . . . . . . . . . . . .<br />
Crane shipper, boom, boom<br />
extension, and rollers<br />
maintenance (M819):<br />
Boom extension assembly . . . . . . .<br />
Boom extension disassembly . . . .<br />
Boom extension installation . . . .<br />
Boom extension removal . . . . . . . .<br />
Boom installation . . . . . . . . . . . . . .<br />
Boom removal . . . . . . . . . . . . . . . . . .<br />
Cleaning and inspection . . . . . . . .<br />
Extension cylinder<br />
installation . . . . . . . . . . . . . . . . . . .<br />
Extension cylinder removal . . . . .<br />
Front lower roller assembly<br />
and adjustmen t . . . . . . . . . . . . .<br />
Front lower roller<br />
disassembly . . . . . . . . . . . . . . . . . . .<br />
Middle lower roller<br />
assembly. . . . . . . . . . . . . . . . . . . . . .<br />
Middle lower roller<br />
disassembly . . . . . . . . . . . . . . . . . . .<br />
Repair . . . . . . . . . . . . . . . . . . . . . . . . .<br />
Shipper installation . . . . . . . . . . . .<br />
Shipper removal . . . . . . . . . . . . . . . .<br />
Upper roller assembly<br />
3-14b 3-37<br />
3-14a 3-37<br />
16-29b 16-174<br />
16-29a 16-174<br />
16-28d 16-172<br />
16-28c 16-170<br />
16-28b 16-168<br />
16-28e 16-173<br />
16-28a 16-168<br />
16-22d 16-1<strong>34</strong><br />
16-22c 16-132<br />
16-22b 16-132<br />
16-22e 16-136<br />
16-22a 16-130<br />
16-<strong>34</strong>o 16-208<br />
16-<strong>34</strong>f 16-200<br />
16-<strong>34</strong>s 16-210<br />
16-<strong>34</strong>b 16-197<br />
16-<strong>34</strong>r 16-210<br />
16-<strong>34</strong>c 16-198<br />
16-<strong>34</strong>j 16-202<br />
16-<strong>34</strong>q 16-209<br />
16-<strong>34</strong>d 16-198<br />
16-<strong>34</strong>n 16-206<br />
16-<strong>34</strong>g 16-200<br />
16-<strong>34</strong>m 16-206<br />
16-<strong>34</strong>h 16-201<br />
16-<strong>34</strong>k 16-202<br />
16-<strong>34</strong>t 16-212<br />
16-<strong>34</strong>a 16-194<br />
3-30 and adjustment . . . . . . . . . . . . . . .<br />
Upper roller disassembly . . . . . . .<br />
Upper roller installation . . . . . . . .<br />
Upper roller removal . . . . . . . . . . .<br />
16-<strong>34</strong>l 16-204<br />
16-<strong>34</strong>i 16-201<br />
16-<strong>34</strong>p 16-208<br />
16-<strong>34</strong>e 16-199<br />
Index 6
<strong>TM</strong> 9-<strong>2320</strong>-<strong>260</strong>-<strong>34</strong>-2<br />
INDEX (Contd)<br />
Para<br />
Page<br />
Para<br />
Page<br />
Crane turntable<br />
maintenance (M816):<br />
Assembly . . . . . . . . . . . . . . . . . . . . . . 16-26d 16-160<br />
Cleaning, inspection,<br />
and repair . . . . . . . . . . . . . . . . . . . . 16-26c 16-160<br />
Disassembly . . . . . . . . . . . . . . . . . . . 16-26b 16-158<br />
Installation . . . . . . . . . . . . . . . . . . . . 16-26e 16-162<br />
Removal . . . . . . . . . . . . . . . . . . . . . . . 16-26a 16-156<br />
Crankshaft and main<br />
bearing installation:<br />
Installation . . . . . . . . . . . . . . . . . . . . 3-54 3-178<br />
Crankshaft and main<br />
bearing removal:<br />
Removal . . . . . . . . . . . . . . . . . . . . . . . 3-48 3-1<strong>34</strong><br />
Crankshaft flange installation:<br />
Installation . . . . . . . . . . . . . . . . . . . . 3-73 3-212<br />
Crankshaft flange maintenance:<br />
Check runout and wobble . . . . . . . 3-6c 3-12<br />
Installation . . . . . . . . . . . . . . . . . . . . 3-6b 3-10<br />
Removal . . . . . . . . . . . . . . . . . . . . . . . 3-6a 3-10<br />
Crankshaft flange removal:<br />
Removal . . . . . . . . . . . . . . . . . . . . . . . 3-31 3-110<br />
Crosshead installation:<br />
Installation . . . . . . . . . . . . . . . . . . . 3-63 3-198<br />
Crosshead removal:<br />
Removal . . . . . . . . . . . . . . . . . . . . . . . 3-39 3-121<br />
Crosshead, valve, maintenance:<br />
Inspection . . . . . . . . . . . . . . . . . . . . . . 3-16b 3-46<br />
Installation and adjustment . . . . 3-16c 3-46<br />
Removal . . . . . . . . . . . . . . . . . . . . . . . 3-16a 3-46<br />
Crossover connector,<br />
fuel, installation:<br />
Installation . . . . . . . . . . . . . . . . . . . . 3-60 3-193<br />
Cylinder block, cylinder<br />
liners and, maintenance:<br />
Assembly . . . . . . . . . . . . . . . . . . . . . . 3-50d 3-147<br />
Cleaning and inspection . . . . . . . . 3-50c 3-139<br />
Disassembly . . . . . . . . . . . . . . . . . . . 3-50b 3-137<br />
Installation . . . . . . . . . . . . . . . . . . . . 3-50e 3-147<br />
Removal . . . . . . . . . . . . . . . . . . . . . . . 3-50a 3-136<br />
Cylinder, boom extension,<br />
maintenance (M819):<br />
Assembly . . . . . . . . . . . . . . . . . . . . . . 16-35d 16-216<br />
Cleaning and inspection . . . . . . . . 16-35b 16-214<br />
Disassembly . . . . . . . . . . . . . . . . . . . 16-35a 16-214<br />
Repair . . . . . . . . . . . . . . . . . . . . . . . . . 16-35c 16-216<br />
Cylinder, boom lift,<br />
maintenance (M819):<br />
Assembly . . . . . . . . . . . . . . . . . . . . . . 16-33e 16-192<br />
Cleaning and inspection . . . . . . . . 16-33c 16-191<br />
Disassembly . . . . . . . . . . . . . . . . . . . 16-33b 16-190<br />
Installation . . . . . . . . . . . . . . . . . . . . 16-33f 16-192<br />
Removal . . . . . . . . . . . . . . . . . . . . . . . 16-33a 16-188<br />
Repair . . . . . . . . . . . . . . . . . . . . . . . . . 16-33d 16-191<br />
Cylinder, extension, repair:<br />
Cleaning, inspection,<br />
and repair . . . . . . . . . . . . . . . . . . . . 16-20b 16-122<br />
Removal . . . . . . . . . . . . . . . . . . . . . . . 16-20a 16-120<br />
Reassembly . . . . . . . . . . . . . . . . . . . . 16-20c 16-122<br />
Cylinder head installation:<br />
Installation . . . . . . . . . . . . . . . . . . . . 3-62 3-196<br />
Cylinder head removal:<br />
Removal . . . . . . . . . . . . . . . . . . . . . . . 3-40 3-122<br />
Cylinder head repair:<br />
Assembly . . . . . . . . . . . . . . . . . . . . . . 3-51d 3-162<br />
Cleaning . . . . . . . . . . . . . . . . . . . . . . . 3-51b 3-150<br />
Disassembly . . . . . . . . . . . . . . . . . . . 3-51a 3-150<br />
Inspection . . . . . . . . . . . . . . . . . . . . . . 3-51c 3-152<br />
Cylinder heads replacement:<br />
Installation . . . . . . . . . . . . . . . . . . . . 3-18b 3-50<br />
Removal . . . . . . . . . . . . . . . . . . . . . . . 3-18a 3-49<br />
Cylinder, hoist, maintenance:<br />
Assembly . . . . . . . . . . . . . . . . . . . . . . 15-15d 15-44<br />
Cleaning and inspection . . . . . . . . 15-15c 15-42<br />
Disassembly . . . . . . . . . . . . . . . . . . . 15-15b 15-40<br />
Installation . . . . . . . . . . . . . . . . . . . . 15-15e 15-46<br />
Removal . . . . . . . . . . . . . . . . . . . . . . . 15-15a 15-38<br />
Cylinder, liftgate closing,<br />
maintenance (M820A2):<br />
Assembly . . . . . . . . . . . . . . . . . . . . . . 15-60d 15-232<br />
Cleaning and inspection . . . . . . . . 15-60c 15-232<br />
Disassembly . . . . . . . . . . . . . . . . . . . 15-60b 15-230<br />
Installation . . . . . . . . . . . . . . . . . . . . 15-60e 15-232<br />
Removal . . . . . . . . . . . . . . . . . . . . . . . 15-60a 15-230<br />
Cylinder, liftgate,<br />
maintenance (M820A2):<br />
Assembly . . . . . . . . . . . . . . . . . . . . . . 15-59d 15-228<br />
Cleaning and inspection . . . . . . . . 15-59c 15-227<br />
Disassembly . . . . . . . . . . . . . . . . . . . 15-59b 15-226<br />
Installation . . . . . . . . . . . . . . . . . . . . 15-59e 15-228<br />
Removal . . . . . . . . . . . . . . . . . . . . . . . 15-59a 15-226<br />
Cylinder liners and cylinder<br />
block maintenance:<br />
Assembly . . . . . . . . . . . . . . . . . . . . . . 3-50d 3-147<br />
Cleaning and inspection . . . . . . . . 3-50c 3-139<br />
Disassembly . . . . . . . . . . . . . . . . . . . 3-50b 3-137<br />
Installation . . . . . . . . . . . . . . . . . . . . 3-50e 3-147<br />
Removal . . . . . . . . . . . . . . . . . . . . . . . 3-50a 3-136<br />
Cylinder, power steering<br />
assist, maintenance:<br />
Assembly . . . . . . . . . . . . . . . . . . . . . . 12-7c 12-17<br />
Cleaning and inspection . . . . . . . . 12-7b 12-16<br />
Disassembly . . . . . . . . . . . . . . . . . . . 12-7a 12-16<br />
Index 7
<strong>TM</strong> 9-<strong>2320</strong>-<strong>260</strong>-<strong>34</strong>-2<br />
Cylinders, boom elevating,<br />
maintenance (M816):<br />
Assembly . . . . . . . . . . . . . . . . . . . . . . 16-14d 16-86<br />
Cleaning and inspection . . . . . . . . 16-14c 16-84<br />
Disassembly . . . . . . . . . . . . . . . . . . . 16-14b 16-84<br />
Installation . . . . . . . . . . . . . . . . . . . . 16-14e 16-88<br />
Removal . . . . . . . . . . . . . . . . . . . . . . . 16-14a 16-82<br />
Damper maintenance:<br />
Assembly . . . . . . . . . . . . . . . . . . . . . .<br />
Disassembly . . . . . . . . . . . . . . . . . . .<br />
Installation . . . . . . . . . . . . . . . . . . . .<br />
Removal . . . . . . . . . . . . . . . . . . . . . . .<br />
Damper, pulsation,<br />
maintenance:<br />
Assembly . . . . . . . . . . . . . . . . . . . . . .<br />
Disassembly . . . . . . . . . . . . . . . . . . .<br />
Inspection . . . . . . . . . . . . . . . . . . . . . .<br />
Installation . . . . . . . . . . . . . . . . . . . .<br />
Removal . . . . . . . . . . . . . . . . . . . . . . .<br />
Damper, vibration, installation:<br />
Installation . . . . . . . . . . . . . . . . . . . .<br />
Damper, vibration, maintenance:<br />
Check runout and wobble, . . . . . .<br />
Inspection . . . . . . . . . . . . . . . . . . . . . .<br />
Installation . . . . . . . . . . . . . . . . . . . .<br />
Removal . . . . . . . . . . . . . . . . . . . . . . .<br />
Damper, vibration, removal:<br />
Removal . . . . . . . . . . . . . . . . . . . . . . .<br />
Data, equipment<br />
description and . . . . . . . . . . . . . . . . . .<br />
Deflectors, ceiling registers<br />
and, replacement:<br />
Installation . . . . . . . . . . . . . . . . . . . .<br />
Removal . . . . . . . . . . . . . . . . . . . . . . .<br />
Designations, official<br />
nomenclature, names, and . . . . . . .<br />
Destruction of army materiel<br />
to prevent enemy use. . . . . . . . . . . .<br />
Diagnostic Equipment (<strong>TM</strong>DE),<br />
Test Measurement, and . . . . . . . . .<br />
Differential and differential<br />
earner repair:<br />
Assembly and adjustment. . . . . .<br />
Cleaning, inspection,<br />
and repair . . . . . . . . . . . . . . . . . . . .<br />
Disassembly . . . . . . . . . . . . . . . . . . .<br />
D<br />
INDEX (Contd)<br />
Para Page Para Page<br />
5-20c<br />
5-20b<br />
5-20d<br />
5-20a<br />
5-16d<br />
5-16b<br />
5-16c<br />
5-16e<br />
5-16a<br />
5-54<br />
5-54<br />
5-55<br />
5-54<br />
5-46<br />
5-45<br />
545<br />
5-46<br />
545<br />
3-74 3-213<br />
3-5a<br />
3-5c<br />
3-5d<br />
3-5b<br />
3-7<br />
3-8<br />
3-8<br />
3-8<br />
3-30 3-109<br />
1-9 1-2<br />
15-38b<br />
15-38a<br />
1-5 1-1<br />
1-3 1-1<br />
2-3 2-1<br />
15-154<br />
15-154<br />
Differential earner,<br />
differential and, repair:<br />
Assembly and adjustment . . . . . .<br />
Cleaning, inspection,<br />
and repair . . . . . . . . . . . . . . . . . . . .<br />
Disassembly . . . . . . . . . . . . . . . . . . .<br />
Differential, front and<br />
rear, maintenance:<br />
Cleaning and inspection . . . . . . . .<br />
Installation . . . . . . . . . . . . . . . . . . .<br />
Removal . . . . . . . . . . . . . . . . . . . . . . .<br />
Differential oil seals<br />
replacement:<br />
Front seal installation . . . . . . . . . .<br />
Front seal removal . . . . . . . . . . . . .<br />
Rear seal installation . . . . . . . . . . .<br />
Rear seal removal . . . . . . . . . . . . . .<br />
Door, bonnet, maintenance:<br />
Assembly . . . . . . . . . . . . . . . . . . . . . .<br />
Cleaning and inspection . . . . . . . .<br />
Disassembly . . . . . . . . . . . . . . . . . . .<br />
Installation . . . . . . . . . . . . . . . . . . . .<br />
Removal . . . . . . . . . . . . . . . . . . . . . . .<br />
Doors, rear, maintenance:<br />
Assembly . . . . . . . . . . . . . . . . . . . . . .<br />
Cleaning and inspection . . . . . . . .<br />
Disassembly . . . . . . . . . . . . . . . . . . .<br />
Installation . . . . . . . . . . . . . . . . . . . .<br />
Removal . . . . . . . . . . . . . . . . . . . . . . .<br />
Doors, side, maintenance:<br />
Assembly . . . . . . . . . . . . . . . . . . . . . .<br />
Cleaning and inspection . . . . . . . .<br />
Disassembly . . . . . . . . . . . . . . . . . . .<br />
Installation . . . . . . . . . . . . . . . . . . . .<br />
Removal . . . . . . . . . . . . . . . . . . . . . . .<br />
Drag brake, front<br />
winch, replacement:<br />
Installation . . . . . . . . . . . . . . . . . . . .<br />
Removal . . . . . . . . . . . . . . . . . . . . . . .<br />
Drive, accessory, installation:<br />
Installation . . . . . . . . . . . . . . . . . . . .<br />
Drive, accessory, maintenance:<br />
Assembly . . . . . . . . . . . . . . . . . . . . . .<br />
Cleaning and inspection . . . . . . . .<br />
Disassembly . . . . . . . . . . . . . . . . . . .<br />
Installation . . . . . . . . . . . . . . . . . . . .<br />
Removal . . . . . . . . . . . . . . . . . . . . . . .<br />
Drive repair:<br />
10-8c 10-<strong>34</strong><br />
10-8b 10-29<br />
10-8a 10-22<br />
10-7b 10-19<br />
10-7c 10-20<br />
10-7a 10-18<br />
10-9c 10-52<br />
10-9a 10-52<br />
10-9d 10-53<br />
10-9b 10-52<br />
15-48d 15-186<br />
1548c 15-186<br />
15-48b 15-184<br />
15-48e 15-186<br />
15-48a 15-182<br />
15-28d 15-90<br />
15-28c 15-90<br />
15-28b 15-86<br />
15-28e 15-94<br />
15-28a 15-86<br />
15-29d 15-98<br />
15-29c 15-96<br />
15-29b 15-96<br />
15-29e 15-98<br />
15-29a 15-95<br />
16-6b 16-42<br />
16-6a 16-41<br />
3-69 3-206<br />
3-9d 3-22<br />
3-9c 3-22<br />
3-9b 3-20<br />
3-9e 3-23<br />
3-9a 3-20<br />
10-8c 10-<strong>34</strong> Assembly . . . . . . . . . . . . . . . . . . . . . . 16-49c 16-298<br />
Cleaning, inspection,<br />
10-8b 10-29<br />
and repair . . . . . . . . . . . . . . . . . . . . 16-49b 16-297<br />
10-8a 10-22<br />
Disassembly . . . . . . . . . . . . . . . . . . . 16-49a 16-296<br />
Index 8
<strong>TM</strong> 9-<strong>2320</strong>-<strong>260</strong>-<strong>34</strong>-2<br />
INDEX (Contd)<br />
Driver’s seat base maintenance:<br />
Inspection and repair . . . . . . . . . . .<br />
Installation. . . . . . . . . . . . . . . . . . . .<br />
Removal . . . . . . . . . . . . . . . . . . . . . . .<br />
Driveshaft, retractable beam,<br />
and lock maintenance:<br />
Cleaning and inspection . . . . . . . .<br />
Installation . . . . . . . . . . . . . . . . . . . .<br />
Removal . . . . . . . . . . . . . . . . . . . . . . .<br />
Ducts, ceiling air, and<br />
supports replacement:<br />
Installation . . . . . . . . . . . . . . . . . . . .<br />
Removal . . . . . . . . . . . . . . . . . . . . . . .<br />
Dump body maintenance:<br />
Cleaning, inspection,<br />
and repair . . . . . . . . . . . . . . . . . . . .<br />
Installation . . . . . . . . . . . . . . . . . . . .<br />
Removal . . . . . . . . . . . . . . . . . . . . . . .<br />
Electrical box replacement<br />
Installation . . . . . . . . . . . . . . . . . . . .<br />
Removal . . . . . . . . . . . . . . . . . . . . . . .<br />
Electric heater (10kW) wiring<br />
harness replacement:<br />
Installation . . . . . . . . . . . . . . . . . . . .<br />
Removal . . . . . . . . . . . . . . . . . . . . . . .<br />
Elevating cylinders, boom,<br />
maintenance (M816):<br />
Assembly . . . . . . . . . . . . . . . . . . . . . .<br />
Cleaning and inspection . . . . . . . .<br />
Disassembly . . . . . . . . . . . . . . . . . . .<br />
Installation . . . . . . . . . . . . . . . . . . . . .<br />
Removal . . . . . . . . . . . . . . . . . . . . . . .<br />
Emergency lamp, left side,<br />
wiring harness replacement:<br />
Installation . . . . . . . . . . . . . . . . . . . .<br />
Removal . . . . . . . . . . . . . . . . . . . . . . .<br />
Emergency lamp, right side,<br />
wiring harness replacement<br />
Installation . . . . . . . . . . . . . . . . . . . .<br />
Removal . . . . . . . . . . . . . . . . . . . . . . .<br />
Emergency light fixtures,<br />
blackout and, replacement<br />
Installation . . . . . . . . . . . . . . . . . . . .<br />
Removal . . . . . . . . . . . . . . . . . . . . . . .<br />
End panel, hinged,<br />
maintenance:<br />
Assembly . . . . . . . . . . . . . . . . . . . . . .<br />
Cleaning and inspection . . . . . . . .<br />
Disassembly . . . . . . . . . . . . . . . . . . .<br />
Installation . . . . . . . . . . . . . . . . . . . .<br />
Removal . . . . . . . . . . . . . . . . . . . . . . .<br />
E<br />
Para<br />
14-4b<br />
14-4c<br />
14-4a<br />
15-25b<br />
15-25c<br />
15-25a<br />
15-45b<br />
1545a<br />
15-13b<br />
15-13c<br />
15-13a<br />
Page<br />
14-4<br />
14-5<br />
14-2<br />
15-76<br />
15-78<br />
15-76<br />
15-170<br />
15-168<br />
15-32<br />
15-32<br />
15-28<br />
15-90b 15-332<br />
15-90a 15-332<br />
15-67b 15-254<br />
15-67a 15-252<br />
16-14d 16-86<br />
16-14c 16-84<br />
16-14b 16-84<br />
16-14e 16-88<br />
16-14a 16-82<br />
15-73b 15-272<br />
15-73a 15-270<br />
15-74b 15-276<br />
15-74a 15-274<br />
15-91b 15-333<br />
15-91a 15-333<br />
15-33d 15-116<br />
15-33c 15-114<br />
15-33b 15-114<br />
15-33e 15-116<br />
15-33a 15-113<br />
Para<br />
Engine and container<br />
replacement:<br />
Installation . . . . . . . . . . . . . . . . . . . . 3-25b<br />
Removal . . . . . . . . . . . . . . . . . . . . . . . 3-25a<br />
Engine and transmission<br />
replacement<br />
Installation . . . . . . . . . . . . . . . . . . . . 3-24c<br />
Preliminary disconnections . . . . . 3-24a<br />
Removal . . . . . . . . . . . . . . . . . . . . . . . 3-24b<br />
Engine coolant heater blower<br />
motor maintenance:<br />
Cleaning and inspection . . . . . . . . 17-4b<br />
Installation . . . . . . . . . . . . . . . . . . . . 174c<br />
Removal . . . . . . . . . . . . . . . . . . . . . . . 174a<br />
Engine coolant heater<br />
burner maintenance:<br />
Cleaning and inspection . . . . . . . . 17-10b<br />
Installation . . . . . . . . . . . . . . . . . . . . 17-10c<br />
Removal . . . . . . . . . . . . . . . . . . . . . . . 17-10a<br />
Engine coolant heater<br />
component bracket<br />
maintenance:<br />
Assembly . . . . . . . . . . . . . . . . . . . . . . 17-6d<br />
Disassembly . . . . . . . . . . . . . . . . . . . 17-6b<br />
Inspection . . . . . . . . . . . . . . . . . . . . . . 17-6c<br />
Installation . . . . . . . . . . . . . . . . . . . . 17-6e<br />
Removal . . . . . . . . . . . . . . . . . . . . . . . 17-6a<br />
Engine coolant heater flame<br />
detector switch maintenance:<br />
Assembly . . . . . . . . . . . . . . . . . . . . . . 17-3d<br />
Disassembly . . . . . . . . . . . . . . . . . . . 17-3b<br />
Inspection . . . . . . . . . . . . . . . . . . . . . . 17-3c<br />
Installation . . . . . . . . . . . . . . . . . . . . 17-3e<br />
Removal . . . . . . . . . . . . . . . . . . . . . . . 17-3a<br />
Engine coolant heater fuel<br />
control valve replacement<br />
Installation . . . . . . . . . . . . . . . . . . . . 17-7b<br />
Removal . . . . . . . . . . . . . . . . . . . . . . . 17-7a<br />
Engine coolant heater fuel ‘<br />
tube and preheat resistor<br />
replacement:<br />
Installation . . . . . . . . . . . . . . . . . . . . 17-9b<br />
Removal . . . . . . . . . . . . . . . . . . . . . . . 17-9a<br />
Engine coolant heater<br />
housing and heat exchanger<br />
maintenance:<br />
Cleaning and inspection . . . . . . . . 17-11b<br />
Installation . . . . . . . . . . . . . . . . . . . . 17-11c<br />
Removal . . . . . . . . . . . . . . . . . . . . . . . 17-11a<br />
Page<br />
3-98<br />
3-97<br />
3-88<br />
3-77<br />
3-86<br />
17-8<br />
17-9<br />
17-8<br />
17-24<br />
17-24<br />
17-24<br />
17-14<br />
17-12<br />
17-13<br />
17-14<br />
17-12<br />
17-6<br />
17-4<br />
17-4<br />
17-6<br />
17-4<br />
17-16<br />
17-16<br />
17-22<br />
17-22<br />
17-26<br />
17-26<br />
17-26<br />
Index 9
<strong>TM</strong> 9-<strong>2320</strong>-<strong>260</strong>-<strong>34</strong>-2<br />
Engine coolant heater<br />
overheat switch and<br />
igniter maintenance:<br />
Igniter installation . . . . . . . . . . . . .<br />
Igniter removal . . . . . . . . . . . . . . . . .<br />
Inspection . . . . . . . . . . . . . . . . . . . . . .<br />
Overheat switch installation . . . .<br />
Overheat switch removal . . . . . . .<br />
Engine coolant heater<br />
restriction thermostat<br />
maintenance:<br />
Inspection . . . . . . . . . . . . . . . . . . . . . .<br />
Installation . . . . . . . . . . . . . . . . . . . .<br />
Removal . . . . . . . . . . . . . . . . . . . . . . .<br />
Engine coolant heater testing<br />
Blower motor test . . . . . . . . . . . . . .<br />
Flame detector switch test . . . . . .<br />
Fuel control valve test . . . . . . . . . .<br />
Igniter test . . . . . . . . . . . . . . . . . . . . .<br />
Overheat switch test . . . . . . . . . . .<br />
Preparation . . . . . . . . . . . . . . . . . . . .<br />
Restriction thermostat test . . . . .<br />
Test equipment removal . . . . . . . .<br />
Engine injector timing<br />
instructions:<br />
Injector timing . . . . . . . . . . . . . . . . .<br />
Timing tool setup . . . . . . . . . . . . . . .<br />
Engine lifting brackets<br />
installation:<br />
Installation . . . . . . . . . . . . . . . . . . . .<br />
Entrance receptacle<br />
replacement:<br />
Installation . . . . . . . . . . . . . . . . . . . .<br />
Removal . . . . . . . . . . . . . . . . . . . . . . .<br />
Engine removal<br />
from repair stand:<br />
Removal . . . . . . . . . . . . . . . . . . . . . . .<br />
Equipment characteristics,<br />
capabilities, and features . . . . . . . .<br />
Equipment common tools and . . . .<br />
Equipment description<br />
and data . . . . . . . . . . . . . . . . . . . . . . . .<br />
Equipment improvement<br />
recommendations,<br />
reporting quality<br />
deficiencies, ideas, and . . . . . . . . . . .<br />
Equipment Improvement<br />
Report and Maintenance<br />
Digest (EIR MD) . . . . . . . . . . . . . . . .<br />
Equipment requiring<br />
calibration . . . . . . . . . . . . . . . . . . . . . .<br />
INDEX (Contd)<br />
Para Page Para<br />
17-8d<br />
17-8b<br />
17-8c<br />
17-8e<br />
17-8a<br />
17-5b<br />
17-5c<br />
17-5a<br />
17-12e<br />
17-12c<br />
17-12d<br />
17-12b<br />
17-12g<br />
17-12a<br />
17-12f<br />
17-12h<br />
3-81b<br />
3-81a<br />
3-66<br />
15-81b<br />
15-81a<br />
3-75<br />
1-10<br />
2-1<br />
1-9<br />
1-7<br />
1-8<br />
1-6<br />
17-20<br />
17-18<br />
17-19<br />
17-20<br />
17-18<br />
17-10<br />
17-10<br />
17-10<br />
17-32<br />
17-32<br />
17-32<br />
17-30<br />
17-<strong>34</strong><br />
17-28<br />
17-<strong>34</strong><br />
17-<strong>34</strong><br />
3-2<strong>34</strong><br />
3-233<br />
3-203<br />
15-294<br />
15-294<br />
3-214<br />
1-2<br />
2-1<br />
1-2<br />
1-2<br />
1-2<br />
1-1<br />
Exhaust, intake and,<br />
valves, refacing<br />
Cleaning after refacing . . . . . . . . . 3-77c<br />
Grinding or refacing valves . . . . . 3-77<br />
Valve specifications . . . . . . . . . . . . . 3-77a<br />
Exhaust manifold replacement<br />
Installation . . . . . . . . . . . . . . . . . . . . 3-11b<br />
Removal . . . . . . . . . . . . . . . . . . . . . . . 3-11a<br />
Expendable/durable<br />
supplies and materials<br />
list, Appendix C . . . . . . . . . . . . . . . . .<br />
Extension, boom, and rollers,<br />
crane shipper, boom,<br />
maintenance (M819):<br />
Boom extension assembly . . . . . . . 16-<strong>34</strong>o<br />
Boom extension disassembly . . . . 16-<strong>34</strong>f<br />
Boom extension installation . . . . 16-<strong>34</strong>s<br />
Boom extension removal . . . . . . . . 16-<strong>34</strong>b<br />
Worn installation . . . . . . . . . . . . . . 16-<strong>34</strong>r<br />
Boom removal . . . . . . . . . . . . . . . . . . 16-<strong>34</strong>c<br />
Cleaning and inspection . . . . . . . . 16-<strong>34</strong>j<br />
Extension cylinder<br />
installation . . . . . . . . . . . . . . . . . . . 16-<strong>34</strong>q<br />
Extension cylinder removal . . . . . 16-<strong>34</strong>d<br />
Front lower roller assembly<br />
and adjustment . . . . . . . . . . . . . . . 16-<strong>34</strong>n<br />
Front lower roller<br />
disassembly . . . . . . . . . . . . . . . . . . . 16-<strong>34</strong>g<br />
Middle lower roller<br />
assembly . . . . . . . . . . . . . . . . . . . . . . 16-<strong>34</strong>m<br />
Middle lower roller<br />
disassembly . . . . . . . . . . . . . . . . . . . 16-<strong>34</strong>h<br />
Repair . . . . . . . . . . . . . . . . . . . . . . . . . 16-<strong>34</strong>k<br />
Shipper installation . . . . . . . . . . . . 16-<strong>34</strong>t<br />
Shipper removal . . . . . . . . . . . . . . . . 16-<strong>34</strong>a<br />
Upper roller assembly<br />
and adjustment . . . . . . . . . . . . . . . 16-<strong>34</strong>l<br />
Upper roller disassembly . . . . . . . 16-<strong>34</strong>i<br />
Upper roller installation . . . . . . . . 16-<strong>34</strong>p<br />
Upper roller removal . . . . . . . . . . . 16-<strong>34</strong>e<br />
Extension cylinder, boom,<br />
maintenance (M819):<br />
Assembly . . . . . . . . . . . . . . . . . . . . . . 16-35d<br />
Cleaning and inspection . . . . . . . . 16-35b<br />
Disassembly . . . . . . . . . . . . . . . . . . . 16-35a<br />
Repair . . . . . . . . . . . . . . . . . . . . . . . . . 16-35c<br />
Extension cylinder repair:<br />
Cleaning, inspection,<br />
and repair . . . . . . . . . . . . . . . . . . . . 16-20b<br />
Removal . . . . . . . . . . . . . . . . . . . . . . . 16-20a<br />
Reassembly . . . . . . . . . . . . . . . . . . . . 16-20c<br />
Page<br />
3-218<br />
3-218<br />
3-217<br />
3-28<br />
3-28<br />
C-1<br />
16-208<br />
16-200<br />
16-210<br />
16-197<br />
16-210<br />
16-198<br />
16-202<br />
16-209<br />
16-198<br />
16-206<br />
16-200<br />
16-206<br />
16-201<br />
16-202<br />
16-212<br />
16-194<br />
16-204<br />
16-201<br />
16-208<br />
16-199<br />
16-216<br />
16-214<br />
16-214<br />
16-216<br />
16-122<br />
16-120<br />
16-122<br />
Index 10
<strong>TM</strong> 9-<strong>2320</strong>-<strong>260</strong>-<strong>34</strong>-2<br />
Para<br />
INDEX<br />
Page<br />
Exterior side panel<br />
maintenance:<br />
Assembly . . . . . . . . . . . . . . . . . . . . . . 15-32c 15-110<br />
Cleaning and inspection . . . . . . . . 15-32b 15-110<br />
Disassembly . . . . . . . . . . . . . . . . . . . . 15-32a 15-106<br />
Fabricated tools . . . . . . . . . . . . . . . . . . 2-4<br />
Fan hub repair:<br />
Assembly . . . . . . . . . . . . . . . . . . . . . . 3-7c<br />
Cleaning and inspection . . . . . . . 3-7b<br />
Disassembly . . . . . . . . . . . . . . . . . . . 3-7a<br />
Features, equipment<br />
characteristics and<br />
capabilities . . . . . . . . . . . . . . . . . . . . . . 1-10<br />
Fenders, rear, replacement;<br />
tractor wrecker body<br />
maintenance:<br />
Installation . . . . . . . . . . . . . . . . . . . . 15-9b<br />
Removal . . . . . . . . . . . . . . . . . . . . . . . 15-9a<br />
Fifth wheel maintenance<br />
(M815):<br />
Assembly . . . . . . . . . . . . . . . . . . . . . . 13-4c<br />
Cleaning and inspection . . . . . . . 13-4b<br />
Disassembly . . . . . . . . . . . . . . . . . . . 13-4a<br />
Fifth wheel maintenance<br />
(M818):<br />
Assembly . . . . . . . . . . . . . . . . . . . . . . 13-3c<br />
Cleaning and inspection . . . . . . . 13-3b<br />
Disassembly . . . . . . . . . . . . . . . . . . . 13-3a<br />
Fifth wheel maintenance<br />
(M819):<br />
Assembly . . . . . . . . . . . . . . . . . . . . . . 13-5c<br />
Cleaning and inspection . . . . . . . 13-5b<br />
Disassembly . . . . . . . . . . . . . . . . . . . 13-5a<br />
Filler, ceiling, and side<br />
panels replacement<br />
Left side panel and filler<br />
installation . . . . . . . . . . . . . . . . . . . 15-44d<br />
Left side panel and filler<br />
removal . . . . . . . . . . . . . . . . . . . . . . . 15-44a<br />
Right side panel and filler<br />
installation . . . . . . . . . . . . . . . . . . . 15-44c<br />
Right side panel and filler<br />
removal . . . . . . . . . . . . . . . . . . . . . . . 15-44b<br />
Flame detector switch, engine<br />
coolant heater, maintenance:<br />
Assembly . . . . . . . . . . . . . . . . . . . . . . 17-3d<br />
Disassembly . . . . . . . . . . . . . . . . . . . 17-3b<br />
Inspection . . . . . . . . . . . . . . . . . . . . . 17-3c<br />
F<br />
2-1<br />
3-16<br />
3-14<br />
3-14<br />
1-2<br />
15-18<br />
15-18<br />
13-12<br />
13-12<br />
13-11<br />
13-8<br />
13-6<br />
13-2<br />
13-20<br />
13-18<br />
13-14<br />
15-167<br />
15-166<br />
15-166<br />
15-166<br />
17-6<br />
17-4<br />
17-4<br />
Installation . . . . . . . . . . . . . . . . . . . . 17-3e 17-6<br />
Removal . . . . . . . . . . . . . . . . . . . . . . . 17-3a 17-4<br />
(Contd)<br />
Para<br />
Page<br />
Flame detector switch,<br />
personnel heater,<br />
maintenance:<br />
Assembly . . . . . . . . . . . . . . . . . . . . . . 17-15d 17-38<br />
Cleaning and inspection . . . . . . . 17-15c 17-38<br />
Disassembly . . . . . . . . . . . . . . . . . . . 17-15b 17-38<br />
Installation . . . . . . . . . . . . . . . . . . . . 17-15e 17-38<br />
Removal . . . . . . . . . . . . . . . . . . . . . . . 17-15a 17-37<br />
Flange, crankshaft,<br />
installation:<br />
Installation . . . . . . . . . . . . . . . . . . . . 3-73 3-212<br />
Flange, crankshaft,<br />
maintenance:<br />
Check runout and wobble . . . . . . 3-6c 3-12<br />
Installation . . . . . . . . . . . . . . . . . . . . 3-6b 3-10<br />
Removal . . . . . . . . . . . . . . . . . . . . . . . 3-6a 3-10<br />
Flange, crankshaft, removal:<br />
Removal . . . . . . . . . . . . . . . . . . . . . . . 3-31 3-110<br />
Flexible converter wiring<br />
harness replacement:<br />
Installation . . . . . . . . . . . . . . . . . . . . 15-77b 15-282<br />
Removal . . . . . . . . . . . . . . . . . . . . . . . 15-77a 15-282<br />
Floor, hinged, maintenance:<br />
Assembly . . . . . . . . . . . . . . . . . . . . . . 15-31d 15-104<br />
Cleaning and inspection . . . . . . . 15-31c 15-104<br />
Disassembly . . . . . . . . . . . . . . . . . . . 15-31b 15-102<br />
Installation . . . . . . . . . . . . . . . . . . . . 15-31e 15-104<br />
Removal . . . . . . . . . . . . . . . . . . . . . . . 15-31a 15-102<br />
Flow test:<br />
Checkball seating test . . . . . . . . . 5-11b 5-30<br />
Fuel delivery adjustment<br />
and measurement . . . . . . . . . . . . 5-11c 5-31<br />
Test stand setup . . . . . . . . . . . . . . . 5-11a 5-28<br />
Fluorescent light fixtures<br />
maintenance:<br />
Assembly . . . . . . . . . . . . . . . . . . . . . . 15-92c 15-335<br />
Disassembly . . . . . . . . . . . . . . . . . . . 15-92b 15-3<strong>34</strong><br />
Installation . . . . . . . . . . . . . . . . . . . . 15-92d 15-335<br />
Removal . . . . . . . . . . . . . . . . . . . . . . . 15-92a 15-3<strong>34</strong><br />
Flywheel and clutch<br />
installation:<br />
Clutch installation . . . . . . . . . . . . . 3-59b 3-192<br />
Flywheel installation . . . . . . . . . . 3-59a 3-191<br />
Flywheel and clutch removal:<br />
Removal . . . . . . . . . . . . . . . . . . . . . . . 3-42 3-124<br />
Flywheel and gear replacement:<br />
Flywheel installation . . . . . . . . . . 3-21d 3-68<br />
Flywheel removal.. . . . . . . . . . . . . 3-21a 3-66<br />
Ring gear installation . . . . . . . . . . 3-21c 3-68<br />
Ring gear removal . . . . . . . . . . . . . 3-21b 3-66<br />
Index 11
<strong>TM</strong> 9-<strong>2320</strong>-<strong>260</strong>-<strong>34</strong>-2<br />
Flywheel housing installation:<br />
Alinement . . . . . . . . . . . . . . . . . . . . .<br />
Installation . . . . . . . . . . . . . . . . . . . .<br />
Flywheel housing maintenance:<br />
Adjustment . . . . . . . . . . . . . . . . . . . .<br />
Cleaning and inspection . . . . . . .<br />
Installation, . . . . . . . . . . . . . . . . . . .<br />
Removal . . . . . . . . . . . . . . . . . . . . . . .<br />
Flywheel housing removal:<br />
Removal . . . . . . . . . . . . . . . . . . . . . . .<br />
Follower, cam, installation:<br />
Installation . . . . . . . . . . . . . . . . . . . .<br />
Follower, cam, removal:<br />
Removal . . . . . . . . . . . . . . . . . . . . . . .<br />
Forward-rear and rear-rear<br />
axle replacement:<br />
Installation . . . . . . . . . . . . . . . . . . . .<br />
Removal . . . . . . . . . . . . . . . . . . . . . . .<br />
400 Hz converter and support<br />
bracket replacement:<br />
Installation . . . . . . . . . . . . . . . . . . . .<br />
Removal . . . . . . . . . . . . . . . . . . . . . . .<br />
400 Hz converter harness<br />
conduit replacement:<br />
Installation . . . . . . . . . . . . . . . . . . . .<br />
Removal . . . . . . . . . . . . . . . . . . . . . . .<br />
400 Hz receptacle wiring<br />
harness replacement:<br />
Installation . . . . . . . . . . . . . . . . . . . .<br />
Removal . . . . . . . . . . . . . . . . . . . . . . .<br />
400 Hz supply wiring<br />
harness replacement:<br />
Installation . . . . . . . . . . . . . . . . . . . .<br />
Removal . . . . . . . . . . . . . . . . . . . . . . .<br />
Frame alinement inspection:<br />
Frame leveling . . . . . . . . . . . . . . . . .<br />
Frame squareness . . . . . . . . . . . . .<br />
Horizontal bow inspection. . . . . .<br />
Vertical bow inspection . . . . . . . .<br />
Frame, bonnet, repair:<br />
Assembly . . . . . . . . . . . . . . . . . . . . . .<br />
Disassembly . . . . . . . . . . . . . . . . . . .<br />
Frame, ceiling and,<br />
maintenance:<br />
Cleaning and inspection . . . . . . .<br />
Installation . . . . . . . . . . . . . . . . . . . .<br />
Removal . . . . . . . . . . . . . . . . . . . . . . .<br />
Frame, lift liftgate,<br />
maintenance (M820A2):<br />
Assembly . . . . . . . . . . . . . . . . . . . . . .<br />
Cleaning and inspection . . . . . . .<br />
Disassembly . . . . . . . . . . . . . . . . . . .<br />
Installation . . . . . . . . . . . . . . . . . . . .<br />
Removal . . . . . . . . . . . . . . . . . . . . . . .<br />
INDEX (Contd)<br />
Para Page Para Page<br />
Frame, main, liftgate,<br />
3-58b 3-188 maintenance (M820A2):<br />
3-58a 3-188 Cleaning and inspection . . . . . . . 15-53b 15-206<br />
Installation . . . . . . . . . . . . . . . . . . . . 15-53c 15-206<br />
3-22d 3-73<br />
Removal . . . . . . . . . . . . . . . . . . . . . . . 15-53a 15-206<br />
3-22b 3-70 Frame rail sill, cargo<br />
3-22c 3-72 body, replacement:<br />
3-22a 3-70 Installation . . . . . . . . . . . . . . . . . . . . 15-3b 15-6<br />
Removal . . . . . . . . . . . . . . . . . . . . . . . 15-3a 15-6<br />
3-43 3-125 Frame repair . . . . . . . . . . . . . . . . . . . . . 13-2 13-1<br />
Front and rear<br />
3-61 3-194<br />
differential maintenance:<br />
3-41 3-123<br />
Cleaning and inspection . . . . . . . 10-7b 10-19<br />
Installation . . . . . . . . . . . . . . . . . . . . 10-7c 10-20<br />
Removal . . . . . . . . . . . . . . . . . . . . . . . 10-7a 10-18<br />
10-5b 10-17<br />
Front axle engagement air<br />
10-5a 10-16 cylinder maintenance:<br />
Assembly . . . . . . . . . . . . . . . . . . . . . . 9-2d 9-4<br />
Cleaning and inspection . . . . . . . 9-2c 9-2<br />
15-85b 15-320 Disassembly . . . . . . . . . . . . . . . . . . . 9-2b 9-2<br />
15-85a 15-320 Installation . . . . . . . . . . . . . . . . . . . . 9-2e 9-4<br />
Removal . . . . . . . . . . . . . . . . . . . . . . . 9-2a 9-2<br />
Front axle replacement:<br />
15-87b 15-326 Installation . . . . . . . . . . . . . . . . . . . . 10-2b 10-2<br />
15-87a 15-326 Removal . . . . . . . . . . . . . . . . . . . . . . . 10-2a 10-2<br />
Front cover, fuel<br />
pump, maintenance:<br />
15-79b 15-288 Inspection . . . . . . . . . . . . . . . . . . . . . 5-24b 5-66<br />
15-79a 15-288 Installation . . . . . . . . . . . . . . . . . . . . 5-24c 5-66<br />
Removal . . . . . . . . . . . . . . . . . . . . . . . 5-24a 5-66<br />
Front gear cover installation:<br />
15-78b 15-286 Installation . . . . . . . . . . . . . . . . . . . . 3-71 3-208<br />
15-78a 15-284 Front gear cover maintenance:<br />
Assembly . . . . . . . . . . . . . . . . . . . . . . 3-33d 3-114<br />
13-6a 13-24<br />
Cleaning and inspection . . . . . . .<br />
13-6c 13-28<br />
3-33c 3-112<br />
Disassembly . . . . . . . . . . . . . . . . . . .<br />
13-6b 13-24<br />
3-33b 3-112<br />
Removal . . . . . . . . . . . . . . . . . . . . . . .<br />
13-6d 13-30<br />
3-33a 3-112<br />
Front wall register<br />
15-46b<br />
replacement:<br />
15-174<br />
15-46a 15-172<br />
Installation . . . . . . . . . . . . . . . . . . . . 15-39b 15-156<br />
Removal . . . . . . . . . . . . . . . . . . . . . . . 15-39a 15-156<br />
Front winch cable tensioner<br />
15-36b 15-1<strong>34</strong> maintenance:<br />
15-36c 15-136 Assembly . . . . . . . . . . . . . . . . . . . . . . 16-4d 16-32<br />
15-36a 15-131 Cleaning and inspection . . . . . . . 16-4c 16-30<br />
Disassembly . . . . . . . . . . . . . . . . . . . 16-4b 16-28<br />
Installation . . . . . . . . . . . . . . . . . . . . 16-4e 16-32<br />
15-52d 15-204 Removal . . . . . . . . . . . . . . . . . . . . . . . 16-4a 16-28<br />
15-52c 15-204 Front winch drag<br />
15-52b 15-204 brake replacement:<br />
15-52e 15-205 Installation . . . . . . . . . . . . . . . . . . . . 16-6b 16-42<br />
15-52a 15-204 Removal . . . . . . . . . . . . . . . . . . . . . . . 16-6a 16-41<br />
Index 12
<strong>TM</strong> 9-<strong>2320</strong>-<strong>260</strong>-<strong>34</strong>-2<br />
INDEX (Contd)<br />
Para<br />
Page<br />
Para<br />
Page<br />
Front winch level<br />
wind maintenance:<br />
Assembly . . . . . . . . . . . . . . . . . . . . . . 16-3d<br />
Cleaning and inspection . . . . . . . 16-3c<br />
Disassembly . . . . . . . . . . . . . . . . . . . 16-3b<br />
Installation . . . . . . . . . . . . . . . . . . . . 16-3e<br />
Removal . . . . . . . . . . . . . . . . . . . . . . . 16-3a<br />
Front winch repair<br />
Cleaning, inspection,<br />
and repair . . . . . . . . . . . . . . . . . . . . 16-2d<br />
End frame assembly . . . . . . . . . . . 16-2f<br />
End frame disassembly . . . . . . . . 16-2b<br />
Gearcase assembly . . . . . . . . . . . . . 16-2e<br />
Gearcase disassembly . . . . . . . . . . 16-2c<br />
Winch assembly . . . . . . . . . . . . . . . . 16-2g<br />
Winch disassembly . . . . . . . . . . . . . 16-2a<br />
Front winch roller<br />
maintenance:<br />
Assembly . . . . . . . . . . . . . . . . . . . . . . 16-5d<br />
Cleaning and inspection . . . . . . . 16-5c<br />
Disassembly . . . . . . . . . . . . . . . . . . . 16-5b<br />
Installation . . . . . . . . . . . . . . . . . . . . 16-5e<br />
Removal . . . . . . . . . . . . . . . . . . . . . . . 16-5a<br />
Front wiring harness<br />
replacement:<br />
Installation . . . . . . . . . . . . . . . . . . . . 7-3b<br />
Removal . . . . . . . . . . . . . . . . . . . . . . . 7-3a<br />
Fuel control valve, engine<br />
coolant heater, replacement<br />
Installation . . . . . . . . . . . . . . . . . . . . 17-7b<br />
Removal . . . . . . . . . . . . . . . . . . . . . . . 17-7a<br />
Fuel control valve, personnel<br />
heater, maintenance:<br />
Inspection . . . . . . . . . . . . . . . . . . . . . 17-16b<br />
Installation . . . . . . . . . . . . . . . . . . . . 17-16c<br />
Removal . . . . . . . . . . . . . . . . . . . . . . . 17-16a<br />
Fuel crossover connectors<br />
installation:<br />
Installation . . . . . . . . . . . . . . . . . . . . 3-60<br />
Fuel crossover connectors<br />
removal:<br />
Removal . . . . . . . . . . . . . . . . . . . . . . . 3-38<br />
Fuel crossover connector<br />
replacement<br />
Installation, . . . . . . . . . . . . . . . . . . . 3-17b<br />
Removal . . . . . . . . . . . . . . . . . . . . . . . 3-17a<br />
Fuel injector (non-top stop)<br />
maintenance<br />
Assembly . . . . . . . . . . . . . . . . . . . . . . 5-7c<br />
Cleaning and inspection . . . . . . . 5-7b<br />
Disassembly . . . . . . . . . . . . . . . . . . . 5-7a<br />
16-24<br />
16-20<br />
16-18<br />
16-26<br />
16-18<br />
16-6<br />
16-14<br />
16-4<br />
16-10<br />
16-5<br />
16-15<br />
16-2<br />
16-38<br />
16-36<br />
16-<strong>34</strong><br />
16-40<br />
16-<strong>34</strong><br />
7-12<br />
7-3<br />
17-16<br />
17-16<br />
17-40<br />
17-42<br />
17-40<br />
3-193<br />
3-120<br />
3-48<br />
3-48<br />
5-10<br />
6-8<br />
6-6<br />
Fuel injector replacement:<br />
Installation . . . . . . . . . . . . . . . . . . . . 5-6b<br />
Removal . . . . . . . . . . . . . . . . . . . . . . . 5-6a<br />
Fuel injector (top stop)<br />
maintenance:<br />
Assembly . . . . . . . . . . . . . . . . . . . . . . 5-8c<br />
Cleaning and inspection . . . . . . . 5-8b<br />
Disassembly . . . . . . . . . . . . . . . . . . . 5-8a<br />
Fuel line and blower housing,<br />
personnel heater, replacement:<br />
Installation . . . . . . . . . . . . . . . . . . . . 17-19b<br />
Removal . . . . . . . . . . . . . . . . . . . . . . . 17-19a<br />
Fuel pump air cylinder<br />
maintenance:<br />
Adjustment . . . . . . . . . . . . . . . . . . . . 5-21c<br />
Installation . . . . . . . . . . . . . . . . . . . . 5-21b<br />
Removal . . . . . . . . . . . . . . . . . . . . . . . 5-21a<br />
Fuel pump calibration:<br />
Checking and adjusting<br />
governor weight pressure . . . . . 5-25l<br />
Checking and adjusting<br />
throttle lever travel . . . . . . . . . . . 5-25h<br />
Fuel pump run-in . . . . . . . . . . . . . . 5-25c<br />
Mounting pump<br />
to test stand . . . . . . . . . . . . . . . . . . 5-25b<br />
Shutdown and removal<br />
from test stand . . . . . . . . . . . . . . . 5-25n<br />
Testing and adjusting<br />
fuel pressure . . . . . . . . . . . . . . . . . 5-25j<br />
Testing and adjusting<br />
governor fuel pressure . . . . . . . . 5-25k<br />
Testing and adjusting<br />
idle speed . . . . . . . . . . . . . . . . . . . . . 5-25g<br />
Testing and adjusting idle<br />
speed (VS governor only) . . . . . . 5-25m<br />
Testing and adjusting<br />
pump main pressure . . . . . . . . . . 5-25i<br />
Testing and adjusting<br />
throttle leakage . . . . . . . . . . . . . . . 5-25f<br />
Testing governor<br />
cutoff RPM . . . . . . . . . . . . . . . . . . . 5-25e<br />
Testing pump seals<br />
for leaks . . . . . . . . . . . . . . . . . . . . . . 5-25d<br />
Throttle shaft cover<br />
removal . . . . . . . . . . . . . . . . . . . . . . . 5-25a<br />
Fuel pump front cover<br />
maintenance:<br />
Inspection. . . . . . . . . . . . . . . . . . . . .5-24b<br />
Installation . . . . . . . . . . . . . . . . . . . .5-24c<br />
Removal . . . . . . . . . . . . . . . . . . . . . . . 5-24a<br />
5-4<br />
5-4<br />
5-16<br />
5-14<br />
5-13<br />
17-50<br />
17-50<br />
5-56<br />
5-56<br />
5-56<br />
5-84<br />
5-80<br />
5-72<br />
5-68<br />
5-86<br />
5-82<br />
5-84<br />
5-78<br />
5-86<br />
5-82<br />
5-76<br />
5-74<br />
5-74<br />
5-68<br />
5-66<br />
6-66<br />
5-66<br />
Index 13
<strong>TM</strong> 9-<strong>2320</strong>-<strong>260</strong>-<strong>34</strong>-2<br />
INDEX (Contd)<br />
Para Page Para Page<br />
Fuel pump housing<br />
maintenance:<br />
Assembly . . . . . . . . . . . . . . . . . . . . . .<br />
Disassembly . . . . . . . . . . . . . . . . . . .<br />
Inspection . . . . . . . . . . . . . . . . . . . . .<br />
Installation . . . . . . . . . . . . . . . . . . . .<br />
Removal . . . . . . . . . . . . . . . . . . . . . . .<br />
Fuel pump mounting<br />
to holding fixture:<br />
Installation . . . . . . . . . . . . . . . . . . . .<br />
Removal . . . . . . . . . . . . . . . . . . . . . . .<br />
Fuel pump replacement<br />
Installation . . . . . . . . . . . . . . . . . . . .<br />
Removal . . . . . . . . . . . . . . . . . . . . . . .<br />
Fuel pump shutoff<br />
valves replacement<br />
Installation . . . . . . . . . . . . . . . . . . . .<br />
Removal . . . . . . . . . . . . . . . . . . . . . . .<br />
Fuel pump spring<br />
pack maintenance:<br />
Inspection . . . . . . . . . . . . . . . . . . . . .<br />
Installation . . . . . . . . . . . . . . . . . . . .<br />
Removal . . . . . . . . . . . . . . . . . . . . . . .<br />
Fuel pump wiring harness,<br />
heater replacement:<br />
Installation . . . . . . . . . . . . . . . . . . . .<br />
Removal . . . . . . . . . . . . . . . . . . . . . . .<br />
Fuel tank repair . . . . . . . . . . . . . . . . . .<br />
Fuel tube and preheat<br />
resistor, engine coolant<br />
heater, replacement<br />
Installation . . . . . . . . . . . . . . . . . . . .<br />
Removal . . . . . . . . . . . . . . . . . . . . . . .<br />
G<br />
5-23d<br />
5-23b<br />
5-23c<br />
5-23e<br />
5-23a<br />
5-14b<br />
5-14a<br />
5-13b<br />
5-13a<br />
5-15b<br />
5-15a<br />
5-18b<br />
5-18c<br />
5-18a<br />
15-68b<br />
15-68a<br />
5-4<br />
17-9b<br />
17-9a<br />
5-64<br />
5-62<br />
5-64<br />
5-65<br />
5-62<br />
5-42<br />
5-42<br />
5-40<br />
5-38<br />
5-44<br />
5-43<br />
5-48<br />
5-49<br />
5-48<br />
15-256<br />
15-256<br />
5-2<br />
17-22<br />
17-22<br />
Gear Case, crane,<br />
maintenance (M816):<br />
Assembly . . . . . . . . . . . . . . . . . . . . . . 16-28d 16-172<br />
Cleaning and inspection . . . . . . . 16-28c 16-170<br />
Disassembly . . . . . . . . . . . . . . . . . . . 16-28b 16-168<br />
Installation . . . . . . . . . . . . . . . . . . . . 16-28c 16-173<br />
Removed . . . . . . . . . . . . . . . . . . . . . . . 16-28a 16-168<br />
Gear Case, hoist bevel,<br />
repair (M816):<br />
Assembly . . . . . . . . . . . . . . . . . . . . . . 16-25e 16-150<br />
Cleaning and inspection . . . . . . . 16-25c 16-148<br />
Disassembly . . . . . . . . . . . . . . . . . . . 16-25b 16-146<br />
Installation . . . . . . . . . . . . . . . . . . . . 16-25f 16-154<br />
Removal . . . . . . . . . . . . . . . . . . . . . . . 16-25a 16-144<br />
Repair . . . . . . . . . . . . . . . . . . . . . . . . . 16-25d 16-149<br />
Gear cover, tint, installation:<br />
Installation . . . . . . . . . . . . . . . . . . . .<br />
Gear cover, front, maintenance:<br />
Assembly . . . . . . . . . . . . . . . . . . . . . .<br />
Cleaning and inspection . . . . . . .<br />
Disassembly . . . . . . . . . . . . . . . . . . .<br />
Removal, . . . . . . . . . . . . . . . . . . . . . .<br />
Gear, flywheel and,<br />
replacement<br />
Flywheel installation . . . . . . . . . .<br />
Flywheel removal . . . . . . . . . . . . . .<br />
Ring gear installation . . . . . . . . . .<br />
Ring gear removal . . . . . . . . . . . . .<br />
Gear, power steering,<br />
replacement<br />
Installation . . . . . . . . . . . . . . . . . . . .<br />
Removal . . . . . . . . . . . . . . . . . . . . . . .<br />
Gear pump, pressure,<br />
replacement<br />
Installation . . . . . . . . . . . . . . . . . . . .<br />
Removal . . . . . . . . . . . . . . . . . . . . . . .<br />
Gearshift lever, transmission,<br />
maintenance:<br />
Assembly . . . . . . . . . . . . . . . . . . . . . .<br />
Disassembly . . . . . . . . . . . . . . . . . . .<br />
Inspection . . . . . . . . . . . . . . . . . . . . .<br />
Installation . . . . . . . . . . . . . . . . . . . .<br />
Removal . . . . . . . . . . . . . . . . . . . . . . .<br />
General troubleshooting<br />
instructions . . . . . . . . . . . . . . . . . . . . .<br />
Glass, windshield,<br />
replacement:<br />
Installation . . . . . . . . . . . . . . . . . . . .<br />
Removal . . . . . . . . . . . . . . . . . . . . . . .<br />
Gondola, crane cab,<br />
replacement (M819):<br />
Installation . . . . . . . . . . . . . . . . . . . .<br />
Removal . . . . . . . . . . . . . . . . . . . . . . .<br />
Gondola, crane,<br />
maintenance (M816):<br />
Assembly . . . . . . . . . . . . . . . . . . . . . .<br />
Cleaning, inspection,<br />
and repair . . . . . . . . . . . . . . . . . . . .<br />
Disassembly . . . . . . . . . . . . . . . . . . .<br />
Installation . . . . . . . . . . . . . . . . . . . .<br />
Removal . . . . . . . . . . . . . . . . . . . . . . .<br />
Governor control valve,<br />
power divider, replacement:<br />
Installation (M816) . . . . . . . . . . . .<br />
Installation (M819) . . . . . . . . . . . .<br />
Removal (M816) . . . . . . . . . . . . . . .<br />
Removal (M819) . . . . . . . . . . . . . . .<br />
3-71 3-208<br />
3-33d 3-114<br />
3-33c 3-112<br />
3-33b 3-112<br />
3-33a 3-112<br />
3-21d 3-68<br />
3-21a 3-66<br />
3-21c 3-68<br />
3-21b 3-66<br />
12-5b 12-4<br />
12-5a 12-3<br />
5-17b 5-47<br />
5-17a 5-47<br />
8-3d 8-4<br />
8-3b 8-4<br />
8-3c 8-4<br />
8-3e 8-4<br />
8-3a 8-4<br />
2-6 2-1<br />
14-5b 14-6<br />
14-5a 14-6<br />
16-29b 16-174<br />
16-29a 16-174<br />
16-22d 16-1<strong>34</strong><br />
16-22c 16-132<br />
16-22b 16-132<br />
16-22e 16-136<br />
16-22a 16-130<br />
16-50d 16-300<br />
16-50c 16-300<br />
16-50a 16-299<br />
16-50b 16-300<br />
Index 14
<strong>TM</strong> 9-<strong>2320</strong>-<strong>260</strong>-<strong>34</strong>-2<br />
INDEX (Contd)<br />
Para Page Para Page<br />
Head, cylinder, installation:<br />
Installation, . . . . . . . . . . . . . . . . . . .<br />
Head, cylinder, repair:<br />
Assembly . . . . . . . . . . . . . . . . . . . . . .<br />
Cleaning . . . . . . . . . . . . . . . . . . . . . . .<br />
Disassembly . . . . . . . . . . . . . . . . . . .<br />
Inspection . . . . . . . . . . . . . . . . . . . . .<br />
Heads, cylinder, removal:<br />
Removal . . . . . . . . . . . . . . . . . . . . . . . .<br />
Heads, cylinder, replacement:<br />
Installation . . . . . . . . . . . . . . . . . . . .<br />
Removal . . . . . . . . . . . . . . . . . . . . . . .<br />
Heat exchanger, engine<br />
coolant heater housing,<br />
maintenance:<br />
Cleaning and inspection . . . . . . .<br />
Installation . . . . . . . . . . . . . . . . . . . .<br />
Removal . . . . . . . . . . . . . . . . . . . . . . .<br />
Heat exchanger, personnel<br />
heater, maintenance:<br />
Cleaning and inspection . . . . . . .<br />
Installation . . . . . . . . . . . . . . . . . . . .<br />
Removal . . . . . . . . . . . . . . . . . . . . . . .<br />
Heater blower motor,<br />
engine coolant, maintenance:<br />
Cleaning and inspection . . . . . . .<br />
Installation . . . . . . . . . . . . . . . . . . . .<br />
Removal . . . . . . . . . . . . . . . . . . . . . . .<br />
Heater blower motor,<br />
personnel, replacement:<br />
Installation . . . . . . . . . . . . . . . . . . . .<br />
Removal . . . . . . . . . . . . . . . . . . . . . . .<br />
Heater burner, engine<br />
coolant, maintenance:<br />
Cleaning and inspection . . . . . .<br />
Installation . . . . . . . . . . . . . . . . . . . .<br />
Removal . . . . . . . . . . . . . . . . . . . . . . .<br />
Heater burner, personnel,<br />
maintenance:<br />
Assembly . . . . . . . . . . . . . . . . . . . . . .<br />
Cleaning and inspection . . . . . . .<br />
Disassembly . . . . . . . . . . . . . . . . . . .<br />
Installation . . . . . . . . . . . . . . . . . . . .<br />
Removal . . . . . . . . . . . . . . . . . . . . . . .<br />
Heater component bracket,<br />
engine coolant, maintenance:<br />
Assembly . . . . . . . . . . . . . . . . . . . . . .<br />
Disassembly . . . . . . . . . . . . . . . . . . .<br />
Inspection . . . . . . . . . . . . . . . . . . . . .<br />
Installation . . . . . . . . . . . . . . . . . . . .<br />
Removal . . . . . . . . . . . . . . . . . . . . . . .<br />
H<br />
3-62<br />
3-51d<br />
3-51b<br />
3-51a<br />
3-51c<br />
3-40<br />
3-18b<br />
3-18a<br />
17-11b<br />
17-11c<br />
17-11a<br />
17-24b<br />
17-24c<br />
17-24a<br />
17-4b<br />
17-4c<br />
17-4a<br />
17-20b<br />
17-20a<br />
17-10b<br />
17-10c<br />
17-10a<br />
17-21d<br />
17-21c<br />
17-21b<br />
17-21e<br />
17-21a<br />
17-6d<br />
17-6b<br />
17-6c<br />
17-6e<br />
17-6a<br />
3-196<br />
3-162<br />
3-150<br />
3-150<br />
3-152<br />
3-122<br />
3-50<br />
3-49<br />
17-26<br />
17-26<br />
17-26<br />
17-64<br />
17-65<br />
17-64<br />
17-8<br />
17-9<br />
17-8<br />
17-52<br />
17-52<br />
17-24<br />
17-24<br />
17-24<br />
17-58<br />
17-56<br />
17-56<br />
17-59<br />
17-54<br />
17-14<br />
17-12<br />
17-13<br />
17-14<br />
17-12<br />
Heater control bracket,<br />
personnel, replacement:<br />
Installation . . . . . . . . . . . . . . . . . . . .<br />
Removal . . . . . . . . . . . . . . . . . . . . . . .<br />
Heater, engine coolant, testing:<br />
Blower motor test . . . . . . . . . . . . . .<br />
Flame detector switch test . . . . .<br />
Fuel control valve test . . . . . . . . .<br />
Igniter test . . . . . . . . . . . . . . . . . . . .<br />
Overheat switch test . . . . . . . . . . .<br />
Preparation . . . . . . . . . . . . . . . . . . . .<br />
Restriction thermostat test . . . .<br />
Test equipment removal . . . . . . .<br />
Heater flame detector switch,<br />
engine coolant, maintenance:<br />
Assembly . . . . . . . . . . . . . . . . . . . . . .<br />
Disassembly . . . . . . . . . . . . . . . . . . .<br />
Inspection . . . . . . . . . . . . . . . . . . . . .<br />
Installation . . . . . . . . . . . . . . . . . . . .<br />
Removal . . . . . . . . . . . . . . . . . . . . . . .<br />
Heater flame detector switch,<br />
personnel, maintenance:<br />
Assembly . . . . . . . . . . . . . . . . . . . . . .<br />
Cleaning and inspection . . . . . . .<br />
Disassembly . . . . . . . . . . . . . . . . . . .<br />
Installation . . . . . . . . . . . . . . . . . . . .<br />
Removal . . . . . . . . . . . . . . . . . . . . . . .<br />
Heater fuel control valve,<br />
engine coolant, replacement:<br />
Installation . . . . . . . . . . . . . . . . . . . .<br />
Removal . . . . . . . . . . . . . . . . . . . . . . .<br />
Heater fuel control valve,<br />
personnel, maintenance:<br />
Inspection . . . . . . . . . . . . . . . . . . . . .<br />
Installation . . . . . . . . . . . . . . . . . . . .<br />
Removal . . . . . . . . . . . . . . . . . . . . . . .<br />
Heater fuel line and blower<br />
housing, personnel,<br />
replacement:<br />
Installation . . . . . . . . . . . . . . . . . . . .<br />
Removal . . . . . . . . . . . . . . . . . . . . . . .<br />
Heater fuel pump wiring<br />
harness replacement:<br />
Installation . . . . . . . . . . . . . . . . . . . .<br />
Removal . . . . . . . . . . . . . . . . . . . . . . .<br />
Heater fuel tube and preheat<br />
resistor, engine coolant,<br />
replacement:<br />
Installation . . . . . . . . . . . . . . . . . . . .<br />
Removal . . . . . . . . . . . . . . . . . . . . . . .<br />
17-17b 17-44<br />
17-17a 17-44<br />
17-12e 17-32<br />
17-12c 17-32<br />
17-12d 17-32<br />
17-12b 17-30<br />
17-12g 17-<strong>34</strong><br />
17-12a 17-28<br />
17-12f 17-<strong>34</strong><br />
17-12h 17-<strong>34</strong><br />
17-3d 17-6<br />
17-3b 17-4<br />
17-3c 17-4<br />
17-3e 17-6<br />
17-3a 17-4<br />
17-15d 17-38<br />
17-15c 17-38<br />
17-15b 17-38<br />
17-15e 17-38<br />
17-15a 17-37<br />
17-7b 17-16<br />
17-7a 17-16<br />
17-16b 17-40<br />
17-16c 17-42<br />
17-16a 17-40<br />
17-19b 17-50<br />
17-19a 17-50<br />
15-68b 15-256<br />
15-68a 15-256<br />
17-9b 17-22<br />
17-9a 17-22<br />
Index 15
<strong>TM</strong> 9-<strong>2320</strong>-<strong>260</strong>-<strong>34</strong>-2<br />
INDEX (Contd)<br />
Para Page Para Page<br />
Heater heat exchanger,<br />
personnel, maintenance:<br />
Cleaning and inspection . . . . . . .<br />
Installation . . . . . . . . . . . . . . . . . . . .<br />
Removal . . . . . . . . . . . . . . . . . . . . . . .<br />
Heater housing and heat<br />
exchanger, engine coolant,<br />
maintenance:<br />
Cleaning and inspection . . . . . . .<br />
Installation . . . . . . . . . . . . . . . . . . . .<br />
Removal . . . . . . . . . . . . . . . . . . . . . . .<br />
Heater igniter and ignition<br />
control unit, personnel,<br />
replacement:<br />
Igniter installation. . . . . . . . . . . . .<br />
Igniter removal . . . . . . . . . . . . . . . .<br />
Ignition control unit<br />
installation . . . . . . . . . . . . . . . . . . .<br />
Ignition control unit<br />
removal . . . . . . . . . . . . . . . . . . . . . . .<br />
Heater overheat switch and<br />
igniter, engine coolant,<br />
maintenance:<br />
Igniter installation. . . . . . . . . . . . .<br />
Igniter removal . . . . . . . . . . . . . . . .<br />
Inspection . . . . . . . . . . . . . . . . . . . . .<br />
Overheat switch installation . . .<br />
Overheat switch removal . . . . . .<br />
Heater overheat switch,<br />
personnel, replacement:<br />
Installation . . . . . . . . . . . . . . . . . . . .<br />
Removal . . . . . . . . . . . . . . . . . . . . . . .<br />
Heater, personnel, testing:<br />
Blower motor test . . . . . . . . . . . . . .<br />
Flame detector switch test . . . . .<br />
Fuel control valve test . . . . . . . . .<br />
Ignition test . . . . . . . . . . . . . . . . . . .<br />
Overheat switch test. . . . . . . . . . .<br />
Preparation . . . . . . . . . . . . . . . . . . . .<br />
Test equipment removal . . . . . . .<br />
Heater receptacle,<br />
personnel, replacement:<br />
Installation . . . . . . . . . . . . . . . . . . . .<br />
Removal . . . . . . . . . . . . . . . . . . . . . . .<br />
Heater restriction thermostat,<br />
engine coolant, maintenance:<br />
Inspection . . . . . . . . . . . . . . . . . . . . .<br />
Installation . . . . . . . . . . . . . . . . . . . .<br />
Removal . . . . . . . . . . . . . . . . . . . . . . .<br />
Heater wiring harness<br />
replacement:<br />
Installation . . . . . . . . . . . . . . . . . . . .<br />
Removal, . . . . . . . . . . . . . . . . . . . . . .<br />
17-24b<br />
17-24c<br />
17-24a<br />
17-11b<br />
17-11c<br />
17-11a<br />
17-18d<br />
17-18a<br />
17-64<br />
17-65<br />
17-64<br />
17-26<br />
17-26<br />
17-26<br />
17-48<br />
17-46<br />
17-18c 17-48<br />
17-18b 17-46<br />
17-8d<br />
17-8b<br />
17-8c<br />
17-8e<br />
17-8a<br />
17-22b<br />
17-22a<br />
17-25e<br />
17-25c<br />
17-25d<br />
17-25b<br />
17-25f<br />
17-25a<br />
17-25g<br />
17-23b<br />
17-23a<br />
17-5b<br />
17-5c<br />
17-5a<br />
17-20<br />
17-18<br />
17-19<br />
17-20<br />
17-18<br />
17-60<br />
17-60<br />
17-72<br />
17-68<br />
17-68<br />
17-68<br />
17-72<br />
17-66<br />
17-72<br />
17-62<br />
17-62<br />
17-10<br />
17-10<br />
17-10<br />
15-66b<br />
15-66a 15-250<br />
15-248<br />
Hinged end panel<br />
maintenance:<br />
Assembly . . . . . . . . . . . . . . . . . . . . . . 15-33d 15-116<br />
Cleaning and inspection . . . . . . . 15-33c 15-114<br />
Disassembly . . . . . . . . . . . . . . . . . . . 15-33b 15-114<br />
Installation . . . . . . . . . . . . . . . . . . . . 15-33e 15-116<br />
Removal . . . . . . . . . . . . . . . . . . . . . . . 15-33a 15-113<br />
Hinged floor maintenance:<br />
Assembly . . . . . . . . . . . . . . . . . . . . . . 15-31d 15-104<br />
Cleaning and inspection . . . . . . . 15-31c 15-104<br />
Disassembly . . . . . . . . . . . . . . . . . . . 15-31b 15-102<br />
Installation . . . . . . . . . . . . . . . . . . . . 15-31e 15-104<br />
Removal . . . . . . . . . . . . . . . . . . . . . . . 15-31a 15-102<br />
Hinged roof maintenance:<br />
Assembly . . . . . . . . . . . . . . . . . . . . . . 15-37d 15-148<br />
Cleaning and inspection . . . . . . . 15-37c 15-146<br />
Disassembly . . . . . . . . . . . . . . . . . . . 15-37b 15-142<br />
Installation . . . . . . . . . . . . . . . . . . . . 15-37e 15-152<br />
Removal . . . . . . . . . . . . . . . . . . . . . . . 15-37a 15-140<br />
Hinge plate, liftgate platform<br />
and, maintenance (M820A2):<br />
Adjustment . . . . . . . . . . . . . . . . . . . . 15-51d 15-202<br />
Cleaning and inspection . . . . . . . 15-51b 15-202<br />
Installation . . . . . . . . . . . . . . . . . . . . 15-51e 15-202<br />
Removal . . . . . . . . . . . . . . . . . . . . . . . 15-51a 15-200<br />
Repair . . . . . . . . . . . . . . . . . . . . . . . . . 15-51c 15-202<br />
Hoist bevel gearcase<br />
repair (M816):<br />
Assembly . . . . . . . . . . . . . . . . . . . . . . 16-25e 16-150<br />
Cleaning and inspection . . . . . . . 16-25c 16-148<br />
Disassembly . . . . . . . . . . . . . . . . . . . 16-25b 16-146<br />
Installation . . . . . . . . . . . . . . . . . . . . 16-25f 16-154<br />
Removal . . . . . . . . . . . . . . . . . . . . . . . 16-25a 16-144<br />
Repair . . . . . . . . . . . . . . . . . . . . . . . . . 16-25d 16-149<br />
Hoist cylinder maintenance:<br />
Assembly . . . . . . . . . . . . . . . . . . . . . . 15-15d 15-44<br />
Cleaning and inspection . . . . . . . 15-15c 15-42<br />
Disassembly . . . . . . . . . . . . . . . . . . . 15-15d 15-40<br />
Installation . . . . . . . . . . . . . . . . . . . . 15-15e 15-46<br />
Removal . . . . . . . . . . . . . . . . . . . . . . . 15-15a 15-38<br />
Hoist hydraulic pump and<br />
support maintenance (M816):<br />
Cleaning, inspection,<br />
and repair . . . . . . . . . . . . . . . . . . . . 16-24b 16-142<br />
Installation . . . . . . . . . . . . . . . . . . . . 16-24c 16-142<br />
Removal . . . . . . . . . . . . . . . . . . . . . . . 16-24a 16-140<br />
Hoist hydraulic winch motor<br />
replacement (M816):<br />
Installation . . . . . . . . . . . . . . . . . . . . 16-23b 16-138<br />
Removal . . . . . . . . . . . . . . . . . . . . . . . 16-23a 16-138<br />
Index 16
<strong>TM</strong> 9-<strong>2320</strong>-<strong>260</strong>-<strong>34</strong>-2<br />
INDEX (Contd)<br />
Para<br />
Page<br />
Hoist level wind<br />
maintenance (M816):<br />
Assembly . . . . . . . . . . . . . . . . . . . . . . 16-16d 16-93<br />
Cleaning and inspection . . . . . . . 16-16c 16-92<br />
Disassembly . . . . . . . . . . . . . . . . . . . 16-16b 16-92<br />
Installation . . . . . . . . . . . . . . . . . . . . 16-16e 16-93<br />
Removal . . . . . . . . . . . . . . . . . . . . . . . 16-16a 16-92<br />
Hoist pump maintenance:<br />
Assembly . . . . . . . . . . . . . . . . . . . . . . 15-17d 15-54<br />
Cleaning and inspection . . . . . . . 15-17c 15-54<br />
Disassembly . . . . . . . . . . . . . . . . . . . 15-17b 15-52<br />
Installation . . . . . . . . . . . . . . . . . . . . 15-17e 15-54<br />
Removal . . . . . . . . . . . . . . . . . . . . . . . 15-17a 15-52<br />
Hoist safety latch<br />
maintenance:<br />
Assembly . . . . . . . . . . . . . . . . . . . . . . 15-16d 15-50<br />
Cleaning and inspection . . . . . . . 15-16c 15-50<br />
Disassembly . . . . . . . . . . . . . . . . . . . 15-16b 15-48<br />
Installation . . . . . . . . . . . . . . . . . . . . 15-16e 15-50<br />
Removal . . . . . . . . . . . . . . . . . . . . . . . 15-16a 15-48<br />
Hoist winch, cable,<br />
replacement (M819):<br />
Installation . . . . . . . . . . . . . . . . . . . . 16-31b 16-180<br />
Removal . . . . . . . . . . . . . . . . . . . . . . . 16-31a 16-178<br />
Hoist winch maintenance<br />
(M816):<br />
Assembly . . . . . . . . . . . . . . . . . . . . . . 16-17d 16-100<br />
Cleaning and inspection . . . . . . . 16-17c 16-98<br />
Disassembly . . . . . . . . . . . . . . . . . . . 16-17b 16-95<br />
Installation . . . . . . . . . . . . . . . . . . . . 16-17e 16-103<br />
Removal . . . . . . . . . . . . . . . . . . . . . . . 16-17a 16-94<br />
Hoist winch motor<br />
replacement (M816):<br />
Installation . . . . . . . . . . . . . . . . . . . . 16-15b 16-91<br />
Removal. . . . . . . . . . . . . . . . . . . . . . . . . 16-15a 16-90<br />
Holding fixture, fuel<br />
pump mounting to:<br />
Installation . . . . . . . . . . . . . . . . . . . . 5-14b 5-42<br />
Removal . . . . . . . . . . . . . . . . . . . . . . . 5-14a 5-42<br />
Hose, hydraulic, and tube<br />
replacement; tractor wrecker<br />
body maintenance:<br />
Installation . . . . . . . . . . . . . . . . . . . . 15-10b 15-22<br />
Removal . . . . . . . . . . . . . . . . . . . . . . . 15-10a 15-20<br />
Hoses, hydraulic, replacement;<br />
dump body maintenance:<br />
Installation . . . . . . . . . . . . . . . . . . . . 15-20b 15-66<br />
Removal . . . . . . . . . . . . . . . . . . . . . . 15-20a 15-64<br />
Housing, blower, personnel<br />
heater fuel line and,<br />
replacement:<br />
Installation . . . . . . . . . . . . . . . . . . . . 17-19b 17-50<br />
Removal . . . . . . . . . . . . . . . . . . . . . . . 17-19a 17-50<br />
Para<br />
Page<br />
Housing, cam follower,<br />
maintenance:<br />
Assembly . . . . . . . . . . . . . . . . . . . . . . 3-19e 3-56<br />
Cleaning and inspection . . . . . . . 3-19c 3-54<br />
Disassembly. . . . . . . . . . . . . . . . . 3-19b 3-53<br />
Installation . . . . . . . . . . . . . . . . . . . . 3-19f 3-58<br />
Removal . . . . . . . . . . . . . . . . . . . . . . . 3-19a 3-51<br />
Repair . . . . . . . . . . . . . . . . . . . . . . . . . 3-19d 3-54<br />
Housing, engine coolant<br />
heater, and heat exchanger,<br />
maintenance:<br />
Cleaning and inspection . . . . . . . 17-11b 17-26<br />
Installation . . . . . . . . . . . . . . . . . . . . 17-11c 17-26<br />
Removal . . . . . . . . . . . . . . . . . . . . . . . 17-11a 17-26<br />
Housing, flywheel,<br />
installation:<br />
Alinement . . . . . . . . . . . . . . . . . . . . . 3-58b 3-188<br />
Installation . . . . . . . . . . . . . . . . . . . . 3-58a 3-188<br />
Housing, flywheel,<br />
maintenance:<br />
Adjustment . . . . . . . . . . . . . . . . . . . . 3-22d 3-73<br />
Cleaning and inspection . . . . . . . 3-22b 3-70<br />
Installation . . . . . . . . . . . . . . . . . . . . 3-22c 3-72<br />
Removal . . . . . . . . . . . . . . . . . . . . . . . 3-22a 3-70<br />
Housing, flywheel, removal:<br />
Removal . . . . . . . . . . . . . . . . . . . . . . 3-43 3-125<br />
Housing, fuel pump,<br />
maintenance:<br />
Assembly . . . . . . . . . . . . . . . . . . . . . . 5-23d 5-64<br />
Disassembly . . . . . . . . . . . . . . . . . . . 5-23b 5-62<br />
Inspection . . . . . . . . . . . . . . . . . . . . . 5-23c 5-64<br />
Installation . . . . . . . . . . . . . . . . . . . . 5-23e 5-65<br />
Removal . . . . . . . . . . . . . . . . . . . . . 5-23a 5-62<br />
Hub, fan, repair:<br />
Assembly . . . . . . . . . . . . . . . . . . . . . . 3-7c 3-16<br />
Cleaning and inspection . . . . . . . 3-7b 3-14<br />
Disassembly . . . . . . . . . . . . . . . . . . 3-7a 3-14<br />
Hydraulic hose and tube<br />
replacement; tractor wrecker<br />
body maintenance:<br />
Installation . . . . . . . . . . . . . . . . . . . . 15-10b 15-22<br />
Removal . . . . . . . . . . . . . . . . . . . . . . . 15-10a 15-20<br />
Hydraulic hoses replacement;<br />
dump body maintenance:<br />
Installation . . . . . . . . . . . . . . . . . . . . 15-20b 15-66<br />
Removal . . . . . . . . . . . . . . . . . . . . . . . 15-20a 15-64<br />
Hydraulic pump, hoist, and<br />
support maintenance (M816):<br />
Cleaning, inspection,<br />
and repair . . . . . . . . . . . . . . . . . . . . 16-24b 16-142<br />
Installation . . . . . . . . . . . . . . . . . . . . 16-24c 16-142<br />
Removal . . . . . . . . . . . . . . . . . . . . . . . 16-24a 16-140<br />
Index 17
<strong>TM</strong> 9-<strong>2320</strong>-<strong>260</strong>-<strong>34</strong>-2<br />
INDEX (Contd)<br />
Para Page Para Page<br />
Hydraulic pump, liftgate,<br />
replacement (M820A2):<br />
Installation . . . . . . . . . . . . . . . . . . . .<br />
Removal . . . . . . . . . . . . . . . . . . . . . . .<br />
Hydraulic swivel valve<br />
replacement (M819):<br />
Installation . . . . . . . . . . . . . . . . . . . .<br />
Removal . . . . . . . . . . . . . . . . . . . . . . .<br />
Hydraulic tubing, liftgate,<br />
replacement (M820A2):<br />
Installation . . . . . . . . . . . . . . . . . . . .<br />
Removal . . . . . . . . . . . . . . . . . . . . . . .<br />
Hydraulic winch motor, hoist,<br />
replacement (M816):<br />
Installation . . . . . . . . . . . . . . . . . . . .<br />
Removal . . . . . . . . . . . . . . . . . . . . . . .<br />
Igniter and ignition control<br />
unit, personnel heater,<br />
replacement:<br />
Igniter installation. . . . . . . . . . . . .<br />
Igniter removal . . . . . . . . . . . . . . . .<br />
Ignition control unit<br />
installation . . . . . . . . . . . . . . . . . . .<br />
Ignition control unit<br />
removal . . . . . . . . . . . . . . . . . . . . . . .<br />
Igniter, engine coolant<br />
heater overheat switch<br />
and, maintenance:<br />
Igniter installation. . . . . . . . . . . . .<br />
Igniter removal . . . . . . . . . . . . . . . .<br />
Inspection . . . . . . . . . . . . . . . . . . . . .<br />
Overheat switch installation . . .<br />
Overheat switch removal . . . . . .<br />
Ignition control unit,<br />
personnel heater igniter<br />
and, replacement:<br />
Igniter installation. . . . . . . . . . . . .<br />
Igniter removal . . . . . . . . . . . . . . . .<br />
Ignition control unit<br />
installation . . . . . . . . . . . . . . . . . . .<br />
Ignition control unit<br />
removal . . . . . . . . . . . . . . . . . . . . . . .<br />
Illustrated list of<br />
manufactured items,<br />
Appendix E . . . . . . . . . . . . . . . . . . . . .<br />
I<br />
15-61b<br />
15-61a<br />
16-32b<br />
16-32a<br />
15-57b<br />
15-57a<br />
16-23b<br />
16-23a<br />
17-18d<br />
17-18a<br />
17-18c 17-48<br />
17-18b 17-46<br />
17-8d<br />
17-8b<br />
17-8c<br />
17-8e<br />
17-8a<br />
17-18d<br />
17-18a<br />
17-18c 17-48<br />
17-18b<br />
Injector and valve adjustment<br />
(dial indicator method):<br />
15-2<strong>34</strong> Checking plunger<br />
15-2<strong>34</strong> free travel . . . . . . . . . . . . . . . . . . . . 3-82a 3-237<br />
Injector and valve<br />
adjustment . . . . . . . . . . . . . . . . . . . 3-82b 3-239<br />
Injector and valve adjustment<br />
16-184<br />
(torque method):<br />
16-182<br />
Injector and valve<br />
adjustment . . . . . . . . . . . . . . . . . . . 3-83b 3-246<br />
Pre-adjustment setup . . . . . . . . . . 3-83a 3-244<br />
15-220 Injector, fuel, replacement:<br />
15-216 Installation, . . . . . . . . . . . . . . . . . . . 5-6b 5-4<br />
Removal . . . . . . . . . . . . . . . . . . . . . . . 5-6a 5-4<br />
Injector leakage test:<br />
16-138 Injector leakage<br />
16-138 tester setup . . . . . . . . . . . . . . . . . . . 5-9a 5-19<br />
Injector plunger<br />
and seat testing . . . . . . . . . . . . . . 5-9b<br />
Injector (non-top stop),<br />
fuel, maintenance:<br />
Assembly . . . . . . . . . . . . . . . . . . . . . . 5-7c<br />
Cleaning and inspection . . . . . . . 5-7b<br />
Disassembly . . . . . . . . . . . . . . . . . . . 5-7a<br />
Injector sleeve maintenance:<br />
5-21<br />
5-10<br />
5-8<br />
5-6<br />
17-48<br />
17-46 Bead cutting. . . . . . . . . . . . . . . . . . . 3-79b 3-223<br />
Check and test . . . . . . . . . . . . . . . . . 3-79e 3-226<br />
Fitting and forming. . . . . . . . . . . . 3-79d 3-225<br />
Installation . . . . . . . . . . . . . . . . . . . . 3-79c 3-224<br />
Removal . . . . . . . . . . . . . . . . . . . . . . . 3-79a 3-222<br />
Injector timing,<br />
engine, instructions:<br />
Injector timing . . . . . . . . . . . . . . . . . 3-81b 3-2<strong>34</strong><br />
Timing tool setup, . . . . . . . . . . . . . 3-81a 3-233<br />
17-20<br />
Injector (top stop),<br />
17-18 fuel, maintenance:<br />
17-19 Assembly, . . . . . . . . . . . . . . . . . . . . . 5-8c 5-16<br />
17-20 Cleaning and inspection . . . . . . . 5-8b 5-14<br />
17-18 Disassembly . . . . . . . . . . . . . . . . . . . 5-8a 5-13<br />
Inner boom maintenance<br />
(M816):<br />
Assembly . . . . . . . . . . . . . . . . . . . . . . 16-19d 16-116<br />
17-48 Cleaning and inspection . . . . . . . 16-19c 16-116<br />
17-46 Disassembly . . . . . . . . . . . . . . . . . . . 16-19b 16-114<br />
Installation . . . . . . . . . . . . . . . . . . . . 16-19e 16-118<br />
Removal . . . . . . . . . . . . . . . . . . . . . . . 16-19a 16-112<br />
Insert seat, valve,<br />
maintenance:<br />
17-46<br />
Cleaning . . . . . . . . . . . . . . . . . . . . . . . 3-78c 3-221<br />
Gaging and counterboring . . . . . 3-78b 3-220<br />
Installation . . . . . . . . . . . . . . . . . . . . 3-78d 3-221<br />
E-1<br />
Removal . . . . . . . . . . . . . . . . . . . . . . . 3-78a 3-219<br />
Index 18
<strong>TM</strong> 9-<strong>2320</strong>-<strong>260</strong>-<strong>34</strong>-2<br />
INDEX (Contd)<br />
Para<br />
Page<br />
Para<br />
Page<br />
Inspection . . . . . . . . . . . . . . . . . . . . . . . . 2-9 2-35<br />
Insulation, thermal<br />
barrier, replacement:<br />
Installation . . . . . . . . . . . . . . . . . . . . 17-26b 17-74<br />
Removal . . . . . . . . . . . . . . . . . . . . . . . 17-26a 17-74<br />
Intake and exhaust<br />
valves refacing:<br />
Cleaning after resurfacing . . . . . 3-77c 3-218<br />
Grinding or refacing valves . . . . 3-77b 3-218<br />
Valve specifications . . . . . . . . . . . . 3-77a 3-217<br />
Intake manifold installation:<br />
Installation . . . . . . . . . . . . . . . . . . . . 3-67 3-204<br />
Intake manifold maintenance:<br />
Assembly . . . . . . . . . . . . . . . . . . . . . . 3-10d 3-26<br />
cleaning and inspection . . . . . . . 3-10c 3-26<br />
Disassembly . . . . . . . . . . . . . . . . . . . 3-10b 3-26<br />
Installation . . . . . . . . . . . . . . . . . . . . 3-10e 3-26<br />
Removal . . . . . . . . . . . . . . . . . . . . . . . 3-10a 3-24<br />
Intake manifold removal:<br />
Assembly . . . . . . . . . . . . . . . . . . . . . . 3-35c 3-117<br />
Disassembly . . . . . . . . . . . . . . . . . . . 3-35b 3-117<br />
Removal . . . . . . . . . . . . . . . . . . . . . . . 3-35a 3-116<br />
Interior panels, rear<br />
wall, replacement:<br />
Installation . . . . . . . . . . . . . . . . . . . . 15-<strong>34</strong>b 15-118<br />
Removal . . . . . . . . . . . . . . . . . . . . . . . 15-<strong>34</strong>a 15-118<br />
Interior side panels and<br />
latches replacement:<br />
Installation . . . . . . . . . . . . . . . . . . . . 15-35b 15-126<br />
Removal . . . . . . . . . . . . . . . . . . . . . . . 15-35a 15-120<br />
J<br />
Junction box, converter,<br />
replacement:<br />
Installation . . . . . . . . . . . . . . . . . . . . 15-86b 15-324<br />
Removal . . . . . . . . . . . . . . . . . . . . . . . 15-86a 15-322<br />
Knuckle, steering,<br />
maintenance:<br />
Adjustments . . . . . . . . . . . . . . . . . . . 10-3d 10-10<br />
Cleaning and inspection . . . . . . . 10-3b 10-6<br />
Installation . . . . . . . . . . . . . . . . . . . . 10-3c 10-8<br />
Removal . . . . . . . . . . . . . . . . . . . . . . . 10-3a 10-4<br />
K<br />
Latch, hoist safety,<br />
maintenance:<br />
Assembly . . . . . . . . . . . . . . . . . . . . . . 15-16d 15-50<br />
Cleaning and inspection . . . . . . . . . . . . . .15-16c 15-50<br />
Disassembly . . . . . . . . . . . . . . . . . . . 15-16b 15-48<br />
Installation . . . . . . . . . . . . . . . . . . . . 15-16e 15-50<br />
Removal, . . . . . . . . . . . . . . . . . . . . . . 15-16a 15-48<br />
Latches, interior side<br />
panels and, replacement:<br />
Installation . . . . . . . . . . . . . . . . . . . . . . . 15-35b 15-126<br />
Removal . . . . . . . . . . . . . . . . . . . . . . . 15-35a 15-120<br />
Left side emergency lamp<br />
wiring harness replacement:<br />
Installation . . . . . . . . . . . . . . . . . . . . 15-73b 15-272<br />
Removal . . . . . . . . . . . . . . . . . . . . . . . 15-73a 15-270<br />
Level wind, front winch,<br />
maintenance:<br />
Assembly . . . . . . . . . . . . . . . . . . . . . . 16-3d 16-24<br />
Cleaning and inspection . . . . . . . . . . . . 16-3c 16-20<br />
Disassembly . . . . . . . . . . . . . . . . . . . 16-3b 16-18<br />
Installation . . . . . . . . . . . . . . . . . . . . 16-3e 16-26<br />
Removal . . . . . . . . . . . . . . . . . . . . . . . 16-3a 16-18<br />
Level wind, rear winch,<br />
maintenance<br />
Assembly . . . . . . . . . . . . . . . . . . . . . . 16-9d 16-66<br />
Cleaning and inspection . . . . . . . 16-9c 16-62<br />
Disassembly . . . . . . . . . . . . . . . . . . . 16-9b 16-58<br />
Installation . . . . . . . . . . . . . . . . . . . . 16-9e 16-68<br />
Removal . . . . . . . . . . . . . . . . . . . . . . . 16-9a 16-58<br />
Level wind, hoist,<br />
maintenance (M816):<br />
Assembly . . . . . . . . . . . . . . . . . . . . . . 16-16d 16-93<br />
Cleaning and inspection . . . . . . . 16-16c 16-92<br />
Disassembly . . . . . . . . . . . . . . . . . . . 16-16b 16-92<br />
Installation . . . . . . . . . . . . . . . . . . . . 16-16e 16-93<br />
Removal . . . . . . . . . . . . . . . . . . . . . . . 16-16a 16-92<br />
Lift cylinder, boom,<br />
maintenance (M819):<br />
Assembly . . . . . . . . . . . . . . . . . . . . . . 16-33e 16-192<br />
cleaning and inspection . . . . . . . 16-33c 16-191<br />
Disassembly . . . . . . . . . . . . . . . . . . . 16-33b 16.190<br />
Installation . . . . . . . . . . . . . . . . . . . . 16-33f 16-192<br />
Removal . . . . . . . . . . . . . . . . . . . . . . . 16-33a 16-188<br />
Repair . . . . . . . . . . . . . . . . . . . . . . . . . 16-33d 16-191<br />
L<br />
Index 19
<strong>TM</strong> 9-<strong>2320</strong>-<strong>260</strong>-<strong>34</strong>-2<br />
INDEX (Contd)<br />
Lift frame, liftgate,<br />
maintenance (M820A2):<br />
Assembly . . . . . . . . . . . . . . . . . . . . . .<br />
Cleaning and inspection . . . . . . .<br />
Disassembly . . . . . . . . . . . . . . . . . . .<br />
Installation . . . . . . . . . . . . . . . . . . . .<br />
Removal . . . . . . . . . . . . . . . . . . . . . . .<br />
Liftgate auxiliary pump and<br />
bracket replacement (M820A2):<br />
Installation . . . . . . . . . . . . . . . . . . . .<br />
Removal . . . . . . . . . . . . . . . . . . . . . . .<br />
Liftgate closing cylinders<br />
maintenance (M820A2):<br />
Assembly . . . . . . . . . . . . . . . . . . . . . .<br />
Cleaning and inspection . . . . . . .<br />
Disassembly . . . . . . . . . . . . . . . . . . .<br />
Installation . . . . . . . . . . . . . . . . . . . .<br />
Removal . . . . . . . . . . . . . . . . . . . . . . .<br />
Liftgate clutches<br />
replacement (M820A2):<br />
Installation . . . . . . . . . . . . . . . . . . . .<br />
Removal . . . . . . . . . . . . . . . . . . . . . . .<br />
Liftgate control linkage<br />
maintenance (M820A2):<br />
Assembly . . . . . . . . . . . . . . . . . . . . .<br />
Cleaning and inspection . . . . . . .<br />
Disassembly . . . . . . . . . . . . . . . . . . .<br />
Installation . . . . . . . . . . . . . . . . . . . .<br />
Removal . . . . . . . . . . . . . . . . . . . . . . .<br />
Liftgate control valve<br />
replacement (M820A2):<br />
Installation . . . . . . . . . . . . . . . . . . . .<br />
Removal . . . . . . . . . . . . . . . . . . . . . . .<br />
Liftgate cylinder<br />
maintenance (M820A2):<br />
Assembly . . . . . . . . . . . . . . . . . . . . . .<br />
Cleaning and inspection . . . . . . .<br />
Disassembly . . . . . . . . . . . . . . . . . . .<br />
Installation . . . . . . . . . . . . . . . . . . . .<br />
Removal . . . . . . . . . . . . . . . . . . . . . . .<br />
Liftgate hydraulic pump<br />
replacement (M820A2):<br />
Installation . . . . . . . . . . . . . . . . . . . .<br />
Removal . . . . . . . . . . . . . . . . . . . . . . .<br />
Liftgate hydraulic tubing<br />
replacement (M820A2):<br />
Installation . . . . . . . . . . . . . . . . . . . .<br />
Removal . . . . . . . . . . . . . . . . . . . . . . .<br />
Para<br />
Page<br />
15-52d 15-204<br />
15-52c 15-204<br />
15-52b 15-204<br />
15-52e 15-205<br />
15-52a 15-204<br />
15-56b 15-214<br />
15-56a 15-214<br />
15-60d 15-232<br />
15-60c 15-232<br />
15-60b 15-230<br />
15-60e 15-232<br />
15-60a 15-230<br />
15-54b 15-208<br />
15-54a 15-208<br />
15-55d 15-212<br />
15-55c 15-212<br />
15-55b 15-212<br />
15-55e 15-212<br />
15-55a 15-210<br />
15-58b 15-224<br />
15-58a 15-224<br />
15-59d 15-228<br />
15-59c 15-227<br />
15-59b 15-226<br />
15-59e 15-228<br />
15-59a 15-226<br />
15-61b 15-2<strong>34</strong><br />
15-61a 15-2<strong>34</strong><br />
15-57b 15-220<br />
15-57a 15-216<br />
Para<br />
Page<br />
Liftgate lift frame<br />
maintenance (M820A2):<br />
Assembly . . . . . . . . . . . . . . . . . . . . . . 15-52d 15-204<br />
Cleaning and inspection . . . . . . . 15-52c 15-204<br />
Disassembly . . . . . . . . . . . . . . . . . . . 15-52b 15-204<br />
Installation . . . . . . . . . . . . . . . . . . . . 15-52e 15-205<br />
Removal . . . . . . . . . . . . . . . . . . . . . . . 15-52a 15-204<br />
Liftgate main frame<br />
maintenance (M820A2):<br />
Cleaning and inspection . . . . . . . 15-53b 15-206<br />
Installation . . . . . . . . . . . . . . . . . . . . 15-53c 15-206<br />
Removal . . . . . . . . . . . . . . . . . . . . . . . 15-53a 15-206<br />
Liftgate platform and hinge<br />
plate maintenance (M820A2):<br />
Adjustment . . . . . . . . . . . . . . . . . . . . 15-51d 15-202<br />
Cleaning and inspection . . . . . . . 15-51b 15-202<br />
Installation . . . . . . . . . . . . . . . . . . . . 15-51e 15-202<br />
Removal . . . . . . . . . . . . . . . . . . . . . . . 15-51a 15-200<br />
Repair . . . . . . . . . . . . . . . . . . . . . . . . . 15-51c 15-202<br />
Liftgate pump oil tank<br />
replacement (M820A2):<br />
Installation . . . . . . . . . . . . . . . . . . . . 15-62b 15-238<br />
Removal . . . . . . . . . . . . . . . . . . . . . . . 15-62a 15-236<br />
Liftgate replacement (M820A2):<br />
Installation . . . . . . . . . . . . . . . . . . . . 15-50b 15-198<br />
Removal . . . . . . . . . . . . . . . . . . . . . . . 15-50a 15-196<br />
Lifting brackets and rocker<br />
lever housing covers removal:<br />
Lifting bracket remova1. . . . . . . . 3-36a 3-118<br />
Rocker lever housing<br />
cover removal . . . . . . . . . . . . . . . . . 3-36b 3-118<br />
Lifting brackets,<br />
engine, installation:<br />
Installation . . . . . . . . . . . . . . . . . . . . 3-66 3-203<br />
Lifting brackets replacement:<br />
Installation . . . . . . . . . . . . . . . . . . . . 3-13b 3-36<br />
Removal . . . . . . . . . . . . . . . . . . . . . . . 3-13a 3-36<br />
Light fixtures, ceiling,<br />
replacement (M820A1):<br />
Installation . . . . . . . . . . . . . . . . . . . . 15-93b 15-336<br />
Removal . . . . . . . . . . . . . . . . . . . . . . . 16-93a 15-336<br />
Light fixtures, emergency,<br />
blackout and, replacement:<br />
Installation . . . . . . . . . . . . . . . . . . . . 15-91b 15-333<br />
Removal . . . . . . . . . . . . . . . . . . . . . . . 15-91a 15-333<br />
Light fixtures, fluorescent,<br />
maintenance:<br />
Assembly . . . . . . . . . . . . . . . . . . . . . . 15-92c 15-335<br />
Disassembly . . . . . . . . . . . . . . . . . . . 15-92b 15-3<strong>34</strong><br />
Installation . . . . . . . . . . . . . . . . . . . . 15-92d 15-335<br />
Removal . . . . . . . . . . . . . . . . . . . . . . . 15-92a 15-3<strong>34</strong><br />
Index 20
<strong>TM</strong> 9-<strong>2320</strong>-<strong>260</strong>-<strong>34</strong>-2<br />
INDEX (Contd)<br />
Para<br />
Page<br />
Load center conduit<br />
replacement:<br />
Installation . . . . . . . . . . . . . . . . . . . . 15-83b 15-314<br />
Remora] . . . . . . . . . . . . . . . . . . . . . . . 15-83a 15-312<br />
Load center maintenance:<br />
Assembly . . . . . . . . . . . . . . . . . . . . . . 15-82c 15-304<br />
Disassembly . . . . . . . . . . . . . . . . . . . 15-82b 15-302<br />
Installation . . . . . . . . . . . . . . . . . . . . 15-82d 15-305<br />
Removal . . . . . . . . . . . . . . . . . . . . . . . 15-82a 15-296<br />
Lock and retractable beam<br />
driveshaft maintenance:<br />
cleaning and inspection . . . . . . . 15-25b 15-76<br />
Installation . . . . . . . . . . . . . . . . . . . . 15-25c 15-78<br />
Removal . . . . . . . . . . . . . . . . . . . . . . . 15-25a 15-76<br />
Lower beam roller, upper<br />
and, maintenance (M816):<br />
Assembly . . . . . . . . . . . . . . . . . . . . . . 16-13d 16-78<br />
Cleaning and inspection . . . . . . . 16-13c 16.78<br />
Disassembly . . . . . . . . . . . . . . . . . . . 16-13b 16-77<br />
Installation . . . . . . . . . . . . . . . . . . . . 16-13e 16-80<br />
Removal . . . . . . . . . . . . . . . . . . . . . . . 16-13a 16-77<br />
M<br />
Main bearing, crankshaft<br />
and, installation:<br />
Installation . . . . . . . . . . . . . . . . . . . . 3-54 3-178<br />
Main bearing, crankshaft<br />
and, removal:<br />
Removal . . . . . . . . . . . . . . . . . . . . . . . 3-48 3-1<strong>34</strong><br />
Main frame, liftgate,<br />
maintenance (M820A2):<br />
Cleaning and inspection . . . . . . . 15-53b 15-206<br />
Installation . . . . . . . . . . . . . . . . . . . . 15-53c 15-206<br />
Removal . . . . . . . . . . . . . . . . . . . . . . . 15-53a 15-206<br />
Main wiring harness<br />
replacement; van body<br />
electrical components<br />
maintenance:<br />
Installation . . . . . . . . . . . . . . . . . . . . 15-64b 15-242<br />
Removal . . . . . . . . . . . . . . . . . . . . . . . 15-64a 15-240<br />
Maintenance checklist,<br />
preliminary; mechanical<br />
and power steering system<br />
maintenance . . . . . . . . . . . . . . . . . . . . 12-3 12-2<br />
Maintenance Digest (EIR MD),<br />
Equipment Improvement<br />
Report . . . . . . . . . . . . . . . . . . . . . . . . . . 1-8 1-2<br />
Maintenance forms, records,<br />
and reports . . . . . . . . . . . . . . . . . . . . . 1-2 1-1<br />
Para<br />
Maintenance precautions;<br />
mechanical and power<br />
steering system<br />
maintenance . . . . . . . . . . . . . . . . . . . . 12-4<br />
Mandatory replacement<br />
parts, Appendix D . . . . . . . . . . . . . . .<br />
Manifold, exhaust,<br />
replacement:<br />
Installation . . . . . . . . . . . . . . . . . . . . 3-11b<br />
Removal . . . . . . . . . . . . . . . . . . . . . . . 3-11a<br />
Manifold, intake, installation:<br />
Installation . . . . . . . . . . . . . . . . . . . . 3-67<br />
Manifold, intake, maintenance:<br />
Assembly . . . . . . . . . . . . . . . . . . . . . . 3-35c<br />
Disassembly . . . . . . . . . . . . . . . . . . . 3-35b<br />
Removal . . . . . . . . . . . . . . . . . . . . . . . 3-35a<br />
Manifold, water, maintenance:<br />
Assembly . . . . . . . . . . . . . . . . . . . . . . 6-3c<br />
Disassembly . . . . . . . . . . . . . . . . . . . 6-3b<br />
Installation . . . . . . . . . . . . . . . . . . . . 6-3d<br />
Removal . . . . . . . . . . . . . . . . . . . . . . . 6-3a<br />
Manual starter switches,<br />
AC, replacement:<br />
Installation . . . . . . . . . . . . . . . . . . . . 15-89b<br />
Removal . . . . . . . . . . . . . . . . . . . . . . . 15-89a<br />
Motor, hoist hydraulic winch,<br />
replacement (M816):<br />
Installation . . . . . . . . . . . . . . . . . . . . 16-23b<br />
Removal . . . . . . . . . . . . . . . . . . . . . . . 16-23a<br />
Mounting engine on<br />
repair stand:<br />
Installation . . . . . . . . . . . . . . . . . . . . 3-29<br />
N<br />
Page<br />
12-2<br />
D-1<br />
3-28<br />
3-28<br />
3-204<br />
3-117<br />
3-117<br />
3-116<br />
6-4<br />
6-4<br />
6-5<br />
6-4<br />
15-330<br />
15-330<br />
16-138<br />
16-138<br />
3-108<br />
Names, designations, and<br />
official nomenclature . . . . . . . . . . . . 1-5 1-1<br />
Official nomenclature,<br />
names, and designations . . . . . . . . 1-5 1-1<br />
Gil cooler maintenance:<br />
Assembly . . . . . . . . . . . . . . . . . . . . . .3-12d 3-<strong>34</strong><br />
Cleaning and inspection . . . . . . . 3-12c 3-32<br />
Disassembly . . . . . . . . . . . . . . . . . . . 3-12b 3-30<br />
Installation . . . . . . . . . . . . . . . . . . . . 3-12e 3-<strong>34</strong><br />
Removal . . . . . . . . . . . . . . . . . . . . . . .3-12a 3-30<br />
Oil pan installation:<br />
Installation . . . . . . . . . . . . . . . . . . . . 3-72 3-210<br />
0<br />
Index 21
<strong>TM</strong> 9-<strong>2320</strong>-<strong>260</strong>-<strong>34</strong>-2<br />
INDEX (Contd)<br />
Para Page Para Page<br />
Oil pan maintenance:<br />
Assembly . . . . . . . . . . . . . . . . . . . . . .<br />
Cleaning and inspection . . . . . . .<br />
Disassembly . . . . . . . . . . . . . . . . . . .<br />
Installation . . . . . . . . . . . . . . . . . . . .<br />
Removal . . . . . . . . . . . . . . . . . . . . . . .<br />
Oil pan removal:<br />
Removal . . . . . . . . . . . . . . . . . . . . . . . .<br />
Oil pump installation:<br />
Installation . . . . . . . . . . . . . . . . . . . .<br />
Oil pump removal:<br />
Removal . . . . . . . . . . . . . . . . . . . . . . .<br />
Oil pump repair:<br />
Assembly . . . . . . . . . . . . . . . . . . . . . .<br />
Cleaning and inspection . . . . . . .<br />
Disassembly . . . . . . . . . . . . . . . . . . .<br />
Oil seal, rear cover<br />
and, installation:<br />
Installation . . . . . . . . . . . . . . . . . . . .<br />
Oil seal, rear cover<br />
and, removal:<br />
Removal . . . . . . . . . . . . . . . . . . . . . . .<br />
Oil seals, differential,<br />
replacement:<br />
Front seal installation . . . . . . . . .<br />
Front seal removal . . . . . . . . . . . . .<br />
Rear seal installation . . . . . . . . . .<br />
Rear seal removal . . . . . . . . . . . . . .<br />
Oil tank, liftgate pump,<br />
replacement (M820A2):<br />
Installation . . . . . . . . . . . . . . . . . . . .<br />
Removal . . . . . . . . . . . . . . . . . . . . . . .<br />
Outlet box replacement:<br />
Installation . . . . . . . . . . . . . . . . . . . .<br />
Removal . . . . . . . . . . . . . . . . . . . . . . .<br />
Overheat switch and igniter,<br />
engine coolant heater,<br />
maintenance:<br />
Igniter installation. . . . . . . . . . . . .<br />
Igniter removal . . . . . . . . . . . . . . . .<br />
Inspection . . . . . . . . . . . . . . . . . . . . .<br />
Overheat switch installation . . .<br />
Overheat switch removal . . . . . .<br />
Overheat switch, personnel<br />
heater, replacement:<br />
Installation . . . . . . . . . . . . . . . . . . . .<br />
Removal . . . . . . . . . . . . . . . . . . . . . .<br />
3-20d<br />
3-20c<br />
3-20b<br />
3-20e<br />
3-20a<br />
3-62<br />
3-62<br />
3-62<br />
3-64<br />
3-60<br />
3-46 3-130<br />
3-68 3-205<br />
3-<strong>34</strong> 3-115<br />
3-52c<br />
3-52b<br />
3-52a<br />
3-172<br />
3-170<br />
3-168<br />
3-57 3-186<br />
3-45 3-129<br />
10-9c<br />
10-9a<br />
10-9d<br />
10-9b<br />
15-62b<br />
15-62a<br />
15-88b<br />
15-88a<br />
17-8d<br />
17-8b<br />
17-8c<br />
17-8e<br />
17-8a<br />
17-22b<br />
17-22a<br />
10-52<br />
10-52<br />
10-53<br />
10-52<br />
15-238<br />
15-236<br />
15-328<br />
15-328<br />
17-20<br />
17-18<br />
17-19<br />
17-20<br />
17-18<br />
17-60<br />
17-60<br />
Painting and refinishing . . . . . . . . . 2-12<br />
Pan, oil, installation:<br />
Installation . . . . . . . . . . . . . . . . . . . . . 3-72<br />
Pan, oil, maintenance:<br />
Assembly . . . . . . . . . . . . . . . . . . . . . . 3-20d<br />
Cleaning and inspection . . . . . . . 3-20c<br />
Disassembly . . . . . . . . . . . . . . . . . . . 3-20b<br />
Installation, . . . . . . . . . . . . . . . . . . . 3-20e<br />
Removal . . . . . . . . . . . . . . . . . . . . . . . 3-20a<br />
Pan, oil, removal:<br />
Removal . . . . . . . . . . . . . . . . . . . . . . . 3-46<br />
Parking and service<br />
brakedrum repair:<br />
Cleaning . . . . . . . . . . . . . . . . . . . . . . . 11-7a<br />
Inspection and repair . . . . . . . . . . 11-7b<br />
Parking and service<br />
brakeshoe repair:<br />
Parking and service<br />
brakeshoe inspection<br />
and repair . . . . . . . . . . . . . . . . . . . . 11-6c<br />
Parking brakeshoe<br />
assembly . . . . . . . . . . . . . . . . . . . . . 11-6e<br />
Parking brakeshoe<br />
disassembly . . . . . . . . . . . . . . . . . . 11-6a<br />
Service brakeshoe<br />
assembly . . . . . . . . . . . . . . . . . . . . . 11-6d<br />
Service brakeshoe<br />
disassembly . . . . . . . . . . . . . . . . . . 11-6b<br />
Pattern test:<br />
Spray pattern test . . . . . . . . . . . . . 5-10b<br />
Spray pattern tester setup . . . . . 5-10a<br />
Pedal lever and bracket,<br />
service brake, maintenance:<br />
Cleaning and inspection . . . . . . . 11-8b<br />
Installation . . . . . . . . . . . . . . . . . . . . 11-8c<br />
Removal, . . . . . . . . . . . . . . . . . . . . . . 11-8a<br />
Personnel heater blower<br />
motor replacement:<br />
Installation . . . . . . . . . . . . . . . . . . . . 17-20b<br />
Removal . . . . . . . . . . . . . . . . . . . . . . . 17-20a<br />
Personnel heater burner<br />
maintenance:<br />
Assembly . . . . . . . . . . . . . . . . . . . . . . 17-21d<br />
Cleaning and inspection . . . . . . . 17-21c<br />
Disassembly . . . . . . . . . . . . . . . . . . . 17-21b<br />
Installation . . . . . . . . . . . . . . . . . . . . 17-21e<br />
Removal . . . . . . . . . . . . . . . . . . . . . . . 17-21a<br />
P<br />
2-38<br />
3-210<br />
3-62<br />
3-62<br />
3-62<br />
3-64<br />
3-60<br />
3-130<br />
11-28<br />
11-28<br />
11-26<br />
11-27<br />
11-26<br />
11-27<br />
11-26<br />
5-26<br />
5-25<br />
11-32<br />
11-32<br />
11-30<br />
17-52<br />
17-52<br />
17-58<br />
17-56<br />
17-56<br />
17-59<br />
17-54<br />
Index 22
<strong>TM</strong> 9-<strong>2320</strong>-<strong>260</strong>-<strong>34</strong>-2<br />
INDEX (Contd)<br />
Para<br />
Page<br />
Personnel heater control<br />
bracket replacement:<br />
Installation . . . . . . . . . . . . . . . . . . . . 17-17b 17-44<br />
Removal . . . . . . . . . . . . . . . . . . . . . . . 17-17a 17-44<br />
Personnel heater flame<br />
detector switch<br />
maintenance:<br />
Assembly . . . . . . . . . . . . . . . . . . . . . . 17-15d 17-38<br />
Cleaning and inspection . . . . . . . 17-15c 17-38<br />
Disassembly . . . . . . . . . . . . . . . . . . . 17-15b 17-38<br />
Installation . . . . . . . . . . . . . . . . . . . . 17-15e 17-38<br />
Removal . . . . . . . . . . . . . . . . . . . . . . . 17-15a 17-37<br />
Personnel heater fuel control<br />
valve maintenance:<br />
Inspection . . . . . . . . . . . . . . . . . . . . . 17-16b 17-40<br />
Installation . . . . . . . . . . . . . . . . . . . . 17-16c 17-42<br />
Removal . . . . . . . . . . . . . . . . . . . . . . . 17-16a 17-40<br />
Personnel heater fuel line<br />
and blower housing<br />
replacement<br />
Installation . . . . . . . . . . . . . . . . . . . . 17-19b 17-50<br />
Removal . . . . . . . . . . . . . . . . . . . . . . . 17-19a 17-50<br />
Personnel heater heat<br />
exchanger maintenance:<br />
Cleaning and inspection . . . . . . . 17-24b 17-64<br />
Installation . . . . . . . . . . . . . . . . . . . . 17-24c 17-65<br />
Removal . . . . . . . . . . . . . . . . . . . . . . . 17-24a 17-64<br />
Personnel heater igniter<br />
and ignition control<br />
unit replacement:<br />
Igniter installation. . . . . . . . . . . . . 17-18d 17-48<br />
Igniter removal . . . . . . . . . . . . . . . . 17-18a 17-46<br />
Ignition control unit<br />
installation . . . . . . . . . . . . . . . . . . . 17-18c 17-48<br />
Ignition control unit<br />
removal . . . . . . . . . . . . . . . . . . . . . . . 17-18b 17-46<br />
Personnel heater overheat<br />
switch replacement:<br />
Installation . . . . . . . . . . . . . . . . . . . . 17-22b 17-60<br />
Remora] . . . . . . . . . . . . . . . . . . . . . . . 17-22a 17-60<br />
Personnel heater<br />
receptacle replacement:<br />
Installation . . . . . . . . . . . . . . . . . . . . 17-23b 17-62<br />
Removal . . . . . . . . . . . . . . . . . . . . . . . 17-23a 17-62<br />
Personnel heater testing<br />
Blower motor test . . . . . . . . . . . . . . 17-25e 17-72<br />
Flame detector switch test . . . . . 17-25c 17-68<br />
Fuel control valve test . . . . . . . . . 17-25d 17-68<br />
Ignition test, . . . . . . . . . . . . . . . . . . 17-25b 17-68<br />
Overheat switch test . . . . . . . . . . . 17-25f 17-72<br />
Preparation . . . . . . . . . . . . . . . . . . . . 17-25a 17-66<br />
Test equipment removal . . . . . . . 17-25g 17-72<br />
Para<br />
Page<br />
Piston and connecting<br />
rod installation:<br />
Assembly . . . . . . . . . . . . . . . . . . . . . . 3-55a 3-180<br />
Connecting rod<br />
side clearance . . . . . . . . . . . . . . . . 3-55c 3-182<br />
Installation . . . . . . . . . . . . . . . . . . . . 3-55b 3-180<br />
Piston and connecting<br />
rod maintenance:<br />
Disassembly . . . . . . . . . . . . . . . . . . . 3-47b 3-132<br />
Removal . . . . . . . . . . . . . . . . . . . . . . . 3-47a 3-132<br />
Plate, hinge, liftgate platform<br />
and, maintenance (M820A2):<br />
Adjustment . . . . . . . . . . . . . . . . . . . . 15-51d 15-202<br />
Cleaning and inspection . . . . . . . 15-51b 15-202<br />
Installation . . . . . . . . . . . . . . . . . . . . 15-51e 15-202<br />
Removal . . . . . . . . . . . . . . . . . . . . . . . 15-51a 15-200<br />
Repair . . . . . . . . . . . . . . . . . . . . . . . . . 15-51c 15-202<br />
Plates, water header,<br />
replacement:<br />
Instillation . . . . . . . . . . . . . . . . . . . . 3-4b 3-6<br />
Removal . . . . . . . . . . . . . . . . . . . . . . . 3-4a 3-6<br />
Platform, liftgate, and hinge<br />
plate maintenance (M820A2):<br />
Adjustment . . . . . . . . . . . . . . . . . . . . 15-51d 15-202<br />
Cleaning and inspection . . . . . . . 15-51b 15-202<br />
Installation . . . . . . . . . . . . . . . . . . . . 15-51e 15-202<br />
Removal . . . . . . . . . . . . . . . . . . . . . . . 15-51a 15-200<br />
Repair . . . . . . . . . . . . . . . . . . . . . . . . . 15-51c 15-202<br />
Plunger travel, top stop<br />
injector, adjustment:<br />
Adjustment . . . . . . . . . . . . . . . . . . . . 3-84 3-250<br />
Power divider and<br />
drive replacement:<br />
Installation . . . . . . . . . . . . . . . . . . . . 16-47b 16-274<br />
Removal . . . . . . . . . . . . . . . . . . . . . . . 16-47a 16-270<br />
Power divider governor<br />
control valve replacement:<br />
Installation (M816) . . . . . . . . . . . . 16-50d 16-300<br />
Installation (M819) . . . . . . . . . . . . 16-50c 16-300<br />
Removal (M816) . . . . . . . . . . . . . . . 16-50a 16-299<br />
Removal (M819) . . . . . . . . . . . . . . . 16-50b 16-300<br />
Power divider repair:<br />
Assembly . . . . . . . . . . . . . . . . . . . . . . 16-48c 16-288<br />
Cleaning and inspection . . . . . . . . 16-48b 16-285<br />
Disassembly . . . . . . . . . . . . . . . . . . . 16-48a 16-278<br />
Power steering assist<br />
cylinder maintenance:<br />
Assembly . . . . . . . . . . . . . . . . . . . . . . 12-7c 12-17<br />
Cleaning and inspection . . . . . . . 12-7b 12-16<br />
Disassembly . . . . . . . . . . . . . . . . . . . 12-7a 12-16<br />
Index 23
<strong>TM</strong> 9-<strong>2320</strong>-<strong>260</strong>-<strong>34</strong>-2<br />
INDEX (Contd)<br />
Para<br />
Page<br />
Para<br />
Page<br />
Power steering gear<br />
replacement:<br />
Installation . . . . . . . . . . . . . . . . . . . . 12-5b 12-4<br />
Removal . . . . . . . . . . . . . . . . . . . . . . . 12-5a 12-3<br />
Power steering test<br />
and adjustment:<br />
Poppet adjustment . . . . . . . . . . . . . 12-6e 12-12<br />
Sector shaft adjustment . . . . . . . . 12-6f 12-12<br />
Steering gear internal<br />
leakage test . . . . . . . . . . . . . . . . . . 12-6d 12-10<br />
Steering pump flow test . . . . . . . . 12-6c 12-8<br />
Steering pump<br />
pressure test . . . . . . . . . . . . . . . . . . 12-6b 12-8<br />
Steering pump test<br />
equipment installation . . . . . . . . 12-6a 12-6<br />
Steering pump test<br />
equipment removal . . . . . . . . . . . 12-6g 12-14<br />
Preliminary maintenance<br />
checklist; mechanical and<br />
power steering system<br />
maintenance . . . . . . . . . . . . . . . . . . . .<br />
Preparation for storage<br />
or shipment . . . . . . . . . . . . . . . . . . . . .<br />
preparing replacement<br />
engine for installation:<br />
Installation . . . . . . . . . . . . . . . . . . . .<br />
Removal . . . . . . . . . . . . . . . . . . . . . . .<br />
Pressure gear pump<br />
replacement<br />
Installation . . . . . . . . . . . . . . . . . . . .<br />
Removal . . . . . . . . . . . . . . . . . . . . . . .<br />
Pulley, accessory drive<br />
and, removal:<br />
Removal . . . . . . . . . . . . . . . . . . . . . . .<br />
Pulley, accessory drive,<br />
installation:<br />
Power takeoff, transfer, Installation . . . . . . . . . . . . . . . . . . . . 3-70 3-207<br />
Pulley, accessory drive,<br />
16-44c 16-258 replacement<br />
16-44b 16-256<br />
Installation . . . . . . . . . . . . . . . . . . . 3-8b 3-18<br />
16-44a 16-254<br />
Removal . . . . . . . . . . . . . . . . . . . . . . . 3-8a 3-18<br />
Pulsation damper<br />
maintenance:<br />
Assembly . . . . . . . . . . . . . . . . . . . . . . 5-16d 5-46<br />
16-45c 16-266 Disassembly . . . . . . . . . . . . . . . . . . . 5-16b 5-45<br />
16-45b 16-262 Inspection . . . . . . . . . . . . . . . . . . . . . 5-16c 5-45<br />
16-45a 16-<strong>260</strong> Installation . . . . . . . . . . . . . . . . . . . . 5-16e 5-46<br />
Removal . . . . . . . . . . . . . . . . . . . . . . . 5-16a 5-45<br />
Pump, fuel, calibration:<br />
16-43b 16-252<br />
Checking and adjusting<br />
governor weight pressure . . . . . 5-25l 5-84<br />
16-43a 16-250 Checking and adjusting<br />
throttle lever travel . . . . . . . . . . . 5-25h 5-80<br />
Fuel pump run-in . . . . . . . . . . . . . . 5-25c 5-72<br />
16-41c 16-244 Mounting pump<br />
to test stand. . . . . . . . . . . . . . . . . . 5-25b 5-68<br />
16-41b 16-238 Shutdown and removal<br />
repair (M816):<br />
Assembly . . . . . . . . . . . . . . . . . . . . . .<br />
Cleaning and inspection . . . . . . .<br />
Disassembly . . . . . . . . . . . . . . . . . . .<br />
Power takeoff, transfer,<br />
repair (M815, M819):<br />
Assembly . . . . . . . . . . . . . . . . . . . . . .<br />
Cleaning and inspection . . . . . . .<br />
Disassembly . . . . . . . . . . . . . . . . . . .<br />
Power takeoff, transfer,<br />
replacement:<br />
Installation . . . . . . . . . . . . . . . . . . . .<br />
Removal . . . . . . . . . . . . . . . . . . . . . . .<br />
Power takeoff,<br />
transmission, repair<br />
Assembly . . . . . . . . . . . . . . . . . . . . . .<br />
Cleaning, inspection,<br />
and repair . . . . . . . . . . . . . . . . . . . .<br />
Disassembly . . . . . . . . . . . . . . . . . . .<br />
Power takeoff, transmission,<br />
replacement:<br />
Installation . . . . . . . . . . . . . . . . . . . .<br />
Removal . . . . . . . . . . . . . . . . . . . . . . .<br />
Precautions, maintenance;<br />
mechanical and power<br />
steering system<br />
maintenance . . . . . . . . . . . . . . . . . . . .<br />
Preheat resistor, engine<br />
coolant heater fuel tube<br />
and, replacement:<br />
Installation . . . . . . . . . . . . . . . . . . . .<br />
Removal . . . . . . . . . . . . . . . . . . . . . . .<br />
12-3<br />
12-2<br />
16-41a 16-232 from test stand . . . . . . . . . . . . . . . 5-25n 5-86<br />
Testing and adjusting<br />
fuel pressure . . . . . . . . . . . . . . . . . 5-25j 5-82<br />
Testing and adjusting<br />
16-40b 16-231 governor fuel pressure . . . . . . . . 5-25k 5-84<br />
16-40a 16-230 Testing and adjusting<br />
idle speed . . . . . . . . . . . . . . . . . . . . . 5-25g 5-78<br />
Testing and adjusting idle<br />
speed (VS governor only) . . . . . . 5-25m 5-86<br />
12-4 12-2 Testing and adjusting<br />
pump main pressure . . . . . . . . . . 5-25i 5-82<br />
Testing and adjusting<br />
throttle leakage . . . . . . . . . . . . . . . 5-25f 5-76<br />
Testing governor cutoff RPM... 5-25e 5-74<br />
17-9b 17-22 Testing pump seals for leaks . . . 5-25d 5-74<br />
17-9a 17-22 Throttle shaft cover removal . . . 5-25a 5-68<br />
1-4<br />
3-26b<br />
3-26a<br />
5-17b<br />
5-17a<br />
1-1<br />
3-102<br />
3-101<br />
5-47<br />
5-47<br />
3-32 3-111<br />
Index 24
<strong>TM</strong> 9-<strong>2320</strong>-<strong>260</strong>-<strong>34</strong>-2<br />
INDEX (Contd)<br />
Para<br />
Page<br />
Pump, fuel, replacement:<br />
Installation . . . . . . . . . . . . . . . . . . . . 5-13b 5-40<br />
Removal . . . . . . . . . . . . . . . . . . . . . . . 5-13a 5-38<br />
Pump, hoist hydraulic, and<br />
support maintenance (M816):<br />
Cleaning, inspection,<br />
and repair . . . . . . . . . . . . . . . . . . . . 16-24b 16-142<br />
Installation . . . . . . . . . . . . . . . . . . . . 16-24c 16-142<br />
Removal . . . . . . . . . . . . . . . . . . . . . . . 16-24a 16-140<br />
Pump, hoist, maintenance:<br />
Assembly . . . . . . . . . . . . . . . . . . . . . . 15-17d 15-54<br />
Cleaning and inspection . . . . . . . 15-17c 15-54<br />
Disassembly . . . . . . . . . . . . . . . . . . . 15-17b 15-52<br />
Installation . . . . . . . . . . . . . . . . . . . . 15-17e 15-54<br />
Removal . . . . . . . . . . . . . . . . . . . . . . . 15-17a 15-52<br />
Pump, liftgate auxiliary, and<br />
bracket replacement (M820A2):<br />
Installation . . . . . . . . . . . . . . . . . . . . 15-56b 15-214<br />
Removal . . . . . . . . . . . . . . . . . . . . . . . 15-56a 15-214<br />
Pump, liftgate hydraulic,<br />
replacement (M820A2):<br />
Installation . . . . . . . . . . . . . . . . . . . . 15-61b 15-2<strong>34</strong><br />
Removal . . . . . . . . . . . . . . . . . . . . . . . 15-61a 15-2<strong>34</strong><br />
Pump, oil, installation:<br />
Installation . . . . . . . . . . . . . . . . . . . . 3-68 3-205<br />
Pump, oil, removal:<br />
Removal . . . . . . . . . . . . . . . . . . . . . . . 3-<strong>34</strong><br />
Pump, oil, repair:<br />
3-115<br />
Assembly . . . . . . . . . . . . . . . . . . . . . . 3-52c 3-172<br />
Cleaning and inspection . . . . . . . 3-52b 3-170<br />
Disassembly . . . . . . . . . . . . . . . . . . . 3-52e 3-168<br />
Pump, water, maintenance:<br />
Cleaning and inspection . . . . . . . 6-4b 6-6<br />
Installation . . . . . . . . . . . . . . . . . . . . 6-4c 6-6<br />
Removal . . . . . . . . . . . . . . . . . . . . . . . 6-4a 6-6<br />
Push tubes, rocker lever<br />
housings and, installation:<br />
Installation . . . . . . . . . . . . . . . . . . . . 3-64 3-200<br />
Push tubes, rocker lever<br />
housing and, maintenance:<br />
Assembly . . . . . . . . . . . . . . . . . . . . . . 3-15e 3-44<br />
Cleaning and inspection . . . . . . . 3-15c 3-41<br />
Disassembly . . . . . . . . . . . . . . . . . . . 3-15b 3-40<br />
Installation . . . . . . . . . . . . . . . . . . . . 3-15f 3-45<br />
Removal . . . . . . . . . . . . . . . . . . . . . . . 3-15a 3-38<br />
Repair . . . . . . . . . . . . . . . . . . . . . . . . .3-15d 3-43<br />
Push tubes, rocker lever<br />
housings and, removal:<br />
Removal . . . . . . . . . . . . . . . . . . . . . . . 3-37 3-119<br />
R<br />
Para<br />
Radiator maintenance:<br />
Assembly . . . . . . . . . . . . . . . . . . . . . . 6-2c<br />
Cleaning and inspection . . . . . . . 6-2b<br />
Disassembly . . . . . . . . . . . . . . . . . . . 6-2a<br />
Rear cover and oil<br />
seal installation:<br />
Installation . . . . . . . . . . . . . . . . . . . . 3-57<br />
Rear cover and oil<br />
seal removal:<br />
Removal . . . . . . . . . . . . . . . . . . . . . . . 3-45<br />
Rear cover, ceiling,<br />
replacement (M820A1):<br />
Installation . . . . . . . . . . . . . . . . . . . . 15-40b<br />
Removal . . . . . . . . . . . . . . . . . . . . . . . 15-40a<br />
Rear cover, ceiling,<br />
replacement (M820, M820A2):<br />
Installation . . . . . . . . . . . . . . . . . . . . 15-41b<br />
Removal . . . . . . . . . . . . . . . . . . . . . . . 15-41a<br />
Rear doors maintenance:<br />
Assembly . . . . . . . . . . . . . . . . . . . . . . 15-28d<br />
Cleaning and inspection . . . . . . . 15-28c<br />
Disassembly . . . . . . . . . . . . . . . . . . . 15-28b<br />
Installation . . . . . . . . . . . . . . . . . . . . 15-28e<br />
Removal . . . . . . . . . . . . . . . . . . . . . . . 15-28a<br />
Rear fenders replacement;<br />
tractor wrecker body<br />
maintenance:<br />
Installation . . . . . . . . . . . . . . . . . . . . 15-9b<br />
Removal . . . . . . . . . . . . . . . . . . . . . . . 15-9a<br />
Rear wall interior<br />
panels replacement:<br />
-<br />
Left panel installation . . . . . . . . .<br />
Left panel removal . . . . . . . . . . . . .<br />
Rear winch automatic<br />
brake maintenance:<br />
Cleaning and inspection . . . . . . .<br />
Installation . . . . . . . . . . . . . . . . . . . .<br />
Removal, . . . . . . . . . . . . . . . . . . . . . .<br />
Rear winch cable<br />
tensioner maintenance:<br />
Assembly . . . . . . . . . . . . . . . . . . . . . .<br />
Cleaning and inspection . . . . . . .<br />
Disassembly . . . . . . . . . . . . . . . . . . .<br />
Rear winch level wind<br />
maintenance:<br />
Assembly . . . . . . . . . . . . . . . . . . . . . .<br />
Cleaning and inspection . . . . . . .<br />
Disassembly . . . . . . . . . . . . . . . . . . .<br />
Installation . . . . . . . . . . . . . . . . . . . .<br />
Removal . . . . . . . . . . . . . . . . . . . . . . .<br />
15-<strong>34</strong>b<br />
15-<strong>34</strong>a<br />
16-11b<br />
16-11c<br />
16-11a<br />
16-10c<br />
16-10b<br />
16-10a<br />
16-9d<br />
16-9c<br />
16-9b<br />
16-9e<br />
16-9a<br />
Page<br />
6-2<br />
6-2<br />
6-2<br />
3-186<br />
3-129<br />
15-157<br />
15-157<br />
15-158<br />
15-158<br />
15-90<br />
15-90<br />
15-86<br />
15-94<br />
15-86<br />
15-18<br />
15-18<br />
15-118<br />
15-118<br />
16-74<br />
16-75<br />
16-74<br />
16-72<br />
16-70<br />
16-70<br />
16-66<br />
16-62<br />
16-58<br />
16-68<br />
16-58<br />
Index 25
<strong>TM</strong> 9-<strong>2320</strong>-<strong>260</strong>-<strong>34</strong>-2<br />
INDEX (Contd)<br />
Para Page Para Page<br />
Rear winch repair:<br />
Assembly . . . . . . . . . . . . . . . . . . . . . . 16-8c 16-52<br />
Cleaning, inspection,<br />
and repair . . . . . . . . . . . . . . . . . . . . 16-8b 16-48<br />
Disassembly . . . . . . . . . . . . . . . . . . . 16-8a 16-44<br />
Rear winch rollers repair:<br />
Repair . . . . . . . . . . . . . . . . . . . . . . . . . 15-6 15-12<br />
Rear wiring harness<br />
replacement:<br />
Installation . . . . . . . . . . . . . . . . . . . . 7-4b 7-30<br />
Removal . . . . . . . . . . . . . . . . . . . . . . . 7-4a 7-22<br />
Receptacle, personnel<br />
heater, replacement:<br />
Installation . . . . . . . . . . . . . . . . . . . . 17-23b 17-62<br />
Removal . . . . . . . . . . . . . . . . . . . . . . . 17-23a 17-62<br />
Records, reports, and<br />
maintenance forms . . . . . . . . . . . . . . 1-2<br />
1-1<br />
References, Appendix A . . . . . . . . . . A-1<br />
Refinishing, painting and . . . . . . . . 2-12 2-38<br />
Register, front wall,<br />
replacement:<br />
Installation . . . . . . . . . . . . . . . . . . . . 15-39b 15-156<br />
Removal . . . . . . . . . . . . . . . . . . . . . . . 15-39a 15-156<br />
Registers, ceiling, and<br />
deflectors replacement:<br />
Installation . . . . . . . . . . . . . . . . . . . . 15-38b 15-154<br />
Removal . . . . . . . . . . . . . . . . . . . . . . . 15-38a 15-154<br />
Release bearing, shaft,<br />
and yoke maintenance:<br />
Assembly . . . . . . . . . . . . . . . . . . . . . . 4-3d 4-4<br />
Cleaning and inspection . . . . . . . 4-3c 4-4<br />
Disassembly . . . . . . . . . . . . . . . . . . . 4-3b 4-4<br />
Installation . . . . . . . . . . . . . . . . . . . . 4-3e 4-5<br />
Removal . . . . . . . . . . . . . . . . . . . . . . . 4-3a 4-4<br />
Relief valve<br />
maintenance (M819):<br />
Assembly . . . . . . . . . . . . . . . . . . . . . . 16-37d 16-226<br />
Cleaning and inspection . . . . . . . 16-37c 16-226<br />
Disassembly . . . . . . . . . . . . . . . . . . . 16-37b 16-224<br />
Installation . . . . . . . . . . . . . . . . . . . . 16-37e 16-226<br />
Removal . . . . . . . . . . . . . . . . . . . . . . . 16-37a 16-224<br />
Repair . . . . . . . . . . . . . . . . . . . . . . . . . . . . 2-10 2-36<br />
Repair stand,<br />
mounting engine on:<br />
Installation . . . . . . . . . . . . . . . . . . . . 3-29 3-108<br />
Repair stand, engine<br />
removal from:<br />
Removal . . . . . . . . . . . . . . . . . . . . . . . 3-75 3-214<br />
Repair parts . . . . . . . . . . . . . . . . . . . . . . 2-5 2-1<br />
Replacement engine,<br />
preparing for, installation:<br />
Installation . . . . . . . . . . . . . . . . . . . . 3-26b 3-102<br />
Removal . . . . . . . . . . . . . . . . . . . . . . . 3-26a 3-101<br />
Reporting quality deficiencies,<br />
ideas, and equipment improvement<br />
recommendations . . . . . . . . .<br />
Resistor, preheat, engine<br />
coolant heater fuel tube<br />
and, replacement<br />
Installation . . . . . . . . . . . . . . . . . . . .<br />
Removal . . . . . . . . . . . . . . . . . . . . . . .<br />
Retractable beam driveshaft<br />
and lock maintenance:<br />
Cleaning and inspection . . . . . . .<br />
Installation . . . . . . . . . . . . . . . . . . . .<br />
Removal . . . . . . . . . . . . . . . . . . . . . . .<br />
Retractable beam replacement:<br />
Installation . . . . . . . . . . . . . . . . . . . .<br />
Removal . . . . . . . . . . . . . . . . . . . . . . .<br />
Retractable beam<br />
rollers replacement:<br />
End roller installation . . . . . . . . .<br />
End roller removal . . . . . . . . . . . . .<br />
Support roller installation . . . . .<br />
Support roller removal . . . . . . . . .<br />
Right and left side blackout<br />
wiring harness replacement:<br />
Installation . . . . . . . . . . . . . . . . . . . .<br />
Removal . . . . . . . . . . . . . . . . . . . . . . .<br />
Right side emergency lamp<br />
wiring harness replacement:<br />
Installation . . . . . . . . . . . . . . . . . . . .<br />
Removal . . . . . . . . . . . . . . . . . . . . . . .<br />
Rocker lever housing<br />
covers installation:<br />
Installation . . . . . . . . . . . . . . . . . . . .<br />
Rocker lever housing<br />
covers replacement:<br />
Installation . . . . . . . . . . . . . . . . . . . .<br />
Removal . . . . . . . . . . . . . . . . . . . . . . .<br />
Rocker lever housing covers,<br />
lifting brackets and, removal:<br />
Lifting bracket removal . . . . . . . .<br />
Rocker lever housing<br />
cover removal . . . . . . . . . . . . . . . . .<br />
Rocker lever housings and ‘<br />
push tubes installation:<br />
Installation . . . . . . . . . . . . . . . . . . . .<br />
Rocker lever housing and<br />
push tubes maintenance:<br />
Assembly . . . . . . . . . . . . . . . . . . . . . .<br />
Cleaning and inspection . . . . . . .<br />
Disassembly . . . . . . . . . . . . . . . . . . .<br />
Installation . . . . . . . . . . . . . . . . . . . .<br />
Removal . . . . . . . . . . . . . . . . . . . . . . .<br />
Repair . . . . . . . . . . . . . . . . . . . . . . . . .<br />
1-7 1-2<br />
17-9b 17-22<br />
17-9a 17-22<br />
15-25b 15-76<br />
15-25c 15-78<br />
15-25a 15-76<br />
15-25b 15-80<br />
15-26a 15-80<br />
15-27d 15-84<br />
15-27c 15-84<br />
15-27b 15-82<br />
15-27a 15-82<br />
15-72b 15-268<br />
15-72a 15-266<br />
15-74b 15-276<br />
15-74a 15-274<br />
3-65 3-202<br />
3-14b 3-37<br />
3-14a 3-37<br />
3-36a 3-118<br />
3-36b 3-118<br />
3-64 3-200<br />
3-15e 3-44<br />
3-15c 3-41<br />
3-15b 3-40<br />
3-15f 3-45<br />
3-15a 3-38<br />
3-15d 3-43<br />
Index 26
<strong>TM</strong> 9-<strong>2320</strong>-<strong>260</strong>-<strong>34</strong>-2<br />
INDEX (Contd)<br />
Para<br />
Page<br />
Para<br />
Page<br />
Rocker lever housings and<br />
push tubes removal:<br />
Removal . . . . . . . . . . . . . . . . . . . . . . . 3-37<br />
Roller arm maintenance:<br />
3-119<br />
Assembly . . . . . . . . . . . . . . . . . . . . . . 15-14d 15-36<br />
Cleaning and inspection . . . . . . . 15-14c<br />
Disassembly . . . . . . . . . . . . . . . . . . . 15-14b<br />
15-36<br />
15-36<br />
Installation . . . . . . . . . . . . . . . . . . . . 15-14e 15-37<br />
Removal . . . . . . . . . . . . . . . . . . . . . . . 15-14a 15-35<br />
Roller, front winch,<br />
maintenance:<br />
Assembly . . . . . . . . . . . . . . . . . . . . . . 16-5d 16-38<br />
Cleaning and inspection . . . . . . . 16-5c 16-36<br />
Disassembly . . . . . . . . . . . . . . . . . . . 16-5b 16-<strong>34</strong><br />
Installation . . . . . . . . . . . . . . . . . . . . 16-5e 16-40<br />
Removal . . . . . . . . . . . . . . . . . . . . . . . 16-5a 16-<strong>34</strong><br />
Rollers, crane shipper,<br />
boom, boom extension,<br />
maintenance (M819):<br />
Boom extension assembly. . . . . . 16-<strong>34</strong>o 16-208<br />
Boom extension disassembly . . . 16-<strong>34</strong>f 16-200<br />
Boom extension installation. . . . 16-<strong>34</strong>s 16-210<br />
Boom extension removal . . . . . . . 16-<strong>34</strong>b 16-197<br />
Boom installation . . . . . . . . . . . . . . 16-<strong>34</strong>r 16-210<br />
Boom removal . . . . . . . . . . . . . . . . . 16-<strong>34</strong>c 16-198<br />
Cleaning and inspection . . . . . . . 16-<strong>34</strong>j 16-202<br />
Extension cylinder<br />
installation . . . . . . . . . . . . . . . . . . . 16-<strong>34</strong>q 16-209<br />
Extension cylinder removal . . . . 16-<strong>34</strong>d 16-198<br />
Front lower roller assembly<br />
and adjustment . . . . . . . . . . . . . . . 16-<strong>34</strong>n 16-206<br />
Front lower roller<br />
disassembly . . . . . . . . . . . . . . . . . . 16-<strong>34</strong>g 16-200<br />
Middle lower roller<br />
assembly . . . . . . . . . . . . . . . . . . . . . 16-<strong>34</strong>m 16-206<br />
Middle lower roller<br />
disassembly . . . . . . . . . . . . . . . . . . 16-<strong>34</strong>h 16-201<br />
Repair . . . . . . . . . . . . . . . . . . . . . . . . . 16-<strong>34</strong>k 16-202<br />
Shipper installation . . . . . . . . . . . . 16-<strong>34</strong>t 16-212<br />
Shipper removal . . . . . . . . . . . . . . . 16-<strong>34</strong>a 16-194<br />
Upper roller assembly<br />
and adjustment . . . . . . . . . . . . . . . 16-<strong>34</strong>l 16-204<br />
Upper roller disassembly . . . . . . 16-<strong>34</strong>i 16-201<br />
Upper roller installation . . . . . . . 16-<strong>34</strong>p 16-208<br />
Upper roller removal . . . . . . . . . . . 16-<strong>34</strong>e 16-199<br />
Rollers, rear winch, repair:<br />
Repair . . . . . . . . . . . . . . . . . . . . . . . . . 15-6 15-12<br />
Rollers, retractable beam,<br />
replacement:<br />
End roller installation . . . . . . . . . 15-27d 15-84<br />
End roller removal . . . . . . . . . . . . . 15-27c 15-84<br />
Support roller installation . . . . . 15-27b 15-82<br />
Support roller removal. . . . . . . . . 15-27a 15-82<br />
Roller, upper and lower boom,<br />
maintenance (M816):<br />
Assembly . . . . . . . . . . . . . . . . . . . . . .<br />
Cleaning and inspection . . . . . . .<br />
Disassembly . . . . . . . . . . . . . . . . . . .<br />
Installation . . . . . . . . . . . . . . . . . . . .<br />
Removal . . . . . . . . . . . . . . . . . . . . . . .<br />
Roof, hinged, maintenance:<br />
Assembly . . . . . . . . . . . . . . . . . . . . . .<br />
Cleaning and inspection . . . . . . .<br />
Disassembly . . . . . . . . . . . . . . . . . . .<br />
Installation . . . . . . . . . . . . . . . . . . . .<br />
Removal . . . . . . . . . . . . . . . . . . . . . . .<br />
Rotochamber replacement<br />
(M816):<br />
Adjustment . . . . . . . . . . . . . . . . . . . .<br />
Installation . . . . . . . . . . . . . . . . . . . .<br />
Removal . . . . . . . . . . . . . . . . . . . . . . .<br />
S<br />
16-13d 16-78<br />
16-13c 16-78<br />
16-13b 16-77<br />
16-13e 16-80<br />
16-13a 16-77<br />
15-37d 15-148<br />
15-37c 15-146<br />
15-37b 15-142<br />
15-37e 15-152<br />
15-37a 15-140<br />
4-4c 4-6<br />
4-4b 4-6<br />
4-4a 4-6<br />
Safety brace replacement:<br />
Installation . . . . . . . . . . . . . . . . . . . . 15-21b 15-69<br />
Removal . . . . . . . . . . . . . . . . . . . . . . . 15-21a 15-69<br />
Safety latch, hoist,<br />
maintenance:<br />
Assembly . . . . . . . . . . . . . . . . . . . . . . 15-16d 15-50<br />
Cleaning and inspection . . . . . . . 15-16c 15-50<br />
Disassembly . . . . . . . . . . . . . . . . . . . 15-16b 15-48<br />
Installation . . . . . . . . . . . . . . . . . . . . 15-16e 15-50<br />
Removal . . . . . . . . . . . . . . . . . . . . . . . 15-16a 15-48<br />
Seat base, driver’s,<br />
maintenance:<br />
Inspection and repair . . . . . . . . . . 14-4b 14-4<br />
Installation . . . . . . . . . . . . . . . . . . . 14-4c 14-5<br />
Removal . . . . . . . . . . . . . . . . . . . . . . . 14-4a 14-2<br />
Seat grinding, valve:<br />
Cleaning..., . . . . . . . . . . . . . . . . . . . 3-80d 3-230<br />
Dressing grinding wheel . . . . . . . 3-80a 3-228<br />
Gaging valve seats . . . . . . . . . . . . . 3-80s 3-230<br />
Lapping valve seats . . . . . . . . . . . . 3-80f 3-232<br />
Pre-grinding operation . . . . . . . . . 3-80b 3-229<br />
Valve seat grinding . . . . . . . . . . . . 3-80c 3-230<br />
Service brakedrum,<br />
parking and, repair:<br />
Cleaning . . . . . . . . . . . . . . . . . . . . . . . 11-7a 11-28<br />
Inspection and repair . . . . . . . . . . 11-7b 11-28<br />
Service brake pedal lever<br />
and bracket maintenance:<br />
Cleaning and inspection . . . . . . . 11-8b 11-32<br />
Installation . . . . . . . . . . . . . . . . . . . . 11-8c 11-32<br />
Removal . . . . . . . . . . . . . . . . . . . . . . .11-8a 11-30<br />
Index 27
<strong>TM</strong> 9-<strong>2320</strong>-<strong>260</strong>-<strong>34</strong>-2<br />
INDEX (Contd)<br />
Para Page Para Page<br />
Service brakeshoe,<br />
parking and, repair:<br />
Parking and service<br />
brakeshoe inspection<br />
and repair. . . . . . . . . . . . . . . . . . . . 11-6c 11-26<br />
Parking brakeshoe<br />
assembly . . . . . . . . . . . . . . . . . . . . . 11-6e 11-27<br />
Parking brakeshoe<br />
disassembly . . . . . . . . . . . . . . . . . . 11-6a 11-26<br />
Service brakeshoe assembly . . . . 11-6d 11-27<br />
Service brakeshoe<br />
disassembly . . . . . . . . . . . . . . . . . . 11-6b 11-26<br />
Shaft yoke, and release<br />
bearing maintenance:<br />
Assembly . . . . . . . . . . . . . . . . . . . . . . 4-3d 4-4<br />
Cleaning and inspection . . . . . . . 4-3c 4-4<br />
Disassembly . . . . . . . . . . . . . . . . . . . 4-3b 4-4<br />
Installation . . . . . . . . . . . . . . . . . . . . 4-3e 4-5<br />
Removal. . . . . . . . . . . . . . . . . . . 4-3a 4-4<br />
Shield, cab protector,<br />
maintenance:<br />
Cleaning and inspection . . . . . . . 15-12b 15-26<br />
Installation . . . . . . . . . . . . . . . . . . . . 15-12c 15-26<br />
Removal . . . . . . . . . . . . . . . . . . . . . . . 15-12a 15-24<br />
Shifter housing,<br />
transmission, maintenance:<br />
Assembly . . . . . . . . . . . . . . . . . . . . . . 8-7c 8-40<br />
Disassembly . . . . . . . . . . . . . . . . . . . 8-7b 8-38<br />
Installation . . . . . . . . . . . . . . . . . . . . 8-7d 8-42<br />
Removal . . . . . . . . . . . . . . . . . . . . . . . 8-7a 8-38<br />
Shipper, crane, boom, boom<br />
extension, and rollers<br />
maintenance (M819):<br />
Boom extension assembly . . . . . . 16-<strong>34</strong>o 16-208<br />
Boom extension disassembly . . . 16-<strong>34</strong>f 16-200<br />
Boom extension installation . . . . 16-<strong>34</strong>s 16-210<br />
Boom extension removal . . . . . . . 16-<strong>34</strong>b 16-197<br />
Boom installation . . . . . . . . . . . . . . 16-<strong>34</strong>r 16-210<br />
Boom removal . . . . . . . . . . . . . . . . . 16-<strong>34</strong>c 16-198<br />
Cleaning and inspection . . . . . . . 16-<strong>34</strong>j 16-202<br />
Extension cylinder<br />
installation . . . . . . . . . . . . . . . . . . . 16-<strong>34</strong>q 16-209<br />
Extension cylinder removal . . . . 16-<strong>34</strong>d 16-198<br />
Front lower roller assembly<br />
and adjustment . . . . . . . . . . . . . . . 16-<strong>34</strong>n 16-206<br />
Front lower roller<br />
disassembly . . . . . . . . . . . . . . . . . . 16-<strong>34</strong>g 16-200<br />
Middle lower roller<br />
assembly . . . . . . . . . . . . . . . . . . . . . 16-<strong>34</strong>m 16-206<br />
Middle lower roller<br />
disassembly . . . . . . . . . . . . . . . . . . 16-<strong>34</strong>h 16-201<br />
Repair . . . . . . . . . . . . . . . . . . . . . . . . . 16-<strong>34</strong>k 16-202<br />
Shipper installation . . . . . . . . . . . . 16-<strong>34</strong>t 16-212<br />
Shipper removal . . . . . . . . . . . . . . . 16-<strong>34</strong>a 16-194<br />
Upper roller assembly<br />
and adjustment . . . . . . . . . . . . . . . 16-<strong>34</strong>l 16-204<br />
Upper roller disassembly . . . . . . 16-<strong>34</strong>i 16-201<br />
Upper roller installation . . . . . . . 16-<strong>34</strong>p 16-208<br />
Upper roller removal . . . . . . . . . . . 16-<strong>34</strong>e 16-199<br />
Shipment, preparation<br />
for storage or . . . . . . . . . . . . . . . . . . . . 1-4 1-1<br />
Shutoff valves, fuel<br />
pump, replacement<br />
Installation . . . . . . . . . . . . . . . . . . . . 5-15b 5-44<br />
Removal . . . . . . . . . . . . . . . . . . . . . . . 5-15a 5-43<br />
Side doors maintenance:<br />
Assembly . . . . . . . . . . . . . . . . . . . . . . 15-29d 15-98<br />
Cleaning and inspection . . . . . . . 15-29c 15-96<br />
Disassembly . . . . . . . . . . . . . . . . . . . 15-29b 15-96<br />
Installation . . . . . . . . . . . . . . . . . . . . 15-29e 15-98<br />
Removal . . . . . . . . . . . . . . . . . . . . . . . 15-29a 15-95<br />
Side panel, exterior,<br />
maintenance:<br />
Assembly . . . . . . . . . . . . . . . . . . . . . . 15-32c 15-110<br />
Cleaning and inspection . . . . . . . 15-32b 15-110<br />
Disassembly . . . . . . . . . . . . . . . . . . . 15-32a 15-106<br />
Side panels, ceiling filler<br />
and, replacement<br />
Left side panel and filler<br />
installation . . . . . . . . . . . . . . . . . . . 15-44d 15-167<br />
Left side panel and filler<br />
removal . . . . . . . . . . . . . . . . . . . . . . . 15-44a 15-166<br />
Right side panel and filler<br />
installation . . . . . . . . . . . . . . . . . . . 15-44c 15-166<br />
Right side panel and filler<br />
removal . . . . . . . . . . . . . . . . . . . . . . . 15-44b 15-166<br />
Side panels, interior, and<br />
latches replacement<br />
Installation . . . . . . . . . . . . . . . . . . . . 15-35b 15-126<br />
Removal . . . . . . . . . . . . . . . . . . . . . . . 15-35a 15-120<br />
Sill, cargo body frame<br />
rail replacement:<br />
Installation . . . . . . . . . . . . . . . . . . . . 15-3b 15-6<br />
Removal . . . . . . . . . . . . . . . . . . . . . . . 15-3a 15-6<br />
Sleeve, injector, maintenance:<br />
Bead cutting . . . . . . . . . . . . . . . . . . . 3-79b 3-223<br />
Check and test . . . . . . . . . . . . . . . . . 3-79e 3-226<br />
Fitting and forming . . . . . . . . . . . . 3-79d 3-225<br />
Installation . . . . . . . . . . . . . . . . . . . . 3-79c 3-224<br />
Removal . . . . . . . . . . . . . . . . . . . . . . . 3-79a 3-222<br />
Special tools and<br />
support equipment . . . . . . . . . . . . . . 2-2 2-1<br />
Spindle, wheel hub,<br />
maintenance:<br />
Inspection . . . . . . . . . . . . . . . . . . . . . 10-4b 10-14<br />
Installation . . . . . . . . . . . . . . . . . . . . 10-4c 10-15<br />
Removal . . . . . . . . . . . . . . . . . . . . . . . 10-4a 10-14<br />
Spring pack, fuel pump,<br />
maintenance:<br />
Inspection . . . . . . . . . . . . . . . . . . . . . 5-18b 5-48<br />
Installation . . . . . . . . . . . . . . . . . . . . 5-18c 5-49<br />
Removal . . . . . . . . . . . . . . . . . . . . . . . 5-18a 5-48<br />
Index 28
<strong>TM</strong> 9-<strong>2320</strong>-<strong>260</strong>-<strong>34</strong>-2<br />
INDEX (Contd)<br />
Para<br />
Page<br />
Spring pack, upper,<br />
maintenance:<br />
Assembly . . . . . . . . . . . . . . . . . . . . . . 5-19d 5-52<br />
Disassembly . . . . . . . . . . . . . . . . . . . 5-19b 5-50<br />
Inspection . . . . . . . . . . . . . . . . . . . . . 5-19c 5-52<br />
Installation . . . . . . . . . . . . . . . . . . . . 5-19e 5-52<br />
Removal . . . . . . . . . . . . . . . . . . . . . . . 5-19a 5-50<br />
Starter switches, AC<br />
manual, replacement:<br />
Installation . . . . . . . . . . . . . . . . . . . . 15-89b 15-330<br />
Removal . . . . . . . . . . . . . . . . . . . . . . . 15-89a 15-330<br />
Starting repaired<br />
or replaced engine:<br />
In-chassis run-in. . . . . . . . . . . . . . . 3-27c 3-106<br />
Out-of-chassis run-in . . . . . . . . . . 3-27b 3-104<br />
Priming lubrication system . . . . 3-27a 3-104<br />
Steering assist cylinder,<br />
power, maintenance:<br />
Assembly . . . . . . . . . . . . . . . . . . . . . . 12-7c 12-17<br />
Cleaning and inspection . . . . . . . 12-7b 12-16<br />
Disassembly . . . . . . . . . . . . . . . . . . . 12-7a 12-16<br />
Steering gear, power,<br />
replacement:<br />
Installation . . . . . . . . . . . . . . . . . . . . 12-5b 12-4<br />
Removal . . . . . . . . . . . . . . . . . . . . . . . 12-5a 12-3<br />
Steering knuckle maintenance:<br />
Adjustments . . . . . . . . . . . . . . . . . . . 10-3d 10-10<br />
Cleaning and inspection . . . . . . . 10-3b 10-6<br />
Installation . . . . . . . . . . . . . . . . . . . . 10-3c 10-8<br />
Removal . . . . . . . . . . . . . . . . . . . . . . .10-3a 10-4<br />
Steering, power, test<br />
and adjustment:<br />
Poppet adjustment . . . . . . . . . . . . . 12-6e 12-12<br />
Sector shaft adjustment . . . . . . . . 12-6f 12-12<br />
Steering gear internal<br />
leakage test . . . . . . . . . . . . . . . . . . 12-6d 12-10<br />
Steering pump flow test . . . . . . . . 12-6c 12-8<br />
Steering pump pressure test . . . 12-6b 12-8<br />
Steering pump test<br />
equipment installation . . . . . . . . 12-6a 12-6<br />
Steering pump test<br />
equipment removal . . . . . . . . . . . 12-6g 12-14<br />
Subframe replacement:<br />
Installation . . . . . . . . . . . . . . . . . . . . 15-18b 15-58<br />
Removal . . . . . . . . . . . . . . . . . . . . . . . 15-18a 15-56<br />
Support equipment,<br />
special tools and . . . . . . . . . . . . . . . . 2-2 2-1<br />
Swing mechanism, boom,<br />
replacement (M819):<br />
Installation . . . . . . . . . . . . . . . . . . . . 16-30b 16-177<br />
Removal . . . . . . . . . . . . . . . . . . . . . . . 16-30a 16-176<br />
Para<br />
Page<br />
Switch, engine coolant heater<br />
flame detector, maintenance:<br />
Assembly . . . . . . . . . . . . . . . . . . . . . . 17-3d 17-6<br />
Disassembly . . . . . . . . . . . . . . . . . . . 17-3b 17-4<br />
Inspection . . . . . . . . . . . . . . . . . . . . . 17-3c 17-4<br />
Installation . . . . . . . . . . . . . . . . . . . . 17-3e 17-6<br />
Removal . . . . . . . . . . . . . . . . . . . . . . . 17-3a 17-4<br />
Switch, personnel heater<br />
flame detector, maintenance:<br />
Assembly . . . . . . . . . . . . . . . . . . . . . . 17-15d 17-38<br />
Cleaning and inspection . . . . . . . 17-15c 17-38<br />
Disassembly . . . . . . . . . . . . . . . . . . . 17-15b 17-38<br />
Installation . . . . . . . . . . . . . . . . . . . . 17-15e 17-38<br />
Removal . . . . . . . . . . . . . . . . . . . . . . . 17-15a 17-37<br />
Switch, personnel heater<br />
overheat, replacement:<br />
Installation . . . . . . . . . . . . . . . . . . . . 17-22b 17-60<br />
Removal . . . . . . . . . . . . . . . . . . . . . . . 17-22a 17-60<br />
Switches, AC manual<br />
starter, replacement:<br />
Installation . . . . . . . . . . . . . . . . . . . . 15-89b 15-330<br />
Removal . . . . . . . . . . . . . . . . . . . . . . . 15-89a 15-330<br />
Swivel valve, hydraulic,<br />
replacement (M819):<br />
Installation . . . . . . . . . . . . . . . . . . . . 16-32b 16-184<br />
Removal . . . . . . . . . . . . . . . . . . . . . . . 16-32a 16-182<br />
Tank, fuel, repair . . . . . . . . . . . . . . . . .<br />
Tank, liftgate pump oil,<br />
replacement (M820A2):<br />
Installation . . . . . . . . . . . . . . . . . . . .<br />
Removal . . . . . . . . . . . . . . . . . . . . . . .<br />
Telephone post wiring<br />
harness replacement:<br />
Installation . . . . . . . . . . . . . . . . . . . .<br />
Removal . . . . . . . . . . . . . . . . . . . . . . .<br />
Tensioner, front winch<br />
cable, maintenance:<br />
Assembly . . . . . . . . . . . . . . . . . . . . . .<br />
Cleaning and inspection . . . . . . . .<br />
Disassembly . . . . . . . . . . . . . . . . . . .<br />
Installation . . . . . . . . . . . . . . . . . . . .<br />
Removal . . . . . . . . . . . . . . . . . . . . . . .<br />
Tensioner, rear winch<br />
cable, maintenance:<br />
Assembly . . . . . . . . . . . . . . . . . . . . . .<br />
Cleaning and inspection . . . . . . . .<br />
Disassembly . . . . . . . . . . . . . . . . . . .<br />
T<br />
5-4 5-2<br />
15-62b 15-238<br />
15-62a 15-236<br />
15-75b 15-278<br />
15-75a 15-278<br />
16-4d 16-32<br />
164c 16-30<br />
16-4b 16-28<br />
16-4e 16-32<br />
164a 16-28<br />
16-10c 16-72<br />
16-10b 16-70<br />
16-10a 16-70<br />
Index 29
<strong>TM</strong> 9-<strong>2320</strong>-<strong>260</strong>-<strong>34</strong>-2<br />
INDEX (Contd)<br />
Test, Measurement, and<br />
Diagnostic Equipment<br />
(<strong>TM</strong>DE) . . . . . . . . . . . . . . . . . . . . . . . . .<br />
Thermal barrier insulation<br />
replacement:<br />
Installation . . . . . . . . . . . . . . . . . . . .<br />
Removal . . . . . . . . . . . . . . . . . . . . . . .<br />
Thermostat, engine<br />
coolant heater restriction,<br />
maintenance:<br />
Inspection . . . . . . . . . . . . . . . . . . . . . .<br />
Installation . . . . . . . . . . . . . . . . . . . .<br />
Removal . . . . . . . . . . . . . . . . . . . . . . .<br />
3-phase receptacle wiring<br />
harness replacement:<br />
Installation . . . . . . . . . . . . . . . . . . . .<br />
Removal . . . . . . . . . . . . . . . . . . . . . . .<br />
Tire maintenance . . . . . . . . . . . . . .<br />
Tools, fabricated . . . . . . . . . . . . . . . . .<br />
Top stop injector plunger<br />
travel adjustment:<br />
Adjustment . . . . . . . . . . . . . . . . . . . .<br />
Torque limits, Appendix F . . . . . . . . .<br />
Tractor wrecker body<br />
replacement<br />
Installation . . . . . . . . . . . . . . . . . . . .<br />
Removal . . . . . . . . . . . . . . . . . . . . . . .<br />
Transfer power takeoff<br />
repair (M816):<br />
Assembly . . . . . . . . . . . . . . . . . . . . . .<br />
Cleaning and inspection . . . . . . . .<br />
Disassembly . . . . . . . . . . . . . . . . . . .<br />
Transfer power takeoff<br />
repair (M815, M819):<br />
Assembly . . . . . . . . . . . . . . . . . . . . . .<br />
Cleaning and inspection . . . . . . . .<br />
Disassembly . . . . . . . . . . . . . . . . . . .<br />
Transfer power takeoff<br />
replacement:<br />
Installation . . . . . . . . . . . . . . . . . . . .<br />
Removal . . . . . . . . . . . . . . . . . . . . . . .<br />
Transfer repair<br />
Assembly . . . . . . . . . . . . . . . . . . . . . .<br />
Cleaning and inspection . . . . . . . .<br />
Disassembly . . . . . . . . . . . . . . . . . . .<br />
Repair . . . . . . . . . . . . . . . . . . . . . . . . .<br />
Transfer replacement<br />
Installation . . . . . . . . . . . . . . . . . . . .<br />
Removal . . . . . . . . . . . . . . . . . . . . . . .<br />
Para<br />
Page<br />
2-3 2-1<br />
17-26b 17-74<br />
17-26a 17-74<br />
17-5b 17-10<br />
17-5c 17-10<br />
17-5a 17-10<br />
15-76b 15-280<br />
15-76a 15-280<br />
12-8 12-18<br />
2-4 2-1<br />
3-84 3-250<br />
F-1<br />
15-8b 15-16<br />
15-8a 15-14<br />
16-44c 16-258<br />
16-44b 16-256<br />
1644a 16-254<br />
1645c 16-266<br />
1645b 16-262<br />
16-45a 16-<strong>260</strong><br />
16-43b 16-252<br />
16-43a 16-250<br />
9-4d 9-35<br />
9-4b 9-25<br />
9-4a 9-12<br />
9-4c 9-33<br />
9-3b 9-8<br />
9-3a 9-6<br />
Para<br />
Page<br />
Transition, ceiling,<br />
maintenance (M820, M820A2):<br />
Assembly . . . . . . . . . . . . . . . . . . . . . . 15-42c 15-162<br />
Disassembly . . . . . . . . . . . . . . . . . . . 15-42b 15-160<br />
Installation . . . . . . . . . . . . . . . . . . . . 15-42d 15-162<br />
Removal . . . . . . . . . . . . . . . . . . . . . . . 15-42a 15-160<br />
Transition, ceiling,<br />
maintenance (M820A1):<br />
Assembly . . . . . . . . . . . . . . . . . . . . . . 15-43c 15-164<br />
Disassembly . . . . . . . . . . . . . . . . . . . 15-43b 15-164<br />
Installation . . . . . . . . . . . . . . . . . . . . 15-43d 15-164<br />
Removal . . . . . . . . . . . . . . . . . . . . . . . 15-43a 15-164<br />
Transmission, engine<br />
and, replacement:<br />
Installation . . . . . . . . . . . . . . . . . . . . 3-24c<br />
Preliminary disconnections . . . . . 3-24a<br />
Removal . . . . . . . . . . . . . . . . . . . . . . . 3-24b<br />
Transmission gearshift<br />
lever maintenance:<br />
Assembly . . . . . . . . . . . . . . . . . . . . . . 8-3d<br />
Disassembly . . . . . . . . . . . . . . . . . . . 8-3b<br />
Inspection . . . . . . . . . . . . . . . . . . . . . . 8-3c<br />
Installation . . . . . . . . . . . . . . . . . . . . 8-3e<br />
Removal . . . . . . . . . . . . . . . . . . . . . . . 8-3a<br />
Transmission (in-vehicle)<br />
replacement:<br />
Installation . . . . . . . . . . . . . . . . . . . 8-4b<br />
Removal . . . . . . . . . . . . . . . . . . . . . . . 8-4a<br />
Transmission maintenance:<br />
Assembly . . . . . . . . . . . . . . . . . . . . . . 8-6c<br />
Cleaning and inspection . . . . . . . . 8-6b<br />
Disassembly . . . . . . . . . . . . . . . . . . . 8-6a<br />
Transmission (out-of-vehicle)<br />
replacement:<br />
Installation . . . . . . . . . . . . . . . . . . . . 8-5b<br />
Removal . . . . . . . . . . . . . . . . . . . . . . . 8-5a<br />
Transmission power<br />
takeoff repair:<br />
Assembly . . . . . . . . . . . . . . . . . . . . . . 16-41c<br />
Cleaning, inspection,<br />
and repair . . . . . . . . . . . . . . . . . . . . 16-41b<br />
Disassembly . . . . . . . . . . . . . . . . . . . 16-41a<br />
Transmission power<br />
takeoff replacement:<br />
Installation . . . . . . . . . . . . . . . . . . . . 16-40b<br />
Removal . . . . . . . . . . . . . . . . . . . . . . . 16-40a<br />
Transmission shifter<br />
housing maintenance:<br />
Assembly . . . . . . . . . . . . . . . . . . . . . . 8-7c<br />
Disassembly . . . . . . . . . . . . . . . . . . . 8-7b<br />
Installation . . . . . . . . . . . . . . . . . . . . 8-7d<br />
Removal . . . . . . . . . . . . . . . . . . . . . . . 8-7a<br />
3-88<br />
3-77<br />
3-86<br />
8-4<br />
8-4<br />
8-4<br />
8-4<br />
8-4<br />
8-8<br />
8-6<br />
8-28<br />
8-22<br />
8-14<br />
8-12<br />
8-10<br />
16-244<br />
16-238<br />
16-232<br />
16-231<br />
16-230<br />
8-40<br />
8-38<br />
8-42<br />
8-38<br />
Index 30
<strong>TM</strong> 9-<strong>2320</strong>-<strong>260</strong>-<strong>34</strong>-2<br />
INDEX (Contd)<br />
Para Page<br />
Para Page<br />
Troubleshooting,general,<br />
instructions . . . . . . . . . . . . . . . . . . . . .<br />
Tube, fuel, and preheat<br />
resistor, engine coolant<br />
heater, replacement<br />
Installation . . . . . . . . . . . . . . . . . . . .<br />
Removal . . . . . . . . . . . . . . . . . . . . . . .<br />
Tube, hydraulic hose and,<br />
replacement tractor wrecker<br />
body maintenance:<br />
Instigation . . . . . . . . . . . . . . . . . . . .<br />
Removal . . . . . . . . . . . . . . . . . . . . . . .<br />
Tubing, liftgate hydraulic,<br />
replacement (M820A2):<br />
Installation . . . . . . . . . . . . . . . . . . . .<br />
Removal . . . . . . . . . . . . . . . . . . . . . . .<br />
Turntable, crane,<br />
maintenance (M816)<br />
Assembly . . . . . . . . . . . . . . . . . . . . . .<br />
Cleaning, inspection,<br />
and repair . . . . . . . . . . . . . . . . . . . .<br />
Disassembly . . . . . . . . . . . . . . . . . . .<br />
Installation . . . . . . . . . . . . . . . . . . . .<br />
Removal . . . . . . . . . . . . . . . . . . . . . . .<br />
Twin poppet valve replacement:<br />
Installation . . . . . . . . . . . . . . . . . . . .<br />
Removal . . . . . . . . . . . . . . . . . . . . . . .<br />
U<br />
2-6<br />
17-9b<br />
17-9a<br />
15-10b<br />
15-10a<br />
15-57b<br />
15-57a<br />
16-26d<br />
16-26c<br />
16-26b<br />
16-26e<br />
16-26a<br />
8-2b<br />
8-2a<br />
Underframe repair<br />
Assembly . . . . . . . . . . . . . . . . . . . . . . 15-30b<br />
Disassembly . . . . . . . . . . . . . . . . . . . 15-30a<br />
Unloader valve replacement<br />
Installation . . . . . . . . . . . . . . . . . . . . 11-4b<br />
Removal . . . . . . . . . . . . . . . . . . . . . . . 11-4a<br />
Upper and lower boom roller<br />
maintenance (M816):<br />
Assembly . . . . . . . . . . . . . . . . . . . . . . 16-13d<br />
Cleaning and inspection . . . . . . . . 16-13c<br />
Disassembly . . . . . . . . . . . . . . . . . . . 16-13b<br />
Installation . . . . . . . . . . . . . . . . . . . . 16-13e<br />
Removal . . . . . . . . . . . . . . . . . . . . . . . 16-13a<br />
Upper spring pack<br />
maintenance:<br />
Assembly . . . . . . . . . . . . . . . . . . . . . . 5-19d<br />
Disassembly . . . . . . . . . . . . . . . . . . . 5-19b<br />
Inspection . . . . . . . . . . . . . . . . . . . . . . 5-19c<br />
Installation . . . . . . . . . . . . . . . . . . . . 5-19e<br />
Removal . . . . . . . . . . . . . . . . . . . . . . . 5-19a<br />
2-1<br />
17-22<br />
17-22<br />
15-22<br />
15-20<br />
15-220<br />
15-216<br />
16-160<br />
16-160<br />
16-158<br />
16-162<br />
16-156<br />
8-2<br />
8-2<br />
15-100<br />
15-100<br />
11-8<br />
11-8<br />
16-78<br />
16-78<br />
16-77<br />
16-80<br />
16-77<br />
5-52<br />
5-50<br />
5-52<br />
5-52<br />
5-50<br />
Valve adjustment, injector<br />
and, (dial indicator method):<br />
Checking plunger free<br />
travel . . . . . . . . . . . . . . . . . . . . . . . . . 3-82a<br />
Injector and valve<br />
adjustment . . . . . . . . . . . . . . . . . . . 3-82b<br />
Valve adjustment, injector<br />
and, (torque method)<br />
Injector and valve<br />
adjustmen t . . . . . . . . . . . . . . . . . . 3-83b<br />
Pre-adjustment setup . . . . . . . . . . 3-83a<br />
Valve bank, control,<br />
replacement (M819):<br />
Installation . . . . . . . . . . . . . . . . . . . . 16-36b<br />
Removal . . . . . . . . . . . . . . . . . . . . . . . 16-36a<br />
Valves, check,<br />
replacement (M819):<br />
Elevating cylinder check<br />
valve installation . . . . . . . . . . . . . . 16-38c<br />
Elevating cylinder check<br />
valve removal . . . . . . . . . . . . . . . . . 16-38a<br />
Hoist winch motor check<br />
valve installation . . . . . . . . . . . . . . 16-38d<br />
Hoist winch motor check<br />
valve removal . . . . . . . . . . . . . . . . . 16-38b<br />
Valve, control, maintenance:<br />
Assembly . . . . . . . . . . . . . . . . . . . . . . 15-19d<br />
Cleaning and inspection . . . . . . . . 15-19c<br />
Disassembly . . . . . . . . . . . . . . . . . . . 15-19b<br />
Installation . . . . . . . . . . . . . . . . . . . . 15-19e<br />
Removal . . . . . . . . . . . . . . . . . . . . . . . 15-19a<br />
Valve, control repair (M816):<br />
Assembly . . . . . . . . . . . . . . . . . . . . . . 16-27c<br />
Cleaning, inspection,<br />
and repair . . . . . . . . . . . . . . . . . . . . 16-27b<br />
Disassembly . . . . . . . . . . . . . . . . . . . 16-27a<br />
Valve crosshead maintenance:<br />
Inspection . . . . . . . . . . . . . . . . . . . . . . . 3-16b<br />
Installation and adjustment . . . . 3-16c<br />
Removal . . . . . . . . . . . . . . . . . . . . . . . 3-16a<br />
Valve, engine coolant heater<br />
fuel control, replacement:<br />
Installation . . . . . . . . . . . . . . . . . . . . 17-7b<br />
Removal . . . . . . . . . . . . . . . . . . . . . . . 17-7a<br />
Valve, hydraulic swivel,<br />
replacement (M819):<br />
Installation . . . . . . . . . . . . . . . . . . . . 16-32b<br />
Removal . . . . . . . . . . . . . . . . . . . . . . . 16-32a<br />
V<br />
3-237<br />
3-239<br />
3-246<br />
3-244<br />
16-221<br />
16-218<br />
16-228<br />
16-228<br />
16-229<br />
16-228<br />
15-62<br />
15-62<br />
15-60<br />
15-62<br />
15-60<br />
16-166<br />
16-164<br />
16-164<br />
3-46<br />
3-46<br />
3-46<br />
17-16<br />
17-16<br />
16-184<br />
16-182<br />
Index 31
<strong>TM</strong> 9-<strong>2320</strong>-<strong>260</strong>-<strong>34</strong>-2<br />
INDEX (Contd)<br />
Valve, liftgate control,<br />
replacement (M820A2):<br />
Installation . . . . . . . . . . . . . . . . . . . .<br />
Removal . . . . . . . . . . . . . . . . . . . . . . .<br />
Valve, personnel heater<br />
fuel control, maintenance:<br />
Inspection . . . . . . . . . . . . . . . . . . . . . .<br />
Installation . . . . . . . . . . . . . . . . . . . .<br />
Removal . . . . . . . . . . . . . . . . . . . . . . .<br />
Valve, relief, maintenance<br />
(M819):<br />
Assembly . . . . . . . . . . . . . . . . . . . . . .<br />
Cleaning and inspection . . . . . . . .<br />
Disassembly . . . . . . . . . . . . . . . . . . .<br />
Installation . . . . . . . . . . . . . . . . . . . .<br />
Removal . . . . . . . . . . . . . . . . . . . . . . .<br />
Valve seat grinding<br />
Cleaning . . . . . . . . . . . . . . . . . . . . . . .<br />
Dressing grinding wheel . . . . . . . .<br />
Gaging valve seats . . . . . . . . . . . . .<br />
Lapping valve seats . . . . . . . . . . . .<br />
Pre-grinding operation . . . . . . . . .<br />
Valve seatgrinding . . . . . . . . . . . . .<br />
Valve seat insert maintenance:<br />
Cleaning . . . . . . . . . . . . . . . . . . . . . . .<br />
Gaging and counterboring . . . . . .<br />
Installation . . . . . . . . . . . . . . . . . . . .<br />
Removal . . . . . . . . . . . . . . . . . . . . . . .<br />
Valve, twin poppet,<br />
replacement:<br />
Installation . . . . . . . . . . . . . . . . . . . .<br />
Removal . . . . . . . . . . . . . . . . . . . . . . .<br />
Valve, unloader, replacement<br />
Installation . . . . . . . . . . . . . . . . . . . .<br />
Removal . . . . . . . . . . . . . . . . . . . . . . .<br />
Van body maintenance:<br />
Inspection . . . . . . . . . . . . . . . . . . . . . .<br />
Installation . . . . . . . . . . . . . . . . . . . .<br />
Removal . . . . . . . . . . . . . . . . . . . . . . .<br />
Vibration damper installation:<br />
Installation . . . . . . . . . . . . . . . . . . . .<br />
Vibration damper maintenance:<br />
Check runout and wobble . . . . . . .<br />
Inspection . . . . . . . . . . . . . . . . . . . . . .<br />
Installation . . . . . . . . . . . . . . . . . . . .<br />
Removal . . . . . . . . . . . . . . . . . . . . . . .<br />
Vibration damper removal:<br />
Removal . . . . . . . . . . . . . . . . . . . . . . .<br />
Para<br />
15-58b<br />
15-58a<br />
17-16b<br />
17-16c<br />
17-16a<br />
16-37d<br />
16-37c<br />
16-37b<br />
16-37e<br />
16-37a<br />
3-8od<br />
3-80a<br />
3-80e<br />
3-80f<br />
3-80b<br />
3-80c<br />
3-78c<br />
3-78b<br />
3-78d<br />
3-78a<br />
8-2b<br />
8-2a<br />
11-4b<br />
11-4a<br />
15-24b<br />
15-24c<br />
15-24a<br />
3-74<br />
3-5a<br />
3-5c<br />
3-5d<br />
3-5b<br />
3-30<br />
Page<br />
15-224<br />
15-224<br />
17-40<br />
17-42<br />
17-40<br />
16-226<br />
16-226<br />
16-224<br />
16-226<br />
16-224<br />
3-230<br />
3-228<br />
3-230<br />
3-232<br />
3-229<br />
3-230<br />
3-221<br />
3-220<br />
3-221<br />
3-219<br />
8-2<br />
8-2<br />
11-8<br />
11-8<br />
15-74<br />
15-74<br />
15-72<br />
3-213<br />
3-7<br />
3-8<br />
3-8<br />
3-8<br />
3-109<br />
W<br />
Wall, rear, interior panels<br />
replacement<br />
Left panel installation . . . . . . . . . .<br />
Left panel removal . . . . . . . . . . . . .<br />
Water header plates<br />
replacement:<br />
Installation . . . . . . . . . . . . . . . . . . . .<br />
Removal . . . . . . . . . . . . . . . . . . . . . . .<br />
Water manifold maintenance:<br />
Assembly . . . . . . . . . . . . . . . . . . . . . .<br />
Disassembly . . . . . . . . . . . . . . . . . . .<br />
Installation . . . . . . . . . . . . . . . . . . . .<br />
Removal . . . . . . . . . . . . . . . . . . . . . . .<br />
Water pump maintenance:<br />
Cleaning and inspection . . . . . . . .<br />
Installation . . . . . . . . . . . . . . . . . . . .<br />
Removal . . . . . . . . . . . . . . . . . . . . . . .<br />
Wheel hub spindle<br />
maintenance:<br />
Inspection . . . . . . . . . . . . . . . . . . . . . .<br />
Installation . . . . . . . . . . . . . . . . . . . .<br />
Removal . . . . . . . . . . . . . . . . . . . . . . .<br />
Winch automatic brake,<br />
rear, maintenance:<br />
Cleaning and inspection . . . . . . . .<br />
Installation . . . . . . . . . . . . . . . . . . . .<br />
Removal . . . . . . . . . . . . . . . . . . . . . . .<br />
Winch, cable hoist,<br />
replacement (M819):<br />
Installation . . . . . . . . . . . . . . . . . . . .<br />
Removal . . . . . . . . . . . . . . . . . . . . . . .<br />
Winch cable tensioner,<br />
front maintenance:<br />
Assembly . . . . . . . . . . . . . . . . . . . . . .<br />
Cleaning and inspection . . . . . . . .<br />
Disassembly . . . . . . . . . . . . . . . . . . .<br />
Installation . . . . . . . . . . . . . . . . . . . .<br />
Removal . . . . . . . . . . . . . . . . . . . . . . .<br />
Winch cable tensioner,<br />
rear, maintenance:<br />
Assembly . . . . . . . . . . . . . . . . . . . . . .<br />
Cleaning and inspection . . . . . . . .<br />
Disassembly . . . . . . . . . . . . . . . . . . .<br />
Winch drag brake,<br />
front replacement<br />
Installation . . . . . . . . . . . . . . . . . . . .<br />
Removal . . . . . . . . . . . . . . . . . . . . . . .<br />
Para<br />
Page<br />
15-<strong>34</strong>b 15-118<br />
15-<strong>34</strong>a 15-118<br />
3-4b 3-6<br />
3-4a 3-6<br />
6-3c 64<br />
6-3b 64<br />
6-3d 6-5<br />
6-3a 6-4<br />
6-4b 6-6<br />
64c 6-6<br />
6-4a 6-6<br />
10-4b 10-14<br />
10-4c 10-15<br />
10-4a 10-14<br />
16-11b 16-74<br />
16-11c 16-75<br />
16-11a 16-74<br />
16-31b 16-180<br />
16-31a 16-178<br />
16-4d 16-32<br />
16-4c 16-30<br />
16-4b 16-28<br />
16-4e 16-32<br />
16-4a 16-28<br />
16-10c 16-72<br />
16-10b 16-70<br />
16-10a 16-70<br />
16-6b 16-42<br />
16-6a 16-41<br />
Index 32
<strong>TM</strong> 9-<strong>2320</strong>-<strong>260</strong>-<strong>34</strong>-2<br />
INDEX (Contd)<br />
Para<br />
Page<br />
Winch, front, repair<br />
Cleaning, inspection,<br />
and repair . . . . . . . . . . . . . . . . . . . . 16-2d 16-6<br />
End frame assembly . . . . . . . . . . . . 16-2f 16-14<br />
End frame disassembly . . . . . . . . . 16-2b 164<br />
Gearcase assembly . . . . . . . . . . . . . 16-2e 16-10<br />
Gearcase disassembly . . . . . . . . . . 16-2c 16-5<br />
Winch assembly . . . . . . . . . . . . . . . . 16-2g 16-15<br />
Winch disassembly . . . . . . . . . . . . . 16-2a 16-2<br />
Winch, hoist, maintenance<br />
(M816):<br />
Assembly . . . . . . . . . . . . . . . . . . . . . . 16-17d 16-100<br />
Cleaning and inspection . . . . . . . . 16-17c 16-98<br />
Disassembly . . . . . . . . . . . . . . . . . . . 16-17b 16-95<br />
Installation . . . . . . . . . . . . . . . . . . . . 16-17e 16-103<br />
Removal . . . . . . . . . . . . . . . . . . . . . . . 16-17a 16-94<br />
Winch level wind,<br />
front, maintenance:<br />
Assembly . . . . . . . . . . . . . . . . . . . . . . 16-3d 16-24<br />
Cleaning and inspection . . . . . . . . 16-3c 16-20<br />
Disassembly . . . . . . . . . . . . . . . . . . . 16-3b 16-18<br />
Installation . . . . . . . . . . . . . . . . . . . . 16-3e 16-26<br />
Removal . . . . . . . . . . . . . . . . . . . . . . . 16-3a 16-18<br />
Winch level wind,<br />
rear, maintenance:<br />
Assembly . . . . . . . . . . . . . . . . . . . . . 16-9d 16-66<br />
Cleaning and inspection . . . . . . . . 16-9c 16-62<br />
Disassembly . . . . . . . . . . . . . . . . . . . 16-9b 16-58<br />
Installation . . . . . . . . . . . . . . . . . . . . 16-9e 16-68<br />
Removal . . . . . . . . . . . . . . . . . . . . . . . 16-9a 16-58<br />
Winch motor, hoist,<br />
maintenance (M816):<br />
Installation . . . . . . . . . . . . . . . . . . . . 16-15b 16-91<br />
Removal . . . . . . . . . . . . . . . . . . . . . . . 16-15a 16-90<br />
Winch motor, hoist, hydraulic,<br />
replacement (M816):<br />
Installation . . . . . . . . . . . . . . . . . . . . 16-23b 16-138<br />
Removal . . . . . . . . . . . . . . . . . . . . . . . 16-23a 16-138<br />
Winch, rear, repair:<br />
Assembly . . . . . . . . . . . . . . . . . . . . . . 16-6c 16-52<br />
Cleaning, inspection,<br />
and repair . . . . . . . . . . . . . . . . . . . . 16-8b 16-48<br />
Disassembly . . . . . . . . . . . . . . . . . . . 16-8a 16-44<br />
Winch roller, front,<br />
maintenance:<br />
Assembly . . . . . . . . . . . . . . . . . . . . . . 16-5d 16-38<br />
Cleaning and inspection . . . . . . . 16-5c 16-36<br />
Disassembly, . . . . . . . . . . . . . . . . . . . 16-5b 16-<strong>34</strong><br />
Installation . . . . . . . . . . . . . . . . . . . . 16-5e 16-40<br />
Removal . . . . . . . . . . . . . . . . . . . . . . . 16-5a 16-<strong>34</strong><br />
Para<br />
Page<br />
Winch rollers, rear, repair<br />
Repair . . . . . . . . . . . . . . . . . . . . . . . . . 15-6 15-12<br />
Windshield glass replacement<br />
Installation . . . . . . . . . . . . . . . . . . . . 14-5b 14-6<br />
Removal . . . . . . . . . . . . . . . . . . . . . . . 14-5a 14-6<br />
Wiring harness, air conditioner,<br />
replacement<br />
Installation . . . . . . . . . . . . . . . . . . . . 15-65b 15-246<br />
Removal . . . . . . . . . . . . . . . . . . . . . . . 15-65a 15-244<br />
Wiring harness, blackout<br />
bypass, replacement<br />
Installation . . . . . . . . . . . . . . . . . . . . 15-70b 15-262<br />
Removal . . . . . . . . . . . . . . . . . . . . . . . 15-70a 15-<strong>260</strong><br />
Wiring harness, blackout and<br />
clearance light, replacement<br />
Installation . . . . . . . . . . . . . . . . . . . . 15-71b 15-264<br />
Removal . . . . . . . . . . . . . . . . . . . . . . . 15-71a 15-264<br />
Wiring harness, electric<br />
heater (10kW), replacement:<br />
Installation . . . . . . . . . . . . . . . . . . . 15-67b 15-254<br />
Removal . . . . . . . . . . . . . . . . . . . . . . . 15-67a 15-252<br />
Wiring harness, flexible<br />
converter, replacement:<br />
Installation . . . . . . . . . . . . . . . . . . . . 15-77b 15-282<br />
Removal . . . . . . . . . . . . . . . . . . . . . . . 15-77a 15-282<br />
Wiring harness,<br />
front replacement:<br />
Installation . . . . . . . . . . . . . . . . . . . . 7-3b 7-12<br />
Removal . . . . . . . . . . . . . . . . . . . . . . . 7-3a 7-3<br />
Wiring harness, 400 Hz<br />
receptacle, replacement<br />
Installation . . . . . . . . . . . . . . . . . . . . 15-79b 15-288<br />
Removal . . . . . . . . . . . . . . . . . . . . . . . 15-79a 15-288<br />
Wiring harness, 400 Hz<br />
supply, replacement<br />
Installation . . . . . . . . . . . . . . . . . . . . 15-78b 15-286<br />
Removal . . . . . . . . . . . . . . . . . . . . . . . 15-78a 15-284<br />
Wiring harness, heater<br />
fuel pump, replacement<br />
Installation . . . . . . . . . . . . . . . . . . . . 15-68b 15-256<br />
Removal . . . . . . . . . . . . . . . . . . . . . . . 15-68a 15-256<br />
Wiring harness,<br />
heater, replacement<br />
Installation . . . . . . . . . . . . . . . . . . . . 15-66b 15-250<br />
Removal . . . . . . . . . . . . . . . . . . . . . . . 15-66a 15-241<br />
Wiring harness, left side<br />
emergency lamp, replacement<br />
Installation . . . . . . . . . . . . . . . . . . . . 15-73b 15-272<br />
Removal . . . . . . . . . . . . . . . . . . . . . . . 15-73a 15-270<br />
Index 33
<strong>TM</strong> 9-<strong>2320</strong>-<strong>260</strong>-<strong>34</strong>-2<br />
INDEX (Contd)<br />
Para<br />
Page<br />
Para<br />
Page<br />
Wiring harness, main,<br />
replacement van body<br />
electrical components<br />
maintenance:<br />
Installation . . . . . . . . . . . . . . . . . . . .<br />
Removal . . . . . . . . . . . . . . . . . . . . . . .<br />
Wiring harness, rear,<br />
replacement<br />
Installation . . . . . . . . . . . . . . . . . . . .<br />
Removal . . . . . . . . . . . . . . . . . . . . . . .<br />
Wiring harness, right and left<br />
side blackout, replacement<br />
Installation . . . . . . . . . . . . . . . . . . . .<br />
Removal . . . . . . . . . . . . . . . . . . . . . . .<br />
Wiring harness, right side<br />
emergency lamp, replacement<br />
Installation . . . . . . . . . . . . . . . . . . . .<br />
Removal . . . . . . . . . . . . . . . . . . . . . . .<br />
Wiring harness, telephone<br />
post replacement<br />
Installation . . . . . . . . . . . . . . . . . . . .<br />
Removal . . . . . . . . . . . . . . . . . . . . . . .<br />
Wiring harness, 3-phase<br />
receptacle, replacement<br />
Installation . . . . . . . . . . . . . . . . . . . .<br />
Removal . . . . . . . . . . . . . . . . . . . . . . .<br />
15-64b<br />
15-64a<br />
7-4b<br />
7-4a<br />
15-72b<br />
15-72a<br />
15-74b<br />
15-74a<br />
15-75b<br />
15-75a<br />
15-76b<br />
15-76a<br />
15-242<br />
15-240<br />
7-30<br />
7-22<br />
15-268<br />
15-266<br />
15-276<br />
15-274<br />
15-278<br />
15-278<br />
15-280<br />
15-280<br />
Wiring hamesses, converter<br />
and auxiliary pump,<br />
replacement<br />
Installation . . . . . . . . . . . . . . . . . . . .<br />
Removal . . . . . . . . . . . . . . . . . . . . . . .<br />
Wrecker body replacement<br />
Installation . . . . . . . . . . . . . . . . . . . .<br />
Removal . . . . . . . . . . . . . . . . . . . . . . .<br />
Wrecker, tractor, body<br />
replacement:<br />
Installation...................<br />
Removal . . . . . . . . . . . . . . . . . . . . . . .<br />
Yoke, release bearing, shaft<br />
and, maintenance:<br />
Assembly . . . . . . . . . . . . . . . . . . . . . .<br />
Cleaning and inspection . . . . . . . .<br />
Disassembly . . . . . . . . . . . . . . . . . . .<br />
Installation . . . . . . . . . . . . . . . . . . . .<br />
Removal . . . . . . . . . . . . . . . . . . . . . . .<br />
Y<br />
15-80b<br />
15-80a<br />
15-5b<br />
15-5a<br />
15-8b<br />
15-8a<br />
4-3d<br />
4-3c<br />
4-3b<br />
4-3e<br />
4-3a<br />
15-292<br />
15-290<br />
15-10<br />
15-8<br />
15-16<br />
15-14<br />
4-4<br />
4-4<br />
4-4<br />
4-5<br />
4-4<br />
Index <strong>34</strong>
By Order of the Secretary of the Army:<br />
GORDON R. SULLIVAN<br />
General, United States Army<br />
Chief of Staff<br />
Official:<br />
Administrative Assistant to the<br />
Secretary of the Army<br />
06843<br />
By Order of the Secretary of the Air Force:<br />
MERRILL A. McPEAK<br />
General, United States Air Force<br />
Chief of Staff<br />
RONALD W. YATES<br />
General, United States Air Force<br />
Commander, Air Force Materiel Communal<br />
By Order of the Marine Corps:<br />
D.R. BLOOMER<br />
Colonel, USMC<br />
Director Program Support<br />
Marine Corps Systems Command -<br />
Distribution:<br />
To be distribution in accordance with DA Form 12-38-E (Block 0244) requirements for<br />
<strong>TM</strong>9-<strong>2320</strong>-<strong>260</strong>-<strong>34</strong>-2.<br />
● U.S. GOVERNMENT PRINTING OFFICE: 1994-546-017/00153
PIN: 027280-000


