Scholarship on the Web: Editing EngravingsâMatting Photoshop
Scholarship on the Web: Editing EngravingsâMatting Photoshop
Scholarship on the Web: Editing EngravingsâMatting Photoshop

You also want an ePaper? Increase the reach of your titles
YUMPU automatically turns print PDFs into web optimized ePapers that Google loves.
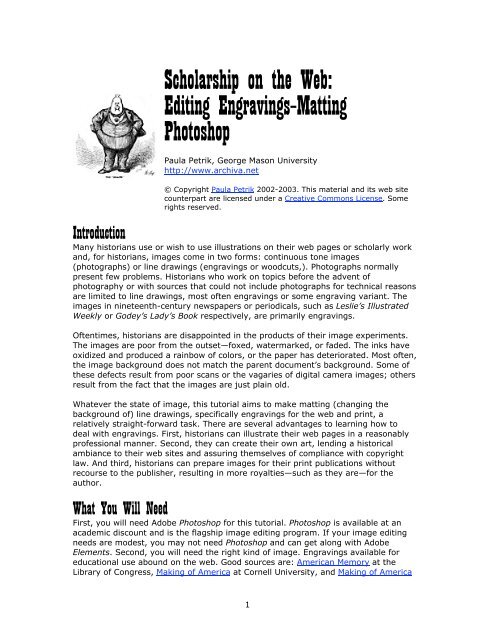
<str<strong>on</strong>g>Scholarship</str<strong>on</strong>g> <strong>on</strong> <strong>the</strong> <strong>Web</strong>:<br />
<strong>Editing</strong> Engravings–Matting<br />
<strong>Photoshop</strong><br />
Paula Petrik, George Mas<strong>on</strong> University<br />
http://www.archiva.net<br />
© Copyright Paula Petrik 2002-2003. This material and its web site<br />
counterpart are licensed under a Creative Comm<strong>on</strong>s License. Some<br />
rights reserved.<br />
Introducti<strong>on</strong><br />
Many historians use or wish to use illustrati<strong>on</strong>s <strong>on</strong> <strong>the</strong>ir web pages or scholarly work<br />
and, for historians, images come in two forms: c<strong>on</strong>tinuous t<strong>on</strong>e images<br />
(photographs) or line drawings (engravings or woodcuts,). Photographs normally<br />
present few problems. Historians who work <strong>on</strong> topics before <strong>the</strong> advent of<br />
photography or with sources that could not include photographs for technical reas<strong>on</strong>s<br />
are limited to line drawings, most often engravings or some engraving variant. The<br />
images in nineteenth-century newspapers or periodicals, such as Leslie’s Illustrated<br />
Weekly or Godey’s Lady’s Book respectively, are primarily engravings.<br />
Oftentimes, historians are disappointed in <strong>the</strong> products of <strong>the</strong>ir image experiments.<br />
The images are poor from <strong>the</strong> outset—foxed, watermarked, or faded. The inks have<br />
oxidized and produced a rainbow of colors, or <strong>the</strong> paper has deteriorated. Most often,<br />
<strong>the</strong> image background does not match <strong>the</strong> parent document’s background. Some of<br />
<strong>the</strong>se defects result from poor scans or <strong>the</strong> vagaries of digital camera images; o<strong>the</strong>rs<br />
result from <strong>the</strong> fact that <strong>the</strong> images are just plain old.<br />
Whatever <strong>the</strong> state of image, this tutorial aims to make matting (changing <strong>the</strong><br />
background of) line drawings, specifically engravings for <strong>the</strong> web and print, a<br />
relatively straight-forward task. There are several advantages to learning how to<br />
deal with engravings. First, historians can illustrate <strong>the</strong>ir web pages in a reas<strong>on</strong>ably<br />
professi<strong>on</strong>al manner. Sec<strong>on</strong>d, <strong>the</strong>y can create <strong>the</strong>ir own art, lending a historical<br />
ambiance to <strong>the</strong>ir web sites and assuring <strong>the</strong>mselves of compliance with copyright<br />
law. And third, historians can prepare images for <strong>the</strong>ir print publicati<strong>on</strong>s without<br />
recourse to <strong>the</strong> publisher, resulting in more royalties—such as <strong>the</strong>y are—for <strong>the</strong><br />
author.<br />
What You Will Need<br />
First, you will need Adobe <strong>Photoshop</strong> for this tutorial. <strong>Photoshop</strong> is available at an<br />
academic discount and is <strong>the</strong> flagship image editing program. If your image editing<br />
needs are modest, you may not need <strong>Photoshop</strong> and can get al<strong>on</strong>g with Adobe<br />
Elements. Sec<strong>on</strong>d, you will need <strong>the</strong> right kind of image. Engravings available for<br />
educati<strong>on</strong>al use abound <strong>on</strong> <strong>the</strong> web. Good sources are: American Memory at <strong>the</strong><br />
Library of C<strong>on</strong>gress, Making of America at Cornell University, and Making of America<br />
1
at University of Michigan. For last two, finding illustrati<strong>on</strong>s is a bit more difficult<br />
because <strong>the</strong> search engine does not specifically index images. Searching a particular<br />
subject in periodicals likely to have illustrati<strong>on</strong>s produces <strong>the</strong> best results. Part of<br />
Making of America is also available through American Memory.<br />
The Goal<br />
The goal for <strong>the</strong>se tutorials is to matte an engraving <strong>on</strong>to a different background. In<br />
o<strong>the</strong>r words, we’ll take an engraving and drop out its existing background and place<br />
it <strong>on</strong> a new background, resize <strong>the</strong> image, and prepare it for <strong>the</strong> web. For those who<br />
wish to follow al<strong>on</strong>g and use <strong>the</strong> image employed in <strong>the</strong> tutorial, <strong>the</strong> image, “Home<br />
Guard,” can be downloaded from <strong>the</strong> Library of C<strong>on</strong>gress website. Be aware that <strong>the</strong><br />
American Memory folks are professi<strong>on</strong>als and know how to make good scans, so we’ll<br />
start off <strong>on</strong> <strong>the</strong> right foot. This tutorial assumes that you have basic familiarity with a<br />
computer and can carry out <strong>the</strong> basics of file management and mouse maneuvers.<br />
The tutorial steps follow <strong>the</strong> standard c<strong>on</strong>venti<strong>on</strong> of choosing a menu and a selecti<strong>on</strong>,<br />
so “Choose Window > Layers” translates into going to <strong>the</strong> Window Menu <strong>on</strong> <strong>the</strong><br />
menu bar and selecting Layers.<br />
2
Adobe <strong>Photoshop</strong>: Engravings<br />
The technique employed in matting Adobe Elements can also be used in <strong>Photoshop</strong>,<br />
but <strong>the</strong>re is an easier way. Like most software applicati<strong>on</strong>s, Adobe <strong>Photoshop</strong><br />
supports a number of different ways of approaching a problem and an equal number<br />
of techniques. This tutorial uses <strong>the</strong> “menu” approach as opposed to <strong>the</strong> “keyboard<br />
command” strategy for sake of simplicity. If you are comfortable using keyboard<br />
commands, substitute accordingly.<br />
Our first task is to crop <strong>the</strong> image and correct <strong>the</strong> color. But before tackling <strong>the</strong><br />
image, be sure that <strong>the</strong> Layer (Choose Window > Layers) and History (Choose<br />
Window > History) palettes open and accessible and that your tools are handy. At<br />
this juncture, it’s also advisable to tend to housekeeping: create a folder for your<br />
images and a file-naming regimen.<br />
1. Choose File > Open<br />
4. Press RETURN or ENTER<br />
2. Select <strong>the</strong> Crop Tool<br />
3. Click and drag to select an area.<br />
For those using <strong>the</strong> tutorial image,<br />
select an area <strong>on</strong> <strong>the</strong> image that<br />
includes <strong>the</strong> woman and text but<br />
excludes <strong>the</strong> black border. The key to<br />
cropping is to crop closely, focusing<br />
<strong>on</strong> <strong>the</strong> center of interest in <strong>the</strong> image.<br />
5. Select Image > Adjust > Auto<br />
Color Correcti<strong>on</strong>.<br />
6. Select Image > Adjust > Auto<br />
C<strong>on</strong>trast.<br />
7. Select Image > Adjust > Auto<br />
Levels.<br />
3
OK. Now we’ll put in <strong>the</strong> new background and set up <strong>the</strong> image for editing. For our<br />
purposes of this exercise, <strong>the</strong> new background will be white. We must c<strong>on</strong>vert <strong>the</strong><br />
locked background layer to an editable layer.<br />
1. Double-click <strong>the</strong> name of <strong>the</strong><br />
“Background” layer.<br />
2. Type “main” in <strong>the</strong> dialogue box.<br />
3. Click OK.<br />
4. Choose Layer > New > Layer.<br />
5. Type “bkgd” in <strong>the</strong> dialogue box.<br />
6. Click OK.<br />
7. Choose Layer > New > Layer.<br />
8. Type “transparency” in <strong>the</strong><br />
dialogue box.<br />
9. Click OK.<br />
The order of <strong>the</strong> layers is important in this technique. At this point you can use your<br />
own background color or texture.<br />
1. Arrange <strong>the</strong> layers by clicking and<br />
dragging <strong>the</strong> layers until <strong>the</strong>y are<br />
in <strong>the</strong> order shown <strong>on</strong> <strong>the</strong> left.<br />
2. Select <strong>the</strong> “bkgd” layer by clicking<br />
it.<br />
3. Be sure that <strong>the</strong> foreground color<br />
chip is white.<br />
4. Choose Edit > Fill.<br />
4
Be sure that you select <strong>the</strong> “main layer.” Selecting any of <strong>the</strong> o<strong>the</strong>r layers will<br />
produce no results and puzzlement.<br />
1. Select <strong>the</strong> “main” layer<br />
by clicking it.<br />
2. Choose Layer > Layer<br />
Style > Blending Opti<strong>on</strong>s.<br />
3. In <strong>the</strong> Blend If box, drag<br />
<strong>the</strong> This Layer slider to<br />
<strong>the</strong> left until as much of<br />
<strong>the</strong> background as<br />
possible disappears.<br />
Use <strong>the</strong> Eraser or Paint<br />
Brush tools to touch up any<br />
remaining defects in <strong>the</strong><br />
image.<br />
5
Time to resize <strong>the</strong> image. Note <strong>the</strong> dimensi<strong>on</strong>s and resoluti<strong>on</strong> of <strong>the</strong> image. If you<br />
are using <strong>the</strong> “Home Guard,” you’ll not that it has been scanned at a very high<br />
resoluti<strong>on</strong>—far too high for a web image.<br />
1. Choose Image > Resize Image.<br />
2. Type 72 in <strong>the</strong> Resoluti<strong>on</strong> area of<br />
<strong>the</strong> dialogue box.<br />
3. Select Percent from <strong>the</strong> pull down<br />
menu.<br />
4. Type 50 in <strong>the</strong> Height or Width.<br />
5. Click OK.<br />
6. Choose Layer > Flatten Image.<br />
7. Click OK.<br />
Since <strong>the</strong> image has lost some data in <strong>the</strong> down sampling process, it has become a<br />
bit blurry. We’ll restore some of <strong>the</strong> detail by using <strong>the</strong> Unsharp Mask filter.<br />
1. Choose Filter > Unsharp Mask.<br />
2. Set <strong>the</strong> sliders to <strong>the</strong> following<br />
settings:<br />
Amount=50%<br />
Radius=1<br />
Threshold=0<br />
You may need to use different settings to<br />
sharpen your image sufficiently. One of<br />
<strong>the</strong> best ways is to exaggerate <strong>the</strong><br />
settings by moving <strong>the</strong> Amount slider to<br />
<strong>the</strong> far right and <strong>the</strong>n by moving <strong>the</strong><br />
slider to <strong>the</strong> left in increments until you<br />
get <strong>the</strong> result that you wish.<br />
6
The last step involves preparing <strong>the</strong> image for <strong>the</strong> <strong>Web</strong>. Note that it is still possible to<br />
reduce <strong>the</strong> quality setting of <strong>the</strong> image markedly and still achieve excellent<br />
results—and a small image.<br />
1. Choose File > Save for <strong>Web</strong>.<br />
2. Select GIF or JPEG from <strong>the</strong> drop<br />
down menu.<br />
3. Adjust colors and quality.<br />
JPEG<br />
Low<br />
Optimized<br />
Quality=20<br />
4. Click OK.<br />
The image can be ei<strong>the</strong>r a JPEG or a GIF, although engravings turn out best as JPEG,<br />
given <strong>the</strong> fine lines that comprise an engraving. Creating a GIF requires making <strong>the</strong><br />
white porti<strong>on</strong>s of <strong>the</strong> image transparent. Selecting and deleting <strong>the</strong> white porti<strong>on</strong>s of<br />
<strong>the</strong> image invariably destroys some of <strong>the</strong> fine lines and detail. For this reas<strong>on</strong>, it is<br />
advisable to matte an image to a background color or texture before importing it into<br />
an HTML editor.<br />
There are some images that that are so damaged that <strong>the</strong>y will resist this approach.<br />
It’s important to gauge whe<strong>the</strong>r or not an image is worth <strong>the</strong> extra time and effort.<br />
Severely mutilated images can be resurrected, but <strong>the</strong> work is painstaking and<br />
detailed, involving <strong>the</strong> selecti<strong>on</strong> tool, multiple blends or color replacements, and<br />
pixel-based editing. From time to time, historians also want to put facsimiles of text<br />
sources <strong>on</strong> <strong>the</strong> <strong>Web</strong>. These are am<strong>on</strong>g <strong>the</strong> most difficult images to work with, and a<br />
good result ultimately depends <strong>on</strong> <strong>the</strong> c<strong>on</strong>diti<strong>on</strong> of <strong>the</strong> original and <strong>the</strong> quality of <strong>the</strong><br />
scan. Just so you know what you might be getting into.<br />
7