Device Cut Sheet Download - Ross Video
Device Cut Sheet Download - Ross Video
Device Cut Sheet Download - Ross Video

You also want an ePaper? Increase the reach of your titles
YUMPU automatically turns print PDFs into web optimized ePapers that Google loves.
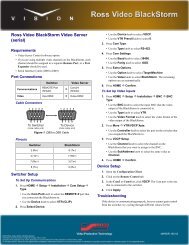
BlackStorm Setup<br />
This device was tested with Carbonite version 6.0.<br />
Cable Connections<br />
The <strong>Ross</strong> <strong>Video</strong> BlackStorm connects to the switcher<br />
over ethernet.<br />
Switcher Setup<br />
To Set Up Communications<br />
1. Press MENU > SYSTEM > NEXT > NEXT ><br />
<strong>Device</strong> Config.<br />
2. Press the Add knob.<br />
3. Use the Slot knob to select Slot #, where # is<br />
the number of the slot you want to use.<br />
4. Use the Type knob to select Server.<br />
5. Press NEXT.<br />
6. Use the SubType knob to select AMP_#.#.<br />
7. Press NEXT.<br />
8. Use the Field knob to select the segment of the<br />
IP address you want to edit.<br />
9. Press NEXT.<br />
10. Use the Option and Value knobs to set the<br />
options for this video server.<br />
• PreRoll — set the number of the frames that<br />
switcher waits after sending the play<br />
command to a video server before taking the<br />
source on-air<br />
11. Press the Option knob.<br />
12. Press the Confrm knob to save your settings.<br />
To Assign a <strong>Video</strong> Server Channel to a <strong>Video</strong><br />
Input<br />
1. Press MENU > Config > Input > NEXT.<br />
2. Use the Input knob to select the input BNC that<br />
is connected to the video server.<br />
3. Press the <strong>Device</strong> knob.<br />
4. Use the <strong>Device</strong> knob to select the video server<br />
you set up for the input BNC.<br />
5. Press NEXT.<br />
6. Use the Option and Value knobs to set the<br />
options for this video server.<br />
• Channel — select the channel on the video<br />
server that you want to control<br />
7. Press the Option knob.<br />
8. Press the Confrm knob to save your changes.<br />
BlackStorm Setup<br />
1. Open the Configuration Client.<br />
2. Click on the Remote Control tab.<br />
3. Click Enable AMP over Ethernet.<br />
4. Click Apply.<br />
<strong>Video</strong> Server Control<br />
The switcher interface allows you to cue and play clips<br />
on a video server.<br />
Keep the following in mind when controlling a video<br />
server:<br />
• The Cue command asks for the currently cued clip<br />
on the video server channel and re-cues it.<br />
• When Cue is recorded into a custom control, only<br />
the cue command for the clip id is recorded. This<br />
allows you to create a number of custom controls<br />
to cue different clips on the video server.<br />
• The Cue command from a custom control will<br />
eject the contents of the channel before cueing the<br />
clip. If the contents of the channel is a playlist, the<br />
playlist will be ejected.<br />
To Control a <strong>Video</strong> Server<br />
The video server controls are intended to be used for<br />
creating custom controls. For example, manually load a<br />
clip on the video server and then create a custom control<br />
on the switcher with Cue followed by Play. This custom<br />
control will cue the clip that was cued on the video server<br />
when it was recorded and play it.<br />
4802DR-610-02
1. Press the video source button that the video<br />
server channel you want to control is assigned<br />
to.<br />
2. Select the command you want to send to the<br />
video server.<br />
• Cue — asks the video server for the current<br />
clip id and then sends a cue command for<br />
that clip id<br />
• Play — tells the video server to play the<br />
currently cued clip<br />
2