SWITCHBLADE 2 - Cabrinha
SWITCHBLADE 2 - Cabrinha
SWITCHBLADE 2 - Cabrinha
You also want an ePaper? Increase the reach of your titles
YUMPU automatically turns print PDFs into web optimized ePapers that Google loves.
REPAIRS<br />
TEARS / STRUT BLADDERS<br />
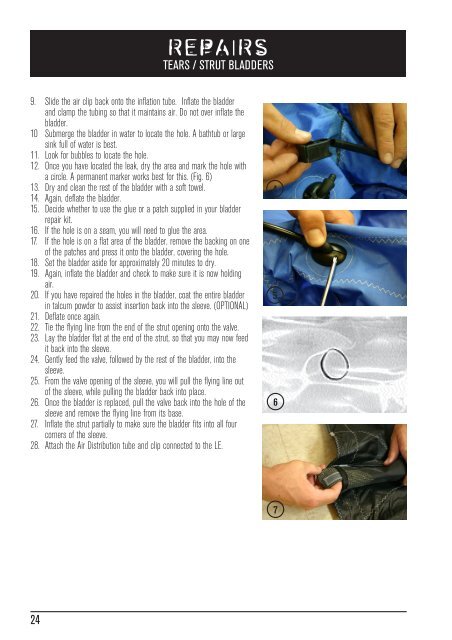
9. Slide the air clip back onto the inflation tube. Inflate the bladder<br />
and clamp the tubing so that it maintains air. Do not over inflate the<br />
bladder.<br />
10 Submerge the bladder in water to locate the hole. A bathtub or large<br />
sink full of water is best.<br />
11. Look for bubbles to locate the hole.<br />
12. Once you have located the leak, dry the area and mark the hole with<br />
a circle. A permanent marker works best for this. (Fig. 6)<br />
13. Dry and clean the rest of the bladder with a soft towel.<br />
14. Again, deflate the bladder.<br />
15. Decide whether to use the glue or a patch supplied in your bladder<br />
repair kit.<br />
16. If the hole is on a seam, you will need to glue the area.<br />
17. If the hole is on a flat area of the bladder, remove the backing on one<br />
of the patches and press it onto the bladder, covering the hole.<br />
18. Set the bladder aside for approximately 20 minutes to dry.<br />
19. Again, inflate the bladder and check to make sure it is now holding<br />
air.<br />
20. If you have repaired the holes in the bladder, coat the entire bladder<br />
in talcum powder to assist insertion back into the sleeve. (OPTIONAL)<br />
21. Deflate once again.<br />
22. Tie the flying line from the end of the strut opening onto the valve.<br />
23. Lay the bladder flat at the end of the strut, so that you may now feed<br />
it back into the sleeve.<br />
24. Gently feed the valve, followed by the rest of the bladder, into the<br />
sleeve.<br />
25. From the valve opening of the sleeve, you will pull the flying line out<br />
of the sleeve, while pulling the bladder back into place.<br />
26. Once the bladder is replaced, pull the valve back into the hole of the<br />
sleeve and remove the flying line from its base.<br />
27. Inflate the strut partially to make sure the bladder fits into all four<br />
corners of the sleeve.<br />
28. Attach the Air Distribution tube and clip connected to the LE.<br />
4<br />
5<br />
6<br />
7<br />
24<br />
CK07SwitchbladeUserManual.indd 24<br />
8/10/06 3:40:59 AM


