Expert Tibial Nail. - Osteosyntese
Expert Tibial Nail. - Osteosyntese
Expert Tibial Nail. - Osteosyntese

You also want an ePaper? Increase the reach of your titles
YUMPU automatically turns print PDFs into web optimized ePapers that Google loves.
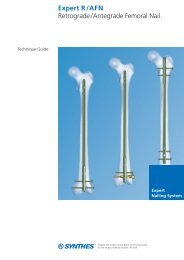
<strong>Expert</strong> <strong>Tibial</strong> <strong>Nail</strong>.<br />
Technique Guide<br />
<strong>Expert</strong><br />
<strong>Nail</strong>ing System
Table of Contents<br />
Introduction<br />
Features 2<br />
AO/ASIF Principles of internal fixation 4<br />
Indications 5<br />
Cases 6<br />
Surgical technique<br />
Preoperative planning 8<br />
Opening the tibia 9<br />
Insert the nail 20<br />
Distal locking 28<br />
Proximal locking 35<br />
Insert the end cap 55<br />
Weight-bearing 57<br />
Implant removal 58<br />
Product information<br />
Implant specifications 61<br />
Implants 62<br />
Instruments 69<br />
Image intensifier control<br />
Warning<br />
This description is not sufficient for immediate application of<br />
the instrumentation. Instruction by a surgeon experienced in<br />
handling this instrumentation is highly recommended.<br />
Cleaning of instruments:<br />
For detailed information please refer to “Reprocessing,<br />
Care and Maintenance of Synthes Instruments”,<br />
Article No. 035.000.090.<br />
Synthes 1
<strong>Expert</strong> <strong>Tibial</strong> <strong>Nail</strong><br />
Advanced solutions<br />
Advanced proximal locking options:<br />
– Three unique and innovative locking<br />
options, in combination with can cellous<br />
bone locking screws, increase<br />
the stability of the proximal fragment<br />
for proximal third fractures.<br />
– Two state of the art medio-lateral<br />
(ML) locking options enable primary<br />
compression or secondary controlled<br />
dynamization<br />
Improved stability<br />
End caps:<br />
– Securely lock the most proximal<br />
oblique locking screw to create a<br />
fixed-angle construct<br />
– End cap prevents ingrowth of tissue<br />
and facilitates nail extraction<br />
– Self-retaining Stardrive T40 recess for<br />
effortless end cap pick-up and ease<br />
of insertion<br />
– Cannulated<br />
– 0 mm end cap sits flush with nail.<br />
– 5, 10 and 15 mm end caps extend<br />
nail height if nail is over inserted.<br />
0 mm 5 mm 10 mm 15 mm<br />
locking<br />
screws with h exalobular<br />
Stardrive ®<br />
T40<br />
This patient has some Sy nthes®<br />
ISO 10664<br />
in ternal drive<br />
ac cording to EN<br />
2 Synthes <strong>Expert</strong> <strong>Tibial</strong> <strong>Nail</strong>
Advanced nail design:<br />
– New anatomic bend for ease of nail<br />
insertion<br />
– Titanium alloy TAN* for improved<br />
mechanical and fatigue properties<br />
– Cannulated nails (from 8 mm to<br />
13 mm) for reamed or unreamed<br />
techniques, enabling nail insertion<br />
over guide wire<br />
– The 2.5 mm or 3.0 mm ball tipped<br />
guide wires may be removed through<br />
the nail and insertion handle assembly<br />
(no exchange tube required).<br />
– Solid nails (from 8 mm to<br />
10 mm) for unreamed technique<br />
Advanced distal locking options:<br />
– Distal oblique locking option to prevent<br />
soft tissue damage and increase<br />
stability of the distal fragment<br />
– Two ML and one antero-posterior<br />
(AP) locking options for stability of<br />
the distal fragment<br />
Multidirectional locking options for improved stability<br />
All locking screws:<br />
– Double lead thread for more contact<br />
points for enhanced stability and<br />
ease of insertion<br />
– Thread closer to screw head providing<br />
better bone purchase in the near<br />
cortex and improved stability<br />
– Titanium alloy TAN* for improved<br />
mechanical and fatigue properties<br />
– Self-tapping blunt tip<br />
– Self-retaining Stardrive T25 recess<br />
allows improved torque transmission<br />
and increased resistance to stripping<br />
relative to a hex recess and secure<br />
locking screw pick-up.<br />
Cancellous bone locking screws:<br />
– Indicated for the three unique proximal<br />
locking options of all tibial nails<br />
diameters<br />
– Dual core design for optimized purchase<br />
in cancellous bone<br />
– Unicortical<br />
– Lengths: 30 mm – 90 mm<br />
Standard locking screws:<br />
– Larger cross section for improved<br />
mechanical resistance<br />
– 4.0 mm for 8 mm and 9 mm<br />
tibial nails, lengths: 18 mm – 80 mm<br />
– 5.0 mm for 10 mm to<br />
13 mm tibial nails,<br />
lengths: 26 mm – 100 mm<br />
locking<br />
screws with h exalobular<br />
Stardrive ®<br />
T25<br />
in ternal drive<br />
ac cording to EN<br />
This patient has some Sy nthes®<br />
* Titanium-6% aluminum-7% niobium<br />
ISO 10664<br />
Synthes 3
AO/ASIF Principles of<br />
internal fixation<br />
In 1958, the AO/ASIF (Association for the Study of Internal<br />
Fixation) formulated four basic principles 1 , which have<br />
become the guidelines for internal fixation in general, and intramedullary<br />
nailing in particular:<br />
The <strong>Expert</strong> <strong>Tibial</strong> <strong>Nail</strong> permits an intra medullary approach for<br />
the fixation of proximal, shaft and distal fractures of the<br />
tibia. The system consists of a series of cannulated nails, cannulated<br />
end caps, dual core locking screws and standard<br />
locking screws. All of the implants are made of titanium alloy<br />
(TAN*).<br />
Anatomic Reduction<br />
The <strong>Expert</strong> <strong>Tibial</strong> <strong>Nail</strong> is designed to fit anatomically in the<br />
medullary canal, allowing indirect reduction of proximal,<br />
distal and shaft fractures of the tibia.<br />
Stable Fixation<br />
The <strong>Expert</strong> <strong>Tibial</strong> <strong>Nail</strong> provides stable fixation of fractures by<br />
incorporating oblique locking holes in the proximal and distal<br />
portions of the nail.<br />
Cancellous bone locking screws are used proximally for<br />
better purchase in the cancellous bone. The most proximal<br />
locking screw, when used with an end cap, provides a<br />
locked, fixed-angle construct. Locking screws in the distal<br />
oblique hole and ML hole provide stable fixation of distal<br />
fractures.<br />
Preservation of Blood Supply<br />
The instruments and implants in the <strong>Expert</strong> <strong>Tibial</strong> <strong>Nail</strong> permit<br />
a more percutaneous technique and less tissue stripping<br />
than other treatment methods. An intramedullary approach<br />
results in decreased blood loss compared to plate fixation.<br />
Early, Active Mobilization<br />
The <strong>Expert</strong> <strong>Tibial</strong> <strong>Nail</strong> provides secure fixation which permits<br />
controlled, early, active rehabilitation conducive to optimal<br />
recovery.<br />
1 M.E. Müller, M. Allgöwer, R. Schneider y R. Willenegger:<br />
Manual de osteosíntesis, 3ª edición. Barcelona: Springer-Verlag Ibérica. 1991<br />
* Titanio, 6%; aluminio, 7%; niobio<br />
4 Synthes <strong>Expert</strong> <strong>Tibial</strong> <strong>Nail</strong>
Indications<br />
The <strong>Expert</strong> <strong>Tibial</strong> <strong>Nail</strong> is indicated for fractures in the tibial<br />
shaft as well as for metaphyseal and certain intraarticular<br />
fractures of the tibial head and the pilon tibiale:<br />
– 41-A2/A3<br />
– All shaft fractures<br />
– 43-A1/A2/A3<br />
– Combinations of these fractures<br />
For these indications the <strong>Expert</strong> <strong>Tibial</strong> <strong>Nail</strong> should be used in<br />
combination with other implants (not shown in the illustrations):<br />
– 41-C1/C2<br />
– 43-C1/C2<br />
Note: The use of a cannulated <strong>Expert</strong> <strong>Tibial</strong> <strong>Nail</strong> with a large<br />
diameter offering more stability associated with the reamed<br />
technique is generally recommended for pseudarthroses,<br />
tumours, mal-unions and non-unions.<br />
Synthes 5
Cases<br />
Fracture involving the proximal component<br />
Case 1<br />
The use of the three locking screws in the proximal oblique<br />
locking options ensures optimal stabilization of the proximal<br />
fragment. The distal segment can be stabilized by using<br />
two ML locking options. Stability of the distal fragment can<br />
be enhanced by the use of a third locking screw in the AP<br />
hole.<br />
Shaft fracture<br />
Case 2<br />
For simple shaft fractures, two proximal ML and two distal<br />
ML locking screws are normally sufficient to stabilize the<br />
fracture. Secondary dynaminization is achieved by removing<br />
the proximal static locking screw.<br />
Fracture involving the distal component<br />
Case 3<br />
The use of four distal locking screws is sometimes necessary<br />
to achieve stabilization of the distal fragment. In many<br />
cases though, three locking screws placed in the most distal<br />
locking options are sufficient to stabilize the distal fragment.<br />
6 Synthes <strong>Expert</strong> <strong>Tibial</strong> <strong>Nail</strong>
preoperative<br />
postoperative<br />
follow-up (3 weeks after surgery)<br />
preoperative postoperative follow-up (1 month after surgery)<br />
preoperative postoperative follow-up (4 months after surgery)<br />
Synthes 7
5<br />
Preoperative planning<br />
Use the AO ASIF Preoperative Planner Template for the<br />
<strong>Expert</strong> <strong>Tibial</strong> <strong>Nail</strong> to estimate nail diameter and nail length. To<br />
estimate nail diameter, place the template on the AP or<br />
lateral X-ray of the uninjured tibia and measure the diameter<br />
of the medullary canal at the narrowest part that will contain<br />
the nail.<br />
To estimate nail length, place the template on the AP X-ray<br />
of the uninjured tibia and select the appropriate nail length<br />
based on patient anatomy. When selecting nail size, consider<br />
canal diameter, fracture pattern, patient anatomy and postoperative<br />
protocol.<br />
EXPERT TM<br />
<strong>Tibial</strong> <strong>Nail</strong><br />
for Ø 8, 9, 10, 11, 12, 13 mm nails<br />
Ø 13 mm<br />
0 mm 30 40 50 60 70 80 90<br />
Cancellous Bone Locking Screw Ø 5.0 mm (golden)<br />
04.015.5XX<br />
dynamic<br />
static<br />
7 mm<br />
15 10 5 0 mm<br />
04.004.003<br />
04.004.002<br />
04.004.001<br />
04.004.000<br />
(04.004.004)<br />
Ø 12 mm<br />
Ø 11 mm<br />
Ø 10 mm<br />
37<br />
Ø 9 mm<br />
22<br />
13<br />
Ø 8<br />
0 mm<br />
255 mm<br />
270 mm<br />
285 mm<br />
0 mm 26 30 40 50 60 70 80 100<br />
Locking Screw Ø 5.0 mm (light green)<br />
04.005.5XX<br />
300 mm<br />
315 mm<br />
330 mm<br />
345 mm<br />
360 mm<br />
375 mm<br />
390 mm<br />
AP View<br />
1.10 Magnification<br />
0 mm 18 30 40 50 60 70 80<br />
0 10 20 30 40 50 60 70 80 90 100 mm<br />
For use only with the Original AO/ASIF System of<br />
Instruments and Implants<br />
Manufacturer: Stratec Medical<br />
Eimattstrasse 3<br />
CH-4436 Oberdorf<br />
www.synthes.com<br />
Locking Screw Ø 4.0 mm (dark blue)<br />
04.005.4XX<br />
Lateral View<br />
405 mm<br />
420 mm<br />
435 mm<br />
450 mm<br />
465 mm<br />
034.000.015 © Stratec Medical 2005 Printed in Switzerland SEK Subject to modifications.<br />
8 Synthes <strong>Expert</strong> <strong>Tibial</strong> <strong>Nail</strong>
Opening the tiba<br />
1<br />
Position patient<br />
Position the patient supine on the radiolucent table. Ensure<br />
that the knee of the injured leg can be flexed at least 90°.<br />
Position the image intensifier such that visualisation of the<br />
tibia including the articular surface proximally and distally is<br />
possible in AP and lateral views.<br />
Optionally, the procedure can be performed on a fracture<br />
table with the leg placed in traction.<br />
Note: The knee roller can be placed under the lower part<br />
of the thigh if it obstructs the view of the tibia plateau in AP<br />
view.<br />
Synthes 9
Opening the tiba<br />
2<br />
Reduce fracture<br />
Perform closed reduction manually by axial traction under<br />
image intensifier. The use of the Large Distractor (394.350)<br />
or Pinless Fixator (186.310) may be appropriate in certain<br />
circumstances.<br />
Note: The reduction can be temporarily fixed with reduction<br />
clamps. In epiphyseal fractures the condyles or the pilon<br />
tibiale are fixed first in order to enable the nail insertion.<br />
10 Synthes <strong>Expert</strong> <strong>Tibial</strong> <strong>Nail</strong>
3<br />
Confirm nail length and diameter<br />
Instrument<br />
03.010.021 Radiographic Ruler for <strong>Tibial</strong> <strong>Nail</strong>s,<br />
length 450 mm<br />
The required nail length must be determined after reduction<br />
of the lower leg fracture.<br />
Position the C-arm for an AP view of the distal tibia. With<br />
long forceps, hold the ruler along the leg, parallel to and at<br />
the same level as the tibia. Adjust the ruler until the distal tip<br />
is at the level of the physeal scar or the desired nail insertion<br />
depth. Mark the skin at that site.<br />
Move the C-arm to the proximal tibia, replace the distal end<br />
of the ruler at the skin mark, and take an AP image of the<br />
proximal tibia. Read nail length directly from the ruler image,<br />
selecting the measurement at or just below the level of the<br />
anterior edge of the tibial plateau.<br />
When using the large distractor, measure the distance from<br />
the inferior border of the distal pin to the superior border of<br />
the proximal pin to determine optimal nail length.<br />
Position the C-arm for an AP or lateral view of the tibia at<br />
the level of the isthmus. Hold the ruler over the tibia so that<br />
the diameter gauge is centered over the narrowest part of<br />
the medullary canal. Read the diameter measurement on the<br />
circular indicator that fills the canal.<br />
Note: Compression or dynaminization must be taken into<br />
account when determining the nail length. A shorter nail<br />
should be chosen when active compression is planned for<br />
the procedure. The dynamic locking option allows for 7 mm<br />
of travel.<br />
Synthes 11
Opening the tiba<br />
Alternatives<br />
Determine the nail length by the above procedure on the uninjured<br />
leg or before draping (unsterile) or compare the<br />
length of two identical SynReam Reaming Rods 2.5 mm<br />
(352.032).<br />
Place the radiographic ruler over the tibia so that the measuring<br />
edge is located over the isthmus. Select the nail diameter<br />
shown when the medullary canal/cortex transition is still visible<br />
on both sides of the marking.<br />
If the reamed technique is used, the diameter of the largest<br />
medullary reamer applied must be 0.5 mm to 1.5 mm larger<br />
than the nail diameter.<br />
4<br />
Approach<br />
Make an incision in line with the central axis of the intra -<br />
medullary canal. Depending on the anatomy of the patient,<br />
this incision can be transpatellar, medial or even lateral<br />
parapatellar.<br />
The incision starts proximally at the distal third of the patella<br />
along the patellar ligament down to the tibial tuberosity.<br />
Mobilise the infrapatellar corpus adiposum laterally and dorsally<br />
without opening the synovia. A free access of the nail to<br />
the insertion point must be guaranteed.<br />
Prepare the entry site of the nail on the ventral edge of the<br />
tibial plateau.<br />
12 Synthes <strong>Expert</strong> <strong>Tibial</strong> <strong>Nail</strong>
5<br />
Determine entry point<br />
The entry point defines the optimal position of the <strong>Expert</strong><br />
<strong>Tibial</strong> <strong>Nail</strong> in the intramedullary canal. This is more important<br />
for proximal and distal third fractures to prevent fragment<br />
displacement.<br />
In AP view the entry point is in line with the axis of the intramedullary<br />
canal and with the lateral tubercle of the intercondylar<br />
eminence.<br />
In lateral view the entry point is at the ventral edge of the<br />
tibial plateau.<br />
Synthes 13
Opening the tiba<br />
6<br />
Insert guide wire<br />
Instruments<br />
357.399 Guide Wire 3.2 mm<br />
393.100 Universal Chuck with T-Handle<br />
Secure the guide wire in the universal chuck. Slightly punch<br />
mark the insertion point at a 10° angle to the shaft axis in<br />
the lateral view. Hold a sterile <strong>Expert</strong> <strong>Tibial</strong> <strong>Nail</strong> on the side of<br />
the lower leg with its distal end parallel to the tibia shaft.<br />
The curved proximal nail end determines the definitive angle<br />
of insertion for the guide wire.<br />
Insert the guide wire for approx. 8–10 cm and check the position<br />
under the image intensification in the AP and lateral<br />
views.<br />
14 Synthes <strong>Expert</strong> <strong>Tibial</strong> <strong>Nail</strong>
7<br />
Open medullary canal – cutter<br />
Instruments<br />
357.399 Guide Wire 3.2 mm<br />
03.010.008 Cutter for <strong>Tibial</strong> <strong>Nail</strong>s, 12.0 mm,<br />
length 350 mm<br />
03.010.035 Protection Sleeve 14.0/12.0,<br />
length 161 mm<br />
Push the protection sleeve and the cutter over the guide wire<br />
and open the medullary canal to a depth of 8–10 cm. The<br />
guide wire and the cutter should not touch the posterior cortex.<br />
Remove guide wire, cutter and protection sleeve.<br />
Synthes 15
Opening the tiba<br />
7a<br />
Open medullary canal – drill bit<br />
Alternative instruments<br />
357.399 Guide Wire 3.2 mm<br />
03.010.036 Drill Bit 12.0 mm, cannulated,<br />
length 300 mm, for No. 532.015<br />
03.010.035 Protection Sleeve 14.0/12.0,<br />
length 161 mm<br />
Place the protection sleeve and the drill bit over the guide<br />
wire and down to the bone. Drill to a depth of approx. 8–<br />
10 cm. The guide wire and the drill bit should not touch the<br />
posterior cortex.<br />
Remove guide wire, drill bit and protection sleeve.<br />
16 Synthes <strong>Expert</strong> <strong>Tibial</strong> <strong>Nail</strong>
7b<br />
Open medullary canal – awl<br />
Alternative instruments<br />
357.399 Guide Wire 3.2 mm<br />
03.010.040 Awl 12.0 mm, cannulated,<br />
length 243 mm<br />
Place the cannulated awl over the guide wire and open the<br />
medullary canal. Use a twisting motion to advance the awl to<br />
a depth of approx. 8–10 cm.<br />
The awl should not touch the posterior cortex.<br />
Remove guide wire and awl.<br />
Synthes 17
Opening the tiba<br />
8<br />
Reaming medullary canal (optional)<br />
Instruments<br />
189.060 SynReam Intramedullary Reaming System<br />
03.010.093 Rod Pusher for Reaming Rod with<br />
Hexagonal Screwdriver 8.0 mm<br />
If necessary enlarge the tibia canal with the medullary<br />
reamer up to the desired diameter.<br />
Check fracture reduction under the image intensification.<br />
Inserting the reaming rod<br />
Insert the SynReam Reaming Rod 2.5 mm (352.032) into<br />
the medullary canal to the desired insertion depth.<br />
Reaming<br />
Starting with the 8.5 mm reaming head, ream to a diameter<br />
of 0.5–1.5 mm greater than the nail diameter. Ream<br />
in 0.5 mm increments and advance the reamer with steady,<br />
moderate pressure. Do not force the reamer. Partially retract<br />
the reamer often to clear debris from the medullary canal.<br />
Note: All cannulated <strong>Expert</strong> <strong>Tibial</strong> <strong>Nail</strong>s can be inserted over<br />
the reaming rod. Reaming rod exchange is not required.<br />
In case of solid <strong>Expert</strong> <strong>Tibial</strong> <strong>Nail</strong>s, remove the reaming rod<br />
before nail insertion.<br />
18 Synthes <strong>Expert</strong> <strong>Tibial</strong> <strong>Nail</strong>
Option<br />
Use the rod pusher to help retain the reaming rod during<br />
reamer extraction.<br />
Synthes 19
Insert the <strong>Nail</strong><br />
1<br />
Assemble the insertion instruments<br />
Instruments<br />
03.010.045 Insertion Handle,<br />
for <strong>Tibial</strong> and Femoral <strong>Nail</strong>s<br />
03.010.044 Connecting Screw,<br />
for <strong>Tibial</strong> and Femoral <strong>Nail</strong>s<br />
03.010.092 Screwdriver,<br />
hexagonal with spherical head 8.0 mm<br />
Orient the insertion handle anteriorly, and match the notch<br />
on the handle to the nail.<br />
Place the connecting screw into the insertion handle and<br />
thread it into the proximal nail end using the screwdriver.<br />
Verify the nail is oriented properly on the insertion handle,<br />
secure the assembly with the screwdriver.<br />
20 Synthes <strong>Expert</strong> <strong>Tibial</strong> <strong>Nail</strong>
Alternative instrument<br />
(cannulated <strong>Expert</strong> <strong>Tibial</strong> <strong>Nail</strong>s only)<br />
03.010.093 Rod Pusher for Reaming Rod with<br />
Hexagonal Screwdriver 8.0 mm<br />
Optionally, slide the connecting screw onto the rod pusher.<br />
Slide the assembly through the insertion handle and match<br />
the notch on the handle to the nail. Tighten using the rod<br />
pusher.<br />
Synthes 21
Insert the <strong>Nail</strong><br />
2<br />
Inserting the nail<br />
Note: Hyper flex the knee to aid nail insertion into the<br />
medullary canal.<br />
Insert the nail into the intramedullary canal. Use a twisting<br />
motion to advance the nail.<br />
Monitor the nail passage across the fracture, control in two<br />
planes to avoid malalignment.<br />
Insert the nail until it is at or below the tibial opening. Check<br />
final nail position in AP and lateral views.<br />
Note: For proximal locking mount the aiming arm only when<br />
the nail has been completely inserted, otherwise the aiming<br />
arm may loosen during nail insertion.<br />
22 Synthes <strong>Expert</strong> <strong>Tibial</strong> <strong>Nail</strong>
Optional instruments<br />
03.010.047 Connector, for Insertion Handle<br />
03.010.056 Combined Hammer, 700 g<br />
357.220 Hammer Guide, for No. 357.250 (*)<br />
321.160 Combination Wrench 11 mm<br />
321.170 Pin Wrench 4.5 mm<br />
357.398 Cannulated Shaft with 8 mm Hex<br />
If needed, use light, controlled hammer blows to seat the<br />
nail. Slide the connector into the grooves on the insertion<br />
handle and secure it in place using the combination wrench.<br />
Lock the head of the combined hammer in place by tightening<br />
the nut onto the threads located below the hammer<br />
head using the pin wrench if necessary. Strike the connector<br />
directly.<br />
Optionally, the hammer guide can be threaded into the connector<br />
and the hammer can be used as a slide hammer.<br />
Loosen the nut away from the threads located below the<br />
hammer head and secure onto the threads located above the<br />
handle.<br />
Note: If nail insertion is difficult, choose a smaller diameter<br />
nail or ream the intramedullary canal to a larger diameter.<br />
Important: Confirm that the nail is securely connected to<br />
the insertion handle, especially after hammering.<br />
(*) Also adapted for No. 03.010.056<br />
Synthes 23
Insert the <strong>Nail</strong><br />
3<br />
Check proximal nail position<br />
Instruments<br />
03.010.018 Aiming Arm for <strong>Tibial</strong> <strong>Nail</strong><br />
357.399 Guide Wire 3.2 mm<br />
Attach the aiming arm and insert a guide wire in the hole as<br />
shown in the illustration.<br />
The tip of the guide wire indicates the exact proximal position<br />
of the nail.<br />
Remove the connector and the aiming arm unless proximal<br />
locking is the next step.<br />
Check proximal nail position under image intensification in<br />
the lateral view.<br />
Note: The distance between the markings on the insertion<br />
handle is 5 mm and corresponds to the extensions of the<br />
end caps. This feature can be used for over insertion of the<br />
nail or for correcting the nail location within the medullary<br />
canal.<br />
20 mm<br />
15 mm<br />
10 mm<br />
5 mm<br />
If primary compression or secondary dynaminization are<br />
planned, it is recommended to over insert the nail by more<br />
than 7 mm, which corresponds to the maximum distance<br />
between the positions in static and dynamic modes.<br />
24 Synthes <strong>Expert</strong> <strong>Tibial</strong> <strong>Nail</strong>
4<br />
Check distal nail position<br />
Check final nail position under image intensification in AP<br />
and lateral views.<br />
Remove the reaming rod.<br />
Important: Confirm that the nail is securely connected to<br />
the insertion handle, especially after hammering.<br />
Note: Insertion depth is critical for distal third fractures<br />
where a minimum of two locking screws below the fracture<br />
line are required to stabilize the distal segment.<br />
Synthes 25
Insert the <strong>Nail</strong><br />
Locking options<br />
Proximal segment fractures<br />
For proximal fractures, it is recommended to lock the nail<br />
with the knee in extension. This neutralizes the deforming<br />
forces on proximal fragments caused by the quadriceps<br />
mechanism, and relieves the pressure on the soft tissue usually<br />
associated with tibial nail insertion instruments. This position<br />
also facilitates assessment of rotational alignment prior<br />
to locking.<br />
Diaphyseal segment fractures<br />
For diaphyseal fractures, it is recommended to lock distally<br />
first to allow intraoperative compression.<br />
Distal segment fractures<br />
For distal fractures, it is recommended to lock distally first<br />
to facilitate reduction<br />
ML view<br />
26 Synthes <strong>Expert</strong> <strong>Tibial</strong> <strong>Nail</strong>
Locking holes<br />
0 mm<br />
14 mm<br />
20 mm<br />
30 mm<br />
36 mm<br />
43 mm<br />
57 mm<br />
37 mm<br />
22 mm<br />
13 mm<br />
5 mm<br />
0 mm<br />
8 mm<br />
9 mm<br />
10 mm<br />
11 mm<br />
12 mm<br />
13 mm<br />
Synthes 27
Distal locking<br />
1<br />
Distal locking<br />
Use the appropriate locking screws and drill bit for the nail<br />
diameter selected.<br />
<strong>Nail</strong> Diameter Locking Screw Drill Bit<br />
8 mm and 9 mm 4.0 mm 3.2 mm<br />
(dark blue) (dark blue) 03.010.100* or<br />
03.010.103<br />
10 mm to 13 mm 5.0 mm 4.2 mm<br />
(light green) (light green) 03.010.101* or<br />
03.010.104<br />
It is recommended to lock distally first, enabling the use of<br />
the backstroke** technique to prevent diastasis. Verify the<br />
nail has been inserted to the appropriate depth.<br />
Locking of the tibial nail is usually performed from the medial<br />
side, if possible with the leg extended. This position helps<br />
counteract the forces exerted by the quadriceps muscle that<br />
would tend to deform the proximal fragment and also facilitates<br />
rotational control of the tibial axis before locking.<br />
Distal locking with the Radiolucent Drive (511.300) is<br />
described below.<br />
Note: The use of the most distal locking option is recommended<br />
for distal fractures. This locking option is oriented<br />
30° from the Sagittal plane.<br />
** For Radiolucent Drive<br />
** Backstroke technique: with the hammer guide attached to the connector and<br />
insertion handle (see page 23), light reverse hammer blows may be used to<br />
compress the fracture; monitor reduction radiographically.<br />
28 Synthes <strong>Expert</strong> <strong>Tibial</strong> <strong>Nail</strong>
2<br />
Align the image<br />
Check the reduction, correct alignment of the fragments and<br />
leg length before locking the nail.<br />
Align the C-arm with the hole in the nail closest to the fracture<br />
until a perfect circle is visible in the center of the screen.<br />
(distal ML hole shown in illustration).<br />
3<br />
Determine incision point<br />
Place a scalpel blade on the skin over the center of the hole<br />
to mark the incision point and make a stab incision.<br />
Synthes 29
Distal locking<br />
4<br />
Drill<br />
Instruments<br />
03.010.100 Drill Bit 3.2 mm, calibrated,<br />
lenght 145 mm,<br />
3-flute, with Coupling for RDL<br />
03.010.101 Drill Bit 4.2 mm, calibrated,<br />
lenght 145 mm,<br />
3-flute, with Coupling for RDL<br />
Using the radiolucent drive, under image intensification,<br />
insert the tip of the appropriate drill bit through the incision<br />
down to the bone.<br />
Incline the drive so that the tip of the drill bit is centered over<br />
the locking hole. The drill bit should almost completely fill<br />
the circle of the locking hole. Hold the drill bit in this position<br />
and drill through both cortices.<br />
Tip: For greater drill bit control, discontinue drill power after<br />
perforating the near cortex. Manually guide the drill bit<br />
through the nail before drilling the far cortex.<br />
30 Synthes <strong>Expert</strong> <strong>Tibial</strong> <strong>Nail</strong>
Alternative instruments<br />
03.010.103 Drill Bit 3.2 mm, calibrated,<br />
length 145 mm,<br />
3-flute, for Quick Coupling<br />
03.010.104 Drill Bit 4.2 mm, calibrated,<br />
length 145 mm<br />
3-flute, for Quick Coupling<br />
Standard freehand locking technique can be performed without<br />
the radiolucent drive. Use the appropriate drill bit shown<br />
in the table above.<br />
Synthes 31
Distal locking<br />
5<br />
Determine the length of the locking screw<br />
Instrument<br />
03.010.106 Direct Measuring Device for Drill Bits<br />
length 145 mm<br />
Stop drilling immediately after both cortices and disassemble<br />
the drill bit from the Radiolucent Drive. Ensure the correct<br />
position of the drill bit beyond the far cortex. Place the direct<br />
measuring device onto the drill bit. Read the graduation of<br />
the measuring device at the end of the drill bit.<br />
This corresponds to the appropriate locking screw length.<br />
32 Synthes <strong>Expert</strong> <strong>Tibial</strong> <strong>Nail</strong>
Alternative instrument<br />
03.010.072 Depth Gauge for Locking Screws<br />
Measure the screw length using the depth gauge. Ensure the<br />
outer sleeve is in contact with the bone and the hook grasps<br />
the far cortex.<br />
Read the screw length directly from the measuring device at<br />
the back of the protection sleeve.<br />
Note: Drill bit location with respect to the far cortex is critical<br />
for measuring the appropriate locking screw length.<br />
Synthes 33
Distal locking<br />
6<br />
Insert locking screw<br />
a<br />
Instruments<br />
03.010.107 Screwdriver Stardrive, T25,<br />
length 330 mm<br />
b<br />
03.010.112 Holding Sleeve, with Locking Device<br />
Insert the appropriate length locking screw using the screwdriver<br />
Stardrive T25 and the holding sleeve, if needed.<br />
c<br />
Verify screw length under image intensification. If needed,<br />
a second locking screw may be inserted using the same technique.<br />
Note: In the event of diastasis, the backstroke technique can<br />
be used after insertion of the second distal locking screw.<br />
Alternatively the compression screw can be used, please refer<br />
to step 26 (page 34).<br />
d<br />
Use the holding sleeve as described below:<br />
a Insert the holding sleeve onto the shaft of the screwdriver<br />
and place the tip of the screwdriver in the recess of the<br />
locking screw.<br />
b Push the holding sleeve in the direction of the locking<br />
screw, the sleeve now holds the locking screw.<br />
c Lock the holding sleeve by tightening it counter clockwise.<br />
d Release the holding sleeve after insertion of the locking<br />
screw by loosening it clockwise and pushing backwards.<br />
34 Synthes <strong>Expert</strong> <strong>Tibial</strong> <strong>Nail</strong>
Proximal locking<br />
Diaphyseal and distal segment fractures<br />
1<br />
Choose locking screws and instruments<br />
Use the correct locking screw, drill sleeve, trocar and drill bit<br />
for the selected nail diameter as shown in the table.<br />
DYNAM<br />
STAT 2<br />
STAT 1<br />
<strong>Nail</strong> Diameter Locking Screws Protection Sleeve Drill Sleeve Trocar Calibrated Drill Bit<br />
8 mm and 9 mm 4.0 mm 12.0 mm / 8.0 mm 8.0 mm / 3.2 mm 3.2 mm 3.2 mm<br />
(dark blue) (dark blue) 03.010.063 03.010.064 03.010.069 03.010.060<br />
10 mm – 13 mm 5.0 mm 12.0 mm / 8.0 mm 8.0 mm / 4.2 mm 4.2 mm 4.2 mm<br />
(light green) (light green) 03.010.063 03.010.065 03.010.070 03.010.061<br />
Three proximal ML locking options can be targeted using<br />
the aiming arm:<br />
1 The dynamic locking option (DYNAM) corresponds to the<br />
upper position of the proximal locking slot. This type<br />
of locking allows primary compression or secondary, controlled<br />
dynaminization of the bone fragments.<br />
2 Static 2 (STAT 2) corresponds to the lower position of the<br />
proximal locking slot. This type of locking does<br />
not allow primary compression or secondary controlled dynaminization.<br />
3 Static 1 (STAT 1) corresponds to most distal of the proximal<br />
locking holes.<br />
Synthes 35
Proximal locking<br />
2<br />
Mount the aiming arm<br />
Instrument<br />
03.010.018 Aiming Arm for <strong>Expert</strong> <strong>Tibial</strong> <strong>Nail</strong><br />
Confirm that the nail is securely connected to the insertion<br />
handle (use the blue and green marked guided holes).<br />
Mount the aiming arm to the insertion handle.<br />
Note: Do not exert forces on the aiming arm, protection<br />
sleeve, drill sleeves and drill bits. These forces may prevent<br />
accurate targeting through the proximal locking holes and<br />
damage the drill bits.<br />
36 Synthes <strong>Expert</strong> <strong>Tibial</strong> <strong>Nail</strong>
3<br />
Insert trocar combination<br />
Instruments<br />
03.010.063 Protection Sleeve 12.0/8.0, length 188 mm<br />
03.010.064 Drill Sleeve 8.0/3.2, for No. 03.010.063<br />
(with blue and yellow marking)<br />
03.010.065 Drill Sleeve 8.0/4.2, for No. 03.010.063<br />
(with green marking)<br />
03.010.069 Trocar 3.2 mm, for No. 03.010.063<br />
(with blue and yellow marking)<br />
03.010.070 Trocar 4.2 mm, for No. 03.010.063<br />
(with green marking)<br />
Insert the three-part trocar combination (protection sleeve,<br />
corresponding drill sleeve and trocar) through the desired ML<br />
hole in the aiming arm, make stab incision and insert the<br />
trocar to the bone. Remove the trocar.<br />
Synthes 37
Proximal locking<br />
4<br />
Drill and determine the locking screw length<br />
Instruments<br />
03.010.060 Drill Bit 3.2 mm, calibrated,<br />
length 340 mm,<br />
3-flute, for Quick Coupling<br />
(with blue and yellow marking)<br />
03.010.061 Drill Bit 4.2 mm, calibrated,<br />
length 340 mm,<br />
3-flute, for Quick Coupling<br />
(with green marking)<br />
Ensure that the drill sleeve is pressed firmly to the near cortex.<br />
Using the corresponding drill bit (3.2 mm for 4.0 mm<br />
locking screws or 4.2 mm for 5.0 mm locking screws), drill<br />
through both cortices until the tip of the drill bit penetrates<br />
the far cortex.<br />
Confirm drill bit position.<br />
Ensure that the drill sleeve is pressed firmly to the near cortex<br />
and read the measurement from the calibrated drill bit at<br />
the back of the drill sleeve. This measurement corresponds to<br />
the appropriate length of the locking screw. Remove the<br />
drill bit and the drill sleeve.<br />
38 Synthes <strong>Expert</strong> <strong>Tibial</strong> <strong>Nail</strong>
Alternative instrument<br />
03.010.072 Depth Gauge for Locking Screws<br />
After drilling both cortices, remove the drill bit and the drill<br />
sleeve.<br />
Disassemble the depth gauge into 2 parts: the outer sleeve<br />
and the measuring device with hook. Insert the measuring<br />
device into the protection sleeve. Make sure that the hook<br />
grasps the far cortex and that the protection sleeve is on the<br />
bone.<br />
Read the measurement from the back of the protection<br />
sleeve, which corresponds to the appropriate length of the<br />
locking screw.<br />
Synthes 39
Proximal locking<br />
5<br />
Insert locking screw<br />
Instrument<br />
03.010.107 Screwdriver Stardrive, T25,<br />
length 330 mm<br />
Insert the appropriate locking screw through the protection<br />
sleeve using the Stardrive T25 screwdriver. Verify locking<br />
screw length under image intensification.<br />
The tip of the locking screw should not project more than<br />
1–2 mm beyond the far cortex.<br />
Repeat the steps 3 to 5 for the second proximal ML locking<br />
Screw.<br />
Option<br />
Additional cancellous bone locking screws can be added for<br />
proximal fractures and highly unstable fractures.<br />
Refer to steps 1 to 7 on pages 44 to 54 for details on proximal<br />
locking with the cancellous bone locking screws.<br />
40 Synthes <strong>Expert</strong> <strong>Tibial</strong> <strong>Nail</strong>
6<br />
Compression locking mode (optional)<br />
For situations where the fracture gap needs compression after<br />
nail insertion, diastasis, compression of the fracture gap<br />
can be accomplished without removing the insertion instruments.<br />
The <strong>Expert</strong> <strong>Tibial</strong> <strong>Nail</strong> allows for a maximum compression of<br />
7 mm. If more compression of the fracture gap is needed,<br />
the conventional backstroke technique is recommended.<br />
Note: Distal locking is required prior to compression locking,<br />
refer to steps 1 to 6 on pages 28 to 34.<br />
Insert one proximal locking screw in the dynamic locking<br />
hole (DYNAM), refer to steps 1 to 5 on pages 35 to 40 for<br />
details on inserting this locking screw.<br />
Synthes 41
Proximal locking<br />
7<br />
Insert compression screw<br />
Instruments<br />
03.010.015 Compression Screw for <strong>Tibial</strong> <strong>Nail</strong>,<br />
for No. 03.010.044<br />
03.010.092 Screwdriver, hexagonal<br />
with spherical head 8.0 mm<br />
Confirm that the nail is securely connected to the insertion<br />
handle.<br />
Insert the compression screw through the connecting screw<br />
and into the nail using the screwdriver.<br />
The compression screw will contact the dynamic locking<br />
screw.<br />
Advance the compression screw until the fracture gap is reduced.<br />
Monitor reduction under image intensification.<br />
Each revolution of the compression screw corresponds to a<br />
compression of 1 mm (maximum 7 mm).<br />
Important: Do not overtighten the compression screw,<br />
it may deform the locking screw.<br />
42 Synthes <strong>Expert</strong> <strong>Tibial</strong> <strong>Nail</strong>
8<br />
Monitor fracture<br />
Control the fracture gap before, during and after the compression<br />
procedure.<br />
9<br />
Insert static locking screw<br />
Insert second proximal locking screw in the most distal hole<br />
of the proximal locking options (Static 1), refer to steps 1 to<br />
5 on pages 35 to 40.<br />
Remove the compression screw.<br />
Additional oblique cancellous bone locking screws can be inserted<br />
if required, refer to steps 1 to 7 on pages 44 to 54.<br />
Synthes 43
Proximal locking<br />
Proximal segment fractures<br />
1<br />
Oblique proximal locking<br />
Proximal locking can be performed with the leg in full extension.<br />
This neutralizes the deforming forces on proximal fragments<br />
caused by the quadriceps mechanism and relieves the<br />
pressure on the soft tissue usually associated with tibial nail<br />
insertion instruments. This position also facilitates assessment<br />
of rotational alignment prior to locking.<br />
OBLI 2<br />
OBLI 1<br />
Use the cancellous bone locking screws (gold) only in combination<br />
with the two oblique proximal locking holes (OBLI 1,<br />
OBLI 2) and A/P proximal locking hole for all nail diameters.<br />
A/P<br />
Use the 3.2 mm drill bit (03.010.060 with blue and yellow<br />
markings) for the cancellous bone locking screws (gold).<br />
The aiming arm can target all three proximal oblique locking<br />
options:<br />
1. The oblique locking option (OBLI1) corresponds to the<br />
most proximal locking position. Inserting an end cap<br />
(04.004.000–04.004.003) with this locking screw will create<br />
a fixed angle construct .<br />
2. The oblique locking option (OBLI2) corresponds to the second<br />
proximal locking position. Inserting an end cap<br />
(04.004.004) with this locking screw will create a fixed angle<br />
construct (OBLI 1 must be kept empty).<br />
3. The oblique locking option in antero-posterior direction<br />
(A/P) corresponds to the third proximal locking position.<br />
44 Synthes <strong>Expert</strong> <strong>Tibial</strong> <strong>Nail</strong>
Important: Drilling for the oblique proximal locking requires<br />
special attention.<br />
To avoid lesion of the popliteal artery, the tibial nerve and the<br />
common peroneal nerve as well as damage to the proximal<br />
tibiofibular joint, drilling must be stopped immediately before<br />
penetrating the far cortex.<br />
In case of C-type fractures of the tibial head, the articulation<br />
surface of the proximal tibia should be restored before inserting<br />
the nail. The most recommended procedure is the use of<br />
two cannulated screws parallel to and below the tibia<br />
plateau surface.<br />
common<br />
peroneal nerve<br />
tibial nerve<br />
popliteal artery<br />
Synthes 45
Proximal locking<br />
2<br />
C-type fractures of the tibial head (optional)<br />
Insert two cannulated screws under image intensification according<br />
to standard technique. These cannulated screws<br />
must not interfere with the nail and must not damage the<br />
tibial plateau.<br />
Cannulated screws<br />
Using TAN screws is strongly recommended. The following<br />
cannulated screws can be considered:<br />
– Cannulated Screws 6.5 mm, TAN, dark blue (408.401–<br />
408.482)<br />
– Cannulated Screws 7.0 mm, TAN, light blue (408.151–<br />
408.223)<br />
– Cannulated Screws 7.3 mm, TAN, gold (408.830–409.950)<br />
Insert <strong>Expert</strong> <strong>Tibial</strong> <strong>Nail</strong>, please refer to steps 1 to 4 on pages<br />
20 to 25.<br />
46 Synthes <strong>Expert</strong> <strong>Tibial</strong> <strong>Nail</strong>
3<br />
Mount the aiming arm<br />
Instrument<br />
03.010.018 Aiming Arm for <strong>Expert</strong> <strong>Tibial</strong> <strong>Nail</strong><br />
Confirm that the nail is securely connected to the insertion<br />
handle. Mount the aiming arm to the insertion handle as<br />
shown in the illustration.<br />
Note: Do not exert forces on the aiming arm, protection<br />
sleeve, drill sleeves and drill bits. These forces may prevent<br />
accurate targeting through the proximal locking holes and<br />
damage the drill bits.<br />
Synthes 47
Proximal locking<br />
4<br />
Check proximal nail position (optional)<br />
Instruments<br />
03.010.018 Aiming Arm for <strong>Expert</strong> <strong>Tibial</strong> <strong>Nail</strong><br />
(use the yellow marked guide holes)<br />
03.010.063 Protection Sleeve 12.0/8.0, length 188 mm<br />
03.010.064 Drill Sleeve 8.0/3.2, for No. 03.010.063<br />
(with blue and yellow marking)<br />
03.010.060 Drill Bit 3.2 mm, calibrated,<br />
length 340 mm, 3-flute,<br />
for Quick Coupling<br />
(with blue and yellow marking)<br />
Insert the protection sleeve and the drill sleeve through the<br />
oblique guide hole (OBLI 1) of the aiming arm.<br />
Insert one drill bit through the corresponding guide hole of<br />
the aiming arm as illustrated. Do not drill.<br />
Position the image intensifier in lateral view and adjust until<br />
the drill bit and the protection sleeve are perfectly aligned.<br />
48 Synthes <strong>Expert</strong> <strong>Tibial</strong> <strong>Nail</strong>
The view obtained when the drill bit and the protection<br />
sleeve are perfectly aligned is exactly perpendicular to the<br />
plane formed by the nail and the insertion handle and, therefore,<br />
almost parallel to the knee joint.<br />
The drill bit shows the exact position of the first proximal<br />
cancellous bone locking screw.<br />
If necessary, insert the nail more distally.<br />
Note:<br />
– It is important that the cannulated screws and the cancellous<br />
bone locking screws do not interfere, and that the<br />
cancellous bone locking screws do not damage the surface<br />
of the tibia plateau.<br />
– Depending on the anatomy of the patient’s proximal tibia<br />
and on the specific situation, the second proximal oblique<br />
locking option can be chosen instead of the first locking<br />
option.<br />
Synthes 49
Proximal locking<br />
Alternative<br />
The position of the second oblique locking option can be<br />
checked similarly to the technique described above by using<br />
the oblique guide hole (OBLI 2) of the aiming arm and corresponding<br />
guide hole for the drill bit.<br />
50 Synthes <strong>Expert</strong> <strong>Tibial</strong> <strong>Nail</strong>
5<br />
Insert trocar combination<br />
Instruments<br />
03.010.063 Protection Sleeve 12.0/8.0, length 188 mm<br />
03.010.064 Drill Sleeve 8.0/3.2, for No. 03.010.063<br />
(with blue and yellow marking)<br />
03.010.069 Trocar 3.2 mm, for No. 03.010.063<br />
(with blue and yellow marking)<br />
Insert the three part trocar combination (protection sleeve,<br />
corresponding drill sleeve and trocar) through the desired<br />
hole for oblique locking options in the aiming arm, make a<br />
stab incision and insert the trocar to the bone. Remove the<br />
trocar.<br />
Synthes 51
Proximal locking<br />
6<br />
Drill and determine the length of the<br />
cancellous bone locking screw<br />
Instrument<br />
03.010.060 Drill Bit 3.2 mm, calibrated,<br />
length 340 mm, 3-flute,<br />
for Quick Coupling<br />
(with yellow and blue markings)<br />
Ensure that the drill sleeve is pressed firmly to the near<br />
cortex.<br />
Insert the calibrated drill bit and start drilling the near cortex.<br />
Stop drilling immediately after penetrating the near<br />
cortex. DO NOT penetrate the far cortex.<br />
Monitor the position of the drill bit with image intensification.<br />
This can be done by orienting the image intensifier perpendicular<br />
to the drill bit.<br />
Drill to the desired depth. A long cancellous bone locking<br />
screw will achieve better bone purchase than a shorter cancellous<br />
bone locking screw.<br />
Important: Do not perforate the far cortex with the drill bit.<br />
Do not damage the tibial plateau.<br />
Confirm drill bit position after drilling.<br />
52 Synthes <strong>Expert</strong> <strong>Tibial</strong> <strong>Nail</strong>
Ensure that the drill sleeve is pressed firmly to the bone and<br />
read the measurement from the calibrated drill bit at the<br />
back of the drill sleeve.<br />
This measurement corresponds to the appropriate length of<br />
the cancellous bone locking screw.<br />
Remove the drill bit and the drill sleeve.<br />
Important: To avoid perforation of the far cortex with the<br />
cancellous bone locking screw, it is recommended to choose<br />
a cancellous bone locking screw 5 mm shorter than the<br />
measured length.<br />
7<br />
Insert cancellous bone locking screw<br />
Instrument<br />
03.010.107 Screwdriver Stardrive, T25,<br />
length 330 mm<br />
Insert the appropriate cancellous bone locking screw through<br />
the protection sleeve using the screwdriver, do not over<br />
tighten.<br />
Verify screw length under image intensification.<br />
Synthes 53
Proximal locking<br />
Repeat this procedure for the second cancellous bone locking<br />
screw.<br />
Option<br />
Repeat the same steps as described above for the third proximal<br />
cancellous bone locking screw in the AP direction.<br />
The position of the cancellous bone locking screw should be<br />
controlled under image intensification to ensure a correct position<br />
of the AP cancellous bone locking screw.<br />
54 Synthes <strong>Expert</strong> <strong>Tibial</strong> <strong>Nail</strong>
Insert the end cap<br />
1<br />
Insertion of the end cap<br />
Instruments<br />
03.010.110 Screwdriver Stardrive, T40, cannulated,<br />
length 300 mm<br />
357.399 Guide Wire 3.2 mm<br />
The end caps for the <strong>Expert</strong> <strong>Tibial</strong> <strong>Nail</strong>s are available in extension<br />
lengths of 0 mm (04.004.000 and 04.004.004), 5 mm<br />
(04.004.001), 10 mm (04.004.002), and 15 mm<br />
(04.004.003). They fulfill three functions: they prevent bone<br />
ingrowth into the nail; they extend the nail height if it is<br />
overinserted; and they lock the proximal oblique screw or the<br />
distal oblique locking screw, providing a stable, fixed-angle<br />
construct.<br />
The end caps are cannulated for use over a guide wire if necessary.<br />
Remove the nail insertion instruments.<br />
To aid in end cap insertion, remove the connecting screw<br />
only. The insertion handle can remain to help align the end<br />
cap to the top of the nail. The end cap fits through the barrel<br />
of the insertion handle.<br />
Note: The patient’s leg should be positioned in flexion to<br />
facilitate end cap insertion.<br />
Synthes 55
Insert the end cap<br />
Engage the end cap with the screwdriver by exerting axial<br />
pressure. To prevent cross threading, align the end cap with<br />
the nail axis and turn the end cap counter clockwise until the<br />
thread of the end cap aligns with that of the nail.<br />
Turn the end cap clockwise to thread the end cap into the<br />
nail.<br />
Remove the guide wire and screwdriver.<br />
56 Synthes <strong>Expert</strong> <strong>Tibial</strong> <strong>Nail</strong>
Weight-bearing<br />
When deciding on weight-bearing, fracture pattern, fracture<br />
location, conditions of soft tissues and quality of bone stock<br />
should be taken into account.<br />
Partial weight bearing (sole contact or 15 kg) is the basic<br />
form of loading the fractured leg. Complete non-weightbearing<br />
should be avoided.<br />
Increase in load is determined according to fracture pattern<br />
and location, conditions of soft tissues and quality of bone as<br />
well as absence or presence of load induced pain.<br />
Synthes 57
Implant removal<br />
1<br />
Remove end cap and locking screws<br />
Instruments<br />
03.010.110 Screwdriver Stardrive, T40, cannulated,<br />
length 300 mm<br />
03.010.107 Screwdriver Stardrive, T25,<br />
length 330 mm<br />
03.010.112 Holding Sleeve, with Locking Device<br />
Implant removal is an optional procedure.<br />
Clear the Stardrive socket of the end cap and the locking<br />
from any tissue ingrowth. Remove the end cap with the<br />
screwdriver Stardrive T40.<br />
Remove all locking screws except one of the proximal locking<br />
screws using the screwdriver Stardrive T25 and the holding<br />
sleeve.<br />
Note: Always remove the most proximal cancellous bone<br />
locking screw in order to insert the extraction screw into the<br />
proximal end of the nail.<br />
58 Synthes <strong>Expert</strong> <strong>Tibial</strong> <strong>Nail</strong>
2<br />
Attach extraction screw and hammer guide<br />
Instruments<br />
03.010.000 Extraction Screw<br />
357.220 Hammer Guide<br />
03.010.107 Screwdriver Stardrive, T25,<br />
length 330 mm<br />
Before removing the final locking screw, screw the extraction<br />
screw into the nail and tighten it to prevent rotation or<br />
displacement of the nail posteriorly below the tibial plateau.<br />
Attach the hammer guide to the extraction screw. Remove<br />
the remaining locking screw with the screwdriver.<br />
Synthes 59
Implant removal<br />
3<br />
Remove nail<br />
Instrument<br />
03.010.056 Combined Hammer, 700g<br />
Extract the nail by applying gentle blows with the Hammer.<br />
Alternative instrument<br />
03.010.001 Extraction Screw for 516.100 Air Pulse<br />
For extraction of intramedullary femoral<br />
and tibial nails<br />
Before removing the final locking screw, screw the extraction<br />
screw into the nail and tighten it to prevent rotation or<br />
displacement of the nail posteriorly below the tibial plateau.<br />
Remove the remaining locking screw. Attach Air Pulse to<br />
the extraction screw and extract the <strong>Expert</strong> <strong>Tibial</strong> <strong>Nail</strong>.<br />
60 Synthes <strong>Expert</strong> <strong>Tibial</strong> <strong>Nail</strong>
Implant specifications<br />
<strong>Expert</strong> <strong>Tibial</strong> <strong>Nail</strong><br />
Universal design for the left and right tibia<br />
Material:<br />
Titanium-6% aluminum-7% niobium alloy (TAN)<br />
Diameters:<br />
– 8 mm – 13 mm (1 mm increments)<br />
– 8 mm – 10 mm nails have a proximal diameter of 11 mm<br />
– 11 mm – 13 mm nails have a proximal diameter consistent<br />
with the shaft diameter<br />
0 mm<br />
14 mm<br />
20 mm<br />
30 mm<br />
0 mm<br />
36 mm<br />
43 mm<br />
57 mm<br />
Colors:<br />
– 8 mm and 9 mm (dark blue) use 4.0 mm locking screws<br />
(dark blue)<br />
– 10 mm – 13 mm (light green) use 5.0 mm locking<br />
screws (light green)<br />
Lengths:<br />
– 255 mm – 465 mm (15 mm increments)<br />
Cross section:<br />
– 8 mm – 10 mm nails are round<br />
– 11 mm – 13 mm nails are fluted<br />
37 mm<br />
22 mm<br />
13 mm<br />
5 mm<br />
0 mm<br />
0 mm<br />
Synthes 61
Implants<br />
<strong>Expert</strong> <strong>Tibial</strong> <strong>Nail</strong>s, cannulated*<br />
Length 8 mm 9 mm 10 mm<br />
mm dark blue dark blue light green<br />
255 04.004.231 04.004.331 04.004.431<br />
270 04.004.234 04.004.334 04.004.434<br />
285 04.004.237 04.004.337 04.004.437<br />
300 04.004.240 04.004.340 04.004.440<br />
315 04.004.243 04.004.343 04.004.443<br />
330 04.004.246 04.004.346 04.004.446<br />
345 04.004.249 04.004.349 04.004.449<br />
360 04.004.252 04.004.352 04.004.452<br />
375 04.004.255 04.004.355 04.004.455<br />
390 04.004.258 04.004.358 04.004.458<br />
405 04.004.261 04.004.361 04.004.461<br />
420 04.004.264 04.004.364 04.004.464<br />
435 04.004.267 04.004.367 04.004.467<br />
450 04.004.270 04.004.370 04.004.470<br />
465 04.004.273 04.004.373 04.004.473<br />
8 mm<br />
9 mm<br />
10 mm<br />
* Available non-sterile or sterile packed. Add “S” to the catalogue number<br />
to order sterile products.<br />
62 Synthes <strong>Expert</strong> <strong>Tibial</strong> <strong>Nail</strong>
Length 11 mm 12 mm 13 mm<br />
mm light green light green light green<br />
255 04.004.531 04.004.631 04.004.731<br />
270 04.004.534 04.004.634 04.004.734<br />
285 04.004.537 04.004.637 04.004.737<br />
300 04.004.540 04.004.640 04.004.740<br />
315 04.004.543 04.004.643 04.004.743<br />
330 04.004.546 04.004.646 04.004.746<br />
345 04.004.549 04.004.649 04.004.749<br />
360 04.004.552 04.004.652 04.004.752<br />
375 04.004.555 04.004.655 04.004.755<br />
390 04.004.558 04.004.658 04.004.758<br />
405 04.004.561 04.004.661 04.004.761<br />
420 04.004.564 04.004.664 04.004.764<br />
435 04.004.567 04.004.667 04.004.767<br />
450 04.004.570 04.004.670 04.004.770<br />
465 04.004.573 04.004.673 04.004.773<br />
11 mm<br />
12 mm<br />
13 mm<br />
* Available non-sterile or sterile packed. Add “S” to the catalogue number<br />
to order sterile products.<br />
Synthes 63
Implants<br />
<strong>Expert</strong> <strong>Tibial</strong> <strong>Nail</strong>s, solid<br />
Length 8 mm 9 mm 10 mm<br />
mm dark blue dark blue light green<br />
255 04.024.231 04.024.331 04.024.431<br />
270 04.024.234 04.024.334 04.024.434<br />
285 04.024.237 04.024.337 04.024.437<br />
300 04.024.240 04.024.340 04.024.440<br />
315 04.024.243 04.024.343 04.024.443<br />
330 04.024.246 04.024.346 04.024.446<br />
345 04.024.249 04.024.349 04.024.449<br />
360 04.024.252 04.024.352 04.024.452<br />
375 04.024.255 04.024.355 04.024.455<br />
390 04.024.258 04.024.358 04.024.458<br />
405 04.024.261 04.024.361 04.024.461<br />
420 04.024.264 04.024.364 04.024.464<br />
435 04.024.267 04.024.367 04.024.467<br />
450 04.024.270 04.024.370 04.024.470<br />
465 04.024.273 04.024.373 04.024.473<br />
8 mm<br />
9 mm<br />
10 mm<br />
64 Synthes <strong>Expert</strong> <strong>Tibial</strong> <strong>Nail</strong>
Locking Screws for <strong>Expert</strong> <strong>Tibial</strong> <strong>Nail</strong><br />
Cancellous Bone Locking Screws 5.0 mm (gold)*<br />
– Drill 3.2 mm<br />
– Titanium-6% aluminium-7% niobium alloy (TAN)<br />
– Lengths: 30 mm – 90 mm (5 mm increments)<br />
– Used for proximal locking in the metaphysis (through the<br />
3 most proximal holes)<br />
– Dual core: smaller core (3.4 mm) for better purchase in<br />
cancellous bone, larger core (4.3 mm) to withstand loadbearing<br />
from the nail<br />
– Stardrive T25 recess<br />
– Fully threaded<br />
– Self-tapping, blunt tip<br />
Article No. Length mm<br />
04.015.520 30<br />
04.015.525 35<br />
04.015.530 40<br />
04.015.535 45<br />
04.015.540 50<br />
04.015.545 55<br />
04.015.550 60<br />
Article No. Length mm<br />
04.015.555 65<br />
04.015.560 70<br />
04.015.565 75<br />
04.015.570 80<br />
04.015.575 85<br />
04.015.580 90<br />
* Available non-sterile or sterile packed. Add “S” to the catalogue number<br />
to order sterile products.<br />
Synthes 65
Implants<br />
Locking Screws 4.0 mm (dark blue)*<br />
– Drill 3.2 mm<br />
– Titanium-6% aluminium-7% niobium alloy (TAN)<br />
– Lengths: 18 mm – 80 mm (2 mm increments)<br />
– 3.3 mm core diameter<br />
– Stardrive T25 recess<br />
– Fully threaded<br />
– Self-tapping, blunt tip<br />
Article No. Length mm Article No. Length mm<br />
04.005.408 18 04.005.440 50<br />
04.005.410 20 04.005.442 52<br />
04.005.412 22 04.005.444 54<br />
04.005.414 24 04.005.446 56<br />
04.005.416 26 04.005.448 58<br />
04.005.418 28 04.005.450 60<br />
04.005.420 30 04.005.452 62<br />
04.005.422 32 04.005.454 64<br />
04.005.424 34 04.005.456 66<br />
04.005.426 36 04.005.458 68<br />
04.005.428 38 04.005.460 70<br />
04.005.430 40 04.005.462 72<br />
04.005.432 42 04.005.464 74<br />
04.005.434 44 04.005.466 76<br />
04.005.436 46 04.005.468 78<br />
04.005.438 48 04.005.470 80<br />
* Available non-sterile or sterile packed. Add “S” to the catalogue number<br />
to order sterile products.<br />
66 Synthes <strong>Expert</strong> <strong>Tibial</strong> <strong>Nail</strong>
Locking Screws 5.0 mm (light green)*<br />
– Drill 4.2 mm<br />
– Titanium-6% aluminium-7% niobium alloy (TAN)<br />
– Lengths: 26 mm – 80 mm (2 mm increments)<br />
85 mm–100 mm (5 mm increments)<br />
– 4.3 mm core diameter<br />
– Stardrive T25 recess<br />
– Fully threaded<br />
– Self-tapping, blunt tip<br />
Article No. Length mm<br />
04.005.516 26<br />
04.005.518 28<br />
04.005.520 30<br />
04.005.522 32<br />
04.005.524 34<br />
04.005.526 36<br />
04.005.528 38<br />
04.005.530 40<br />
04.005.532 42<br />
04.005.534 44<br />
04.005.536 46<br />
04.005.538 48<br />
04.005.540 50<br />
04.005.542 52<br />
04.005.544 54<br />
04.005.546 56<br />
Article No. Length mm<br />
04.005.548 58<br />
04.005.550 60<br />
04.005.552 62<br />
04.005.554 64<br />
04.005.556 66<br />
04.005.558 68<br />
04.005.560 70<br />
04.005.562 72<br />
04.005.564 74<br />
04.005.566 76<br />
04.005.568 78<br />
04.005.570 80<br />
04.005.575 85<br />
04.005.580 90<br />
04.005.585 95<br />
04.005.590 100<br />
* Available non-sterile or sterile packed. Add “S” to the catalogue number<br />
to order sterile products.<br />
Synthes 67
Implants<br />
End Caps for <strong>Expert</strong> <strong>Tibial</strong> <strong>Nail</strong>s, (gold)*<br />
– Titanium-6% aluminium-7% niobium alloy (TAN)<br />
– Protect nail threads from tissue ingrowth<br />
– Cannulated<br />
– Stardrive T40 recess<br />
– Securely lock the most proximal oblique cancellous bone<br />
locking screw<br />
0 mm<br />
– Sits flush with end of nail<br />
5 mm, 10 mm and 15 mm extensions<br />
– Extend nail height if nail is overinserted<br />
Article No. Extension (in mm)<br />
04.004.000 0<br />
04.004.001 5<br />
04.004.002 10<br />
04.004.003 15<br />
Securely locks the second proximal oblique cancellous bone<br />
locking screw.<br />
Article No. Extension (in mm)<br />
04.004.004 0<br />
* Available non-sterile or sterile packed. Add “S” to the catalogue number<br />
to order sterile products.<br />
68 Synthes <strong>Expert</strong> <strong>Tibial</strong> <strong>Nail</strong>
Instruments<br />
Standard instrumentation<br />
03.010.021 Radiographic Ruler for <strong>Tibial</strong> <strong>Nail</strong>,<br />
length 450 mm<br />
357.399 Guide Wire 3.2 mm<br />
393.100 Universal Chuck with T-Handle<br />
03.010.008 Cutter for <strong>Tibial</strong> <strong>Nail</strong>s, 12.0 mm,<br />
length 350 mm<br />
03.010.035 Protection Sleeve 14.0/12.0<br />
03.010.044 Connecting Screw,<br />
for <strong>Tibial</strong> and Femoral <strong>Nail</strong>s<br />
Synthes 69
Instruments<br />
03.010.045 Insertion Handle, for <strong>Tibial</strong> and<br />
Femoral <strong>Nail</strong>s<br />
03.010.092 Screwdriver, hexagonal with spherical head<br />
8.0 mm<br />
03.010.047 Connector, length 141 mm,<br />
for Aiming Arm<br />
321.160 Combination Wrench 11 mm<br />
321.170 Pin Wrench 4.5 mm<br />
357.220 Hammer Guide, for No. 357.250 (*)<br />
(*) Also suitable for No. 03.010.056<br />
70 Synthes <strong>Expert</strong> <strong>Tibial</strong> <strong>Nail</strong>
03.010.056 Combined Hammer, 700 g,<br />
can be mounted<br />
357.398 Shaft, hexagonal, 8.0 mm,<br />
cannulated, short, length 125 mm<br />
03.010.100 Drill Bit 3.2 mm, length 145 mm,<br />
3-flute, with Coupling for RDL<br />
03.010.101 Drill Bit 4.2 mm, length 145 mm,<br />
3-flute, with Coupling for RDL<br />
03.010.106 Direct Measuring Device for<br />
Drill Bits of length 145 mm, for<br />
Nos. 03.010.100–105<br />
03.010.107 Screwdriver Stardrive, T25,<br />
length 330 mm<br />
03.010.112 Holding Sleeve, with Locking Device,<br />
for No. 03.010.107<br />
Synthes 71
Instruments<br />
03.010.018 Aiming Arm for <strong>Tibial</strong> <strong>Nail</strong><br />
03.010.063 Protection Sleeve 12.0/8.0,<br />
length 188 mm<br />
03.010.064 Drill Sleeve 8.0/3.2, for No. 03.010.063<br />
03.010.065 Drill Sleeve 8.0/4.2, for No. 03.010.063<br />
03.010.069 Trocar 3.2 mm<br />
03.010.070 Trocar 4.2 mm<br />
72 Synthes <strong>Expert</strong> <strong>Tibial</strong> <strong>Nail</strong>
03.010.060 Drill Bit 3.2 mm, calibrated,<br />
length 340 mm, 3-flute,<br />
for Quick Coupling<br />
03.010.061 Drill Bit 4.2 mm, calibrated,<br />
length 340 mm, 3-flute,<br />
for Quick Coupling<br />
03.010.072 Depth Gauge for Locking Screws<br />
18 to 110 mm, for No. 03.010.063<br />
03.010.015 Compression Screw for <strong>Tibial</strong> <strong>Nail</strong>,<br />
for No. 03.010.044<br />
03.010.110 Screwdriver Stardrive, T40, cannulated,<br />
length 300 mm<br />
03.010.000 Extraction Screw for <strong>Tibial</strong> and<br />
Femoral <strong>Nail</strong>s<br />
Synthes 73
Instruments<br />
Radiolucent Instrumentation (Alternative)<br />
03.010.013 Insertion Handle for <strong>Tibial</strong> <strong>Nail</strong>,<br />
radiolucent, short<br />
03.010.095 Connecting Screw, cannulated, short,<br />
for <strong>Tibial</strong> <strong>Nail</strong><br />
03.010.004 Compression Screw for <strong>Tibial</strong> <strong>Nail</strong><br />
03.010.011 Insertion Handle for <strong>Tibial</strong> <strong>Nail</strong>,<br />
radiolucent, long<br />
03.010.014 Connecting Screw for <strong>Tibial</strong> <strong>Nail</strong>, long,<br />
for No. 03.010.011<br />
03.010.007 Compression Screw for <strong>Tibial</strong> <strong>Nail</strong>,<br />
for No. 03.010.014<br />
74 Synthes <strong>Expert</strong> <strong>Tibial</strong> <strong>Nail</strong>
03.010.010 Aiming Arm for <strong>Tibial</strong> <strong>Nail</strong>, radiolucent<br />
357.117 Hammer Guide for DFN,<br />
for No. 357.026 (*)<br />
03.010.124 Combined Hammer 500 g,<br />
can be mounted<br />
Optional Instruments<br />
189.060 SynReam Intramedullary Reaming<br />
System<br />
03.010.093 Rod Pusher for Reaming Rod with<br />
Hexagonal Screwdriver 8.0 mm<br />
(*) Also suitable for <strong>Expert</strong> <strong>Tibial</strong> <strong>Nail</strong> for No. 03.010.124<br />
Synthes 75
Instruments<br />
03.010.036 Drill Bit 12.0 mm, cannulated,<br />
length 300 mm, for No. 532.015<br />
03.010.040 Awl 12.0 mm, cannulated<br />
03.010.103 Drill Bit 3.2 mm, length 145 mm,<br />
3-flute, for Quick Coupling<br />
03.010.104 Drill Bit 4.2 mm, length 145 mm,<br />
3-flute, for Quick Coupling<br />
03.010.009 Protection Sleeve 12.0/8.0,<br />
length 128 mm<br />
03.010.073 Drill Sleeve 8.0/3.2, for No. 03.010.009<br />
03.010.074 Drill Sleeve 8.0/4.2, for No. 03.010.009<br />
76 Synthes <strong>Expert</strong> <strong>Tibial</strong> <strong>Nail</strong>
03.010.098 Trocar 3.2 mm, for No. 03.010.073<br />
03.010.099 Trocar 4.2 mm, for No. 03.010.074<br />
03.010.122 Drill Bit 3.2 mm, calibrated,<br />
length 270 mm, 3-flute,<br />
for Quick Coupling<br />
03.010.123 Drill Bit 4.2 mm, calibrated,<br />
length 270 mm, 3-flute,<br />
for Quick Coupling<br />
03.010.019 Depth Gauge for Locking Screws,<br />
measuring range up to 110 mm,<br />
for No. 03.010.009<br />
03.010.001 Extraction Screw for <strong>Tibial</strong> and<br />
Femoral <strong>Nail</strong>s, for No. 516.100<br />
Note: Do not use standard instruments together with alternative<br />
instruments before contacting your Synthes representative.<br />
Synthes 77
Instruments<br />
VarioCase<br />
68.004.001 Vario Case for <strong>Expert</strong> <strong>Tibial</strong> <strong>Nail</strong>s<br />
(Titanium Alloy), incl. Locking Screws<br />
and End Caps, without Lid, without<br />
Contents<br />
78 Synthes <strong>Expert</strong> <strong>Tibial</strong> <strong>Nail</strong>
68.004.002 Vario Case for Standard Instruments<br />
for <strong>Expert</strong> <strong>Tibial</strong> <strong>Nail</strong>, without Lid,<br />
without Contents<br />
68.004.003 Vario Case for Radiolucent Instruments for<br />
<strong>Expert</strong> <strong>Tibial</strong> <strong>Nail</strong>, without Lid,<br />
without Contents (not shown here)<br />
Synthes 79
Instruments<br />
Power Tools<br />
511.300 Radiolucent Drive Mark II<br />
511.730 Jacobs Chuck with Key (large)<br />
511.750 Quick Coupling, for drill bits<br />
511.761 Large Quick Coupling<br />
511.785 Reduction Drive Unit<br />
511.790 Quick Coupling, for Kirschner wires<br />
530.010 Power Drive, complete<br />
530.100 Power Drive<br />
530.200 Battery, for Power Drive<br />
530.280 Battery Casing, for Power Drive<br />
80 Synthes <strong>Expert</strong> <strong>Tibial</strong> <strong>Nail</strong>
Presented by:<br />
Ö036.000.380öAC7ä<br />
0123<br />
036.000.380 SE_001078 AC 30060046 © Synthes 2006 <strong>Expert</strong>, Stardrive and Vario Case are trademarks of Synthes Subject to modifications