
Create successful ePaper yourself
Turn your PDF publications into a flip-book with our unique Google optimized e-Paper software.
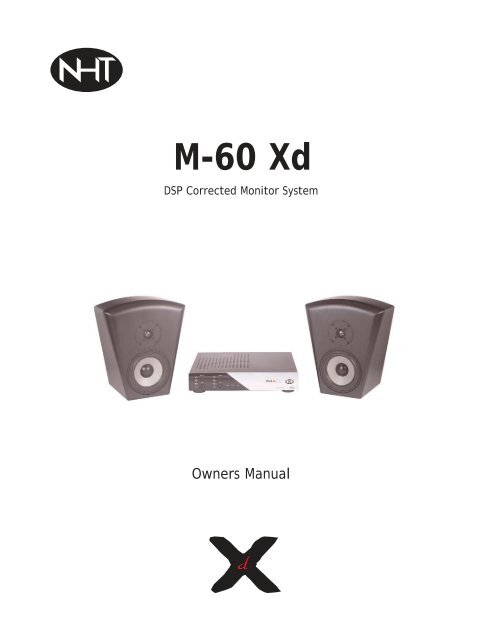
M-60 Xd<br />
DSP Corrected Monitor System<br />
<strong>Owners</strong> <strong>Manual</strong>
Safety instructions - Please Read First<br />
The lightning flash with arrowhead symbol, within an equilateral<br />
triangle, is intended to alert the user to the presence of<br />
uninsulated "dangerous voltage" within the product's enclosure<br />
that may be of sufficient magnitude to constitute a risk of electric<br />
shock to persons.<br />
The exclamation point within an equilateral triangle is intended to<br />
alert the user to the presence of important operating and<br />
maintenance (servicing) instructions in the literature accompanying<br />
the appliance.<br />
Marking by the "CE" symbol (shown left) indicates compliance of<br />
this device with the EMC (Electromagnetic Compatibility) and LVD<br />
(Low Voltage Directive) standards of the European Community.<br />
DETAILED SAFETY INSTRUCTIONS:<br />
All the safety and operation instructions should be read before the appliance is operated.<br />
Retain Instructions:<br />
The safety and operating instructions should be retained for future reference.<br />
Heed Warnings:<br />
All warnings on the appliance and in the operating instructions should be adhered to.<br />
Follow Instructions:<br />
All operation and user instructions should be followed.<br />
Water and Moisture:<br />
The appliance should not be used near water (e.g. near a bathtub, washbowl, kitchen sink. laundry tub, in a wet basement, or near a swimming<br />
pool etc.).<br />
Ventilation:<br />
The appliance should be situated so that its location or position does not interfere with its proper ventilation. For example, the appliance should not<br />
be situated on a bed, sofa, rug, or similar surface that may block the ventilation openings, or placed in a built-in installation, such as a bookcase<br />
or cabinet that may impede the flow of air through the ventilation openings.<br />
Heat:<br />
The appliance should be situated away from heat sources such as radiators, heat registers, stoves, or other appliances (including other amplifiers)<br />
that produce heat.<br />
Power Source:<br />
The appliance should only be connected to a power supply of the type described in the operating instructions or as marked on the appliance.<br />
Grounding and Polarization:<br />
Precautions should be taken so that the grounding or the polarization means of the appliance is not defeated.<br />
Power Cord Protection:<br />
Power supply cords should be routed so that they are not likely to be walked on or pinched by items placed upon or against them, paying particular<br />
attention to cords and plugs, convenience receptacles and the point where they exit from the appliance.<br />
Cleaning:<br />
The appliance should only be cleaned as recommended by the manufacturer.<br />
Non-use Periods:<br />
The power cord of the appliance should be unplugged from the outlet when left unused for a long period of time.<br />
Object and Liquid Entry:<br />
Care should be taken so that objects do not fall and liquids are not spilled into the enclosure through openings.<br />
Damage Requiring Service:<br />
The appliance should be serviced by qualified service personnel when;<br />
The power supply cord or the plug has been damaged; or<br />
Objects have fallen, or liquid has been spilled into the appliance; or<br />
The appliance has been exposed to rain; or<br />
The appliance does not appear to operate normally or exhibits a marked change in performance; or<br />
The appliance has been dropped, or the enclosure damaged.<br />
Servicing:<br />
The user should not attempt to service the appliance beyond what is described in the Operating Instructions. All other servicing should be referred<br />
to qualified service personnel.
INTRODUCTION<br />
The M-60 Xd is a high-resolution monitoring system designed for mixing, editing and mastering. The<br />
M-60 Xd employs DEQX calibration, a proprietary dsp correction system that corrects frequency and<br />
time domain response in real time. In addition, the system offers almost “brick wall” digital crossovers<br />
(up to 300dB per octave) and does all processing with latency less than 10ms making it useful for film<br />
production as well as music. The benefit to the audio professional is a wider sweet spot, a higher output<br />
system and dead-on accurate reproduction.<br />
The system includes a pair of monitors and a dedicated, outboard processor amplifier. The uniquely<br />
shaped cabinet is ideally designed for near-field listening. The wide baffle around the tweeter<br />
promotes even power response, and the narrow baffle surrounding the woofer reduces midrange<br />
reflections and reduces cabinet resonance. The lack of parallel surfaces on the cabinet minimizes the<br />
formation of internal standing waves. The drivers employed in the M60 monitors are designed for<br />
power handling and extremely low non-linear distortion.<br />
The XdA amplifier/processor houses the DEQX DSP processor, switching power supply and four<br />
150W, class D amplifiers. The system is bi-amplified, each amplifier is dedicated to a single driver in<br />
the system.<br />
The M-60Xd can be used as a stand alone monitor pair or be mated with the <strong>NHT</strong> S-80 subwoofer for<br />
a full range system. The M-60 Xd offers accuracy previously unknown in the loudspeaker universe.<br />
The system has a frequency response of +/- 0.5dB from 55Hz - 20kHz, with distortion less than 0.3%<br />
above 100Hz at 90dB SPL.<br />
The M-60 Xd is shipped with factory preset filters. The system is as future-proof as we can make it.<br />
As we develop new filters and other uses for the DEQX DSP engine, you can upgrade your system<br />
via the USB2.0 port found on the back of the XdA.
Unpack all cartons:<br />
Check Contents with Packaging Contents list below:<br />
Loudspeaker Carton<br />
- Loudspeaker<br />
Accessory Box:<br />
- 20' 4-conductor speaker wire<br />
with quad banana plugs on both ends<br />
- Rubber Pads<br />
XdA Carton:<br />
- Integrated Digital Amplifier<br />
- Power Cord<br />
- This <strong>Manual</strong>
XdA PLACEMENT<br />
The XdA is designed to be placed on a shelf or table. It should never be placed on a carpeted surface<br />
as this will affect the airflow coming into the unit on the bottom side. The feet should never be removed<br />
from the bottom of the unit. The XdA can be rack mounted with the aid of a rack pan or tray. At this<br />
time we do not have a rack ear option available for it.<br />
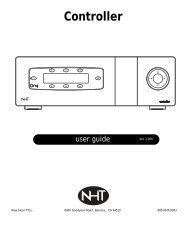
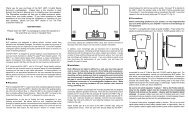
Before making any connections, make sure that all devices in the system are turned off. Connect the<br />
output of your mixer, preamplifier or soundcard to either the RCA or XLR inputs. The inputs are wired<br />
in parallel, so only one set of inputs should have patch cords connected to them at a time. The XLR<br />
inputs are wired as shown below.<br />
Inputs<br />
The XdA utilizes a switching power supply that automatically senses the incoming AC line voltage and<br />
adjusts accordingly. The range of AC voltages it can be used with is from 90-260VAC. There are no<br />
external fuses or switches that need to be changed when moving the unit from one country to<br />
another.<br />
A grounded power cord must always be used with the XdA. Never lift or break the ground connection.<br />
If your system installation has hum problems, fix the ground loop the proper way at the signal level<br />
connections. Excellent information on these problems and how to fix them are available at the Jensen<br />
Transformer's website, www.jensentransformers.com, under the white paper section.
M-60Xd SPEAKER CONNECTIONS<br />
The M-60 Xd system comes with a pair of 25' long 4-conductor speaker wires to connect the XdA to<br />
M-60 Xd speakers. Each end of the wires is pre-terminated with a quad banana plug. These banana<br />
plugs are lettered A, B, C, D to indicate the correct polarity for installation on the XdA and M-60 Xd<br />
end. Simply plug the wire in at each end observing the correct polarity.
If you need a longer wire run between your XdA and M-60 Xds, there a couple of options. You can purchase<br />
quad banana plug kits and bulk wire directly from <strong>NHT</strong> or fabricate your own. To facilitate your<br />
own harness construction, the A and B terminals of the quad banana plugs are spaced on standard<br />
¾" banana plug/binding post dimensions, as are the C and D terminals. The B and C terminals are not<br />
spaced on ¾" centers. Standard dual banana plugs can be plugged into the A-B and C-D terminals. If<br />
you fabricate your own harness, make absolutely sure to connect the A terminal on the XdA to the A<br />
terminal on the M-60 Xd. Do the same for the B, C and D terminals. Misconnecting the terminals can<br />
result in serious damage to the M-60 Xd speaker.<br />
Optional S-80 SUBWOOFER<br />
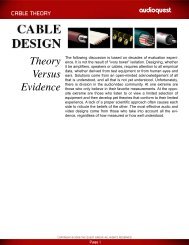
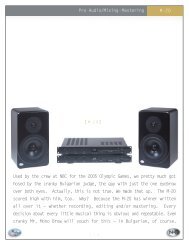
If you are using an S-80 subwoofer with your M-60 Xd system, connect the supplied XLR patch cord<br />
from the #1 XdW output on the back of the XdA to the input on the S-80 subwoofer. Set the XdW output<br />
switch on the back of the XdA to the Single subwoofer position.<br />
If you are using two S-80 subwoofers with your M-60 Xd system, connect the first S-80 to the #1 XdW<br />
output and the second S-80 to the #2 output. Set the XdW output switch to the Dual position.<br />
Single Subwoofer<br />
Dual Subwoofer<br />
For correct operation of your system with the S-80 subwoofer,<br />
you must have a subwoofer compatible filter set loaded into<br />
the XdA. For information on this, see your S-80 manual or<br />
contact <strong>NHT</strong>.
SYSTEM CONTROLS<br />
Power Switch:<br />
The main AC power switch is located on the rear panel by the IEC inlet socket for the AC power.<br />
Trigger Control:<br />
The XdA power status can be controlled several different ways through the External Trigger switch<br />
located on the rear panel. When the Trigger Mode is set to On, the XdA power will always be on. When<br />
set to Audio, the XdA will automatically power up whenever it detects an audio signal at either of the<br />
inputs. When set to Ext., the XdA will power up whenever it detects a 12VDC signal at the External<br />
Trigger input. When the XdA powers up from the power switch or any of the trigger sources, there may<br />
be a slight tick heard through the speakers. This is normal.
SPEAKER MODE:<br />
The XdA is programmed with four different filters for each of the two channels. Each of these filters is<br />
designed for a particular application or acoustic setting. For example one filter might have a bass rolloff<br />
at 80Hz for use with a subwoofer. Another filter may have rolled off high frequencies to compensate<br />
for a very reflective room, while another may cut the low frequencies of the M-60 Xd sharply to allow<br />
it to produce higher SPLs. The combination of these eight filters is called a filter set. Contact <strong>NHT</strong> or<br />
visit our website at www.nhthifi.com to find out what other filter sets are available for your M-60 Xd<br />
system.<br />
The ability of the M-60 Xd system to change performance characteristics simply by changing the filter<br />
set is one of the great advantages of DSP processing that the M-60 Xd system offers. What follows<br />
below is a description of the stock filter settings in the M-60 Xd system as shipped from <strong>NHT</strong> and how<br />
to access them.<br />
Each filter setting is accessed by the mode buttons on the front panel of the XdA. The left mode<br />
button accesses the four filters for channel 1, the right button accesses the filters for channel 2. To<br />
change the filter setting for one of the channels, simply depress the mode button for that channel until<br />
the appropriate icon is illuminated. The top icon is for filter setting #1, the next icon down is for filter<br />
setting #2 and so forth.<br />
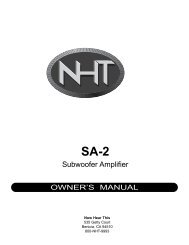
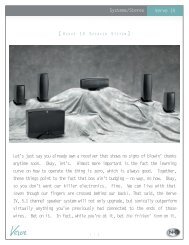
Set 1:<br />
In this filter setting, the system has a flat<br />
frequency response that rolls off slowly below<br />
70Hz.<br />
Set 2:<br />
In this filter setting, the system has a flat<br />
frequency response that rolls off sharply below<br />
45Hz.
Set 3:<br />
In this filter setting, the system has a flat<br />
frequency response that rolls off sharply below<br />
45Hz and a 1dB depression from 2-6kHz.<br />
Set 4:<br />
In this filter setting, the system has a flat<br />
frequency response that rolls off sharply below<br />
45Hz and a 1dB shelving above 2kHz. (See the<br />
specifications page for details of the frequency<br />
response differences.)<br />
LOCKOUT MODE:<br />
If neither mode button is depressed for<br />
several minutes, most of the front panel illumination<br />
turns off and the mode buttons become<br />
inactive. This feature serves several purposes.<br />
It saves power, reduces ambient light when<br />
doing video work, and most importantly keeps<br />
prying fingers from messing with your controls!<br />
To gain access to the mode functions again,<br />
depress both mode buttons for several seconds<br />
until the front panel illuminates again.
FRONT PANEL ICONS:<br />
Standby:<br />
This text illuminates whenever the XdA is in standby. See the Trigger Control section for more<br />
details.<br />
Power:<br />
This text illuminates whenever the XdA is powered up and operational.<br />
Fault:<br />
This text illuminates whenever the XdA detects a fault condition. There are several situations that<br />
can cause this.<br />
If one of the speaker outputs is shorted to each other or ground, the fault light will stay on until the<br />
condition is fixed and the XdA is power cycled. The amplifier channel with the shorted speaker wire<br />
will remain muted until the condition is fixed.<br />
If any of the amplifiers has excessive DC at its output, the fault light will remain on and that channel<br />
will remain muted.<br />
If any of the amplifiers’ temperature gets too high for safe operation, the fault light will illuminate and<br />
that channel will mute. To fix the condition, the amplifier must cool off at least 10 degrees C and<br />
then be power cycled.<br />
If any of the amplifiers are driven into clipping, the fault light will flash during clipping. If the amplifier<br />
is driven into clipping excessively, the over current protection will trip and that channel will mute. To<br />
reset this protection, power cycle the XdA.
SPEAKER PLACEMENT:<br />
The M-60 Xd Monitor System is intended to provide consistent performance over a wide range of<br />
placement situations. This is accomplished through the use of electrical controls, wide dispersion<br />
drivers, advanced enclosure design and carefully chosen crossover characteristics. Nevertheless, it<br />
is always worth investing time and effort experimenting with optimum loudspeaker placement. In all<br />
cases, the M-60 Xd Monitors should be set up the same distance from the listening position (see fig.<br />
8 below). This is important in order to insure equal arrival time of all channels to the listening position.<br />
Ideally, the tweeter height on the M-60 Xd monitor, as with all channels, should be on axis with your<br />
ears, or slightly above. Also, remember that nearby reflective surfaces (including video monitors) can<br />
alter impulse response, blur imaging and change tonality; giving the M-60 Xd as much room as<br />
possible assures the highest-quality reproduction.<br />
SYSTEM OPERATION:<br />
The M-60 Xd is capable of very high output levels, especially when listening in the near field. Still,<br />
every speaker system has its limits. Harsh breakup at extremely high volume, or heat emanating from<br />
the drivers is an indication that the system has exceeded its output limits and that you should lower<br />
the playback level. Watch for excessive lighting of the front panel overload indicator on the Control<br />
Amplifier. Speaker damage most often occurs from sustained high volume levels, not from transient<br />
sounds or brief musical peaks. Protect your ears and use common sense.<br />
M-60 Xd MONITOR SYSTEM CARE:<br />
Except for the occasional flattering comment, your M-60 Xd System needs no regular maintenance.<br />
Never attempt to clean the M-60 Xd Monitor driver units except for very light feather dusting. The M-<br />
60 Xd Monitor cabinets and the M-60 Xd Control Amplifier front panel can be cleaned using a damp,<br />
soft cotton cloth, first sprayed with a mild, non-abrasive glass cleaner and with the unit unplugged and<br />
AC power off. Never spray the speaker or amplifier directly! Avoid silicone and oil based cleaners or<br />
treatments.
NEED SOME HELP?<br />
Technical Support can be reached several ways: Telephone us 800-<strong>NHT</strong>-9993 (648-9993), E-mail<br />
us at: tech@nhtpro.com, Fax us at: (707) 747-1252 or write us at: <strong>NHT</strong>, 6400 Goodyear Rd. Benicia,<br />
CA 94510. Visit our web site at www.nhtpro.com for more info and product updates.<br />
SYSTEM SPECIFICATIONS:<br />
Monitor:<br />
Type: DSP corrected/powered near/midfield monitor<br />
Configuration: 2-way, Acoustic Suspension<br />
Woofer: 6.5" magnesium cone, super linear motor<br />
Tweeter: 1" aluminum dome, textile surround, ferrofluid cooled<br />
Magnetic Shielding: Full<br />
Loudspeaker Dimensions: 15” x 13” x 10”<br />
Weight: 17.5 lbs.<br />
Loudspeaker Materials: Machined MDF of various thicknesses<br />
Amplifier/DSP processor:<br />
Amplifier Power: 150W RMS x 4, 300W x 4 peak<br />
Peak Acoustic Output: 112dB SPL (100ms pink noise at 1M)<br />
Residual acoustic noise:
XdA ARCHITECTURE<br />
Limited Warranty<br />
Valid Only in the U.S.A.<br />
Warranty Period<br />
For a period of 3 years for parts and 3 years for labor from the date this product is first purchased from an authorized <strong>NHT</strong> dealer, Now Hear This (<strong>NHT</strong>) warrants that if it<br />
fails to function properly due to a manufacturing defect, despite its being installed and operated according to these instructions and used under normal conditions, it will<br />
be either replaced or repaired with new or rebuilt parts (both at <strong>NHT</strong>'s option) with a unit of comparable value without charge to you.<br />
What's Not Covered<br />
Altered, defaced or removed serial numbers void this warranty.<br />
This warranty does not cover any product used in trade, business, industrial or commercial applications.<br />
This warranty also does not cover the cabinet or appearance factors, or costs, defects or damage resulting from misuse, abuse, accident, improper maintenance, alterations<br />
or modifications not authorized in writing by <strong>NHT</strong>, or parts or labor from any source other than an authorized <strong>NHT</strong> service location.<br />
Damage due to power exposure in excess of the speaker's published power ratings; ie, overpowering, lightning or power surges, are also not covered.<br />
Your Rights<br />
This warranty gives you specific legal rights, and you may have other rights which vary from state to state.<br />
<strong>NHT</strong> limits this warranty to the purchase price of the product, excludes incidental or consequential damages, and limits its obligations under any implied warranties under<br />
state laws to a period not exceeding their warranty periods. As some states do not allow the above limitations, however, they may not apply to you.<br />
To Obtain Service<br />
To find the name and address of the nearest authorized <strong>NHT</strong> service location, call or write:<br />
Customer Service Department, <strong>NHT</strong>, 6400 Goodyear Rd., Benicia, CA 94510, 1-800-<strong>NHT</strong>-9993 (648-9993), www.nhthifi.com<br />
For your future convenience, please keep this warranty with your sales receipt, and record date and place of purchase for further reference.