Using Google Sites Introduction to Google Sites Creating a Site
Using Google Sites Introduction to Google Sites Creating a Site
Using Google Sites Introduction to Google Sites Creating a Site

You also want an ePaper? Increase the reach of your titles
YUMPU automatically turns print PDFs into web optimized ePapers that Google loves.
<strong>Using</strong> <strong>Google</strong> <strong><strong>Site</strong>s</strong><br />
<strong>Introduction</strong> <strong>to</strong> <strong>Google</strong> <strong><strong>Site</strong>s</strong><br />
<strong>Google</strong> <strong><strong>Site</strong>s</strong> is an online application that makes creating a team website as easy as<br />
editing a document. With <strong>Google</strong> <strong><strong>Site</strong>s</strong>, you can quickly gather a variety of<br />
information in one place -- including videos, calendars, presentations, attachments,<br />
and text -- and easily share it for viewing or editing with a small group, an entire<br />
organization, or the world.<br />
Here's what you can do with <strong>Google</strong> <strong><strong>Site</strong>s</strong>:<br />
• Cus<strong>to</strong>mize your site's look.<br />
• Create sub-pages <strong>to</strong> keep your content organized.<br />
• Choose page types: webpage, announcements, file cabinet.<br />
• Keep your web content (for example, videos, online documents, Picasa pho<strong>to</strong><br />
slide shows, i<strong>Google</strong> gadgets) and offline files in one central location.<br />
• Keep your site as private or public as you'd like.<br />
• Search across your <strong>Google</strong> <strong><strong>Site</strong>s</strong> content with <strong>Google</strong> search technology.<br />
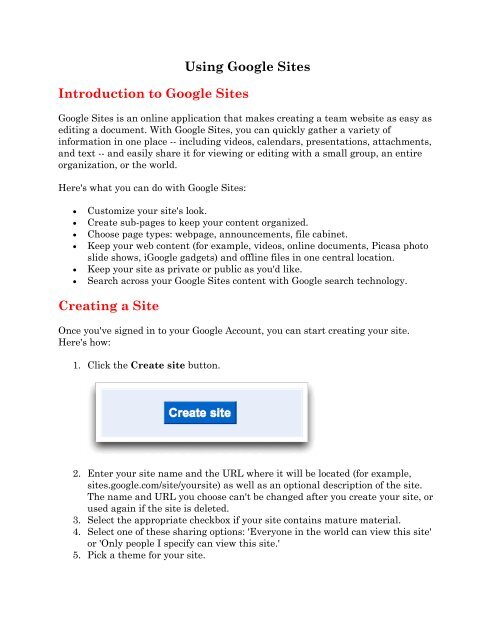
<strong>Creating</strong> a <strong>Site</strong><br />
Once you've signed in <strong>to</strong> your <strong>Google</strong> Account, you can start creating your site.<br />
Here's how:<br />
1. Click the Create site but<strong>to</strong>n.<br />
2. Enter your site name and the URL where it will be located (for example,<br />
sites.google.com/site/yoursite) as well as an optional description of the site.<br />
The name and URL you choose can't be changed after you create your site, or<br />
used again if the site is deleted.<br />
3. Select the appropriate checkbox if your site contains mature material.<br />
4. Select one of these sharing options: 'Everyone in the world can view this site'<br />
or 'Only people I specify can view this site.'<br />
5. Pick a theme for your site.
6. Enter the wavy characters in the word verification section, and click the<br />
Create site but<strong>to</strong>n.<br />
Now that you've created your site, you can create a new page by clicking the Create<br />
page but<strong>to</strong>n.<br />
Then, name the new page and select the type of page you want: webpage, dashboard,<br />
announcement, file cabinet, or list. After you've selected where you want <strong>to</strong> locate<br />
the page, click the Create Page but<strong>to</strong>n at the bot<strong>to</strong>m of the page.<br />
Editing Your <strong>Site</strong><br />
To edit your site, click the Edit Page but<strong>to</strong>n in the upper right hand corner of the<br />
screen.<br />
The edit <strong>to</strong>olbar will provide you with the <strong>to</strong>ols necessary <strong>to</strong> edit your site.<br />
Here's what each option does:<br />
Undo and redo changes<br />
You can undo and redo changes by clicking the arrow but<strong>to</strong>ns in the <strong>to</strong>olbar. You<br />
can also use these keyboard shortcuts:<br />
• Undo (Ctrl-z)<br />
• Redo (Ctrl-y or Shift-Ctrl-z)<br />
Change the font type and size<br />
You can select the font type and size using the two drop-down menus.
Edit text<br />
Add boldface type and italics, underline text, and change the color of your text or<br />
text background:<br />
• B adds boldface type<br />
• I allows you <strong>to</strong> italicize<br />
• U underlines text<br />
• A changes text color<br />
• The marker changes the text background color<br />
Create a link<br />
Highlight the text that you want <strong>to</strong> turn in<strong>to</strong> a link, and click the Link but<strong>to</strong>n. A<br />
window appears with these options for creating your link:<br />
• Existing page<br />
• Web address<br />
• Create a new page and link <strong>to</strong> it<br />
Create a list<br />
Click the Numbered list but<strong>to</strong>n or the Bulleted list but<strong>to</strong>n, depending on the type<br />
of list you need <strong>to</strong> add <strong>to</strong> the site. Then type the first item, and press Enter. The<br />
next number or bullet point appears.
The Tab key can help you indent your bullet points, while the Enter key will move<br />
back your indentation.<br />
Indent or move your list<br />
Click the two but<strong>to</strong>ns next <strong>to</strong> the bulleted list <strong>to</strong> indent or move back the starting<br />
point when adding a bulleted or numbered list. Click twice <strong>to</strong> move each item two<br />
spaces, and so forth.<br />
Align your text<br />
Use these but<strong>to</strong>ns for your page alignment. You have the option <strong>to</strong> align the text on<br />
your page <strong>to</strong> the left, center, or right side of the page.<br />
Remove formatting and edit HTML<br />
You can remove the formatting from any part of your page by highlighting the<br />
relevant text and clicking this icon.<br />
Click the HTML but<strong>to</strong>n <strong>to</strong> edit the HTML on your site. Please keep in mind that we<br />
do limit the amount of editing that can be done. Some advanced coding won't work.<br />
Inserting Objects and Apps<br />
To start adding objects and apps <strong>to</strong> your site, just click Edit page, select Insert,<br />
and pick the object or app you'd like <strong>to</strong> insert.<br />
When the embedded app (a <strong>Google</strong> Docs Presentation,<br />
for example) is updated at its source and published (in<br />
this example, within <strong>Google</strong> Docs), it gets updated<br />
au<strong>to</strong>matically within <strong><strong>Site</strong>s</strong>. Make sure you set the app<br />
<strong>to</strong> au<strong>to</strong>matically republish changes, so your site's<br />
information is always updated.<br />
Here are some of the objects you can insert:<br />
An image: Click Insert, select Image, and either<br />
browse for an image on your machine or upload one<br />
from a specific web address. After you've uploaded and<br />
saved the image, you can click it <strong>to</strong> view it in full<br />
screen. You can choose one of these standard sizes for<br />
your image: small, medium, large, or original size. If<br />
you'd like <strong>to</strong> resize your image manually on the page,<br />
click the HTML but<strong>to</strong>n and within the source view,
include attributes for width, height, or both, within the 'img src' tag.<br />
A <strong>Google</strong> Docs Spreadsheet: Select Spreadsheet from the Insert drop-down<br />
menu, and a window appears with a list of the spreadsheets that you own or can<br />
view or edit in <strong>Google</strong> Docs. Click the spreadsheet you want <strong>to</strong> insert, or enter the<br />
URL in the box right below the list of spreadsheets. Click Select and you'll see the<br />
properties of the spreadsheet. Select your options and click Save.<br />
A video: Click Insert, select Video, and upload a video from YouTube or <strong>Google</strong><br />
Video. Paste the URL, enter a title, and save.<br />
Inserting gadgets<br />
To easily embed rich media, retrieve feeds, or perform simple tasks like managing a<br />
<strong>to</strong>-do list, you can insert gadgets in<strong>to</strong> your site. Click Edit page, select Insert, and<br />
choose one of the gadgets in the menu.<br />
For example, insert the Recent posts gadget <strong>to</strong> display<br />
the announcements posted <strong>to</strong> the site, or the Recently<br />
updated files gadget, <strong>to</strong> show recent files. To view<br />
gadgets created by third-party sites, click More gadgets...<br />
and a window appears.<br />
Select the type of<br />
gadget you want <strong>to</strong><br />
insert by clicking the<br />
links on the left side,<br />
select a gadget, and<br />
click OK <strong>to</strong> save. If<br />
you'd like <strong>to</strong> first check<br />
how the gadget looks in<br />
your site, click<br />
Preview Gadget first.
Sharing and Collaborating<br />
Sharing your site<br />
Now that you've created your <strong>Google</strong> site, you can share it with your friends, family,<br />
coworkers, or make it public. Just click More actions in the <strong>to</strong>p right of any page<br />
and select Share this site.<br />
As the site owner, you can control who can edit and view your site by adding others<br />
as owners, collabora<strong>to</strong>rs, or viewers. Follow these steps:<br />
1. Enter the email addresses of the people you'd like <strong>to</strong> add.<br />
2. Select 'as owners,' 'as collabora<strong>to</strong>rs,' or 'as viewers.'<br />
3. Click Invite these people. Then write a message and click Send if you'd<br />
like <strong>to</strong> send an invitation, or click Skip sending an invitation <strong>to</strong> add people<br />
<strong>to</strong> your site without sending them an invitation. They'll still be able <strong>to</strong> access<br />
the site if they know the URL.<br />
Here's what owners can do:<br />
• Invite other owners, collabora<strong>to</strong>rs, or viewers<br />
• Change site themes, and layout<br />
• Change the site name<br />
• Delete the site<br />
• Do everything a collabora<strong>to</strong>r can do<br />
Here's what collabora<strong>to</strong>rs can do:
• Create, edit, delete pages<br />
• Move pages<br />
• Add attachments<br />
• Add comments<br />
• Add pages <strong>to</strong> and remove them from the sidebar navigation<br />
• Subscribe <strong>to</strong> site and page changes<br />
Here's what viewers can do:<br />
• View pages<br />
You can send up <strong>to</strong> 50 invites per day. If you make your site public, you don't need<br />
<strong>to</strong> send invitations for people <strong>to</strong> be able <strong>to</strong> view it.<br />
Note: if you use <strong>Google</strong> Apps, you can control who can edit and view by domain.<br />
However, your domain administra<strong>to</strong>r may restrict the ability <strong>to</strong> share outside the<br />
domain.<br />
Revision his<strong>to</strong>ry<br />
While you and your collabora<strong>to</strong>rs are editing your site, you can keep track of<br />
changes (and of the person who made them), and even revert <strong>to</strong> an older version by<br />
using 'Revision his<strong>to</strong>ry.' From your site, click More actions in the <strong>to</strong>p right of any<br />
page and select Revision his<strong>to</strong>ry.<br />
On the next page, you'll see a list of the site<br />
versions, the date and time each was last edited,<br />
and the name of the person who made the changes.<br />
You can also compare two revisions at a time by<br />
selecting one version and clicking the Compare<br />
two versions link.<br />
If you change your mind about the most recent<br />
edits you or your collabora<strong>to</strong>rs made <strong>to</strong> the site,<br />
simply revert <strong>to</strong> an older version. Here's how:<br />
1. Click any version from the list. Optionally,<br />
while viewing a particular version, use the<br />
Compare two versions link <strong>to</strong> see the<br />
differences highlighted.<br />
2. After returning <strong>to</strong> the 'Version his<strong>to</strong>ry' view,<br />
click the Revert <strong>to</strong> this version link next <strong>to</strong> the version you'd like <strong>to</strong> revert<br />
<strong>to</strong>.
Your document is reset <strong>to</strong> the version you selected. The replaced version is also<br />
included in the version his<strong>to</strong>ry and can be res<strong>to</strong>red as well.<br />
Assignment:<br />
You are <strong>to</strong> create a <strong>Google</strong> site that is made up of at least three separate pages. You can<br />
make the contents any thing you want; personal interests, hobbies, clubs, or things you are<br />
just interested in. You should include some graphics and if possible some of the <strong>Google</strong><br />
widgets that are readily available within <strong>Google</strong> <strong><strong>Site</strong>s</strong>.<br />
When complete, you are <strong>to</strong> make your site public and email me the URL so that I can<br />
review it.