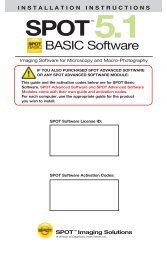
Installing the Software - SPOT Imaging Solutions
Installing the Software - SPOT Imaging Solutions
Installing the Software - SPOT Imaging Solutions

Create successful ePaper yourself
Turn your PDF publications into a flip-book with our unique Google optimized e-Paper software.
Table of Contents<br />
Table of Contents<br />
Table of Contents .....................................................................................................................................1<br />
Installation Guidelines.............................................................................................................................3<br />
Introduction...............................................................................................................................................3<br />
System Requirements ..............................................................................................................................3<br />
Equipment Standards - Windows.....................................................................................................3<br />
Equipment Standards - Mac.............................................................................................................4<br />
Equipment Standards – General......................................................................................................5<br />
What is in <strong>the</strong> Box .....................................................................................................................................5<br />
<strong>Installing</strong> <strong>the</strong> <strong>Software</strong> .............................................................................................................................5<br />
Windows Installation...........................................................................................................................6<br />
Video Card Related Problems (Windows) ................................................................................7<br />
Mac Installation ..................................................................................................................................7<br />
<strong>Installing</strong> <strong>the</strong> Hardware ...........................................................................................................................8<br />
Connecting <strong>the</strong> Camera to <strong>the</strong> Microscope.................................................................................8<br />
<strong>Installing</strong> FireWire Port Adapter Cards (Optional)..........................................................................8<br />
Multiple Camera Installations ................................................................................................................9<br />
Using <strong>the</strong> <strong>SPOT</strong> On-line Documentation ...............................................................................................9<br />
Specifications .........................................................................................................................................11<br />
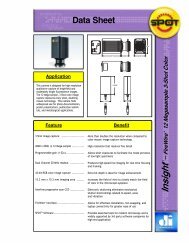
Insight Series Catalog Information ......................................................................................................13<br />
FCC “Class A” Product Warning ..........................................................................................................14<br />
Spot Insight Hardware Guide 1
Installation Guidelines<br />
Installation Guidelines<br />
Introduction<br />
The following sections detail <strong>the</strong> system and installation guidelines for using <strong>the</strong> <strong>SPOT</strong> Insight camera and<br />
v 4.5 of <strong>the</strong> <strong>SPOT</strong> software. They are as follows:<br />
• System Requirements<br />
• What is in <strong>the</strong> Box<br />
• <strong>Installing</strong> <strong>the</strong> <strong>Software</strong><br />
• <strong>Installing</strong> <strong>the</strong> Hardware<br />
• Multiple Camera Installations<br />
• Using <strong>SPOT</strong> On-line Documentation<br />
System Requirements<br />
The following sections detail <strong>the</strong> minimum hardware and software requirements needed for <strong>the</strong> <strong>SPOT</strong><br />
Insight FireWire camera and associated software. These requirements are valid at <strong>the</strong> time of your camera<br />
purchase and may change with future development of our camera and software products as well as <strong>the</strong><br />
computers to which <strong>the</strong>y interface. For optimal system suggestions, please consult our website at<br />
www.diaginc.com for <strong>the</strong> timeliest information.<br />
<br />
Note: For <strong>the</strong> most up-to-date suggestions on an optimal computer system configuration, please<br />
consult our website at www.diaginc.com<br />
Equipment Standards - Windows<br />
Minimum<br />
Processor<br />
Pentium,<br />
400 MHz<br />
Video Card<br />
A card that supports 24 bit, true color at <strong>the</strong> desired resolution with a refresh rate above<br />
70 Hz.<br />
With some video cards, you might experience system crashes or display problems in live image mode; you might also<br />
experience display problems when zooming in on captured images. To correct <strong>the</strong>se problems, lower <strong>the</strong> Graphics<br />
Acceleration setting in Windows, as described in <strong>the</strong> “Video Card Related Problems” section below.<br />
RAM<br />
FireWire (IEEE1394a)<br />
Port<br />
FireWire-PCI Adapter<br />
Card (optional for<br />
desktop)<br />
FireWire-PCMCIA<br />
Cardbus Adapter<br />
(optional for laptop)<br />
256 Mb<br />
One available 6 pin (6-4 pin converters available for special order)<br />
One available PCI slot<br />
One available PCMCIA Cardbus slot<br />
Spot Insight Hardware Guide 3
Installation Guidelines<br />
Equipment Standards – Windows (cont.)<br />
Minimum<br />
Monitor<br />
Operating System<br />
Any color monitor with at least 800 x 600 pixel resolution at 24 bit RGB, and a refresh rate<br />
over 70 Hz.<br />
Windows 98SE/2000/ME/XP<br />
Windows 95, 98, and NT are not supported for <strong>the</strong> Insight FireWire Camera System<br />
Printer<br />
Web Browser<br />
Driver required for reports feature<br />
Internet Explorer 5.0 or greater<br />
Equipment Standards - Mac<br />
Minimum<br />
Processor<br />
Video Memory/<br />
Card<br />
RAM<br />
FireWire (IEEE1394a)<br />
Port<br />
Monitor<br />
Operating System<br />
Printer<br />
Image Editing <strong>Software</strong><br />
(optional)<br />
400 MHz G3 PowerPC<br />
Enough video memory on ei<strong>the</strong>r <strong>the</strong> mo<strong>the</strong>r board or a plug in video card to display<br />
millions of colors at <strong>the</strong> desired resolution, and with a refresh rate above 70 Hz<br />
256 Mb<br />
One available 6 pin (6-4 pin converters available for special order)<br />
Any color monitor with at least 800 x 600 pixel resolution at 24 bit RGB, and a refresh rate<br />
over 70 Hz.<br />
Mac OS10.2.8 or greater<br />
Driver required for reports feature<br />
The <strong>SPOT</strong> 3 rd Party Interface, which is included with Mac software, is a stand-alone miniapplication<br />
designed for Mac users who want to use <strong>the</strong> <strong>SPOT</strong> camera to capture<br />
images, and <strong>the</strong>n edit <strong>the</strong> images in ano<strong>the</strong>r imaging application. Some commonly used<br />
third party applications include:<br />
• Adobe Photoshop<br />
• Image Pro Plus<br />
• Color It<br />
The image editing software used with <strong>the</strong> <strong>SPOT</strong> 3 rd Party Interface does not need to be<br />
TWAIN compliant. Refer to Ch. 17 – Using O<strong>the</strong>r Mac <strong>Imaging</strong> Applications for more<br />
information.<br />
4 Spot Insight Hardware Guide
Installation Guidelines<br />
Equipment Standards – General<br />
Additional Hardware and <strong>Software</strong><br />
Coupler<br />
Lens<br />
Light Source<br />
For F-mount Insight cameras, use a 1.0x F mount coupler.<br />
For C-mount Insight cameras, use a 1.0x C mount coupler.<br />
C- Mount lens for 1” format CCD<br />
Because <strong>the</strong> <strong>SPOT</strong> Insight camera is capable of extremely short exposure times, light<br />
sources whose intensity varies with <strong>the</strong> waveform of <strong>the</strong> 60 Hz line supply should be<br />
avoided. Problem light sources include fluorescent lamps, 120-volt incandescent bulbs,<br />
and 6 volt 20 watt halogen lamps. These light sources cause <strong>the</strong> Live Image window to<br />
flicker and result in incorrect brightness and color balance readings in captured images.<br />
We have found that <strong>the</strong> low voltage halogen/xenon lamps used on most microscopes<br />
work well, as do <strong>the</strong> mercury burners used on fluorescence illuminators.<br />
If your work requires you to use a light source that causes problems, you can use <strong>the</strong><br />
Minimum Exposure option on <strong>the</strong> Image Setup window to avoid flicker and give you<br />
correct brightness and color balance readings. Refer to Ch. 5 – Preparing to Take a<br />
Picture for more information.<br />
What is in <strong>the</strong> Box<br />
In addition to this hardware guide, <strong>the</strong> shipping box should contain <strong>the</strong> following items:<br />
• Camera head with a dust cap<br />
• Power supply (with cable to camera)<br />
• Power cord for <strong>the</strong> power supply<br />
• Spot <strong>Software</strong> User Guide<br />
• Insight Hardware Guide<br />
• 6 pin to 6 pin FireWire (IEEE 1394a) data cable to connect <strong>the</strong> camera to <strong>the</strong> FireWire port on <strong>the</strong><br />
computer (10 feet long)<br />
• One CD-R that contains:<br />
− The software required to operate <strong>the</strong> <strong>SPOT</strong> camera.<br />
− A PDF (portable document format) version of <strong>the</strong> Spot <strong>Software</strong> User Guide and <strong>the</strong> Spot Insight<br />
−<br />
Hardware Guide.<br />
The Adobe Acrobat Reader software that is required to read and/or print <strong>the</strong> user's manual. Refer<br />
to “Using <strong>SPOT</strong> On-line Documentation” below for instructions on installing <strong>the</strong> Reader on your<br />
computer.<br />
• A registration card (you may also register online at www.diaginc.com)<br />
• 2 year limited warranty<br />
<strong>Installing</strong> <strong>the</strong> <strong>Software</strong><br />
The CD disk provided with your Insight FireWire camera contains <strong>the</strong> <strong>SPOT</strong> 4.5 software, which can be<br />
used with:<br />
• Windows 98SE (second edition)/2000/ME/XP<br />
• Mac OS10.2.8 or higher<br />
Spot Insight Hardware Guide 5
Installation Guidelines<br />
<br />
Note: In some instances, on older model computer systems, Diagnostic Instruments has found<br />
that <strong>SPOT</strong> users with <strong>the</strong> Windows 2000 operating system will get a No response from<br />
camera… message when trying to ei<strong>the</strong>r capture an image or view a live image. This is due to<br />
incorrect BIOS settings. For information on correcting this problem, refer to Appendix D:<br />
Selected Error Messages.<br />
Windows Installation<br />
1. Ensure that all o<strong>the</strong>r application programs are closed. Windows 2000 and XP users should also ensure<br />
that <strong>the</strong>y are logged on with administrator privileges.<br />
2. Insert <strong>the</strong> disk into your CD drive. The <strong>SPOT</strong> InstallShield Wizard automatically runs, and <strong>the</strong> Setup<br />
window appears.<br />
3. Click on Next at <strong>the</strong> Readme Information window. The User Information window appears. Enter<br />
your name and company name.<br />
4. Click on Next. The Choose Destination Location window appears. Ei<strong>the</strong>r press <strong>the</strong> Browse button to<br />
specify <strong>the</strong> destination directory, or click on Next to accept <strong>the</strong> default directory, C:\SpotCam.<br />
5. The Select Program Folder window appears. Click on Next. The Start Copying Files window<br />
displays <strong>the</strong> settings that you selected. Ei<strong>the</strong>r click on Next to accept <strong>the</strong> settings, or click on Back to<br />
return to <strong>the</strong> previous screens and revise <strong>the</strong> settings.<br />
6. After you have accepted <strong>the</strong> settings, <strong>the</strong> program files are copied over, and <strong>the</strong> installation program<br />
prompts you with <strong>the</strong> message Will <strong>the</strong>re be a <strong>SPOT</strong> camera connected this computer?<br />
7. Select Yes. The installation program runs and looks for a camera and a device driver is installed. If<br />
you select No, <strong>the</strong> program still installs but will not install a driver for camera support.<br />
8. When <strong>the</strong> installation is complete you may be requested to re-start your computer.<br />
9. You should see <strong>the</strong> following two desktop shortcuts.<br />
Use <strong>the</strong> <strong>SPOT</strong> Advanced program mode if you are an experienced<br />
user, or you are a new user who wants to explore <strong>the</strong> broad range of<br />
functionality and choices offered by <strong>the</strong> program.<br />
Use <strong>the</strong> <strong>SPOT</strong> Basic program mode if you are a new user who wants<br />
to immediately begin taking high quality pictures without having to<br />
make a lot of processing decisions.<br />
To replace a shortcut that was deleted from <strong>the</strong> desktop, follow <strong>the</strong>se steps:<br />
a) Right click on <strong>the</strong> desktop.<br />
b) Select New > Shortcut. The Create Shortcut window appears.<br />
c) Enter <strong>the</strong> information in <strong>the</strong> Command line box (this presumes that you selected <strong>the</strong> default<br />
Spotcam directory in step 4 above).<br />
♦ For <strong>the</strong> Advanced program, enter C:\Spotcam\Spot32.exe -a<br />
♦<br />
For <strong>the</strong> Basic program, enter C:\Spotcam\Spot32.exe.<br />
If you found <strong>the</strong> file by browsing, you will see only one Spot32.exe program. If <strong>the</strong> shortcut is for<br />
<strong>the</strong> Advanced program, you will have to modify <strong>the</strong> command line, as described above.<br />
d) Click on Next.<br />
e) Name <strong>the</strong> shortcut.<br />
6 Spot Insight Hardware Guide
Installation Guidelines<br />
f) Click on Finish. The new shortcut appears on <strong>the</strong> desktop.<br />
Video Card Related Problems (Windows)<br />
Diagnostic Instruments has found that when <strong>the</strong> graphics acceleration is set too high on certain video cards,<br />
<strong>the</strong> <strong>SPOT</strong> program can crash when using <strong>the</strong> Live Image feature or <strong>the</strong> Live Image can be corrupted. If you<br />
experience this problem, change <strong>the</strong> Graphics Acceleration in Windows to a lower setting. Follow <strong>the</strong>se<br />
steps:<br />
1. From <strong>the</strong> Start menu button, select Settings > Control Panel.<br />
2. Double click on <strong>the</strong> Display icon,<br />
3. Click on <strong>the</strong> Settings tab.<br />
4. Click on <strong>the</strong> Advanced button.<br />
5. Click on <strong>the</strong> Performance tab.<br />
6. Change <strong>the</strong> Hardware Acceleration setting by moving <strong>the</strong> slider to a lower setting. With some cards,<br />
you might have to move <strong>the</strong> slider to <strong>the</strong> lowest setting in order for live imaging to work.<br />
7. Click on Apply.<br />
8. Click on OK.<br />
9. Click on Close.<br />
Mac Installation<br />
The CD disk provided with your camera contains <strong>the</strong> <strong>SPOT</strong> software, which can be used with Mac OS10.1<br />
or higher. Ensure that you have an administrator password BEFORE BEGINNING THE<br />
INSTALLATION.<br />
To install <strong>the</strong> <strong>SPOT</strong> software on a Mac, follow <strong>the</strong> steps listed below.<br />
1. Insert <strong>the</strong> disk into your CD drive.<br />
2. Double click on <strong>the</strong> installer icon.<br />
3. Enter <strong>the</strong> Administrator User Name and Password<br />
4. Click on Continue. The Spot Installer window appears.<br />
5. Select <strong>the</strong> installation location for <strong>the</strong> program.<br />
6. Click on Install. The <strong>Installing</strong> progress indicator appears.<br />
7. When <strong>the</strong> installation is complete, you may be notified that <strong>the</strong> computer will restart.<br />
Spot Insight Hardware Guide 7
Installation Guidelines<br />
<strong>Installing</strong> <strong>the</strong> Hardware<br />
There are three simple steps to installing <strong>the</strong> hardware:<br />
• Connect <strong>the</strong> camera to <strong>the</strong> microscope<br />
• Connect your camera to <strong>the</strong> computer using <strong>the</strong> 6 pin to 6 pin FireWire cable<br />
• Connect <strong>the</strong> power supply to <strong>the</strong> camera and to <strong>the</strong> appropriate electrical supply.<br />
<br />
Note: Although <strong>the</strong> <strong>SPOT</strong> software can be installed ei<strong>the</strong>r before or after installing <strong>the</strong> FireWire<br />
cable, Diagnostic Instruments recommends installing <strong>the</strong> software first.<br />
WARNING<br />
This (<strong>the</strong> <strong>SPOT</strong> camera) is a Class A Product. In a domestic environment this product may cause<br />
radio interference in which case <strong>the</strong> user may be required to take adequate measures.<br />
Connecting <strong>the</strong> Camera to <strong>the</strong> Microscope<br />
To attach <strong>the</strong> camera to <strong>the</strong> microscope, follow <strong>the</strong>se steps:<br />
1. Attach <strong>the</strong> bottom clamp to <strong>the</strong> coupler.<br />
2. Screw <strong>the</strong> Insight camera into <strong>the</strong> coupler/bottom clamp until it is tight.<br />
3. Insert <strong>the</strong> camera/coupler/bottom clamp combination into <strong>the</strong> microscope’s photoport or phototube.<br />
4. Tighten <strong>the</strong> thumbscrew on <strong>the</strong> microscope's phototube (or <strong>the</strong> coupler's bottom clamp) to lock <strong>the</strong><br />
combination to <strong>the</strong> microscope.<br />
5. Connect <strong>the</strong> camera to your computer as follows:<br />
a) Attach one end of <strong>the</strong> 6 pin (10 ft.) FireWire cable to <strong>the</strong> FireWire port on <strong>the</strong> computer, and<br />
attach <strong>the</strong> o<strong>the</strong>r end to <strong>the</strong> camera head.<br />
b) Attach <strong>the</strong> power supply/cable to <strong>the</strong> camera head.<br />
c) Plug one end of <strong>the</strong> power cord into <strong>the</strong> power supply and <strong>the</strong> o<strong>the</strong>r end into a surge protector.<br />
<strong>Installing</strong> FireWire Port Adapter Cards (Optional)<br />
If your computer is not equipped with a FireWire port, you may be able to add one using a FireWire-PCI<br />
Adapter Board for a desktop computer or a FireWire-PCMCIA Cardbus adapter for a laptop computer.<br />
Please consult your dealer or your computer manufacturer for assistance in selecting <strong>the</strong> appropriate<br />
hardware.<br />
To install <strong>the</strong> FireWire-PCI Adapter Board or <strong>the</strong> FireWire-PCMCIA Cardbus adapter, follow <strong>the</strong><br />
instructions included with <strong>the</strong> adapter manufacturer’s packaging.<br />
8 Spot Insight Hardware Guide
Installation Guidelines<br />
Multiple Camera Installations<br />
More than one <strong>SPOT</strong> camera can be operated from a single computer, provided adequate hardware and<br />
FireWire ports are available. Any combination of <strong>SPOT</strong> cameras can be used.<br />
Using <strong>the</strong> <strong>SPOT</strong> On-line Documentation<br />
To use <strong>the</strong> on-line documentation that accompanies your <strong>SPOT</strong> camera, you must first install <strong>the</strong> Acrobat<br />
Reader software that is included on <strong>the</strong> CD. This software enables you to read and/or print <strong>the</strong> Portable<br />
Document Format (PDF) versions of <strong>the</strong> software and hardware guides on your CD.<br />
Spot Insight Hardware Guide 9
Specifications<br />
Specifications<br />
Camera and Filter<br />
Insight 2 Mega-pixel B/W – Monochrome with and<br />
w/o IR filter<br />
Insight 2 Mega-pixel l Color Mosaic– Color<br />
Insight 2 Mega-pixel 3-Shot Color – Color external<br />
filter<br />
Insight 4 Mega-pixel l B/W – Monochrome with and<br />
w/o IR filter<br />
Insight 4 Mega-pixel Color Mosaic– Color<br />
Insight 4 Mega-pixel 3-Shot Color – Color external<br />
filter<br />
CCD Information<br />
Insight 2 Mega-pixel B/W – KAI 2020M Monochrome<br />
Insight 2 Mega-pixel Color Mosaic– KAI 2020CM<br />
Insight 2 Mega-pixel 3-Shot Color– KAI 2020M<br />
Monochrome<br />
Insight 4 Mega-pixel B/W – KAI 4021M Monochrome<br />
Insight 4 Mega-pixel Color Mosaic– KAI 4021CM<br />
Insight 4 Mega-pixel 3-Shot Color– KAI 4021M<br />
Monochrome<br />
KAI 2020<br />
<strong>Imaging</strong> Area – 11.8mm x 8.9mm<br />
Active Pixels – 1600 x 1200 (1.92 million)<br />
7.4 µm square pixels<br />
Full well charge capacity – 33,333e<br />
KAI 4021<br />
<strong>Imaging</strong> Area – 15.16mm x 15.16mm<br />
Active Pixels – 2048 x 2048 (4.19 million)<br />
7.4 µm square pixels<br />
Full well charge capacity – 27,300e<br />
Insight 2 Mega-pixel Color Mosaic Image<br />
Resolution<br />
Live image – 800 x 600<br />
Captured image – 1600 x1200<br />
Insight 2 Mega-pixel B/W Image Resolution<br />
Live image – 1600 x 1200<br />
Captured image – 1600 x1200<br />
Insight 4 Mega-pixel Color Mosaic Image<br />
Resolution<br />
Live image – 1024 x 1024<br />
Captured image – 2048 x 2048<br />
Insight 4 Mega-pixel B/W Image Resolution<br />
Live image – 2048 x 2048<br />
Captured image – 2048 x 2048<br />
Bit Depth – Insight Color<br />
Sampled at 42 bit RGB<br />
Saved file formats: 24 bit, 36 bit, or 48 bit (RGB)<br />
Bit Depth – Insight B/W<br />
Sampled at 14 bit monochrome<br />
Saved file formats: 8 bit, 12 bit, or 16 bit (mono)<br />
Minimum Computer Requirements<br />
PC* - Pentium 400 MHz, 256MB RAM, Firewire (IEEE1394a)<br />
interface, Windows 98SE/2000/ME/XP<br />
Mac* – Power PC 400 MHz G3, 256 MB RAM, Firewire<br />
(IEEE1394a), Mac OS 10.2.8 or greater<br />
* (Desktop computers may require an IEEE 1394a to PCI bus<br />
interface card. Laptop computers may require a IEEE 1394a to<br />
PCMCIA “Cardbus” interface card)<br />
Video card – Support of 24 bit RGB at <strong>the</strong> desired resolution.<br />
<strong>Software</strong> Features<br />
• Live image window<br />
• Image capture window<br />
• Pre-defined image types<br />
• Auto exposure<br />
• Auto white balance<br />
• Bias Frame, Thermal Frame and Flatfield correction<br />
• Zoom and pan window<br />
• Image enhancement tools<br />
• Non-destructive Annotation and Calibration mark<br />
• Measurement – length, perimeter area, angle<br />
• Print layout dialog<br />
• On-line help menu<br />
• Macro Scripting<br />
• “Floating” Taskbar<br />
• Image archiving database with export feature<br />
• Report generator<br />
• Sequential image capture and playback<br />
• Correct Color Technology<br />
Image File Formats<br />
TIFF, TIFF-JPEG, JPEG, Bitmap, PICT, AVI (PC, export only),<br />
JPEG2000, QuickTime (Mac, export only)<br />
File Size- Insight 2 Mega-pixel<br />
Insight Color<br />
Insight B/W<br />
24 bit - 5.49 MB 8 bit - 1.83 MB<br />
36 bit - 8.24 MB 12 bit - 2.75 MB<br />
48 bit – 10.99 MB 16 bit - 3.66 MB<br />
File Size- Insight 4 Mega-pixel<br />
Insight Color<br />
Insight B/W<br />
24 bit – 4 MB 8 bit - 12 MB<br />
36 bit - 6 MB 12 bit - 18 MB<br />
48 bit – 8 MB 16 bit - 24 MB<br />
Drivers<br />
TWAIN for Windows supported Windows® Operating Systems;<br />
Apple Event for supported Mac® Operating Systems<br />
Couplers- Insight 2 Mega-pixel<br />
Insight Monochrome, Insight Monochrome w/IR, Insight Color<br />
Mosaic: D10XXC (1.0x), HRU060-CMT (0.60x) and bottom<br />
clamp, HRD100-CMT (1.0x) and bottom clamp, all available<br />
from Diagnostic Instruments<br />
Insight 3 Shot Color: D10XXF (1.0x), HRU060-NIK (0.60x) and<br />
bottom clamp, HRD100-NIK (1.0x) and bottom clamp; all<br />
available from Diagnostic Instruments<br />
Spot Insight Hardware Guide 11
Specifications<br />
Pixel Readout Rate<br />
Live images – 40 MHz (2 channel x 20 MHz)<br />
Captured images – 20 MHz (1 channel x 20 MHz)<br />
Anti – Blooming Factor<br />
300 times (nominal); 100 times (minimum)<br />
Exposure<br />
Automatic and User-Defined<br />
Range – 0.04 ms – 536 seconds<br />
(1 saturated hot pixel @ 5 sec. typical)<br />
External Trigger<br />
TTL input<br />
External Shutter Control<br />
TTL level output<br />
Weight<br />
Insight FireWire®, Monochrome and Color Mosaic -<br />
Camera - 1.5 lbs., Power supply - 0.5 lbs.<br />
Insight FireWire, 3-Shot - Camera - 1.7 lbs., Power<br />
supply - 0.5 lbs.<br />
Power Requirements<br />
100 –240 VAC, 47 – 63 Hz<br />
Certifications<br />
CE, FCC, Class A, EN 60950<br />
available from Diagnostic Instruments<br />
Couplers- Insight 4 Mega-pixel<br />
C-mount cameras: D10XXC (1.0x), available from Diagnostic<br />
Instruments<br />
F-mount cameras: D10XXF (1.0x), available from Diagnostic<br />
Instruments<br />
Lens & Mounting<br />
For C-mount cameras - C- Mount lens for 1” format CCD,<br />
Flange to rear lens clearance - 0.46” (11.7 mm) max.<br />
For F-mount cameras - F- Mount lens for 1” format CCD, Flange<br />
to rear lens clearance - 0.43” (10.8 mm) max.<br />
Camera Dimensions<br />
12 Spot Insight Hardware Guide
Specifications<br />
Power Supply Dimensions<br />
3.350"<br />
1.970"<br />
1.300"<br />
Insight Series Catalog Information<br />
Catalog Part<br />
Numbers<br />
IN1800<br />
IN1810<br />
IN1820<br />
Description<br />
<strong>SPOT</strong> Insight 2 Mega-pixel Monochrome “C” mount<br />
camera<br />
<strong>SPOT</strong> Insight 2 Mega-pixel Monochrome “C” mount<br />
camera<br />
with IR filter<br />
<strong>SPOT</strong> Insight 2 Mega-pixel Color Mosaic “C” mount<br />
camera<br />
Connectivity<br />
IEEE 1394a<br />
(FireWire)<br />
IEEE 1394a<br />
(FireWire)<br />
IEEE 1394a<br />
(FireWire)<br />
IN1830<br />
IN1400<br />
IN1401<br />
IN1410<br />
<strong>SPOT</strong> Insight 2 Mega-pixel 3-shot Color “F” mount<br />
camera<br />
<strong>SPOT</strong> Insight 4 Mega-pixel Monochrome “C” mount<br />
camera<br />
<strong>SPOT</strong> Insight 4 Mega-pixel Monochrome “F” mount<br />
camera<br />
<strong>SPOT</strong> Insight 2 Mega-pixel Monochrome “C” mount<br />
camera<br />
with IR filter<br />
IEEE 1394a<br />
(FireWire)<br />
IEEE 1394a<br />
(FireWire)<br />
IEEE 1394a<br />
(FireWire)<br />
IEEE 1394a<br />
(FireWire)<br />
Spot Insight Hardware Guide 13
Specifications<br />
IN1411<br />
IN1420<br />
<strong>SPOT</strong> Insight 2 Mega-pixel Monochrome “F” mount<br />
camera<br />
with IR filter<br />
<strong>SPOT</strong> Insight 2 Mega-pixel Color Mosaic “C” mount<br />
camera<br />
IEEE 1394a<br />
(FireWire)<br />
IEEE 1394a<br />
(FireWire)<br />
IN1421<br />
<strong>SPOT</strong> Insight 2 Mega-pixel Color Mosaic “F” mount<br />
camera<br />
IEEE 1394a<br />
(FireWire)<br />
IN1430<br />
<strong>SPOT</strong> Insight 2 Mega-pixel 3-shot Color “F” mount<br />
camera<br />
IEEE 1394a<br />
(FireWire)<br />
FCC “Class A” Product Warning<br />
All <strong>SPOT</strong> cameras fall into <strong>the</strong> Class A category of <strong>the</strong> FCC (Federal Communications Commission)<br />
emission standard EN55022/CISPR22. The following is <strong>the</strong> FCC’s standard warning for this type of<br />
device:<br />
WARNING:<br />
This is a Class A Product. In a domestic environment this product may cause radio interference<br />
in which case <strong>the</strong> user may be required to take adequate measures.<br />
14 Spot Insight Hardware Guide