

INSTRUCTION MANUAL - Singer
INSTRUCTION MANUAL - Singer
INSTRUCTION MANUAL - Singer

You also want an ePaper? Increase the reach of your titles
YUMPU automatically turns print PDFs into web optimized ePapers that Google loves.
4830 & 4832<br />
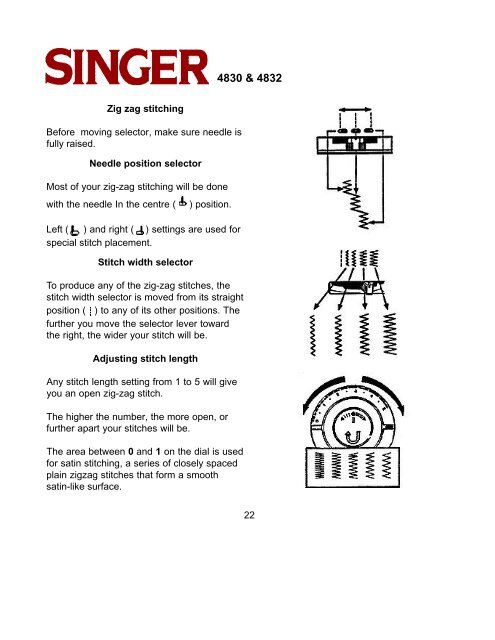
Zig zag stitching<br />
Before moving selector, make sure needle is<br />
fully raised.<br />
Needle position selector<br />
Most of your zig-zag stitching will be done<br />
with the needle In the centre (<br />
) position.<br />
Left ( ) and right ( ) settings are used for<br />
special stitch placement.<br />
Stitch width selector<br />
To produce any of the zig-zag stitches, the<br />
stitch width selector is moved from its straight<br />
position ( ) to any of its other positions. The<br />
further you move the selector lever toward<br />
the right, the wider your stitch will be.<br />
Adjusting stitch length<br />
Any stitch length setting from 1 to 5 will give<br />
you an open zig-zag stitch.<br />
The higher the number, the more open, or<br />
further apart your stitches will be.<br />
The area between 0 and 1 on the dial is used<br />
for satin stitching, a series of closely spaced<br />
plain zigzag stitches that form a smooth<br />
satin-like surface.<br />
22


