

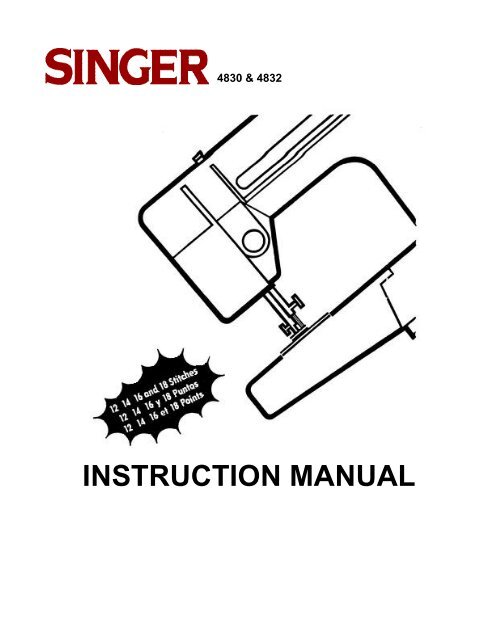
INSTRUCTION MANUAL - Singer
INSTRUCTION MANUAL - Singer
INSTRUCTION MANUAL - Singer

You also want an ePaper? Increase the reach of your titles
YUMPU automatically turns print PDFs into web optimized ePapers that Google loves.
4830 & 4832<br />
<strong>INSTRUCTION</strong> <strong>MANUAL</strong>
4830 & 4832<br />
Table of contents<br />
Important safety instructions<br />
Getting to know your machine<br />
Principal parts<br />
Accessories<br />
Connecting the machine<br />
Running the machine<br />
Choosing and changing the needle<br />
Changing the needle plate<br />
Changing screw-on presser feet<br />
Attaching the bed Cover<br />
Changing snap-on presser feet<br />
Fabric thread and needle table<br />
Inserting a bobbin<br />
Winding a bobbin<br />
Threading the machine<br />
Raising the bobbin thread<br />
Adjusting thread tension<br />
Sewing a seam<br />
Starting a seam<br />
Straight stitching<br />
Stitch width selector<br />
Needle position Selector<br />
Stitch length selector<br />
Reverse stitch button and sewing<br />
In reverse<br />
Darning<br />
Inserting a zipper<br />
Zig-Zag Stitching<br />
Needle position selector<br />
Stitch width Selector<br />
Adjusting stitch length<br />
Pattern groups selection<br />
Flexi-stitch patterns<br />
Balancing flexi-stitches<br />
Decorative stitch patterns<br />
Flexi-stitch patterns<br />
Attaching a button<br />
Free-arm sewing<br />
Removing the extension table<br />
Four-step buttonhole<br />
Twin needle sewing<br />
Additional accessories/Accessory storage<br />
Caring for your machine<br />
Removing and replacing bobbin case<br />
Cleaning the machine<br />
Lubricating the machine<br />
Changing the light bulb<br />
Performance checklist
4830 & 4832<br />
Congratulations<br />
As the owner of a new <strong>Singer</strong> sewing<br />
machine. you are about to begin an exciting<br />
adventure in creativity. from the moment you<br />
first use your machine you will know you are<br />
sewing one of the easiest to use sewing<br />
machines ever made.<br />
May we recommend that, before you start to<br />
use your sewing machine you discover the<br />
many advantages and the ease of operation<br />
by going through this instruction book, step<br />
by step, seated at your machine.<br />
Dear Customer,<br />
We recommend that for future reference you<br />
record the Serial Number of Your Sewing<br />
Machine in the space provided.<br />
Refer to illustration for location of Serial<br />
Number on your machine<br />
To ensure that you are always provided with<br />
the most modern sewing capabilities, the<br />
manufacturer reserves the right to change the<br />
appearance, design or accessories of this<br />
sewing machine when considered necessary.<br />
A Trademark d The <strong>Singer</strong> Company<br />
Copyright (c) 1993 <strong>Singer</strong> Sewing Machine Company<br />
All rights reserved throughout the world.<br />
3
4830 & 4832<br />
For European Territories:<br />
This product is suppressed for radio and television<br />
interference with the international<br />
Electrotechnical Commission requirements of<br />
the CISPR.<br />
IMPORTANT SAFETY <strong>INSTRUCTION</strong>S<br />
When using this machine basic safety precautions<br />
should always be followed including<br />
the following:<br />
• Read all instructions before using this<br />
machine.<br />
DANGER<br />
To reduce the risk of electric shock<br />
• The machine should never be left unattended<br />
when plugged in. Always unplug the<br />
machine from the electric outlet immediately<br />
after using and before cleaning.<br />
• Always unplug before relamping. Replace<br />
bulb with the same type rated 15 watts<br />
• Be sure to replace the face plate which<br />
covers the light bulb before operating the<br />
machine.<br />
WARNING<br />
To reduce the risk of burns. tire, electric<br />
shock or injury to persons:<br />
• Be sure that the electrical voltage of the<br />
socket outlet (wall receptacle is the same<br />
as the rated voltage of the motor).<br />
• Use this machine only for its intended use<br />
as described In this Operator's Guide<br />
• Use only attachments recommended by the<br />
manufacturer as contained In the<br />
Operator's Guide<br />
• To disconnect, turn all controls to the off<br />
("0") position, then remove plug from outlet<br />
• Disconnect the power-line plug from the<br />
socket outlet or switch the machine off<br />
when making any adjustments in the needle<br />
area, such as threading needle changing<br />
needle, changing throat plate or changing<br />
presser foot, etc<br />
• Always unplug the machine from the electrical<br />
outlet when removing covers lubricating,<br />
or when making any other user servicing<br />
adjustments mentioned in the<br />
Operator's Guide.<br />
4
4830 & 4832<br />
WARNING continued...<br />
• Do not attempt to adjust the motor belt.<br />
Contact Your nearest Service Center<br />
should any adjustment be required.<br />
• Do not unplug by pulling on cord. To<br />
unplug, grasp the plug, not the cord.<br />
• Handle the foot controller with care and<br />
avoid dropping it on the door. Be sure not<br />
to place anything on top of it.<br />
• Always use the proper throat plate. The<br />
wrong plate can cause the needle to break.<br />
• Do not use bent needles.<br />
• When sewing, keep fingers away from all<br />
moving parts Special care is required<br />
around the sewing machine needle.<br />
• Do not pull or push fabric while stitching. It<br />
may deflect the needle causing It to break.<br />
• Before removing the bobbin case, remove<br />
plug from the socket outlet.<br />
• For double insulated machines. when servicing<br />
use only identical replacement parts<br />
• Never operate the machine if it has a<br />
damaged cord or plug, If it Is not working<br />
properly, If it has been dropped or damage;<br />
or dropped into the water, return the<br />
machine to the nearest authorized dealer<br />
or Service Center for examination, repair,<br />
electrical, or mechanical adjustment.<br />
• Never operate the machine with any air<br />
openings blocked. Keep ventilation openings<br />
of the machine and foot controller<br />
free from the accumulation of lint, dust,<br />
and loose cloth<br />
• Never drop or insert any object into any<br />
opening.<br />
• Do not use outdoors<br />
• Do not operate where aerosol aerosol<br />
(spray) products are being or oxygen is<br />
administered .<br />
• Do not allow to be used as a toy. Close<br />
attention is necessary when the machine<br />
Is used by or near children.<br />
SAVE THESE <strong>INSTRUCTION</strong>S<br />
Servicing should be performed by an<br />
authorized service representatives.<br />
This product is intended for<br />
household use.<br />
5
4830 & 4832<br />
Getting to know your machine<br />
Principal parts<br />
1. Hand wheel<br />
2. Bobbin winder<br />
3. Horizontal spool pin and holder<br />
4. Thread guide<br />
5. Bobbin winder tension disc<br />
6. Snap-in thread guide<br />
7. Take up lever<br />
8. Face plate<br />
9. Needle thread tension dial<br />
10. Accessory storage<br />
11. Snap on presser foot<br />
12. Needle plate<br />
13. Removable extension table<br />
14. One-way needle clamp<br />
15. Thread guides<br />
16. Push button reverse<br />
17. Stitch length dial/four-step buttonhole<br />
18. Stitch width lever<br />
19. Pattern selector dial<br />
20. Needle position selector<br />
21. Stitch balance control<br />
22. Presser foot lifter<br />
23. Thread cutter<br />
24. Feed system<br />
26 Slide plate<br />
26. Foot control<br />
27. Electrical lead<br />
28. Machine plug<br />
29. Power and light switch<br />
30. Bobbin winding Indent<br />
6
4830 & 4832<br />
Accessories<br />
The following accessories furnished with your<br />
sewing machine are designed to simplify your<br />
sewing projects and increase the versatility of<br />
your machine.<br />
The letter in a circle adjacent to the Illustrated<br />
part is reproduced on the part itself to help<br />
you select the correct attachment for the type<br />
of work you are doing.<br />
1. Blindstitch hem presser foot is used to<br />
position the hem for blindstitch hemming.<br />
2. Special purpose presser foot (J) is used<br />
for decorative and zig-zag sewing.<br />
3. General purpose needle plate (A) and<br />
presser foot (B) are on your machine<br />
when delivered. Use together for alternating<br />
between straight and zigzag stitching.<br />
4. Buttonhole presser foot (1) is used with<br />
the General Purpose Needle Plate to<br />
make four-step buttonholes.<br />
5. Zipper foot (E) is used for inserting zipper<br />
and stitching corded seams.<br />
6. Friction free spool holder is used to hold<br />
various size spools and allows thread to<br />
unwind smoothly. The spool does not turn.<br />
7. Small thread spool hold (Q) for use with<br />
small diameter spools of thread.<br />
8. Needle pack includes an assortment for<br />
sewing various types of fabrics.<br />
9. Feed cover (F) is used to prevent the<br />
feed from moving the fabric when darning<br />
or free motion embroidery.<br />
10. Transparent bobbins for easy viewing of<br />
thread supply.<br />
7
4830 & 4832<br />
Connecting the machine<br />
Push plug into the receptacle (1) at the right<br />
end of the machine. Then connect plug (2) to<br />
your socket outlet.<br />
Running the machine<br />
To turn on machine and sewing light, press<br />
upper portion of power switch. To turn off<br />
machine and light, press lower portion "D" of<br />
power switch.<br />
To run the machine and control speed, press<br />
the foot control with your foot. The harder you<br />
press, the faster the machine will sew. To<br />
stop machine, remove foot from control.<br />
Note: Do not operate machine without fabric<br />
under the presser foot as this may<br />
damage the feed and the presser foot.<br />
8
4830 & 4832<br />
Choosing and changing needles<br />
• Raise needle to its highest position.<br />
• Loosen needle clamp screw and remove<br />
needle.<br />
• With flat side of needle to the back, insert<br />
new needle up into clamp as far as it will<br />
go.<br />
• Tighten needle clamp screw securely.<br />
Changing the needle plate (A), (C)<br />
• Raise needle and presses foot.<br />
• Open slide plate.<br />
• Lift up needle plate from right comer and<br />
slide out from under foot.<br />
• To replace needle plate slide it under pin<br />
(1) and push it firmly to the left.<br />
• Press down until it snaps into place<br />
Changing screw-on presser feet (H)<br />
• Raise needle and presser foot.<br />
• Loosen presser foot screw (1) and remove<br />
presser foot with shank (2), guiding it<br />
toward you and to the right.<br />
• To replace presser foot with shank, hook<br />
shank around the presser bar and tighten<br />
presser foot screw with the use of a coin.<br />
9
4830 & 4832<br />
Attaching the feed cover (F)<br />
The feed cover is used to keep the feed from<br />
moving the fabric when attaching a button,<br />
darning or sewing free motion embroidery. To<br />
attach it, follow the directions below:<br />
• Raise needle and presser foot.<br />
• Open slide plate.<br />
• Slide feed cover on top of needle plate,<br />
pressing tabs (1) and (2) into holes.<br />
• Close slide plate.<br />
• To remove open slide plate and lift front<br />
edge of cover; pull it away.<br />
Changing snap-on presser feet<br />
(B),(D),(J),(L)<br />
• Raise needle to its highest position by turning<br />
hand wheel toward you.<br />
• Raise presser foot using presser foot lifter<br />
at back of machine.<br />
• Push to of presser foot (1) up, until it snaps<br />
off the shank (2).<br />
• Remove foot from machine.<br />
• Place new foot under centre of shank.<br />
• Lower presser foot lifter, fitting shank over<br />
presser foot pin (3).<br />
• Don't turn screw. Instead, push presser foot<br />
screw (4) down, firmly until foot snaps into<br />
place.<br />
10
4830 & 4832<br />
Fabric, thread and needle table<br />
The needle and thread you choose will depend upon the fabric being sewn, the table below is<br />
a practical guide to needle and thread selection. Always refer to it before beginning a sewing<br />
project. Be sure to use the same size and type of thread in both needle and bobbin.<br />
The fabrics below can be of any fiber cotton, linen, silk, wool,<br />
synthetic rayon, blends. They are listed as examples of weight.<br />
Needles<br />
Fabrics<br />
Thread<br />
Type<br />
Size<br />
Light<br />
Weight<br />
Batiste<br />
Chiffon<br />
Crepe<br />
Organza<br />
Voile<br />
Cotton-wrapped Polyester Core<br />
100% Polyester (Extra Fine)<br />
• Mercerized Size 50 Nylon<br />
2020<br />
11/80<br />
Medium<br />
Weight<br />
Corduroy<br />
Flannel<br />
Gabardine<br />
Gingham<br />
Linen<br />
Muslin<br />
Wool Crepe<br />
Cotton-wrapped<br />
Polyester<br />
100% Polyester<br />
• Mercerized Size 50 Nylon<br />
2020<br />
14/90<br />
Medium<br />
Heavy<br />
Canvas<br />
Coating<br />
Denim<br />
Duck<br />
Sailcloth<br />
Upholstery<br />
Cotton wrapped Polyester100%<br />
Polyester<br />
• Mercerized Size 40<br />
• "Heavy Duty"<br />
2020<br />
2020<br />
16/100<br />
18/110<br />
Knits<br />
Single Knits<br />
Double Knit<br />
Jersey<br />
Tricot<br />
Cotton-wrapped Polyester<br />
100% Polyester<br />
Nylon<br />
Ball-Point 2045<br />
Size 11/80, 14/100, 16/110<br />
• Not recommended on stretch fabrics.<br />
11
4830 & 4832<br />
• Raise presser foot.<br />
Inserting a bobbin<br />
• Turn hand wheel toward you until needle is<br />
in its highest position.<br />
• Open slide plate and remove empty bobbin.<br />
1. Pull 4" (10 cm) of thread from replacement<br />
bobbin and insert bobbin into case as<br />
shown.<br />
2. Holding bobbin in place guide thread into<br />
notch (1) and then down the slot to the left<br />
and guide around into notch (2).<br />
3. Draw several inches of thread diagonally<br />
across the bobbin toward the back of the<br />
machine.<br />
4. While holding thread on outside, close the<br />
slide plate allowing thread to extend<br />
through the slot between the slide plate<br />
and needle plate.<br />
12
4830 & 4832<br />
Winding a bobbin<br />
Winding a bobbin is quick and easy when you follow the directions below. Always wind the<br />
bobbin, before threading the machine and needle.<br />
• Push in indent (1) on hand wheel disc. This will stop the needle from moving.<br />
• Place spool of thread on spool pin.<br />
• Slide spool cap (2) firmly over rim of spool to prevent thread tangling.<br />
• Lead thread from spool and snap into thread guide post (3).<br />
• Wind thread clockwise around front of bobbin winder tension disc (4).<br />
• Pass thread end from inside, through small hole in rim of bobbin.<br />
• Place bobbin on spindle and push it to the right<br />
• Holding thread end, step on speed controller to run machine until desired amount of thread<br />
is wound. (Winding stops automatically once bobbin is full).<br />
• Cut thread: push bobbin to the left and remove it from spindle.<br />
• Trim thread end from top of bobbin.<br />
• Return hand wheel disc to sewing position by pressing on side opposite indent.<br />
13
4830 & 4832<br />
Threading the machine<br />
• Raise take-up lever to highest position<br />
by turning hand wheel toward<br />
you.<br />
• Raise presser foot to release thread<br />
tension.<br />
• Place spool of thread on spool pin.<br />
• Slide spool cap firmly over rim of<br />
spool to prevent thread tangling.<br />
• Lead thread from spool and snap<br />
into thread guide (1) and with only<br />
one hand pass the thread under the<br />
guide and through the slot, as illustrated<br />
(2)<br />
• Thread the tension discs by leading<br />
the thread down and around the torsion<br />
(3). Hold the spool lightly and<br />
pull the thread up, lifting the spring<br />
and allowing the thread to dip into<br />
thread guard.<br />
• Slip thread into take up lever as<br />
illustrated (4).<br />
• Pass thread through guides (5) and<br />
(6).<br />
• Thread needle from front to back,<br />
pulling 4" (10 cm) of thread through<br />
eye (7).<br />
14
4830 & 4832<br />
Raising the bobbin thread<br />
1. Hold needle thread loosely with left hand.<br />
• Turn hand wheel slowly toward you,<br />
lowering needle into hole in plate.<br />
2. Continue to do this until needle rises above<br />
needle plate.<br />
• Pull gently on needle thread and bring<br />
up bobbin thread in a loop.<br />
3. Open loop with fingers to find end of bobbin<br />
thread.<br />
4. Draw needle thread through left side opening<br />
in presser foot.<br />
• Pull both threads to back machine.<br />
15
4830 & 4832<br />
Adjusting thread tension<br />
(For straight stitching)<br />
A perfect, well balanced stitch (1), will have<br />
the needle and bobbin threads locked<br />
between the two layers of fabric with no loops<br />
on top or bottom and no puckering.<br />
Too much tension will produce a tight stitch<br />
which will cause the fabric to pucker.<br />
• To decrease tension, turn the dial to a<br />
lower number.<br />
Too little tension will produce a loose stitch<br />
(3) which will cause loops in your seam.<br />
• To increase tension, turn the dial to a<br />
higher number.<br />
Adjusting thread tension<br />
(For zig-zag stitching)<br />
The correct tension setting will produce a<br />
smooth even stitch (1).<br />
Too much tension will produce a tight stitch<br />
(2), causing fabric to pucker. Loosen tension<br />
by turning dial to a lower number.<br />
Too little tension will produce a loose stitch<br />
(3), causing loops in your pattern. Tighten<br />
tension by turning dial to a higher number.<br />
16
4830 & 4832<br />
Sewing a seam<br />
You can sew seams easily and accurately<br />
when you follow the suggestions below.<br />
Placing fabric under foot<br />
Most fabrics can be placed under the foot by<br />
raising the presser foot lifter (1) to its normal<br />
"Up" position (2), where it locks in place.<br />
When using bulky fabric multiple fabric layers<br />
or an embroidery hoop, raise the lifter to the<br />
high rise position (3), thus increasing the<br />
space between the foot and the needle plate.<br />
• Lower presser foot lifter all the way down<br />
and you are ready to sew.<br />
Basting<br />
Pin basting and hand basting are easy ways<br />
to make temporary seams before machine<br />
sewing.<br />
• To pin baste, insert pins at stitching line.<br />
NEVER place pins on the underside of fabric<br />
in contact with the feed. Do not sew<br />
over pins; pull them out as you stitch.<br />
• To hand baste, make long stitches that can<br />
be easily removed<br />
17
4830 & 4832<br />
Keeping seams straight<br />
To keep seams straight, use one of the guidelines<br />
on the needle plate.<br />
• The most commonly used line (1), the 5/8<br />
Inch (1.6 cm) seam allowance, is extended<br />
onto the slide plate.<br />
Starting seam<br />
Place fabric under presser foot 1/2 Inch (12<br />
mm) from rear of fabric. Align the right edge<br />
with one d the seam guidelines on the needle<br />
plate. Lower the presser foot.<br />
Backstitch to the edge of the fabric for by<br />
pushing in the reverse button boated in centre<br />
of the stitch length dial. Hold button in<br />
until stitching reaches edge of fabric.<br />
Release push button for forward stitching.<br />
Guiding and supporting fabric<br />
• For tricot, and other similar synthetic knits,<br />
apply gentle tension by holding the fabric at<br />
the front and back d presser foot as you<br />
sew. Do not pull fabric.<br />
• For elasticated fabric, stretch lace, and<br />
knits with an unusual amount d elasticity,<br />
hold the fabric firmly In front and back d the<br />
presser hot to stretch the seam as the<br />
stitches are being placed.<br />
18
4830 & 4832<br />
Straight stitching<br />
Stitch width selector<br />
Before you move the selectors to set your<br />
machine for straight stitching, turn the hand<br />
wheel toward you until needle is at its highest<br />
point.<br />
Straight stitching can be performed with pattern<br />
selector in any position; stitch width lever<br />
must be set at ( ) only.<br />
Needle position selector<br />
Needle Position Selector positions the needle<br />
in left ( ), center ( ) or right ( ) needle<br />
positions.<br />
Stitch length selector<br />
To adjust the length of your stitches, turn the<br />
dial so that desired stitch length is positioned<br />
under (•) symbol.<br />
• To shorten ditch length, turn dial toward a<br />
lower number.<br />
• To lengthen stitch length, turn dial toward a<br />
higher number.<br />
19
4830 & 4832<br />
Applications with straight stitching<br />
Darning<br />
Recommended settings<br />
Stitch Selection: Straight Stitch<br />
Needle Position:<br />
Stitch Width:<br />
Stitch length: 2-5<br />
Foot: General Purpose (B)<br />
Needle Plate: General Purpose (A)<br />
Attach feed cover plate (F)<br />
Reverse stitch button<br />
The reverse stitch button, with the ( ) symbol,<br />
is located in the centre of the stitch<br />
length selector.<br />
• For reverse stitching push in the button and<br />
hold in place. The machine will stitch in<br />
reverse only as long as you keep the button<br />
pushed in.<br />
Sewing in reverse<br />
To neaten the end of a seam, push in the<br />
reverse button and backstitch 3-4 stitches<br />
Raise needle and presser foot and remove<br />
fabric by drawing it to the back and left. Cut<br />
thread on thread cutter on presser bar.<br />
20
4830 & 4832<br />
Inserting a zipper<br />
Preparation<br />
Pattern:<br />
Needle position:<br />
Stitch width:<br />
Stitch length: 2-5<br />
Foot: Zipper (E)<br />
Needle plate: General Purpose (A)<br />
Adjusting the zipper foot<br />
When the zipper teeth are to the left of the<br />
needle (A):<br />
• Slide the adjusting block, (1) which slides<br />
on the pin, across to the right.<br />
• Snap-on the foot to the left side of the pin.<br />
When the zipper teeth are to the right of the<br />
needle (B):<br />
• Slide the adjusting block (1) across to the<br />
left.<br />
• Snap on the foot to the right side of the pin.<br />
21
4830 & 4832<br />
Zig zag stitching<br />
Before moving selector, make sure needle is<br />
fully raised.<br />
Needle position selector<br />
Most of your zig-zag stitching will be done<br />
with the needle In the centre (<br />
) position.<br />
Left ( ) and right ( ) settings are used for<br />
special stitch placement.<br />
Stitch width selector<br />
To produce any of the zig-zag stitches, the<br />
stitch width selector is moved from its straight<br />
position ( ) to any of its other positions. The<br />
further you move the selector lever toward<br />
the right, the wider your stitch will be.<br />
Adjusting stitch length<br />
Any stitch length setting from 1 to 5 will give<br />
you an open zig-zag stitch.<br />
The higher the number, the more open, or<br />
further apart your stitches will be.<br />
The area between 0 and 1 on the dial is used<br />
for satin stitching, a series of closely spaced<br />
plain zigzag stitches that form a smooth<br />
satin-like surface.<br />
22
4830 & 4832<br />
Pattern groups selection<br />
• The dial localized on panel on your machine, lets you choose pattern groups.<br />
• Raise the needle to its highest position.<br />
• Adjust the stitch width selector to straight position ( ).<br />
• This will see to it that the stitch pattern dial moves far easier.<br />
• In order to single out the desired pattern group, just turn the dial until the corresponding letter<br />
to this pattern group appears on the dial, under symbol ( ).<br />
• After carrying out the embroidery selection, turn back the stitch width selector to the zig-zag<br />
position ( ).<br />
• Adjust the stitch length as indicated on each kind of embroidery (from 1/2 to 2 1/2).<br />
23
4830 & 4832<br />
Flexi stitch patterns<br />
Note: The pattern groups selection, needle<br />
position selection on and stitch width selection<br />
are similar to zig-zag stitching.<br />
These stitch patterns are used for sewing<br />
knits and other stretch fabrics. Flexi Stitch<br />
patterns are made by the side to side movement<br />
of the needle along with the backward<br />
and forward movement of the feed.<br />
The flexi-stitch, only accepts stitches works<br />
which on panel, are to the right of each pattern<br />
group.<br />
Act upon the following manner:<br />
Notes: If for any reason the machine does<br />
not start sewing your desired pattern<br />
after aligning the two dot symbols,<br />
push in on the reverse stitch button.<br />
• Turn the stitch length dial to the left until<br />
the dot on the dial lines up with the dot on<br />
the machine, as shown.<br />
24
4830 & 4832<br />
Balancing flexi-stitches<br />
You may need to adjust the Flexi-stitch<br />
Balance selector when using a flexi-stitch pattern<br />
in order to achieve the correct pattern<br />
appearance.<br />
Before you move the stitch balance dial from<br />
its neutral position, make a test sample using<br />
two layers of scrap fabric if adjustment is<br />
required stitch slowly and move the selector<br />
you sew.<br />
• Move selector to the right to separate<br />
stitches of pattern.<br />
• Move selector to the left to bring stitches of<br />
the pattern together.<br />
25
4830 & 4832<br />
Decorative stitch patterns<br />
Pattern<br />
Needle<br />
position<br />
Stitch<br />
width<br />
Stitch<br />
length<br />
Foot<br />
Needle<br />
plate<br />
Application<br />
Straight stitch 1<br />
Any<br />
setting<br />
General<br />
purpose<br />
General<br />
purpose<br />
General<br />
sewing<br />
Zig-zag stitch<br />
Any<br />
setting<br />
General<br />
purpose<br />
General<br />
purpose<br />
Stretch sewing<br />
and embroidery<br />
Blind hem stitch<br />
1.5 to 2.5<br />
Special for<br />
blindstitch<br />
General<br />
purpose<br />
Finishing<br />
hems<br />
Multi zig-zag<br />
stitch<br />
1.0 to 2.0<br />
Special<br />
purpose<br />
General<br />
purpose<br />
Bar<br />
tacking<br />
Overedge Stttch<br />
1.0 to 2.0<br />
Special<br />
purpose<br />
General<br />
purpose<br />
Seams in knit and<br />
stretch fabric<br />
Crescent stitch<br />
0 to 2.0<br />
Special<br />
purpose<br />
General<br />
purpose<br />
Ornamental<br />
borders<br />
Domino stitch<br />
0 to 2.0<br />
Special<br />
purpose<br />
General<br />
purpose<br />
Decoratice<br />
stitching<br />
Rampart stitch<br />
1.0 to 2.0<br />
Special<br />
purpose<br />
General<br />
purpose<br />
Borders and<br />
smocking<br />
Fagotting stitch<br />
1.0 to 2.0<br />
Special<br />
purpose<br />
General<br />
purpose<br />
Swimsuit<br />
seams<br />
26
4830 & 4832<br />
Flexi-stitch patterns<br />
Pattern<br />
Needle<br />
position<br />
Stitch<br />
width<br />
Stitch<br />
length<br />
Foot<br />
Needle<br />
plate<br />
Application<br />
Straight stitch 1<br />
( )<br />
Special<br />
purpose<br />
General<br />
purpose<br />
Ideal for plain<br />
seams that stretch<br />
Ric-rac stitch<br />
( )<br />
Special<br />
purpose<br />
General<br />
purpose<br />
Heavy-duty<br />
general purpose<br />
sewing<br />
Slant overedge<br />
stitch (left)<br />
( )<br />
Special<br />
purpose<br />
General<br />
purpose<br />
Sweater and<br />
swimsuit<br />
construction<br />
Feather stitch<br />
( )<br />
Special<br />
purpose<br />
General<br />
purpose<br />
Flexible seam<br />
in lingerie<br />
Overedge<br />
stretch stitch<br />
( )<br />
Special<br />
purpose<br />
General<br />
purpose<br />
Joining and<br />
overcasting<br />
seams<br />
Mountain stitch<br />
( )<br />
Special<br />
purpose<br />
General<br />
purpose<br />
Hemming and<br />
ornamental<br />
edges<br />
Crown stitch<br />
( )<br />
Special<br />
purpose<br />
General<br />
purpose<br />
Edge<br />
decoration<br />
Chevron stitch<br />
( )<br />
Special<br />
purpose<br />
General<br />
purpose<br />
Classical<br />
decorative<br />
seams<br />
Thorn stitch<br />
( )<br />
Special<br />
purpose<br />
General<br />
purpose<br />
Ideal for<br />
flat-butted seam<br />
27
4830 & 4832<br />
Attaching a button<br />
Recommended settings:<br />
Stitch Selection: Zig-Zag Stitch<br />
Needle Position:<br />
Stitch Width: To suit Button Sewing (H)<br />
(Additional Accessory)<br />
Needle Plate: General Purpose (A)<br />
Attach Feed Cover (F)<br />
Note: Before you can attach a button, the<br />
bobbin thread must be brought up<br />
through the hole in the feed cover.<br />
1. Set stitch width at ( ) and needle position<br />
selector at ( ). Position button under foot<br />
and lower the needle into the center of the<br />
left kid. Lower the foot. Turn hand wined<br />
toward you until needle rises out of button<br />
and is above the foot.<br />
2. Move stitch width selector until needle is<br />
over the other hole in the button. Then,<br />
when you begin to ditch, the needle should<br />
enter into the right hole of the button. Take<br />
six or more zig-zag stitches to attach button<br />
and finish with the needle on the left<br />
side.<br />
3. To fasten stitching, adjust width to ( ) and<br />
take three or four stitches. Remove work,<br />
draw threads to underside, fasten, and<br />
trim.<br />
28
4830 & 4832<br />
Free-arm sewing<br />
Removing the extension table<br />
To change machine for free arm sewing, lift<br />
right edge (1) of extension table. Slide it to<br />
the left and off the machine (2).<br />
To replace the extension table, slide it to the<br />
right keeping it even with the free-arm, until<br />
the tabs on the right lock into place.<br />
Fabric handling, when sewing tubular and<br />
hard to reach garment areas, is simplified<br />
and made easier when you use the free-arm<br />
sewing capability of your sewing machine.<br />
Applications<br />
Sleeves<br />
• Free-arm sewing takes the difficulty out of<br />
topstitching, sleeves, finishing waistbands<br />
and trouser legs rotate smoothly under the<br />
needle, around the arm, allowing you to<br />
place your stitching accurately.<br />
Buttons<br />
• Sewing buttons on a cuff or neckband is<br />
easy with free arm sewing. The sewing arm<br />
allows room for cuffs to slip onto without<br />
being stretched out of shape, and you can<br />
also see and handle the stitching area<br />
more easily.<br />
29
4830 & 4832<br />
Bar tacks<br />
• Bar tacks reinforce areas of strain and can<br />
be applied to ready-made garments, as<br />
well as to those sewn at home. Use the<br />
free-arm surface to avoid fabric bulk<br />
around the needle when you apply bar<br />
tacks to pockets, pleats and waistlines.<br />
Four step buttonhole<br />
Your machine makes buttonholes to any size<br />
you choose in only four easy steps.<br />
• You never need to move the fabric or reposition<br />
the needle.<br />
• Always make a practice buttonhole on a<br />
sample of your fabric.<br />
• Be sure bobbin contains enough thread.<br />
• When making buttonholes on hard-to-reach<br />
areas convert machine bed to free-arm<br />
sewing.<br />
• Mark buttonhole position on fabric as indicated<br />
in pattern.<br />
30
4830 & 4832<br />
Buttonholes<br />
Recommended settings:<br />
Stitch Selection: Buttonhole Stitch<br />
Stitch Width: Pre-set<br />
Foot: Buttonhole (L)<br />
Needle Plate: General Purpose (A)<br />
Step 1<br />
• Raise presser foot.<br />
• Place fabric under foot<br />
• Centre 3 red guidelines (1) of foot around<br />
beginning line of buttonhole.<br />
• Turn buttonhole dial to the buttonhole<br />
symbol (1) for the first step<br />
• Position needle in fabric at point (2) by<br />
turning the hand wheel towards you.<br />
• Stitch down to point (3).<br />
Step 2<br />
• Raise needle out of fabric.<br />
• Turn buttonhole dial to the buttonhole symbol<br />
(2) for the second step.<br />
• Make at least four stitches ending at<br />
point(4).<br />
31
4830 & 4832<br />
Step 3<br />
• Raise needle out of fabric.<br />
• Turn buttonhole dial to the buttonhole symbol<br />
(3) for the third step.<br />
• Stitch up to point (5).<br />
Step 4<br />
• Raise needle out of fabric.<br />
• Turn buttonhole dial to the buttonhole symbol<br />
(4) for the fourth step.<br />
• Make at least four stitches, ending at point<br />
(6).<br />
• Rake presser foot and remove garment<br />
from machine.<br />
• Clip thread ends.<br />
• Carefully cut buttonhole opening with a<br />
seam ripper or small, sharp scissors.<br />
32
4830 & 4832<br />
Balancing the buttonhole<br />
On some kinds of fabrics, there may be a difference<br />
in the density of the stitches on the<br />
right or the left side of the buttonhole.<br />
This is easily adjusted by turning the balance<br />
knob (1), in the center of the stitch length dial<br />
to balance the density of the stitching.<br />
A very slight turn of the dial will produce a<br />
noticeable change.<br />
• If the stitches on the right side of the buttonhole<br />
(l) are too open, turn the balance dial<br />
slightly to the right, until the density of the<br />
stitches increases.<br />
• If the stitches on the left side of the buttonhole<br />
(ll) are too open, turn the balance<br />
slightly to the left, until the density of the<br />
stitches increases.<br />
33
4830 & 4832<br />
Twin needle sewing<br />
Additional accessory<br />
Caution: Make sure not to use a stitch width<br />
greater than that what is recommended when<br />
twin needle stitching.<br />
Recommended settings<br />
Stitch Selection: Desired stitch<br />
Needle Position:<br />
Stitch Width:<br />
Stitch Length: 2-5<br />
Foot: General Purpose (B)<br />
Needle Plate: General Purpose (A)<br />
Procedure<br />
• Turn the machine off.<br />
• Insert the twin needle with the flat side of<br />
the shank toward the rear of the machine.<br />
• Thread the machine as you normally would<br />
for single needle stitching, and pass the<br />
thread through the left eye of the twin<br />
needle<br />
• Insert a second spool pin into the hole on<br />
the top cover of the machine as illustrated.<br />
• Thread the machine in the usual way.<br />
• Pass the thread through the remaining<br />
point, making certain to omit the thread<br />
guide just above the needle and pass<br />
thread through right eye of needle.<br />
• Draw both threads under the foot and back<br />
along with the bobbin thread.<br />
• Slowly lower the needle into the hole in the<br />
needle plate by turning the hand wheel<br />
toward you to make sure the needle clear<br />
the plate.<br />
34
4830 & 4832<br />
Additional accessories<br />
Additional Accessories for your sewing<br />
machine are available for purchase at your<br />
SINGER stockist.<br />
1. Straight stitch presser foot (D) and needle<br />
plate (C) are used together when straight<br />
stitching lightweight fabric or when your<br />
fabric or sewing procedure requires close<br />
control.<br />
2. Button sewing foot (H) is used to hold any<br />
two-hole or four-hole button securely for<br />
stitching.<br />
3. Lint brush is used for cleaning hard to<br />
reach areas on your sewing machine.<br />
4. Oil container for machine lubrication.<br />
5. Twin needle and spool pin are used to<br />
ditch two parallel rows of decorative stitching<br />
simultaneously. When using twin-needle<br />
for decorative stitching set stitch width<br />
selector no greater than midrange of zig<br />
zag graphics.<br />
6. Felt for twin needle spool pin.<br />
Accessory storage<br />
The accessories leave from factory in this<br />
area.<br />
35
4830 & 4832<br />
Caring for your machine<br />
Removing and replacing bobbin case<br />
Caution: Before cleaning or adjusting the<br />
machine, remove plug from the socket outlet.<br />
• Raise presser foot and needle.<br />
• Open slide plate, remove bobbin and<br />
remove needle plate.<br />
To remove bobbin case<br />
• With a small screwdriver, turn bobbin case<br />
holder (1) to the rear as far as it will go.<br />
• Lifting the left side of the bobbin case, slide<br />
it out from machine.<br />
To replace bobbin case<br />
• Guide forked end (2} of bobbin case under<br />
feed (3).<br />
• Draw rim of bobbin ease under position<br />
plate (4). Be sure bobbin ease is freely<br />
seated on hook race.<br />
• Turn bobbin case holder (1) forward as far<br />
as it will go, locking bobbin case in place.<br />
Note: Turn handwheel towards you to cheek<br />
to make sure it is properly replaced.<br />
• Replace needle plate.<br />
• Insert bobbin and close slide plate.<br />
36
4830 & 4832<br />
Cleaning the machine<br />
The machine surfaces and covers can be<br />
cleaned when necessary with a damp cloth<br />
and a mild soap. Remove lint and fluff from<br />
parts and with a flat brush clean these parts:<br />
• Take up lever and thread guide.<br />
• Presser and needle bars.<br />
• Bobbin case and needle plate areas.<br />
Your machine should be periodically checked<br />
by your local SINGER dealer for wear.<br />
37
4830 & 4832<br />
Lubricating the machine<br />
Approximately once a year, lubricate all moving<br />
connections, as shown, to ensure freedom<br />
of movement and to protect metal parts<br />
from excessive wear.<br />
To determine which connections move and<br />
need lubrication, turn the handwheel slowly,<br />
by hand, while face plate is removed.<br />
When lubricating, apply only SINGER oil at<br />
the points shown. SINGER oil is specially<br />
prepared and does not contain harmful<br />
deposits that can interfere with the smooth<br />
action of precision parts.<br />
38
4830 & 4832<br />
Changing the light bulb<br />
Caution: Before changing light bulb, make<br />
sure you have removed plug from socket outlet<br />
and remove face plate which covers the<br />
light bulb. Be sure to replace the face plate<br />
which covers me light bulb before operating<br />
the machine.<br />
This machine is designed to use a 15 watt<br />
maximum light bulb with a bayonet fitting.<br />
1. Removing bulb<br />
• Loosen and remove screw (1) located on<br />
face plate.<br />
• Remove face plate by grasping it around<br />
the bottom edge and pulling toward the left,<br />
then down and away from machine.<br />
• Do not attempt to unscrew light bulb.<br />
• Push bulb up into socket and turn in the<br />
direction of arrows to unlock bulb pin.<br />
• Pull bulb down and out of socket.<br />
2. Replacing bulb<br />
• Push new bulb up into socket and turn in<br />
the direction of arrows until pins lock into<br />
position.<br />
• Replace face plate again and tighten<br />
screw.<br />
39
4830 & 4832<br />
When sewing difficulties occur, look back<br />
through this manual to make sure you are<br />
correctly following the instructions. If you still<br />
have a problem, the reminders below may<br />
help you to correct it.<br />
Needle does not move<br />
Is machine connected to electrical supply?<br />
Is the power and light switch on?<br />
Is controller connected?<br />
Is the handwheel engaged for bobbin<br />
winding?<br />
Needle moves but stitch is not formed<br />
Is needle defective?<br />
Is needle fully inserted into needle clamp?<br />
Are bobbin and needle correctly threaded?<br />
Is bobbin correctly inserted into bobbin case?<br />
Needle breaks<br />
Is needle straight and sharp?<br />
Is needle correct size?<br />
Is needle fully inserted into needle clamp?<br />
Are controls properly set?<br />
Are accessories correct for applications?<br />
Bobbin winding difficulties<br />
Is thread unwinding freely from spool?<br />
Is bobbin winder engaged?<br />
Is thread end securely held at start of wind?<br />
Is thread hanging up on the slit on the thread<br />
spool?<br />
Performance Checklist<br />
40<br />
Upper thread breaks<br />
Is machine properly threaded?<br />
Is thread freely unwinding from spool?<br />
Is proper spool cap being used?<br />
Is needle correct size for thread?<br />
Is upper thread tension too tight?<br />
Is bobbin case properly inserted?<br />
Is bobbin rim free of nicks?<br />
Lower thread breaks<br />
Is bobbin correctly wound?<br />
Is bobbin correctly inserted into bobbin case?<br />
Is bobbin case correctly threaded?<br />
Is thread hanging up on the slit on the thread<br />
spool?<br />
Skipped stitches<br />
Is machine properly threaded?<br />
Is fabric firmly held down?<br />
Is needle correct style and size?<br />
Is needle straight and sharp?<br />
Fabric does not move<br />
properly under presser foot<br />
Is presser foot correctly attached to machine?<br />
Is presser foot lowered?<br />
Is stitch length correctly set?


