Butt-Weld Fittings / Clamps - RO-FI Edelstahl
Butt-Weld Fittings / Clamps - RO-FI Edelstahl
Butt-Weld Fittings / Clamps - RO-FI Edelstahl
Create successful ePaper yourself
Turn your PDF publications into a flip-book with our unique Google optimized e-Paper software.
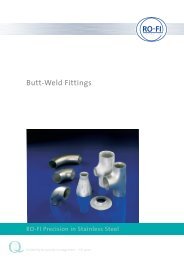
<strong>Butt</strong>-<strong>Weld</strong> <strong>Fittings</strong><br />
<strong>Fittings</strong> for welding DIN 2609<br />
11.2007_1.000<br />
Table 6. Schema about the scope of inspection and certificate about admeasurement assay at tittings with certificate.<br />
assay scope of inxpection for the proper form of<br />
accomplishment<br />
certificate about<br />
Nr Art chapter the assays material control<br />
1 cast analysis 4.3 per melt or casting device manufacture of DIN 10 204 – 2.2 4)<br />
the base material<br />
2 pull-out test at 5.3.5 per batch at two test pieces for the class of materials H – Q and U, at one by appointment DIN 10 204 – 3.1 A or<br />
room temperature test piece for class of materials A – G and R – T and at delivery quantity DIN 10 204 – 3.1 B or<br />
100mm.maximal 4 batches per delivery DIN 10 204 – 3.1 C<br />
quantity will be checked. At, by welding manufactured fittings, with da<br />
>200 additionally one assay across the weld seam.<br />
3 impact test 1) 5.3.5 per batch according to 2 of these table, 1 set >=3 single tests, according by appointment DIN 10 204 – 3.1 A or<br />
to the details in the norms of the base material for da>=100 mm.<br />
DIN 10 204 – 3.1 B or<br />
Additionally at by welding manufactured fittings 1 set = 3 single tests in<br />
DIN 10 204 – 3.1 C<br />
the middle of the weld seam.<br />
in class of material D,E,E,U from da> 200mm and wall thickness >=5mm<br />
in class of material F – K from da> 100mm and wall thickness >=5mm<br />
when the extraction of a omnidirectional assay with minimal 5 mm<br />
breadth is possible<br />
in class of material R,S from da> 200mm and wall thickness >=10mm<br />
in class of material L - Q from da> 100mm and wall thickness >=12mm<br />
4 technological 5.3.5 per batch at one test set by appointment DIN 10 204 – 3.1 A oder<br />
beam impact test 3)<br />
DIN 10 204 – 3.1 B oder<br />
DIN 10 204 – 3.1 C<br />
5 hot tensile 5.3.6 1 test pe-batch for d a ≥ 100 mm by appointment DIN 10 204 – 3.1 A oder<br />
test 5),2)<br />
DIN 10 204 – 3.1 B oder<br />
DIN 10 204 – 3.1 C<br />
6 examination 5.3.7 all fittings manufacturer DIN 10 204 – 3.1 B<br />
of the<br />
weld beam 3)<br />
7 spectro-chemical 5.3.7 all fittings of alloyed materials manufacturer DIN 10 204 – 2.1 4)<br />
analyis<br />
8 inspection 5.3.7 all fittings by appointment DIN 10 204 – 3.1 A oder<br />
DIN 10 204 – 3.1 B oder<br />
DIN 10 204 – 3.1 C<br />
9 dimensional 5.3.7 all fittings by appointment DIN 10 204 – 3.1 A oder<br />
check<br />
DIN 10 204 – 3.1 B oder<br />
DIN 10 204 – 3.1 C<br />
10 product analysis 5) 5.3.6 1 productanalysis per melting Manufacturer of the DIN 10 204 – 3.1 B<br />
material or<br />
the fittings<br />
11 examination 5.3.9 per melt by agreement manufacturer DIN 10 204 – 3.1 B<br />
of the base<br />
material 5)<br />
www.rofi.de<br />
12 assay of 5.3.6 according to agreement manufacturer DIN 10 204 – 3.1 B<br />
intercrystaline<br />
5), 6)<br />
corrosion<br />
13 hardness test 5.3.5 just at da


