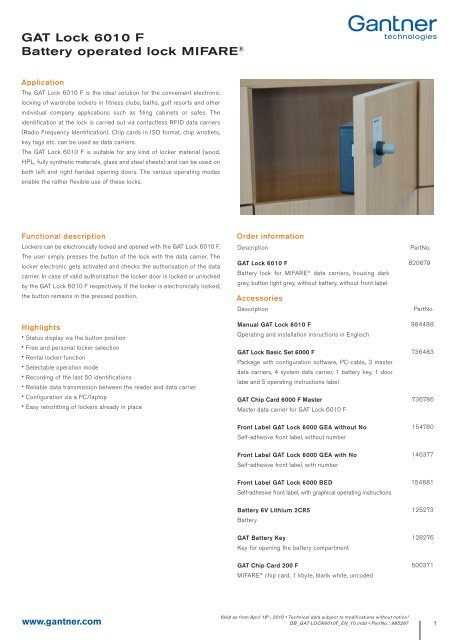
GAT Lock 6010 F Battery operated lock MIFARE® - gantner.com.au
GAT Lock 6010 F Battery operated lock MIFARE® - gantner.com.au
GAT Lock 6010 F Battery operated lock MIFARE® - gantner.com.au

Create successful ePaper yourself
Turn your PDF publications into a flip-book with our unique Google optimized e-Paper software.
<strong>GAT</strong> <strong>Lock</strong> <strong>6010</strong> F<br />
<strong>Battery</strong> <strong>operated</strong> <strong>lock</strong> MIFARE ®<br />
Application<br />
The <strong>GAT</strong> <strong>Lock</strong> <strong>6010</strong> F is the ideal solution for the convenient electronic<br />
<strong>lock</strong>ing of wardrobe <strong>lock</strong>ers in fitness clubs, baths, golf resorts and other<br />
individual <strong>com</strong>pany applications such as filing cabinets or safes. The<br />
identification at the <strong>lock</strong> is carried out via contactless RFID data carriers<br />
(Radio Frequency Identification). Chip cards in ISO format, chip wristlets,<br />
key tags etc. can be used as data carriers.<br />
The <strong>GAT</strong> <strong>Lock</strong> <strong>6010</strong> F is suitable for any kind of <strong>lock</strong>er material (wood,<br />
HPL, fully synthetic materials, glass and steel sheets) and can be used on<br />
both left and right handed opening doors. The various operating modes<br />
enable the rather flexible use of these <strong>lock</strong>s.<br />
Functional description<br />
<strong>Lock</strong>ers can be electronically <strong>lock</strong>ed and opened with the <strong>GAT</strong> <strong>Lock</strong> <strong>6010</strong> F.<br />
The user simply presses the button of the <strong>lock</strong> with the data carrier. The<br />
<strong>lock</strong>er electronic gets activated and checks the <strong>au</strong>thorisation of the data<br />
carrier. In case of valid <strong>au</strong>thorisation the <strong>lock</strong>er door is <strong>lock</strong>ed or un<strong>lock</strong>ed<br />
by the <strong>GAT</strong> <strong>Lock</strong> <strong>6010</strong> F respectively. If the <strong>lock</strong>er is electronically <strong>lock</strong>ed,<br />
the button remains in the pressed position.<br />
Highlights<br />
• Status display via the button position<br />
• Free and personal <strong>lock</strong>er selection<br />
• Rental <strong>lock</strong>er function<br />
• Selectable operation mode<br />
• Recording of the last 50 identifications<br />
• Reliable data transmission between the reader and data carrier<br />
• Configuration via a PC/laptop<br />
• Easy retrofitting of <strong>lock</strong>ers already in place<br />
Order information<br />
Description<br />
<strong>GAT</strong> <strong>Lock</strong> <strong>6010</strong> F<br />
<strong>Battery</strong> <strong>lock</strong> for MIFARE ® data carriers, housing dark<br />
grey, button light grey, without battery, without front label<br />
Accessories<br />
Description<br />
Manual <strong>GAT</strong> <strong>Lock</strong> <strong>6010</strong> F<br />
Operating and installation insructions in Englisch<br />
<strong>GAT</strong> <strong>Lock</strong> Basic Set 6000 F<br />
Package with configuration software, PC-cable, 3 master<br />
data carriers, 4 system data carrier, 1 battery key, 1 door<br />
labe and 5 operating instructions label<br />
<strong>GAT</strong> Chip Card 6000 F Master<br />
Master data carrier for <strong>GAT</strong> <strong>Lock</strong> <strong>6010</strong> F<br />
PartNo.<br />
820679<br />
PartNo.<br />
984488<br />
736483<br />
736786<br />
Front Label <strong>GAT</strong> <strong>Lock</strong> 6000 GEA without No<br />
Self-adhesive front label, without number<br />
154780<br />
Front Label <strong>GAT</strong> <strong>Lock</strong> 6000 GEA with No<br />
Self-adhesive front label, with number<br />
146377<br />
Front Label <strong>GAT</strong> <strong>Lock</strong> 6000 BED<br />
Self-adhesive front label, with graphical operating instructions<br />
154881<br />
<strong>Battery</strong> 6V Lithium 2CR5<br />
<strong>Battery</strong><br />
125273<br />
<strong>GAT</strong> <strong>Battery</strong> Key<br />
Key for opening the battery <strong>com</strong>partment<br />
128276<br />
<strong>GAT</strong> Chip Card 200 F<br />
MIFARE ® chip card, 1 kbyte, blank white, uncoded<br />
500371<br />
www.<strong>gantner</strong>.<strong>com</strong><br />
Valid as from April 16 th , 2010 • Technical data subject to modifications without notice!<br />
DB_<strong>GAT</strong>-LOCK<strong>6010</strong>F_EN_10.indd • PartNo.: 985287<br />
1
Technical data<br />
Power supply:<br />
Usable battery types:<br />
6 V battery 2CR5<br />
- Manufact.: Panasonic, Type 2CR5<br />
- Manufact.: Ansmann, Type 2CR5<br />
- Manufact.: Sanyo, Type Y-PC-2CR5-I<br />
- Manufact.: Duracell, Type 2CR5<br />
<strong>Battery</strong> life-time: Approx 3 years* at +20 °C<br />
Data storage:<br />
Internal c<strong>lock</strong>:<br />
Reader type: MIFARE ®<br />
Frequency of read field:<br />
Range of read field:<br />
EEPROM for 50 bookings, data<br />
preservation also by battery change<br />
Quartz-controlled real time c<strong>lock</strong><br />
13.56 MHz<br />
5 to 35 mm, according to the<br />
installation and data carrier<br />
Control element:<br />
Display element:<br />
Button<br />
Configuration interface: RS 232<br />
Housing:<br />
Housing colour:<br />
Dimensions:<br />
Permitted ambient temperature:<br />
LED (red / green / orange)<br />
Plastic (PC-ABS), halogen-free<br />
dark grey<br />
Protection type: IP 52<br />
Protection class:<br />
Weight:<br />
Environment class<br />
based on VDS 2110:<br />
112 x 110 x 33 mm<br />
0 to +60°C<br />
III<br />
0.2 kg<br />
II (conditions in indoor areas)<br />
* ) depending on battery type and battery quality<br />
Dimensions<br />
For left-side mounted door<br />
64 mm 30 mm<br />
19,5 mm<br />
22 mm<br />
1<br />
3<br />
5 4<br />
72 mm 33,2 mm<br />
Ø 22 mm<br />
Ø 5 mm<br />
13 mm<br />
5<br />
2<br />
4 mm<br />
3<br />
29 mm<br />
18 mm<br />
Ø 15 mm<br />
109 mm<br />
20 mm<br />
112 mm<br />
10,5 mm 7,5 mm<br />
90 mm<br />
17 mm<br />
7,5 mm<br />
1. <strong>Lock</strong> electronics<br />
2. <strong>Battery</strong> <strong>com</strong>partment<br />
3. Button<br />
4. LED display<br />
5. <strong>Lock</strong>ing bolt<br />
7,5 mm<br />
For right-side mounted door<br />
72 mm 22 mm<br />
Ø 5 mm<br />
33,2 mm<br />
17 mm 109 mm<br />
7,5 mm 7,5 mm<br />
Ø 22 mm<br />
2<br />
1<br />
4 5<br />
3<br />
19,5 mm<br />
30 mm<br />
64 mm<br />
Ø 15 mm<br />
18 mm<br />
3<br />
29 mm<br />
13 mm<br />
5<br />
4 mm<br />
90 mm<br />
10,5 mm 7,5 mm<br />
112 mm<br />
20 mm<br />
Typical application<br />
Row of <strong>lock</strong>ers<br />
Front label<br />
Button<br />
<strong>GAT</strong> <strong>Lock</strong> <strong>6010</strong> F<br />
Valid as from April 16 th , 2010 • Technical data subject to modifications without notice!<br />
2 DB_<strong>GAT</strong>-LOCK<strong>6010</strong>F_EN_10.indd • PartNo.: 985287<br />
www.<strong>gantner</strong>.<strong>com</strong>
Mounting and installation instructions<br />
The <strong>GAT</strong> <strong>Lock</strong> <strong>6010</strong> F can be used in <strong>lock</strong>ers with metallic doors (plate<br />
doors) or non metallic doors and is mounted by way of 4 screws on the<br />
inside of the <strong>lock</strong>er door. The button requires a drilled hole in the door.<br />
Observe the installation instructions in the Manual <strong>GAT</strong> <strong>Lock</strong> <strong>6010</strong> F.<br />
Doors opening<br />
There are doors which can be open to the right or left. The <strong>lock</strong>er<br />
electronics should be positioned accordingly (please refer to the Manual<br />
<strong>GAT</strong> <strong>Lock</strong> <strong>6010</strong> F).<br />
Mounting<br />
left-side mounted door:<br />
right-side mounted door:<br />
left-side mounted door:<br />
right-side mounted door:<br />
<strong>Lock</strong>er<br />
<strong>Lock</strong>er<br />
22 mm<br />
72 mm<br />
72 mm<br />
22 mm<br />
<strong>Lock</strong>er Door<br />
<strong>GAT</strong> <strong>Lock</strong> <strong>6010</strong> F<br />
<strong>GAT</strong> <strong>Lock</strong> <strong>6010</strong> F<br />
<strong>Lock</strong>er Door<br />
30 mm<br />
19,5 mm<br />
19,5 mm<br />
30 mm<br />
View A<br />
View B<br />
64 mm<br />
64 mm<br />
Bolt<br />
Button<br />
Button<br />
LED <strong>Battery</strong> Compartmnet <strong>Battery</strong> Compartment LED<br />
Bolt<br />
As the <strong>GAT</strong> <strong>Lock</strong> <strong>6010</strong> F is suitable for very diverse installation conditions,<br />
always perform a test installation and a functional test with a corresponding<br />
data carrier on just one <strong>lock</strong>er of the system prior to the <strong>com</strong>plete<br />
installation of subsequent <strong>lock</strong>ers.<br />
View A<br />
View B<br />
<strong>GAT</strong> <strong>Lock</strong> <strong>6010</strong> F<br />
Fastening screws<br />
Drill hole for the button<br />
For the button, drill a hole into the <strong>lock</strong>er door. For non-metallic <strong>lock</strong>er<br />
doors, the diameter of the button drill hole is 23 mm. The read/write range<br />
of the data carriers depends on the types of data carriers (refer to the<br />
Manual <strong>GAT</strong> <strong>Lock</strong> <strong>6010</strong> F).<br />
<strong>Lock</strong>er door<br />
Reading range<br />
Diameter of button drill hole<br />
Ø 23 mm<br />
Number label<br />
Instruction label<br />
Notice:<br />
• Please ensure the housing of the <strong>GAT</strong> <strong>Lock</strong> <strong>6010</strong> F does not foul the<br />
inside of the <strong>lock</strong>er body on opening/closure of <strong>lock</strong>er door.<br />
• Select the appropriate length and type of the 4 fastening screws.<br />
• The button must be centered in the drilled hole.<br />
• The opening of the battery <strong>com</strong>partment should not be hindered by other<br />
<strong>com</strong>ponents<br />
• Do not use any metallic front labels.<br />
For metallic <strong>lock</strong>er doors, other values apply for the button drill hole and<br />
the read/write ranges (refer to the Manual <strong>GAT</strong> <strong>Lock</strong> <strong>6010</strong> F).<br />
Double walled door or<br />
single walled door with mounting ridge<br />
Reading range<br />
Ø 23 mm<br />
Diameter of button drill hole<br />
www.<strong>gantner</strong>.<strong>com</strong><br />
Valid as from April 16 th , 2010 • Technical data subject to modifications without notice!<br />
DB_<strong>GAT</strong>-LOCK<strong>6010</strong>F_EN_10.indd • PartNo.: 985287<br />
3
Set up and configuration<br />
Power supply<br />
The unit is powered by a 6 V battery (see technical data). In order to open<br />
the battery <strong>com</strong>partment of the <strong>GAT</strong> <strong>Lock</strong> <strong>6010</strong> F, the corresponding key<br />
must be used.<br />
left-side mounted door:<br />
right-side mounted door:<br />
Configuration<br />
The configuration of the <strong>GAT</strong> <strong>Lock</strong> <strong>6010</strong> F by means of a PC/laptop<br />
is performed by connecting the <strong>GAT</strong> <strong>Lock</strong> 6000 B programming<br />
cable between the PC/laptop and the RS 232 interface in the battery<br />
<strong>com</strong>partment. Communication is then activated with the service card. The<br />
programming cable and service card are included in the <strong>GAT</strong> <strong>Lock</strong> Basic<br />
Set 6000 F.<br />
<strong>Battery</strong> key<br />
RS 232 to PC/laptop<br />
Programming cable<br />
<strong>Battery</strong><br />
Inserting the battery:<br />
1. Ensure polarity is matched.<br />
2. Press the battery until it <strong>lock</strong>s into place.<br />
A detailed description of the configuration can be found in the Manual<br />
<strong>GAT</strong> <strong>Lock</strong> <strong>6010</strong> F.<br />
2<br />
1<br />
<strong>Battery</strong> Contacts<br />
<strong>Battery</strong> Compartment Contacts<br />
Only insert the battery once the <strong>GAT</strong> <strong>Lock</strong> <strong>6010</strong> F has been mounted<br />
and the <strong>lock</strong>ers have been installed in their final position.<br />
Only use batteries of the listed manufacturers in the technical data<br />
on page 2!<br />
Safety instructions<br />
- This device must be installed by qualified personnel only.<br />
- The applicable safety and accident prevention regulations<br />
must be observed.<br />
- Safety devices must not be removed.<br />
- Please observe the technical data of the device specified<br />
on the data sheet.<br />
- Remove the battery during the transportation of the <strong>lock</strong>er.<br />
Valid as from April 16 th , 2010 • Technical data subject to modifications without notice!<br />
4 DB_<strong>GAT</strong>-LOCK<strong>6010</strong>F_EN_10.indd • PartNo.: 985287<br />
www.<strong>gantner</strong>.<strong>com</strong>