DN-13005 / DN-13015 - Digitus
DN-13005 / DN-13015 - Digitus
DN-13005 / DN-13015 - Digitus

You also want an ePaper? Increase the reach of your titles
YUMPU automatically turns print PDFs into web optimized ePapers that Google loves.
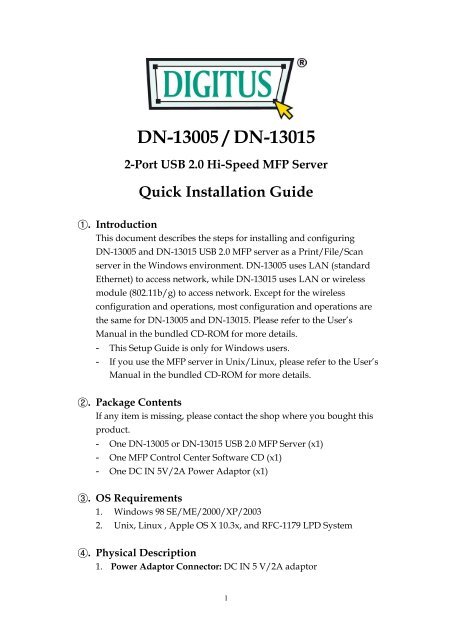
<strong>DN</strong>-<strong>13005</strong> / <strong>DN</strong>-<strong>13015</strong><br />
2-Port USB 2.0 Hi-Speed MFP Server<br />
Quick Installation Guide<br />
1. Introduction<br />
This document describes the steps for installing and configuring<br />
<strong>DN</strong>-<strong>13005</strong> and <strong>DN</strong>-<strong>13015</strong> USB 2.0 MFP server as a Print/File/Scan<br />
server in the Windows environment. <strong>DN</strong>-<strong>13005</strong> uses LAN (standard<br />
Ethernet) to access network, while <strong>DN</strong>-<strong>13015</strong> uses LAN or wireless<br />
module (802.11b/g) to access network. Except for the wireless<br />
configuration and operations, most configuration and operations are<br />
the same for <strong>DN</strong>-<strong>13005</strong> and <strong>DN</strong>-<strong>13015</strong>. Please refer to the User’s<br />
Manual in the bundled CD-ROM for more details.<br />
- This Setup Guide is only for Windows users.<br />
- If you use the MFP server in Unix/Linux, please refer to the User’s<br />
Manual in the bundled CD-ROM for more details.<br />
2. Package Contents<br />
If any item is missing, please contact the shop where you bought this<br />
product.<br />
- One <strong>DN</strong>-<strong>13005</strong> or <strong>DN</strong>-<strong>13015</strong> USB 2.0 MFP Server (x1)<br />
- One MFP Control Center Software CD (x1)<br />
- One DC IN 5V/2A Power Adaptor (x1)<br />
3. OS Requirements<br />
1. Windows 98 SE/ME/2000/XP/2003<br />
2. Unix, Linux , Apple OS X 10.3x, and RFC-1179 LPD System<br />
4. Physical Description<br />
1. Power Adaptor Connector: DC IN 5 V/2A adaptor<br />
1
2. Init Button: print the configuration page and initialize the server<br />
3. Wireless Station (only for <strong>DN</strong>-<strong>13015</strong>): IEEE 802.11 b/g wireless<br />
station with antenna inside<br />
4. Ethernet Connector: a twisted pair category 5 cable<br />
5. USB Host Ports: USB 1.1/2.0 low, full, and Hi-Speed compliant<br />
6. Indicators<br />
• Power Indicator is lit while power is applied. If it is not lit, or if<br />
it blinks, there is a problem with the MFP server or Power<br />
Adapter.<br />
• Link Status (only for <strong>DN</strong>-<strong>13005</strong>) is lit while network is applied.<br />
If it is not lit, it indicates that this server does not connect to the<br />
network.<br />
• Status Indicator (only for <strong>DN</strong>-<strong>13005</strong>) blinks to indicate network<br />
activity.<br />
• LAN Indicator (only for <strong>DN</strong>-<strong>13015</strong>) blinks to indicate wired<br />
network activity. If it is lit, it indicates the wired network is<br />
applied. If it is not lit, it indicates that the server does not<br />
connect to the wired network.<br />
• WLAN Indicator (only for <strong>DN</strong>-<strong>13015</strong>) blinks to indicate wireless<br />
network activity. If it is lit, it indicates the wireless network is<br />
applied. If it is not lit, it indicates that the server does not<br />
connect to the wireless network.<br />
• USB1 Indicator is lit while a USB device connects to USB1 Port<br />
of the MFP server. If it is not lit, or if it blinks, there is a<br />
problem with the USB device or the MFP server.<br />
• USB2 Indicator is lit while a USB device connects to USB2 Port<br />
of the MFP server. If it is not lit, or if it blinks, there is a<br />
problem with the USB device or the MFP server.<br />
5. Connect <strong>DN</strong>-<strong>13005</strong> / <strong>DN</strong>-<strong>13015</strong> to Your Wired Network<br />
1. Connect <strong>DN</strong>-<strong>13005</strong> / <strong>DN</strong>-<strong>13015</strong> to the wired network, such as a LAN<br />
switch or a LAN hub, using a LAN cable.<br />
2. Connect <strong>DN</strong>-<strong>13005</strong> / <strong>DN</strong>-<strong>13015</strong> to USB printers, hard drives or flash<br />
ROM disks, and HP all-in-one series printers (AIO/MFP) using USB<br />
cables.<br />
3. Connect <strong>DN</strong>-<strong>13005</strong> / <strong>DN</strong>-<strong>13015</strong> to the power jack using the power<br />
adaptor (included in this package).<br />
2
6. Connect <strong>DN</strong>-<strong>13015</strong>W to Your Wireless Network<br />
Just skip this step if you are using <strong>DN</strong>-<strong>13005</strong>.<br />
1. Follow Step 5.<br />
2. Properly set up wireless configuration as Step 8.<br />
3. Plug-off the LAN (Ethernet) cable.<br />
4. Plug-off the power adapter and then plug-in the power adapter to<br />
restart server. <strong>DN</strong>-<strong>13015</strong>W will connect to your wireless network.<br />
7. Install Utility<br />
1. Insert the included CD-ROM into the personal computer. The<br />
Autorun screen as Fig1 should appear.<br />
Figure 1 Autorun<br />
2. Click Install Product button.<br />
3. Click Next, if you see any Next button in installation windows.<br />
4. Click Finish.<br />
8. Configure <strong>DN</strong>-<strong>13005</strong> / <strong>DN</strong>-<strong>13015</strong> with Utility<br />
Using MFP Control Center Software (Fig2):<br />
1. Open the <strong>Digitus</strong> MFP Control Center. It will automatically search the<br />
existing servers and display their statuses.<br />
3
2. Select the server that you want to configure. Double click the<br />
selected server and enter Administrator (default: admin) and<br />
Password (default: admin).<br />
Figure 2 Control Center<br />
3. Name your <strong>DN</strong>-<strong>13005</strong> / <strong>DN</strong>-<strong>13015</strong> server and select a codepage for<br />
file server function as Fig3. Please enter server’s host name and<br />
workgroup for Windows networking by SMB protocol. The default<br />
host name is <strong>DN</strong>-<strong>13005</strong> for <strong>DN</strong>-<strong>13005</strong> or <strong>DN</strong>-<strong>13015</strong> for <strong>DN</strong>-<strong>13015</strong><br />
and workgroup is ARBEITSGRUPPE. If you want to use the file<br />
server function, you have to set the same codepage as the one that<br />
your Windows PC is using.<br />
4. Assign IP address to <strong>DN</strong>-<strong>13005</strong> / <strong>DN</strong>-<strong>13015</strong> as Fig4. Please choose<br />
the one method to set the IP address of the server. You can<br />
automatically get IP by using DHCP or manually assign an IP to the<br />
server.<br />
5. Set up wireless configuration (only for <strong>DN</strong>-<strong>13015</strong>):<br />
- Select the Network Type: Ad-Hoc mode - no Access Point is used or<br />
Infrastructure mode (Default) - all Wireless stations connect to the<br />
4
Access Point.<br />
- Set SSID, Channel, and Security according to the table below<br />
SSID<br />
Channel<br />
WEP<br />
Settings<br />
Ad-hoc Mode<br />
The Server will join any group with<br />
the same SSID.<br />
If there is no Ad-Hoc group<br />
available, the Server will create the<br />
group using the SSID assigned to it.<br />
The Server will join any group with<br />
the same Channel number.<br />
If there is no existing Ad-Hoc<br />
group available, the Server will<br />
create the group using its own<br />
Channel number.<br />
Must match the other Wireless<br />
stations.<br />
Infrastructure Mode<br />
Must match the Access<br />
Point.<br />
Access Point sets the<br />
Channel used.<br />
Wireless stations<br />
automatically locate the<br />
correct channel.<br />
Must match the Access<br />
Point.<br />
Figure 3 Set Server Name and Codepage<br />
5
Figure 4 TCP/IP Setting<br />
9. Set Up Printers<br />
You can set up your network printer using steps below.<br />
Step 1 Step 2 Step 3<br />
Set up Local<br />
Window Printer<br />
Driver<br />
Connect Your Printer to<br />
MFP Server and Connect<br />
MFP Server to Network<br />
Turn on Your<br />
Printer and MFP<br />
Server<br />
Step 6 Step 5 Step 4<br />
Turn on “Online Use<br />
Printer” in Installed<br />
Window Printer<br />
Driver<br />
Add Network Printer by<br />
- Windows Standard<br />
Method<br />
- Control Center<br />
Configure Your<br />
MFP Server<br />
6
Note: If you want to install HP all-in-one series printer drivers in<br />
Windows, you are advised to connect the MFP to PC during<br />
installation.<br />
Add Network Printer<br />
A. Use Add Printer Function of MFP Control Center Software<br />
1. Start <strong>Digitus</strong> MFP Control Center, select your MFP server,<br />
and click Add Printer (Fig 5).<br />
Figure 5 Add Printer<br />
2. Select USB1 Port or USB2 Port in Add printer box, choose to<br />
use IP Address or Host Name to represent MFP Server in<br />
printer port, and select Printing with LPR (Line Printer<br />
Remote), Printing with Raw TCP (JetDirect) or Printing<br />
with network Path(SMB) in Select the network printing<br />
protocol box (Fig6).<br />
If your server is running on a different LAN than your<br />
Windows PC, you have to choose IP address in Select IP<br />
Address or Host Name in printer port box.<br />
SMB Protocol is compatible with Windows 98<br />
SE/ME/2000/XP/2003. LPR and Raw TCP protocols are<br />
compatible for Windows 2000/XP/2003.<br />
3. Click Apply.<br />
4. Select the desired printer driver and click Set Port to Printer.<br />
5. Click OK.<br />
6. If you can not find any printer driver in Printer List, please install<br />
your printer driver first or click Add New Printer to install the<br />
printer driver.<br />
7
Figure 6 Printer Setting in Control Center<br />
B. Use Standard Windows Add Printer Wizard<br />
- Windows Platform: Windows 98SE/ME/2000/XP/2003<br />
- Network Printing Protocol: SMB<br />
1. Open Printers and Faxes<br />
2. Right-click the printer for which you want to change settings,<br />
and then click Properties<br />
3. Click the Ports tab.<br />
4. Clear Enable bidirectional support and click Create a new<br />
port, and then click Local Port in the Port type section.<br />
5. In the Port Name box, type the path to the printer in the<br />
following format: ”\\ server’s host name\printer name” or ”\\<br />
server’s IP address \printer name” (Please refer to server’s web<br />
pages or <strong>Digitus</strong> MFP Control Center tool to know the exact<br />
path). For example: if you set server’s host name as<br />
<strong>DN</strong>-<strong>13005</strong> and printer name (USB1 port) as psc 1300 ser,<br />
then the network path is expressed as: \\<strong>DN</strong>-<strong>13005</strong>\psc 1300<br />
8
as shown in Fig7.<br />
If your server is running on a different LAN than your<br />
windows PC, you have to type IP address in Port Name box.<br />
6. Click OK, and then select a Windows driver for your printer.<br />
If you already have the printer’s driver installed, you will be<br />
asked whether to keep it or to replace it. Click Next.<br />
7. Choose whether you want to share the printer with other<br />
network users. Do you want to print a test page? Select the<br />
appropriate radio button and click Next and Finish.<br />
Figure 7 Printer Setting for Local Port<br />
10. Use File Sharing<br />
- File System: This product supports a file format of FAT12/16/32. It<br />
will not support a drive formatted by NTFS, etc.<br />
- Naming Your Storages: The local drives of the two storages in<br />
USB1 port and USB2 port are named as USBx_DyPz, where USBx<br />
represents the USBx port, Dy represents the the y-th Disk and Pz<br />
represents the z-th partition.<br />
- Setting MFP Server Code Page: MFP Server supports Windows<br />
code pages. If you want to communicate files with MFP server, you<br />
have to set your MFP server codepage to be same as the codepage<br />
that your Windows PC is using.<br />
- Using SMB Method for Sharing Storages<br />
1. Connect a USB storage device to this product.<br />
2. Select My Network Places<br />
3. Click Display the Computers of Workgroup<br />
4. Double click Microsoft Windows Network icon.<br />
5. Double click the Workgroup that MFP server belongs to. The<br />
default Workgroup name is “ARBEITSGRUPPE”. You can<br />
refer to <strong>Digitus</strong> MFP Control Center or server’s web pages to<br />
get it. You will see that the MFP server will be displayed as the<br />
9
default host name "<strong>DN</strong>-<strong>13005</strong>" (or "<strong>DN</strong>-<strong>13015</strong>") or the host<br />
name that you set.<br />
6. If you can not find Workgroup name of MFP server in<br />
Microsoft Windows Network, you can select Search Computer<br />
in My Network Places and type the server’s hostname or IP<br />
address (eg, default host name “<strong>DN</strong>-<strong>13005</strong>” ) to find it.<br />
7. Double click this host name icon. The folders will be displayed<br />
as USB1_DyPz, and USB2_DyPz where Dy represents the y-th<br />
disk and Pz represents the z-th partition with respect to USB1<br />
port and USB2 port.<br />
8. If you clear Enable SMB/CIFS Print/File Server<br />
Authentication in Supported Protocols, you login to the SMB<br />
server without requiring authentication; otherwise you have to<br />
type user name and password to login to the server. You can<br />
add user name and password in User Account box by MFP<br />
Control Center or server’s Web page.<br />
If you use SMB on Windows 98 SE/ME, you must login to your<br />
Windows 98 SE/ME using the same user name as in server’s User<br />
Account.<br />
9. Perform Open, Paste, Remove or Copy the files to the shared<br />
folders.<br />
- Using FTP Method for Sharing Storages<br />
1. Open Microsoft IE<br />
2. In Web Address List, type command: “ftp://server’s host name<br />
“ or “ftp:// server’sIP address”. If you have changed the default<br />
FTP port : 21, you have to add the new port number in the tail<br />
of the command as “ftp://server’s host name:ftp port” or<br />
“ftp://IP address of server: ftp port”<br />
3. The shared folders will be listed in IE.<br />
4. If you set Enable Server Authentication in FTP server protocol<br />
settings you have to type user name and password to login to<br />
the server; if you set Allow Anonymous Login, you can use the<br />
user name “anonymous” to login with Read-only permission. If<br />
you clear server authentication, you do not need username or<br />
password to login to the server. You can add user name and<br />
password in User Account box by MFP Control Center or<br />
server’s Web page.<br />
10
5. Perform Open, Paste, Remove or Copy the files to the shared<br />
folders.<br />
11. Use Network Scanning Function<br />
Figure 8 Network Scan Button<br />
Figure 9 Network Scanner Interface<br />
1. Connect HP all-in-one series printer (MFP) to the server. Please<br />
refer to User’s Manual for more details.<br />
2. Open the User software: <strong>Digitus</strong> MFP Control Center and select<br />
11
your <strong>DN</strong>-<strong>13005</strong> / <strong>DN</strong>-<strong>13015</strong> that the MFP is connecting to.<br />
3. Click Network Scan Button (Fig8) and use the scanner (Fig9).<br />
4. Use Windows applications such as MS Word or Photoshop.<br />
12. Default Parameters<br />
Some of the important default parameters are shown below.<br />
- Administrator: admin<br />
- Password: admin<br />
- Host Name: <strong>DN</strong>-<strong>13005</strong> (for <strong>DN</strong>-<strong>13005</strong>) or <strong>DN</strong>-<strong>13015</strong> (for <strong>DN</strong>-<strong>13015</strong>)<br />
- Workgroup: ARBEITSGRUPPE<br />
- Static IP: 192.168.1.100<br />
- DHCP: enabled<br />
12