Service manual Counting balances KERN CDS / CKE - FineMech
Service manual Counting balances KERN CDS / CKE - FineMech
Service manual Counting balances KERN CDS / CKE - FineMech
Create successful ePaper yourself
Turn your PDF publications into a flip-book with our unique Google optimized e-Paper software.
<strong>KERN</strong> & Sohn GmbH<br />
Ziegelei 1<br />
D-72336 Balingen<br />
E-Mail: info@kern-sohn.com<br />
Tel: +49-[0]7433- 9933-0<br />
Fax: +49-[0]7433-9933-149<br />
Internet: www.kern-sohn.com<br />
<strong>Service</strong> <strong>manual</strong><br />
<strong>Counting</strong> <strong>balances</strong><br />
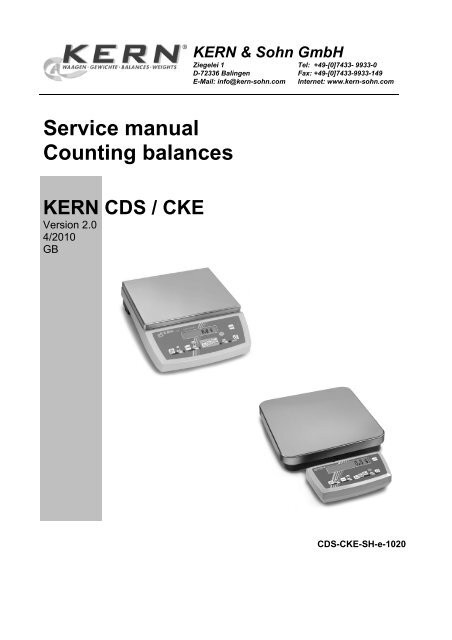
<strong>KERN</strong> <strong>CDS</strong> / <strong>CKE</strong><br />
Version 2.0<br />
4/2010<br />
GB<br />
<strong>CDS</strong>-<strong>CKE</strong>-SH-e-1020
GB<br />
<strong>KERN</strong> <strong>CDS</strong> / <strong>CKE</strong><br />
Version 2.0 4/2010<br />
<strong>Service</strong> <strong>manual</strong><br />
<strong>Counting</strong> <strong>balances</strong><br />
Table of Contents<br />
1 Basic Information ....................................................................................................... 3<br />
2 Introduction ................................................................................................................. 3<br />
3 Keyboard Description ................................................................................................ 4<br />
4 Mode – Menu ............................................................................................................... 5<br />
5 Troubleshooting ......................................................................................................... 6<br />
6 Adjustment .................................................................................................................. 6<br />
7 Factory Menu .............................................................................................................. 7<br />
7.1 How to Enter the Factory Menu ............................................................................................ 7<br />
7.2 Display Contrast .................................................................................................................... 7<br />
7.3 Factory Adjustment ............................................................................................................... 8<br />
7.4 Automatic Linearity Adjustment ........................................................................................... 9<br />
7.5 Manual Linearity Adjustment .............................................................................................. 10<br />
8 Electronics ................................................................................................................ 11<br />
8.1 Explanation and Connection of Main PCB ........................................................................ 11<br />
8.2 Layout of Main PCB ............................................................................................................. 12<br />
2 <strong>CDS</strong>-<strong>CKE</strong>-SH-e-1020
1 Basic Information<br />
Grundlegende Hinweise<br />
The device must be repaired only by trained specialist staff or personnel with<br />
professional formation (such as a repair-specialist accredited by law<br />
concerning verification).<br />
The service <strong>manual</strong> is obligatory for repair work.<br />
After repair, original conditions of the device have to be restored.<br />
Only original spare parts should be used.<br />
Das Gerät darf nur von geschultem oder beruflich ausgebildetem<br />
Fachpersonal (z. B. eichrechtlich anerkannter Instandsetzer) repariert werden.<br />
Die <strong>Service</strong>anleitung ist bindend für Reparaturen.<br />
Das Gerät muss nach erfolgter Reparatur wieder in den Originalzustand<br />
zurückversetzt werden.<br />
Es dürfen nur Originalersatzteile verwendet werden.<br />
2 Introduction<br />
This service <strong>manual</strong> covers the <strong>CDS</strong> and <strong>CKE</strong> series and is edited for the authorized<br />
servicing personnel.<br />
Note all rights are reserved. Copying any part of this <strong>manual</strong> is prohibited without our<br />
permission.<br />
<strong>CDS</strong>-<strong>CKE</strong>-SH-e-1020 3
3 Keyboard Description<br />
<strong>CDS</strong> / <strong>CKE</strong><br />
ON/OFF<br />
Taring;<br />
Invoke the mode menu by pressing the ON/OFF key.<br />
Generate reference using 5 parts;<br />
In mode menu: NO function<br />
Generate reference using 10 parts<br />
Generate reference using 20 parts;<br />
In mode menu: YES function<br />
Switchover pcs ↔ g;<br />
In menu: Mode function.<br />
Print out weighing result.<br />
4 <strong>CDS</strong>-<strong>CKE</strong>-SH-e-1020
4 Mode – Menu<br />
How to invoke the mode menu:<br />
Turn on balance. Press and hold the TARE key and press the ON/OFF key.<br />
/ <strong>CDS</strong><br />
Factory settings:<br />
9600bd:<br />
YES<br />
Fast: 3<br />
Keyboard overview / Function<br />
No<br />
Yes<br />
IMPORTANT!<br />
The modified settings - as well as the adjustment - must be stored when switching-off,<br />
via the ON/OFF button.<br />
<strong>CDS</strong>-<strong>CKE</strong>-SH-e-1020 5
5 Troubleshooting<br />
Interruption<br />
==OVERLOAD==<br />
Possible cause<br />
• Either the scale is overloaded or there is a mechanical<br />
defect<br />
= ============ • Underload: Weighing range has been fallen short of<br />
• Mechanical defect or a defect in the main PCB<br />
7 Factory Menu<br />
7.1 How to Enter the Factory Menu<br />
1. Turn ON the balance.<br />
2. Press and hold the TARE key approx. 10 seconds until [Factory Reset?]<br />
appears.<br />
3. Press key once.<br />
4. The display appears [Contrast xx]. The balance is now in service mode.<br />
5. Step trough with key<br />
7.2 Display Contrast<br />
1. Turn ON the balance.<br />
2. Press and hold the TARE key approx. 10 seconds until [Factory Reset?]<br />
appears.<br />
3. Press key once.<br />
4. The display appears [Contrast xx].<br />
5. With the keys and<br />
insert the value and confirm with<br />
key.<br />
6. Press key until the balance is in weighing mode, e.g. 0.0 g<br />
Please notice the LCD segments are intense visible if the stored value is low.<br />
If the stored value is high the LCD segments are low visible.<br />
<strong>CDS</strong>-<strong>CKE</strong>-SH-e-1020 7
7.3 Factory Adjustment<br />
1. Turn ON the balance.<br />
2. Press and hold the TARE key approx. 10 seconds until [Factory Reset?]<br />
appears.<br />
3. Press key twice until [Lock ? N] appears.<br />
4. Set “Lock” to ON with key.<br />
The display appears [Lock ?<br />
Y].<br />
5. Press key until the balance is in weighing mode, e.g. 0.0 g<br />
6. Press and hold the TARE key and press simultaneously the ON/OFF key once.<br />
The display appears [Cal ? N].<br />
7. Press key to start the factory adjustment. The display appears [--------],<br />
then [Place CAL Weight].<br />
8. Place the maximum weight on the weighing pan.<br />
9. Balance measuring for approx. one minute.<br />
10. After that balance go back to normal weighing mode.<br />
11. Remove the weight and switch off the balance by pressing the ON/OFFkey.<br />
12. Now plug off the power supply and plug in again.<br />
8 <strong>CDS</strong>-<strong>CKE</strong>-SH-e-1020
7.4 Automatic Linearity Adjustment<br />
1. Turn ON the balance.<br />
2. Press and hold the TARE key approx. 10 seconds until [Factory Reset?]<br />
appears.<br />
3. Press key until [Linear auto ?] appears.<br />
4. Press key to start the automatic linearity adjustment. The display appears<br />
the first linearity point, e.g. [L1 2000.0g ?].<br />
5. Confirm with key or press the key<br />
to select another linearity point, which is outside the permissible tolerances, e.g.<br />
[L2 4000.0g ?] and confirm with key.<br />
The display appears [Place Lin Weight].<br />
6. Place the required weight on the centre of the weighing pan and wait until you will<br />
get a stable weighing result.<br />
7. Remove the weight. Now balance is in weighing mode.<br />
8. Switch off the balance by pressing the ON/OFF-key.<br />
9. Now plug off the power supply and plug in again.<br />
Please notice the linearity points were defined and configured in our production line.<br />
Therefore it is not possible to change them afterwards without special configuration<br />
software.<br />
<strong>CDS</strong>-<strong>CKE</strong>-SH-e-1020 9
7.5 Manual Linearity Adjustment<br />
1. Turn ON the balance. After warming-up time and adjustment check balance<br />
readings in all measuring points. In case of differences make a note.<br />
2. Press and hold the TARE key approx. 10 seconds until [Factory Reset?]<br />
appears.<br />
3. Press key until [Linear man ?] appears.<br />
4. Press key to start the <strong>manual</strong> linearity adjustment. The display appears the<br />
first linearity point, e.g. [L 2000.0g +00d].<br />
5. With the keys , and you can change the stored<br />
value.<br />
6. Press the key to select another linearity point, which is outside the<br />
permissible tolerances, e.g. [L 4000.0g -07d] and inscribe the correction value<br />
like described above in point (5.) and so on.<br />
7. To return to normal weighing mode press TARE key once.<br />
8. Switch off the balance by pressing the ON/OFF-key.<br />
9. Now plug off the power supply and plug in again.<br />
Information:<br />
If there is a positive difference (e.g. 2000.6 g = + 6 digit) you should subtract this difference<br />
to the stored value (e.g. [L 2000.0 -06d]).<br />
If there is a negative difference (e.g. 1999.4 g = - 6 digit) you should add this difference to<br />
the stored value (e.g. [L 2000.0 +06d]).<br />
10 <strong>CDS</strong>-<strong>CKE</strong>-SH-e-1020
8 Electronics<br />
8.1 Explanation and Connection of Main PCB<br />
Pin 1: Power supply (-)<br />
Pin 2: Power supply (+)<br />
Pin 3: RS 232 (TXD)<br />
Pin 4: RS 232 (RXD)<br />
Pin 5: RS 232 (GND)<br />
1 2 3 4 5<br />
Connection of<br />
keyboard overlay<br />
JTAG<br />
Load cell<br />
+IN (+EX)<br />
- IN (-EX)<br />
Shield<br />
+OUT (+SIG)<br />
-OUT (-SIG)<br />
Connection<br />
of LCDdisplay<br />
Series resistor<br />
for backlight<br />
(min. 50 ohm)<br />
Connection of<br />
LCD display<br />
Top Side<br />
If required set solder bridge<br />
to switch on the scale<br />
automatically after plug in<br />
the mains adapter (without<br />
pressing the ON/OFF key)<br />
Resistor for<br />
charging circuit<br />
(modeldependent)<br />
Bottom Side<br />
<strong>CDS</strong>-<strong>CKE</strong>-SH-e-1020 11
8.2 Layout of Main PCB<br />
12 <strong>CDS</strong>-<strong>CKE</strong>-SH-e-1020


