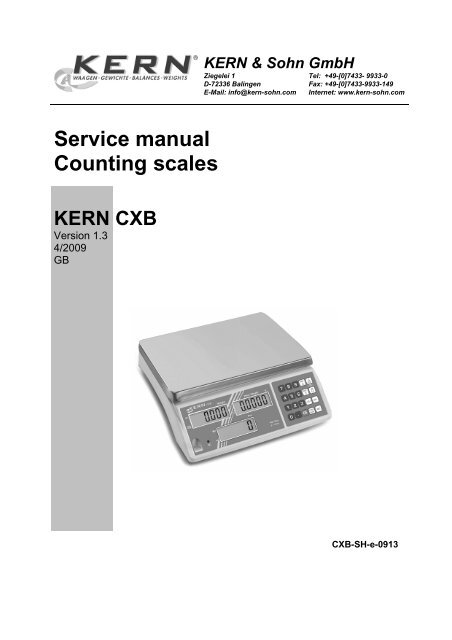
KERN CXB Version 1.3 - FineMech
KERN CXB Version 1.3 - FineMech
KERN CXB Version 1.3 - FineMech
Create successful ePaper yourself
Turn your PDF publications into a flip-book with our unique Google optimized e-Paper software.
5.1 Symbol indicator “3”Display weightHere, the weight of your goods is displayed.Overlay indicates:0PRE-TAREZeroing displayTare in memoryBattery very lowDisplay reference weightThe reference weight of a sample is shown here. This value is either entered by userof calculated by balance.Overlay indicates:Placed number of pieces insufficient for reference calculationPlaced reference weight insufficient for reference calculationDisplay quantityHere, all the parts placed on balance are immediately displayed by number.Overlay indicates:M+ Data in summation memoryStability displayBattery charge status displayredgreenBattery is almost dischargedBattery is completely discharged<strong>CXB</strong>-SH-e-0913 7
6 Explanation of keyboardChoiceFunction-• Number keys• Delete key• Call counting with tolerance control• Store reference weights in memory• Call stored reference weights• Addition in total memory• Call up total memory• Delete summation memory• Enter reference weight through weighing• Display reference weight stored last• Enter target number of pieces• Numeric entry reference weight• Display reference weight stored last• Enter target weight• Zeroing key• Back to weighing mode• Taring key• Enter numerical tare8 <strong>CXB</strong>-SH-e-0913
7 External calibration7.1 Calibration of non-approval models (<strong>CXB</strong>)♦ Before calibrating, adjust the mini jumper SWA1 to “ADJ” position (see chap. 8)♦ Observe stable environmental conditions. A warming up time of 30 minutes isrequired for stabilization.OperationEnsure that there are no objects on the weighing plate.a PRE-TARE0Press thekeykey and keep it pressed down whilst simultaneously operating theWeight value of calibration weight is flashing on display. However, you may enter avalue of your choice via the number keys. *a PRE-TARE3000CALCarefully place calibration weight in the centre of the weighing plate. Calibrationwill be carried out automatically after dead stop control.Remove calibration weight during count down to zero.The balance returns automatically into weighing mode. An error message willappear on the display should a calibration error occur or should the calibrationweight be incorrect. Turn balance off, then restart it and repeat the calibrationprocess.* The calibration should be made with the recommended calibration weight (seechap. 1 "Technical data" in the operating manual).NoteUse thekey to exit calibration mode. The balance returns to weighing mode.7.2 Back to the original value of calibration(only non-approval models) Press and hold key followed by pressing key until the scale is countingbackward to zero, then release it. The scale will show the original value, which is the value setting at the factory.<strong>CXB</strong>-SH-e-0913 9
7.3 Calibration of approval models (<strong>CXB</strong>-M)♦ Before calibrating, adjust the mini jumper SWA1 to “ADJ” position (see chap. 8)♦ Observe stable environmental conditions. A warming up time of 30 minutes isrequired for stabilization.OperationEnsure that there are no objects on the weighing plate. Press+ 1 + 5 keys PresskeyThe display shows:0.000M+0194452(Example) PresskeyThe display shows:15.000(Example)Weight value of calibration weight is flashing on display.M+0194452 Carefully place calibration weight in the centre of the weighing plate. PresskeyCalibration will be carried out automatically after dead stop control. Remove calibration weight during count down to zero.The balance returns automatically into weighing mode. An error message willappear on the display should a calibration error occur or should the calibrationweight be incorrect. Turn balance off, then restart it and repeat the calibrationprocess.* The calibration should be made with the recommended calibration weight (seechap. 1 "Technical data" in the operating manual).10 <strong>CXB</strong>-SH-e-0913
8 Service mode access♦ Access to the service mode is controlled by jumper SWA1 on the main PCB. Thejumper has two positions LOCK, which prevents access to the service mode andADJ, which allows access to the calibration and configuration routines.♦ SWA 1 jumper is located adjacent to the RF screening cover of the main PCB.♦ Place your balance upside down and remove seal/cap. For calibration andconfiguration routines the jumper “SWA1” must be set to position “ADJ”.Sealing mark / unlocking switchPosition of unlocking switchTo the rightTo the leftStatusUnlock the balance for calibration process (ADJ)Verification position - calibration locked (LOCK)<strong>CXB</strong>-SH-e-0913 11
9 Linearity calibration♦ Before calibrating, please adjust the mini jumper SWA1 to “ADJ” position.♦ After finish the calibration, please re-adjust the mini jumper SWA1 to“LOCK” position. Divide the capacity into 5 sections before linearity calibration.E.g. <strong>CXB</strong> 30K2 (capacity = 30kg)Divide it into 5 phases: 3kg, 6kg, 12kg, 12kg, 3kg(The total calibrated weight should be between 1.1~1.25 times of the capacityweight. E.g.: 3kg + 6kg + 12kg + 12kg + 3kg = 36kg are 1.2 times of 30kg) Turn on the machine, after the scale resets back to zero,then press key + 1 key + 6 key (at the same time) to enter the linearitycalibration mode. (Please press 9 key to pass over this linearity calibrationmode.)Weight Piece Weight Pcs0 0 L. XXXXXXkey in *n valuedisplay the number of times of calibrationcore value(zero internal value)♦ *n = the calibrated value of phase X / the calibrated value of 1 st phase[*n = multiplier (2,3,4…) of 1 st calibration weight / 1 st phase]♦ *n ⇒ must be an integral Press . keyWeight Piece Weight Pcs0 1 1 XXXXXXinternal value of the phase12 <strong>CXB</strong>-SH-e-0913
Put the 1 st weight mass (e.g. weight mass=3kg, *n=1), then press . keyWeight Piece Weight Pcs0 2 1 XXXXXXinput *n valueinternal value of the phase Add the 2 nd weight mass (e.g. 6kg, in sum 9kg) and input *n value (e.g. *n=2),then press . keyWeight Piece Weight Pcs0 3 1 XXXXXXinput *n value, e.g. n=2internal value of the phase Add the 3 rd weight mass (e.g. 12kg, in sum 21kg) and input *n value(e.g. *n=4), then press . keyWeight Piece Weight Pcs0 4 1 XXXXXXinput *n value, e.g. n=4internal value of the phase Add the 4 th weight mass (e.g. 12kg, in sum 33kg) and input *n value(e.g. *n=4), then press . keyWeight Piece Weight Pcs0 5 1 XXXXXXinput *n value, e.g. n=4internal value of the phase<strong>CXB</strong>-SH-e-0913 13
Add the 5 th weight mass (e.g. 3kg, in sum 36kg) and input *n value (e.g. *n=1),then press . keyWeight Piece Weight Pcs0 6 1 XXXXXXinput *n value, e.g. n=1internal value of the phase Presskey (“CONFIRM” key), the buzzer beeps onceWeight Piece Weight PcsS Y SU P Remove all the weight mass, the scale will reset back to zero automatically,then the procedures finished.14 <strong>CXB</strong>-SH-e-0913
10 Spec. calibration♦ Before calibrating, please adjust the mini jumper SWA1 to “ADJ” position.♦ After finish the calibration, please re-adjust the mini jumper SWA1 to “LOCK”position. Turn on the machine, after the scale resets back to zero,then presscalibration mode.key + 1 key + 7 key (at the same time) to enter the spec.Weight Piece Weight Pcs0 3 0 0 1 0 2 1 X X 2 0 2 0 5 3 Pressprogram version keyboard default value core value(to check keyboard function) (internal value of zero)see chapter 3“General Information“keyWeight Piece Weight Pcs00 0 0 0 0 0 0 0 0 0 0 0 0 0 1full capacity setting preset calibrated value refer to “Approx. 1”key in “ full scale+9d ” suggest key in “full scale”(overload function max.+ 9d)Approx. 1: 0 0 0 0 0 1a b c d ea ⇒ input the division 1 = e.g. 1g / 10g 2 = e.g. 0,2g / 2g 5 = e.g. 0,5g / 5gb ⇒ input the decimal point 0 = e.g. 1g 1 = e.g. 0,2g2 = e.g. 0,01kg 3 = e.g. 0,001kgc ⇒ input the unit of the unit weight 0, 1, 2, 8, 9 (full capacity are 10 n of division)0 = 10 0 (x 1) » <strong>CXB</strong> 15K1 / <strong>CXB</strong> 30K21 = 10 1 (x 10)2 = 10 2 (x 100)8 = 10 -2 (x 0.01)9 = 10 -1 (x 0.1) » <strong>CXB</strong> 3K0.2 / <strong>CXB</strong> 6K0.5Example: <strong>CXB</strong> 3K0.2 a= 2.value of a x 10 n = Readout 2 x 10 -1 = 0,2g c= 9d ⇒ define the keyboard function of ; kg/lb ; PST CE keys (use always 1 )0 = PST CE, unit weight in kg1 = 10 preset, unit weight in kg (OIML approval model)2 = kg/lb (1 st unit = kg, 2 nd unit = lb) 3 = 10 preset, kg/lb (1 st unit kg, 2 nd unit lb)4 = PST CE, lb unit only 5 = 10 preset, lb unit only6 = lb/kg (1 st unit lb, 2 nd unit kg) 7 = 10 preset, lb/kg (1 st unit lb, 2 nd unit kg)<strong>CXB</strong>-SH-e-0913 15
e ⇒ different versions of models setting0 = Non-approval model (External calibration is applicable)1 = OIML approval model (The display resolution should be set at 1/3000,External calibration is NOT applicable)4 = Non-approval model (External calibration is NOT applicable) After input spec., press key (not necessary to put the weight mass on theplatter, the calibrated weight value is the reference for the temperaturecalibration procedure).♦ The scale will be self-tested and reset back to zero.Press key+ 1 key+ 5 key, then press key to enter the temperaturecalibration mode (see chapter 11).NOTES:(1) The last number of full capacity value must be variable number, can be fixed “0”.(2) The digit and location of preset calibrated value, refer to the location of capacitydigit.(3) Input capacity + 9d in order to run 9 times overload function.(4) If max. number of digit is “0”, please input “0”.(5) Reference values for capacity setting see chapter 10.1.16 <strong>CXB</strong>-SH-e-0913
10.1 Reference values for capacity settingWeighing unit – g –<strong>CXB</strong> 3K0.2<strong>CXB</strong> 6K0.5<strong>CXB</strong> 15K1<strong>CXB</strong> 30K2Weight Piece Weight Pcs30 0 1 8 3 0 0 0 0 2 1 9 1 0 (1)Weight Piece Weight Pcs60 0 4 5 6 0 0 0 0 5 1 9 1 0 (1)Weight Piece Weight Pcs15 0 0 9 1 5 0 0 0 1 0 0 1 0 (1)Weight Piece Weight Pcs30 0 1 8 3 0 0 0 0 2 0 0 1 0 (1)<strong>CXB</strong> 3K1M<strong>CXB</strong> 6K2MWeight Piece Weight Pcs30 0 1 8 3 0 0 0 0 1 0 0 1 1 (1)Weight Piece Weight Pcs60 0 4 5 6 0 0 0 0 2 0 0 1 1 (1)Weighing unit – kg –<strong>CXB</strong> 15K1<strong>CXB</strong> 30K2<strong>CXB</strong> 3K1M<strong>CXB</strong> 6K2M<strong>CXB</strong> 15K5M<strong>CXB</strong> 30K10MWeight Piece Weight Pcs15 0 0 9 1 5 0 0 0 1 3 0 1 0 (1)Weight Piece Weight Pcs30 0 1 8 3 0 0 0 0 2 3 0 1 0 (1)Weight Piece Weight Pcs03 0 0 9 0 3 0 0 0 1 3 0 1 1 (1)Weight Piece Weight Pcs06 0 1 8 0 6 0 0 0 2 3 0 1 1 (1)Weight Piece Weight Pcs15 0 4 5 1 5 0 0 0 5 3 0 1 1 (1)Weight Piece Weight Pcs03 0 0 9 0 3 0 0 0 1 2 0 1 1 (1)<strong>CXB</strong>-SH-e-0913 17
11 Temperature calibration♦ Before calibrating, please adjust the mini jumper SWA1 to “ADJ” position.♦ After finish the calibration, please re-adjust the mini jumper SWA1 to “LOCK”position.11.1 Indoor air (normal) temperature calibration * The scale will be self-tested and reset back to zero.Press key+ 1 key+ 5 key, then press key to enter the temperaturecalibration mode.Weight Piece Weight Pcs0. 0 0 0 XX XXXXXXindoor temperature(°C)zero internal valueNo weight on the platter, press . key to calibrate zero.Weight Piece Weight Pcs3 0. 0 0 0 XX XXXXXXfull capacity value indoor temperature(°C) internal value of full capacityPut the full capacity weight on the platter, press . key to calibrate full capacityvalue.After scale is stable, it will reset back to zero automatically (remove the weightmass from the platter before it resets back to zero), then the proceduresfinished. Put the weight mass on the platter again to check if the displayshows the accurate weight. If it’s correct, turn off the power, then re-adjust themini jumper SWA1 to “LOCK” position.NOTES:(1) The procedures are for the scale without the temperature IC or for the scale inthe normal temperature environment.(2) To achieve the accuracy of the scale, please run the high temperature and lowtemperature calibration procedures.(3) The procedures for high temperature and low temperature are totally reversed.18 <strong>CXB</strong>-SH-e-0913
11.2 High temperature calibration⇒ scales must be in the temperature lab chamber Press key+ 1 key+ 5 key, then press key to enter the temperaturecalibration modeWeight Piece Weight Pcs0. 0 0 0 XX XXXXXXhigh temperature(°C)zero internal valueNo weight on the platter, press . key to calibrate zeroWeight Piece Weight Pcs3 0. 0 0 0 XX XXXXXXfull capacity value high temperature(°C) internal value of full capacityPut the full capacity weight on the platter, press . key to calibrate full capacityvalue.After scale is stable, it will reset back to zero automatically (remove the weightmass from the platter before it resets back to zero), then the proceduresfinished. Put the weight mass on the platter again to check if the displayshowing the accurate weight. If it’s correct, turn off the power, then re-adjustthe mini jumper SWA1 to “LOCK” position.<strong>CXB</strong>-SH-e-0913 19
1<strong>1.3</strong> Low temperature calibration⇒ scales must be in the control room of low temperature Press key+ 1 key+ 5 key, then press key to enter the temperaturecalibration modeWeight Piece Weight Pcs0. 0 0 0 XX XXXXXXlow temperature(°C)zero internal valueNo weight on the platter, press . key to calibrate zeroWeight Piece Weight Pcs3 0. 0 0 0 XX XXXXXXfull capacity value low temperature(°C) internal value of full capacityPut the full capacity weight on the platter, press . key to calibrate full capacityvalue.After scale is stable, it will reset back to zero automatically (remove the weightmass from the platter before it resets back to zero), then the proceduresfinished. Put the weight mass on the platter again to check if the displayshowing the accurate weight. If it’s correct, turn off the power, then re-adjustthe mini jumper SWA1 to “LOCK” position.11.4 Check / Delete temperature calibration data Presskey+ 1 key+ 5 keyWeight Piece Weight PcsSho t 0 0 XXXXXXshow temperature temperature (°C) internal value Press 2 or 8 key to check the temperature calibration data. Press 2 or 8 key to select the desirable data, and double-press . key todelete it.20 <strong>CXB</strong>-SH-e-0913
12 Spare parts<strong>CXB</strong>-SH-e-0913 21
No. Description Q’ty1 Switch on/off (2 pin) 12 Power socket 13 Level 14 Buckle plug (HP-13) 15 Terminal Cover (male) 56 Round head screw M3*6 27 Round head screw M4*6 28 Round head screw TP2 3*8 19 Flat head screw M3*10 110 Round head screwTP2 4*16 411 Hexagon screw M4*12 112 Round head screw M4*25 W/10 113 Hexagon screw M4*16 414 Washer 6*13 415 1/4 spring washer 416 Nut 3*6 317 Battery Cap Foam 118 Power nameplate 230V AC 119 Power sticker 120 Dust cover 121 FD aluminum support 122 FD aluminum bracket 123 Battery 6V/4AH 124 X2 capacitor 0.1µF/275V(P=15) 125 Wire Fixer 126 Front panel 127 Rear panel 128 Keypad 129 Keypad circuit 130 Load cell 131 9501 battery fixer 132 AE washer 2.0mm 233 FD Pad for Cockroach Filter Cap 434 9910 Upper noise Filter Cap t=0.8mm 135 9910 Lower Noise Filter Cap t=0.8mm 136 FD Anti-cockroach plastic 437 Waterproof rubber 27*18*1mm 138 Main board 139 FD plastic pan 140 FD stainless steel pan 141 Adjust feet 442 Battery cover (blue) 122 <strong>CXB</strong>-SH-e-0913
43 Upper housing 144 Lower housing 145 AE Sealing 146 Round head screw M4*8 647 Multi wire 150mm 148 Alloy hexagon screw M6*16 449 Power cable 150 Capacity sticker 151 Spring 152 Transformer 115/230V-10V 1<strong>CXB</strong>-SH-e-0913 23


