RecoveryWrap⢠System - Drs. Foster and Smith
RecoveryWrap⢠System - Drs. Foster and Smith
RecoveryWrap⢠System - Drs. Foster and Smith

You also want an ePaper? Increase the reach of your titles
YUMPU automatically turns print PDFs into web optimized ePapers that Google loves.
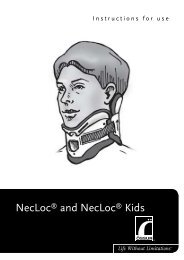
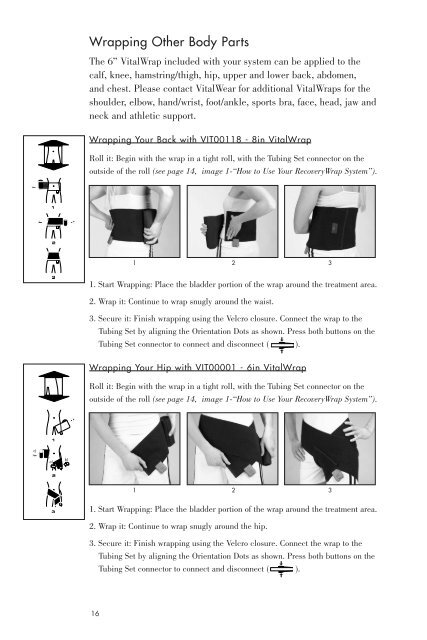
Wrapping Other Body Parts<br />
The 6” VitalWrap included with your system can be applied to the<br />
calf, knee, hamstring/thigh, hip, upper <strong>and</strong> lower back, abdomen,<br />
<strong>and</strong> chest. Please contact VitalWear for additional VitalWraps for the<br />
shoulder, elbow, h<strong>and</strong>/wrist, foot/ankle, sports bra, face, head, jaw <strong>and</strong><br />
neck <strong>and</strong> athletic support.<br />
Wrapping Your Knee with VIT00001 - 6in VitalWrap<br />
Roll it: Begin with the wrap in a tight roll, with the Tubing Set connector on the<br />
outside of the roll (see page 14, image 1-“How to Use Your RecoveryWrap <strong>System</strong>”).<br />
<br />
Wrapping Your Back with VIT00118 - 8in VitalWrap<br />
Roll it: Begin with the wrap in a tight roll, with the Tubing Set connector on the<br />
outside of the roll (see page 14, image 1-“How to Use Your RecoveryWrap <strong>System</strong>”).<br />
1 2 3<br />
1. Start Wrapping: Place the bladder portion of the wrap around the treatment area.<br />
2. Wrap it: Continue to wrap snugly around the waist.<br />
3. Secure it: Finish wrapping using the Velcro closure. Connect the wrap to the<br />
Tubing Set by aligning the Orientation Dots as shown. Press both buttons on the<br />
Tubing Set connector to connect <strong>and</strong> disconnect ( ).<br />
1 2 3<br />
1. Start Wrapping: Place the bladder portion of the wrap around the knee.<br />
2. Wrap it: Continue to wrap snugly around the knee.<br />
3. Secure it: Finish wrapping using the Velcro closure. Connect the wrap to the<br />
Tubing Set by aligning the Orientation Dots as shown. Press both buttons on the<br />
Tubing Set connector to connect <strong>and</strong> disconnect ( ).<br />
Wrapping Your Knee with VIT00392 (Large) & VIT00397 (Medium)<br />
Knee VitalWrap<br />
Unfold it: Begin by unfolding the wrap <strong>and</strong> detaching all the Velcro straps.<br />
Wrapping Your Hip with VIT00001 - 6in VitalWrap<br />
Roll it: Begin with the wrap in a tight roll, with the Tubing Set connector on the<br />
outside of the roll (see page 14, image 1-“How to Use Your RecoveryWrap <strong>System</strong>”).<br />
1 2 3<br />
<br />
<br />
<br />
1 2 3<br />
1. Start Wrapping: Place the bladder portion of the wrap around the treatment area.<br />
2. Wrap it: Continue to wrap snugly around the hip.<br />
3. Secure it: Finish wrapping using the Velcro closure. Connect the wrap to the<br />
Tubing Set by aligning the Orientation Dots as shown. Press both buttons on the<br />
Tubing Set connector to connect <strong>and</strong> disconnect ( ).<br />
1. Start Wrapping: Place the center of the wrap onto the knee with the Tubing Set<br />
connector pointing down the leg. Make sure the bladder portion of the wrap is<br />
facing down <strong>and</strong> is on top of the knee.<br />
2. Wrap it: Continue to wrap the top <strong>and</strong> bottom portion snugly around the knee.<br />
3. Secure it: Finish wrapping using the Velcro closure. Connect the wrap to the<br />
Tubing Set by aligning the Orientation Dots as shown. Press both buttons on the<br />
Tubing Set connector to connect <strong>and</strong> disconnect ( ).<br />
16<br />
17