RecoveryWrap⢠System - Drs. Foster and Smith
RecoveryWrap⢠System - Drs. Foster and Smith
RecoveryWrap⢠System - Drs. Foster and Smith

You also want an ePaper? Increase the reach of your titles
YUMPU automatically turns print PDFs into web optimized ePapers that Google loves.
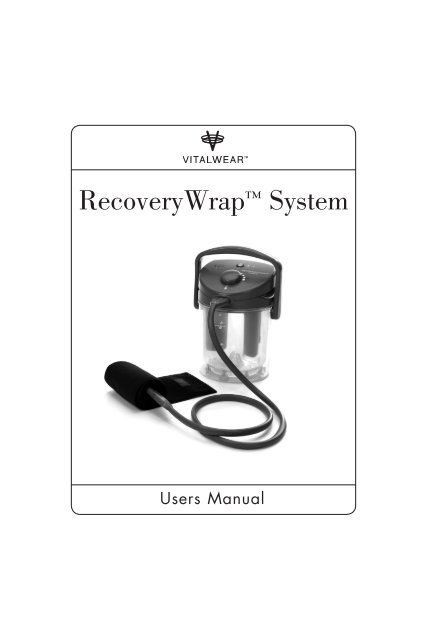
RecoveryWrap <strong>System</strong><br />
Users Manual
Thank you for purchasing our RecoveryWrap <strong>System</strong>.<br />
Dedicated to becoming the leader in durable medical<br />
equipment, VitalWear, Inc. develops <strong>and</strong> markets<br />
affordable thermal <strong>and</strong> compression therapy systems<br />
for use in accelerating the recovery of anyone who<br />
has experienced an injury <strong>and</strong> wants more control in<br />
their personal treatment.<br />
Please read this instruction manual completely prior to<br />
using the unit to ensure reliable <strong>and</strong> safe operation.<br />
RecoveryWrap <strong>System</strong> Specifications 3<br />
Warranty 4<br />
<strong>System</strong> Operation 5<br />
Notes, Cautions And Warnings 6<br />
Safety Symbols And Warnings 7<br />
Amendment 2, Sub-clause 6.8.2a(EMC) 9<br />
Unpackaging Information 9<br />
Indications & Contraindications 10<br />
Operating Instructions 12<br />
Available VitalWraps for Your <strong>System</strong> 13<br />
How To Use Your RecoveryWrap <strong>System</strong> 14<br />
Battery Operation & Charging 15<br />
Wrapping Other Body Parts 16<br />
Tubing Set Instructions for Use 20<br />
Troubleshooting 21<br />
Cleaning The Control Unit 22<br />
Cleaning The Wrap 22<br />
Storage 23<br />
Notes 24<br />
1
A significant number of Americans suffer from some type of<br />
persistent or recurrent acute pain sufficient to significantly impact<br />
their lives. The VitalWear RecoveryWrap <strong>System</strong> is a patent pending<br />
technology that applies a unique combination of cooling <strong>and</strong> compression<br />
to the human body, providing a range of key benefits:<br />
• Combination of compression <strong>and</strong> cooling therapy to the affected body part<br />
at any desired temperature between 40ºF <strong>and</strong> 70ºF,<br />
RecoveryWrap <strong>System</strong> Specifications<br />
Physical<br />
Size (approximately)<br />
Weight (dry)<br />
Fluid Tether<br />
Control <strong>System</strong><br />
Type<br />
8”diameter x 11.8”H (20.3cm x 30.0cm)<br />
5 lbs. (2.27 kg)<br />
8 ft. (2.4m)<br />
Manual user control<br />
• Compression via a proprietary VitalWrap providing for greater fluid<br />
management in the injured area,<br />
• Continuous cryotherapy to reduce pain <strong>and</strong> discomfort, <strong>and</strong> to reduce dependency<br />
on pain medication,<br />
• Variable <strong>and</strong> changeable temperature control allows for extended application<br />
minimizing the risk of skin/nerve damage <strong>and</strong> for uniquely beneficial treatments<br />
such as cryotherapy,<br />
• Safe <strong>and</strong> effective for both the professional practitioner <strong>and</strong> individual user,<br />
Thermal <strong>System</strong><br />
Range<br />
Operating period<br />
Circulating <strong>System</strong><br />
Reservoir Capacity<br />
Reservoir Fluid<br />
Flow Rate (through VitalWrap)<br />
Maximum Pressure<br />
40°F to 70°F (4.4°C to 21.1°C)<br />
2-6 hours typical continuous use<br />
0.8 gallons (2.9 liters)<br />
Ice water<br />
5.5 gph (21 lph)<br />
18 psi<br />
• A portable injury therapy system that is affordable, easy to use at a clinic, home<br />
or at work,<br />
• Universal personal wraps convenient, familiar, <strong>and</strong> easy to apply to the<br />
body, conforming comfortably to the major joints <strong>and</strong> muscles,<br />
• Applications cover treatment of chronic pain or injury of back, knee, hip,<br />
foot <strong>and</strong> ankle, h<strong>and</strong> <strong>and</strong> wrist, shoulder, elbow, chest, breast, face <strong>and</strong> jaw,<br />
head, neck, <strong>and</strong> other specific applications.<br />
Applications for the RecoveryWrap <strong>System</strong>:<br />
Orthopedics <strong>and</strong> Obstetrics<br />
Chiropractics<br />
Physical Therapy<br />
Plastic <strong>and</strong> Reconstructive Procedures<br />
Sports Medicine/ Athletics<br />
Pregnant Women <strong>and</strong> New Mothers<br />
General Procedures<br />
Chronic Joint Pain<br />
Emergency Medicine<br />
Arthritis<br />
Neuropathy<br />
Designed to help reduce pain <strong>and</strong> swelling, the RecoveryWrap cooling <strong>and</strong> compression<br />
therapy system can be used from the earliest stages of post-operative<br />
recovery, through rehabilitation, to postrecovery home use for treatment of pain<br />
<strong>and</strong> residual swelling.<br />
Electrical <strong>System</strong><br />
Voltage<br />
15VDC<br />
Max Power<br />
15W<br />
Leakage Current Under 300µA<br />
Battery Performance<br />
80 Minute Charge 2 hours of use (approximately)<br />
Overnight Charge<br />
2 1/2 hours of use (approximately)<br />
Regulatory<br />
Classification<br />
Type of Equipment<br />
Class II Equipment<br />
Type BF<br />
Operating Environment<br />
Atmospheric Pressure<br />
525 to 795 mmHg<br />
Humidity<br />
30% to 70% relative non-condensing<br />
Temperature 10°C to 40°C<br />
Transport & Storage Environment<br />
Atmospheric Pressure<br />
179 to 760 mmHg<br />
Humidity 10% to 95%<br />
Temperature<br />
0°C <strong>and</strong> +50°C<br />
Regulatory Approvals<br />
Compliance<br />
UL60601-1: St<strong>and</strong>ard for Medical Equipment<br />
Part 1: General Requirements for Safety.<br />
CAN/CSA-C22.2 no. 601.1-M90:<br />
Medical Electrical Equipment Part 1:<br />
General Requirements for Medical Electrical<br />
Equipment.<br />
IEC 60601-1: Part 1: General Requirements<br />
for Safety.<br />
VITALWEAR <strong>and</strong> RECOVERYWRAP are<br />
registered trademarks of VitalWear, Inc.<br />
Covered by US Patents: 7,191,798<br />
2<br />
3
Warranty<br />
VitalWear, Inc. guarantees this product free from defects in material<br />
<strong>and</strong> workmanship for a period of 1 year from the date of purchase<br />
except as noted below. This warranty extends only to the original<br />
retail purchaser.<br />
This VitalWear product warranty does not cover damage caused<br />
by misuse or abuse; accident; the attachment of any unauthorized<br />
accessory; alteration to the product; or any other conditions whatsoever<br />
that are beyond the control of VitalWear. VitalWear shall not<br />
be responsible for any type of incidental, consequential or special<br />
damages. All implied warranties, including but not limited to those<br />
implied warranties of fitness <strong>and</strong> merchantability, are limited in total<br />
duration of 1 year from the original purchase date.<br />
<strong>System</strong> Operation<br />
thermal wrap<br />
control unit<br />
To obtain warranty service on your VitalWear RecoveryWrap <strong>System</strong>,<br />
either h<strong>and</strong> deliver or mail the unit <strong>and</strong> your dated sales receipt (as<br />
proof of purchase) to VitalWear, Inc. (384 Oyster Point Blvd., Suite<br />
16, South San Francisco, CA 94080-6523). Be sure to include the<br />
serial number of your unit <strong>and</strong> your phone number on any correspondence.<br />
If you have any questions, please call VitalWear Inc. at<br />
1-800-553-4081.<br />
Upon receipt, VitalWear will repair or replace, as appropriate, your<br />
RecoveryWrap <strong>System</strong> <strong>and</strong> return it to you, postpaid. Warranty is<br />
solely through VitalWear Service Center. Service of this product by<br />
anyone other than VitalWear Service Center voids warranty.<br />
This warranty provides you with specific legal rights. You may have<br />
additional rights, which may vary from state to state. Because of individual<br />
state regulations, some of the above limitations <strong>and</strong> exclusions<br />
may not apply to you.<br />
tubing set<br />
The VitalWear RecoveryWrap <strong>System</strong> is comprised of a control unit, a<br />
tubing set <strong>and</strong> a thermal wrap. This VitalWrap is the part of the system<br />
that you actually apply to the body to provide cooling <strong>and</strong> compression<br />
therapy. The wrap can be applied to virtually any area of the<br />
body that can be treated with a compressive b<strong>and</strong>age.<br />
Setting up the system is a simple three-step process. (1) The user<br />
first fills the portable, leak-proof container of the control unit with ice<br />
<strong>and</strong> water, (2) then applies the VitalWrap around the injured area <strong>and</strong><br />
secures it with its Velcro closure, <strong>and</strong> (3) finally, attaches the control<br />
unit to the wrap via the tubing set.<br />
Once the control unit is turned on, cooled fluid is passed through<br />
the tubing set from the control unit to the wrap. The fluid is then<br />
circulated through the wrap, drawing heat from the body <strong>and</strong> deeply<br />
cooling the body part. The fluid is then passed back through the tubing<br />
set to the control unit where it is re-cooled <strong>and</strong> then re-circulated<br />
back to the wrap.<br />
When using this system, please check the skin where the<br />
wrap is applied periodically. Discontinue use if continued<br />
numbness <strong>and</strong> skin discoloration are present. Please refer to<br />
your health care professional prior to applying this system<br />
<strong>and</strong>/or using the system for extended periods of time.<br />
The benefit of compression can continue even if the user chooses to<br />
disconnect the tubing set from either the control unit or the wrap.<br />
4<br />
5
Notes, Cautions And Warnings<br />
Notes, cautions <strong>and</strong> warnings are used to highlight certain operating<br />
procedures <strong>and</strong> recommendations. A Note indicates a special procedure,<br />
an exception to normal operation or something else of specific<br />
interest to the reader. Notes are preceded by the word “Note” in italics.<br />
Caution or Warning symbol precedes an operational step<br />
that could damage the instrument if the user does not take<br />
certain precautions. Cautions or Warnings are located in the<br />
main text, are preceded by a Caution or Warning statement<br />
<strong>and</strong> are accompanied by this symbol in the left margin.<br />
Caution: risk of electric shock.<br />
“OFF” (only for a part of EQUIPMENT)<br />
“ON” (only for a part of EQUIPMENT)<br />
Important Safety Instructions<br />
Read all instructions before using.<br />
This equipment has been tested <strong>and</strong> found to comply with the limits<br />
for medical devices to the IEC 60601-1.<br />
Follow local governing ordinances <strong>and</strong> recycling plans regarding disposal<br />
or recycling of device components.<br />
Grounding reliability can only be achieved when the equipment is<br />
connected to an equivalent receptacle marked ‘hospital only’ or ‘hospital<br />
grade’.<br />
When using an electrical appliance, especially when children are<br />
present, basic safety precautions should always be followed.<br />
For use only with Power Supply Model VIT–00496.<br />
Safety Symbols And Warnings<br />
DANGER –To reduce the risk of electric shock:<br />
1. Always unplug this appliance from the electrical outlet<br />
immediately after using <strong>and</strong> before cleaning.<br />
2. DO NOT use while bathing or in a shower<br />
3. DO NOT place or store appliance where it can fall or<br />
be pulled into a tub or sink. DO NOT place in or drop into<br />
water or other liquid.<br />
4. DO NOT reach for a product that has fallen into water.<br />
Unplug immediately.<br />
An appliance should never be left unattended when plugged<br />
in. Unplug from outlet when not in use, <strong>and</strong> before putting<br />
on or taking off parts.<br />
Close supervision is necessary when this appliance is used<br />
by, on, or near children, invalids, or disabled persons. This<br />
appliance should not be used by or on children without<br />
parental supervision.<br />
Use this appliance only for its intended use as described in<br />
this manual. DO NOT use attachments not recommended by<br />
the manufacturer.<br />
Never operate this appliance if it has a damaged cord or<br />
plug, if it is not working properly, if it has been dropped or<br />
damaged, or dropped into water.<br />
To ensure safe use <strong>and</strong> adequate maintenance of rechargeable<br />
batteries, please avoid potential electromagnetic or<br />
other electrical <strong>and</strong> non-electrical interference when charging<br />
the batteries.<br />
To ensure safe use <strong>and</strong> adequate maintenance of rechargeable<br />
batteries, please avoid overcharging the batteries.<br />
6<br />
7
1. Ensure the top of the appliance is properly installed <strong>and</strong> the<br />
h<strong>and</strong>le is fully engaged prior to carrying the appliance.<br />
2. DO NOT carry this appliance by supply cord or use cord as a<br />
h<strong>and</strong>le.<br />
3. Keep the cord away from heated surfaces.<br />
4. Never operate the appliance without the Fluid Canister, the Top<br />
Assembly, the Tubing Set, <strong>and</strong> the Wrap completely connected.<br />
5. Never operate the appliance with any foreign objects in the<br />
Fluid Canister.<br />
6. Never drop or insert any object into any opening.<br />
7. To disconnect, turn off power (“ ” position), then remove plug<br />
from outlet.<br />
8. Use cooling surfaces carefully. Do not use over insensitive skin<br />
areas or in the presence of poor circulation. The unattended use<br />
of cooling by children or incapacitated persons may be dangerous.<br />
Consult your physician.<br />
9. DO NOT st<strong>and</strong> on or in the appliance.<br />
10. Do not use while sleeping or drowsy.<br />
11. Do not place the appliance or operate the appliance while it is<br />
on a surface more than 3 feet above the floor.<br />
12. Unplug this product before filling. Fill with water <strong>and</strong> ice only.<br />
Do not overfill.<br />
13. Do not operate without water.<br />
14. Do not operate with hot water.<br />
15. Do not place the Tubing Set, Power cord or use any wrap other<br />
than the Cervical (neck) wrap around the neck.<br />
16. Do not charge battery pack except in specified conditions.<br />
17. Do not heat battery pack above 212ºF (100ºC).<br />
18. Do not short circuit the battery pack.<br />
19. Do not crush or modify the battery pack.<br />
20. Do not overcharge the battery pack.<br />
VitalWear does not have an authorized service center. However,<br />
if this appliance is still under warranty, return it to the VitalWear<br />
Consumer Service Department at 1.800.553.4081.<br />
Amendment 2, Sub-clause 6.8.2 a (EMC):<br />
This equipment has been tested <strong>and</strong> found to comply with the limits<br />
for medical devices to the IEC 60601-1-2:2001. These limits are<br />
designed to provide reasonable protection against harmful interference<br />
in a typical medical installation. This equipment generates, uses<br />
<strong>and</strong> can radiate radio frequency energy <strong>and</strong>, if not installed <strong>and</strong> used<br />
in accordance with the instructions, may cause harmful interference<br />
to other devices in the vicinity. However, there is no guarantee that<br />
interference will not occur in a particular installation. If this equipment<br />
does cause harmful interference to other devices, which can be<br />
determined by turning the equipment off <strong>and</strong> on, the user is encouraged<br />
to try to correct the interference by one or more of the following<br />
measures:<br />
• Reorient or relocate the receiving device.<br />
• Increase the separation between the equipment.<br />
• Connect the equipment into an outlet on a circuit different from that<br />
to which the other device(s) are connected.<br />
• Consult the manufacturer or field service technician for help.<br />
Unpackaging Information<br />
Your RecoveryWrap <strong>System</strong> is 100% Quality Tested. When unpackaging<br />
your new system:<br />
• it is normal to find moisture in the RecoveryWrap fluid canister due<br />
to Quality Testing, <strong>and</strong><br />
• it is normal to find moisture inside the RecoveryWrap canister due<br />
to Quality Testing.<br />
Please ensure the RED dip tube caps are removed prior to operating<br />
your new RecoveryWrap <strong>System</strong>. You may find fluid in the RED caps<br />
due to Quality Testing.<br />
During some air freight shipments in pressurized containers, the<br />
RecoveryWrap <strong>System</strong> may develop a vacuum between the top <strong>and</strong><br />
fluid canister due to the anti-spill seal. If this does occur, insert a flat,<br />
blunt object such as a large paper clip between the top <strong>and</strong> fluid canister<br />
to overcome the seal. Please contact VitalWear at 1.800.553.4081<br />
if this is not effective.<br />
Please refer to VitalWear for proper disposable of this product.<br />
8<br />
9
Indications & Contraindications<br />
General Indications for Cold Therapy<br />
There are general indications for using cold therapy across the body <strong>and</strong> in various<br />
situations:<br />
• First aid after trauma,<br />
• Relief of pain,<br />
• Fever reduction,<br />
• Control of bleeding,<br />
• Prevention or reduction of swelling of traumatic origin,<br />
• Prevention or reduction of inflammation,<br />
• Decrease of muscle guarding <strong>and</strong> spasm,<br />
• Temporary reduction of spasticity.<br />
Cold is preferred during treatment of acute injury, sub-acute injury where swelling<br />
persists, <strong>and</strong> acute stages of inflammation.<br />
Contraindications for Cold Therapy<br />
Users should be aware of situations where cold therapy may not be appropriate,<br />
detrimental to a specific condition or otherwise contraindicated for use:<br />
• Users with specific cold sensitivity symptoms such as:<br />
— Cold uticaria,<br />
— Cryoglobulinemia,<br />
— Raynaud’s syndrome,<br />
— Proximal cold hemoglobinuria,<br />
— Vasospastic disease,<br />
— Cold hypersensitivity,<br />
— Peripheral neuropathy (as in some cases in diabetes),<br />
— Compromised local circulation.<br />
General Indications for Compression<br />
There are general indications for using compression across the body <strong>and</strong> in various<br />
situations:<br />
• Edema/lymphedema,<br />
• Venous insufficiency,<br />
• Post sclerotherapy,<br />
• Venous ulcers,<br />
• Thrombophlebitis.<br />
Contraindications for Compression<br />
Users should be aware of situations where compression may not be appropriate,<br />
detrimental to a specific condition or otherwise contraindicated for use:<br />
• Arterial occlusive disease,<br />
• Any circumstance where increased venous return is desired.<br />
Note: When operating, the VitalWrap will apply additional compression as the fluid<br />
bladder inflates. Adjust the compression of your VitalWrap so that it is comfortable.<br />
Users should be aware of situations where compression may not be appropriate,<br />
detrimental or otherwise contraindicated for use.<br />
Consult your physician. Not all treatments are appropriate in every<br />
patient, <strong>and</strong> you should have a discussion with your doctor to determine<br />
which treatments are appropriate for your condition.<br />
Users should take caution in applying cold therapy over open sores <strong>and</strong> abrasions.<br />
At a minimum these areas should be cleaned <strong>and</strong> b<strong>and</strong>aged.<br />
When using this system, please check the skin where the wrap is applied<br />
periodically. Discontinue use if continued numbness <strong>and</strong> skin discoloration<br />
are present. Please refer to your health care professional prior<br />
to applying this system <strong>and</strong>/or using the system for extended periods of<br />
time.<br />
10<br />
Referenced: “Thermal Agents in Rehabilitation” 3rd ed. Susan L. Michlovitz. 11
Operating Instructions<br />
Use VitalWear’s RecoveryWrap <strong>System</strong> for relief from pain <strong>and</strong> swelling<br />
due to injury or aches <strong>and</strong> pains.<br />
Available VitalWraps for Your VitalWear <strong>System</strong><br />
Setting Up Your RecoveryWrap <strong>System</strong><br />
VIT-00001<br />
Assembly, VitalWrap,<br />
6x60” width<br />
VIT-00397<br />
Assembly, VitalWrap,<br />
Medium Knee<br />
1 2 3<br />
VIT-00255<br />
Assembly, VitalWrap,<br />
4x48” width<br />
VIT-00393<br />
Assembly, VitalWrap,<br />
Ankle<br />
VIT-00118<br />
Assembly, VitalWrap,<br />
8x72” width<br />
<br />
<br />
4 5 6<br />
1. Open it Up: Rotate the h<strong>and</strong>le down to unlock <strong>and</strong> remove the Top Assembly.<br />
Take it Off: Remove the Top Assembly <strong>and</strong> place it down carefully on a counter<br />
top so that the Fluid Canister can be filled.<br />
2. Take it off: Remove the RED caps on the dip tubes.<br />
VIT-00119<br />
Assembly, VitalWrap,<br />
Shoulder<br />
VIT-00122<br />
Assembly, VitalWrap,<br />
Cervical<br />
VIT-00394<br />
Assembly, VitalWrap,<br />
Wrist<br />
VIT-00395<br />
Assembly, VitalWrap,<br />
Large Shoulder<br />
3. Fill it Up: Fill Fluid Canister with ice <strong>and</strong> water to a level above the line<br />
marked minimum fill ( ), but do not fill above the line marked maximum<br />
fill ( ).<br />
4. Cover it Up: Place the Top Assembly on the Fluid Canister. Rotate the Top<br />
Assembly so that it aligns <strong>and</strong> seats in the Fluid Canister notch. Then, raise<br />
the H<strong>and</strong>le to lock the Top Assembly onto the Fluid Canister.<br />
VIT-00392<br />
Assembly, VitalWrap,<br />
Large Knee<br />
VIT-00396<br />
Assembly, VitalWrap,<br />
Dual H<strong>and</strong><br />
5. Connect Them: Connect the Tubing Set to the Fluid Connector located on the<br />
Top Assembly. Align the Orientation Dots as shown. Press BOTH buttons<br />
on the Tubing Set connector to connect & disconnect ( ).<br />
Please contact us to find out about the latest VitalWraps that may be right for you.<br />
6. Power it Up: Plug the electrical cord into the DC Appliance Jack located on the<br />
Top Assembly <strong>and</strong> connect the appliance to the electrical source or plug a battery<br />
pack into the battery compartment located on the Top Assembly (see pg.15,<br />
“Battery Operation”).<br />
12<br />
13
How To Use Your RecoveryWrap <strong>System</strong><br />
The VitalWrap can be applied on the skin or over clothing.<br />
Battery Operation<br />
When first using your new RecoveryWrap <strong>System</strong> Battery Pack, it is<br />
important to first charge the battery pack (see page 15, “Charging Your<br />
RecoveryWrap <strong>System</strong> Battery Pack”). Make sure the battery clip is<br />
located on the top <strong>and</strong> the four metal contacts are facing the back of<br />
the Top Assembly.<br />
1 2 3<br />
1. Roll it: Begin with the wrap in a tight roll, with the Tubing Set connector on<br />
the outside of the roll.<br />
2. Start Wrapping: Place the bladder portion of the wrap around the treatment<br />
area.<br />
3. Secure it: Finish wrapping using the Velcro closure. Connect the wrap to the<br />
Tubing Set by aligning the Orientation Dots as shown. Press both buttons on<br />
the Tubing Set connector to connect <strong>and</strong> disconnect ( ).<br />
Priming Information<br />
When first using your new VitalWrap it is important to PRIME or fill your<br />
VitalWrap during initial use.<br />
This can be done by operating the RecoveryWrap <strong>System</strong> with the new VitalWrap<br />
attached for at least one minute set to maximum COLD. This will allow the new<br />
wrap to properly fill.<br />
Please contact VitalWear at 1.800.553.4081 if this is not effective.<br />
Operating Your RecoveryWrap <strong>System</strong><br />
on/off switch<br />
<br />
<br />
1 2<br />
1. Load it: Slide the battery pack inside the back of the Top Assembly next to the<br />
DC Appliance Inlet. The battery clip will engage with the Top Assembly when<br />
the battery pack is correctly positioned.<br />
2. Start it Up: The RecoveryWrap <strong>System</strong> is now ready for use.<br />
Charge it: The DC Supply will charge the Battery pack when both are connected.<br />
Charging Your RecoveryWrap <strong>System</strong> Battery Pack<br />
When charging your RecoveryWrap <strong>System</strong> Battery Pack, it is important<br />
to fully discharge your battery pack before charging.<br />
1. Begin by loading the battery pack in the unit (see page 15, “Battery Operation”).<br />
2. Charging will begin as soon as the DC Power Supply is connected to your<br />
RecoveryWrap <strong>System</strong> .<br />
3. Charging will continue when the unit is off. The Power Switch will be YELLOW<br />
with the power switch to the “ ” position. Charging will continue if the <strong>System</strong><br />
is turned to the “ ” position.<br />
<br />
<br />
1 2 3<br />
70˚f<br />
(small dots)<br />
40˚f<br />
(big dots)<br />
1. Fire it Up: Press the Power Switch to the ON “ ” position.<br />
2. Chill it Out: Adjust the Temperature Control Knob to a comfortable setting.<br />
3. Refill it <strong>and</strong> Keep Going: Save the remaining ice <strong>and</strong> refill the Fluid<br />
Canister to continue.<br />
14<br />
15
Wrapping Other Body Parts<br />
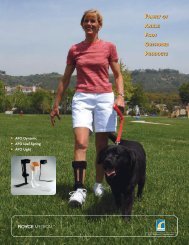
The 6” VitalWrap included with your system can be applied to the<br />
calf, knee, hamstring/thigh, hip, upper <strong>and</strong> lower back, abdomen,<br />
<strong>and</strong> chest. Please contact VitalWear for additional VitalWraps for the<br />
shoulder, elbow, h<strong>and</strong>/wrist, foot/ankle, sports bra, face, head, jaw <strong>and</strong><br />
neck <strong>and</strong> athletic support.<br />
Wrapping Your Knee with VIT00001 - 6in VitalWrap<br />
Roll it: Begin with the wrap in a tight roll, with the Tubing Set connector on the<br />
outside of the roll (see page 14, image 1-“How to Use Your RecoveryWrap <strong>System</strong>”).<br />
<br />
Wrapping Your Back with VIT00118 - 8in VitalWrap<br />
Roll it: Begin with the wrap in a tight roll, with the Tubing Set connector on the<br />
outside of the roll (see page 14, image 1-“How to Use Your RecoveryWrap <strong>System</strong>”).<br />
1 2 3<br />
1. Start Wrapping: Place the bladder portion of the wrap around the treatment area.<br />
2. Wrap it: Continue to wrap snugly around the waist.<br />
3. Secure it: Finish wrapping using the Velcro closure. Connect the wrap to the<br />
Tubing Set by aligning the Orientation Dots as shown. Press both buttons on the<br />
Tubing Set connector to connect <strong>and</strong> disconnect ( ).<br />
1 2 3<br />
1. Start Wrapping: Place the bladder portion of the wrap around the knee.<br />
2. Wrap it: Continue to wrap snugly around the knee.<br />
3. Secure it: Finish wrapping using the Velcro closure. Connect the wrap to the<br />
Tubing Set by aligning the Orientation Dots as shown. Press both buttons on the<br />
Tubing Set connector to connect <strong>and</strong> disconnect ( ).<br />
Wrapping Your Knee with VIT00392 (Large) & VIT00397 (Medium)<br />
Knee VitalWrap<br />
Unfold it: Begin by unfolding the wrap <strong>and</strong> detaching all the Velcro straps.<br />
Wrapping Your Hip with VIT00001 - 6in VitalWrap<br />
Roll it: Begin with the wrap in a tight roll, with the Tubing Set connector on the<br />
outside of the roll (see page 14, image 1-“How to Use Your RecoveryWrap <strong>System</strong>”).<br />
1 2 3<br />
<br />
<br />
<br />
1 2 3<br />
1. Start Wrapping: Place the bladder portion of the wrap around the treatment area.<br />
2. Wrap it: Continue to wrap snugly around the hip.<br />
3. Secure it: Finish wrapping using the Velcro closure. Connect the wrap to the<br />
Tubing Set by aligning the Orientation Dots as shown. Press both buttons on the<br />
Tubing Set connector to connect <strong>and</strong> disconnect ( ).<br />
1. Start Wrapping: Place the center of the wrap onto the knee with the Tubing Set<br />
connector pointing down the leg. Make sure the bladder portion of the wrap is<br />
facing down <strong>and</strong> is on top of the knee.<br />
2. Wrap it: Continue to wrap the top <strong>and</strong> bottom portion snugly around the knee.<br />
3. Secure it: Finish wrapping using the Velcro closure. Connect the wrap to the<br />
Tubing Set by aligning the Orientation Dots as shown. Press both buttons on the<br />
Tubing Set connector to connect <strong>and</strong> disconnect ( ).<br />
16<br />
17
Wrapping Your H<strong>and</strong> with VIT00396 - Dual H<strong>and</strong> VitalWrap<br />
Place it: Begin by placing the wrap on a flat surface. Make sure the Tubing Set is<br />
on the right side of the wrap pointing away from user.<br />
Wrapping Your Shoulder with VIT00119 (Medium) & VIT00395<br />
(Large) Shoulder VitalWrap<br />
Slip it on: Begin by sliding arm through the wrap with the connector facing down<br />
towards the elbow.<br />
1 2<br />
1. Wrap it: Place h<strong>and</strong>s inside the wrap after connecting the wrap to the Tubing Set<br />
by aligning the Orientation Dots as shown. Press both buttons on the Tubing Set<br />
connector to connect <strong>and</strong> disconnect ( ).<br />
2. Secure it: Adjust temperature of wrap or adjust positions to optimize comfort <strong>and</strong><br />
pain relief.<br />
Wrapping Your Wrist with VIT00394 - Wrist VitalWrap<br />
Loop it: Begin by unfolding your wrist wrap.<br />
1 2 3<br />
1. Adjust the underarm strap so that the wrap fits snugly.<br />
2. Adjust chest strap. It may be necessary to adjust back strap before using wrap.<br />
3. Finish wrapping by attaching Velcro closure under opposite shoulder. Connect<br />
the wrap to the Tubing Set by aligning the Orientation Dots as shown. Press both<br />
buttons on the Tubing Set connector to connect <strong>and</strong> disconnect ( ).<br />
Wrapping Your Foot/Ankle with VIT00393 - Foot & Ankle<br />
VitalWrap<br />
Unfold it: Begin by unfolding the wrap <strong>and</strong> detaching all the Velcro straps.<br />
<br />
<br />
<br />
<br />
<br />
<br />
<br />
1 2 3<br />
1. Start Wrapping: Put thumb through loop <strong>and</strong> hang the wrap off the palm of the<br />
h<strong>and</strong>. Make sure theTubing Set connector points towards user.<br />
2. Wrap it: Continue to wrap snugly around the wrist.<br />
3. Secure it: Finish wrapping using the Velcro closure. Connect the wrap to the<br />
Tubing Set by aligning the Orientation Dots as shown. Press both buttons on the<br />
Tubing Set connector to connect <strong>and</strong> disconnect ( ).<br />
1 2 3<br />
1. Start Wrapping: Place foot inside the wrap with the connector pointing up<br />
towards the knee.<br />
2. Wrap it: Continue to wrap the top <strong>and</strong> bottom portion snugly around the ankle<br />
<strong>and</strong> foot.<br />
3. Secure it: Finish wrapping using the Velcro closure. Connect the wrap to the<br />
Tubing Set by aligning the Orientation Dots as shown. Press both buttons on the<br />
Tubing Set connector to connect <strong>and</strong> disconnect ( ).<br />
18<br />
19
Tubing Set Instructions for Use<br />
Troubleshooting<br />
Frequently asked questions in troubleshooting the RecoveryWrap<br />
<strong>System</strong>.<br />
1. What do I do if the VitalWrap does not seem to get cold?<br />
<br />
1 2<br />
<br />
<br />
<br />
A) Check to make sure that the Fluid Canister was properly filled with ice<br />
<strong>and</strong> water.<br />
B) Check that the Tubing Set is properly connected <strong>and</strong> latched.<br />
C) Check that fluid is flowing through the <strong>System</strong> <strong>and</strong> not obstructed.<br />
D) Check that the temperature adjustment knob is set fully clockwise<br />
(largest dot).<br />
E) Check that the RED dip tube caps are removed prior to operation.<br />
F) Check that power is applied.<br />
G) Refer to Service if these actions are ineffective.<br />
2. What do I do if the Tubing Set does not connect to the VitalWrap<br />
or control unit?<br />
A) Check to make sure that the indictor dots are aligned.<br />
B) Check to make sure no foreign objects block the fluid connector.<br />
C) Refer to Service if these actions are ineffective.<br />
3. What do I do if the system does not turn on?<br />
<br />
1. Press BOTH buttons on the Tubing Set connector to connect & disconnect.<br />
2. Connect the Tubing Set to the Fluid Connector located on the Top Assembly <strong>and</strong><br />
VitalWrap.<br />
<br />
A) Check power connection.<br />
B) Check that the Tubing Set is properly connected <strong>and</strong> latched.<br />
C) Check that fluid is flowing through the <strong>System</strong> <strong>and</strong> not obstructed.<br />
D) Wait 20 minutes <strong>and</strong> cycle power.<br />
E) Refer to Service if these actions are ineffective.<br />
4. What do I do if the system is not pumping any fluid through the<br />
wrap?<br />
A) Check that the Tubing Set <strong>and</strong> Vital Wrap are connected properly.<br />
B) Or purge the fluid pump by first disconnecting the Tubing Set from the<br />
RecoveryWrap <strong>System</strong>. With the RecoveryWrap <strong>System</strong> POWERED <strong>and</strong> turned<br />
ON, press the Pump Troubleshooting Tool into the left connector until water<br />
is pumped into the tool canister. Empty contents when canister becomes full<br />
by removing cap. Repeat for approximately 2 minutes (see diagram below).<br />
Reconnect the Tubing Set to the <strong>System</strong> <strong>and</strong> continue use.<br />
20<br />
C) Refer to Service if these actions are ineffective.<br />
21
Cleaning The Control Unit<br />
To clean your VitalWear <strong>System</strong>, please follow these simple steps:<br />
1. Remove electrical cord, fold down h<strong>and</strong>le, <strong>and</strong> remove top assembly.<br />
2. Fill the empty Fluid Canister to the MAX fill line with fresh, room temperature<br />
water.<br />
3. Replace top assembly, electrical cord, <strong>and</strong> raise h<strong>and</strong>le to lock.<br />
4. Turn system ON for 10 minutes with setting on maximum COLD.<br />
5. Empty canister <strong>and</strong> follow directions under “Storage” on page 23.<br />
6. Repeat these actions periodically.<br />
Cleaning The Wrap<br />
The VitalWrap can be washed in a conventional laundry machine.*<br />
Notice the following cleaning instructions on the VitalWrap.<br />
30°<br />
Machine Wash Cold<br />
Delicate/Gentle Cycle<br />
Do Not Bleach<br />
Line Dry In Shade<br />
Do Not Iron<br />
Do Not Dry Clean<br />
Do Not Wring<br />
*VitalWear recommends a maximum of three machine washes per VitalWrap.<br />
Storage<br />
1. Turn it Off: Switch the appliance off <strong>and</strong> remove the electrical cord from the<br />
power source <strong>and</strong> from the Appliance Inlet.<br />
2. Keep Dry: DO NOT immerse the appliance in water.<br />
3. Coil It: Wrap <strong>and</strong> secure the electrical cord.<br />
4. Disconnect It, Part 1: Disconnect the Tubing Set from the control unit.<br />
5. Open It Up: Remove the top assembly <strong>and</strong> gently lay it on its side.<br />
6. Pour it Out: Hold the Fluid Canister by the h<strong>and</strong>le with one h<strong>and</strong> <strong>and</strong> underneath<br />
with the other h<strong>and</strong>. Pour the water <strong>and</strong> any remaining ice out of the<br />
Fluid Canister from the opposing lip from the ice strainer.<br />
7. Dry it Out: Simply dry the dip tubes with a soft absorbent cloth.<br />
8. Disconnect It, Part 2: Remove the Tubing Set from the wrap.<br />
9. Lock it Up: Wrap <strong>and</strong> secure the Tubing Set.<br />
10. Roll it Up: Dry <strong>and</strong> then roll or fold the wrap for storage.<br />
11. Last Step: Store wrap in the canister or with the system in the carrying bag.<br />
Care And Maintenance Of Your RecoveryWrap <strong>System</strong><br />
(Or Things You Must Remember!!!)<br />
• YOU MUST Place the RecoveryWrap Unit in a safe, cool <strong>and</strong> dry place when<br />
not in use.<br />
• YOU MUST wipe with a soft, damp cloth. DO NOT use abrasive cleaner.<br />
AND NEVER submerge the unit in any liquid. Keep away from all solvents <strong>and</strong><br />
harsh detergents.<br />
• DO NOT attempt to repair this RecoveryWrap Unit. There are no user-serviceable<br />
parts.<br />
• To store YOU MUST always disconnect the electrical cord, the Tubing Set from<br />
the top assembly <strong>and</strong> the wrap when not in use.<br />
Users should not use cleaning or decontamination methods different<br />
from those recommended by the manufacturer without first checking<br />
with the manufacturer that the proposed methods will not damage<br />
the equipment.<br />
22<br />
Velcro is a registered trademark of Velcro Industries B.V.<br />
All photographs ©Bang 2006<br />
23
Notes: __________________________________________________<br />
_______________________________________________________<br />
_______________________________________________________<br />
_______________________________________________________<br />
_______________________________________________________<br />
_______________________________________________________<br />
_______________________________________________________<br />
_______________________________________________________<br />
_______________________________________________________<br />
_______________________________________________________<br />
_______________________________________________________<br />
_______________________________________________________<br />
_______________________________________________________<br />
_______________________________________________________<br />
_______________________________________________________<br />
_______________________________________________________<br />
_______________________________________________________<br />
_______________________________________________________<br />
_______________________________________________________<br />
_______________________________________________________<br />
_______________________________________________________<br />
_______________________________________________________<br />
_______________________________________________________<br />
_______________________________________________________<br />
_______________________________________________________<br />
_______________________________________________________<br />
_______________________________________________________<br />
_______________________________________________________<br />
_______________________________________________________<br />
_______________________________________________________<br />
_______________________________________________________<br />
_______________________________________________________<br />
_______________________________________________________<br />
_______________________________________________________<br />
_______________________________________________________<br />
_______________________________________________________<br />
_______________________________________________________<br />
_______________________________________________________<br />
_______________________________________________________<br />
_______________________________________________________<br />
_______________________________________________________<br />
_______________________________________________________<br />
24
Put a Wrap on Pain SM<br />
VitalWear, Inc.<br />
384 Oyster Point Blvd.<br />
Suite 16<br />
South San Francisco, CA 94080-1968<br />
www.vitalwrap.com<br />
1.800.553.4081<br />
Part number: 00504 Rev G