CoaguChek® XS System
CoaguChek® XS System
CoaguChek® XS System
You also want an ePaper? Increase the reach of your titles
YUMPU automatically turns print PDFs into web optimized ePapers that Google loves.
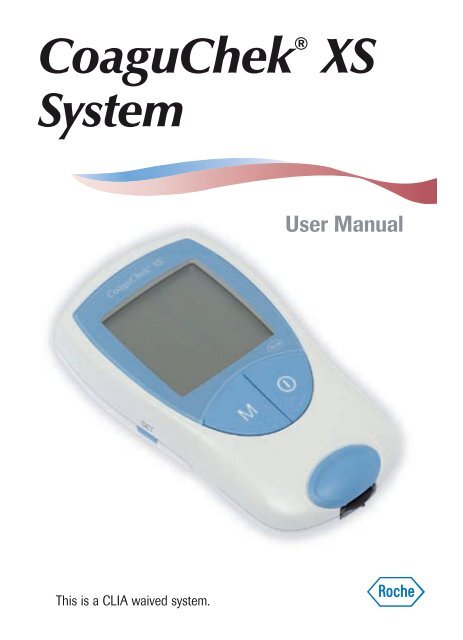
CoaguChek ®<br />
<strong>System</strong><br />
<strong>XS</strong><br />
User Manual<br />
This is a CLIA waived system.
The contents of this manual, including all graphics and photographs, are the property of Roche<br />
Diagnostics. No part of this document may be reproduced or transmitted in any form or by<br />
any means, electronic or mechanical, for any purpose, without the express written permission<br />
of Roche Diagnostics.<br />
Roche Diagnostics has made every reasonable effort to ensure that all the information<br />
contained in this manual is correct at the time of printing. However, Roche Diagnostics<br />
reserves the right to make any changes necessary without notice as part of ongoing product<br />
development.<br />
This training manual was created by the Roche Diagnostics Technical Publications<br />
department. Direct questions or concerns regarding the contents of this document<br />
to:<br />
Roche Diagnostics<br />
Technical Publications Department<br />
9115 Hague Road<br />
P.O. Box 50457<br />
Indianapolis, IN 46250-0457<br />
USA<br />
The following U.S. patents have been granted for the CoaguChek <strong>XS</strong> <strong>System</strong> (meter and test<br />
strips): 6,662,439; 7,073,246; 7,386,937; 6,645,368; 7,407,811; 6,881,378; 6,207,000; 7,429,865;<br />
7,049,131; 7,084,251; 5,625,036. Additional U.S. patents pending.<br />
COAGUCHEK is a trademark of Roche.<br />
DISPATCH is a registered trademark of Caltech Industries, Inc.<br />
All other trademarks are property of their respective owners.<br />
© 2009, Roche Diagnostics.<br />
US Order Number: 0 4837991001 (03) 2009-11 USA<br />
Distribution in USA by: Roche Diagnostics, Indianapolis, IN<br />
This document is available electronically at www.poc.roche.com.<br />
III
Revisions to this document are provided by Roche Diagnostics when necessary. No part of this<br />
document may be reproduced in any form or by any means without prior written consent.<br />
Manual version Revision date Changes<br />
Version 3.0 November 2009 New document
Table of Contents<br />
About this Manual..............................................................................1<br />
Symbols and Abbreviations...........................................................................1<br />
User Resources...................................................................................2<br />
Video (DVD Format).........................................................................................2<br />
Getting Started...................................................................................................2<br />
User Manual........................................................................................................2<br />
Test Strip Package Inserts .............................................................................2<br />
The CoaguChek <strong>XS</strong> <strong>System</strong>.............................................................3<br />
Anticoagulation Medication..........................................................................3<br />
Blood-clotting Time..........................................................................................3<br />
How the <strong>System</strong> Works...................................................................................4<br />
The CoaguChek <strong>XS</strong> Meter.............................................................................5<br />
Operating Conditions.......................................................................................6<br />
Getting Started....................................................................................7<br />
Batteries................................................................................................................7<br />
Installing (or Replacing) Batteries..............................................................8<br />
Meter Setup.........................................................................................................9<br />
Setting the Date and Time.............................................................................9<br />
Code Chip.......................................................................................................... 12<br />
Inserting a New Code Chip........................................................................ 12<br />
Integrated Quality Controls......................................................................... 14<br />
Testing a Blood Sample................................................................. 15<br />
Tips for a Good Fingerstick........................................................................ 15<br />
Important Notes about Blood Testing.................................................... 16<br />
Always............................................................................................................ 16<br />
Never.............................................................................................................. 16<br />
Infection Control........................................................................................ 17<br />
Preparing for a Test....................................................................................... 18<br />
Performing a Test........................................................................................... 20<br />
Out of Range Values..................................................................................... 24<br />
Optional Testing Methods........................................................................... 25<br />
Using Capillary Tubes.............................................................................. 25<br />
Using Venous Blood................................................................................. 28
Memory.............................................................................................. 30<br />
Storing Test Results in Memory ............................................................... 30<br />
Reviewing Stored Test Results.................................................................. 30<br />
Erasing Stored Test Results........................................................................ 32<br />
Cleaning/Disinfecting the Meter................................................. 34<br />
Cleaning/Disinfecting the Exterior........................................................... 34<br />
Cleaning/Disinfecting the Test Strip Guide.......................................... 35<br />
Advanced Features......................................................................... 37<br />
Setting Advanced Features......................................................................... 38<br />
The Meter’s Display........................................................................ 39<br />
Error Messages................................................................................ 40<br />
Error Messages You May See After You Apply Blood.................... 44<br />
Other Information............................................................................ 48<br />
Ordering Information for Health Care Professionals........................ 48<br />
Product Limitations........................................................................................ 48<br />
Product Specifications.................................................................................. 49<br />
Support/Services............................................................................................. 50<br />
Symbols.............................................................................................................. 51<br />
Warranty............................................................................................................. 54
About this Manual<br />
Symbols and Abbreviations<br />
The test strip insert, the label on the back of the meter, the User<br />
Manual, and other packaging material may contain the following<br />
symbols or abbreviations:<br />
Use by<br />
Batch code/Lot number<br />
In vitro diagnostic medical device<br />
0123<br />
This product fulfills the requirements of the European<br />
Directive 98/79/EC for in vitro diagnostic medical<br />
devices<br />
Catalog number<br />
Consult instructions for use<br />
Caution (consult accompanying documents).<br />
Refer to safety-related notes in the manual<br />
accompanying this instrument.<br />
Manufacturer<br />
Temperature limitation (Store at)<br />
1
User Resources<br />
Several resources are available to help you use and maintain the<br />
CoaguChek <strong>XS</strong> <strong>System</strong>.<br />
Video (DVD Format)<br />
The CoaguChek <strong>XS</strong> <strong>System</strong> Video is for new users of the<br />
CoaguChek <strong>XS</strong> <strong>System</strong>. The video will help you get comfortable<br />
with the CoaguChek <strong>XS</strong> Meter and the testing procedure.<br />
Getting Started<br />
The Getting Started guide shows you how to perform your first<br />
coagulation test on the CoaguChek <strong>XS</strong> Meter.<br />
User Manual<br />
This CoaguChek <strong>XS</strong> <strong>System</strong> User Manual is a comprehensive guide<br />
to the meter and test strips. It is designed to provide answers to<br />
your questions about the meter’s operation and use. Read this<br />
entire manual carefully, and refer to it as necessary.<br />
Test Strip Package Inserts<br />
Be sure to read the test strip package insert for important<br />
updates and keep the insert from your current test strip package<br />
for future reference.<br />
2
The CoaguChek <strong>XS</strong> <strong>System</strong><br />
The CoaguChek <strong>XS</strong> <strong>System</strong> is intended for use by professional<br />
healthcare providers for quantitative prothrombin time testing for<br />
the monitoring of warfarin therapy. The CoaguChek <strong>XS</strong> <strong>System</strong><br />
uses fresh capillary or nonanticoagulated venous whole blood.<br />
Anticoagulation Medication<br />
Anticoagulation medications, also known as blood thinners, are<br />
prescribed to avoid unwanted clots. Blood-clotting time must be<br />
monitored to ensure that a patient’s medication dosage is correct.<br />
Blood-clotting Time<br />
The rate at which blood clots is measured in units called INR. It is<br />
very important for patients to stay within their target INR range. If<br />
the INR is too low, the risk of blood clots increases. If the INR is<br />
too high, the risk for internal bleeding increases.<br />
Everyone’s INR is different. The patient’s doctor determines the<br />
best INR range for the patient, depending on why the patient is<br />
taking anticoagulants and how the patient reacts to them. The<br />
doctor also determines how often the patient’s blood should be<br />
tested. The doctor needs to know the patient’s blood-clotting time<br />
in order to successfully treat the patient.<br />
3
How the <strong>System</strong> Works<br />
The CoaguChek <strong>XS</strong> <strong>System</strong> includes a meter and CoaguChek <strong>XS</strong><br />
PT test strips. Each box of test strips has its own code chip that<br />
you insert into the meter. The code chip contains important<br />
information about the test strips such as their expiration date<br />
and lot number. The meter and test strips work together to<br />
provide a safe and reliable system for testing blood-clotting time.<br />
The CoaguChek <strong>XS</strong> <strong>System</strong> makes measuring blood-clotting time<br />
easy. The display on the meter guides you through the testing<br />
process. With the code chip inserted in the meter, you simply insert<br />
a test strip and apply a blood sample. The meter displays the result<br />
in about a minute. The meter automatically stores the result in<br />
memory so that you can easily recall results.<br />
The CoaguChek <strong>XS</strong> PT test strip contains various ingredients.<br />
When a blood drop is applied, the meter starts the test and the<br />
blood mixes with the ingredients on the test strip. When the meter<br />
determines that the blood has clotted, it stops the measurement<br />
and calculates the result.<br />
4
The CoaguChek <strong>XS</strong> Meter<br />
A Display<br />
B M (Memory) Button<br />
C ON-OFF Button<br />
D Test Strip Guide Cover<br />
E Test Strip Guide<br />
F Battery Compartment Cover<br />
G Code Chip Slot<br />
H SET Button<br />
I Data Port<br />
A<br />
F<br />
B<br />
C<br />
G<br />
D<br />
E<br />
H<br />
I<br />
5
Operating Conditions<br />
To ensure that the CoaguChek <strong>XS</strong> Meter functions correctly,<br />
follow these guidelines:<br />
• Use the meter at room temperature, between 59°F and 90°F<br />
(15°C and 32°C).<br />
• Use the meter at a relative humidity of less than 85%,<br />
without condensation.<br />
• When testing, keep the meter level.<br />
• If you store the meter for a period of time, remove the batteries.<br />
• Do not use the meter at an altitude higher than 14,000 feet<br />
(4,300 meters).<br />
• Do not use the meter near a strong magnetic field, such as<br />
a microwave oven, as this may interfere with the meter’s<br />
proper operation.<br />
Note: The CoaguChek <strong>XS</strong> Meter automatically shuts off after<br />
3 minutes if no buttons have been pushed.<br />
6
Getting Started<br />
Refer to the Getting Started guide to learn how to set up the meter<br />
and prepare for and run your first blood-clotting-time test.<br />
Batteries<br />
The CoaguChek <strong>XS</strong> Meter uses 4 AAA batteries. The<br />
recommended batteries, alkaline-manganese batteries, should<br />
last for approximately 60 tests.<br />
When you power the meter on, the display<br />
briefly shows the battery symbol. The battery<br />
symbol is divided into 4 segments. With new,<br />
fresh batteries in the meter, the battery symbol<br />
shows all 4 segments.<br />
When only 1 segment appears, replace the<br />
batteries. When only 1 segment appears you can<br />
still access results stored in the meter’s memory.<br />
If you insert new batteries within 1 minute of removing the old<br />
batteries, the date and time settings will remain in memory. But if<br />
you do need to reset the date and time, refer to the Meter Setup<br />
section in this manual.<br />
The meter saves battery power by automatically powering off after<br />
3 minutes, unless you press a button or insert a test strip. Even<br />
when the batteries are removed, the test results are saved in<br />
memory.<br />
7
Installing (or Replacing) Batteries<br />
Have ready 4 AAA batteries.<br />
1. Open Battery Compartment<br />
With the meter powered<br />
off, turn it over. Press the<br />
latch gently inward and lift<br />
the cover. Remove the old<br />
batteries, if necessary.<br />
2. Insert New Batteries<br />
Position the batteries<br />
according to the diagram<br />
inside the battery<br />
compartment. Replace<br />
the cover. Turn the meter<br />
back over.<br />
3. Power Off<br />
Power the meter off .<br />
8
Meter Setup<br />
The CoaguChek <strong>XS</strong> Meter is preset with the U.S. date format<br />
(month-day-year) and U.S. time format (12-hour as opposed to<br />
24-hour).<br />
Before you use the meter for the first time—or if there is no battery<br />
power for more than 1 minute—you’ll have to set the current date<br />
and time. In addition, the meter has certain advanced features that<br />
you can set up if you plan to use them. See the Advanced Features<br />
section in this manual to learn more about the advanced features<br />
and how to set them up.<br />
Setting the Date and Time<br />
The date and time settings are important. Each time you run a test,<br />
the meter compares its date with the test strip’s expiration date.<br />
If the test strips are expired, the meter displays an error message<br />
and prevents you from running a test.<br />
Whenever you put batteries in the meter, it automatically goes to<br />
Setup mode (where you set the date and time). You can also go to<br />
Setup mode at any time by pressing the SET button .<br />
To set the date and time, you’ll use these buttons:<br />
• to change a setting.<br />
• to accept a setting.<br />
9
1. Go to Setup Mode<br />
If the meter is not already in<br />
Setup mode, press the SET<br />
button .<br />
The date format flashes in the<br />
upper-right corner.<br />
2. Set Today’s Date<br />
Press the SET button .<br />
Press the M button to<br />
change the year. Press the<br />
SET button .<br />
Press the M button to<br />
change the month. Press the<br />
SET button .<br />
Press the M button to<br />
change the day. Press the<br />
SET button .<br />
10
The time format flashes in the<br />
upper-left corner.<br />
3. Set Current Time<br />
Press the SET button .<br />
Press the M button to<br />
change the hour. Press the<br />
SET button .<br />
Press the M button to<br />
change the minutes. Press the<br />
SET button .<br />
4. Power Off<br />
Power the meter off .<br />
11
Code Chip<br />
Each box of test strips comes with its own code chip. The code<br />
chip provides the meter with information such as the lot number<br />
and expiration date of the test strips.<br />
Before each test, make sure the correct code chip is in the meter.<br />
Each time you open a new box of test strips, replace the old code<br />
chip with the new one.<br />
Protect the code chip from moisture and also from equipment that<br />
produces magnetic fields, such as a microwave oven.<br />
Inserting a New Code Chip<br />
Have the correct code chip ready.<br />
1. Remove Old Code Chip With the meter powered off,<br />
remove the old code chip and<br />
throw it away.<br />
12
2. Match Codes<br />
Make sure that the threenumber<br />
code on the new test<br />
strip container matches the<br />
three-number code on the<br />
new code chip.<br />
3. Insert New Code Chip<br />
Slide the new code chip into<br />
the code chip slot until it<br />
snaps into place.<br />
13
Integrated Quality Controls<br />
The CoaguChek <strong>XS</strong> <strong>System</strong> has quality control functions integrated<br />
into the meter and test strips, so you never have to run quality<br />
control tests with liquid quality controls. The meter automatically<br />
runs its own quality control test as part of every blood test.<br />
When the quality control test runs, the letters QC flash on the<br />
meter’s display. When the quality control test completes, a<br />
checkmark (P) appears following the letters QC. Then the meter<br />
continues to run the blood test.<br />
If the quality control test fails, the meter displays the following<br />
error message. See the Error Messages section in this manual for<br />
an explanation of this (and other) error messages and what to do<br />
when they occur.<br />
14
Testing a Blood Sample<br />
Tips for a Good Fingerstick<br />
For fingerstick blood testing, increasing the blood flow in the finger<br />
will help you get a good drop of blood. Before you prick the finger,<br />
try the following techniques until you see that the fingertip has<br />
good color:<br />
• Warm the hand by having<br />
the patient hold it under his<br />
or her armpit, use a hand<br />
warmer, and/or wash the<br />
hand with warm water.<br />
• Have the patient hold his or<br />
her arm down to the side,<br />
so that the hand is below<br />
the waist.<br />
• Massage the finger from<br />
its base.<br />
If needed, immediately after<br />
pricking, gently squeeze<br />
the finger from the base to<br />
encourage blood to flow.<br />
15
Important Notes About Blood Testing<br />
Always<br />
• Operate the meter at temperatures between 59°F and 90°F<br />
(15°C and 32°C).<br />
• Refer to the test strip package insert for proper use and<br />
handling of test strips.<br />
• Keep the test strip guide and meter clean. You may occasionally<br />
need to clean them. See the Cleaning the Meter section in this<br />
manual for more information.<br />
Never<br />
• Store the meter in damp or humid conditions (greater than<br />
85% humidity).<br />
• Remove or insert the code chip while the meter is<br />
performing a test.<br />
• Use a code chip from a box of test strips other than the<br />
one in use.<br />
• Open a container of test strips or touch a test strip with wet<br />
hands or wet gloves.<br />
• Touch or remove the test strip during a test.<br />
• Wait more than 15 seconds after sticking the fingertip before<br />
applying the blood.<br />
• Add more blood after the test has begun.<br />
• Touch any buttons while a test is in progress.<br />
• Perform a test with a drop of blood from a previous fingerstick.<br />
16
Infection Control<br />
Follow appropriate infection control guidelines.<br />
• Use gloves.<br />
• Use a separate lancet for each person.<br />
• Dispose of used lancets and test strips in a stable container with<br />
a lid according to infection control guidelines.<br />
• Follow all other hygiene and safety procedures applicable.<br />
Caution: There is a potential risk of infection. Medical staff and<br />
other persons using the CoaguChek <strong>XS</strong> Meter to perform tests on<br />
more than one patient must be aware that any object coming into<br />
contact with human blood is a potential source of infection. (See:<br />
National Committee for Clinical Laboratory Standards: Protection<br />
of Laboratory Workers from Instrument Biohazards and Infectious<br />
Disease Transmitted by Blood, Body Fluids, and Tissue. Approved<br />
Guideline, NCCLS document M29-A, 1997.) Dispose of used items<br />
according to the disposal policy of your facility.<br />
17
Preparing for a Test<br />
1. Gather Items Gather the following items:<br />
• CoaguChek <strong>XS</strong> Meter<br />
• Container of test strips<br />
• Test strip code chip<br />
• CoaguChek lancet<br />
2. Match Codes Make sure the code number<br />
on the test strip container and<br />
the code chip match.<br />
Each box of test strips comes<br />
with a matching code chip.<br />
Every time you open a new box<br />
of test strips, you must replace<br />
the code chip.<br />
18
3. Insert Code Chip Make sure the meter is<br />
powered off. With the code<br />
number facing up, insert the<br />
code chip into the code chip<br />
slot until it snaps into place.<br />
4. Wash Hands Have the patient wash his<br />
or her hands in warm, soapy<br />
water. Or, clean the fingertip<br />
with an alcohol wipe.<br />
Make sure the fingertip is<br />
thoroughly dry.<br />
19
Performing a Test<br />
1. Get Ready Take a test strip out of the<br />
container.<br />
Close the container tightly.<br />
Do not open a container of test<br />
strips or touch a test strip with<br />
wet hands or wet gloves. This<br />
may damage the test strips.<br />
You have 10 minutes to use a<br />
test strip once you remove it<br />
from the container.<br />
2. Insert Strip Slide the test strip into the test<br />
strip guide in the direction of<br />
the arrows until it stops.<br />
The meter powers on.<br />
The code number of the<br />
inserted code chip flashes<br />
on the display.<br />
20
3. Match the Code Confirm that the number<br />
displayed matches the number<br />
on the test strip container,<br />
then press .<br />
If the numbers are different,<br />
make sure you are using the<br />
code chip that came with the<br />
test strips you are using.<br />
An hourglass appears as the<br />
meter warms up, which takes<br />
about thirty seconds<br />
When the meter is warmed up<br />
a flashing test strip appears and<br />
the meter begins a countdown.<br />
You have 180 seconds to apply<br />
blood to the test strip.<br />
4. Collect the Blood Twist the protective cap off<br />
the CoaguChek lancet.<br />
Massage the finger until you see<br />
increased color in the fingertip.<br />
Keeping the hand down,<br />
press the tip of the lancet<br />
firmly against the side of<br />
the fingertip. Press the blue<br />
trigger button.<br />
Gently squeeze from the base<br />
of the finger to develop a<br />
hanging drop of blood.<br />
21
5. Identify the Target Area Find the target area on the<br />
test strip.<br />
You can dose the target area<br />
by bringing the patient’s finger<br />
to the top of the test strip or<br />
by bringing the meter to the<br />
patient’s finger so that the side<br />
of the test strip touches the<br />
blood drop.<br />
6. Apply the Blood Within 15 seconds of<br />
sticking the fingertip, apply<br />
the blood to the target area of<br />
the test strip—either from the<br />
top or side of the test strip.<br />
Hold the blood drop to the<br />
test strip until you hear a beep.<br />
The flashing blood drop symbol<br />
disappears.<br />
Do not add more blood to<br />
the test strip. Do not touch<br />
the test strip.<br />
The result appears in about<br />
1 minute.<br />
22
7. Record Result Record the result according to<br />
your facility’s guidelines.<br />
8. Clean Up Place the used test strip<br />
and lancet in an approved<br />
container. Power the meter<br />
off .<br />
If the meter is dirty, wipe it clean<br />
with a recommended cleaner.<br />
23
Out of Range Values<br />
The CoaguChek <strong>XS</strong> PT test strips provide test results if the INR<br />
value is 0.8 and 8.0. If the result falls outside of this range, the<br />
meter displays < (less than) 0.8 or > (greater than) 8.0. If the<br />
meter indicates an out-of-range value, refer to the test strip<br />
package insert and repeat the test.<br />
In rare cases, an “error 7” message can occur in patients with<br />
long coagulation times (> 8 INR). If this error message appears<br />
again when the test is repeated, the result must be checked using<br />
another method.<br />
OR<br />
24
Optional Testing Methods<br />
Using Capillary Tubes<br />
You may use capillary tubes to collect the blood from a fingerstick<br />
and to dose the test strip. Use only CoaguChek Capillary Tubes/<br />
Bulbs, REF 11621173001. Do not use glass capillary tubes or<br />
capillary tubes that contain anticoagulants.<br />
The following steps are optional to the fingerstick blood sample<br />
instructions in the Preparing for a Test and Performing a Test<br />
sections of this manual.<br />
1. Prepare the Capillary Tube Firmly insert the end of the<br />
capillary tube into the capillary<br />
bulb. Completely insert the<br />
tube into the bulb to break the<br />
bulb diaphragm.<br />
Do not push the capillary tube<br />
in so far that it extends beyond<br />
the top of the bulb.<br />
25
2. Fill the Capillary Tube When the flashing test strip<br />
appears on the meter’s<br />
display, stick the fingertip.<br />
Then touch the capillary tube<br />
to the blood drop. Keep the<br />
tube level, and allow it to fill<br />
by capillary action. Fill the<br />
tube only halfway.<br />
Avoid getting air bubbles into<br />
the sample. Do not touch the<br />
hole at the top of the bulb. If<br />
blood gets into the bulb during<br />
sample collection, discard the<br />
bulb and repeat the test with a<br />
new test strip and fingerstick.<br />
3. Dose the Test Strip Within 15 seconds of<br />
sticking the fingertip, apply<br />
the blood to the test strip. Put<br />
your finger over the hole at<br />
the end of the capillary tube.<br />
Hold the capillary tube directly<br />
over the target area of the<br />
test strip. Squeeze the bulb to<br />
dispense one hanging drop of<br />
blood.<br />
Do not touch the test strip,<br />
move the meter, or add more<br />
blood during testing.<br />
26
4. Record Result Record the result according to<br />
your facility’s guidelines.<br />
5. Dispose of Blood<br />
Collection Items<br />
After testing, discard the<br />
capillary tube along with the<br />
used test strip and lancet<br />
according to infection control<br />
guidelines.<br />
27
Using Venous Blood<br />
You may use the CoaguChek <strong>XS</strong> Meter to test venous blood. Blood<br />
may be collected directly using a butterfly or a needle and syringe.<br />
Do not clean the syringe tip with alcohol or water prior to dosing<br />
the test strip. Use only a plastic syringe free of anticoagulant. Do<br />
not use glass. The syringe needle should be 23 gauge or larger. A<br />
21 gauge or larger needle is recommended.<br />
Note: Refer to the Preparing for a Test and Performing a Test<br />
sections of this manual for fingerstick blood testing instructions.<br />
1. Collect the Venous Sample When the flashing test strip<br />
appears on the meter’s<br />
display, collect the venous<br />
blood sample.<br />
Do not perform venipuncture<br />
until the flashing test strip<br />
is displayed.<br />
28
2. Dose the Test Strip Discard the first 4 drops of<br />
blood. Then immediately<br />
place 1 hanging drop of blood<br />
directly onto the target area of<br />
the test strip. Completely cover<br />
the target area.<br />
Do not touch the test strip. Do<br />
not introduce air bubbles, move<br />
the meter, or add more blood<br />
during testing.<br />
3. Record Result Record the result according to<br />
your facility’s guidelines.<br />
4. Dispose of Blood<br />
Collection Items<br />
After testing, discard the<br />
needle, syringe, or butterfly,<br />
and used test strip according<br />
to infection control guidelines.<br />
29
Memory<br />
Storing Test Results in Memory<br />
The CoaguChek <strong>XS</strong> Meter automatically stores up to 100 test<br />
results and their dates and times in its memory. If the memory<br />
is full when you perform a test, the oldest result is automatically<br />
deleted. The most recent result is always saved.<br />
When viewing results in memory, results can be changed between<br />
INR and Seconds by pressing the Set button on the meter side. This<br />
allows the user to toggle between seconds and INR.<br />
Note: All test results, including their date and time, remain in memory<br />
even when the meter is without batteries.<br />
Reviewing Stored Test Results<br />
You can review stored test results even when the meter’s battery<br />
power is low. To review results in memory:<br />
1. Access the Memory<br />
Press the M button .<br />
The meter powers on, if it is<br />
not already on, and goes to<br />
Memory mode.<br />
30
2. View Most Recent Result The most recent test result<br />
appears. The letters mem<br />
indicate that you are viewing<br />
a result in memory. The time<br />
and date of the test also<br />
appear. If there are no results<br />
in memory, a 0 appears in the<br />
display’s top-right corner.<br />
3. View Earlier Results To view earlier results, press<br />
the M button again .<br />
After you have viewed all the<br />
results in the memory,<br />
3 dashes appear.<br />
31
Erasing Stored Test Results<br />
You can erase all of the test results that are stored in the meter’s<br />
memory. You cannot, however, erase individual test results.<br />
To erase all stored results:<br />
1. Go to Erase mode. With the meter powered off,<br />
press and hold down the<br />
M button . While you are<br />
holding down the M button,<br />
press the ON-OFF button<br />
and then hold down both<br />
buttons for at least 5 seconds.<br />
The meter displays mem<br />
(flashing) and clr. The<br />
number of results in memory<br />
is shown in the top-right<br />
corner of the display.<br />
32
2. Confirm<br />
Press the M button to<br />
confirm that you want to erase<br />
the entire memory.<br />
Note: To exit Erase mode<br />
without erasing the results,<br />
press the ON-OFF button<br />
instead.<br />
The hourglass symbol flashes<br />
while the test results are being<br />
erased. Then, the counter is<br />
set to 0 and 3 dashes appear.<br />
33
Cleaning/Disinfecting the Meter<br />
It is important to follow the procedures below to clean and<br />
disinfect the meter. Failure to follow these procedures may cause<br />
malfunction of the meter.<br />
• Do not use sprays of any sort<br />
• Ensure that swab or cloth is only damp, not wet<br />
Cleaning/Disinfecting the Exterior<br />
• Use only the following items for cleaning/disinfecting the<br />
CoaguChek <strong>XS</strong> meter housing for a contact time of >1 minute:<br />
––70% isopropyl alcohol<br />
––10% Sodium hypochlorite solution (1 part bleach to 9 parts<br />
deionized water, made fresh every 24 hours)<br />
––Note: Do not use any other disinfectants/cleaning solutions on the<br />
meter housing.<br />
1. Clean/Disinfect the Exterior With the meter powered off,<br />
wipe the meter’s exterior clean.<br />
• Do not let liquid accumulate<br />
near any opening. Make<br />
sure that no liquid enters the<br />
meter.<br />
2. Dry the Exterior<br />
With a lint-free tissue, dry<br />
the meter.<br />
• Wipe away residual moisture<br />
and fluids after cleaning the<br />
housing.<br />
• Allow wiped areas to dry for<br />
at least 10 minutes before<br />
performing a test.<br />
34
Cleaning/Disinfecting the Test Strip Guide<br />
• Use only 70% isopropyl alcohol or 10% bleach solution to clean<br />
the CoaguChek <strong>XS</strong> test strip guide.<br />
• Do not use any other cleaning/disinfecting solutions on the<br />
test strip guide. Use of other cleaning/disinfecting solutions<br />
could result in damage to the meter.<br />
1. Open the Cover<br />
With the meter powered off,<br />
use your thumbnail to open<br />
the cover of the test strip<br />
guide by pressing its front<br />
edge upward. Move the cover<br />
safely away from the meter.<br />
Then rinse the cover with<br />
water or wipe it clean.<br />
2. Clean/Disinfect the Test<br />
Strip Guide<br />
• Hold the meter upright with<br />
the test strip guide facing<br />
down.<br />
• Clean the easily accessible<br />
areas with a cotton swab.<br />
• Ensure the swab is only<br />
damp, not wet.<br />
• Apply cleaning agent for a<br />
contact time of >1 minute<br />
(refer to the corresponding<br />
product labeling). Wipe away<br />
residual moisture and fluids.<br />
35
Caution: Do not insert any<br />
objects into the test strip<br />
guide. Doing so could<br />
damage the electrical<br />
contacts behind the test<br />
strip guide.<br />
3. Allow to Dry<br />
With the cover off, allow the<br />
test strip guide to dry for<br />
at least 10 minutes before<br />
re-attaching the test strip<br />
guide cover and testing again.<br />
4. Close the Cover<br />
Close the cover, and make<br />
sure it snaps into place.<br />
36
Advanced Features<br />
The CoaguChek <strong>XS</strong> Meter includes advanced features that you can<br />
set up as necessary. They are:<br />
• Changing the unit of measurement<br />
• Disabling the beep (With the beep enabled, the meter beeps<br />
when it detects a test strip, when it is ready for you to apply a<br />
sample, when it detects a sample, when the result is displayed,<br />
and when an error occurs—3 short beeps.)<br />
• Setting a therapeutic range (for INR only)<br />
The following table shows the setting options and the default<br />
setting for each advanced feature:<br />
Feature Setting Options Default Setting<br />
Unit %Q INR<br />
Sec<br />
INR<br />
Beep On On<br />
Off<br />
Therapeutic range On Off<br />
(for INR only) Off<br />
Set range Lower range (1.5 – 3.5) 1.5 INR<br />
(in INR) Upper range (2.5 – 4.5) 2.5 INR<br />
37
Setting Advanced Features<br />
You can access these settings by going to Setup mode. To go to<br />
Setup mode, press the SET button . The date format, flashing,<br />
will appear. Once you are in Setup mode, you’ll use these buttons:<br />
• to change a setting<br />
• to accept a setting (and move on to the next setting)<br />
Note: When you go to Setup<br />
mode, the date format, date,<br />
time format, and time settings<br />
appear first. Press the SET<br />
button to move past the<br />
date and time settings to get to<br />
the advanced settings.<br />
38
The Meter’s Display<br />
When you power the meter on, it briefly shows all the display’s<br />
letters, numbers, and symbols. Regularly check that all segments<br />
of each letter, number, and symbol appear. Please compare your<br />
meter’s display to the meter display shown here on this page.<br />
You can display all the letters, numbers, and symbols for a longer<br />
time to allow comparison. To do this, you will power the meter on<br />
and then hold down the ON-OFF button .<br />
The full display should appear as follows:<br />
39
Error Messages<br />
You may see the following error messages while using the<br />
CoaguChek <strong>XS</strong> Meter. If you see an error message, first try to<br />
correct the problem using the solution described below. If the<br />
problem persists, call Roche Diagnostics Technical Service Center<br />
at 1-800-428-4674, 24 hours a day, 7 days a week.<br />
Error: Test Strip<br />
A test strip was already<br />
inserted when the meter was<br />
powered on. If you did not<br />
remove the test strip after the<br />
last test, you will see this error.<br />
This error could also occur if<br />
the meter timed out after you<br />
inserted the test strip.<br />
The test strip is unusable.<br />
The test strip is not a<br />
CoaguChek <strong>XS</strong> PT test strip.<br />
Solution:<br />
Remove the test strip. Then<br />
repeat the test with a new<br />
CoaguChek <strong>XS</strong> PT test strip.<br />
40
Error: Meter Temperature<br />
The meter is too cold or too<br />
warm to measure correctly.<br />
Solution:<br />
Power the meter off and<br />
allow it to stand for about 30<br />
minutes at room temperature<br />
(between 59°F and 90°F).<br />
Error: Battery<br />
The battery level is too low.<br />
Solution:<br />
Replace the batteries. See<br />
the Batteries section of<br />
this manual.<br />
41
Error: Test Strip Guide Cover<br />
The test strip guide cover is<br />
not properly closed.<br />
Solution:<br />
Close the test strip guide<br />
cover.<br />
Error: Code Chip<br />
The code chip is missing,<br />
not properly inserted, or<br />
damaged.<br />
Solution:<br />
Check to see if you have<br />
the correct code chip<br />
properly inserted in the meter.<br />
For more information, see<br />
the Code Chip section of<br />
this manual.<br />
If the code chip is damaged,<br />
call Roche Diagnostics<br />
Technical Service Center<br />
at 1-800-428-4674.<br />
42
Error: Test Strip Expired<br />
The test strip has expired.<br />
Solution:<br />
Check the meter’s date<br />
setting. If it is not correct, set<br />
the correct date. For more<br />
information, see the Meter<br />
Setup section of this manual.<br />
If the date is correct, power<br />
the meter off and remove the<br />
code chip and the test strip.<br />
Then use the code chip and<br />
a test strip from a new box of<br />
test strips.<br />
Error: Test Strip Unusable<br />
The test strip is unusable.<br />
Solution:<br />
Power the meter off, remove<br />
the test strip, and then<br />
re-insert it. If the error<br />
message reappears, discard<br />
the unusable test strip and<br />
use a new one.<br />
43
Error Messages You May See<br />
After You Apply Blood<br />
Error: Time Exceeded<br />
You did not apply blood to<br />
the test strip within 2 minutes<br />
after the blood drop symbol<br />
appeared.<br />
Solution:<br />
Power the meter off and<br />
remove the test strip. Repeat<br />
the test using the same test<br />
strip and blood taken from<br />
a new fingerstick from a<br />
different finger.<br />
Error: Blood Application<br />
Error applying blood to the<br />
test strip.<br />
Solution:<br />
Power the meter off and<br />
remove the test strip.<br />
Repeat the test using a new<br />
test strip and blood taken<br />
from a new fingerstick from a<br />
different finger.<br />
44
Error: Test Strip Interference<br />
The test strip was touched or<br />
removed during the test.<br />
Solution:<br />
Power the meter off and<br />
remove the test strip. Repeat<br />
the test using a new test<br />
strip and blood taken from<br />
a new fingerstick from a<br />
different finger.<br />
Do not touch or remove<br />
the test strip when a test is<br />
in progress.<br />
Error: Quality Control Failure<br />
The test strip failed the<br />
internal quality control check.<br />
The test strip is unusable.<br />
Solution:<br />
Power the meter off and<br />
remove the test strip. Repeat<br />
the test using a new test<br />
strip and blood taken from<br />
a new fingerstick from a<br />
different finger.<br />
45
Error: Measurement Error<br />
Measurement error caused<br />
by the blood sample.<br />
Solution:<br />
Do not touch or remove the test<br />
strip when a test is in progress.<br />
Be sure to apply the blood<br />
drop to the test strip within 15<br />
seconds of sticking the fingertip.<br />
In rare cases, “error 7” message<br />
can occur in patients with long<br />
coagulation times (> 8 INR).<br />
If this error message appears<br />
again when the test is repeated,<br />
the result must be checked<br />
using another method.<br />
The CoaguChek <strong>XS</strong> PT test<br />
strip may be used for patients<br />
under a combination therapy<br />
of oral anticoagulants plus<br />
heparin injections. Under<br />
no circumstances should<br />
heparinized capillary tubes be<br />
used for sample application.<br />
If capillary tubes are used,<br />
please use only the dedicated<br />
CoaguChek capillary tubes.<br />
46
Error: Internal Error<br />
An error occurred during the<br />
internal diagnostic test.<br />
Error: Internal Error<br />
Solution:<br />
Power the meter off and<br />
remove the batteries. Wait<br />
at least 1 minute before<br />
re-inserting the batteries in the<br />
battery compartment.<br />
Re-set the date and time as<br />
described in the Meter Setup<br />
section of this manual.<br />
Caution: The date and time<br />
must be set correctly.<br />
Repeat the test. If you see the<br />
same error message again, the<br />
meter has a defect.<br />
Solution:<br />
Because this error indicates<br />
possible damage to the heater<br />
plate contacts, call the Roche<br />
Diagnostics Technical Service<br />
Center at 1-800-428-4674 to<br />
have the meter replaced.<br />
47
Other Information<br />
Ordering Information for Health Care<br />
Professionals<br />
Please contact Roche Diagnostics Customer Service at<br />
1-800-428-5076.<br />
REF/Cat. Number<br />
CoaguChek <strong>XS</strong> <strong>System</strong> 04837975001<br />
(includes carrying case)<br />
CoaguChek <strong>XS</strong> PT Test 04625315160<br />
2 x 24 tests<br />
CoaguChek Lancets 04348150001<br />
Box of 200<br />
Capillary Tubes/Bulbs 11621173001<br />
Product Limitations<br />
Please read the information packaged with the test strips<br />
regarding up-to-date product specifications and limitations.<br />
48
Product Specifications<br />
Operating Conditions<br />
Temperature<br />
Relative humidity<br />
59°F to 90°F (15°C to 32°C)<br />
less than 85% (without condensation)<br />
Maximum altitude 14,000 feet (4300 m)<br />
Placement<br />
Operate the meter on a level, vibration-free<br />
surface or hold it so it is roughly horizontal.<br />
Measuring range Refer to test strip package insert.<br />
Memory<br />
100 test results with date and time<br />
Interface Infrared interface, LED/IRED Class 1<br />
Battery operation 4 AAA batteries<br />
Number of tests per Approx. 60 tests<br />
set of batteries<br />
Safety class<br />
III<br />
Automatic power-off After 3 minutes<br />
Dimensions<br />
5.43 x 3.07 x 1.10 in (138 x 78 x 28 mm)<br />
Weight<br />
4.48 oz. or 127 g (without batteries)<br />
49
Sample Material<br />
Sample type<br />
Sample size At least 8 µL<br />
Interference<br />
Capillary whole blood or<br />
non-anticoagulated venous whole blood.<br />
Refer to the test strip package insert.<br />
Non-Operating Storage and Transport Conditions<br />
Temperature range<br />
Relative humidity<br />
-13°F to 158°F (-25°C to 70°C)<br />
10% to 85% (without condensation)<br />
Support/Services<br />
Questions<br />
Please call the Roche Diagnostics Technical Service Center at<br />
1-800-428-4674 if you have questions regarding the handling<br />
of your meter, the reliability of your results, or if you suspect the<br />
meter is defective.<br />
Repairs<br />
Please note that repairs, new settings or other modifications to<br />
the meter may only be performed by persons authorized by Roche<br />
Diagnostics.<br />
50
Symbols<br />
The following table lists all of the display screen icons and<br />
their meaning.<br />
Symbol<br />
Meaning<br />
Test strip (without sample application area)<br />
Test strip (with sample application area)<br />
Apply sample<br />
User must wait until the meter has completed<br />
an action.<br />
24-hour time format<br />
12-hour time format<br />
Time between midnight and noon<br />
(in 12-hour time format)<br />
Time between noon and midnight<br />
(in 12-hour time format)<br />
Indicates the results are displayed as a<br />
Quick percentage value.<br />
Indicates the results are displayed in<br />
Seconds.<br />
Indicates the results are displayed in<br />
INR units.<br />
51
Symbol<br />
Meaning<br />
Beep tone is enabled<br />
Beep tone is disabled<br />
Result is above the chosen therapeutic range<br />
(only with INR as unit)<br />
Result is below the chosen therapeutic range<br />
(only with INR as unit)<br />
• Results in the chosen unit<br />
• Error numbers<br />
Memory contains no results or no further<br />
results<br />
Displays the time in HH:MM format<br />
Displays the date in DD-MM-YY,<br />
MM-DD-YY or YY-MM-DD format.<br />
The monitor is in Setup Mode.<br />
Indicates the code number of the code chip<br />
inserted in the meter.<br />
Result in the chosen unit is above the<br />
measuring range.<br />
Result in the chosen unit is below the<br />
measuring range.<br />
52
Symbol<br />
Meaning<br />
Battery status:<br />
• When the batteries still have their full<br />
charge, all segments are lit.<br />
• Individual segments disappear one by one<br />
as the batteries become weaker.<br />
• When there is no segment remaining, you<br />
can no longer perform a test. You can,<br />
however, still access the meter’s memory.<br />
The meter is in Memory Mode.<br />
Automatic quality control completed<br />
successfully<br />
Reports an error (see Error messages)<br />
Room or meter temperature is outside the<br />
acceptable range.<br />
Communication is taking place via the<br />
infrared interface<br />
Measurement chamber cover is open.<br />
53
54<br />
Warranty<br />
CoaguChek <strong>XS</strong> Meter Limited (1 Year) Warranty<br />
ROCHE DIAGNOSTICS warrants, to the original purchaser only,<br />
that the meter shall be free from all defects in material and<br />
workmanship for a period of one year from the date of purchase.<br />
Purchaser’s sole and exclusive remedy, with respect to the<br />
CoaguChek <strong>XS</strong> meter and parts thereof, shall be the repair and/or<br />
replacement of the meter or parts at Roche Diagnostic’s option.<br />
THE ABOVE WARRANTY IS EXCLUSIVE OF ALL OTHER<br />
WARRANTIES, AND ROCHE DIAGNOSTICS MAKES NO OTHER<br />
WARRANTIES, EXPRESS OR IMPLIED, INCLUDING WITHOUT<br />
LIMITATION THE IMPLIED WARRANTY OF MERCHANTABILITY<br />
OR FITNESS FOR A PARTICULAR PURPOSE. IN NO EVENT SHALL<br />
ROCHE DIAGNOSTICS BE LIABLE TO THE PURCHASER OR ANY<br />
OTHER PERSON FOR ANY INCIDENTAL, CONSEQUENTIAL,<br />
INDIRECT, SPECIAL OR PUNITIVE DAMAGES ARISING FROM OR<br />
IN ANY WAY CONNECTED WITH THE PURCHASE OR USE OF THE<br />
METER. NO WARRANTY OF MERCHANTABILITY OR FITNESS FOR A<br />
PARTICULAR PURPOSE, IF ANY IS IMPLIED FROM THE SALE OF THE<br />
COAGUCHEK <strong>XS</strong> METER. NO WARRANTY, EXPRESS OR IMPLIED<br />
(IF ANY), SHALL EXTEND FOR A LONGER DURATION THAN THE<br />
DURATION OF THE EXPRESS WARRANTY STATED ABOVE.<br />
The foregoing warranty shall not apply to a meter which is<br />
damaged by accident or subject to alteration, misuse, tampering,<br />
and/or abuse, including the use of Dispatch® products. Meters<br />
which show damage or misuse will be handled in accordance with<br />
Roche Diagnostic’s non-warranty service policy.<br />
The warranty of the repaired/replacement meter will expire on the<br />
date of the original warranty expiration or ninety (90) days after<br />
shipment of a replacement system, whichever period is longer.
0123<br />
COAGUCHEK is a trademark of Roche.<br />
Distribution in the U.S.A. by:<br />
Roche Diagnostics<br />
9115 Hague Road<br />
Indianapolis, IN 46256<br />
Roche Diagnostics GmbH<br />
Sandhofer Strasse 116<br />
68305 Mannheim<br />
Germany<br />
www.poc.roche.com<br />
0 4837991001 (03) 2009-11 USA


