Aastra 6753i User Manual (PDF) - VoIPon Solutions
Aastra 6753i User Manual (PDF) - VoIPon Solutions
Aastra 6753i User Manual (PDF) - VoIPon Solutions

You also want an ePaper? Increase the reach of your titles
YUMPU automatically turns print PDFs into web optimized ePapers that Google loves.
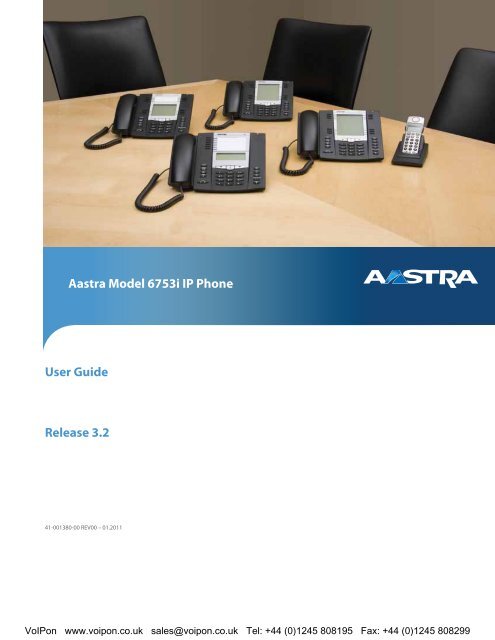
<strong>Aastra</strong> Model <strong>6753i</strong> IP Phone<br />
<strong>User</strong> Guide<br />
Release 3.2<br />
41-001380-00 REV00 – 01.2011<br />
<strong>VoIPon</strong> www.voipon.co.uk sales@voipon.co.uk Tel: +44 (0)1245 808195 Fax: +44 (0)1245 808299
Software License Agreement<br />
<strong>Aastra</strong> Telecom Inc., hereinafter known as "Seller", grants to Customer a personal,<br />
worldwide, non-transferable, non-sublicenseable and non-exclusive, restricted use license<br />
to use Software in object form solely with the Equipment for which the Software was<br />
intended. This Product may integrate programs, licensed to <strong>Aastra</strong> by third party<br />
Suppliers, for distribution under the terms of this agreement. These programs are<br />
confidential and proprietary, and are protected as such by copyright law as unpublished<br />
works and by international treaties to the fullest extent under the applicable law of the<br />
jurisdiction of the Customer. In addition, these confidential and proprietary programs are<br />
works conforming to the requirements of Section 401 of title 17 of the United States Code.<br />
Customer shall not disclose to any third party such confidential and proprietary programs<br />
and information and shall not export licensed Software to any country except in<br />
accordance with United States Export laws and restrictions.<br />
Customer agrees to not reverse engineer, decompile, disassemble or display Software<br />
furnished in object code form. Customer shall not modify, copy, reproduce, distribute,<br />
transcribe, translate or reduce to electronic medium or machine readable form or<br />
language, derive source code without the express written consent of the Seller and its<br />
Suppliers, or disseminate or otherwise disclose the Software to third parties. All Software<br />
furnished hereunder (whether or not part of firmware), including all copies thereof, are<br />
and shall remain the property of Seller and its Suppliers and are subject to the terms and<br />
conditions of this agreement. All rights reserved.<br />
Customer's use of this software shall be deemed to reflect Customer's agreement to abide<br />
by the terms and conditions contained herein. Removal or modification of trademarks,<br />
copyright notices, logos, etc., or the use of Software on any Equipment other than that for<br />
which it is intended, or any other material breach of this Agreement, shall automatically<br />
terminate this license. If this Agreement is terminated for breach, Customer shall<br />
immediately discontinue use and destroy or return to Seller all licensed software and other<br />
confidential or proprietary information of Seller. In no event shall Seller or its suppliers or<br />
licensors be liable for any damages whatsoever (including without limitation, damages for<br />
loss of business profits, business interruption, loss of business information, other<br />
pecuniary loss, or consequential damages) arising out of the use of or inability to use the<br />
software, even if Seller has been advised of the possibility of such damages.<br />
ii<br />
<strong>VoIPon</strong> www.voipon.co.uk sales@voipon.co.uk Tel: +44 (0)1245 808195 Fax: +44 (0)1245 808299
Table of Contents<br />
Software License Agreement ....................................................................................................... ii<br />
Table of Contents ........................................................................................................................ iii<br />
Welcome .........................................................................................................................................1<br />
About This Guide ..........................................................................................................................1<br />
Documentation ..........................................................................................................................1<br />
Phone Features ..........................................................................................................................1<br />
Requirements ............................................................................................................................2<br />
Installation and Setup ................................................................................................................2<br />
Getting Started ..............................................................................................................................3<br />
Plugging in and Starting the Phone ...........................................................................................3<br />
Idle Screens ...............................................................................................................................6<br />
Incomplete Configuration .........................................................................................................7<br />
No Service .................................................................................................................................7<br />
IP Phone Keys ..............................................................................................................................8<br />
Key Panel ..................................................................................................................................8<br />
Key Descriptions .....................................................................................................................10<br />
Keypad Keys ...........................................................................................................................12<br />
Methods for Customizing Your Phone ......................................................................................13<br />
Phone Options via the IP Phone UI ........................................................................................13<br />
Phone Options via the <strong>Aastra</strong> Web UI ....................................................................................16<br />
Phone Status ................................................................................................................................20<br />
Phone Status via IP Phone UI .................................................................................................20<br />
Finding Your Phone’s IP Address ..........................................................................................21<br />
Phone Status via the <strong>Aastra</strong> Web UI .......................................................................................21<br />
Customizing Your Phone ............................................................................................................25<br />
Ring Tone Sets ........................................................................................................................25<br />
Contrast Level .........................................................................................................................28<br />
Live Dialpad* .........................................................................................................................28<br />
Set Audio ................................................................................................................................29<br />
Time and Date .........................................................................................................................30<br />
Language .................................................................................................................................34<br />
<strong>User</strong> Password .........................................................................................................................43<br />
Resetting a <strong>User</strong> Password ......................................................................................................44<br />
Restarting Your Phone ............................................................................................................45<br />
Table of Contents<br />
iii<br />
<strong>VoIPon</strong> www.voipon.co.uk sales@voipon.co.uk Tel: +44 (0)1245 808195 Fax: +44 (0)1245 808299
Table of Contents<br />
Table of Contents<br />
Phone Lock .............................................................................................................................46<br />
Defining an Emergency Dial Plan ..........................................................................................47<br />
Line Keys and Programmable Keys ..........................................................................................49<br />
Multiple Line and Call Appearance Keys ...............................................................................49<br />
Programmable Keys ................................................................................................................50<br />
Line Key .................................................................................................................................53<br />
Creating a Speed Dial Key ......................................................................................................54<br />
Editing Speed Dial Keys .........................................................................................................60<br />
Do Not Disturb (DND) Key ....................................................................................................64<br />
Busy Lamp Field (BLF) Key ..................................................................................................65<br />
BLF List Key ..........................................................................................................................67<br />
Flash Key ................................................................................................................................70<br />
Automatic Call Distribution (ACD) Key (for Sylantro Servers) ............................................71<br />
Directed Call Pickup/Group Call Pickup Keys (for Sylantro Servers) ...................................75<br />
XML Key ................................................................................................................................79<br />
Sprecode Key ..........................................................................................................................82<br />
Park/Pickup Keys ....................................................................................................................84<br />
Last Call Return (lcr) Key (for Sylantro Servers) ...................................................................86<br />
Call Forward Key ....................................................................................................................87<br />
BLF/Xfer .................................................................................................................................89<br />
Speed Dial/Xfer ......................................................................................................................91<br />
Speed Dial/Conf ......................................................................................................................93<br />
Directory Key .........................................................................................................................95<br />
Callers List Key ......................................................................................................................97<br />
Transfer Key ...........................................................................................................................99<br />
Conference Key ....................................................................................................................100<br />
Intercom Key ........................................................................................................................102<br />
Services Key .........................................................................................................................104<br />
Phone Lock Key ....................................................................................................................106<br />
Paging Key (Sends the RTP Stream) ....................................................................................108<br />
None Key ..............................................................................................................................110<br />
Deleting a Key .....................................................................................................................111<br />
Making Calls .............................................................................................................................112<br />
Dialing a Number ..................................................................................................................112<br />
iv<br />
<strong>VoIPon</strong> www.voipon.co.uk sales@voipon.co.uk Tel: +44 (0)1245 808195 Fax: +44 (0)1245 808299
Table of Contents<br />
Using Handsfree Speakerphone ............................................................................................112<br />
Using a Headset ....................................................................................................................113<br />
Redial ....................................................................................................................................114<br />
Mute ......................................................................................................................................115<br />
Receiving Calls ..........................................................................................................................116<br />
Answering an Incoming Call ................................................................................................116<br />
Sending an Incoming Call to Voicemail ...............................................................................116<br />
Handling Calls ...........................................................................................................................117<br />
Placing a Call on Hold ..........................................................................................................117<br />
Transferring Calls .................................................................................................................118<br />
Conferencing Calls ...............................................................................................................121<br />
Ending Calls ..........................................................................................................................126<br />
Managing Calls .........................................................................................................................127<br />
Directory List ........................................................................................................................127<br />
Callers List ............................................................................................................................137<br />
Account Configuration (DND and Call Forwarding) ...........................................................143<br />
Missed Calls Indicator ..........................................................................................................163<br />
Voicemail ..............................................................................................................................164<br />
Additional Features ..................................................................................................................165<br />
Star Codes .............................................................................................................................165<br />
Suppress DTMF Playback ....................................................................................................166<br />
Display DTMF Digits ...........................................................................................................167<br />
Call Waiting Tone Period ......................................................................................................169<br />
Stuttered Dial Tone ...............................................................................................................170<br />
XML Beep Support ...............................................................................................................171<br />
Call Hold Reminder During Active Calls .............................................................................172<br />
Call Hold Reminder (on single hold) ....................................................................................174<br />
Status Scroll Delay ................................................................................................................176<br />
Incoming Call Interrupts Dialing ..........................................................................................177<br />
Switch UI Focus to Ringing Line .........................................................................................179<br />
Preferred Line and Preferred Line Timeout ..........................................................................180<br />
Goodbye Key Cancels Incoming Calls .................................................................................182<br />
Message Waiting Indicator ...................................................................................................183<br />
Incoming Intercom Call Features .........................................................................................184<br />
Table of Contents<br />
v<br />
<strong>VoIPon</strong> www.voipon.co.uk sales@voipon.co.uk Tel: +44 (0)1245 808195 Fax: +44 (0)1245 808299
Table of Contents<br />
Table of Contents<br />
Using Redial Key for “Last Number Redial” .......................................................................187<br />
Group RTP Paging (receives RTP streams) ..........................................................................188<br />
Shared Call Appearance (SCA) Call Bridging .....................................................................189<br />
Available Features Enabled by Administrators .....................................................................193<br />
Outgoing Intercom Calls .......................................................................................................193<br />
Missed Call Summary Subscription .....................................................................................193<br />
Customizable Callers List Key .............................................................................................194<br />
Autodial (Hotline and Warmline) .........................................................................................194<br />
Centralized Conferencing .....................................................................................................195<br />
Answer and Ignore Keys for XML Applications ..................................................................195<br />
Playing a WAV File On Your Phone .....................................................................................196<br />
Using the Keypad During Active XML Applications ..........................................................196<br />
Key Redirection ....................................................................................................................197<br />
XML Applications and Off-Hook Interaction ......................................................................198<br />
XML Override for a Locked Phone ......................................................................................198<br />
RTP Recording and Simultaneous Playing ...........................................................................198<br />
“Hold” Feature Enhancement (for Broadsoft Servers) .........................................................199<br />
Configurable Save and Delete Keys .....................................................................................199<br />
Authentication Support for HTTP/HTTPS Download Methods<br />
Used with Broadsoft Client Management System (CMS) ....................................................199<br />
Diverting Calls from Your Phone .........................................................................................201<br />
Display of Call Destination Information ..............................................................................202<br />
Indication of Terminated Calls ..............................................................................................203<br />
Model M670i Expansion Module .............................................................................................205<br />
Using the Expansion Module ................................................................................................206<br />
Troubleshooting <strong>Solutions</strong> ........................................................................................................207<br />
Limited Warranty .....................................................................................................................212<br />
Appendix A - Time Zone Codes .............................................................................................. A-1<br />
Index ................................................................................................................................... Index-1<br />
vi<br />
<strong>VoIPon</strong> www.voipon.co.uk sales@voipon.co.uk Tel: +44 (0)1245 808195 Fax: +44 (0)1245 808299
Welcome<br />
The <strong>Aastra</strong> <strong>6753i</strong> offers advanced XML capability to access custom applications and is fully<br />
interoperable with leading IP-PBX platforms. Featuring a 3-line display, the <strong>6753i</strong> supports up to 9<br />
lines with call appearances and allows you to make and receive calls, transfer, conference, and<br />
more. The <strong>6753i</strong> IP telephone provides communications over an IP Network using the SIP IP<br />
telephony protocol.<br />
About This Guide<br />
This guide explains how to use the basic features of your new <strong>6753i</strong> phone. Not all features listed<br />
are available by default. Contact your system or network Administrator to find out which features<br />
and services are available to you on your system.<br />
Your System Administrator has the ability to customize some features on this phone. For<br />
information on more advanced settings and configurations, administrators should refer to the<br />
<strong>Aastra</strong> Models 9000i and 6700i Series SIP IP Phones Administrator Guide.<br />
Documentation<br />
• <strong>Aastra</strong> <strong>6753i</strong> SIP IP Phone Installation Guide – Contains installation and set-up instructions,<br />
general features and functions, and basic options list customization. This Installation Guide is<br />
included in the box with your phone.<br />
• <strong>Aastra</strong> <strong>6753i</strong> SIP IP Phone <strong>User</strong> Guide – Describes the most commonly used features and<br />
functions for an end user.<br />
• <strong>Aastra</strong> Models 9000i and 6700i Series SIP IP Phones Administrator Guide – Describes how<br />
to set the <strong>6753i</strong> phone up on the network and contains advanced configuration instructions for<br />
the <strong>6753i</strong>.<br />
Phone Features<br />
• 3-line LCD screen<br />
• 6 top keys - all 6 keys are programmable<br />
• Press-and-hold speed dial key configuration feature<br />
• 3 call appearance lines with LEDs<br />
• Supports up to 9 call lines<br />
• Full-duplex speakerphone for handsfree calls<br />
Model <strong>6753i</strong> IP Phone <strong>User</strong> Guide 1<br />
<strong>VoIPon</strong> www.voipon.co.uk sales@voipon.co.uk Tel: +44 (0)1245 808195 Fax: +44 (0)1245 808299
• Headset mode support (via handset jack)<br />
• Built-in-two-port, 10/100/1000 Gigabit Ethernet switch - lets you share a connection with<br />
your computer.<br />
• Inline power support (based on 802.3af standard) which eliminates power adapters<br />
• AC power adapter (included)<br />
• Enhanced busy lamp fields*<br />
• Set paging*<br />
*Availability of feature dependant on your phone system or service provider.<br />
Requirements<br />
Installation and Setup<br />
The <strong>6753i</strong> IP Phone requires the following environment:<br />
• SIP-based IP PBX system or network installed and running with a SIP account created for<br />
the <strong>6753i</strong> IP phone.<br />
• Access to a Trivial File Transfer Protocol (TFTP), File Transfer Protocol (FTP), Hypertext<br />
Transfer Protocol (HTTP) server, or HyperText Transfer Protocol over Secure Sockets Layer<br />
(SSL) (HTTPS).<br />
• Ethernet/Fast Ethernet LAN (10/100 Mbps) (Gigabit Ethernet LAN (1000 Mbps)<br />
recommended)<br />
• Category 5/5e straight through cabling (category 6 straight through cabling required for<br />
optimum Gigabit Ethernet performance) Power source<br />
— For Ethernet networks that supply in-line power to the phone (IEEE 802.3af):<br />
— For power, use the Ethernet cable (supplied) to connect from the phone directly to the<br />
network for power. (No 48v AC power adapter required.)<br />
— For Ethernet networks that DO NOT supply power to the phone:<br />
— For power, use the 48V AC Power Adapter (included) to connect from the DC<br />
power port on the phone to a power source.<br />
or<br />
— (optional) - For power, use a Power over Ethernet (PoE) power injector or a PoE<br />
switch. A PoE power injector is available as an optional accessory from <strong>Aastra</strong><br />
Telecom. Contact your Administrator for more information.<br />
If your System Administrator has not already setup your <strong>6753i</strong> phone, please refer to the <strong>Aastra</strong><br />
<strong>6753i</strong> Installation Guide for basic installation and physical setup of the <strong>6753i</strong>. For more<br />
advanced administration and configuration information, System Administrators should refer to<br />
the <strong>Aastra</strong> Models 9000i and 6700i Series SIP IP Phones Administrator Guide.<br />
2 Model <strong>6753i</strong> IP Phone <strong>User</strong> Guide<br />
<strong>VoIPon</strong> www.voipon.co.uk sales@voipon.co.uk Tel: +44 (0)1245 808195 Fax: +44 (0)1245 808299
Getting Started<br />
The <strong>6753i</strong> must be set up and configured prior to its first use. This section describes phone<br />
behavior and start up screens you may see when the phone is first plugged in, or when it is<br />
restarted.<br />
Plugging in and Starting the Phone<br />
The <strong>6753i</strong> automatically begins the start up sequence as soon as it is connected. The phone goes<br />
through this process the first time you plug in your phone and every time you restart your phone.<br />
Note: Some start up screens only appear the first time you connect your phone,<br />
or if your phone has been factory defaulted.<br />
The phone displays the following startup screens.<br />
<strong>Aastra</strong> <strong>6753i</strong><br />
Firmware Loaded<br />
LLDP<br />
Initializing<br />
network<br />
During the first start up the <strong>6753i</strong> phone attempts to contact the Redirection and Configuration<br />
Server (rcs.aastra.com) for current server information. No personal information is transmitted<br />
from the phone during this process.<br />
Contacting<br />
Redirector<br />
Model <strong>6753i</strong> IP Phone <strong>User</strong> Guide 3<br />
<strong>VoIPon</strong> www.voipon.co.uk sales@voipon.co.uk Tel: +44 (0)1245 808195 Fax: +44 (0)1245 808299
The <strong>6753i</strong> phone may also look for configuration servers on your local network (press 3Remote<br />
to enter a remote server address, or 4Skip to continue without checking for servers).<br />
Auto Discovery<br />
Remote<br />
Skip<br />
If appropriate servers are found they are listed for you to select from by scrolling down to view<br />
the complete list. (Press 3Skip to continue without selecting a server.).<br />
Choose Server<br />
<br />
Skip<br />
Select<br />
The <strong>6753i</strong> phone then checks settings and looks for new configuration and firmware updates for<br />
the phone from a server. If a new update is found, the phone displays the message “Updating<br />
Configuration”. This may take a few moments while the phone downloads the latest updates<br />
Updating<br />
configuration<br />
.<br />
Note: New updates to your phone can be automatically scheduled from the<br />
server. This is set up on the phone system by your System Administrator and<br />
should be scheduled during non-business hours or slow call periods.<br />
Important! Do not unplug or remove power to the phone while it is checking or<br />
installing firmware and configuration information.<br />
If language packs were loaded to your phone by your System Administrator, the following<br />
screen displays during startup.<br />
Downloading<br />
language packs.....<br />
4 Model <strong>6753i</strong> IP Phone <strong>User</strong> Guide<br />
<strong>VoIPon</strong> www.voipon.co.uk sales@voipon.co.uk Tel: +44 (0)1245 808195 Fax: +44 (0)1245 808299
When the configuration update is complete, the phone displays the following screens.<br />
Network<br />
DSP<br />
SIP<br />
Done<br />
Model <strong>6753i</strong> IP Phone <strong>User</strong> Guide 5<br />
<strong>VoIPon</strong> www.voipon.co.uk sales@voipon.co.uk Tel: +44 (0)1245 808195 Fax: +44 (0)1245 808299
Idle Screens<br />
Idle Screen 1<br />
When the phone has successfully updated the configuration and connected to the network, the<br />
phone displays the Idle State screen:<br />
1<br />
John Burns<br />
9054550055<br />
Sat Jun 8 2:55pm<br />
The Idle State screen lists your name (SIP screen name), extension (or phone number), and day,<br />
date, and time. The "1" in the upper corner in the above example indicates the idle screen for the<br />
first line appearance. You can use the left and right arrow keys to scroll through the idle screens<br />
for all three line appearances. The <strong>6753i</strong> allows for scrolling up to 3 lines.<br />
This screen is shown whenever your phone is not in use.<br />
Idle Screen 2<br />
The second display line displays the following temporary messages if the event occurs:<br />
• No Service<br />
• DHCP Failed<br />
• Restarting......<br />
• New IP Obtained<br />
• Network Disconnected/Connected<br />
Note: Since the "Network Disconnected/Connected" display on two lines, the<br />
date and time does not show if this event displays.<br />
The second line can also display the following status messages, listed in order of display<br />
priority:<br />
• Call forward status<br />
• DND On (Do Not Disturb)<br />
• Number of missed calls<br />
6 Model <strong>6753i</strong> IP Phone <strong>User</strong> Guide<br />
<strong>VoIPon</strong> www.voipon.co.uk sales@voipon.co.uk Tel: +44 (0)1245 808195 Fax: +44 (0)1245 808299
When more than one status message displays, the 2 is shown after the message to indicate you can<br />
use the 2 and 5 navigation keys to scroll through the remaining messages.<br />
1<br />
John Burns<br />
CFWD All<br />
Jun 8 2:55pm<br />
2<br />
Network Connected<br />
Incomplete Configuration<br />
If your phone displays an "Incomplete Config" message without any extension or user name at the<br />
end of the start up sequence instead of an Idle state screen, this indicates the phone configuration<br />
that was downloaded from the configuration server is not complete or correct. Contact your<br />
System Administrator for assistance.<br />
No Service<br />
When the phone is not properly connected to the network, or the account has not been configured<br />
by the Network Administrator, the "No Service" or "Network Disconnected" prompt appears on<br />
the display and the telephone status light turns ON. The phone also displays the default time and<br />
date of 12:00am Jan. 1st, 2000. Check that the cables are tightly connected to the phone and to the<br />
wall jack. The phone should automatically detect when the connection is reconnected and display<br />
the "Network Connected" prompt temporarily.<br />
If changes have been made to your phone settings, you may need to restart your phone. For more<br />
information on restarting your phone, see “Restarting Your Phone” on page 45.<br />
For more information about connecting your phone, refer to the <strong>Aastra</strong> <strong>6753i</strong> Installation Guide.<br />
Check with your System Administrator for assistance.<br />
Model <strong>6753i</strong> IP Phone <strong>User</strong> Guide 7<br />
<strong>VoIPon</strong> www.voipon.co.uk sales@voipon.co.uk Tel: +44 (0)1245 808195 Fax: +44 (0)1245 808299
IP Phone Keys<br />
Key Panel<br />
The following sections describe the various <strong>6753i</strong> phone key functions on both the symbol and<br />
text hardware platforms, and how they help you make and manage your calls and caller<br />
information. Images of the symbol keys and the symbol hardware platform are used throughout<br />
this document.<br />
8 Model <strong>6753i</strong> IP Phone <strong>User</strong> Guide<br />
<strong>VoIPon</strong> www.voipon.co.uk sales@voipon.co.uk Tel: +44 (0)1245 808195 Fax: +44 (0)1245 808299
<strong>6753i</strong> Handset <br />
Three (3) Line Call<br />
High Quality Speakerphone Speakerphone/Headset<br />
Key<br />
Message Waiting Lamp <br />
Mute Key<br />
Goodbye Key <br />
Navigation Keys<br />
Options Key Keypad<br />
Hold Key <br />
LCD Screen<br />
Redial Key <br />
Volume Control (+) (-)<br />
<br />
Softkeys<br />
Model <strong>6753i</strong> IP Phone <strong>User</strong> Guide 9<br />
<strong>VoIPon</strong> www.voipon.co.uk sales@voipon.co.uk Tel: +44 (0)1245 808195 Fax: +44 (0)1245 808299
Key Descriptions<br />
The following table identifies the keys on the key panel of your <strong>6753i</strong> IP phone that you can use<br />
for handling calls.<br />
Text Keys Symbol Keys Key Description<br />
Goodbye key - Ends an active call. The Goodbye key also<br />
Goodbye<br />
exits an open list, such as the Options List, without saving<br />
changes.<br />
Options<br />
Hold<br />
Redial<br />
Options key - Accesses options to customize your phone.<br />
Your System Administrator may have already customized<br />
some of your settings. Check with your System<br />
Administrator before changing the Administrator-only<br />
options.<br />
Hold key - Places an active call on hold. To retrieve a held<br />
call, press the call appearance button beside the light that<br />
is flashing.<br />
Redial key - Redials up to 100 previously dialed numbers.<br />
Pressing the Redial key twice simultaneously redials the<br />
last dialed number.53<br />
Volume control key - Adjusts the volume for the handset,<br />
headset, ringer, and handsfree speaker.<br />
Line 3<br />
Line 2<br />
Line 1<br />
L3<br />
L2<br />
L1<br />
Line/Call Appearance key - Connects you to a line or<br />
call. The <strong>Aastra</strong> <strong>6753i</strong> IP phone supports up to 3 line keys.<br />
Speaker<br />
Mute<br />
Handsfree key - Activates Handsfree for making and<br />
receiving calls without lifting the handset. When the audio<br />
mode option is set, this key is used to switch between a<br />
headset and the handsfree speakerphone.<br />
Mute key - Mutes the microphone so that your caller<br />
cannot hear you (the light indicator flashes when the<br />
microphone is on mute).<br />
10 Model <strong>6753i</strong> IP Phone <strong>User</strong> Guide<br />
<strong>VoIPon</strong> www.voipon.co.uk sales@voipon.co.uk Tel: +44 (0)1245 808195 Fax: +44 (0)1245 808299
Text Keys Symbol Keys Key Description<br />
Navigation keys - Pressing the UP and DOWN arrow<br />
keys lets you view different status and text messages on<br />
the LCD display (if there is more than 1 line of status/text<br />
messages). These buttons also let you scroll through<br />
menu selections, such as the Options List.<br />
Pressing the LEFT and RIGHT arrow keys lets you view<br />
the different line/call appearances. While in the Options<br />
List, these keys allow you to exit or enter the current<br />
option. When you are editing entries on the display,<br />
pressing the LEFT arrow key erases the character on the<br />
left; pressing the RIGHT arrow key sets the option.<br />
Programmable keys - 6 Top Keys - all 6 keys are<br />
programmable.<br />
Keys 1 and 2 are designated as the SAVE and DELETE<br />
keys, respectively. Only your System Administrator can<br />
make these keys configurable, if required.<br />
The following are the default functions for the<br />
programmable keys on the <strong>6753i</strong> IP phone:<br />
1 SAVE Allows you to save numbers and/or<br />
names to the<br />
Directory. Using this key, you enter<br />
the number,<br />
name, and line (or speed dial key)<br />
to record in the<br />
Directory List.<br />
2 DELETE Allows you to delete a single entry<br />
or all entries<br />
from the Directory List and Callers<br />
List.<br />
3 DIRECTORY Displays up to 200 names and<br />
phone numbers<br />
(stored in alphabetical order).<br />
4 CALLERS LIST Accesses the last 200 calls<br />
received.<br />
5 TRANSFER Transfers the active call to another<br />
number.<br />
6 CONFERENCE Begins a conference call with the<br />
active call.<br />
Notes:<br />
1. For more information about the SAVE and DELETE<br />
keys, see “Configurable Save and Delete Keys” on<br />
page 199.<br />
2. For more information about configuring keys 1 thru 6<br />
to perform specific functions, see “Programmable Keys”<br />
on page 50.<br />
Model <strong>6753i</strong> IP Phone <strong>User</strong> Guide 11<br />
<strong>VoIPon</strong> www.voipon.co.uk sales@voipon.co.uk Tel: +44 (0)1245 808195 Fax: +44 (0)1245 808299
Keypad Keys<br />
Keypad Key<br />
The <strong>6753i</strong> has a keypad with digits from 0 through 9, a “*” key, and a “#” key. Keys 2 through 9<br />
contain the letters of the alphabet. The <strong>6753i</strong> phone keypad includes the following:<br />
Description<br />
0 Dials 0<br />
Dials the Operator on a registered phone<br />
1 Dials 1<br />
2 ABC Dials 2<br />
When entering text, this key enters A with one press, B with two presses, and C with three presses<br />
3 DEF Dials 3<br />
When entering text, this key enters D with one press, E with two presses, and F with three presses<br />
4 GHI Dials 4<br />
When entering text, this key enters G with one press, H with two presses, and I with three presses<br />
5 JKL Dials 5<br />
When entering text, this key enters J with one press, K with two presses, and L with three presses<br />
6 MNO Dials 6<br />
When entering text, this key enters M with one press, N with two presses, and O with three presses<br />
7 P QRS Dials 7<br />
When entering text, this key enters P with one press, Q with two presses, R with three presses, and S with<br />
four presses.<br />
8 TUV Dials 8<br />
When entering text, this key enters T with one press, U with two presses, and V with three presses<br />
9 WXYZ Dials 9<br />
When entering text, this key enters W with one press, X with two presses, Y with three presses, and Z with<br />
four presses.<br />
The "*" is called the "star key". The "#" is called the "number sign", "pound key", or "hash key",<br />
depending on one's nationality or personal preference. These can be used for special functions<br />
such as accessing voicemail. The “star key” and “pound key” functions are dependant on your<br />
country’s feature availablities. Contact your System Administrator for more information about<br />
available functions using these keys.<br />
These keypad keys can be used for any of the following on the phone:<br />
• Dial a phone number to make a call (see “Dialing a Number” on page 112.)<br />
• Enter digits or letters in the IP Phone user interface.<br />
• Program a speed dial number (see “Creating a Speed Dial Key” on page 54.)<br />
• Press a speed dial key (see “Creating a Speed Dial Key” on page 54.)<br />
• Press the keys associated with a called Interactive Voice Response (IVR) system.<br />
12 Model <strong>6753i</strong> IP Phone <strong>User</strong> Guide<br />
<strong>VoIPon</strong> www.voipon.co.uk sales@voipon.co.uk Tel: +44 (0)1245 808195 Fax: +44 (0)1245 808299
Methods for Customizing Your Phone<br />
There are two ways to customize specific options on your phone:<br />
• Using the Options key on the IP Phone<br />
• Using the <strong>Aastra</strong> Web UI in an Internet browser window from your PC.<br />
Phone Options via the IP Phone UI<br />
You can customize your phone by pressing the Options<br />
key and accessing the IP Phone UI.<br />
These options allow you to customize the following phone settings.<br />
Option Number<br />
Option<br />
1 Call Forward<br />
1. Screenname<br />
2. All Off<br />
3. All On<br />
Note: The menus that display for Call Forward<br />
are dependant on the Call Forward Mode set on<br />
the phone. Default is "Account" mode.<br />
2 Services<br />
1. Directory<br />
2. Callers List<br />
3. Voicemail<br />
3 Preferences<br />
1. Tones<br />
Ring Tone<br />
Tone Set<br />
2. Contrast Level<br />
3. Speed Dial Edit<br />
4. Live Dialpad<br />
5. Set Audio<br />
Audio Mode<br />
Headset Mic Vol<br />
6. Time and Date<br />
Time Zone<br />
Daylight Savings<br />
Time Format<br />
Date Format<br />
Time Server<br />
Time Server 1<br />
Time Server 2<br />
Time Server 3<br />
Set Time<br />
Set Date<br />
7. Language<br />
Screen Language<br />
Input Language<br />
Model <strong>6753i</strong> IP Phone <strong>User</strong> Guide 13<br />
<strong>VoIPon</strong> www.voipon.co.uk sales@voipon.co.uk Tel: +44 (0)1245 808195 Fax: +44 (0)1245 808299
4 Phone Status<br />
1. IP&MAC Addresses<br />
2. LAN Port<br />
3. PC Port<br />
4. Firmware Info<br />
5. Error Messages<br />
5 <strong>User</strong> Password<br />
6 Administrator Menu<br />
(Password Protected)<br />
7 Restart Phone<br />
8 Phone Lock<br />
Note: *The "Administrator Menu" options are Administrator level functions<br />
only, and are not accessible by the user. These options should only be set up and<br />
changed by your System Administrator.<br />
Simplified Options Menu<br />
Your System Administrator may configure a simplified options menu for your phone. The<br />
following table indicates the options that may appear on your phone if the simplified options<br />
menu is applied.<br />
Option<br />
Number<br />
Option<br />
1 Call Forward<br />
1. Screenname<br />
2. All Off<br />
3. All On<br />
Note: The menus that display for Call Forward are<br />
dependant on the Call Forward Mode set on the<br />
phone. Default is "Account" mode.<br />
2 Services<br />
1. Directory<br />
2. Callers List<br />
3. Voicemail<br />
2 Preferences<br />
1. Tones<br />
Ring Tone<br />
Tone Set<br />
2. Contrast Level<br />
3. Live Dialpad<br />
4. Set Audio<br />
Audio Mode<br />
Headset Mic Vol<br />
3 Phone Status<br />
1. IP&MAC Addresses<br />
2. LAN Port<br />
3. PC Port<br />
4. Firmware Info<br />
5. Error Messages<br />
4 Phone Lock<br />
14 Model <strong>6753i</strong> IP Phone <strong>User</strong> Guide<br />
<strong>VoIPon</strong> www.voipon.co.uk sales@voipon.co.uk Tel: +44 (0)1245 808195 Fax: +44 (0)1245 808299
Using the IP Phone UI<br />
1. Press the Options key on the phone to enter the Options List.<br />
2. Use 2 and 5 to scroll through the list of options, or press the number corresponding to the<br />
Option.<br />
3. Press Enter, the 4 key, or press the digit number of the corresponding option to select an<br />
option.<br />
4. Change a selected option if applicable.<br />
5. Press the Set or Done key to save the change.<br />
6. Press the button, the 3 key, or the button at any time to exit without saving<br />
changes.<br />
Reference<br />
IP Phone UI<br />
For more information about customizing your phone using the available options from the IP Phone<br />
UI, see the section “Customizing Your Phone” on page 25.<br />
For more information about Administrator options, contact your System Administrator.<br />
Model <strong>6753i</strong> IP Phone <strong>User</strong> Guide 15<br />
<strong>VoIPon</strong> www.voipon.co.uk sales@voipon.co.uk Tel: +44 (0)1245 808195 Fax: +44 (0)1245 808299
Phone Options via the <strong>Aastra</strong> Web UI<br />
In addition to the IP Phone UI options, you can customize additional options on the IP Phone<br />
using the <strong>Aastra</strong> Web UI. In order to access your phone using the <strong>Aastra</strong> Web UI, you need to<br />
know your phone’s IP address. To find your phone’s IP address, see “Finding Your Phone’s IP<br />
Address” on page 21.<br />
Using the <strong>Aastra</strong> Web UI<br />
<strong>Aastra</strong> Web UI<br />
1. Open your web browser, enter the phone’s IP address or host name into the address field and<br />
press .<br />
The following logon screen displays.<br />
2. At the prompt, enter your username and password and click OK.<br />
Note: For a user, the default user name is “user” and the password field is left<br />
blank.<br />
16 Model <strong>6753i</strong> IP Phone <strong>User</strong> Guide<br />
<strong>VoIPon</strong> www.voipon.co.uk sales@voipon.co.uk Tel: +44 (0)1245 808195 Fax: +44 (0)1245 808299
The Network Status window displays for the IP phone you are accessing.<br />
3. You can logout of the <strong>Aastra</strong> Web UI at any time by clicking Log Off.<br />
Model <strong>6753i</strong> IP Phone <strong>User</strong> Guide 17<br />
<strong>VoIPon</strong> www.voipon.co.uk sales@voipon.co.uk Tel: +44 (0)1245 808195 Fax: +44 (0)1245 808299
The following categories display in the side menu of the <strong>Aastra</strong> Web UI: Status, Operation,<br />
Basic Settings.<br />
Headings<br />
Status<br />
Operation<br />
Descriptions<br />
The Status section displays the network status and the MAC address of the IP phone. It<br />
also displays hardware and firmware information about the IP phone, and information about<br />
the SIP account(s) currently configured on the phone. The information in the Network Status<br />
window is read-only.<br />
<strong>User</strong> Password - Allows you to change user password.<br />
Phone Lock - Allows you to assign an emergency dial plan to the phone, lock the phone to<br />
prevent any changes to the phone and to prevent use of the phone, and reset the user<br />
password.<br />
Programmable Keys - There are 6 function keys, all 6 of which you can configure to<br />
perform the functions identified in the following list.<br />
Your Administrator must unlock the SAVE and DELETE keys in order for these keys to be<br />
configurable. For more information about the SAVE and DELETE keys, see “Configurable<br />
Save and Delete Keys” on page 199.<br />
• None • Last Call Return (lcr)<br />
• Line • Call Forward<br />
• Speed Dial • BLF/Xfer<br />
• Do Not Disturb (DND) • Speed Dial/Xfer<br />
• Busy Lamp Field • Speed Dial/Conf<br />
(BLF)<br />
• BLF List • Directory<br />
• Auto Call Distribution • Callers List<br />
(ACD)<br />
• Directed Call Pickup • Conference<br />
• Extensible Markup • Transfer<br />
Language (XML)<br />
• Flash • Incom (Intercom)<br />
• Sprecode • Services<br />
• Park • Phone Lock<br />
• Pickup • Paging<br />
Keypad Speed Dial - Allows you to assign a speed dial number to a specific digit on the<br />
phone’s keypad for speed dialing purposes.<br />
Expansion Module - Allows you to configure an additional 36 keys with a M670i Expansion<br />
Module if it is attached to the phone. This option displays on the side menu of the <strong>Aastra</strong><br />
Web UI only if an Expansion Module is attached.<br />
Directory - Allows you to copy the Callers List and Directory List from your IP phone to your<br />
PC.<br />
Reset - Allows you to restart the IP phone when required.<br />
18 Model <strong>6753i</strong> IP Phone <strong>User</strong> Guide<br />
<strong>VoIPon</strong> www.voipon.co.uk sales@voipon.co.uk Tel: +44 (0)1245 808195 Fax: +44 (0)1245 808299
Headings<br />
Basic<br />
Settings<br />
Descriptions<br />
Preferences - Allows you to enable/disable the following:<br />
• Suppress DTMF Playback<br />
• Display DTMF Digits<br />
• Play Call Waiting Tone<br />
• Stuttered Dial Tone<br />
• XML Beep Support<br />
• Status Scroll Delay (seconds)<br />
• Incoming Call Interrupts Dialing<br />
• Switch UI Focus to Ringing Line<br />
• Call Hold Reminder During Active Calls<br />
• Call Hold Reminder<br />
• Call Waiting Tone Period<br />
• Preferred Line<br />
• Preferred Line Timeout (seconds)<br />
• Goodbye Key Cancels Incoming Call<br />
• Message Waiting Indicator Line<br />
• DND Key Mode<br />
• Call Forward Key Mode<br />
This category also allows you to configure:<br />
• Incoming Intercom Call Settings<br />
• Group Paging RTP Settings<br />
• Ring Tones (global and per-line basis)<br />
• Time and Date Settings<br />
• Webpage Language and Language Settings<br />
Account Configuration - Allows you to configure “do not disturb” (DND) and “call<br />
forwarding” (CFWD) by account. You can have multiple accounts on the <strong>6753i</strong>.<br />
Model <strong>6753i</strong> IP Phone <strong>User</strong> Guide 19<br />
<strong>VoIPon</strong> www.voipon.co.uk sales@voipon.co.uk Tel: +44 (0)1245 808195 Fax: +44 (0)1245 808299
Phone Status<br />
You can view the status of your phone using the IP Phone UI or the <strong>Aastra</strong> Web UI.<br />
Phone Status via IP Phone UI<br />
The "Phone Status" option on the IP phone displays the status of your phone to the LCD<br />
display.<br />
This option allows you to view your phone’s:<br />
• Network status including your phone’s IP and MAC address<br />
• Local Area Network (LAN) port information<br />
• PC Port information (if PC link exists)<br />
• Firmware version<br />
• Error messages from the last reboot or startup<br />
Use the following procedure to view the status of your phone using the IP Phone UI.<br />
IP Phone UI<br />
1. Press on the phone to enter the Options List.<br />
2. Select Phone Status.<br />
3. Select the option you want to view:<br />
• IP&MAC Address<br />
• LAN Port<br />
• PC Port<br />
• Firmware Info<br />
• Error Messages<br />
The option you select displays to the LCD. Use the and keys to scroll the through the<br />
LCD display.<br />
20 Model <strong>6753i</strong> IP Phone <strong>User</strong> Guide<br />
<strong>VoIPon</strong> www.voipon.co.uk sales@voipon.co.uk Tel: +44 (0)1245 808195 Fax: +44 (0)1245 808299
Finding Your Phone’s IP Address<br />
If you want to access your phone’s options using an Internet browser, you need to enter the IP<br />
address of the phone in the browser to open the <strong>Aastra</strong> Web UI. Use the following procedure to<br />
find your phone’s IP address.<br />
IP Phone UI<br />
1. Press the button on the phone to enter the Option List.<br />
2. Select Phone Status and press the 4 key.<br />
3 Phone Status<br />
=Next<br />
=Enter<br />
3. Select "IP&MAC Addresses" and press the 4 key.<br />
1 IP&MAC Addresses<br />
=Next<br />
=Enter<br />
The IP address of your <strong>6753i</strong> IP phone displays in the "IP Address" field.<br />
IP Address:<br />
10.40.50.112<br />
=Exit<br />
=Next<br />
Phone Status via the <strong>Aastra</strong> Web UI<br />
Use the following procedure to view the phone status via the <strong>Aastra</strong> Web UI.<br />
<strong>Aastra</strong> Web UI<br />
1. Open your web browser, enter the phone’s IP address or host name into the address field and<br />
press .<br />
2. In the <strong>User</strong>name/Password window, enter your username and password and click OK.<br />
Note: For a user, the default user name is “user” and the password field is left<br />
blank.<br />
Model <strong>6753i</strong> IP Phone <strong>User</strong> Guide 21<br />
<strong>VoIPon</strong> www.voipon.co.uk sales@voipon.co.uk Tel: +44 (0)1245 808195 Fax: +44 (0)1245 808299
The Network Status window displays for the IP phone you are accessing.<br />
This Network Status window is view only. It displays the Network Status of your phone which<br />
includes the following:<br />
• Link State, Negotiation, Speed, and Duplex setting for the LAN and PC ports<br />
• MAC Address<br />
• Hardware Information<br />
• Firmware Information<br />
• SIP Account status<br />
22 Model <strong>6753i</strong> IP Phone <strong>User</strong> Guide<br />
<strong>VoIPon</strong> www.voipon.co.uk sales@voipon.co.uk Tel: +44 (0)1245 808195 Fax: +44 (0)1245 808299
SIP Account Status<br />
The IP Phones show the SIP registration status on the IP Phone’s Network Status screen in the<br />
<strong>Aastra</strong> Web UI.<br />
The following is an illustration of the Network Status screen in the <strong>Aastra</strong> Web UI with SIP status<br />
displayed.<br />
SIP Account Status<br />
Model <strong>6753i</strong> IP Phone <strong>User</strong> Guide 23<br />
<strong>VoIPon</strong> www.voipon.co.uk sales@voipon.co.uk Tel: +44 (0)1245 808195 Fax: +44 (0)1245 808299
The following table describes the status conditions that can display for the account.<br />
Status Condition<br />
Registered<br />
Desription<br />
Displays this status on accounts that HAVE been registered with the SIP proxy<br />
server.<br />
Example:<br />
Backup<br />
Registrar<br />
Line SIP Account Status Used?<br />
1 9057604603@anasipproxy.aastra.com:5060 Registered Yes<br />
SIP Error Number<br />
where<br />
Account Number is “1”<br />
SIP Account is “9057604603@anasipproxy.aastra.com” on port “5060”<br />
Status is “Registered”<br />
Backup registrar is used (“Yes”)<br />
Displays on accounts when registration fails with the SIP proxy server.<br />
Example:<br />
Backup<br />
Registrar<br />
Line SIP Account Status Used?<br />
4 9057604601@anasipproxy.aastra.com:5060 401 No<br />
where<br />
Account Number is “4”<br />
SIP Account is “9057604601@anasipproxy.aastra.com” on port “5060”<br />
Status is “401” - Unregistered if SIP registration fails.<br />
Backup registrar is used (“No”)<br />
24 Model <strong>6753i</strong> IP Phone <strong>User</strong> Guide<br />
<strong>VoIPon</strong> www.voipon.co.uk sales@voipon.co.uk Tel: +44 (0)1245 808195 Fax: +44 (0)1245 808299
Customizing Your Phone<br />
The following paragraphs describe the options available from either the IP Phone UI, the <strong>Aastra</strong><br />
Web UI, or both, and provide procedures applicable to the option.<br />
Ring Tone Sets<br />
You can configure ring tones and ring tone sets on the IP phone.<br />
Ring Tones<br />
There are several distinct ring tones a user can select from to set on the IP phones. You can enable/<br />
disable these ring tones on a global or per-line basis.<br />
The following table identifies the valid settings and default values for each type of configuration<br />
method.<br />
Ring Tones Table<br />
Configuration Method Valid Values Default Value<br />
IP Phone UI<br />
Global<br />
Tone 1<br />
Tone 2<br />
Tone 3<br />
Tone 4<br />
Tone 5<br />
Silent<br />
Global Setting:<br />
Tone 1<br />
<strong>Aastra</strong> Web UI<br />
Lines 1 to 9<br />
Global:<br />
Tone 1<br />
Tone 2<br />
Tone 3<br />
Tone 4<br />
Tone 5<br />
Silent<br />
Per-Line Setting:<br />
Global<br />
Tone 1<br />
Tone 2<br />
Tone 3<br />
Tone 4<br />
Tone 5<br />
Silent<br />
Global Setting:<br />
Tone 1<br />
Per-Line Setting:<br />
Global<br />
Model <strong>6753i</strong> IP Phone <strong>User</strong> Guide 25<br />
<strong>VoIPon</strong> www.voipon.co.uk sales@voipon.co.uk Tel: +44 (0)1245 808195 Fax: +44 (0)1245 808299
Ring Tone Sets<br />
In addition to ring tones, you can configure ring tone sets on a global-basis on the IP phone. Ring<br />
tone sets consist of tones customized for a specific country. The ring tone sets you can configure<br />
on the IP phones are:<br />
• United States (US) (Default - also used in Canada)<br />
• Mexico<br />
• Malaysia<br />
• Brazil<br />
• United Kingdom (UK)<br />
• Italy<br />
• Germany<br />
• France<br />
• Europe (generic tones)<br />
• Australia<br />
• Russia<br />
When you configure the country's tone set, the country-specific tone is heard on the phone for<br />
the following:<br />
• dial tone<br />
• secondary dial tone<br />
• ring tone<br />
• busy tone<br />
• congestion tones<br />
• call waiting tone<br />
• ring cadence pattern<br />
You configure global ring tones and tone sets using the <strong>Aastra</strong> Web UI and the IP Phone UI.<br />
Configuring Ring Tones and Tone Sets<br />
IP Phone UI<br />
Use the following procedures to configure ring tones and tone sets on the IP phone.<br />
Global configuration only<br />
1. Press on the phone to enter the Options List.<br />
2. Select Preferences.<br />
26 Model <strong>6753i</strong> IP Phone <strong>User</strong> Guide<br />
<strong>VoIPon</strong> www.voipon.co.uk sales@voipon.co.uk Tel: +44 (0)1245 808195 Fax: +44 (0)1245 808299
3. Select Tones.<br />
4. Select Ring Tone.<br />
5. Select the type of ring tone (Tone 1 through Tone 5, or Silent).<br />
6. Select Set and then press 2.<br />
7. Select Tone Set.<br />
8. Select the country for which you want to apply the tone set. Valid values are<br />
Australia, Europe, France, Germany, Italy, UK, Mexico, Brazil, Malaysia, Russia, and<br />
US. Default is US.<br />
9. Press 4.<br />
The ring tone and tone set you select is immediately applied to the IP phone.<br />
<strong>Aastra</strong> Web UI<br />
1. Click on Basic Settings->Preferences->Ring Tones.<br />
For global configuration:<br />
2. In the "Ring Tones" section, select a country from the "Tone Set" field.<br />
Valid values are Australia, Europe, France, Germany, Italy, UK, Mexico, Brazil,<br />
Malaysia, Russia, and US. Default is US.<br />
3. Select a value from the "Global Ring Tone" field.<br />
Note: *See the Ring Tones Table on page 25 for valid values.<br />
For per-line configuration:<br />
4. In the "Ring Tone" section, select a line for which you want to set ring tone.<br />
5. Select a value from the "LineN" field.<br />
Note: See the Ring Tones Table on page 25 for valid values.<br />
6. Click Save Settings.<br />
Model <strong>6753i</strong> IP Phone <strong>User</strong> Guide 27<br />
<strong>VoIPon</strong> www.voipon.co.uk sales@voipon.co.uk Tel: +44 (0)1245 808195 Fax: +44 (0)1245 808299
Contrast Level<br />
The "Contrast Level" option on the IP phone allows you to set the amount of light that<br />
illuminates the LCD display. Use this option to set the preference of contrast level.<br />
You can set the contrast level using the IP Phone UI only.<br />
Setting Contrast Level<br />
Live Dialpad*<br />
IP Phone UI<br />
1. Press on the phone to enter the Options List.<br />
2. Select Preferences.<br />
3. Select Contrast Level.<br />
4. Use the 3 and 4 navigation buttons to increase or decrease the intensity of contrast<br />
lighting on the LCD.<br />
5. Press Set to save your selection.<br />
The "Live Dialpad" option on the IP phone turns the Live Dial Pad mode ON or OFF. With live<br />
dial pad ON, the <strong>6753i</strong> IP phone automatically dials out and turns ON Handsfree mode as soon<br />
as a dial pad key or programmable key is pressed. With live dial pad OFF, if you dial a number<br />
while the phone is on-hook, lifting the receiver or pressing the initiates a call to that<br />
number.<br />
*Availability of feature dependant on your phone system or service provider.<br />
You can enable/disable the live dialpad using the IP Phone UI only.<br />
Enabling/Disabling Live Dialpad<br />
IP Phone UI<br />
1. Press on the phone to enter the Options List.<br />
2. Select Preferences.<br />
3. Select Live Dialpad.<br />
4. Use the Change key to turn the live dialpad ON or OFF.<br />
5. Press Done to save your selection.<br />
28 Model <strong>6753i</strong> IP Phone <strong>User</strong> Guide<br />
<strong>VoIPon</strong> www.voipon.co.uk sales@voipon.co.uk Tel: +44 (0)1245 808195 Fax: +44 (0)1245 808299
Set Audio<br />
The "Set Audio" option on the IP Phone allows you to set the audio mode for your IP phone. It<br />
also allows you to set the volume level of the headset microphone.<br />
You can set Audio on your IP phone using the IP Phone UI only.<br />
Audio Mode<br />
The <strong>6753i</strong> allows you to use a handset, a headset, or handsfree mode to handle incoming and<br />
outgoing calls. The audio mode option provides different combinations of these three methods to<br />
provide maximum flexibility in handling calls. There are four audio mode options you can set:<br />
Audio Mode Option<br />
Description<br />
Speaker<br />
This is the default setting. Calls can be made or received using the handset<br />
or handsfree speakerphone. In handset audio mode, pressing the<br />
button on the phone switches to handsfree speakerphone. In Speaker audio<br />
mode, lift the handset to switch to the handset.<br />
Headset<br />
Choose this setting if you want to make or receive all calls using a handset<br />
or headset. Calls can be switched from the handset to headset by pressing<br />
the button on the phone. To switch from the headset to the handset, lift<br />
the handset.<br />
Speaker/Headset Incoming calls are sent to the handsfree speakerphone first when the<br />
button is pressed. By pressing the button again, you can switch back<br />
and forth between the handsfree speakerphone and the headset. At<br />
anytime, lifting the handset switches back to the handset from either the<br />
handsfree speakerphone or the headset.<br />
Headset/Speaker Incoming calls are sent to the headset first when the button is<br />
pressed. By pressing the button again, you can switch back and forth<br />
between the headset and the handsfree speakerphone. At anytime, lifting<br />
the handset switches back to the handset from either the headset or the<br />
handsfree speakerphone.<br />
Headset Mic Volume<br />
The "Headset Mic Volume" option allows you to set the volume level for the headset microphone.<br />
Setting Audio Mode and Headset Mic Volume<br />
IP Phone UI<br />
1. Press on the phone to enter the Options List.<br />
2. Select Preferences.<br />
3. Select Set Audio.<br />
4. Select Audio Mode.<br />
Model <strong>6753i</strong> IP Phone <strong>User</strong> Guide 29<br />
<strong>VoIPon</strong> www.voipon.co.uk sales@voipon.co.uk Tel: +44 (0)1245 808195 Fax: +44 (0)1245 808299
Time and Date<br />
5. Select the audio mode you want to use on your phone. Valid values are:<br />
Speaker<br />
Headset<br />
Speaker/Headset<br />
Headset/Speaker<br />
6. Press Done to save your selection.<br />
7. Select Headset Mic Volume.<br />
8. Select the Low, Medium, or High volume level.<br />
9. Press Done to save your selection.<br />
On the IP phones, you can configure the following:<br />
• Time and date<br />
• Time and date format<br />
• Time zone<br />
• Daylight savings time<br />
• Time Servers<br />
Note: Only the Time and Date Formats and Time Servers can be set using the<br />
<strong>Aastra</strong> Web UI.<br />
Note:<br />
Configuring Time and Date<br />
Use the following procedures to configure the time and date settings on the IP phone.<br />
IP Phone UI<br />
Set Time and Time Format<br />
1. Press on the phone to enter the Options List.<br />
2. Select Preferences.<br />
3. Select Time and Date.<br />
4. Select Set Time.<br />
5. Using the keys on the keypad, enter a time to set on the IP phone. Use the<br />
3 and 4 navigation keys to move backward or forward when entering the time. Use the<br />
"*" key to set either AM or PM.<br />
6. Press Set to save the time setting.<br />
7. Select Time Format.<br />
30 Model <strong>6753i</strong> IP Phone <strong>User</strong> Guide<br />
<strong>VoIPon</strong> www.voipon.co.uk sales@voipon.co.uk Tel: +44 (0)1245 808195 Fax: +44 (0)1245 808299
8. Using the "Change" key, set the Time Format to either a 12 hour format or a 24 hour format.<br />
Valid values are 12h and 24h. Default is 12h.<br />
9. Press Set to save the Time Format you selected.<br />
Set Date and Date Format<br />
1. Select Preferences.<br />
2. Select Time and Date.<br />
3. Select Set Date.<br />
4. Using the keys on the keypad, enter a date to set on the IP phone. Use the<br />
3 and 4 navigation keys to move backward or forward when entering the date.<br />
5. Press Set to save the date setting.<br />
6. Select Date Format.<br />
7. Select a date format from the list of options. Default is Sun Jan 2. Valid values are:<br />
• Sun Jan 2 (Default)<br />
• 2-Jan-00<br />
• 2000 01 02<br />
• 02/01/2000<br />
• 02/01/00<br />
• 02-01-00<br />
• 01/.02/00<br />
• Jan 2<br />
• 2 Jan 2000<br />
• Sun 2 Jan<br />
• 2 Jan<br />
• 02.01.2000<br />
8. Press Set to save the Date Format setting.<br />
Set Time Zone<br />
1. Select Preferences.<br />
2. Select Time and Date.<br />
3. Select Time Zone.<br />
4. Press * to display a list of Time Zone options.<br />
A list of Time Zones display for different areas of the world.<br />
5. Select a Time Zone that applies to your area.<br />
The default Time Zone is US-Eastern.<br />
Note: For a list of the Time Zones values available on the IP Phone, see<br />
‘Appendix A - Time Zone Codes.”.<br />
Model <strong>6753i</strong> IP Phone <strong>User</strong> Guide 31<br />
<strong>VoIPon</strong> www.voipon.co.uk sales@voipon.co.uk Tel: +44 (0)1245 808195 Fax: +44 (0)1245 808299
6. Press Set to save the Time Zone setting.<br />
Set Daylight Savings Time<br />
1. Select Preferences.<br />
2. Select Time and Date.<br />
3. Select Daylight Savings.<br />
4. Select a Daylight Savings time from the list of options.<br />
Valid values are:<br />
• OFF<br />
• 30 min summertime<br />
• 1 h summertime<br />
• Automatic (Default)<br />
Note: The default for Daylight Savings is Automatic.<br />
5. Press Set to save the Daylight Savings setting.<br />
Set Time Servers<br />
With a valid time server enabled your IP phone will synchronize the time displayed with the<br />
specified configuration server. The phone will use the time from Time Server 1 unless it is not<br />
configured or unavailable, in which case it will move on to Time Server 2, and if neccessary<br />
Time Server 3.<br />
1. Select Preferences.<br />
2. Select Time and Date.<br />
3. Select Time Server.<br />
4. Select from Time Server 1, Time Server 2, or Time Server 3.<br />
5. Enter an IP address or domain name for the time server.<br />
Note: The default for Time Servers is Enabled. The Time Servers can be<br />
Enabled or Diabled only from the <strong>Aastra</strong> Web UI.<br />
6. Press Set to save the time server setting.<br />
32 Model <strong>6753i</strong> IP Phone <strong>User</strong> Guide<br />
<strong>VoIPon</strong> www.voipon.co.uk sales@voipon.co.uk Tel: +44 (0)1245 808195 Fax: +44 (0)1245 808299
<strong>Aastra</strong> Web UI<br />
1. Click on Basic Settings->Preferences->Time and Date Setting.<br />
2. In the “Time Format” field, select the time format you want to use on your phone. Valid<br />
values are:<br />
• 12h (12 hour format) (default)<br />
• 24h (24 hour format)<br />
Note: The time and time format you configure display on the phone’s idle<br />
screen.<br />
3. In the “Date Format” field, select the date format you want to use on your phone. Default is<br />
WWW MMM DD. Valid values are:<br />
• WWW MMM DD (default)<br />
• DD-MMM-YY<br />
• YYYY-MM-DD<br />
• DD/MM/YYYY<br />
• DD/MM/YY<br />
• DD-MM-YY<br />
• MM/DD/YY<br />
• MMM DD<br />
• DD MMM YYYY<br />
• WWW DD MMM<br />
• DD MMM<br />
• DD.MM.YYYY<br />
Note: The date and date format you configure display on the phone’s idle screen.<br />
4. In the “NTP Time Servers” field, enable by checking the checkbox or disable by unchecking<br />
the box (default is enabled).<br />
Model <strong>6753i</strong> IP Phone <strong>User</strong> Guide 33<br />
<strong>VoIPon</strong> www.voipon.co.uk sales@voipon.co.uk Tel: +44 (0)1245 808195 Fax: +44 (0)1245 808299
5. In the “Time Server 1”, “Time Server 2”, and “Time Server 3” fields, enter IP addresses<br />
or qualified domain names for the primary, secondary, and tertiary time servers.<br />
Note: Time Servers can only be entered if NTP Time Servers is enabled.<br />
6. Click Save Settings.<br />
Language<br />
The IP phones support several different languages. You can have the IP Phone UI and the <strong>Aastra</strong><br />
Web UI display in a specific language as required. When you set the language to use, all of the<br />
display screens (menus, services, options, configuration parameters, etc.) display in that<br />
language. The IP phones support the following languages:<br />
• English (default)<br />
• French (Canadian)<br />
• French (European)<br />
• Spanish (Mexican)<br />
• Spanish (European)<br />
• German<br />
• Italian<br />
• Portuguese<br />
• Russian<br />
• Nordic<br />
You can also configure the language to use when inputing values in the <strong>Aastra</strong> Web UI and the<br />
IP Phone UI.<br />
Specifying the Language to Use<br />
Once the language pack(s) are available on your phone from your System Administrator, you<br />
can specify which language to use on the phone and/or the <strong>Aastra</strong> Web UI.<br />
Note: All languages may not be available for selection. The available languages<br />
are dependant on the language packs currently loaded to the IP phone.<br />
IP Phone UI<br />
Use the following procedure to specify which language to use for the IP Phone UI.<br />
1. Press on the phone to enter the Options List.<br />
2. Select Preferences.<br />
3. Select Language.<br />
34 Model <strong>6753i</strong> IP Phone <strong>User</strong> Guide<br />
<strong>VoIPon</strong> www.voipon.co.uk sales@voipon.co.uk Tel: +44 (0)1245 808195 Fax: +44 (0)1245 808299
4. Select Screen Language.<br />
The language setting displays a check mark indicating this is the current language on the IP<br />
Phone.<br />
5. Using the 2 and 5 keys, scroll through the languages. Valid values are:<br />
• English (default)<br />
• Français (French)<br />
• Español (Spanish)<br />
• Deutsch (German)<br />
• Italiano (Italian)<br />
• Português (Portuguese)<br />
• Русский (Russian)<br />
• Nordic<br />
Note: All languages may not be available for selection. The available languages<br />
are dependant on the language packs currently loaded to the IP phone. English is<br />
the default language and cannot be changed or removed. For more information<br />
about loading language packs, see your System Administrator.<br />
6. Press Set to set the language on the phone.<br />
The change is dynamic. When you exit the Options Menu, the phone displays all menu items<br />
in the language you selected.<br />
Model <strong>6753i</strong> IP Phone <strong>User</strong> Guide 35<br />
<strong>VoIPon</strong> www.voipon.co.uk sales@voipon.co.uk Tel: +44 (0)1245 808195 Fax: +44 (0)1245 808299
<strong>Aastra</strong> Web UI<br />
Note: You must have the language pack(s) already loaded to your phone in order<br />
to use them. For more information about loading language packs, see your<br />
System Administrator.<br />
1. Click on Basic Settings->Preferences->Language Settings.<br />
2. In the “Webpage Language” field, select a language to apply to the <strong>Aastra</strong> Web UI. The IP<br />
phone supports the following languages:<br />
• English (default)<br />
• Français (French)<br />
• Español (Spanish)<br />
• Deutsch (German)<br />
• Italiano (Italian)<br />
• Português (Portuguese)<br />
• Русский (Russian)<br />
• Nordic<br />
Note: All languages may not be available for selection. The available languages<br />
are dependant on the language packs currently loaded to the IP phone by your<br />
System Administrator. English is the default language and cannot be changed or<br />
removed.<br />
3. Click Save Settings. The change is dynamic. The <strong>Aastra</strong> Web UI displays all screens in the<br />
language you selected.<br />
36 Model <strong>6753i</strong> IP Phone <strong>User</strong> Guide<br />
<strong>VoIPon</strong> www.voipon.co.uk sales@voipon.co.uk Tel: +44 (0)1245 808195 Fax: +44 (0)1245 808299
Language Input<br />
The <strong>6753i</strong> supports text and character inputs in various languages (English, German, French,<br />
Spanish, and Italian, Portuguese, and Russian). Inputting textual or character information into the<br />
IP Phone UI can be done using the keypad on the phone. You enable the Language Input feature<br />
using the <strong>Aastra</strong> Web UI or the IP Phone UI. You can then use text and characters in a specific<br />
language when performing inputs on the phone.<br />
The following tables identify the language characters that you can use to enter text and characters<br />
on the <strong>6753i</strong>.<br />
Keypad Input Alphabet Tables<br />
English<br />
Key Uppercase Characters Lowercase Characters<br />
0 0 0<br />
1 1.:;=_,-'&() 1.:;=_,-'&()<br />
2 ABC2 abc2<br />
3 DEF3 def3<br />
4 GHI4 ghi4<br />
5 JKL5 jkl5<br />
6 MNO6 mno6<br />
7 PQRS7 pqrs7<br />
8 TUV8 tuv8<br />
9 WXYZ9 wxyz9<br />
* * * <br />
# #/\@ #/\@<br />
French<br />
Key Uppercase Characters Lowercase Characters<br />
0 0 0<br />
1 1.:;=_,-'&() 1.:;=_,-'&()<br />
2 ABC2ÀÂÇÁÅÆ abc2àâçáåæ<br />
3 DEF3ÉÈÊË def3éèêë<br />
4 GHI4ÎÏ ghi4îï<br />
5 JKL5 jkl5<br />
6 MNO6ÑÓÒÔÖ mno6ñóòôö<br />
7 PQRS7 pqrs7<br />
8 TUV8ÚÙÛÜ tuv8úùûü<br />
9 WXYZ9 wxyz9<br />
* * * <br />
# #/\@ #/\@<br />
Model <strong>6753i</strong> IP Phone <strong>User</strong> Guide 37<br />
<strong>VoIPon</strong> www.voipon.co.uk sales@voipon.co.uk Tel: +44 (0)1245 808195 Fax: +44 (0)1245 808299
Spanish<br />
Key Uppercase Characters Lowercase Characters<br />
0 0 0<br />
1 1.:;=_,-'&() 1.:;=_,-'&()<br />
2 ABC2ÁÀÇ abc2áàç<br />
3 DEF3ÉÈ def3éè<br />
4 GHI4ÏÍ ghi4ïí<br />
5 JKL5 jkl5<br />
6 MNO6ÑÓÒ mno6ñóò<br />
7 PQRS7 pqrs7<br />
8 TUV8ÚÜ tuv8úü<br />
9 WXYZ9 wxyz9<br />
* * * <br />
# #/\@ #/\@<br />
German<br />
Key Uppercase Characters Lowercase Characters<br />
0 0 0<br />
1 1.:;=_,-'&() 1.:;=_,-'&()<br />
2 ABC2ÄÀ abc2äà<br />
3 DEF3É def3é<br />
4 GHI4 ghi4<br />
5 JKL5 jkl5<br />
6 MNO6Ö mno6ö<br />
7 PQRS7ß pqrs7ß<br />
8 TUV8Ü tuv8ü<br />
9 WXYZ9 wxyz9<br />
* * * <br />
# #/\@ #/\@<br />
38 Model <strong>6753i</strong> IP Phone <strong>User</strong> Guide<br />
<strong>VoIPon</strong> www.voipon.co.uk sales@voipon.co.uk Tel: +44 (0)1245 808195 Fax: +44 (0)1245 808299
Italian<br />
Key Uppercase Characters Lowercase Characters<br />
0 0 0<br />
1 1.:;=_,-'&() 1.:;=_,-'&()<br />
2 ABC2ÀCÇ abc2àcç<br />
3 DEF3ÉÈË def3éèë<br />
4 GHI4 ghi4<br />
5 JKL5 jkl5<br />
6 MNO6ÓÒ mno6óò<br />
7 PQRS7 pqrs7<br />
8 TUV8Ù tuv8ù<br />
9 WXYZ9 wxyz9<br />
* * * <br />
# #/\@ #/\@<br />
Portuguese<br />
Key Uppercase Characters Lowercase Characters<br />
0 0 0<br />
1 1.:;=_,-'&() 1.:;=_,-'&()<br />
2 ABC2ÁÀÂÃÇ abc2áàâãç<br />
3 DEF3ÉÊ def3éê<br />
4 GHI4Í ghi4í<br />
5 JKL5 jkl5<br />
6 MNO6ÓÔÕ mno6óôõ<br />
7 PQRS7 pqrs7<br />
8 TUV8ÚÜ tuv8úü<br />
9 WXYZ9 wxyz9<br />
* * * <br />
# # / \ @ # / \ @<br />
Model <strong>6753i</strong> IP Phone <strong>User</strong> Guide 39<br />
<strong>VoIPon</strong> www.voipon.co.uk sales@voipon.co.uk Tel: +44 (0)1245 808195 Fax: +44 (0)1245 808299
Russian<br />
Key Uppercase Characters Lowercase Characters<br />
0 0 0<br />
1 1.:;=_,-'&() 1.:;=_,-'&()<br />
2 АБВГ2ABC aбвг2abc<br />
3 ДЕЁЖЭ3DEF Дeëжз3def<br />
4 ИЙКЛ4GHI ийкл4ghi<br />
5 МНОП5JKL мноп5jkl<br />
6 РСТУ6MNO рсту6mno<br />
7 ФХЦЧ7PQRS7 фхЧч7pqrs<br />
8 ШЩЪЫ8TUV шщъы8tuv<br />
9 ЬЗЮЯ9WXYZ ьзюя9wxyz<br />
* * * <br />
# #/\@ #/\@<br />
Configuring Language Input Using the IP Phone UI<br />
You can configure the language you use for inputting on the phone by setting the Input<br />
Language option. The default input language setting is English. You can change this setting<br />
using the IP Phone UI or the <strong>Aastra</strong> Web UI.<br />
Example<br />
7. Language<br />
= Next = Enter<br />
2. Input Language<br />
= Next = Enter<br />
Input Language<br />
English ̌<br />
= Next = Set<br />
Language Option Input Language Option Select an Input<br />
Language<br />
IP Phone UI<br />
Use the following procedure to change the input language using the IP Phone UI.<br />
1. Press on the phone to enter the Options List.<br />
2. Select Preferences.<br />
3. Select Language.<br />
4. Select Input Language.<br />
Select the language you want to use when inputting text and characters into the IP Phone UI.<br />
Valid values are:<br />
• English (default)<br />
• Français (French)<br />
• Español (Spanish)<br />
• Deutsch (German)<br />
• Italiano (Italian)<br />
• Português (Portuguese)<br />
• Русский (Russian)<br />
40 Model <strong>6753i</strong> IP Phone <strong>User</strong> Guide<br />
<strong>VoIPon</strong> www.voipon.co.uk sales@voipon.co.uk Tel: +44 (0)1245 808195 Fax: +44 (0)1245 808299
Note: Available input languages are dependent on the configuration enabled by<br />
your System Administrator.<br />
5. Press Set when you have selected an input language.<br />
<strong>Aastra</strong> Web UI<br />
Use the following procedure to set the input language using the <strong>Aastra</strong> Web UI.<br />
1. Click on Basic Settings-> Preferences->Language Settings.<br />
2. Select a language from the "Input Language" field. Setting this field allows you to specify<br />
the language to use when entering text and characters in the <strong>Aastra</strong> Web UI and IP Phone UI.<br />
Valid values are:<br />
• English (default)<br />
• Français (French)<br />
• Español (Spanish)<br />
• Deutsch (German)<br />
• Italiano (Italian)<br />
• Português (Portuguese)<br />
• Русский (Russian)<br />
Note: All languages may not be available for selection. The available input<br />
languages are dependant on the configuration enabled by your System<br />
Administrator.<br />
3. Click Save Settings. The change is dynamic. The <strong>Aastra</strong> Web UI and IP Phone UI allow you<br />
to enter text and characters in the language you selected.<br />
Model <strong>6753i</strong> IP Phone <strong>User</strong> Guide 41<br />
<strong>VoIPon</strong> www.voipon.co.uk sales@voipon.co.uk Tel: +44 (0)1245 808195 Fax: +44 (0)1245 808299
Latin 2 Character Set<br />
The <strong>6753i</strong> includes support for ISO 8859-2 (Latin2) of multi-national languages when<br />
displaying and inputing in the IP Phone UI and the <strong>Aastra</strong> Web UI.<br />
UTF-8 is also compatible with XML encoding on the IP Phones.<br />
The following table illustrates the Latin 2 character set used on the <strong>6753i</strong> IP Phone.<br />
42 Model <strong>6753i</strong> IP Phone <strong>User</strong> Guide<br />
<strong>VoIPon</strong> www.voipon.co.uk sales@voipon.co.uk Tel: +44 (0)1245 808195 Fax: +44 (0)1245 808299
<strong>User</strong> Password<br />
This category allows you to change the user password for your phone. Changing your password<br />
ensures that only you can alter your phone settings, and helps keep your system secure. You can<br />
change your user password using the IP Phone UI or the <strong>Aastra</strong> Web UI.<br />
If you change the password<br />
using the IP Phone UI,<br />
using the <strong>Aastra</strong> Web UI,<br />
Then you need to:<br />
use that new password to log into<br />
the <strong>Aastra</strong> Web UI.<br />
use that new password when<br />
changing the user password via the<br />
IP Phone UI.<br />
Note: Valid values when creating or changing a password are 0 to 4294967295<br />
(integers only; symbols and alpha characters are not allowed). Default password<br />
is an empty string "" (field is blank).<br />
Setting a <strong>User</strong> Password<br />
IP Phone UI<br />
1. Press on the phone to enter the Options List.<br />
2. Select <strong>User</strong> Password and press Enter.<br />
3. At the "Current Password" prompt, enter the current user password and press Enter.<br />
4. At the "New Password" prompt, enter the new user password and press Enter.<br />
5. At the "Enter Again" prompt, re-enter the new user password and press Enter.<br />
A message, "Password Changed" displays on the screen.<br />
<strong>Aastra</strong> Web UI<br />
1. Click on Operation-><strong>User</strong> Password.<br />
2. In the "Current Password" field, enter the current user password.<br />
Note: By default, the user name is “user” (all lowercase) and the password field<br />
is left blank.<br />
Model <strong>6753i</strong> IP Phone <strong>User</strong> Guide 43<br />
<strong>VoIPon</strong> www.voipon.co.uk sales@voipon.co.uk Tel: +44 (0)1245 808195 Fax: +44 (0)1245 808299
3. In the "New Password" field, enter the new user password.<br />
4. In the "Password Confirm" field, enter the new user password again.<br />
5. Click Save Settings.<br />
Resetting a <strong>User</strong> Password<br />
If you forget your password, you can reset it and enter a new password. The reset user password<br />
feature resets the password to the factory default which is blank (no password).<br />
You can reset a user password using the <strong>Aastra</strong> Web UI only.<br />
Note: Valid values when creating or changing a password are 0 to 4294967295<br />
(integers only; symbols and alpha characters are not allowed). Default password<br />
is an empty string "" (field is blank).<br />
Reset a <strong>User</strong> Password<br />
Use the following procedure to reset a user password.<br />
<strong>Aastra</strong> Web UI<br />
1. Click on Operation->Phone Lock.<br />
2. In the "Reset <strong>User</strong> Password" field, click Reset.<br />
The following screen displays.<br />
3. In the "Current Password" field, leave this blank.<br />
4. In the "New Password" field, enter a new password.<br />
5. In the "Password Confirm" field, re-enter your new user password.<br />
6. Click Save Settings.<br />
44 Model <strong>6753i</strong> IP Phone <strong>User</strong> Guide<br />
<strong>VoIPon</strong> www.voipon.co.uk sales@voipon.co.uk Tel: +44 (0)1245 808195 Fax: +44 (0)1245 808299
Restarting Your Phone<br />
You may want to restart your phone to check for updates for your phone on the server. You may<br />
occasionally need to restart your phone to set changes or updates to your phone or network<br />
settings. You may also need to restart your phone if you have been asked to do so by your System<br />
Administrator, or should you experience any unexpected behavior.<br />
IP Phone UI<br />
1. Press the button on the phone to enter the Options List.<br />
2. Select Restart Phone.<br />
3. Press # to confirm the restart of the phone. If you do not wish to restart your phone, press the<br />
3 key to cancel.<br />
Note: Your phone is out of service temporarily during the restart and<br />
downloading process.<br />
<strong>Aastra</strong> Web UI<br />
1. Click on Operation->Reset.<br />
2. Click Reset.<br />
3. Click OK at the confirmation prompt.<br />
Model <strong>6753i</strong> IP Phone <strong>User</strong> Guide 45<br />
<strong>VoIPon</strong> www.voipon.co.uk sales@voipon.co.uk Tel: +44 (0)1245 808195 Fax: +44 (0)1245 808299
Phone Lock<br />
You can lock your phone to prevent the phone from being used or configured. You can lock the<br />
phone using any of the following:<br />
• At the path Options->Phone Lock on the IP Phone UI.<br />
• At the path Operations->Phone Lock on the <strong>Aastra</strong> Web UI.<br />
• At a configured key on the phone. For more information about configuring a Lock/Unlock<br />
key on your phone, see “Phone Lock Key” on page 106.<br />
In the <strong>Aastra</strong> Web UI, the Operation->Phone Lock path also allows you to perform the<br />
following:<br />
• Reset a user password. Clicking on the “Reset” button in the “Reset <strong>User</strong> Password” field<br />
displays a screen that allows you to enter and save a new user password.<br />
• Set an emergency dial plan. An emergency dial plan can be 911, 999, 112, 110 or all of the<br />
above. The default emergency dial plan is 911|999|112|110.<br />
The following procedures describe locking the phone, setting an emergency dial plan, and<br />
resetting the user password.<br />
Locking/Unlocking a Phone<br />
Use the following procedures to lock an IP phone and prevent it from being used or configured.<br />
IP Phone UI<br />
Lock the Phone<br />
1. Press on the phone to enter the Options List.<br />
2. Select Phone Lock and press Enter.<br />
3. At the "Lock the phone?" prompt, press Lock.<br />
The message "Phone is locked" displays.<br />
Unlock the Phone<br />
1. Press on the phone to enter the Options List.<br />
2. At the prompt, "Password:", enter your user password and press Enter.<br />
The phone unlocks.<br />
46 Model <strong>6753i</strong> IP Phone <strong>User</strong> Guide<br />
<strong>VoIPon</strong> www.voipon.co.uk sales@voipon.co.uk Tel: +44 (0)1245 808195 Fax: +44 (0)1245 808299
<strong>Aastra</strong> Web UI<br />
1. Click on Operation->Phone Lock.<br />
Lock the Phone<br />
2. In the "Lock the Phone?" field, click Lock .<br />
The phone locks dynamically and displays the following message:<br />
"Phone is locked".<br />
Unlock the Phone<br />
3. Click on Operation->Phone Lock.<br />
4. In the "Unlock the Phone?" field, click Unlock .<br />
The phone unlocks dynamically and displays the following message:<br />
"Phone is unlocked".<br />
Defining an Emergency Dial Plan<br />
Public telephone networks in countries around the world have a single emergency telephone<br />
number (emergency services number), that allows a caller to contact local emergency services for<br />
assistance when required. The emergency telephone number may differ from country to country. It<br />
is typically a three-digit number so that it can be easily remembered and dialed quickly. Some<br />
countries have a different emergency number for each of the different emergency services.<br />
You can specify the digits to dial on the IP phone for contacting emergency services. Once you<br />
specify the emergency number(s) on the phone, you can dial those numbers directly on the dial pad<br />
when required and the phone automatically dials to those emergency services.<br />
Note: Contact your local phone service provider for available emergency<br />
numbers in your area.<br />
Model <strong>6753i</strong> IP Phone <strong>User</strong> Guide 47<br />
<strong>VoIPon</strong> www.voipon.co.uk sales@voipon.co.uk Tel: +44 (0)1245 808195 Fax: +44 (0)1245 808299
The following table describes the default emergency numbers on the IP phones.<br />
Emergency<br />
Number<br />
Description<br />
911 A United States emergency number<br />
999 A United Kingdom emergency number<br />
112 An international emergency telephone number for GSM mobile phone<br />
networks.<br />
In all European Union countries it is also the emergency telephone number<br />
for both mobile and fixed-line telephones.<br />
110 A police and/or fire emergency number in Asia, Europe, Middle East, and<br />
South America.<br />
You can set the emergency dial plan using the <strong>Aastra</strong> Web UI.<br />
Define an Emergency Dial Plan<br />
Use the following procedure to specify the numbers to use on your phone for dialing emergency<br />
services in your area.<br />
<strong>Aastra</strong> Web UI<br />
1. Click on Operation->Phone Lock.<br />
2. In the "Emergency Dial Plan" field, enter the 3-digit number used in your local area to<br />
contact emergency services. For multiple numbers, enter a “|” between each emergency<br />
number. For example:<br />
911|110<br />
Default for this field is 911|999|112|110.<br />
3. Click Save Settings to save the emergency dial plan to your phone.<br />
Reference<br />
For more advanced options you can set on your phone, see “Additional Features” on page 165.<br />
48 Model <strong>6753i</strong> IP Phone <strong>User</strong> Guide<br />
<strong>VoIPon</strong> www.voipon.co.uk sales@voipon.co.uk Tel: +44 (0)1245 808195 Fax: +44 (0)1245 808299
Line Keys and Programmable Keys<br />
This section describes the Multiple Line/Call Appearance Keys (L1, L2, and L3) and the<br />
customizable programmable keys located at the top left on the phone.<br />
Programmable Keys<br />
Multiple Line/<br />
Call Appearance<br />
Keys<br />
Multiple Line and Call Appearance Keys<br />
The <strong>6753i</strong> has 3 hard line/call appearance keys each with a corresponding status light.<br />
These line/call appearance buttons and lights can represent physical lines, calls for your extension<br />
or calls from a group that your extension is part of. By pressing a line/call appearance button, you<br />
connect to the line or a call it represents. The line/call appearance light indicates the status of that<br />
line or call. When the phone is taken off-hook, the phone automatically selects a line for you.<br />
Line/Call Appearance<br />
Light Behavior<br />
Off<br />
Light flashes quickly<br />
Light is solid<br />
Light flashes slowly<br />
Line/Call<br />
Appearance Status<br />
Idle line or no call<br />
activity<br />
Ringing<br />
Connected<br />
Hold<br />
When you have more than one call, you can use the left and right navigation buttons (3 and 4) to<br />
scroll left and right to the different call information. Icons 3 and 4 appear if there is call<br />
information either left, right or both sides of the current information you are viewing.<br />
The display shows which line the call information is referring to (L1, L2, L3, etc.), the Caller ID<br />
information (name and number, if available), the call status (Connected, Ring, Hold, etc.) and the<br />
timer specific to that call.<br />
Model <strong>6753i</strong> IP Phone <strong>User</strong> Guide 49<br />
<strong>VoIPon</strong> www.voipon.co.uk sales@voipon.co.uk Tel: +44 (0)1245 808195 Fax: +44 (0)1245 808299
Programmable Keys<br />
There are six function keys on the <strong>6753i</strong> phone, all 6 of which are programmable, located to the<br />
left of the paper label.<br />
Save Key<br />
Delete Key<br />
Directory<br />
Callers List<br />
Transfer<br />
Conference<br />
Programmable<br />
Keys after Admin Unlocks<br />
Programmable<br />
Keys<br />
Note: The SAVE and DELETE keys are programmable ONLY after an<br />
Administrator has unlocked these keys. For more information about the SAVE<br />
and DELETE keys, see “Configurable Save and Delete Keys” on page 199.<br />
Note: If a M670i Expansion Module(s) is attached to the phone, you can<br />
configure 36 additional keys on each Expansion Module (Phone allows up to 3<br />
expansion modules totaling up to 108 additional keys). For more information<br />
about expansion modules, see “Model M670i Expansion Module” on page 205.<br />
You can use the <strong>Aastra</strong> Web UI only, to configure key functions. The following table lists the<br />
functions you can set on the programmable keys and provides a description for each function.<br />
Key Function<br />
None<br />
Line<br />
Speed Dial<br />
Do Not Disturb<br />
Busy Lamp Field<br />
(BLF)<br />
BLF List<br />
Auto Call<br />
Distribution (ACD)<br />
Description<br />
Indicates no setting for the key.<br />
Indicates the key is configured for line use.<br />
Indicates the key is configured for speed dial use. You can also configure a<br />
prefix for a speed dial number.<br />
Indicates the key is configured for "do not disturb" on the phone.<br />
Indicates the key is configured for Busy Lamp Field (BLF) use. <strong>User</strong> can dial out<br />
on a BLF configured key.<br />
(Maximum of 50 BLFs allowed on M670i Expansion Module.)<br />
Indicates the key is configured for BLF list use. <strong>User</strong> can dial out on a BLF List<br />
configured key.<br />
(For Sylantro Servers)<br />
Indicates the key is configured to allow the Sylantro server to distribute calls<br />
from a queue to registered IP phone users (agents).<br />
50 Model <strong>6753i</strong> IP Phone <strong>User</strong> Guide<br />
<strong>VoIPon</strong> www.voipon.co.uk sales@voipon.co.uk Tel: +44 (0)1245 808195 Fax: +44 (0)1245 808299
Key Function<br />
Description<br />
Directed Call Pickup<br />
(DCP)/<br />
Group Call Pickup<br />
(GCP)<br />
XML<br />
(For Sylantro Servers)<br />
Indicates the key is configured to allow you to intercept - or pickup - a call on a<br />
monitored extension(s).<br />
Indicates the key is configured to accept an XML application for accessing<br />
customized XML services. You can also specify an XML key URL for this option.<br />
Flash Indicates the key is set to generate a flash event when it is pressed on the <strong>6753i</strong>.<br />
The IP phone generates flash events only when a call is connected and there is<br />
an active RTP stream (for example, when the call is not on hold).<br />
Sprecode<br />
Park<br />
Pickup<br />
Last Call Return (lcr)<br />
Call Forward<br />
BLF/Xfer<br />
Speed Dial/Xfer<br />
Speed Dial/Conf<br />
Directory<br />
(Key 3 by Default)<br />
Callers List<br />
(Key 4 by Default)<br />
Transfer<br />
(Key 5 by Default)<br />
Conference<br />
(Key 6 by Default)<br />
Intercom<br />
Services<br />
Indicates the key is configured to automatically activate specific services offered<br />
by the server. For example, if the sprecode value of *82 is configured, then by<br />
pressing the Sprecode key, *82 automatically activates a service provided by the<br />
server. Contact your System Administrator for available services.<br />
Indicates the key is configured to park incoming calls when pressed.<br />
Indicates the key is configured to pick up parked calls when pressed.<br />
Indicates the key is configured for “last call return” when pressed.<br />
Indicates the key is configured as a Call Forward key. When pressed, the IP<br />
Phone UI displays the Call Forward menus.<br />
Indicates the key is configured as a simplified BLF key and a transfer key. You<br />
can use this key to perform the BLF function, or you can use it as a transfer key<br />
to transfer calls.<br />
Indicates the key is configured as a simplified speed dial key and a transfer key.<br />
You can use this key to perform speed dial functions, or you can use it as a<br />
transfer key to transfer calls.<br />
Indicates the key is configured as a speed dial key and a conference key. You<br />
can use this key to speed dial from within a conference call, and add the new<br />
call directly to the conference.<br />
Indicates the key is configured to access the Directory List.<br />
Indicates the key is configured to access the Callers List.<br />
Indicates the key is configured as a Transfer key (Xfer) for transferring calls.<br />
Indicates the key is configured as a Conference key (Conf).<br />
Indicates the key is configured to be used for intercom calls.<br />
Indicates the key is set to access Services, such as, Directory List, Callers List,<br />
Voicemail, or any other XML applications set up by your System Administrator.<br />
Model <strong>6753i</strong> IP Phone <strong>User</strong> Guide 51<br />
<strong>VoIPon</strong> www.voipon.co.uk sales@voipon.co.uk Tel: +44 (0)1245 808195 Fax: +44 (0)1245 808299
Key Function<br />
Phone Lock<br />
Paging<br />
Description<br />
Indicates the key is configured as a phone lock key, allowing you to press this<br />
key to lock/unlock the phone.<br />
Indicates the key is configured as a Paging key. When pressed, the phone can<br />
send Real Time Transport Protocol (RTP) streams from a pre-configured<br />
multicast address without involving SIP signaling. You can also receive RTP<br />
streams from pre-configured multicast addresses (can specify up to 5<br />
addresses) using the "Paging Listen Addresses" at the path,<br />
Basic Settings->Preferences->Group Paging RTP Settings in the <strong>Aastra</strong> Web<br />
UI. For more information about setting this parameter, see “Group RTP Paging<br />
(receives RTP streams)” on page 188.<br />
Programmable keys can also be set up to quickly to access features such as Call Return (*69) or<br />
Voicemail.<br />
Note: Quick access features like Call Return and Voicemail must first be configured<br />
on your PBX in order to work on your phone. See your System Administrator for<br />
more information.<br />
The following paragraphs describe how to configure each function listed in the previous table.<br />
52 Model <strong>6753i</strong> IP Phone <strong>User</strong> Guide<br />
<strong>VoIPon</strong> www.voipon.co.uk sales@voipon.co.uk Tel: +44 (0)1245 808195 Fax: +44 (0)1245 808299
Line Key<br />
You can set a programmable key or an expansion module key to act as a line/call appearance key<br />
on the <strong>6753i</strong>. The key acts as a line that behaves the same as a hard line key (L1, L2, and L3). For<br />
more information about the behavior of line keys, see “Multiple Line and Call Appearance Keys”<br />
on page 49.<br />
You use the <strong>Aastra</strong> Web UI to set a Line key.<br />
Configuring a Line Key<br />
<strong>Aastra</strong> Web UI<br />
Note: Keys 1 and 2 (SAVE and DELETE keys) can be made configurable ONLY<br />
by your System Administrator.<br />
Use the following procedure to set a Line key on your phone.<br />
1. Click on Operation->Programmable Keys.<br />
or<br />
Click on Operation->Expansion Module .<br />
Programmable Keys and Expansion Module Keys<br />
2. Select from "Key 3" through "Key 6".<br />
or<br />
Select from “Key 1” through “Key 36” (M670i).<br />
3. In the "Type" field, select Line to apply to the key.<br />
4. In the "Line" field, select a line for which to apply this key. Valid values are 4 through 9.<br />
5. Click Save Settings.<br />
Model <strong>6753i</strong> IP Phone <strong>User</strong> Guide 53<br />
<strong>VoIPon</strong> www.voipon.co.uk sales@voipon.co.uk Tel: +44 (0)1245 808195 Fax: +44 (0)1245 808299
Creating a Speed Dial Key<br />
The normal function of the speed dial option allows you to dial a number quickly by pressing a<br />
key configured for speed dialing. You can program the keys on the <strong>6753i</strong> to speed dialspeed dial<br />
outside numbers, dial directly to another person’s line or extension, or set up to quickly access<br />
features such as Caller ID (*69), Voicemail.<br />
The speed dial function can be set using the IP Phone UI or the <strong>Aastra</strong> Web UI.<br />
Note: You can use a speed dial key while on an active call by placing the active<br />
call on hold first, and then pressing the speed dial key.<br />
You can create speed dial keys using any of the following methods:<br />
• Using the <strong>Aastra</strong> Web UI at the paths:<br />
— Operation->Programmable Keys<br />
— Operation->Expansion Module<br />
— Operation->Speed Dial Edit<br />
• By pressing and holding a programmable key, expansion module key, or keypad key.<br />
• Using the IP Phone UI at the path:<br />
— Options->Preferences->Speed Dial Edit<br />
Speed Dial Prefix<br />
The speed dial feature also allows you to specify a preset string of numbers followed by a “+”<br />
that the phone dials automatically after pressing the speed dial key. You can use this feature for<br />
numbers that contain long prefixes.<br />
For example, if you had the following speed dial configuration in the <strong>Aastra</strong> Web UI:<br />
Key 1<br />
Type=speed dial<br />
Label=Europe Office<br />
Value=1234567+<br />
Line=2<br />
then, after you press key 1 on the phone, the prefix number displays on the phone screen. The<br />
phone proceeds to dial the prefix number automatically and pauses for you to enter the<br />
remaining phone number using the keypad on the phone.<br />
You can save up to 7 speed dial numbers on the <strong>6753i</strong>.<br />
54 Model <strong>6753i</strong> IP Phone <strong>User</strong> Guide<br />
<strong>VoIPon</strong> www.voipon.co.uk sales@voipon.co.uk Tel: +44 (0)1245 808195 Fax: +44 (0)1245 808299
Use the following procedures to set speed dial on the <strong>6753i</strong> IP phone.<br />
Press-and-Hold to Create a Speed Dial<br />
(applicable to programmable keys, keypad keys, expansion module keys)<br />
IP Phone UI<br />
Pressing and holding down a programmable key, expansion module key, or keypad key on the<br />
phone initiates a speed dial feature.<br />
Note: When creating a speed dial for a key on the IP Phone, you must select a<br />
key that has no preassigned function (key must be set to None). Pressing and<br />
holding a programmable key, expansion module key, or keypad key that currently<br />
has a speed dial setting, allows you to edit that speed dial setting.<br />
1. Press a programmable key, expansion module key, or a number key on the keypad for 3<br />
seconds. A screen displays with the prompt, "Enter number>".<br />
2. Enter a phone number or extension to assign to that speed dial key.<br />
The following example illustrates the screen display:<br />
Speeddial<br />
Enter number> 3456<br />
After entering the number, the prompt, "Use Save to end" displays on the screen.<br />
3456<br />
Use Save to end<br />
3. Press Save to save the number as a speed dial key.<br />
By default, the phone automatically assigns the speed dial key to line 1 if available. To select a<br />
different line, press the Change key and select a different line, or use the phone’s keypad to<br />
select a number (1-9), or use the 2 and 5 to make your selection.<br />
Line: 1<br />
Change<br />
Use Save to end<br />
4. Press Save to save the speed dial key to the line specified.<br />
Note: Press and hold a speed dial key to edit that speed dial key. If you try to edit<br />
a digit key set to “Empty” or “None”, the phone proceeds to enter the “Add a<br />
Speed Dial Key” process. For more information about editing a speed dial key,<br />
see “On the <strong>6753i</strong>, you can edit a speed dial key using any of the following<br />
methods:” on page 60.<br />
Model <strong>6753i</strong> IP Phone <strong>User</strong> Guide 55<br />
<strong>VoIPon</strong> www.voipon.co.uk sales@voipon.co.uk Tel: +44 (0)1245 808195 Fax: +44 (0)1245 808299
Creating a Speed Dial Using the Speed Dial Edit Option<br />
You can use the IP Phone UI at the path, Options->Preferences->Speed Dial Edit, to create a<br />
speed dial key.<br />
IP Phone UI<br />
1. Press on the phone to enter the Options List.<br />
2. Select Preferences.<br />
3. Select Speed Dial Edit.<br />
The following prompt displays:<br />
"Press SD button"<br />
All current speed dial key LEDs flash RED (for programmable keys and expansion module<br />
keys). All other function key LEDs turn off, during this process. After you press a speed dial<br />
key for editing, the phone restores all key LEDs to their previous state.<br />
Note: If you select a key that is currently set as a speed dial key, the speed dial<br />
information displays for you to edit.<br />
4. Press a non-configured programmable key, keypad key, or expansion module key.<br />
5. Enter a phone number or extension to assign to that speed dial key.<br />
The following example illustrates the screen display:<br />
Speeddial<br />
Enter number> 3456<br />
After entering the number, the prompt, "Use Save to end" displays on the screen.<br />
3456<br />
Use Save to end<br />
6. Press Save to save the number as a speed dial key.<br />
By default, the phone automatically assigns the speed dial key to line 1 if available. To select<br />
a different line, press the Change key and select a different line, or use the phone’s keypad<br />
to select a number (1-9), or use the 2 and 5 to make your selection.<br />
Line: 1<br />
Change<br />
Use Save to end<br />
7. Press Save to save the speed dial key to the line specified.<br />
56 Model <strong>6753i</strong> IP Phone <strong>User</strong> Guide<br />
<strong>VoIPon</strong> www.voipon.co.uk sales@voipon.co.uk Tel: +44 (0)1245 808195 Fax: +44 (0)1245 808299
Creating a Speed Dial Key Using the Save Key<br />
IP Phone UI<br />
Use the following procedure to create a speed dial key using the Save key. Use the following<br />
illustration for reference.<br />
Save Key<br />
Programmable<br />
Keys<br />
1. Press the Save key. The screen displays "Save to?"<br />
Save to?<br />
2. Select a programmable key or expansion module key you want to save to.<br />
3. At the "Enter Number" prompt, use the dial pad key to enter the number.<br />
Enter Number<br />
5553491234<br />
><br />
4. Press the Save key to save the speed dial configuration.<br />
5. At the "Enter Name" prompt, use the dial pad keys to select the letters. Continue to press the<br />
number key to access the next letter for that key (i.e. press 2 three times to access C). Press 4<br />
to move to the next space, or wait a moment and the cursor automatically advances. To insert a<br />
space between letters, press 4. To backspace and erase a mistake, press 3 or the Delete key.<br />
You can save up to 16 letters and numbers on each programmable key entry.<br />
Enter Name ><br />
John Smith<br />
Model <strong>6753i</strong> IP Phone <strong>User</strong> Guide 57<br />
<strong>VoIPon</strong> www.voipon.co.uk sales@voipon.co.uk Tel: +44 (0)1245 808195 Fax: +44 (0)1245 808299
6. Press the Save key to finish.<br />
Saved Memory key<br />
5553491234<br />
Creating a Speed Dial Using a Programmable Key or Expansion Module Key<br />
<strong>Aastra</strong> Web UI<br />
Note: Keys 1 and 2 (SAVE and DELETE keys) can be made configurable ONLY<br />
by your System Administrator.<br />
1. Click on Operation->Programmable Keys.<br />
or<br />
Click on Operation->Expansion Module .<br />
Programmable Keys and Expansion Module Keys<br />
2. Select from "Key 3" through "Key 6".<br />
or<br />
Select from “Key 1” through “Key 36” (M670i).<br />
3. In the "Type" field, select Speed Dial to apply to the key.<br />
4. In the "Value" field, enter the phone number, extension, or speed dial prefix to apply to this<br />
hard key. If you enter a speed dial prefix, you must enter the "+" character at the end of the<br />
prefix number (for example, "123456+").<br />
5. In the "Line" field, select a line for which to apply the speed dial to. Valid values are 1<br />
through 9.<br />
6. Click Save Settings.<br />
58 Model <strong>6753i</strong> IP Phone <strong>User</strong> Guide<br />
<strong>VoIPon</strong> www.voipon.co.uk sales@voipon.co.uk Tel: +44 (0)1245 808195 Fax: +44 (0)1245 808299
Creating Speed Dial Key Using “Keypad Speed Dial” in the <strong>Aastra</strong> Web UI<br />
<strong>Aastra</strong> Web UI<br />
1. Click on Operation->Keypad Speed Dial..<br />
2. Select from "Digit 1" through "Digit 9".<br />
3. In the input box, enter the phone number, extension, or speed dial prefix to apply to this Digit<br />
key. If you enter a speed dial prefix, you must enter the "+" character at the end of the prefix<br />
number (for example, "123456+").<br />
4. In the "Line" field, select a line for which to apply the speed dial to. Valid values are 1 through<br />
9.<br />
5. Click Save Settings.<br />
Saving an Entry from the Redial, Callers, or Directory Lists to a<br />
Speed Dial Key<br />
IP Phone UI<br />
Use the following procedure to save an entry from your Directory List, Callers List, or Redial List<br />
on the IP phone.<br />
Save Key<br />
Directory List Key<br />
Callers List Key<br />
Redial List Key<br />
Model <strong>6753i</strong> IP Phone <strong>User</strong> Guide 59<br />
<strong>VoIPon</strong> www.voipon.co.uk sales@voipon.co.uk Tel: +44 (0)1245 808195 Fax: +44 (0)1245 808299
1. Press the Directory List, Callers List, or Redial List key. From the Directory List, Callers<br />
List, or Redial List, scroll through the list to find the name and number that you wish to save<br />
to your speed dial.<br />
2. Press the Save key.<br />
3. Press the selected speed dial. If the name is displayed with the number, both are saved to the<br />
speed dial. If no name is displayed, you can enter the name using the phone’s key pad.<br />
Editing Speed Dial Keys<br />
On the <strong>6753i</strong>, you can edit a speed dial key using any of the following methods:<br />
• Using the <strong>Aastra</strong> Web UI at the path:<br />
— Operation->Programmable Keys<br />
— Operation->Expansion Module Keys<br />
— Operation->Keypad Speed Dial<br />
• Using the IP Phone UI at the path:<br />
— Options->Preferences->Speed Dial Edit.<br />
The following illustration shows the path in the <strong>6753i</strong> IP Phone UI for editing a speed dial key.<br />
Preferences<br />
1. Tones<br />
2. Contrast Level<br />
3. Speed Dial Edit<br />
4. Live Dialpad<br />
5. Set Audio<br />
6. Time and Date<br />
7. Language<br />
Next<br />
Enter<br />
Speed Dial Edit:<br />
Press SD button<br />
Press the Speed Dial Key<br />
(LED for Speed Dial Key<br />
flashes)<br />
555-1212<br />
Use Save to end<br />
Edit and Save the<br />
Speed Dial<br />
Speed Dial Edit Option<br />
IP Phone UI<br />
Use the following procedure to edit a speed dial key from the IP Phone UI.<br />
Note: *A speed dial key must be already configured on the phone to edit the key.<br />
1. Press on the phone to enter the Options List.<br />
2. Select Preferences.<br />
60 Model <strong>6753i</strong> IP Phone <strong>User</strong> Guide<br />
<strong>VoIPon</strong> www.voipon.co.uk sales@voipon.co.uk Tel: +44 (0)1245 808195 Fax: +44 (0)1245 808299
3. Select Speed Dial Edit.<br />
All current speed dial key LEDs flash RED (for programmable keys and expansion module<br />
keys). All other function key LEDs turn off, during this process. After you press a speed dial<br />
key for editing, the phone restores all key LEDs to their previous state.<br />
4. Press a speed dial key you want to edit.<br />
The speed dial edit screen displays.<br />
Notes:<br />
1. If a number on the keypad is setup as a speed dial key, pressing the applicable<br />
number in the speed dial editing process also displays the speed dial edit screen.<br />
The edit screen allows you to change the Speed Dial Number and Line setting.<br />
2. If you press a key that is NOT setup as a speed dial key, the phone displays an<br />
“Invalid Key” message. However, if you press-and-hold an empty keypad key,<br />
programmable key, or expansion module key that is set to "NONE", it initiates the<br />
“Add a Speed Dial Key” process allowing you to setup a new speed dial key. For<br />
more information, see “Press-and-Hold to Create a Speed Dial (applicable to<br />
programmable keys, keypad keys, expansion module keys)” on page 55.<br />
5. Edit the speed dial information as applicable and press SAVE.<br />
Notes:<br />
1. You can cancel out of the speed dial editing process at any time without<br />
saving, by pressing the key.<br />
2. You can also use the (up arrow) key to cancel when in Extension editing or the<br />
3 (left arrow) key to cancel if in Line editing. Pressing either of these keys<br />
displays the idle screen.<br />
On the <strong>6753i</strong>, you can remove the Speed Dial Key by erasing the speed dial<br />
number digits (leaving the speed dial value blank) and then press SAVE or the<br />
(right arrow) key. Use the left arrow key to delete the digits.<br />
Model <strong>6753i</strong> IP Phone <strong>User</strong> Guide 61<br />
<strong>VoIPon</strong> www.voipon.co.uk sales@voipon.co.uk Tel: +44 (0)1245 808195 Fax: +44 (0)1245 808299
Editing a Speed Dial on a Programmable Key or Expansion Module Key<br />
<strong>Aastra</strong> Web UI<br />
1. Click on Operation->Programmable Keys.<br />
or<br />
Click on Operation->Expansion Module .<br />
2. Select the key configured for speed dial.<br />
3. In the "Value" field, edit the phone number, extension, or speed dial prefix to apply to this<br />
hard key. If you enter a speed dial prefix, you must enter the "+" character at the end of the<br />
prefix number (for example, "123456+").<br />
4. If required in the "Line" field, select a line for which to apply the speed dial to. Valid values<br />
are 1 through 9.<br />
5. Click Save Settings.<br />
Note: You can delete a speed dial key by removing the information from the<br />
"Value" field.<br />
62 Model <strong>6753i</strong> IP Phone <strong>User</strong> Guide<br />
<strong>VoIPon</strong> www.voipon.co.uk sales@voipon.co.uk Tel: +44 (0)1245 808195 Fax: +44 (0)1245 808299
Editing a Speed Dial Using “Keypad Speed Dial” in the <strong>Aastra</strong> Web UI<br />
<strong>Aastra</strong> Web UI<br />
1. Click on Operation->Keypad Speed Dial.<br />
2. Select from "Digit 1" through "Digit 9".<br />
3. In the input box, edit the phone number, extension, or speed dial prefix for this Digit key. If<br />
you enter a speed dial prefix, you must enter the "+" character at the end of the prefix number<br />
(for example, "123456+").<br />
4. In the "Line" field, select a line for which to apply the speed dial to. Valid values are 1 through<br />
9.<br />
5. Click Save Settings.<br />
Model <strong>6753i</strong> IP Phone <strong>User</strong> Guide 63<br />
<strong>VoIPon</strong> www.voipon.co.uk sales@voipon.co.uk Tel: +44 (0)1245 808195 Fax: +44 (0)1245 808299
Do Not Disturb (DND) Key<br />
The IP phones have a feature you can enable called "Do not Disturb (DND). The DND function<br />
allows you to turn "do not disturb" ON and OFF.<br />
Note: You can configure DND using the <strong>Aastra</strong> Web UI only.<br />
If DND is ON, callers calling into the phone hear a busy signal or a message, depending on how<br />
your System Administrator set up the configuration server. The second line on the screen of the<br />
IP phone shows when DND is set.<br />
If the phone shares a line with other phones, only the phone that has DND configured is affected.<br />
You can set DND on the programmable keys or expansion module keys using the <strong>Aastra</strong> Web UI<br />
only. DND is not configurable from the IP phone UI.<br />
Configuring a DND Key<br />
<strong>Aastra</strong> Web UI<br />
Note: Keys 1 and 2 (SAVE and DELETE keys) can be made configurable ONLY<br />
by your System Administrator.<br />
1. Click on Operation->Programmable Keys.<br />
or<br />
Click on Operation->Expansion Module .<br />
64 Model <strong>6753i</strong> IP Phone <strong>User</strong> Guide<br />
<strong>VoIPon</strong> www.voipon.co.uk sales@voipon.co.uk Tel: +44 (0)1245 808195 Fax: +44 (0)1245 808299
Programmable Keys and Expansion Module Keys<br />
2. Select from "Key 3" through "Key 6".<br />
or<br />
Select from “Key 1” through “Key 36” (M670i).<br />
3. In the "Type" field, select do not disturb to apply to this key.<br />
Busy Lamp Field (BLF) Key<br />
The BLF feature on the IP phones allows a specific extension to be monitored for state changes.<br />
BLF monitors the status (busy or idle) of extensions on the IP phone.<br />
Note: The BLF setting is applicable to the Asterisk server only.<br />
Example<br />
A Supervisor configures BLFs on his phone for monitoring the status of a worker’s phone use<br />
(busy or idle). When the worker picks up his phone to make a call, a busy indicator on the<br />
Supervisor’s phone shows that the worker’s phone is in use and busy.<br />
On the <strong>6753i</strong>, the busy and idle indicators are the LEDs next to each BLF key. The LED<br />
illuminates steady to indicate the monitored line is off-hook or unregistered. The LED goes off<br />
when the line is idle.<br />
You can set BLF on the programmable keys or expansion module keys using the <strong>Aastra</strong> Web UI<br />
only. BLF is not configurable from the IP phone UI.<br />
Note: You can also use a BLF configured key to dial out. Contact your System<br />
Administrator for more information<br />
Model <strong>6753i</strong> IP Phone <strong>User</strong> Guide 65<br />
<strong>VoIPon</strong> www.voipon.co.uk sales@voipon.co.uk Tel: +44 (0)1245 808195 Fax: +44 (0)1245 808299
Configuring a BLF Key<br />
<strong>Aastra</strong> Web UI<br />
Note: Keys 1 and 2 (SAVE and DELETE keys) can be made configurable ONLY<br />
by your System Administrator.<br />
1. Click on Operation->Programmable Keys.<br />
or<br />
Click on Operation->Expansion Module .<br />
Programmable Keys and Expansion Module Keys<br />
2. Select from "Key 3" through "Key 6".<br />
or<br />
Select from “Key 1” through “Key 36” (M670i).<br />
3. In the "Type" field, select BLF to apply to this key.<br />
4. In the "Value" field, enter the phone number or extension you want to monitor.<br />
5. In the "Line" field, select a line for which to apply to this key. Valid values are Global (for<br />
all lines), or 1 through 9.<br />
6. Click Save Settings.<br />
66 Model <strong>6753i</strong> IP Phone <strong>User</strong> Guide<br />
<strong>VoIPon</strong> www.voipon.co.uk sales@voipon.co.uk Tel: +44 (0)1245 808195 Fax: +44 (0)1245 808299
BLF List Key<br />
(For use with the BroadSoft Broadworks Rel 13 or higher platform only)<br />
The BLF\List feature on the IP phones is specifically designed to support the BroadSoft<br />
Broadworks Rel 13 Busy Lamp Field feature.<br />
This feature allows the IP phone to subscribe to a list of monitored users defined through the<br />
BroadWorks web portal.<br />
Note: Your System Administrator must have BLF List enabled on the<br />
BroadWorks Server. Contact your System Administrator for more information.<br />
In addition to monitoring the idle and busy state, the BLF\List feature also supports the ringing<br />
state. On the <strong>6753i</strong> phone, the LED lights next to each BLF key illuminate steady to indicate the<br />
monitored line is off-hook or unregistered. The LED goes off when the is idle. When the<br />
monitored extension is ringing, the LED flashes.<br />
Note: You can use a BLF\List configured key to dial out.<br />
Example<br />
A receptionist has a <strong>6753i</strong> running Broadsoft firmware that subscribes to a list of extensions from<br />
the BroadWorks Application Server. On the <strong>6753i</strong> running Broadsoft firmware, the key LEDs<br />
illuminate either flashing, solid, or turn off depending on the state of those extensions.<br />
Note: The Broadworks BLF feature is not the same as the Broadworks Shared<br />
Call Appearance (SCA) feature and does not permit call control over the<br />
monitored extension.<br />
Model <strong>6753i</strong> IP Phone <strong>User</strong> Guide 67<br />
<strong>VoIPon</strong> www.voipon.co.uk sales@voipon.co.uk Tel: +44 (0)1245 808195 Fax: +44 (0)1245 808299
Configuring a BLF List Key<br />
<strong>Aastra</strong> Web UI<br />
The BLF List function can be configured on the <strong>6753i</strong> using the <strong>Aastra</strong> Web UI only.<br />
If you set a key to use BLF/List, you must also enter a BLF List URI at<br />
Operation->Programmable Keys->Services. The BLF List URI is the name of the BLF list<br />
defined on the BroadSoft BroadWorks Busy Lamp field page for your particular user. For<br />
example, my480i-blf-list@as.broadworks.com. The value of the BLF\List URI parameter must<br />
match the list name configured. Otherwise, no values display on the <strong>6753i</strong> screen and the feature<br />
is disabled.<br />
Note: Keys 1 and 2 (SAVE and DELETE keys) can be made configurable ONLY<br />
by your System Administrator.<br />
1. Click on Operation->Programmable Keys.<br />
or<br />
Click on Operation->Expansion Module .<br />
Programmable Keys and Expansion Module Keys<br />
2. Select from "Key 3" through "Key 6".<br />
or<br />
Select from “Key 1” through “Key 36” (M670i).<br />
3. In the "Type" field, select "BLF\List" (BroadSoft BroadWorks).<br />
4. In the "Line" field, select a line number that is actively registered to the appropriate SIP<br />
proxy you are using. Valid values are Global (for all lines), or 1 through 9.<br />
68 Model <strong>6753i</strong> IP Phone <strong>User</strong> Guide<br />
<strong>VoIPon</strong> www.voipon.co.uk sales@voipon.co.uk Tel: +44 (0)1245 808195 Fax: +44 (0)1245 808299
5. In the "BLF List URI" field, enter the name of the BLF list defined on the BroadSoft<br />
BroadWorks Busy Lamp field page for your particular user. For example,<br />
my<strong>6753i</strong>-blf-list@as.broadworks.com.<br />
Note: Contact your System Administrator for the BLF List URI.<br />
6. Click Save Settings.<br />
Model <strong>6753i</strong> IP Phone <strong>User</strong> Guide 69<br />
<strong>VoIPon</strong> www.voipon.co.uk sales@voipon.co.uk Tel: +44 (0)1245 808195 Fax: +44 (0)1245 808299
Flash Key<br />
You can set a programmable key or expansion module key to generate a flash event when it is<br />
pressed on the <strong>6753i</strong>. You do this by setting the key to "flash". The IP phone generates flash<br />
events only when a call is connected and there is an active RTP stream (for example, when the<br />
call is not on hold).<br />
Configuring a Flash Key<br />
<strong>Aastra</strong> Web UI<br />
Note: Keys 1 and 2 (SAVE and DELETE keys) can be made configurable ONLY<br />
by your System Administrator.<br />
1. Click on Operation->Programmable Keys.<br />
or<br />
Click on Operation->Expansion Module .<br />
Programmable Keys and Expansion Module Keys<br />
2. Select from "Key 3" through "Key 6".<br />
or<br />
Select from “Key 1” through “Key 36” (M670i).<br />
3. In the "Type" field, select flash.<br />
4. Click Save Settings.<br />
70 Model <strong>6753i</strong> IP Phone <strong>User</strong> Guide<br />
<strong>VoIPon</strong> www.voipon.co.uk sales@voipon.co.uk Tel: +44 (0)1245 808195 Fax: +44 (0)1245 808299
Automatic Call Distribution (ACD) Key (for Sylantro Servers)<br />
The <strong>6753i</strong> and any attached Expansion Modules support Automatic Call Distribution (ACD) for<br />
Sylantro servers. The ACD feature allows the Sylantro server to distribute calls from a queue to<br />
registered IP phone users (agents).<br />
To use the ACD feature on an IP phone, you must first configure an ACD key or Expansion<br />
Module key. When you want to subscribe to a queue (in order to receive incoming calls), you press<br />
the ACD key and the IP phone UI prompts you to specify the following information:<br />
• <strong>User</strong> ID: the phone number(s) used to login into the queue.<br />
• Password: the password used to login to the queue.<br />
• Available/unavailable: Shows the current status of the IP phone. Specifies if the IP phone<br />
user is available/unavailable to receive a call from the queue.<br />
Note: Your System Administrator must provide you with your <strong>User</strong> ID and<br />
Password to access the applicable phone queue.<br />
After creating an ACD key, you are ready to receive calls from a queue on the server. You must<br />
press the ACD key and then log in by entering your <strong>User</strong> ID and Password. An "Available" key<br />
displays allowing you to make your phone available to accept these calls.<br />
When you are on an active call, or you miss a call, the server automatically changes the phone’s<br />
status to unavailable. The server updates it’s database with this new information and no longer<br />
distributes calls to the phone. The phone remains in this "unavailable" state until:<br />
• you make yourself “available” again by pressing the "Available" key.<br />
• an ACD timer expires (set by your System Administrator).<br />
You can also choose to manually change the phone status to unavailable by pressing the<br />
"Unavailable" key on the phone.<br />
Note: It is recommended you configure no more than a single ACD key,<br />
programmable key, or expansion module key per IP phone.<br />
Model <strong>6753i</strong> IP Phone <strong>User</strong> Guide 71<br />
<strong>VoIPon</strong> www.voipon.co.uk sales@voipon.co.uk Tel: +44 (0)1245 808195 Fax: +44 (0)1245 808299
Configuring an Automatic Call Distribution (ACD) Key<br />
Use the following procedure to configure ACD on the <strong>6753i</strong> IP Phone.<br />
<strong>Aastra</strong> Web UI<br />
Note: Keys 1 and 2 (SAVE and DELETE keys) can be made configurable ONLY<br />
by your System Administrator.<br />
1. Click on Operation->Programmable Keys.<br />
or<br />
Click on Operation->Expansion Module .<br />
Programmable Keys and Expansion Module Keys<br />
2. Select from "Key 3" through "Key 6".<br />
or<br />
Select from “Key 1” through “Key 36” (M670i).<br />
3. In the "Type" field, select Automatic call distribution.<br />
4. In the "Line" field, select a line to apply Automatic call distribution. Valid values are 1<br />
through 9.<br />
Note: It is recommended you configure no more than a single ACD<br />
programmable key or expansion module key per IP phone.<br />
5. Click Save Settings.<br />
72 Model <strong>6753i</strong> IP Phone <strong>User</strong> Guide<br />
<strong>VoIPon</strong> www.voipon.co.uk sales@voipon.co.uk Tel: +44 (0)1245 808195 Fax: +44 (0)1245 808299
Using the ACD Feature on your IP Phone<br />
The ACD feature allows you to login to a phone queue in order to receive distributed calls on your<br />
IP phone. To login to a phone queue, you must preconfigure an ACD key on your IP Phone as<br />
described in the previous procedure.<br />
Your Administrator sets up the queue that you access when you press the ACD Key. Contact your<br />
System Administrator for more information.<br />
When you press the ACD Key, the phone prompts you to enter a <strong>User</strong> ID and Password to login<br />
into the queue. Once logged in, you can make your phone “available” or “unavailable” to take calls<br />
by pressing the Available/Unavailable Key (2). The server monitors your IP phone status. When<br />
you set the IP phone to “available,” the server begins distributing calls to your phone. When you<br />
set the IP phone to “unavailable,” the server temporarily stops distributing calls to your phone.<br />
The LED for the ACD Key shows the current status of your phone.<br />
ACD LED Table<br />
This LED changes when you log into the phone queue and are available to take calls. The LED<br />
changes again when you are busy with an active call. The table below shows the status of the LED<br />
as they may appear on your IP phone.<br />
Phone<br />
Model<br />
Status: Logged In<br />
and Available Status: Unavailable Logged Out<br />
<strong>6753i</strong> Solid Red LED Blinking red LED No LED<br />
Using the ACD Key<br />
Use the following procedure to log into a phone queue from your IP phone.<br />
IP Phone UI<br />
1. Check with your Administrator to verify the queue linked to your ACD Key.<br />
2. Press the ACD Key on your IP phone.<br />
The LCD displays the label of the ACD queue you are accessing.<br />
The "<strong>User</strong> ID" prompt displays.<br />
ACD: <br />
<strong>User</strong> ID:<br />
= Next = Login<br />
Model <strong>6753i</strong> IP Phone <strong>User</strong> Guide 73<br />
<strong>VoIPon</strong> www.voipon.co.uk sales@voipon.co.uk Tel: +44 (0)1245 808195 Fax: +44 (0)1245 808299
3. Using the keypad, enter your <strong>User</strong> ID (phone number provided by your System<br />
Administrator) and press the 2 Key.<br />
The "Password" prompt displays.<br />
ACD: <br />
Password:<br />
= Next = Login<br />
4. Using your keypad, enter your Password (provided by your System Administrator) and press<br />
the 2 Key.<br />
5. Press 4 (Login) to login to the queue.<br />
You are logged into the queue and the following screen displays.<br />
ACD: <br />
= Avail = Logout<br />
6. To allow your phone to be available in the queue, press 2 (Avail).<br />
The following screen displays.<br />
ACD: <br />
= Unavail = Logout<br />
If your IP phone status is set to “Available” then the server begins to distribute phone calls<br />
from this queue to your IP phone. You must manually change the state to “Available” in<br />
order to start receiving calls.<br />
7. To temporarily stop receiving calls, press the press 2 (Unavail).<br />
If you are on a call (or miss a call that has been distributed to your phone), your phone status<br />
automatically changes to "Unavailable". Your phone remains in the "Unavailable" state<br />
until one of the following occurs:<br />
• You use the IP Phone UI to manually switch the IP phone state back to<br />
"Available".<br />
or<br />
• The availability “timer” for your IP phone expires. This only occurs if your<br />
Administrator has configured an auto-availability timer on your IP phone. Contact your<br />
System Administrator for more information.<br />
8. To logout of the queue, press 4 (Logout).<br />
The server no longer distributes phone calls to your IP phone.<br />
74 Model <strong>6753i</strong> IP Phone <strong>User</strong> Guide<br />
<strong>VoIPon</strong> www.voipon.co.uk sales@voipon.co.uk Tel: +44 (0)1245 808195 Fax: +44 (0)1245 808299
Directed Call Pickup/Group Call Pickup Keys (for Sylantro Servers)<br />
<strong>Aastra</strong> IP phones support the Directed Call Pickup (DCP) and Group Call Pickup (GCP) features.<br />
The DCP/GCP feature allows you to intercept - or pickup - a call on a monitored extension. You<br />
can configure this feature using the <strong>Aastra</strong> Web UI to create a DCP or GCP key on the IP phone.<br />
When you configure a DCP key, you specify the extension that you want to monitor. Then, when<br />
the monitored extension receives a call, you press the DCP key to pick up the call. If the monitored<br />
extension receives multiple incoming calls simultaneously, the IP Phone UI displays a list of<br />
incoming calls. You select a call from this list, and are connected to the call.<br />
When you configure a GCP key, you specify the ring group (for example, extensions 2200 - 2210)<br />
that you want to monitor for incoming calls. When an incoming call is received on any of these<br />
extensions, the Operator presses the GCP key and is connected to the call. If multiple incoming<br />
calls are received simultaneously, the Operator press the GCP key, selects an extension from a list,<br />
and presses the Pickup key to answer the call.<br />
Note: Your System Administrator must configure the extension range for the<br />
Group Call Pickup feature. Contact your System Administrator for more<br />
information.<br />
Configuring Directed Call Pickup (DCP) Key (for Sylantro Servers)<br />
Use the following procedure to configure Directed Call Pickup using the<br />
<strong>Aastra</strong> Web UI.<br />
<strong>Aastra</strong> Web UI<br />
Note: Keys 1 and 2 (SAVE and DELETE keys) can be made configurable ONLY<br />
by your System Administrator.<br />
Model <strong>6753i</strong> IP Phone <strong>User</strong> Guide 75<br />
<strong>VoIPon</strong> www.voipon.co.uk sales@voipon.co.uk Tel: +44 (0)1245 808195 Fax: +44 (0)1245 808299
1. Click on Operation->Programmable Keys.<br />
or<br />
Click on Operation->Expansion Module .<br />
Programmable Keys and Expansion Module Keys<br />
2. Select from "Key 3" through "Key 6".<br />
or<br />
Select from “Key 1” through “Key 36” (M670i).<br />
3. In the “Type” field, select Directed Call Pickup.<br />
4. In the “Value” field, specify the extension you want to intercept when you press this key.<br />
For example: 2200.<br />
5. In the "Line" field, select the line for which to apply the Directed Call Pickup configuration.<br />
Valid values are 1 through 9.<br />
6. Click Save Settings.<br />
Configuring Group Call Pickup (GCP) Key (for Sylantro Servers)<br />
Use the following procedure to configure Group Call Pickup using the<br />
<strong>Aastra</strong> Web UI.<br />
<strong>Aastra</strong> Web UI<br />
Note: A ring group must be configured on the Sylantro Server in order for a<br />
GCP key to function.<br />
1. Click on Operation->Programmable Keys.<br />
or<br />
Click on Operation->Expansion Module .<br />
76 Model <strong>6753i</strong> IP Phone <strong>User</strong> Guide<br />
<strong>VoIPon</strong> www.voipon.co.uk sales@voipon.co.uk Tel: +44 (0)1245 808195 Fax: +44 (0)1245 808299
2.<br />
3. Select a key for which to configure Group Call Pickup.<br />
4. In the “Type” field, select Directed Call Pickup.<br />
5. In the “Value” field, enter groupcallpickup.<br />
6. In the "Line" field, select the line for which to apply the Group Call Pickup configuration.<br />
Valid value are 1 through 9.<br />
7. Click Save Settings.<br />
Using Directed Call Pickup/Group Call Pickup<br />
Use the following procedure for the DCP/GCP feature on your phone.<br />
IP Phone UI<br />
Note: Before using the DCP/GCP feature on your phone, you must first<br />
configure the DCP or GCP Key. You must identify the extension(s) or phone<br />
number(s) you want to monitor when configuring the key. See the previous<br />
procedures to configure a DCP or GCP Key.<br />
Using Directed Call Pickup (DCP)<br />
1. When the monitored extension receives a call, press the DCP Key to pick up the call.<br />
If the monitored extension receives multiple incoming calls simultaneously, the phone<br />
displays a list of incoming calls.<br />
2. Use the 5 and 2 keys to scroll through the list to select an extension.<br />
3. Press 2 (Pickup) Key for the extension you select.<br />
The call is answered.<br />
Model <strong>6753i</strong> IP Phone <strong>User</strong> Guide 77<br />
<strong>VoIPon</strong> www.voipon.co.uk sales@voipon.co.uk Tel: +44 (0)1245 808195 Fax: +44 (0)1245 808299
Using Group Call Pickup (GCP)<br />
1. If any of the monitored group of extensions receives a call, press the GCP Key.<br />
The call is answered. If the monitored group of extensions receives multiple incoming calls<br />
simultaneously, the phone displays a list of incoming calls.<br />
2. Use the 5 and 2 keys to scroll through the list to select an extension.<br />
3. Press 2 (Pickup) Key for the extension you select.<br />
The call is answered.<br />
Select an extension<br />
Press the Pickup<br />
Key to answer<br />
the call<br />
DCP on line:<br />
1. 2201<br />
= Pickup = Cancel<br />
78 Model <strong>6753i</strong> IP Phone <strong>User</strong> Guide<br />
<strong>VoIPon</strong> www.voipon.co.uk sales@voipon.co.uk Tel: +44 (0)1245 808195 Fax: +44 (0)1245 808299
XML Key<br />
The <strong>6753i</strong> IP phone has a feature you can enable called "XML" (Extensible Markup Language).<br />
XML is a markup language much like HTML. Your System Administrator can create customized<br />
XML menu services and load them to your IP phone. These services include things like weather<br />
and traffic reports, contact information, company info, stock quotes, or custom call scripts. You<br />
can configure XML using the <strong>Aastra</strong> Web UI only.<br />
Using the <strong>Aastra</strong> Web UI, you can configure a key to access XML applications. Under<br />
Operations->Programmable Keys or Operation->Expansion Module, you can assign a key the<br />
type "XML".<br />
Note: The XML services must be set up by your System Administrator before<br />
you can use the key. Contact your System Administrator for more information.<br />
You must also specify an XML URI and a Services label using the following XML fields:<br />
• XML Application URI<br />
• XML Application Title<br />
The XML Application URI is the URI loaded by your phone. The phone performs an HTTP GET.<br />
Contact your System Administrator for the applicable XML URI to enter in the "XML Application<br />
URI" field.<br />
The XML Application Title is the label that displays beside the XML key on your phone. If you<br />
use the Services key to access the XML features, the "XML Application Title" is the label that<br />
displays on the Services Menu in the IP Phone UI.<br />
Note: Contact your System Administrator for the applicable URI to enter in this<br />
field.<br />
After an XML key is configured, you can use the IP Phone UI to access the XML applications.<br />
Model <strong>6753i</strong> IP Phone <strong>User</strong> Guide 79<br />
<strong>VoIPon</strong> www.voipon.co.uk sales@voipon.co.uk Tel: +44 (0)1245 808195 Fax: +44 (0)1245 808299
Configuring an XML Key<br />
<strong>Aastra</strong> Web UI<br />
Note: Keys 1 and 2 (SAVE and DELETE keys) can be made configurable ONLY<br />
by your System Administrator.<br />
1. Click on Operation->Programmable Keys.<br />
or<br />
Click on Operation->Expansion Module .<br />
Programmable Keys and Expansion Module Keys<br />
2. Select from "Key 3" through "Key 6".<br />
or<br />
Select from “Key 1” through “Key 36” (M670i).<br />
3. In the "Type" field, select XML to apply to the key.<br />
4. In the "Value" field, enter a URI(s) to apply to this key.<br />
Note: Contact your System Administrator for the appropriate value to enter in<br />
the "Value" field.<br />
If you specify multiple URIs in the "Value" field, a list of XML applications appears for<br />
selection after pressing the XML key.<br />
5. In the "XML Application URI" field, enter the XML application URI provided by your<br />
System Administrator.<br />
6. In the "XML Application Title" field, enter the XML application title that you want to<br />
display as the title for the key on your phone.<br />
7. Click Save Settings.<br />
80 Model <strong>6753i</strong> IP Phone <strong>User</strong> Guide<br />
<strong>VoIPon</strong> www.voipon.co.uk sales@voipon.co.uk Tel: +44 (0)1245 808195 Fax: +44 (0)1245 808299
Accessing the XML Service<br />
After an XML application(s) have been saved to your IP phone, and after a key has been<br />
configured to access the XML application(s), the customized service is ready for you to use.<br />
IP Phone UI<br />
1. Press the key configured for XML on the <strong>6753i</strong> phone. A "Custom Features" screen displays<br />
or the title you specified.<br />
2. Use the 5 and 2 to scroll through the customized features.<br />
3. For menu and directory services, select a service to display the information for that customized<br />
service. Message services display to the screen after pressing the key. For user input services,<br />
follow the prompts as appropriate.<br />
4. To exit from the "Customized Features" screen, press the XML key again.<br />
Model <strong>6753i</strong> IP Phone <strong>User</strong> Guide 81<br />
<strong>VoIPon</strong> www.voipon.co.uk sales@voipon.co.uk Tel: +44 (0)1245 808195 Fax: +44 (0)1245 808299
Sprecode Key<br />
You can set a programmable key or expansion module key to automatically activate specific<br />
services offered by the server. For example, if the sprecode value of *82 is configured, then by<br />
pressing the Sprecode key, *82 automatically activates a service provided by the server. Contact<br />
your System Administrator for information about available services.<br />
<strong>Aastra</strong> Web UI<br />
Note: Keys 1 and 2 (SAVE and DELETE keys) can be made configurable ONLY<br />
by your System Administrator.<br />
Configuring a Sprecode Key<br />
Use the following procedure to configure a sprecode key on the <strong>6753i</strong> phone.<br />
1. Click on Operation->Programmable Keys.<br />
or<br />
Click on Operation->Expansion Module .<br />
82 Model <strong>6753i</strong> IP Phone <strong>User</strong> Guide<br />
<strong>VoIPon</strong> www.voipon.co.uk sales@voipon.co.uk Tel: +44 (0)1245 808195 Fax: +44 (0)1245 808299
Programmable Keys and Expansion Module Keys<br />
2. Select from "Key 3" through "Key 6".<br />
or<br />
Select from “Key 1” through “Key 36” (M670i).<br />
3. In the "Type" field, select sprecode.<br />
4. In the "Value" field, enter the appropriate value for accessing specific services from the server.<br />
Note: For values to enter in this field, contact your System Administrator.<br />
5. Click Save Settings.<br />
Model <strong>6753i</strong> IP Phone <strong>User</strong> Guide 83<br />
<strong>VoIPon</strong> www.voipon.co.uk sales@voipon.co.uk Tel: +44 (0)1245 808195 Fax: +44 (0)1245 808299
Park/Pickup Keys<br />
The <strong>6753i</strong> phone has a park and pickup call feature that allows you to park a call and pickup a<br />
call when required. The IP phones support the Park/Pickup feature on the Asterisk, BroadWorks,<br />
and Sylantro servers.<br />
The park/pickup feature performs as follows:<br />
• When a call comes in and you pickup the handset, you can press the applicable "Park" key to<br />
park the call.<br />
• After the call is parked, you can press the "Pickup" key, followed by the applicable value to<br />
pickup the call.<br />
Administrators can configure the park and pickup keys for any line using the configuration files<br />
or the <strong>Aastra</strong> Web UI. <strong>User</strong>s can make changes to customize the label of the park/pick up keys<br />
using the Web UI.<br />
Configuring Park/Pickup Keys<br />
<strong>Aastra</strong> Web UI<br />
Note: Keys 5 and 6 (SAVE and DELETE keys) can be made configurable ONLY<br />
by your System Administrator.<br />
Use the following procedure to configure park/pickup on the <strong>6753i</strong> phone:<br />
1. Click on Operation->Programmable Keys.<br />
2. Select from "Key 1" through "Key 8". (Keys 5 and 6 can be made configurable only by<br />
your system administrator.)<br />
3. In the "Type" field, select Park.<br />
Note: The” Value” and “Line” fields are configured by the Administrator.<br />
4. Select from "Key 1" through "Key 8".<br />
5. In the "Type" field, select Pickup.<br />
84 Model <strong>6753i</strong> IP Phone <strong>User</strong> Guide<br />
<strong>VoIPon</strong> www.voipon.co.uk sales@voipon.co.uk Tel: +44 (0)1245 808195 Fax: +44 (0)1245 808299
6. Click Save Settings.<br />
7. Click on Reset, then click Restart to restart the IP phone and apply the changes.<br />
Using the Park Call/Pickup Parked Call Feature<br />
Use the following procedure on the IP phone to park a call and pick up a parked call.<br />
Park a Call<br />
1. While on a live call, press the "Park" key.<br />
2. Perform the following for your specific server:<br />
For Asterisk Server<br />
Server announces the extension number where the<br />
call has been parked. Once the call is parked, press<br />
the key to complete parking.<br />
For BroadWorks Server<br />
After you hear the greeting from the CallPark server,<br />
enter the extension where you want to park the call.<br />
For Sylantro Server<br />
Enter the extension number where you want to park<br />
the call, followed by "#" key.<br />
For ININ Server<br />
Enter the extension number where you want to park<br />
the call, followed by "#" key.<br />
If the call is parked successfully, the response is either a greeting voice confirming that the call<br />
was parked, or a hang up occurs. The parked call party hears music on hold.<br />
3. If the call fails, you can pick up the call (using the next procedure) and press the "Park" key<br />
again to retry step 2.<br />
Pickup a Parked Call<br />
1. Pick up the handset on the phone.<br />
2. Enter the extension number where the call was parked.<br />
3. Press the "Pickup" key.<br />
If the call pick up is successful, you are connected with the parked call.<br />
Model <strong>6753i</strong> IP Phone <strong>User</strong> Guide 85<br />
<strong>VoIPon</strong> www.voipon.co.uk sales@voipon.co.uk Tel: +44 (0)1245 808195 Fax: +44 (0)1245 808299
Last Call Return (lcr) Key (for Sylantro Servers)<br />
Using the <strong>Aastra</strong> Web UI, you can configure the "Last call return" (lcr) function on a key. This<br />
feature is for Sylantro servers only.<br />
How it works<br />
If you configure "lcr" on a key, and a call comes into your phone, after you are finished with the<br />
call and hang up, you can press the key configured for “lcr” and the phone dials the last call you<br />
received. When you configure an “lcr” key, the label “LCR” displays next to that key on the IP<br />
phone. When the Sylantro server detects an “lcr” request, it translates this request and routes the<br />
call to the last caller.<br />
Configuring a Last Call Return Key<br />
<strong>Aastra</strong> Web UI<br />
Note: Keys 1 and 2 (SAVE and DELETE keys) can be made configurable<br />
ONLY by your System Administrator.<br />
1. Click on Operation->Programmable Keys.<br />
or<br />
Click on Operation->Expansion Module .<br />
Programmable Keys and Expansion Module Keys<br />
2. Select from "Key 3" through "Key 6".<br />
or<br />
Select from “Key 1” through “Key 36” (M670i).<br />
3. In the "Type" field, select Last Call Return.<br />
86 Model <strong>6753i</strong> IP Phone <strong>User</strong> Guide<br />
<strong>VoIPon</strong> www.voipon.co.uk sales@voipon.co.uk Tel: +44 (0)1245 808195 Fax: +44 (0)1245 808299
Call Forward Key<br />
4. In the "Line" field, select the line to apply this feature.<br />
Valid values are 1 through 9.<br />
5. Click Save Settings.<br />
Using the <strong>Aastra</strong> Web UI, you can configure the "Call Forward" function on a key. Use call<br />
forwarding when you want a specific account on your phone to be forwarded to another number<br />
when your phone is in the busy state or the no answer state, or both. Pressing the Call Forward key<br />
on the phone accesses the Call Forward Menus. The menus that display are dependant on the Call<br />
Forward mode (Account (default), Phone, or Custom) configured for the phone.<br />
For more information about call forwarding and call forwarding modes, see “Call Forward<br />
Account-Based Configuration” on page 148.<br />
Configuring a Call Forward<br />
<strong>Aastra</strong> Web UI<br />
Note: Keys 1 and 2 (SAVE and DELETE keys) can be made configurable<br />
ONLY by your System Administrator.<br />
1. Click on Operation->Programmable Keys.<br />
or<br />
Click on Operation->Expansion Module .<br />
Model <strong>6753i</strong> IP Phone <strong>User</strong> Guide 87<br />
<strong>VoIPon</strong> www.voipon.co.uk sales@voipon.co.uk Tel: +44 (0)1245 808195 Fax: +44 (0)1245 808299
Programmable Keys and Expansion Module Keys<br />
2. Select from "Key 3" through "Key 6".<br />
or<br />
Select from “Key 1” through “Key 36” (M670i).<br />
3. In the "Type" field, select Call Forward.<br />
4. Click Save Settings.<br />
88 Model <strong>6753i</strong> IP Phone <strong>User</strong> Guide<br />
<strong>VoIPon</strong> www.voipon.co.uk sales@voipon.co.uk Tel: +44 (0)1245 808195 Fax: +44 (0)1245 808299
BLF/Xfer<br />
The BLF key allows one or more extensions to be monitored, and once there is any state change<br />
with those extensions, the key shows the status of the monitored lines. The Xfer key allows a call<br />
to be transferred to other recipients blindly or consultatively. The BLF/Xfer key combines the BLF<br />
and Xfer key's functionality together allowing the user to transfer calls or use BLF with one key.<br />
Note: It is recommended that you enable the “Switch UI Focus to Ringing Line”<br />
parameter when using the BLF/Xfer feature. For more information about this<br />
parameter, see “Switch UI Focus to Ringing Line” on page 179.<br />
BLF/Xfer Key Requirements and Functionality<br />
• BLF/Xfer and BLF<br />
A BLF/Xfer key can be configured for subscribing to an extension and monitor the status of<br />
the extension, similar to the BLF key functionality. Changes of the state of the monitored<br />
extension are indicated by a LED / Icon.<br />
• BLF/Xfer and Blind Transfer Calls<br />
When the focused line is in the “Connected” state, pressing the BLF/Xfer key transfers the call<br />
to the extension unconditionally, disregarding the status of the monitored extension.<br />
If transferring a call to an extension fails, a message “Transfer Failed” displays on the phone,<br />
and you can reconnect the call (get the call back) by pressing the line key again.<br />
• BLF/Xfer and Call Forward<br />
When the focused line is in the “Ringing” state, pressing the BLF/Xfer key forwards the call to<br />
the extension unconditionally, disregarding the status of the monitored extension.<br />
• BLF/Xfer and Speed Dial<br />
When the focused line and the monitored extension are idle, pressing the BLF/Xfer key causes<br />
the phone to go offhook and dial the number of the extension.<br />
Model <strong>6753i</strong> IP Phone <strong>User</strong> Guide 89<br />
<strong>VoIPon</strong> www.voipon.co.uk sales@voipon.co.uk Tel: +44 (0)1245 808195 Fax: +44 (0)1245 808299
Configuring a BLF/Xfer Key<br />
<strong>Aastra</strong> Web UI<br />
Note: Keys 1 and 2 (SAVE and DELETE keys) can be made configurable<br />
ONLY by your System Administrator.<br />
1. Click on Operation->Programmable Keys.<br />
or<br />
Click on Operation->Expansion Module .<br />
Programmable Keys and Expansion Module Keys<br />
2. Select from "Key 3" through "Key 6".<br />
or<br />
Select from “Key 1” through “Key 36” (M670i).<br />
3. In the "Type" field, select BLF/Xfer.<br />
4. In the “Value” field, enter the monitored extension or the extension to transfer calls to (for<br />
example, “35”).<br />
5. In the “Line” field, select the line for which you want to use the key functionality.<br />
6. Click Save Settings.<br />
90 Model <strong>6753i</strong> IP Phone <strong>User</strong> Guide<br />
<strong>VoIPon</strong> www.voipon.co.uk sales@voipon.co.uk Tel: +44 (0)1245 808195 Fax: +44 (0)1245 808299
Speed Dial/Xfer<br />
The Speed Dial key allows a number to be dialed quickly by pressing one key configured for speed<br />
dialing. The Xfer key allows a call to be transferred to other recipients blindly or consultatively.<br />
The Speed Dial/Xfer key combines the Speed Dial and Xfer key's functionality together allowing<br />
the user to transfer calls or use Speed Dial with one key.<br />
Note: It is recommended that you enable the “Switch UI Focus to Ringing Line”<br />
parameter when using the Speed Dial/Xfer feature. For more information about<br />
this parameter, see “Switch UI Focus to Ringing Line” on page 179.<br />
Speed Dial/Xfer Key Requirements and Functionality<br />
The Speed Dial/Xfer key has the following capabilities:<br />
• Speed Dial/Xfer and Speed Dial<br />
When the phone is in the “Idle” state, pressing the Speed Dial/Xfer key causes the phone to go<br />
offhook and dial the predefined extension.<br />
• Speed Dial/Xfer and Blind Transfer<br />
When the phone is connected to a call, pressing the Speed Dial/Xfer key blind transfers the<br />
call to the predefined target.<br />
If transferring a call fails, a message “Transfer Failed” displays, and you can reconnect the call<br />
(get the call back) by pressing the line key again.<br />
• Speed Dial/Xfer and Call Forward<br />
When the phone is in the “Ringing” state, pressing the Speed Dial/Xfer key forwards the call<br />
to the predefined extension.<br />
Model <strong>6753i</strong> IP Phone <strong>User</strong> Guide 91<br />
<strong>VoIPon</strong> www.voipon.co.uk sales@voipon.co.uk Tel: +44 (0)1245 808195 Fax: +44 (0)1245 808299
Configuring a Speed Dial/Xfer Key<br />
<strong>Aastra</strong> Web UI<br />
Note: Keys 1 and 2 (SAVE and DELETE keys) can be made configurable<br />
ONLY by your System Administrator.<br />
1. Click on Operation->Programmable Keys.<br />
or<br />
Click on Operation->Expansion Module .<br />
Programmable Keys and Expansion Module Keys<br />
2. Select from "Key 3" through "Key 6".<br />
or<br />
Select from “Key 1” through “Key 36” (M670i).<br />
3. In the "Type" field, select Speed Dial/Xfer.<br />
4. In the “Value” field, enter the speed dial extension or the extension to transfer calls to (for<br />
example, “5551212”).<br />
5. In the “Line” field, select the line for which you want to use the key functionality.<br />
6. Click Save Settings.<br />
92 Model <strong>6753i</strong> IP Phone <strong>User</strong> Guide<br />
<strong>VoIPon</strong> www.voipon.co.uk sales@voipon.co.uk Tel: +44 (0)1245 808195 Fax: +44 (0)1245 808299
Speed Dial/Conf<br />
The <strong>6753i</strong> allows you to configure a programmable key or expansion module key to be used as a<br />
speed dial conference key (Speed Dial/Conf key) while remaining in the current call. This key<br />
allows a user on a call to conference another party at a pre-defined number while remaining in the<br />
conference.<br />
For example, while on an active call, a user can use the Speed Dial/Conf key to dial a recording<br />
service and have the resulting conference recorded.<br />
Note: If not currently in a conference, the Speed Dial/Conf key is<br />
disabled on the active call.<br />
If you configure a programmable key as a Speed Dial/Conf key and you press this key while on an<br />
active call, the focused line changes to the dialing line. A Cancel softkey displays on the phone<br />
allowing you to abort the conference speed dial if required. The message "Ringing..." displays<br />
below the number when the far end is ringing. The message "Conf. Unavailable" briefly displays<br />
when a conference is already in progress. The active call is not put on hold when the speed dial<br />
number is dialed.<br />
Note: This feature is not compatible with centralized conferencing.<br />
Model <strong>6753i</strong> IP Phone <strong>User</strong> Guide 93<br />
<strong>VoIPon</strong> www.voipon.co.uk sales@voipon.co.uk Tel: +44 (0)1245 808195 Fax: +44 (0)1245 808299
Configuring a Speed Dial/Conf Key<br />
<strong>Aastra</strong> Web UI<br />
Note: Keys 1 and 2 (SAVE and DELETE keys) can be made configurable<br />
ONLY by your System Administrator.<br />
1. Click on Operation->Programmable Keys.<br />
or<br />
Click on Operation->Expansion Module .<br />
Programmable Keys and Expansion Module Keys<br />
2. Select from "Key 3" through "Key 6".<br />
or<br />
Select from “Key 1” through “Key 36” (M670i).<br />
3. In the "Type" field, select Speed Dial/Conf.<br />
4. In the “Value” field, enter the number or the extension to add to the conference (for<br />
example, “5551212”).<br />
5. In the “Line” field, select the line for which you want to use the key functionality.<br />
6. Click Save Settings.<br />
94 Model <strong>6753i</strong> IP Phone <strong>User</strong> Guide<br />
<strong>VoIPon</strong> www.voipon.co.uk sales@voipon.co.uk Tel: +44 (0)1245 808195 Fax: +44 (0)1245 808299
Directory Key<br />
By default, the <strong>6753i</strong> has a Directory key configured on Key 3. However, using the <strong>Aastra</strong> Web UI,<br />
you can assign the Directory key to another available key if required (Key 3 through Key 6).<br />
Directory<br />
Key<br />
The "Directory List" feature allows you to store frequently used names and numbers on the phone.<br />
You can also dial directly from a directory entry.<br />
You can use the Directory key to access a Directory List which contains a customized list of names<br />
with phone numbers and labels.<br />
In addition to creating a Directory key, you can also download a Directory List to your PC if<br />
required using the <strong>Aastra</strong> Web UI.<br />
Reference<br />
For more information about the Directory List, see “Directory List” on page 127.<br />
Model <strong>6753i</strong> IP Phone <strong>User</strong> Guide 95<br />
<strong>VoIPon</strong> www.voipon.co.uk sales@voipon.co.uk Tel: +44 (0)1245 808195 Fax: +44 (0)1245 808299
Configuring a Directory Key<br />
<strong>Aastra</strong> Web UI<br />
Notes:<br />
1. Keys 1 and 2 (SAVE and DELETE keys) can be made configurable ONLY by<br />
your System Administrator.<br />
2. By default, the Directory key is Key 3.<br />
Use the following procedure to configure a Directory key on the <strong>6753i</strong> phone.<br />
1. Click on Operation->Programmable Keys.<br />
or<br />
Click on Operation->Expansion Module .<br />
Programmable Keys and Expansion Module Keys<br />
2. Select from "Key 3" through "Key 6".<br />
or<br />
Select from “Key 1” through “Key 36” (M670i).<br />
3. In the "Type" field, select Directory.<br />
4. Click Save Settings.<br />
96 Model <strong>6753i</strong> IP Phone <strong>User</strong> Guide<br />
<strong>VoIPon</strong> www.voipon.co.uk sales@voipon.co.uk Tel: +44 (0)1245 808195 Fax: +44 (0)1245 808299
Callers List Key<br />
By default, the <strong>6753i</strong> has a Callers List key configured on Key 4. However, using the <strong>Aastra</strong> Web<br />
UI, you can assign the Callers List key to another available key if required (Key 3 through Key 6).<br />
Callers List<br />
Key<br />
The Callers list is a stored log of your incoming calls. You can use the Callers List key to access a<br />
list of callers that called your phone.<br />
Reference<br />
For more information about the Callers List, see “Callers List” on page 137.<br />
Configuring a Callers List Key<br />
<strong>Aastra</strong> Web UI<br />
Notes:<br />
1. Keys 1 and 2 (SAVE and DELETE keys) can be made configurable ONLY by<br />
your System Administrator.<br />
2. By default, the Callers List key is Key 4.<br />
Use the following procedure to configure a Callers List key on the <strong>6753i</strong> phone.<br />
Model <strong>6753i</strong> IP Phone <strong>User</strong> Guide 97<br />
<strong>VoIPon</strong> www.voipon.co.uk sales@voipon.co.uk Tel: +44 (0)1245 808195 Fax: +44 (0)1245 808299
1. Click on Operation->Programmable Keys.<br />
or<br />
Click on Operation->Expansion Module .<br />
Programmable Keys and Expansion Module Keys<br />
2. Select from "Key 3" through "Key 6".<br />
or<br />
Select from “Key 1” through “Key 36” (M670i).<br />
3. In the "Type" field, select Callers List.<br />
4. Click Save Settings.<br />
98 Model <strong>6753i</strong> IP Phone <strong>User</strong> Guide<br />
<strong>VoIPon</strong> www.voipon.co.uk sales@voipon.co.uk Tel: +44 (0)1245 808195 Fax: +44 (0)1245 808299
Transfer Key<br />
By default, the <strong>6753i</strong> has a Transfer key configured on Key 5. However, using the <strong>Aastra</strong> Web UI,<br />
you can assign the Transfer key to another available key if required (Key 3 through Key 6).<br />
Transfer<br />
Key<br />
The Transfer key allows you to perform blind or consultative call transfers to other recipients. The<br />
blind transfer feature transfers a call to another number without you having to talk to the recipient.<br />
A consultative transfer feature transfers a call to another number but allows you to speak with the<br />
recipient before the call is actually transferred.<br />
Reference<br />
For more information about using blind and consultative call transfers, see “Transferring Calls” on<br />
page 118.<br />
Configuring a Transfer Key<br />
<strong>Aastra</strong> Web UI<br />
Notes:<br />
1. Keys 1 and 2 (SAVE and DELETE keys) can be made configurable ONLY by<br />
your System Administrator.<br />
2. By default, the Transfer key is Key 5.<br />
Model <strong>6753i</strong> IP Phone <strong>User</strong> Guide 99<br />
<strong>VoIPon</strong> www.voipon.co.uk sales@voipon.co.uk Tel: +44 (0)1245 808195 Fax: +44 (0)1245 808299
Use the following procedure to configure a Transfer key on the <strong>6753i</strong> phone.<br />
1. Click on Operation->Programmable Keys.<br />
or<br />
Click on Operation->Expansion Module .<br />
Conference Key<br />
Programmable Keys and Expansion Module Keys<br />
2. Select from "Key 3" through "Key 6".<br />
or<br />
Select from “Key 1” through “Key 36” (M670i).<br />
3. In the "Type" field, select Transfer.<br />
4. Click Save Settings.<br />
By default, the <strong>6753i</strong> has a Conference key configured on Key 6. However, using the <strong>Aastra</strong><br />
Web UI, you can assign the Conference key to another available key if required (Key 3 through<br />
Key 6).<br />
Conference<br />
Key<br />
The Conference key allows you to link three active calls into a single conference (Local<br />
Conferencing). This key also helps to create multiple conferences with unlimited participants on<br />
your phone if your System Administrator has enabled Centralized Conferencing on your phone.<br />
100 Model <strong>6753i</strong> IP Phone <strong>User</strong> Guide<br />
<strong>VoIPon</strong> www.voipon.co.uk sales@voipon.co.uk Tel: +44 (0)1245 808195 Fax: +44 (0)1245 808299
Reference<br />
For more information about Local and Centralized Conferencing, see “Conferencing Calls” on<br />
page 121.<br />
Configuring a Conference Key<br />
<strong>Aastra</strong> Web UI<br />
Notes:<br />
1. Keys 1 and 2 (SAVE and DELETE keys) can be made configurable ONLY by<br />
your System Administrator.<br />
2. By default, the Conference key is Key 6.<br />
Use the following procedure to configure a Conference key on the <strong>6753i</strong> phone.<br />
1. Click on Operation->Programmable Keys.<br />
or<br />
Click on Operation->Expansion Module .<br />
Programmable Keys and Expansion Module Keys<br />
2. Select from "Key 3" through "Key 6".<br />
or<br />
Select from “Key 1” through “Key 36” (M670i).<br />
3. In the "Type" field, select Conference.<br />
4. Click Save Settings.<br />
Model <strong>6753i</strong> IP Phone <strong>User</strong> Guide 101<br />
<strong>VoIPon</strong> www.voipon.co.uk sales@voipon.co.uk Tel: +44 (0)1245 808195 Fax: +44 (0)1245 808299
Intercom Key<br />
By default, the IP phone allows incoming intercom calls to be automatically answered without<br />
having to set up an Icom key on your phone. For more information about changing the behavior<br />
of incoming Intercom calls, see the section “Incoming Intercom Call Features” on page 184.<br />
Your System Administrator can enable outgoing intercom calls on your phone. If enabled, you<br />
must configure an Icom key on your phone to use for outgoing intercom calls.You must<br />
configure a programmable key or expansion module key with the function, “Intercom”.<br />
Use the following procedure to configure a key as an Icom key using the <strong>Aastra</strong> Web UI.<br />
Configuring an Intercom Key<br />
<strong>Aastra</strong> Web UI<br />
Note: Keys 1 and 2 (SAVE and DELETE keys) can be made configurable ONLY<br />
by your System Administrator.<br />
1. Click on Operation->Programmable Keys.<br />
or<br />
Click on Operation->Expansion Module .<br />
Programmable Keys and Expansion Module Keys<br />
2. Select from "Key 3" through "Key 6".<br />
or<br />
Select from “Key 1” through “Key 36” (M670i).<br />
3. In the "Type" field, select Intercom.<br />
4. Click Save Settings.<br />
102 Model <strong>6753i</strong> IP Phone <strong>User</strong> Guide<br />
<strong>VoIPon</strong> www.voipon.co.uk sales@voipon.co.uk Tel: +44 (0)1245 808195 Fax: +44 (0)1245 808299
Using the Icom Key (for Outgoing Intercom Calls)<br />
1. Press the Icom key.<br />
2. Enter the extension number of the person you want to intercom or the BLF key for that<br />
extension.<br />
3. After a beep tone, your phone automatically connects with the remote extension and you can<br />
speak through its speaker.<br />
4. To cancel intercom, press or hang up the handset.<br />
5. When you are finished speaking, hang up the phone by placing the handset back on-hook or by<br />
pressing or the line/call appearance button for the active call. When you hang up, the<br />
remote phone also hangs up.<br />
Reference<br />
IP Phone UI<br />
For more information about incoming intercom calls, see “Incoming Intercom Call Features” on<br />
page 184. For more information about outgoing intercom calls, see “Available Features Enabled<br />
by Administrators” on page 193.<br />
Model <strong>6753i</strong> IP Phone <strong>User</strong> Guide 103<br />
<strong>VoIPon</strong> www.voipon.co.uk sales@voipon.co.uk Tel: +44 (0)1245 808195 Fax: +44 (0)1245 808299
Services Key<br />
The <strong>6753i</strong> allows you to configure a Services key that, when pressed on the phone, displays the<br />
Services menu which includes the following options:<br />
• Directory (See “Directory List” on page 127 for more information.)<br />
• Callers List (See “Callers List” on page 137 for more information.)<br />
• Voicemail (See “Voicemail” on page 164 for more information.)<br />
The Services Menu can also be accessed via the IP Phone UI at the location, Options->Services.<br />
The Services key can also access any XML applications setup by your System Administrator.<br />
Contract your System Administrator for more information.<br />
To configure a Services key, you must configure a key with the function, “Services”.<br />
Use the following procedure to configure a key as a Services key using the <strong>Aastra</strong> Web UI.<br />
Configuring a Services Key<br />
<strong>Aastra</strong> Web UI<br />
Note: Keys 1 and 2 (SAVE and DELETE keys) can be made configurable ONLY<br />
by your System Administrator.<br />
1. Click on Operation->Programmable Keys.<br />
or<br />
Click on Operation->Expansion Module .<br />
104 Model <strong>6753i</strong> IP Phone <strong>User</strong> Guide<br />
<strong>VoIPon</strong> www.voipon.co.uk sales@voipon.co.uk Tel: +44 (0)1245 808195 Fax: +44 (0)1245 808299
Programmable Keys and Expansion Module Keys<br />
2. Select from "Key 3" through "Key 6".<br />
or<br />
Select from “Key 1” through “Key 36” (M670i).<br />
3. In the "Type" field, select Services.<br />
4. Click Save Settings.<br />
Using the Services Key<br />
IP Phone UI<br />
1. Press the Services key. The following default list displays:<br />
• Directory (See “Directory List” on page 127 for more information.)<br />
• Callers List (See “Callers List” on page 137 for more information.)<br />
• Voicemail (See “Voicemail” on page 164 for more information.)<br />
Note: Addtional options may display in the Services Menu if setup by your<br />
System Administrator. Contact your Administrator for more information.<br />
2. Select an option from the Services Menu.<br />
3. To cancel a Service, press .<br />
Model <strong>6753i</strong> IP Phone <strong>User</strong> Guide 105<br />
<strong>VoIPon</strong> www.voipon.co.uk sales@voipon.co.uk Tel: +44 (0)1245 808195 Fax: +44 (0)1245 808299
Phone Lock Key<br />
You can configure a programmable key or an expansion module key on the phone to use as a<br />
lock/unlock key. You assign the function of the key as “Phone Lock”.<br />
Use the following procedure to configure a key as a lock/unlock key in the <strong>Aastra</strong> Web UI.<br />
Configuring a Phone Lock Key<br />
<strong>Aastra</strong> Web UI<br />
Note: Keys 1 and 2 (SAVE and DELETE keys) can be made configurable ONLY<br />
by your System Administrator.<br />
1. Click on Operation->Programmable Keys.<br />
or<br />
Click on Operation->Expansion Module .<br />
Programmable Keys and Expansion Module Keys<br />
2. Select from "Key 3" through "Key 6".<br />
or<br />
Select from “Key 1” through “Key 36” (M670i).<br />
3. In the "Type" field, select Phone Lock.<br />
4. Click Save Settings.<br />
Note: You can lock/unlock the phone using the new key you just configured,<br />
using the <strong>Aastra</strong> Web UI at the path Operation->PhoneLock, or using the "Phone<br />
Lock" option on the IP Phone UI at the path Options->Phone Lock. For more<br />
information about using the lock/unlock feature, see “Phone Lock” on page 46.<br />
106 Model <strong>6753i</strong> IP Phone <strong>User</strong> Guide<br />
<strong>VoIPon</strong> www.voipon.co.uk sales@voipon.co.uk Tel: +44 (0)1245 808195 Fax: +44 (0)1245 808299
Using the Lock/Unlock Key on the IP Phone<br />
After configuring a key as a lock/unlock key, refer to the following procedure to use the key on the<br />
IP phone.<br />
IP Phone UI<br />
Lock the Phone<br />
1. Press the Lock key.<br />
The phone locks.<br />
The LED for the key AND the Message Waiting Lamp illuminate steady ON. An “Unlock”<br />
label appears next to the key you just pressed.<br />
Unlock the Phone<br />
1. Press the Unlock key.<br />
A password prompt displays.<br />
2. Enter your user password and press ENTER.<br />
The phone unlocks.<br />
The LED for the key AND the Message Waiting Lamp go OFF. The “Lock” label appears next<br />
to the key you just pressed.<br />
Model <strong>6753i</strong> IP Phone <strong>User</strong> Guide 107<br />
<strong>VoIPon</strong> www.voipon.co.uk sales@voipon.co.uk Tel: +44 (0)1245 808195 Fax: +44 (0)1245 808299
Paging Key (Sends the RTP Stream)<br />
You can configure a Paging key on the phone that allows you to send a Real Time Transport<br />
Protocol (RTP) stream to pre-configured multicast address(es) without involving SIP signaling.<br />
You enter a multicast IP address(es) and a port number for the Paging key, that when pressed,<br />
initiates an outgoing multicast RTP session. This is called Group Paging on the IP phones.<br />
You can also specify group paging RTP addresses that the phone listens for when receiving RTP<br />
streams. You can specify up to 5 listening multicast addresses at the path, Basic<br />
Settings->Preferences->Group Paging RTP Settings.<br />
For more information about Group Paging and how it works, and to specify multicast addresses,<br />
see “Group RTP Paging (receives RTP streams)” on page 188.<br />
Configuring a Paging Key<br />
<strong>Aastra</strong> Web UI<br />
Note: Keys 1 and 2 (SAVE and DELETE keys) can be made configurable ONLY<br />
by your System Administrator.<br />
1. Click on Operation->Programmable Keys.<br />
or<br />
Click on Operation->Expansion Module .<br />
Programmable Keys and Expansion Module Keys<br />
2. Select from "Key 3" through "Key 6".<br />
or<br />
Select from “Key 1” through “Key 36” (M670i).<br />
3. In the "Type" field, select Paging.<br />
<strong>VoIPon</strong> www.voipon.co.uk sales@voipon.co.uk Tel: +44 (0)1245 808195 Fax: +44 (0)1245 808299
4. In the “Value” field, enter a multicast IP address and a port number for the Paging key. When<br />
you press this key, the phone initiates an outgoing multicast RTP session to the specified<br />
address using the specified port. (For example, 239.0.1.15:10000).<br />
Note: The “Value” field allows for one multicast address entry only.<br />
5. To receive RTP steams for Group Paging, you must also configure the "Paging Listen<br />
Addresses" parameter at the path, Basic Settings->Preferences->Group Paging RTP Settings.<br />
For more information about setting this parameter, see “Group RTP Paging (receives RTP<br />
streams)” on page 188.<br />
6. Click Save Settings.<br />
Using the Paging Key<br />
The following procedure describes the use of the Paging key on the IP Phone. The procedure<br />
assumes you have already configured the Paging key using the <strong>Aastra</strong> Web UI.<br />
IP Phone UI<br />
Notes:<br />
1. Recipient of a Paging call can set a global “Do Not Disturb” (DND) to ignore<br />
any incoming pages.<br />
2. For incoming Paging, the phone uses the Intercom configuration settings. The<br />
incoming Page is dependant on the “Allow Barge-In” parameter setting and the<br />
“Idling/On Call” state.<br />
1. On the IP Phone, press the key you configured for Paging.<br />
The phone opens a multicast RTP session and an outgoing OR incoming phone screen displays<br />
as follows:<br />
Paging 00:01<br />
= Drop<br />
2. Press the Drop key to end the multicast RTP session and return to the idle screen.<br />
Note: If you enable global DND on the phone, the incoming multicast RTP<br />
session is dropped.<br />
Model <strong>6753i</strong> IP Phone <strong>User</strong> Guide 109<br />
<strong>VoIPon</strong> www.voipon.co.uk sales@voipon.co.uk Tel: +44 (0)1245 808195 Fax: +44 (0)1245 808299
None Key<br />
You can set a key to force a blank entry on the IP phone display for a specific key. You do this by<br />
setting the key to "none". If a particular key is not defined, it is ignored.<br />
Setting a None Key<br />
<strong>Aastra</strong> Web UI<br />
Note: Keys 1 and 2 (SAVE and DELETE keys) can be made configurable ONLY<br />
by your System Administrator.<br />
Use the following procedure to configure a None key on the <strong>6753i</strong> IP Phone.<br />
1. Click on Operation->Programmable Keys.<br />
or<br />
Click on Operation->Expansion Module .<br />
Programmable Keys and Expansion Module Keys<br />
2. Select from "Key 3" through "Key 6".<br />
or<br />
Select from “Key 1” through “Key 36” (M670i).<br />
3. In the "Type" field, select None.<br />
4. Click Save Settings.<br />
110 Model <strong>6753i</strong> IP Phone <strong>User</strong> Guide<br />
<strong>VoIPon</strong> www.voipon.co.uk sales@voipon.co.uk Tel: +44 (0)1245 808195 Fax: +44 (0)1245 808299
Deleting a Key<br />
<strong>Aastra</strong> Web UI<br />
Note: Keys 1 and 2 (SAVE and DELETE keys) can be made configurable<br />
ONLY by your System Administrator.<br />
Use the following procedure to delete a key function using the <strong>Aastra</strong> Web UI.<br />
1. Click on Operation->Programmable Keys.<br />
or<br />
Click on Operation->Expansion Module .<br />
Programmable Keys and Expansion Module Keys<br />
2. Select from "Key 3" through "Key 6".<br />
or<br />
Select from “Key 1” through “Key 36” (M670i).<br />
3. In the "Type" field, select None.<br />
4. Click Save Settings.<br />
The function is deleted from the IP phone memory.<br />
Model <strong>6753i</strong> IP Phone <strong>User</strong> Guide 111<br />
<strong>VoIPon</strong> www.voipon.co.uk sales@voipon.co.uk Tel: +44 (0)1245 808195 Fax: +44 (0)1245 808299
Making Calls<br />
This section describes ways to make calls on your <strong>6753i</strong> phone, using your handset,<br />
speakerphone or headset.<br />
Dialing a Number<br />
First, take the phone off-hook by:<br />
• lifting the handset<br />
• pressing or<br />
• pressing a line/call appearance button.<br />
At the dial tone, enter the number you wish to call.<br />
Note: After dialing the number, the phone has a short delay before sending the<br />
call. To send the call immediately, you can press the "#" key immediately after<br />
dialing the number. The phone sends the call without delay.<br />
If you are unable to make calls within certain area codes, check with your System Administrator<br />
for any toll restrictions placed on your extension that may restrict your access to long distance<br />
area codes or dialing prefixes.<br />
=Dial<br />
When your party picks up, a timer appears on your display that records the length of your call.<br />
If the Live DialPad option is on, as soon as you press the first digit on the dial pad the phone<br />
automatically selects the next available line, go off-hook and dial as digits are pressed.<br />
Using Handsfree Speakerphone<br />
The handsfree feature allows you to speak to someone without using the handset or headset.<br />
Your phone must be in either the Speaker or Speaker/Headset audio mode. For more information<br />
about setting the audio mode on your phone, see “Set Audio” on page 29.<br />
IP Phone UI<br />
• To dial using handsfree, first press and enter a number at the dial tone.<br />
• To answer a call on your phone using handsfree, press or the line/call appearance<br />
button.<br />
112 Model <strong>6753i</strong> IP Phone <strong>User</strong> Guide<br />
<strong>VoIPon</strong> www.voipon.co.uk sales@voipon.co.uk Tel: +44 (0)1245 808195 Fax: +44 (0)1245 808299
• If you are in Speaker audio mode, lift the handset and press to switch between<br />
handsfree and handset.<br />
• If you are in Speaker/headset audio mode, press to switch between handsfree and<br />
headset.<br />
• When the handset is on hook, press to disconnect the call.<br />
When handsfree is on, the speaker light turns on.<br />
Using a Headset<br />
The <strong>6753i</strong> accepts headsets through the modular RJ9 jack on the back of the phone. Contact your<br />
telephone equipment retailer or distributor to purchase a compatible headset.<br />
Note: Customers should read and observe all safety recommendations contained<br />
in headset operating guides when using any headset.<br />
Advanced Volume Controls for the Headset Mic<br />
On the <strong>6753i</strong>, there are 3 options for the headset microphone volume. For more information about<br />
the headset microphone, see “Headset Mic Volume” on page 29.<br />
IP Phone UI<br />
To change the volume:<br />
1. Press to enter the Options list.<br />
2. Select Preferences and press 4.<br />
3. Use 2 to scroll down to Set Audio and press 4 to select.<br />
4. Press 2 to scroll down to Headset/Mic Volume and press 4 to select.<br />
5. Use 2 to scroll down the list and press 4 to select your desired volume.<br />
6. Press 4 to save changes and 3 to exit.<br />
7. If you do not wish to save changes, press 3 to return to the previous screen.<br />
Note: By default, the volume for the headset microphone is set to medium.<br />
Model <strong>6753i</strong> IP Phone <strong>User</strong> Guide 113<br />
<strong>VoIPon</strong> www.voipon.co.uk sales@voipon.co.uk Tel: +44 (0)1245 808195 Fax: +44 (0)1245 808299
Making and Receiving Calls Using a Headset<br />
IP Phone UI<br />
1. Ensure that you have selected a headset audio mode by accessing the Options list (under<br />
option Preferences->Set Audio->Audio Mode on the IP Phone).<br />
2. Plug the headset into the jack.<br />
3. Press the key to obtain a dial tone or to answer an incoming call. Depending on the<br />
audio mode selected from the options menu, a dial tone or an incoming call is received on<br />
either the headset or the handsfree speakerphone.<br />
4. Press the key to end the call.<br />
Redial<br />
IP Phone UI<br />
• Press to dial the most recent number you dialed from the phone.<br />
• If you are off-hook and press the last number you called is called back.<br />
• If you are on-hook and press , a Redial Directory list appears on-screen.<br />
The redial list is available during active calls. It stores up to the last 100 numbers you called,<br />
allowing you to scroll through and select the number you wish to redial.<br />
Note: Your System Administrator can set your Redial key to speed dial a<br />
specific number. Contact your System Administrator for more information.<br />
Accessing the Redial List<br />
IP Phone UI<br />
1. If you are off-hook and press , the telephone automatically dials the last number you<br />
called.<br />
2. If you are not on the phone, press to display the most recently dialed number and use<br />
2 and 5 to scroll through the list to view the other numbers.<br />
3. Press 2 to see the second most recently dialed number, or 5 to see the oldest call on your<br />
list.<br />
4. To dial the displayed number press , or lift the Handset or press any line keys.<br />
5. Press or the key to cancel.<br />
Note: The redial list is available during active calls. It also stores up to the last<br />
100 numbers you called, allowing you to scroll through and select the number<br />
you wish to redial.<br />
114 Model <strong>6753i</strong> IP Phone <strong>User</strong> Guide<br />
<strong>VoIPon</strong> www.voipon.co.uk sales@voipon.co.uk Tel: +44 (0)1245 808195 Fax: +44 (0)1245 808299
Deleting from the Redial List<br />
Note: You cannot delete individual entries in the Redial List.<br />
IP Phone UI<br />
Delete All Items<br />
1. Press .<br />
2. Press the Delete Key, then press the Delete Key again at the prompt to erase all items.<br />
DELETE again to<br />
erase all items<br />
Redial List is<br />
empty<br />
Mute<br />
You can use the Mute key to mute the handset, headset, or speakerphone. When you use the<br />
mute key on your phone, you cannot be heard on an active call or on a conference.<br />
When a call is muted, the icon displays as follows.<br />
1<br />
John Burns<br />
9054550055<br />
03:00<br />
For muted calls, the handsfree LED flashes and the Mute key LED is ON.<br />
IP Phone UI<br />
Press the button at any time to mute handset, headset, or handsfree.<br />
The speaker light flashes slowly and you can hear the caller, but they cannot hear you. To switch<br />
mute on or off, press .<br />
Note: If you place a muted call on hold, the phone automatically takes the call<br />
off mute when you reconnect to the call.<br />
Model <strong>6753i</strong> IP Phone <strong>User</strong> Guide 115<br />
<strong>VoIPon</strong> www.voipon.co.uk sales@voipon.co.uk Tel: +44 (0)1245 808195 Fax: +44 (0)1245 808299
Receiving Calls<br />
When a call is ringing at your extension, you see the "Inbound Call" Screen. The line/call<br />
appearance light flashes quickly for the incoming call.<br />
Laflamme & Assoc<br />
555-1234<br />
Answering an Incoming Call<br />
IP Phone UI<br />
To answer the call<br />
• For handsfree operation, press or the line/call appearance button for the incoming<br />
call.<br />
• Press for handsfree or headset operation.<br />
Note: The audio mode setting you have selected in the options list under Set<br />
Audio->Audio Mode determines if the call goes to handsfree or headset operation.<br />
For more information, see “Set Audio” on page 29.<br />
• Lift the handset for handset operation.<br />
If the phone is already connected to a call, pressing the line/call appearance button for the new<br />
incoming call automatically places the connected call on hold and answers the new call. To<br />
reconnect to a party, press the line/call appearance button for that call.<br />
If you cannot answer the call, the caller goes to voicemail has been configured for your<br />
extension.<br />
Note: The<br />
button can be used to cancel the call pickup procedure.<br />
Sending an Incoming Call to Voicemail<br />
You can send an incoming call directly to voicemail without answering the call. To do this, press<br />
without picking up the handset. If you're already on the phone your incoming call<br />
should go directly to voicemail. Your phone screen displays a voicemail icon ( ) along with<br />
the number of waiting messages, if you have unheard messages<br />
(example: x4).<br />
116 Model <strong>6753i</strong> IP Phone <strong>User</strong> Guide<br />
<strong>VoIPon</strong> www.voipon.co.uk sales@voipon.co.uk Tel: +44 (0)1245 808195 Fax: +44 (0)1245 808299
Handling Calls<br />
When you are connected to a call, you can use the hard keys or programmable keys on the phone<br />
to place a call on hold, transfer a call, or conference.<br />
Placing a Call on Hold<br />
You can place an active call on hold by pressing the Hold<br />
hold, only your phone can retrieve the call.<br />
key. When you place a call on<br />
When a call is on hold, the icon displays on-hook as follows.<br />
1<br />
Call held<br />
03:05<br />
For on-hold calls, the timer displays as running and the Line and main LEDs flash.<br />
IP Phone UI<br />
To place a call on hold<br />
1. Connect to the call (if not already connected).<br />
2. Press the Hold key.<br />
Call held<br />
Jun 8 2:55pm<br />
The line/call appearance light begins to flash slowly and after a short time the phone beeps softly<br />
to remind you that you still have a call on hold. The screen displays "Call Held" with the line<br />
number the call is held at the phone.<br />
Note: If you are connected to another call, the phone does not beep to remind<br />
you that you still have a call on hold.<br />
Model <strong>6753i</strong> IP Phone <strong>User</strong> Guide 117<br />
<strong>VoIPon</strong> www.voipon.co.uk sales@voipon.co.uk Tel: +44 (0)1245 808195 Fax: +44 (0)1245 808299
When on Hold<br />
To let your caller know that they are still on hold, music plays softly (if this has been set up for<br />
your system). The call/line appearance light for the line you are on remains solid to indicate that<br />
you are still connected.<br />
John 1051<br />
01:17<br />
Automatic Hold<br />
When juggling between calls, you do not have to press the hold button to go from one call to the<br />
next. The phone automatically puts your current call on hold as soon as you press a new line/call<br />
appearance button. If you have more than one call on hold, you can reconnect to a held call by<br />
pressing the line/call appearance button where that call is being held. Press to disconnect<br />
the call.<br />
Retrieving a Held Call<br />
If you have more than 1 call on hold, you can scroll through the held call information by<br />
pressing 3 and 4 navigation keys. To reconnect to a call press the line/call appearance button<br />
where that call is being held. If you press the call/line appearance button again, you disconnect<br />
from the call.<br />
Transferring Calls<br />
Blind Transfer<br />
A blind transfer is when you transfer a call directly to another extension without consulting with<br />
the person receiving the call. To do this, simply complete the transfer immediately after you<br />
have entered the number. The call goes directly to the extension or outside line you transferred<br />
to. If the party you are transferring the call to does not answer, the transferred call rings back to<br />
your extension.<br />
Consultive Transfer<br />
You also have the option to consult with the person you are transferring the call to, before you<br />
complete the transfer. To do this, remain on the line until the receiving party answers the call.<br />
After consulting with the receiving party, you can either complete the transfer or cancel the<br />
transfer to go back to the original call.<br />
118 Model <strong>6753i</strong> IP Phone <strong>User</strong> Guide<br />
<strong>VoIPon</strong> www.voipon.co.uk sales@voipon.co.uk Tel: +44 (0)1245 808195 Fax: +44 (0)1245 808299
IP Phone UI<br />
Use the following procedure to transfer a call to another extension. Use the following illustration<br />
as a reference.<br />
Transfer<br />
Key<br />
1. Connect to Party 1 (if not already connected). Party 1 is the party you want to transfer.<br />
2. Press the Transfer Key. You should hear a dial tone as a second line opens up.<br />
3. Dial the extension number (or the outside number) to Party 2. This is the Party for which you<br />
want to transfer Party 1.<br />
4. To complete a "blind" transfer, press the Transfer Key again before the receiving end answers.<br />
To complete a consultive transfer, remain on the line to speak with the Party 2, before pressing<br />
the Transfer Key again to transfer Party 1 to Party 2. To cancel the transfer, select Cancel on<br />
the display screen.<br />
Transferring Two Existing Calls<br />
The <strong>6753i</strong> allows you to perform a transfer of a call when there are currently two active calls on<br />
the phone. For example, on your phone, there are two active calls - Call A and Call B. Call B is on<br />
hold. You can perform the following to transfer Call A to Call B:<br />
1. Press Xfer key. A new line opens.<br />
2. Press or scroll to the Line where Call B is on hold.<br />
3. Press Xfer key.<br />
Call A is transferred to Call B.<br />
Model <strong>6753i</strong> IP Phone <strong>User</strong> Guide 119<br />
<strong>VoIPon</strong> www.voipon.co.uk sales@voipon.co.uk Tel: +44 (0)1245 808195 Fax: +44 (0)1245 808299
Indication of Transferred Calls<br />
When you transfer an active call, the near-end phone displays a “Call Transferred” screen when<br />
a call is transferred and the far-end call is dropped. An audible busy signal is also heard on the<br />
phone. The following is the “Call Transferred” screen on the <strong>6753i</strong> phone:<br />
L1<br />
<strong>6753i</strong><br />
Call Transferred<br />
120 Model <strong>6753i</strong> IP Phone <strong>User</strong> Guide<br />
<strong>VoIPon</strong> www.voipon.co.uk sales@voipon.co.uk Tel: +44 (0)1245 808195 Fax: +44 (0)1245 808299
Conferencing Calls<br />
The <strong>6753i</strong> IP phone offers two methods of conferencing:<br />
• Local conferencing (default method).<br />
• Centralized conferencing (for Sylantro and Broadsoft Servers) (Administrator must enable this<br />
method).<br />
By default, the Conference key is Key 6 on your phone. A Conference key must be set up on your<br />
phone before you can set up conference calls. To assign a key as a Conference key, see<br />
“Conference Key” on page 100.<br />
Conference State Screens<br />
When you use the Conference key to initiate a conference call, the following screen displays.<br />
1-1<br />
1-2<br />
John<br />
Jim<br />
03:05<br />
= Drop<br />
In a conference call, the call timer moves to the left. You use the up and down arrow keys to scroll<br />
to a party on the list. You use the right arrow key to select the party to drop.<br />
Local Conferencing<br />
The <strong>6753i</strong> phone supports up to 3 parties (including yourself) in a conference call. This is called<br />
Local Conferencing and is the default method of conferencing on the <strong>6753i</strong>.<br />
Note: Your System Administrator can set your Conference key to speed dial a<br />
specific number. Contact your System Administrator for more information.<br />
Model <strong>6753i</strong> IP Phone <strong>User</strong> Guide 121<br />
<strong>VoIPon</strong> www.voipon.co.uk sales@voipon.co.uk Tel: +44 (0)1245 808195 Fax: +44 (0)1245 808299
Using Local Conferencing<br />
IP Phone UI<br />
Use the following procedure to create a conference call using local conferencing. Use the<br />
following illustration as a reference.<br />
Conference<br />
Key<br />
1. When you begin a conference, you are the first party in the conference (Party 1). Pickup the<br />
handset or press the speakerphone key.<br />
A line opens up.<br />
2. Call Party 2 by dialing their number (or answer an incoming call of a Party).<br />
3. Wait for Party 2 to answer. When Party 2 answers, you can consult with them before adding<br />
them to the conference.<br />
4. Press the Conf Key. A new line opens.<br />
2<br />
=Dial<br />
5. Enter the phone number of Party 3.<br />
6. Wait for Party 3 to answer. When Party 3 answers, you can consult with them before adding<br />
them to the conference.<br />
7. Press the Conf key again to add Party 3 to the conference. Party 1 (which is yourself), Party<br />
2, and Party 3 are all connected to a single conference.<br />
8. To drop a party from the conference, press the Conf key once more.<br />
Note: You can use 2 and 5 to scroll through and see the numbers and names (if<br />
available) of the parties in the conference call. When a name is displayed,<br />
pressing 4 drops the displayed party from the call.<br />
122 Model <strong>6753i</strong> IP Phone <strong>User</strong> Guide<br />
<strong>VoIPon</strong> www.voipon.co.uk sales@voipon.co.uk Tel: +44 (0)1245 808195 Fax: +44 (0)1245 808299
Joining Two Active Calls in a Single Conference<br />
IP Phone UI<br />
1. Begin with active calls on two different lines (for example, Line 1 and Line 2 have active<br />
calls).<br />
2. Press the Line key for which you want to conference the two calls together (for example, Line<br />
1).<br />
3. Press the Conf key.<br />
4. Press the Line key that has the second active call (for example, Line 2).<br />
5. Press the Conf key. The two active calls link into a conference call on Line 1.<br />
Note: You can use 2 and 5 to scroll through and see the numbers and names (if<br />
available) of the parties in the conference call. When a name is displayed,<br />
pressing 4 drops the displayed party from the call.<br />
Centralized Conferencing (for Sylantro and Broadsoft Servers)<br />
The <strong>6753i</strong> allows you to create multiple conferences with unlimited participants (depending on<br />
your server limitations) when your Administrator enables Centralized Conferencing.<br />
If your Administrator does not enable Centralized Conferencing, then the <strong>6753i</strong> uses Local<br />
Conferencing by default.<br />
Your Administrator can configure Centralized Conferencing globally on all lines or on specific<br />
lines. Although, for the global setting to work, you must configure the lines with the applicable<br />
phone number.<br />
Reference<br />
For more information on Centralized Conferencing, see “Centralized Conferencing” on page 195<br />
or contact your System Administrator.<br />
Model <strong>6753i</strong> IP Phone <strong>User</strong> Guide 123<br />
<strong>VoIPon</strong> www.voipon.co.uk sales@voipon.co.uk Tel: +44 (0)1245 808195 Fax: +44 (0)1245 808299
Using Centralized Conferencing<br />
IP Phone UI<br />
Note: When Centralized Conferencing is enabled on your phone, local<br />
conferencing (or three-way conferencing) works as indicated in the previous<br />
section, “Using Local Conferencing.” Joining two active calls in a conference<br />
also works as indicated in the previous section, “Joining Two Active Calls in a<br />
Single Conference.”<br />
Use the following procedure to create a conference call using centralized conferencing. Use the<br />
following illustration as a reference.<br />
Conference<br />
Key<br />
Setting Up a Conference and Adding Multiple Parties<br />
(for Sylantro and Broadsoft Servers)<br />
Note: You can have an unlimited number of parties in a conference (dependent<br />
on the limitations of the server.<br />
1. When you begin a conference, you are the first party in the conference (Party 1). Pickup the<br />
handset or press the Speakerphone Key.<br />
A line opens up.<br />
2. Call Party 2 by dialing their number (or answer an incoming call of a Party).<br />
3. Wait for Party 2 to answer. When Party 2 answers, you can consult with them before adding<br />
them to Conference 1.<br />
4. Press the Conf Key. A new line opens.<br />
2<br />
=Dial<br />
5. Enter the phone number of Party 3.<br />
124 Model <strong>6753i</strong> IP Phone <strong>User</strong> Guide<br />
<strong>VoIPon</strong> www.voipon.co.uk sales@voipon.co.uk Tel: +44 (0)1245 808195 Fax: +44 (0)1245 808299
6. Wait for Party 3 to answer. When Party 3 answers, you can consult with them before adding<br />
them to the Conference 1.<br />
7. Press the Conf Key again to add Party 3 to Conference 1. Party 1 (which is yourself), Party 2,<br />
and Party 3 are all connected to Conference 1.<br />
8. Press an available Line Key (or answer an incoming call on an available line). If calling out,<br />
call Party 4.<br />
9. Wait for Party 4 to answer. When Party 4 answers, you can consult with them before adding<br />
them to the conference.<br />
10. Press the Conf Key to add Party 4 to Conference 1.<br />
11. Press the Line Key that has Conference 1.<br />
12. Press the Conf Key to join all parties (Parties 1 through 4) on Conference 1.<br />
13. To add more parties, repeat steps 8 through 12.<br />
Note: You can use 2 and 5 to scroll through and see the numbers and names (if<br />
available) of the parties in the conference call. When a name is displayed,<br />
pressing 4 drops the displayed party from the call.<br />
If any party in the conference hangs up (including the party that began the conference), all other<br />
parties in the conference are still connected.<br />
Setting Up Multiple Conferences (for Sylantro Server only)<br />
Note: The <strong>6753i</strong> is limited to 9 conferences (a single conference each on lines 1<br />
through 9).<br />
1. Start Conference 1 using the procedures in the previous section, “Setting Up a Conference and<br />
Adding Multiple Parties (for Sylantro and Broadsoft Servers)”.<br />
2. When you are finished adding all required parties to Conference 1, press an available Line<br />
Key to start Conference 2. You are Party 1 on Conference 2. Call Party 2.<br />
3. When Party 2 answers, press the Conf Key.<br />
4. Press an available Line Key.<br />
5. Call Party 3 for Conference 2.<br />
6. When Party 3 answers, press the Conf Key to join Parties 1 (which is yourself), Party 2, and<br />
Party 3 on Conference 2.<br />
You now have two active conferences on two different lines.<br />
Note: When you are connected to multiple conference calls, and you put a<br />
conference on hold, the conference may be on hold for a limited period of time<br />
before it is disconnected. Contact your System Administrator for more<br />
information.<br />
If any party in a conference hangs up (including the party that began the conference), all other<br />
parties in the conference are still connected.<br />
Model <strong>6753i</strong> IP Phone <strong>User</strong> Guide 125<br />
<strong>VoIPon</strong> www.voipon.co.uk sales@voipon.co.uk Tel: +44 (0)1245 808195 Fax: +44 (0)1245 808299
Ending Calls<br />
Joining Additional Parties to Active Conferences<br />
In centralized conferencing, you can join multiple incoming or outgoing calls to active<br />
conferences. Before following this procedure, at least one active conference must exist on your<br />
phone.<br />
1. As Party 1, pickup the handset or press the speakerphone key.<br />
A line opens up.<br />
2. Call Party 2 by dialing their number (or answer an incoming call of a Party).<br />
3. Wait for Party 2 to answer. When Party 2 answers, you can consult with them before adding<br />
them to the conference.<br />
4. Press the Conf Key.<br />
5. Press the Line Key that has the active conference. (For example, Line 1 and Line 2 both<br />
have active conferences. Pressing Line 1 joins Party 1 and Party 2 to the conference on Line<br />
1. Pressing Line 2 joins Party 1 and Party 2 to the conference on Line 2.)<br />
6. Press the Conf Key again to join the Parties to the active conference.<br />
Ending a Conference and Transferring Remaining Parties<br />
The <strong>6753i</strong> allows a Host to drop from a 3-way conference and let the other two parties remain<br />
connected by pressing a Xfer key.<br />
Notes:<br />
1. The <strong>6753i</strong> does not support scrolling between lines.<br />
2. The Caller ID of the dropped Host still displays on the remaining parties’ phones.<br />
If you are the Host of a conference and want to leave that conference:<br />
• While in a 3-way conference press the Xfer key on the phone.<br />
Your phone leaves the 3-way conference but the remaining parties are still connected to the<br />
conference.<br />
IP Phone UI<br />
To end a call, you first need to connect or reconnect to the call if not already connected (for example,<br />
if your caller is on hold). Press or the line/call appearance button of the active call to end<br />
the call. If connected through the handset, you can also place the handset back on hook to end<br />
the call.<br />
126 Model <strong>6753i</strong> IP Phone <strong>User</strong> Guide<br />
<strong>VoIPon</strong> www.voipon.co.uk sales@voipon.co.uk Tel: +44 (0)1245 808195 Fax: +44 (0)1245 808299
Managing Calls<br />
Directory List<br />
The <strong>6753i</strong> has several features that make it easier to manage calls, and to keep track of your caller<br />
history, as well as your business and personal contacts.<br />
These features include:<br />
• Directory List<br />
• Callers List<br />
• Call Forwarding<br />
• Missed Calls Indicator<br />
• Voicemail<br />
The Directory List is your personal phone book, conveniently stored within your phone. You can<br />
enter up to 200 entries into the <strong>6753i</strong> Directory by adding them manually, or by saving the number<br />
and name from other lists stored on your phone. You can also dial directly from a directory entry.<br />
Each entry can contain a maximum of 16 letters and numbers. On the <strong>6753i</strong>, you access the<br />
Directory by pressing the Directory Key (Key 3).<br />
Accessing Your Directory<br />
IP Phone UI<br />
Use the following procedure to access your Directory List. Use the following illustration as a<br />
reference.<br />
Directory<br />
Key (Key 3)<br />
1. Press the Directory Key (Key 3). The directory displays the number of entries in your list. If<br />
the Directory list is empty, "Directory Empty/Use Save to add" is displayed.<br />
Directory empty<br />
Use Save to add<br />
Model <strong>6753i</strong> IP Phone <strong>User</strong> Guide 127<br />
<strong>VoIPon</strong> www.voipon.co.uk sales@voipon.co.uk Tel: +44 (0)1245 808195 Fax: +44 (0)1245 808299
2. You can access entries by pressing 2 and 5 to scroll through the list.<br />
3. To search for an entry by name, press the dial pad number corresponding to the first letter of<br />
the name (for example, press 7 for the letter P). Continue to press the dial pad number to<br />
access other letters on the same key (for example, press 7 three times for ‘Ron’). If there are<br />
multiple entries under the same letter, you can use 2 and 5 to scroll through the list, or<br />
continue to press the next letters of the name to find a better match.<br />
4. To dial the displayed number press or just lift the handset or press any Line Key.<br />
5. Press the Directory Key to cancel.<br />
Sorting Entries and Quick Search Feature<br />
You can also sort multiple numbers according to preference and perform a quick-search feature<br />
that allows you to enter the first letter that corresponds to a name in the Directory to find specific<br />
line items. The phone displays the first name with this letter.<br />
Note: The quick-search feature in the Directory List works only when the<br />
Directory is first accessed.<br />
Managing the Directory List<br />
From the Directory List in the IP Phone UI, you can perform the following:<br />
• “Add a New Entry to the Directory List” (page 129)<br />
• “Edit an Entry in the Directory List” (page 131)<br />
• “Delete an Entry from the Directory List” (page 132)<br />
• “Save an Entry to the Directory List” (page 133)<br />
128 Model <strong>6753i</strong> IP Phone <strong>User</strong> Guide<br />
<strong>VoIPon</strong> www.voipon.co.uk sales@voipon.co.uk Tel: +44 (0)1245 808195 Fax: +44 (0)1245 808299
Add a New Entry to the Directory List<br />
IP Phone UI<br />
Use the following procedures to add a new entry to the Directory List. Use the following<br />
illustration as a reference.<br />
Save Key<br />
Delete Key<br />
Directory<br />
Key<br />
Notes:<br />
1. Use the 3 Key when required for backspacing.<br />
2. You can exit the entry process any time by pressing the Key.<br />
1. Press the Directory Key (Key 3).<br />
2. Press Save (Key 1).<br />
The "Enter Number" prompt displays.<br />
3. Enter a phone number using the numbers on the keypad and press Save. To backspace and<br />
erase a mistake, press 3 or press the Delete Key (Key 2).<br />
The "Press 1st letter to enter name" prompt displays.<br />
4. Enter a name to associate with the phone number you just entered, and press Save. Use the<br />
keypad to select the letters. Continue to press the number key to access the next letter for that<br />
key (for example, press 2 three times to access C). Press 4 to move to the next space, or wait<br />
a moment and the cursor automatically advances. To insert a space between letters, press 4.<br />
To backspace and erase a mistake, press 3 or press the Delete Key.<br />
The "Line" prompt displays. The default is Line 1.<br />
5. If you want to save the new Directory entry to use Line 1, press Save to save the new entry to<br />
the Directory List.<br />
If you want the new entry to use a different line, use the 2 key to select a different Line and<br />
press Save.<br />
The new entry you added is saved to the Directory List.<br />
Saved: Directory<br />
John Burns<br />
Model <strong>6753i</strong> IP Phone <strong>User</strong> Guide 129<br />
<strong>VoIPon</strong> www.voipon.co.uk sales@voipon.co.uk Tel: +44 (0)1245 808195 Fax: +44 (0)1245 808299
Adding an Entry to the Directory List from the Save Key<br />
You can also add a new entry to the Directory List from the Save Key (Key 1).<br />
Notes:<br />
1. Use the 3 Key when required for backspacing.<br />
2. You can exit the entry process any time by pressing the Key or the<br />
Directory Key.<br />
1. Press the Save Key.<br />
The "Save to?" prompt displays.<br />
2. Press the Directory Key.<br />
The "Enter Number" prompt displays.<br />
3. Enter a phone number using the numbers on the keypad and press Save. To backspace and<br />
erase a mistake, press 3 or press the Delete Key (Key 2).<br />
The "Press 1st letter to enter name" prompt displays.<br />
4. Enter a name to associate with the phone number you just entered, and press Save. Use the<br />
keypad to select the letters. Continue to press the number key to access the next letter for<br />
that key (for example, press 2 three times to access C). Press 4 to move to the next space, or<br />
wait a moment and the cursor automatically advances. To insert a space between letters,<br />
press 4. To backspace and erase a mistake, press 3 or press the Delete Key.<br />
The "Line" prompt displays. The default is Line 1.<br />
5. If you want to save the new Directory entry to use Line 1, press Save to save the new entry<br />
to the Directory List.<br />
If you want the new entry to use a different line, use the 2 key to select a different Line and<br />
press Save.<br />
The new entry you added is saved to the Directory List.<br />
Saved: Directory<br />
John Burns<br />
130 Model <strong>6753i</strong> IP Phone <strong>User</strong> Guide<br />
<strong>VoIPon</strong> www.voipon.co.uk sales@voipon.co.uk Tel: +44 (0)1245 808195 Fax: +44 (0)1245 808299
Edit an Entry in the Directory List<br />
IP Phone UI<br />
Use the following procedure to edit an entry in the Directory List. Use the following illustration as<br />
a reference.<br />
Save Key<br />
Directory<br />
Key<br />
1. Press the Directory Key.<br />
2. Access the entry you want to edit by pressing the first letter of the name on the dial pad, or use<br />
2 and 5 to scroll through the list to find the name.<br />
3. To begin editing, press 3. Press 3 again to erase the numbers or letters to the left or use the<br />
dial pad to enter additional digits or characters once you have saved the number.<br />
If you don't want to change the number or name just press the Directory Key or the<br />
at any time to exit.<br />
4. Press the Save Key to finish.<br />
Key<br />
Model <strong>6753i</strong> IP Phone <strong>User</strong> Guide 131<br />
<strong>VoIPon</strong> www.voipon.co.uk sales@voipon.co.uk Tel: +44 (0)1245 808195 Fax: +44 (0)1245 808299
Delete an Entry from the Directory List<br />
You can delete a single entry from the Directory List, or you can delete all entries from the<br />
Directory List.<br />
IP Phone UI<br />
Use the following procedures to delete a single entry or all entries from the Directory List. Use<br />
the following illustration as a reference.<br />
Delete Key<br />
Directory<br />
Key<br />
Delete a Single Entry<br />
1. Press the Directory Key.<br />
2. Press 2 and 5 to find the entry you want to delete.<br />
3. Press the Delete Key.<br />
The "DELETE again to erase this item" prompt displays.<br />
DELETE again to<br />
erase this item<br />
4. Press the Delete Key again at the prompt to erase the entry.<br />
Delete All Entries<br />
1. Press the Directory Key.<br />
2. Press the Delete Key.<br />
The "DELETE again to erase all items" prompt displays.<br />
DELETE again to<br />
erase all items<br />
132 Model <strong>6753i</strong> IP Phone <strong>User</strong> Guide<br />
<strong>VoIPon</strong> www.voipon.co.uk sales@voipon.co.uk Tel: +44 (0)1245 808195 Fax: +44 (0)1245 808299
3. Press the Delete Key again to erase all entries from the Directory List.<br />
The "Directory empty" prompt displays.<br />
Directory empty<br />
Use Save to add<br />
Save an Entry to the Directory List<br />
You can save entries (names and numbers) from other sources to your Directory using any of the<br />
following methods:<br />
• Saving from the Display<br />
• Saving from the Caller List<br />
• Saving from the Redial List<br />
Saving from the Display<br />
IP Phone UI<br />
You can save the name and/or number displayed on your screen during a call to the Directory List,<br />
or to one of your programmable keys using the following procedure. Use the following illustration<br />
as a reference.<br />
Save Key<br />
Directory<br />
Key<br />
1. Press the Save Key during the call.<br />
Save to?<br />
John Burns<br />
9054550055<br />
2. Press the Directory Key or an empty programmable key. If a name is displayed both the<br />
number and name are saved in the Directory List or the programmable key. If no name or<br />
"Unknown Name" displays, you can enter the name using the dial pad.<br />
3. Press the Save Key to finish.<br />
Model <strong>6753i</strong> IP Phone <strong>User</strong> Guide 133<br />
<strong>VoIPon</strong> www.voipon.co.uk sales@voipon.co.uk Tel: +44 (0)1245 808195 Fax: +44 (0)1245 808299
Saving from the Callers List<br />
IP Phone UI<br />
Use the following procedure to save names/numbers from the Callers List to the Directory. Use<br />
the following illustration as a reference.<br />
Save Key<br />
Directory<br />
Key<br />
Callers List<br />
Key<br />
1. Press the Callers List Key (Key 4).<br />
2. From the Callers List, scroll through the list to find the name and number that you want to<br />
save to your Directory.<br />
3. Press the Save Key.<br />
4. Press the Directory Key to save the number you selected to the Directory List. If the name is<br />
displayed with the number, both are saved to the Directory. If no name is displayed, you can<br />
enter the name using the dial pad.<br />
134 Model <strong>6753i</strong> IP Phone <strong>User</strong> Guide<br />
<strong>VoIPon</strong> www.voipon.co.uk sales@voipon.co.uk Tel: +44 (0)1245 808195 Fax: +44 (0)1245 808299
Saving from the Redial List<br />
IP Phone UI<br />
Use the following procedure to save names/numbers from the Redial List to the Directory. Use the<br />
following illustration as a reference.<br />
Save Key<br />
Directory<br />
Key<br />
Redial List<br />
Key<br />
1. Press the Redial List Key ( ).<br />
2. From the Redial List, scroll through the list to find the name and number that you want to save<br />
to your directory.<br />
3. Press the Save Key.<br />
4. Press the Directory Key to save the number you selected to the Directory List. If the name is<br />
displayed with the number, both are saved to the Directory. If no name is displayed, you can<br />
enter the name using the dial pad.<br />
Model <strong>6753i</strong> IP Phone <strong>User</strong> Guide 135<br />
<strong>VoIPon</strong> www.voipon.co.uk sales@voipon.co.uk Tel: +44 (0)1245 808195 Fax: +44 (0)1245 808299
Downloading the Directory List to Your PC<br />
You can download the Directory List to your PC via the <strong>Aastra</strong> Web UI. The phone stores the<br />
directorylist.csv file to your PC in comma-separated value (CSV) format.<br />
You can use any spreadsheet application to open the file for viewing. The following is an<br />
example of a Directory List in a spreadsheet application. The file displays the name, phone<br />
number, and line number for each Directory entry.<br />
Note: Your System Administrator can populate your IP phone Directory List<br />
with server directory files. Contact your System Administrator for more details.<br />
Download the Directory List<br />
Use the following procedure to download the Directory List to your PC using the <strong>Aastra</strong> Web<br />
UI.<br />
<strong>Aastra</strong> Web UI<br />
1. Click on Operation->Directory.<br />
2. In the Directory List field, click on Save As.<br />
A File Download message displays.<br />
3. Click OK.<br />
4. Enter the location on your computer where you want to download the Directory List and<br />
click SAVE.<br />
The callerslist.csv file downloads to your computer.<br />
5. Use a spreadsheet application to open and view the Directory List.<br />
136 Model <strong>6753i</strong> IP Phone <strong>User</strong> Guide<br />
<strong>VoIPon</strong> www.voipon.co.uk sales@voipon.co.uk Tel: +44 (0)1245 808195 Fax: +44 (0)1245 808299
Callers List<br />
The Callers list is a stored log of your incoming calls. The <strong>6753i</strong> IP Phone stores information for<br />
up to 200 incoming calls in the Callers list.<br />
By default, the Callers List Key is Key 4 on the top left of your phone.<br />
Callers List Key<br />
Note: Your System Administrator can create a custom Callers List XML<br />
application allowing you to access the Callers List via an XML Key instead of the<br />
Callers List Key. This allows you to configure the Callers List Key with other<br />
functions if required. Contact your System Administrator for more information.<br />
Your phone logs the number and name (if available) of the caller, when they last called, and the<br />
number of times they tried to reach you. When the Callers list is full, the oldest call records are<br />
deleted to accommodate the information of new callers.<br />
If the phone number of an incoming or outgoing call matches a number that you have programmed<br />
with a name in a programmable key or in the Directory List, the Callers List displays the name and<br />
number.<br />
The display shows you how many callers have been added to the list since you last checked it.<br />
Model <strong>6753i</strong> IP Phone <strong>User</strong> Guide 137<br />
<strong>VoIPon</strong> www.voipon.co.uk sales@voipon.co.uk Tel: +44 (0)1245 808195 Fax: +44 (0)1245 808299
Caller’s List Screen Display<br />
Display Item<br />
Description<br />
450-349-0438 Indicates you have returned the call from the<br />
Callers list.<br />
N MAR 04 3:30pm 2x "N" indicates a new call.<br />
XX New Callers When you’re not on the telephone and not in the<br />
Callers list, the display shows you how many<br />
callers have been added to the list since you last<br />
checked it.<br />
Indicates an unanswered call in the Callers list.<br />
Indicates an answered call in the Callers list.<br />
Indicates a Call Waiting call in the Callers list.<br />
Indicates an incoming Call Waiting call.<br />
John Burns<br />
9054550055<br />
Jun 8 2:41pm 2X<br />
"2x" indicates this caller has called twice. The<br />
display shows the date and time of the last call<br />
from that caller.<br />
You can view, scroll, and delete line items in the Callers List from the IP phone UI. You can also<br />
directly dial from a displayed line item in the Callers List.<br />
138 Model <strong>6753i</strong> IP Phone <strong>User</strong> Guide<br />
<strong>VoIPon</strong> www.voipon.co.uk sales@voipon.co.uk Tel: +44 (0)1245 808195 Fax: +44 (0)1245 808299
Accessing the Callers List<br />
IP Phone UI<br />
Use the following procedure to access the Callers List. Use the following illustration as a<br />
reference.<br />
Callers List<br />
Key<br />
Handsfree<br />
Button<br />
1. Press the Callers List Key. Press 2 and 5 to move through the Callers list. Press 2 to see the<br />
most recent call, or 5 to see the oldest call on your list.<br />
2. To dial the displayed number just press or lift the Handset or press any line keys.<br />
3. Press the Callers List Key to cancel.<br />
Editing Entries in the Callers List<br />
Important: The Caller List does not save changes. Editing in the Callers List is generally used if<br />
you plan to call the number and need to add a prefix.<br />
In the Callers List, if a dial pad key is pressed when a number and/or a name is displayed, the<br />
cursor automatically adds the digit at the left side of the number to enable the entry of the prefix.<br />
007<br />
N<br />
John Burns<br />
9054550055<br />
Jun 8 2:55pm<br />
Model <strong>6753i</strong> IP Phone <strong>User</strong> Guide 139<br />
<strong>VoIPon</strong> www.voipon.co.uk sales@voipon.co.uk Tel: +44 (0)1245 808195 Fax: +44 (0)1245 808299
IP Phone UI<br />
Use the following procedure to edit the Callers List. Use the following illustration as a reference.<br />
Callers List<br />
Key<br />
Handsfree<br />
Button<br />
1. Press the Callers List Key.<br />
2. Press 2 and 5 to find the entry you want to edit. Press 2 to view the most recent call, or 5 to<br />
see the oldest call on your list.<br />
3. Press any key on the dial pad to begin editing.<br />
4. To move the cursor one digit to the right, press 4. To erase one digit to the left of the cursor,<br />
press 3.<br />
5. To dial the displayed number press , or just lift the handset, or press any line keys.<br />
140 Model <strong>6753i</strong> IP Phone <strong>User</strong> Guide<br />
<strong>VoIPon</strong> www.voipon.co.uk sales@voipon.co.uk Tel: +44 (0)1245 808195 Fax: +44 (0)1245 808299
Deleting Entries From the Callers List<br />
You can delete individual items from the Callers List, or you can delete all items in the Callers<br />
List.<br />
IP Phone UI<br />
Use the following procedure to delete an individual item from the Callers List. Use the following<br />
illustration as a reference.<br />
Delete Key<br />
Callers List<br />
Key<br />
1. Press the Callers List Key.<br />
2. Press 2 and 5 to find the item you want to delete.<br />
3. Press the Delete Key.<br />
4. Press the Delete Key again at the prompt to erase the item.<br />
IP Phone UI<br />
Use the following procedure to delete all items from the Callers List.<br />
1. Press the Callers List Key.<br />
2. Press the Delete Key.<br />
3. Press the Delete Key again at the prompt to erase all items.<br />
Model <strong>6753i</strong> IP Phone <strong>User</strong> Guide 141<br />
<strong>VoIPon</strong> www.voipon.co.uk sales@voipon.co.uk Tel: +44 (0)1245 808195 Fax: +44 (0)1245 808299
Downloading the Callers List to Your PC<br />
You can download the Callers List to your PC for viewing using the <strong>Aastra</strong> Web UI. When you<br />
download the Callers List, the phone stores the callerlist.csv file to your computer in<br />
comma-separated value (CSV) format.<br />
You can use any spreadsheet application to open the file for viewing. The following is an<br />
example of a Callers List in a spreadsheet application. This file displays the name, phone<br />
number, and the line that the call came in on.<br />
Download the Callers List<br />
Use the following procedure to download the Callers List to your PC using the <strong>Aastra</strong> Web UI.<br />
<strong>Aastra</strong> Web UI<br />
1. Click on Operation->Directory.<br />
2. In the Callers List field, click on Save As.<br />
A File Download message displays.<br />
3. Click OK.<br />
4. Enter the location on your computer where you want to download the Callers List and click<br />
SAVE.<br />
The callerslist.csv file downloads to your computer.<br />
5. Use a spreadsheet application to open and view the Callers List.<br />
142 Model <strong>6753i</strong> IP Phone <strong>User</strong> Guide<br />
<strong>VoIPon</strong> www.voipon.co.uk sales@voipon.co.uk Tel: +44 (0)1245 808195 Fax: +44 (0)1245 808299
Account Configuration (DND and Call Forwarding)<br />
The <strong>6753i</strong> has a feature that allows you to configure “Do Not Disturb” (DND) and “call<br />
forwarding” (CFWD) for multiple accounts on the phone. You can set specific modes for the way<br />
you want the phone to handle DND and CFWD. The three modes you can set on the phone for<br />
these features are:<br />
• Account<br />
• Phone<br />
• Custom<br />
The following paragraphs describe account-based DND and CFWD:<br />
• DND Account-Based Configuration<br />
• Call Forward Account-Based Configuration<br />
DND Account-Based Configuration<br />
"Do Not Disturb" (DND) is a feature on the phone that prevents the phone from ringing and<br />
receiving incoming calls. When DND is enabled with "call forwarding" (CFWD), any incoming<br />
calls can be call forwarded to voicemail or another number. See "“Call Forward Account-Based<br />
Configuration”" on page 148 for more information about call forwarding to other numbers.<br />
On the <strong>6753i</strong>, you can set DND on the phone-side for a specific account or for all accounts on the<br />
phone. You can set three modes for DND using the <strong>Aastra</strong> Web UI at the path, Basic<br />
Settings->Preferences->General->DND Key Mode: Account, Phone (default), and Custom.<br />
DND performs according to the mode you set.<br />
You can then configure a DND key (for the phone or for an expansion module) using the <strong>Aastra</strong><br />
Web UI at the path, Operation->Programmable Keys. You can enable and disable DND by<br />
toggling the key, or by setting DND for a specific account at the path,<br />
Basic Settings->Account Configuration. Once you enable DND, "DND" displays on the LCD for<br />
the applicable account.<br />
1<br />
Screenname1<br />
DND On<br />
Jan 1 12:96<br />
Note: If there is only one account configured on the phone, then the mode<br />
setting is ignored and the phone behaves as if the mode was set to “Phone”.<br />
Model <strong>6753i</strong> IP Phone <strong>User</strong> Guide 143<br />
<strong>VoIPon</strong> www.voipon.co.uk sales@voipon.co.uk Tel: +44 (0)1245 808195 Fax: +44 (0)1245 808299
The following describes the key behavior for each DND mode.<br />
• Account - DND key toggles the account in focus on the IP Phone UI, to ON or OFF if DND<br />
enabled for that account.<br />
• Phone - (default) DND key toggles all accounts on the phone to ON or OFF.<br />
• Custom - DND key displays custom screens on the IP Phone UI. <strong>User</strong> can select whether to<br />
enable/disable DND per account, enable DND on all accounts, or disable DND on all<br />
accounts.<br />
The following table describes the key and Message Waiting Indicator (MWI) LEDs when you<br />
enable DND on the IP Phone.<br />
Key LED Behavior<br />
for All Modes<br />
DND key LED RED if current<br />
account in focus has DND ON.<br />
DND key LED OFF when current<br />
account in focus has DND<br />
disabled.<br />
MWI LED Behavior<br />
for All Modes<br />
MWI LED ON if current account in<br />
focus has DND ON.<br />
MWI LED OFF if current account in<br />
focus has DND OFF.<br />
Note: If you make changes to the configuration for DND via the IP Phone UI,<br />
you must refresh the <strong>Aastra</strong> Web UI screen to see the changes.<br />
Configuring a DND Key<br />
To configure a DND key, see the section, “Do Not Disturb (DND) Key” on page 64.<br />
Note: If there is no DND key configured or if it is removed, DND is disabled on<br />
the IP Phone.<br />
144 Model <strong>6753i</strong> IP Phone <strong>User</strong> Guide<br />
<strong>VoIPon</strong> www.voipon.co.uk sales@voipon.co.uk Tel: +44 (0)1245 808195 Fax: +44 (0)1245 808299
Configuring DND Using the <strong>Aastra</strong> Web UI.<br />
<strong>Aastra</strong> Web UI<br />
Use the following procedure to configure DND using the <strong>Aastra</strong> Web UI.<br />
1. Click on Basic Settings->Preferences->General<br />
2. In the “DND Key Mode” field, select a “do not disturb” (DND) mode to use on the phone.<br />
Valid values are: Account, Phone (default), Custom. Default is Phone.<br />
• account Sets DND for a specific account. DND key toggles the<br />
account in focus on the phone to ON or OFF.<br />
• phone (default) Sets DND ON for all accounts on the phone. DND key<br />
toggles all accounts on the phone to ON or OFF.<br />
• custom Sets the phone to display custom screens after pressing<br />
the DND key, that list the account(s) on the phone.<br />
The user can select a specific account for DND, turn<br />
DND ON for all accounts, or turn DND OFF for all accounts.<br />
Notes:<br />
1. If there is only one account configured on the phone, then the mode setting is<br />
ignored and the phone behaves as if the mode was set to “Phone”.<br />
2. Using the <strong>Aastra</strong> Web UI, if you change the DND Key Mode to “phone”, all<br />
accounts synchronize to the current setting of Account 1.<br />
3. Click Save Settings. The changes takes affect immediately without a reboot.<br />
Model <strong>6753i</strong> IP Phone <strong>User</strong> Guide 145<br />
<strong>VoIPon</strong> www.voipon.co.uk sales@voipon.co.uk Tel: +44 (0)1245 808195 Fax: +44 (0)1245 808299
4. Click on Basic Settings->Account Configuration.<br />
5. For each account, enable DND by placing a check mark in the box. Disable DND by<br />
unchecking the box.<br />
Notes:<br />
1. If you selected “Account” or “Custom” mode in step 2, you can enable/<br />
disable each account or all accounts as applicable. If you selected “Phone” mode,<br />
the first account allows you to change the DND status for all accounts.<br />
2. Number and name of accounts that display to this screen are dependant on the<br />
number and name of accounts configured on the phone. In the screen in step 4,<br />
Screenname1 is configured on Line 1, Screenname2 is configured on Line 2, and<br />
Screenname3 is configured on Line 3. Only your Administrator can create<br />
accounts for your phone. Contact your Administrator for more information.<br />
6. Click Save Settings. The changes takes affect immediately without a reboot.<br />
Using DND Modes via the IP Phone UI<br />
After you add a DND key to your phone, you can toggle the DND state using this key on the<br />
phone. Use the following procedure to enable/disable DND on the IP Phone.<br />
IP Phone UI<br />
The following procedures assume you have already configured a DND key AND assumes there<br />
are three accounts configured on the phone.<br />
Notes:<br />
1. If there is no DND key configured or if it is removed, DND is disabled on the<br />
IP Phone.<br />
2. If there is only one account configured on the phone, then the mode setting is<br />
ignored and the phone behaves as if the mode was set to “Phone”.<br />
3. Using the <strong>Aastra</strong> Web UI, if you change the DND key mode to “phone”, all<br />
accounts synchronize to the current setting of Account 1.<br />
146 Model <strong>6753i</strong> IP Phone <strong>User</strong> Guide<br />
<strong>VoIPon</strong> www.voipon.co.uk sales@voipon.co.uk Tel: +44 (0)1245 808195 Fax: +44 (0)1245 808299
DND in Account Mode<br />
1. With the account in focus on the IP Phone UI, press the DND key to toggle DND ON or OFF<br />
for the account.<br />
2. Use the RIGHT and LEFT arrow keys to scroll through each account.<br />
1 Screenname1<br />
2 Screenname2<br />
DND On<br />
Jan 1 12:96<br />
Jan 1 12:96<br />
3<br />
Screenname3<br />
DND On<br />
Jan 1 12:96<br />
In the above example, Screenname1, Screenname2, and Screenname3, are three accounts<br />
configured on the phone. Only Screenname1 and 3 have DND ON. Screenname 2 has DND OFF.<br />
DND in Phone Mode (Default)<br />
1. Press the DND key to toggle DND ON or OFF for all accounts on the phone. Toggling to ON<br />
enables DND on all accounts on the phone. Toggling to OFF disables DND on all accounts on<br />
the phone.<br />
2. Use the RIGHT and LEFT arrow keys to scroll through each account.<br />
1 Screenname1<br />
2 Screenname2<br />
DND On<br />
DND On<br />
Jan 1 12:96<br />
Jan 1 12:96<br />
3<br />
Screenname3<br />
DND On<br />
Jan 1 12:96<br />
In the above example, toggling Screenname1 to DND ON, enabled DND for Screenname2 and 3<br />
also.<br />
Model <strong>6753i</strong> IP Phone <strong>User</strong> Guide 147<br />
<strong>VoIPon</strong> www.voipon.co.uk sales@voipon.co.uk Tel: +44 (0)1245 808195 Fax: +44 (0)1245 808299
DND in Custom Mode<br />
1. Press the DND key on the phone. The screen displays a list of the accounts on the phone and<br />
allows you to enable/disable a specific account or all accounts.<br />
2. Use the UP and DOWN arrow keys to scroll through the accounts.<br />
DND<br />
1. Screenname1 ̌<br />
Done<br />
Change<br />
DND<br />
2. Screenname2 X<br />
Done<br />
Change<br />
DND<br />
3. Screenname3 ̌<br />
Done<br />
Change<br />
DND<br />
4. All Off<br />
Done<br />
DND<br />
5. All On<br />
Done<br />
Set<br />
Set<br />
In the above example, Screenname1 and 3 have DND ON as indicated by a check mark ().<br />
Screenname2 has DND off as indicated by an X. Items 4 and 5 allow you to disable or enable<br />
DND on all accounts, respectively.<br />
3. Use the CHANGE key to enable or disable DND for a specific account.<br />
4. Use the SET key to enable/disable DND for all accounts.<br />
5. After making the change, press DONE and then Confirm (#) to save the change. Pressing<br />
Cancel (0) cancels the attempted change. The following screen displays after pressing a<br />
DONE key:<br />
Call Forward Account-Based Configuration<br />
Call Forward (CFWD) on the IP phone allows incoming calls to be forwarded to another<br />
destination.<br />
On the <strong>6753i</strong>, you can set Call Forward (CFWD) on the phone-side for a specific account or for<br />
all accounts on the phone. You can set three modes for CFWD using the <strong>Aastra</strong> Web UI at the<br />
path, Basic Settings->Preferences->General->Call Forward Key Mode:<br />
• Account (default)<br />
• Phone<br />
• Custom<br />
Apply Changes?<br />
0 Cancel<br />
# Confirm<br />
CFWD performs according to the mode you set.<br />
148 Model <strong>6753i</strong> IP Phone <strong>User</strong> Guide<br />
<strong>VoIPon</strong> www.voipon.co.uk sales@voipon.co.uk Tel: +44 (0)1245 808195 Fax: +44 (0)1245 808299
You can configure CFWD using the <strong>Aastra</strong> Web UI at the path,<br />
Basic Settings->Account Configuration, OR you can configure CFWD using the IP Phone UI at<br />
the path, Options->Call Forward.<br />
Using the <strong>Aastra</strong> Web UI at the path, Operation->Programmable Keys, you can also configure a<br />
CFWD key (on the phone or on an expansion module) to use as a shortcut for accessing the CFWD<br />
menu on the phone.<br />
The following describes the behavior for each CFWD mode.<br />
• Account - (default) The account mode allows you to configure CFWD on a per account basis.<br />
Pressing a configured CFWD key applies to the account in focus.<br />
• Phone - The Phone mode allows you to set the same CFWD configuration for all accounts<br />
(All, Busy, and/or No Answer). When you configure the initial account, the phone applies the<br />
configuration to all other accounts. (In the <strong>Aastra</strong> Web UI, only the account you configured is<br />
enabled. All other accounts are grayed out but set to the same configuration.) Using the <strong>Aastra</strong><br />
Web UI, if you make changes to that initial account, the changes apply to all accounts on the<br />
phone.<br />
• Custom - The Custom mode allows you to configure CFWD for a specific account or all<br />
accounts. You can configure a specific mode (All, Busy, and/or No Answer) for each account<br />
independently or all accounts. On the <strong>6753i</strong>, you can set all accounts to ALL On or ALL Off.<br />
Note: If there is only one account configured on the phone, then the mode<br />
setting is ignored and the phone behaves as if the mode was set to “Phone”.<br />
You can enable different CFWD rules/modes independently (for example, you can set different<br />
phone numbers for Busy, All, and NoAns modes and then turn them on/off individually).<br />
The following table describes the key and Message Waiting Indicator (MWI) LEDs when you<br />
enable CFWD on the IP Phone.<br />
Key LED Behavior<br />
for All Modes<br />
MWI LED Behavior<br />
for All Modes<br />
CFWD key LED RED if CFWD All,<br />
CFWD Busy, or CFWD No Answer<br />
is enabled for the account in focus.<br />
CFWD key LED OFF if any CFWD<br />
mode is disabled.<br />
MWI LED ON if current account in<br />
focus has CFWD ALL enabled.<br />
MWI LED OFF if CFWD All is<br />
disabled.<br />
Note: If you make changes to the configuration for CFWD via the IP Phone UI,<br />
you must refresh the <strong>Aastra</strong> Web UI screen to see the changes.<br />
Model <strong>6753i</strong> IP Phone <strong>User</strong> Guide 149<br />
<strong>VoIPon</strong> www.voipon.co.uk sales@voipon.co.uk Tel: +44 (0)1245 808195 Fax: +44 (0)1245 808299
Configuring CFWD Using the <strong>Aastra</strong> Web UI<br />
<strong>Aastra</strong> Web UI<br />
Use the following procedure to configure CFWD using the <strong>Aastra</strong> Web UI.<br />
1. Click on Basic Settings->Preferences->General<br />
2. In the “Call Forward Key Mode” field, select a call forward mode to use on the phone.<br />
Valid values are: Account, Phone, Custom. Default is Account.<br />
• Account - (default) The account mode allows you to configure CFWD on a per account<br />
basis. Pressing a configured CFWD key applies to the account in focus.<br />
• Phone - The Phone mode allows you to set the same CFWD configuration for all accounts<br />
(All, Busy, and/or No Answer). When you configure the initial account, the phone applies<br />
the configuration to all other accounts. (In the <strong>Aastra</strong> Web UI, only the account you<br />
configured is enabled. All other accounts are grayed out but set to the same configuration.)<br />
Using the <strong>Aastra</strong> Web UI, if you make changes to that initial account, the changes apply to<br />
all accounts on the phone.<br />
• Custom - The Custom mode allows you to configure CFWD for a specific account or all<br />
accounts. You can configure a specific state (All, Busy, and/or No Answer) for each account<br />
independently or all accounts. On the <strong>6753i</strong>, you can set all accounts to ALL On or ALL<br />
Off.<br />
Note: If there is only one account configured on the phone, then the mode<br />
setting is ignored and the phone behaves as if the mode was set to “Phone”.<br />
3. Click Save Settings.<br />
The changes takes affect immediately without a reboot.<br />
150 Model <strong>6753i</strong> IP Phone <strong>User</strong> Guide<br />
<strong>VoIPon</strong> www.voipon.co.uk sales@voipon.co.uk Tel: +44 (0)1245 808195 Fax: +44 (0)1245 808299
4. Click on Basic Settings->Account Configuration.<br />
The illustration above shows 3 accounts configured on the phone. Accounts must be set up by<br />
your System Administrator.<br />
5. For each account, enable the CFWD state by placing a check mark in one or more of the<br />
following “State” fields:<br />
• All<br />
• Busy<br />
• No Answer<br />
The “All” option forwards all incoming calls for this account to the specified phone number<br />
regardless of the state of the phone. The phone can be in the Busy or No Answer states, or can<br />
be in the idle state. The phone still forwards all calls to the specified number.<br />
The “Busy” option call forwards incoming calls only if the account is in the busy state. The<br />
calls are forwarded to the specified phone number.<br />
The “No Answer” option call forwards incoming calls only if the account rings but is not<br />
answered in the defined number of rings. The call gets forwarded to the specified number.<br />
Note: You can use the “Busy” and “No Answer” states together using different<br />
forwarding phone numbers. If these states are enabled for an account (the “All”<br />
state is disabled), and the phone is in the busy state when a call comes in, the<br />
phone can forward the call to the specified phone number (for example,<br />
voicemail). If there is no answer on the phone after the specified number of rings,<br />
the phone can forward the call to a different specified number, such as a cell<br />
phone number.<br />
6. For each account, in the “Number” field, enter the phone number for which you want the<br />
incoming calls to forward to if the phone is in the specified state.<br />
If using the “Account” mode or “Custom” mode, you can enter different phone numbers for<br />
each account.<br />
Model <strong>6753i</strong> IP Phone <strong>User</strong> Guide 151<br />
<strong>VoIPon</strong> www.voipon.co.uk sales@voipon.co.uk Tel: +44 (0)1245 808195 Fax: +44 (0)1245 808299
Notes:<br />
1. If you selected “Account” mode in step 2, you can enable/disable each<br />
account or all accounts as applicable. You can enter different phone number for<br />
each enabled state.<br />
If you selected “Custom” mode, you can enable/disable each account or all<br />
accounts as applicable. You can enter different phone numbers for each enabled<br />
state.<br />
If you selected “Phone” mode, all accounts are set to the same CFWD<br />
configuration (All, Busy, and/or No Answer) as Account 1 on the phone. (In the<br />
<strong>Aastra</strong> Web UI, only Account 1 is enabled. All other accounts are grayed out but<br />
use the same configuration as Account 1.)<br />
Using the <strong>Aastra</strong> Web UI, if you make changes to Account 1, the changes apply<br />
to all accounts on the phone. Using the IP Phone UI, if you make changes to any<br />
other account other then Account 1, the changes also apply to all accounts on the<br />
phone. When enabling a CFWD state, you must specify a phone number for the<br />
phone to CFWD to. The number you specify applies to all accounts of the same<br />
mode.<br />
2. Number and name of accounts that display to this screen are dependant on the<br />
number and name of accounts configured on the phone. In the screen in step 4,<br />
Screenname1 is configured on Line 1, Screenname2 is configured on Line 2, and<br />
Screenname3 is configured on Line 3. The name for the account is specified by<br />
your System Administrator. Contact your System Administrator for more<br />
information.<br />
7. For the "No Answer" state, in the “No. Rings” field, enter the number of times that the<br />
account rings before forwarding the call to the specified number. Valid values are 1 through<br />
20. Default is 1.<br />
When using the “Account” mode or “Custom” mode, you can enter a different number of<br />
rings for each account. If you use the <strong>Aastra</strong> Web UI to change the Call Forward Key Mode<br />
to “Phone”, all accounts synchronize to Account 1.<br />
8. (Optional) You can configure a Call Forward key on your phone to access the Call Forward<br />
menus if desired. You can also access the Call Forward menu from the IP Phone UI at the<br />
path, Options->Call Forward. To create a Call Forward key, see “Call Forward Key” on<br />
page 87.<br />
9. Click Save Settings.<br />
The changes takes affect immediately without a reboot.<br />
152 Model <strong>6753i</strong> IP Phone <strong>User</strong> Guide<br />
<strong>VoIPon</strong> www.voipon.co.uk sales@voipon.co.uk Tel: +44 (0)1245 808195 Fax: +44 (0)1245 808299
Using CFWD via the IP Phone UI<br />
Once CFWD is enabled on your phone, you can access and change the configuration using the IP<br />
Phone UI or the <strong>Aastra</strong> Web UI. You can access the CFWD menus by pressing a pre-configured<br />
Call Forward key, or by selecting Options->Call Forward from the IP Phone UI.<br />
The following procedure assumes you have already configured a CFWD key AND assumes there<br />
are three accounts configured on the phone.<br />
Notes:<br />
1. If there is no CFWD key configured on the phone or it is removed, you can<br />
still enable CFWD via the IP Phone UI at the path Options->Call Forward.<br />
2. If there is only one account configured on the phone, then the mode setting is<br />
ignored and the phone behaves as if the mode was set to “Phone”.<br />
3. Using the <strong>Aastra</strong> Web UI, if you change the CFWD key mode to “Phone”, all<br />
accounts synchronize to the current setting of Account 1.<br />
CFWD in Account Mode<br />
1. Use the RIGHT and LEFT arrow keys to scroll through each account.<br />
1 Screenname1<br />
2 Screenname2<br />
3 Screenname3<br />
CFWD All<br />
CFWD Busy<br />
Jan 1 12:96<br />
Jan 1 12:96<br />
Jan 1 12:96<br />
In the above example, Screenname1, Screenname2, and Screenname3, are three accounts<br />
configured on the phone. Screenname1 has “CFWD All” enabled, Screenname 2 has CFWD<br />
disabled as indicated by no message displayed, and Screenname3 has “CFWD Busy” enabled.<br />
2. Press the Call Forward key. The Call Forward Mode screen displays. Use the UP and<br />
DOWN arrow keys to scroll through each state type.<br />
Indicates<br />
CFWD Enabled<br />
Indicates<br />
no CFWD<br />
phone number<br />
configured<br />
Indicates<br />
CFWD Disabled<br />
Cfwd Mode<br />
1. All ̌<br />
Done<br />
Change<br />
Cfwd Mode<br />
2. Busy<br />
!<br />
Done<br />
Change<br />
Cfwd Mode<br />
3. NoAns<br />
X<br />
Done<br />
Change<br />
Cfwd Mode<br />
4. All Off<br />
Done<br />
Cfwd Mode<br />
5. All On<br />
Done<br />
Set<br />
Set<br />
In the above example, CFWD All is enabled as indicated by a check mark (), CFWD Busy<br />
is enabled but no call forward phone number configured as indicated by a !, and CFWD<br />
NoAns is disabled, as indicated by an X.<br />
Model <strong>6753i</strong> IP Phone <strong>User</strong> Guide 153<br />
<strong>VoIPon</strong> www.voipon.co.uk sales@voipon.co.uk Tel: +44 (0)1245 808195 Fax: +44 (0)1245 808299
3. Select a state for the account(s) in focus using the UP and DOWN arrow keys.<br />
You can enable/disable any or all of the following states for an account:<br />
• All - Enables CFWD All for an account and forwards all incoming calls for that account, to<br />
the specified number.<br />
• Busy - Enables CFWD Busy for an account and forwards incoming calls to a specified<br />
number if DND has been enabled for that account OR if the account is currently engaged in<br />
another call.<br />
• No Answer - Enables CFWD NoAns for an account and forwards incoming calls to a<br />
specified number if the call has not been answered for the specified number of rings.<br />
Note: If CFWD All AND CFWD Busy AND CFWD NoAns are all enabled<br />
(and/or if the account has DND enabled), the CFWD All settings take precedence<br />
over CFWD Busy and CFWD NoAns.<br />
You can also use the following keys if required:<br />
• All Off - Disables all CFWD states for the current account in focus.<br />
• All On - Enables all CFWD states for the current account in focus.<br />
4. Press the CHANGE key for the state you selected in step 3. Scroll to the CFWD State<br />
screen. This displays the current state of the mode you selected. In the following example,<br />
the CFWD All state is ON.<br />
CFWD State Screen<br />
1. Cfwd All<br />
Use to view<br />
1. Cfwd State<br />
On<br />
Done<br />
Change<br />
Change<br />
Cfwd State<br />
On<br />
Next<br />
Cfwd State<br />
Off<br />
Next<br />
̌<br />
Set<br />
Set<br />
5. Press the CHANGE key in the CFWD State screen. Press NEXT to toggle the state of the<br />
CFWD mode ON or OFF. In the example in Step 4, you press NEXT to change the option to<br />
OFF.<br />
6. Press SET to save the change.<br />
7. In the CFWD State screen, press the DOWN arrow key to scroll to the CFWD Number<br />
screen and press CHANGE.<br />
.<br />
Use<br />
1. Cfwd All<br />
to view<br />
CFWD Number Screen<br />
1. Cfwd State<br />
On<br />
Done<br />
Change<br />
2. Cfwd Number<br />
Done<br />
Change<br />
Change<br />
Cfwd Number<br />
__<br />
Cancel<br />
Set<br />
154 Model <strong>6753i</strong> IP Phone <strong>User</strong> Guide<br />
<strong>VoIPon</strong> www.voipon.co.uk sales@voipon.co.uk Tel: +44 (0)1245 808195 Fax: +44 (0)1245 808299
8. Enter a phone number to apply to the current state in focus. When the phone is in the state you<br />
specified, and a call comes into the phone, it forwards the call to the number you specify.<br />
9. Press SET to save the change.<br />
10. For the CFWD No Answer state, In the CFWD Number screen, press the DOWN arrow key<br />
to scroll to the CFWD No. Rings screen and press CHANGE.<br />
1. Cfwd NoAns<br />
Use to view<br />
1. Cfwd State<br />
On<br />
Done<br />
Change<br />
CFWD No. Rings Screen<br />
2. Cfwd Number<br />
Done<br />
Change<br />
3. No. Rings<br />
Done<br />
Change<br />
Change<br />
No. Rings<br />
1<br />
Next<br />
̌<br />
Set<br />
11. Press NEXT to select the number of rings to apply to the phone for call forwarding incoming<br />
calls. Valid values are 1 to 20. Default is 1.<br />
When the phone receives an incoming call, and call forward is configured on the phone, the<br />
phone rings the number of times you specify in the No. Rings screen, and then forwards the<br />
call if there is no answer.<br />
12. Press SET to save the change.<br />
13. Press DONE to save CFWD All Number, CFWD All State, CFWD Busy Number, CFWD<br />
Busy State, CFWD No Answer Number, CFWD No Answer State, CFWD No Answer Rings.<br />
Each time you press DONE, the following “Apply Changes” screen displays.<br />
Apply Changes?<br />
0 Cancel<br />
# Confirm<br />
14. Press # to confirm the change(s) each time the “Apply Changes” screen displays. All changes<br />
are saved to the phone.<br />
Model <strong>6753i</strong> IP Phone <strong>User</strong> Guide 155<br />
<strong>VoIPon</strong> www.voipon.co.uk sales@voipon.co.uk Tel: +44 (0)1245 808195 Fax: +44 (0)1245 808299
CFWD in Phone Mode<br />
1. Use the RIGHT and LEFT arrow keys to scroll through each account.<br />
1 Screenname1<br />
2 Screenname2<br />
3 Screenname3<br />
CFWD All<br />
CFWD All<br />
CFWD All<br />
Jan 1 12:96<br />
Jan 1 12:96<br />
Jan 1 12:96<br />
In the above example, Screenname1, Screenname2, and Screenname3, are three accounts<br />
configured on the phone. All three accounts have CFWD enabled as indicated by the<br />
“CFWD All” message.<br />
Note: In ”Phone” mode, when you change the call forward configuration for an<br />
account, the change applies to all accounts.<br />
2. Press the Call Forward key. The Call Forward menu displays. Use the UP and DOWN<br />
arrow keys to scroll through each state type.<br />
Indicates<br />
CFWD ALL<br />
enabled<br />
Indicates<br />
no CFWD<br />
phone number<br />
configured for<br />
Busy<br />
Cfwd Mode<br />
1. All ̌<br />
Done<br />
Change<br />
Cfwd Mode<br />
2. Busy<br />
!<br />
Done<br />
Change<br />
Cfwd Mode<br />
3. NoAns ̌<br />
Done<br />
Change<br />
Indicates<br />
CFWD NoAns<br />
enabled<br />
Cfwd Mode<br />
4. All Off<br />
Done<br />
Cfwd Mode<br />
5. All On<br />
Done<br />
Set<br />
Set<br />
In the above example, the account has CFWD All and CFWD NoAns enabled as indicated<br />
by a check mark (). The CFWD Busy setting is enabled but no call forward phone number<br />
is configured as indicated by a !.<br />
3. Select a state using the UP and DOWN arrow keys.<br />
You can enable/disable a specific account on the phone with any or all of the following<br />
states. However, the configuration you set will apply to all accounts on the phone.<br />
• All - Enables CFWD All on the phone and forwards all incoming calls to the specified<br />
number.<br />
• Busy - Enables CFWD Busy on the phone and forwards incoming calls to a specified<br />
number if DND has been enabled OR if the phone is currently engaged in another call.<br />
• No Answer - Enables CFWD NoAns on the phone and forwards incoming calls to a<br />
specified number if the call has not been answered for the specified number of rings.<br />
156 Model <strong>6753i</strong> IP Phone <strong>User</strong> Guide<br />
<strong>VoIPon</strong> www.voipon.co.uk sales@voipon.co.uk Tel: +44 (0)1245 808195 Fax: +44 (0)1245 808299
Note: If CFWD All AND CFWD Busy AND CFWD NoAns are all enabled<br />
(and/or if the account has DND enabled), the CFWD All settings take precedence<br />
over CFWD Busy and CFWD NoAns.<br />
You can also use the following keys if required:<br />
• All Off - Disables all CFWD states for the phone.<br />
• All On - Enables all CFWD states for the phone.<br />
Note: In “Phone” mode, the initial configuration you set for an account applies<br />
to all the accounts on the phone.<br />
4. Press the CHANGE key for the mode you selected in Step 2. Scroll to the CFWD State screen.<br />
This screen displays the current state of the mode you selected. In the following example, the<br />
CFWD All state is ON.<br />
CFWD State<br />
Screen<br />
1. Cfwd All<br />
Use to view<br />
1. Cfwd State<br />
On<br />
Done<br />
Change<br />
Change<br />
Cfwd State<br />
On<br />
Next<br />
Cfwd State<br />
Off<br />
Next<br />
̌<br />
Set<br />
Set<br />
5. Press the CHANGE key in the CFWD State screen. Press NEXT to toggle the state of the<br />
CFWD state ON or OFF. In the example in Step 4, you press NEXT to change the option to<br />
OFF.<br />
6. Press the SET key to save the change.<br />
7. In the CFWD State screen, press the DOWN arrow key to scroll to the CFWD Number screen<br />
and press CHANGE<br />
Use<br />
1. Cfwd All<br />
to view<br />
1. Cfwd State<br />
On<br />
Done<br />
Change<br />
CFWD Number<br />
Screen<br />
2. Cfwd Number<br />
Done<br />
Change<br />
Change<br />
Cfwd Number<br />
__<br />
Cancel<br />
Set<br />
8. Enter a phone number to apply to the current state in focus. When the phone is in the state you<br />
specified, and a call comes into the phone, it forwards the call to the number you specify.<br />
9. Press SET to save the change.<br />
Model <strong>6753i</strong> IP Phone <strong>User</strong> Guide 157<br />
<strong>VoIPon</strong> www.voipon.co.uk sales@voipon.co.uk Tel: +44 (0)1245 808195 Fax: +44 (0)1245 808299
10. For the CFWD No Answer state, in the CFWD Number screen, press the DOWN arrow<br />
key to scroll to the CFWD No. Rings screen and press CHANGE.<br />
1. Cfwd NoAns<br />
Use to view<br />
1. Cfwd State<br />
On<br />
Done<br />
Change<br />
2. Cfwd Number<br />
Done<br />
Change<br />
CFWD No.<br />
Rings Screen<br />
3. No. Rings<br />
Done<br />
Change<br />
Change<br />
No. Rings<br />
1<br />
Next<br />
̌<br />
Set<br />
11. Press the NEXT key to select the number of rings to apply to the phone for call forwarding<br />
incoming calls. Valid values are 1 to 20. Default is 1.<br />
When the phone receives an incoming call, and call forward is configured on the phone, the<br />
phone rings the number of times you specify in the No. Rings screen, and then forwards the<br />
call.<br />
12. Press SET to save the change.<br />
13. Press DONE to save CFWD All Number, CFWD All State, CFWD Busy Number, CFWD<br />
Busy State, CFWD No Answer Number, CFWD No Answer State, CFWD No Answer<br />
Rings.<br />
Each time you press DONE, the following “Apply Changes” screen displays.<br />
Apply Changes?<br />
0 Cancel<br />
# Confirm<br />
14. Press # to confirm the change(s) each time the “Apply Changes” screen displays.<br />
All the same changes are saved to all accounts on the phone.<br />
158 Model <strong>6753i</strong> IP Phone <strong>User</strong> Guide<br />
<strong>VoIPon</strong> www.voipon.co.uk sales@voipon.co.uk Tel: +44 (0)1245 808195 Fax: +44 (0)1245 808299
CFWD in Custom Mode<br />
1. Use the RIGHT and LEFT arrow keys to scroll through each account.<br />
1 Screenname1<br />
2 Screenname2<br />
3 Screenname3<br />
CFWD All<br />
CFWD Busy<br />
CFWD NoAns<br />
Jan 1 12:96<br />
Jan 1 12:96<br />
Jan 1 12:96<br />
In the above example, Screenname1, Screenname2, and Screenname3, are three accounts<br />
configured on the phone. All three accounts have CFWD enabled as indicated by the “CFWD<br />
All”, “CFWD Busy”, and “CFWD NoAns” messages.<br />
Press the Call Forward key. The CFWD Account screens display. Use the UP and DOWN arrow<br />
keys to scroll through each account.<br />
Call Forward<br />
1. Screenname1 ̌<br />
Done<br />
Change<br />
Indicates<br />
CFWD Enabled<br />
Call Forward<br />
2. Screenname2 X<br />
Done<br />
Change<br />
Indicates<br />
CFWD Disabled<br />
Call Forward<br />
3. Screenname3 !<br />
Done<br />
Change<br />
Indicates<br />
no CFWD phone<br />
number<br />
configured<br />
Call Forward<br />
4. All Off<br />
Done<br />
Call Forward<br />
5. All On<br />
Done<br />
Set<br />
Set<br />
In the above example, Screenname1 has one or more CFWD states enabled as indicated by a check<br />
mark (). Screenname2 has one or more CFWD states disabled as indicated by an X.<br />
Screenname3 has one or more CFWD states configured but a specific state has no call forward<br />
phone number configured as indicated by a !. Items 4 and 5 allow you to disable or enable CFWD<br />
on all accounts, respectively.<br />
Model <strong>6753i</strong> IP Phone <strong>User</strong> Guide 159<br />
<strong>VoIPon</strong> www.voipon.co.uk sales@voipon.co.uk Tel: +44 (0)1245 808195 Fax: +44 (0)1245 808299
2. Select an account to configure. Press the CHANGE key. The CFWD Mode screen displays.<br />
Use the UP and DOWN arrow keys to scroll through each state screen.<br />
Indicates<br />
CFWD All<br />
enabled<br />
Indicates<br />
no CFWD<br />
phone number<br />
configured for<br />
Busy<br />
Cfwd Mode<br />
1. All ̌<br />
Done<br />
Change<br />
Cfwd Mode<br />
2. Busy<br />
!<br />
Done<br />
Change<br />
Cfwd Mode<br />
3. NoAns ̌<br />
Done<br />
Change<br />
Indicates<br />
CFWD NoAns<br />
enabled<br />
Cfwd Mode<br />
4. All Off<br />
Done<br />
Cfwd Mode<br />
5. All On<br />
Done<br />
Set<br />
Set<br />
In the above example, the account has CFWD All and CFWD NoAns enabled as indicated by a<br />
check mark (). The CFWD Busy setting is enabled for the account but has no call forward<br />
phone number configured as indicated by a !.<br />
3. Select a state for the account(s) in focus using the UP and DOWN arrow keys.<br />
You can enable/disable any or all of the following states for a specific account or for all<br />
accounts (with individual configurations):<br />
• All - Enables CFWD All for an account and forwards all incoming calls for that account, to<br />
the specified number. The phone number can be different between accounts.<br />
• Busy - Enables CFWD Busy for an account and forwards incoming calls to a specified<br />
number if DND has been enabled for that account OR if that account is currently engaged in<br />
another call. The phone number can be different between accounts.<br />
• No Answer - Enables CFWD NoAns for an account and forwards incoming calls to a<br />
specified number if the call has not been answered for a specified number of rings. The<br />
phone number can be different between accounts.<br />
Note: If CFWD All AND CFWD Busy AND CFWD NoAns are all enabled<br />
(and/or if the account has DND enabled), the CFWD All settings take<br />
precedence over CFWD Busy and CFWD NoAns.<br />
You can also use the following keys if required:<br />
• All Off - Disables all CFWD states for the current account in focus or all accounts.<br />
• All On - Enables all CFWD states for the current account in focus or all accounts.<br />
160 Model <strong>6753i</strong> IP Phone <strong>User</strong> Guide<br />
<strong>VoIPon</strong> www.voipon.co.uk sales@voipon.co.uk Tel: +44 (0)1245 808195 Fax: +44 (0)1245 808299
4. Press the CHANGE key for the mode you selected in step 2. Scroll to the CFWD State screen.<br />
This displays the current state of the mode you selected. In the following example, the CFWD<br />
All state is ON.<br />
CFWD State<br />
Screen<br />
1. Cfwd All<br />
Use to view<br />
1. Cfwd State<br />
On<br />
Done<br />
Change<br />
Change<br />
Cfwd State<br />
On<br />
Next<br />
Cfwd State<br />
Off<br />
Next<br />
̌<br />
Set<br />
Set<br />
5. Press the CHANGE key in the CFWD State screen. Press NEXT to toggle the state of the<br />
CFWD state ON or OFF. In the example in Step 4, you press NEXT to change the option to<br />
OFF.<br />
6. Press the SET key to save the change.<br />
7. In the CFWD State screen, press the DOWN arrow key to scroll to the CFWD Number screen<br />
and press CHANGE.<br />
Use<br />
1. Cfwd All<br />
to view<br />
1. Cfwd State<br />
On<br />
Done<br />
Change<br />
CFWD Number<br />
Screen<br />
2. Cfwd Number<br />
Done<br />
Change<br />
Change<br />
Cfwd Number<br />
__<br />
Cancel<br />
Set<br />
8. Enter a phone number to apply to the current state in focus. When the phone is in the state you<br />
specified, and a call comes into the phone, it forwards the call to the number you specify.<br />
9. Press SET to save the change.<br />
Model <strong>6753i</strong> IP Phone <strong>User</strong> Guide 161<br />
<strong>VoIPon</strong> www.voipon.co.uk sales@voipon.co.uk Tel: +44 (0)1245 808195 Fax: +44 (0)1245 808299
10. For the CFWD No Answer state, in the CFWD Number screen, press the DOWN arrow<br />
key to scroll to the CFWD No. Rings screen and press CHANGE.<br />
1. Cfwd NoAns<br />
Use to view<br />
1. Cfwd State<br />
On<br />
Done<br />
Change<br />
2. Cfwd Number<br />
Done<br />
Change<br />
CFWD No.<br />
Rings Screen<br />
3. No. Rings<br />
Done<br />
Change<br />
Change<br />
No. Rings<br />
1<br />
Next<br />
̌<br />
Set<br />
11. Press the NEXT key to select the number of rings to apply to the phone for call forwarding<br />
incoming calls. Valid values are 1 to 20. Default is 1.<br />
When the phone receives an incoming call, and call forward is configured on the phone, the<br />
phone rings the number of times you specify in the No. Rings screen, and then forwards the<br />
call.<br />
12. Press SET to save the change.<br />
13. Press DONE to save CFWD All Number, CFWD All State, CFWD Busy Number, CFWD<br />
Busy State, CFWD No Answer Number, CFWD No Answer State, CFWD No Answer<br />
Rings.<br />
Each time you press DONE, the following “Apply Changes” screen displays.<br />
Apply Changes?<br />
0 Cancel<br />
# Confirm<br />
14. Press # to confirm the change(s) each time the “Apply Changes” screen displays.<br />
All changes are saved to the phone for all accounts.<br />
162 Model <strong>6753i</strong> IP Phone <strong>User</strong> Guide<br />
<strong>VoIPon</strong> www.voipon.co.uk sales@voipon.co.uk Tel: +44 (0)1245 808195 Fax: +44 (0)1245 808299
Missed Calls Indicator<br />
The IP phone has a "missed calls" indicator that increments the number of missed calls to the<br />
phone. This feature is accessible from the IP phone UI only.<br />
The number of calls that have not been answered increment on the phone’s idle screen as<br />
" New Calls". As the number of unanswered calls increment, the phone numbers<br />
associated with the calls are stored in the Callers List. The user can access the Callers List and<br />
clear the call from the list. Once the user accesses the Callers List, the " New Calls" on<br />
the idle screen is cleared.<br />
Accessing and Clearing Missed Calls.<br />
IP Phone UI<br />
Use the following procedure to access and clear missed calls from the Callers List. Once you<br />
display the Callers List, the " New Calls" indicator clears. Use the following illustration<br />
as a reference.<br />
Callers List<br />
Key<br />
1. .Press Callers List key on the phone.<br />
2. Use the 2 and 5 keys to scroll through the line items in the Callers List to find the line items<br />
that have the b icon with the receiver ON. These are the missed calls to the phone.<br />
3. To clear a line item from the Callers List, select the line item you want to delete and press the<br />
Clear key. The line item is deleted from the Callers List.<br />
Model <strong>6753i</strong> IP Phone <strong>User</strong> Guide 163<br />
<strong>VoIPon</strong> www.voipon.co.uk sales@voipon.co.uk Tel: +44 (0)1245 808195 Fax: +44 (0)1245 808299
Voicemail<br />
The Voicemail feature on the <strong>6753i</strong> IP phone allows you to use a line, configured with a phone<br />
number for dialing out, to connect to a voicemail server.<br />
For each assigned Voicemail number, there can be a minimum of 0 or a maximum of 1 Voicemail<br />
access phone number.<br />
The Voicemail list displays a list of phone numbers assigned to the <strong>6753i</strong> that have registered<br />
voicemail accounts associated with them.<br />
Note: The Voicemail list does not display the voicemail access number.<br />
The phone displays up to 99 voicemail messages for an account even if the number of<br />
voicemails exceeds the limit.<br />
Registered account numbers/URIs that exceed the length of the screen, either with or without the<br />
voicemail icon and the message count, are truncated with an ellipse character at the end of the<br />
number/URI string.<br />
The end of the Voicemail list displays the number of new voicemail messages (if any exist).<br />
Contact your System Administrator for lines configured for Voicemail.<br />
Using Voicemail<br />
IP Phone UI<br />
1. Press the key on the phone that your System Administrator set up to access voicemail. After<br />
pressing the key, the phone dials to access the voicemail server.<br />
2. Use the 2 and 5 keys to scroll through the line items in the Voicemail list.<br />
3. When you have selected a line item, press the handsfree key, 4 Scroll Right key, or<br />
press a line key to make an outgoing call using the voicemail access phone number<br />
associated with the line for which the voicemail account is registered.<br />
From a selected item in the Voicemail list, you can also lift the handset (go offhook) to make<br />
an outgoing call using the voicemail access phone number.<br />
164 Model <strong>6753i</strong> IP Phone <strong>User</strong> Guide<br />
<strong>VoIPon</strong> www.voipon.co.uk sales@voipon.co.uk Tel: +44 (0)1245 808195 Fax: +44 (0)1245 808299
Additional Features<br />
This section describes additional features you can use on the <strong>6753i</strong> phone.<br />
Star Codes<br />
All of the main call handling and extension management features using star codes can be set on<br />
your phone by your Administrator. Contact your System Administrator for more information.<br />
If these have not been set up, you can dial any star code commands on the 55i phone the same way<br />
you would on a regular telephone.<br />
Model <strong>6753i</strong> IP Phone <strong>User</strong> Guide 165<br />
<strong>VoIPon</strong> www.voipon.co.uk sales@voipon.co.uk Tel: +44 (0)1245 808195 Fax: +44 (0)1245 808299
Suppress DTMF Playback<br />
A feature on the IP phones allows you to enable or disable the suppression of DTMF playback<br />
when a number is dialed from the keys on your phone.<br />
When suppression of DTMF playback is disabled, and you press a key, the IP phone dials the<br />
stored number and displays each digit as dialed, in the LCD window.<br />
When the suppression of DTMF playback is enabled, the IP phone dials the stored number and<br />
displays the entire number immediately in the LCD window, allowing the call to be dialed faster.<br />
DTMF playback suppression is enabled by default. Disabling suppression of DTMF playback<br />
can be configured using the <strong>Aastra</strong> Web UI.<br />
Configuring Suppression of DTMF Playback<br />
<strong>Aastra</strong> Web UI<br />
Use the following procedure to configure suppression of DTMF playback.<br />
Note: "Suppress DTMF Playback" is enabled by default.<br />
1. Click on Basic Settings->Preferences->General.<br />
2. Go to the "General" section.<br />
3. The parameter “Suppress DTMF Playback” is enabled by default. (Disable this field by<br />
unchecking the box). Default is enabled.<br />
4. Click Save Settings.<br />
166 Model <strong>6753i</strong> IP Phone <strong>User</strong> Guide<br />
<strong>VoIPon</strong> www.voipon.co.uk sales@voipon.co.uk Tel: +44 (0)1245 808195 Fax: +44 (0)1245 808299
Display DTMF Digits<br />
A feature on the IP phones allows users to enable or disable DTMF (dual-tone multi-frequency)<br />
digits to display to the IP phone when using the keypad to dial, or when dialing from a<br />
programmed key.<br />
DTMF is the signal sent from the phone to the network that you generate when you press the<br />
phone’s touch keys. This is also known as “touchtone” dialing. Each key you press on your phone<br />
generates two tones of specific frequencies. One tone is generated from a high-frequency group of<br />
tones and the other from a low frequency group.<br />
If you enable the Display DTMF Digits parameter, the digits you are dialing from the keypad or or<br />
from a programmable key display to the IP phone’s LCD display. This parameter is disabled by<br />
default (no digits display when dialing).<br />
You can enable the "Display DTMF Digits" parameter using the <strong>Aastra</strong> Web UI.<br />
Model <strong>6753i</strong> IP Phone <strong>User</strong> Guide 167<br />
<strong>VoIPon</strong> www.voipon.co.uk sales@voipon.co.uk Tel: +44 (0)1245 808195 Fax: +44 (0)1245 808299
Configuring Display of DTMF Digits<br />
<strong>Aastra</strong> Web UI<br />
Use the following procedure to configure the display of DTMF digits on the IP phone.<br />
Note: "Display DTMF Digits" is disabled by default.<br />
1. Click on Basic Settings->Preferences->General.<br />
2. Enable the "Display DTMF Digits" field by checking the check box.<br />
Disable this field by unchecking the box). Default is disabled.<br />
3. Click Save Settings.<br />
168 Model <strong>6753i</strong> IP Phone <strong>User</strong> Guide<br />
<strong>VoIPon</strong> www.voipon.co.uk sales@voipon.co.uk Tel: +44 (0)1245 808195 Fax: +44 (0)1245 808299
Call Waiting Tone Period<br />
You can specify a specific time period (in seconds) for the call waiting tone to play at regular<br />
intervals on an active call using the parameter “Call Waiting Tone Period”. A value of “0” is the<br />
default and plays the call waiting tone only once on the active call. When the incoming caller<br />
hangs up, the call waiting tone stops on the existing active call.<br />
You can enable or disable this feature in the <strong>Aastra</strong> Web UI.<br />
Configuring Call Waiting Tone<br />
Use the following procedure to configure “Call Waiting Tone Period”..<br />
<strong>Aastra</strong> Web UI<br />
1. Click on Basic Settings->Preferences->General<br />
2. In the "Call Waiting Tone Period" field, enter a time period, in seconds, that the call waiting<br />
tone will be audible on an active call when another call comes in. Default is 0 seconds.<br />
3. When enabled, the call waiting tone plays at regular intervals for the amount of time set for<br />
this parameter. For example, if set to “30” the call waiting tone plays every 30 seconds. When<br />
set to “0”, the call waiting tone is audible only once on the active call.<br />
4. Click Save Settings.<br />
Model <strong>6753i</strong> IP Phone <strong>User</strong> Guide 169<br />
<strong>VoIPon</strong> www.voipon.co.uk sales@voipon.co.uk Tel: +44 (0)1245 808195 Fax: +44 (0)1245 808299
Stuttered Dial Tone<br />
You can enable or disable the playing of a stuttered dial tone when there is a message waiting on<br />
the IP phone.<br />
You can configure this feature using the <strong>Aastra</strong> Web UI.<br />
Configuring Stuttered Dial Tone<br />
<strong>Aastra</strong> Web UI<br />
Use the following procedures to configure stuttered dial tone on the IP phone.<br />
Note: "Stuttered Dial Tone" is enabled by default.<br />
1. Click on Basic Settings->Preferences->General.<br />
2. Stuttered dial tone is enabled by default. If required, disable the "Stuttered Dial Tone" field<br />
by unchecking the check box.<br />
3. Click Save Settings.<br />
170 Model <strong>6753i</strong> IP Phone <strong>User</strong> Guide<br />
<strong>VoIPon</strong> www.voipon.co.uk sales@voipon.co.uk Tel: +44 (0)1245 808195 Fax: +44 (0)1245 808299
XML Beep Support<br />
Using the <strong>Aastra</strong> Web UI, you can enable or disable a beep to be audible when the phone receives<br />
an XML application using the "XML Beep Support" field at the path Basic<br />
Settings->Preferences->General. If you disable this feature, then no beep is heard when the XML<br />
application arrives to the phone.<br />
If your System Administrator has set a value for this feature in a custom XML application or in the<br />
configuration files, the value you set in the <strong>Aastra</strong> Web UI overrides the Administrator’s setting.<br />
Setting and saving the value in the <strong>Aastra</strong> Web UI applies to the phone immediately.<br />
Configuring XML Beep Support<br />
<strong>Aastra</strong> Web UI<br />
Use the following procedures to configure an XML beep on the IP phone.<br />
Note: "XML Beep Support" is enabled by default.<br />
1. Click on Basic Settings->Preferences->General.<br />
2. "XML Beep Support" is enabled by default. If required, disable the "XML Beep Support"<br />
field by unchecking the check box.<br />
3. Click Save Settings.<br />
Model <strong>6753i</strong> IP Phone <strong>User</strong> Guide 171<br />
<strong>VoIPon</strong> www.voipon.co.uk sales@voipon.co.uk Tel: +44 (0)1245 808195 Fax: +44 (0)1245 808299
Call Hold Reminder During Active Calls<br />
The IP phones allow you to enable or disable the ability for the phone to initiate a continuous<br />
reminder tone on the active call when another call is on hold. For example, when this feature is<br />
enabled, and the call on Line 1 is on hold, and then the you answer a call on Line 2 and stay on<br />
that line, a reminder tone is played in the active audio path on Line 2 to remind you that there is<br />
still a call on hold on Line 1.<br />
When this feature is disabled, a ring splash is heard when the active call hangs up and there is<br />
still a call on hold.<br />
You can enable or disable this feature using the “Call Hold Reminder During Active Calls” in<br />
the <strong>Aastra</strong> Web UI.<br />
Configuring “Call Hold Reminder During Active Calls”<br />
Use the following procedure to configure “Call Hold Reminder During Active Calls” on the IP<br />
phone.<br />
Note: "Call Hold Reminder During Active Calls" is disabled by default.<br />
<strong>Aastra</strong> Web UI<br />
1. Click on Basic Settings->Preferences->General<br />
172 Model <strong>6753i</strong> IP Phone <strong>User</strong> Guide<br />
<strong>VoIPon</strong> www.voipon.co.uk sales@voipon.co.uk Tel: +44 (0)1245 808195 Fax: +44 (0)1245 808299
2. The “Call Hold Reminder During Active Calls” field is disabled by default. To enabled this<br />
field, check the box.<br />
When this feature is enabled, a reminder tone is heard on the active call when another call is on<br />
hold. When disabled, a ring splash is heard when the active call hangs up and there is still a<br />
call on hold.<br />
3. Click Save Settings<br />
Model <strong>6753i</strong> IP Phone <strong>User</strong> Guide 173<br />
<strong>VoIPon</strong> www.voipon.co.uk sales@voipon.co.uk Tel: +44 (0)1245 808195 Fax: +44 (0)1245 808299
Call Hold Reminder (on single hold)<br />
In previous releases, the call hold reminder ring splash was triggered when you hung up a call<br />
and there was at least one other call on hold. The reminder ring splash timer started only when<br />
the active call hung up and there was still another call on hold.<br />
On the IP phones, you can enable or disable a feature that would start the reminder ring splash<br />
timer as soon as you put a call on hold (even when no other calls are active on the phone). When<br />
enabled, the phone initiates a reminder ring splash periodically for the single call on hold. When<br />
disabled, no reminder ring splash is audible.<br />
You can enable or disable this feature using the “Call Hold Reminder” parameter in the <strong>Aastra</strong><br />
Web UI.<br />
Configuring “Call Hold Reminder”<br />
Use the following procedure to configure “Call Hold Reminder” on the IP phone.<br />
Note: "Call Hold Reminder" is disabled by default.<br />
<strong>Aastra</strong> Web UI<br />
1. Click on Basic Settings->Preferences->General<br />
174 Model <strong>6753i</strong> IP Phone <strong>User</strong> Guide<br />
<strong>VoIPon</strong> www.voipon.co.uk sales@voipon.co.uk Tel: +44 (0)1245 808195 Fax: +44 (0)1245 808299
2. The “Call Hold Reminder” field is disabled by default. To enabled this field, check the box.<br />
When this feature is enabled, the reminder ring splash timer starts as soon as you put a call on<br />
hold (even when no other calls are active on the phone).The phone initiates a reminder ring<br />
splash periodically for the single call on hold. When disabled, no reminder ring splash is<br />
audible.<br />
3. Click Save Settings.<br />
Model <strong>6753i</strong> IP Phone <strong>User</strong> Guide 175<br />
<strong>VoIPon</strong> www.voipon.co.uk sales@voipon.co.uk Tel: +44 (0)1245 808195 Fax: +44 (0)1245 808299
Status Scroll Delay<br />
Using the <strong>Aastra</strong> Web UI, you can specify a scroll delay option that allows you to set the time<br />
delay, in seconds, between the scrolling of each status message on the phone. You can specify<br />
this setting in the "Status Scroll Delay (seconds)" field at the path Basic<br />
Settings->Preferences->General. The default time is 5 seconds for each message to display<br />
before scrolling to the next message. You can increase or decrease this time as required. Setting<br />
and saving the value in the <strong>Aastra</strong> Web UI applies to the phone immediately.<br />
Configuring Status Scroll Delay<br />
<strong>Aastra</strong> Web UI<br />
Use the following procedures to specify a status scroll delay on the IP phone.<br />
1. Click on Basic Settings->Preferences->General.<br />
2. Enter a value in the "Status Scroll Delay (seconds)" field. Valid values are: 1 to 25 seconds.<br />
Default is 5.<br />
3. Click Save Settings.<br />
176 Model <strong>6753i</strong> IP Phone <strong>User</strong> Guide<br />
<strong>VoIPon</strong> www.voipon.co.uk sales@voipon.co.uk Tel: +44 (0)1245 808195 Fax: +44 (0)1245 808299
Incoming Call Interrupts Dialing<br />
The <strong>6753i</strong> has a feature you can enable or disable called "Incoming Call Interrupts Dialing".<br />
This feature is disabled by default. If you are dialing out on your phone, and you receive an<br />
incoming call at the same time, the incoming call goes to an available line and the LED blinks to<br />
let you know where the call was placed by the phone. If there is no line available to take the call, a<br />
busy signal is sent to the caller. The LCD continues to display the number you were dialing.<br />
If “Incoming Call Interrupts Dialing” is enabled, the incoming call interrupts your dialing<br />
sequence and displays to the phone’s LCD for you to answer. You have a choice to ignore the<br />
incoming call. If you choose to answer the incoming call, you can answer the call, finish the call,<br />
and then hang up. You can still go back to the original outgoing call and finish dialing out.<br />
You can enable or disable this parameter in the <strong>Aastra</strong> Web UI at the path Basic<br />
Settings->Preferences->General.<br />
Notes:<br />
1. On a <strong>6753i</strong>, you must use the down arrow key to ignore the call. To answer<br />
the call, lift the handset or press the Speaker Key.<br />
2. If you disable this field, and the phone receives an incoming call while you<br />
are dialing an outgoing call, you can pick up the call and perform transfer or<br />
conference as required.<br />
Transfer/Conference Call Behavior<br />
If you are dialing the phone to transfer or conference a call, and your phone receives an incoming<br />
call, your dialing is never interrupted (regardless of whether the “Incoming Call Interrupts<br />
Dialing” is enabled or disabled). For Transfer and Conference, the incoming calls always go to an<br />
available line (other than the one you are using for dialing) and the incoming call’s line LED<br />
blinks. The LCD still displays your dialing screen.<br />
Intercom Behavior<br />
If “Incoming Call Interrupts Dialing” is enabled and you are dialing an outgoing Intercom call,<br />
the enabled interrupt setting takes precedence over an enabled “Allow Barge In” setting. The<br />
incoming call interrupts your dialing on an outgoing intercom call. On an incoming intercom call,<br />
the enabled “Allow Barge In” and “Auto-Answer” occurs while you are dialing to transfer or<br />
conference the call. However, the incoming call goes to an available idle line, and the LED blinks<br />
while you are dialing the second half of the conference or transfer.<br />
If “Incoming Call Interrupts Dialing” is disabled, an incoming intercom goes to an available idle<br />
line and the LED blinks for that line. The phone answers the call under all conditions.<br />
Model <strong>6753i</strong> IP Phone <strong>User</strong> Guide 177<br />
<strong>VoIPon</strong> www.voipon.co.uk sales@voipon.co.uk Tel: +44 (0)1245 808195 Fax: +44 (0)1245 808299
Configuring "Incoming Call Interrupts Dialing"<br />
<strong>Aastra</strong> Web UI<br />
Use the following procedures to configure "Incoming Call Interrupts Dialing" on the IP Phone.<br />
Note: "Incoming Call Interrupts Dialing" is disabled by default.<br />
1. Click on Basic Settings->Preferences->General.<br />
2. Enable the "Incoming Call Interrupts Dialing" field by checking the check box. Disable<br />
this field by unchecking the box). Default is disabled.<br />
3. Click Save Settings.<br />
178 Model <strong>6753i</strong> IP Phone <strong>User</strong> Guide<br />
<strong>VoIPon</strong> www.voipon.co.uk sales@voipon.co.uk Tel: +44 (0)1245 808195 Fax: +44 (0)1245 808299
Switch UI Focus to Ringing Line<br />
You can configure a feature on the <strong>6753i</strong> that controls the behavior of the phone when it receives<br />
an incoming call when it is already in a connected call. When a call comes into the phone, and the<br />
phone is already on a connected call, the phone switches focus to the ringing line to enable the user<br />
to see who is calling them. You can turn off this functionality so that the phone stays focused on<br />
the connected call. You can do this using the Switch Focus to Ringing Line parameter in the <strong>Aastra</strong><br />
Web UI.<br />
Configuring “Switch Focus to Ringing Line” Using the <strong>Aastra</strong> Web UI<br />
<strong>Aastra</strong> Web UI<br />
Use the following procedure to enable or disable the “Switch Focus to Ringing Line” using the<br />
<strong>Aastra</strong> Web UI.<br />
1. Click on Basic Settings->Preferences->General.<br />
2. The “Switch Focus to Ringing Line” field is enabled by default. To disable this field,<br />
uncheck the box.<br />
3. Click Save Settings.<br />
Model <strong>6753i</strong> IP Phone <strong>User</strong> Guide 179<br />
<strong>VoIPon</strong> www.voipon.co.uk sales@voipon.co.uk Tel: +44 (0)1245 808195 Fax: +44 (0)1245 808299
Preferred Line and Preferred Line Timeout<br />
The <strong>6753i</strong> has a feature called “preferred line” and “preferred line timeout”. If you enable the<br />
preferred line parameter on your phone, after a call ends (incoming or outgoing), the display<br />
switches back to the preferred line. Next time you go off-hook to make another call, you pickup<br />
on the preferred line. You can enable the preferred line parameter using the <strong>Aastra</strong> Web UI at<br />
the location, Basic Settings->Preferences->General. You can also set a preferred timeout<br />
parameter that specifies the number of seconds it takes for the phone to switch back to the<br />
preferred line.<br />
Note: You can configure “Preferred Line” and “Preferred Line Timeout” using<br />
the <strong>Aastra</strong> Web UI only.<br />
The following table provides the behavior of the preferred line focus feature with other features<br />
on the phone.<br />
Phone Feature<br />
call return<br />
speed dial<br />
conference<br />
transfer<br />
blf<br />
park<br />
voicemail<br />
redial<br />
dialing<br />
caller id<br />
factory default<br />
Preferred Line Behavior<br />
The phone switches back to the focused line immediately after<br />
the call ends.<br />
The line is already specified when the speed dial is created. The<br />
phone switches back immediately after the call ends.<br />
For incoming calls, the phone switches back immediately after<br />
the call ends.<br />
For incoming or outgoing calls, the current behavior is that the<br />
same line used to transfer the call does not change. For incoming<br />
calls, the phone switches back immediately after the call<br />
transfers.<br />
The phone switches back immediately after the call ends.<br />
The phone switches back immediately after the call ends.<br />
The phone switches back immediately after the call ends.<br />
The phone switches back immediately after the call ends.<br />
For incomplete dialing on a non-preferred line, the focus does not<br />
change if some digits are entered.<br />
If no digits are entered or digits were cleared, the focus changes<br />
to preferred line after the time out has passed without activities.<br />
If the "Switch UI Focus To Ringing Line" parameter is disabled,<br />
the <strong>User</strong> is able to see the Caller ID when the phone switches the<br />
focus to the ringing line.<br />
Factory default and recovery mode clears the "preferred line" and<br />
"preferred line timeout" parameters, and the phone operates in a<br />
non-preferred line mode.<br />
180 Model <strong>6753i</strong> IP Phone <strong>User</strong> Guide<br />
<strong>VoIPon</strong> www.voipon.co.uk sales@voipon.co.uk Tel: +44 (0)1245 808195 Fax: +44 (0)1245 808299
Notes:<br />
1. If you specify a value of “0” for the preferred line parameter, it<br />
disables the preferred line focus feature.<br />
2. If you specify a value of “0” for the preferred line timeout<br />
parameter, the phone returns the line to the preferred line immediately.<br />
Configuring “Preferred Line” and “Preferred Line Timeout”<br />
Using the <strong>Aastra</strong> Web UI<br />
<strong>Aastra</strong> Web UI<br />
Use the following procedure to configure the Preferred Line and Preferred Line Timeout feature<br />
using the <strong>Aastra</strong> Web UI.<br />
1. Click on Basic Settings->Preferences->General.<br />
2. In the “Preferred Line” field, select a preferred line to switch focus to after incoming or<br />
outgoing calls end on the phone. Default is 1. Valid values are:<br />
• None (disables the preferred line focus feature)<br />
• 1 to 9<br />
For example, if you set the preferred line to “1”, when a call (incoming or outgoing) ends on<br />
the phone (on any line), the phone switches focus back to Line 1.<br />
3. In the “Preferred Line Timeout” field, enter the amount of time, in seconds, that the phone<br />
switches back to the preferred line after a call (incoming or outgoing) ends on the phone, or<br />
after a duration of inactivity on an active line. Default is 0. Valid values are:<br />
• 0 to 999<br />
4. Click Save Settings.<br />
Model <strong>6753i</strong> IP Phone <strong>User</strong> Guide 181<br />
<strong>VoIPon</strong> www.voipon.co.uk sales@voipon.co.uk Tel: +44 (0)1245 808195 Fax: +44 (0)1245 808299
Goodbye Key Cancels Incoming Calls<br />
The <strong>6753i</strong> has a feature that allows you to configure the Goodbye key to drop a second<br />
incoming call or ignore incoming calls presented to the phone when you are on an active call.<br />
The parameter is called "Goodbye Key Cancels Incoming Call" and is configurable via the<br />
<strong>Aastra</strong> Web UI.<br />
If you enable this parameter, which is the default, pressing the Goodbye key rejects calls coming<br />
into the phone while you are on an active call. When you disable this parameter, pressing the<br />
Goodbye key hangs up the active call.<br />
If you disable this feature, and the phone receives another call when an active call is already<br />
present, the <strong>6753i</strong> displays "3 Ignore Answer 4" on the LCD. For the <strong>6753i</strong>, you must use the<br />
Right and Left arrow keys to answer or ignore the call.<br />
A <strong>User</strong> can set this parameter using only the <strong>Aastra</strong> Web UI.<br />
Configuring Goodbye Key to Cancel Incoming Calls<br />
<strong>Aastra</strong> Web UI<br />
Use the following procedure to configure the Goodbye key to cancel incoming calls on the IP<br />
Phone.<br />
Note: "Goodbye Key Cancels Incoming Call" is enabled by default.<br />
1. Click on Basic Settings->Preferences->General.<br />
2. The "Goodbye Key Cancels Incoming Call" field is enabled by default. If required, disable<br />
this field by unchecking the check box.<br />
182 Model <strong>6753i</strong> IP Phone <strong>User</strong> Guide<br />
<strong>VoIPon</strong> www.voipon.co.uk sales@voipon.co.uk Tel: +44 (0)1245 808195 Fax: +44 (0)1245 808299
3. Click Save Settings.<br />
Using the Goodbye Key to Cancel Incoming Calls Feature<br />
IP Phone UI<br />
IF<br />
"Goodbye Key Cancels Incoming Call" is<br />
enabled AND a second call comes in while<br />
you are on an active call,<br />
"Goodbye Key Cancels Incoming Call" is<br />
disabled AND a second call comes in while<br />
you are on an active call,<br />
"Goodbye Key Cancels Incoming Call" is<br />
disabled AND a second call comes in while<br />
you are on an active call,<br />
THEN<br />
press the Goodbye key to reject the second<br />
incoming call.<br />
press the Goodbye key to hang up on the<br />
active call so you can answer the second<br />
incoming call.<br />
press the Left Arrow 3 key to ignore the<br />
second incoming call and remain on the active<br />
call<br />
OR<br />
press the Right Arrow 4 key to answer the<br />
second incoming call.<br />
Message Waiting Indicator<br />
You can configure the Message Waiting Indicator (MWI) to illuminate for a specific line or for all<br />
lines. For example, if you configure the MWI LED on line 3 only, the LED illuminates if a voice<br />
mail is pending on line 3. If you configure the MWI LED for all lines, the LED illuminates if a<br />
voice mail is pending on any line on the phone (lines 1 through 9).<br />
You configure the MWI indicator using the <strong>Aastra</strong> Web UI.<br />
Configuring Message Waiting Indicator<br />
<strong>Aastra</strong> Web UI<br />
Use the following procedure to configure the message waiting indicator on a specific line or on all<br />
lines on the IP phone.<br />
Note: "Message Waiting Indicator Line" parameter is set to ALL lines by<br />
default.<br />
Model <strong>6753i</strong> IP Phone <strong>User</strong> Guide 183<br />
<strong>VoIPon</strong> www.voipon.co.uk sales@voipon.co.uk Tel: +44 (0)1245 808195 Fax: +44 (0)1245 808299
1. Click on Basic Settings->Preferences->General.<br />
2. The "Message Waiting Indicator Line" field is set to ALL lines by default. If required,<br />
change the setting to a specific line by selecting a line from the list. Valid values are All and<br />
lines 1 through 9.<br />
3. Click Save Settings.<br />
Incoming Intercom Call Features<br />
Incoming Intercom<br />
By default, the IP phone allows incoming intercom calls to be automatically answered without<br />
having to set up an Icom key on your phone. The phone automatically plays a warning tone<br />
when it receives an incoming intercom call. It also mutes the microphone. If the intercom call<br />
comes into the phone while an active call is already present, the phone puts the active call on<br />
hold and answers the intercom call.<br />
184 Model <strong>6753i</strong> IP Phone <strong>User</strong> Guide<br />
<strong>VoIPon</strong> www.voipon.co.uk sales@voipon.co.uk Tel: +44 (0)1245 808195 Fax: +44 (0)1245 808299
You can change the behavior of how the phone handles incoming intercom calls by enabling/<br />
disabling specific parameters using the <strong>Aastra</strong> Web UI. The following table describes these<br />
features.<br />
Incoming Intercom Features in<br />
<strong>Aastra</strong> Web UI<br />
Microphone Mute<br />
Auto Answer<br />
Play Warning Tone<br />
Allow Barge In<br />
Description<br />
Allows you to enable or disable the microphone on the IP<br />
phone for Intercom calls made by the originating caller.<br />
Allows you to enable or disable the IP phone to automatically<br />
answer an Intercom call. If auto-answer is enabled on the IP<br />
phone, the phone plays a tone (if "Play Warning Tone" is<br />
enabled) to alert the user before answering the intercom call. If<br />
auto-answer is disabled, the phone rejects the incoming<br />
intercom call and sends a busy signal to the caller.<br />
Note: Your Administrator can set a time period delay before<br />
the phone automatically answers. Contact your System<br />
Administrator for more information.<br />
Allows you to enable or disable a warning tone to play when<br />
the phone receives an incoming intercom call on an active line.<br />
Allows you to enable or disable how the phone handles<br />
incoming intercom calls while the phone is on an active call.<br />
Microphone Mute<br />
You can mute or unmute the microphone on the IP phone for intercom calls made by the<br />
originating caller. If you want to mute the intercom call, you enable this feature. If you want to<br />
unmute (or hear the intercom call), you disable this feature. "Microphone Mute" is enabled by<br />
default.<br />
Model <strong>6753i</strong> IP Phone <strong>User</strong> Guide 185<br />
<strong>VoIPon</strong> www.voipon.co.uk sales@voipon.co.uk Tel: +44 (0)1245 808195 Fax: +44 (0)1245 808299
Auto-Answer/Play Warning Tone<br />
The auto-answer feature on the IP phone allows you to enable or disable automatic answering<br />
for an Intercom call. If “Auto-Answer” is enabled, the phone automatically answers an incoming<br />
intercom call. If “Play Warning Tone” is also enabled, the phone plays a tone to alert you before<br />
answering the intercom call. If “Auto-Answer” is disabled, the phone rejects the incoming<br />
intercom call and sends a busy signal to the caller."Auto-Answer" and "Play Warning Tone"<br />
are enabled by default.<br />
Note: Your Administrator can set a time period delay before the phone<br />
automatically answers. Contact your System Administrator for more information.<br />
Allow Barge In<br />
You can configure whether or not the IP phone allows an incoming intercom call to interrupt an<br />
active call. The “Allow Barge In” parameter controls this feature. When you enable the this<br />
parameter, which is the default value, an incoming intercom call takes precedence over any<br />
active call, by placing the active call on hold and automatically answering the intercom call.<br />
When you disable this parameter, and there is an active call, the phone treats an incoming<br />
intercom call like a normal call and plays the call warning tone. "Allow Barge In" is enabled by<br />
default.<br />
Configuring Incoming Intercom Settings<br />
<strong>Aastra</strong> Web UI<br />
Use the following procedure to configure incoming Intercom settings on the IP phone.<br />
1. Click on Basic Settings->Preferences->Incoming Intercom Settings.<br />
2. The "Auto-Answer" field is enabled by default. The automatic answering feature is turned<br />
on for the IP phone for answering Intercom calls. To disable this field, uncheck the box.<br />
Note: If the Auto-Answer field is not checked (disabled), the phone rejects the<br />
incoming intercom call and sends a busy signal to the caller.<br />
3. The "Microphone Mute" field is enabled by default. The microphone is muted on the IP<br />
phone for Intercom calls made by the originating caller. To disable this field, uncheck the<br />
box.<br />
186 Model <strong>6753i</strong> IP Phone <strong>User</strong> Guide<br />
<strong>VoIPon</strong> www.voipon.co.uk sales@voipon.co.uk Tel: +44 (0)1245 808195 Fax: +44 (0)1245 808299
4. The "Play Warning Tone" field is enabled by default. If “Auto-Answer” is enabled, the phone<br />
plays a warning tone when it receives in incoming intercom call. To disable this field, uncheck<br />
the box.<br />
5. The "Allow Barge In" field is enabled by default. If “Allow Barge In” is enabled, the phone<br />
puts an active call on hold and answers the incoming Intercom call. To disable this field,<br />
uncheck the box.<br />
6. Click Save Settings.<br />
Using Redial Key for “Last Number Redial”<br />
The IP phone has an enhanced redial user interface that allows a user to quickly redial the last<br />
number that was dialed out from the phone. You can:<br />
• Press the REDIAL button twice to redial the last number dialed.<br />
• Press the REDIAL button once, scroll the list of numbers, then press the REDIAL button again<br />
to dial the number that displays on the screen.<br />
The “last number redial” feature for the Redial key is static and is not configurable.<br />
Model <strong>6753i</strong> IP Phone <strong>User</strong> Guide 187<br />
<strong>VoIPon</strong> www.voipon.co.uk sales@voipon.co.uk Tel: +44 (0)1245 808195 Fax: +44 (0)1245 808299
Group RTP Paging (receives RTP streams)<br />
You can configure the phone to allow it to receive a Real Time Transport Protocol (RTP) stream<br />
from pre-configured multicast address(es) without involving SIP signaling. This is called Group<br />
Paging on the IP phones. You can specify up to 5 multicast addresses that the phone listens for<br />
on the network. This feature is configurable using the <strong>Aastra</strong> Web UI only.<br />
The <strong>6753i</strong> in the local network listens for RTP on the preconfigured multicast address. The<br />
Phone displays the “Paging” message to the phone’s LCD. It uses the G711 uLaw CODEC for<br />
multicast RTP.<br />
The recipient can drop the incoming page if required. The recipient can also set Do Not Disturb<br />
(DND) to ignore any incoming pages.<br />
For incoming RTP multicasts, the ringing display is dependant on the setting for the “Allow<br />
Barge-In” parameter. (See “Allow Barge In” on page 186.) If this parameter is disabled, and<br />
there is no other call on the phone, then the paging is automatically played via the default audio<br />
device.<br />
If there is an existing call on the phone, the call initially displays in the ringing state. The user<br />
has the option to accept/ignore the call. If the “Allow Barge-In” parameter is enabled, the RTP<br />
multicast call barges in, and any existing calls are put on hold.<br />
If an RTP multicast session already exists on the phone, and the phone receives another<br />
incoming RTP multicast session, the priority is given to the first multicast session and the second<br />
multicast session is ignored. The behavior for the incoming calls in this case is also based on the<br />
setting for the “Allow Barge-in” parameter. The incoming call is handled as if there were an<br />
existing call already on the phone.<br />
188 Model <strong>6753i</strong> IP Phone <strong>User</strong> Guide<br />
<strong>VoIPon</strong> www.voipon.co.uk sales@voipon.co.uk Tel: +44 (0)1245 808195 Fax: +44 (0)1245 808299
Configuring Group RTP Paging<br />
<strong>Aastra</strong> Web UI<br />
Use the following procedure to configure RTP streaming on the receiving end for Paging<br />
applications using the <strong>Aastra</strong> Web UI.<br />
1. Click on Basic Settings->Preferences->Group Paging RTP Settings.<br />
2. In the “Paging Listen Addresses” text box, enter the multicast IP address(es) and port number<br />
on which the phone listens for incoming multicast RTP packets.<br />
Enter the IP address in dotted decimal format.<br />
(for example, 239.0.1.15:10000,239.0.1.20:15000)<br />
You can enter up to 5 listening multicast addresses.<br />
If this field is blank, the Paging Listening capability is disabled on the phone.<br />
Notes:<br />
1. Recipient of a Paging call can set a global “Do Not Disturb” (DND) to ignore<br />
any incoming pages.<br />
2. For incoming Paging, the phone uses the Intercom configuration settings. The<br />
incoming Page is dependant on the “Allow Barge-In” parameter setting and the<br />
“Idling/On Call” state.<br />
3. Click Save Settings.<br />
Shared Call Appearance (SCA) Call Bridging<br />
Shared Call Appearance (SCA) is when incoming calls are presented to multiple phones<br />
simultaneously. For example, it is the ability to assign the boss' extension to a button on the<br />
secretary's phone. Calls can be transferred between two phones with the same extension button by<br />
simply putting the call on hold at one phone and picking it up on the other. Status LEDs light and<br />
flash in unison, allowing all people sharing the extension to see the status at a glance.<br />
The phones include an enhanced SCA for the servers that support call bridging and allows two or<br />
more SCA users to be connected in a call with a third party.<br />
Model <strong>6753i</strong> IP Phone <strong>User</strong> Guide 189<br />
<strong>VoIPon</strong> www.voipon.co.uk sales@voipon.co.uk Tel: +44 (0)1245 808195 Fax: +44 (0)1245 808299
Refer to the following example.<br />
Phone A calls the SCA number and<br />
all the phones in the SCA enironment<br />
ring.<br />
Phone A<br />
Phone 1<br />
Phone 2<br />
Phone 3<br />
SCA Environment<br />
Note: A user can place a call on hold while in an SCA bridged call, by pressing the SCA line key.<br />
SCA phone 1 answers.<br />
When 2 and 3 pickup,<br />
1 can hangup.<br />
SCA phone 2 joins by<br />
pressing SCA line. When<br />
phone 1 hangs up, 2 is still<br />
connected. Phone 2 can<br />
press the line key to<br />
put SCA call on hold<br />
leaving 3 still connected<br />
to 1.<br />
SCA phone 3 joins by<br />
pressing SCA line. When<br />
phone 1 hangs up, 3 is still<br />
connected. Phone 3 can<br />
press the line key to<br />
put SCA call on hold<br />
leaving 2 still connected<br />
to 1.<br />
Using the example above, when a call comes into Phone 1, Phone 2 and Phone 3 can pickup the<br />
same call by pressing the SCA line key. Phone 2 and 3 display the call they are bridging into on<br />
the LCD of the phones. Existing SCA parties in a bridge or one-to-one call hear an audible beep<br />
when another party has joined the call.<br />
Note: Your Administrator must enable/disable the beep on the server-side.<br />
If a phone is configured for SCA bridging and it attempts to join a call, but the account on the<br />
server does not have this functionality enabled, an error message displays to the LCD on the<br />
phone.<br />
The SCA call bridging feature is disabled by default on all phones. Your Administrator can<br />
enable/disable this feature if required. Contact your System Administrator for more information.<br />
190 Model <strong>6753i</strong> IP Phone <strong>User</strong> Guide<br />
<strong>VoIPon</strong> www.voipon.co.uk sales@voipon.co.uk Tel: +44 (0)1245 808195 Fax: +44 (0)1245 808299
Keys States and LED Behavior<br />
There are two call states on the phones that support SCA bridging:<br />
• Bridge-active - A bridged call is in progress<br />
• Bridge-held - The 3rd-party (i.e., non-SCA party) in the bridge is on hold.<br />
The following tables provide the key states and LED behavior in an SCA bridge call for users<br />
involved in an SCA call and users not involved in the SCA call.<br />
Line Keys and Idle Screens<br />
State Call LED Call Caller ID Non-Call LED Non-Call Caller ID<br />
Idle N/A N/A Off N/A<br />
Seized Solid Green None Solid Red None<br />
Progressing (outgoing call) Green Called Part7 Solid Red None<br />
Alerting (incoming call) Blinking Unselected Red N/A<br />
Active Solid Green Far-end Solid Red Far-end<br />
Held Slow Flashing Green Far-end Slow Flashing Red Far-end<br />
Hold private Slow Flashing Green Far-end Solid Red Far-end<br />
Bridge-active Solid Green Far-end Solid Red Far-end<br />
Bridge-held Slow Flashing Green Far-end Solid Red Far-end<br />
Programmable Line Keys<br />
State Call Icon Call LED Non-Call Icon Non-Call LED<br />
Idle Small circle None Small circle None<br />
Seized N/A N/A Sold Circle Solid Red<br />
Progressing (outgoing call) Empty circle Solid Red Sold Circle Solid Red<br />
Alerting (incoming call) Empty blinking circle Flashing Red N/A N/A<br />
Active Empty circle Solid Red Sold Circle Solid Red<br />
Held<br />
Reverse empty blinking<br />
circle<br />
Slow Flashing<br />
Red<br />
Sold Reverse Circle Slow Flashing Red<br />
Hold private<br />
Reverse empty blinking<br />
circle<br />
Slow Flashing<br />
Red<br />
Sold Circle<br />
Solid Red<br />
Bridge-active Empty circle Solid Red Sold Circle Solid Red<br />
Bridge-held<br />
Reverse empty blinking<br />
circle<br />
Slow Flashing<br />
Red<br />
Sold Circle<br />
Solid Red<br />
Model <strong>6753i</strong> IP Phone <strong>User</strong> Guide 191<br />
<strong>VoIPon</strong> www.voipon.co.uk sales@voipon.co.uk Tel: +44 (0)1245 808195 Fax: +44 (0)1245 808299
Line key Phone Behavior<br />
State Call Line Key Pressed Non-Call Line Key Pressed<br />
Idle N/A Attempt to seize the line<br />
Seized Hang up Ignore<br />
Progressing Hang up Ignore<br />
Alerting answer N/A<br />
Active Hold Bridge<br />
Held Retrieve Bridge<br />
Hold private Retrieve Ignore<br />
Bridge-active Hold Bridge<br />
Bridge-held Retrieve Bridge<br />
192 Model <strong>6753i</strong> IP Phone <strong>User</strong> Guide<br />
<strong>VoIPon</strong> www.voipon.co.uk sales@voipon.co.uk Tel: +44 (0)1245 808195 Fax: +44 (0)1245 808299
Available Features Enabled by Administrators<br />
There are features on your IP Phone that you can use ONLY if an Administrator has enabled them<br />
on your phone. Those features are described in this section. Contact your System Administrator for<br />
more information.<br />
Outgoing Intercom Calls<br />
If your System Administrator configures the outgoing intercom feature on your phone, pressing<br />
the Icom button allows your phone to find an available line and place an intercom call to a<br />
recipient. To use this feature, you must configure an intercom key on your phone. For more<br />
information about configuring and using an Icom key, see “Intercom Key” on page 102.<br />
Missed Call Summary Subscription<br />
A feature on the IP phones allows missed calls that have been redirected by the server, to be<br />
incremented in the missed calls indicator on the phone it was initially directed to. This feature is<br />
called the Missed Call Summary Subscription and can be configured by your System<br />
Administrator. For this feature to work, you must configure voicemail on the phone that the call<br />
was initially directed to.<br />
For example, phones A, B, and C are connected to the server. Your Administrator configures the<br />
server to direct calls coming into phone B (which has voicemail configured) to be forwarded to<br />
phone C. When phone A calls phone B, the server forwards the call to phone C. With the Missed<br />
Call Summary Subscription enabled, phone B receives notification from the server that the call<br />
was forwarded and the missed calls indicator is incremented on phone B. See the illustration<br />
below.<br />
Phone A<br />
Phone C<br />
A calls B<br />
Phone B<br />
B fowards call to C<br />
Missed calls indicator increments on phone B.<br />
Note: : Voicemail must be configured on phone B.<br />
Note: Your System Administrator can configure the Missed Call Summary<br />
Subscription feature on a global or per-line basis.<br />
Model <strong>6753i</strong> IP Phone <strong>User</strong> Guide 193<br />
<strong>VoIPon</strong> www.voipon.co.uk sales@voipon.co.uk Tel: +44 (0)1245 808195 Fax: +44 (0)1245 808299
Customizable Callers List Key<br />
Your System Administrator can specify an XML URI that creates a custom Callers List<br />
application for your phone. When you press the Callers List key, the phone accesses a custom<br />
XML URI Callers List instead of the standard Callers List. Contact your System Administrator<br />
for more information.<br />
Autodial (Hotline and Warmline)<br />
Your System Administrator can configure an autodial feature on your phone. If autodial is<br />
enabled, the phone automatically dials a preconfigured number whenever it is off-hook.<br />
Depending on the configuration specified by your Administrator, the Autodial functions as<br />
either a “hotline”, or as a “warmline,” as follows:<br />
• Hotline: The IP phone immediately dials a preconfigured number when you lift the handset.<br />
• Warmline: The IP phone waits for a specified amount of time after you lift the handset<br />
before dialing a preconfigured number. If you do not dial a number within the time allotted,<br />
then the IP phone begins to dial the number.<br />
The Autodial feature is available on a global or per-line basis. Contact your System<br />
Administrator for more information.<br />
Notes:<br />
1. Any speed dial numbers that you configure on your IP phone are not affected<br />
by autodial settings.<br />
2. If Autodial is configured on your phone, any lines that function as hotlines do<br />
not accept conference calls, transferred calls, and/or intercom calls.<br />
194 Model <strong>6753i</strong> IP Phone <strong>User</strong> Guide<br />
<strong>VoIPon</strong> www.voipon.co.uk sales@voipon.co.uk Tel: +44 (0)1245 808195 Fax: +44 (0)1245 808299
Centralized Conferencing<br />
The <strong>6753i</strong> supports centralized conferencing for Sylantro and Broadsoft servers. This feature<br />
provides centralized conferencing on the SIP server (versus localized, on the phone). Your System<br />
Administrator must enable this feature on your phone before you can use centralized conferencing.<br />
Centralized Conferencing allows you to perform the following:<br />
• Conference two active calls together into a conference call.<br />
• When on an active conference call, invite another party into the call.<br />
• Create simultaneous conference calls on the same IP phone (Sylantro servers only). For<br />
example, a user at extension 2005 could create two conferences, and put one conference on<br />
hold while conversing with the other party:<br />
— Line 1: conference together extensions 2005, 2010, and 2020.<br />
— -Line 2: conference together extensions 2005, 2011 and 2021.<br />
• Disconnect from an active conference call while allowing the other callers to remain<br />
connected.<br />
• Add unlimited number of users to a conference (dependent on the limitations of the server).<br />
• Join two active calls together into a conference.<br />
• Join incoming or outgoing active calls to any existing conference.<br />
Reference<br />
For more information about using Centralized Conferencing, see “Centralized Conferencing (for<br />
Sylantro and Broadsoft Servers)” on page 123.<br />
Answer and Ignore Keys for XML Applications<br />
If you are accessing XML applications on your phone and a call comes in, your System<br />
Administrator can create "Answer" and "Ignore" keys that you can use to either answer the<br />
incoming call, or ignore it.<br />
An XML application can display<br />
here while a call is coming in.<br />
Ignore Answer<br />
When the 3 Ignore Answer 4 line displays, you can press the Right Arrow key (Answer) to<br />
answer the incoming call without disturbing the current XML application. When you answer the<br />
call, the 3 Ignore Answer 4 line disappears from the LCD. Pressing the Left Arrow key (Ignore)<br />
ignores the incoming call without disturbing the current XML application. Contact your System<br />
Administrator for more information.<br />
Model <strong>6753i</strong> IP Phone <strong>User</strong> Guide 195<br />
<strong>VoIPon</strong> www.voipon.co.uk sales@voipon.co.uk Tel: +44 (0)1245 808195 Fax: +44 (0)1245 808299
Playing a WAV File On Your Phone<br />
If enabled by your Administrator, the <strong>6753i</strong> IP Phone can play a WAV file. A WAV file is an<br />
audio file format standard for storing an audio bit stream on a system in raw, uncompressed<br />
format or compressed format to reduce the file size.<br />
A WAV file is streamed to the phone using the HTTP protocol.<br />
The WAV feature supports the following:<br />
• Streaming of the WAV file to allow it to be locally played<br />
• Allows you to abort the audio streaming by pressing the Goodbye key on the phone.<br />
• Supports the HTTP file download protocol<br />
• Supports the aLaw and uLaw codecs<br />
• Plays the WAV file only if the phone is idle.<br />
• WAV audio file starts only when 4 seconds of the audio data (or the complete file) has been<br />
accumulated.<br />
• Follows the standard phone behavior of speaker/head set/hand set.<br />
IP Phone UI Screen During WAV Streaming<br />
The <strong>6753i</strong> screen displays the following during WAV streaming.<br />
Streaming<br />
00:10<br />
To abort the WAV streaming, press any of the following:<br />
• Goodbye key<br />
• Drop softkey<br />
You can also place the handset (if in use) on hook.<br />
Using the Keypad During Active XML Applications<br />
If enabled by your Administrator, the <strong>6753i</strong> IP Phone can allow you to continue using your<br />
keypad keys during active XML applications on your phone. This feature is applicable only<br />
when your phone is in the connected state. By default, the phone suppresses dialpad events when<br />
an XML object is in focus, so your Administrators must enable the keypad to be used during<br />
active XML applications. Contact your System Administrator for more information.<br />
196 Model <strong>6753i</strong> IP Phone <strong>User</strong> Guide<br />
<strong>VoIPon</strong> www.voipon.co.uk sales@voipon.co.uk Tel: +44 (0)1245 808195 Fax: +44 (0)1245 808299
Key Redirection<br />
Conference, Transfer, Redial, Intercom Keys and Voicemail Option<br />
If enabled by your Administrator, the Conference, Transfer, Redial, and Intercom keys, as well as<br />
the Voicemail option, can be redirected to XML scripts.This allows the server to provide the phone<br />
with Redial, Transfer (Xfer), Conference (Conf), and Intercom (Icom) key features, and the<br />
Voicemail option feature, rather then accessing them from the phone-side. By default, the<br />
server-side keys function the same as the phone-side key features.<br />
Notes:<br />
1. Key remapping takes precedence over redirecting.<br />
2. Disabling the redial, conference, or transfer features on the phone<br />
also disables the redirection of these keys.<br />
Contact your System Administrator for more information about this feature.<br />
Options Key<br />
If enabled by your Administrator, the Services Menu on the <strong>6753i</strong> IP Phone can be redirected to an<br />
XML script. This allows the server to provide the phone with available options, rather then<br />
accessing them from the phone-side. You access the XML script by selecting the Services Menu.<br />
You can still access the Services Menu from the phone-side by pressing and holding the Options<br />
key to display the phone-side Services Menu.<br />
IMPORTANT NOTES<br />
• If no Options URI script is configured, the local Options Menu on the phone displays as<br />
normal.<br />
• If you configure password access to the Options Menu, this password is required when<br />
accessing the local Option Menu, but is not required for the Options Key redirection feature.<br />
• Pressing the Options Menu for redirection from the server does not interfere with normal<br />
operations of the phone (for example, pressing the options menu when on a call does not affect<br />
the call).<br />
• If the phone is locked, you must unlock the phone before accessing the Options Menu redirect<br />
feature. After pressing the Options Key, the phone displays a screen that allows you to unlock<br />
the phone before continuing.<br />
• On the <strong>6753i</strong>, the redirection feature works after selecting the Services Menu. To display the<br />
original Options Menu, press and hold the Options key.<br />
Contact your System Administrator for more information about this feature.<br />
Model <strong>6753i</strong> IP Phone <strong>User</strong> Guide 197<br />
<strong>VoIPon</strong> www.voipon.co.uk sales@voipon.co.uk Tel: +44 (0)1245 808195 Fax: +44 (0)1245 808299
XML Applications and Off-Hook Interaction<br />
If enabled by your Administrator, the <strong>6753i</strong> can be prevented from going into the off-hook/<br />
dialing state when the handset is off-hook and the call ends. This feature is disabled by default<br />
and must be enabled by your Administrator. The disabled behavior is as follows:<br />
You are in a call using the handset and the phone displays an XML application. The far-end<br />
terminates the call, and a new XML application gets pushed/pulled onto the display. Since the<br />
handset is off-hook and in idle mode, the "offhook idle timer" starts. When this timer expires, the<br />
phone applies dial tone and moves to the off-hook/dialing state, which then destroys the XML<br />
application that was being displayed.<br />
Contact your System Administrator for more information about this feature.<br />
XML Override for a Locked Phone<br />
The <strong>6753i</strong> has a feature that allows a locked phone to be overridden when an XML application is<br />
sent to the phone. This feature also allows you to still use programmable keys/expansion module<br />
keys applicable to the XML application even though the phone is locked. However, any keys<br />
NOT associated with the XML application cannot be used when the phone is locked.<br />
Also, XML Get Requests override the locked feature on the phone so that any programmable<br />
key pressed by the user that initiates a Get Request continues to get sent.<br />
Only a System Administrator can configure the feature of "XML override for a locked phone".<br />
RTP Recording and Simultaneous Playing<br />
The IP Phones now allow for Real-Time Transport Protocol (RTP) recording and simultaneous<br />
playing of an audio file via XML commands created by your Administrator. The RTP and<br />
multicast RTP commands allow the phone to send/receive an RTP stream to/from given<br />
multicast/unicast addresses (without involving SIP signaling).<br />
Notes:<br />
1. When an RTP stream is being sent with RTP recording and simultaneous<br />
playing (mix), the IP Phone LCD displays an icon with an ‘m’ on top to indicate<br />
that a mixed RTP stream is being sent.<br />
2. When RTP stream is being received with RTP recording and simultaneous<br />
playing (mix), you can use the volume controls on the IP phone to adjust the<br />
volume (increase or decrease) to your specifications.<br />
Contact your System Administrator for more information about this feature.<br />
198 Model <strong>6753i</strong> IP Phone <strong>User</strong> Guide<br />
<strong>VoIPon</strong> www.voipon.co.uk sales@voipon.co.uk Tel: +44 (0)1245 808195 Fax: +44 (0)1245 808299
“Hold” Feature Enhancement (for Broadsoft Servers)<br />
The Hold feature allows you to put an active call on “hold,” then retrieve the call later. This<br />
enhancement is intended for IP phones operating with servers that support RFC3264 (for example,<br />
Broadsoft). If a server does not support RFC3264, then the IP phones do not use RFC3264<br />
functionality.<br />
Configurable Save and Delete Keys<br />
There are six function keys on the <strong>6753i</strong> phone located to the left of the paper label. Your System<br />
Administrator can make the Save and Delete keys (Keys 1 and 2) programmable keys with the<br />
same functions that are available for the other programmable keys.<br />
By default, the Save key allows you to save entries to the Directory and perform a Save-To from<br />
the Callers List. It also allows you to save speed dial information to a programmable key. You can<br />
also use the Save key while using specific XML applications.<br />
By default, the Delete key allows you to remove entries from the Directory List and Callers List.<br />
(Must enter the Directory or Callers list and select an entry, then press twice to delete entry).<br />
Once the Save and Delete keys are made configurable, you can change the function of the keys<br />
using the <strong>Aastra</strong> Web UI.<br />
IMPORTANT: If you change the functions of the Save and Delete keys, and then an<br />
Administrator locks Keys 1 and 2, the functions are automatically set back to the default settings<br />
of "Save" and "Delete".<br />
Authentication Support for HTTP/HTTPS Download Methods Used with Broadsoft<br />
Client Management System (CMS)<br />
If enabled by an Administrator, the <strong>6753i</strong> has authentication support when using HTTP or HTTPS<br />
as download protocols (as per RFC 2617). When a phone is connected to a Broadsoft Server using<br />
the CMS tool, a LOGIN key displays. Pressing the LOGIN key displays a login screen with<br />
<strong>User</strong>name and Password. <strong>User</strong>name can be up to 40 characters and Password can be up to 20<br />
characters. A System Administrator can optionally configure a Domain Name to be used as the<br />
<strong>User</strong>name (e.g. username@domain.com). A user can navigate the screen using the navigation keys<br />
(arrow keys) on the phone. The screen provides a SUBMIT key for submission of the field<br />
information, and a CANCEL key for exiting the login screen. Appropriate messages display if the<br />
phone reaches a timeout while trying to connect to the server, or if a <strong>User</strong>name or Password are<br />
incorrect.<br />
Once the login information for a specific user is entered and accepted by the server, the phone<br />
reboots and downloads the user profile.<br />
Model <strong>6753i</strong> IP Phone <strong>User</strong> Guide 199<br />
<strong>VoIPon</strong> www.voipon.co.uk sales@voipon.co.uk Tel: +44 (0)1245 808195 Fax: +44 (0)1245 808299
IP Phone UI when Broadsoft CMS is Enabled<br />
When the Broadsoft CMS feature is enabled on the IP Phone, the following screens display:<br />
Login Screen 9054550055<br />
Sat Jun 8 2:55pm<br />
=Log In<br />
<strong>User</strong>name Screen<br />
Please Enter:<br />
<strong>User</strong>name: _<br />
=Next<br />
=Submit<br />
Password Screen<br />
Please Enter:<br />
Password: _<br />
=Cancel<br />
=Submit<br />
200 Model <strong>6753i</strong> IP Phone <strong>User</strong> Guide<br />
<strong>VoIPon</strong> www.voipon.co.uk sales@voipon.co.uk Tel: +44 (0)1245 808195 Fax: +44 (0)1245 808299
Diverting Calls from Your Phone<br />
Your Administrator can enable/disable a feature on your phone that allows incoming calls to be<br />
diverted to another phone if required.<br />
When an outgoing call from your phone is being diverted to another destination (i.e., via call<br />
forward), the phone displays the Caller ID (phone number and/or caller name) of the new<br />
destination and the reason for the call diversion. Similarly, at the new destination, the Caller ID of<br />
the original call destination displays.<br />
1 Tim calls Mark at x400.<br />
2 Mark’s phone is busy.<br />
Call Diversion Example<br />
3 Mark’s phone diverts the incoming call to another destination (Roger @ x 464).<br />
4 Tim’s phone displays name and extension of where the call is being diverted to and<br />
reason for diverting the call. The screen scrolls between Screen 1 and Screen 2.<br />
5 Roger’s phone accepts the call and displays the name and number of the phone the<br />
incoming call (Tim) and the name (or number) of the original destination (Mark). The<br />
screens scroll between Screen 1 and Screen 2..<br />
See examples of the phones’ LCD below.<br />
The diversion LCD screens scroll every 3 seconds.<br />
Tim’s Phone @ x462<br />
Tim @ 463 calls Mark’s phone which is busy<br />
and diverts to Roger.<br />
1<br />
Roger<br />
2 Diverting:<br />
464<br />
<strong>User</strong>-Busy<br />
diverted to<br />
Roger’s Phone @ x464<br />
Roger @ 464 receives the incoming call from Tim<br />
divertted from Mark<br />
1<br />
Tim<br />
2 Via:<br />
462<br />
Mark<br />
3-Line LCD Display<br />
3-Line LCD Display<br />
To enable this call diverting feature, contact your System Administrator.<br />
Model <strong>6753i</strong> IP Phone <strong>User</strong> Guide 201<br />
<strong>VoIPon</strong> www.voipon.co.uk sales@voipon.co.uk Tel: +44 (0)1245 808195 Fax: +44 (0)1245 808299
Display of Call Destination Information<br />
By default, your phone displays call destination information if your phone is configured to<br />
forward calls to other destinations. The call destination information displays on multiple screens<br />
that scroll every 3 seconds. The following example shows call destination information on the<br />
<strong>6753i</strong> IP Phone.<br />
Call Destination Information<br />
1<br />
Bob<br />
2 To:<br />
0409123456<br />
Alice One<br />
<strong>6753i</strong> IP Phone<br />
Note: When both call diversion and call destination are enabled, the information<br />
displays to the phone’s screens in the following order:<br />
Screen 1 Caller info<br />
Screen 2 Call destination<br />
Screen 3 Call diversion<br />
If your phone does not display call destination information, your System Administrator may<br />
have disabled this feature. Contact your System Administrator for more information.<br />
<strong>VoIPon</strong> www.voipon.co.uk sales@voipon.co.uk Tel: +44 (0)1245 808195 Fax: +44 (0)1245 808299
Indication of Terminated Calls<br />
An Administrator can configure your phone to display a disconnected screen (“Call Terminated”)<br />
when the far-end hangs up. An audible busy signal is also heard on the phone. The configuration of<br />
this feature can also include the maximum time interval that the busy signal is audible. Contact<br />
your System Administrator for more information.<br />
L1<br />
<strong>6753i</strong><br />
Call Terminated<br />
IF<br />
The following is the call terminated screen that displays on the <strong>6753i</strong> if this feature is enabled on<br />
your phone:<br />
THEN<br />
1 line active and far-end disconnects, the line in focus:<br />
• displays disconnected screen.<br />
• plays busy tone.<br />
• displays "Call Terminated" message on the screen.<br />
the line not in focus:<br />
• plays busy tone.<br />
2 or more lines active, and far-end disconnects, the line in focus:<br />
• displays disconnected screen.<br />
• plays busy tone.<br />
• displays "Call Terminated" message on the screen for 5 seconds.<br />
When 5 second times out:<br />
• the busy tone stops<br />
• the disconnected screen disappears.<br />
2 or more lines active, and a line NOT in focus is<br />
disconnected by the far-end,<br />
An incoming call comes in on the line in focus that<br />
has a disconnected screen displaying,<br />
• no busy tone plays<br />
• no disconnected screen displays<br />
• no “Call Terminated” message displays<br />
the line in focus with no calls on hold:<br />
• displays a ringing screen<br />
the line in focus WITH calls on hold:<br />
• flashes its’ Line LED<br />
Model <strong>6753i</strong> IP Phone <strong>User</strong> Guide 203<br />
<strong>VoIPon</strong> www.voipon.co.uk sales@voipon.co.uk Tel: +44 (0)1245 808195 Fax: +44 (0)1245 808299
IF<br />
An incoming call comes in on another line (NOT in<br />
focus), and the disconnected screen is displaying on<br />
the line in focus,<br />
THEN<br />
• the disconnected screen no longer displays on the line in focus.<br />
A phone application is NOT in focus, • busy tone plays<br />
• no disconnected screen displays<br />
When the phone application in focus on screen stops:<br />
• busy tone plays<br />
• disconnected screen displays<br />
Note: This “indication of terminated calls” feature does not affect parked calls on<br />
the phone or the conference call feature.<br />
The following procedure describes how to handle the disconnected screens on your phone.<br />
IP Phone UI<br />
For all phones:<br />
• Press the Goodbye key.<br />
The busy tone stops and the disconnected screen no longer displays.<br />
or<br />
Select any Line key.<br />
The busy tone stops and the disconnected screen no longer displays.<br />
A dial screen displays.<br />
204 Model <strong>6753i</strong> IP Phone <strong>User</strong> Guide<br />
<strong>VoIPon</strong> www.voipon.co.uk sales@voipon.co.uk Tel: +44 (0)1245 808195 Fax: +44 (0)1245 808299
Model M670i Expansion Module<br />
The <strong>6753i</strong> IP Phone offers an optional M670i Expansion Module that attaches to the right side of<br />
the phone to provide additional keys.<br />
Model M670i<br />
The M670i provides 18 keys in each column (totaling 36 keys) on the keypad. Each key provides<br />
an LED for indicating call status. The M670i provides a paper label for convenient key labeling.<br />
The Expansion Module keys support the following functions:<br />
• None • Pickup<br />
• Line • Last Call Return (lcr)<br />
• Speed dial • Call Forward<br />
• Do not disturb (DND) • BLF/Xfer<br />
• Busy Lamp Field • Speed Dial/Xfer<br />
(BLF)<br />
• BLF List • Directory<br />
• Auto Call Distribution • Callers List<br />
(ACD)<br />
• Directed Call Pickup • Conference<br />
• Extensible Markup • Transfer<br />
Language (XML)<br />
• Flash • Intercom<br />
• Sprecode • Services<br />
• Park • Phone Lock<br />
• Paging<br />
You can configure the keys using the <strong>Aastra</strong> Web UI at the path,<br />
Operation->Expansion Module when an Expansion Module is attached to the <strong>6753i</strong> IP<br />
Phone.<br />
Model <strong>6753i</strong> IP Phone <strong>User</strong> Guide 205<br />
<strong>VoIPon</strong> www.voipon.co.uk sales@voipon.co.uk Tel: +44 (0)1245 808195 Fax: +44 (0)1245 808299
Reference<br />
For more information about configuring the expansion module keys with these functions, see the<br />
“Programmable Keys” on page 50.<br />
Using the Expansion Module<br />
M670i Expansion Module<br />
After configuring the keys on the M670i Expansion Module, you can record the name of the key<br />
on the paper labels provided with the Expansion Module. Press the key you want to use when<br />
applicable.<br />
Keys<br />
Lock Phone<br />
BLF Key<br />
Office (speeddial)<br />
References<br />
For more information about configuring keys, see “Programmable Keys” on page 50.<br />
For more information about installing the M670i module on your phone, see the <strong>Aastra</strong> <strong>6753i</strong> IP<br />
Phone Installation Guide.<br />
Press-and-Hold to Create a Speed Dial Key<br />
You can press and hold an expansion module key to create a speed dial key and configure it the<br />
same way you configure a speed dial key on the phone.<br />
For a procedure on creating a speed dial key, see “Press-and-Hold to Create a Speed Dial<br />
(applicable to programmable keys, keypad keys, expansion module keys)” on page 55.<br />
206 Model <strong>6753i</strong> IP Phone <strong>User</strong> Guide<br />
<strong>VoIPon</strong> www.voipon.co.uk sales@voipon.co.uk Tel: +44 (0)1245 808195 Fax: +44 (0)1245 808299
Troubleshooting <strong>Solutions</strong><br />
Why is my display blank?<br />
Ensure that power is being provided to your phone. Make sure your phone is plugged into a power<br />
source.<br />
Why is my speakerphone not working?<br />
If you press the button and the speaker light flashes and you do not hear dial tone through<br />
the speaker phone, the Set Audio option in the phone’s Options list has been set up for headset use.<br />
Press a second time and if the light goes out, the phone has been set up to be used only with<br />
a headset or handset. If the light stays on steady and you hear dial tone, the phone has been set up<br />
so that you can alternate between the speakerphone and the headset by pressing . See the<br />
section, “Set Audio” on page 29 for instructions on how to change the Set Audio option.<br />
Why can’t I get a dial tone?<br />
Check for any loose connections and that the phone has been installed properly. For installation<br />
instructions, please refer to the “Installation and Setup” section in the <strong>Aastra</strong> <strong>6753i</strong> Installation<br />
Guide provided with your phone.<br />
Why doesn’t my phone ring?<br />
Check the ring volume on your phone. It may be turned down or turned off. To adjust the ringer<br />
volume setting, press the volume button when the phone is on-hook and idle. For more<br />
information, refer to the “Adjusting Volume section” in the <strong>Aastra</strong> <strong>6753i</strong> Installation Guide<br />
provided with your phone.<br />
Why is the light not coming on with a new Voice Mail Message?<br />
Your phone system or service provider must provide “Visual” Message Waiting service for this<br />
function to work. Check with your System Administrator for more information.<br />
Why is my handset not working?<br />
Check to ensure that the handset cord is fully connected to both the phone and handset. See the<br />
section “Connecting a Handset or Headset” in the <strong>Aastra</strong> <strong>6753i</strong> Installation Guide for<br />
information.<br />
How do I find the IP address of my phone?<br />
Instructions on where to find the IP address of your phone can be found in this guide in the section,<br />
“Finding Your Phone’s IP Address” on page 21.<br />
Model <strong>6753i</strong> IP Phone <strong>User</strong> Guide 207<br />
<strong>VoIPon</strong> www.voipon.co.uk sales@voipon.co.uk Tel: +44 (0)1245 808195 Fax: +44 (0)1245 808299
Why does my phone display the “No Service” message?<br />
The phone displays the “No Service” message if the SIP settings have not been set up correctly.<br />
Contact your System Administrator for more information.<br />
How do I change my user password?<br />
You can change the user password from the IP phone UI or the <strong>Aastra</strong> Web UI.<br />
IP Phone UI<br />
1. Press on the phone to enter the Options List.<br />
2. Select <strong>User</strong> Password and press Enter.<br />
3. Enter the current user password and press Enter.<br />
4. Enter the new user password and press Enter.<br />
5. Re-enter the new user password and press Enter.<br />
A message, "Password Changed" displays on the screen.<br />
<strong>Aastra</strong> Web UI<br />
1. Click on Operation-><strong>User</strong> Password.<br />
2. In the "Current Password" field, enter the current user password.<br />
Note: By default, the user name is “user” (all lowercase) and the password field<br />
is left blank. If you have forgotten your password, contact your System<br />
Administrator for assistance.<br />
3. In the "New Password" field, enter the new user password.<br />
4. In the "Password Confirm" field, enter the new user password again.<br />
5. Click Save Settings.<br />
For information on how to access the <strong>Aastra</strong> Web UI, go to the section “Using the <strong>Aastra</strong> Web<br />
UI” on page 16.<br />
208 Model <strong>6753i</strong> IP Phone <strong>User</strong> Guide<br />
<strong>VoIPon</strong> www.voipon.co.uk sales@voipon.co.uk Tel: +44 (0)1245 808195 Fax: +44 (0)1245 808299
Why does my phone display "Bad Encrypted Config"?<br />
The IP phone displays "Bad Encrypted Config" because encrypted configuration files are enabled<br />
but the decryption process has failed.<br />
Report this error to your System Administrator.<br />
How do I restart the IP phone?<br />
IP Phone UI<br />
1. Press the button on the phone to enter the Option List.<br />
2. Use the 2 key to scroll down the list of options to Phone Status and press the 4. key to select.<br />
3. Press the 2 key to scroll to the Restart Phone option.<br />
Press the 4. key to confirm and restart the phone. If you do not wish to restart your phone, press<br />
the 3 key to cancel.<br />
Note: Your phone is out of service temporarily during the restart and<br />
downloading process.<br />
<strong>Aastra</strong> Web UI<br />
1. Click on Operation->Reset.<br />
2. Click Reset.<br />
3. Click OK at the confirmation prompt.<br />
Model <strong>6753i</strong> IP Phone <strong>User</strong> Guide 209<br />
<strong>VoIPon</strong> www.voipon.co.uk sales@voipon.co.uk Tel: +44 (0)1245 808195 Fax: +44 (0)1245 808299
How do I lock my phone?<br />
You can lock your phone to prevent the phone from being used or configured. You can lock the<br />
phone using any of the following:<br />
• In the IP Phone UI at the path Options->Phone Lock.<br />
• In the <strong>Aastra</strong> Web UI at the path Operations->Phone Lock.<br />
• At a configured Phone Lock key on the phone. For more information about configuring a<br />
Lock/Unlock key on your phone, see “Phone Lock Key” on page 106.<br />
Use the following procedure to lock an IP phone using the IP Phone UI.<br />
IP Phone UI<br />
Lock the Phone<br />
1. Press on the phone to enter the Options List.<br />
2. Select Phone Lock and press Enter..<br />
3. Press 4 to set the phone to lock.<br />
4. Press on the phone.<br />
The following message displays:<br />
"Phone is locked".<br />
Unlock the Phone<br />
1. Press on the phone to enter the Options List.<br />
2. Enter your user password and press Enter.<br />
The phone unlocks.<br />
Use the following procedure to lock an IP Phone using the <strong>Aastra</strong> Web UI.<br />
<strong>Aastra</strong> Web UI<br />
1. Click on Operation->Phone Lock.<br />
210 Model <strong>6753i</strong> IP Phone <strong>User</strong> Guide<br />
<strong>VoIPon</strong> www.voipon.co.uk sales@voipon.co.uk Tel: +44 (0)1245 808195 Fax: +44 (0)1245 808299
Lock the Phone<br />
2. In the "Lock the Phone?" field, click Lock.<br />
The phone locks dynamically and displays the following message:<br />
"Phone is locked".<br />
Unlock the Phone<br />
3. Click on Operation->Phone Lock.<br />
4. In the "Unlock the Phone?" field, click Unlock.<br />
The phone unlocks dynamically and displays the following message:<br />
"Phone is unlocked".<br />
Model <strong>6753i</strong> IP Phone <strong>User</strong> Guide 211<br />
<strong>VoIPon</strong> www.voipon.co.uk sales@voipon.co.uk Tel: +44 (0)1245 808195 Fax: +44 (0)1245 808299
Limited Warranty<br />
<strong>Aastra</strong> Telecom warrants this product against defects and malfunctions during a one (1) year<br />
period from the date of original purchase. If there is a defect or malfunction, <strong>Aastra</strong> Telecom<br />
shall, at its option, and as the exclusive remedy, either repair or replace the telephone set at no<br />
charge, if returned within the warranty period.<br />
If replacement parts are used in making repairs, these parts may be refurbished, or may contain<br />
refurbished materials. If it is necessary to replace the telephone set, it may be replaced with a<br />
refurbished telephone of the same design and color. If it should become necessary to repair or<br />
replace a defective or malfunctioning telephone set under this warranty, the provisions of this<br />
warranty shall apply to the repaired or replaced telephone set until the expiration of ninety (90)<br />
days from the date of pick up, or the date of shipment to you, of the repaired or replacement set,<br />
or until the end of the original warranty period, whichever is later. Proof of the original purchase<br />
date is to be provided with all telephone sets returned for warranty repairs.<br />
Exclusions<br />
<strong>Aastra</strong> Telecom does not warrant its telephone sets to be compatible with the equipment of any<br />
particular telephone company. This warranty does not extend to damage to products resulting<br />
from improper installation or operation, alteration, accident, neglect, abuse, misuse, fire or<br />
natural causes such as storms or floods, after the telephone is in your possession.<br />
<strong>Aastra</strong> Telecom shall not be liable for any incidental or consequential damages, including, but<br />
not limited to, loss, damage or expense directly or indirectly arising from the customers use of or<br />
inability to use this telephone, either separately or in combination with other equipment. This<br />
paragraph, however, shall not apply to consequential damages for injury to the person in the case<br />
of telephones used or bought for use primarily for personal, family or household purposes.<br />
This warranty sets forth the entire liability and obligations of <strong>Aastra</strong> Telecom with respect to<br />
breach of warranty, and the warranties set forth or limited herein are the sole warranties and are<br />
in lieu of all other warranties, expressed or implied, including warranties or fitness for particular<br />
purpose and merchantability.<br />
Warranty Repair Services<br />
Should the set fail during the warranty period;<br />
In North America, please call 1-800-574-1611 for further information.<br />
Outside North America, contact your sales representative for return instructions.<br />
You will be responsible for shipping charges, if any. When you return this telephone for<br />
warranty service, you must present proof of purchase.<br />
212 Model <strong>6753i</strong> IP Phone <strong>User</strong> Guide<br />
<strong>VoIPon</strong> www.voipon.co.uk sales@voipon.co.uk Tel: +44 (0)1245 808195 Fax: +44 (0)1245 808299
After Warranty Service<br />
<strong>Aastra</strong> Telecom offers ongoing repair and support for this product. This service provides repair or<br />
replacement of your <strong>Aastra</strong> Telecom product, at <strong>Aastra</strong> Telecom's option, for a fixed charge. You<br />
are responsible for all shipping charges. For further information and shipping instructions;<br />
In North America, contact our service information number: 1-800-574-1611.<br />
Outside h America, contact your sales representative.<br />
Note: Repairs to this product may be made only by the manufacturer and its<br />
authorized agents, or by others who are legally authorized. This restriction<br />
applies during and after the warranty period. Unauthorized repair will void the<br />
warranty.<br />
Model <strong>6753i</strong> IP Phone <strong>User</strong> Guide 213<br />
<strong>VoIPon</strong> www.voipon.co.uk sales@voipon.co.uk Tel: +44 (0)1245 808195 Fax: +44 (0)1245 808299
Appendix A - Time Zone Codes<br />
The following table identifies the time zone name and time zone code to use on the IP phone.<br />
Time Zone Name/Time Zone Code Table<br />
Time Zone Name<br />
AD-Andorra<br />
AE - Dubai<br />
AG-Antigua<br />
AI-Anguilla<br />
AL-Tirane<br />
AN-Curacao<br />
AR-Buenos Aires<br />
AS-Pago Pago<br />
AT-Vienna<br />
AU-Lord Howe<br />
AU-Tasmania<br />
AU-Melbourne<br />
AU-Sydney<br />
AU-Broken Hill<br />
AU-Brisbane<br />
AU-Lindeman<br />
AU-Adelaide<br />
AU-Darwin<br />
AU-Perth<br />
AW-Aruba<br />
AZ - Baku<br />
BA-Sarajevo<br />
BB-Barbados<br />
BE-Brussels<br />
BG-Sofia<br />
BM-Bermuda<br />
BO-La Paz<br />
BR-Noronha<br />
BR-Belem<br />
BR-Fortaleza<br />
BR-Recife<br />
BR-Araguaina<br />
BR-Maceio<br />
BR-Sao Paulo<br />
BR-Cuiaba<br />
BR-Porto Velho<br />
BR-Boa Vista<br />
BR-Manaus<br />
BR-Eirunepe<br />
BR-Rio Branco<br />
BS-Nassau<br />
BY-Minsk<br />
BZ-Belize<br />
Time Zone Code<br />
CET<br />
GST<br />
AST<br />
AST<br />
CET<br />
AST<br />
ART<br />
BST<br />
CET<br />
LHS<br />
EST<br />
EST<br />
EST<br />
CST<br />
EST<br />
EST<br />
CST<br />
CST<br />
WST<br />
AST<br />
AZT<br />
EET<br />
AST<br />
CET<br />
EET<br />
AST<br />
BOT<br />
FNT<br />
BRT<br />
BRT<br />
BRT<br />
BRS<br />
BRT<br />
BRS<br />
AMS<br />
AMT<br />
AMT<br />
AMT<br />
ACT<br />
ACT<br />
EST<br />
EET<br />
CST<br />
Model <strong>6753i</strong> IP Phone <strong>User</strong> Guide A-1<br />
<strong>VoIPon</strong> www.voipon.co.uk sales@voipon.co.uk Tel: +44 (0)1245 808195 Fax: +44 (0)1245 808299
Time Zone Name<br />
CA-Newfoundland<br />
CA-Atlantic<br />
CA-Eastern<br />
CA-Saskatchewan<br />
CA-Central<br />
CA-Mountain<br />
CA-Pacific<br />
CA-Yukon<br />
CH-Zurich<br />
CK-Rarotonga<br />
CL-Santiago<br />
CL-Easter<br />
CN-China<br />
CO-Bogota<br />
CR-Costa Rica<br />
CU-Havana<br />
CY-Nicosia<br />
CZ-Prague<br />
DE-Berlin<br />
DK-Copenhagen<br />
DM-Dominica<br />
DO-Santo Domingo<br />
EE-Tallinn<br />
ES-Madrid<br />
ES-Canary<br />
FI-Helsinki<br />
FJ-Fiji<br />
FK-Stanley<br />
FO-Faeroe<br />
FR-Paris<br />
GB-London<br />
GB-Belfast<br />
GD-Grenada<br />
GE - Tbilisi<br />
GF-Cayenne<br />
GI-Gibraltar<br />
GP-Guadeloupe<br />
GR-Athens<br />
GS-South Georgia<br />
GT-Guatemala<br />
GU-Guam<br />
GY-Guyana<br />
HK-Hong Kong<br />
HN-Tegucigalpa<br />
HR-Zagreb<br />
HT-Port-au-Prince<br />
HU-Budapest<br />
IE-Dublin<br />
IS-Reykjavik<br />
IT-Rome<br />
JM-Jamaica<br />
JP-Tokyo<br />
Time Zone Code<br />
NST<br />
AST<br />
EST<br />
EST<br />
CST<br />
MST<br />
PST<br />
PST<br />
CET<br />
CKS<br />
CLS<br />
EAS<br />
CST<br />
COS<br />
CST<br />
CST<br />
EES<br />
CET<br />
CET<br />
CET<br />
AST<br />
AST<br />
EET<br />
CET<br />
WET<br />
EET<br />
NZT<br />
FKS<br />
WET<br />
CET<br />
GMT<br />
GMT<br />
AST<br />
GET<br />
GFT<br />
CET<br />
AST<br />
EET<br />
GST<br />
CST<br />
CST<br />
GYT<br />
HKS<br />
CST<br />
CET<br />
EST<br />
CET<br />
GMT<br />
GMT<br />
CET<br />
EST<br />
JST<br />
A-2 Model <strong>6753i</strong> IP Phone <strong>User</strong> Guide<br />
<strong>VoIPon</strong> www.voipon.co.uk sales@voipon.co.uk Tel: +44 (0)1245 808195 Fax: +44 (0)1245 808299
Time Zone Name<br />
KY-Cayman<br />
LC-St Lucia<br />
LI-Vaduz<br />
LT-Vilnius<br />
LU-Luxembourg<br />
LV-Riga<br />
MC-Monaco<br />
MD-Chisinau<br />
MK-Skopje<br />
MQ-Martinique<br />
MS-Montserrat<br />
MT-Malta<br />
MU - Mauritius<br />
MX-Mexico City<br />
MX-Cancun<br />
MX-Merida<br />
MX-Monterrey<br />
MX-Mazatlan<br />
MX-Chihuahua<br />
MX-Hermosillo<br />
MX-Tijuana<br />
NI-Managua<br />
NL-Amsterdam<br />
NO-Oslo<br />
NR-Nauru<br />
NU-Niue<br />
NZ-Auckland<br />
NZ-Chatham<br />
OM - Muscat<br />
PA-Panama<br />
PE-Lima<br />
PL-Warsaw<br />
PR-Puerto Rico<br />
PT-Lisbon<br />
PT-Madeira<br />
PT-Azores<br />
PY-Asuncion<br />
RO-Bucharest<br />
RU-Kaliningrad<br />
RU-Moscow<br />
RU-Samara<br />
RU-Yekaterinburg<br />
RU-Omsk<br />
RU-Novosibirsk<br />
RU-Krasnoyarsk<br />
RU-Irkutsk<br />
RU-Yakutsk<br />
RU-Vladivostok<br />
RU-Sakhalin<br />
RU-Magadan<br />
RU-Kamchatka<br />
RU-Anadyr<br />
Time Zone Code<br />
EST<br />
AST<br />
CET<br />
EET<br />
CET<br />
EET<br />
CET<br />
EET<br />
CET<br />
AST<br />
AST<br />
CET<br />
MUT<br />
CST<br />
CST<br />
CST<br />
CST<br />
MST<br />
MST<br />
MST<br />
PST<br />
CST<br />
CET<br />
CET<br />
NRT<br />
NUT<br />
NZS<br />
CHA<br />
GST<br />
EST<br />
PES<br />
CET<br />
AST<br />
WET<br />
WET<br />
AZO<br />
PYS<br />
EET<br />
EET<br />
MSK<br />
SAM<br />
YEK<br />
OMS<br />
NOV<br />
KRA<br />
IRK<br />
YAK<br />
VLA<br />
SAK<br />
MAG<br />
PET<br />
ANA<br />
Model <strong>6753i</strong> IP Phone <strong>User</strong> Guide A-3<br />
<strong>VoIPon</strong> www.voipon.co.uk sales@voipon.co.uk Tel: +44 (0)1245 808195 Fax: +44 (0)1245 808299
Time Zone Name<br />
SE-Stockholm<br />
SG-Singapore<br />
SI-Ljubljana<br />
SK-Bratislava<br />
SM-San Marino<br />
SR-Paramaribo<br />
SV-El Salvador<br />
TR-Istanbul<br />
TT-Port of Spain<br />
TW-Taipei<br />
UA-Kiev<br />
US-Eastern<br />
US-Central<br />
US-Mountain<br />
US-Pacific<br />
US-Alaska<br />
US-Aleutian<br />
US-Hawaii<br />
UY-Montevideo<br />
VA-Vatican<br />
YU-Belgrade<br />
Time Zone Code<br />
CET<br />
SGT<br />
CET<br />
CET<br />
CET<br />
SRT<br />
CST<br />
EET<br />
AST<br />
CST<br />
EET<br />
EST<br />
CST<br />
MST<br />
PST<br />
AKS<br />
HAS<br />
HST<br />
UYS<br />
CET<br />
CET<br />
A-4 Model <strong>6753i</strong> IP Phone <strong>User</strong> Guide<br />
<strong>VoIPon</strong> www.voipon.co.uk sales@voipon.co.uk Tel: +44 (0)1245 808195 Fax: +44 (0)1245 808299
Index<br />
Numerics<br />
<strong>6753i</strong><br />
customizing 13, 25<br />
feature 1<br />
getting started 3<br />
idle screens 6<br />
incomplete configuration message 7<br />
installation and setup 2<br />
no service message 7<br />
plugging in the phone 3<br />
requirements 2<br />
A<br />
<strong>Aastra</strong> Web UI<br />
Basic Settings parameters 19<br />
Operaton parameters 18<br />
phone status 18<br />
about this guide 1<br />
account configuration 143<br />
account status 23<br />
ACD key 71<br />
allow barge-in, for intercom 186<br />
audio, setting 29<br />
auto-answer, for intercom 186<br />
autodial (hotline and warmline) 194<br />
B<br />
BLF key 65<br />
BLF list 67, 70<br />
BLF List key 67<br />
BLF/Xfer 89<br />
BLF/Xfer key 89<br />
BLF/Xfer, softkeys for 90, 92, 94<br />
C<br />
call destination, displaying 202<br />
Call Forward key 87<br />
call forwarding, softkeys for 87<br />
call hold reminder 174<br />
call hold reminder during active calls 172<br />
call waiting tone period 169<br />
callers list 137<br />
downloading to phone 142<br />
Callers List key 97<br />
callers list key 97<br />
callers list key, customizable 194<br />
calls, ending 126<br />
calls, handling 117<br />
calls, making 112<br />
calls, managing 127<br />
calls, placing on hold 117<br />
calls, receiving 116<br />
calls, transferring 118<br />
conference calls 121<br />
Conference key 100<br />
conference key, setting 99, 101<br />
conferencing<br />
ending 126<br />
transfer remaining parties 126<br />
conferencing, centralized 195<br />
contrast level 28<br />
D<br />
DCP key 75<br />
delete key 11<br />
dial plan, emergency 47<br />
dial tones, stuttered 170<br />
dialing a number 112<br />
dialpad, live 28<br />
Directory key 95<br />
directory key 96<br />
Directory List<br />
downloading to phone 136<br />
directory list 127<br />
downloading to PC 136<br />
sorting 128<br />
diverting calls 201<br />
DND key 64<br />
DND, enabling/disabling 143, 148<br />
documentation 1<br />
DTMF, suppressing playback 166<br />
Index<br />
Model <strong>6753i</strong> IP Phone <strong>User</strong> Guide<br />
Index-1<br />
<strong>VoIPon</strong> www.voipon.co.uk sales@voipon.co.uk Tel: +44 (0)1245 808195 Fax: +44 (0)1245 808299
Index<br />
Index<br />
E<br />
emergency dial plan, defining 47<br />
empty key 110<br />
expansion module, 560M 205<br />
expansion module, M670i 205<br />
F<br />
Flash key 70<br />
G<br />
GCP key 75<br />
Goodbye key cancels incoming call 182<br />
configuring 182<br />
using 183<br />
group RTP paging 188<br />
H<br />
headset mode 29<br />
headset, using 113<br />
headset/speaker mode 29<br />
hold, feature enhancement using 199<br />
I<br />
idle screens 6<br />
ignore sofkey 195<br />
incoming call interrupts dialing 177<br />
incomplete configuration 7<br />
Indication of transferred calls 120<br />
installation and setup, 9122i 2<br />
intercom calls<br />
incoming call features 184<br />
Intercom key 102<br />
intercom, outgoing calls using 193<br />
Introduction 212<br />
IP address of the phone 21<br />
IP address, finding 21<br />
K<br />
key panel 9<br />
key redirection 197<br />
Keypad Keys 12<br />
keys<br />
L<br />
ACD key 71<br />
Answer softkey for XML 195<br />
BLF key 65<br />
BLF List key 67<br />
BLF/Xfer key 89<br />
Call Forward key 87<br />
Callers List key 97<br />
Conference key 100<br />
DCP and GCP keys 75<br />
deleting 111<br />
descriptions of 8<br />
Directory key 95<br />
DND key 64<br />
Flash key 70<br />
Ignore key for XML 195<br />
Intercom key 102<br />
Last Call Return key 86<br />
Line key 53<br />
None key 110<br />
Paging key 108<br />
Park and Pickup keys 84<br />
Phone Lock key 106<br />
Services key 104<br />
Speeddial key 54<br />
Speeddial/Conf key 93<br />
Speeddial/Xfer key 91<br />
Sprecode key 82<br />
Transfer key 99<br />
XML key 79<br />
language<br />
latin 2 character set 42<br />
overview 34<br />
specifying on IP phone 34<br />
last call return key 86<br />
LCR key 86<br />
Line key 53<br />
lines settings 49<br />
lock/unlock the phone 210<br />
locking/unlocking the phone 46<br />
M<br />
M670i 205<br />
Index-2<br />
Model <strong>6753i</strong> IP Phone <strong>User</strong> Guide<br />
<strong>VoIPon</strong> www.voipon.co.uk sales@voipon.co.uk Tel: +44 (0)1245 808195 Fax: +44 (0)1245 808299
Index<br />
message waiting indicator, configuring 183<br />
microphone mute, for intercom 185<br />
microphone volume, headset 29<br />
missed call summary subscription 193<br />
missed calls indicator<br />
accessing and clearing 163<br />
overview 163<br />
N<br />
no service 7, 208<br />
None key 110<br />
O<br />
options<br />
<strong>Aastra</strong> Web UI 16<br />
IP Phone UI 13<br />
simplified menu 14<br />
P<br />
Paging key 108<br />
paging, softkeys for 108<br />
Park key 84<br />
park/pickup<br />
using on the IP phone 85<br />
password, resetting user’s 44<br />
Phone Lock key 106<br />
phone status 43<br />
phone status, displaying 20<br />
playing a WAV file 196<br />
preferred line 180<br />
preferred line timeout 180<br />
programmable key<br />
description 50<br />
R<br />
redial 114<br />
restarting the phone 45<br />
ring tone sets 26<br />
ring tones 25<br />
RTP paging, group 188<br />
S<br />
save key 11<br />
Services key 104<br />
speaker mode 29<br />
speaker/headset mode 29<br />
speakerphone, using 112<br />
speeddial<br />
configuring key for 54<br />
configuring prefix for 54<br />
creating from Keypad Speeddial in Web UI 59<br />
creating from phone keypad 55<br />
creating from programmable key in Web UI 58<br />
creating from SAVE key 57<br />
creating from Speeddial Edit Option 56<br />
editing 60<br />
saving to Redial List, Callers List, Directory List 59<br />
speeddial/Xfer 91<br />
Speeddial/Xfer key 91<br />
Sprecode key 82<br />
star codes 165<br />
starting up the phone 3<br />
status scroll delay 176<br />
switch UI focus to ringing line 179<br />
T<br />
Transfer key 99<br />
transferr calls<br />
indication of 120<br />
troubleshooting solutions 207<br />
changing password 208<br />
display blank 207<br />
finding IP address 207<br />
handset not working 207<br />
locking/unlocking phone 210<br />
no dial tone 207<br />
no light for VM message 207<br />
no ring 207<br />
no speakerphone 207<br />
phone displays "Bad Encrypted Config"? 209<br />
phone displays "No Service" 208<br />
restarting phone 209<br />
Index<br />
Model <strong>6753i</strong> IP Phone <strong>User</strong> Guide<br />
Index-3<br />
<strong>VoIPon</strong> www.voipon.co.uk sales@voipon.co.uk Tel: +44 (0)1245 808195 Fax: +44 (0)1245 808299
Index<br />
Index<br />
U<br />
user password 43<br />
V<br />
voicemail 116, 164<br />
W<br />
warning tone, for Intercom 186<br />
warranty, limited 212<br />
X<br />
XML application title 79<br />
XML application URI 79<br />
XML beep support 171<br />
XML features 196, 198<br />
XML key 79<br />
XML service, accessing 81<br />
Index-4<br />
Model <strong>6753i</strong> IP Phone <strong>User</strong> Guide<br />
<strong>VoIPon</strong> www.voipon.co.uk sales@voipon.co.uk Tel: +44 (0)1245 808195 Fax: +44 (0)1245 808299
<strong>VoIPon</strong> www.voipon.co.uk sales@voipon.co.uk Tel: +44 (0)1245 808195 Fax: +44 (0)1245 808299