Jinko Installation Manual - All Eco Energy
Jinko Installation Manual - All Eco Energy
Jinko Installation Manual - All Eco Energy

Create successful ePaper yourself
Turn your PDF publications into a flip-book with our unique Google optimized e-Paper software.
Rev. C<br />
*Note: before installing, you should confirm below important things:<br />
1) Visual check before installation, to make sure there is no bug in the packing and<br />
junction box as well as the surface of module. , If have , remove and clean it .<br />
2) Check the series number to know is it right or not.<br />
2.3.1 Screw fitting:<br />
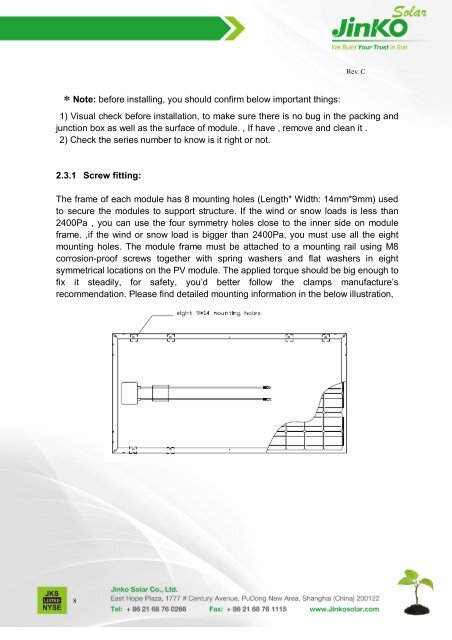
The frame of each module has 8 mounting holes (Length* Width: 14mm*9mm) used<br />
to secure the modules to support structure. If the wind or snow loads is less than<br />
2400Pa , you can use the four symmetry holes close to the inner side on module<br />
frame. ,if the wind or snow load is bigger than 2400Pa, you must use all the eight<br />
mounting holes. The module frame must be attached to a mounting rail using M8<br />
corrosion-proof screws together with spring washers and flat washers in eight<br />
symmetrical locations on the PV module. The applied torque should be big enough to<br />
fix it steadily, for safety, you’d better follow the clamps manufacture’s<br />
recommendation. Please find detailed mounting information in the below illustration,<br />
8