Installation Guidelines for XT Series Convertible ... - Robbins Auto Top
Installation Guidelines for XT Series Convertible ... - Robbins Auto Top
Installation Guidelines for XT Series Convertible ... - Robbins Auto Top
You also want an ePaper? Increase the reach of your titles
YUMPU automatically turns print PDFs into web optimized ePapers that Google loves.
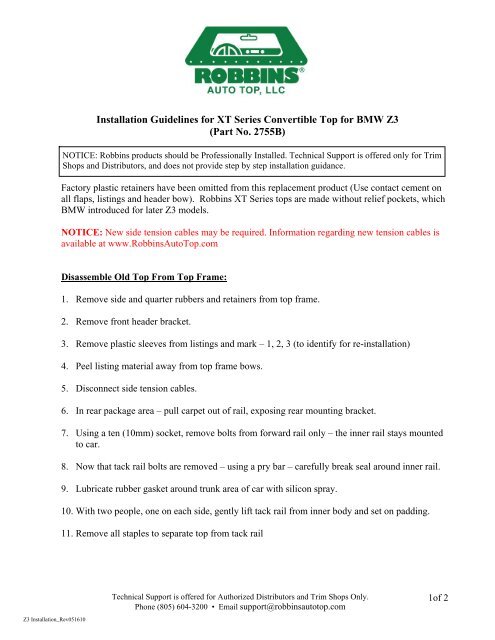
<strong>Installation</strong> <strong>Guidelines</strong> <strong>for</strong> <strong>XT</strong> <strong>Series</strong> <strong>Convertible</strong> <strong>Top</strong> <strong>for</strong> BMW Z3<br />
(Part No. 2755B)<br />
NOTICE: <strong>Robbins</strong> products should be Professionally Installed. Technical Support is offered only <strong>for</strong> Trim<br />
Shops and Distributors, and does not provide step by step installation guidance.<br />
Factory plastic retainers have been omitted from this replacement product (Use contact cement on<br />
all flaps, listings and header bow). <strong>Robbins</strong> <strong>XT</strong> <strong>Series</strong> tops are made without relief pockets, which<br />
BMW introduced <strong>for</strong> later Z3 models.<br />
NOTICE: New side tension cables may be required. In<strong>for</strong>mation regarding new tension cables is<br />
available at www.<strong>Robbins</strong><strong>Auto</strong><strong>Top</strong>.com<br />
Disassemble Old <strong>Top</strong> From <strong>Top</strong> Frame:<br />
1. Remove side and quarter rubbers and retainers from top frame.<br />
2. Remove front header bracket.<br />
3. Remove plastic sleeves from listings and mark – 1, 2, 3 (to identify <strong>for</strong> re-installation)<br />
4. Peel listing material away from top frame bows.<br />
5. Disconnect side tension cables.<br />
6. In rear package area – pull carpet out of rail, exposing rear mounting bracket.<br />
7. Using a ten (10mm) socket, remove bolts from <strong>for</strong>ward rail only – the inner rail stays mounted<br />
to car.<br />
8. Now that tack rail bolts are removed – using a pry bar – carefully break seal around inner rail.<br />
9. Lubricate rubber gasket around trunk area of car with silicon spray.<br />
10. With two people, one on each side, gently lift tack rail from inner body and set on padding.<br />
11. Remove all staples to separate top from tack rail<br />
Technical Support is offered <strong>for</strong> Authorized Distributors and Trim Shops Only.<br />
Phone (805) 604-3200 • Email support@robbinsautotop.com<br />
1of 2<br />
Z3 <strong>Installation</strong>_Rev051610
Install New <strong>Robbins</strong> <strong>Top</strong> on BMW Z3<br />
1. Install side tension cables into new <strong>Robbins</strong> top.<br />
2. Find center of new top and mark top and tack rail. Starting on edge of tack rail (each side)<br />
attach each corner of new top evenly with guide line on rail, staple center mark, pull each<br />
corner to guide mark and fasten. Staple remainder of top to rail.<br />
Note: There is no excess material. Align rear edge of top to bottom edge of channel on rail.<br />
3. Reattach rear rail back into car, using a 1/4 inch bead of butyl tape to seal against water<br />
penetration. (We recommend 3M Ribbon Sealer Window-Weld #08610).<br />
4. Attach side tension cables.<br />
5. Find the glue guide mark at front of new <strong>Robbins</strong> Z3 top.<br />
6. Apply contact cement following glue mark on top and corresponding area of header bow, and<br />
front side flaps.<br />
7. Following the guide mark, affix the top to the header bow.<br />
8. Latch frame – top should be very snug and wrinkle free.<br />
9. Glue quarter panels (inner and outer flaps).<br />
10. Glue listings to bows (and install plastic sleeves)<br />
11. Reassemble retainers and rubber moldings.<br />
When first operating the new top, proceed slowly and with caution. If anything appears or sounds<br />
incorrect, Stop Immediately and address the problem be<strong>for</strong>e continuing.<br />
Most Vehicles Manufactured up to 12/1996 Require short<br />
(12 ¾” OAL) tension cables. <strong>Robbins</strong> part # CBL2750S<br />
Most Vehicles Manufactured 1/1997-2002 Require long<br />
(17 ¾” OAL) tension cables. <strong>Robbins</strong> part # CBL2750L<br />
CAUTION Regarding Z3 Cables: We have found that<br />
BMW's documented change period (12/1996) from SHORT<br />
cables to LONG cables is not consistent. There<strong>for</strong>e the way<br />
to determine which cables are needed, with certainly, is to<br />
measure the existing cables and match them to the OAL<br />
(Overall Length) listed above.<br />
***The BMW dealer's Serial Number based product selection<br />
Does Not insure correct cable identification***<br />
Technical Support is offered <strong>for</strong> Authorized Distributors and Trim Shops Only.<br />
Phone (805) 604-3200 • Email support@robbinsautotop.com<br />
2 of 2


