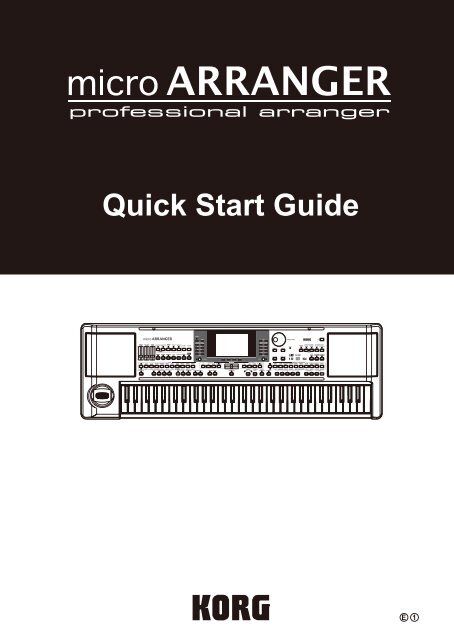
microARRANGER Quick Start Guide - Korg
microARRANGER Quick Start Guide - Korg
microARRANGER Quick Start Guide - Korg

Create successful ePaper yourself
Turn your PDF publications into a flip-book with our unique Google optimized e-Paper software.
<strong>Quick</strong> <strong>Start</strong> <strong>Guide</strong><br />
E 1
PRECAUTIONS<br />
LOCATION<br />
Using the unit in the following locations can result in a malfunction.<br />
• In direct sunlight<br />
• Locations of extreme temperature or humidity<br />
• Excessively dusty or dirty locations<br />
• Locations of excessive vibration<br />
• Close to magnetic fields<br />
POWER SUPPLY<br />
Please connect the designated AC adapter to an AC outlet of<br />
the correct voltage. Do not connect it to an AC outlet of voltage<br />
other than that for which your unit is intended.<br />
INTERFERENCE WITH OTHER ELECTRICAL<br />
DEVICES<br />
Radios and televisions placed nearby may experience reception<br />
interference. Operate this unit at a suitable distance from<br />
radios and televisions.<br />
HANDLING<br />
To avoid breakage, do not apply excessive force to the<br />
switches or controls.<br />
CARE<br />
If the exterior becomes dirty, wipe it with a clean, dry cloth.<br />
Do not use liquid cleaners such as benzene or thinner, or<br />
cleaning compounds or flammable polishes.<br />
KEEP THIS MANUAL<br />
After reading this manual, please keep it for later reference.<br />
KEEPING FOREIGN MATTER OUT OF YOUR<br />
EQUIPMENT<br />
Never set any container with liquid in it near this equipment.<br />
If liquid gets into the equipment, it could cause a breakdown,<br />
fire, or electrical shock.<br />
Be careful not to let metal objects get into the equipment. If<br />
something does slip into the equipment, unplug the AC<br />
adapter from the wall outlet.<br />
Then contact your nearest <strong>Korg</strong> dealer or the store where the<br />
equipment was purchased.<br />
THE FCC REGULATION WARNING (FOR USA)<br />
This equipment has been tested and found to comply with<br />
the limits for a Class B digital device, pursuant to Part 15<br />
of the FCC Rules. These limits are designed to provide reasonable<br />
protection against harmful interference in a residential<br />
installation. This equipment generates,<br />
uses, and can radiate radio frequency energy and, if not<br />
installed and used in accordance with the instructions,<br />
may cause harmful interference to radio communications.<br />
However, there is no guarantee that interference will not<br />
occur in a particular installation. If this equipment does<br />
cause harmful interference to radio or television reception,<br />
which can be determined by turning the equipment off<br />
and on, the user is encouraged to try to correct the interference<br />
by one or more of the following measures:<br />
•Reorient or relocate the receiving antenna.<br />
•Increase the separation between the equipment and<br />
receiver.<br />
•Connect the equipment into an outlet on a circuit different<br />
from that to which the receiver is connected.<br />
•Consult the dealer or an experienced radio/TV technician<br />
for help.<br />
Unauthorized changes or modification to this system can<br />
void the user’s authority to operate this equipment.<br />
NOTICE REGARDING DISPOSAL (EU ONLY)<br />
When this “crossed‐out wheeled bin” symbol is<br />
displayed on the product, owner’s manual, battery,<br />
or battery package, it signifies that when you<br />
wish to dispose of this product, manual, package<br />
or battery you must do so in an approved manner.<br />
Do not discard this product, manual, package or<br />
battery along with ordinary household waste.<br />
Disposing in the correct manner will prevent harm to<br />
human health and potential damage to the environment.<br />
Since the correct method of disposal will depend on the<br />
applicable laws and regulations in your locality, please contact<br />
your local administrative body for details. If the battery<br />
contains heavy metals in excess of the regulated amount, a<br />
chemical symbol is displayed below the “crossed‐out<br />
wheeled bin” symbol on the battery or battery package.<br />
IMPORTANT NOTICE TO CONSUMERS<br />
This product has been manufactured according to strict<br />
specifications and voltage requirements that are applicable<br />
in the country in which it is intended that this product<br />
should be used. If you have purchased this product via the<br />
internet, through mail order, and/or via a telephone sale,<br />
you must verify that this product is intended to be used in<br />
the country in which you reside.<br />
WARNING: Use of this product in any country other than<br />
that for which it is intended could be dangerous and could<br />
invalidate the manufacturer’s or distributor’s warranty.<br />
Please also retain your receipt as proof of purchase otherwise<br />
your product may be disqualified from the manufacturer’s<br />
or distributor’s warranty.
DATA HANDLING<br />
Data stored in memory may occasionally be lost due to incorrect<br />
user action. Be sure to save your important data to a<br />
memory card. KORG will not be responsible for damages<br />
caused by data loss.<br />
LCD DISPLAY<br />
Some pages of the manuals show LCD screens along with an<br />
explanation of operation and functionality. All sound names,<br />
parameter names, and values are merely examples and may<br />
not always match the actual display that you are working on.<br />
TRADEMARKS<br />
Mac, the Mac logo and the Audio Units logo are trademarks<br />
of Apple Inc., registered in the U.S. and other countries.<br />
MS‐DOS and Windows are registered trademarks of Microsoft<br />
Corporation, registered in the U.S. and other countries.<br />
All product names and company names are the trademarks<br />
or registered trademarks of their respective owners.<br />
TABLE OF CONTENTS<br />
Welcome! . . . . . . . . . . . . . . . . . . . . . . . . . . 1<br />
Useful links . . . . . . . . . . . . . . . . . . . . . . . . . . . . . . . . . . . . 1<br />
About this manual . . . . . . . . . . . . . . . . . . . . . . . . . . . . . . 1<br />
<strong>Start</strong> up . . . . . . . . . . . . . . . . . . . . . . . . . . . . 1<br />
Connecting the AC power adapter . . . . . . . . . . . . . . . . 1<br />
Turning the instrument on and off . . . . . . . . . . . . . . . . 1<br />
Controlling the Volume . . . . . . . . . . . . . . . . . . . . . . . . . 2<br />
The BALANCE slider . . . . . . . . . . . . . . . . . . . . . . . . . . . 2<br />
Headphones . . . . . . . . . . . . . . . . . . . . . . . . . . . . . . . . . . . 2<br />
Audio Outputs . . . . . . . . . . . . . . . . . . . . . . . . . . . . . . . . . 2<br />
Audio Inputs . . . . . . . . . . . . . . . . . . . . . . . . . . . . . . . . . . 2<br />
MIDI connections . . . . . . . . . . . . . . . . . . . . . . . . . . . . . . . 2<br />
Damper Pedal . . . . . . . . . . . . . . . . . . . . . . . . . . . . . . . . . . 2<br />
Demo . . . . . . . . . . . . . . . . . . . . . . . . . . . . . . . . . . . . . . . . . 2<br />
The music stand . . . . . . . . . . . . . . . . . . . . . . . . . . . . . . . . 2<br />
Front panel . . . . . . . . . . . . . . . . . . . . . . . . . 3<br />
Display and User Interface . . . . . . . . . . . . 9<br />
Display controls . . . . . . . . . . . . . . . . . . . . . . . . . . . . . . . . 9<br />
Interface structure . . . . . . . . . . . . . . . . . . . . . . . . . . . . . 10<br />
Message windows . . . . . . . . . . . . . . . . . . . . . . . . . . . . . 11<br />
Symbols and Icons . . . . . . . . . . . . . . . . . . . . . . . . . . . . . 11<br />
Grayed‐out non‐available parameters . . . . . . . . . . . . 11<br />
Rear panel . . . . . . . . . . . . . . . . . . . . . . . . 11<br />
Basic operations . . . . . . . . . . . . . . . . . . . 12<br />
Playing on the keyboard . . . . . . . . . . . . . . . . . . . . . . . . 12<br />
Selecting, muting/unmuting and soloing a track . . . 12<br />
Selecting a Performance . . . . . . . . . . . . . . . . . . . . . . . . 12<br />
Selecting a Program . . . . . . . . . . . . . . . . . . . . . . . . . . . . 13<br />
Selecting a Style . . . . . . . . . . . . . . . . . . . . . . . . . . . . . . . 14<br />
Selecting a Single Touch Setting (STS) . . . . . . . . . . . . 14<br />
Changing all keyboard tracks at once . . . . . . . . . . . . . 14<br />
Shortcut to see the original bank<br />
for a Style, Performance or Program . . . . . . . . . . . . 14<br />
Tutorial . . . . . . . . . . . . . . . . . . . . . . . . . . . 15<br />
Playing a Style<br />
(Automatic Accompaniment) . . . . . . . . . . . . . . . . . . 15<br />
Playing in Realtime<br />
(Without using Automatic Accompaniment) . . . . 16<br />
Recording a Song<br />
(Simultaneously recording<br />
the Style and realtime performance) . . . . . . . . . . . . 18<br />
Playing a Song from a card . . . . . . . . . . . . . . . . . . . . . 19<br />
Specifications . . . . . . . . . . . . . . . . . . . . . 20
1 <strong>Start</strong> up<br />
Useful links<br />
1. WELCOME!<br />
Thank you for purchasing the <strong>Korg</strong> Professional Arranger<br />
<strong>microARRANGER</strong>.<br />
This instrument is an ideal keyboard for song production —<br />
it lets you select a desired musical style and generate a highquality<br />
band accompaniment simply by playing chords, and<br />
then you can play the melody yourself to easily create an<br />
original song.<br />
USEFUL LINKS<br />
Your preferred KORG dealer also carries a wide range of<br />
<strong>Korg</strong> hardware and software accessories. Please ask your<br />
dealer about additional Programs, Styles, and other useful<br />
music materials.<br />
Each KORG distributor can supply you with useful information.<br />
In the English‐speaking world, here are the relevant<br />
addresses:<br />
USA KORG USA, 316 South Service Road, Melville,<br />
New York, 11747, USA<br />
Tel:1‐516‐333‐9100, Fax:1‐516‐333‐9108<br />
UK KORG UK Ltd, 1 Harrison Close, Knowlhill,<br />
Milton Keynes, MK5, 8PA, UK<br />
Tel: 01908 304600, Fax: 01908 304699<br />
UK Technical Support<br />
Tel: 01908 304637<br />
E‐mail: info@korg.co.uk<br />
Many KORG distributors also have their own web page on<br />
the internet, where you can find information and software.<br />
Useful web pages in English are the following:<br />
http://www.korg.com/<br />
http://www.korg.co.uk/<br />
A place to find operating system updates and various system<br />
files (for example, a full backup of the factory data) is at the<br />
following link:<br />
http://www.korgpa.com/<br />
ABOUT THIS MANUAL<br />
The documentation for this instrument consists of the ʺ<strong>Quick</strong><br />
<strong>Start</strong> <strong>Guide</strong>ʺ (the document youʹre reading) and a more<br />
detailed PDF ownerʹs manual provided on the accessory disc.<br />
The PDF ownerʹs manual is divided into the following three<br />
sections.<br />
• A Basic <strong>Guide</strong>, containing an overview of the instrument,<br />
as well as a series of practical guides (named<br />
“Tutorials”).<br />
• A Reference <strong>Guide</strong>, with each page and parameter<br />
described in detail.<br />
• An Appendix, with a list of data and useful information<br />
for the advanced user.<br />
The quick start guide and PDF ownerʹs manual use the following<br />
abbreviations.<br />
The parameter can be saved onto a Performance<br />
by pressing the WRITE button.<br />
The parameter can be saved onto the current<br />
Style Performance by pressing the WRITE button.<br />
The parameter can be saved onto a Single<br />
Touch Setting by pressing the WRITE button.<br />
The parameter can be saved onto a Global setting<br />
by going to the Global environment and<br />
pressing the WRITE button.<br />
2. START UP<br />
CONNECTING THE AC POWER ADAPTER<br />
Connect the supplied AC power adapter to the dedicated<br />
socket on the rear of the instrument. Then, plug it into a wall<br />
socket.<br />
Warning: Use only the supplied adapter, or an adapter suggested<br />
by <strong>Korg</strong>. Other adapters may look similar, but they<br />
may damage your instrument!<br />
TURNING THE INSTRUMENT ON AND OFF<br />
Turning the power on<br />
• Press the power button ( ) located on the upper right<br />
side of the front panel.<br />
The startup screen will appear in the LCD, and after a<br />
time it will display the main page in Style Play mode<br />
and the unit will be ready for sound output.<br />
Turning the power off<br />
• Press the power button ( ) located on the upper right<br />
side of the front panel to turn off the power.<br />
Warning: When turning the instrument off, all data contained<br />
in RAM (a volatile memory, used for Song editing) will<br />
be lost. On the contrary, data contained in the SSD disk (a<br />
non‐volatile memory, used for Factory and User data) will be<br />
preserved.<br />
Note: Never turn off the power while the SD card data is<br />
being read or written.
<strong>Start</strong> up<br />
Controlling the Volume<br />
2<br />
ABOUT THE AUTO POWER-OFF FUNCTION<br />
With the factory settings, this instrument will automatically<br />
power‐off when four hours have passed since you last played<br />
the keyboard or used the buttons. If desired, you can turn off<br />
(disable) this function.<br />
The power will also turn off automatically after four hours<br />
pass with only songs or demo songs being played.<br />
To adjust power on/off settings, press the [GLOBAL] button<br />
to enter the GLOBAL page, and adjust the settings on the<br />
Page1‐Gen.Controls page.<br />
CONTROLLING THE VOLUME<br />
• Use the MASTER VOLUME<br />
slider to control the overall<br />
volume of the instrument.<br />
This slider controls the volume<br />
of the sound going to<br />
the internal speakers,<br />
the L/MONO & RIGHT<br />
OUTPUTS, and the HEAD‐<br />
PHONES connector.<br />
Note: <strong>Start</strong> at a moderate level,<br />
then raise the MASTER VOLUME up. Don’t keep the volume<br />
at an uncomfortable level for too long.<br />
• Use the ACC/SEQ VOLUME slider to control the Style<br />
tracks (drums, percussion, bass…) volume. This slider<br />
also controls both of the Sequencers tracks, excluding<br />
the Realtime (Keyboard) tracks.<br />
• By default, you can use the ASSIGN.SLIDER to control<br />
the keyboard tracks volume. This slider is user‐assignable,<br />
but is set to the Keyboard Expression parameter by<br />
default.<br />
THE BALANCE SLIDER<br />
The BALANCE slider sets the relative volume of the two<br />
onboard sequencers (Sequencer1 and Sequencer 2).<br />
• Move it fully left to set Sequencer 1 to the maximum<br />
level and Sequencer 2 to zero.<br />
• Move it fully right to set Sequencer 1 to zero and<br />
Sequencer 2 to the maximum level.<br />
• Move it to the center to set both Sequencers at the same<br />
level.<br />
Note: When turning the instrument on, move this slider to the center,<br />
to avoid starting a Song at the minimum level.<br />
HEADPHONES<br />
You can connect a pair of headphones to the rear panel headphone<br />
jack (PHONES: stereo mini‐jack). You can use headphones<br />
with an impedance of 16–200Ω (50Ω recommended).<br />
Use the connected device’s volume control to adjust the input<br />
level. Be careful not to make it distort (or “clip”). Here is how<br />
to set the volume of the connected device:<br />
• if the sound heard on <strong>microARRANGER</strong>’s outputs is too<br />
low, you should increase the output level of the connected<br />
device.<br />
• if it sounds fine, it’s ok.<br />
• if it distorts, you should lower the level a little, until the<br />
sounds is fine again.<br />
MIDI CONNECTIONS<br />
You can play the internal sounds of your <strong>microARRANGER</strong><br />
with an external controller, i.e. a master keyboard, a MIDI<br />
guitar, a wind controller, a MIDI accordion, or a digital piano.<br />
1. Connect a standard MIDI cable from the MIDI OUT of<br />
your controller to the MIDI IN connector on the micro‐<br />
ARRANGER.<br />
2. Select a transmission MIDI channel on your controller.<br />
Some controllers, like the MIDI accordions, usually<br />
transmit on more than one channel.<br />
3. On the <strong>microARRANGER</strong>, select the MIDI Setup that<br />
best fits your controller’s type.<br />
DAMPER PEDAL<br />
Connect a Damper (Sustain) pedal to the DAMPER connector<br />
on the back panel. Use a KORG PS‐1, PS‐3 or DS1H footswitch<br />
pedal, or a compatible one.<br />
DEMO<br />
Listen to the built‐in Demo Songs to appreciate the power of the<br />
<strong>microARRANGER</strong>. There are 16 Demo Songs to choose from.<br />
1. Press the STYLE PLAY and SONG PLAY buttons<br />
together. Their LEDs start blinking.<br />
At this point, if you don’t press any other button, all the<br />
Demo Songs will be played back.<br />
2. Choose a page using the PAGE buttons. There are two<br />
different pages in the Demo mode.<br />
3. Select a Demo Song by pressing the corresponding VOL‐<br />
UME/VALUE button around the display. The Demo will<br />
automatically start.<br />
4. Stop the Demo by pressing START/STOP.<br />
5. Exit the Demo mode by pressing one of the MODE buttons.<br />
THE MUSIC STAND<br />
A music stand comes standard with your <strong>microARRANGER</strong>.<br />
Fit it into the two dedicated holes in the front panel.<br />
AUDIO OUTPUTS<br />
You can send the sound to an external amplification system,<br />
instead of the internal speakers. This is useful when recording,<br />
or when playing live.<br />
AUDIO INPUTS<br />
You can connect the output of another electronic musical<br />
instrument, an unpowered mixer, or any audio device to the<br />
rear panel input jack (INPUT: stereo mini‐jack). Since this is a<br />
line‐level input, youʹll need to use a separately sold mic preamp<br />
or mixer if youʹre connecting a mic.
3 Front panel<br />
The music stand<br />
3. FRONT PANEL<br />
27<br />
2 3 4 5 6 7<br />
30<br />
28<br />
29<br />
30<br />
34<br />
35<br />
38<br />
39<br />
1<br />
40<br />
15 8 9 10 11 12 13 14<br />
31<br />
32<br />
48<br />
33<br />
49<br />
36<br />
37<br />
44<br />
41<br />
42 43<br />
16<br />
17 18 19 20 21 22<br />
23<br />
24<br />
25<br />
26<br />
45<br />
46<br />
47<br />
1 Power switch ( )<br />
This turns the <strong>microARRANGER</strong>ʹs power on or off.<br />
2 MASTER VOLUME<br />
This slider controls the overall volume of the instrument,<br />
both of the internal speakers, the L/MONO and RIGHT outputs,<br />
and the HEADPHONES output.<br />
Warning: At the maximum level, with rich‐sounding Songs, Styles<br />
or Programs, the internal speakers could distort during signal<br />
peaks. Should this happen, lower the Master Volume a little.<br />
3 ACC/SEQ VOLUME<br />
This slider controls the accompaniment tracks volume (Style<br />
Play mode) or the Song tracks volume, excluding the Realtime<br />
tracks (Song and Song Play modes). This is a relative<br />
control, where the effective maximum value is determined by<br />
the MASTER VOLUME slider position.<br />
4 ASSIGN.SLIDER<br />
This is a freely programmable slider. By default, it acts as the<br />
Keyboard Expression control, to let you balance the relative<br />
volume of the Realtime (Keyboard) tracks.<br />
5 MODE section<br />
Each of these buttons recalls one of the operating modes of<br />
the instrument. Each mode excludes the others.<br />
STYLE PLAY Style Play mode, where you can play Styles<br />
(automatic accompaniments) and/or play up to<br />
four Realtime tracks on the keyboard.<br />
In the main page, Realtime (Keyboard) tracks<br />
are shown on the right half of the display. You<br />
can reach the main page by pressing EXIT from<br />
any of the Style Play edit pages. If you are in a<br />
different operating mode, press STYLE PLAY<br />
to recall the Style Play mode. If the TRACK<br />
SELECT LED is on, press TRACK SELECT to<br />
turn it off and see the Realtime tracks.<br />
This operating mode is automatically selected<br />
when the instrument is turned on.<br />
SONG PLAY Song Play mode, where you can playback 16‐<br />
track Songs in Standard Midi File (SMF) format<br />
directly from the memory card. You can also<br />
play “.MID” and “.KAR” files directly from the<br />
memory card. Since the <strong>microARRANGER</strong> is<br />
equipped with two sequencers, you can even<br />
play two Songs at the same time, and mix them<br />
with the BALANCE slider.<br />
B.SEQ<br />
SONG<br />
PROGRAM<br />
DEMO<br />
In addition to the Song tracks, you can play<br />
one to four Realtime (Keyboard) tracks, along<br />
with the Song(s). In the main page, Realtime<br />
(Keyboard) tracks are shown on the right half<br />
of the display. You can reach the main page by<br />
pressing EXIT from any of the Song Play edit<br />
pages. If you are in a different operating mode,<br />
press SONG PLAY to recall the Song Play<br />
mode. If the TRACK SELECT LED is on or<br />
flashing, press TRK SELECT one or two times<br />
to turn it off and see the Realtime tracks.<br />
Backing Sequence mode, where you can record<br />
a new Song based on the Realtime and Style<br />
tracks, and save it as a new Standard MIDI File.<br />
Song mode, where you can play, record, or edit<br />
a Song.<br />
Program mode, to play single Sound Programs<br />
on the keyboard, or edit them.<br />
Press the STYLE PLAY and SONG PLAY buttons<br />
together to select the Demo mode. This<br />
mode lets you listen to some Demo Songs, to<br />
let you hear the sonic power of the microAR‐<br />
RANGER.<br />
6 GLOBAL<br />
This button recalls the Global edit environment where you<br />
can select various global settings. This edit environment overlaps<br />
any operating mode, which will still remain active in the<br />
background. Press EXIT to go back to the underlying operating<br />
mode.<br />
7 SD CARD<br />
This button recalls the Card edit environment, where you can<br />
execute various operations on files and cards (Load, Save, Format,<br />
etc…). This edit environment overlaps the current operating<br />
mode, which will still remain active in the background.<br />
Press EXIT to go back to the underlying operating mode.
Front panel<br />
The music stand<br />
4<br />
8 MEMORY (TIE)<br />
This button turns the Lower and Chord Memory functions on<br />
or off. Go to the “Page 24 ‐ Preferences: controls” edit page to<br />
decide if this button should be a Chord Memory only, or a<br />
Lower/Chord Memory button. When it works as a Lower/<br />
Chord Memory:<br />
O N<br />
OFF<br />
The sound to the left of the split point, and the<br />
chord for the automatic accompaniment, are<br />
kept in memory even when you raise your<br />
hand from the keyboard.<br />
The sound and chords are released as soon as<br />
you raise your hand from the keyboard.<br />
This button doubles as a TIE function for the Song mode.<br />
9 BASS INV. (REST)<br />
This button turns the Bass Inversion function on or off.<br />
ON<br />
OFF<br />
The lowest note of a chord played in inverted<br />
form will always be detected as the root note of<br />
the chord. Thus, you can specify to the arranger<br />
composite chords such as Am7/G or “F/C”.<br />
The lowest note is scanned together with the<br />
other chord notes, and is not always considered<br />
as the root note.<br />
This button doubles as a REST function for the Song mode.<br />
10 MAN. BASS<br />
This button turns the Manual Bass function on or off.<br />
Note: When you press the MAN. BASS button, the Bass track volume<br />
is automatically set to the maximum value. The volume is<br />
automatically set back to the original value when the MAN. BASS<br />
button is deactivated.<br />
ON<br />
OFF<br />
The automatic accompaniment stops playing<br />
(apart for the Drum and Percussion tracks),<br />
and you can manually play the Bass track on<br />
the Lower part of the keyboard. You can start<br />
the automatic accompaniment again by pressing<br />
one of the CHORD SCANNING buttons.<br />
The bass track is automatically played by the<br />
Style.<br />
11 SPLIT POINT ()<br />
Press this button to open the Groove Quantize window,<br />
where you can select a realtime groove quantization to be<br />
applied to the Song (only Sequencer 1).<br />
This button doubles as a NEXT EVENT function for the<br />
Backing Sequence and Song modes.<br />
13 TEMPO (= LOCK)<br />
This button turns the Tempo Lock function on or off.<br />
ON<br />
OFF<br />
When you select a different Style or Performance,<br />
the tempo doesn’t change. You can still<br />
change it using the DIAL or the TEMPO buttons.<br />
When you select a different Style or Performance,<br />
the memorized tempo value is automatically<br />
selected.<br />
14<br />
This button turns the Single Touch function on or off.<br />
ON<br />
OFF<br />
SINGLE TOUCH<br />
When a different Style (or the same again) is<br />
selected, a Single Touch Setting (STS1) is automatically<br />
selected, meaning that the Realtime<br />
tracks and effects will change, together with<br />
the Style tracks and effects.<br />
When you select a different Style (or the same<br />
again), the Style tracks and effects are changed,<br />
while the Realtime tracks are not changed.<br />
15 STYLE section (NUMERIC KEYPAD)<br />
Use these buttons to open the Style Select window and select<br />
a Style. See “Selecting a Style” on page 14.<br />
The leftmost button lets you select the upper or lower row of<br />
Style banks. Press it until you’ve selected the row you’re looking<br />
for. (After both LEDs have turned on, press the button<br />
again to turn them off).<br />
UPPER LED ON<br />
LOWER LED ON<br />
Upper‐row Styles selected.<br />
Lower‐row Styles selected.<br />
A word about Style banks and names. Styles from “8/16<br />
BEAT” to “WORLD 3”, and from “LATIN1” to “TRAD” are<br />
standard Styles, the user can’t normally overwrite with a<br />
Load operation.<br />
“DIRECT SD” Styles are Styles directly accessed from the<br />
memory card (no need to load from card).<br />
Styles from “USER1” to “USER3” are locations where you<br />
can load new Styles from the memory card.<br />
Each button (Style bank) contains 2 pages, each with up to 8<br />
Styles. Browse through the Styles using the PAGE buttons.<br />
There is a shortcut to see the original bank for a Style. You<br />
can see the original bank where a Style is contained. Just keep<br />
the SHIFT button pressed, and then press the lefmost button of<br />
the STYLE section. A message window will appear, showing<br />
the name of the original bank. Release the SHIFT button to exit<br />
the window.<br />
There is a shortcut to see all pages of the selected bank. To<br />
cycle all pages for a selected bank, press the bank’s button<br />
until you see the page that you’re looking for.<br />
These buttons double as a numeric keypad on certain pages.<br />
16 FADE IN/OUT<br />
When the Style stopped, press this button to start it with a<br />
volume fade‐in (the volume goes from zero to the maximum).<br />
When the Style is playing, press this button to stop it with a<br />
volume fade‐out (the volume gradually decreases).<br />
You don’t need to press START/STOP to start or stop the Style.<br />
17 VARIATION 1–4 (NOTE LENGTH) buttons<br />
Each of these buttons will select one of the four variations of<br />
the current Style. Each variation can vary in patterns and<br />
sounds.<br />
These buttons double as a NOTE LENGTH function for the<br />
Song mode.<br />
18 FILL 1–2 (NOTE LENGTH) buttons<br />
These two buttons trigger a fill‐in. Press them twice (LED blinking)<br />
to let them play in loop, and select any other Style element<br />
(Fill, Intro, Variation…) to exit the loop.<br />
They also double as a NOTE LENGTH function for the<br />
Song mode.
5 Front panel<br />
The music stand<br />
19 COUNT IN / BREAK<br />
While the Style is not running, press this button, then press<br />
START/STOP. This combination triggers a one‐bar initial<br />
count, then the Style starts playing.<br />
While the Style is already in play, this button triggers a break<br />
(an empty measure beginning with a kick + crash shot). Press<br />
it twice to let it play in loop, and select any other Style element<br />
(Fill, Intro, Variation…) to exit the loop.<br />
20 ENDING 1–2 (DOT, TRIPLET) buttons<br />
While the Style is running, these two buttons trigger an Ending,<br />
and stop the Style. Press one of them, and the Style will<br />
stop running with an Ending. If pressed while the Style is<br />
stopped, they act as an additional couple of Intros.<br />
Press them twice (LED blinking) to let them play in loop, and<br />
select any other Style element (Fill, Intro, Variation…) to exit<br />
the loop.<br />
ENDING1 also doubles as a DOT function, and ENDING2<br />
doubles as a TRIPLET function, to be used in Song mode.<br />
Note: Ending 1 plays a short sequence with different chords, while<br />
Ending 2 plays on the last recognized chord.<br />
21 INTRO 1–2 buttons<br />
These two buttons set the arranger in Intro mode. After pressing<br />
one of these buttons, start the Style, and it will begin with<br />
the selected intro. The INTRO LED will automatically go off<br />
at the end of the intro.<br />
Press them twice (LED blinking) to let them play in a loop,<br />
and select any other Style element (Fill, Intro, Variation…) to<br />
exit the loop.<br />
Note: Intro 1 plays a short sequence with different chords, while<br />
Intro 2 plays on the last recognized chord.<br />
22 START/STOP<br />
<strong>Start</strong>s or stops the Style that’s running.<br />
You can reset all ‘frozen’ notes and controllers on the<br />
<strong>microARRANGER</strong> and any instrument connected to its MIDI<br />
OUT, by using the “Panic” key combination. Just press SHIFT<br />
+ START/STOP to stop all notes and reset all controllers.<br />
23 SYNCHRO START / STOP (DELETE)<br />
This button turns the Synchro <strong>Start</strong> and Synchro Stop functions<br />
on or off. Press it repeatedly to turn the functions on or<br />
off. The LEDs will cycle in this order: START <br />
START+STOP OFF.<br />
START LED ON<br />
START+STOP LEDs ON<br />
OFF<br />
When this LED is lit‐up, just play a chord in the<br />
chord recognition area to automatically start<br />
the Style running. If you like, you can turn one<br />
of the INTROs on before starting the Style.<br />
When both LEDs are lit‐up, raising your hand<br />
from the keyboard momentarily will stop the<br />
Style from playing. If you play a chord again,<br />
the Style starts again.<br />
All Synchro functions are turned off.<br />
This button doubles as a DELETE function for the Backing<br />
Sequence and Song modes.<br />
It is also used to delete the selected character, during text<br />
editing.<br />
24 TAP TEMPO/RESET (INSERT)<br />
This is a double‐function button, acting in a different way<br />
depending on the Style status (stop/play).<br />
Tap Tempo: When the Style is not playing, you can “beat” the<br />
tempo on this button. At the end, the accompaniment starts<br />
playing, using the “tapped in” tempo.<br />
Reset: When you press this button while the Style is in play,<br />
the Style pattern goes back to the previous strong beat.<br />
This button doubles as an INSERT function for the Backing<br />
Sequence and Song modes.<br />
It is also used to insert a character at the cursor position, during<br />
text editing.<br />
25 WRITE/CARD IN USE<br />
In Style Play mode, this button opens the Write window, that<br />
lets you save all the tracks onto a Performance, the Realtime<br />
(Keyboard) tracks in a Single Touch Setting (STS), or the<br />
accompaniment tracks onto a Style Performance.<br />
In the Global edit environment, press it to save Global parameters<br />
in memory.<br />
This button’s LED works as a CARD IN USE indicator, and<br />
turns on when the card slot is in use.<br />
26 ENSEMBLE<br />
This button turns the Ensemble function on or off. When on,<br />
the right‐hand melody is harmonized with the left‐hand<br />
chords.<br />
Note: The Ensemble function works only when the keyboard is in<br />
SPLIT mode, and the LOWER Chord Scanning mode selected.<br />
27 RECORD<br />
This button sets the instrument in Record mode (depending<br />
on the current operating mode).<br />
28 MENU<br />
This button opens the Menu page for the current operating<br />
mode or edit environment. After opening a menu, you can<br />
jump to one of the edit pages by pressing the corresponding<br />
VOLUME/VALUE buttons; or browse them using the PAGE<br />
buttons. Otherwise, go back to the main page of the current<br />
operating mode, or close the edit environment, by pressing<br />
the EXIT button.<br />
See the relevant chapter devoted to each operating mode or<br />
edit environment, to see their “maps” in detail.<br />
29 PAGE -/+<br />
After pressing MENU to open a menu, use these buttons to<br />
browse the edit pages of an operating mode or editing environment.<br />
Press EXIT to go back from an edit page to the main<br />
page of the current operating mode, or to close the Global or<br />
Card Edit environment.<br />
In addition, you can use these buttons to select a different<br />
page in a Style Select or Program Select window.
Front panel<br />
The music stand<br />
6<br />
30 VOLUME/VALUE (MUTE) A–H buttons<br />
Within this user’s manual, each button pair is marked with an<br />
alphabetic letter (A–H). See “Display and User Interface” on<br />
page 9 for more details.<br />
A corresponding track name is printed over each button pair.<br />
These names show the corresponding track the button pair<br />
affects in the main page of the Style Play mode.<br />
• The left half is for the main page, where you can see the<br />
Realtime tracks, and the Style tracks grouped together:<br />
• The right half is for the Style tracks page, where you can<br />
see each of the accompaniment tracks:<br />
See “Symbols and Icons” on page 11.<br />
Use these buttons to perform various operations on the commands<br />
and functions appearing in the display.<br />
SELECTING Use each button pair to select the corresponding<br />
item in the display (i.e. a track, a parameter<br />
or a command). Use either the left or right button<br />
in a pair.<br />
VOLUME<br />
MUTE<br />
SOLO<br />
While you are in the main pages of any operating<br />
mode, select a track and use these buttons<br />
to change the track’s volume. Use the left button<br />
to decrease it, or the right button to<br />
increase it.<br />
Press both buttons in a pair to mute the corresponding<br />
track. Press both buttons again to<br />
unmute the track.<br />
While in the Style Play, Song Play and<br />
Song modes, you can solo one of the tracks.<br />
Just keep the SHIFT button pressed, and press<br />
both of the VOLUME/VALUE buttons corresponding<br />
with the track you wish to solo.<br />
To exit the solo mode, keep the SHIFT button<br />
pressed again, and press both the VOLUME/<br />
VALUE buttons corresponding to the soloed<br />
track.<br />
VALUE<br />
Use each button pair to change the corresponding<br />
parameter’s value. The left button decreases<br />
the value, the right button increases it.<br />
31 TRACK SELECT<br />
Depending on the operating mode, this button switches<br />
between the various tracks view.<br />
STYLE PLAY MODE<br />
SONG PLAY MODE<br />
SONG MODE<br />
Switches between the Realtime tracks and the<br />
Style tracks.<br />
Switches between the main page (showing the<br />
Realtime/Keyboard tracks), Song tracks 1–8,<br />
and Song tracks 9–16.<br />
Switches between the main page, Song tracks<br />
1–8 and Song tracks 9–16.<br />
The TRACK SELECT LED shows the current page view:<br />
Off<br />
Main page (Realtime tracks, or Song controls)<br />
On 2nd page (Style tracks, or Song tracks 1–8)<br />
Flashing 3rd page (Song tracks 9–16)<br />
32 SINGLE TOUCH SETTING<br />
(F-1–F-4 FUNCTION KEYS) buttons<br />
While in the main page of the Style Play or Backing Sequence<br />
mode, these buttons select a Single Touch Setting each. Each<br />
of the Styles includes a maximum of four Single Touch Settings<br />
(STS), to automatically configure the Realtime tracks<br />
and effects at the touch of a finger. When the SINGLE<br />
TOUCH LED is lit, an STS is automatically selected when<br />
selecting a Style.<br />
In Edit mode, these buttons double as function keys, to<br />
select the corresponding items in the display.<br />
33 SHIFT<br />
With this button held down, pressing certain other buttons<br />
will access a second function.<br />
34 TEMPO/VALUE section<br />
The DIAL and the DOWN/‐ and UP/+ buttons can be used to<br />
control the Tempo, assign a different value to the selected<br />
parameter in the display or scroll a list of files in the Song<br />
Select and Card pages. The VALUE LED shows the status of<br />
this section.<br />
DIAL<br />
Turn the dial clockwise to increase the value or<br />
tempo. Turn it counter‐clockwise to decrease<br />
the value or tempo.<br />
When used while pressing the SHIFT<br />
button, this control always acts as a Tempo<br />
control.<br />
DOWN/‐ and UP/+<br />
DOWN/‐ decreases the value or tempo; UP/+<br />
increases the value or tempo.<br />
Keep the SHIFT button pressed down,<br />
and press either the DOWN/‐ or<br />
UP/+ button to reset the Tempo to the value<br />
that’s saved onto the selected Style.
7 Front panel<br />
The music stand<br />
35 VALUE LED<br />
This LED shows the status of the DIAL and DOWN/‐ and UP/<br />
+ buttons.<br />
ON<br />
OFF<br />
The DIAL and DOWN/‐ and UP/+ buttons act<br />
as Value controls, to change the value of the<br />
selected parameter in the display.<br />
The DIAL and DOWN/‐ and UP/+ buttons control<br />
the Tempo.<br />
36 EXIT/NO<br />
Use this button to perform various actions, leaving the current<br />
status:<br />
• exit a dialog box<br />
• answer “No” to any question that appears in the display<br />
• exit the Menu window<br />
• go back to the main page of the current operating mode<br />
• exit the Global or Card Edit environment, and go back to<br />
the main page of the current operating mode<br />
• exit from a Style, Performance or Program Select window<br />
37 ENTER/YES<br />
Use this button to perform various actions, confirming the<br />
current selected status:<br />
• answer “Yes” to any question that appears in the display<br />
• confirm a command<br />
38 DISPLAY HOLD<br />
This button turns the Display Hold function on or off.<br />
ON<br />
OFF<br />
When you open a temporary window (like the<br />
Program Select window), it remains in the display<br />
until you press EXIT/NO, or an operating<br />
mode button.<br />
Any temporary window closes after a certain<br />
time, or after selecting an item in the window.<br />
39 CHORD SCANNING section<br />
In Style Play and Backing Sequence mode, use these buttons<br />
to define the way chords are recognized by the arranger.<br />
LOWER<br />
UPPER<br />
Chords are detected below the split point. The<br />
number of notes you should play to form a<br />
chord is defined by the Chord Scanning Mode<br />
parameter.<br />
Chords are detected above the split point. You<br />
must always play three or more notes to let the<br />
arranger recognize a chord.<br />
FULL (both LEDs on)<br />
Chords are detected on the full keyboard<br />
range. You must always play three or more<br />
notes to let the arranger recognize a chord.<br />
OFF<br />
No chords will be detected. After pressing<br />
START/STOP, only the Drum and Percussion<br />
accompaniment tracks can play.<br />
40 KEYBOARD MODE section<br />
These buttons define how the four Keyboard (or Realtime)<br />
tracks are positioned on the keyboard.<br />
SPLIT<br />
The Lower track plays below the split point,<br />
while the Upper 1, Upper 2 and Upper 3 tracks<br />
play above it. By default, selecting this keyboard<br />
mode automatically selects the Lower<br />
chord scanning mode.<br />
FULL UPPER<br />
The Upper 1, Upper 2 and/or Upper 3 tracks<br />
play on the whole keyboard range. The Lower<br />
track does not play. By default, selecting this<br />
keyboard mode automatically selects the Full<br />
chord scanning mode.<br />
41 STYLE CHANGE<br />
This button turns the Style Change function on or off.<br />
ON<br />
OFF<br />
When you select a Performance, the Style could<br />
change, according to which Style number is<br />
memorized onto the Performance.<br />
When you select a Performance, the Style and<br />
Style track settings remain unchanged. Only<br />
Realtime (Keyboard) tracks settings are<br />
changed.<br />
42 PERFORM.<br />
Press this button to use the PROGRAM/PERFORMANCE<br />
section to select a Performance.<br />
43<br />
PROGRAM<br />
Press this button to use the PROGRAM/PERFORMANCE<br />
section to select a Program, and assign it to the selected track.<br />
44 PROGRAM/PERFORMANCE section<br />
Use these buttons to open the Program Select or Performance<br />
Select window, and select a Program or a Performance. See<br />
“Selecting a Program” on page 13, or “Selecting a Performance”<br />
on page 12.<br />
The leftmost button selects the upper or lower row of Program<br />
or Performance banks. Press it until you’ve selected the<br />
row that you’re looking for. (After both LEDs have consecutively<br />
turned on, press the button again to turn them off).<br />
UPPER LED ON<br />
Upper row of Programs or Performances selected.<br />
LOWER LED ON<br />
Lower row of Programs or Performances selected.<br />
On the front panel, Program banks are identified by the<br />
instrument names, while Performance banks are identified<br />
by numbers (1–10; 0=bank 10).<br />
A note about Program banks and names. Programs from<br />
“PIANO” to “SFX” are standard Programs, the user can’t<br />
directly modify.<br />
Programs “USER1” and “USER2” are locations where you<br />
can load new Programs from the memory card.<br />
“USER DK” is where you can load new drum kits.<br />
Each Program bank contains various pages, each with up to 8<br />
Programs. You can browse them using the PAGE buttons.
Front panel<br />
The music stand<br />
8<br />
Shortcut to see the original bank for a Performance or Program.<br />
You can see the original bank where a Performance or<br />
Program is contained. Just keep the SHIFT button pressed,<br />
and then press the lefmost button of the PROGRAM/PER‐<br />
FORMANCE section. A message window will appear, showing<br />
the name of the original bank. Release the SHIFT button<br />
to exit the window.<br />
Shortcut to see all pages of the selected bank. To cycle all of<br />
the pages for a selected bank, press the bank’s button.<br />
45 PADS (1–4, STOP)<br />
These programmable pads can be used to trigger a sound<br />
effect. Use the STOP button to stop a cyclic sound.<br />
Each Pad corresponds to a dedicated Pad track.<br />
46 TRANSPOSE<br />
These buttons transpose the whole instrument<br />
in semitone steps (Master Transpose).<br />
The transposition value is shown (as a note<br />
name) on the top right of the display.<br />
Press both buttons together, to reset the Master<br />
Transpose to zero.<br />
Note: The Master Transpose has no effect on tracks set to Drum<br />
mode (and, even if set in a different status, on the Drum and Percussion<br />
tracks).<br />
♭<br />
♯<br />
Lowers the Master Transpose a semitone.<br />
Raises the Master Transpose a semitone.<br />
47 OCTAVE<br />
These buttons transpose the selected track<br />
in steps of a whole octave (12 semitones;<br />
max ±2 octaves). The transposition value is<br />
shown (in octaves) on the top right area of<br />
the display.<br />
Press both buttons together, to reset the<br />
Octave Transpose to zero.<br />
Note: The Octave Transpose has no effect on tracks set to Drum<br />
mode (and, even if set in a different status, on the Drum and Percussion<br />
tracks).<br />
– Lowers the selected track an octave.<br />
+ Raises the selected track an octave.<br />
48 BALANCE slider<br />
In Song Play mode, this slider balances the volume of the two<br />
on‐board sequencers. When fully on the left, only Sequencer<br />
1 can be heard. When fully on the right, only Sequencer 2 can<br />
be heard. When in the middle, both sequencers will play at<br />
full volume.<br />
49 SEQUENCER TRANSPORT CONTROLS - SEQ1<br />
and SEQ2<br />
The instrument is equipped with two sequencers (Sequencer<br />
1 and Sequencer 2), each with its own set of transport controls.<br />
> Rewind and Fast Forward commands. If you<br />
use them while the Song is in play, they make it<br />
scroll back or forward.<br />
When pressed once, these buttons move the<br />
Song to the previous or following measure.<br />
When kept pressed, they make the Song scroll<br />
continuously, until you release them.<br />
In Jukebox mode (Sequencer 1), keep<br />
the SHIFT button pressed, and press these buttons<br />
to scroll to the previous or next Song in<br />
the Jukebox list.<br />
PAUSE Pauses the Song at the current position. Press<br />
PAUSE or PLAY/STOP to start the Song playing<br />
again.<br />
PLAY/STOP <strong>Start</strong>s or stops the current Song. When you<br />
stop the Song, the Song Position goes back to<br />
measure 1.<br />
In Song Play mode, pressing this button<br />
while keeping SHIFT pressed, starts both<br />
sequencers at the same time.
9 Display and User Interface<br />
Display controls<br />
4. DISPLAY AND USER INTERFACE<br />
The display shows the current status of the microAR‐<br />
RANGER and its performance and editing parameters. You<br />
can select each parameter by using the VOLUME/VALUE (A–<br />
H) buttons on the side of the display, or each page command<br />
Status icons area<br />
appearing along the last line using the F‐1–F‐4 buttons. You<br />
can vary many of the parameter’s values by pressing the left<br />
(‐) or right (+) button of any VOLUME/VALUE pair.<br />
Style (accompaniment/backing) tracks<br />
Realtime (Keyboard) tracks<br />
DISPLAY CONTROLS<br />
VOLUME/VALUE (A–H) buttons and display parameters.<br />
These buttons are used to select the corresponding parameter<br />
or command in the display, to change the parameter’s value,<br />
or to change the volume of the corresponding track.<br />
While you are on the main page, these buttons can select a<br />
track, change the track’s volume, or mute/unmute a track.<br />
See “VOLUME/VALUE (MUTE) A–H buttons” on page 6 for<br />
more information.<br />
F-1–F-4 buttons. When in an Edit page, these buttons may<br />
be used when there are four parameters in a row, as in the following<br />
example:<br />
In the Card Edit environment, the F‐1–F‐4 buttons can be<br />
used also to select one of the page commands appearing in<br />
the last line of the display.<br />
First, select the line using a VOLUME/VALUE (A–H) button.<br />
Then, select a column using the F‐1–F‐4 function button.<br />
See “SINGLE TOUCH SETTING (F‐1–F‐4 FUNCTION KEYS)<br />
buttons” on page 6 for more information.<br />
PAGE. The PAGE buttons select the previous or next edit<br />
page. When selecting a Style or a Program, they select a different<br />
page of Styles or Programs. See “PAGE ‐/+” on page 5<br />
for more information.<br />
MENU. The MENU button opens the current operating mode<br />
or edit environment’s Menu. When in a Menu, you can use the<br />
VOLUME/VALUE buttons to select an edit section to jump to.<br />
TRACK SELECT. Each of the operating modes have a different<br />
number of tracks:<br />
Style Play<br />
Song Play<br />
4 Realtime tracks, 8 Style tracks, 4 Pads.<br />
4 Realtime tracks, 2 x 16 Song Tracks, 4 Pads.<br />
Backing Sequence<br />
4 Realtime tracks, 8 Style tracks, 4 Pads.<br />
Song 16 Song tracks.<br />
You can only see up to 8 tracks in the display. So, use the<br />
TRACK SELECT button to switch to the other (hidden)<br />
tracks. For example, when in Style Play, you can use this button<br />
to switch from the Realtime tracks and the Style tracks.
Display and User Interface<br />
Interface structure<br />
10<br />
INTERFACE STRUCTURE<br />
Thanks to its multitasking operating system, the microAR‐<br />
RANGER user interface is structured in “overlapping”, active<br />
layers. From the lower level:<br />
• operating modes (Style Play, Backing Sequence, Song<br />
Play, Song, Program)<br />
• edit environments (Global, Card)<br />
• selecting windows (Style Select, Song Select, Program<br />
Select, Performance Select).<br />
When opening an edit environment or a selecting page, the<br />
current operating mode is still working in the background.<br />
Edit environment. (See diagram at the bottom). When you<br />
press GLOBAL or SD CARD, an edit environment overlaps<br />
the current operating mode. Press EXIT to go back to the current<br />
operating mode.<br />
An edit environment is made up of a menu and a series of<br />
edit pages. Use the MENU and PAGE buttons to browse<br />
across the various edit pages.<br />
Edit environment<br />
Menu<br />
Edit pages<br />
Selecting windows. When you press one of the STYLE or<br />
PROGRAM/PERFORMANCE buttons, you open a selecting<br />
window. This window closes after selecting one of the items<br />
in it, or after pressing EXIT.<br />
If the DISPLAY HOLD LED is light up, the window doesn’t<br />
close after selecting an item. Press EXIT to close the window,<br />
and go back to the underlying page.<br />
Operating modes. (See diagram at the bottom of this page).<br />
At the lowest level, an operating mode is always active. The<br />
current operating mode is indicated by the lit LED on the<br />
STYLE PLAY, B.SEQ, SONG PLAY, SONG or PROGRAM button<br />
in the MODE section. The relevant icon lights up in the<br />
display.<br />
An operating mode is divided into a main page (the page<br />
where you usually play a Style, a Song or a Program), a<br />
menu, and a series of edit pages.<br />
Press MENU to access the Menu. Use the MENU and PAGE<br />
buttons to browse across the various edit pages. Press EXIT to<br />
go back to the main page.<br />
Operating modes<br />
Main page Menu Edit pages
11 Rear panel<br />
Message windows<br />
MESSAGE WINDOWS<br />
Sometimes, a message might appear in the display, warning<br />
about an error or an incorrect operation:<br />
5. REAR PANEL<br />
Press ENTER or EXIT to exit one of these windows.<br />
Other messages ask for an answer, as in the “Are you sure”<br />
window below:<br />
1 2 3 4 5 6 7 8<br />
Press ENTER/YES for Yes, or EXIT/NO for No.<br />
SYMBOLS AND ICONS<br />
Many icons and symbols, on the custom display, show the<br />
status of a parameter or the display content.<br />
(no icon)<br />
Realtime/Keyboard track<br />
(Upper 1–3, Lower).<br />
Drum track (Style track view).<br />
Percussion track (Style track view).<br />
Grouped Drum and Percussion tracks.<br />
Bass track (Style track view).<br />
Grouped accompaniment tracks. This symbol<br />
indicates the five grouped accompaniment<br />
tracks (Acc1–5).<br />
Accompaniment tracks (Style track view).<br />
Sequencer tracks.<br />
Selected track or parameter. When this symbol<br />
appears, you can execute any available operation<br />
on the selected item.<br />
The track is in mute, and can’t play on the keyboard.<br />
GRAYED-OUT NON-AVAILABLE<br />
PARAMETERS<br />
Currently non‐available parameters are now shown in “gray”<br />
in the display, i.e. with a “ghost” texture. Here is an example<br />
of a grayed‐out parameter, compared to a normal parameter:<br />
Text in solid black<br />
Text in gray<br />
1 PHONES<br />
Use this jack to connect a pair of headphones. You can use<br />
headphones with an impedance of 16–200Ω (50Ω suggested).<br />
Use a headphone distributor to connect more than one pair of<br />
headphones.<br />
2 INPUT<br />
Use these unbalanced connectors to input another keyboard/<br />
synthesizer, a (non‐powered) mixer’s output, or a CD/tape<br />
player (line impedance). The signal is automatically routed to<br />
the speakers, the Audio Outputs and the Phones.<br />
3 OUTPUTS<br />
Use these unbalanced connectors to send the audio signal<br />
(sound) to a mixer, a PA system, a set of powered monitors,<br />
or your hi‐fi system. Set the output level with the MASTER<br />
VOLUME slider.<br />
4 DAMPER<br />
Use this to connect a Damper pedal, like the KORG PS1, PS3<br />
or DS1H.<br />
5 ASSIGN. PDL/SW<br />
Use this to connect a continuous or footswitch pedal, like the<br />
KORG EXP2 or XVP10.<br />
6 MIDI interface<br />
The MIDI interface allows your <strong>microARRANGER</strong> to be connected<br />
to an external controller (master keyboard, MIDI guitar,<br />
wind controller, MIDI accordion…), to an expander, or to<br />
a computer running a sequencer or an editor.<br />
IN<br />
This connector receives MIDI data from a computer<br />
or a controller. Connect it to an external<br />
controller’s or computer’s MIDI OUT.<br />
OUT This connector sends MIDI data generated by<br />
the <strong>microARRANGER</strong>’s keyboard, controllers,<br />
and/or the internal sequencer. Connect it to an<br />
expander’s or computer’s MIDI IN.<br />
7 DC 12V (AC power adapter connector)<br />
Plug the supplied power adapter into this connector.<br />
8 SD Card Slot<br />
To insert an SD card (or SDHC card), push it<br />
into the slot until it clicks into place. To<br />
remove the SD card, push it in; the card will<br />
pop out slightly, allowing you to pull it out.<br />
Note: Carefully read the ownerʹs manual that<br />
came with your SD card, and observe the instructions<br />
regarding care and handling.<br />
Note: Take care to insert the SD card in the correct<br />
direction and orientation, and be sure to<br />
press it all the way into the slot. Do not use<br />
excessive force.<br />
Connector<br />
side
Basic operations<br />
Playing on the keyboard<br />
12<br />
6. BASIC OPERATIONS<br />
PLAYING ON THE KEYBOARD<br />
Just play on the keyboard. You will hear the Realtime tracks<br />
playing. There are four Realtime tracks: Upper 1–3 and<br />
Lower. They may play all at the same time, or just one or a<br />
few of them, depending on their Mute status. If you cannot<br />
hear a track, check the mute status of that part.<br />
Tracks can be set in different ways: use the KEYBOARD<br />
MODE section to select the way they are configured on the<br />
keyboard.<br />
• Press FULL UPPER to play the Upper 1–3 tracks on the<br />
full range of the keyboard, just as you would on a piano.<br />
• Press SPLIT to let the Upper 1–3 tracks play on the right<br />
of the Split Point, and the Lower track on the left.<br />
Lower<br />
Upper 1<br />
• Keep the SPLIT POINT<br />
button pressed, and<br />
play a note to change<br />
the point where the<br />
keyboard is divided in<br />
an Upper and a Lower<br />
part.<br />
To save the selected split point<br />
note, press the GLOBAL button,<br />
then press WRITE to save<br />
the Global in memory.<br />
Upper 2<br />
Split Point<br />
Upper 3<br />
LOWER<br />
Upper 1<br />
Upper 2<br />
Upper 3<br />
SELECTING, MUTING/UNMUTING AND<br />
SOLOING A TRACK<br />
UPPER<br />
Selecting. Use the VOLUME/VALUE (A–H) buttons to select<br />
a track.<br />
If you can’t see the track that<br />
you’re looking for, use the<br />
TRACK SELECT button to scroll<br />
up or down the tracks, and find<br />
the hidden ones.<br />
Mute/unmute.<br />
Press both VOLUME/VALUE (A–H)<br />
buttons to mute or unmute a track. For<br />
example, if you are on the main page<br />
that appears after turning the instrument<br />
on, and you want to mute the Upper 1 track, press the E<br />
(UPPER1/ACC2) buttons together.<br />
The mute/play status is shown by the relevant icon in the display:<br />
Play status; the track plays on the keyboard.<br />
(no icon) Mute status; the track doesn’t play on the keyboard.<br />
Solo. While in the Style Play, Song Play and Song modes, you<br />
can solo one of the tracks. Just keep the SHIFT button pressed,<br />
and press both VOLUME/VALUE buttons corresponding to the<br />
track you wish to solo.<br />
To exit the solo mode, keep the SHIFT button pressed again,<br />
and press both VOLUME/VALUE buttons corresponding to<br />
the soloed track.<br />
SELECTING A PERFORMANCE<br />
A Performance is a set of Programs and settings for the Keyboard<br />
and Style tracks, that makes selecting complex combinations<br />
live fast and easy. When the STYLE CHANGE LED is<br />
on, a Performance can also select a different Style.<br />
It is always advisable to use Performances, rather than single<br />
Programs, when playing even a solo sound, since a Performance<br />
lets you select the right effects, transposition, plus many other<br />
parameters, together with the Programs.<br />
Data type<br />
Realtime<br />
Tracks<br />
Style<br />
Tracks<br />
Upper 1, Upper 2<br />
Upper 3, Lower<br />
Drum, Percussion,<br />
Bass, Acc1, Acc2,<br />
Acc3, Acc4, Acc5<br />
Parameters<br />
Master Transpose, Program, Volume,<br />
Pan, Octave, Scale, Detune,<br />
Pitch Bend, Poly/Mono/Drum, Int/<br />
Ext, Damper, Dynamic Range,<br />
Joystick, C&D Effect Send level,<br />
Type, Parameters,<br />
Program parameters, Pads<br />
Program, Volume, Pan, Octave,<br />
Detune, Pitch Bend, Poly/Mono/<br />
Drum, Int/Ext, Wrap Around, Keyboard<br />
Range, A&B Effect Send level,<br />
Type, Parameters, Program parameters,<br />
Drum Mapping, Kick&Snare<br />
Assignment<br />
Other “performance” parameters are saved in the Global.<br />
Global<br />
Chord Recognition Mode, Memory Mode, Velocity<br />
Trigger, Lock<br />
The selected track is shown with a solid square surrounding<br />
its status icons.<br />
Selected track<br />
1. Press the PERFORM button. This<br />
changes the PROGRAM/PERFOR‐<br />
MANCE section into a Performance<br />
selector.<br />
2. Use the leftmost button of the PROGRAM/PERFOR‐<br />
MANCE section to select the first row of ten banks (1–<br />
10, upper LED turned on), or the second row of ten<br />
banks (11–20, lower LED turned on).
13 Basic operations<br />
Selecting a Program<br />
3. Press one of the 1–0 buttons to select the PROGRAM/<br />
PERFORMANCE bank containing the Performance you<br />
are looking for.<br />
The Performance Select window appears. There are 8<br />
Performances for each bank.<br />
Last selected Performance<br />
SELECTING A PROGRAM<br />
You can select a different Program (i.e., sound) to be played by<br />
a track. Before selecting a Program, you must select the track<br />
that you want to assign the Program to.<br />
Note: To assign different Programs to the Style tracks, press<br />
TRACK SELECT to see the Style tracks. If you select a Program<br />
while grouped tracks (Drum/Percussion or ACC) are selected, the<br />
Program will be assigned to the last selected track.<br />
Each Style Element (Variations, Fills…) can have different<br />
Programs, so your selection might be automatically reset<br />
when selecting a different Element.<br />
1. Use the VOLUME/VALUE (E–H) buttons on the right side<br />
of the display, to select the Realtime (Keyboard) track you<br />
wish to assign a different Program to.<br />
4. Select a Performance using the VOLUME/VALUE (A–H)<br />
buttons.<br />
5. If the DISPLAY HOLD LED is on, press EXIT to exit this<br />
window.<br />
The STYLE CHANGE button<br />
When you select a Performance, the Style may or may not<br />
change, depending on the status of the STYLE CHANGE button.<br />
(When you save a Performance, the current Style number<br />
is always memorized).<br />
• If the STYLE CHANGE LED is on, the Style saved in the<br />
Performance will be selected.<br />
• If the STYLE CHANGE LED is off, the Style doesn’t<br />
change.<br />
2. Press the PROGRAM button. This<br />
changes the PROGRAM/PERFOR‐<br />
MANCE section into a Program selector.<br />
3. Use the leftmost PROGRAM/PERFOR‐<br />
MANCE button to select a row of Program<br />
banks (upper, lower).<br />
4. Select the PROGRAM/PERFORMANCE<br />
bank containing the Program you are<br />
looking for (Program banks are identified by instrument<br />
names).<br />
The Program Select window appears.<br />
Last selected Program<br />
Selected track<br />
5. Browse all the Programs in the selected bank using the<br />
PAGE buttons. There can be various pages for each<br />
bank, containing up to 8 Programs each.<br />
6. As you find the Program you are looking for, select it<br />
using the VOLUME/VALUE (A–H) buttons.<br />
7. If the DISPLAY HOLD LED is on, press EXIT to exit this<br />
window.
Basic operations<br />
Selecting a Style<br />
14<br />
SELECTING A STYLE<br />
A Style is a set of rhythm and accompaniment patterns. You<br />
can select a Style from the internal memory, or from a memory<br />
card.<br />
1. Use the leftmost STYLE button to select a<br />
row of Style banks (upper, lower).<br />
2. Select the STYLE bank containing the<br />
Style that you’re looking for.<br />
The Style Select window appears.<br />
3. There are 2 pages for each bank, each containing 8<br />
Styles. Select a page using the PAGE buttons.<br />
4. As you find the Style you are looking for, select it using<br />
the VOLUME/VALUE (A–H) buttons.<br />
Note: The new Style will enter at the next strong beat.<br />
5. If the DISPLAY HOLD LED is on, press EXIT to exit this<br />
window.<br />
SELECTING A SINGLE TOUCH SETTING (STS)<br />
A Single Touch Setting (STS) contains Realtime (Keyboard)<br />
tracks’ settings. Four STS are included in each Style, and can<br />
be recalled by pressing the SINGLE TOUCH SETTING (F‐1–<br />
F‐4) buttons under the display.<br />
Note: You can select a STS only when you are in the main page of<br />
the Style Play or Backing Sequence operating mode.<br />
CHANGING ALL KEYBOARD TRACKS AT ONCE<br />
Select a Performance or a Single Touch Setting (F‐1–F‐4 buttons,<br />
when you are in the Style Play main page) to change keyboard<br />
Programs and effects at the touch of a button.<br />
SHORTCUT TO SEE THE ORIGINAL BANK FOR<br />
A STYLE, PERFORMANCE OR PROGRAM<br />
You can see the original bank where your Style, Performance or<br />
Program came from. Just keep the SHIFT button pressed, and<br />
press the lefmost button of the STYLE or PROGRAM/PERFOR‐<br />
MANCE section. A message window will appear, showing the<br />
name of the original bank.<br />
Release the SHIFT button to exit the window.<br />
The SINGLE TOUCH button<br />
When you select a Style, the Realtime (Keyboard) tracks can<br />
be changed.<br />
• If the SINGLE TOUCH LED is on, the Single Touch Setting<br />
(STS) #1 is automatically selected, and the Realtime<br />
tracks are changed. Programs, and the Keyboard Mode,<br />
may change.<br />
• If the SINGLE TOUCH LED is off, Realtime tracks don’t<br />
change.
15 Tutorial<br />
Playing a Style (Automatic Accompaniment)<br />
7. TUTORIAL<br />
This chapter is fully devoted to step‐by‐step instructions, that<br />
we hope may be useful to learn the basics—in the field.<br />
PLAYING A STYLE<br />
(Automatic Accompaniment)<br />
A Style will be your virtual band for your best solos. Select<br />
one of the 304 Styles we fitted in this machine…<br />
1 OK, select your favorite musical Style.<br />
There are plenty of Styles to choose from. We will go with a<br />
Jazz Style—the “Jazz Brush”.<br />
1. Select the second row of Styles. Press the leftmost STYLE<br />
button to switch the lower LED on.<br />
2 Call an Intro.<br />
You can engage an Intro to be played before the Style. Press<br />
INTRO1 or INTRO2. The former plays more freely, without<br />
letting you decide the chords. The latter lets you play a chord<br />
progression while it’s playing.<br />
3 <strong>Start</strong> the Style!<br />
Play a chord, and press the START/STOP button.<br />
Then begin playing.<br />
Usually (when the SPLIT LED is on) chords are recognized<br />
under the split point, i.e. on the Lower part of the keyboard.<br />
With the UPPER or FULL Chord Scanning mode, you must<br />
play three or more notes to have a chord recognized.<br />
2. Now, you are free to press button number 4, called<br />
“JAZZ 1”.<br />
The Style Select window appears.<br />
The selected Style<br />
3. Press one of the A VOLUME/VALUE buttons to select<br />
“Jazz Brush”.<br />
4 Play your chords and your melody.<br />
Go on playing. As you may notice, the <strong>microARRANGER</strong><br />
features a very sophisticated chord recognition engine. Recognized<br />
chords are shown in the display.<br />
5 Make a break—or should we say “a fill”?<br />
During your playing, you are free to call a one‐bar break. Try<br />
it:<br />
PRESS BREAK<br />
Do you see? Music stopped for one bar. Then, it is back again.<br />
After a while, let’s go for something different…<br />
PRESS FILL1 OR FILL2<br />
No silence, this time. <strong>microARRANGER</strong> plays a complex passage<br />
to let you take a breath. FILL1 is the simpler one, where<br />
FILL2 is more sophisticated. Usually, you will use FILL1<br />
when playing with Variations 1 and 2 (the most easy), FILL2<br />
when working with Variations 3 and 4 (more complex ones).<br />
6 Select other Variations.<br />
There are four VARIATION buttons. These are four different<br />
versions of the same Style. Try them all!<br />
You can go to a Variation after a Fill. Just press a FILL button,<br />
then, immediately after press a VARIATION button.
Tutorial<br />
Playing in Realtime (Without using Automatic Accompaniment)<br />
16<br />
7 Stop it!<br />
OK, you could say: “Oh, that’s easy, I know how to do it, I can<br />
just press that big red START/STOP button again”.<br />
Yes, you are perfectly right. But that’s the easy way. Let us<br />
suggest a more colorful way:<br />
PRESS ENDING1 OR ENDING2<br />
An ending is instantaneously called, and will begin playing,<br />
to lead the Style to a colorful end. As usual, ENDING1 is preprogrammed,<br />
while ENDING2 asks for your chord progression.<br />
PLAYING IN REALTIME<br />
(Without using Automatic Accompaniment)<br />
As soon as you turn your <strong>microARRANGER</strong> on, it is in Style<br />
Play mode, and you can play it in realtime. Please follow<br />
me…<br />
1 Play on the keyboard.<br />
When you turn the <strong>microARRANGER</strong> on, Performance 1‐1 is<br />
automatically selected.<br />
Performance bank-number<br />
In Sync<br />
“What if I want to avoid all that START/STOP stuff? I mean, I prefer<br />
to have my hands free for playing music!”<br />
Good point. The SYNCHRO button is there right for this purpose.<br />
1 While the Style is stopped, press the SYN-<br />
CHRO button.<br />
The SYNCHRO‐START LED begins blinking. The Synchro<br />
<strong>Start</strong> function is enabled.<br />
2 Play a chord on the keyboard.<br />
You must play a chord for the chord recognition engine. Usually,<br />
it will be to the left of the split point, but it depends on<br />
the CHORD SCANNING section (see “CHORD SCANNING<br />
section” on page 7).<br />
The Style starts.<br />
3 Stop the Style using your chosen method.<br />
This sets the Realtime (Keyboard) tracks for you. In this case<br />
you get the Upper 1 track playing on the full keyboard range,<br />
with the Grand Piano Program selected.<br />
As you may know, there are four available Realtime tracks:<br />
Upper 1–3 and Lower. Upper Realtime tracks may play on<br />
the full range of the keyboard (the selected KEYBOARD<br />
MODE shall be FULL UPPER). Otherwise, the Lower track<br />
plays on the left of the Split Point, and the Upper tracks on<br />
the right (KEYBOARD MODE shall be SPLIT).<br />
If you are not satisfied with this setting at startup, you can<br />
simply select another Performance. Or change the track’s settings—as<br />
you will see in this tutorial—and save them into<br />
Performance 1‐1. You’ll soon see how to do it.<br />
2 Select a different Performance.<br />
Is the PERFORM. LED on?<br />
If so, press one of the PROGRAM/PERFORMANCE buttons,<br />
and select a Performance with the VOLUME/VALUE buttons<br />
(on the side of the display).<br />
Select a Performance with the VOLUME/VALUE buttons<br />
Go ahead and try out the different Performances. We provided<br />
160 of them for you.<br />
3 Select Performance 1-1 (“Grand Piano”) again.<br />
As above: press Performance bank 1, and use the A VOL‐<br />
UME/VALUE buttons to select Performance 1‐1.
17 Tutorial<br />
Playing in Realtime (Without using Automatic Accompaniment)<br />
4 Unmute the Upper 2 track.<br />
Press both F VOLUME/VALUE buttons.<br />
The Upper 2 track will be selected and<br />
unmuted. The Play icon will appear, surrounded<br />
by the “selected track” frame and<br />
accompanied by the pointing arrow. You will hear the Dark Pad<br />
Program play together with the Grand Piano.<br />
Press them again to unmute the Lower track.<br />
Try also with the Upper tracks, using the E, F and G VOL‐<br />
UME/VALUE buttons. You will notice the sound becomes<br />
more or less fuller‐sounding, depending on the number of<br />
tracks muted or unmuted.<br />
Press the E–G VOLUME/VALUE buttons<br />
Press the F VOLUME/VALUE buttons<br />
5 Press SPLIT on the KEYBOARD MODE section,<br />
and play.<br />
Now, the keyboard is split in two parts: the Lower part on the<br />
left, and the Upper part on the right. The AnalogStr Program<br />
is playing on the Lower part, while the Grand Piano and the<br />
Dark Pad are playing on the Upper part.<br />
8 Set the relative volume of the Realtime tracks.<br />
Use each E–H VOLUME/VALUE button pair to set the volume<br />
of the Realtime tracks. Press one of the VOLUME/<br />
VALUE button to select a track. Then press the right one to<br />
increase the volume, the left one to lower it.<br />
Press the left one to lower…<br />
…and the right one to raise.<br />
6 Set the split point.<br />
Not happy with the current split point? Keep the SPLIT<br />
POINT button held down, and play the new split point on the<br />
keyboard. You can even save this setting in memory.<br />
9 Press FULL UPPER on the KEYBOARD MODE<br />
section, and play.<br />
Again, the Upper tracks can play across the full keyboard<br />
range.<br />
7 Mute/unmute various tracks.<br />
Press both H VOLUME/VALUE buttons. You will mute the<br />
Lower track.<br />
10 Save your track configuration in a Performance.<br />
That’s all! When you find the right sound, you can press the<br />
WRITE button to save the track configuration into a Performance,<br />
a Single Touch Setting (STS), or a Style Performance.<br />
The Performance is a handy way to save Realtime tracks.<br />
Press the H VOLUME/VALUE buttons
Tutorial<br />
Recording a Song (Simultaneously recording the Style and realtime performance)<br />
18<br />
RECORDING A SONG<br />
(Simultaneously recording the Style and<br />
realtime performance)<br />
The Backing Sequence mode is a fast and effective way of<br />
recording a new Song, making full use of the features of the<br />
Style Play mode. So, arm your recorder, and play live with<br />
the Styles—a song will be ready in seconds!<br />
1 First, enter Backing Sequence mode<br />
Press B.SEQ to access the Backing Sequence mode. The Realtime<br />
tracks, on the keyboard, will remain the same as you<br />
selected in the Style Play mode.<br />
This is the Backing Sequence Play page, where you can load,<br />
play or save a Song.<br />
2 Now, press RECORD.<br />
You are prompted to select either the Realtime recording<br />
mode, or the Chord/Acc Step recording mode.<br />
3 Select the Realtime recording mode.<br />
Simply press one of the A VOLUME/VALUE buttons. The<br />
Record page appears.<br />
4 If you think the selected Style is not what you<br />
like for your backing tracks, select a different<br />
one.<br />
Here is a fast reminder:<br />
1. Select one of the Style rows in the STYLE section, using<br />
the leftmost button.<br />
2. Select one of the Style Banks, by pressing one of the buttons<br />
of the STYLE section.<br />
3. Select one of the pages, using the PAGE buttons.<br />
4. Select a Style, using the VOLUME/VALUE (A–H) buttons.<br />
The Style Bank and number appear after the “Style” parameter<br />
in the display.<br />
5 And what about changing the Performance or<br />
Single Touch Setting?<br />
(see “Selecting a Performance” on page 12, or “Selecting a Single<br />
Touch Setting (STS)” on page 14). Here is a short recap for<br />
the Performances:<br />
1. Press the PERFORM button to set the PROGRAM/PER‐<br />
FORMANCE section act as a Performance selector.<br />
2. Select one of the Performance Banks, by pressing one of<br />
the buttons of the PROGRAM/PERFORMANCE section.<br />
3. Select a Performance, using the VOLUME/VALUE (A–<br />
H) buttons.<br />
…and for the Single Touch Settings (STS):<br />
• Press one of the SINGLE TOUCH SETTING buttons.<br />
6 Ok, now we can go.<br />
As you see, both the RT track and the Ch/Acc track are in<br />
RECord mode. This means you can start recording everything<br />
you play in a realtime performance with the Styles.<br />
PRESS START/STOP<br />
WAIT FOR THE PRECOUNT TO REACH BAR 1<br />
AND BEGIN PLAYING!<br />
7 Play as if you were playing live.<br />
You can do exactly what you do when playing with the<br />
Styles: select a different Style, Performance, STS, different<br />
Variation, a Fill, and Ending…<br />
You can even start your recording with an Intro: just press<br />
one of the INTRO buttons before pressing START/STOP to<br />
start recording.<br />
8 Stop the Song.<br />
To stop the Song, press either START/STOP or one of the<br />
ENDING buttons. The Song will stop, but the Recording will<br />
still be on. So, you can start with another Song to be recorded<br />
in the same session (go back to step 6, if you like).<br />
Otherwise, finish the Recording. Now forgoing to the next<br />
step.<br />
9 Finish the recording.<br />
PRESS PLAY/STOP (SEQ1)<br />
and the Recording status will be gone. Both Backing Sequence<br />
tracks (RT and Ch/Acc) will be set to the PLAY status.
19 Tutorial<br />
Playing a Song from a card<br />
10 Listen to the Song.<br />
When back in the Backing Sequence Play page, press PLAY/<br />
STOP (SEQ1) to listen to the new Song. How smart were you?<br />
If the Song is fine, you can switch to the Song mode and do<br />
some editing. Or you can save it (as seen below), and play it<br />
in Song Play mode.<br />
11 Deleting one of the tracks, or the whole Song<br />
and record again.<br />
That’s easy!<br />
1. Press RECORD to enter Record mode.<br />
4. Move the folder where you wish to save your Song to<br />
the first line of the display, using the E–F (Scroll Up) and<br />
G–H (Scroll Down) VOLUME/VALUE buttons, or the<br />
TEMPO/VALUE controls. Press F‐3 (OPEN) to open it.<br />
Close the current folder by pressing F‐4 (CLOSE).<br />
5. To create a new file, move the “NEW_NAME.MID” item to<br />
the first line of the display.<br />
6. When the “NEW_NAME.MID” item is selected, press<br />
one of the A VOLUME/VALUE buttons. You are<br />
prompted to assign a name to the new folder:<br />
2. Set the track to delete and set the REC status to record.<br />
3. Set the track you want to listen to during recording to<br />
PLAY status. If you don’t want to delete it, but you don’t<br />
want to listen to it, set the track to MUTE status.<br />
4. <strong>Start</strong> recording again. If you are recording the RT track,<br />
you can’t use the Style controls.<br />
5. Press PLAY/STOP (SEQ1) to finish the Song and exit<br />
Recording mode.<br />
12 Time to save your Song.<br />
If you don’t save your Song, it will be lost when you turn the<br />
instrument off, or switch to the Song Play mode. You must<br />
save to a card any Song you wish to preserve.<br />
1. Insert your SD card into the card slot.<br />
2. In the Backing Sequence Play page, select the ʺSave<br />
Songʺ parameter.<br />
Move the cursor using the DOWN/‐ and UP/+ buttons.<br />
Select a character using the DIAL. Insert a character at<br />
the cursor position by pressing the INSERT button.<br />
Delete a character at the cursor position by pressing the<br />
DELETE button.<br />
7. When you have finished writing a name for the new<br />
midifile, press F‐2 (SAVE) to confirm. The “Are you<br />
sure?” message will appear. Press ENTER to confirm, or<br />
EXIT to abort.<br />
PLAYING A SONG FROM A CARD<br />
1 Insert the card containing the Song into the<br />
card slot.<br />
2 Press the SONG PLAY button to access the<br />
Song Play mode.<br />
3 Press the A (S1:) VOLUME/VALUE button to<br />
open the Song Select window.<br />
3. Press the [F‐1] button to select the SD card (SD).<br />
Page commands<br />
Note: You can also access the Song Select window by pressing<br />
the PAGE+ button from the main page. You can exit this window<br />
either by pressing EXIT or PAGE‐.<br />
4 Press the F-1 button to select the SD card (SD).<br />
The card content appears.
Specifications<br />
Playing a Song from a card<br />
20<br />
5 Use the TEMPO/VALUE controls, or the VOL-<br />
UME/VALUE (E–H) buttons to scroll the list.<br />
The E–F buttons are the Scroll Up ( ), while the<br />
G–H buttons are the Scroll Down ( ).<br />
Move the file you are looking for to the first line of the display.<br />
6 If the file you are looking for is in a folder (a file<br />
whose name begins with “ ”), move the<br />
folder to the first line in the display, then select<br />
the F-3 (OPEN) command.<br />
Select the F‐4 (CLOSE) command to close a folder and go<br />
back to the upper level.<br />
7 When the file you are looking for is in the first<br />
line of the display, press the F-2 (SELECT) button.<br />
8 When the Song appears in the S1 line on the<br />
main page of the Song Play mode, press the<br />
left (SEQ 1) PLAY/STOP button to start the playback.<br />
Note: If the BALANCE slider is all the way to the right,<br />
Sequencer 1 is at the minimum volume and can’t be heard.<br />
8. Specifications<br />
Operating conditions<br />
0–+40°C (no condensation)<br />
Keyboard<br />
61 keys (C2–C7), natural‐touch mini‐keyboard with velocity<br />
Power<br />
AC adapter DC 12V (included)<br />
Dimensions (W x D x H)<br />
873 x 277 x 91 (mm) /34.37”× 10.91” × 3.58”<br />
Weight<br />
4.2 kg / 9.26 lbs<br />
Power consumption<br />
9 W<br />
Included items<br />
AC adapter (DC12V: )<br />
<strong>Quick</strong> <strong>Start</strong> <strong>Guide</strong><br />
Music stand<br />
Accessory Disc<br />
Options<br />
XVP‐10: expression/volume pedal<br />
EXP‐2: foot controller<br />
DS‐1H: damper pedal<br />
PS‐1 or PS‐3: pedal switch<br />
If you wish to play a different Song on Sequencer 2 at<br />
the same time, press the B (S2:) VOLUME/VALUE button<br />
(press it twice if a Song is already selected for<br />
Sequencer 2), and repeat the above procedure to select a<br />
Song for Sequencer 2. Use the right (SEQ 2) PLAY/STOP<br />
button to start/stop the second Song. Use the BALANCE<br />
slider to mix between Sequencer 1 and Sequencer 2.<br />
Stop the Song(s) using the PLAY/STOP button for the corresponding<br />
Sequencer.
Styles<br />
8/16 Beat 1<br />
Soft Beat<br />
Pop Beat<br />
Stndrd8Beat<br />
Unplug8Bt 1<br />
Love 8 Beat<br />
Half Beat<br />
UK 8 Beat<br />
8BeatGroove<br />
8/16 Beat 2<br />
Guitar Bld1<br />
Guitar Bld2<br />
8Bt Analog1<br />
Analogyst<br />
8Bt Analog2<br />
Trendy Beat<br />
Slow Ballad<br />
6Strings Bt<br />
Ballad<br />
Groove Bld<br />
Diva<br />
RockBallad1<br />
Folk Ballad<br />
PopBallad 2<br />
HalfTimeBld<br />
CountryBld1<br />
4/4 Ballad<br />
Ballroom<br />
Slow Pop<br />
Slow Rock 1<br />
Slow Rock 2<br />
Unpl.SlRock<br />
BigBnd Fox1<br />
Slow Waltz1<br />
Slow Waltz2<br />
Foxtrot 1<br />
Dance<br />
HouseGarage<br />
House<br />
Dream<br />
Techno<br />
Underground<br />
Progressive<br />
Jungle<br />
Rap<br />
Rock<br />
Open Rock 1<br />
Open Rock 2<br />
Pop Rock<br />
Fire Rock<br />
Hard Rock<br />
Heavy Rock<br />
RockShuffle<br />
Rock Ballad<br />
Soul & Funk<br />
Rubber Funk<br />
Groove Funk<br />
Acid Jazz<br />
Double Beat<br />
Groove<br />
Jazz Funk<br />
Al Swing<br />
HipHop Funk<br />
World 1<br />
OberkrWaltz<br />
OberkrPolka<br />
Bavar.Pop 1<br />
Bavar.Pop 2<br />
Party Polka<br />
Pop Polka<br />
Flipper 6/8<br />
Flipper 4/4<br />
World 2<br />
Bluegrass<br />
Country 8Bt<br />
Country16Bt<br />
CountryBeat<br />
Mod.Country<br />
CntryBoogie<br />
CountryShf1<br />
CountryShf2<br />
World 3<br />
Hora<br />
Sevillana 1<br />
Sevillana 2<br />
Jota<br />
Copla<br />
Classic 3/4<br />
Bolero<br />
Minuetto<br />
UK RnB<br />
PopBallad 1<br />
HipHop Beat<br />
LightRock 1<br />
LightRock 2<br />
Miami Beat<br />
ClassicBeat<br />
Unplug8Bt 2<br />
Std 16Beat 1<br />
Std 16Beat 2<br />
Unpl.16Beat<br />
Pop 16Beat1<br />
Pop 16Beat2<br />
Cinema Bld<br />
Windy Beat<br />
Home Beat<br />
Love Ballad<br />
NaturalBeat<br />
Celtic Bld<br />
16BtAnalog1<br />
Color Beat<br />
PopBallad 3<br />
8Bt Analog3<br />
16BtAnalog2<br />
BigBnd Fox2<br />
Slow Fox<br />
Foxtrot 2<br />
Operetta<br />
BigBnd Fox3<br />
Charleston<br />
<strong>Quick</strong> Step<br />
New Jive<br />
Hip Hop<br />
Disco 70<br />
80's Dance<br />
Love Disco<br />
Disco Party<br />
Disco Funky<br />
Disco Gully<br />
Twist<br />
Half Time<br />
Rock 6/8<br />
Abbey Road<br />
Surf Rock<br />
Pop Shuffle<br />
BluesShuffl<br />
60's Rock<br />
Rock & Roll<br />
HipHop Soul<br />
MotownShufl<br />
PopBallad 4<br />
RhythmBlues<br />
Soul<br />
Memphis<br />
Motown<br />
Gospel<br />
Schlager 1<br />
Schlager 2<br />
Schlager 3<br />
Schlager 4<br />
PopSchlager<br />
Trucker<br />
Cajun<br />
Zydeco<br />
CountryBld2<br />
Country 3/4<br />
Orleans<br />
Jig<br />
CelticDream<br />
Norteno<br />
Quebradita<br />
Tejano<br />
Baroque<br />
New Age<br />
Tarantella<br />
Raspa<br />
Vahde<br />
Oriental<br />
Roman<br />
Ciftetelli<br />
Latin 1<br />
UnplugBossa<br />
Basic Bossa<br />
L.A. Bossa<br />
New Bossa<br />
Miss Bossa<br />
Lite Bossa<br />
GrooveBossa<br />
DiscoChaCha<br />
Latin 2<br />
Engl. Tango<br />
Orch. Tango<br />
Tango.it<br />
Habanera 1<br />
Habanera 2<br />
Mambo 1<br />
Mambo 2<br />
Salsa 1<br />
Latin Dance<br />
Samba<br />
Sambalegre<br />
Disco Samba<br />
Samba Funk<br />
Merengue 1<br />
Merengue 2<br />
Cumbia<br />
Latin Dance<br />
Jazz 1<br />
Jazz Brush<br />
Med. Swing<br />
Slow Swing<br />
SwingBallad<br />
JazzWaltz 1<br />
JazzWaltz 2<br />
5/4 Swing<br />
Mood Swing<br />
Jazz 2<br />
Big Band 3<br />
Sw. Shuffle<br />
FastBigBand<br />
LatinBigBnd<br />
BigBnd Fox4<br />
Dixieland<br />
Hollywood<br />
Broadway<br />
Trad<br />
Ital.Valzer<br />
Valzer<br />
GermWaltz 1<br />
GermWaltz 2<br />
Laendler<br />
WalzMusette<br />
ViennaWaltz<br />
Viennese<br />
Direct SD User 1<br />
Foxtrot 3<br />
Hully Gully<br />
Mazurka 3<br />
Polka 3<br />
It. Valzer2<br />
Slow Waltz3<br />
Trad.Bolero<br />
NewBeguine<br />
User 2<br />
16Beat John<br />
8 Beat John<br />
2Bt Country<br />
Bajon<br />
Ipanema<br />
SanbaDeSol<br />
Ricky<br />
Mambo 99<br />
User 3<br />
Soul 2<br />
Boston Boy<br />
6/8 JazzPop<br />
J-Pop<br />
HipHopFunk2<br />
Schuffle<br />
Jazz Funk 2<br />
Blues<br />
Cha Cha Cha<br />
Sabor<br />
ChaCha Funk<br />
Latin Rock<br />
UnplugLatin<br />
Beguine 1<br />
Beguine 2<br />
Slow Bolero<br />
Salsa 2<br />
Mariachi<br />
Reggae 1<br />
Reggae 2<br />
Reggae 3<br />
Pasodoble 1<br />
PasDobBanda<br />
Pasodoble 2<br />
Batucada<br />
Rumba<br />
Gipsy<br />
Rumba Pop<br />
Calypso<br />
Lambada<br />
Meneito<br />
Macarena<br />
Be Bop<br />
Unpl.Swing1<br />
Unpl.Swing2<br />
B.BndBallad<br />
BigBandMed.<br />
Big Band 1<br />
BigBand40's<br />
Big Band 2<br />
Acid Jazz<br />
New Jazz<br />
Latin Jazz<br />
Fusion<br />
Ragtime Pno<br />
Shuffle Pno<br />
Boogie Pno<br />
Bossa Pno<br />
Mazurka 1<br />
Mazurka 2<br />
Polka 1<br />
Polka 2<br />
Germ. Polka<br />
Trad. Polka<br />
Marsch<br />
FrenchMarsc<br />
SchlagerMx1<br />
SchlagerMx2<br />
Dance Mix<br />
Soca Dance<br />
60's Dance<br />
70's Disco<br />
Motown 2<br />
Dance 80<br />
PopShuffle2<br />
Front Beat<br />
Long Train<br />
2000 Hits<br />
Questions<br />
8BeatRock1<br />
8BeatRock2<br />
L.A. R & B<br />
6/8 Swing<br />
The Avalon<br />
6/8 R & B<br />
Groovin'<br />
90's Funk<br />
Party Funk<br />
6/8 Blues<br />
Fusion Funk<br />
4015-2 Yanokuchi, Inagi-city, Tokyo 206-0812 Japan<br />
© 2011 KORG INC.