
You also want an ePaper? Increase the reach of your titles
YUMPU automatically turns print PDFs into web optimized ePapers that Google loves.
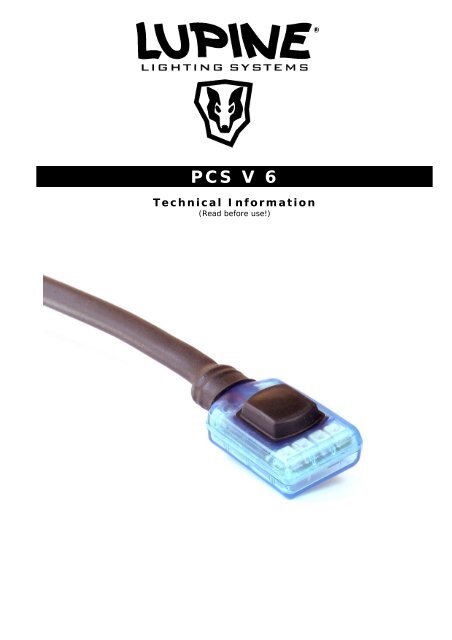
<strong>PCS</strong> V 6<br />
Technical Information<br />
(Read before use!)
<strong>PCS</strong> <strong>V6</strong><br />
(Not suitable for <strong>Lupine</strong> Edison 4/5/10<br />
or Halogen lamps)<br />
General:<br />
The <strong>PCS</strong> <strong>V6</strong> is only compatible with <strong>Lupine</strong> Power-LED lighting systems. It is fitted as standard<br />
to the following <strong>Lupine</strong> lighting systems:<br />
Wilma X<br />
Wilma 4<br />
Wilma 8<br />
Out of the box the <strong>PCS</strong> <strong>V6</strong> is set to the standard factory settings. There is no need to program<br />
the switch as the factory settings allow full use of the lighting system; however some<br />
individuals have their own requirements which can easily be programmed by reading this<br />
manual. Please do not attempt to program the <strong>PCS</strong> until you are used to operating the lighting<br />
system and you have read and understood this Technical Information.<br />
Mounting:<br />
The <strong>PCS</strong> <strong>V6</strong> is designed to be mounted directly next to the lamp on the handlebars. Before<br />
attaching the velcro strip to the handlebar, ensure that the surface is free of dirt and oil. The<br />
velcro strip should be applied at room temperature, colder temperatures will cause the<br />
adhesive not to work. Attach the couterpart velcro to the bottom of the <strong>PCS</strong> housing. Attach<br />
the <strong>PCS</strong> to the velcro strip on the handle bar and secure it in place with the supplied velcrostrap<br />
with rubber ring as shown below:<br />
<strong>PCS</strong> <strong>V6</strong><br />
2
Using the <strong>PCS</strong> <strong>V6</strong>:<br />
After connecting the beam to the rechargeable battery, all LEDs will blink once or twice. The<br />
<strong>PCS</strong> <strong>V6</strong> then starts initialising its software and the voltage of the rechargeable battery will be<br />
indicated. The backlight LED then starts light.<br />
The four LEDs and the Power-LED’s will blink 1 x<br />
After this voltage will be indicated.<br />
Voltage:<br />
After initialising the software, the voltage will be indicated as follows:<br />
First, the blue LED will blink 1 time per volt,<br />
then the green LED will blink 1 time per 1/10 volt<br />
Example: The blue LED blinks 7 times and the green LED 5 times = the voltage measured is<br />
7.5 V. This information will help you to judge the actual condition of your rechargeable battery<br />
before use:<br />
Between 7.5 and 8 V : fully charged. Between 7 and 7.5 V : Re-charge battery if it is not an<br />
older battery. Between 6.5 und 7 V : Not ready for use.<br />
Hint: You don’t have to wait for the whole voltage information to be shown in order to use<br />
your lamp. You can stop the voltage information at any time by switching on the beam.<br />
Note: Even if the Power-LED’s are faulty, the LEDs will flash as above. If the light does not<br />
illuniate despite a successful initialisation, the failure is not caused by the <strong>PCS</strong> but from a<br />
serious damage.<br />
Switching on: Pressing the button on the switch unit turns the lamp on. It will operate on<br />
high beam. (signalled by the blue LED on the switch).<br />
Dimming: Pressing the button once, after the light has stablised, will switch to low beam<br />
mode (the blue LED is off). By pressing the button again the the light will return to high beam<br />
mode.<br />
Switching off: Press and hold the button for 2 seconds until the light switches off. Backlight<br />
LED will turn off after some seconds.<br />
Controlling the remaining light time:<br />
The electronics of the <strong>PCS</strong> <strong>V6</strong> not only control the high and low beam but also protect the<br />
rechargeable battery against over discharge and includes a low battery indicator.<br />
Low battery is signalled by the yellow and the red LED.<br />
When the yellow LED lights: Significant amount of capacity is gone!<br />
Red and yellow LEDs blinks: Light will automatically switch off in a few minutes!<br />
It is a matter of experience to interpret exactly how much time is left after the LEDs light up.<br />
Remaining burn time depends on the battery’s age and capacity, the operating temperature<br />
and the capacity gauge program (Low, Middle, High; see "Technical Information <strong>PCS</strong> <strong>V6</strong>").<br />
When the yellow and red LEDs light up the light automatically switches to low beam. There is<br />
only a few minutes burn time left.<br />
Note: As soon as both the red and yellow LEDs light up, the light will automatically dimmed to<br />
6 Watts or less<br />
<strong>PCS</strong> <strong>V6</strong><br />
3
Reserve tank:<br />
When the battery is almost empty (yellow and red LEDs have been lit for several minutes<br />
already) the lamp switches off automatically. By "double clicking" the switch it activates the<br />
reserve tank which provides some additonal hours of emergency light on low beam.<br />
A flashing red LED signals the reserve tank has been activated. Its duration also depends on<br />
the battery condition.<br />
When the reserve tank is empty the light will switch off and should not be restarted.<br />
Caution! Switching on is not possible at this point. If you unplug the battery and then reattach<br />
it, you will damage the battery by over discharging it! Also, storing a discharged<br />
battery will cause over discharging. Recharge the battery as soon as possible!<br />
Explanation of the LEDs:<br />
Blue LED lights: High beam (Maximum Power)<br />
Green LED lights: Low beam (Econo mode)<br />
Yellow LED lights: Significant amount of burn time consumed<br />
Yellow + Red LED blinks: Rechargeable battery almoust empty<br />
Caution! Light will switch off very soon without further notice –<br />
Stop!<br />
Red LED flashes: Reserve tank activated<br />
PROGRAMMING THE <strong>PCS</strong> <strong>V6</strong><br />
The Power Control System <strong>V6</strong> offers several settings to fine tune the lighting system to<br />
individual needs. Out of the box, the factory settings are based on <strong>Lupine</strong>’s years of experience<br />
in producing lighting systems and are designed to provide optimum performance. These<br />
factory default settings are marked with a grey background in the "Programming chart".<br />
It is possible to set the following features and functions:<br />
- Flashing SOS, Alpin emergency signal or Superflash<br />
- Setting the low beam<br />
- Setting the capacity control (remaining burn time)<br />
- Setting the max. Power (8 /10 or 12 W)<br />
- Setting the Flash , SOS, Alpin or Superflash<br />
1.) SOS Function<br />
Press and hold the button on the <strong>PCS</strong> <strong>V6</strong> for 5 seconds until the green LED starts flashing.<br />
Release the button and the lamp will flash continuously the SOS signal ( "...---..." ) until the<br />
button is pressed again. You also could use Alpin emergeny signal or Superflash, this settings<br />
are programmable.<br />
Warning!!: The SOS signal is an international emergency signal! It should only be used in a<br />
real emergency! Due to the high power of the lighting system the signal can be seen from a<br />
considerable distance. It will flash continuously until the capacity of the battery runs out!<br />
Only use this signal if emergency help is required. Misuse could result in a fine or<br />
prosecution.<br />
<strong>PCS</strong> <strong>V6</strong><br />
4
2.) Low Beam<br />
Factory default is two step dimming: maximum power (blue LED lit) and 12% of maximum<br />
power (low beam). However it is possible to change these defaults to your individual needs:<br />
On/Off:<br />
It might be useful in some circumstances to fore go the low beam mode. In the on/off mode<br />
you can only switch between high beam and switched off.<br />
Two step dimming:<br />
The standard high/ low beam mode.<br />
High beam is always 100 % power. However it is possible to choose between 12%, 40%, 60%<br />
or 75% of the maximum brightness for the low beam.<br />
The equivalent wattage of the dimmed beams is shown below:<br />
12W Power LED’s<br />
12% dimm level 1 W<br />
40% dimm level 5 W<br />
60% dimm level 7 W<br />
75% dimm level 9 W<br />
Three step dimming:<br />
If one low beam is not sufficient, if is possible to program a third beam between the high and<br />
low settings. In this mode the power of the beams is fixed:<br />
Maximum = 100%, middle = 60%, low = 12%<br />
Continuous Dimming:<br />
This mode makes it possible to set the light's power to any value between 100% and 12%.<br />
Starting with maximum power, each press of the button reduces the brightness until it reaches<br />
12%. After the 10% setting, the brightness increases to 100% again.<br />
Note! You can also dim the light by pressing and holding down the button until the brightness<br />
reaches the desired level. However, pressing the button for too long will switch the light off!<br />
3.) Capacity control<br />
The <strong>PCS</strong> <strong>V6</strong> monitors the capacity of the rechargeable battery by measuring the voltage.<br />
Unfortunately voltage and capacity are not exactly proportional which is why <strong>Lupine</strong> does not<br />
quote an exact remaining capacity when the yellow and red LEDs light up. It takes some<br />
experience of using the lighting system to tell exactly how much burn time is left when the<br />
yellow LED lights up. Accordingly, it also varies how much burn time is left when the red LED<br />
lights up. The factory default capacity control will be suitable for a long time. It is not<br />
recommended to change the capacity control until you have experienced a remarkable loss of<br />
burn time.<br />
"High"<br />
This is the default for Li-Ion rechargeable batteries. The yellow and red LEDs will light up with<br />
a large amount of burn time remaining due to the behaviour of this battery type. If used with<br />
an extension cord or used in very cold temperatures, it should be more accuarate to set the<br />
capacity control to "middle".<br />
"Middle"<br />
This is the default for Ni-MH rechargeable batteries. It is also suitable for Li-Ion batteries. The<br />
yellow and red LEDs light up with less capacity left compared to "high". The reserve tank is<br />
also activated later than "high".<br />
<strong>PCS</strong> <strong>V6</strong><br />
5
"Low"<br />
This capacity control should be used for older Ni-MH rechargeable batteries. The yellow and<br />
red LEDs and the reserve tank are activated with very little capacity left. This benefits old<br />
batteries with sufficient capacity but with weaker voltage.<br />
Threshold voltage:<br />
LED Low Middle High<br />
Yellow 6.3V 6.7V 7.2V<br />
Red 5.8V 6.1V 6.5V<br />
Reserve 5.5V 5.7V 6.0V<br />
Off 5.4V 5.4V 5.4V<br />
4.) Max. Power<br />
Power mode 12 W<br />
Factory default setting is Power mode. This setting maximises the performance. Life span of<br />
the Power-LED’s is around 1000 h.<br />
Normal mode 10 W<br />
This setting save energy and the light output is nearly unvisible lower Life span will be<br />
doubled.<br />
Econo Mode 8 W:<br />
If you prefer to maximise the life span of the bulb it is possible to reduce the maximum power<br />
to 8 W. This will increase the life span of the Power LED’s but will reduce the brightness of the<br />
beam.<br />
5.) SOS, Alpine emergency signal or Superflash<br />
SOS Signal is factory default setting. If prefered, this setting is permanent programmable.<br />
Be aware that Superflash Mode is extremely dangerous to other persons, use it with care !<br />
6.) The Programming Chart:<br />
Programming the <strong>PCS</strong> <strong>V6</strong> is easy and is performed with the battery connected to the lamp.<br />
Please read the chart fully before programming as it may take a few attempts to fully<br />
understand the chart.<br />
The programming is performed on 2 levels, each requiring a press of the button to activate.<br />
The first level in highlighted in left column. By pressing and holding down the button you can<br />
set:<br />
SOS-Function<br />
Dimming<br />
Capacity control<br />
Max power<br />
SOS,Alpin or Flash<br />
<strong>PCS</strong> <strong>V6</strong><br />
6
This first level is passed through by keeping the button pressed. Every 5 seconds a different<br />
LED (or combination of LEDs) lights up signal which setting has been selected. .<br />
When the LED signals that you reached the desired setting (SOS, dimming, capacity control<br />
etc.), release the button and this will activate the second level of the programming. From this<br />
point it is possible to choose how the desired setting will function (selected mode):<br />
Dimming:<br />
On/Off<br />
2-step<br />
3-step<br />
Continuous<br />
Capacity control:<br />
High<br />
Middle<br />
Low<br />
Max Power:<br />
Power mode<br />
Normal mode<br />
Econo mode<br />
Signal Setting:<br />
SOS<br />
Alpin emergency signal<br />
Superflash<br />
The <strong>PCS</strong> <strong>V6</strong> passes through the options of the second level automatically, signalling each<br />
option with a different LED (or combination of LEDs). Do not press the button until the <strong>PCS</strong> has<br />
reached the exact setting you desire. When the LEDs signal the desired mode, press the button<br />
and the set up is complete...<br />
Unless you have have chosen 2-step dimming and wish to set the brightness level of the low<br />
beam. This is controlled by a third level! This level can only be reached if 2-step dimming has<br />
been selected at level 2. From here you can choose the brightness level of the low beam:<br />
The <strong>PCS</strong> <strong>V6</strong> will pass through the dimming level options (12% -- 40% -- 60% -- 75%). When<br />
the LEDs signal the desired setting, press and release the button to set the brightness level.<br />
The third level is highlighted on the programming chart by a vertical arrow pointing down. This<br />
level is only activated when the 2-step dimming has been chosen at level 2.<br />
<strong>PCS</strong> <strong>V6</strong><br />
7
Note for beginners:<br />
1) Be cool! Take your time to fully understand each mode and how the programming chart<br />
works.<br />
2) Carefully read this manual and the programming chart.<br />
3) Make up your mind about what you want to set, how to get there, which LEDs signal the<br />
desired mode, when to press the button and when to release it.<br />
4) If you make an error and select the incorrect mode, try again until you have correctly set up<br />
the desired mode. Practice makes perfect!<br />
Notes:<br />
<strong>Lupine</strong> Lighting Systems<br />
Altdorfer Str. 17<br />
D-90559 Burgthann<br />
Fon: 0049 91 83 902310<br />
Fax: 0049 91 83 902315<br />
e-mail: info@lupine.de<br />
net: www.lupine.de<br />
<strong>PCS</strong> <strong>V6</strong><br />
8