Tesla TL 1200 - Lupine
Tesla TL 1200 - Lupine
Tesla TL 1200 - Lupine

You also want an ePaper? Increase the reach of your titles
YUMPU automatically turns print PDFs into web optimized ePapers that Google loves.
�� ��������������<br />
�� ��������������<br />
������������<br />
������������<br />
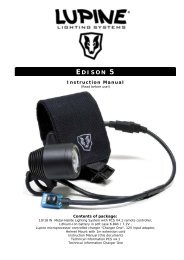
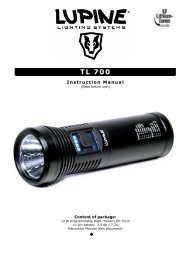
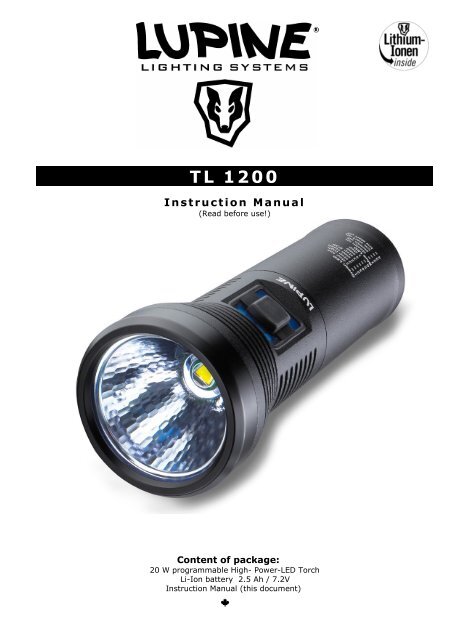
T L 1 2 0 0<br />
I n s t r u c t i o n M a n u a l<br />
(Read before use!)<br />
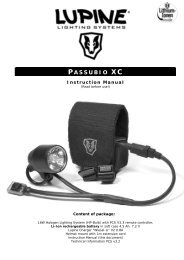
Content of package:<br />
20 W programmable High- Power-LED Torch<br />
Li-Ion battery 2.5 Ah / 7.2V<br />
Instruction Manual (this document)
1.) READ BEFORE USE!<br />
General:<br />
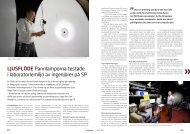
Congratulations! You have just bought the brightest single LED Lamp – no other will give you<br />
more light in this size!<br />
The light and charger are ready to use immediately. Please read this instruction manual<br />
carefully and completely to familiarise yourself with all the functions. Before hitting the trails,<br />
first try the system at home to prevent any surprises while riding.<br />
As with any other electrical device, there is a slight chance of failure at any time. Please be<br />
aware and use with caution.<br />
<strong>Lupine</strong> accepts no liability for any injuries or other damages arising from the use of this<br />
product.<br />
Rechargeable Battery:<br />
The battery is supplied with a very small amount of charge. Before use it must be fully<br />
charged (see chapter 3 "Charging"). The rechargeable Li-Ion battery will reach its full power<br />
after 1 charge cycle.<br />
It might become hot!<br />
The <strong>TL</strong> <strong>1200</strong> is not a simple torch. The lamp housing can become very hot if used without<br />
airflow. Do not touch the lamp during or immediately after use.<br />
If lamp is used without any airflow temperature control will reduce light power<br />
stepless up to 3 W after some minutes automatically.<br />
Dazzling:<br />
The <strong>TL</strong> <strong>1200</strong> is a powerful light. Always use it with care and with respect for others. Do not<br />
look directly into the light.<br />
Waterproof?<br />
All components of the <strong>TL</strong> <strong>1200</strong> are splash proofed and will withstand even the most extreme<br />
conditions. However, it is not a diving lamp and therefore not suitable for use under water.<br />
Warranty:<br />
The two year warranty covers defects in materials or workmanship only. Batteries are not<br />
covered by this warranty. Modifications to the light or improper use also voids this warranty.<br />
Attention:<br />
Used batteries have to be put into especially reserved collection receptacles.<br />
Please pay attention that you do not deliberately turn the light to somebody else’s eyes. In<br />
case the light beam hits your eyes, close the eyes and turn your head away so that you are<br />
out of the direct light beam.<br />
Don’t use any magnifying instruments for light beam testing purposes. In case of commercial<br />
usages, the user of the lamp must be instructed by the advice of the International Commission<br />
on Non-ionizing Radiation Protection (ICNIRP) and national advices for safety and health.<br />
T L 1 2 0 0<br />
2
2.) USING THE LIGHT<br />
Initialising:<br />
After connecting the lamp to the rechargeable battery part , the software will start a<br />
self- test, the Power LED will flash once. The batteries voltage will be indicated with<br />
the blue and red LED, please read more in the section “Hints“<br />
Now the <strong>TL</strong> <strong>1200</strong> is ready for use.<br />
Switch on:<br />
By pressing the switch for the first time, the beam starts running on maximum power<br />
( except the low start is choosen ) .<br />
The blue LED will glow.<br />
Dimming:<br />
Pressing the button once, after the light has stabilised, will switch the light to low beam.<br />
By pressing the button again the light will go up to high beam. After pressing the button again,<br />
the light return to low beam mode.<br />
2 steps: 20 W<br />
1.5 W<br />
Switch off:<br />
You can switch off the <strong>TL</strong> <strong>1200</strong> by pressing the button longer than 2 seconds.<br />
After you have turned off the lamp ( but battery is still connected ) blue LED will glow for some<br />
seconds.<br />
Reading the consumed capacity:<br />
After turning off the lamp the consumed capacity will be indicated as follows:<br />
First, the blue LED will blink 1 time per complete ampere hour,<br />
then the green LED will blink 1 time per 1/10 ampere hour.<br />
Example: The blue LED blinks 1 time and the green LED 5 times = the gone capacity is around<br />
1,5 Ah. This information will help you to judge the actual condition of your rechargeable<br />
battery before the next use.<br />
Hint: PCS will count the consumed capacity always if the lamp unit is connected to the battery<br />
part . But if the battery part is disconnected, counting will start from the beginning.<br />
Controlling the remaining light time:<br />
The electronics not only control the high and low beam; they also protect the rechargeable<br />
battery against over-discharge and include a low battery indicator.<br />
Low battery is signalled by the red LED.<br />
Yellow LED lights: Significant amount of the capacity is gone!<br />
Red LED lights: Very low capacity, only some minutes runtime !<br />
Red LED flashes: Reserve tank activated<br />
It is a matter of experience to interpret exactly how much time is left after the LEDs light up.<br />
Remaining burn time depends on the battery's age and capacity and the operating<br />
temperature.<br />
Hint: When the red LED light up you can increase the remaining burn time with economical<br />
use of the high beam.<br />
T L 1 2 0 0<br />
3
Reserve tank:<br />
When the battery is almost empty (red LED have flashed for several minutes already) the lamp<br />
switches off automatically. By double clicking the switch the reserve tank is activated, which<br />
provides some additonal time of emergency light. The flashing red LED indicates the<br />
reserve tank has been activated. The performance of the reserve tank also depends on the<br />
battery condition.<br />
When the reserve tank is empty, the light will switch off and must not be restarted.<br />
Never store a discharged battery. Recharge your battery as soon as possible!<br />
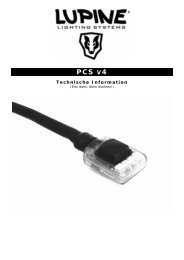
3.) CHARGING THE RECHARGEABLE BATTERY<br />
Unscrew the battery part from the lamp unit. The <strong>Lupine</strong> plug is in the gold/ green board of the<br />
battery part.<br />
Only <strong>Lupine</strong> Li-ion Charger :<br />
You can use every Li-ion charger, Wiesel, micro charger or Charger One.<br />
Charging will works as you know from all the other <strong>Lupine</strong> batteries.<br />
Estimated charging times:<br />
Charger One : 1 hour<br />
Micro Charger : 1.5 hours<br />
Wiesel V 3 : 4 hours<br />
T L 1 2 0 0<br />
4
4.) Changing the light modes<br />
The new Power Control System offers easy to handle settings to fine tune the light to individual<br />
needs. Out of the box, the <strong>TL</strong> <strong>1200</strong> comes with a “2 step mode” and “low start on”. Available<br />
are several other settings:<br />
2 step mode low ( 20 W + 1.5 W )<br />
2 step mode high ( 20 W + 3 W )<br />
2 step mode with disorientation mode ( 20 W + 12 Hz )<br />
3 step mode with SOS ( 20 W + 1.5 W + SOS )<br />
4 step mode ( 20 W + 10 W + 6 W + 1.5 W )<br />
1 step mode ( 20 W )<br />
stealth mode on ( no light on the switch )<br />
stealth mode off<br />
low start on ( starts with the lowest lewel )<br />
low start off<br />
Programming is easy , simply press the switch and hold it down until the light<br />
flashes the required number of times and then release.<br />
If the light is turned OFF and you start the programming sequence, please ignore the<br />
first light flash. If the light is turned ON when you start the programming sequence<br />
the first flash you see is stage 1 of programming (2 Step Mode).<br />
Keep the button pressed and then release:<br />
for 5 seconds 1 st flash green 2 step low<br />
for 10 seconds 2 nd flash green 2 step high<br />
for 15 seconds 3 rd flash green<br />
T L 1 2 0 0<br />
5<br />
2 step<br />
disorientation<br />
for 20 seconds 4 th flash green 3 step SOS<br />
for 25 seconds 5 th flash green 4 step<br />
for 30 seconds 6 th flash green 1 step<br />
for 35 seconds 1 st flash blue stealth on<br />
for 40 seconds 2 nd flash blue stealth off<br />
for 45 seconds 3 rd flash blue low start on<br />
for 50 seconds 4 th flash blue low start off
Hints<br />
Voltage:<br />
After connecting the battery part to the lamp unit, the voltage will be indicated as follows:<br />
First, the blue LED will blink 1 time per volt,<br />
then the red LED will blink 1 time per 1/10 volt<br />
Example: The blue LED blinks 7 times and the red LED 5 times = the voltage measured is<br />
7.5 V. This information will help you to judge the actual condition of your rechargeable battery<br />
before use:<br />
Between 7.5 and 8 V : fully charged. Between 7 and 7.5 V : Re-charge battery if it is not an<br />
older battery. Between 6.5 und 7 V : Not ready for use.<br />
Hint: You don’t have to wait for the whole voltage information to be shown in order to use<br />
your lamp. You can stop the voltage information at any time by switching on the beam.<br />
Note: Even if the Power-LED is faulty, the LEDs will flash as above. If the light does not<br />
iluminate despite a successful initialisation, the failure is not caused by the PCS but from a<br />
serious damage.<br />
Capacity control<br />
The PCS monitors the capacity of the rechargeable battery by measuring the voltage.<br />
Unfortunately voltage and capacity are not exactly proportional which is why <strong>Lupine</strong> does not<br />
quote an exact remaining capacity when the yellow and red LEDs light up. It takes some<br />
experience of using the lighting system to tell exactly how much burn time is left when the<br />
yellow LED lights up. Accordingly, it also varies how much burn time is left when the red LED<br />
lights up. The factory default capacity control will be suitable for a long time. It is not<br />
recommended to change the capacity control until you have experienced a remarkable loss of<br />
burn time.<br />
5.) CARE AND STORAGE<br />
Lamp:<br />
All components should be cleaned with warm soapy water, but do not use a high pressure<br />
spray or hose to clean the torch. Please make shure that the battery part is connected properly<br />
to the lamp unit.<br />
Opening the Screw Top - moisture inside the lamp:<br />
Little moisture on the inner side of the front glass may occur. This is no serious problem and<br />
easily to solve.<br />
Open the casing. Please open the screw-on top on the front of the casing: Hold the back part of<br />
the casing with one hand, with the other hand, turn the screw-on top counter-clockwise.<br />
Having removed the top, you can see the reflector, the front glass and the sealing.<br />
Please notice the right assembling :<br />
Reflector – glass – silicone O-ring.<br />
Please allow all parts some minutes to dry properly. Sometimes it’s also helpful cleaning the<br />
glass with a soft small towel.<br />
Then it’s time to re-assemble your <strong>Tesla</strong>.<br />
First insert the O-ring silicone sealing properly in the top. Please insert the glass into the top.<br />
Now you can close the top.<br />
T L 1 2 0 0<br />
6
Important: The top must be screwed onto the thread in the correct position. If the<br />
thread runs smooth, the top is in the right position. Otherwise, please stop, re-screw<br />
the top and try again or you might damage the thread. Please be cautious!<br />
Please make sure that the top is really closed completely, otherwise the casing will<br />
not be waterproof.<br />
Transport:<br />
In case you transport your light in a bag or a box so that the button might accidentally be<br />
pressed: Always unscrew the battery part from the lamp unit.<br />
Storage:<br />
For short periods of time, store the battery fully charged. Disconnect it from the lamp unit.<br />
Before using the system again, re-charge the battery fully. If you intend not to use it for a<br />
longer period (over 3 months), we strongly recommend to store the battery in a cold<br />
place. This will prevent the battery from over-discharging.<br />
6.) TROUBLESHOOTING<br />
Failure Caused by Solution<br />
Lamp does not light and the LEDs<br />
on the Lamp do not light during<br />
initialisation.<br />
.<br />
Lamp does not light, LEDs of the<br />
Over discharged battery. Charge!<br />
Battery is not or not<br />
correctly plugged into Check all connections<br />
the light.<br />
Lamp do flash during<br />
initialisation.<br />
Power LED are faulty Replace LED insert<br />
Burn times are too short.<br />
Battery was not in use<br />
for a long time<br />
Battery is new.<br />
Please charge the battery<br />
Battery is very old Replace with new battery<br />
Cold temperatures Keep the battery warm<br />
Charger is defective Replace charger<br />
T L 1 2 0 0<br />
7
7.) TECHNICAL DATA<br />
Lamp:<br />
Weight complete with rechargeable battery: 269g<br />
Capacity of rechargeable battery / Voltage: 2.5 Ah 7.2 V Li-Ion<br />
Light output: <strong>1200</strong> lumen<br />
Burn time 20 W: 1 hour<br />
Burn time 1,5 W: 15 hours<br />
Temperature range: - 25°C - +70°C<br />
Beam angle LED: 15°<br />
Burn times may vary depending on battery's age, condition and temperature.<br />
IMPORTANT NOTES:<br />
Use of this lighting system might be limited differently from country to country depending on<br />
the purpose you use it for. Please do inform yourself about possible restrictions in your<br />
country.<br />
The design of the <strong>TL</strong> <strong>1200</strong> as well as of the PCS are protected by worldwide patents.<br />
<strong>Lupine</strong> Lighting Systems GmbH<br />
Winnberger Weg 11<br />
D-92318 Neumarkt<br />
Germany<br />
Fon: 0049 91 81 509490<br />
Fax: 0049 91 81 5094915<br />
e-mail: info@lupine.de<br />
net: www.lupine.de<br />
T L 1 2 0 0<br />
8