Operating Manual - Funkwerk Dabendorf GmbH
Operating Manual - Funkwerk Dabendorf GmbH
Operating Manual - Funkwerk Dabendorf GmbH
Create successful ePaper yourself
Turn your PDF publications into a flip-book with our unique Google optimized e-Paper software.
130 8001 1.05<br />
US<br />
English<br />
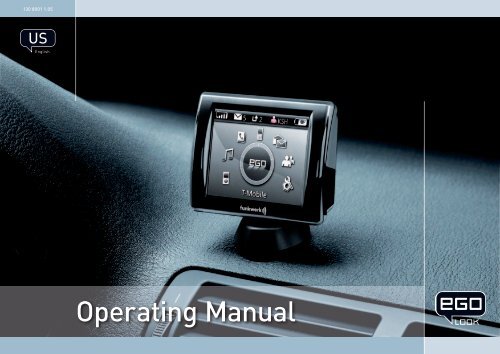
<strong>Operating</strong> <strong>Manual</strong>
EGO LOOK<br />
<strong>Funkwerk</strong> <strong>Dabendorf</strong> reserves the right to modifi cations in the course of technological progress and deviations from the delivery<br />
scope! All rights reserved! Reproduction, in whole or in part, is only permitted with the prior written consent of <strong>Funkwerk</strong><br />
<strong>Dabendorf</strong> <strong>GmbH</strong>!
1<br />
Inhaltsverzeichnis<br />
2 List of illustrations......................................................................................................... 6<br />
3 Introduction / foreword.................................................................................................. 7<br />
4 Safety notes................................................................................................................... 8<br />
5 Scope of delivery / package content............................................................................... 9<br />
6 Installation instructions................................................................................................. 10<br />
6.1 Required configuration..................................................................................................................................10<br />
6.1.1 Vehicle................................................................................................................................................................................. 10<br />
6.1.2 Mobile phone....................................................................................................................................................................... 10<br />
6.1.3 Muting (radio mute switch)................................................................................................................................................ 10<br />
6.1.4 Converting the EGO LOOK into a previously installed <strong>Funkwerk</strong> hands-free car kit..................................................... 10<br />
6.1.5 Add-on speakers / Car audio telephone connection........................................................................................................ 11<br />
6.1.6 Car radio line-in................................................................................................................................................................. 11<br />
6.2 Installation locations.....................................................................................................................................11<br />
6.2.1 Checking cable lengths...................................................................................................................................................... 11<br />
6.2.2 Selection of site for installing the electronics box............................................................................................................ 11<br />
6.2.3 Selection of site for installing the microphone................................................................................................................. 12<br />
6.2.4 Selection of site for installing the radio controller........................................................................................................... 13<br />
6.2.5 Selection of site for installing the display......................................................................................................................... 13<br />
6.3 Installation....................................................................................................................................................14<br />
6.3.1 Mounting the electronics box............................................................................................................................................. 14<br />
6.3.2 Mounting the microphone.................................................................................................................................................. 14<br />
6.3.3 Inserting the battery in the radio controller...................................................................................................................... 15<br />
6.3.4 Mounting the radio controller............................................................................................................................................ 15<br />
6.3.5 Mounting the display.......................................................................................................................................................... 15<br />
2 | 3
6.4 Connection scheme.......................................................................................................................................16<br />
6.5 Installing the ISO connection cable..............................................................................................................17<br />
6.5.1 Checking the mute inputs................................................................................................................................................... 18<br />
6.5.2 Checking the installation.................................................................................................................................................... 19<br />
6.5.3 Additional external speakers............................................................................................................................................. 19<br />
6.6 Connecting the components to the electronics box.....................................................................................20<br />
6.7 Connecting the EGO iDapter to the electronics box.....................................................................................21<br />
7 <strong>Operating</strong> instructions................................................................................................... 23<br />
7.1 Features........................................................................................................................................................23<br />
7.1.1 Overview of features........................................................................................................................................................... 23<br />
7.2 Controls.........................................................................................................................................................24<br />
7.3 Getting started with the EGO LOOK controller.............................................................................................25<br />
7.4 Symbols.........................................................................................................................................................26<br />
7.4.1 Symbols in the status bar.................................................................................................................................................. 26<br />
7.4.2 Speller Symbols.................................................................................................................................................................. 27<br />
7.4.3 Symbole Menüoptionen...................................................................................................................................................... 27<br />
7.4.4 Contact list number types.................................................................................................................................................. 27<br />
7.4.5 Music player symbols/buttons.......................................................................................................................................... 28<br />
7.5 Speller...........................................................................................................................................................28<br />
7.6 Getting started..............................................................................................................................................29<br />
7.6.1 About Bluetooth ® technology............................................................................................................................................. 29<br />
7.6.2 Activating the controller..................................................................................................................................................... 29<br />
7.6.3 Einschalten.......................................................................................................................................................................... 29<br />
7.6.4 Entering the Bluetooth ® PIN.............................................................................................................................................. 30<br />
7.6.5 Hands-free mode................................................................................................................................................................ 30<br />
EGO LOOK
7.6.6 Automatic coupling............................................................................................................................................................. 30<br />
7.6.7 Calling................................................................................................................................................................................. 30<br />
7.7 The menus.....................................................................................................................................................32<br />
7.7.1 User management.............................................................................................................................................................. 35<br />
7.7.2 Settings............................................................................................................................................................................... 36<br />
7.7.3 iPod TM Player....................................................................................................................................................................... 39<br />
7.7.4 Music player........................................................................................................................................................................ 40<br />
7.7.5 Contacts list........................................................................................................................................................................ 41<br />
7.7.6 Call history.......................................................................................................................................................................... 42<br />
7.7.7 Nachrichten........................................................................................................................................................................ 42<br />
7.8 Voice control..................................................................................................................................................43<br />
8 Software update............................................................................................................. 46<br />
9 Service........................................................................................................................... 47<br />
10 Accessories and spares parts........................................................................................ 50<br />
11 Technical specifications................................................................................................. 52<br />
12 Zulassungen................................................................................................................... 52<br />
13 Conformity statement.................................................................................................... 53<br />
14 Hotline........................................................................................................................... 55<br />
4 | 5
2<br />
List of illustrations<br />
Fig. 01 Scope of Delivery 9<br />
Fig. 02 Signal direction of the Bluetooth ® antenna 11<br />
Fig. 03 Installation location of the electronics box 12<br />
Fig. 04 Installation location of the microphone 12<br />
Fig. 05 Installation location of the radio controller 13<br />
Fig. 06 Installation location of the display 13<br />
Fig. 07 Assembly dimensions of the electronics box 14<br />
Fig. 08 Connection for the mini ISO connection cable 16<br />
Fig. 09 Installation procedure 17<br />
Fig. 10 Setting the PIN according to device type 18<br />
Fig. 11 Connector assignments 18<br />
Fig. 12 Connection system 18<br />
Fig. 13 a/b View after changing cables 19<br />
Fig. 14 Connecting external loudspeakers 20<br />
Fig. 15 Connecting electronics box 21<br />
Fig. 15a Connecting EGO iDapter 22<br />
Fig. 16 Status bar 26<br />
EGO LOOK
3<br />
Introduction / foreword<br />
Congratulations on your new EGO!<br />
The EGO LOOK combines functionality with a brilliant visual effect. This is evident in its beautiful design, in the numerous<br />
functions, and primarily in its color display. The high-resolution display is generously sized and provides you with all the<br />
important information such as contact list entries, SMS (text) messages, and more. Intuitive menu prompting and wireless<br />
remote control ensure that you always have an overview.<br />
The installation of your EGO LOOK in your car requires specialized knowledge and skills. We therefore recommend that the<br />
installation be performed by a qualified professional.<br />
Before installation in your car, please make sure that your mobile phone is fully compatible with EGO LOOK. If you are uncertain,<br />
please consult your dealer or a qualified workshop. Our service team will also be happy to help you with any information you may<br />
require. Further information on compatibility between EGO LOOK and various mobile phones can be found on our website.<br />
6 | 7
4<br />
Safety notes<br />
1. Incorrect installation – Incorrect installation may lead to damage to the units and/or your car! Specialized knowledge and<br />
skills are required for installing the system. We strongly recommend that the system be installed by a qualified rofessional.<br />
2. Risk of injury – Unsuitable installation locations may become a source of injury in an accident situation, or may inhibit the<br />
correct functioning of essential safety equipment. Please carefully read the notes in the „Installation“ chapter carefully!<br />
3. Risk of injury/material damage – the removal of vehicle lining with sharp or pointed objects may lead to injuries or material<br />
damage.<br />
4. Road safety risk – Diverted attention can lead to dangerous situations in traffic. Even when using hands-free phone<br />
systems, your complete attention must be paid to the current traffic conditions. It is always advisable to avoid phone calls<br />
while driving in difficult traffic situations!<br />
5. Damage to airbags – An incorrect installation location may cause damage to, or inhibit the correct function of, your airbags.<br />
Do not install the components within the deployment area of the airbags!<br />
6. Insulation damage – Damaged insulation can lead to equipment and wiring damage. The cables and leads may not be under<br />
tension when installed. Install the cables and leads in such a way as to avoid pinching or abrasion.<br />
7. Polarity and shorting damage – Cables connected with reversed polarity, or in such a way as to produce a short circuit, can<br />
lead to serious damage to your equipment. Before commencing installation, make sure that the car battery is disconnected.<br />
8. Damage to essential vehicle components – Essential vehicle components or wiring can be damaged when drilling<br />
mounting holes or screwing in self-threading screws. Please make sure there is always sufficient space behind the screw<br />
holes and drilled holes!<br />
9. Interference with on-board electronics – Despite the extreme protection against interference, incorrect installation can<br />
lead to interference with the vehicle electronic systems. Please read the vehicle manufacturer’s notes to this effect!<br />
10. Appropriate use – The EGO LOOK is intended exclusively for use in vehicles with Bluetooth ® mobile phones and A2DP<br />
devices.<br />
11. Damage caused by inappropriate replacement parts – Inappropriate spare or replacement parts may lead to malfunctions.<br />
Please use only the approved parts listed in the section „Spares parts and accessories“!<br />
12. Road safety risk – For your own safety, never initiate the coupling procedure while your vehicle is in motion!<br />
EGO LOOK
5<br />
Scope of delivery / package content<br />
[1] Electronics box<br />
[2] Display and base<br />
[3] Radio controller including battery (CR2477 type)<br />
[4] Microphone<br />
[5] ISO-cable for connection to the car electrical system<br />
[6] Adhesive pad for the base<br />
[7] Quick Guide<br />
[8] Safety manual<br />
[1]<br />
[5]<br />
<br />
[2] [3]<br />
[4]<br />
Safety Instructions<br />
1. Improper installation – Improper installation may cause damages to the unit or to the vehicle! The installation of the hands-free car kit requires spezial knowledge and special<br />
abilities. We therefore strongly recommend to have the installation one by a professional.<br />
2. Personal injury – Inappropriate places for the installation may cause personal injuries in accidents or may disable the safety equipment. Note the directions in the chapter<br />
“Installation”!<br />
3. Personal injury / Material damage – When you remove coverings or armature parts, sharp tools may cause personal injuries or material damage. Remove the parts carefully.<br />
Don’t submit the connecting cables to pressure.<br />
4. Negative effects on road safety – Talking whilst driving reduces your concentration. This may cause dangerous situations on the road. Also in hands-free mode, you should draw<br />
your attention to the traffic. In complex traffic situations you should refrain from using the mobile phone!<br />
5. Damage of the airbag – A wrong place selected for the installation of the components may cause damage to the air bag or impair the functioning of the air bag. Install the<br />
components out of range of action of the air bag!<br />
6. Insulation damage – Damaged insulations may cause damages of the unit. The cables installed should not be exposed to tensile stress. Install the cables such as they are not<br />
pinched or chafed.<br />
7. Damage caused by polarity reversal or short circuiting – Incorrectly connected cables or a short circuit may cause serious damage to the equipment. It is essential to disconnect<br />
the car battery before you begin installation.<br />
PLEASE MAKE SURE THE CONTENT OF THE PACKAGE is complete. If any parts are missing, please don‘t hesitate to contact our<br />
service hotline team: (+1) 858.566.2170, Mon – Fri, 8 AM to 5 PM (PST)<br />
[6]<br />
[7]<br />
QUICK<br />
GUIDE<br />
EGO LOOK<br />
130 8011 1.02<br />
Welcome<br />
Contents<br />
Thank you for choosing a product from <strong>Funkwerk</strong> <strong>Dabendorf</strong>.<br />
This Quick Guide leads you through the initial set-up of EGO LOOK.<br />
We recommend using the operating instructions for your cellular<br />
phone (or similar) to familiarize yourself with the Bluetooth ®<br />
functions. Please make sure before installation that the cell<br />
phone is compatible with the unit.<br />
More information and detailed operating instructions can be<br />
found on our website at www.fwd-online.de.<br />
If you have any questions, call our hotline at +49 (0) 3377 316-233.<br />
8. Damage of important vehicle components – Drilling mounting holes or driving in self-tapping screws may cause damage to important vehicle components or to cables. Make sure<br />
there is enough space left also behind the screws und drilling holes!<br />
- Electronics box<br />
- Display<br />
- Control unit<br />
- Microphone<br />
- ISO cable for connecting to the vehicle<br />
- Adapter cable<br />
- Adhesive pad<br />
- Quick Guide<br />
- Safety information<br />
Connection Concept<br />
[8]<br />
9. Effects on the ve h ic le ’s electrical system – Although the hands-free car kit produces low amounts of radiation, improper installation of the hands-free car kit may influence the<br />
electronic equipment of the car. Note the directions of the vehicle manufacturer!<br />
10. Proper use – This system is intended for use exclusively with mobile phones in motor vehicles.<br />
<strong>Funkwerk</strong> <strong>Dabendorf</strong> <strong>GmbH</strong><br />
Märkische Straße<br />
15806 <strong>Dabendorf</strong><br />
Germany<br />
Telephone +49 (0) 3377 316-233<br />
Fax +49 (0) 3377 316-300<br />
E-mail info@fwd-online.de<br />
Internet www.fwd-online.de<br />
A <strong>Funkwerk</strong> AG company.<br />
Connection<br />
for EGO LOOK<br />
display<br />
11. Damages caused by false replacement parts – False replacement parts may cause disturbances. Only use the replacement parts listed in the chapter “Replacement parts and<br />
Accessories”!<br />
Microphone<br />
connection<br />
Connection,<br />
e.g.<br />
MP3 player<br />
Line out<br />
connection,<br />
e.g. car radio<br />
Connection<br />
for ISO cable<br />
EGO LOOK<br />
ISO connection<br />
for the vehicle<br />
cable loom<br />
Bluetooth QD ID B012939<br />
Fig. 01:<br />
Scope of Delivery<br />
ISO connection<br />
to car radio<br />
Baseplate connector<br />
for mounted charger<br />
(optional)<br />
Connection<br />
for the<br />
Stereo Mute Box<br />
12. Negative impact on driving safety – For your own safety, please do not perform a pairing procedure while driving!<br />
8 | 9
6<br />
Installation instructions<br />
6.1 Required configuration<br />
Before installation of your EGO LOOK, please note which features and connection options are provided by your car audio system.<br />
It is advantageous when your audio has the following: a muting function, phone input and line-in. You can find out which of these<br />
input options your audio system has in the documentation provided.<br />
6.1.1 Vehicle<br />
The EGO LOOK may only be installed in vehicles with 12 V, with the negative terminal connected to the chassis. If no car audio<br />
is installed, an add-on speaker will be required. For the installation of the optional charging cradle, you will require a modelspecific<br />
mounting that may be purchased from a specialist dealer.<br />
6.1.2 Mobile phone<br />
Operation of the EGO LOOK requires a Bluetooth ® -compatible mobile phone. You can find a list of supported Bluetooth ®<br />
telephones online at www.egohandsfree.com.<br />
6.1.3 Muting (radio mute switch)<br />
The muting function (Radio Muting) ensures that the audio sound is turned off during telephone calls. The system supports the<br />
muting function. Your car`s audio documentation will show whether your car audio has a mute option. If your car audio is not<br />
equipped with a muting option, you can install the optionally available Stereo Mute Box to facilitate speaker muting.<br />
6.1.4 Converting the EGO LOOK into a previously installed <strong>Funkwerk</strong> hands-free car kit<br />
An adapter cable is available for customers who already own a <strong>Funkwerk</strong> hands-free car kit (including the Audio 2000, 3000,<br />
Audio blue, Audio com, and Audio compact) and who would like to easily convert the EGO LOOK. The adapter cable connects the<br />
ISO cable, already installed in the vehicle, of your previous <strong>Funkwerk</strong> handsfree system with the EGO LOOK and is available as an<br />
accessory.<br />
<br />
NOTE! This simple converting option is only possible when installing the EGO LOOK without a stereo mute box. To install the EGO<br />
LOOK with the stereo mute box, the stereo mute box’s ISO connecting cable should be used to connect to the vehicle.<br />
EGO LOOK
6.1.5 Add-on speakers / Car audio telephone connection<br />
The car’s loudspeakers are transferred to the system is by means of switch contacts. These are designed for a peak power handling<br />
of 35 W (Sinus). Loudspeaker power handling exceeding 35 W leads to premature wear on the switching contacts. For higher outputs,<br />
use the telephone connection of the car audio or a 5 W / 4-Ohm satellite speaker. This port is only designed for voice reproduction.<br />
6.1.6 Car radio line-in<br />
A car audio with a line-in input option is required for music reproduction in stereo. As an alternative to line-in, the car audio may<br />
have a mini-ISO port (block connector C), a 0.14 in jack socket or a RCA input socket. An appropriate adapter lead is required for<br />
the connection between the EGO LOOK line-out and the line-in version of your audio system. If your car audio system has no linein<br />
option, you can employ the optionally available Stereo Mute Box for stereo reproduction in combination with your car’s front<br />
speakers.<br />
<br />
6.2 Installation locations<br />
RISK OF INJURY! Unsuitable installation locations may become a source of injury in an accident (or emergency braking) situation, or<br />
may inhibit the correct functioning of essential safety equipment!<br />
6.2.1 Checking cable lengths<br />
Before you’ve securely installed the components, check that the installation locations have been selected in such a way that the cable<br />
length is sufficient to connect the individual components.<br />
6.2.2 Selection of site for installing the electronics box<br />
The Bluetooth ® antenna for connection to the mobile phone and the<br />
antenna for radio communication with the radio control unit are<br />
contained in the electronics box. The antenna transmits directionally<br />
towards the front. For this reason, during installation, ensure that the<br />
antenna faces into the passenger cell (see Fig. 02). Vertical mounting<br />
is ideal. Metallic screening between the front panel and the passenger<br />
cell, such as metal or metallised plastic panels, are unsuitable and<br />
may interfere with the Bluetooth ® connection. Locations behind the<br />
dashboard or in a metal-lined glove compartment are also unsuitable.<br />
A covering in plastic, fabric or wood presents no problems whatsoever.<br />
Fig. 02:<br />
Signal direction of<br />
the Bluetooth ®<br />
antenna<br />
10 | 11
Suitable locations for the electronics box:<br />
Passenger side, next to the middle console under the paneling, modelspecific<br />
installation console (dealer).<br />
Our suggested installation locations are shown in the illustration on<br />
the right.<br />
Further unsuitable locations are:<br />
Leg and knee height, potential head impact zone, airbag inflation<br />
space, engine compartment<br />
Fig. 03:<br />
Installation<br />
location of the<br />
electronics box<br />
6.2.3 Selection of site for installing the microphone<br />
Suitable for the microphone:<br />
Where voice can reach the microphone unhindered (distance between<br />
the speaker and the microphone should be approx. 13.78 in), on the<br />
A-column (between windshield and driver’s side window), next to the<br />
driver‘s sun visor, on the dashboard<br />
Unsuitable for the microphone:<br />
Close to the speakers (less than 31 in), under the dashboard, in the air<br />
stream from open windows or air vents.<br />
Fig. 04:<br />
Installation location of<br />
the microphone<br />
The illustration shows<br />
one of the potential<br />
microphone mounting<br />
locations. Alternatively,<br />
the microphone may be<br />
attached to the sun visor<br />
with the clip provided.<br />
EGO LOOK
6.2.4 Selection of site for installing the radio controller<br />
The following locations are suitable for the radio controller:<br />
In the area above the DIN installation slot, in the vicinity of the steering<br />
wheel (at a location within the driver’s reach).<br />
The following locations are unsuitable for the radio controller:<br />
Airbag deployment area, possible head impact area, beyond the<br />
reach of the driver.<br />
Fig. 05:<br />
Installation location of<br />
the radio controller<br />
6.2.5 Selection of site for installing the display<br />
The following locations are suitable for the display:<br />
In the space above the DIN installation shaft, close to the steering<br />
wheel (in an easily accessible and visible position), Note the position<br />
of sunlight to avoid reflection on the display.<br />
The following locations are unsuitable for the display:<br />
Airbag inflation space, potential head impact zones, out of reach of<br />
driver’s reach.<br />
Fig. 06:<br />
Installation location of<br />
the display<br />
12 | 13
6.3 Installation<br />
DAMAGE TO ESSENTIAL VEHICLE COMPONENTS! Essential vehicle components or wiring can be damaged when drilling mounting<br />
holes or screwing in self-threading screws. Please make sure there is always sufficient space behind the screw holes and drilled<br />
holes!<br />
6.3.1 Mounting the electronics box<br />
Installation consoles for a number of car models are<br />
available from your dealer. These are designed to contain<br />
all the system components, including the electronics box.<br />
When it is not possible to use an installation console, please<br />
proceed as follows:<br />
Fig. 07:<br />
Assembly<br />
dimensions of<br />
the electronics<br />
box<br />
Define the mounting points<br />
Making sure that there is at least 2.8 in space for the plug and<br />
socket connectors. Mark the positions for the fixing screws.<br />
Mounting the electronics box<br />
For mounting the electronics box, use four self-threading<br />
screws and appropriate washers. We recommend size “ST<br />
2,9x25 DIN 7981”self-threading screws. These are ideal for<br />
the fixing of the electronics box. Pre-drill the holes with a 0.08 in drill.<br />
6.3.2 Mounting the microphone<br />
Define the mounting location<br />
The microphone holder has a self-adhesive strip on the back. The mounting location should have the same form and area as the<br />
self-adhesive strip on the microphone holder. The location selected must allow the microphone cable to reach the electronics<br />
box! Position the microphone with the head facing towards the direction of speech.<br />
Cleaning and degreasing the mounting location<br />
The mounting location must be clean and free from grease and dirt/dust. Prior to installation, clean the area with a cleansing<br />
product containing ethyl alcohol. Only use products that do not damage plastics or varnished wood finishes and are themselves<br />
free of oils or grease. Unsuitable cleansers are, for example, lighter fluid, acetone, turpentine, trichloroethylene and similar<br />
products.<br />
EGO LOOK
Attaching the microphone holder<br />
Peel off the protective backing from the self-adhesive strip. Hold the microphone holder at a distance of several millimetres<br />
(about a quarter of an inch) above the desired mounting location. Re-check the positioning. Re-positioning after mounting is no<br />
longer possible. Place the microphone holder on the mounting location and fix by applying short and light pressure.<br />
Attaching the microphone<br />
Attach the microphone by sliding it into the holder and position the microphone head towards the direction of speech.<br />
6.3.3 Inserting the battery in the radio controller<br />
Rotate the lower portion of the controller clockwise and the upper portion counterclockwise to open the controller. Lift the upper<br />
portion. Insert the supplied battery with the positive terminal downward into the lower portion until it latches. Now place the<br />
upper portion on the bottom so that the contacts from the bottom of the controller touch the contact surface in the upper portion.<br />
Position the latching tabs in the notches and rotate opposite the opening direction.<br />
6.3.4 Mounting the radio controller<br />
Define the mounting location<br />
The control console is mounted on a smooth service by means of the self-adhesive pad provided. Make sure that the user can<br />
easily reach the controller.<br />
Cleaning and degreasing the mounting location<br />
The mounting location must be clean and free from grease and dirt/dust. Prior to installation, clean the area with a cleansing<br />
product containing ethyl alcohol. Only use cleansing products that do not damage plastics or varnished wood finishes and are<br />
themselves free of oils or grease. Unsuitable cleansers are, for example, lighter fluid, acetone, turpentine, trichloroethylene and<br />
similar products.<br />
Gluing the radio controller in position<br />
Remove the protective foil from the adhesive pad on the underside of the controller. Hold the radio controller a few millimeters<br />
over the desired installation position. Check the position again – when doing so, keep the position of the red and green buttons<br />
in mind. It is not possible to correct the controller after it has been glued in position. Place the radio controller on the adhesive<br />
location and briefly apply moderate pressure.<br />
6.3.5 Mounting the display<br />
Determining the mounting location<br />
The display is mounted to a smooth surface using the supplied adhesive pad. The optimal position for this is facing directly at the<br />
driver. Keep the effect of lights and sunlight in mind in order to minimize possible reflections.<br />
14 | 15
Cleaning and degreasing the mounting location<br />
The mounting location must be clean and free from grease and dirt/dust. Prior to installation, clean the area with a cleansing<br />
product containing ethyl alcohol. Only use cleansing products that do not damage plastics or varnished wood finishes and are<br />
themselves free of oils or grease. Unsuitable cleansers are, for example, lighter fluid, acetone, turpentine, trichloroethylene<br />
and similar products.<br />
Gluing the display in position<br />
Pull the protective foil from the adhesive strips. Hold the display a few millimeters over the desired installation position. Check<br />
the position again. It is not possible to correct the display after it has been glued in place. Place the display on the adhesive<br />
location and briefly apply moderate pressure.<br />
Changing the base position<br />
As supplied, the display base is intended for vertical mounting in the vehicle. To change to the horizontal mounting position,<br />
unlatch the base, rotate 180° and re-latch the base on the underside of the display.<br />
6.4 Connection scheme<br />
<br />
Installation for call reception for a car audio system with a mute input but without a phone input<br />
With this connection option, voice playback is is emitted from the front right car speaker. During calls, the mute input blocks the<br />
car audio signal.<br />
NOTE: Please observe the information in section “6.5.1 Checking the mute inputs” on connecting the mute lead of the ISO<br />
connecting cable.<br />
Installation for voice playback with a car audio system with phone and mute input<br />
options<br />
With this connection option, voice playback comes through the car audio system<br />
speakers. During calls, the car radio output is switched to the phone input by the mute<br />
input In order to access the phone input of your car audio system, the speaker output<br />
of your EGO LOOK must be connected to the phone input of your car audio system. The<br />
purple and green leads of the ISO cable must be connected to the car audio phone<br />
input for this option. The purple and green leads must be disconnected from the ISO<br />
connector. The green lead (pin 14 of the 14-pin plug) should be connected to „Phone<br />
Fig. 08:<br />
Connection for<br />
the mini ISO<br />
connection cable<br />
EGO LOOK
Out“, and the purple lead (pin 7 of the 14-pin plug) to „Phone In +“ of the Mini-ISO socket.<br />
Informationen zum Telefoneingang Ihres Autoradios entnehmen Sie bitte der Einbau- und Bedienungsanleitung Ihres Autoradios.<br />
<br />
NOTE: If your car audio system has different phone connection options from those mentioned here, please consult a qualified<br />
professional for installation of the system. Furthermore, please read the section with information on connecting the mute lead of<br />
the ISO connection cable, “6.5.1 Checking the mute input”.<br />
6.5 Installing the ISO connection cable<br />
The battery must be disconnected before starting cable installation. Disconnect the grounding cable from the negative pole of the<br />
battery. The cable installation procedure is shown in the illustrations.<br />
Car audio<br />
Disconnect car wiring<br />
harness from car radio<br />
Electronics box<br />
Connect 14-pin ISO<br />
connecting cable to<br />
EGO LOOK<br />
2<br />
Car audio<br />
Connect EGO LOOK ISO<br />
connector to car radio<br />
Fig. 09:<br />
Installation<br />
procedure<br />
Connect EGO LOOK ISO connectors to car<br />
wiring harness ISO connectors<br />
Connect yellow mute lead to<br />
one of the three mute inputs<br />
(see table)<br />
When the installation is completed, reconnect the grounding cable to the negative pole of the battery.<br />
16 | 17
6.5.1 Checking the mute inputs<br />
The mute inputs 1-3 can be seen in Fig. 5 of Illustration 09. The yellow mute cable of the hands-free equipment is connected to<br />
one of these inputs. The table below shows which mute input is to be used:<br />
Fig. 10:<br />
Setting the<br />
PIN according<br />
to device type<br />
Socket contact housing<br />
Radio model Pin Wire colour Function<br />
1<br />
Audi,<br />
2 Mute<br />
3<br />
Volkswagen,<br />
4 blue Ignition (15)<br />
Grundig<br />
7 red Permanent positive (30)<br />
8 brown Ground (31)<br />
Wiring of power supply connectors<br />
Socket wiring from<br />
the rear (see table)<br />
Plug wiring from<br />
the rear<br />
Socket contact housing<br />
Radio model Pin Wire colour Function<br />
Ford,<br />
Mercedes,<br />
1<br />
2<br />
3 Mute<br />
Porsche, 4 red Permanent positive (30)<br />
Becker 7 blue Ignition (15)<br />
8 brown Ground (31)<br />
Fig. 11:<br />
Connector assignments<br />
Socket contact housing<br />
Radio model Pin Wire colour Function<br />
1<br />
2 Mute<br />
Blaupunkt<br />
3<br />
4 red Permanent positive (30)<br />
7 blue Ignition (15)<br />
8 brown Ground (31)<br />
Car audio<br />
Vehicle wiring harness<br />
Socket contact housing<br />
Radio model Pin Wire colour Function<br />
1 Mute<br />
2<br />
Philips<br />
3<br />
4 red Permanent positive (30)<br />
7 blue Ignition (15)<br />
8 brown Ground (31)<br />
Electronics box<br />
Fig. 12:<br />
Connection system<br />
EGO LOOK
6.5.2 Checking the installation<br />
When the ISO connection cable is correctly installed, a call remains active until the call is ended, even if the ignition has already<br />
been turned off beforehand. The system switches off automatically when the call has been ended. If the system switches to off<br />
immediately switches off,then exchange the ignition lead (blue) with the power supply lead (red) as shown in Fig. 13b.<br />
red<br />
+12V<br />
1A<br />
2A<br />
red<br />
red<br />
+12V<br />
red<br />
red<br />
+12V<br />
2A<br />
1A<br />
blue<br />
Fig. 13a:<br />
View of original<br />
connection<br />
blue<br />
blue<br />
blue<br />
blue<br />
blue<br />
red<br />
Fig. 13b:<br />
View after<br />
changing cables<br />
6.5.3 Additional external speakers<br />
In the following cases, additional speakers (4 Ω, min. 5 W) must be used:<br />
→ when the car audio system speakers should not be used<br />
→ when the output rating of the speaker channel is greater than 35 W (Sinus) and the car audio<br />
system has no phone connection option<br />
→ when the car audio system is used with active speakers and has no phone connection option<br />
Feedback interferes with the clarity of calls. Mount additional speakers at a distance of at least 31 in from the microphone.<br />
When mounting additional speakers, please observe the manufacturer‘s installation instructions. Speakers can be connected<br />
to the green (pin 14) and the purple (pin 7) leads of the connection cable. First of all, the purple and green leads must be<br />
disconnected from the ISO connector (see Fig. 14).<br />
18 | 19
Pin Colour Function<br />
1 Brown Ground (31)<br />
2 Yellow Radio mute<br />
3<br />
4<br />
5<br />
View of the plug side,<br />
from which the wiring is<br />
fed in the plug housing<br />
(with pin allocation)<br />
Connection option for additional speakers on<br />
pin 7 (purple lead) and pin 14 (green lead) of the<br />
14-pin plug<br />
6 White<br />
7 Purple<br />
Car audio speaker<br />
output +<br />
(front right)<br />
Speaker lead +<br />
(front right)<br />
8 Red Permanent positive (30)<br />
9 Blue Ignition (15)<br />
10<br />
11<br />
12<br />
13 Black<br />
14 Green<br />
Car audio speaker<br />
output -<br />
(front right)<br />
Speaker lead -<br />
(front right)<br />
Fig. 14:<br />
Connecting external<br />
loudspeakers<br />
6.6 Connecting the components to the electronics box<br />
The individual components are connected to the electronics box as follows :<br />
[1] Plug the microphone jack into the jack socket with the microphone symbol<br />
[2] The electronic box line-in can be used to connect an optional MP3 player with line-out. To do so, a connection<br />
cable 0.14 in stereo jack plug to 0.14 in stereo jack plug (l = 4.92 ft) is required<br />
<br />
IMPORTANT: Only connect the device (MP3 player, iPod, etc.) to the electronics box line-in with a jack cable when it is being<br />
powered by battery alone (without the recharger), as interfering impulses may otherwise cause damage to the electronic box<br />
line-in.<br />
[3] The electronics box line-out must be connected to the car audio line-in. Depending on the car audio line-in configuration,<br />
EGO LOOK
one of the following cables is required:<br />
→ Connection cable 0.14 in stereo jack to 0.14 in stereo jack (l = 4.92 ft)<br />
→ Connection cable 0.14 in stereo jack to RCA plug (l = 4.92 ft)<br />
→ Connection cable 0.14 in stereo jack to Mini-ISO (l = 4.92 ft)<br />
[4] The display must be connected to the jack.<br />
[5] The 14-pin plug of the ISO connecting cable must be connected with the electronics box.<br />
[6] The base plate for the charging cradle may also be connected to the “charger” output socket.<br />
[1]<br />
[2]<br />
[4]<br />
[3] [5] [6]<br />
6.7 Connecting the EGO iDapter to the electronics box<br />
Fig. 15:<br />
Connecting<br />
electronics box<br />
20 | 21
Before the EGO iDapter is connected to the Ego Look/Flash, a Bluetooth update to software version 7.0 or higher<br />
must be performed. Following this, the EGO iDapter can be connected to the Ego Look/Flash as described in the<br />
connection diagram.<br />
Fig. 15a:<br />
Connecting<br />
EGO iDapter<br />
iPod Playe<br />
er<br />
EGO LOOK
7<br />
<br />
<strong>Operating</strong> instructions<br />
ROAD SAFETY RISK! Failure to pay attention can lead to dangerous situations in traffic. You must always direct your complete<br />
attention to current traffic conditions, even when speaking with a hands-free device. It is advisable to avoid phone calls while<br />
driving in difficult traffic situations!<br />
<br />
NOTE: Depending on the software version and the mobile telephones used, certain functions may not be available. For more<br />
information, visit www.egohandsfree.com.<br />
7.1 Features<br />
7.1.1 Overview of features<br />
The hands-free EGO LOOK system supports the Bluetooth ® hands-free profile. The EGO LOOK is the convenient system for<br />
phoning in your car. It provides the following capabilities:<br />
→<br />
→<br />
→<br />
→<br />
→<br />
→<br />
→<br />
→<br />
→<br />
→<br />
Call functions, such as incoming/outgoing calls and redial<br />
Integrated voice control<br />
Intuitive voice dialing directly from your mobile phone’s contacts list (without training)<br />
Activate and use the voice dialing of the mobile phone<br />
Allows users to read and reply to SMS messages<br />
iPod TM player<br />
Contacts list and call lists<br />
Music player – replay of music files on mobile phones, iPod TM or MP3 players via<br />
Bluetooth ® Audio Streaming (A2DP)<br />
Automatic radio muting<br />
Can be buddied with up to 10 mobile phones<br />
22 | 23
7.2 Controls<br />
The EGO LOOK controller has three buttons. The picture to the right gives a<br />
brief overview of the device’s buttons. This section explains the functions of the<br />
individual buttons.<br />
Button functions<br />
You use the rotary knob to navigate through the menus and to select the active menu. Another function is the<br />
Voice control, which is activated by holding down the rotary knob. Numbers and letters can be selected using the<br />
rotary knob in the “Speller”. You will find more information on the “Speller” and “Voice control” in the<br />
corresponding chapters.<br />
Brief description:<br />
Menu navigation, starting Voice control, entering numbers and letters, selecting the active<br />
menu, stopping the screen saver<br />
The green button is used for accepting an incoming call. Additional functions of the green button:<br />
→ In the main screen: Selecting the active menu.<br />
→ In the menus: Selecting the active menu.<br />
→ In the contact list and the contact history: Starting a call to the currently selected number.<br />
Brief description:<br />
Accepting, selecting a menu, starting a call to the currently selected number,<br />
stopping the screen saver<br />
The red button is used to reject an incoming call. The red button can also be used to end a current call.<br />
Additional functions of the red button:<br />
→ In the menus: Returning from the current submenu.<br />
→ In edit mode: Returning from the current submenu.<br />
Brief description:<br />
Rejecting, hanging up, returning from the current submenu,<br />
stopping the screen saver, Activate the voice dialing of the mobile phone<br />
<br />
NOTE: The EGO LOOK has a screensaver. After 60 seconds of inactivity, the brightness of the display is reduced. The display<br />
becomes brighter again after any button is pressed. At the same time, the button pressed performs the associated function. The<br />
brightness of the screensaver can be selected via the Settings menu. (Standby brightness)<br />
EGO LOOK
7.3 Getting started with the EGO LOOK controller<br />
Battery type<br />
→ Only use CR2477 type lithium batteries. Other batteries can cause the unit not to operate properly or may even damage it.<br />
→ The manufacturer assumes no liability for damage caused by the use of incorrect batteries.<br />
→ The battery is not rechargeable.<br />
Inserting the battery<br />
→ While looking at the and buttons, rotate the lower portion of the controller clockwise and the upper portion<br />
counterclockwise to open the controller. Lift the upper portion.<br />
→ Push the battery with the positive terminal (+) facing downward at an angle into the battery compartment and latch it in<br />
place. When inserted, you should not be able to see the labeled side of the battery.<br />
→ Place the upper portion on the bottom so that the contacts of the bottom of the controller touch the contact surface in the<br />
upper portion. Place the latching tabs in the notches and rotate opposite the opening direction.<br />
Removing the battery<br />
→ While looking at the and buttons, rotate the lower portion of the controller counterclockwise and the upper<br />
portion clockwise to open the controller. Lift the upper portion.<br />
→ Remove the battery from the battery compartment and then put the controller back together again.<br />
Activating the controller with the EGO LOOK<br />
→ The controller must initially be activated with the EGO LOOK.<br />
→ Switch on the EGO LOOK.<br />
→ Within the first 10 seconds after switching the EGO LOOK on (indicated by the display backlighting being turned on), press<br />
the and buttons simultaneously for at least one second until the LED between the buttons is illuminated.<br />
→ The controller has now been activated with the EGO LOOK and can be used. After changing the battery, it is unnecessary to<br />
perform the activation again.<br />
Disposing of used batteries<br />
→ Do not discard used batteries in household garbage.<br />
→ Return used batteries to a designated collection point (e.g. your dealer or an electronics store).<br />
24 | 25
7.4 Symbols<br />
7.4.1 Symbols in the status bar<br />
Fig. 16: Status bar<br />
The status bar is a located at the top of the display and shows<br />
the symbols described in this section.<br />
Field strength symbol – indicates the<br />
current strength of the reception field<br />
SMS symbol – indicates text messages<br />
received<br />
Arrow symbol – indicates missed calls<br />
FWD Indicates the user’s initials<br />
Battery symbol – indicates the battery<br />
capacity of the mobile phone<br />
EGO LOOK
7.4.2 Speller Symbols<br />
Symbol for confirming input<br />
Symbol to delete the last character<br />
Symbol for changing to numeric input<br />
az Symbol for changing to lowercase letters<br />
Symbol for changing to uppercase letters<br />
Symbol for changing to special characters<br />
Symbol for exiting the speller<br />
7.4.3 Symbole Menüoptionen<br />
Activated option. This symbol appears in front of an activated menu item.<br />
Deactivated option. This symbol appears in front of a menu item when it may<br />
be activated as an option.<br />
7.4.4 Contact list number types<br />
Symbol for personal telephone numbers<br />
Symbol for mobile telephone numbers<br />
Symbol for business telephone numbers<br />
26 | 27
7.4.5 Music player symbols/buttons<br />
for selecting the device<br />
Symbol for setting the volume<br />
Play, pause<br />
Stop<br />
Track skip, forward<br />
Track skip, reverse<br />
7.5 Speller<br />
The controller controls the EGO LOOK using the rotary knob. In addition, the rotary knob is used for confirmation. The<br />
button is used to go one step back or to exit the menu. The Speller allows you to compose telephone numbers from individual<br />
digits or names from individual letters. It is available for various functions of the EGO LOOK, for example, for dialing a telephone<br />
number or for creating a contact list entry. <strong>Operating</strong> the Speller is explained in the following:<br />
→ Entering numbers<br />
By rotating the rotary knob, navigate to a digit and accept this digit by pressing the rotary knob. You can delete the last digit<br />
of the number by selecting the symbol. Once the number has been completely entered, you can confirm it by selecting<br />
the symbol. To cancel the process at any time, press the button.<br />
→ Entering names or text<br />
Similar to the method used for entering numbers, you can enter names or even entire texts using the Speller. Navigate to a<br />
character by rotating the rotary knob and accept it by pressing the rotary knob. You can delete the last character by selecting<br />
the symbol. Once the name has been completely entered, you can save it by selecting the symbol. To cancel the<br />
process at any time, press the button. You can switch between upper-case letters, lower-case letters, numbers and<br />
special characters using the symbols described in Chapter 7.2.3. You select these symbols using the rotary knob.<br />
EGO LOOK
7.6 Getting started<br />
Take enough time to familiarize yourself with the use of the EGO LOOK in combination with your mobile phone. First of all, make a<br />
few calls to determine the ideal volume and the best voice pickup direction before using the EGO LOOK in traffic.<br />
When getting started, your car should be parked in a quiet place. It is also helpful if the person you will be calling can take time to<br />
let you make some test calls.<br />
7.6.1 About Bluetooth ® technology<br />
Bluetooth ® technology is a wireless technology and, as such, it allows communication between individual devices without the need<br />
for cables. Data and voice information can be transmitted simultaneously. It is unnecessary to have line-of-sight routing between<br />
the devices. The transmission/reception range in the open is typically 33 feet. Interference from other electrical or electronic<br />
equipment or obstacles may, however, reduce this range. The frequency band, in which Bluetooth ® operates, is reserved virtually<br />
worldwide. This, coupled with the fact that each Bluetooth ® product is tested and approved for compatibility with other Bluetooth ®<br />
devices, ensures the highest possible levels of compatibility with devices from a wide range of manufacturers. The EGO LOOK<br />
system supports the Bluetooth ® hands-free profile. This means that it is fully compatible with all phones supporting the<br />
Bluetooth ® hands-free profile. If you are uncertain, read the operating instructions for your mobile phone to see which profiles<br />
are supported.<br />
A2DP (Advanced Audio Distribution Profile) is a technology that enables the wireless transmission of stereo audio signals via<br />
Bluetooth ® to a compatible receiving device. Please take a look at our homepage for information about compatible mobile phones.<br />
7.6.2 Activating the controller<br />
You can read how to activate the radio controller with the EGO LOOK in Chapter 7.3 „Getting started with the EGO LOOK controller“<br />
in „Activating the controller with the EGO LOOK“.<br />
7.6.3 On / Off function<br />
The first time you use your EGO LOOK, you need to start it by switching on the ignition. You will see the start logo followed by the<br />
main screen. If the EGO LOOK is not connected to a mobile telephone, or if no user is found, the functionality of the main menu is<br />
limited.<br />
To establish a connection to the EGO LOOK, you need to select the menu item „Manage users“ using the rotary knob. There, you<br />
select „New user.“ The EGO LOOK then searches for mobile telephones in its reception range. If your mobile telephone is not<br />
found, you can start a search again or read the „Troubleshooting“ section. If the name of your mobile telephone is displayed,<br />
select it by pressing the rotary knob. Once connected with the EGO LOOK, complete functionality is available in the main menu.<br />
Capabilities not supported by the mobile telephone cannot be selected. Once the ignition is switched off, the EGO LOOK powers<br />
down. If the ignition is switched off during a telephone call, this telephone call is maintained. The EGO LOOK does not power down<br />
until the telephone call has been completed.<br />
28 | 29
7.6.4 Entering the Bluetooth ® PIN<br />
After a few seconds you will be prompted to enter your Bluetooth ® PIN. Enter the PIN shown on the EGO LOOK display onto your<br />
mobile phone.<br />
7.6.5 Hands-free mode<br />
In some cases, coupling with your mobile phone in the hands-free mode does not work when using the method described above.<br />
If you are sure that your mobile phone supports the Bluetooth ® hands-free profile, proceed as follows: In the list of detected<br />
devices, select “couple from phone”. Now you need to search for Bluetooth ® devices using your mobile phone. The procedure for<br />
this can be found in the operating instructions for your mobile phone. The mobile phone will then start searching for devices.<br />
Select the EGO LOOK from the list of devices found by your mobile phone. During the coupling process, your mobile phone will<br />
prompt you to enter a PIN or password. At this point, please enter the series of numbers shown on the display of the EGO LOOK.<br />
After a short time, the mobile phone should inform you that coupling was successful. You may also cancel the coupling at any<br />
time by pressing the key. If coupling fails, please read the section on “Troubleshooting”.<br />
7.6.6 Automatic coupling<br />
If the phone is already connected with the EGO LOOK, the EGO LOOK will try to couple to this phone. If the search is successful,<br />
a connection is automatically established. A search is always performed for the most recently connected mobile phone.<br />
If the search process was unsuccessful, it‘s possible that Bluetooth ® or the mobile phone is not turned on, or that you were not<br />
the last user. If you would like to select another user, activate user management and log this user in.<br />
7.6.7 Calling<br />
If there is a Bluetooth ® link between the EGO LOOK and a mobile telephone, you can use the hands-free capability of your EGO<br />
LOOK. You can dial a number using voice dialing, the menu, or directly on the mobile telephone.<br />
Incoming call<br />
If the mobile phone is available over the Bluetooth ® connection, the call is signaled with the ringtone on your mobile phone.<br />
Otherwise a signaling tone is generated by the EGO LOOK.<br />
If the caller has not blocked his number and if the mobile telephone supports this function, the number, or the name of the<br />
caller if a corresponding entry is found in the contact list, is displayed. You can decide to accept the call ( -button) or reject<br />
it ( -button). If you accept the call, you can regulate the volume using the rotary knob. The setting is stored. You may end<br />
the call by pressing the button.<br />
EGO LOOK
Call setup<br />
Call setup from the EGO LOOK is only possible if there is an existing Bluetooth ® connection between the EGO LOOK and the<br />
mobile phone. You may set up a call with voice-activated dialing or through the menu.<br />
To activate voice dialing, press the rotary knob for longer than a half a second. With the command „Dial number,“ you can<br />
announce the telephone number to be dialed or with the „Dial “ command you can dial an entry in the contact list directly.<br />
You can find more information on this in the „Voice control“ chapter. (Take paragraph into account)<br />
The following methods may be used to initiate a call from the menu:<br />
→ by selecting from the contacts list and the mobile phone<br />
→ by direct outward dialing of a number with the number speller<br />
→ dialing from the call list on your mobile phone<br />
→ through the call-back feature for received SMS messages.<br />
And lastly, you may also dial a number directly on your mobile phone.<br />
Starting the voice dialing of the telephone<br />
The telephone‘s own voice dialing, if present, can be started by holding down the red button This can be ended again by pressing<br />
the red button again.<br />
<br />
IMPORTANT NOTE: Please observe your country’s regulations on in-car telephone use!<br />
Call ended<br />
Once a call is ended, the menu jumps back to the main menu. If an incoming call is rejected with the<br />
the previous menu.<br />
key, the menu jumps to<br />
Setting the volume<br />
You can regulate the volume during a call and during active speech recognition using the rotary knob.<br />
<br />
TIP! If the person you‘re speaking with cannot hear you well, consider increasing the sensitivity of the microphone in the “Audio”<br />
menu under “Settings”. There is a risk, however, that this may produce annoying echoes.<br />
30 | 31
Options during phone calls<br />
During a phone call, the following options can be carried out once the rotary knob has been turned:<br />
→ DTMF tones<br />
→ Mute mic.<br />
→ Private mode<br />
→ DTMF tones<br />
Here, touch key tones are selected and then sent by means of the speller.<br />
→ Mute mic.<br />
With this option, the microphone can be switched to mute. The person you have been speaking with can then no longer hear you.<br />
Pressing again deactivates the muting of the microphone.<br />
<br />
→ Private mode<br />
You can also switch into Private mode during a telephone call by selecting the „Private mode“ item and confirming with the<br />
rotary knob. The call now only uses the mobile telephone. Communication by way of the EGO LOOK is not possible at this<br />
moment and anyone else in the vehicle cannot listen to the conversation. Pressing the rotary knob again ends Private mode.<br />
IMPORTANT NOTE: In most countries, phoning while driving is only allowed when using a hands-free system!<br />
7.7 The menus<br />
Using the rotary knob, navigate to a menu item. Select a menu item using the rotary knob or exit the menu by pressing the<br />
button. By pressing the rotary knob again, you select the submenu of the current menu. You can select from the following menu<br />
items listed in the menu overview below:<br />
→ User management<br />
User-specified settings such as “change initials”, “log in”, “log out”, etc., can be set out under this menu item. New users can<br />
also be logged on. For details, please see the “User management” chapter.<br />
EGO LOOK
→ Settings<br />
General settings for the EGO LOOK can be entered under this menu item. These range from “Ringtone” to “Software update” to<br />
“Voicemail”. The exact breakdown can be found in the following overview, which depicts the menu structure. You can find more<br />
information in the “Settings” chapter<br />
→ iPod TM Player<br />
The „iPod TM player“ menu offers the option of controlling the iPod TM via the Ego system. Under Options, you can search in various<br />
track lists as usual with iPod TM . See the „iPod TM player“ chapter for more information.<br />
→ Music player<br />
The “Music player” menu allows you to playback songs and to control them as usual with Play, Pause, Stop, Forward, and<br />
Reverse. The playback device can be coupled to the EGO LOOK under “Options”. For details, see the “Music player” chapter.<br />
→ Contacts list<br />
The contacts list contains the entries downloaded from the mobile phone. Each number in an entry can be accessed. In addition,<br />
direct outward dialing is possible here (without voice control). You can find more information in the “Contacts list” chapter.<br />
→ Call history<br />
This contains lists of the last dialed numbers, accepted calls, and missed calls. You can mark an entry using the rotary knob<br />
and start a call using the button. You will find more information in the „Call history“ chapter.<br />
→ Messages<br />
Contains the list of text messages (SMS). Unread messages are marked accordingly. The messages menu is divided into “Read<br />
messages” and “New message”. More information can be found in the “Messages” chapter<br />
32 | 33
Main menu structure for the EGO LOOK<br />
User management Settings Music player Dictation function Contacts list Call history Messages<br />
→<br />
New user<br />
→<br />
Ringtone<br />
→<br />
Playing<br />
→<br />
Playback<br />
→<br />
Search<br />
→<br />
Missed<br />
→<br />
Read message<br />
→<br />
User 1 - Melody - Pause - Play<br />
→<br />
Options<br />
→<br />
Accepted - Read aloud<br />
- Change initials - Volume - Stop - Pause - Direct dialing<br />
→<br />
Dialed - Call back<br />
- Change icon color<br />
→<br />
Brightness<br />
→<br />
Options - Stop - Synchronization - Answer<br />
- Log in - Brightness - Playback list - Forwards - SIM<br />
→<br />
New message<br />
- Log out - Standby brightness - Artists - Reverse - SIM & telephone - Template 1<br />
- Delete<br />
→<br />
Call settings - Albums<br />
→<br />
Options<br />
→<br />
Entry 1 - Template 2<br />
→<br />
User 2 - Autom. call acceptance - Tracks - New device<br />
→<br />
Entry 2 - ...<br />
- Change initials<br />
→<br />
Direction of rotation - Genres - Device 1<br />
→<br />
...<br />
- Change icon color<br />
→<br />
Power-off delay - Composers - Connect<br />
→<br />
Entry ...<br />
- Log in<br />
→<br />
Reset - Settings - Disconnect<br />
- Log out<br />
→<br />
Software update - Delete<br />
- Delete<br />
→<br />
Information - Device 2<br />
→<br />
...<br />
→<br />
Language - Connect<br />
→<br />
User 10<br />
→<br />
Voice control - Disconnect<br />
- Activate - Delete<br />
- Language - Device ...<br />
→<br />
Audio<br />
- Microphone sens.<br />
- Line-In<br />
- Telephone<br />
announcements<br />
- Mute delay<br />
- Reset<br />
→<br />
Switch off<br />
EGO LOOK
7.7.1 User management<br />
Symbol:<br />
The EGO LOOK allows you to manage up to 10 user profiles; you can quickly and easily switch between these profiles while using<br />
the EGO LOOK. Individual information saved for each user includes the following:<br />
→ Contacts list<br />
→ Display brightness<br />
→ Ringtone<br />
→ Display language<br />
→ Volume settings<br />
→ Call lists<br />
Starting the Manage users function<br />
To reach the Manage users function, go to the symbol on the main screen and press the rotary knob. Then, you will see the<br />
users linked to the EGO LOOK and the „New user“ item. If no users are linked, only the „New user“ item is present.<br />
Create a new user<br />
To activate a new user, you must select the „New user“ item using the rotary knob and then press the rotary knob. All further<br />
steps are similar to those in the „Getting started“ chapter.<br />
Change user initials<br />
Open Manage users. Then, select a user and press the rotary knob. This brings you into a submenu. From there, select the<br />
„Change initials“ item. Using the Speller, you can now edit the name of the user.<br />
Change icon color<br />
In this item, the user can change the color of the user symbol<br />
. Ten colors are available.<br />
Reset user<br />
To delete all user data, open Manage users. Select the user to be reset. Confirm your selection by pressing the rotary knob. A<br />
menu opens. In this menu, select the „Delete“ item. All user data is now deleted from the EGO LOOK.<br />
34 | 35
Change users<br />
To change users, move into Manage users and select the desired user. Confirm your selection by pressing the rotary knob. A<br />
submenu opens. Select the „Activate“ item. The previous user is deactivated and the new user activated. If the selected user<br />
can be found, the change in users takes place immediately. If the user cannot be found, the program returns to Manage users.<br />
Log out user<br />
You can disconnect the current Bluetooth ® connection within “User management” under the current user with the “Log out”<br />
menu item.<br />
7.7.2 Settings<br />
Symbol:<br />
The “Settings” menu is highly complex, since many settings for the EGO LOOK can be carried out under this menu item. The<br />
following settings can be carried out:<br />
→ Ring tone<br />
→ Brightness<br />
→ Call settings<br />
→ Direction of rotation<br />
→ Follow-up time<br />
→ Reset<br />
→ Software update<br />
→ Information<br />
→ Language<br />
→ Voice control<br />
→ Audio<br />
→ Power down<br />
Ring tone<br />
The „Ring tone“ menu is divided into „Melody“ and „Volume.“ Several ring tones are available under „Melody.“ You may set these<br />
according to your personal tastes. You can set the „Volume“ of these ring tones using the rotary knob.<br />
EGO LOOK
Brightness<br />
The brightness of the display can be adjusted here to the needs of the user.<br />
→ Standby brightness<br />
The brightness that the display should have after switching to standby mode can be set here.<br />
Call settings<br />
→ Automatic call answer<br />
If this option is activated, incoming calls are automatically answered after three rings.<br />
Direction of rotation<br />
→ Clockwise<br />
If this option is activated, rotating the knob clockwise signifies advancing in the menu or the contact list.<br />
→ Counterclockwise<br />
If this option is activated, rotating the knob counterclockwise signifies advancing in the menu or the contact list.<br />
Delay time<br />
You may determine how long the EGO LOOK should remain active after switching off the ignition. The delay time may be set in<br />
steps between 0 and 30 minutes.<br />
Reset<br />
This resets all settings back to the standard factory settings. In doing so, all user settings including the contacts list are lost.<br />
Software update<br />
The software for your EGO LOOK can be updated via Bluetooth ® . For more details, please see the section “Software update”.<br />
Info<br />
Provides information about the various software and hardware versions of your EGO LOOK. Use this information when you<br />
contact our service department with questions and problems.<br />
Language<br />
The EGO LOOK supports multiple display languages. You can change the display language within this menu item.<br />
36 | 37
Voice control<br />
→ Activate<br />
Carrying out this item launches voice control. Control is performed with specific commands. For moreinformation see the<br />
“Voice control” chapter.<br />
→ Language<br />
If your EGO LOOK features multiple languages, you may select the language here.<br />
Audio<br />
→ Microphone sensitivity<br />
Under certain circumstances, it may be necessary to adjust the microphone sensitivity. For example, if the microphone is<br />
located too far from or too close to the driver. The EGO LOOK has 10 possible sensitivity settings available. The sensitivities<br />
are shown to the right of the display as bars. There are a total of five bars where one bar indicates two steps. The sensitivity<br />
can be adjusted using the rotary knob. Do not set the microphone to be too sensitive because this may result in over-modulati<br />
on and poor audio quality for the other party.<br />
→ Line-In<br />
In this menu item, you may activate the line in and vary the input volume of the audio device connected to the line in of the<br />
electronics box.<br />
<br />
Note: Please note that only the connection of an audio device with line level is allowed. If the electronics box’s line in is<br />
overamplified through an excessively high signal from the line out of the audio device, the volume must be reduced on the audio<br />
device.<br />
→ Telephone announcements<br />
If the connected telephone has navigation functions, here you can set whether the navigation announcements are to be output<br />
over the EGO system. The radio is muted during this output. Key tones are also output from the telephone if the telephone<br />
generates these. The status is saved for every user and returned to the previously set status when the system is restarted.<br />
Possible statuses: ON/OFF<br />
EGO LOOK
→ Mute delay<br />
Here, you can set the waiting time between the activation of the mute line and the voice recognition. This is logical, as car<br />
radios require various amounts of time to recognize a mute signal and the switchover of the audio channels in the radio. The<br />
time should be set so that the first announcement of the EGO „Main menu“ can be completely heard.<br />
Possible statuses: 0.5 sec. / 1.0 sec. / 1.5 sec. / 2.0 sec. / 2.5 sec. / 3.0 sec.<br />
→ Reset<br />
Resets all audio settings to the default values.<br />
Power down<br />
The current Bluetooth ® connection is severed under this item and the EGO LOOK is switched off. The EGO LOOK may be switched<br />
back on by pressing a single key.<br />
7.7.3 iPod TM Player<br />
Symbol:<br />
The iPod TM player is activated via the main menu. The activation can only be performed if the accessory device „EGO iDapter“<br />
was also purchased. The iPod TM player can also be activated if a mobile phone is not paired with the EGO LOOK. To be able to play<br />
back music from the iPod TM an iPod TM must be connected to the EGO iDapter cable.<br />
Connection/pairing<br />
The connection with the iPod TM is automatically performed after the connection to the EGO iDapter cable. If the iPod TM icon in the<br />
main menu remains grayed out, the connection has failed and then you must reconnect the connector of the EGO iDapter cable<br />
to the iPod TM . After establishing a connection, music can immediately be played back from the iPod TM . If the music is stopped, you<br />
can search in the track lists under Options.<br />
Charging the iPod TM<br />
The iPod TM is charged via the EGO iDapter. The iPod TM charging can be manually switched off under Options in the „Settings“<br />
menu item in the iPod TM player.<br />
38 | 39
Playing<br />
The following functions are available for playing and are shown in the display:<br />
→ Play<br />
→ Pause<br />
→ Stop<br />
→ Forward (track-by-track in the current playlist)<br />
→ Backward (track-by-track in the current playlist)<br />
→ Volume control<br />
Return to the symbols using the rotary knob. For a description of these keys, please see the “Symbols” chapter.<br />
7.7.4 Music player<br />
Symbol:<br />
The music player is activated through the main menu. The music player may also be activated without a mobile phone being<br />
couple to the EGO LOOK. In order to play back music, the EGO LOOK must be coupled to an A2DP-capable device (such as a<br />
mobile phone with A2DP, an iPod or an MP3-Player with A2DP adapter).<br />
Connection / coupling<br />
Under the “Option” menu item, a “New device” may be coupled, or an already coupled device may be connected. A total of 10<br />
devices may be coupled, whereas only one device may be active. If a “New device” is selected, a Bluetooth ® device search is<br />
performed. The desired device can be selected from there.<br />
If the music device does not support coupling from other devices, it is also possible to couple the EGO LOOK from the music<br />
device via the “Couple from device” menu item. In both cases, a four-digit PIN code is displayed by the EGO LOOK, which must<br />
be entered into the music device. Is the PIN is incorrect, the menu jumps back to device selection, and you must repeat the<br />
process. If an iPod or MP3 player with an A2DP adapter is used, these devices couple automatically with the EGO LOOK. For<br />
this, the “Couple from device” menu item must be selected during the search for devices. After coupling, all playback functions<br />
are available to the user.<br />
Playback<br />
The following functions are available for playback and are shown in the display:<br />
EGO LOOK
→ Play<br />
→ Pause<br />
→ Stop<br />
→ Forwards (by title)<br />
→ Reverse (by title)<br />
→ Volume setting (playback volume adjustable in 10 steps)<br />
Return to the symbols using the rotary knob. For a description of these keys, please see the “Symbols” chapter<br />
7.7.5 Contacts list<br />
Symbol:<br />
The mobile phone’s contacts list can be read via the “Contacts list” menu item. In addition to dialing numbers from the contact<br />
information with the key, entries can be found more quickly with the search function. You may also download the contacts<br />
list from the mobile phone under the “Option” menu item, or enter the number via direct outward dialing.<br />
Read<br />
To read numbers from the contacts list, please select the menu item. After opening the contacts list, all entries contained in<br />
the list are displayed. Select the number or name you want to call and press the key. The numbers stored under this name<br />
are then displayed. By pressing the key once again, the number is dialed.<br />
Search<br />
If searching for a particular name becomes difficult due to a large number of entries, the search function may be used. With this<br />
function, entries may be searched for a specific name or specific first letters. The desired name or first letters can be entered<br />
by using the speller. By pressing the key, the contacts list will be searched for this name or letter.<br />
Direct dial<br />
Direct dialing is possible in addition to voice-activated dialing. As described under the “Speller” and “Call setup” items, a<br />
number can be entered here by hand using the speller. The call is set up after confirming the number with the key.<br />
40 | 41
Synchronizing<br />
In the „Synchronize“ item, you can download the contact lists of the mobile telephone or from the SIM card into the EGO LOOK<br />
memory. Both contact lists can be synchronized, too. Once you have selected a contact list, you confirm this with the rotary<br />
knob. Now a loading bar appears in the display. This bar indicates the instantaneous progress of the synchronization process.<br />
If the download has been completed successfully, the entries are now found in the EGO LOOK contact list. In addition, you can<br />
cancel the download manually using the button. If you decide to cancel, you must reconfirm this by answering the Yes/No<br />
question. If you answer „Yes“, the synchronized entries are deleted and the program returns to the „Contact list“ menu. If you<br />
answer „No“, synchronization continues.<br />
7.7.6 Call history<br />
Symbol:<br />
In the “Call history” menu item, you may view “Numbers dialed”, “Missed calls”, and “Calls received”. After selecting the “Call<br />
list” menu item, a list of numbers dialed is downloaded from the mobile phone. “Missed calls” and “Calls received” may also be<br />
viewed by selecting the corresponding upper list entries. Some mobile phones do not support access to the call list; in this case,<br />
a call list is maintained within the EGO LOOK.<br />
7.7.7 Nachrichten<br />
Symbol:<br />
The EGO LOOK supports the sending and receiving of text messages. The menu is structured in same form users are familiar<br />
with from their mobile phones. Messages received can be viewed under the “Incoming SMS” item. The sender of the message<br />
can be called back by phone using the “Call-back” function. You may also reply to the sender with a text message (SMS).<br />
Various templates are available to you for answering a text message. Select one of these and confirm with the „Send“ button.<br />
The message is sent.<br />
If you do not wish to answer an SMS but rather to send a new SMS, select the „New message“ button. Here you can once again<br />
select a template and then send this. In addition, you can enter the telephone number by hand or select a contact from the<br />
phonebook.<br />
You will find the „Read aloud“ item under the SMS text. You have the option here of having the SMS read aloud. You can also<br />
activate this function by selecting one of the SMSs shown in the list and holding down the rotary knob. If the SMS function via<br />
Bluetooth is not supported by the mobile phone, then the Messages menu item cannot be selected in the EGO LOOK.<br />
EGO LOOK
7.8 Voice control<br />
The dialogue-guided voice control of the EGO LOOK allows you to select a name or number via voice input. While numerical<br />
selection allows you to directly announce a number, you also have the option to select the name directly from the contacts list.<br />
Switching the Language<br />
Depending on the country version of your EGO LOOK, the voice recognition system supports up to three languages. One of these<br />
may be activated. To change the active recognized language, select the item „Setting → Voice control → Language“ in the<br />
menu. A list of available languages is now displayed. Select the desired language and confirm by pressing the rotary knob. The<br />
EGO LOOK will now save your settings and begin updating the recognized language. The status of this process is displayed for<br />
you using a progress bar.<br />
Activation and sequence<br />
Voice control is only possible if you are not making a telephone call. By pressing the rotary knob for longer than a half a second<br />
while not engaged in a telephone call, the status text „Main menu“ is heard, and the message „Please speak“ appears in the<br />
display.<br />
You may cancel each voice dialogue at almost any time with another prolonged pressing of the key. If the EGO LOOK is<br />
waiting for a voice command, you may end the dialogue by saying “abort”.<br />
If there is no Bluetooth ® phone connected to the EGO LOOK, voice-activated dialing cannot be activated.<br />
The following voice commands are possible:<br />
→ “Call / dial ”<br />
→ “Call / dial at home …<br />
at work / in the office / on business …<br />
on the cell phone“<br />
→ “Dial number”<br />
→ “Help”<br />
→ “Redial / call again”<br />
→ “Abort”<br />
42 | 43
“Call / Dial ”<br />
This command may be used to select a name from the contacts list. The name must be contained in the contacts list for this<br />
command to function. If the name is not recognized or found, the EGO LOOK responds with “Please repeat” and offers you the<br />
chance to repeat the command. If the name is recognized, you will be asked if the name should really be dialed. The following<br />
commands are available to you:<br />
→ “Yes / Call / Dial”<br />
Dials the number stored under that name<br />
→ “No / Back”<br />
The number for the recognized name is not dialed<br />
→ “Abort / Cancel“<br />
Ends the dialogue without carrying out a function<br />
→ “Help”<br />
Calls up Help and an explanation of possible commands<br />
“Call / Dial at home … on the cell phone”<br />
With this command, you may dial a specific type of number from a contacts list entry. If the name is recognized, you will be<br />
asked if the name should really be dialed. The following commands are available to you:<br />
→ “Yes / Call / Dial”<br />
Dials the number stored under that name<br />
→ “No / Back”<br />
The number for the recognized name is not dialed<br />
→ “Abort / Cancel“<br />
Ends the dialogue without carrying out a function<br />
→ “Help”<br />
Calls up Help and an explanation of possible commands<br />
“Dial number“<br />
You will be prompted to enter the number to be dialed. This may be done with individual numerals as well as groups of numbers.<br />
If you insert a pause, the last number/group of numbers entered is repeated for checking. In addition, you will be notified if you<br />
exceed the maximum telephone number length. In addition to continuing with the entry of numerals, the following additional<br />
commands are available:<br />
→ „+, *, #, 0, 1, …, 9“ For entering the number<br />
→ “Delete all”<br />
To delete the entire phone number entered<br />
→ “Delete/Correct/Change” To delete the last number/group of numbers entered<br />
→ “Repeat”<br />
To announce the entire phone number entered up to this point<br />
EGO LOOK
→ “Yes / Call / Dial”<br />
→ “No / Back”<br />
→ „Store“<br />
→ “Abort / Cancel“<br />
→ “Help”<br />
To dial the phone number entered<br />
To not dial the number/name in the call list<br />
To store the entered phone numbers<br />
Ends the dialogue without carrying out a function<br />
Calls up Help and an explanation of possible commands<br />
“Help“<br />
As with “Cancel”, this command may be used at any time. If the “Help” command is selected, the EGO LOOK explains which<br />
commands are possible for specific functions at the time they are called up.<br />
“Redial / call again“<br />
This command you provides you with the simplest way to redial the most recently dialed phone number. No further dialogue<br />
follows. Dialing is only possible when the mobile phone is logged in. An announcement will then inform you when dialing begins.<br />
“Abort / Cancel”<br />
With his command, the current dialogue is ended immediately without any function being carried out.<br />
44 | 45
8<br />
Software update<br />
The software for your EGO LOOK can be updated to the latest version via Bluetooth ® . In order to receive the most<br />
current software, please visit our website at www.egohandsfree.com. A detailed description of the update procedure<br />
is included with the software.<br />
EGO LOOK
9<br />
Service<br />
(FAQ) – A list of frequently asked questions:<br />
1. Is it possible to dial directly (without voice control) with the EGO unit?<br />
Yes, with all EGO units except EGO TALK, under the menu item “Contacts list / Options / Direct outward dialing”.<br />
2. What are the exact dimensions of the EGO LOOK components?<br />
You can find the dimensions in the operating instructions under the “Technical data” section.<br />
3. Are EGO units suitable for all types of vehicles?<br />
Yes, EGO units are suitable for all types of vehicles. See installation instructions!<br />
4. Is there a list of optional charging cradles?<br />
Ja. Auf der Homepage ist eine Liste der optionalen Halter verfügbar.<br />
5. Are software updates for the units free?<br />
Yes.<br />
6. Where can EGO be purchased?<br />
From authorized specialty dealers. You can find a specialty dealer in your area through our website under the link<br />
Dealers → Dealer search.<br />
7. What is the procedure for transferring data in order to playback music?<br />
With the EGO LOOK, music can be transferred via Bluetooth ® (A2DP), via the EGO iDapter and also via the line in.<br />
It is possible to make an MP3 player and iPod Bluetooth ® -capable with a dongle/adapter. If an MP3 player without A2DP is<br />
used, a jack cable can be used to connect it to the EGO LOOK.<br />
8. Do EGO units have an external antenna port?<br />
In combination with the optional charging cradle and the associated base plate, the mobile phone can be connected to the<br />
external antenna port.<br />
46 | 47
Problembehebung:<br />
Problem Cause Remedy<br />
No supply voltage<br />
Replace fuse if needed and check cable and connections<br />
EGO LOOK won’t switch on<br />
Ignition not switched on<br />
Switch on ignition<br />
Ignition line interrupted<br />
Check line and 1A fuse<br />
The person you are having a phone<br />
conversation with cannot hear you<br />
The microphone is not plugged in<br />
Connect the microphone to the electronics box. If the<br />
cable is defective, replacement is necessary<br />
The person you are<br />
having a phone conversation<br />
with complains of interference<br />
Air is flowing across the microphone<br />
The mobile phone is very close to<br />
parts of the EGO LOOK or the car radio<br />
Mount the microphone in another place or<br />
reduce air flow if needed<br />
Increase the distance between your mobile<br />
phone and the EGO LOOK or radio<br />
The person you are<br />
having a phone conversation<br />
with complains of echoes<br />
Too little space between<br />
the microphone and speaker<br />
Volume too high<br />
Increase distance or decrease volume<br />
Reduce volume<br />
The mobile phone cannot<br />
find the EGO LOOK during coupling<br />
EGO LOOK is already coupled with a device<br />
Cancel existing connection<br />
Sound is fuzzy or scratchy<br />
Poor Bluetooth ® connection<br />
Reduce the distance between the mobile phone and<br />
EGO LOOK or remove (metallic) obstructions if needed<br />
After switching on<br />
the ignition, the connection<br />
to the coupled mobile phone<br />
is not produced<br />
The mobile phone is not within range.<br />
The Bluetooth ® interface is<br />
deactivated in the mobile phone.<br />
The mobile phone requires<br />
confirmation of the connection setup.<br />
One of the devices no longer has a valid link key.<br />
Place the mobile phone within the range of the EGO LOOK<br />
Switch your mobile phone’s Bluetooth ®<br />
to "On" ("Automatic" option is not sufficient)<br />
Confirm the connection on the mobile phone. Deactivate the<br />
security prompt (see operating instructions for the mobile phone)<br />
Delete the other device from both devices’<br />
list of coupled devices and perform a new coupling.<br />
EGO LOOK
Problem Cause Remedy<br />
No reaction to user input<br />
System frozen<br />
(not responding)<br />
Press the reset button on the back of the display using a<br />
thin object (e.g. a paper clip). The system restarts.<br />
iPod TM cannot be connected<br />
to the EGO system<br />
Incorrect connection of the components<br />
EGO iDapter was not completely initialized<br />
Disconnect system from the mains power supply and check<br />
connection, remedy any connection faults<br />
Shut down and restart system<br />
EGO iDapter cable not completely connected<br />
Reconnect cable to iPod TM<br />
System no longer reacts to<br />
operation<br />
Press the reset button on the rear of your EGO LOOK display for<br />
approx. 2 seconds using a paper clip. After a short wait time, the EGO<br />
LOOK initializes itself again<br />
48 | 49
10<br />
Accessories and spares parts<br />
You can find out more about supported mobile phones on our website at www.egohandsfree.com. Your dealer will also be happy<br />
to advise you if you have any questions.<br />
Accessories:<br />
Stereo Mute Box<br />
Relax and listen to music or phone from your car. The Stereo Mute Box provides<br />
smart sound management. This compact box plays your calls or music over the<br />
car‘s speakers – of course in superb stereo sound. The car radio is muted during<br />
calls or when listening to music.<br />
Features:<br />
- Radio muting during calls or music playback (Audio Streaming)<br />
- Stereo music reproduction in combination with the car‘s front speakers<br />
- Phone audio over the front speakers<br />
Base plate with charging cradle<br />
The charging cradle is a practical accessory for Bluetooth ® hands-free systems<br />
by <strong>Funkwerk</strong> <strong>Dabendorf</strong>. The charging cradle holds your mobile phone firmly<br />
and allows you to recharge its batteries in your car and is an ideal accessory<br />
for drivers who are constantly on the road and often need their phones. In<br />
addition, the external antenna connection ensures outstanding reception and<br />
transmission.<br />
Features:<br />
- Intelligent charging circuit for mobile phones<br />
- Mobile phone safely and securely held in the charging cradle<br />
- External antenna connection for excellent call quality<br />
Adaptercable<br />
EGO LOOK
EGO iDapter<br />
The EGO iDapter allows convenient integration of your iPod TM into<br />
the vehicle. You thus always have your favorite music with you and can<br />
charge the battery of the iPod TM at the same time.<br />
Features:<br />
- Remote control of the iPod TM via EGO system<br />
- Volume control via EGO system<br />
- Navigation through the track lists in the iPod TM<br />
- Automatic charging of the iPod TM<br />
iPod TM is a registered trademark of Apple Inc.<br />
Replacement parts:<br />
[1]<br />
[1] Electronics box<br />
[2] Display<br />
[3] Controller<br />
[4] Microphone<br />
[5] Set of connecting cables<br />
[4]<br />
[2]<br />
[3]<br />
[5]<br />
50 | 51
11<br />
Technical specifications<br />
Outer dimensions of the electronics box<br />
External dimensions: Display without base<br />
External dimensions: Controller<br />
Control unit cable lengths<br />
<strong>Operating</strong> voltage<br />
Quiescent current consumption (ignition off)<br />
Steady plus fuse protection<br />
Ignition fuse protection<br />
Temperature range<br />
Interfaces<br />
Supports Bluetooth ® profiles<br />
5.138 in x 2.126 in x 0.886 in<br />
3.039 in x 3.039 in x 0.906 in<br />
1.843 in x 1.843 in x 1.244 in<br />
6,56 ft<br />
11 V to 15 V<br />
max. 0.1 mA<br />
2 A<br />
1 A<br />
-10°C to +55°C<br />
Microphone connection, line in, line out, accessory port, power<br />
supply terminal and charging connection<br />
Hands-free, A2DP, AVRCP<br />
12<br />
Zulassungen<br />
0681<br />
Fully compliant with the EU R&TTE Directive 1999/5/EC<br />
03 5074<br />
Model certifi cation according to EU Directive 72/245/EWG (2006/28/EC) “Electromagnetic compatibility in motor vehicles”<br />
Bluetooth ® is a registered brand name of Bluetooth SIG, Inc.<br />
EGO LOOK
13<br />
Conformity statement<br />
This equipment employs Bluetooth ® wireless technology. In some countries, the use of this equipment may be restricted or<br />
forbidden. Please make sure you are familiar with such restrictions and do not use your equipment if you are unsure whether<br />
its use is permitted in particular countries you may be visiting.<br />
Bluetooth ® is a registered brand name of Bluetooth SIG, Inc.<br />
<strong>Funkwerk</strong> <strong>Dabendorf</strong> <strong>GmbH</strong><br />
Märkische Straße<br />
D-15806 <strong>Dabendorf</strong><br />
Confirms that the hands-free system “EGO LOOK” complies with the fundamental requirements<br />
and other relevant regulations of the EU Directive 1999/5/EC.<br />
0681<br />
FCC / IC statements<br />
<br />
This device complies with part 15 of the FCC Rules. Operation is subject to the following two conditions: (1) This device may<br />
not cause harmful interference, and (2) this device must accept any interference received, including interference that may<br />
cause undesired operation.<br />
NOTE: This equipment has been tested and found to comply with the limits for a Class B digital device, pursuant to Part 15<br />
of the FCC Rules. These limits are designed to provide reasonable protection against harmful interference in a residential<br />
installation. This equipment generates, uses and can radiate radio frequency energy and, if not installed and used in<br />
accordance with the instructions, may cause harmful interference to radio communications. However, there is no guarantee<br />
that interference will not occur in a particular installation. If this equipment does cause harmful interference to radio or<br />
52 | 53
television reception, which can be determined by turning the equipment off and on, the user is encouraged to try to correct the<br />
interference by one or more of the following measures:<br />
→<br />
→<br />
→<br />
→<br />
Reorient or relocate the receiving antenna.<br />
Increase the separation between the equipment and receiver.<br />
Connect the equipment into an outlet on a circuit different from that to which the receiver is connected.<br />
Consult the dealer or an experienced radio/TV technician for help.<br />
<br />
WARNING: Changes or modifications made to this equipment not expressly approved by FWD may void the FCC authorization to<br />
operate this equipment!<br />
FCC Radiation Exposure statement:<br />
This equipment complies with FCC radiation exposure limits set forth for an uncontrolled environment. End users must follow<br />
the specific operating instructions for satisfying RF exposure compliance.<br />
This transmitter must not be co-located or operating in conjunction with any other antenna or transmitter.<br />
FCC / IC statements for radio controller „FwD FBT“<br />
The labels for the radio controller according to FCC / IC can be found inside the battery lid.<br />
<br />
<br />
<br />
NOTICE: This device complies with Part 15 of the FCC Rules [and with RSS-210 of Industry Canada]. Operation is subject<br />
to the following two conditions:<br />
(1) this device may not cause harmful interference, and<br />
(2) this device must accept any interference received, including interference that may cause undesired operation.<br />
NOTICE: Changes or modifications made to this equipment not expressly approved by <strong>Funkwerk</strong> <strong>Dabendorf</strong> may void the FCC<br />
authorization to operate this equipment.<br />
NOTICE: This Class A digital apparatus complies with Canadian ICES-003.
14 Hotline<br />
Any questions, comments, or suggestions? Would you like some more detailed information? Do you need an adviser or service<br />
in your area? Just give us a call!<br />
Our service hotline is there to help you during the following times:<br />
Monday–Friday<br />
from 8.00 a.m. to 5.00 p.m. (PST)<br />
Before you call us with your problem, please check first with the following steps:<br />
→ Check whether you can solve your problem with the „Troubleshooting“ checklist in Chapter 9.<br />
→ Make sure you have your hands-free system and holder set type available.<br />
→ Try to explain your problem as precisely as possible.<br />
You can contact our service hotline by dialing:<br />
Phone: (+1) 858.566.2170<br />
Fax: (+1) 858.566.2179<br />
eMail support@egohandsfree.com
<strong>Funkwerk</strong> Americas Inc.<br />
8820 Kenamar Drive, Ste 506<br />
San Diego, CA 92121<br />
Telephone +1 (858) 566 - 2159<br />
Fax +1 (858) 566 - 2179<br />
eMail support@egohandsfree.com<br />
Internet www.egohandsfree.com<br />
americas<br />
A <strong>Funkwerk</strong> AG company<br />
<strong>Funkwerk</strong> <strong>Dabendorf</strong> reserves the right to modifi cations in the course of technological progress and deviations from the delivery scope! All rights<br />
reserved! Reproduction, in whole or in part, is only permitted with the prior written consent of <strong>Funkwerk</strong> <strong>Dabendorf</strong> <strong>GmbH</strong>!


