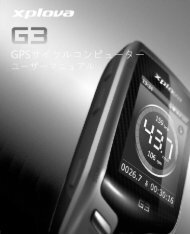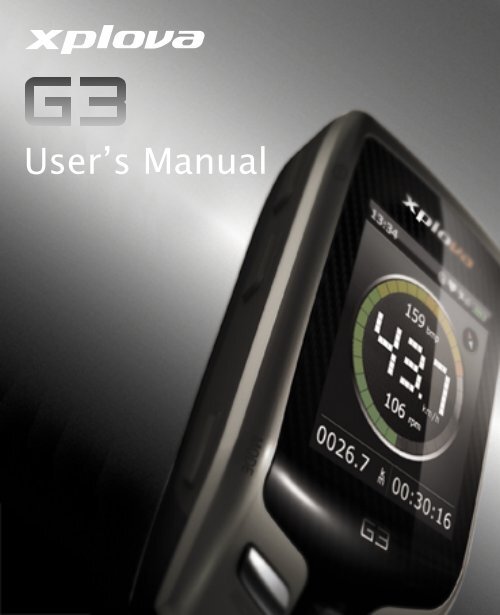
User's Manual - Xplova
User's Manual - Xplova
User's Manual - Xplova

You also want an ePaper? Increase the reach of your titles
YUMPU automatically turns print PDFs into web optimized ePapers that Google loves.
User’s <strong>Manual</strong>
© Copyright 2010, <strong>Xplova</strong> Incorporated. This publication, including<br />
all photographs, illustrations and software, is protected under<br />
international copyright laws, with all rights reserved. Neither this<br />
User’s <strong>Manual</strong>, nor any of the material contained herein, may be<br />
reproduced without written consent of the author.<br />
Download the latest version of this document at www.xplova.com.<br />
XPLOVA Inc.<br />
4F-3, No 66, Sanchong Rd., Nangang District,<br />
Taipei 11560, Taiwan, R.O.C.<br />
E-mail: sales@xplova.com<br />
www.xplova.com<br />
Version: 1.0<br />
ii
Getting Started . . . . . . . . . . . . . . . . . . . . . . . . . . . . . . . . . .1<br />
Getting to Know the <strong>Xplova</strong> G3 . . . . . . . . . . . . . . . . . . . . . . . . . . . 2<br />
Included Accessories . . . . . . . . . . . . . . . . . . . . . . . . . . . . . . . .4<br />
Features of the <strong>Xplova</strong> G3 . . . . . . . . . . . . . . . . . . . . . . . . . . . . . . . . 5<br />
Record/View Cycling Data . . . . . . . . . . . . . . . . . . . . . . . . . . . .5<br />
Smart-Sign Track Navigation . . . . . . . . . . . . . . . . . . . . . . . . .6<br />
Real-time Analysis Chart . . . . . . . . . . . . . . . . . . . . . . . . . . . . . .6<br />
Training . . . . . . . . . . . . . . . . . . . . . . . . . . . . . . . . . . . . . . . . . .6<br />
Optional Accessories . . . . . . . . . . . . . . . . . . . . . . . . . . . . . . . . . . . . 7<br />
Charging the <strong>Xplova</strong> G3 . . . . . . . . . . . . . . . . . . . . . . . . . . . . . . . . . . 8<br />
Powering up the <strong>Xplova</strong> G3 . . . . . . . . . . . . . . . . . . . . . . . . . . . . . . 10<br />
Using the Button Controls . . . . . . . . . . . . . . . . . . . . . . . . . . . . . . . 11<br />
Adjusting Brightness and Turn On/Off Volume . . . . . . . . . . . .11<br />
Switching Modes . . . . . . . . . . . . . . . . . . . . . . . . . . . . . . . . . .12<br />
Recording a Session . . . . . . . . . . . . . . . . . . . . . . . . . . . . . . . .14<br />
Locking the Screen . . . . . . . . . . . . . . . . . . . . . . . . . . . . . . . . .14<br />
Power Options . . . . . . . . . . . . . . . . . . . . . . . . . . . . . . . . . . . .15<br />
Menu . . . . . . . . . . . . . . . . . . . . . . . . . . . . . . . . . . . . . . . . . . .16<br />
Creating a Profile . . . . . . . . . . . . . . . . . . . . . . . . . . . . . . . . . . . . . . 18<br />
Acquiring a GPS Signal . . . . . . . . . . . . . . . . . . . . . . . . . . . . . . . . . . 18<br />
Connecting to Sensors . . . . . . . . . . . . . . . . . . . . . . . . . . . . . . . . . . 19<br />
Mounting the <strong>Xplova</strong> G3 . . . . . . . . . . . . . . . . . . . . . . . . . . . . . . . . 19<br />
Using the GPS Bike Computer . . . . . . . . . . . . . . . . . . . .25<br />
Bike Computer Mode . . . . . . . . . . . . . . . . . . . . . . . . . . . . . . . . . . . 25<br />
The Bike Computer Interface . . . . . . . . . . . . . . . . . . . . . . . . .25<br />
Quick Menu of Bike Computer . . . . . . . . . . . . . . . . . . . . . . . .27<br />
Bike Computer Data . . . . . . . . . . . . . . . . . . . . . . . . . . . . . . . .28<br />
iii
Map Mode . . . . . . . . . . . . . . . . . . . . . . . . . . . . . . . . . . . . . . . . . . . . . 32<br />
The Map Interface . . . . . . . . . . . . . . . . . . . . . . . . . . . . . . . . . .32<br />
Quick Menu of Map . . . . . . . . . . . . . . . . . . . . . . . . . . . . . . . .33<br />
Track Navigation & Smart-Sign Guidance . . . . . . . . . . . . . . .34<br />
Chart Mode . . . . . . . . . . . . . . . . . . . . . . . . . . . . . . . . . . . . . . . . . . . . 35<br />
The Chart Interface . . . . . . . . . . . . . . . . . . . . . . . . . . . . . . . . .35<br />
Quick Menu of Chart . . . . . . . . . . . . . . . . . . . . . . . . . . . . . . .36<br />
Elevation Profile . . . . . . . . . . . . . . . . . . . . . . . . . . . . . . . . . . .37<br />
Training Mode . . . . . . . . . . . . . . . . . . . . . . . . . . . . . . . . . . . . . . . . . 38<br />
The Training Interface . . . . . . . . . . . . . . . . . . . . . . . . . . . . . .38<br />
Quick Menu of Training . . . . . . . . . . . . . . . . . . . . . . . . . . . . .39<br />
Editing Pages . . . . . . . . . . . . . . . . . . . . . . . . . . . . . . . . . . . . . . . . . . 40<br />
Edit this Page . . . . . . . . . . . . . . . . . . . . . . . . . . . . . . . . . . . . .40<br />
Add New Page . . . . . . . . . . . . . . . . . . . . . . . . . . . . . . . . . . . .41<br />
Delete this Page . . . . . . . . . . . . . . . . . . . . . . . . . . . . . . . . . . .41<br />
Changing Settings . . . . . . . . . . . . . . . . . . . . . . . . . . . . . .43<br />
My Data . . . . . . . . . . . . . . . . . . . . . . . . . . . . . . . . . . . . . . . . . . . . . . . 43<br />
Mode Selection . . . . . . . . . . . . . . . . . . . . . . . . . . . . . . . . . . . . . . . . 44<br />
Bike Computer Settings . . . . . . . . . . . . . . . . . . . . . . . . . . . . . . . . . 45<br />
Setting up Alert . . . . . . . . . . . . . . . . . . . . . . . . . . . . . . . . . . .45<br />
Setting up Recording Options . . . . . . . . . . . . . . . . . . . . . . . . .46<br />
Map Settings . . . . . . . . . . . . . . . . . . . . . . . . . . . . . . . . . . . . . . . . . . 47<br />
Changing the Map View . . . . . . . . . . . . . . . . . . . . . . . . . . . . .47<br />
Training Settings . . . . . . . . . . . . . . . . . . . . . . . . . . . . . . . . . . . . . . . 48<br />
User and Bikes . . . . . . . . . . . . . . . . . . . . . . . . . . . . . . . . . . . . . . . . . 49<br />
User Profile . . . . . . . . . . . . . . . . . . . . . . . . . . . . . . . . . . . . . .49<br />
Bike Profile . . . . . . . . . . . . . . . . . . . . . . . . . . . . . . . . . . . . . . .50<br />
iv
General Settings . . . . . . . . . . . . . . . . . . . . . . . . . . . . . . . . . . . . . . . 52<br />
Satellites . . . . . . . . . . . . . . . . . . . . . . . . . . . . . . . . . . . . . . . .53<br />
Display . . . . . . . . . . . . . . . . . . . . . . . . . . . . . . . . . . . . . . . . . .55<br />
Sounds . . . . . . . . . . . . . . . . . . . . . . . . . . . . . . . . . . . . . . . . . .56<br />
Time . . . . . . . . . . . . . . . . . . . . . . . . . . . . . . . . . . . . . . . . . . .56<br />
Units . . . . . . . . . . . . . . . . . . . . . . . . . . . . . . . . . . . . . . . . . . .57<br />
Language . . . . . . . . . . . . . . . . . . . . . . . . . . . . . . . . . . . . . . . .58<br />
Altimeter Calibration . . . . . . . . . . . . . . . . . . . . . . . . . . . . . . .58<br />
Compass Calibration . . . . . . . . . . . . . . . . . . . . . . . . . . . . . . .60<br />
Factory Reset . . . . . . . . . . . . . . . . . . . . . . . . . . . . . . . . . . . . .62<br />
About . . . . . . . . . . . . . . . . . . . . . . . . . . . . . . . . . . . . . . . . . . .63<br />
Using your Accessories . . . . . . . . . . . . . . . . . . . . . . . . .65<br />
Heart Rate Monitor (Optional) . . . . . . . . . . . . . . . . . . . . . . . . . . . 65<br />
Pairing the Heart Rate Monitor . . . . . . . . . . . . . . . . . . . . . . . .65<br />
Wearing the Heart Rate Monitor . . . . . . . . . . . . . . . . . . . . . . .67<br />
Changing the Heart Rate Monitor Battery . . . . . . . . . . . . . . . .68<br />
Combo Cadence Sensor (Optional) . . . . . . . . . . . . . . . . . . . . . . . 68<br />
Pairing the Combo Cadence Sensor . . . . . . . . . . . . . . . . . . . .68<br />
Installing the Combo Cadence Sensor . . . . . . . . . . . . . . . . . . .71<br />
Training with the Combo Cadence Sensor . . . . . . . . . . . . . . . .74<br />
Changing the Combo Cadence Battery . . . . . . . . . . . . . . . . . .75<br />
Battery Charger (Optional) . . . . . . . . . . . . . . . . . . . . . . . . . . . . . . 76<br />
Using the PC Applications . . . . . . . . . . . . . . . . . . . . . . .77<br />
Feature of X-Tracks . . . . . . . . . . . . . . . . . . . . . . . . . . . . . . . . . . . 77<br />
Backup/View Activity Data . . . . . . . . . . . . . . . . . . . . . . . . . . .77<br />
v
GPX & TRK Import/Export . . . . . . . . . . . . . . . . . . . . . . . . . . . .77<br />
Smart-Route Track Planner . . . . . . . . . . . . . . . . . . . . . . . . . .78<br />
Download Detail Maps . . . . . . . . . . . . . . . . . . . . . . . . . . . . . .78<br />
Updating the <strong>Xplova</strong> G3 Software . . . . . . . . . . . . . . . . . . . . . . . . 78<br />
Appendix . . . . . . . . . . . . . . . . . . . . . . . . . . . . . . . . . . . . . .81<br />
Specifications . . . . . . . . . . . . . . . . . . . . . . . . . . . . . . . . . . . . . . . . . . 81<br />
Wheel Size Table . . . . . . . . . . . . . . . . . . . . . . . . . . . . . . . . . . . . . . . 85<br />
Declarations of Conformity . . . . . . . . . . . . . . . . . . . . . . . . . . . . . . 88<br />
Duales System Deutschland GmbH Participant . . . . . . . . . . . .88<br />
CE Declaration of Conformity (CENELEC Europe) . . . . . . . . . . .88<br />
WEEE directive . . . . . . . . . . . . . . . . . . . . . . . . . . . . . . . . . . . .88<br />
vi
Getting Started<br />
Congratulations on having purchased the <strong>Xplova</strong> G3 GPS Bike<br />
Computer. In this chapter you will discover key features and<br />
understand how to power up and use basic features of the user<br />
interface. Further chapters explain how to use the full features and<br />
functions of the bike computer.<br />
1
Getting Started<br />
Getting to Know the <strong>Xplova</strong> G3<br />
This section introduces your <strong>Xplova</strong> G3 and its main features.<br />
1<br />
9<br />
8<br />
7<br />
2<br />
3<br />
4<br />
5<br />
6<br />
1. Power/OSD<br />
2. LED<br />
3. + Button<br />
4. - Button<br />
5. Menu<br />
6. Lap/Reset<br />
7. 5-Way Control Stick<br />
8. Record/End<br />
9. Mode/Bike select<br />
Figure 1.<br />
The <strong>Xplova</strong> G3 front<br />
2 Getting to Know the <strong>Xplova</strong> G3
Getting Started<br />
5<br />
4<br />
1 1. Buzzer output<br />
2. Battery cover<br />
3. Mounting guides<br />
4. Vent holes for pressure<br />
2 and temperature<br />
3 measurement<br />
5. Mini USB connector,<br />
under waterproof cap<br />
Figure 2.<br />
The <strong>Xplova</strong> G3 back<br />
Getting to Know the <strong>Xplova</strong> G3 3
Included Accessories<br />
Getting Started<br />
The <strong>Xplova</strong> G3 includes the items shown in Figure 3. Check to make<br />
sure all items are included in the package; contact your <strong>Xplova</strong><br />
retailer immediately if anything is missing.<br />
Power supply<br />
Stem bike mount<br />
Handle bar bike mount<br />
Cable ties<br />
Figure 3.<br />
Accessories included with the <strong>Xplova</strong> G3<br />
4 Getting to Know the <strong>Xplova</strong> G3
Getting Started<br />
Features of the <strong>Xplova</strong> G3<br />
The <strong>Xplova</strong> G3 is the premier GPS Bike Computer for serious cyclists<br />
the world over. The intuitive, durable design of the <strong>Xplova</strong> G3<br />
delivers maximum usability in a variety of outdoor environments.<br />
• 2.2” sunlight readable color display<br />
• Replaceable rechargeable Li-iron battery, typical operation time is<br />
10 hrs<br />
• High precision GPS receiver<br />
• IPX4 and IPX7 waterproof and anti-shock design<br />
• Low power digital wireless sensors support (ANT+)<br />
• Barometric altimeter, 3-D digital compass & thermometer<br />
Record/View Cycling Data<br />
Get the most out of your workout with the wireless <strong>Xplova</strong> G3.<br />
Receive real-time data for monitoring time, distance, speed, altitude,<br />
heart rate, cadence, calories burned and more, to enhance your<br />
physical performance.<br />
• View and record real-time cycling data<br />
• Review cycling data history in graphic charts on the device<br />
• Monitor body conditions with warnings for speed, heart rate and<br />
cadence<br />
• Mark different riding paths with the lap function<br />
• Set up training program for time, distance or calories<br />
Features of the <strong>Xplova</strong> G3 5
Getting Started<br />
Smart-Sign Track Navigation<br />
<strong>Xplova</strong> Smart-Sign is a group of markers such as waypoints, POI<br />
(Point of Interest), slope information, mountain peaks, turn-by-turn<br />
directions that are assigned by user’s need or automatically<br />
generated by <strong>Xplova</strong> Smart-Route engine. Smart-Sign track<br />
navigation supports:<br />
• Turn-by-turn guidance and Smart-Sign approaching alert on planned<br />
track<br />
• Navigating on auto zoom and contour line enabled OSM maps<br />
• Shows position on an elevation profile while in the track<br />
navigation mode<br />
• A Track back function to help you find the way back to your<br />
original starting point<br />
Real-time Analysis Chart<br />
The <strong>Xplova</strong> G3 support real-time analysis to monitor and analyze<br />
speed, time, distance, heart rate, cadence, and calories by ANT+<br />
wireless-enabled sensors such as Heart Rate Monitor, Speed/<br />
Cadence Combo Sensor and power meter(3 rd party) etc.<br />
Training<br />
The <strong>Xplova</strong> G3 also provides a Training mode with time, distance<br />
and calorie burned thresholds to help you setup your own training<br />
program.<br />
6 Features of the <strong>Xplova</strong> G3
Getting Started<br />
Optional Accessories<br />
The <strong>Xplova</strong> G3 can be paired with two optional accessories that<br />
provide you a complete solution for cycling and outdoor activities.<br />
The heart rate monitor (HRM) measures heart rate for tracking<br />
cardiovascular performance during a workout. The combo cadence<br />
sensor attaches to your bicycle’s chainstay and provides precise<br />
readings throughout your ride. These accessories give you a<br />
complete picture of your workout performance, and as we will see in<br />
later sections, can show you how hard you are working in different<br />
segments of your route.<br />
If you have already purchased these accessories, follow the<br />
instructions in “Using your Accessories” on page 65 to pair and<br />
install the devices. If you haven’t yet made your purchase, inquire at<br />
your local <strong>Xplova</strong> distributor for details.<br />
Optional Accessories 7
Getting Started<br />
Charging the <strong>Xplova</strong> G3<br />
Before using your <strong>Xplova</strong> G3, make sure it is properly charged and<br />
ready to go. Charge the <strong>Xplova</strong> G3 for at least 5 hours before first<br />
use to make sure the batteries are fully charged.<br />
To charge the <strong>Xplova</strong> G3:<br />
1. Remove the battery cover.<br />
2. Insert the battery.<br />
3. Replace the battery cover as shown in Figure 4.<br />
Figure 4.<br />
Replace the battery<br />
Note:Notebook with rate voltage of 5VDC (USB) is required.<br />
See “Battery Charger (Optional)” on page 76<br />
8 Charging the <strong>Xplova</strong> G3
Getting Started<br />
4. Plug the power supply included in the package into a wall outlet.<br />
5. Open the protective silicone door on the base of the <strong>Xplova</strong> G3.<br />
6. Plug the USB adapter into the port as shown in Figure 5.<br />
Figure 5.<br />
Connecting the charger to the <strong>Xplova</strong> G3<br />
Charging the <strong>Xplova</strong> G3 9
Getting Started<br />
Powering up the <strong>Xplova</strong> G3<br />
After charging the <strong>Xplova</strong> G3, you are ready to begin using it.<br />
Pressing the Power button located on the left side of the <strong>Xplova</strong> G3<br />
turns it on. During startup, it displays a splash screen while it loads<br />
map databases into the system. Once the system starts and complete<br />
device initial settings, the bike computer view appears as shown in<br />
Figure 6.<br />
Figure 6.<br />
The bike computer main screen*<br />
Note:*The screen may appear differently from Figure 6<br />
10 Powering up the <strong>Xplova</strong> G3
Getting Started<br />
Using the Button Controls<br />
The side button controls not only allow you to power up the <strong>Xplova</strong><br />
G3, but also to access brightness and volume controls, switch<br />
between modes, record sessions, and support general settings.<br />
Adjusting Brightness and Turn On/Off Volume<br />
To adjust brightness and volume, briefly press the Power button.<br />
The brightness and volume controls appear on screen as shown in<br />
Figure 7. You can adjust volume or brightness by 5-way control<br />
stick. You also can adjust brightness by pressing the power button<br />
again while the brightness control is still displayed. The Power<br />
button toggles backlight brightness between off, the last<br />
intermediate current set, and maximum brightness.<br />
Figure 7.<br />
Brightness and volume controls<br />
Using the Button Controls 11
Getting Started<br />
Switching Modes<br />
You can switch Bike Computer, Map, Chart and Training mode<br />
quickly by pressing the Mode button on the left side of the <strong>Xplova</strong><br />
G3. The display mode as shown in Figure 8.<br />
Bike Computer<br />
Training<br />
(optional)<br />
Map<br />
Chart<br />
(optional)<br />
Figure 8.<br />
The display mode<br />
12 Using the Button Controls
Getting Started<br />
To show the next page of the mode:<br />
While in Bike Computer or Chart mode.<br />
1. Use the control stick to scroll up and down through the page of a<br />
mode.<br />
Figure 9.<br />
Screen of Bike Computer pages<br />
Using the Button Controls 13
Getting Started<br />
Recording a Session<br />
You can use the record button to start a new record, pause record,<br />
continue record, and stop record.<br />
Figure 10. Recording with the side control button<br />
To record a session using the side button controls:<br />
1. Press the Record button. A splash screen appears and confirms<br />
that a session has started.<br />
2. Press the Record button quickly to pause/continue the recording.<br />
3. Press the Record button again for more than 2 seconds to stop<br />
and save the recording.<br />
Locking the Screen<br />
You can lock down the screen to prevent unwanted commands or<br />
changes from being entered via the screen.<br />
14 Using the Button Controls
Getting Started<br />
To lock the screen:<br />
1. Press the Power button for 3 seconds. Scroll to Lock and press the<br />
control stick down.<br />
2. To unlock the screen, press the + button for 3 seconds.<br />
Power Options<br />
The Power button can also be used to power down or put the <strong>Xplova</strong><br />
G3 into standby mode:<br />
• Power off: Turns the device off completely so it uses no power.<br />
When restarting, the <strong>Xplova</strong> G3 will need to reboot and reload<br />
maps and settings<br />
• Standby: Powers down the screen, processor, and antennas but<br />
preserves power to the memory so that it quickly boots to its<br />
previous state when powered on. A green LED flashes<br />
intermittently to indicate when the device is in standby. Note that<br />
Standby mode does consume power. The <strong>Xplova</strong> G3 automatically<br />
powers down from standby mode after 24 hours<br />
Using the Button Controls 15
Getting Started<br />
To view power options on the <strong>Xplova</strong> G3:<br />
1. Press the Power button for 3 seconds. The screen as shown in<br />
Figure 11.<br />
Figure 11. The power-down options menu<br />
2. Use the control stick to select the desired power mode.<br />
3. Press the control stick to select power mode.<br />
Menu<br />
The <strong>Xplova</strong> G3 supports 2 menu types: General Menu and Quick<br />
Menu.<br />
To show the general menu:<br />
1. Press the Menu button. The General Menu screen as shown in<br />
Figure 12.<br />
16 Using the Button Controls
Getting Started<br />
2. For details of the General Menu see “Changing Settings” on<br />
page 43.<br />
Figure 12. The general menu<br />
To show the quick menu:<br />
1. Press the control stick down to call up a quick menu of the mode.<br />
2. For details of the Quick Menu see “Using the GPS Bike Computer”<br />
on page 25.<br />
Note:Press the Mode button to exit a menu.<br />
Using the Button Controls 17
Getting Started<br />
Creating a Profile<br />
There are two profile types in the <strong>Xplova</strong> G3: User profiles and bike<br />
profiles. After you setting profiles, you can accurately record the<br />
distance travelled on your bike and begin tracking performance. For<br />
details see “User and Bikes” on page 49.<br />
Acquiring a GPS Signal<br />
The <strong>Xplova</strong> G3 comes fully equipped with X-Navi technology<br />
designed to maximize your cycling experience. The <strong>Xplova</strong> G3<br />
automatically searches for a GPS signal and announces your location<br />
as soon as it acquires a signal. Go outside to an area free from tall<br />
obstructions to use your <strong>Xplova</strong> G3. The greater the exposure, the<br />
faster the <strong>Xplova</strong> G3 will be able to acquire a signal. Signal<br />
acquisitions can take 5-15 minutes to complete under open skies.<br />
Note:GPS signals are very high frequency and do not transmit well<br />
through solids. Tunnels, bridges, and heavy leaf cover can all<br />
disrupt acquisition and maintenance of a GPS signal.<br />
Signal acquisition is required for the following reasons:<br />
• The first time the device has been powered on<br />
• You have moved hundreds of Km from the previous setting<br />
• The device has not been used in several days<br />
18 Creating a Profile
Getting Started<br />
Connecting to Sensors<br />
If you plan to use the optional combo cadence sensor and/or heart<br />
rate monitor, you will need to pair the devices with your <strong>Xplova</strong> G3<br />
before you can use them. See “Using your Accessories” on page 65<br />
for details.<br />
Mounting the <strong>Xplova</strong> G3<br />
Now that you have familiarized yourself with the basic functions and<br />
controls of the <strong>Xplova</strong> G3, you are ready to mount it to your bicycle.<br />
The <strong>Xplova</strong> G3 includes stem bike mount and handle bar bike mount<br />
for your bicycle.<br />
To mount the <strong>Xplova</strong> G3:<br />
1. Identify the preferred mounting location. You can accomplish this<br />
by attaching the <strong>Xplova</strong> G3 to the mounting clip and holding it in<br />
various locations on the handlebars, stem, and frame.<br />
Connecting to Sensors 19
Getting Started<br />
2. Once you have decided on a location, apply the rubber sleeving to<br />
the area as shown in Figure 13.<br />
Figure 13. Applying the rubber sleeving<br />
20 Mounting the <strong>Xplova</strong> G3
Getting Started<br />
3. Thread two of the included cable ties through the bike stem<br />
mount base of the mounting clip as shown in Figure 14.<br />
Figure 14. Threading cable ties<br />
4. Slide the rubber base of the mounting clip into the bottom of the<br />
mounting clip so the semicircular groove is parallel with the bike<br />
component you are attaching the clip to.<br />
Mounting the <strong>Xplova</strong> G3 21
Getting Started<br />
5. Cinch the cable ties around the bike component loosely and make<br />
final adjustments to the position of the mounting clip, as shown<br />
in Figure 15.<br />
Figure 15. Attaching the mounting clip<br />
6. Cinch the cable ties tightly until the mounting clip is securely in<br />
place.<br />
22 Mounting the <strong>Xplova</strong> G3
Getting Started<br />
7. Slide the <strong>Xplova</strong> G3 onto the mounting clip as indicated in<br />
Figure 16 until it clicks into place.<br />
Figure 16. Attaching the <strong>Xplova</strong> G3 to the mounting clip<br />
NOTE: Handle bar installation is similar to the stem mount.<br />
Mounting the <strong>Xplova</strong> G3 23
Getting Started<br />
24 Mounting the <strong>Xplova</strong> G3
Using the GPS Bike<br />
Computer<br />
Bike Computer Mode<br />
The Bike Computer Interface<br />
The bike computer interface contains the controls and displays<br />
shown in Figure 17.<br />
11<br />
10<br />
<br />
1 234 5<br />
6<br />
7<br />
8<br />
1. Time<br />
2. Recording Status<br />
3. Combo Cadence Status<br />
4. Heart Rate Monitor Status<br />
5. GPS Status<br />
6. Battery Status<br />
7. Heart Rate Bar (Optional)<br />
8. Odometer<br />
9. Current Cadence (Optional)<br />
10.Cadence Bar (Optional)<br />
11.Current Heart Rate (Optional<br />
Note:Optional items only<br />
appear when accessories<br />
are set up.<br />
Figure 17. The Bike Computer Interface (Dash Meter)<br />
Bike Computer Mode 25
Using the GPS Bike Computer<br />
Table 1 describes the controls and displays shown in Figure 17.<br />
Table 1. Bike computer controls and displays<br />
Item<br />
Record<br />
Combo Cadence<br />
Battery<br />
GPS<br />
Heart Rate Monitor<br />
Heart Rate Bar<br />
Odometer<br />
Cadence Bar<br />
Time<br />
Description<br />
Shows the status of start or pause logging a<br />
session<br />
Shows connection to accessories<br />
Shows battery charge<br />
Shows GPS connectivity<br />
Shows connection to accessories<br />
Shows heart rate<br />
Shows the accumulated distance travelled on the<br />
current bicycle profile<br />
Shows cadence<br />
Shows the current time<br />
26 Bike Computer Mode
Using the the GPS GPS Bike Bike Computer<br />
Quick Menu of Bike Computer<br />
Press the control stick down to call up a quick menu of Bike<br />
Computer mode.<br />
Figure 18. Quick menu of bike computer<br />
Before you select a bike, you must set bike profiles. For details see<br />
“Bike Profile” on page 50.<br />
To select a bike:<br />
1. Scroll to Select Bike and enter.<br />
2. Scroll to the desired bike.<br />
3. Press the control stick to save.<br />
To set bike computer settings refer to “Bike Computer Settings” on<br />
page 45.<br />
Bike Computer Mode 27
Using the GPS Bike Computer<br />
To edit pages:<br />
Before you editing pages, switch page to other page, but not dash<br />
meter. Then press the control stick to call up a quick menu. For<br />
details see “Editing Pages” on page 40.<br />
Bike Computer Data<br />
The bike computer view can be easily configured to show only the<br />
items that you need. Each of the displays, including the main<br />
display, can be changed or reordered to meet your specific<br />
requirements. Possible items include the following:<br />
• Elevation: Shows the current altitude<br />
• Maximum Elevation: Shows the highest altitude encountered in<br />
the current session. Appears blank when not logging<br />
• Total Ascent: Shows the total distance ascended in the current<br />
session<br />
• Total Descent: Shows the total distance descended in the<br />
current session. Appears blank when not logging<br />
• Cadence: Shows the current revolutions per minute<br />
• Average Cadence: Shows the average revolutions per minute in<br />
the current session<br />
• Maximum Cadence: Shows the highest cadence in the current<br />
session<br />
• Lap: Shows the average revolutions per minute in the current<br />
lap<br />
28 Bike Computer Mode
Using the the GPS GPS Bike Bike Computer<br />
• Calories: Shows the accumulated calories burned in the current<br />
session<br />
• Calories Burned Rate: Shows the calories burned rate in the<br />
current session<br />
• Remain Training Calories: Shows the remaining calories to<br />
burn in a training session<br />
• Distance: Shows the accumulated distance travelled in the current<br />
session<br />
• Lap Distance: Shows the accumulated distance since the last<br />
lap marker was set<br />
• Last Lap Distance: Shows the length of the last lap<br />
• Distance to next turn: Shows the distance to the next turn if<br />
navigation guidance is being used<br />
• Remain Track Distance: Shows the remaining distance to travel<br />
in a track session<br />
• Remain Training Distance: Shows the remaining distance to<br />
travel in a training session<br />
• Heart Rate: Shows the current heart rate<br />
• Average Heart Rate: Shows the average heart rate during the<br />
current session<br />
• Maximum Heart Rate: Shows the maximum heart rate achieved<br />
during the current session<br />
• Lap Heart Rate: Shows the average heart rate during the<br />
current lap<br />
Bike Computer Mode 29
Using the GPS Bike Computer<br />
• Last Lap Heart Rate: Shows the average heart rate during the<br />
last lap<br />
• Laps: Shows the number of laps traversed during the current<br />
session<br />
• Speed: Shows the current speed<br />
• Average Speed: Shows the average speed of the current<br />
session<br />
• Maximum Speed: Shows the maximum speed achieved during<br />
the current session<br />
• Lap Speed: Shows the average speed during the current lap<br />
• Last Lap Speed: Shows the average speed in the last lap<br />
• Slope: Shows the current slope<br />
• Maximum Slope: Shows the maximum slope experienced<br />
during the current session<br />
• Time: Shows the current time<br />
• Clock: Shows the current time in a 24 or 12-hour format<br />
• Trip Time: Shows the elapsed time for the current session<br />
• Average Lap Time: Shows the average time elapsed for each lap<br />
• Lap Time: Shows the elapsed time for the current lap<br />
• Last Lap Time: Shows the elapsed time for the last completed<br />
lap<br />
• Paused Time: Shows the duration since the recording was<br />
paused<br />
30 Bike Computer Mode
Using the the GPS GPS Bike Bike Computer<br />
• Remain Time: Shows how much time is remaining if in a<br />
training session<br />
• Start Time: Shows the time that the session was started<br />
• Estimated Arrival Time: shows how much longer before<br />
arriving at a destination designated on the map<br />
• Date: Shows the current date<br />
• Direction: Shows the current direction<br />
• Latitude: Shows the current latitude<br />
• Longitude: Shows the current longitude<br />
• Sunrise: Shows the sunrise time<br />
• Sunset: Shows the sunset time<br />
• Temperature: Shows the current temperature<br />
Bike Computer Mode 31
Using the GPS Bike Computer<br />
Map Mode<br />
The Map Interface<br />
The map interface contains the controls and displays shown in<br />
Figure 19.<br />
Turn-by-turn<br />
Guidance<br />
Name of next<br />
Smart-Sign<br />
Loaded track<br />
Current location<br />
Approaching<br />
Smart-Signs<br />
Remaining distance<br />
to next Smart-Sign<br />
Figure 19. The map interface<br />
32 Map Mode
Using the the GPS GPS Bike Bike Computer<br />
Quick Menu of Map<br />
Press the control stick down to call up a quick menu of the Map<br />
mode.<br />
Figure 20. Quick menu of map<br />
To load a track:<br />
Before loading a track, preplanned tracks must be transfered from<br />
PC to <strong>Xplova</strong> G3.<br />
1. Scroll to the desired track.<br />
2. Press the control stick to load the track.<br />
Note:If you want to load other track, you must call up quick menu to<br />
Stop Navigation, and load a new one.<br />
Map Mode 33
Using the GPS Bike Computer<br />
To view Smart-Signs:<br />
1. Scroll to View Smart-Signs and enter.<br />
2. Scroll to the desired sign and enter. A screen appears showing the<br />
following information:<br />
• Sign name: Smart-Sign name<br />
• Latitude and Longitude: The location of Smart-Sign<br />
To edit pages or set map settings refer to “Editing Pages” on page 40<br />
and “Map Settings” on page 47.<br />
Track Navigation & Smart-Sign Guidance<br />
After loading a Smart-Route Track, you can view the track on the<br />
<strong>Xplova</strong> G3 and view the Smart-Signs near by current position. The<br />
<strong>Xplova</strong> G3 will then navigate you through the Track and guides you<br />
with turn-by-turn directions and Smart-Sign approaching Alert.<br />
34 Map Mode
Using the the GPS GPS Bike Bike Computer<br />
Chart Mode<br />
Chart mode supports graphic of the identification to help you<br />
understand the relationship between chart information.<br />
The Chart Interface<br />
The chart interface displays a real-time chart of your riding data as<br />
shown in Figure 21.<br />
Figure 21. The chart interface<br />
Chart Mode 35
Quick Menu of Chart<br />
Using the GPS Bike Computer<br />
Press the control stick to call up a quick menu. For details see<br />
“Editing Pages” on page 40.<br />
Figure 22. Quick menu of chart<br />
36 Chart Mode
Using the the GPS GPS Bike Bike Computer<br />
Elevation Profile<br />
In the elevation profile, the vertival axis represents the height, the<br />
horizontal axis represents the distance, shows curve in the ups and<br />
downs along the track line. The elevation profile displays shown in<br />
Figure 23.<br />
Current Distance<br />
Traveled<br />
Total Distance of<br />
Track<br />
Figure 23. The elevation profile<br />
Note:The elevation profile displayed when desired track is loaded.<br />
About loading a track refer to page 33.<br />
Chart Mode 37
Using the GPS Bike Computer<br />
Training Mode<br />
Training mode help you achieve performance goals during a ride.<br />
When your session has reached predefined limits for distance, time,<br />
or calories burned, the <strong>Xplova</strong> G3 ceases logging data.<br />
The Training Interface<br />
The training interface displays a real-time chart and training goal of<br />
your training as shown in Figure 24.<br />
Figure 24. The training interface<br />
38 Training Mode
Using the the GPS GPS Bike Bike Computer<br />
Quick Menu of Training<br />
Press the control stick down to call up a Training quick menu.<br />
Figure 25. Quick menu of training<br />
To select training mode:<br />
1. Scroll to Select Training Program and enter.<br />
2. Select a training mode and enter:<br />
• Training By Time<br />
• Training By Distance<br />
• Training By Calorie<br />
3. Set up options. Scroll to Start and enter.<br />
Training Mode 39
Using the GPS Bike Computer<br />
The <strong>Xplova</strong> G3 ceases logging the session as soon as your duration,<br />
distance, or calorie goal has been met. A prompt opens to indicate<br />
that your goal has been met. The summary screen displays the<br />
calories burned, time elapsed, and distance travelled.<br />
To set training settings:<br />
For details see “Training Settings” on page 48.<br />
Editing Pages<br />
Edit this Page<br />
You can edit fields in this page or change layout style.<br />
To edit this page:<br />
1. Press the control stick down.<br />
2. Scroll to Edit This Page and enter.<br />
3. Scroll to Change Layout and enter. If you scroll to Edit Fields and<br />
enter, then jump to step 5.<br />
4. Use the control stick to choose a layout style, and enter Next<br />
Step.<br />
5. Use the control stick to assign data types in those fields, and<br />
enter Save.<br />
40 Editing Pages
Using the the GPS GPS Bike Bike Computer<br />
Add New Page<br />
You can add additional information in a new page.<br />
To add a new page:<br />
1. Press the control stick down.<br />
2. Scroll to Add New Page and enter.<br />
3. Use the control stick to choose a layout style, and enter Next<br />
Step.<br />
4. Use the control stick to assign data type in those fields, and enter<br />
Save.<br />
Delete this Page<br />
If you don’t want to display this page, you can delete it.<br />
To delete this page:<br />
1. Press the control stick down.<br />
2. Scroll to Delete This Page and enter.<br />
Editing Pages 41
Using the GPS Bike Computer<br />
42 Editing Pages
Changing Settings<br />
The <strong>Xplova</strong> G3 has a number of customisable settings available so<br />
you can control functionality and personalize your device.<br />
My Data<br />
My Data supports the following: Activities, Tracks and Training<br />
History.<br />
To query my data:<br />
1. Press the Menu button.<br />
2. Scroll to My Data and enter.<br />
3. Scroll to the desired category and enter.<br />
4. Select an item within the category and enter. Then scroll up or<br />
down to view the listed items.<br />
5. Press the Mode button to return to the category list.<br />
6. Press the Mode button to return My Data.<br />
7. Press the Mode button to return General Menu.<br />
My Data 43
Changing Settings<br />
To delete items:<br />
1. Press the Menu button.<br />
2. Scroll to My Data and enter.<br />
3. Scroll to Delete Data and enter.<br />
4. Select a category and enter.<br />
5. Select a time range to delete or delete all. Press Yes to delete<br />
data.<br />
6. Press the Mode button to return Delete Data.<br />
7. Press the Mode button to return My Data.<br />
8. Press the Mode button to return General Menu.<br />
Mode Selection<br />
Mode selection menu can enable/disable Chart mode and Training<br />
mode.<br />
To enable or disable Chart/Training mode:<br />
1. Press the Menu button<br />
2. Scroll to Mode Selection and enter.<br />
3. Use the control stick to turn the display mode on or off.<br />
4. Press the Mode button to save and back to General Menu.<br />
44 Mode Selection
Changing Settings<br />
Bike Computer Settings<br />
Bike Computer Settings control the Alert and Recording settings.<br />
This menu can also be quickly accessed in Bike Computer mode.<br />
To access the bike computer settings quickly:<br />
1. From Bike Computer mode, press enter.<br />
2. Scroll to Bike Computer Settings and enter. The Settings menu<br />
appears.<br />
Setting up Alert<br />
Alerts help you to stay within predefined ranges during your bicycle<br />
riding. You can program the <strong>Xplova</strong> G3 up to alert you when you<br />
exceed set durations or distances, or go below or above a set speed,<br />
cadence limit, or heart rate.<br />
When the <strong>Xplova</strong> G3 detects that you have exceeded your predefined<br />
range during bicycle riding, it emits an audible alarm as well as<br />
visual alarm.<br />
To set up alert:<br />
1. Press the Menu button.<br />
2. Scroll to Bike Computer Settings and enter.<br />
3. Scroll to Alert and enter.<br />
4. Choose one or more parameters to use for your warning. You can<br />
set warnings for the following:<br />
• Time: Set a duration after which the alarm will sound<br />
Bike Computer Settings 45
Changing Settings<br />
• Distance: Set a distance after which the alarm will sound<br />
• Speed: Set a minimum and maximum speed beyond which the<br />
alarm will sound<br />
• Heart Rate: Set a minimum and maximum heart rate (in<br />
revolutions per minute) beyond which the alarm will sound<br />
• Cadence: Set a minimum and maximum cadence (in beats per<br />
minute) beyond which the alarm will sound<br />
5. Press the Mode button to save and back to the Bike Computer<br />
Settings.<br />
6. Press the Mode button to back to the General Menu.<br />
Setting up Recording Options<br />
The <strong>Xplova</strong> G3 allows you to smart-pause and smart-lap while<br />
recording a session.<br />
• Smart Pause keeps the <strong>Xplova</strong> G3 from logging data if your speed<br />
falls below a customisable threshold<br />
• Smart Lap enters a lap marker into the log according to location<br />
or after travelling a predefined distance<br />
• Distance: type a distance to travel between inserting lap<br />
markers<br />
To set recording options:<br />
1. Press the Menu button.<br />
2. Scroll to Bike Computer Settings and enter.<br />
3. Scroll to Recording and enter.<br />
46 Bike Computer Settings
Changing Settings<br />
4. Select how the <strong>Xplova</strong> G3 automatically enters lap markers:<br />
• Smart Pause: Pauses the recording every time your speed falls<br />
below your specified limit<br />
• Smart Lap: Starts a new lap at a preselected distance.<br />
5. Press Mode button to save and back to the Bike Computer<br />
Settings menu.<br />
6. Press the Mode button to save and back to the General Menu.<br />
Map Settings<br />
Map settings change how the map are viewed. The Settings menu<br />
can be quickly accessed in Map mode:<br />
To access the map settings quickly:<br />
1. From Map mode, press the control stick down.<br />
2. Scroll to Map Settings and enter. The Settings menu appears.<br />
Changing the Map View<br />
The map view can be changed to show either a North Up view or<br />
Head Up view. You can also enable or disable Smart-Sign on Map and<br />
Smart-Sign Distance.<br />
To change map view:<br />
1. Press the Menu button.<br />
Map Settings 47
Changing Settings<br />
2. Scroll to Map Settings and enter.<br />
3. Use the control stick to select and change the options.<br />
4. Press the Mode button to save and back to General Menu.<br />
Training Settings<br />
This selection automatically saves your training sessions for a<br />
historical training record.<br />
To access the training settings quickly:<br />
1. From Training mode, press the control stick down.<br />
2. Scroll to Training Settings and enter. The Settings menu<br />
appears.<br />
To save training history automatically:<br />
1. Press the Menu button.<br />
2. Scroll to Training Settings and enter.<br />
3. Turn the Auto Save On. The selected option is in red.<br />
4. Press the Mode button to save and back to the General Menu.<br />
48 Training Settings
Changing Settings<br />
User and Bikes<br />
There are 2 profile types in the <strong>Xplova</strong> G3: User profile and Bike<br />
profile.<br />
User Profile<br />
In the user profile, you can edit information about yourself and set<br />
up a heart rate monitor if it is available.<br />
Figure 26. User profile<br />
To edit the user profile:<br />
1. Press the Menu button.<br />
2. Scroll to User and Bikes and enter.<br />
3. Scroll to User and enter.<br />
User and Bikes 49
Changing Settings<br />
4. Scroll to Name field and enter.<br />
5. Type your name and select Ok.<br />
6. Select your gender.<br />
7. Scroll to Birth Date field and type the Year, Month, and Day you<br />
were born as prompted, selecting Ok after each entry.<br />
8. Scroll the Weight field, type your weight and select Ok.<br />
9. Scroll the Height field, type your height and select Ok.<br />
10.Scroll to the ANT+HRM field, and enter Setup. See “Heart Rate<br />
Monitor (Optional)” on page 65 for information on the heart rate<br />
monitor sensor.<br />
11.Press the Mode button to save and return to user profile.<br />
12. Press the Mode button to save and return to the User and Bikes<br />
menu.<br />
Bike Profile<br />
In the bike profile settings, there are up to three bike profiles that<br />
can be set up and configured for the cadence sensor in each bike<br />
profile if the cadence sensor is available.<br />
50 User and Bikes
Changing Settings<br />
Figure 27. Bike profile<br />
To edit a Bike Profile:<br />
1. Press the Menu button.<br />
2. Scroll to User and Bikes and enter.<br />
3. Select the bike profile that you want to change and enter.<br />
4. Scroll to the Name field, type the name of your bike, and select<br />
Ok.<br />
5. Select the status.<br />
6. Scroll to the Odometer field and type the value of odometer for<br />
the bike.<br />
7. Scroll to the Weight field and enter the bikes weight.<br />
8. Scroll to the Wheel Size field and enter the bike wheel size.<br />
User and Bikes 51
Changing Settings<br />
9. Scroll to the ANT+Combo Cadence and enter Setup. See “Combo<br />
Cadence Sensor (Optional)” on page 68 for information on the<br />
cadence sensor.<br />
10.Press the Mode button to save and return to bike profile.<br />
11. Press the Mode button to save and return to the User and Bikes<br />
menu.<br />
General Settings<br />
General settings include the items listed in Table 2.<br />
Table 2. General settings menu items<br />
Menu Item<br />
Satellites<br />
Display<br />
Sounds<br />
Description<br />
Turn the GPS receiver on or off to view the satellite<br />
signal. See “Satellites” on page 53.<br />
Turn the backlight timer and brightness on or off. See<br />
“Display” on page 55.<br />
Open a screen to turn the sound on or off for key press<br />
and notifications. See “Sounds” on page 56.<br />
Time Set time zone, daylight saving and clock formats (12-<br />
or 24-hour days). See “Time” on page 56.<br />
Units<br />
Select units of measurement for distance, altitude and<br />
temperature. See “Units” on page 57.<br />
Language Select a language for menus. See “Language” on<br />
page 58.<br />
52 General Settings
Changing Settings<br />
Table 2. General settings menu items<br />
Menu Item<br />
Altimeter<br />
Calibration<br />
Compass<br />
Calibration<br />
Factory Reset<br />
About<br />
Description<br />
Calibrate the barometric altimeter sensor. See<br />
“Altimeter Calibration” on page 58.<br />
Calibrate the compass sensor. See “Compass<br />
Calibration” on page 60.<br />
Allows for restoration of factory defaults. See “Press<br />
the Mode button to back to the General Settings.” on<br />
page 61.<br />
Displays hardware and software information. See<br />
“About” on page 63.<br />
Satellites<br />
If you are indoors or do not require the GPS receiver to be active you<br />
can turn it off from the general settings menu. You can also reset the<br />
receiver to drop all active GPS channels and reacquire GPS satellite<br />
signals. If the <strong>Xplova</strong> G3 is unable to fix your current position, it is<br />
recommended that you reset the GPS receiver.<br />
Note:If the <strong>Xplova</strong> G3 does not detect a GPS signal after five minutes,<br />
it prompts you to continue searching for GPS signals. Continue<br />
searching in background mode, or turn off the GPS receiver.<br />
Background search mode keeps the receiver actively searching<br />
for GPS signals but does not display the prompt.<br />
General Settings 53
Changing Settings<br />
To deactivate or activate the GPS receiver:<br />
1. Press the Menu button.<br />
2. Scroll to General Settings and enter.<br />
3. Scroll to Satellites and enter.<br />
4. Scroll to GPS Status.<br />
5. Use the control stick to turn the GPS on or off. The selected<br />
option is in red.<br />
6. Press the Mode button to save and back to the general settings<br />
menu.<br />
To reset the GPS receiver:<br />
1. Press the Menu button.<br />
2. Scroll to General Settings and enter.<br />
3. Scroll to Satellites and enter.<br />
4. Scroll to Reset GPS and enter.<br />
5. Press the Mode button to go back to the General Settings.<br />
To view GPS Info:<br />
1. Press the Menu button.<br />
2. Scroll to General Settings and enter.<br />
3. Scroll to Satellites and enter.<br />
4. Scroll to Satellite Signal and enter. A screen appears displaying<br />
the following information:<br />
• GPS quality: Displays the quality of the signal from GPS<br />
satellites.<br />
• Satellites: Displays the number of satellites in earth orbit.<br />
54 General Settings
Changing Settings<br />
5. Press the Mode button to go back to Satellites.<br />
6. Press the Mode button to go back to General Settings.<br />
Display<br />
When active, the backlight timer shuts down the screen backlight to<br />
reduce power use. You can specify a duration for the backlight timer.<br />
In addition to backlight timer, you can adjust brightness, too.<br />
To activate or deactivate the backlight timer:<br />
1. Press the Menu button.<br />
2. Scroll to General Settings and enter.<br />
3. Scroll to Display and enter.<br />
4. Scroll to Backlight.<br />
5. Select a duration for the backlight timer. Options include 15<br />
seconds, 30 seconds, 1 minute, 5 minutes, or always on.<br />
6. Press the Mode button to save and back to the General Settings.<br />
To adjust the brightness:<br />
1. Press the Menu button.<br />
2. Scroll to General Settings and enter.<br />
3. Scroll to Display and enter.<br />
4. Scroll to Brightness.<br />
5. Select a duration for the brightness. There are 10 levels, level 0 is<br />
minimum and level 9 is maximum.<br />
6. Press the Mode button to save and back to the General Settings.<br />
General Settings 55
Changing Settings<br />
Sounds<br />
You can enable or disable sounds in the Sounds setting.<br />
To turn on the sound:<br />
1. Press the Menu button.<br />
2. Scroll to General Settings and enter.<br />
1. Scroll to Sounds and enter.<br />
2. Use the control stick to enable or disable the sound of key press<br />
and notifications.<br />
3. Press the Mode button to save and back to the General Settings.<br />
Time<br />
The <strong>Xplova</strong> G3 updates its clock from time signals received from the<br />
GPS channel. These signals are received in Universal Time<br />
Coordinated (UTC) and need to be adjusted to display the correct<br />
local time.<br />
To set the time zone:<br />
1. Press the Menu button.<br />
2. Scroll to General Settings and enter.<br />
3. Scroll to Time and enter.<br />
4. Scroll to Time Zone.<br />
5. Select a time zone by using the control stick.<br />
6. Press the Mode button to save and back to the General Settings.<br />
56 General Settings
Changing Settings<br />
To set the time format:<br />
1. Press the Menu button.<br />
2. Scroll to General Settings and enter.<br />
3. Scroll to Time and enter.<br />
4. Scroll to Time Format.<br />
5. Select a time format by using the control stick.<br />
6. Press the Mode button to save and back to the General Settings.<br />
To set the daylight saving:<br />
1. Press the Menu button.<br />
2. Scroll to General Settings and enter.<br />
3. Scroll to Time and enter.<br />
4. Scroll to Daylight Saving.<br />
5. Use the control stick to turn the daylight saving on or off.<br />
6. Press the Mode button to save and back to the General Settings.<br />
Units<br />
Depending on your preference, you can display either metric or<br />
statute (Imperial) units on the <strong>Xplova</strong> G3. In addition, coordinates<br />
can be displayed in terms of degree-minutes-seconds or decimal<br />
degrees, and heart rate as a percentage of your maximum as<br />
calculated by your age.<br />
To set units of measurement:<br />
1. Press the Menu button.<br />
2. Scroll to General Settings and enter.<br />
General Settings 57
Changing Settings<br />
3. Scroll to Units and enter.<br />
4. Select a unit format by using the control stick.<br />
5. Select a unit format for temperature by using the control stick.<br />
6. Press the Mode button to save and back to the General Settings.<br />
Language<br />
The language on the <strong>Xplova</strong> G3 can be changed to suit your<br />
preference.<br />
To set the language:<br />
1. Press the Menu button.<br />
2. Scroll to General Settings and enter.<br />
3. Scroll to Language and enter.<br />
4. Use the control stick to set the language.<br />
5. Press the Mode button to save and back to the General Settings.<br />
Altimeter Calibration<br />
The <strong>Xplova</strong> G3 measures altitude using a high-resolution barometric<br />
altimeter. The altimeter is highly sensitive to changes in air pressure<br />
and may be affected by changing weather conditions in addition to<br />
altitude. To ensure the accuracy of the altimeter, <strong>Xplova</strong><br />
recommends that you periodically calibrate the altimeter.<br />
The best method for calibrating the altimeter is to find a nearby<br />
survey marker that has an accurate altitude measurement engraved<br />
or printed on it.<br />
58 General Settings
Changing Settings<br />
Figure 28. Altimeter Calibration<br />
To calibrate the altimeter:<br />
1. Find a location with a known altitude and place the <strong>Xplova</strong> G3 at<br />
or near the location.<br />
2. Press the Menu button.<br />
3. Scroll to General Settings and enter.<br />
4. Scroll to Altimeter Calibration and enter.<br />
5. Support three ways to calibrate altimeter.<br />
• By Current Altitude: Type a new altitude<br />
• By Smart-Sign: Get a new altitude from Smart-Sign<br />
• By GPS: Get a new altitude from GPS signal<br />
6. Press the Mode button to save and back to the General Settings.<br />
General Settings 59
Changing Settings<br />
Compass Calibration<br />
The compass can locate and determine the direction on the map. If<br />
you find that the electronic compass direction is not accurate, you<br />
can calibrate it.<br />
To calibrate the compass:<br />
1. Press the Menu button.<br />
2. Scroll to General Settings and enter.<br />
3. Scroll to Compass Calibration and enter.<br />
4. Scroll to Start Calibration and enter.<br />
5. Hold the device in your hand and turn your wrist in every direction<br />
(3-dimension figure like 8).<br />
Figure 29. Calibrate Compass<br />
6. Press the Mode button to back to the Compass Calibration.<br />
60 General Settings
Changing Settings<br />
7. Press the Mode button to back to the General Settings.<br />
To view compass:<br />
Figure 30. Compass View<br />
1. Press the Menu button.<br />
2. Scroll to General Settings and enter.<br />
3. Scroll to Compass Calibration and enter.<br />
4. Scroll to View Compass.<br />
5. Press the Mode button to back to the Compass Calibration.<br />
6. Press the Mode button to back to the General Settings.<br />
General Settings 61
Changing Settings<br />
Factory Reset<br />
Restoring factory settings replaces user defined settings with factory<br />
defaults.<br />
To restore factory settings:<br />
1. Press the Menu button.<br />
2. Scroll to General Settings and enter.<br />
3. Scroll to Factory Reset and enter.<br />
4. Select Yes then enter. The <strong>Xplova</strong> G3 resets itself.<br />
62 General Settings
Changing Settings<br />
About<br />
The About screen in the General Settings menu provides the<br />
following information:<br />
• Device S/N: Device serial number<br />
• OS Version: OS revision number<br />
• Software Version: Software revision number<br />
• Copyright information<br />
Provide the information listed above to customer service if your<br />
<strong>Xplova</strong> G3 needs service or troubleshooting.<br />
Figure 31. About<br />
General Settings 63
Changing Settings<br />
64 General Settings
Using your Accessories<br />
Heart Rate Monitor (Optional)<br />
The heart rate monitor is attached to an elastic band worn around<br />
the chest. This section describes how to pair and wear the heart rate<br />
monitor.<br />
Pairing the Heart Rate Monitor<br />
Pairing connects the Heart Rate Monitor to the <strong>Xplova</strong> G3, allowing<br />
heart rate to be recorded and displayed on screen.<br />
To pair the Heart Rate Monitor:<br />
1. Press the Menu button.<br />
2. Scroll to User and Bikes and enter.<br />
3. Scroll to User and enter.<br />
4. Scroll to ANT+HRM and enter Setup.<br />
Heart Rate Monitor (Optional) 65
Using your Accessories<br />
Figure 32. ANT + HRM<br />
5. Select Rescan and enter.<br />
66 Heart Rate Monitor (Optional)
OPEN<br />
CLOSE<br />
Using your your Accessories<br />
6. Rub the ribbed inside edge of the HRM as shown in Figure 33<br />
while holding it near the GPS unit. A popup on the <strong>Xplova</strong> G3<br />
indicates when the HRM is paired.<br />
Figure 33. Pairing the heart rate monitor<br />
Wearing the Heart Rate Monitor<br />
The heart rate monitor is worn around the chest as close as possible<br />
to the heart with the monitor segment worn in the middle of the<br />
chest.<br />
To wear the heart rate monitor:<br />
1. Unbuckle the strap.<br />
2. Wrap around your chest and re-buckle the strap.<br />
3. Adjust the circumference of the band to fit.<br />
Heart Rate Monitor (Optional) 67
Using your Accessories<br />
Changing the Heart Rate Monitor Battery<br />
The heart rate monitor is powered by a 3-volt CR2032 battery<br />
mounted inside the sensor.<br />
To change the heart rate monitor battery:<br />
1. Using a coin, turn the battery cover on the back of the sensor<br />
clockwise until it opens.<br />
2. Remove the old battery and replace with a new one<br />
3. Replace the battery cover and tighten with a coin.<br />
Combo Cadence Sensor (Optional)<br />
The combo cadence (includes the cadence sensor and a speed<br />
sensor) attaches to the chainstay of your bike. It helps you accurately<br />
track performance during sessions.<br />
Pairing the Combo Cadence Sensor<br />
Up to three combo cadence sensors on three bikes can be paired<br />
with one <strong>Xplova</strong> G3.<br />
To pair a combo cadence sensor:<br />
1. Press the Menu button.<br />
2. Scroll to User and Bikes and enter.<br />
3. Scroll to required bike and enter.<br />
4. Scroll to ANT+Combo Cadence and enter Setup.<br />
68 Combo Cadence Sensor (Optional)
Using your your Accessories<br />
Figure 34. ANT + Combo Cadence<br />
5. Select Rescan and enter.<br />
Combo Cadence Sensor (Optional) 69
Using your Accessories<br />
6. Swipe one of the magnets about 1/2 cm from the speed sensor as<br />
shown in Figure 35 while holding the sensor near the GPS unit. A<br />
popup indicates when the combo cadence is paired.<br />
Figure 35. Pairing the combo cadence sensor<br />
70 Combo Cadence Sensor (Optional)
Using your your Accessories<br />
Installing the Combo Cadence Sensor<br />
After pairing the sensor you can install it on the selected bike. Before<br />
installing the combo cadence sensor, make sure you have the<br />
following components in the accessory kit:<br />
CADENCE<br />
Cadence sensor<br />
Speed sensor<br />
Speed magnet Cadence magnet Rubber base<br />
Cable ties<br />
Figure 36. Combo Cadence Sensor Parts<br />
Combo Cadence Sensor (Optional) 71
Using your Accessories<br />
To install the combo cadence sensor:<br />
1. Position the sensor on the chainstay as shown in Figure 37.<br />
Figure 37. Positioning the combo cadence sensor<br />
72 Combo Cadence Sensor (Optional)
Using your Accessories<br />
4. Attach the magnet to the left crank as shown in Figure 39. Do not<br />
fully tighten.<br />
Figure 39. Attaching the cadence magnet to the left crank<br />
5. Adjust magnets and sensors so the air gap between sensor<br />
markings and magnets is less than 5 mm.<br />
6. Fully tighten cable ties.<br />
Training with the Combo Cadence Sensor<br />
Once the combo cadence sensor is paired, you can view speed and<br />
cadence while in bike computer mode. If speed and cadence are not<br />
74 Combo Cadence Sensor (Optional)
Using your your Accessories<br />
displayed on-screen you can customise the view to display them. See<br />
“Bike Computer Data” on page 28 for details.<br />
Changing the Combo Cadence Battery<br />
The combo cadence sensor is powered by a 3-volt CR2032 battery<br />
mounted inside the speed sensor.<br />
To change the combo cadence battery:<br />
1. Using a coin, turn the battery cover on the back of the sensor<br />
clockwise until it opens.<br />
2. Remove the old battery and replace with a new one<br />
3. Replace the battery cover and tighten with a coin.<br />
Combo Cadence Sensor (Optional) 75
Using your Accessories<br />
Battery Charger (Optional)<br />
When the <strong>Xplova</strong> G3 status LED turns red, the battery needs<br />
recharging.<br />
To charge the battery:<br />
1. Connect the battery charger to the power supply.<br />
2. Insert the battery into the battery charger as shown in Figure 40.<br />
LED<br />
Figure 40. Connect the battery charger<br />
3. Remove the battery from the charger when the status LED turns<br />
green.<br />
76 Battery Charger (Optional)
Using the PC Applications<br />
Feature of X-Tracks<br />
Backup/View Activity Data<br />
The <strong>Xplova</strong> G3 generates a quick summary for every completed<br />
activity; its chart analysis in speed, altitude, heart rate and cadence<br />
help you analyze your performance right after riding. X-Tracks<br />
backup all activity data in the <strong>Xplova</strong> G3 and view on computer.<br />
GPX & TRK Import/Export<br />
You can download GPX files from other GPS receivers or TRK from<br />
Smart-Route. Import them into X-Tracks or export them to the<br />
<strong>Xplova</strong> G3.<br />
Note:GPX stands for GPS xChange Format.<br />
TRK stands for <strong>Xplova</strong> Track Format.<br />
Feature of X-Tracks 77
Using the PC Applications<br />
Smart-Route Track Planner<br />
The Smart-Route web service helps you plan a bike route based on<br />
your demand. After you plan a route, you can save the route in TRK<br />
format and view the route in X-Tracks.<br />
Download Detail Maps<br />
Download worldwide detail maps from the <strong>Xplova</strong> map server and<br />
install the maps to device.<br />
Updating the <strong>Xplova</strong> G3 Software<br />
To update the <strong>Xplova</strong> G3 software:<br />
1. Connect <strong>Xplova</strong> G3 to your computer and launch X-Tracks. Click<br />
on Check Software Update or down load the latest image file<br />
available on http://www.xplova.com<br />
2. Copy the files from computer to the <strong>Xplova</strong> G3.<br />
3. Disconnect the <strong>Xplova</strong> G3 and computer.<br />
4. Press and hold on the Power button until an “updating” screen<br />
appears.<br />
78 Updating the <strong>Xplova</strong> G3 Software
Using the the PC PC Applications<br />
OS Updating<br />
Firmware Updating<br />
Figure 41. Screens of Updating<br />
5. Follow the on-screen instructions to complete installation.<br />
Note:Make sure battery is fully charged before software updating.<br />
When updating, don’t power off the <strong>Xplova</strong> G3.<br />
Updating the <strong>Xplova</strong> G3 Software 79
Using the PC Applications<br />
80 Updating the <strong>Xplova</strong> G3 Software
Appendix<br />
Specifications<br />
Table 3. Specifications<br />
Model Name<br />
Model Name<br />
<strong>Xplova</strong> G3 GPS Bike Computer<br />
Bike computer function<br />
User configurable<br />
multi function<br />
information display<br />
Multi information<br />
pages<br />
User profile support<br />
Multi bicycles<br />
profile support<br />
Data recording<br />
Exercise warning<br />
Training program<br />
Multi-information configurable in different fields:<br />
time, speed, distance, altitude, slop, Heart rate,<br />
cadence, calories, lap, …& etc.<br />
Dash Meter, Bike computer, page 1, Page 2, and<br />
Page 3<br />
Name, age, gender, weight, height, ANT+HRM<br />
Bicycle name, odometer, & accessories.<br />
Start/pause/continue/save, lap, clear record<br />
Speed, time, distance, heart rate, cadence, calories<br />
status alert<br />
Training by time, distance, calories<br />
Specifications 81
Appendix<br />
Table 3. Specifications<br />
GPS Navigation function<br />
Navigation<br />
Supports planned track turn-by-turn guidance and<br />
Smart-Sign Approaching alert<br />
Map support Built-in 1:75K OSM base map with elevation<br />
contour line. Free user downloadable OSM detail<br />
map and contour line<br />
Elevation profile Elevation preview of the route and tracks<br />
Smart-Sign Waypoints, mountain peaks, county names,<br />
ascent/decent slope information, user<br />
configurable markers<br />
Hardware<br />
Hard Buttons<br />
GPS<br />
Barometric<br />
Altimeter<br />
Audio<br />
Battery<br />
Indicator<br />
Charging<br />
PC connection<br />
Power/OSD Button, + Button, - Button, Menu<br />
Button, Lap/Reset Button, 5-Way control stick,<br />
Record/End Button, Mode/Bike Select Button<br />
High sensitive -159 dbm<br />
High resolution Barometric Altimeter<br />
Buzzer output<br />
Replaceable and rechargeable Li-iron battery<br />
*Typical 10 hrs operation<br />
Standby and battery low LED indicator<br />
from Mini USB<br />
USB 2.0, Mini USB<br />
82 Specifications
Appendix<br />
Table 3. Specifications<br />
Physical<br />
Dimension<br />
Weight<br />
Temperature<br />
Environment<br />
X-Tracks PC tools<br />
O.S.<br />
Activity Manager<br />
Track Manager<br />
Map manager<br />
Equipment<br />
manager<br />
Services<br />
Smart-Route<br />
Smart-Share<br />
Accessories<br />
Bike Mount<br />
99 (L) x 57 (W) x 25 mm (H)<br />
117 g<br />
Operation -10°~50°C<br />
IEC Standard 60529 IPX7 waterproof<br />
Windows XP and later<br />
Backup, review, analysis, report, export GPX<br />
(note1), map view, and photo tagging activity<br />
record on PC<br />
Launch Smart-Route, Smart-Share services,<br />
track management, track simulation in 3D mode<br />
Download OSM map from <strong>Xplova</strong> map server via<br />
the Internet and install map to device<br />
Equipment usage and mileage calculation and<br />
summary<br />
Plan routes, generate Smart-Sign & turn-by-turn<br />
directions, mark POI (Point of Internet)<br />
Share planned-routes via Facebook; export track<br />
files in TRK (note2) or GPX formats<br />
For stem and handle bar<br />
Specifications 83
Appendix<br />
Table 3. Specifications<br />
Rubber pad<br />
HRM chest belt<br />
(optional)<br />
Combo Cadence<br />
Sensor (optional)<br />
AC adapter charger<br />
USB cable<br />
Anti-slippery Rubber pad<br />
ANT+ heart rate monitor chest belt<br />
ANT+ 2-in-1 (Combo) Cadence sensor module<br />
(Speed sensor, Cadence sensor)<br />
Mini USB Charger, battery charger (optional)<br />
Standard mini-USB cable<br />
Note:Actual operation time is dependent on device setting and<br />
GPS signal condition. With the backlight off and good GPS<br />
signals condition, the battery operation time is about 10<br />
hours<br />
84 Specifications
Appendix<br />
Wheel Size Table<br />
Table 4. Wheel Size*<br />
ETRTO Tire Size L (mm)<br />
12 x 1.75 935<br />
14 x 1.50 1020<br />
14 x 1.75 1055<br />
16 x 1.50 1185<br />
47-305 16 x 1.75 1195<br />
18 x 1.50 1340<br />
18 x 1.75 1350<br />
47-406 20 x 1.75 1515<br />
20 x 1-3/8 1615<br />
22 x 1-3/8 1770<br />
22 x 1-1/2 1785<br />
24 x 1 1753<br />
24 x 3/4 Tubular 1785<br />
24 x 1-1/8 1795<br />
24 x 1-1/4 1905<br />
47-507 24 x 1.75 1890<br />
24 x 2.00 1925<br />
24 x 2.125 1965<br />
26 x 7/8 1920<br />
Wheel Size Table 85
Appendix<br />
Table 4. Wheel Size*<br />
ETRTO Tire Size L (mm)<br />
23-571 26 x 1(59) 1913<br />
26 x 1(65) 1952<br />
26 x 1.25 1953<br />
26 x 1-1/8 1970<br />
37-590 26 x 1-3/8 2068<br />
26 x 1-1/2 2100<br />
26 x 1.40 2005<br />
40-559 26 x 1.50 2010<br />
47-559 26 x 1.75 2023<br />
50-559 26 x 1.95 2050<br />
54-559 26 x 2.00 2055<br />
26 x 2.10 2068<br />
57-559 26 x 2.125 2070<br />
26 x 2.35 2083<br />
57-559 26 x 3.00 2170<br />
27 x 1 2145<br />
27 x 1-1/8 2155<br />
32-630 27 x 1-1/4 2161<br />
27 x 1-3/8 2169<br />
650 x 35A 2090<br />
650 x 38A 2125<br />
86 Wheel Size Table
Appendix<br />
Table 4. Wheel Size*<br />
ETRTO Tire Size L (mm)<br />
18-622 650 x 38B 2105<br />
700 x 18C 2070<br />
700 x 19C 2080<br />
20-622 700 x 20C 2086<br />
23-622 700 x 23C 2096<br />
25-622 700 x 25C 2105<br />
28-622 700 x 28C 2136<br />
700 x 30C 2170<br />
32-622 700 x 32C 2155<br />
700C Tubular 2130<br />
37-622 700 x 35C 2168<br />
700 x 38C 2180<br />
40-522 700 x 40C 2200<br />
Note:Actual physical size of wheel might be slightly different due to<br />
different tire brands, tire pressure, and tire erosion.<br />
Wheel Size Table 87
Appendix<br />
Declarations of Conformity<br />
Duales System Deutschland GmbH Participant<br />
CE Declaration of Conformity (CENELEC Europe)<br />
WEEE directive<br />
Disposal of Waste Electrical and Electronic Equipment by users<br />
in private households in the European Union.<br />
This symbol on the product or on the packaging indicates<br />
that this can not be disposed of as household waste. You<br />
must dispose of your waste equipment by handling it over<br />
to the applicable take-back scheme for the recycling of<br />
electrical and electronic equipment. For more information<br />
about recycling of this equipment, please contact your<br />
city office, the shop where you purchased the equipment or your<br />
household waste disposal service. The recycling of materials will<br />
help to conserve natural resources and ensure that it is recycled in a<br />
manner that protects human health and environment.<br />
88 Declarations of Conformity