Gastro+ Gastrolyzer® - Bedfont Scientific
Gastro+ Gastrolyzer® - Bedfont Scientific
Gastro+ Gastrolyzer® - Bedfont Scientific

You also want an ePaper? Increase the reach of your titles
YUMPU automatically turns print PDFs into web optimized ePapers that Google loves.
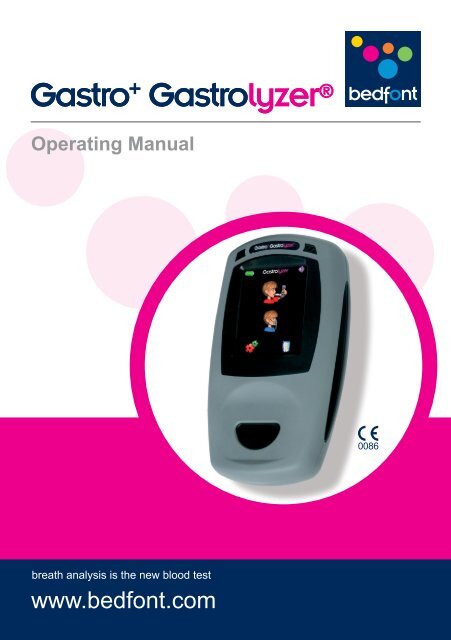
Gastro + Gastrolyzer ®<br />
Operating Manual<br />
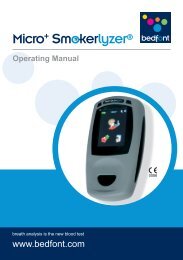
breath analysis is the new blood test
Gastro + Operating Manual<br />
Contents<br />
English<br />
Intended Use 3<br />
Introduction 3<br />
Warnings 4<br />
Contraindications 4<br />
Quick Start Guide 5<br />
Specification 6<br />
Pack Contents List 7<br />
Instrument Layout 7<br />
Display Symbols 8<br />
Maintenance 9<br />
Cleaning 9<br />
Operation 10<br />
Breath Test 11<br />
Face Masks 11<br />
Settings 12<br />
Sounder 12<br />
Breath-hold Countdown Timer 12<br />
Date and Time 12<br />
System Information 12<br />
Zero/Calibration 13<br />
Patient Information 14<br />
Troubleshooting 15<br />
Returns Procedure 16<br />
Spares and Warranty 17<br />
2
Gastro + Operating Manual<br />
English<br />
Intended Use<br />
The Gastro + Gastrolyzer ® is a breath<br />
hydrogen monitor used to measure<br />
hydrogen levels in expired breath. It is<br />
intended for multi-patient use by healthcare<br />
professionals in a clinical environment.<br />
Introduction<br />
Hydrogen (H 2<br />
) is generated in the intestinal<br />
lumen by bacterial action on carbohydrates<br />
in the large or small intestine. Once the<br />
resultant H 2<br />
is diffused into the bloodstream<br />
and then to the alveoli, it can be detected in<br />
expiratory air. Levitt (1969) 1 demonstrated<br />
the correlation between intestinal lumen H 2<br />
production and H 2<br />
excretion in expiratory<br />
air. Accurate measurement of H 2<br />
in parts<br />
per million (ppm) in expiratory air reveals<br />
abnormal breakdown and/or malabsorption<br />
of carbohydrates.<br />
The Gastro + can be used to indicate the<br />
following disorders:<br />
●●<br />
●●<br />
Carbohydrate breakdown deficiency<br />
Carbohydrate malabsorption<br />
●●<br />
Lactose intolerance 2<br />
●●<br />
●●<br />
Bacterial overgrowth<br />
Determination of time passage through<br />
the gut.<br />
1<br />
Levitt, M.D. (1969): Production and excretion of hydrogen gas<br />
in man. New Engl. J.Med. 281:122-127<br />
2<br />
Fleming, S.C. (1990): Evaluation of hand-held hydrogen<br />
monitor in the diagnosis of intestinal lactose deficiency. Ann.Clin.<br />
Biochem. 1990;499-500<br />
Operation of the monitor is straightforward.<br />
A D-piece sampling system enables endexpired<br />
breath to be sampled easily and<br />
hygienically, using single-use disposable<br />
cardboard Steribreath mouthpieces and<br />
disposable face masks. A colour touch<br />
screen ensures ease of operation and users<br />
can view results in a tabular or graphical<br />
format.<br />
3<br />
www.bedfont.com
Gastro + Operating Manual<br />
Warnings<br />
●●<br />
●●<br />
●●<br />
●●<br />
When cleaning the monitor, never use<br />
alcohol, cleaning agents containing<br />
alcohol, or other organic solvents, as<br />
these vapours will damage the H 2<br />
sensor<br />
inside.<br />
Under no circumstances should the<br />
instrument be immersed in or splashed<br />
with liquid.<br />
The device cannot diagnose a specific<br />
condition; only indicate a possible range<br />
of conditions.<br />
People with lung disease or chest<br />
ailments may not be able to achieve<br />
the full breath-hold. In such cases, the<br />
user should inhale and hold their breath<br />
for as long as possible when the breath<br />
test is started, and exhale, if necessary,<br />
before the countdown has completed.<br />
Alternatively, the user can use the face<br />
mask sampling mode.<br />
●●<br />
If the icon is displayed during<br />
start-up, calibration is due. Please refer<br />
to page 13 for instructions. The unit may<br />
give false readings if not calibrated.<br />
●●<br />
If the icon is displayed during<br />
start-up, the D-piece requires changing.<br />
It is recommended that the D-piece<br />
is changed every month, or more<br />
frequently if it is visibly soiled.<br />
●●<br />
●●<br />
●●<br />
The battery life is indicated by the<br />
icon. When the icon is displayed, the<br />
batteries should be changed.<br />
The disposable Steribreath <br />
mouthpieces are for single use<br />
only. Reuse can increase the risk of<br />
cross-infection.<br />
See <strong>Bedfont</strong>’s Infection Control and<br />
Maintenance Guidelines for further<br />
●●<br />
●●<br />
●●<br />
●●<br />
●●<br />
●●<br />
●●<br />
●●<br />
information on infection control.<br />
Please do not attempt to modify<br />
the equipment in any way or use<br />
accessories not specified by the<br />
manuafacturer. Any attempt to do so<br />
will invalidate the warranty and may<br />
compromise the safety of the device.<br />
<strong>Bedfont</strong> will make available on request<br />
service training to appropriately qualified<br />
personnel.<br />
Measurements from the face mask<br />
sampling method may be lower than<br />
when using the mouthpiece. This should<br />
be considered when interpreting the<br />
results.<br />
Do not cover the exhaust port as this<br />
may affect the accuracy of the test.<br />
Remove the D-piece between uses to<br />
allow fresh air to circulate around the<br />
sensor.<br />
The Gastro + must be switched on in<br />
fresh air to ensure an accurate zero.<br />
The USB port should be used to connect<br />
to a PC, to run the GastroCHART PC<br />
software. Please ensure the monitor<br />
is only connected to a computer<br />
manufactured law EN60950.<br />
The operator must not touch the battery<br />
terminals and the patient simultaneously.<br />
Contraindications<br />
●●<br />
Temperature may affect the accuracy<br />
of the Gastro + . The instrument should<br />
be calibrated at 21°C (±4°C). If the<br />
Gastro + is used at a lower temperature<br />
than when it was calibrated, readings<br />
may be lower. When used at a higher<br />
temperature than calibrated, readings<br />
may be higher.<br />
4<br />
English
Gastro + Operating Manual<br />
English<br />
Quick Start Guide<br />
1 Press and hold the on/off<br />
button until the display becomes active,<br />
then release the button.<br />
2 Allow the unit to display the home<br />
screen, then insert the D-piece into the<br />
instrument and fit a new Steribrearth <br />
mouthpiece or a face mask.<br />
3 Touch the icon to start a breath<br />
test. Alternatively, if a face mask is being<br />
used, press the .<br />
4 If has been<br />
touched, the breath-hold<br />
countdown will begin.<br />
The patient should inhale<br />
deeply and hold their<br />
breath while the display<br />
counts down to zero. If<br />
the patient is unable to<br />
hold their breath for the full countdown,<br />
see Warnings on page 4 or Settings on<br />
page 12. Please see step 6 if the face<br />
mask is being used.<br />
5 An audio bleep will sound during the last<br />
three seconds of the countdown.<br />
6 At the end of the<br />
countdown, the patient<br />
should blow slowly<br />
into the mouthpiece,<br />
aiming to empty their<br />
lungs completely.<br />
If the face mask is<br />
being used, the patient should breathe<br />
normally but be encouraged to exhale<br />
as much as possible.<br />
7 The ppm value will rise,<br />
and the highest level will<br />
remain on the screen.<br />
8 Remove and dispose of<br />
the Steribrearth mouthpiece or face<br />
mask safely.<br />
9 Remove the D-piece between tests to<br />
allow fresh air to circulate around the<br />
sensor.<br />
10 Touch the or icon at<br />
bottom of the screen to perform another<br />
breath test. If using a mouthpiece, a<br />
new one should be fitted. If using the<br />
facemask, this can continue to be used.<br />
11 To switch off, press and hold the on/<br />
off button for three seconds. The unit<br />
will auto power-off after 45 minutes of<br />
inactivity.<br />
5<br />
www.bedfont.com
Gastro + Operating Manual<br />
Specification<br />
Concentration range: 0-500ppm hydrogen (H 2<br />
)<br />
English<br />
Display:<br />
Detection principle:<br />
Colour LCD with 1ppm increments<br />
Electrochemical sensor<br />
Accuracy (repeatability of reading): ±10%<br />
Carbon monoxide cross-sensitivity:
Gastro + Operating Manual<br />
English<br />
Pack Contents List<br />
1 Monitor<br />
2<br />
2 Operation Instructions<br />
3 Box of 12 D-pieces<br />
4 Steribreath TM mouthpieces<br />
5 3 x AA batteries<br />
Plus:<br />
Infection Control and Maintenance<br />
Guidelines<br />
Warranty Registration Card<br />
USB cable<br />
GastroCHART software CD<br />
1<br />
5<br />
4<br />
3<br />
Instrument Layout<br />
1 Display<br />
9 Steribreath mouthpiece<br />
2 On/off button<br />
10 Battery compartment<br />
3 Aperture for D-piece<br />
4 D-piece<br />
2<br />
8<br />
5 Exhaust port for breath sample<br />
6 Locating lug on D-piece<br />
9<br />
10<br />
7 Sounder<br />
7<br />
8 USB connector<br />
5<br />
1<br />
4<br />
6<br />
3<br />
7<br />
www.bedfont.com
Gastro + Operating Manual<br />
Display Symbols<br />
1. Start-up screen:<br />
12. Patient data in chart format:<br />
13. Inhale:<br />
English<br />
14. Breath-hold and countdown:<br />
15. Exhale for breath test:<br />
2. Calibration prompt start-up<br />
screen:<br />
16. Peak H 2<br />
reading (ppm):<br />
17. New breath test:<br />
18. Face mask option:<br />
3. D-piece renewal prompt<br />
start-up screen:<br />
19. Save breath test:<br />
20. Set instrument zero in fresh air:<br />
21. Apply calibration gas at 100ppm:<br />
4. Battery condition:<br />
5. Sounder: On Off<br />
6. Return to main menu:<br />
7. Return to previous menu:<br />
8. Start breath test:<br />
9. Settings:<br />
22. Calibration/zero: Pass Fail<br />
23. Retry calibration/zero:<br />
24. Zeroing required before calibration:<br />
25. Breath-hold timer setting:<br />
26. Set date/time:<br />
27. System information screen:<br />
10. Patient data:<br />
11. Patient data in table format:<br />
28. Contact <strong>Bedfont</strong> or<br />
distributor for help:<br />
8
Gastro + Operating Manual<br />
English<br />
Maintenance<br />
Calibrate in accordance with the procedure<br />
on page 13.<br />
Replace batteries when indicated by .<br />
Replace the D-piece every month, or more<br />
frequently if visibly soiled or contaminated.<br />
The D-piece cannot be cleaned or<br />
sterilised. The Gastro + will give a reminder<br />
during the start-up when the D-piece should<br />
be replaced – see Operation, page 10.<br />
Cleaning<br />
Wipe the instrument and external D-piece<br />
surfaces with a product specifically<br />
developed for the purpose, such as<br />
<strong>Bedfont</strong>’s Instrument Cleansing Wipes<br />
– see Warnings, page 4.<br />
Remove the D-piece by gently pulling it out<br />
of the front of the instrument.<br />
Batteries should be removed if the<br />
instrument is not likely to be used for<br />
some time.<br />
<strong>Bedfont</strong> recommend an annual service in<br />
order to check sensor and component parts<br />
performance.<br />
The sensor should be replaced every two<br />
years.<br />
9<br />
www.bedfont.com
Gastro + Operating Manual<br />
Operation<br />
●●<br />
●●<br />
●●<br />
Ensure that 3 × AA alkaline batteries are<br />
correctly inserted.<br />
The touch screen controls all functions<br />
once the instrument is switched on.<br />
Press and hold the on/off button for<br />
three seconds until the display becomes<br />
active, then release the button. The<br />
start-up screen will be displayed for a<br />
one-minute warm-up period before the<br />
main menu appears.<br />
Note: When the Gastro + requires calibration<br />
(every month), the calibration prompt<br />
screen will appear. Touch to accept, or<br />
to calibrate later.<br />
● ● If a and a ppm value are shown<br />
rather than the main menu, the<br />
instrument has failed to zero during<br />
start-up. Ensure that the instrument is in<br />
fresh air, then touch the screen to repeat<br />
the start-up test. If it fails again, please<br />
see Troubleshooting, page 15.<br />
English<br />
When the D-piece requires changing<br />
(recommended monthly), the D-piece<br />
renewal prompt screen will appear. Touch<br />
to accept. The reminder will be reset<br />
and will prompt again in 28 days.<br />
●●<br />
The main menu displays four symbols:<br />
1 Breath test<br />
2 Face mask test<br />
3 Settings<br />
4 Patient select<br />
Note: The patient select icon will not be<br />
accessible until patient data has been<br />
downloaded from GastroCHART.<br />
10
Gastro + Operating Manual<br />
English<br />
Breath Test<br />
●●<br />
Attach a D-piece and a new Steribreath <br />
mouthpiece, or a face mask, to the<br />
Gastro + . Check that all connections are<br />
pushed firmly together.<br />
●●<br />
To start a breath test, touch the or<br />
icon.<br />
Note: If the display shows it means<br />
that the sensor has not settled to zero<br />
before the test. The display will show a<br />
once the sensor has settled and the unit is<br />
ready for use. Removing the D-piece will<br />
accelerate the zero process.<br />
●●<br />
●●<br />
The patient should inhale as deeply<br />
as possible and hold their breath<br />
throughout the on-screen countdown.<br />
An audio beep will sound during the last<br />
three seconds of the countdown.<br />
Exhale slowly but gently into the<br />
mouthpiece, aiming to empty the lungs<br />
as far as possible. If the face mask is<br />
being used, the patient should breathe<br />
normally but be encouraged to exhale as<br />
much as possible.<br />
Note: If the patient cannot hold their<br />
breath for the full countdown, they should<br />
commence exhalation at a comfortable<br />
point, but ensure that they exhale<br />
completely – see Timer settings, page 12,<br />
and Warnings, page 4. Alternatively, they<br />
can use the face mask option.<br />
●●<br />
●●<br />
●●<br />
The display will show a rising ppm value.<br />
The peak reading will be shown on the<br />
display. The test is complete when the<br />
icons are displayed.<br />
Remove and dispose of the Steribreath <br />
●●<br />
●●<br />
mouthpiece or face mask safely.<br />
Remove the D-piece between tests to<br />
allow fresh air to circulate around the<br />
unit. It is advisable to wash your hands<br />
after removing the D-piece.<br />
To start another breath test, fit a new<br />
Steribreath mouthpiece or face<br />
mask and touch the or icon<br />
accordingly.<br />
●●<br />
Touch to return to the main menu.<br />
●●<br />
Touch to save the result to the<br />
patient database. Select the patient<br />
using the and arrows and touch<br />
to save or to cancel. Selecting<br />
either option will take you back to the<br />
main menu.<br />
Note: This is only possible if patient data<br />
has been downloaded to the Gastro + via<br />
GastroCHART.<br />
●●<br />
If no further tests are required, press<br />
and hold the on/off button for three<br />
seconds until the Gastro + turns off. The<br />
Gastro + will automatically turn off after<br />
45 minutes of inactivity.<br />
Face Masks<br />
If children or infants are to be monitored, a<br />
face mask sampling technique can be used.<br />
An appropriately-sized face mask should<br />
be placed over the nose and mouth of the<br />
patient, taking care to avoid leaks around<br />
the mask cushion. The patient can then<br />
breathe normally, but should be encouraged<br />
to exhale as much as possible.<br />
11<br />
www.bedfont.com
Gastro + Operating Manual<br />
Settings<br />
The settings menu allows access to the<br />
following functions:<br />
●●<br />
●●<br />
●●<br />
●●<br />
●●<br />
Sounder<br />
Breath-hold countdown timer<br />
Set date/time<br />
System information<br />
Zero/calibration<br />
Sounder<br />
The operation of the sounder is indicated<br />
by the small symbol on the top line of the<br />
display.<br />
Date and Time<br />
The date and time is used when saving<br />
patient data to accurately record when tests<br />
were carried out. To change the date and<br />
time, touch in the Settings menu.<br />
Touch the required field and use<br />
to change.<br />
and<br />
Press to save or to cancel. Return<br />
to main menu.<br />
System Information<br />
Touch to access system information<br />
such as the software version. Touch to<br />
return to the previous menu.<br />
English<br />
To switch the sounder on or off, touch the<br />
large icon on the Settings menu. The<br />
large sounder symbol and the smaller<br />
symbol on the top line of the display will<br />
indicate whether the sounder is on or off.<br />
If the sounder has been turned off, it will<br />
still operate during the last three seconds<br />
of the breath-hold countdown.<br />
Breath-hold Countdown Timer<br />
It is possible to change the length of time<br />
that the patient should try to hold their<br />
breath – see Warnings, page 4.<br />
Touch in the Settings<br />
menu and use or<br />
to change the timer setting.<br />
Press to save or to<br />
cancel.<br />
Return to main menu.<br />
12
Gastro + Operating Manual<br />
English<br />
Zero/Calibration<br />
●●<br />
13<br />
The instrument should be calibrated at<br />
21 O C (±4 O C) the temperature at which is<br />
it expected to be used – see Warnings,<br />
page 4.<br />
●●<br />
The Gastro + is calibrated at 21 O C (±4 O C)<br />
before leaving <strong>Bedfont</strong>.<br />
●●<br />
●●<br />
●●<br />
The Gastro + should be calibrated at<br />
least every month. The Gastro + will<br />
give a reminder during start-up when<br />
calibration is due.<br />
The calibration gas required is 100ppm<br />
hydrogen in air.<br />
Turn the instrument on in the normal<br />
way. Select from the Settings menu.<br />
●●<br />
The is displayed when the monitor<br />
has not been zeroed prior to calibration.<br />
●●<br />
Ensure that the instrument is surrounded<br />
by fresh air. Touch to begin the<br />
zeroing. If the zeroing has been<br />
successful, a will be displayed. If the<br />
zeroing fails, an will be displayed<br />
– see Troubleshooting, page 15, if this<br />
happens.<br />
●●<br />
Touch to accept the zero and return<br />
to the calibration/zero menu.<br />
●●<br />
●●<br />
●●<br />
Ensure the calibration gas valve is in the<br />
off position.<br />
Screw the fine control valve and flow<br />
indicator assembly<br />
to the gas can. This<br />
is best done by<br />
screwing the gas 1<br />
can into the valve.<br />
Open the fine control<br />
valve by turning<br />
the control knob<br />
anticlockwise and<br />
2<br />
1.Fine control valve<br />
2.Flow indicator<br />
1.5 l/m<br />
1.0 l/m<br />
0.5 l/m<br />
allow the gas to flow at 0.5 litres per<br />
minute.<br />
●●<br />
Touch to begin calibration.<br />
●●<br />
●●<br />
On the third beep<br />
connect calibration<br />
apparatus as<br />
illustrated.<br />
To achieve this,<br />
adjust the flow<br />
so that the ball in<br />
the flow indicator<br />
remains on the<br />
lower line.<br />
●●<br />
As the 100ppm H 2<br />
calibration gas is<br />
applied, the displayed ppm reading will<br />
rise.<br />
●●<br />
●●<br />
Monitor the rate of flow and continue to<br />
apply the gas.<br />
If the final displayed reading is between<br />
84 and 116ppm, the calibration value will<br />
be automatically set in the instrument<br />
as 100ppm and a will be displayed<br />
to show a successful calibration. If the<br />
displayed reading is outside these limits,<br />
the calibration fails, and a will be<br />
displayed - see Troubleshooting page 15<br />
if this happens.<br />
●●<br />
Touch to accept the calibration and<br />
return to the calibration/zero menu.<br />
●●<br />
●●<br />
●●<br />
Turn off the gas flow, remove the<br />
D-piece and disconnect the calibration<br />
adapter.<br />
Unscrew the fine control valve and flow<br />
indicator from the gas can and store<br />
safely. If the valve is left attached to the<br />
can, the gas could escape.<br />
The Gastro + is now calibrated and ready<br />
for use.<br />
www.bedfont.com
Gastro + Operating Manual<br />
Patient Information<br />
Touch on the main menu to access<br />
patient information. This icon will remain<br />
inactive until patient data has been<br />
downloaded via GastroCHART.<br />
English<br />
Touch and to highlight the required<br />
patient.<br />
Touch to view data in table format or<br />
to view in graphical format.<br />
Touch<br />
to return to the previous menu.<br />
Note: The Gastro + should not be used<br />
in live test mode via the PC software. It<br />
should only be connected to the PC for data<br />
upload.<br />
14
Gastro + Operating Manual<br />
English<br />
Troubleshooting<br />
●●<br />
If the unit fails to turn on properly, or<br />
if the low battery symbol is showing,<br />
replace the 3 × AA alkaline batteries.<br />
Ensure that the batteries are inserted<br />
correctly, matching the symbols moulded<br />
into the plastic.<br />
●●<br />
If the display shows after zeroing, a<br />
second attempt can be made to zero the<br />
unit in fresh air. Check that the unit is in<br />
fresh air and the exhaust is not covered<br />
then touch to restart the zeroing<br />
process. If, after a third zeroing attempt,<br />
the display shows again, the unit<br />
needs to be reset using the Calibration<br />
Unlock Tool, which is available as a<br />
download from the Support Site at www.<br />
bedfont.com/support. The monitor will<br />
need to be connected to a PC using<br />
the USB cable provided. Once the<br />
download has been run, the monitor can<br />
be unlocked. It is then possible to restart<br />
the unit and attempt the zeroing process<br />
again. If you are still experiencing<br />
problems, please contact <strong>Bedfont</strong>’s<br />
Customer Service Specialist.<br />
●●<br />
If the display shows after an<br />
attempted calibration with 100ppm H 2<br />
gas, it means that the gas value was<br />
not within the permitted limits. The<br />
reading is displayed below the . If<br />
the value is much lower than 100ppm,<br />
there may have been a problem with<br />
the supply of gas from the cylinder. If<br />
the value is much higher than 100ppm,<br />
the wrong concentration of calibration<br />
gas may have been used or the exhaust<br />
has been covered. In either case,<br />
check the cylinder, connections and<br />
flow rate before touching to repeat<br />
the calibration process. If a still<br />
appears after a third attempt to calibrate<br />
the instrument, please download the<br />
Calibration Unlock Tool, as described.<br />
If you are still experiencing problems,<br />
please contact <strong>Bedfont</strong>’s Customer<br />
Service Specialist. The unit can be<br />
restarted with the previous calibration<br />
settings, or the calibration process can<br />
be begun again.<br />
15<br />
www.bedfont.com
Gastro + Operating Manual<br />
Returns Procedure<br />
Should equipment require servicing, please contact <strong>Bedfont</strong>’s Customer Service Specialist<br />
before returning any goods. If equipment was not purchased directly from <strong>Bedfont</strong>, please<br />
contact the local distributor.<br />
English<br />
●●<br />
●●<br />
●●<br />
●●<br />
●●<br />
●●<br />
When the monitor serial number and<br />
description of the fault have been<br />
supplied, the Customer Service<br />
Specialist will issue a Returns Number.<br />
State the Returns Number when<br />
returning the monitor, ensuring that full<br />
contact details, including telephone and<br />
fax numbers, are clearly provided.<br />
<strong>Bedfont</strong> advise that you use a courier<br />
service when returning monitors.<br />
Confirmation will be sent when goods<br />
are received.<br />
An Engineer’s Report and a quotation<br />
for the repair, including an Authorisation<br />
Form, will be sent following<br />
investigation.<br />
If the monitor is still in warranty,<br />
<strong>Bedfont</strong> will repair it and return it with<br />
an Engineer’s Report, free of charge.<br />
If the monitor is found to simply require<br />
calibrating, a fee will be charged.<br />
●●<br />
●●<br />
●●<br />
If the monitor is out of warranty,<br />
complete the Authorisation Form with<br />
the quotation to proceed with the repair<br />
or calibration. Ensure that an Official<br />
Purchase Order Number is included,<br />
and return the form to <strong>Bedfont</strong>. Contact<br />
the Customer Service Specialist if you<br />
have any queries.<br />
A handling fee will be charged if it is<br />
decided not to proceed with the repair.<br />
Ensure that the completed Authorisation<br />
Form is returned with an Official<br />
Purchase Order Number.<br />
The equipment will be returned as<br />
soon as <strong>Bedfont</strong> have received all the<br />
relevant paperwork. A carriage fee will<br />
be charged if the monitor is no longer in<br />
warranty.<br />
16
Gastro + Operating Manual<br />
English<br />
Spares<br />
Spares:<br />
D-pieces<br />
Part Codes:<br />
D-PIECE<br />
250 Steribreath mouthpieces STERIBREATH- MP<br />
Calibration gas and kits:<br />
100ppm H 2<br />
in air calibration gas<br />
100ppm H 2<br />
in air calibration kit<br />
Face masks<br />
Adult face mask<br />
Child face mask<br />
Infant face mask<br />
Instrument cleansing wipes<br />
AA alkaline batteries<br />
Stylus<br />
Cleaning Cloth<br />
020-14-12010-V<br />
020-14-12010K-V<br />
EC80-IM-V<br />
EC60-MM-V<br />
EC60-AM-V<br />
WIPE-BB<br />
PI-BATTS-V<br />
FXS399<br />
FXS400<br />
The above spares are available from <strong>Bedfont</strong> <strong>Scientific</strong> Ltd, UK. For spares availability<br />
in all other countries, contact your local distributor. It is recommended that only <strong>Bedfont</strong><br />
spares are used.<br />
Warranty<br />
<strong>Bedfont</strong> <strong>Scientific</strong> Ltd warrants the Gastro +<br />
(batteries excepted) to be free of defect in<br />
materials and workmanship for a period<br />
of twenty four months from the date of<br />
shipment. <strong>Bedfont</strong>’s sole obligation under<br />
this warranty is limited to repairing or<br />
replacing, at its choice, any item covered<br />
under this warranty when such an item<br />
is returned intact, prepaid, to <strong>Bedfont</strong><br />
<strong>Scientific</strong> Ltd or the local representative.<br />
Note: Sensors are guaranteed for a period<br />
of twelve months from the date of shipment<br />
from <strong>Bedfont</strong>.<br />
<strong>Bedfont</strong> recommend an annual service<br />
of the Gastro + and a sensor replacement<br />
every 2 years.<br />
These warranties are automatically<br />
invalidated if the products are repaired,<br />
altered or otherwise tampered with by<br />
unauthorised personnel, or have been<br />
subject to misuse, neglect or accident.<br />
Single use consumables and accessories<br />
should be disposed of inline with clinical<br />
waste guidelines.<br />
At the end of the product’s life, do not dispose of any electronic instrument<br />
or batteries in the domestic waste. Contact <strong>Bedfont</strong> or your local distributor<br />
for disposal instructions.<br />
17<br />
www.bedfont.com
<strong>Bedfont</strong> <strong>Scientific</strong> Ltd<br />
Station Road, Harrietsham, Maidstone,<br />
Kent, ME17 1JA England<br />
Tel: +44 (0)1622 851122, Fax: +44 (0)1622 854860<br />
Email: ask@bedfont.com<br />
www.bedfont.com<br />
Issue 14- February 2014, Part No: LAB283<br />
© <strong>Bedfont</strong> <strong>Scientific</strong> Ltd<br />
<strong>Bedfont</strong> <strong>Scientific</strong> Limited reserves the right to change or update this literature without prior notice.<br />
Registered office: England and Wales. Registered No: 1289798<br />
ISO 9001:2008<br />
Cert No. FM 31664<br />
ISO 13485:2003<br />
Cert No. MD 502905