Instructions for Software Upgrade - Mitsubishi
Instructions for Software Upgrade - Mitsubishi
Instructions for Software Upgrade - Mitsubishi

You also want an ePaper? Increase the reach of your titles
YUMPU automatically turns print PDFs into web optimized ePapers that Google loves.
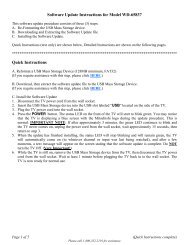
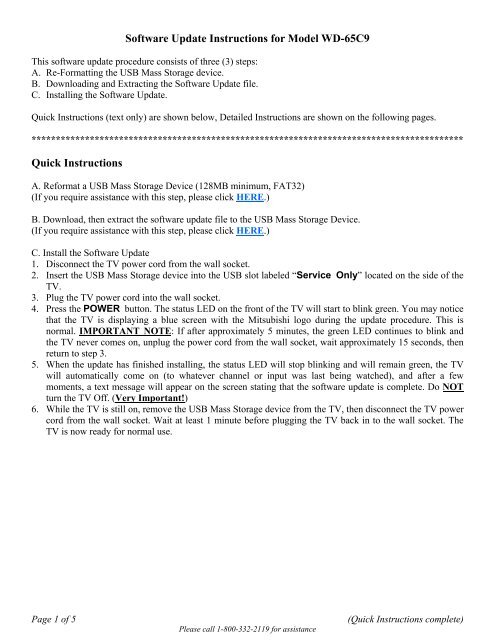
<strong>Software</strong> Update <strong>Instructions</strong> <strong>for</strong> Model WD-65C9<br />
This software update procedure consists of three (3) steps:<br />
A. Re-Formatting the USB Mass Storage device.<br />
B. Downloading and Extracting the <strong>Software</strong> Update file.<br />
C. Installing the <strong>Software</strong> Update.<br />
Quick <strong>Instructions</strong> (text only) are shown below, Detailed <strong>Instructions</strong> are shown on the following pages.<br />
*****************************************************************************************<br />
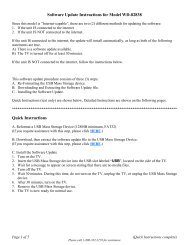
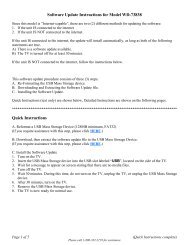
Quick <strong>Instructions</strong><br />
A. Re<strong>for</strong>mat a USB Mass Storage Device (128MB minimum, FAT32)<br />
(If you require assistance with this step, please click HERE.)<br />
B. Download, then extract the software update file to the USB Mass Storage Device.<br />
(If you require assistance with this step, please click HERE.)<br />
C. Install the <strong>Software</strong> Update<br />
1. Disconnect the TV power cord from the wall socket.<br />
2. Insert the USB Mass Storage device into the USB slot labeled “Service Only” located on the side of the<br />
TV.<br />
3. Plug the TV power cord into the wall socket.<br />
4. Press the POWER button. The status LED on the front of the TV will start to blink green. You may notice<br />
that the TV is displaying a blue screen with the <strong>Mitsubishi</strong> logo during the update procedure. This is<br />
normal. IMPORTANT NOTE: If after approximately 5 minutes, the green LED continues to blink and<br />
the TV never comes on, unplug the power cord from the wall socket, wait approximately 15 seconds, then<br />
return to step 3.<br />
5. When the update has finished installing, the status LED will stop blinking and will remain green, the TV<br />
will automatically come on (to whatever channel or input was last being watched), and after a few<br />
moments, a text message will appear on the screen stating that the software update is complete. Do NOT<br />
turn the TV Off. (Very Important!)<br />
6. While the TV is still on, remove the USB Mass Storage device from the TV, then disconnect the TV power<br />
cord from the wall socket. Wait at least 1 minute be<strong>for</strong>e plugging the TV back in to the wall socket. The<br />
TV is now ready <strong>for</strong> normal use.<br />
Page 1 of 5<br />
Please call 1-800-332-2119 <strong>for</strong> assistance<br />
(Quick <strong>Instructions</strong> complete)
Detailed <strong>Instructions</strong><br />
A. Re-Formatting the USB Mass Storage device<br />
To per<strong>for</strong>m this software update, you must have a FAT32 <strong>for</strong>matted (MS-DOS <strong>for</strong> Macintosh users) USB<br />
Mass Storage device with 128MB or higher capacity. The USB Mass Storage device must be re-<strong>for</strong>matted<br />
prior to use. WARNING: All files that exist on the USB Mass Storage device will be deleted. Transfer<br />
any files that you want to keep to your hard drive be<strong>for</strong>e proceeding. <strong>Mitsubishi</strong> Digital Electronics<br />
America is not responsible <strong>for</strong> any loss of personal files.<br />
1. Plug the USB Mass Storage device into your computers USB port.<br />
2. Open “My Computer”. This will open a window showing all current drives on your computer.<br />
3. Right-click on the drive letter associated with the USB Mass Storage device. Select “Format...”.<br />
Step 2 - My Computer<br />
Step 3 - Right-click on “Removable Disk”<br />
4. A <strong>for</strong>matting dialog box will appear; under the “File system” option, make sure that “FAT32” is selected,<br />
then click on the “Start” button. All other options are user definable and do not matter.<br />
5. You will receive a warning message; click on the “OK” button.<br />
6. After a few moments, you will receive a message stating that the <strong>for</strong>matting is complete. Click on the<br />
“OK” button.<br />
7. Close the <strong>for</strong>matting dialog box by clicking on the “Close” button. Re-<strong>for</strong>matting is complete.<br />
Step 5<br />
Step 4<br />
Step 6 Step 7<br />
Page 2 of 5<br />
Please call 1-800-332-2119 <strong>for</strong> assistance<br />
(Re-Formatting complete)
Detailed <strong>Instructions</strong><br />
B. Downloading and Extracting the <strong>Software</strong> Update file<br />
You must have a de-compression (un-zipping) utility application (such as WinZip) installed on your computer.<br />
1. Double-click on the software update file link; Depending on the internet browser in use, you will be<br />
prompted to open or save the file. Select “Open”, then click on “OK” if using Firefox. A downloading<br />
progress box will appear, again based on your internet browser.<br />
Step 1 - Using Windows Internet Explorer<br />
Step 1 - Using Firefox<br />
2. A message box (based on your computer’s un-zipping utility application) will appear. Select “Extract”.<br />
Page 3 of 5<br />
(Downloading and Extracting continued)<br />
Please call 1-800-332-2119 <strong>for</strong> assistance
Detailed <strong>Instructions</strong><br />
B. Downloading and Extracting the <strong>Software</strong> Update file (continued)<br />
3. High-light the drive letter location <strong>for</strong> your USB Mass Storage device (it is normally referred to as a<br />
“Removable Disk”), then select “Extract”.<br />
4. An extraction progress box will appear; when it has completed, a window will open showing the contents<br />
of the USB Mass Storage device.<br />
Extraction Progress Box<br />
Contents of USB Mass Storage device<br />
5. You may remove the USB Mass Storage device from the USB port at this time. Some operating systems<br />
such as Windows 98 or Windows 2000 may require that you stop the USB Mass Storage device prior to<br />
removal from the USB port. Downloading and Extracting is complete.<br />
Page 4 of 5<br />
(Downloading and Extracting complete)<br />
Please call 1-800-332-2119 <strong>for</strong> assistance
Detailed <strong>Instructions</strong><br />
C. Installing the <strong>Software</strong> Update<br />
1. Disconnect the TV power cord from the wall socket.<br />
2. Insert the USB Mass Storage device into the USB slot labeled “Service Only” located on the side of the<br />
TV, as shown in Figure 1.<br />
USB Mass Storage device<br />
Figure 1<br />
3. Plug the TV power cord into the wall socket.<br />
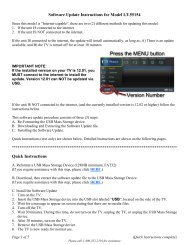
4. Press the POWER button. The status LED on the front of the TV will start to blink green. You may notice<br />
that the TV is displaying a blue screen with the <strong>Mitsubishi</strong> logo during the update procedure. This is normal.<br />
IMPORTANT NOTE: If after approximately 5 minutes, the green LED continues to blink and the<br />
TV never comes on, unplug the power cord from the wall socket, wait approximately 15 seconds, then return<br />
to step C.3.<br />
5. When the update has finished installing, the status LED will stop blinking and will remain green, the TV<br />
will automatically come on (to whatever channel or input was last being watched), and after a few moments,<br />
a text message (see Figure 2) will appear on the screen stating that the software update is complete.<br />
Do NOT turn the TV Off. (Very Important!)<br />
Figure 2<br />
6. While the TV is still on, remove the USB Mass Storage device from the TV, then disconnect the TV power<br />
cord from the wall socket. Wait at least 1 minute be<strong>for</strong>e plugging the TV back in to the wall socket. The<br />
TV is now ready <strong>for</strong> normal use.<br />
Page 5 of 5<br />
Please call 1-800-332-2119 <strong>for</strong> assistance<br />
(<strong>Software</strong> Update complete)