operating manual for the Turboflotor Multi SL - Aqua Medic
operating manual for the Turboflotor Multi SL - Aqua Medic
operating manual for the Turboflotor Multi SL - Aqua Medic

Create successful ePaper yourself
Turn your PDF publications into a flip-book with our unique Google optimized e-Paper software.
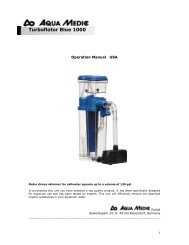
Operation Manual<br />
<strong>for</strong> <strong>the</strong><br />
<strong>Turboflotor</strong> multi <strong>SL</strong><br />
Motor driven skimmer <strong>for</strong> saltwater aquaria up to 1000 l.<br />
In purchasing this unit you have selected a top quality product. It has been<br />
specifically designed <strong>for</strong> aquarium use and has been tested by experts. This unit will<br />
efficiently remove <strong>the</strong> dissolved organic substances in your aquarium water.<br />
1
1. Product description<br />
The <strong>Turboflotor</strong> multi <strong>SL</strong> consists of <strong>the</strong> following parts:<br />
- Foam cup, cover and reaction-pipe<br />
- a venturi pump Ocean Runner pH 2500 inclusive<br />
Needle wheel<br />
- outflow box – 2 pieces.<br />
1<br />
2. Parts of <strong>the</strong> <strong>Turboflotor</strong> multi <strong>SL</strong><br />
1. lid <strong>for</strong> foam cup<br />
2. foam cup<br />
3. bayonet socket<br />
4. 0-ring<br />
5. inlet to skimmer, 20 mm<br />
6. skimmer, reaction pipe<br />
7. 2 outlet pipes<br />
8. flow control taps<br />
9. 2 outflow boxes<br />
10. tubing ( flexible hose)<br />
11. venturi pump<br />
12. magnet with needle wheel<br />
13. air injection nozzle<br />
14. air inlet tube<br />
15. silencer<br />
16. clip<br />
17. holder with rubber suction cups<br />
7<br />
8<br />
3<br />
4<br />
2<br />
5<br />
6<br />
9<br />
10<br />
14<br />
16<br />
17<br />
Fig.1: <strong>Turboflotor</strong> multi <strong>SL</strong><br />
12 11<br />
15<br />
13<br />
2
Fig 2: Venturi pump Ocean Runner PH 2500 with Needle wheel<br />
1. lid of pump head<br />
2. pressure fitting<br />
3. O ring<br />
4. rubber bearing<br />
5. ceramic shaft<br />
6. washer<br />
7. Rotor (Magnet and<br />
impeller)<br />
8. O-Ring<br />
9. motor<br />
10. air injection nozzle<br />
11. Bayonet<br />
12. filter basket<br />
13. holding plate<br />
14. rubber sucker<br />
15. lid <strong>for</strong> <strong>the</strong> filter basket<br />
16. O-ring <strong>for</strong> <strong>the</strong> air<br />
injection nozzle<br />
3. Theory<br />
Protein skimming is a method of physical water treatment. It uses a phenomenon<br />
known from our daily experience: <strong>the</strong> adhesion of surface active substances to air<br />
water layers. If we add a drop of oil to a water surface, a thin film is produced with a<br />
thickness of only one molecule. Surface active compounds like proteins behave in <strong>the</strong><br />
same way. The <strong>Turboflotor</strong> multi <strong>SL</strong> uses its air bubbles to create a large water<br />
surface <strong>for</strong> <strong>the</strong> waste substances to attach <strong>the</strong>mselves to. These air bubbles are <strong>for</strong>ced<br />
into <strong>the</strong> reactor-pipe in a such a way that <strong>the</strong>y undergo a long contact time within <strong>the</strong><br />
counter current. Enriched with organic substances, <strong>the</strong>y rise to <strong>the</strong> top and <strong>for</strong>m a firm<br />
foam, that is dehydrated and pushed into <strong>the</strong> collection cup. This method removes<br />
organic wastes from <strong>the</strong> aquarium water be<strong>for</strong>e <strong>the</strong>y become part of <strong>the</strong> biological<br />
waste treatment cycle.<br />
The Ocean Runner PH 2500 venturi pump draws <strong>the</strong> water out of <strong>the</strong> aquarium or <strong>the</strong><br />
filter chamber, mixes it in <strong>the</strong> pump housing with air, which is <strong>the</strong>n cut into small air<br />
bubbles by <strong>the</strong><br />
Needle wheel. This water/air mixture is pumped into<br />
<strong>the</strong> reaction pipe where <strong>the</strong> organic substances are taken up by <strong>the</strong> air bubbles. Foam<br />
is <strong>for</strong>med and is pushed into <strong>the</strong> foam cup. The cleaned water flows to <strong>the</strong> bottom of<br />
<strong>the</strong> skimmer and is transported via two transparent tubes on <strong>the</strong> outside of skimmer<br />
back into <strong>the</strong> aquarium or into <strong>the</strong> filter chamber.<br />
3
4. Set-up<br />
The <strong>Turboflotor</strong> multi <strong>SL</strong> is a skimmer,<br />
that can be set up in various ways:<br />
1. As an external skimmer, directly mounted on<br />
<strong>the</strong> aquarium: “Hang on”, (fig.3)<br />
2. For use in <strong>the</strong> cabinet with a<br />
sump or under tank filter system (fig.4)<br />
- next to <strong>the</strong> filter tank<br />
- in <strong>the</strong> filter tank<br />
Fig.3: <strong>Turboflotor</strong> multi <strong>SL</strong><br />
in “Hang on” operation<br />
Set up as an external skimmer on <strong>the</strong> aquarium - Hang on (fig.3)<br />
Assemble <strong>the</strong> necessary parts of <strong>the</strong> skimmer, (see fig.1) It now be can be attached to<br />
<strong>the</strong> aquarium. Look <strong>for</strong> a protected place within easy reach - at <strong>the</strong> side or at <strong>the</strong> back.<br />
The venturi pump (11) is connected with <strong>the</strong> pressure tube (10). The length of <strong>the</strong><br />
flexible tubing (10) should be as short as possible. The pump must be placed directly<br />
below <strong>the</strong> surface, because <strong>the</strong> air intake will decrease if it is mounted deeper. A 6-<br />
mm air tube is connected to <strong>the</strong> air injection nozzle (13) and fixed above <strong>the</strong> water<br />
level, so <strong>the</strong> pump can draw in air. Use <strong>the</strong> full length of <strong>the</strong> air hose, which is<br />
attached to <strong>the</strong> silencer (15).<br />
We recommend securing <strong>the</strong> hose with <strong>the</strong> clips provided. Now <strong>the</strong> skimmer can be<br />
aligned with <strong>the</strong> aquarium. The two screws at <strong>the</strong> bottom of <strong>the</strong> skimmer are adjusted<br />
in such a way that <strong>the</strong> skimmer is hanging safely on <strong>the</strong> aquarium. It is advantageous<br />
if <strong>the</strong> skimmer is not 100% upright, but leaning slightly (5º) to <strong>the</strong> aquarium (Fig.3).<br />
The skimmer is <strong>the</strong>n not only hanging more safely, but also back-flow of water from<br />
<strong>the</strong> outflow box over <strong>the</strong> aquarium frame is prevented. Both adjusting screws at <strong>the</strong><br />
bottom are supplied with silicone suction cups <strong>for</strong> increased safety.<br />
4
16<br />
17<br />
1<br />
8<br />
2<br />
14<br />
15<br />
9<br />
5<br />
10<br />
6<br />
13<br />
11<br />
Fig.4: <strong>Turboflotor</strong> multi <strong>SL</strong>, Hang on, tilted at 5º<br />
The skimmer is now ready <strong>for</strong> use and can be started.<br />
Set up: beside or inside <strong>the</strong> filter tank of a sump or under tank filter system<br />
The <strong>Turboflotor</strong> multi <strong>SL</strong> can also be used in a sump or under tank filter system. It<br />
can be placed ei<strong>the</strong>r in- or outside <strong>the</strong> filter.<br />
See <strong>the</strong> above hang-on procedures <strong>for</strong> installing <strong>the</strong> skimmer on <strong>the</strong> outside of <strong>the</strong><br />
filter tank. It is attached to <strong>the</strong> frame of <strong>the</strong> filter tank. If <strong>the</strong> filter tank is not high<br />
enough, <strong>the</strong> skimmer is placed beside <strong>the</strong> tank. For <strong>the</strong> return flow, outflow boxes<br />
may be used. If <strong>the</strong> water level in <strong>the</strong> filter tank is very low, or <strong>the</strong>re is a shortage of<br />
space in <strong>the</strong> tank, two 90°-elbow fittings may be connected to <strong>the</strong> outlets (7) and <strong>the</strong><br />
water will <strong>the</strong>n directed down to <strong>the</strong> water surface in <strong>the</strong> tank. This avoids splashing<br />
and reduces noise. The venturi pump is fixed inside <strong>the</strong> filter tank, in such a way, that<br />
it will not run dry and that <strong>the</strong> length of <strong>the</strong> pressure tube be kept as short as possible<br />
(fig.4). The pump should be placed close to <strong>the</strong> water surface. To prevent <strong>the</strong> pump<br />
running dry, we recommend using an automatic level controller (e.g. ab-aquaniveau<br />
single) to ensure replacement of evaporated water and to keep <strong>the</strong> water level in <strong>the</strong><br />
filter constant.<br />
5
21<br />
20<br />
1<br />
17<br />
2<br />
16<br />
9<br />
8<br />
18<br />
14<br />
15<br />
5<br />
6<br />
19<br />
13<br />
11<br />
Numbers see Fig.<br />
1<br />
18. filter tank 19. re-circulation pump<br />
20. overflow chamber 21. Return flow into <strong>the</strong> aquarium<br />
Fig.5: <strong>Turboflotor</strong> multi <strong>SL</strong>, set up adjacent to <strong>the</strong> filter tank of a sump or under tank<br />
filter<br />
5. Starting / Per<strong>for</strong>mance<br />
The system can be started when <strong>the</strong> <strong>Turboflotor</strong> is correctly installed. After switching<br />
<strong>the</strong> pump on, air is automatically drawn into <strong>the</strong> skimmer. To minimize <strong>the</strong> noise<br />
level, connect <strong>the</strong> air inlet tube with <strong>the</strong> blue connecting piece of <strong>the</strong> silencer<br />
supplied. Fix <strong>the</strong> silencer with <strong>the</strong> holding device on <strong>the</strong> aquarium or <strong>the</strong> filter system.<br />
The needle wheel breaks <strong>the</strong> air into small bubbles. This method eliminates <strong>the</strong><br />
greater proportion of <strong>the</strong> noise. After <strong>the</strong> initial start, some hours may pass be<strong>for</strong>e <strong>the</strong><br />
first foam is pushed into <strong>the</strong> collection cup. This is due to a reaction between <strong>the</strong><br />
surface of <strong>the</strong> acrylic glass and <strong>the</strong> aquarium water. Equilibrium of electrical charges<br />
takes place. After a maximum of 24 hours, <strong>the</strong> foam should push evenly into <strong>the</strong><br />
collection cup. The quantity of liquid and organic substances is dependent on <strong>the</strong><br />
pollution of <strong>the</strong> aquarium.<br />
6
5. Problems<br />
Adjustments: Due to <strong>the</strong> construction, air and water mixing is automatic, but you<br />
can increase <strong>the</strong> amount of air and water by removing <strong>the</strong> grey reduction piece from<br />
<strong>the</strong> suction side of <strong>the</strong> pump. Normally no adjustment is required but it may be<br />
necessary to alter <strong>the</strong> flow control taps (8) to ensure overpumping does not occur<br />
particularly in <strong>the</strong> start up phase. If still an overflow occurs use <strong>the</strong> 5-cm elongation<br />
between foam cup and skimmer body.<br />
Air bubbles: Reduce <strong>the</strong> length of <strong>the</strong> hose between pump and skimmer. The pump<br />
should be placed close to <strong>the</strong> surface o<strong>the</strong>rwise more air and less water will be sucked<br />
in because of <strong>the</strong> increasing water pressure. Result: Many air bubbles are leaving <strong>the</strong><br />
skimmer, wet foam will fill <strong>the</strong> foam cup in a very short time.<br />
If <strong>the</strong> skimmer is added to an existing aquarium <strong>the</strong>re may be a high concentration of<br />
organic substances already dissolved in <strong>the</strong> water. This results in very tiny bubbles in<br />
<strong>the</strong> skimmer. These tiny bubbles remove <strong>the</strong> organic substances effectively, however<br />
it may be that some of <strong>the</strong>se bubbles are drawn back into <strong>the</strong> aquarium. After a few<br />
days, <strong>the</strong> concentration of organic substances will have decreased to such low levels<br />
that this effect will have gone and <strong>the</strong> water flow is free of air bubbles.<br />
Some types of frozen food may have <strong>the</strong> same effects. It is best to thaw and wash <strong>the</strong><br />
food prior to feeding it to <strong>the</strong> fish. The air bubbles will stop after a short period by<br />
<strong>the</strong>mselves.<br />
Wet foam. With freshly prepared sea water, after using water conditioners or at<br />
extremely high loading, excessive wet foam may be produced. This wet foam is<br />
<strong>for</strong>ced into <strong>the</strong> cup, requiring more frequent emptying than normal. After<br />
approximately one day <strong>the</strong> aquarium load will be normal, and <strong>the</strong> skimmer will<br />
produce <strong>the</strong> correct foam.<br />
Dry foam: Not enough foam or too dry a foam could be an indication that <strong>the</strong> needle<br />
wheel is dirty, or <strong>the</strong> venturi is obstructed. A thorough cleaning is recommended.<br />
Remove <strong>the</strong> hose connection from <strong>the</strong> pressure side of <strong>the</strong> pump. Move <strong>the</strong> flap inside<br />
<strong>the</strong> pump from one side to <strong>the</strong> o<strong>the</strong>r until it can be moved easily (Turn <strong>the</strong> pump<br />
around and shake it. Now you must hear <strong>the</strong> flap. If not, clean it again).<br />
Increase <strong>the</strong> water level inside <strong>the</strong> skimmer with <strong>the</strong> two flow control taps. Take <strong>the</strong><br />
elongation between foam cup and skimmer and/or <strong>the</strong> grey reduction piece from <strong>the</strong><br />
suction side of <strong>the</strong> pump away.<br />
6. Maintenance<br />
The collection cup should be cleaned regularly (daily or weekly, depending on <strong>the</strong><br />
organic load). The reaction pipe of <strong>the</strong> skimmer needs to be cleaned only once or<br />
twice a year. The venturi pump should be also cleaned from time to time. The pump<br />
has to be removed and <strong>the</strong> complete pump housing and <strong>the</strong> Needle wheel flushed with<br />
clean water. The same procedure should be undertaken with <strong>the</strong> air injection nozzle.<br />
Don’t <strong>for</strong>get <strong>the</strong> flap on <strong>the</strong> pressure side.<br />
7
7. Warranty<br />
On <strong>the</strong> <strong>Turboflotor</strong> multi <strong>SL</strong> we guarantee 12 months on material defects. Excluding<br />
all wearing parts. Proof of purchase is <strong>the</strong> original invoice.<br />
warrants only material and workmanship defects. The<br />
warranty will not apply to complaints, which are due to improper installation or miss<br />
use, poor cleaning, frost, calcium deposition or improper repairing.<br />
In our production we use only quality materials. Never<strong>the</strong>less, in case of a justified<br />
complaint, we provide a repair or a replacement of defective parts free of charge. We<br />
reserve <strong>the</strong> right to charge <strong>the</strong> assembly costs. Generally, all warranty claims have to<br />
be treated ei<strong>the</strong>r through an approved service centre or us.<br />
If you make use of <strong>the</strong> warranty, send <strong>the</strong> defective unit or part inclusive <strong>the</strong> proof of<br />
purchase and a complaint report.<br />
We are not liable <strong>for</strong> consequential damages caused by failures of <strong>the</strong> pump.<br />
Complaints due to transport damages can only be handled if <strong>the</strong> damage has been<br />
monitored and confirmed by <strong>the</strong> carrier at <strong>the</strong> time of delivery.<br />
- Technical changes reserved –<br />
GmbH -Gewerbepark 24 – 49143 Bissendorf/Germany 06/03<br />
8