Heat Exchanger Cleaning Procedures - Multistack
Heat Exchanger Cleaning Procedures - Multistack
Heat Exchanger Cleaning Procedures - Multistack

Create successful ePaper yourself
Turn your PDF publications into a flip-book with our unique Google optimized e-Paper software.
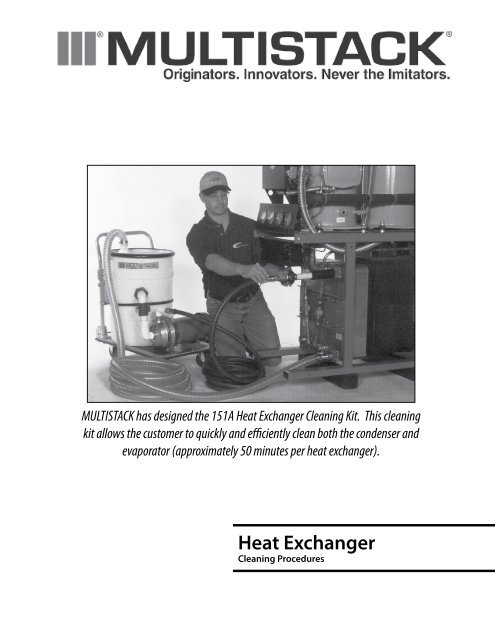
MULTISTACK has designed the 151A <strong>Heat</strong> <strong>Exchanger</strong> <strong>Cleaning</strong> Kit. This cleaning<br />
kit allows the customer to quickly and efficiently clean both the condenser and<br />
evaporator (approximately 50 minutes per heat exchanger).<br />
<strong>Heat</strong> <strong>Exchanger</strong><br />
<strong>Cleaning</strong> <strong>Procedures</strong>
<strong>Cleaning</strong> the MULTISTACK stainless steel brazed plate heat exchanger can be done using FlushGun with and Acid Flush or Detergent Soak. Each solvent offers an<br />
advantage for removing specific types of debris.<br />
Acid Flush Detergent Soak<br />
• Carbonates<br />
• Dirt and Sand Particles<br />
• Sludge<br />
• Fibrous Materials<br />
• Rust<br />
• Grease<br />
• Plastics<br />
WARNING: Do not use hydrochloric or sulfuric acid for cleaning any MULTISTACK <strong>Heat</strong> <strong>Exchanger</strong>s. Make sure any chemicals used are<br />
compatible with copper and stainless steel.<br />
The MULTISTACK <strong>Heat</strong> <strong>Exchanger</strong>s should always be cleaned from the outlet to inlet, by backflushing the particles from the corrugated passages.<br />
1. Victaulic Coupling<br />
2. Remove Condenser Headers<br />
3. Remove Evaporator Headers<br />
PREPARING CHILLER FOR CLEANING<br />
1. Disconnect power to chiller.<br />
2. Isolate Chilled Water Loop by closing the condenser and evaporator isolation valves.<br />
3. Remove end caps and drain the water from the condenser or evaporator (Figure 1).<br />
CAUTION: Be careful not to let the electrical connections get wet. Remove the VICTAULIC COUPLINGS and HEADERS (Figure 1).<br />
Figure 2, 6” Pipe connection.<br />
Figure 1, Removing header from heat exchanger.<br />
Note: Install 6” long pipe to condenser or evaporator inlet, using one victaulic coupling and gasket that you removed from unit (Figure 2).<br />
PREPARE SOLVENT<br />
Detergent<br />
Dish soap and hot water (140º F)<br />
CAUTION: When cleaning difficult types of debris (i.e., grease), allow heat exchanger to soak in detergent 1 ½ hours.<br />
Acid<br />
Phosphoric or sulfamic acid such as Nu-Calgon Imperial Grade Scale Remover part number 4360-84. Prepare acid solvent according to the chemical manufacturers’<br />
directions. If further assistance is required, call <strong>Multistack</strong>, Inc.<br />
CAUTION: When circulating solutions heated to temperatures above 128º F, the module high pressure switches will open. They will need to<br />
reset before starting.<br />
WARNING: Do not use hydrochloric or sulfuric acid for cleaning any MULTISTACK <strong>Heat</strong> <strong>Exchanger</strong>s. Make sure any chemicals used are<br />
compatible with copper and stainless steel.<br />
2
USING FLUSHGUN TO CLEAN INDIVIDUAL HEAT EXCHANGERS<br />
FlushGun kits must be ordered separately and are available in different styles, depending on the heat exchanger model. To obtain the correct FlushGun kit, simply<br />
provide MULTISTACK with the initial purchase order for your modular chiller. The correct kit will be sent to you.<br />
FlushGun A, position mock up.<br />
Figure 3, Inserting FlushGun into heat exchanger.<br />
NOTE:FlushGun kits must be purchased separately.<br />
FlushGun A<br />
1. Connect hose to FlushGun A.<br />
2. Insert FlushGun A into the top outlet side opening of the condenser (bottom outlet of the<br />
evaporator) until it is against the back plate.<br />
A. Tightening the compression nut clockwise until the tool cannot be removed. Open the<br />
hand valve slowly.<br />
B. Apply a minimum of 60 psig water pressure for ten full minutes or until all foreign particles<br />
have been flushed.<br />
Note: If 60 psig is not available, connect a separate pump to compensate.<br />
FlushGun B<br />
1. Loosen the compression nut and remove FlushGun A.<br />
2. Change hose connection to FlushGun B.<br />
3. Insert FlushGun B until it is at the back of the heat exchanger (Figure 3).<br />
4. Repeat Steps A & B.<br />
FlushGun B, position mock up.<br />
FlushGun B<br />
1. Loosen the compression nut and pull the tool out 1 ¼”, measured at the back of the compression nut.<br />
2. Repeat 1 ¼” increments until the entire heat exchanger has been cleaned. The 1 ¼” increments are marked on the FlushGun as 1, 2, 3, and 4.<br />
3. Repeat Steps A & B.<br />
FINAL CLEANING<br />
1. Repeat each of the steps for every heat exchanger until the entire chiller has been flushed.<br />
2. Once the chiller heat exchangers have been cleaned, take a standard garden hose sprayer and insert it into the inlet (condenser bottom/evaporator top) of<br />
the heat exchangers and apply full water pressure until all the debris has been dispersed from the plates.<br />
3. Remove CARTRIDGE FILTERS from headers and clean with soap and wire brush.<br />
4. Rinse CARTRIDGE FILTERS thoroughly with clean water.<br />
5. Remove scale from the headers with a wire brush and replace them. Attach VICTAULICS and reinstall CARTRIDGE FILTER.<br />
6. Backflush the entire chiller with clean water to ensure particles do not break free and enter the heat exchangers.<br />
Note: See MULTISTACK Maintenance Instructions for information on fouling characteristics.<br />
3
1064 Maple Avenue Sparta, WI • P 608-366-2400 • F 608-366-2450<br />
www.multistack.com<br />
F126PM0909