Air Cooled Packaged Module - Multistack
Air Cooled Packaged Module - Multistack
Air Cooled Packaged Module - Multistack

You also want an ePaper? Increase the reach of your titles
YUMPU automatically turns print PDFs into web optimized ePapers that Google loves.
AIR COOLED PACKAGED MODULE<br />
Operations<br />
13.2 Chilled Water System<br />
a. Clean pump strainers and system strainers<br />
b. Remove header caps and clean the ECHW strainers. Please see the 151A Cleaning Kit bulletin #F126 for more details.<br />
c. Check glycol, inhibitor content in system chilled water<br />
13.3 Cabinet and Related Hardware<br />
a. Dry clean electrical panels, remove debris<br />
b. Apply protective coatings or wax if required<br />
c. Remove rust and apply primer and paint if required<br />
14. Compressor Failure<br />
With any chiller system there is always the chance of a compressor failure. In the event of a failure, proper steps should be taken to determine the cause of the<br />
failure.<br />
a. A motor burn out due to a fault in the motor insulation is quite rare. Most burnouts are actually caused by a mechanical condition or lubrication<br />
problems. In the event of a burnout, proper clean up procedures should be followed.<br />
b. Check all electrical components of the circuit (contactors, fuses, wires, etc.)<br />
c. If necessary perform a system clean up. Nu-Calgon RX-11 Flush or Sporlan System Cleaner work well. Follow the cleaning solutions manufacturers<br />
direction<br />
d. Replace the liquid line filter drier with a burnout core.<br />
e. Evacuate the system to a minimum of 500 microns and hold for 20 minutes<br />
f. Charge the circuit with virgin refrigerant. Charge with liquid into the discharge side of the compressor. See refrigerant charge on nameplate data of<br />
unit for proper amount<br />
g. Run the system 2-3 weeks with the burnout filter core. With the King Valve on the receiver closed, replace with standard core drier. Consideration<br />
should be given that the pipe loop will have refrigerant under pressure and consideration must be given to safety.<br />
15. Heat Exchangers<br />
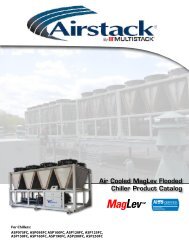
<strong>Air</strong>stack® uses brazed plate stainless steel heat exchangers for all evaporators. Without proper water treatment or due to abuse, heat exchangers can corrode over<br />
time and eventually develop an internal leak. In such an event it would become necessary to replace the heat exchanger.<br />
Following are steps for field replacement of a failed evaporator heat exchanger:<br />
a. If the refrigerant has not been lost on the failed circuit, you should first do a standard refrigerant recovery<br />
b. Begin by isolating the chiller and draining the water/glycol form the loop<br />
c. Remove the 4” round header pipes that attach to the evaporator (if you have a front module). If rear module remove the crossover pipes from the front<br />
module.<br />
d. Cur the refrigerant lines below the elbows and sweat off remaining pipe<br />
e. Remove old evaporator and replace with new one<br />
f. Fit in copper connections and braze, using a minimum 45% silver solder. Purge with Nitrogen while brazing<br />
g. After brazing first perform a pressure check with Nitrogen. Charge the system to 110 psig and hold for 20 minutes. If the system passes the pressure<br />
test, evacuate to a minimum of 500 microns and hold for 20 minutes. Charge the circuit according to the name plate charge.<br />
If the evaporator heat exchanger has caused water to enter into the refrigerant side, the compressor and condenser should also be checked for possible<br />
contamination. If water has entered into the compressor it is recommended the compressor be replaced as removing all the moisture from the oil is very difficult.<br />
Replacement of the condenser, the expansion valve and installation of a liquid line filter drier with a water core cartridge is also recommended. Evacuate the<br />
circuit to a maximum of 500 microns and let stand for 20 minutes. Charge the circuit and run 2-3 weeks with the high water core cartridge and the replace with<br />
a standard core.<br />
Standard condensers on the ASP module are copper coil with aluminum fin type, however other construction materials may be used. Periodic cleaning of the fins<br />
should be done to keep air-born debris from plugging up the fins and causing high pressure conditions. Confirm the specific material used in construction of the<br />
condenser before cleaning to avoid any possible damage. A coil cleaner suitable for copper and aluminum can be used for the standard condensers.<br />
25