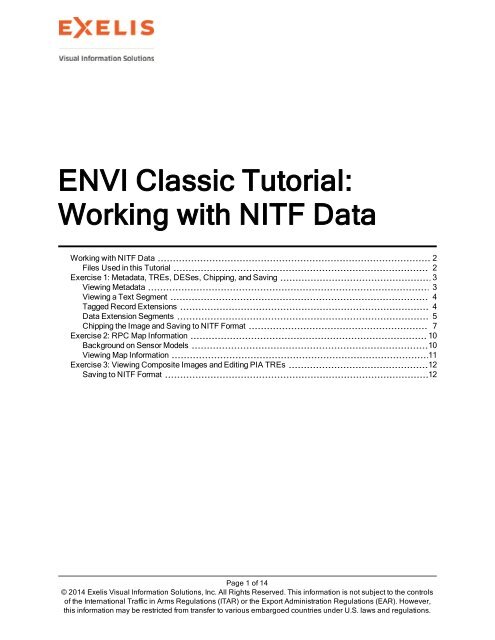
ENVI Classic Working with NITF Data
ENVI Classic Working with NITF Data
ENVI Classic Working with NITF Data

You also want an ePaper? Increase the reach of your titles
YUMPU automatically turns print PDFs into web optimized ePapers that Google loves.
<strong>ENVI</strong> <strong>Classic</strong> Tutorial:<br />
<strong>Working</strong> <strong>with</strong> <strong>NITF</strong> <strong>Data</strong><br />
<strong>Working</strong> <strong>with</strong> <strong>NITF</strong> <strong>Data</strong> 2<br />
Files Used in this Tutorial 2<br />
Exercise 1: Metadata, TREs, DESes, Chipping, and Saving 3<br />
Viewing Metadata 3<br />
Viewing a Text Segment 4<br />
Tagged Record Extensions 4<br />
<strong>Data</strong> Extension Segments 5<br />
Chipping the Image and Saving to <strong>NITF</strong> Format 7<br />
Exercise 2: RPC Map Information 10<br />
Background on Sensor Models 10<br />
Viewing Map Information 11<br />
Exercise 3: Viewing Composite Images and Editing PIA TREs 12<br />
Saving to <strong>NITF</strong> Format 12<br />
Page 1 of 14<br />
© 2014 Exelis Visual Information Solutions, Inc. All Rights Reserved. This information is not subject to the controls<br />
of the International Traffic in Arms Regulations (ITAR) or the Export Administration Regulations (EAR). However,<br />
this information may be restricted from transfer to various embargoed countries under U.S. laws and regulations.
<strong>Working</strong> <strong>with</strong> <strong>NITF</strong> <strong>Data</strong><br />
This tutorial introduces common tasks when working <strong>with</strong> National Imagery Transmission Format<br />
(<strong>NITF</strong>) files. The first exercise shows you how to open a <strong>NITF</strong> 2.1 multiple image segment file; how to<br />
view metadata, Tagged Record Extensions (TREs), and <strong>Data</strong> Extension Segments (DESes); how to chip<br />
(subset) the file; and how to save the chip to <strong>NITF</strong> format. The second exercise demonstrates the use of<br />
rapid positioning coordinate (RPC) map information in georeferencing a <strong>NITF</strong> file. The third exercise<br />
explains how to work <strong>with</strong> composite images and how to edit Profile for Imagery Access (PIA) TREs.<br />
Files Used in this Tutorial<br />
Download data files from the Exelis website.<br />
File<br />
digitalglobe_ncdrd_chip.ntf<br />
target_example.ntf<br />
Description<br />
<strong>NITF</strong> 2.1 Quickbird image of St. Petersburg, Russia<br />
<strong>NITF</strong> 2.1 composite image<br />
The QuickBird file digitalglobe_ncdrd_chip.ntf is courtesy of DigitalGlobe and may not be<br />
reproduced <strong>with</strong>out explicit permission from DigitalGlobe. The file target_example.nitf was<br />
provided by the Joint Interoperability Test Command (JITC) for test purposes.<br />
Page 2 of 14<br />
© 2014 Exelis Visual Information Solutions, Inc. All Rights Reserved. This information is not subject to the controls<br />
of the International Traffic in Arms Regulations (ITAR) or the Export Administration Regulations (EAR). However,<br />
this information may be restricted from transfer to various embargoed countries under U.S. laws and regulations.
Exercise 1: Metadata, TREs, DESes, Chipping,<br />
and Saving<br />
In this exercise, you will open a <strong>NITF</strong> 2.1 file; view metadata, TREs, and DESes; chip (subset) the file;<br />
and save multiple image segments to <strong>NITF</strong> format.<br />
1. From the <strong>ENVI</strong>® <strong>Classic</strong> main menu bar, select File > Open Image File. The Enter <strong>Data</strong><br />
Filenames dialog appears.<br />
2. Select the file digitalglobe_ncdrd_chip.ntf, and click Open. The file appears in the<br />
Available Bands List as two image segments. Image segment #1 is a QuickBird image of St.<br />
Petersburg, Russia, and image segment #2 is an NCDRD cloud image.<br />
3. In the Available Bands List, right-click on the filename digitalglobe_ncdrd_chip.ntf,<br />
and select Load True Color. An RGB version of image segment #1 is loaded into a new display<br />
group.<br />
Viewing Metadata<br />
1. In the Available Bands List, right-click on the filename digitalglobe_ncdrd_chip.ntf<br />
and select View <strong>NITF</strong> Metadata. The <strong>NITF</strong> Metadata Viewer dialog appears. The metadata for<br />
this file is organized into separate entries for the file header, image segments, a text segment, and<br />
<strong>Data</strong> Extension Segments (DESes). Header and segment fields are described in more detail in the<br />
MIL-STD-2500A and MIL-STD-2500C specifications.<br />
2. In the <strong>NITF</strong> Metadata Viewer, click the + symbol next to <strong>NITF</strong> file header to see metadata<br />
describing the file properties.<br />
Page 3 of 14<br />
© 2014 Exelis Visual Information Solutions, Inc. All Rights Reserved. This information is not subject to the controls<br />
of the International Traffic in Arms Regulations (ITAR) or the Export Administration Regulations (EAR). However,<br />
this information may be restricted from transfer to various embargoed countries under U.S. laws and regulations.
3. Click the + symbol next to Image segment #1 and Image segment #2 to see metadata describing<br />
the image characteristics. Image segments contain raster image data, intended for display or<br />
analysis. Under image segment #2, notice that the Image Representation field contains the value<br />
“NODISPLY.” This means the image segment will not be chipped if you save it to <strong>NITF</strong> format.<br />
Viewing a Text Segment<br />
This file contains a text segment, which consists of textual information not intended for graphical<br />
display. Most of the time, text segments are provided to supplement the graphic content in the dataset.<br />
1. In the <strong>NITF</strong> metadata viewer, click the + symbol next to Text segment #1.<br />
2. Click on the line that says Text: . A Text dialog appears <strong>with</strong> the information<br />
contained <strong>with</strong>in the text segment subheader. In this case, the text segment contains the end-user<br />
license agreement from DigitalGlobe.<br />
3. Close the Text dialog.<br />
Tagged Record Extensions<br />
When you click the + symbols to expand the file header, image segments, and DESes in the <strong>NITF</strong><br />
Metadata Viewer, you will notice various colored icons that say “TRE.” These are tagged record<br />
extensions, which contain information about the segment they are in. The file header can contain one or<br />
more TREs that apply to the entire data set, and each segment (image, text, annotation) can also have<br />
one or more TREs associated <strong>with</strong> it. TREs can specify attributes such as processing history,<br />
information about specific targets in an image, collection information, and other types of metadata.<br />
A white TRE icon contains metadata for a TRE that you cannot edit when saving the file. A green icon<br />
contains metadata that you can edit when saving the file.<br />
Each TRE supported by the <strong>NITF</strong>/NSIF Module references an XML definition file that is installed <strong>with</strong><br />
your <strong>ENVI</strong> <strong>Classic</strong> software if you purchased the <strong>NITF</strong>/NSIF Module.<br />
The following figure shows the TREs for Image Segment #1.<br />
When working <strong>with</strong> <strong>NITF</strong> data outside of this tutorial, your data may contain some TREs that do not<br />
have an associated XML file. These TREs are displayed <strong>with</strong> a “Definition Unknown” label next to<br />
their name. Their contents may be viewable if the TREs do not contain binary data. <strong>ENVI</strong> <strong>Classic</strong> will<br />
save these TREs.<br />
Page 4 of 14<br />
© 2014 Exelis Visual Information Solutions, Inc. All Rights Reserved. This information is not subject to the controls<br />
of the International Traffic in Arms Regulations (ITAR) or the Export Administration Regulations (EAR). However,<br />
this information may be restricted from transfer to various embargoed countries under U.S. laws and regulations.
<strong>Data</strong> Extension Segments<br />
In the <strong>NITF</strong> Metadata Viewer, you will also see two blue icons that say “DES.” These are data<br />
extension segments, which are similar to TREs because they contain information that cannot be stored in<br />
other <strong>NITF</strong> segments.<br />
The file you are working <strong>with</strong> is a <strong>NITF</strong> 2.1 Commercial <strong>Data</strong>set Requirements Document (NCDRD)<br />
file that contains two shapefile DESes indicated by the word “CSSHPA.”<br />
1. Click on the + symbol next to DES #1: CSSHPA DES to view its metadata. Then click the +<br />
symbol next to User Defined Subheaders. You will see that this is a CLOUD_SHAPES DES,<br />
which is a polygon shapefile containing cloud locations.<br />
2. In the <strong>NITF</strong> Metadata Viewer, click Load DES Shapefiles. This button is only available when<br />
you open NCDRD files <strong>with</strong> at least one CSSHPA DES. <strong>ENVI</strong> <strong>Classic</strong> extracts the<br />
corresponding shapefile element, converts it to <strong>ENVI</strong> vector format (EVF), and loads it into the<br />
Available Vectors List.<br />
3. In the Available Vectors List, select the layer named digitalglobe_ncdrd_chip_CLOUD_<br />
SHAPES, and click Load Selected. The Load Vectors dialog appears.<br />
4. Select Display #1, and click OK. Polygon vectors overlay the image segment in the display group,<br />
roughly outlinining the boundaries of clouds. The Vector Parameters dialog also appears.<br />
Page 5 of 14<br />
© 2014 Exelis Visual Information Solutions, Inc. All Rights Reserved. This information is not subject to the controls<br />
of the International Traffic in Arms Regulations (ITAR) or the Export Administration Regulations (EAR). However,<br />
this information may be restricted from transfer to various embargoed countries under U.S. laws and regulations.
5. Use the Vector Parameters dialog to change the color of the vector layer to another color.<br />
6. In the <strong>NITF</strong> Metadata Viewer, click on the + symbol next to DES #2: CSSHPA DES to view its<br />
metadata. Then click the + symbol next to User Defined Subheaders. You will see that this is an<br />
IMAGE_SHAPE DES, which is a single-polygon shapefile defining the original image extent.<br />
7. When you are finished, close the Available Vectors List, Vector Parameters, and <strong>NITF</strong> Metadata<br />
Viewer dialogs. The vector shapefiles disappear from the display group. (If you want to view<br />
Page 6 of 14<br />
© 2014 Exelis Visual Information Solutions, Inc. All Rights Reserved. This information is not subject to the controls<br />
of the International Traffic in Arms Regulations (ITAR) or the Export Administration Regulations (EAR). However,<br />
this information may be restricted from transfer to various embargoed countries under U.S. laws and regulations.
them again in the future, you can select Vector > Available Vectors List from the <strong>ENVI</strong> <strong>Classic</strong><br />
main menu bar, then load the desired vectors to the display group.)<br />
Chipping the Image and Saving to <strong>NITF</strong> Format<br />
In these steps, you will attempt to chip (subset) both image segments and output them to <strong>NITF</strong> format.<br />
1. From the <strong>ENVI</strong> <strong>Classic</strong> main menu bar, select File > Save File As > <strong>NITF</strong>. The Select <strong>NITF</strong><br />
Output File dialog appears. The left side of the dialog lists both image segments associated <strong>with</strong><br />
the file.<br />
2. Select the image segment named digitalglobe_ncdrd_chip.ntf M1043BFF00.<br />
Information about the file is displayed, along <strong>with</strong> Spatial Subset and Spectral Subset buttons and<br />
an All Image Segments check box.<br />
3. Click to enable the All Image Segments check box to select both image segments for saving.<br />
Special rules apply when saving any <strong>NITF</strong> image <strong>with</strong> multiple image segments:<br />
• You can save one or all of the image segments to an output <strong>NITF</strong> file. If you have three<br />
or more image segments, you cannot use Ctrl-click to select multiple image segments.<br />
If you hold down the Shift key and select another segment, the last segment you<br />
selected is highlighted (not all segments).<br />
• You cannot create a <strong>NITF</strong> file <strong>with</strong> multiple image segments if the input file does not<br />
contain multiple image segments.<br />
• The Spectral Subset button is not available if all segments are selected.<br />
• If you select all image segments and uncheck All Image Segments, the previously<br />
selected image segment is selected.<br />
• You can edit multiple image segment metadata the same was as single-image output.<br />
• You cannot save image segments containing masks to an output <strong>NITF</strong> file.<br />
• You cannot change the <strong>NITF</strong> file version or compression parameters when saving<br />
multiple image segments.<br />
4. Click Spatial Subset. The Select Spatial Subset dialog appears.<br />
5. Click Image. The Subset by Image dialog appears.<br />
6. Leave the Samples and Lines values at 400, and move the red box to any location <strong>with</strong>in the<br />
image. Click OK.<br />
7. Click OK on the Select Spatial Subset dialog and the Select <strong>NITF</strong> Output File dialog. The <strong>NITF</strong><br />
Output Parameters dialog appears.<br />
8. Select an output filename and click OK. After processing is complete, the output file (and its<br />
Page 7 of 14<br />
© 2014 Exelis Visual Information Solutions, Inc. All Rights Reserved. This information is not subject to the controls<br />
of the International Traffic in Arms Regulations (ITAR) or the Export Administration Regulations (EAR). However,<br />
this information may be restricted from transfer to various embargoed countries under U.S. laws and regulations.
associated image segments) are added to the Available Bands List.<br />
Examining the Output<br />
1. In the Available Bands List, right-click on Image Segment #2 of your chipped image and select<br />
Load Band to New Display. Note that image segment #2 (the NCDRD cloud image) was not<br />
chipped upon output because the Image Representation metadata value was “NODISPLY” (in the<br />
original image).<br />
2. Close Display #2 (containing Image Segment #2).<br />
3. In the Available Bands List, right-click on the new filename and click Load True Color to<br />
. In the next step, you will use <strong>ENVI</strong>’s Dynamic Overlay feature to compare the original<br />
(unchipped) image in Display #1 to the chipped image in Display #2.<br />
4. From any display group menu bar, select Tools > Link > Link Displays. The Link Displays<br />
dialog appears.<br />
5. Ensure that the Display #1 and Display #2 toggle buttons are both set to Yes. Also ensure the<br />
Dynamic Overlay toggle button is set to On. Click OK.<br />
6. Click in one of the Image windows to toggle between the original (unchipped) image and the<br />
chipped image. Notice the color differences between the two images. <strong>ENVI</strong> <strong>Classic</strong><br />
automatically assigned a default 2% linear stretch to the unchipped image, but not to the chipped<br />
image that you saved.<br />
Viewing the Output Metadata<br />
1. In the Available Bands List, right-click on the new filename, and select View <strong>NITF</strong> Metadata.<br />
The <strong>NITF</strong> Metadata Viewer dialog appears.<br />
2. Browse through the metadata and notice that <strong>ENVI</strong> <strong>Classic</strong> retained the input metadata, TREs,<br />
and DESes. An exception is that some fields in the image and file header metadata were updated<br />
to indicate processing changes to the file upon chipping. Also notice that <strong>ENVI</strong> <strong>Classic</strong> added an<br />
ICHIPB TRE to Image Segment #1, which indicates the image was chipped.<br />
Page 8 of 14<br />
© 2014 Exelis Visual Information Solutions, Inc. All Rights Reserved. This information is not subject to the controls<br />
of the International Traffic in Arms Regulations (ITAR) or the Export Administration Regulations (EAR). However,<br />
this information may be restricted from transfer to various embargoed countries under U.S. laws and regulations.
If you click the + symbol to expand the <strong>NITF</strong> file header metadata, you will see the Originating<br />
Station ID, Originator’s Name, and Originator’s Phone fields were changed to the defaults set in<br />
the <strong>NITF</strong> configuration file.<br />
On Windows, the <strong>NITF</strong> configuration file is located in C:\Program<br />
Files\Exelis\IDLxx\products\envixx\menu\nitf.cfg.<br />
On Unix, the file is located in<br />
/usr/local/exelis/idlxx/products/envixx/menu/nitf.cfg.<br />
3. Click Load DES Shapefiles.<br />
4. In the Available Vectors List, select the CLOUD_SHAPES layer corresponding to the output file<br />
you created. Click Load Selected. The Load Vectors dialog appears.<br />
5. Select New Vector Window, and click OK. Note the full extent of the DES shapefile. It was not<br />
chipped upon output.<br />
6. When you are finished, close all dialogs and display groups except for the Available Bands List<br />
and <strong>NITF</strong> Metadata Viewer. You will use the same data file for the next exercise.<br />
Page 9 of 14<br />
© 2014 Exelis Visual Information Solutions, Inc. All Rights Reserved. This information is not subject to the controls<br />
of the International Traffic in Arms Regulations (ITAR) or the Export Administration Regulations (EAR). However,<br />
this information may be restricted from transfer to various embargoed countries under U.S. laws and regulations.
Exercise 2: RPC Map Information<br />
In this exercise, you will learn how the <strong>NITF</strong>/NSIF Module uses RPC map information to georeference<br />
a file. You will open the file digitalglobe_ncdrd_chip.ntf (which contains RPC map<br />
information) and view the map information used for georeferencing.<br />
The <strong>NITF</strong>/NSIF Module uses a variety of different map information for georeferencing:<br />
• Replacement sensor model (RSM) TREs<br />
• Rapid positioning capability (RPC) TREs<br />
• DIGEST GeoSDE TREs (MAPLOB, PRJPSB, and GEOPSB TREs)<br />
• IGEOLO image header field<br />
If a <strong>NITF</strong> file contains RPC or RSM map information, the <strong>NITF</strong>/NSIF Module in <strong>ENVI</strong> <strong>Classic</strong> uses<br />
that information to georeference the file. If a file does not contain RPCs or RSMs, <strong>ENVI</strong> <strong>Classic</strong> looks<br />
for the items in the above list (in that order) to georeference the file. This exercise focuses on the use of<br />
RPCs only.<br />
For a full discussion on how <strong>ENVI</strong> <strong>Classic</strong> uses non-standard projections such as affine map<br />
transformations, RPCs, and RSMs, see the <strong>ENVI</strong> <strong>Classic</strong> Help.<br />
Background on Sensor Models<br />
Sensor models are a type of map information used to define the physical relationship between image<br />
coordinates and ground coordinates. A sensor model is a mathematical model that replaces the rigorous<br />
(physical) sensor model associated <strong>with</strong> a specific sensor by representing the model’s ground-to-image<br />
relationship. It is used to map a 3D ground point to a 2D image point. Various commercial spaceborne<br />
image providers utilize replacement sensor models, particularly RPCs, which are one type. Two sensor<br />
models that <strong>ENVI</strong> <strong>Classic</strong> uses are RPCs and RSMs. This tutorial only discusses the use of RPCs.<br />
RPCs<br />
Rational polynomial coefficients (RPCs) are one type of sensor model. RPCs are not the same as a map<br />
projection; rather, they model the ground-to-image relationship as a third-order, rational, ground-to-image<br />
polynomial. You can use RPCs to perform orthorectification and DEM extraction in <strong>ENVI</strong> <strong>Classic</strong>.<br />
QuickBird data include pre-computed RPCs <strong>with</strong> the imagery. If your file has RPC information, you can<br />
automatically derive RPC-based geolocation information for individual pixels in an image. This method<br />
is not as geographically accurate as performing a full orthorectification, but it is less computationally and<br />
disk-space intensive.<br />
If your image file has pre-computed RPC information, <strong>ENVI</strong> <strong>Classic</strong> uses the mean elevation value used<br />
in the RPC transformation for the entire image. However, you can significantly increase the geolocation<br />
accuracy of the image if you associate the image <strong>with</strong> a DEM.<br />
Page 10 of 14<br />
© 2014 Exelis Visual Information Solutions, Inc. All Rights Reserved. This information is not subject to the controls<br />
of the International Traffic in Arms Regulations (ITAR) or the Export Administration Regulations (EAR). However,<br />
this information may be restricted from transfer to various embargoed countries under U.S. laws and regulations.
The <strong>NITF</strong>/NSIF Module reads RPC information from a <strong>NITF</strong> file and creates an RPC00A or RPC00B<br />
TRE. If either of these TREs exists in a <strong>NITF</strong> file, <strong>ENVI</strong> <strong>Classic</strong> uses the RPC model to emulate a<br />
projection by default. The projection description includes the string *RPC* prior to the name of the<br />
coordinate system in which the image resides.<br />
Viewing Map Information<br />
1. In the <strong>NITF</strong> Metadata Viewer dialog, click the + symbol next to Image segment #1<br />
(digitalglobe_ncdrd_chip.ntf) to expand its contents.<br />
2. Scroll until you see the RPC00B TRE. Click the + symbol next to this TRE to expand its contents.<br />
All of the information here was derived from the RPC map information provided <strong>with</strong> the<br />
QuickBird image of St. Petersburg. <strong>ENVI</strong> <strong>Classic</strong> had read this information into an RPC00B TRE<br />
and georeferenced the file using the coefficients shown here.<br />
3. Click Cancel in the <strong>NITF</strong> Metadata Viewer dialog.<br />
4. In the Available Bands List, you should see a Map Information icon under digitalglobe_<br />
ncdrd_chip.ntf. This indicates that the file is georeferenced. Click the + symbol to expand<br />
its contents. The Proj field shows that RPCs are used to emulate a Geographic Lat/Lon projection.<br />
5. In the Available Bands List, right-click on digitalglobe_ncdrd_chip.ntf, and select<br />
Load True Color.<br />
6. Double-click in the Image window to display the Cursor Location/Value tool.<br />
7. Move around the image and note how <strong>ENVI</strong> <strong>Classic</strong> displays geographic latitude and longitude<br />
coordinates. Also note that the Cursor Location/Value tool shows the Projection as *RPC*<br />
Geographic Lat/Lon.<br />
8. When you are finished, select File > Close All Files from the <strong>ENVI</strong> <strong>Classic</strong> main menu bar, then<br />
click Yes to close all files.<br />
Page 11 of 14<br />
© 2014 Exelis Visual Information Solutions, Inc. All Rights Reserved. This information is not subject to the controls<br />
of the International Traffic in Arms Regulations (ITAR) or the Export Administration Regulations (EAR). However,<br />
this information may be restricted from transfer to various embargoed countries under U.S. laws and regulations.
Exercise 3: Viewing Composite Images and Editing<br />
PIA TREs<br />
In this exercise, you will learn about composite images and how to edit Profile for Imagery Access<br />
(PIA) TREs when saving a <strong>NITF</strong> file.<br />
1. From the <strong>ENVI</strong> <strong>Classic</strong> main menu bar, select File > Open Image File. The Enter <strong>Data</strong><br />
Filenames dialog appears.<br />
2. Select the file target_example.ntf, and click Open. This is a composite image consisting<br />
of two image segments and various annotation segments. The first entry that appears in the<br />
Available Bands List is the RGB composite image. The next two entries are the image segments<br />
that make up the composite image.<br />
3. Click Load RGB. The composite image is loaded to a new display group.<br />
4. In the Available Bands List, right-click on Image Segment #1 and select Load Band to New<br />
Display. The first image segment appears in a new display group.<br />
5. Double-click inside the Image Window in Display #1 (composite image). The Cursor<br />
Location/Value dialog displays. Move your cursor around the composite image, then around the<br />
corresponding image segment (for the same location). Note that the composite image does not<br />
display geographic information, but the image segment does. The composite image is simply a<br />
graphical depiction of the individual image and annotation segments, but it does not provide map<br />
information.<br />
Saving to <strong>NITF</strong> Format<br />
1. From the <strong>ENVI</strong> <strong>Classic</strong> main menu bar, select File > Save File As > <strong>NITF</strong>. The Select <strong>NITF</strong><br />
Output File dialog appears.<br />
2. Select the COMPOSITE image for output. Notice that all of the image segments are selected for<br />
output when you select the composite image. The All Image Segments check box is also<br />
automatically checked.<br />
3. Click OK. The <strong>NITF</strong> Output Parameters dialog appears.<br />
4. Click Edit <strong>NITF</strong> Metadata. The <strong>NITF</strong> Metadata Editor dialog appears.<br />
Adding PIA TREs<br />
The <strong>NITF</strong> Metadata Editor lets you add or delete Profile for Imagery Access and Profile for Imagery<br />
Archive (PIA) TREs, which hold information required by the Standards Profile for Imagery Access<br />
(SPIA). A variety of government agencies require these TREs in <strong>NITF</strong> image products. In this step, you<br />
will simulate adding a Profile for Imagery Access Target Descriptive (PIATGB) TRE to mark a target<br />
of interest in the data.<br />
Page 12 of 14<br />
© 2014 Exelis Visual Information Solutions, Inc. All Rights Reserved. This information is not subject to the controls<br />
of the International Traffic in Arms Regulations (ITAR) or the Export Administration Regulations (EAR). However,<br />
this information may be restricted from transfer to various embargoed countries under U.S. laws and regulations.
1. In the <strong>NITF</strong> Metadata Editor, select Image segment #1 and click Add PIA Tags. The Add PIA<br />
Tags dialog appears.<br />
2. Change the value for PIATGB (PIA Target Tag) to 1.<br />
3. Click OK. The metadata under Image segment #1 expands in the <strong>NITF</strong> Metadata Editor. A new<br />
green TRE symbol appears at the bottom of the metadata.<br />
4. Click the + symbol to expand the new TRE.<br />
5. Double-click on any of the empty fields such as Target UTM. A text entry dialog appears.<br />
6. Enter your own text and click OK. A text entry dialog for the next PIATGB TRE metadata field<br />
appears.<br />
7. Continue adding your own values for the PIATGB TRE metadata in this manner.<br />
Page 13 of 14<br />
© 2014 Exelis Visual Information Solutions, Inc. All Rights Reserved. This information is not subject to the controls<br />
of the International Traffic in Arms Regulations (ITAR) or the Export Administration Regulations (EAR). However,<br />
this information may be restricted from transfer to various embargoed countries under U.S. laws and regulations.
8. Click OK in the <strong>NITF</strong> Metadata Editor. <strong>ENVI</strong> <strong>Classic</strong> validates your entry and issues an error<br />
message if you entered incorrect data.<br />
9. In the <strong>NITF</strong> Output Parameters dialog, enter an output filename, and click OK.<br />
10. When the output file appears in the Available Bands List, right-click on its filename and select<br />
View <strong>NITF</strong> Metadata.<br />
11. Examine the metadata in the output file. You should see the new PIATGB TRE metadata.<br />
Copyright Notice:<br />
<strong>ENVI</strong> <strong>Classic</strong> is a registered trademark of Exelis Inc.<br />
QUAC and FLAASH are registered trademarks of Spectral Sciences, Inc.<br />
Page 14 of 14<br />
© 2014 Exelis Visual Information Solutions, Inc. All Rights Reserved. This information is not subject to the controls<br />
of the International Traffic in Arms Regulations (ITAR) or the Export Administration Regulations (EAR). However,<br />
this information may be restricted from transfer to various embargoed countries under U.S. laws and regulations.