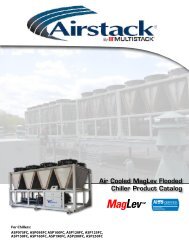
Water-to-Water Heat Pump - Multistack
Water-to-Water Heat Pump - Multistack
Water-to-Water Heat Pump - Multistack

You also want an ePaper? Increase the reach of your titles
YUMPU automatically turns print PDFs into web optimized ePapers that Google loves.
<strong>Water</strong>-<strong>to</strong>-<strong>Water</strong> <strong>Heat</strong> <strong>Pump</strong><br />
Operation Manual
Table of Contents<br />
1.0 Chiller Identification<br />
1.1 <strong>Water</strong> Cooled<br />
1.2 Serial Number<br />
2.0 Theory of Operation<br />
3.0 <strong>Water</strong> Treatment<br />
4.0 Flow Protection<br />
5.0 System <strong>Water</strong> Volume<br />
6.0 Condenser <strong>Water</strong> Temperature Control<br />
7.0 Refrigerant Relief and Moni<strong>to</strong>ring<br />
8.0 Electrical Data<br />
8.1 Single Module<br />
9.0 Components<br />
9.1 Master Control<br />
9.2 Low Voltage<br />
9.3 High Voltage<br />
9.4 Compressors<br />
9.5 <strong>Water</strong> Connections<br />
9.6 Expansion Valve<br />
9.7 Variable Flow<br />
9.8 ISO Valve<br />
9.9 HGBP<br />
9.10 Nameplate<br />
10 Fac<strong>to</strong>ry Setup<br />
11 Daily Log<br />
12.0 Pressure Readings<br />
13.0 Strainer Cleaning<br />
14.0 Refrigerant Charge<br />
15.0 Filter Driers<br />
16.0 Superheat / Subcooling<br />
17.0 Pressure Relief<br />
18.0 Annual Maintenance<br />
19.0 Compressors<br />
20.0 <strong>Heat</strong> Exchangers<br />
21.0 Troubleshooting<br />
2
1.0 Chiller Identification<br />
The module data plate which contains the model and serial number for all MS modules is located on the “B” side electrical box door of each module.<br />
1.1 <strong>Water</strong> Cooled Model Number<br />
Existing<br />
MS 50 X 1 H 1 W 0 R-410A<br />
New<br />
MS 050 X N 1 H 1 R 0 A A -410A<br />
Condenser 6 Refrigerant<br />
Series<br />
Evapora<strong>to</strong>r 5<br />
AHRI Version - if applicable<br />
Application 4<br />
Module Number (1 - single, 2 - multiple)<br />
Voltage 3<br />
Configuration 2<br />
AHRI Certified (C - certified, N - Not certified)<br />
Compressor Type 1<br />
Module Nominal Capacity (10 - 160 <strong>to</strong>ns)<br />
1<br />
B: Bris<strong>to</strong>l, C: Trane Corners<strong>to</strong>ne, R: Bitzer Screw, S: Trane Scroll, T: Danfoss Turbocor, Z: Copeland scroll (old elec), X: Copeland Scroll (ZP), A: Copeland Scroll (ZR)<br />
2<br />
1- Standard, 2- Total access, 3 - Evap extended headers, 4 - Cond extended headers, 5 - Both extended headers, V - others<br />
3<br />
A - 208/3/60, L - 230/3/60, H - 460/3/60, C - 575/3/60, D - 200/3/50, E - 400/3/50, F - 380/3/60, S - 220/230/1/60, V - other<br />
4<br />
C - Single module temp controller, A-Air Cooled split, D - Cond unit, F - Fluid cooler (high temp),H - <strong>Heat</strong> recovery, R - <strong>Heat</strong> pump, W - <strong>Water</strong> cooled<br />
5<br />
A - Brazed SS, B - Brazed SMO, C- S&T copper, D - S&T cu-Ni, V - Other<br />
6<br />
A - Brazed SS, B - Brazed SMO, C- S&T copper, D - S&T cu-Ni, E - Double wall brazed, V - Other<br />
2.0 Theory of Operation<br />
The <strong>Multistack</strong> <strong>Heat</strong> <strong>Pump</strong> provides chilled or heated water <strong>to</strong> an external load based off of the Load Return <strong>Water</strong> Temperature <strong>to</strong> the <strong>Multistack</strong> Master Control. When<br />
the Entering Load <strong>Water</strong> sensor sends the signal <strong>to</strong> the Master Control that heating or cooling is needed, compressors will begin <strong>to</strong> start producing heated or chilled<br />
water. The point at which the ELW temperature calls for compressors <strong>to</strong> start is determined by the Up Setpoint and the Variable Setpoint setting in the System Variables<br />
menu of the Master Control. When the ELW sensor senses that the heating or chilled water temperature has dropped below the Set-Point, compressors will begin <strong>to</strong><br />
cycle off.<br />
On modules equipped with modulating butterfly valves on the Load side, each module’s valve will control off of the Leaving Load water Setpoint (Lo Setpoint in System<br />
Variables). The module slave board of each will send a 2-10VDC output <strong>to</strong> each valve actua<strong>to</strong>r <strong>to</strong> modulate the water valve <strong>to</strong> maintain Lo Setpoint. Modules that are in<br />
the OFF Mode will have their valve closed so water will not mix with running modules. For Variable Flow applications you can select <strong>to</strong> keep 1 or more valves open at<br />
all times for minimum flow through the chiller. This is done in the Fac<strong>to</strong>ry Setup Menu. The valve that stays open will always be the lead compressor for that day. This<br />
feature eliminates the need for an external bypass <strong>to</strong> be installed at the chiller.<br />
On the source side, if modulating butterfly valves are used on each module, the controller looks at the Source <strong>Water</strong> PSIG setpoint located in the Fac<strong>to</strong>ry Setup Menu. This<br />
is also a 2-10VDC output each module board sends <strong>to</strong> the valve actua<strong>to</strong>r. Since the controller waits 10 seconds after start of the 1st compressor <strong>to</strong> look for Source <strong>Water</strong><br />
flow no minimum flow in the off mode is needed on the Source side if the condenser pump shuts off when the last module shuts off. If the Source <strong>Pump</strong> stays running<br />
you will need <strong>to</strong> set up the number of valves <strong>to</strong> be open for minimum flow in the Fac<strong>to</strong>ry Setup.<br />
3
3.0 <strong>Water</strong> Treatment<br />
Proper <strong>Water</strong> treatment is essential <strong>to</strong> ensure the peak efficiency and performance of the heat pump. The Source and Load water quality should be kept<br />
within the following parameters <strong>to</strong> prevent any damage <strong>to</strong> the heat exchangers. The use of hydrochloric, sulfuric, and muriatic acids as well as household<br />
bleach can cause stress corrosion <strong>to</strong> the stainless steel in the heat exchangers. Use of these or any other unapproved chemicals is not covered under the<br />
<strong>Multistack</strong> warranty. Chlorides are the most harmful chemical <strong>to</strong> the 316L stainless steel used in the heat exchangers. For installations in areas where<br />
chlorides are high please contact <strong>Multistack</strong> in regards <strong>to</strong> the optional molybdum steel heat exchanger.<br />
<strong>Multistack</strong> <strong>Water</strong> Guidelines<br />
PH > 7 - < 9<br />
TDS<br />
< 1000 ppm<br />
Hardness<br />
30 - 500 ppm<br />
Alkalinity<br />
30 - 500 ppm<br />
Chlorides<br />
< 200 ppm<br />
Sulphates<br />
< 200 ppm<br />
4.0 Flow Protection<br />
Proof of flow on both the Load <strong>Water</strong> and Source <strong>Water</strong> side is required <strong>to</strong> be supplied <strong>to</strong> the Master Control inputs. Flow or DP switches may be used.<br />
Unless special ordered with the heat pump these switches should be field supplied and installed by the contrac<strong>to</strong>r. <strong>Heat</strong> <strong>Pump</strong>s purchased with optional<br />
Load or Source <strong>Water</strong> pump modules do have a DP sensor installed across the pump <strong>to</strong> insure the pump is running. <strong>Multistack</strong> still recommends a flow or<br />
PD switch be installed in the leaving water side for a flow switch and across the inlet and outlet water take-offs of the Load and Source side for a DP switch.<br />
5.0 System <strong>Water</strong> Volume<br />
Chilled and <strong>Heat</strong>ed water systems work <strong>to</strong> remove the thermal gain from the process in which they are cooling or heating. In a properly sized load side<br />
water system, the heat pump will have enough time <strong>to</strong> properly control, respond <strong>to</strong> changes in load, and prevent short cycling of the heat pump. To ensure<br />
the system water volume is adequate, a general rule of thumb is:<br />
7-10 gallons of water per <strong>to</strong>n<br />
or<br />
Acceptable Load <strong>Water</strong> Volume = Load <strong>Water</strong> Design GPM X 3<br />
In the event the system components can’t hold the necessary load water volume, a properly sized load water s<strong>to</strong>rage tank should be added.<br />
6.0 Source <strong>Water</strong> Temperature Control<br />
For installations where in the Cooling Mode leaving source water temperature can be lower than 75 degrees, <strong>Multistack</strong> recommends a means of source<br />
water temperature control be applied. A bypass valve that directs partial heated ground water directly back <strong>to</strong> the chiller without going <strong>to</strong> the ground loop<br />
until the leaving source water can be maintained at a minimum of 75 degrees is one option.<br />
7.0 Pressure Relief Piping and Refrigerant Moni<strong>to</strong>ring<br />
Because of the small amount of refrigerant charge in each module (.6 lbs per <strong>to</strong>n) most modules are exempt from ASHRAE 15 Standard. Unless required by<br />
local code and special ordered with the modules, pressure relief valves are not standard on MSX modules.<br />
8.0 Electrical Data<br />
Field wiring should be done in accordance with all federal, state and local regulations.<br />
1. Breakers, fuses, wire, and wire gauge must be sized and installed per the National Electric Code (NEC).<br />
2. Applied voltage <strong>to</strong> all <strong>Multistack</strong> heat pumps must be ± 10% of the unit’s nameplate voltage.<br />
3. The voltage imbalance between phases must not exceed 2%. According <strong>to</strong> NEMA Standard MG-1-1998, a 2% voltage imbalance will cause a current<br />
imbalance of 6 <strong>to</strong> 10 times the voltage imbalance. It is very important <strong>to</strong> keep the unbalance between electrical phases <strong>to</strong> a minimum.<br />
4. All <strong>Multistack</strong> heat pumps come standard with a single point of connection up <strong>to</strong> 500 Amps. Above 500 Amps, the machine will have dual points of<br />
electrical connection. This feature simplifies the electrical install.<br />
5. It is intended that the main electrical conduit feeding the Power Junction Box be fed from the <strong>to</strong>p, bot<strong>to</strong>m, or left side of the panel when looking<br />
at the panel.<br />
6. Please note that there is a dedicated chiller ground in this panel. This ground must reference a true earth ground.<br />
8.1 Optional Single Module Field Connection<br />
For installations using only 1 module, the Power Junction Box can be deleted. The main electrical feed can connect directly <strong>to</strong> the module’s circuit breaker.<br />
See the installation Manual for further information.<br />
4
9.0 Components<br />
9.1 Master Control Panel<br />
Each heat pump will have 1 Master Control Panel. The Master Control can be set on <strong>to</strong>p of any of the modules. The <strong>to</strong>p panels for the modules have knockouts<br />
available <strong>to</strong> run sensors, cables, and wiring in<strong>to</strong> the bot<strong>to</strong>m of the Master Control. If desired a hole can be drilled in<strong>to</strong> the side of the Master Control <strong>to</strong> wire<br />
in flow sensors, interlock, and BAS wiring. The Master Control has the terminal strip inputs for flow switches, start/s<strong>to</strong>p, alarm output, and phase moni<strong>to</strong>r.<br />
When shipped, the Master Control Panel will contain the system sensors, and the P-Lan communication wire <strong>to</strong> be field installed by the start up technician.<br />
9.2 Module Control Boards and Low Voltage Panel<br />
The module control boards communicate with the Master Control <strong>to</strong> send individual module temperature and pressures <strong>to</strong> the central control. Each Module<br />
has an AUTO/ OFF/ MANUAL switch. Normal operation would be in the AUTO mode. If there is a problem with the Master Control, the selec<strong>to</strong>r switch can be<br />
changed <strong>to</strong> MANUAL <strong>to</strong> control from the individual module leaving load water temperature which would be pre-set through the Master Control.<br />
9.3 High Voltage Panel<br />
The high voltage panel contains each compressors contac<strong>to</strong>rs, disconnects, control relay’s and the module transformer. External <strong>to</strong> the panel is a single<br />
module disconnect that isolates the entire module from the high voltage supply.<br />
9.4 Compressors, Sensors, Switches.<br />
1. Standard modules use two scroll compressors, each with a separate refrigeration circuit.<br />
2. Each compressor has an HP and LP transducer that sends pressures <strong>to</strong> the module slave board as well as an HP switch with a manual reset but<strong>to</strong>n.<br />
3. Transducers are a 0-5V ratiometric type.<br />
4. Compressors have oil level sight glasses. Oil level should be at ¼ - 1/8 full during operation.<br />
5. Each circuit will have its own Leaving Load <strong>Water</strong> Sensor as well as Refrigerant Suction Temperature Sensors.<br />
6. The Master Module has and Entering Load <strong>Water</strong> Sensor.<br />
7. Compressor crankcase heaters are not used as standard on MSX modules.<br />
9.5 Load and Source Side <strong>Water</strong> Connections.<br />
1. <strong>Water</strong> connections <strong>to</strong> the load and source side are standard 6” grooved fittings. The upper header on the Load <strong>Water</strong> side is Entering <strong>Water</strong> <strong>to</strong> the<br />
module. Bot<strong>to</strong>m header is Leaving Load <strong>Water</strong> from the module. The source side is the same.<br />
2. Entering <strong>to</strong> the module is on the <strong>to</strong>p while leaving water is on the bot<strong>to</strong>m. The Entering header on both sides contains a 30 mesh filter strainer <strong>to</strong><br />
prevent debris from entering the brazed plate heat exchangers. This filter should be used as a last means of defense.<br />
3. Proper filtration before the module should be installed for easy access <strong>to</strong> cleaning.<br />
9.6 Expansion Valve, Subcooling, Liquid Line Sight Glass<br />
1. Each circuit on the module has its own thermal expansion valve located between the source side water header pipes. During run testing at the fac<strong>to</strong>ry,<br />
valves are adjusted <strong>to</strong> maintain a 10-12 degree superheat. Superheat should be checked periodically <strong>to</strong> maintain this range.<br />
2. Subcooling should normally be within the 10-15 degree range. No external subcooler is used.<br />
3. Liquid Line sight glasses should show green on the indica<strong>to</strong>r bulb if no moisture is present in the refrigerant circuit. A yellow indica<strong>to</strong>r could indicate<br />
potential moisture. Sight glasses should show full during normal operation. Flashing in the sight glass would indicate possible under charge of the<br />
circuit.<br />
4. See Nameplate Data for refrigerant charge.<br />
9.7 Variable Flow and Power Actuated Butterfly Valves<br />
To accomplish variable flow on either the load or source water side, modules should be special ordered with power actuated butterfly valves. In most<br />
configurations this will increase the length footprint of the modules as valves will need <strong>to</strong> be installed between the heat exchanger and water header pipe<br />
of each module. The valves on each module will open, close, and modulate as compressors cycle on or off. The valves allow flow <strong>to</strong> go through only modules<br />
that are running, therefore pressure drop increases as modules cycle off (closing valves) and allow the pump <strong>to</strong> slow down <strong>to</strong> maintain constant pressure drop.<br />
Control of the variable speed pump needs <strong>to</strong> be done off of the pressure differential between the inlet and outlet of the corresponding load or source water at<br />
the heat pump. Control based off of system pressure will result in erratic temperature control as well as likely faults with operating modules. On the chilled<br />
water side a minimum flow needs <strong>to</strong> be supplied <strong>to</strong> the chiller. In the Fac<strong>to</strong>ry Setup Menu of the Master Control you can select the number of valves <strong>to</strong> be open<br />
all of the time <strong>to</strong> maintain a minimum flow. For further information on variable flow please see the <strong>Multistack</strong> Variable Flow Supplement.<br />
The Variable Setpoint (VSP) also works differently when doing variable flow. Since valves are used <strong>to</strong> isolate each heat exchanger we do not need <strong>to</strong> account<br />
for the mixing effect of modules that are running with modules in the off mode. In the Cooling Mode on a normal application without valves if you have 10<br />
compressors and flow at a true 10 degree Delta T with setpoints of 55 Up and 45 Lo and VSP at 50% your no load point would be 50 degrees. The last module<br />
running would be producing water at 50 in and 40 degree out and mixing with those not ON producing the same temp as system entering (50 deg). The<br />
system LLW temps would then range between 45-50 degrees depending on the number of circuits ON and number OFF. With mo<strong>to</strong>rized butterfly valves<br />
on each module we do not have <strong>to</strong> take in<strong>to</strong> effect the mixed temperature (except for valves programmed <strong>to</strong> be open for minimum flow) as those modules<br />
heat exchanger is isolated. Since the LW pump will be speeding up and down based on a constant chiller DP we should always be producing the same Delta<br />
T’s through modules as we are with the system temps. So if we kept the VSP at 50% the last module would be on at 50 degrees entering water temp and<br />
producing both module and system leaving temp at 40 degrees. If we raise the VSP <strong>to</strong> 80% with the same 55 and 45 degree setpoints the last module would<br />
5
e on at about 53.5 degree entering and then produce both module and system leaving temp at 43.5 degrees. So basically when doing variable flow on the<br />
load water side, a higher VSP is desired <strong>to</strong> maintain closer leaving water temps. In the <strong>Heat</strong>ing Mode it would be just the opposite as return temperature is<br />
lower than supply. Therefore we would want <strong>to</strong> use a low VSP <strong>to</strong> not run <strong>to</strong>o hot of water.<br />
9.8 Optional Isolation Valves<br />
(pho<strong>to</strong>)need from Pete<br />
Manual isolation valves may be ordered as an option with modules. Like the power actuated butterfly valves, the length footprint may increase with isolation<br />
valves. Isolation valves are intended <strong>to</strong> manually isolate water flow <strong>to</strong> heat exchangers. As valves can seize over time it is a good idea <strong>to</strong> exercise them as<br />
part of annual maintenance.<br />
9.9 Optional Hot Gas Bypass.<br />
Not an option on <strong>Heat</strong> <strong>Pump</strong>s.<br />
9.10 Nameplate<br />
Module Nameplates are located on “B” side compressors electrical control box door. Nameplates include phone and address for <strong>Multistack</strong>, model and serial<br />
number (very important <strong>to</strong> supply when calling for service parts or technical support), refrigerant type and charge, and electrical data.<br />
10.0 Fac<strong>to</strong>ry Setup / Commissioning Information:<br />
By going <strong>to</strong> the System Variables Menu and selecting Fac<strong>to</strong>ry Settings you can access the program type and other Fac<strong>to</strong>ry Setup information. This setup is <strong>to</strong><br />
be done by the Authorized startup Technician. When shipped the Setup parameters will be set <strong>to</strong> default. Actual site conditions need <strong>to</strong> be done at startup.<br />
To change these settings you must enter a password when prompted. The password is available <strong>to</strong> Authorized Service technicians by calling tech support at<br />
<strong>Multistack</strong> (608-366-2400).<br />
The Standard program should be used on applications where no glycol is present in the load water side or source water side. In this mode the chilled water<br />
temperature cut out is 34° F.<br />
The Low Temp program should be used in applications that have a minimum of 25% glycol in the source water loop. Cut out on water temperature in this<br />
mode is 20 deg F. Suction temperature cu<strong>to</strong>ut drops <strong>to</strong> 15 deg F.<br />
If glycol is present only in the Source water loop you can choose Low Temp for the Source side and Standard for the Load side.<br />
Refrigerant Type: Choose refrigerant type used in the modules. R410a /R407C / R134a.<br />
Source <strong>Water</strong> Setpoint: If Power Actuated Butterfly Valves are used on the Source side, this value should be set for the desired discharge psig you want <strong>to</strong><br />
maintain. 340 psig should give approximately 95 degree LSW in Cooling. In <strong>Heat</strong>ing Mode the valve should be 100% open.<br />
Variable Flow: Select Enable if doing variable flow on the load or source side or Disable if not. To do variable flow water control valves must be installed on<br />
each module between the water header pipe and heat exchanger<br />
Bypass: Select enable <strong>to</strong> set an adjustable number of valves on <strong>to</strong> be open for minimum flow bybass. Select Load <strong>Water</strong> or Source <strong>Water</strong> Bypass. If no valves<br />
are installed on the module keep this variable in the disable mode.<br />
For information on basic control setup of the modules see the Comput 600 User manual.<br />
11.0 Daily Log Sheet<br />
On the back page of this manual is an information log sheet. The log sheet can be used daily, weekly or as desired <strong>to</strong> record operation characteristics of the<br />
<strong>Heat</strong> <strong>Pump</strong>. The information recorded on the log sheet can also be very helpful for diagnosing potential problems in the system.<br />
6
12.0 Pressure Readings<br />
1. The operating suction and discharge pressures in the system are directly related <strong>to</strong> water flow, Source <strong>Water</strong> temperatures, Load <strong>Water</strong> setpoints, and the<br />
cleanliness of the system. Standard operating conditions for Cooling Mode with 95 degree LSW with 45 degree LLW should be discharge pressure at 325 psig<br />
(102 deg saturated) and suction pressure at 114 psig (38 degree saturated).<br />
2. For <strong>Heat</strong>ing Mode, if operating conditions are 130 deg LLW head pressure should be close <strong>to</strong> 515 psig for R410a.<br />
3. All MSX modules have a high pressure cut out safety device. Each circuit will cut out on HP when the programmed setting limit in the master control is met.<br />
In addition a back up HP cut out switch is installed on each module. The HP cut out is 650 psig for <strong>Heat</strong> <strong>Pump</strong> modules with R-410A. R134a is 365 psig.<br />
4. Each MSX module also has a low pressure safety cut out. The LP cut out is controlled by a setting in the program of the module. The LP cut out for modules<br />
with R-410A is 40 psig. For 134a cut out is 6 psig.<br />
5. If circuits are faulting on HP faults the water side should be checked <strong>to</strong> make sure proper water flow is being supplied <strong>to</strong> the brazed plate heat exchanger<br />
and filters are not clogged.<br />
6. A LP fault is an indication of low refrigerant charge in the system. If a circuit is going out on a LP fault, check the static pressure of the system while the<br />
circuit is in the off mode. If pressures are low check the circuit for possible leaks. The circuit can be pressurized <strong>to</strong> 15 psig with refrigerant and <strong>to</strong>pped <strong>to</strong> 160<br />
psig with dry Nitrogen.<br />
13.0 Strainer Cleaning, <strong>Heat</strong> Exchanger Cleaning<br />
1. All <strong>Multistack</strong> modules have a 30-mesh filter cartridge in the Source and Load inlet headers. The purpose for the filter cartridge is <strong>to</strong> keep debris from entering<br />
the heat exchanger. An external “Y” or basket type system strainer should also be installed as a pre-filter <strong>to</strong> the <strong>Multistack</strong> strainers.<br />
2. There is no set time for cleaning the filter cartridges. The frequency of this process is dependant on the water quality in the load and / or source loop.<br />
3. The effect of debris being built up in the Load or Source water inlet filter cartridge will be nuisance HP (high pressure) or Low Suction Temperature faults.<br />
By checking the pressure differential between the inlet and outlet of the water side, an indication can be determined if the filters are contaminated. Refer<br />
<strong>to</strong> the Product Data Catalog for correct pressure drop of your model. For a MS70X module with a 10° F Delta T, the Load water 16’ / 7 psi. To keep HP faults<br />
from repeating, the filters will need <strong>to</strong> be pulled. If HP faults still occur after cleaning the filter cartridges the load or source pump should be checked for<br />
proper flow. If flow is not a problem the heat exchangers may need <strong>to</strong> be cleaned. Refer <strong>to</strong> the <strong>Heat</strong> Exchanger Cleaning Bulletin available from <strong>Multistack</strong>.<br />
Following is the procedure for removing and cleaning the filter cartridges on the condenser side.<br />
1. Turn off the <strong>Heat</strong> <strong>Pump</strong>s, shut down the Source or Load pump, and close the butterfly / gate valves <strong>to</strong> the source side heat exchangers.<br />
2. Drain the water remaining in the load or source header pipes. You can do this by opening the drain valve in the supplied pipe stubs.<br />
3. Remove all filters in the <strong>to</strong>p Source or Load header pipes. You may need <strong>to</strong> fabricate a <strong>to</strong>ol <strong>to</strong> hook on<strong>to</strong> and pull the strainers out through the blank end.<br />
4. Slowly open the <strong>to</strong>p butterfly / gate valve and allow water <strong>to</strong> flow through the header pipes and on<strong>to</strong> the floor for approximately 30 seconds. This will push<br />
out any debris that was trapped in the bot<strong>to</strong>m of the heat exchanger as the filters were removed<br />
5. Clean the filters with hose, power washer, or wire brush as needed and re-install. Slide filters in until you hit the filter s<strong>to</strong>p ring on the first module. Some<br />
people like <strong>to</strong> keep an extra set of strainers for quick re-installation. These filters are available for purchase through your local <strong>Multistack</strong> Representative.<br />
6. Close the system by installing any grooved fitting clamps previously removed.<br />
7. Open the ¼” petcock bleed valves on the pipe stubs.<br />
8. Re-fill the system by opening the bot<strong>to</strong>m butterfly / gate valve and filling from the bot<strong>to</strong>m up. Close the ¼” petcock valves and open the <strong>to</strong>p butterfly / gate<br />
valve after the air has been bled from the system.<br />
9. Restart the pump. Bleed any remaining air in the system once the pump has started and re-start the chiller<br />
If circuits are faulting on Low Suction Temperature, or Low Load <strong>Water</strong> Temperature the Load <strong>Water</strong> inlet filter cartridge should be checked. The strainers are located<br />
in the <strong>to</strong>p header on the LW side also. If the strainers are clean the fault is most likely being caused by a low flow condition or <strong>to</strong> low of set-points in the master<br />
control. If these possibilities are eliminated the Load Side heat exchangers may need cleaning.<br />
14.0 Compressor Oil Level<br />
All compressors used on MS modules have an oil level sight glass on each compressor. Each module is run tested and has the oil level set at the fac<strong>to</strong>ry. Following<br />
are fac<strong>to</strong>ry oil level settings and recommendations.<br />
1. Scroll Compressors with R-410A are all single stage and oil level is set at 1/8 – ¼ full sight glass.<br />
2. The compressor’s uses a POE oil. Use Copeland type 998-E022 or Nu Calgon 32-3MA<br />
3. Fac<strong>to</strong>ry oil charge volume for each compressor can be found in the Product Data Catalog.<br />
7
15.0 Refrigerant Charge / Evacuation<br />
All MS modules are fac<strong>to</strong>ry charged with the recommended refrigerant volume. Prior <strong>to</strong> charging, each circuit is evacuated <strong>to</strong> a maximum of 150 microns and held 15<br />
minutes. The proper refrigerant charge for each module can be found on the module data plate.<br />
For proper charge on water-cooled machines the circuit should be charged until the sight glass just clears.<br />
Model<br />
Refrigerant (lbs. per circuit)<br />
MS70XR 22<br />
MS50XR 16<br />
MS30XR 12<br />
MS20XR 10<br />
MS15XR<br />
NEED INFO FROM PETE<br />
16.0 Filter Driers<br />
<strong>Multistack</strong> modules are built with very short piping runs <strong>to</strong> the major components. Only a micro refrigerant charge (.6 of a lb. per <strong>to</strong>n) is used, and all circuits are<br />
evacuated <strong>to</strong> 150 microns. For this reason a liquid line filter drier is not fac<strong>to</strong>ry installed in the unit.<br />
When changing a major component in the system, a replaceable core suction line filter kit can be added <strong>to</strong> reduce contamination. The suction filter kit can be purchased<br />
from <strong>Multistack</strong> through your local <strong>Multistack</strong> Representative. Installation instructions and drawings are also available from <strong>Multistack</strong>.<br />
17.0 Superheat / Subcooling<br />
<strong>Multistack</strong> uses a mechanical type expansion valve on all modules. By turning the valve adjustment clockwise superheat is increased.<br />
1. On MS modules, superheat is set at the fac<strong>to</strong>ry during the run test. Superheat is set for 10 – 12 degrees during the test run.<br />
2. Sub cooling is necessary in the system <strong>to</strong> prevent flash gas as the refrigerant enters the expansion valve. <strong>Multistack</strong> condensers are sized so that sub-cooling of<br />
the liquid refrigerant will take place with no separate sub-cooler being needed. The general range of sub-cooling seen is 10- 20 degrees.<br />
18.0 Pressure Relief Valve<br />
MS modules do not have pressure relief valves as a standard component. If desired or required by local code, pressure relief can be added as an option.<br />
19.0 Annual Maintenance<br />
Most of the annual maintenance requirements for <strong>Multistack</strong> Chillers involve proper shut-down of the machine, and cleaning of the heat exchangers. The Preventative<br />
Maintenance bulletin and <strong>Heat</strong> Exchanger Cleaning Procedures bulletin describe the recommended procedures for both processes. <strong>Multistack</strong> has available the 151A<br />
Cleaning Kit <strong>to</strong> assist with this process. Please see the 151A Cleaning Kit bulletin for more details.<br />
Other annual checks that should be done:<br />
1. A check of all electrical components (contac<strong>to</strong>rs, fuses, relays, etc...) should be performed once a year for any signs of excessive wear. Check for tight connections<br />
at this time.<br />
2. Superheat, pressure gauges, oil levels, master control condition, and sensor accuracy should also be checked.<br />
20.0 Compressors<br />
With any chiller system there is always the chance of a compressor failure. In the event of a failure, proper steps should be taken <strong>to</strong> determine the cause of the failure.<br />
A mo<strong>to</strong>r burn due <strong>to</strong> a fault in the mo<strong>to</strong>r insulation is quite rare. Most burnouts are actually caused by a mechanical condition or lubrication problems. In the event of<br />
a burnout, proper clean up procedures should be followed.<br />
1. Check all electrical components of the circuit (contac<strong>to</strong>rs, fuses, wires, etc.)<br />
2. If necessary, do a system clean up. Nu-Calgon RX-11 flush, Nu Calgon RX acid Scavenger, or Sporlan System Cleaner work well.<br />
3. Install a suction filter drier with burnout core.<br />
4. Evacuate the system <strong>to</strong> a minimum of 500 microns and hold for 20 minutes.<br />
5. Charge the circuit with virgin refrigerant. Charge with liquid in<strong>to</strong> the discharge side. See refrigerant charge on nameplate data of unit.<br />
6. Run the system 2-3 weeks with burnout filter core. Replace with standard core drier
21.0 <strong>Heat</strong> Exchangers<br />
<strong>Multistack</strong> uses brazed plate, stainless-steel heat exchangers for all Load and Source side modules. Without proper water treatment or due <strong>to</strong> abuse, heat exchangers,<br />
especially those on an open <strong>to</strong>wer can corrode over time and eventually develop an internal leak. In such an event it would become necessary <strong>to</strong> replace the heat<br />
exchanger.<br />
Following are the steps <strong>to</strong> test for a failed condenser or evapora<strong>to</strong>r heat exchanger.<br />
1. Shut down the <strong>Heat</strong> <strong>Pump</strong>, valve off, and drain water out of the side <strong>to</strong> be tested.<br />
2. Remove the grooved fitting connections and header pipes for the module with the suspected leak.<br />
3. Place some type of seal over the water connections such as balloons or plastic gloves.<br />
4. Pressurize the refrigerant side with Nitrogen up <strong>to</strong> 160 psig. If there is a water-<strong>to</strong>-refrigerant leak, the seals on the water side should expand.<br />
Following are the steps for field replacement of a failed heat exchanger.<br />
1. If the refrigerant has not been lost on the failed circuit, you should first do a standard refrigerant recovery.<br />
2. Begin by isolating the <strong>Heat</strong> <strong>Pump</strong> and draining water from the side <strong>to</strong> be worked on.<br />
3. Remove the 6” water header pipes by unbolting the grooved couplings.<br />
4. Support the underneath of the defective heat exchanger and the other circuit heat exchanger if applicable. A 2x4 and 1x4 should fit perfectly underneath.<br />
5. Using a Sawz-All you can now cut the refrigerant piping <strong>to</strong> remove the heat exchanger. Cut on the bot<strong>to</strong>m side of the elbow and sweat off remaining portion of<br />
old elbow.<br />
6. Remove the red support brace that holds both heat exchangers in place. Once this is removed you can remove the defective exchanger.<br />
7. Position the new heat exchanger and re-install the support brace.<br />
8. Fit the couplings and refrigerant piping in<strong>to</strong> the heat exchanger. You may need <strong>to</strong> loosen the ro<strong>to</strong>lock at the compressor at this time.<br />
9. Braze in the new exchanger while purging with a low pressure of nitrogen.<br />
10. After brazing leak check and evacuate <strong>to</strong> a maximum of 500 microns. Charge the circuit according <strong>to</strong> the name plate charge.<br />
If the heat exchanger failure has caused water <strong>to</strong> enter in<strong>to</strong> the refrigerant side, the compressor and opposite side heat exchanger should also be checked for possible<br />
contamination. If water has entered in<strong>to</strong> the compressor it is recommended the compressor be replaced, as removing all the moisture from the oil is very difficult.<br />
Replacement of the other contaminated heat exchanger, the expansion valve, and installation of a suction drier with a water core cartridge is also recommended.<br />
Evacuate the circuit <strong>to</strong> a maximum of 500 microns and let stand for 20 minutes. Charge the circuit and run 2-3 weeks with the high water core cartridge and then replace<br />
with a standard core.
22.0 Troubleshooting MS15-70X Modules<br />
MS10-70X modules use the Carel PCO3 master control. The user manual for the PCO3 controller should be supplied with the submittal package. The user manual details<br />
the different status screens and explanations of system or module faults.<br />
The following guide is for troubleshooting the modules and the PC03 controller.<br />
FAULT<br />
No Display on Master Module<br />
SOLUTION<br />
Check main disconnect for power<br />
Check circuit breakers in module<br />
Check transformer in modules<br />
Check for 24V at J1 on board<br />
FAULT<br />
Excessive Cycling<br />
SOLUTION<br />
Check VSP setting is system variables<br />
Check entering LW sensor location<br />
Look for system problem (low water<br />
Volume, low load)<br />
EX 1,2, Interlock<br />
EX 4 Interlock<br />
Waiting For Load <strong>Water</strong> Flow<br />
Waiting For Source <strong>Water</strong> Flow<br />
Check appropriate interlock component<br />
Check jumpers on TB11 in master control<br />
Check for proper rotation, phasing<br />
Check PPM device<br />
Check LW pump<br />
Check flow switch operation<br />
Check filter strainers<br />
Check TB11 inputs #3 - #7<br />
Check SW pump<br />
Check flow switch operation<br />
Check filter strainers<br />
Check TB11 inputs #3 - #8<br />
High Discharge Pressure (HP)<br />
Low Suction Pressure (LP)<br />
Low Suction Temperature<br />
Communication Error<br />
Circuit Fault<br />
Check strainers in Load or Source headers<br />
Check Load or Source water flow<br />
Check refrigerant charge / leaks<br />
Check expansion valve<br />
Check suction sensor<br />
Check setpoints in system variables<br />
Check for flow restriction<br />
Check settings in system variables<br />
Check cables at J11 comm ports<br />
Check dip switch settings<br />
Check components in control circuit<br />
Check wire crimps in control circuit<br />
Check ratio of HP <strong>to</strong> LP<br />
Low Load <strong>Water</strong> Temp<br />
Check LLW sensor<br />
Check setpoints in system variables<br />
Check for flow restriction<br />
P Lan Error<br />
Check cables at J11 comm ports<br />
Check for possible power issues<br />
No Demand<br />
Check entering LW sensor<br />
Check setpoints in system variables<br />
Check sensor location<br />
100% Demand all the time Check entering LW sensor<br />
Check setpoints in system variables<br />
100% Demand, chiller won’t load Turn chiller on<br />
Check sensors<br />
Check load limit setting in system variables
Environmentally Friendly Refrigerants<br />
R-410A and R-134a<br />
Refrigerant R-410A and R-134a are widely available, safe, and environmentally friendly refrigerants. R-410A is available in virtually all <strong>Multistack</strong> systems making hot<br />
water up <strong>to</strong> 140°F and R-134a is available in machines making hot water up <strong>to</strong> 180°F. Good environmental choices!<br />
Environmental Focus<br />
In addition <strong>to</strong> providing products <strong>to</strong> deliver reliable comfort and low operating cost, <strong>Multistack</strong>’s products can also reduce your environmental footprint. We are<br />
committed <strong>to</strong> developing and manufacturing cooling and heating products that can reduce fossil fuel consumption and operate on the refrigerants designed <strong>to</strong><br />
protect the environment. Dedicated heat recovery chillers, water-<strong>to</strong>-water heat pumps and efficiency improvements across our product line are the result of this focus.<br />
Origina<strong>to</strong>rs…<br />
<strong>Multistack</strong> invented the modular water chiller. It started with a radically simple idea: chiller modules that could be brought in<strong>to</strong> the equipment room one at a time,<br />
through standard doorways and down eleva<strong>to</strong>rs, <strong>to</strong> form a fully integrated chiller system. The idea launched a revolution and transformed <strong>Multistack</strong> in<strong>to</strong> a leader in<br />
the commercial water-chiller industry.<br />
Innova<strong>to</strong>rs…<br />
<strong>Multistack</strong> perfected the modular chiller and leads the industry in innovative and environmentally friendly modular solutions. Since founding in the late 1980s,<br />
<strong>Multistack</strong> has engineered, manufactured, and distributed an impressive array of modular air conditioning firsts: the first on-board strainer, the first modular<br />
au<strong>to</strong>matic blow-down device, the first modular chiller for variable flow, the first modular chiller-heater (heat pump), the first modular heat-recovery chiller, the first<br />
modular air-<strong>to</strong>-water heat pump, the first modular chiller <strong>to</strong> utilize MagLev compressor technology, and the first modular chiller <strong>to</strong> utilize R-410A.<br />
Never the Imita<strong>to</strong>rs…<br />
<strong>Multistack</strong> sets the standard in the industry for superior cus<strong>to</strong>mer service, fast and on time shipment, superior product quality, and new product development. Our<br />
pioneering leadership in environmental issues is well documented. If you want the best, be sure <strong>to</strong> specify the original – <strong>Multistack</strong>®.<br />
1065 Maple Avenue P.O. Box 510 Sparta, WI 54656<br />
Phone 608-366-2400 • Fax 608-366-2450<br />
www.multistack.com<br />
Made in the USA<br />
F165 062410