Using DS18B20 digital temperature sensor on AVR ... - teslabs
Using DS18B20 digital temperature sensor on AVR ... - teslabs
Using DS18B20 digital temperature sensor on AVR ... - teslabs

Create successful ePaper yourself
Turn your PDF publications into a flip-book with our unique Google optimized e-Paper software.
<str<strong>on</strong>g>Using</str<strong>on</strong>g> <str<strong>on</strong>g>DS18B20</str<strong>on</strong>g> <str<strong>on</strong>g>digital</str<strong>on</strong>g><br />
<str<strong>on</strong>g>temperature</str<strong>on</strong>g> <str<strong>on</strong>g>sensor</str<strong>on</strong>g> <strong>on</strong> <strong>AVR</strong><br />
microc<strong>on</strong>trollers<br />
Descripti<strong>on</strong> and applicati<strong>on</strong><br />
Versi<strong>on</strong> 1.0 (Preliminary)<br />
Research Project Documents<br />
Gerard Marull Paretas<br />
September 2007
Index<br />
1. Introducti<strong>on</strong>.................................................................................................. ...........................3<br />
2. Making the circuit............................................................................................ .......................4<br />
3. Working with <str<strong>on</strong>g>DS18B20</str<strong>on</strong>g>............................................................................... ...........................5<br />
3.1. A critical operati<strong>on</strong>: timing................................................................... ............................5<br />
3.2. Useful definiti<strong>on</strong>s...................................................................................... ........................8<br />
3.3. Thermometer initializati<strong>on</strong>.................................................................................... ............8<br />
3.4. Read/Write operati<strong>on</strong>s...................................................................................... .................9<br />
3.4.1. Reading/Writing individual bits............................................................. ...................9<br />
3.4.2. Reading/Writing bytes................................................................................. ............10<br />
3.5. Available commands..................................................................................................... ...11<br />
3.6. The last step: reading the <str<strong>on</strong>g>temperature</str<strong>on</strong>g>................................................... .........................12<br />
4. Bibliography...................................................................................................................... .....15<br />
2
1. Introducti<strong>on</strong><br />
A few m<strong>on</strong>ths ago I received two samples of <str<strong>on</strong>g>DS18B20</str<strong>on</strong>g> from Maxim. However, I asked for<br />
another chip, not <str<strong>on</strong>g>DS18B20</str<strong>on</strong>g>, so I decided to notify to Maxim. They agreed about the mistake<br />
and a few days later I received the correct <strong>on</strong>es, but those two chips remained <strong>on</strong> my desktop<br />
until <strong>on</strong>e day I decided to examine them. I had thought they would not be very interesting, as<br />
they <strong>on</strong>ly had 3 pads. Maybe a voltage regulator, a kind of transistor... But I got a surprise<br />
when I read that it was a <str<strong>on</strong>g>digital</str<strong>on</strong>g> <str<strong>on</strong>g>temperature</str<strong>on</strong>g> <str<strong>on</strong>g>sensor</str<strong>on</strong>g>! At first, I could not understand how it<br />
could be a <str<strong>on</strong>g>digital</str<strong>on</strong>g> <str<strong>on</strong>g>temperature</str<strong>on</strong>g> <str<strong>on</strong>g>sensor</str<strong>on</strong>g>: it <strong>on</strong>ly had 3 pads and 2 of them had to be Ground and<br />
Vcc. How could <strong>on</strong>e transfer <str<strong>on</strong>g>digital</str<strong>on</strong>g> data through <strong>on</strong>ly <strong>on</strong>e wire I had been always using two<br />
wires or more, <strong>on</strong>e of them working as a clock source. However, it is possible to transfer data<br />
through <strong>on</strong>ly <strong>on</strong>e wire making it c<strong>on</strong>trolled by the microc<strong>on</strong>troller at very precise intervals.<br />
One comm<strong>on</strong> example is the serial line of your computer. The baud rate of both sides (the<br />
computer and a device) must be known in order to send and receive data without errors. I used<br />
serial line before getting <str<strong>on</strong>g>DS18B20</str<strong>on</strong>g>, but when you set it up <strong>on</strong> an <strong>AVR</strong> microc<strong>on</strong>troller, you<br />
just give some parameters and the device does the rest. But in this case the work will be d<strong>on</strong>e<br />
by us. To c<strong>on</strong>tinue, you just need the materials listed below:<br />
●<br />
●<br />
●<br />
●<br />
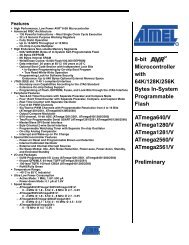
1- <strong>AVR</strong> Microc<strong>on</strong>troller (ex. Atmega8)<br />
1- <str<strong>on</strong>g>DS18B20</str<strong>on</strong>g> Digital <str<strong>on</strong>g>temperature</str<strong>on</strong>g> <str<strong>on</strong>g>sensor</str<strong>on</strong>g><br />
1- 4K7 Resistor<br />
A working <strong>AVR</strong> Toolchain<br />
If you find any mistake in this document, please, report it at gerardmarull@gmail.com.<br />
Notes: In the preliminary versi<strong>on</strong> of this document, a copy of the GNU Free Documentati<strong>on</strong><br />
License is not included, but you can access it by visiting http://www.gnu.org/licenses/fdl.txt.<br />
3
2. Making the circuit<br />
The <str<strong>on</strong>g>sensor</str<strong>on</strong>g> can come in three different packages: TO-92, SO-8 and μSOP-8. You can choose<br />
the most c<strong>on</strong>venient as all operate in the same way. The schematic is shown below for each<br />
package type. For DQ c<strong>on</strong>necti<strong>on</strong> you can choose any of your microc<strong>on</strong>troller's I/O pin.<br />
4
3. Working with <str<strong>on</strong>g>DS18B20</str<strong>on</strong>g><br />
In this chapter I will explain how the <str<strong>on</strong>g>sensor</str<strong>on</strong>g> works and even the necessary C code to get it<br />
running under an <strong>AVR</strong> microc<strong>on</strong>troller. Of course, external topics related to microc<strong>on</strong>trollers<br />
such as the compilati<strong>on</strong> of the code will not be treated. Another requirement is to have a way<br />
to report the <str<strong>on</strong>g>temperature</str<strong>on</strong>g> that you obtain from the <str<strong>on</strong>g>sensor</str<strong>on</strong>g>: a serial c<strong>on</strong>necti<strong>on</strong> with the<br />
computer or a LCD would be fine. Some of the features that the <str<strong>on</strong>g>sensor</str<strong>on</strong>g> offers are not treated in<br />
this versi<strong>on</strong> of the document (ex. Having multiple <str<strong>on</strong>g>sensor</str<strong>on</strong>g>s in the same bus, CRC computati<strong>on</strong><br />
or setting Alarm triggers). They might be included in future versi<strong>on</strong>s of this document.<br />
3.1. A critical operati<strong>on</strong>: timing<br />
Since we <strong>on</strong>ly have <strong>on</strong>e wire to communicate with the <str<strong>on</strong>g>sensor</str<strong>on</strong>g>, it is necessary to read/write data<br />
at very precise intervals. All these intervals are defined in <str<strong>on</strong>g>DS18B20</str<strong>on</strong>g>'s datasheet. If you take a<br />
brief look, you will see that most of them are just a matter of a few micro-sec<strong>on</strong>ds (I will use<br />
the μs abbreviati<strong>on</strong> from now <strong>on</strong>). This might seem too small for humans, but not for<br />
microc<strong>on</strong>trollers. A comm<strong>on</strong> <strong>AVR</strong> microc<strong>on</strong>troller can run up to 16Mhz (some at 20Mhz) so<br />
each clock cycle is very short. In this document I will use the internal 8Mhz clock of an<br />
Atmega1281 (also included in many other models) which means that each clock cycle will<br />
take 0.125μs (1/8000000Hz). <strong>AVR</strong> Instructi<strong>on</strong>s (also called <strong>AVR</strong> assembler instructi<strong>on</strong>s) can<br />
take from 1 to 4 clock cycles to execute, so it is easy to make exact μs delays.<br />
You will probably program in C language, where you do not know which assembler code the<br />
compiler will produce, but you can get it easily.<br />
Let us start with a simple delay functi<strong>on</strong> that will be able to execute from 0 to 65535 loops:<br />
inline __attribute__((gnu_inline)) void therm_delay(uint16_t delay){<br />
while(delay--) asm volatile("nop");<br />
}<br />
There is a thing that you might not know: the inline and gnu_inline attributes. This means that<br />
the code inside therm_delay functi<strong>on</strong> will be inserted where therm_delay is called instead of<br />
making the call, which would require calling and returning from the functi<strong>on</strong> and even<br />
pushing and popping some registers to the stack (a waste of time not desirable in this case).<br />
Now, make another functi<strong>on</strong> (I will name it therm_reset) and call therm_delay inside it. This<br />
way we will be able to see which assembler does this code produce. To do that, you have to<br />
invoke the compiler with -S flag. In my case, I have used the following command (avr-gcc<br />
versi<strong>on</strong> is 4.2.1):<br />
# avrgcc S mcallprologues std=gnu99 funsignedchar<br />
funsignedbitfields fpackstruct fshortenums mmcu=atmega1281<br />
Wall Wstrictprototypes Os yourfile.c o yourfile.s<br />
After that, you should be able to see the file yourfile.s with some assembler code inside. If you<br />
look for therm_delay functi<strong>on</strong> code, you should find something like this:<br />
.global therm_delay<br />
.type therm_delay, @functi<strong>on</strong><br />
therm_delay:<br />
/* prologue: frame size=0 */<br />
5
* prologue end (size=0) */<br />
rjmp .L2<br />
.L3:<br />
/* #APP */<br />
nop<br />
/* #NOAPP */<br />
.L2:<br />
sbiw r24,1<br />
ldi r18,hi8(-1)<br />
cpi r24,lo8(-1)<br />
cpc r25,r18<br />
brne .L3<br />
/* epilogue: frame size=0 */<br />
ret<br />
/* epilogue end (size=1) */<br />
/* functi<strong>on</strong> therm_delay size 9 (8) */<br />
.size therm_delay, .-therm_delay<br />
This is <strong>on</strong>ly the functi<strong>on</strong> code. If you go to therm_reset, you should see something similar:<br />
.global therm_reset<br />
.type therm_reset, @functi<strong>on</strong><br />
therm_reset:<br />
/* prologue: frame size=0 */<br />
/* prologue end (size=0) */<br />
ldi r24,lo8(480)<br />
ldi r25,hi8(480)<br />
rjmp .L14<br />
.L15:<br />
/* #APP */<br />
nop<br />
/* #NOAPP */<br />
.L14:<br />
sbiw r24,1<br />
ldi r18,hi8(-1)<br />
cpi r24,lo8(-1)<br />
cpc r25,r18<br />
brne .L15<br />
There are just two further instructi<strong>on</strong>s: ldi. ldi (LoaD Immediate) is used to load a c<strong>on</strong>stant<br />
value into a register. In this case I am loading the number 480, and as the functi<strong>on</strong> uses an<br />
uint16_t (2-bytes) to store the number of delays, it needs to use two registers (r24 and r25). I<br />
will just explain the meaning of two more instructi<strong>on</strong>s that will be useful to understand this<br />
part. The first is nop, which is an instructi<strong>on</strong> that does nothing, and the sec<strong>on</strong>d is brne<br />
(BRanch if Not Equal) which is a c<strong>on</strong>diti<strong>on</strong>al instructi<strong>on</strong> that will jump to .L8 (in this case) if<br />
r25 and r18 are not equal (compared in the instructi<strong>on</strong> before with cpc). You can refer <strong>AVR</strong><br />
Instructi<strong>on</strong> Set document (available at www.atmel.com/avr) to know the meaning of the other<br />
instructi<strong>on</strong>s, as teaching <strong>AVR</strong> assembler is not the purpose of this document.<br />
Now, is the moment to start counting the time that this delay loop would take if it was<br />
executed. First, we must separate the instructi<strong>on</strong>s ldi, ldi and rjmp that will not enter the<br />
c<strong>on</strong>tinuous loop. They are <strong>on</strong>ly used to load a value and jump to the start of the loop. Looking<br />
at <strong>AVR</strong> Instructi<strong>on</strong> Set document we can see and calculate the values shown in the following<br />
table:<br />
Instructi<strong>on</strong><br />
ldi 1<br />
Clock Cycles<br />
6
ldi 1<br />
rjmp 2<br />
TOTAL CYCLES 4<br />
Table 3.1.A<br />
For the sec<strong>on</strong>d part (those instructi<strong>on</strong>s involved in the loop) you have to look at L14 (where<br />
the loop starts) and L15 (the code executed <strong>on</strong> each loop):<br />
Instructi<strong>on</strong><br />
nop 1<br />
sbiw 2<br />
ldi 1<br />
cpi 1<br />
cpc 1<br />
brne<br />
TOTAL CYCLES<br />
Clock Cycles<br />
2 if true, 1 if false<br />
Read below<br />
Table 3.1.B<br />
We can calculate the total delay of a loop cycle easily: adding all these instructi<strong>on</strong> clock cycles<br />
but taking care of just <strong>on</strong>e thing: brne is normally true (it uses 2 cycles and jumps to L15)<br />
except in the last loop, when brne c<strong>on</strong>diti<strong>on</strong> is false, so it takes <strong>on</strong>ly 1 cycle and L15 is not<br />
executed as the code c<strong>on</strong>tinues with the next instructi<strong>on</strong>. This means we have to subtract 2<br />
cycles from the total (1 from nop and 1 from brne).<br />
Therefore, the total delay of this loop is: (8 cycles * number of loops) – 2 cycles<br />
Finally we have to join everything:<br />
4 cycles (initializati<strong>on</strong>) + ((8 cycles * number of loops) – 2 cycles) =<br />
(8 cycles * number of loops) + 2 cycles<br />
C<strong>on</strong>sidering that at 8Mhz each cycle takes 0.125us, the final delay in μs will be:<br />
(8 * 0.125μs * number of loops) + 2 * 0.125μs = (1μs*number of loops) + 0.25μs =<br />
(number of loops)μs + 0.25μs<br />
Since the number of loops is multiplied by 1, putting the number of μs we want, we will get<br />
the same delay in μs directly (plus 0.25μs, which is depreciable in this case), so there is no<br />
need for any c<strong>on</strong>versi<strong>on</strong> before. However, if your clock speed is not as lucky as mine, you can<br />
create a macro that calculates how many loops would be necessary by just giving the μs you<br />
need:<br />
#define F_CPU 3000000UL //Your clock speed in Hz (3Mhz here)<br />
#define LOOP_CYCLES 8 //Number of cycles that the loop takes<br />
#define us(num) (num/(LOOP_CYCLES*(1/(F_CPU/1000000.0))))<br />
<str<strong>on</strong>g>Using</str<strong>on</strong>g> that macro, your code would look like follows:<br />
therm_delay(us(480)); //We want to make a 480μs delay<br />
7
The value will be automatically transformed by the compiler preprocessor into the<br />
corresp<strong>on</strong>ding loops needed by your clock. In this code, where we simulate having a 3Mhz<br />
clock, it would calculate 180 loops.<br />
3.2. Useful definiti<strong>on</strong>s<br />
Since you will need to change the level or the directi<strong>on</strong> of the pin where your thermometer is<br />
c<strong>on</strong>nected, I recommend you to put the following definiti<strong>on</strong>s in your code to make it more<br />
readable and easy to write:<br />
/* Thermometer C<strong>on</strong>necti<strong>on</strong>s (At your choice) */<br />
#define THERM_PORT<br />
PORTC<br />
#define THERM_DDR<br />
DDRC<br />
#define THERM_PIN<br />
PINC<br />
#define THERM_DQ<br />
PC0<br />
/* Utils */<br />
#define THERM_INPUT_MODE()<br />
THERM_DDR&=~(1
Pull line low and wait for 480uS<br />
THERM_LOW();<br />
THERM_OUTPUT_MODE();<br />
therm_delay(us(480));<br />
//Release line and wait for 60uS<br />
THERM_INPUT_MODE();<br />
therm_delay(us(60));<br />
//Store line value and wait until the completi<strong>on</strong> of 480uS period<br />
i=(THERM_PIN & (1
will keep the line low until the end of the sequence (60μs) but if we want to write 1, after a<br />
delay of 1μs we will release it. An implementati<strong>on</strong> in C is shown below:<br />
void therm_write_bit(uint8_t bit){<br />
}<br />
//Pull line low for 1uS<br />
THERM_LOW();<br />
THERM_OUTPUT_MODE();<br />
therm_delay(us(1));<br />
//If we want to write 1, release the line (if not will keep low)<br />
if(bit) THERM_INPUT_MODE();<br />
//Wait for 60uS and release the line<br />
therm_delay(us(60));<br />
THERM_INPUT_MODE();<br />
On the other side, we have the read operati<strong>on</strong>. It is quite similar, but has some differences. We<br />
also have to start pulling the line low for 1μs. Then we have to release the line and wait for<br />
14μs more (14+1=15μs as shown in the diagram). After that, we can read the value of the line,<br />
that will be high if thermometer transmits 1 and low if it transmits 0. Finally, we just have to<br />
wait 45μs more to end the 60μs period. An implementati<strong>on</strong> in C is shown below:<br />
uint8_t therm_read_bit(void){<br />
}<br />
uint8_t bit=0;<br />
//Pull line low for 1uS<br />
THERM_LOW();<br />
THERM_OUTPUT_MODE();<br />
therm_delay(us(1));<br />
//Release line and wait for 14uS<br />
THERM_INPUT_MODE();<br />
therm_delay(us(14));<br />
//Read line value<br />
if(THERM_PIN&(1
}<br />
//Shift <strong>on</strong>e positi<strong>on</strong> right and store read value<br />
n>>=1;<br />
n|=(therm_read_bit()=1;<br />
}<br />
}<br />
3.5. Available commands<br />
Now that we are able to read/write data from <str<strong>on</strong>g>DS18B20</str<strong>on</strong>g>, we have to know which commands<br />
are available to do the operati<strong>on</strong>s we need. I will define them in a table with a short<br />
descripti<strong>on</strong> of each <strong>on</strong>e and its corresp<strong>on</strong>ding code. The definiti<strong>on</strong>s for your C code will also<br />
be given.<br />
Command Code Descripti<strong>on</strong><br />
ROM COMMANDS<br />
Search ROM 0xf0 Used to identify the ROM codes of the available<br />
slaves in the bus, which also lets the master determine<br />
the total number of slaves.<br />
Read ROM 0x33 This command has the same effect as Search ROM,<br />
but it can be used when there is <strong>on</strong>ly <strong>on</strong>e device in the<br />
bus. If not, data collisi<strong>on</strong> will occur.<br />
Match ROM 0x55 This command followed by a 64-bit ROM code is used<br />
to address a specific slave in the bus. If a slave<br />
matches the code, it will be the <strong>on</strong>ly <strong>on</strong>e to resp<strong>on</strong>d to<br />
the commands. The others will wait for a reset<br />
sequence.<br />
Skip ROM 0xcc This is used to address all the devices in the bus at the<br />
same time. This could be useful to send commands<br />
such as the start of <str<strong>on</strong>g>temperature</str<strong>on</strong>g> c<strong>on</strong>versi<strong>on</strong> (C<strong>on</strong>vert T,<br />
0x44) or if there is <strong>on</strong>ly <strong>on</strong>e device in the bus.<br />
Alarm Search 0xec This command is nearly the same as Search ROM,<br />
excepting that <strong>on</strong>ly devices with a set alarm flag will<br />
resp<strong>on</strong>d.<br />
FUNCTION COMMANDS<br />
11
C<strong>on</strong>vert T 0x44 This command is used to start a <str<strong>on</strong>g>temperature</str<strong>on</strong>g><br />
c<strong>on</strong>versi<strong>on</strong>, that is stored in the first two bytes of the<br />
Scratchpad. The c<strong>on</strong>versi<strong>on</strong> time is resoluti<strong>on</strong><br />
dependent, -look at table shown in chapter 3.6 . If you<br />
send read slots while c<strong>on</strong>versi<strong>on</strong> is in progress the<br />
slave resp<strong>on</strong>ds with 0 (low) if it is still in progress or 1<br />
(high) if it has finished (<strong>on</strong>ly available if it is not<br />
parasite powered).<br />
Write Scratchpad 0x4e This command allows master to write 3 bytes of data<br />
to the Scratchpad: TH, TL and C<strong>on</strong>figurati<strong>on</strong><br />
registers. Data must be transferred with least<br />
significant bit first.<br />
Read Scratchpad 0xbe This command allows the master to read the c<strong>on</strong>tents<br />
of the Scratchpad. It is 9-bytes l<strong>on</strong>g and it is<br />
transferred starting with the least significant byte. If all<br />
bytes are not needed transfer can be stopped by master<br />
issuing a reset.<br />
Copy Scratchpad 0x48 This command copies the c<strong>on</strong>tents of TH, TL and<br />
c<strong>on</strong>figurati<strong>on</strong> registers from the Scratchpad to the<br />
EEPROM.<br />
Recall E 2 0xb8 This command recalls the alarm trigger values (TH<br />
and TL) and c<strong>on</strong>figurati<strong>on</strong> data from EEPROM and<br />
places them in the Scratchpad.<br />
Read Power Supply 0xb4 This command is used to determine if a slave is<br />
externally powered or uses parasite power. Parasite<br />
powered slaves will keep the line low after the<br />
command, and high the externally powered <strong>on</strong>es.<br />
A list of these commands translated into C defines:<br />
Table 3.5.A<br />
#define THERM_CMD_CONVERTTEMP<br />
#define THERM_CMD_RSCRATCHPAD<br />
#define THERM_CMD_WSCRATCHPAD<br />
#define THERM_CMD_CPYSCRATCHPAD<br />
#define THERM_CMD_RECEEPROM<br />
#define THERM_CMD_RPWRSUPPLY<br />
#define THERM_CMD_SEARCHROM<br />
#define THERM_CMD_READROM<br />
#define THERM_CMD_MATCHROM<br />
#define THERM_CMD_SKIPROM<br />
#define THERM_CMD_ALARMSEARCH<br />
0x44<br />
0xbe<br />
0x4e<br />
0x48<br />
0xb8<br />
0xb4<br />
0xf0<br />
0x33<br />
0x55<br />
0xcc<br />
0xec<br />
3.6. The last step: reading the <str<strong>on</strong>g>temperature</str<strong>on</strong>g><br />
Now that we are able to send to and read from the thermometer, it is time to learn how to read<br />
the <str<strong>on</strong>g>temperature</str<strong>on</strong>g>, which is in fact the reas<strong>on</strong> why you are reading this document. The<br />
<str<strong>on</strong>g>temperature</str<strong>on</strong>g> is stored in the first two bytes of the Scratchpad, which is 9-bytes l<strong>on</strong>g and<br />
c<strong>on</strong>tains more informati<strong>on</strong> than the <str<strong>on</strong>g>temperature</str<strong>on</strong>g>. Its structure is shown below:<br />
Byte C<strong>on</strong>tent Startup value<br />
12
0 Temperature LSB<br />
1 Temperature MSB<br />
2 TH Register or User Byte 1<br />
3 TL Register or User Byte 2<br />
4 C<strong>on</strong>figurati<strong>on</strong> register<br />
0x5005<br />
(+85ºC)<br />
C<strong>on</strong>tent stored<br />
in EEPROM<br />
5 Reserved (0xff) -<br />
6 Reserved (0x0c) -<br />
7 Reserved (0x10) -<br />
8 CRC -<br />
Table 3.6.A<br />
A useful thing inside the Scratchpad is the C<strong>on</strong>figurati<strong>on</strong> register. As you should know, the<br />
thermometer can work in four different resoluti<strong>on</strong>s (9,10,11 and 12 bits). It comes with a 12-<br />
bit mode selected by default, but it can be changed at any moment using the Write<br />
Scratchpad command (0x4e) and writing there the desired resoluti<strong>on</strong>. In the following tables<br />
the structure of C<strong>on</strong>figurati<strong>on</strong> register and informati<strong>on</strong> of each resoluti<strong>on</strong> is shown<br />
(including necessary values to change it):<br />
CONFIGURATION REGISTER<br />
Bit 7 Bit 6 Bit 5 Bit 4 Bit 3 Bit 2 Bit 1 Bit 0<br />
0 R1 R0 1 1 1 1 1<br />
R1 R0 Resoluti<strong>on</strong> bits Decimal steps C<strong>on</strong>versi<strong>on</strong> time<br />
0 0 9 0.5 93.75ms<br />
0 1 10 0.25 187.5ms<br />
1 0 11 0.125 375ms<br />
1 1 12 (default) 0.0625 750ms<br />
Table 3.6.C<br />
Table 3.6.B<br />
As I said, the <str<strong>on</strong>g>temperature</str<strong>on</strong>g> is stored in the first 2 bytes of the Scratchpad, but we need to know<br />
how to interpret them. We can obtain three important values from the <str<strong>on</strong>g>temperature</str<strong>on</strong>g> bytes: if it is<br />
positive or negative, the <str<strong>on</strong>g>temperature</str<strong>on</strong>g> integer digit and the number of decimal steps. The<br />
structure is detailed below:<br />
Least Significant Byte<br />
Bit 7 Bit 6 Bit 5 Bit 4 Bit 3 Bit 2 Bit 1 Bit 0<br />
I 3 I 2 I 1 I 0 D -1 D -2 D -3 D -4<br />
Most Significant Byte<br />
Bit 7 Bit 6 Bit 5 Bit 4 Bit 3 Bit 2 Bit 1 Bit 0<br />
S S S S S I 6 I 5 I 4<br />
Table 3.6.D<br />
13
I = Integer digits of Celsius degrees<br />
(signed)<br />
D = Number of decimal steps*<br />
S = Sign (0 = +, 1 = -)<br />
+85.0000 ºC<br />
* For 9-bit resoluti<strong>on</strong> <strong>on</strong>ly bit 3 is valid, bits 3 and 2 for 10-bit, bits 3, 2 and 1 for 11-bit and<br />
all bits for 12-bit. It even needs to be multiplied by decimal steps c<strong>on</strong>stant (shown in 4 th<br />
column of table 3.6.C).<br />
Table 3.6.E<br />
Now is the time to make the C implementati<strong>on</strong>. It has been programmed to work with <strong>on</strong>ly<br />
<strong>on</strong>e thermometer in the same bus and in 12-bit resoluti<strong>on</strong>. It should be easy to change to<br />
another resoluti<strong>on</strong> (<strong>on</strong>ly take care of decimal steps value). At the end, the <str<strong>on</strong>g>temperature</str<strong>on</strong>g> is joined<br />
into a char array forming a string like “+85.0000 C” which you can use to send via serial to<br />
your computer, draw into a LCD, or whatever you want. Note that making use of sprintf()<br />
functi<strong>on</strong>, saves us from having to take care of the <str<strong>on</strong>g>temperature</str<strong>on</strong>g> integer digit sugn and S bits of<br />
2 <str<strong>on</strong>g>temperature</str<strong>on</strong>g> bytes. However, if you do not use sprintf() functi<strong>on</strong>, you can c<strong>on</strong>vert a signed<br />
number to unsigned using two's complement: ( ~(variable)+1 ).<br />
#define THERM_DECIMAL_STEPS_12BIT 625 //.0625<br />
void therm_read_<str<strong>on</strong>g>temperature</str<strong>on</strong>g>(char *buffer){<br />
}<br />
// Buffer length must be at least 12bytes l<strong>on</strong>g! ["+XXX.XXXX C"]<br />
uint8_t <str<strong>on</strong>g>temperature</str<strong>on</strong>g>[2];<br />
int8_t digit;<br />
uint16_t decimal;<br />
//Reset, skip ROM and start <str<strong>on</strong>g>temperature</str<strong>on</strong>g> c<strong>on</strong>versi<strong>on</strong><br />
therm_reset();<br />
therm_write_byte(THERM_CMD_SKIPROM);<br />
therm_write_byte(THERM_CMD_CONVERTTEMP);<br />
//Wait until c<strong>on</strong>versi<strong>on</strong> is complete<br />
while(!therm_read_bit());<br />
//Reset, skip ROM and send command to read Scratchpad<br />
therm_reset();<br />
therm_write_byte(THERM_CMD_SKIPROM);<br />
therm_write_byte(THERM_CMD_RSCRATCHPAD);<br />
//Read Scratchpad (<strong>on</strong>ly 2 first bytes)<br />
<str<strong>on</strong>g>temperature</str<strong>on</strong>g>[0]=therm_read_byte();<br />
<str<strong>on</strong>g>temperature</str<strong>on</strong>g>[1]=therm_read_byte();<br />
therm_reset();<br />
//Store <str<strong>on</strong>g>temperature</str<strong>on</strong>g> integer digits and decimal digits<br />
digit=<str<strong>on</strong>g>temperature</str<strong>on</strong>g>[0]>>4;<br />
digit|=(<str<strong>on</strong>g>temperature</str<strong>on</strong>g>[1]&0x7)
4. Bibliography<br />
MAXIM, “<str<strong>on</strong>g>DS18B20</str<strong>on</strong>g> Datasheet”, http://www.maxim-ic.com/<br />
MAXIM, “APPLICATION NOTE 162: Interfacing the DS18X20/DS1822 1-Wire<br />
Temperature Sensor in a Microc<strong>on</strong>troller Envir<strong>on</strong>ment ”, http://www.maxim-ic.com/<br />
ATMEL, “<strong>AVR</strong> Instructi<strong>on</strong> Set ”, http://www.atmel.com/avr<br />
http://www.atmel.com/avr<br />
http://www.maxim-ic.com<br />
15
Copyright (c) 2007 Gerard Marull Paretas.<br />
Permissi<strong>on</strong> is granted to copy, distribute and/or modify this document<br />
under the terms of the GNU Free Documentati<strong>on</strong> License, Versi<strong>on</strong> 1.2<br />
or any later versi<strong>on</strong> published by the Free Software Foundati<strong>on</strong>;<br />
with no Invariant Secti<strong>on</strong>s, no Fr<strong>on</strong>t-Cover Texts, and no Back-Cover Texts.<br />
A copy of the license is included in the secti<strong>on</strong> entitled "GNU<br />
Free Documentati<strong>on</strong> License".