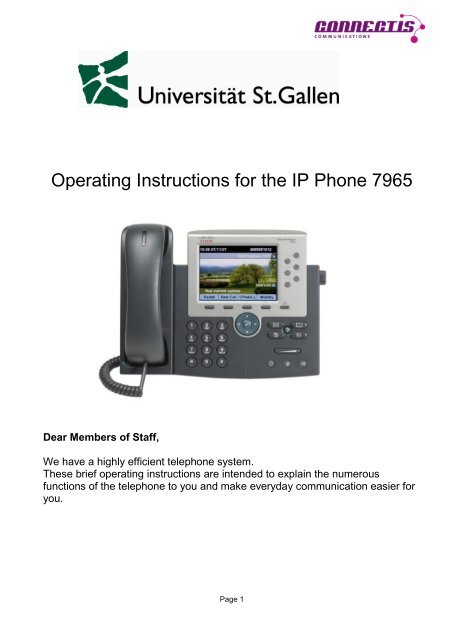
Operating Instructions for the IP Phone 7965 - Universität St.Gallen
Operating Instructions for the IP Phone 7965 - Universität St.Gallen
Operating Instructions for the IP Phone 7965 - Universität St.Gallen

You also want an ePaper? Increase the reach of your titles
YUMPU automatically turns print PDFs into web optimized ePapers that Google loves.
<strong>Operating</strong> <strong>Instructions</strong> <strong>for</strong> <strong>the</strong> <strong>IP</strong> <strong>Phone</strong> <strong>7965</strong><br />
Dear Members of <strong>St</strong>aff,<br />
We have a highly efficient telephone system.<br />
These brief operating instructions are intended to explain <strong>the</strong> numerous<br />
functions of <strong>the</strong> telephone to you and make everyday communication easier <strong>for</strong><br />
you.<br />
Page 1
Cisco <strong>IP</strong> Telephone <strong>7965</strong><br />
1 Programmable keys Depending on <strong>the</strong> configuration, <strong>the</strong>se keys<br />
can have <strong>the</strong> following function:<br />
- telephone line (personal line),<br />
- telephone line (shared line),<br />
- speed dial keys.<br />
The keys light up in colour in order to indicate <strong>the</strong><br />
following statuses of <strong>the</strong> telephone lines:<br />
green, permanent: active call;<br />
green, winking: call held;<br />
yellow, permanent: call ON/OFF activated or<br />
registered with a hunt group;<br />
yellow, winking: incoming or returning call;<br />
red, permanent: shared line occupied.<br />
Page 2
2 Telephone support button To adjust <strong>the</strong> angle of <strong>the</strong> telephone on <strong>the</strong> desktop.<br />
3 Display key Activates <strong>the</strong> telephone display after <strong>the</strong> energy saver<br />
mode.<br />
4 News key Access to <strong>the</strong> voicemail box.<br />
5 Directory key This key enables you to access <strong>the</strong> call log, your<br />
personal directory and <strong>the</strong> firm’s directory.<br />
6 Help key Activates <strong>the</strong> help menu.<br />
7 Settings key The settings menu enables you to adjust <strong>the</strong> settings<br />
of <strong>the</strong> telephone display and to change <strong>the</strong> ring tunes.<br />
8 Service key To access services you may have subscribed to.<br />
9 Volume key To adjust <strong>the</strong> receiver, headset and loudspeaker<br />
volume (when handset is lifted) and <strong>the</strong> ring tone<br />
volume (when <strong>the</strong> handset is replaced).<br />
10 Loudspeaker key Switches <strong>the</strong> loudspeaker on/off.<br />
11 Muting key Switches <strong>the</strong> microphone on/off. When <strong>the</strong> microphone<br />
is off, <strong>the</strong> key is lit up.<br />
12 Headset key When you use <strong>the</strong> telephone with a headset, use this<br />
key to take <strong>the</strong> call.<br />
13 Navigation key Enables you to navigate through menus and directories.<br />
14 Keypad To dial numbers and browse through directories.<br />
15 Softkeys Their functions are indicated on <strong>the</strong> display.<br />
16 LED on <strong>the</strong> receiver Provides in<strong>for</strong>mation about incoming calls and new<br />
voicemails.<br />
17 Telephone display In<strong>for</strong>mation about calls and functions.<br />
Page 3
Telephone functions<br />
Calling with receiver Lift receiver – dial number.<br />
with loudspeaker Press – dial number.<br />
with headset Press – dial number.<br />
Putting through a call<br />
Press Transfer softkey – dial number.<br />
- Addressee Press Transfer softkey again.<br />
- Addressee does NOT answer Press EndCall softkey.<br />
Press Resume softkey to return to caller.<br />
Holding a call<br />
Bringing back from hold<br />
Addressee does not answer<br />
Activating return call<br />
Answering return call<br />
Redialling<br />
Conference<br />
up to 6 participants<br />
Displaying conference participants<br />
Removing conference participants<br />
Press Hold softkey; line key is winking.<br />
Press Resume softkey or winking key.<br />
Press CallBack softkey.<br />
The relevant in<strong>for</strong>mation about <strong>the</strong> return call thus<br />
initiated will display.<br />
As soon as <strong>the</strong> addressee is free, you will receive a<br />
message to that effect on <strong>the</strong> display.<br />
Press Dial softkey.<br />
Press Redial softkey to redial <strong>the</strong> last number,<br />
or<br />
press navigation key to display <strong>the</strong> numbers<br />
selected earier.<br />
Press Confrn softkey.<br />
You may have to press <strong>the</strong> more softkey <strong>for</strong><br />
Confrn to display.<br />
Dial <strong>the</strong> participant’s number.<br />
Wait until <strong>the</strong> participant answers <strong>the</strong> call.<br />
Then redial Confrn to add <strong>the</strong> participant to <strong>the</strong><br />
conference. Fur<strong>the</strong>r conference participants can only<br />
be added by <strong>the</strong> conference chair (initiator).<br />
Press ConfList softkey.<br />
You may have to press <strong>the</strong> more softkey <strong>for</strong><br />
ConfList to display.<br />
All <strong>the</strong> conference participants are listed.<br />
The participant with an * is <strong>the</strong> initiator of <strong>the</strong> conference.<br />
Highlight <strong>the</strong> participant’s name in <strong>the</strong> conference list<br />
and <strong>the</strong>n press Remove.<br />
Depending on <strong>the</strong> configuration, only <strong>the</strong> initiator is<br />
permitted to use this function.<br />
Page 4
Telephone functions<br />
Redirecting<br />
Taking over a call<br />
Within <strong>the</strong> configured group<br />
Taking over with BLF<br />
Press CFwdALL softkey.<br />
Dial number of your choice.<br />
Redirection only applies to <strong>the</strong> telephone line in question.<br />
If your set has several lines, you will have to activate<br />
redirection <strong>for</strong> all <strong>the</strong> lines.<br />
The addressee’s number <strong>for</strong> <strong>the</strong> redirected call can be<br />
seen on <strong>the</strong> telephone display.<br />
Press PickUp key.<br />
The call is now ringing on your set.<br />
Press Answer softkey.<br />
Press BLF key when a call is coming in.<br />
Call logs<br />
Press directory key.<br />
100 entries Missed Calls<br />
per list<br />
Received Calls<br />
Placed Calls<br />
Displaying details<br />
Deleting entry<br />
Deleting entire list<br />
Personal telephone directory<br />
BLF function<br />
Highlight entry of your choice.<br />
Press Details softkey.<br />
Highlight entry of your choice.<br />
Press Remove softkey.<br />
Highlight list of your choice.<br />
Press Clear softkey.<br />
You may have to press <strong>the</strong> more softkey <strong>for</strong><br />
Clear to display.<br />
User ID: like Windows login name<br />
PIN: must first be defined through <strong>the</strong> web.<br />
Entries into <strong>the</strong> personal telephone directory are made<br />
through <strong>the</strong> web (cf. chapter on “Website <strong>for</strong> user options).<br />
With Sign Out, your telephone directory will again be<br />
password-protected.<br />
A BLF key enables you to see <strong>the</strong> status of <strong>the</strong> monitored<br />
lines (<strong>for</strong> instance, your boss’s line). If a call is coming in<br />
on this line, you can answer it by pressing <strong>the</strong> BLF key.<br />
At <strong>the</strong> same time, <strong>the</strong> BLF key only serves as a speed dial<br />
key, which you can also use to call one of <strong>the</strong> extensions<br />
or put a call through to it.<br />
A BLF key must be set up by <strong>the</strong> Administrator.<br />
Page 5
Telephone functions<br />
Register/deregister in<br />
exchange line group<br />
Muting <strong>the</strong> telephone<br />
Press HLog softkey.<br />
Press DND softkey.<br />
You may have to press <strong>the</strong> more softkey <strong>for</strong><br />
DND to display.<br />
Icons on <strong>the</strong> telephone display<br />
Call redirection is activated. In addition, <strong>the</strong><br />
redirection addressee displays on <strong>the</strong> status<br />
bar.<br />
Call has been placed on hold.<br />
In addition, <strong>the</strong> line key is winking.<br />
Incoming call.<br />
In addition, <strong>the</strong> line key is winking yellow.<br />
Receiver has been lifted.<br />
Receiver has been replaced.<br />
Shared line is active.<br />
Message is waiting.<br />
Speed dial, call log or directory entry:<br />
line busy (BLF function).<br />
Speed dial, call log or directory entry:<br />
line free (BLF function).<br />
Speed dial, call log or directory entry:<br />
line status unknown (BLF function).<br />
Ring tone is deactivated <strong>for</strong> this line<br />
(BLF function).<br />
Page 6
Website <strong>for</strong> user options<br />
http://voip.unisg.ch/ccmuser<br />
Log in here with your user name and password<br />
(same log-in as Windows).<br />
Speed dial keys – defining speed dial keys<br />
Open <strong>the</strong> Benutzeroptionen menu,<br />
and click on Gerät<br />
and <strong>the</strong>n on Kurzwahleinträge.<br />
T<strong>IP</strong>: Do not <strong>for</strong>get to prefix <strong>the</strong> 0 required <strong>for</strong> external numbers!<br />
Making a call through a speed dial code<br />
Depending on <strong>the</strong> configuration of<br />
your telephone, <strong>the</strong> keys still freely<br />
available will display here.<br />
Under Einstellung für<br />
Kurzwahlcodes<br />
you can enter up to 199 speed dial<br />
numbers.<br />
Type in <strong>the</strong> relevant speed dial code on <strong>the</strong> telephone keypad, <strong>the</strong>n press <strong>the</strong> AbbrDial softkey.<br />
Page 7
Subscribing to services<br />
Click on Telefondienste.<br />
You can subscribe to <strong>the</strong> following services:<br />
- Extension Mobility<br />
- MUT<br />
- VisualVoicemail<br />
Extension Mobility<br />
This service enables you to register on a different telephone, which means that your entire<br />
configuration, including extension number, is transferred to <strong>the</strong> o<strong>the</strong>r set.<br />
This service needs to be configured by <strong>the</strong> System Administrator.<br />
MUT<br />
If you subscribe to this service, one key on your telephone will be configured with MUT.<br />
This key serves to trigger off a mute alarm.<br />
This service needs to be configured by <strong>the</strong> System Administrator.<br />
VisualVoicemail<br />
This service has already been subscribed to as a standard <strong>for</strong> all <strong>the</strong> users and is available<br />
on sets of <strong>the</strong> <strong>7965</strong> type. It enables you to display and play voicemails on <strong>the</strong> telephone<br />
display.<br />
Setting up call <strong>for</strong>warding<br />
Click on Leitungseinstellungen.<br />
Here you are able to set up call<br />
<strong>for</strong>warding options <strong>for</strong> each line<br />
yourself.<br />
Call <strong>for</strong>warding when line is busy:<br />
If your telephone line is already busy, <strong>the</strong> call will be<br />
put through directly to <strong>the</strong> number defined by you.<br />
Call <strong>for</strong>warding when <strong>the</strong> receiver has not been<br />
lifted means that <strong>the</strong> call will first ring on your set<br />
four times and <strong>the</strong>n be put through to <strong>the</strong> addressee<br />
defined by you.<br />
You can define various addressees <strong>for</strong> external and<br />
internal calls.<br />
Page 8
Personal directory<br />
Open <strong>the</strong> Benutzeroptionen menu, click on Persönliches Adressbuch,<br />
<strong>the</strong>n click on Neue hinzufügen.<br />
Spitzname is a compulsory field.<br />
You can register up to 3 different telephone<br />
numbers and an e-mail address under each<br />
individual entry.<br />
Using <strong>the</strong> telephone directory on your set:<br />
Your personal directory is protected. You have to log in with your user name (Windows login)<br />
and a PIN.<br />
Define <strong>the</strong> PIN as described in <strong>the</strong> next chapter be<strong>for</strong>e you use <strong>the</strong> telephone directory on<br />
your set <strong>for</strong> <strong>the</strong> first time.<br />
You will remain logged into your telephone directory until you reblock it by pressing Log Out.<br />
Looking <strong>for</strong> entries:<br />
Log into <strong>the</strong> telephone directory and type in 2-3 letters<br />
in <strong>the</strong> Last Name, First Name or Nickname fields, <strong>the</strong>n<br />
press <strong>the</strong> Submit softkey. Select <strong>the</strong> name of your<br />
choice and press <strong>the</strong> Dial softkey.<br />
If you have input several numbers <strong>for</strong> this name, you<br />
can now select <strong>the</strong> number to be dialled and press <strong>the</strong><br />
Dial softkey once more.<br />
Page 9
Changing your PIN<br />
Open <strong>the</strong> Benutzeroptionen menu and click on Benutzereinstellungen.<br />
Now define a PIN <strong>for</strong> your personal telephone directory.<br />
The current PIN is 12345.<br />
Changing <strong>the</strong> language setting of your set<br />
Open <strong>the</strong> Benutzeroptionen menu and click on Gerät.<br />
You can now change <strong>the</strong><br />
language setting here.<br />
This is where you will also<br />
find <strong>the</strong> complete User<br />
Manual <strong>for</strong> downloading.<br />
Important<br />
If you change <strong>the</strong> language setting, you will not only have to click on Speichern, but<br />
also on Konfiguration übernehmen and <strong>the</strong>n confirm <strong>the</strong> next window with OK.<br />
Page 10
Mobility settings<br />
These settings enable you to have your desktop set and your mobile phone ring at <strong>the</strong> same<br />
time.<br />
Open <strong>the</strong> Benutzeroptionen, click on<br />
Mobilitätseinstellungen and <strong>the</strong>n on<br />
Remote-Ziele.<br />
Under Remote-Ziel-Profil, you can<br />
select <strong>the</strong> profile generated <strong>for</strong> you<br />
by <strong>the</strong> System Administrator.<br />
If you have no selection, you will first<br />
have to apply <strong>for</strong> a profile.<br />
Then input <strong>the</strong> number which you<br />
want to ring in parallel with your<br />
desktop set.<br />
Please note: external number with<br />
<strong>the</strong> prefix 0.<br />
Then save your entries.<br />
Now place a under<br />
Leitungszuordnung, and<br />
activate Mobiltelefon and<br />
Mobile Verbindung.<br />
Click on Speichern.<br />
Now you will be able to switch mobility on your set on/off with <strong>the</strong> Mobility softkey.<br />
A call that is ringing in parallel can be answered both on your mobile phone and on your desk<br />
set. Also, you will be able to change from one device to <strong>the</strong> o<strong>the</strong>r.<br />
Page 11
Unity (voicemail box) access no: internal: 2828 / external: 071 224 28 28<br />
Accessing <strong>the</strong> voicemail box:<br />
Dial <strong>the</strong> access number and press <strong>the</strong> key.<br />
Type in your PIN and press #. Default PIN = 1245<br />
If you do not call from your own set, you will have to press * in order to be able to type in your<br />
ID (your internal telephone number).<br />
The first time round you will hear a system message that tells you that you have not recorded<br />
a name and salutation yet.<br />
You will also be requested to change your PIN.<br />
Listening to voicemails: during playback or when listening to <strong>the</strong> voicemail summary:<br />
New voicemails<br />
Old voicemails<br />
Restart playback<br />
Save voicemail<br />
Delete voicemail<br />
Reply to voicemail<br />
Forward voicemail<br />
Accessing SetUp options:<br />
Managing salutations<br />
Configuring voicemail settings<br />
Configuring personal settings<br />
Managing salutations<br />
Re-recording current salutation<br />
Alternative salutation on/off<br />
Editing salutations<br />
Recording standard salutation<br />
Recording alternative salutation<br />
Configuring voicemail settings<br />
Setting up notification<br />
You can have <strong>the</strong> system send you a notification by means of a text message<br />
whenever a new voicemail has come in.<br />
Settings through <strong>the</strong> web: cf. chapter on “Website <strong>for</strong> voicemail”.<br />
Configuring personal settings<br />
Changing your PIN<br />
Changing recorded name<br />
Page 12
Website <strong>for</strong> voicemail<br />
You can also access your voicemails and make personal settings through <strong>the</strong> web.<br />
http://voicemail.unisg.ch/ciscopca<br />
Log in with <strong>the</strong> same login that<br />
you use <strong>for</strong> <strong>the</strong><br />
Benutzeroption.<br />
Listening to / managing voicemails<br />
Click here to go to your voicemail<br />
box.<br />
Double-click on <strong>the</strong> voicemail to open <strong>the</strong><br />
window <strong>for</strong> listening.<br />
Define whe<strong>the</strong>r playback should be effected<br />
through <strong>the</strong> telephone or <strong>the</strong> computer (if<br />
equipped <strong>for</strong> <strong>the</strong> purpose).<br />
Of course you can also delete, save or, if need be, <strong>for</strong>ward voicemails here.<br />
Page 13
Recording / activating /deactivating salutation texts<br />
Click here to go to your personal communication<br />
assistant.<br />
Select Begrüssungen.<br />
This is where you are able to activate or deactivate<br />
a salutation (provided you have recorded one).<br />
Salutations can be recorded through <strong>the</strong> web /<br />
telephone, or <strong>the</strong>re is a possibility of uploading a<br />
WAVE file.<br />
Please note: Begrüssung Geschlossen and<br />
Feiertag cannot be used. They need to be<br />
configured by <strong>the</strong> System Administrator.<br />
When <strong>the</strong> alternative salutation is activated, all <strong>the</strong> o<strong>the</strong>r salutations are switched off.<br />
Example of voicemail salutations<br />
<strong>St</strong>andard salutation<br />
This is <strong>the</strong> voicemail box of Jane Smith, University of <strong>St</strong>.<strong>Gallen</strong>. Hello. I’m not available at <strong>the</strong><br />
moment. Please leave a message <strong>for</strong> me after <strong>the</strong> beep and I’ll call you back as soon as<br />
possible. Thank you very much <strong>for</strong> your call and good-bye.<br />
Alternative salutation<br />
This is <strong>the</strong> voicemail box of Jane Smith, University of <strong>St</strong>.<strong>Gallen</strong>. Hello. I’ll be out of office up<br />
to and including [day and date]. Please leave a message <strong>for</strong> me and I’ll call you back when I<br />
return. Thank you very much <strong>for</strong> your call and good-bye.<br />
Page 14
Setting up remote notification<br />
If you are out of office a great deal and do not continually want to call your voicemail box to<br />
find out whe<strong>the</strong>r you have received any voicemails, you can set up remote notification.<br />
The system will <strong>the</strong>n send you a text message every time a voicemail has come in.<br />
Click on<br />
Benachrichtigungsgeräte<br />
and select SMTP.<br />
Enter your mobile telephone<br />
number here (WITHOUT <strong>the</strong> zero<br />
<strong>for</strong> external calls), followed by<br />
@mail2sms.ch:<br />
Then place <strong>the</strong> relevant ticks <br />
and save your inputs.<br />
Notes<br />
_________________________________________________________________________<br />
_________________________________________________________________________<br />
_________________________________________________________________________<br />
_________________________________________________________________________<br />
_________________________________________________________________________<br />
Page 15
Important numbers<br />
If you require help or want to submit an application <strong>for</strong> <strong>the</strong><br />
configuration of your set to be changed:<br />
Service Desk 2900<br />
servicedesk@unisg.ch<br />
Access number to your voicemail box:<br />
2828 or<br />
071 224 28 28 from external telephones<br />
Direct redirection to voicemail: 2828<br />
Internal emergency call: 3333<br />
© 2010 by connectis AG<br />
Page 16